



Chair yoga poses for seniors with stiff joints work best when they look almost too easy. That is the point. If your knees complain after standing in line, your hips feel welded after a long drive, or your shoulders seem to live somewhere up near your ears, a chair gives you a calm place to move without fighting gravity.
I like chair yoga because it takes away the drama. No mat. No floor crawling. No deep squat that makes you bargain with your own kneecaps. You sit, breathe, move a little, and let the joints warm up enough to stop shouting at you.
The trick is not chasing a big stretch. For stiff joints, smaller movements done with patience usually beat heroic poses every time. A good chair practice should leave you looser, steadier, and a little taller — not sore, winded, or holding your breath.
Use a sturdy chair without wheels if you can, and keep one honest rule in mind: sharp pain, numbness, dizziness, or a joint that suddenly feels hot and swollen means stop. The poses below move from the neck down to the feet, so you can loosen the body in a sensible order and keep the session gentle.
1. Seated Posture Reset for Stiff Joints
Start with the thing most people skip. If the seat slouches, everything above it works harder than it should. Sit near the front half of the chair, plant both feet, and let the pelvis settle so your low back feels long instead of jammed.
Why It Helps
A stacked posture gives your hips and spine a cleaner starting point. You do not need military posture; you just need enough space between your rib cage and pelvis to breathe without strain.
- Feet flat, about hip-width apart.
- Knees pointed forward, not flared.
- Chin level, not jutting out.
- Shoulders soft, not lifted.
Three slow breaths here can change how the next stretch feels. If the chair is too low, sit on a folded towel or firm cushion so your knees are not much higher than your hips.
2. Neck Tilts and Gentle Rolls

Do neck rolls help? They can, but the old big circular head swing is not the move here. With stiff joints, I prefer a slow ear-to-shoulder tilt, then a tiny half-circle from one side to center and back to the other side.
The motion should feel like oiling a squeaky hinge, not wringing out a towel. Keep it small. Keep it quiet.
How to Use It
- Drop the right ear toward the right shoulder and hold for 2 breaths.
- Return to center, then switch sides.
- If the front of the neck feels tight, look down toward one armpit instead of making a full circle.
- Keep both shoulders down the whole time.
Skip full circles if your neck is cranky, or if you’ve had dizziness or cervical issues. Smaller is safer, and honestly, it usually feels better anyway.
3. Shoulder Shrugs and Slow Circles

Shoulders creep up on you. One minute you’re relaxed, the next they’re parked near your ears from years of sitting, lifting, or fussing with a phone.
Shrugs are boring in the best way. Lift both shoulders toward the ears on an inhale, then let them drop on the exhale. After that, make 5 slow backward circles, then 5 forward ones.
A lot of people rush this and turn it into a windmill. Don’t. The circle should be smooth and modest, with no trying to crack the joint just to hear a sound.
- 5 shrugs up and down.
- 5 circles backward.
- 5 circles forward.
- Keep the jaw loose.
If the neck feels better after this, you’re doing it right. If it feels pinched, make the circles smaller and stop before the top of the shoulders creeps forward.
4. Wrist Openers and Finger Spreads
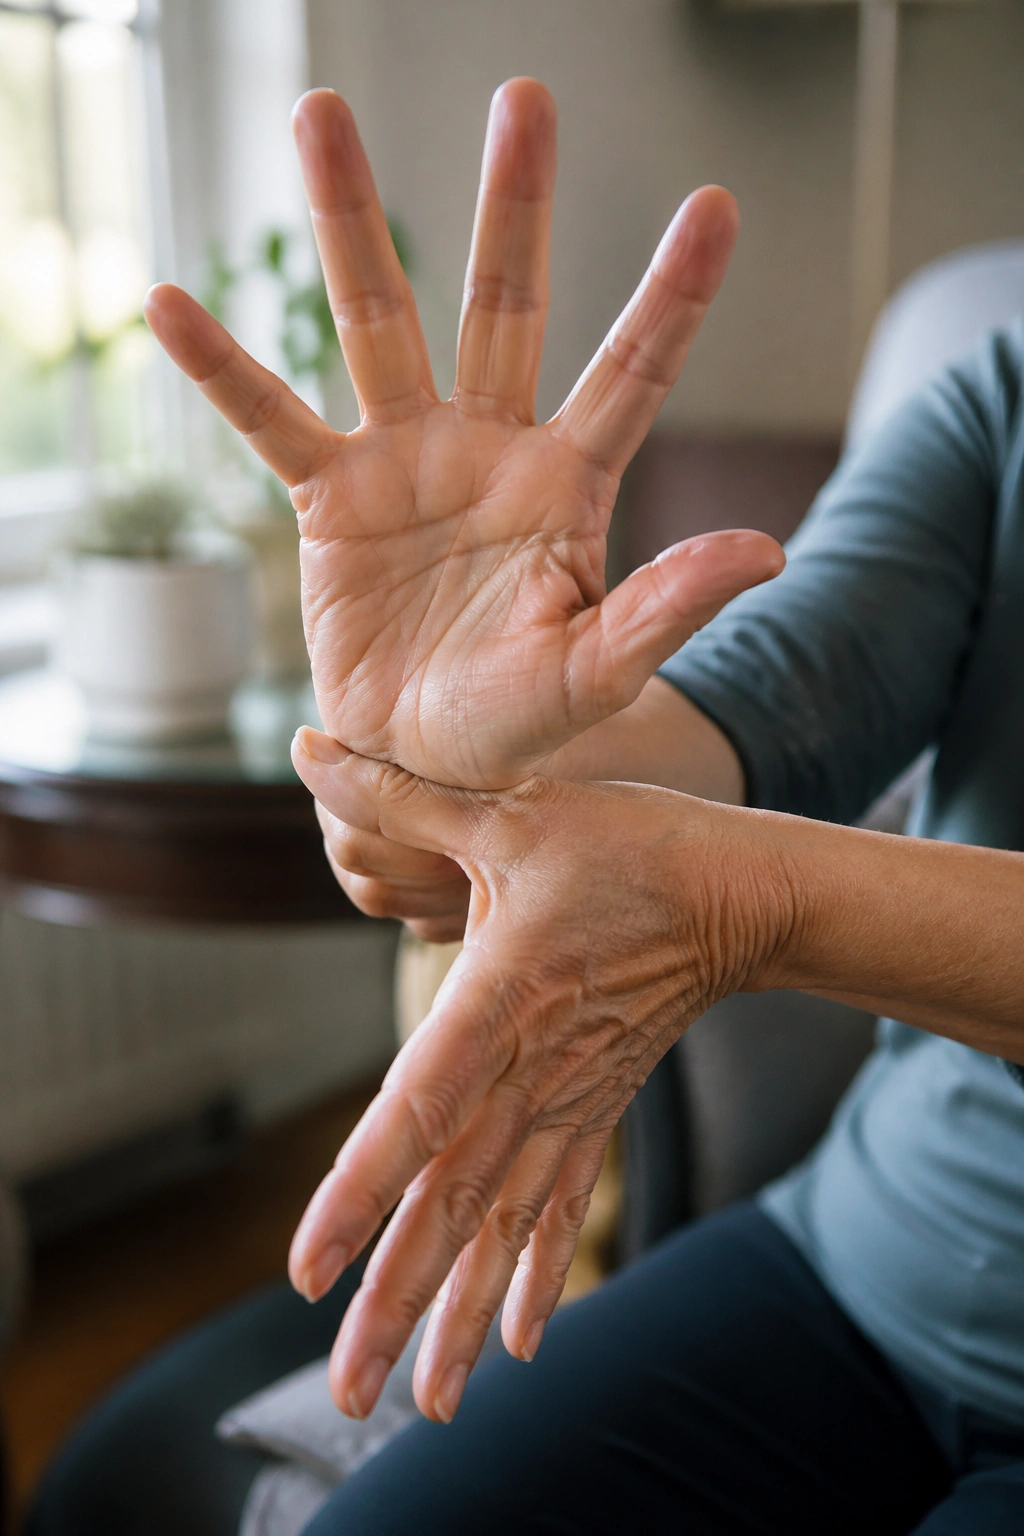
Hands can get stiff in a sneaky way. Knitting, gardening, holding a book, carrying groceries — all of it adds up. Start by opening and closing the fingers 8 to 10 times, then make slow wrist circles in both directions.
I like this one because it feels tiny and useful at the same time. The movement is small, but the payoff can be surprisingly nice if your hands feel rusty in the morning.
Try this sequence:
Open the fingers wide, spread them like you’re saying “stop,” then make soft fists. Repeat that a few times. Afterward, extend one arm at a time and circle the wrist 5 times each way.
If the thumb joint is cranky, keep the circles small and skip any forceful stretches. Hands do not need to be yanked to wake up.
5. Seated Cat-Cow for Chair Yoga Mobility
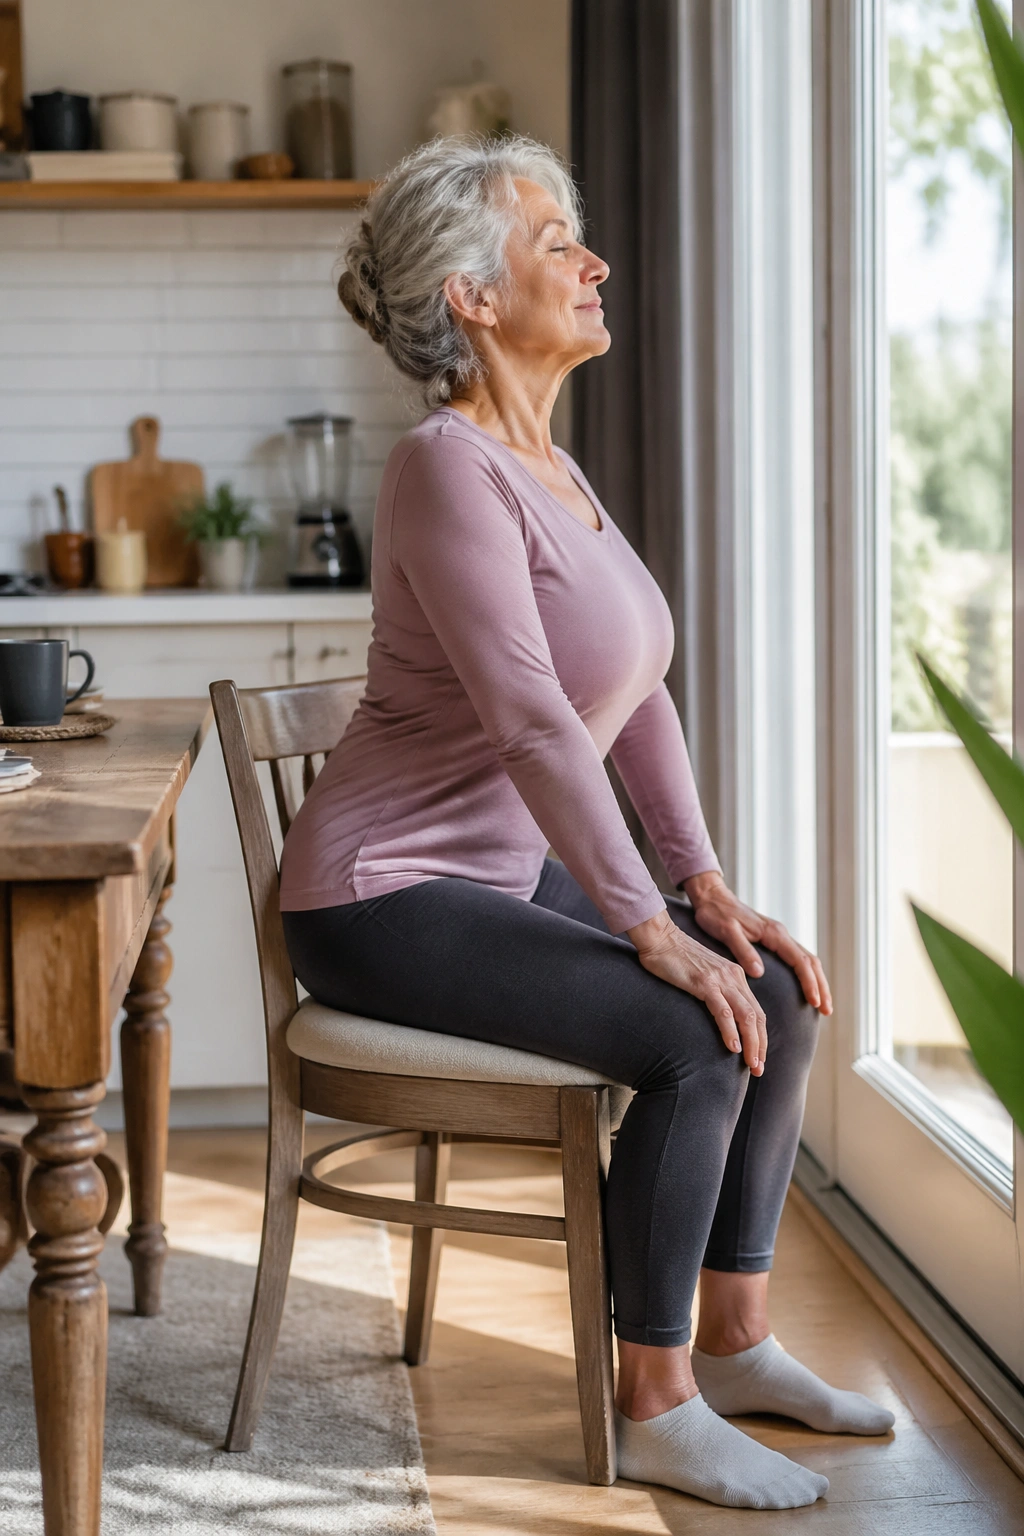
If your spine feels glued in one shape, seated cat-cow wakes it up without asking the hips to do anything dramatic. Sit with both hands on your thighs, inhale to tip the chest forward and lift the sternum, then exhale and round the back gently.
The movement stays smooth and slow. Think “soft wave,” not “big performance.”
What to Feel
- Inhale: belly softens, chest broadens.
- Exhale: lower belly lightly firms, shoulder blades slide apart.
- Keep the motion in the spine, not the neck.
Five to eight rounds is plenty. If the low back feels pinched, make the curve smaller and keep the breath easy. This one is especially nice when your body feels stiff from sitting too long — breakfast table, car seat, couch, all of it.
6. Seated Side Bend
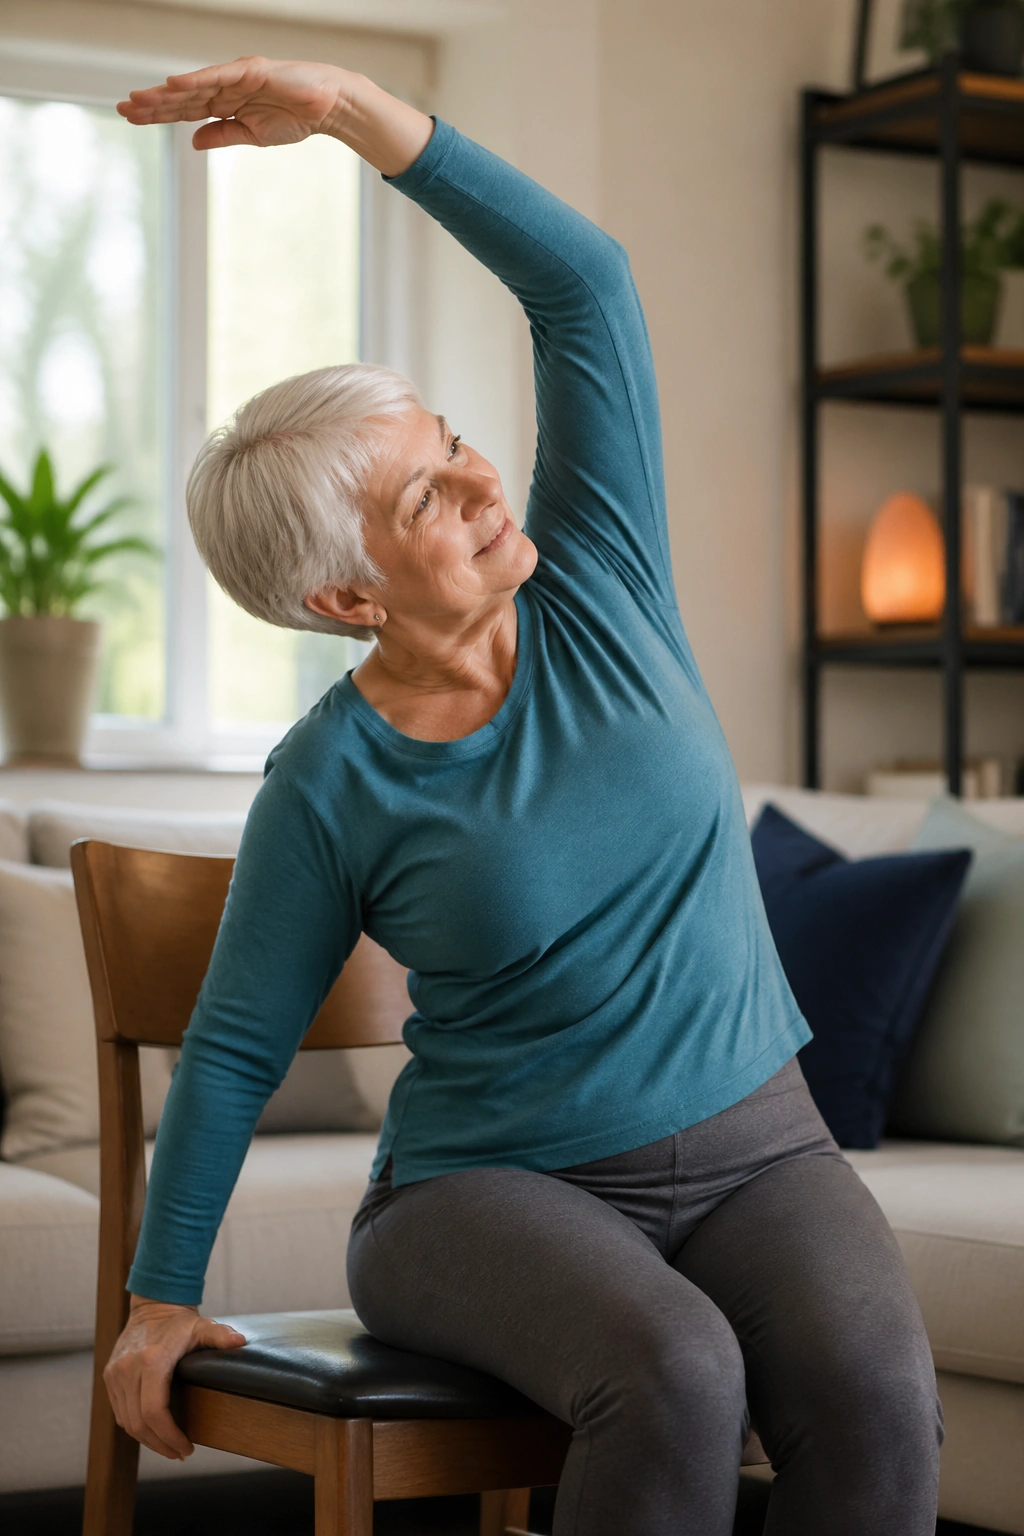
A standing side bend can be lovely, but it asks more from the legs than a lot of stiff joints want to give. Seated side bend keeps things simpler. One hand stays on the chair seat, the other arm floats up, and the rib cage opens along one side.
The key is not collapsing. Reach up first, then lean only as far as you can keep both sit bones heavy. That little detail matters more than a huge arc.
Hold for 2 to 3 breaths on each side, and let the lower ribs widen. If the shoulder feels jammed, keep the top arm bent instead of straight. A shorter line is fine.
This is one of those poses that looks mild and still does useful work. The side body gets a stretch, the shoulder gets room, and the spine remembers it can move without drama.
7. Gentle Seated Twist
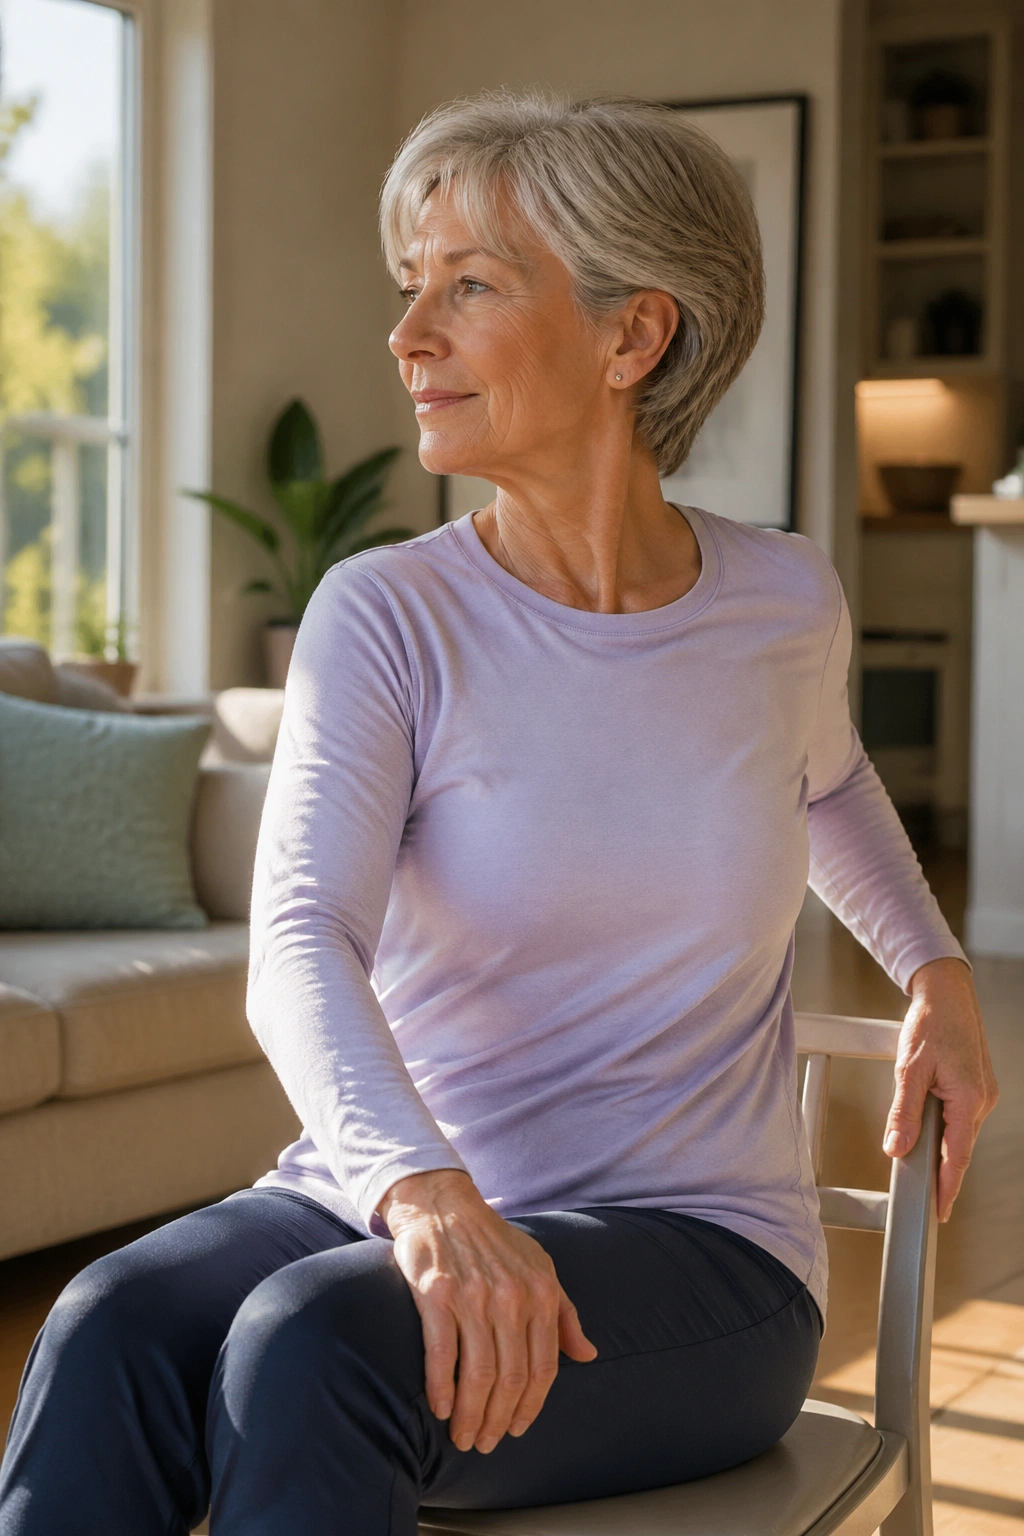
Twists are medicine if they stay small. The moment the twist becomes a crank, the low back and hips start protesting.
Sit tall first. Then turn the rib cage to one side while the hips stay mostly forward. One hand can rest on the outside of the opposite thigh, and the other can hold the chair seat for support. The motion should come from the mid-back more than the knees.
What to Watch For
If your knee follows the twist, you’re probably rotating too far. If the breath gets tight, back off by half. That is usually the right amount.
People with osteoporosis, recent spinal surgery, or sharp back pain should keep this one very mild and check with a clinician before pushing it. A gentle twist should feel like a tidy reset, not a test.
8. Ankle Pumps and Circles
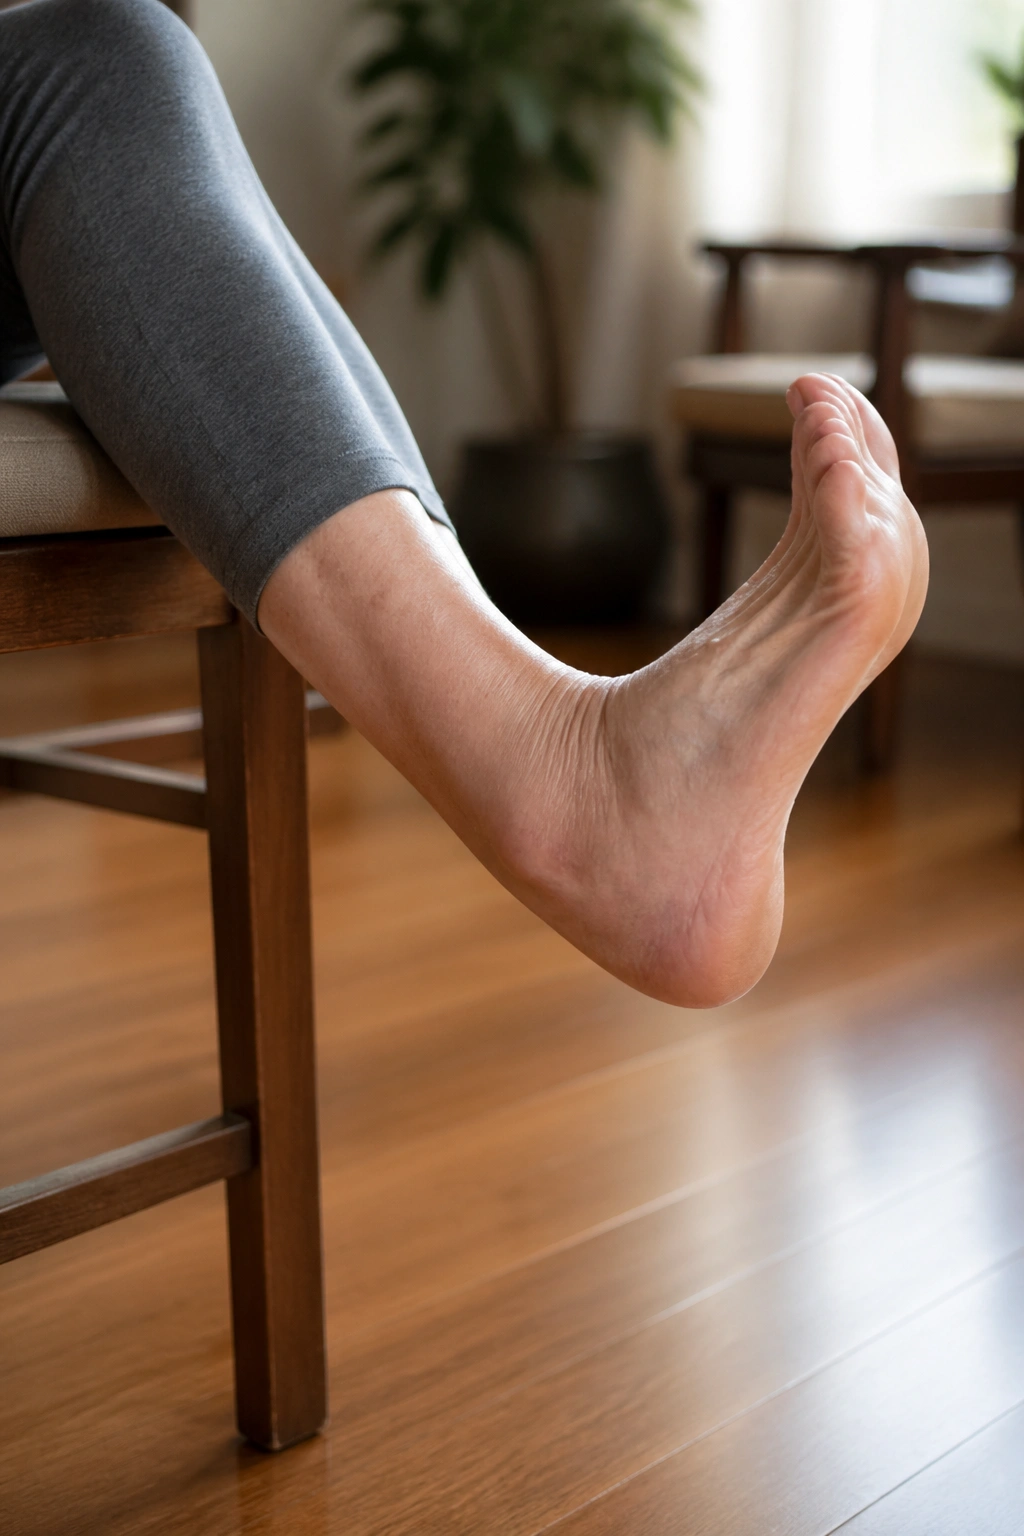
Ankles are easy to forget until they feel like rusty door hinges. Then everything from walking to standing up feels a little heavier.
Sit tall and lift one foot just enough to clear the floor. Pull the toes up toward the shin, then point them away. Do that 8 to 10 times, then circle the ankle 5 times each direction. Switch sides.
Why It Works
The motion is tiny, but it helps the ankle remember how to move through its full range. That matters when stiff joints make the whole lower leg feel slow. If the foot cramps, pause, shake it out, and make the circles smaller.
A one-sentence rule: small beats forced. Every time.
9. Heel Slides
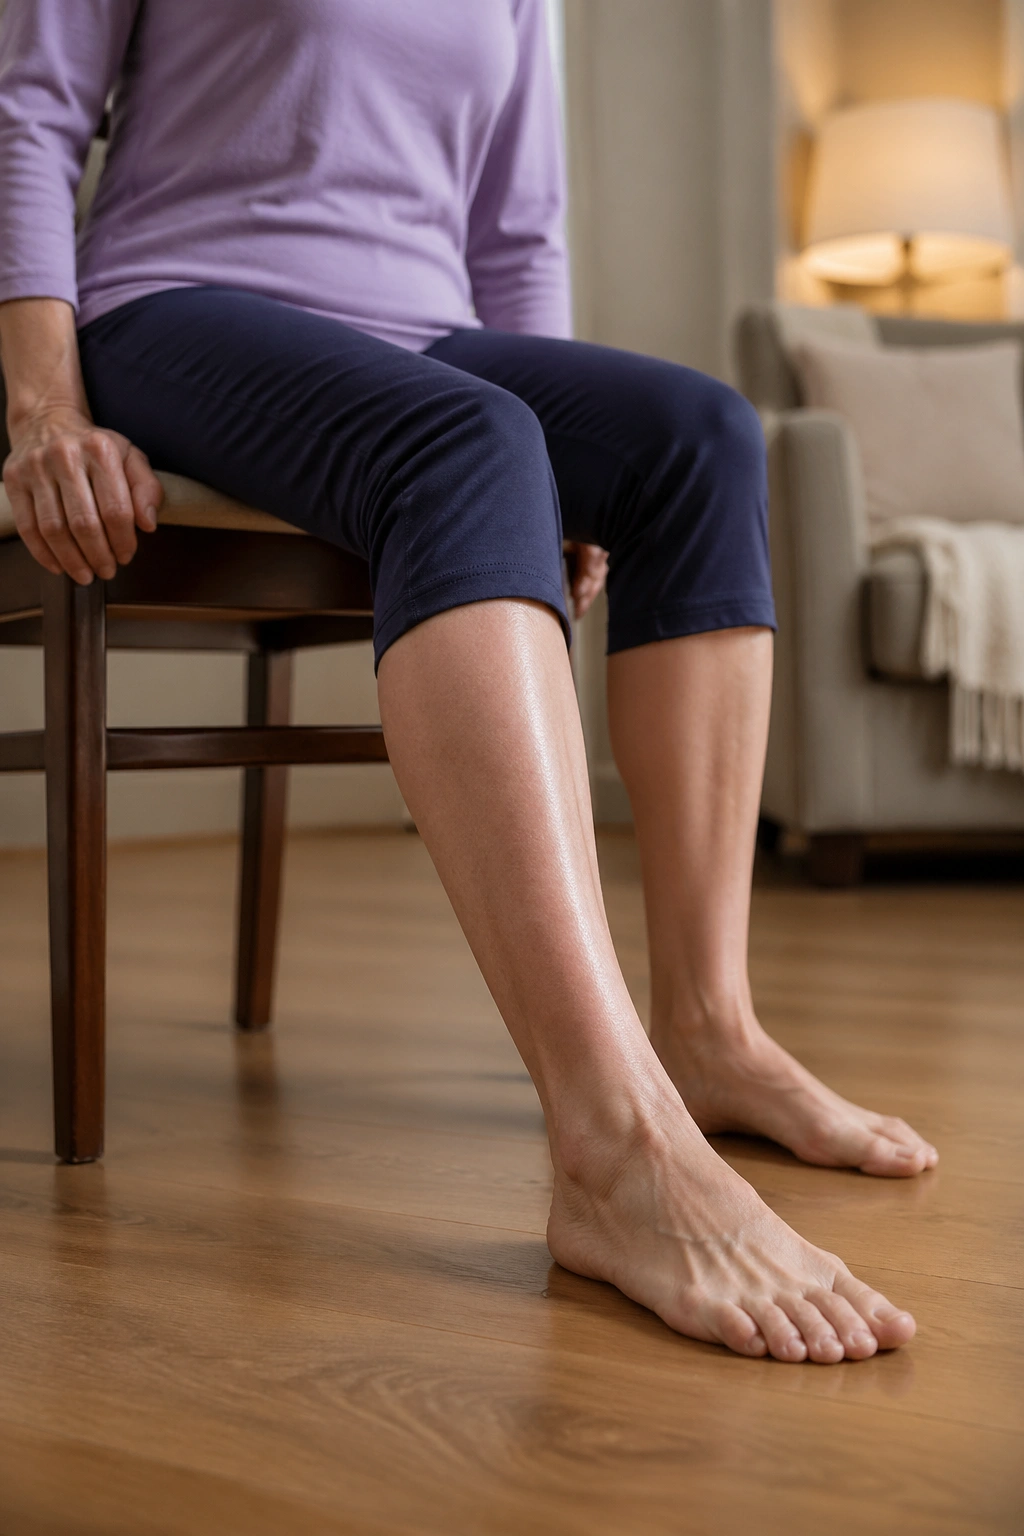
If your knees feel rusty after sitting, heel slides are a clean first step. Keep one heel on the floor and slowly slide it forward until the leg is nearly straight, then draw it back in.
The floor is your guide here. You should feel a smooth glide, not a snap or a catch. That sliding action helps the knee warm up without loading it much.
Take 8 reps per side. Go slower than you think you need to, especially on the way back. That return phase is where control lives.
If the chair is too high and the foot can’t stay in touch with the floor, move your seat forward or use a firmer cushion. Small setup fixes matter more than people expect.
10. Knee Straighten and Point
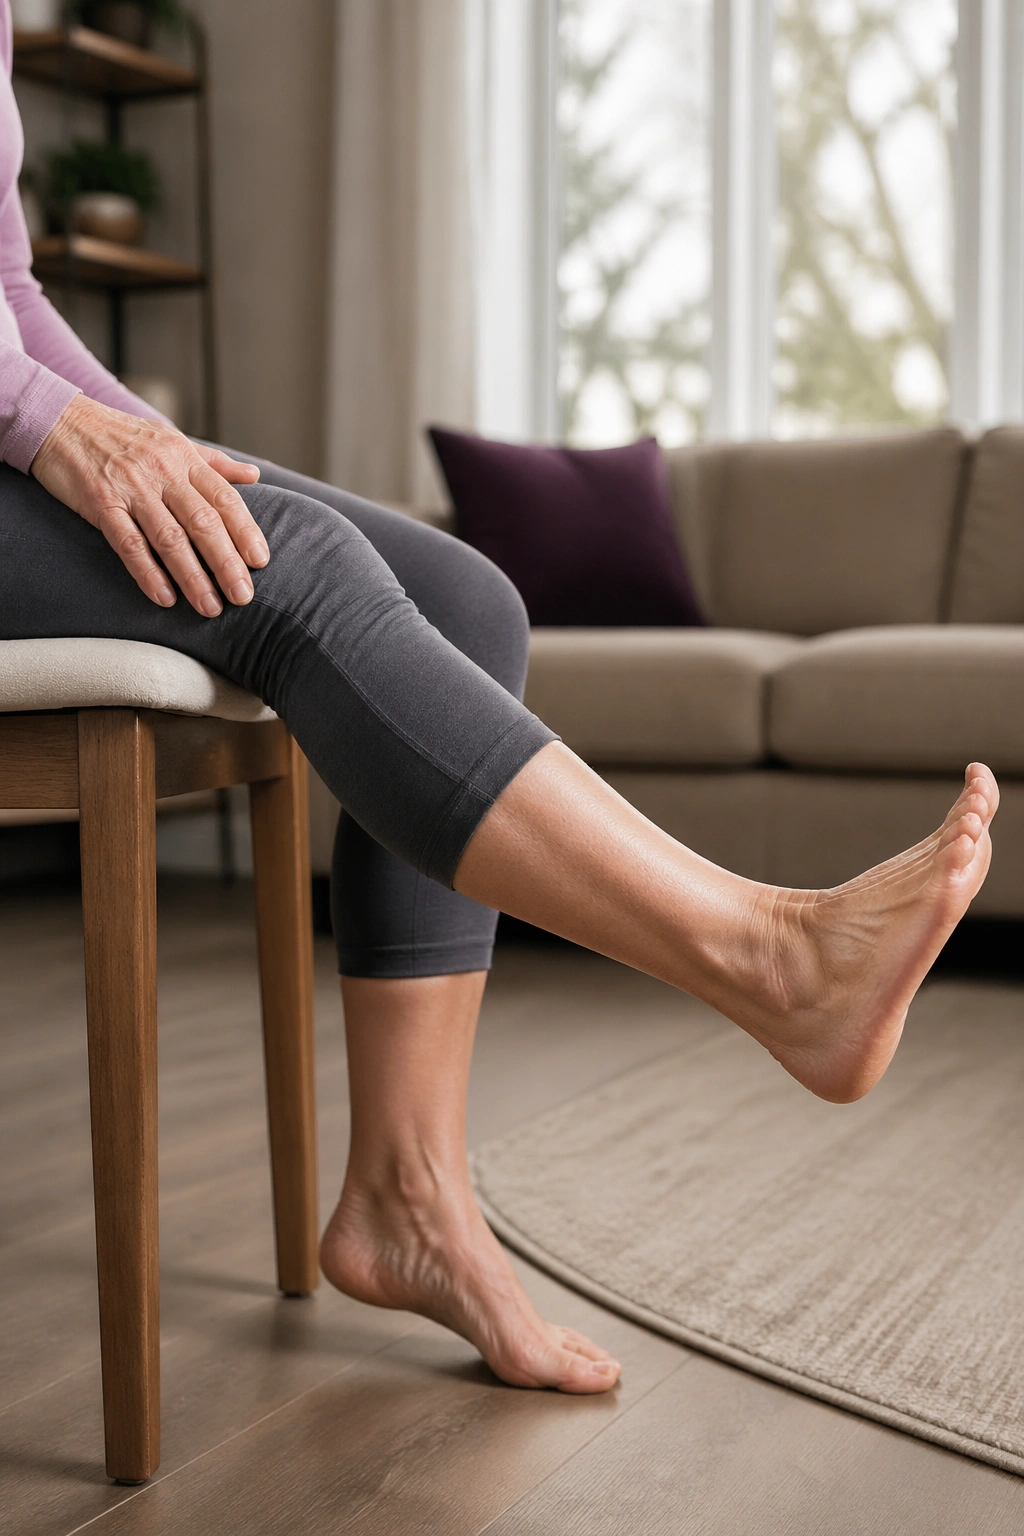
Can you work a stiff knee without standing up? Absolutely. Sit with one foot flat, then straighten the other leg until it’s nearly long, flex the foot, and hold for a breath.
After that, point the toes and lower the leg with control. That little pause at the top wakes up the front of the thigh and gives the knee a bit of friendly motion.
A Simple Pattern
- Lift and straighten the leg.
- Flex the foot hard for 1 breath.
- Point the toes.
- Lower slowly.
Six to ten reps on each side is enough. If the front of the knee hurts, shorten the lift and keep the leg a little bent. A clean, pain-free range beats a bigger one every time.
11. Seated Marching for Chair Yoga Strength
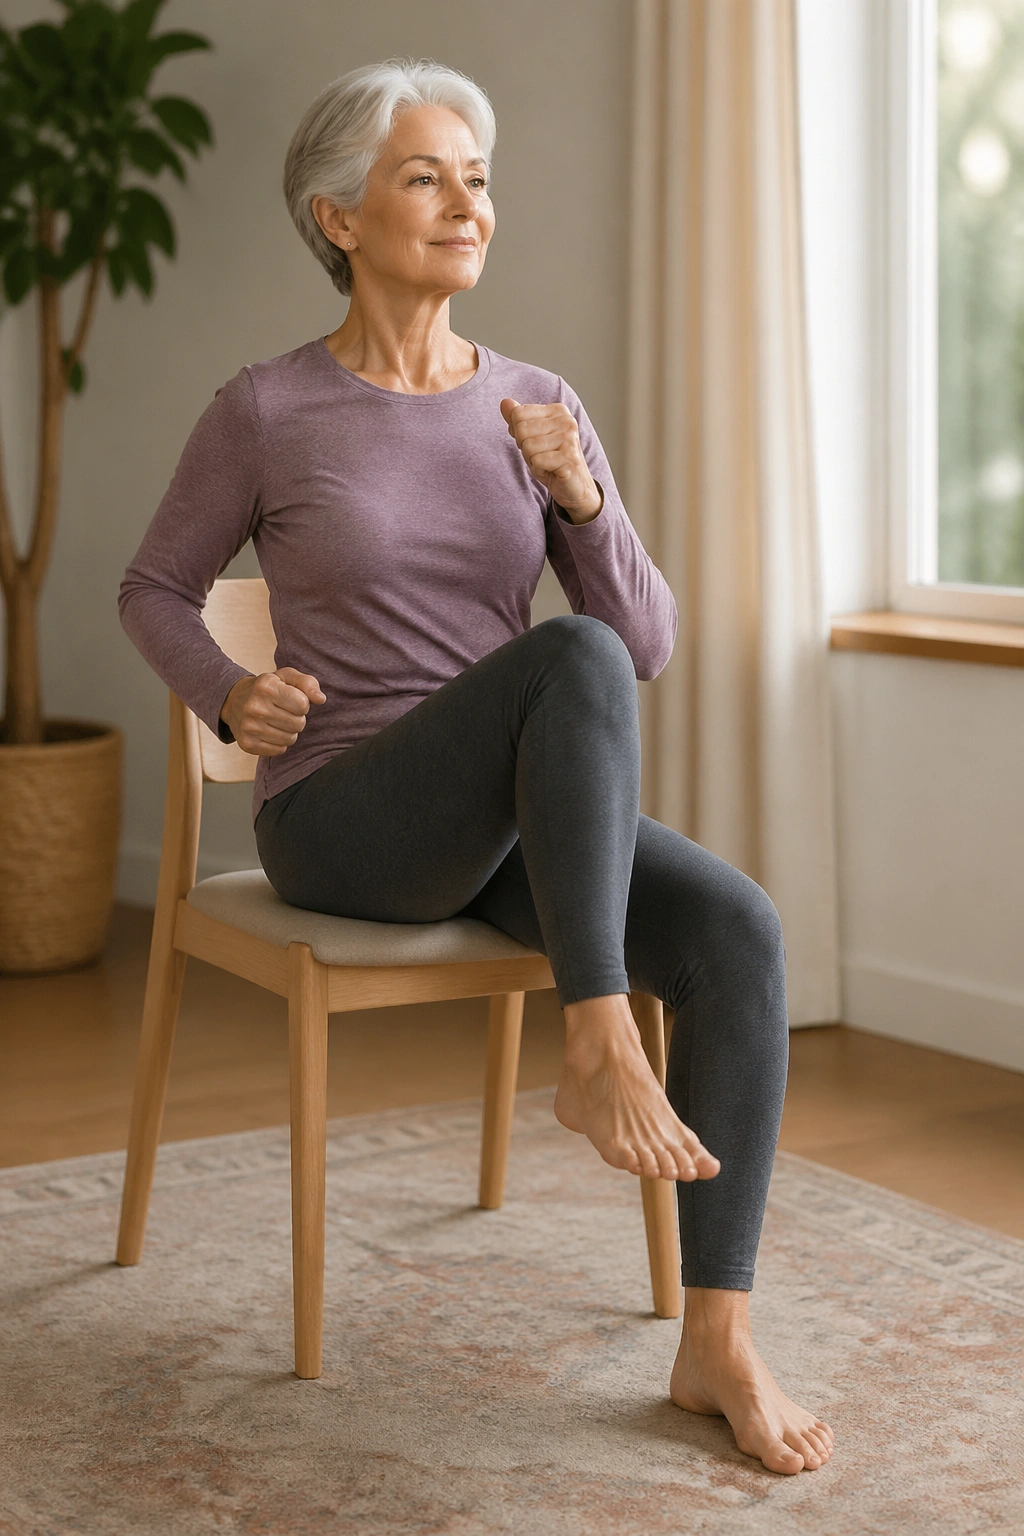
Marching looks silly until your hips wake up. Then it feels like a small power move.
Lift one knee a few inches, lower it, then switch sides. Keep the torso tall and still so the work stays in the hip flexors and core instead of wobbling through the whole body. Ten lifts per side is a good starting point.
The temptation is to lean back and fling the legs. Don’t. If the hips are stiff, slower is cleaner and safer. A steady march also helps your balance skills, which matters more than most people admit.
One quiet bonus: marching often makes the low back feel less locked because the pelvis starts moving again. That is a nice side effect. Not magic. Just useful.
12. Figure-Four Hip Stretch
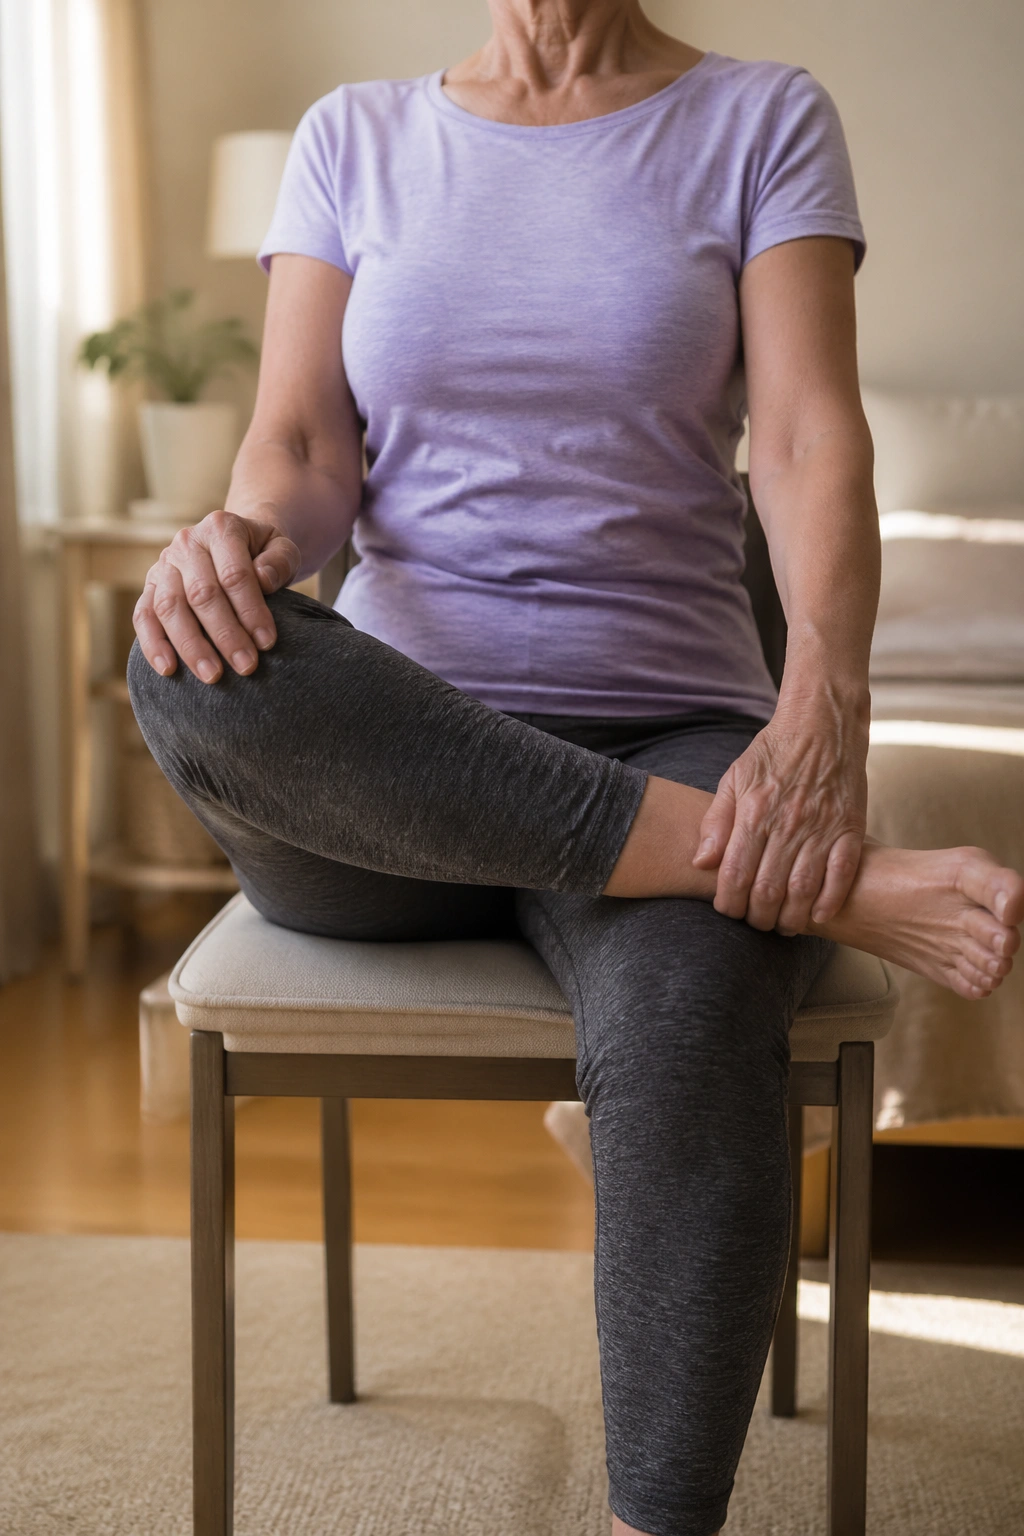
Unlike a deep floor stretch, the seated figure-four respects knees that have opinions. Cross one ankle over the opposite thigh, keep the foot flexed, and sit up tall before you lean forward even a little.
If the knee on the crossed leg feels cranky, back out immediately. That joint should feel supported, not twisted. Sometimes the best version is simply sitting with the ankle on the thigh and breathing there.
A folded blanket under the lifted knee can help if the hip is tight and the leg hangs too low. Hold for 3 to 5 breaths, then change sides. The outer hip usually talks first, and that is the area you want to listen to.
13. Seated Forward Fold
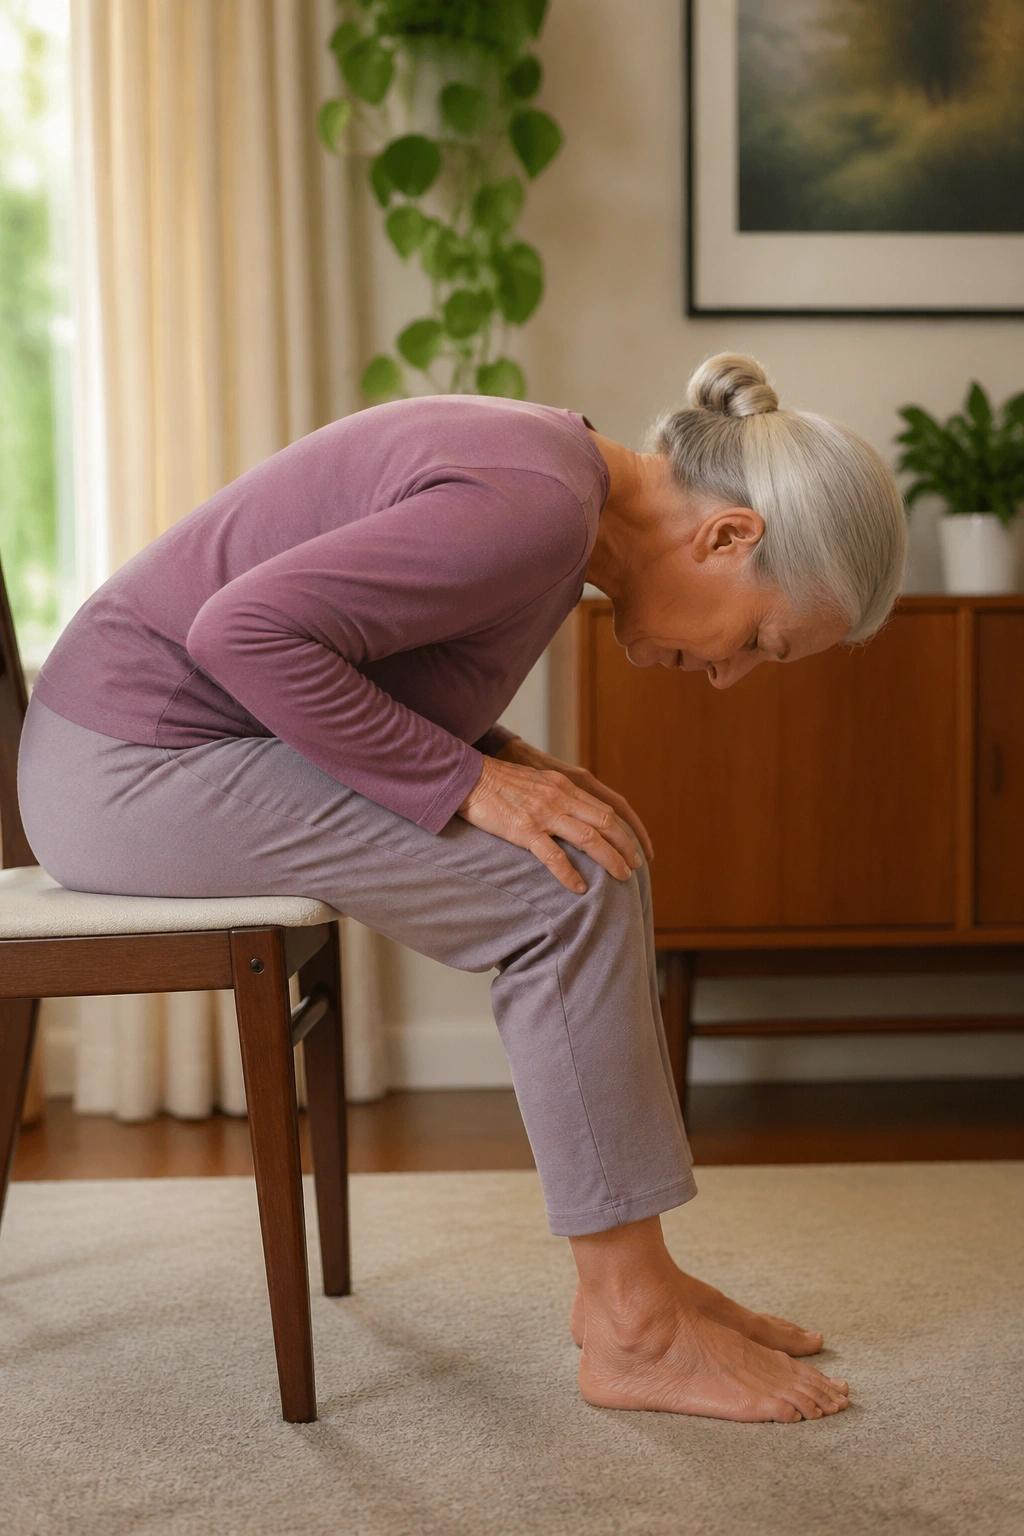
The first time I saw someone do a good seated forward fold, the whole upper back seemed to exhale. Not collapse. Exhale.
Sit toward the front of the chair, place your hands on your thighs, and hinge forward from the hips with a long spine. Let the hands slide down the thighs only as far as you can keep the breath smooth.
The mistake is dumping into the low back. That usually feels round, heavy, and a little pinchy. A better version keeps the chest reaching forward and the neck relaxed, even if the bend is tiny.
Hold for 3 breaths, come back up slowly, and notice whether the back feels warmer. If the hamstrings grab hard, bend the knees a little more. Nobody wins extra points for forcing this one.
14. Eagle Arms Shoulder Stretch
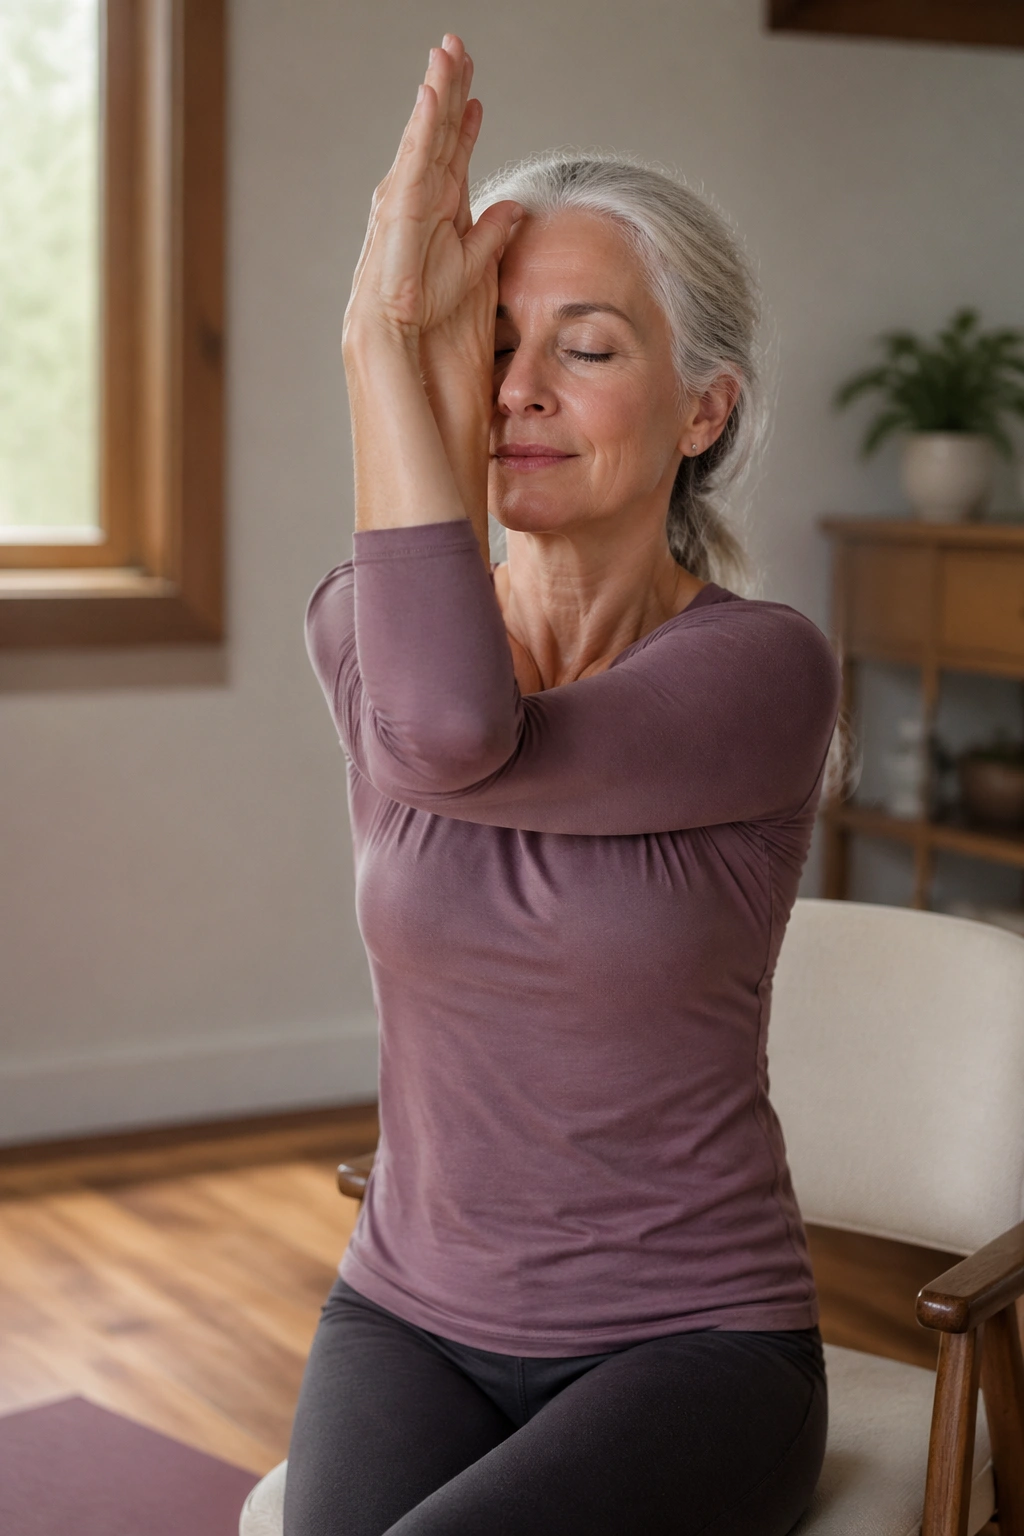
Crossing the arms in front of the chest can feel awkward at first. That is normal. Shoulder joints are often tighter than people think, especially after years of driving, typing, or hunching over a sink.
Wrap the right arm under the left if you can, or just hug the shoulders if the full shape is too much. Lift the elbows a little, then let the shoulder blades separate across the upper back. That spread is the point.
What to Watch For
- Keep the neck soft.
- Don’t shrug the shoulders.
- Breathe into the back ribs.
- Switch arm positions after 3 breaths.
If the wrap feels impossible, skip it and hold opposite shoulders instead. The goal is a stretch, not a wrestling match.
15. Overhead Reach and Side Bend
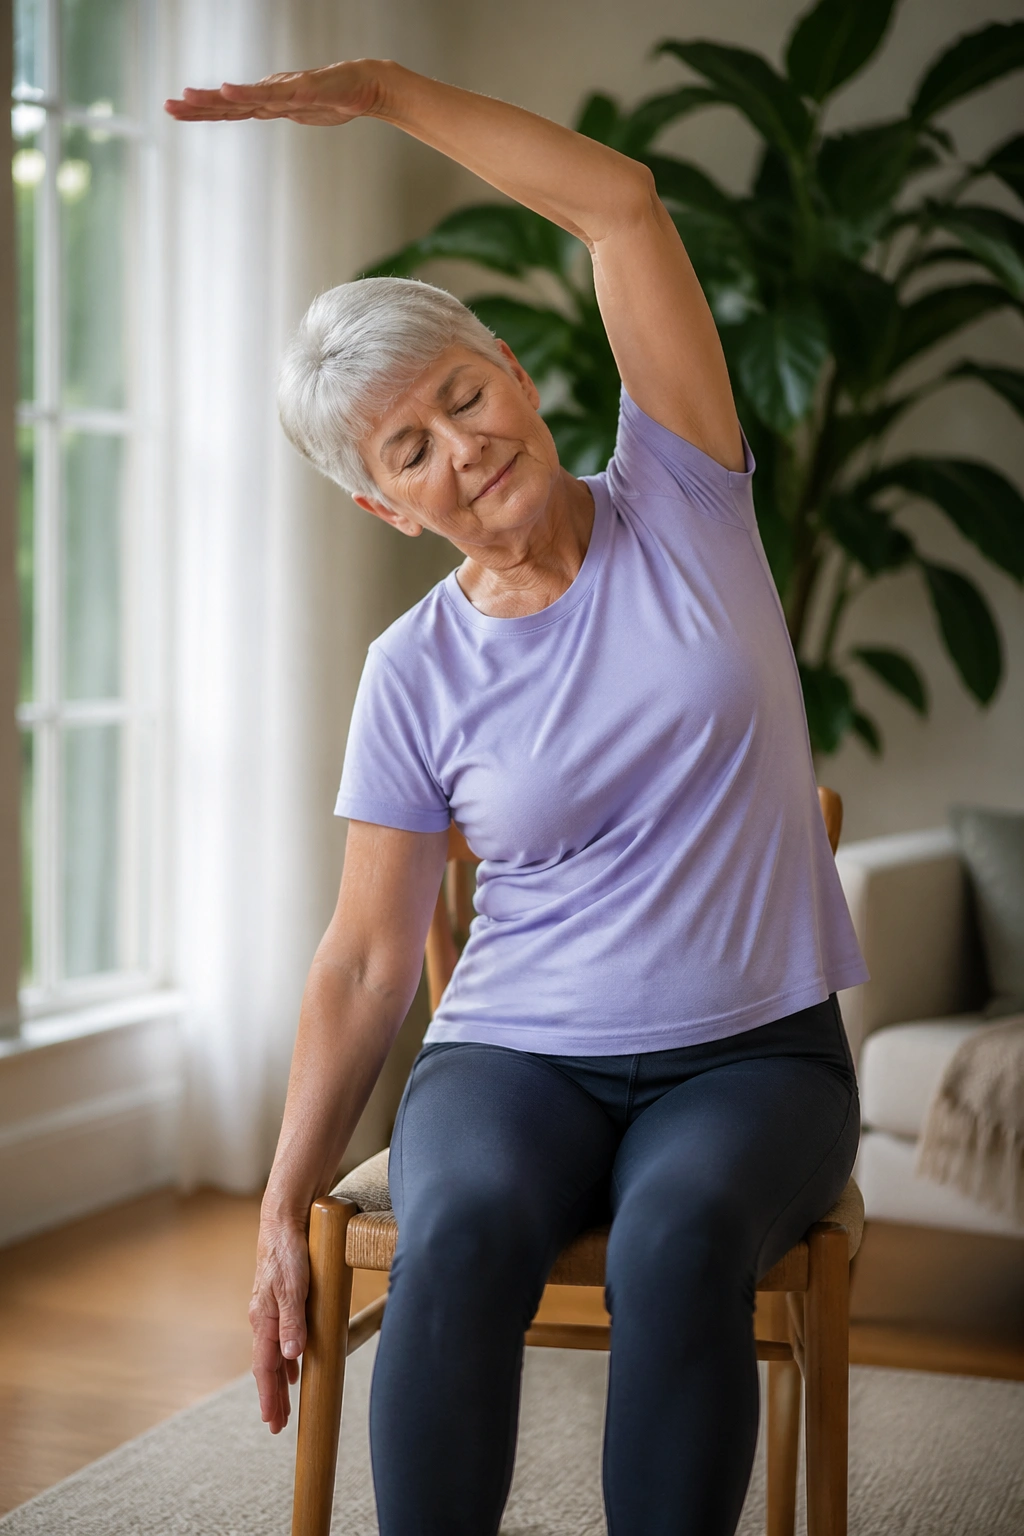
Should you reach overhead if your shoulders are stiff? Yes, but only to the point where the ribs stay quiet. A careful overhead reach can wake up the side body and keep the upper back from folding inward all day.
Start with both hands low, then lift one arm or both arms up as far as feels smooth. Keep the elbows soft. If the shoulders pin as you rise, stop there and breathe. That edge is enough.
A small lean to one side after the reach can open the ribs even more. Do not let the lower back arch hard. The movement should feel long, not squashed or yanked.
This one works well after neck and shoulder prep because the body already has a little space to spare.
16. Seated Half Sun Salutation for Chair Yoga Rhythm
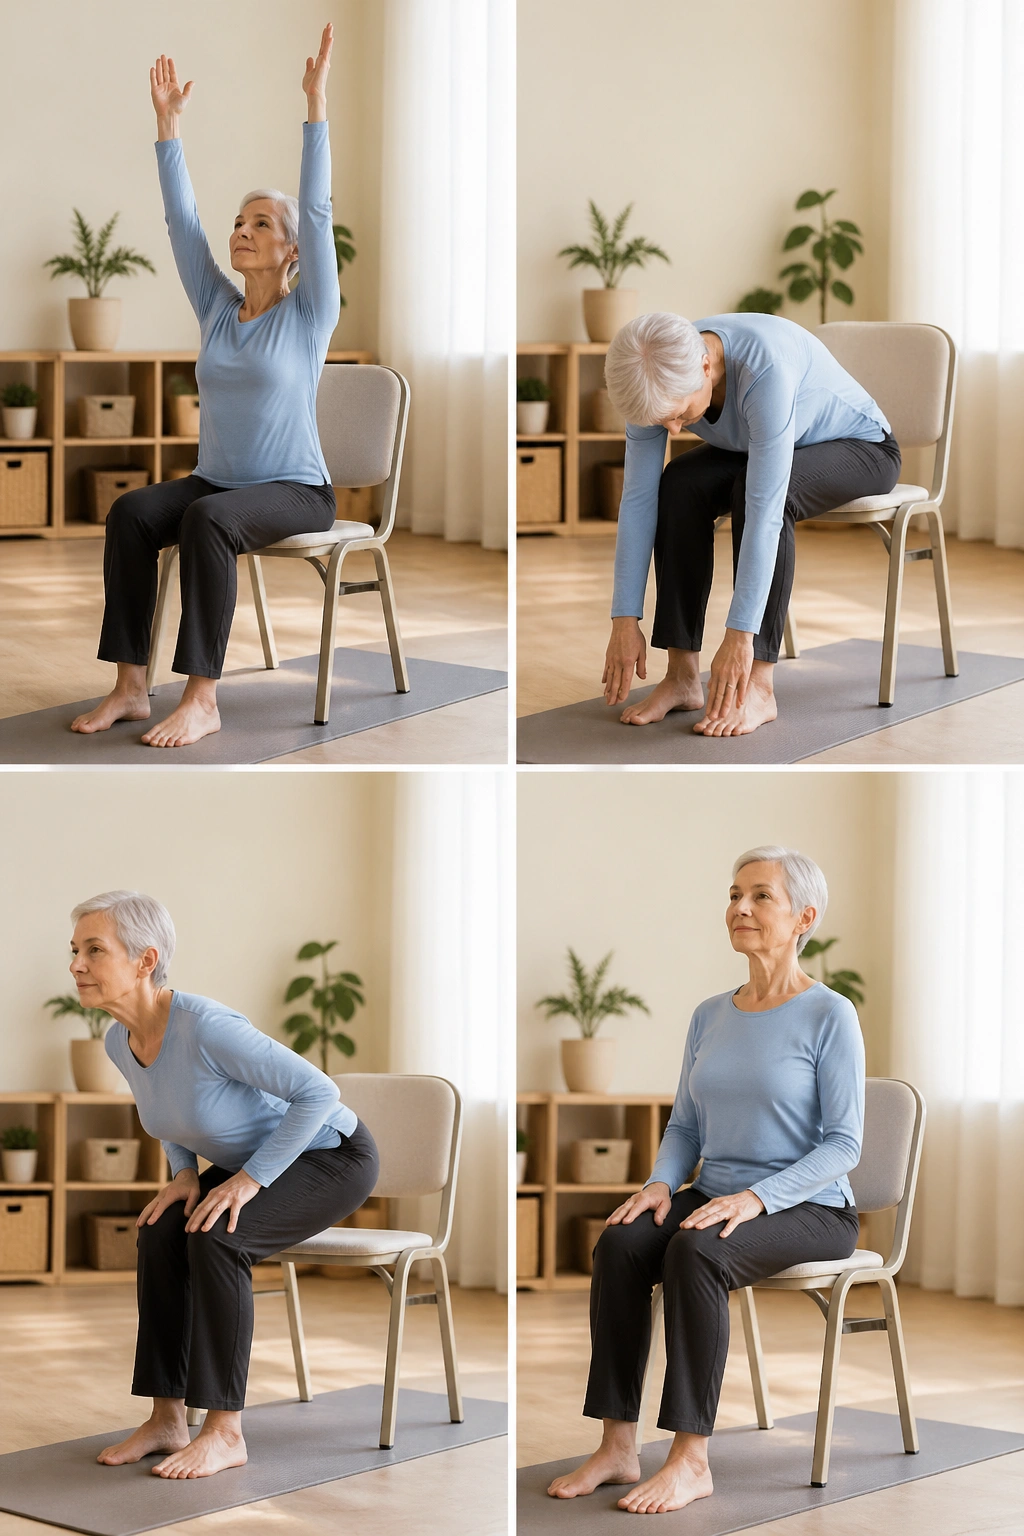
A short flow can feel nicer than a pile of separate stretches. The body gets rhythm, the breath gets a job, and stiff joints often loosen faster when movement keeps changing shape.
A Simple Sequence
- Inhale and reach both arms up.
- Exhale and fold forward from the hips.
- Inhale and lift halfway, hands on thighs.
- Exhale and sit tall again.
Repeat the cycle 3 to 5 times. Keep the movement smooth and unhurried. If the low back complains during the fold, bend the knees more and make the reach smaller.
I like this sequence for mornings because it wakes up the whole body without making any one joint work too hard. It also gives you a chance to notice where the stiffness lives that day — neck, shoulders, hips, wherever.
17. Seated Warrior Arms
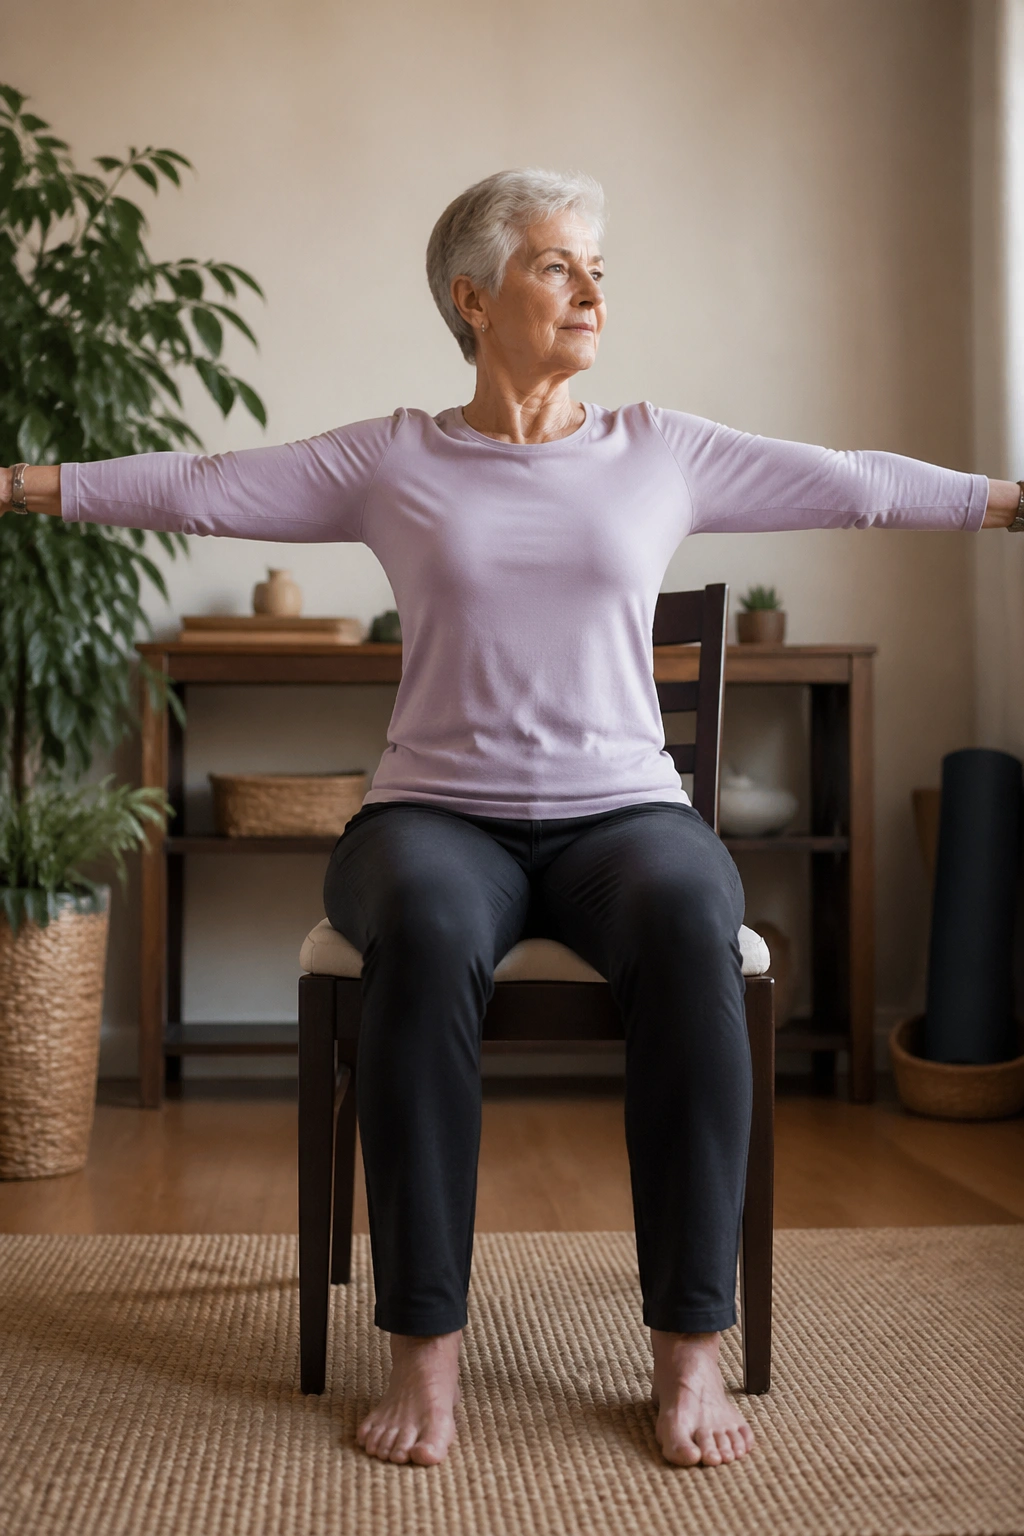
Standing warrior can irritate knees, but seated warrior arms gives you the broad chest and strong posture shape without all that leg demand. Sit tall, extend both arms out to the sides, and soften the elbows so the shoulders don’t clamp down.
Turn the head gently toward the front hand if that feels good. If the neck doesn’t like it, keep your gaze forward. The pose still works.
The interesting part here is how the back of the arms and shoulder blades have to hold their shape for a few breaths. That mild effort helps posture more than people expect. It is not flashy. It is useful.
If the arms shake a little, fine. That just means the shoulders are awake.
18. Supported Tree Pose
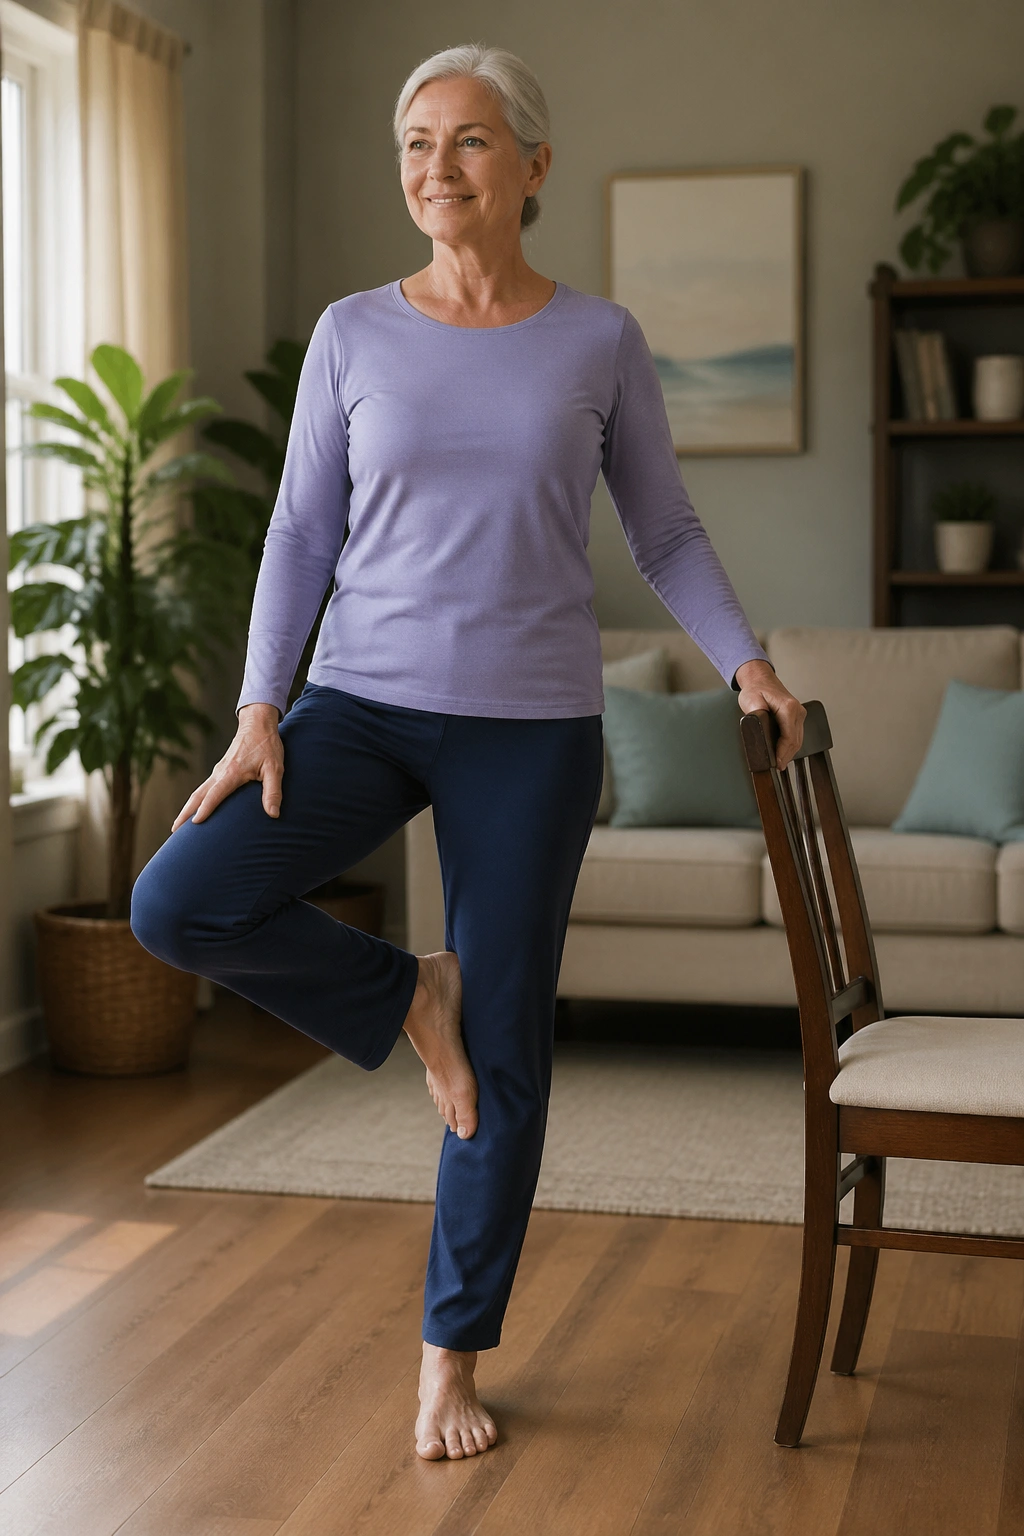
Tree pose does not have to be a balance circus. At a chair, it can be calm and steady. Keep one hand on the chair back, place one foot lightly against the opposite ankle or calf, and stand near the chair so you can let go only if you want to.
Do not shove the foot high up the thigh. That usually makes the standing leg grumpy and the hips uneven. Lower is better here.
One sentence says it all: the chair is part of the pose. Use it.
Hold for a few breaths, then switch sides. If standing feels unsteady, keep one toe on the floor like a little kickstand. That version still teaches balance without making the room spin.
19. Sit-to-Stand Practice
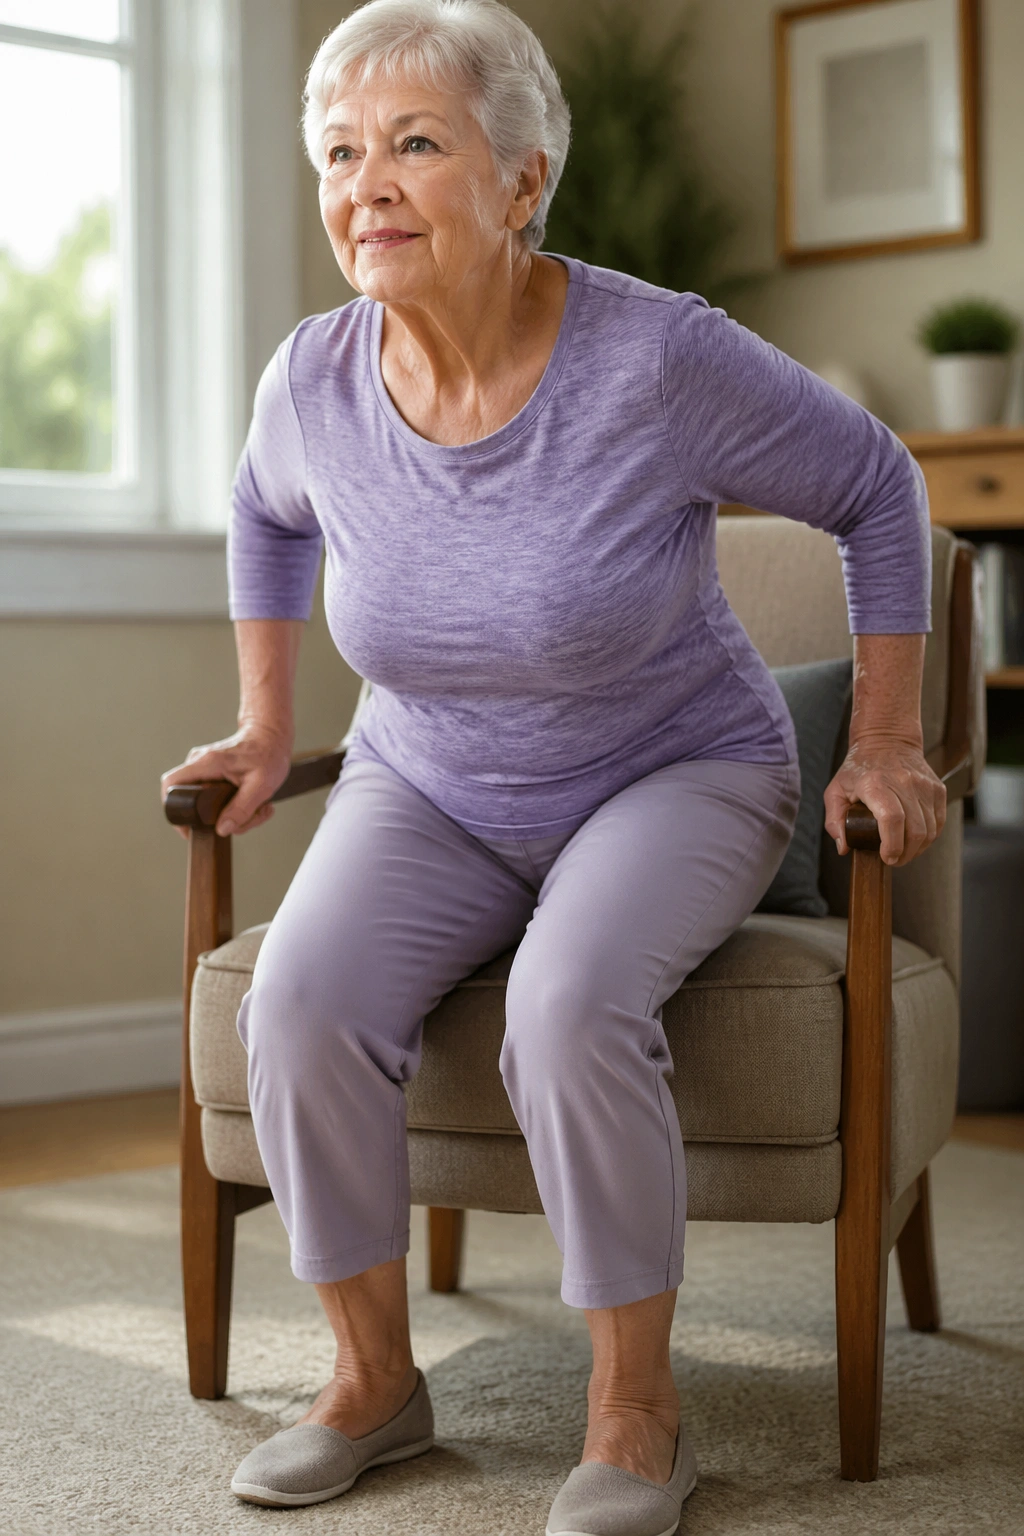
Getting up from a chair is not just a daily chore. It is one of the most useful strength moves a body can practice. For seniors with stiff joints, sit-to-stand often matters more than a pretty stretch.
How to Keep It Joint-Friendly
- Sit near the front of the chair.
- Place feet under the knees.
- Lean the chest slightly forward.
- Stand using the legs, not a yank from the back.
Use your hands on the chair arms or thighs if needed. That is not cheating. It is smart. Five controlled repetitions are enough to start, and the seat height matters a lot, so use a firmer or higher chair if the knees complain.
Coming up slowly on the way down is just as important as the stand itself. That slow lower is where the muscles learn to protect the joints.
20. Side Leg Lift
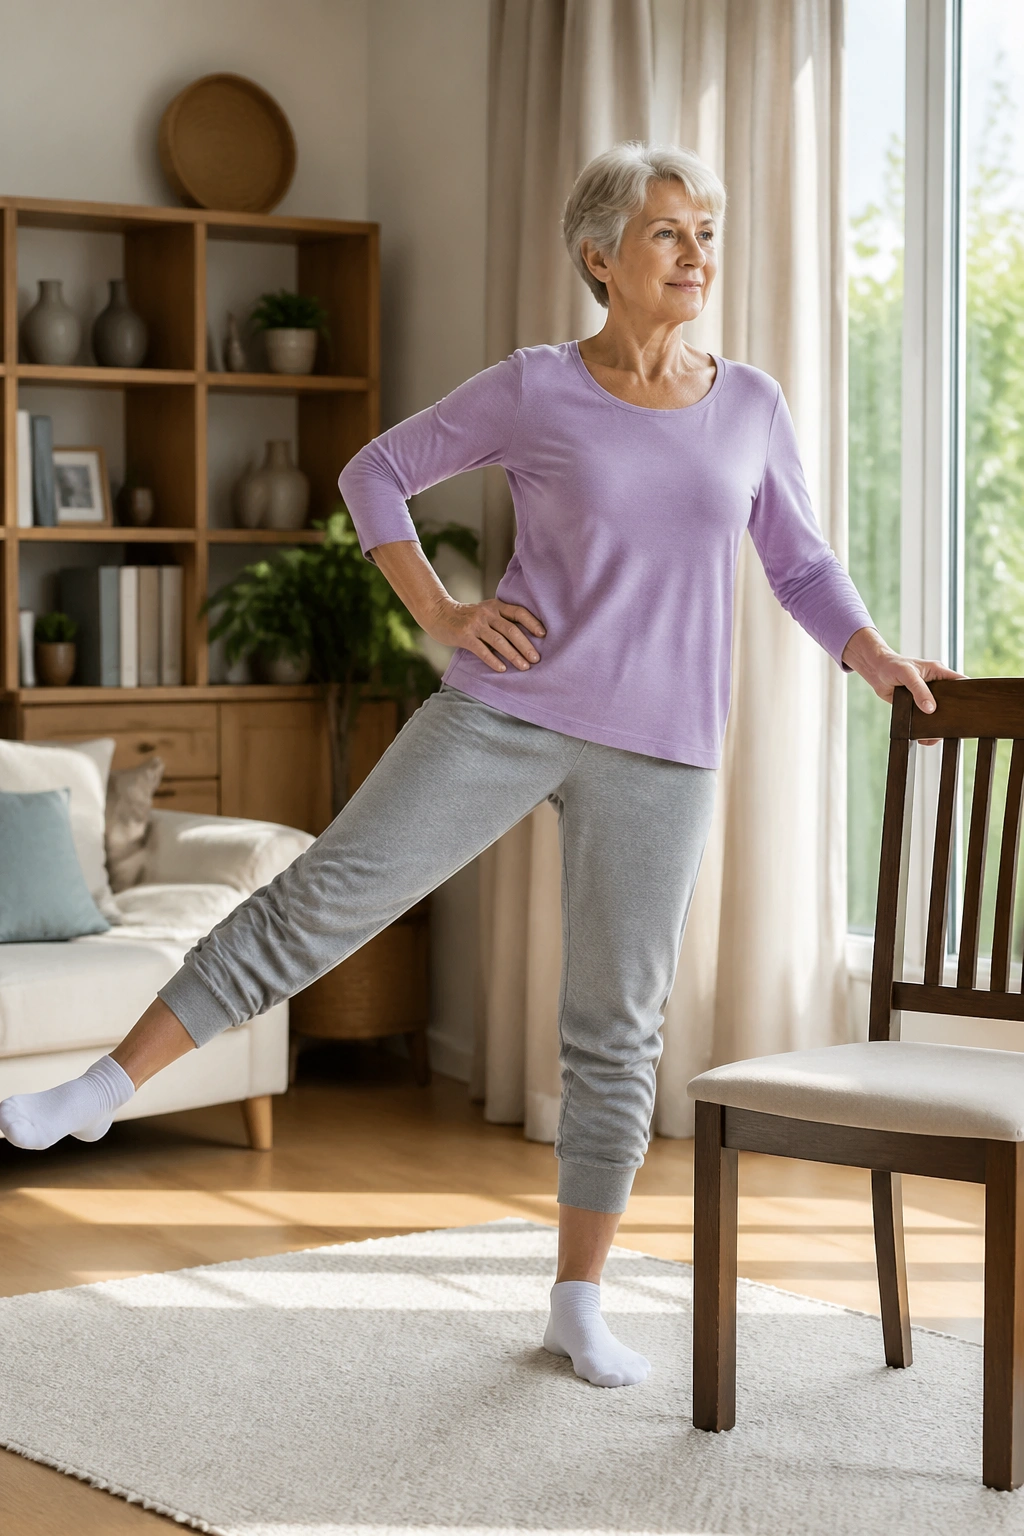
A little outer-hip work saves a lot of wobble later. If the side of the hips feels sleepy, this one wakes it up fast.
Hold the chair seat or back with one hand, stand or sit tall, and slide one leg out to the side a few inches. Keep the toes pointed forward so the movement comes from the hip, not the foot turning out like a pirate.
- Lift only 4 to 6 inches.
- Keep the torso still.
- Lower with control.
- Do 8 reps each side.
If the standing version feels too much, do it seated and lift the leg from the knee. That smaller version still builds useful strength around the hip.
21. Calf Raise and Toe Lift
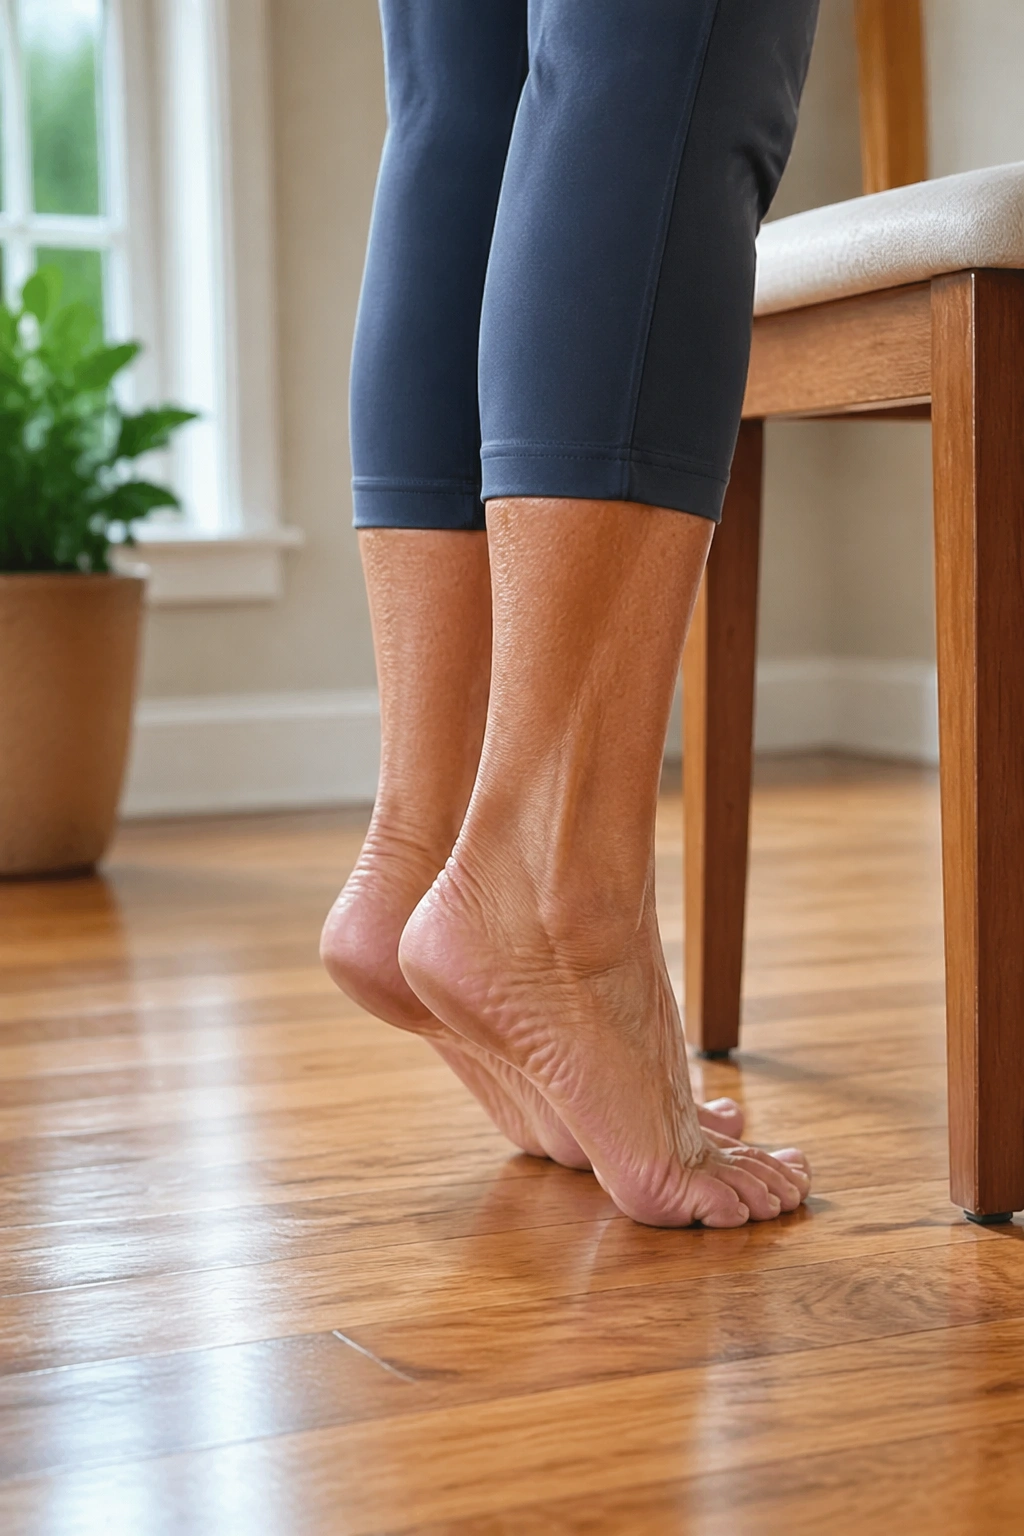
The lower legs get ignored until the ankles start feeling old and sticky. Calf raises and toe lifts bring them back into the conversation.
Lift both heels while keeping the toes on the floor, hold for a breath, then lower slowly. After that, lift the toes and let the heels stay rooted. Ten to 15 reps of each is plenty. The shin muscles will notice. So will the calves.
I like alternating the two because the contrast feels good. Heels up. Toes up. Slow down. It’s plain work, not fancy work, and plain work tends to be what stiff joints respond to best.
If you get a cramp, cut the range down. That is a sign to ease off, not push through.
22. Bound Angle Stretch
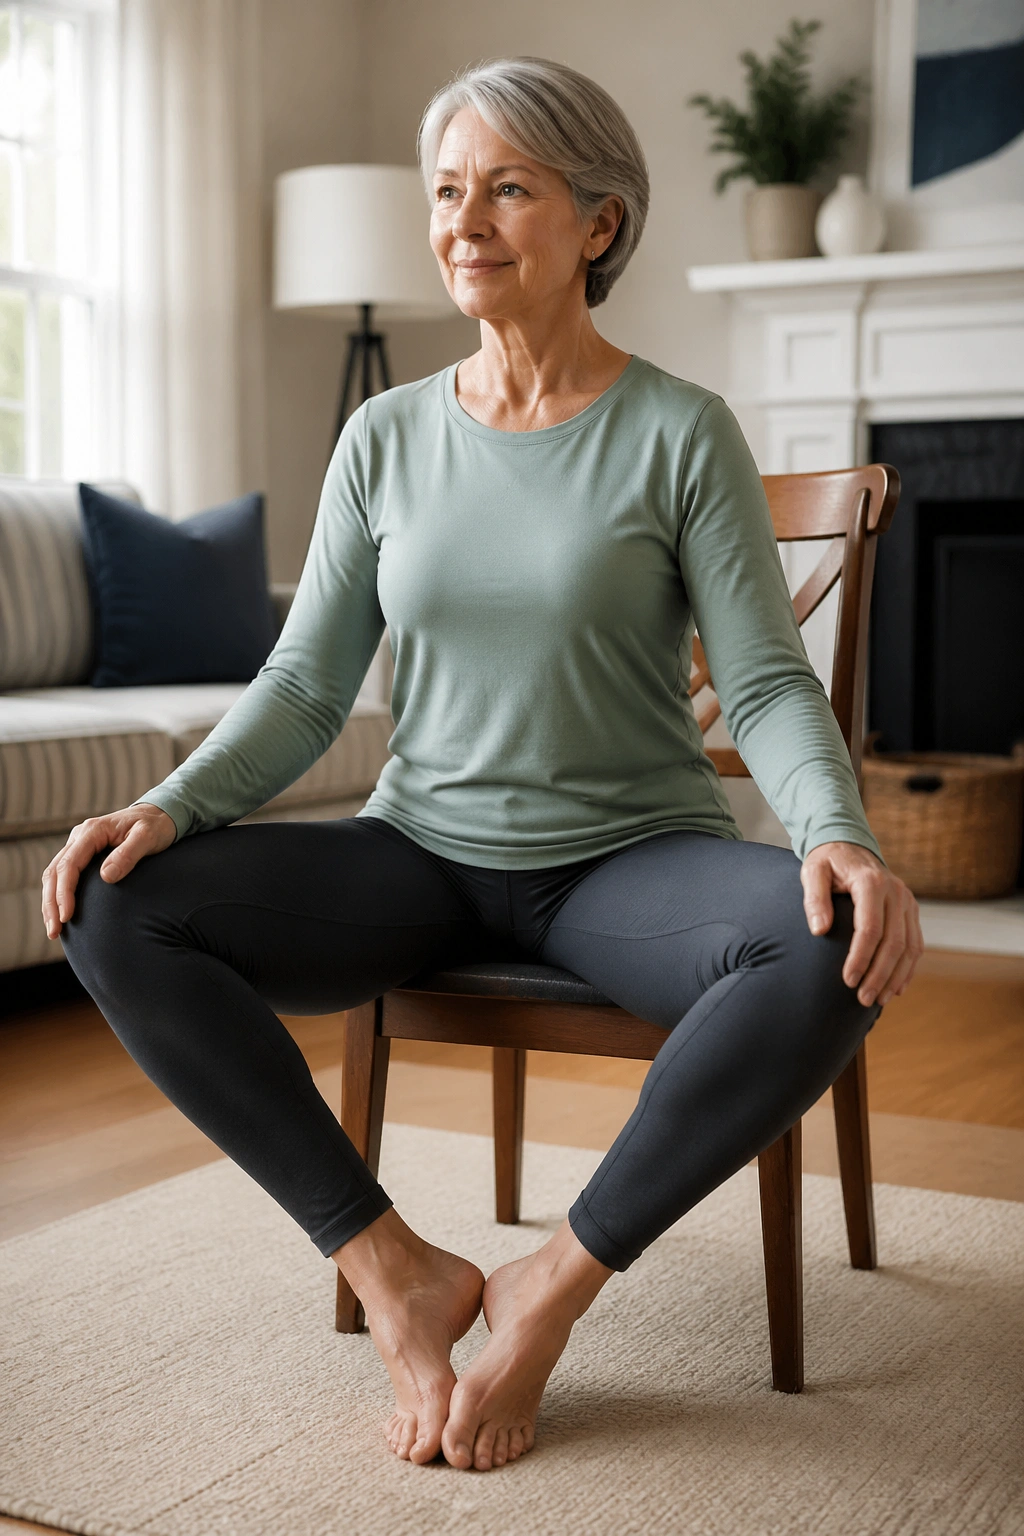
Can you open tight hips without yanking on the knees? Yes. Bound angle pose is one of the kindest ways to do it.
Bring the soles of the feet together, let the knees fall open, and sit on the front edge of the chair. If the knees drop too low and feel heavy, place pillows or folded towels under them. That support makes the stretch feel much friendlier.
The spine can stay tall, or you can hinge forward a little if the hips are ready. Keep the feet closer to the body for a stronger stretch, farther away for a gentler one. The knees should never feel forced apart.
This pose often feels better after a few of the warmer moves above. The body likes a little prep before the deep stuff.
23. Long Spine Reach
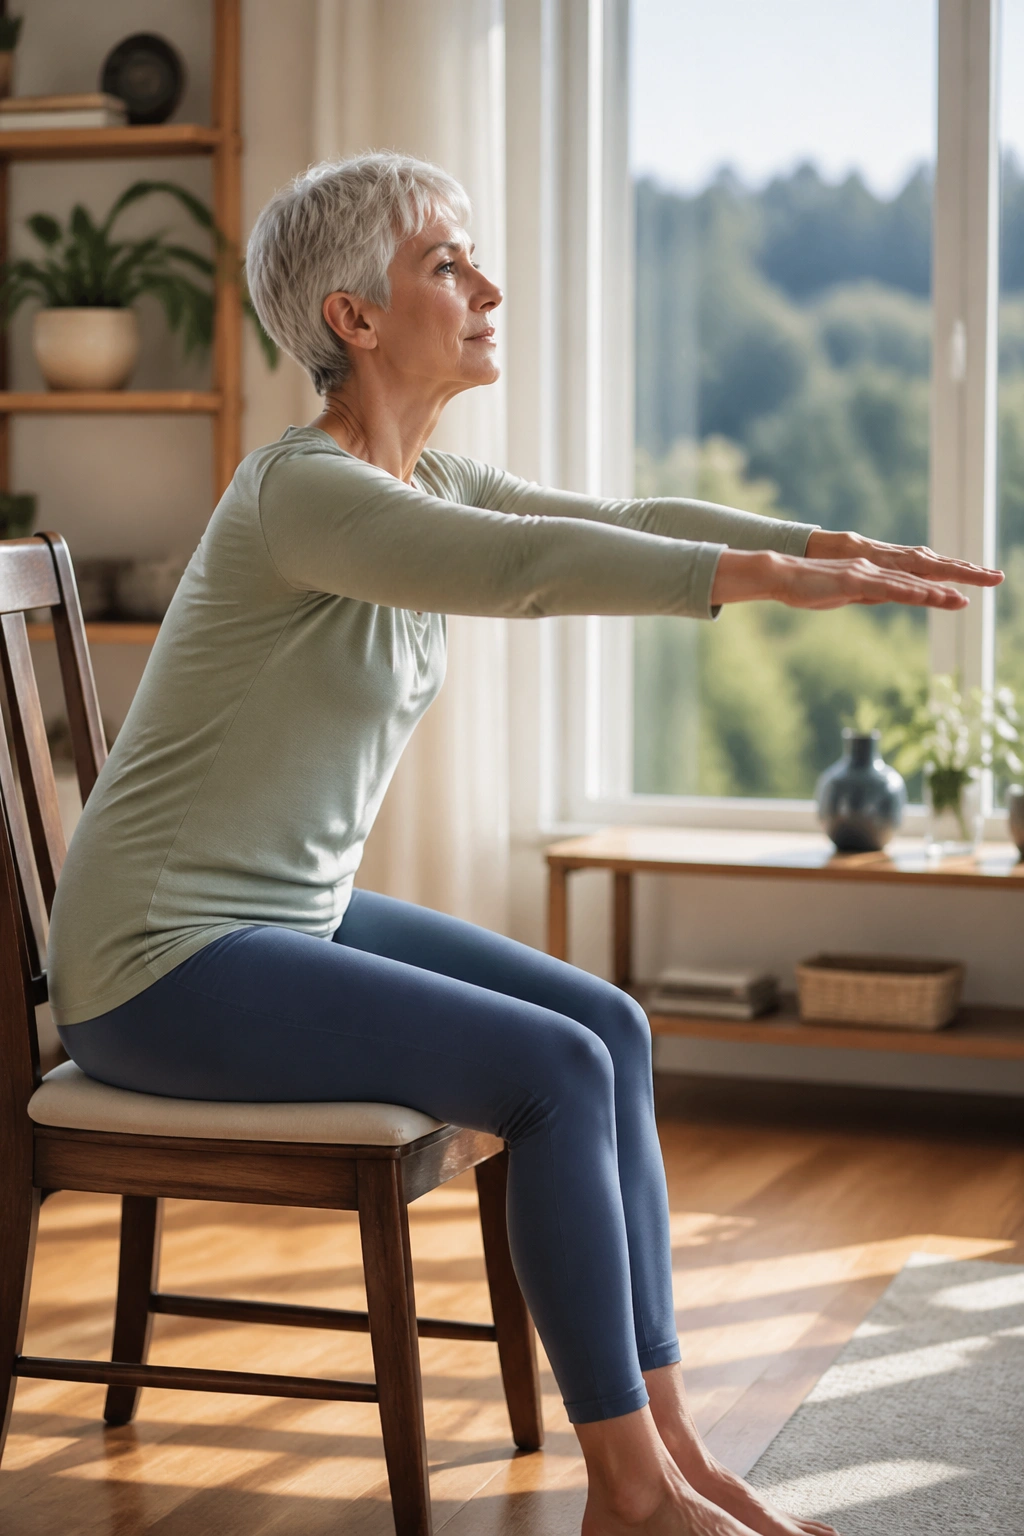
A long spine reach is one of those quiet poses that cleans up everything else. Sit tall, inhale, and reach the arms forward or slightly upward. Then exhale and hinge from the hips while keeping the spine long.
The Slow Version
Hands on thighs work well here. Slide them forward as the chest tips slightly toward the floor, but stop before the back rounds hard. The goal is length through the back of the body, not folding in half.
This pose is excellent when the low back feels compressed from sitting. It gives the hamstrings a gentle say and lets the shoulders move out of their defensive shape. Three slow breaths is enough.
Come back up by pressing into the thighs and stacking the spine one piece at a time. Rush that part and you miss the whole point.
24. Chest Opener With Clasped Hands
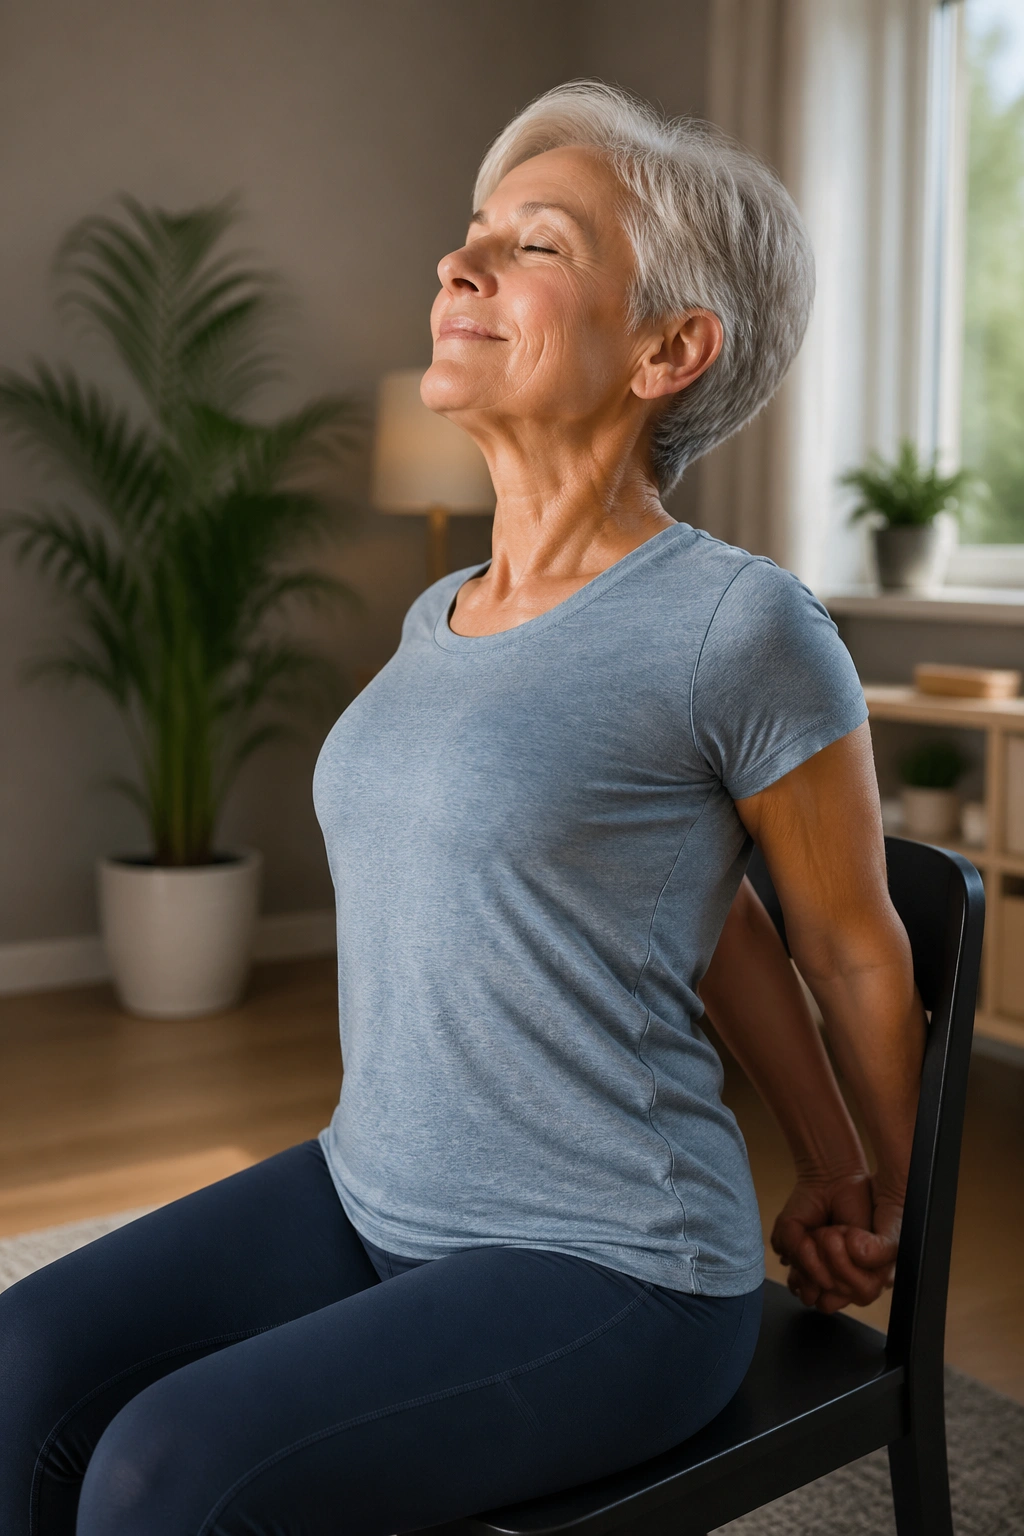
A doorway stretch is nice, but a seated chest opener is easier to control. Clasp the hands behind the back if that works, or hold the sides of the chair seat and let the chest lift.
The trick is to avoid flinging the ribs forward. A small lift in the sternum and a soft squeeze between the shoulder blades is enough. If the shoulders are tight, keep the hands lower and the elbows bent.
This one can feel particularly good after all the forward hunching most people do without noticing. It opens the front of the body and gives the breath a little more room.
If the neck feels strained, shorten the lift. The stretch should land in the chest and shoulders, not in a clenched jaw.
25. Supported Rest Pose and Breath
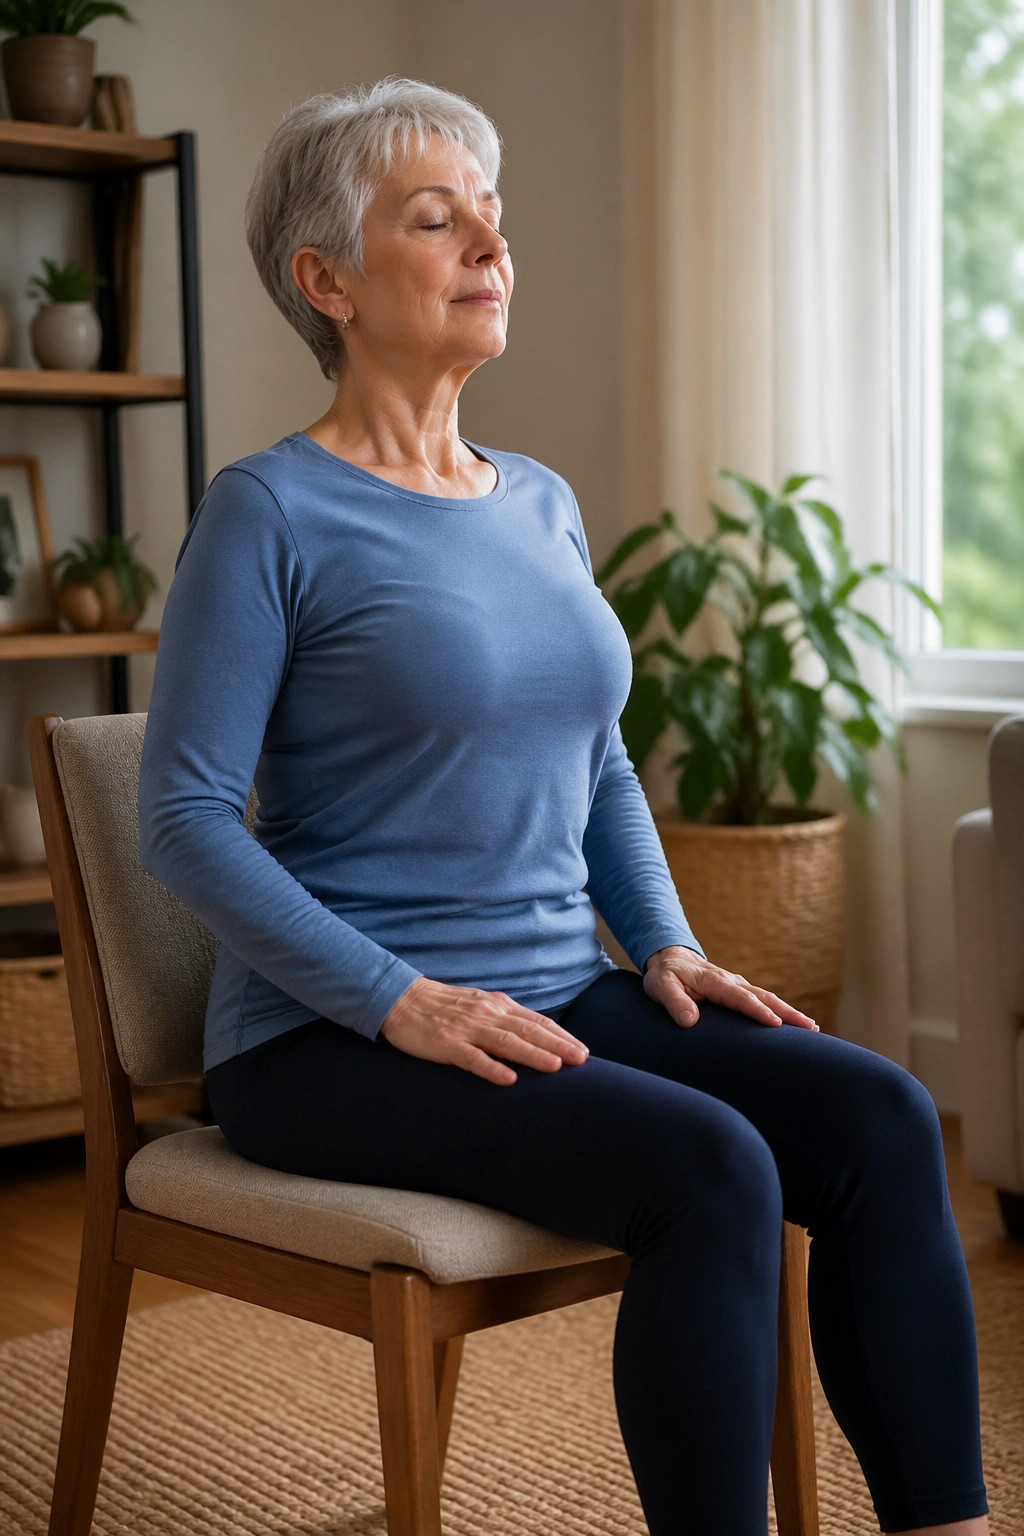
The best chair yoga session often ends with doing less. Sit back in the chair with both feet flat, hands on the thighs or belly, and let the eyes close if that feels safe.
Breathe in through the nose for a count of 4, then breathe out for a count of 6. Longer exhales tend to settle the nervous system and soften the jaw, which is handy when stiff joints have made the whole body feel a bit braced. You do not need to make the breath huge. Small and steady is enough.
If you like, add a final shoulder drop on each exhale. That tiny cue can make the whole practice feel finished.
Stay here for 5 to 10 breaths, or longer if it feels good. Then stand up slowly, because even a good rest can leave you pleasantly loose and a little wobbly — which is a fine place to end.
