



Some lower body yoga poses look gentle until about 20 seconds in, when your thighs start sending very specific complaints.
That’s the sneaky charm of leg-and-hip work in yoga. From across the room, it can look like slow breathing and a calm face. Up close, it’s a different story: quads burning, outer hips waking up, ankles gripping the mat, and a back leg that suddenly remembers it has a job.
The best part is that this kind of strength work doesn’t need a machine or a heavy dumbbell rack. A mat, a little floor space, and the willingness to stay in a shape long enough for the muscles to do their thing are enough. A block helps. A folded blanket helps too. And if your hips are tight, the props are not a sign of weakness — they’re the thing that lets you actually do the pose well.
Strong legs are not only about muscle size. They’re about control. They’re about how cleanly you sit, climb stairs, step out of a car, stand from a low couch, or shift your weight without wobbling like a newborn deer. That’s where these lower body yoga poses earn their keep, because they mix load, balance, and mobility in a way that feels simple until you try to stay honest in the shape.
1. Chair Pose for Quads and Ankles
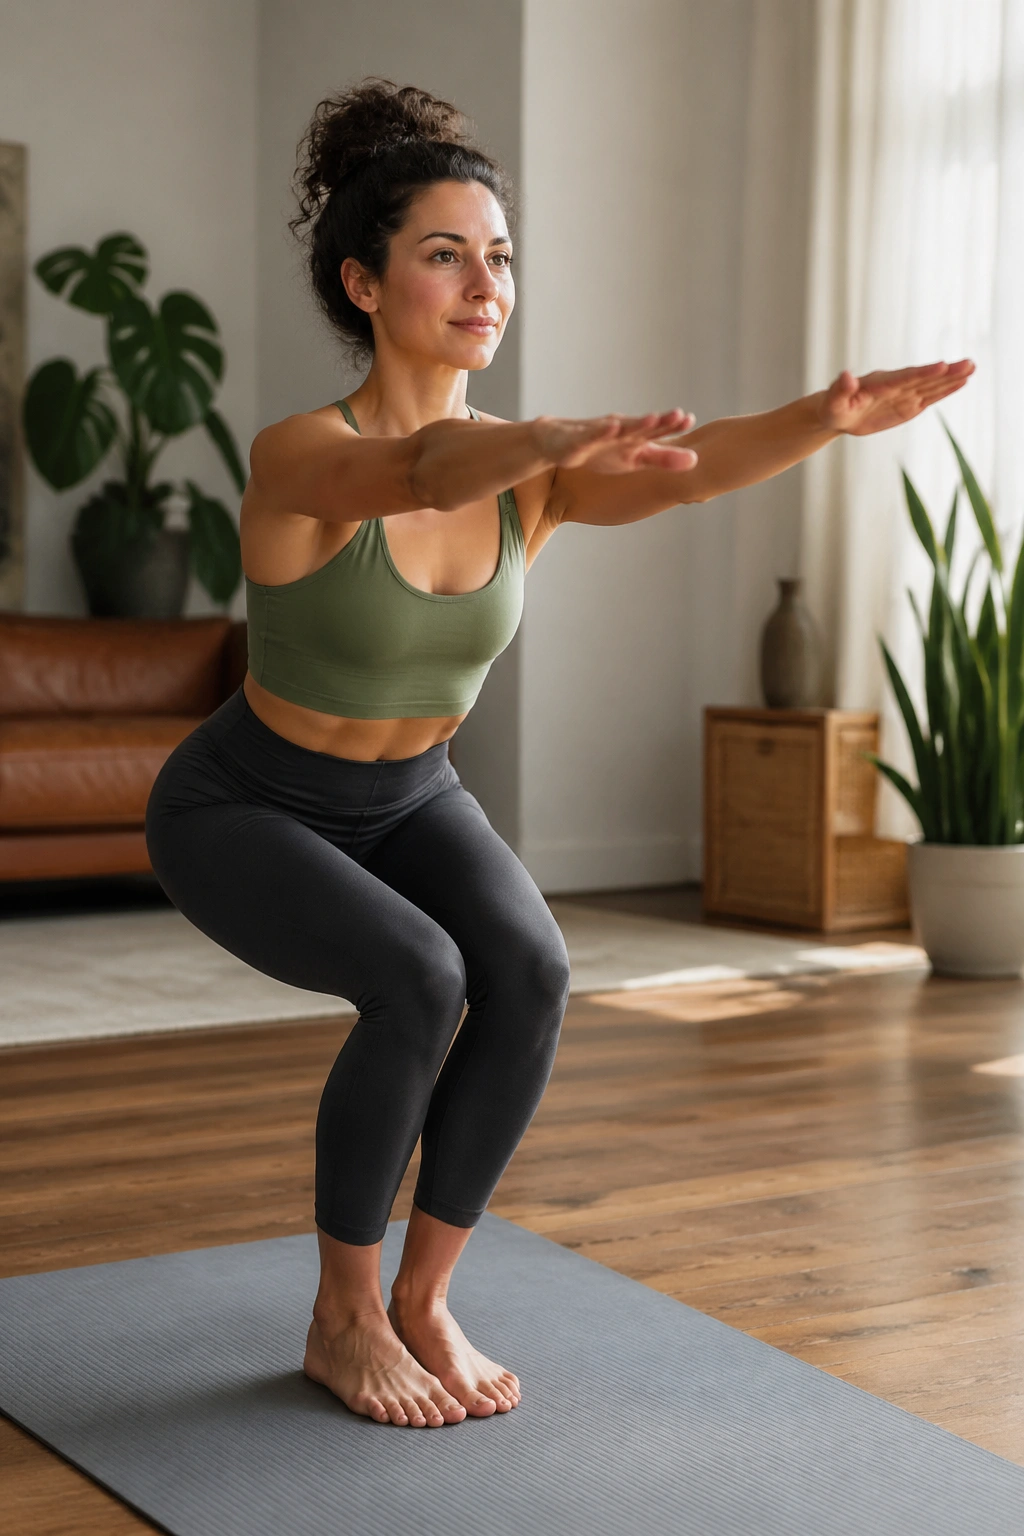
Chair Pose is where lower body yoga stops pretending to be polite. The shape is simple — bend the knees, sit the hips back, reach the arms — but the work lands right in the quads, the outer hips, the calves, and the small muscles around the ankles.
Why It Works
Chair Pose is an isometric hold, which means the muscles stay under tension without a lot of movement. That sounds plain, but it’s exactly why your legs start shaking after a few breaths. The quads have to keep you from collapsing backward, the glutes help keep the pelvis from dumping forward, and the feet stay active so the whole chain doesn’t wobble.
A clean version of the pose starts with feet about hip-width apart, not glued together. Send the hips back as if you are lowering into an invisible chair, but keep the chest lifted enough that your ribs do not flare. Hold for 5 to 8 breaths, then stand up before the shape gets sloppy.
Quick Form Checks
- Keep the knees tracking over the second and third toes.
- Press the weight through the heels, but do not lift the toes off the mat.
- Reach the arms forward or overhead, whichever keeps the ribs quieter.
- Use a block between the thighs if you want the inner thighs to wake up faster.
If your low back arches, rise a little higher. Depth is not the goal. Control is.
2. Goddess Pose for Inner Thighs
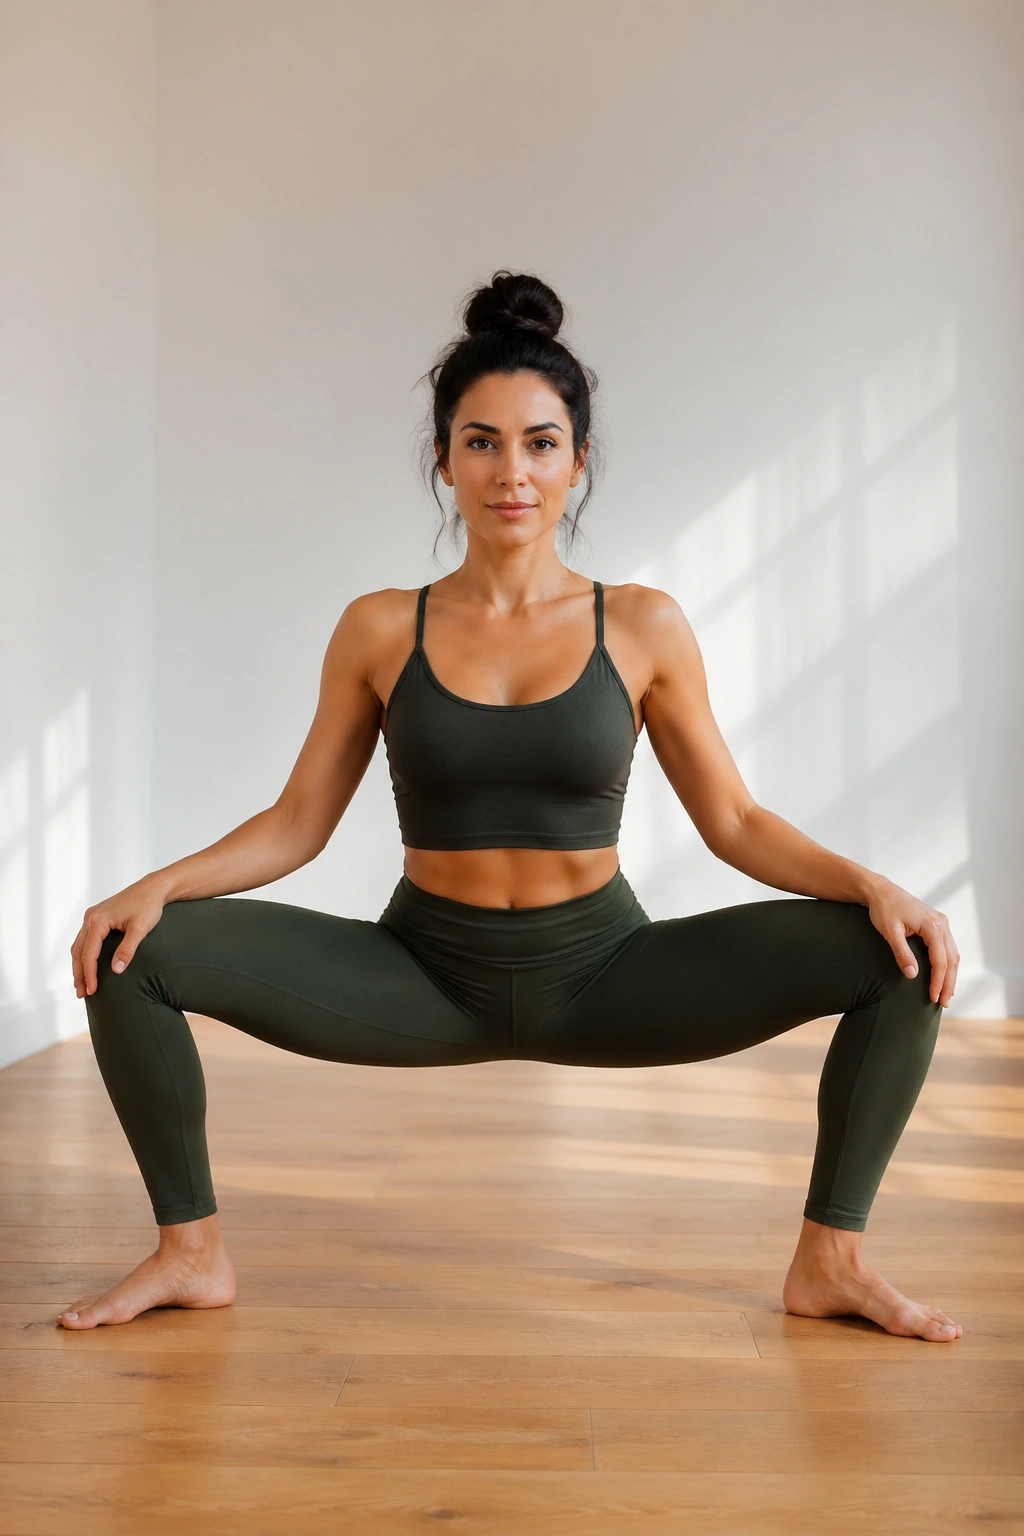
A wider stance can make the inner thighs work harder than a narrow one.
That is why Goddess Pose belongs on a list of lower body yoga poses for stronger legs and hips. The feet turn out, the knees bend, and the pelvis drops into a wide, grounded squat that hits the adductors, glutes, and outer hips in one shot. It looks soft. It is not soft.
The shape works best when you resist the urge to dump all your weight forward. Keep the spine tall, the tailbone heavy, and the knees open over the toes. If you pulse in and out of the bend for 8 to 10 small reps, the thighs usually light up fast. If you hold still for 20 to 30 seconds, the burn settles in a little more slowly but often lasts longer.
I like this pose as a warm-up before deeper hip work. It opens the groin without asking for the same balance skills as a standing pose, which makes it useful on days when your joints feel a little stiff and your focus is not great. No drama. Just honest leg work.
3. Warrior II for Leg Endurance
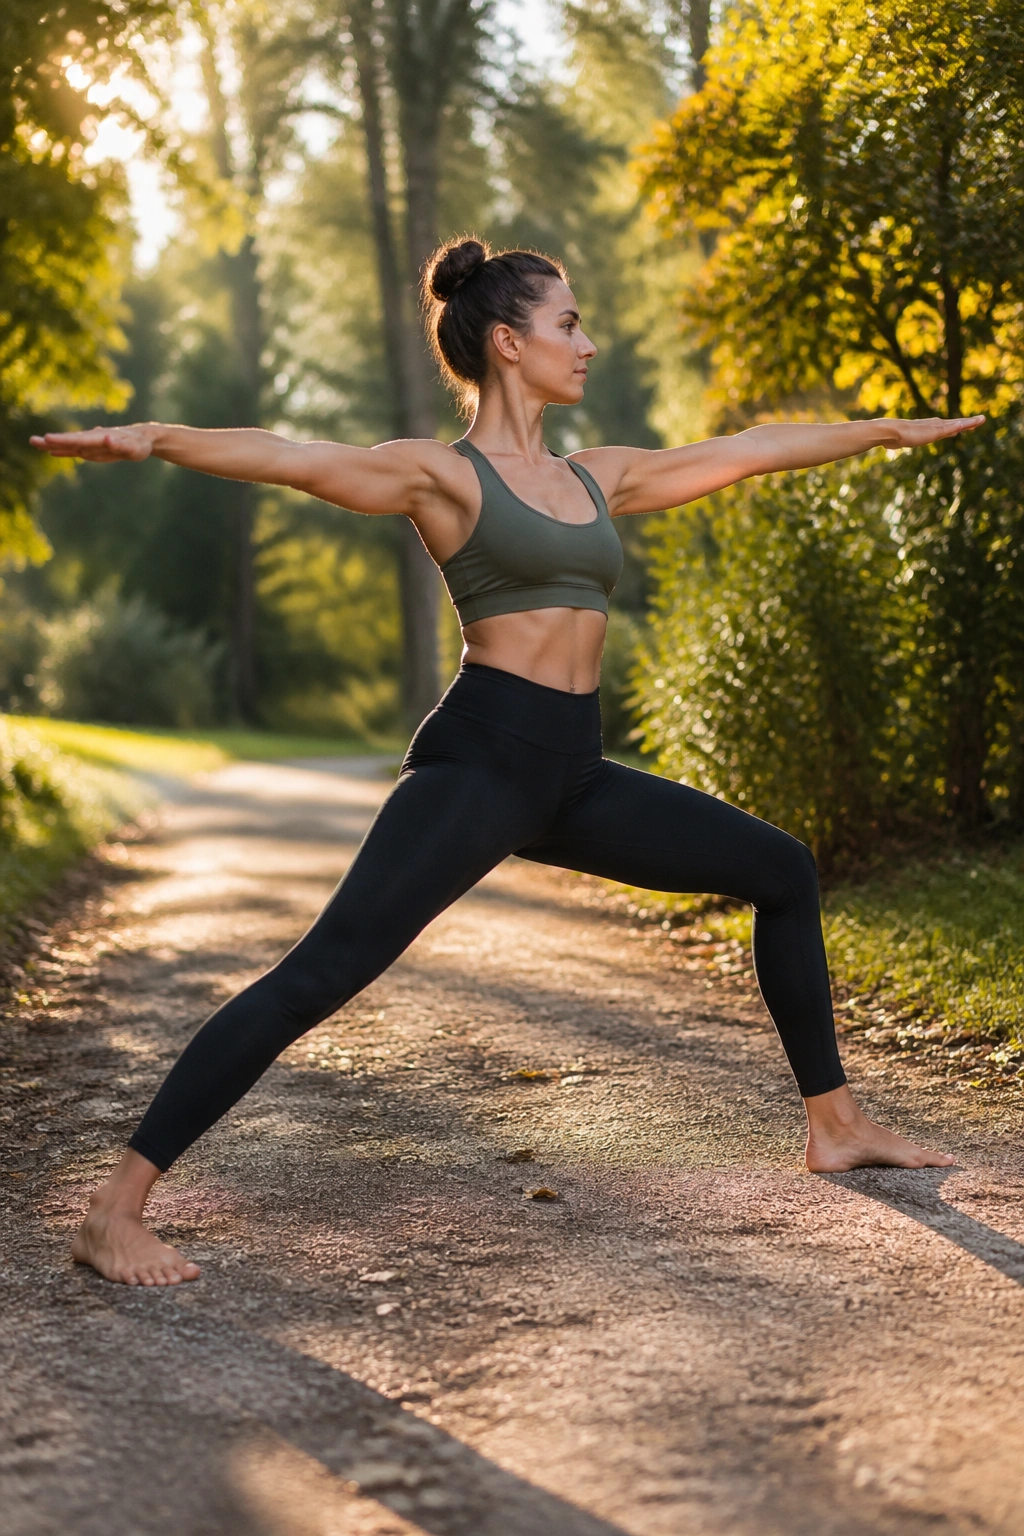
Why does Warrior II make the front thigh complain so quickly? Because it asks that leg to do a long, steady job while the hips stay open and the torso stays calm.
The front knee bends, the back leg reaches long, and both feet stay grounded in a way that looks relaxed from the outside. Inside the pose, the front quad is busy, the glute on the back leg helps stabilize, and the inner thigh of the front leg keeps the knee from drifting inward. That mix is gold if you want strength that lasts longer than one or two breaths.
How to Use It
Hold Warrior II for 5 to 8 breaths per side. That is usually enough time for the legs to work without turning the pose into a slow collapse. Keep the front knee bent enough that you can see it stacked over the ankle, and keep the back arch of the foot pressing down hard.
A few details matter here:
- The front knee should aim toward the middle toes, not caving in.
- The back leg stays straight, but not locked rigid.
- The arms reach out from the shoulders, not shrugged up around the ears.
- The hips stay open to the side, even if that means shortening the stance a little.
Spread the mat apart with your feet. That cue wakes up the legs fast and keeps the pose from feeling like a loose lunge.
4. Crescent Lunge for Hip Flexors and Glutes
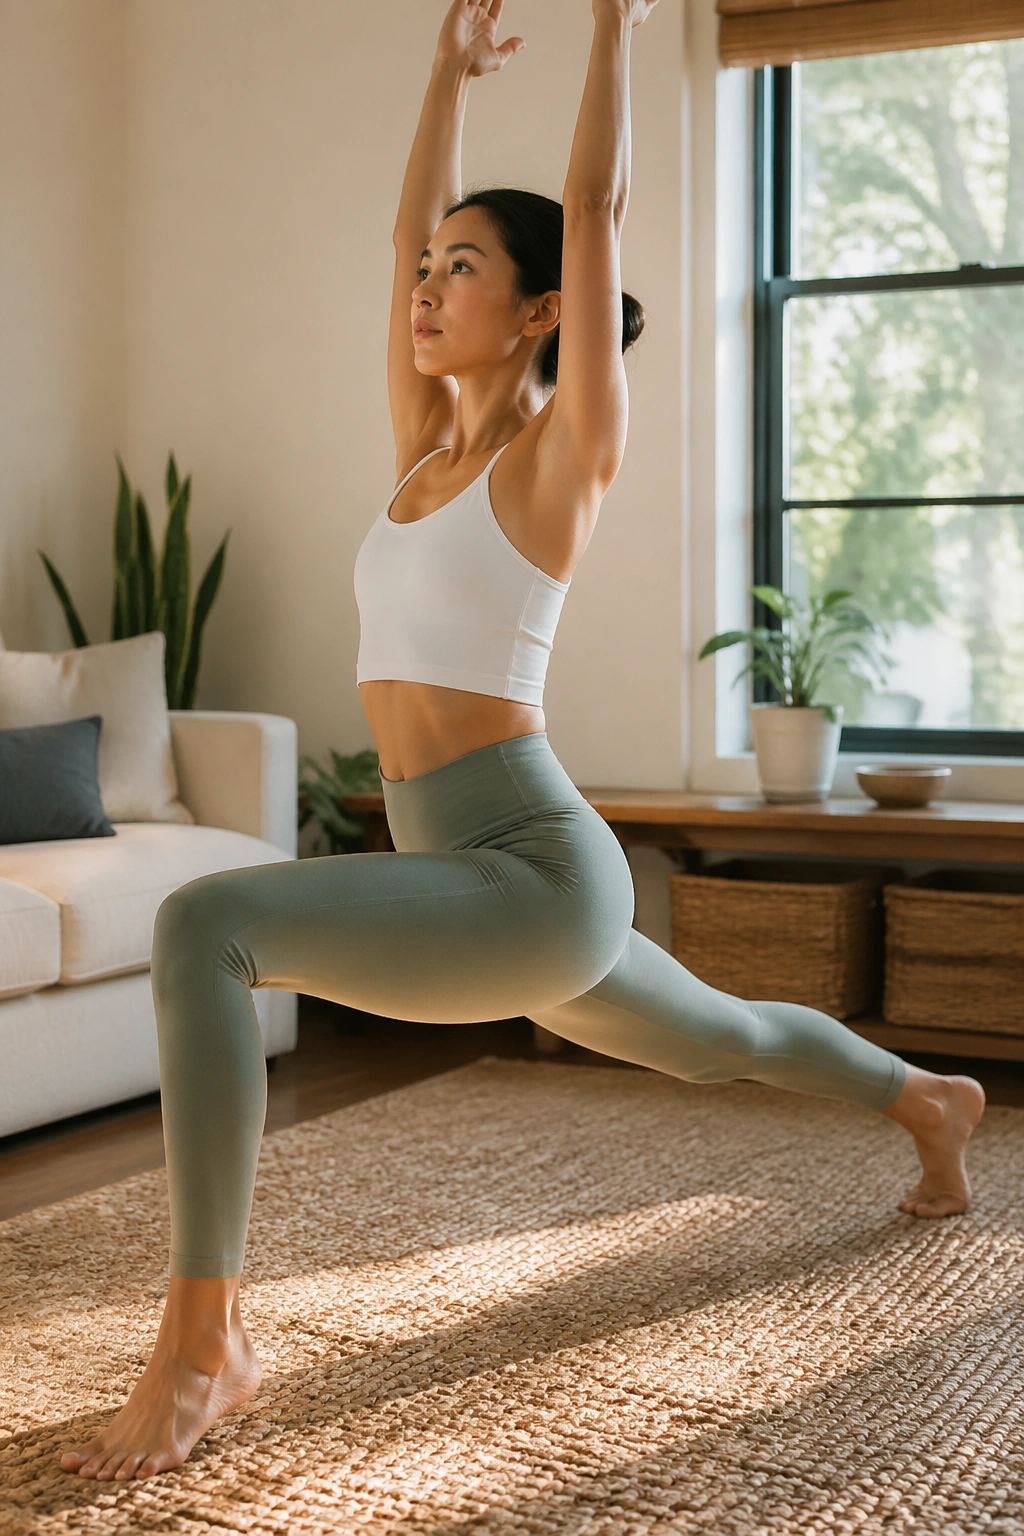
Step into Crescent Lunge and the back leg tells the truth immediately. If it has been sleepy, tight, or underused, you know within one breath.
This pose asks the front thigh to hold your body upright while the back leg extends long and stays active. The hip flexors on the back side get a stretch, the glutes of the back leg have to support the shape, and the front foot does a lot more balancing than people expect. It’s a smart pose for stronger legs and hips because it mixes stretch with work instead of treating them like separate tasks.
I prefer Crescent Lunge with the back heel lifted and the pelvis level, not twisted open. Keep the stance long enough to feel space, but not so long that the front knee gets jammed forward. If you want more fire, bend deeper into the front knee and hold for 4 to 6 breaths. If you want less, bring the back knee down for a low lunge version first.
A folded blanket under the back knee can save your joints. So can a hand on each hip for a moment before you raise the arms. Small things. Useful things.
5. Warrior I for Stronger Standing Legs
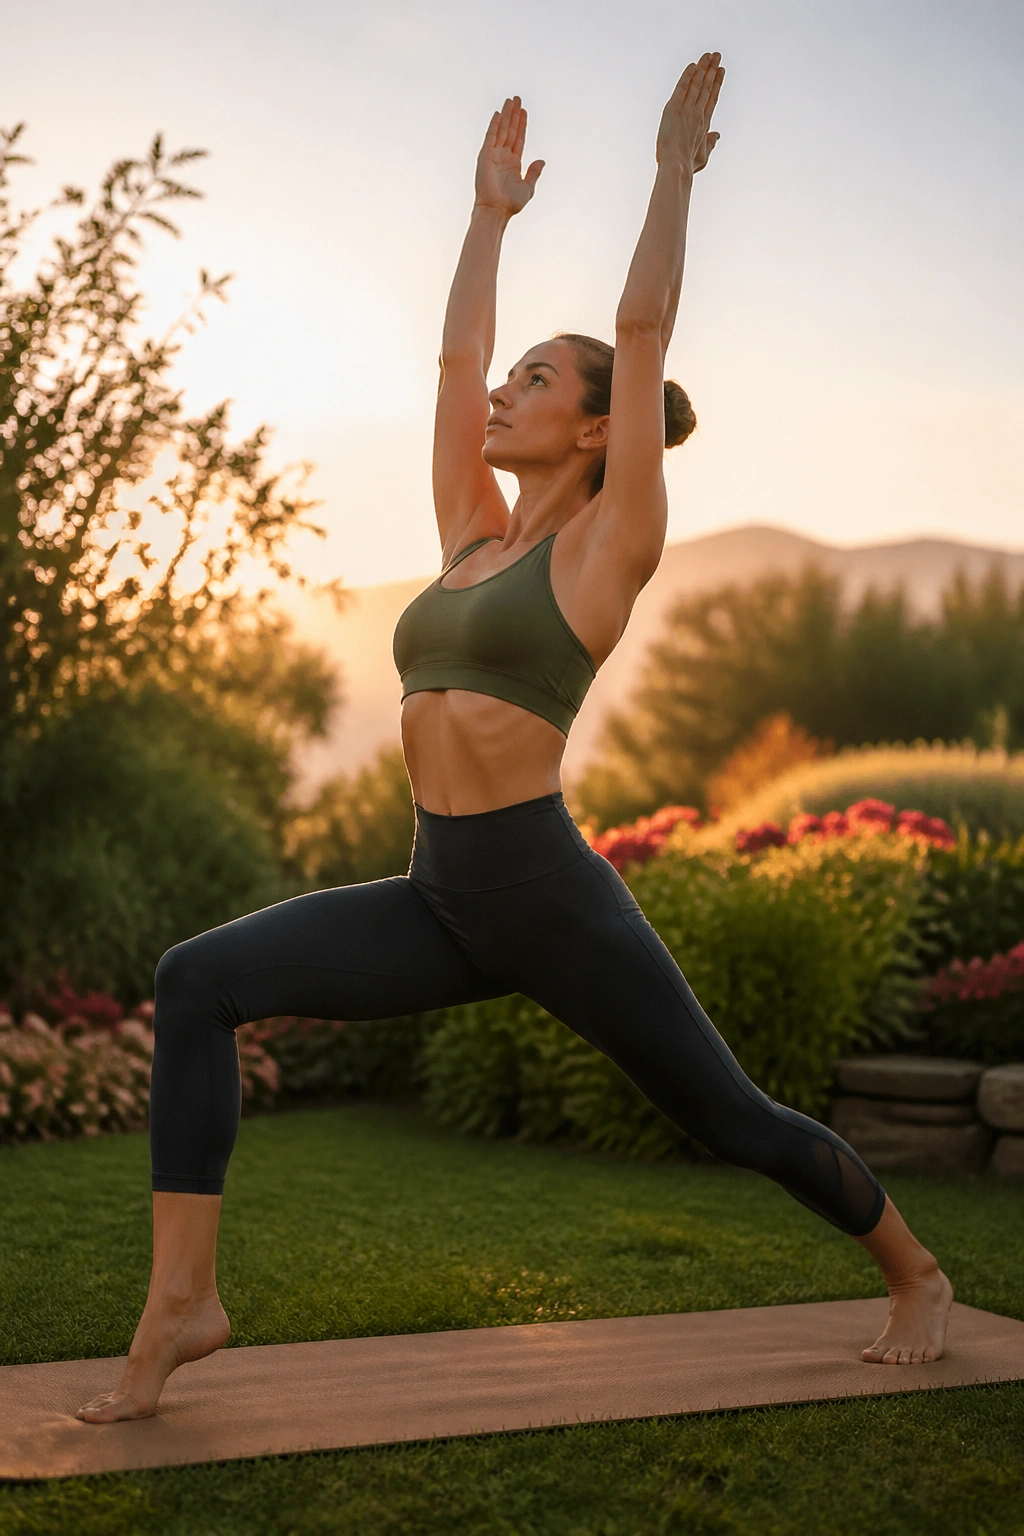
Warrior I is the pose people often rush through, and that’s a shame, because it does serious work if you actually stay in it.
Compared with Crescent Lunge, Warrior I asks for a more rooted back heel and a slightly squarer pelvis. That changes the load. The front quad still works hard, but the back leg joins in more fully because the heel presses down and the inner edge of the foot has to stay awake. The hips also have to organize themselves better, which is why this pose can feel a little awkward before it feels strong.
The trick is not forcing square hips at any cost. If your low back pinches or the pelvis twists hard, shorten the stance and bring the back toes in a little. The goal is an honest shape, not a photo-ready one. Hold for 3 to 5 breaths, then switch sides.
One nice detail here: the back calf and Achilles tendon get involved more than in a lifted-heel lunge. That makes Warrior I useful for building a steadier base, especially if you tend to wobble in standing poses.
6. Extended Side Angle for Outer Hips
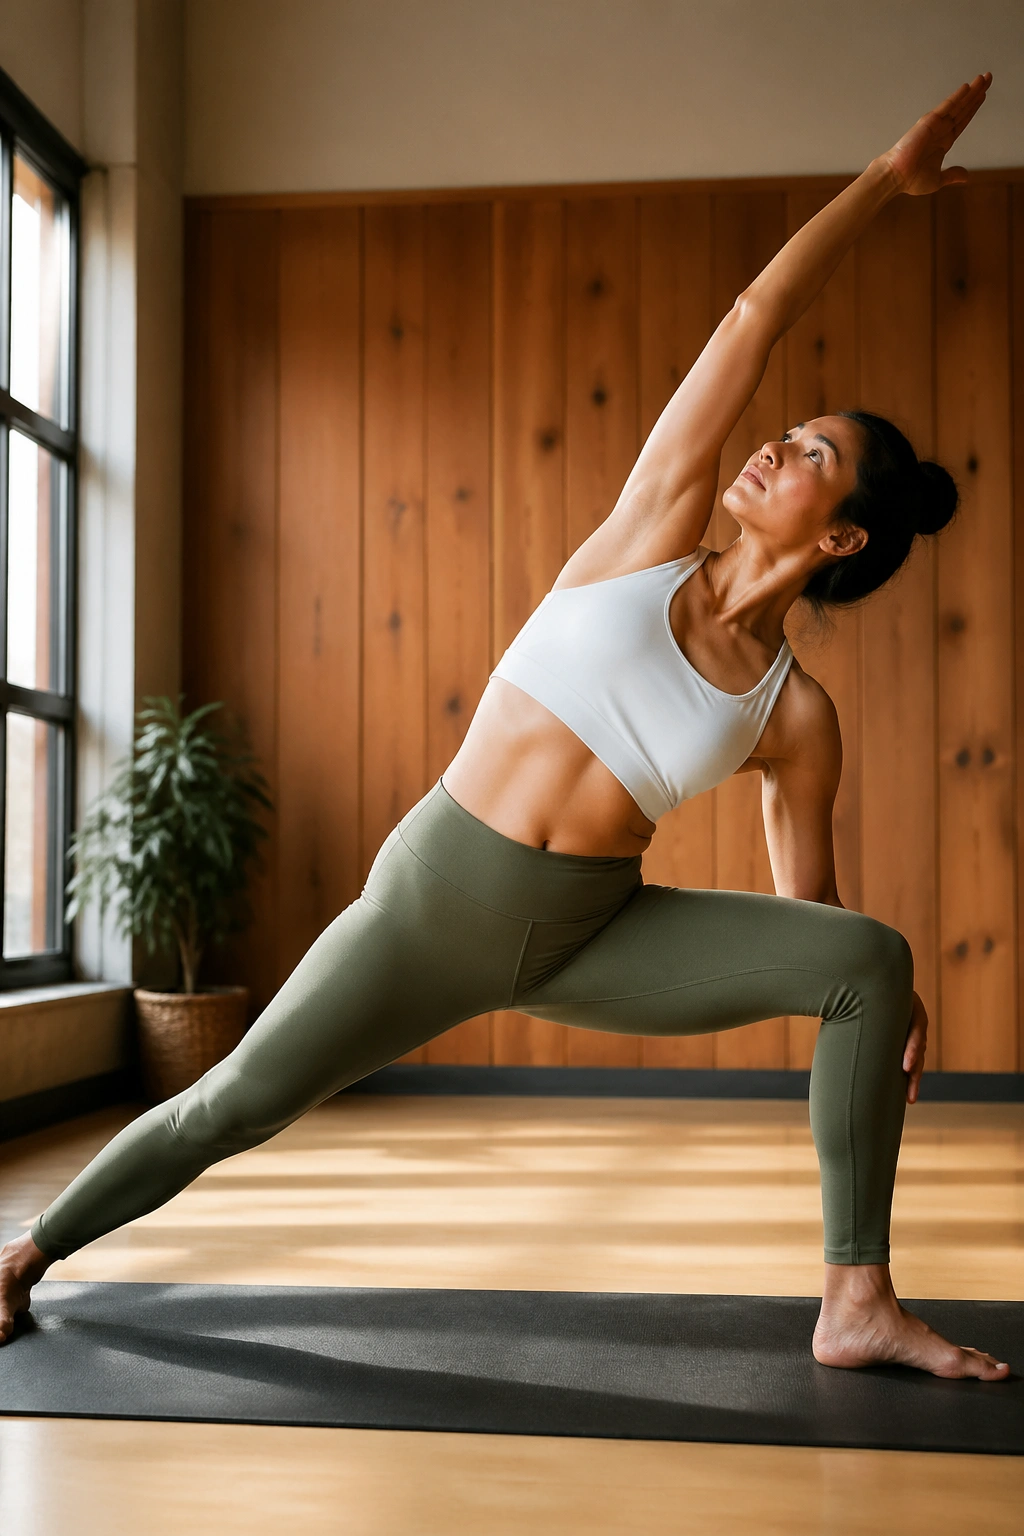
Unlike a simple lunge, Extended Side Angle asks the front leg to keep holding while the hips open and the torso stretches long over the thigh.
That combination is why the pose works so well for leg strength. The front quad stays on, the glute on that side helps control the pelvis, and the inner thigh of the back leg has to stay engaged so you don’t spill weight into the lower back. If you place the lower hand on a block or on the front thigh, the pose gets cleaner fast. If you drop too low too soon, the chest collapses and the front knee starts to wander.
What to Watch For
- Keep the front knee bent enough to feel the quad work.
- Press the back heel down firmly.
- Reach the top arm overhead only if the ribs stay quiet.
- Use a block outside the front foot if the floor feels too far away.
This pose often gets treated as a side stretch, which it is. But the stronger effect comes from the front leg staying under load while the hips stay open. That is the part people feel later when they climb stairs.
7. Triangle Pose for Hamstrings and Hips
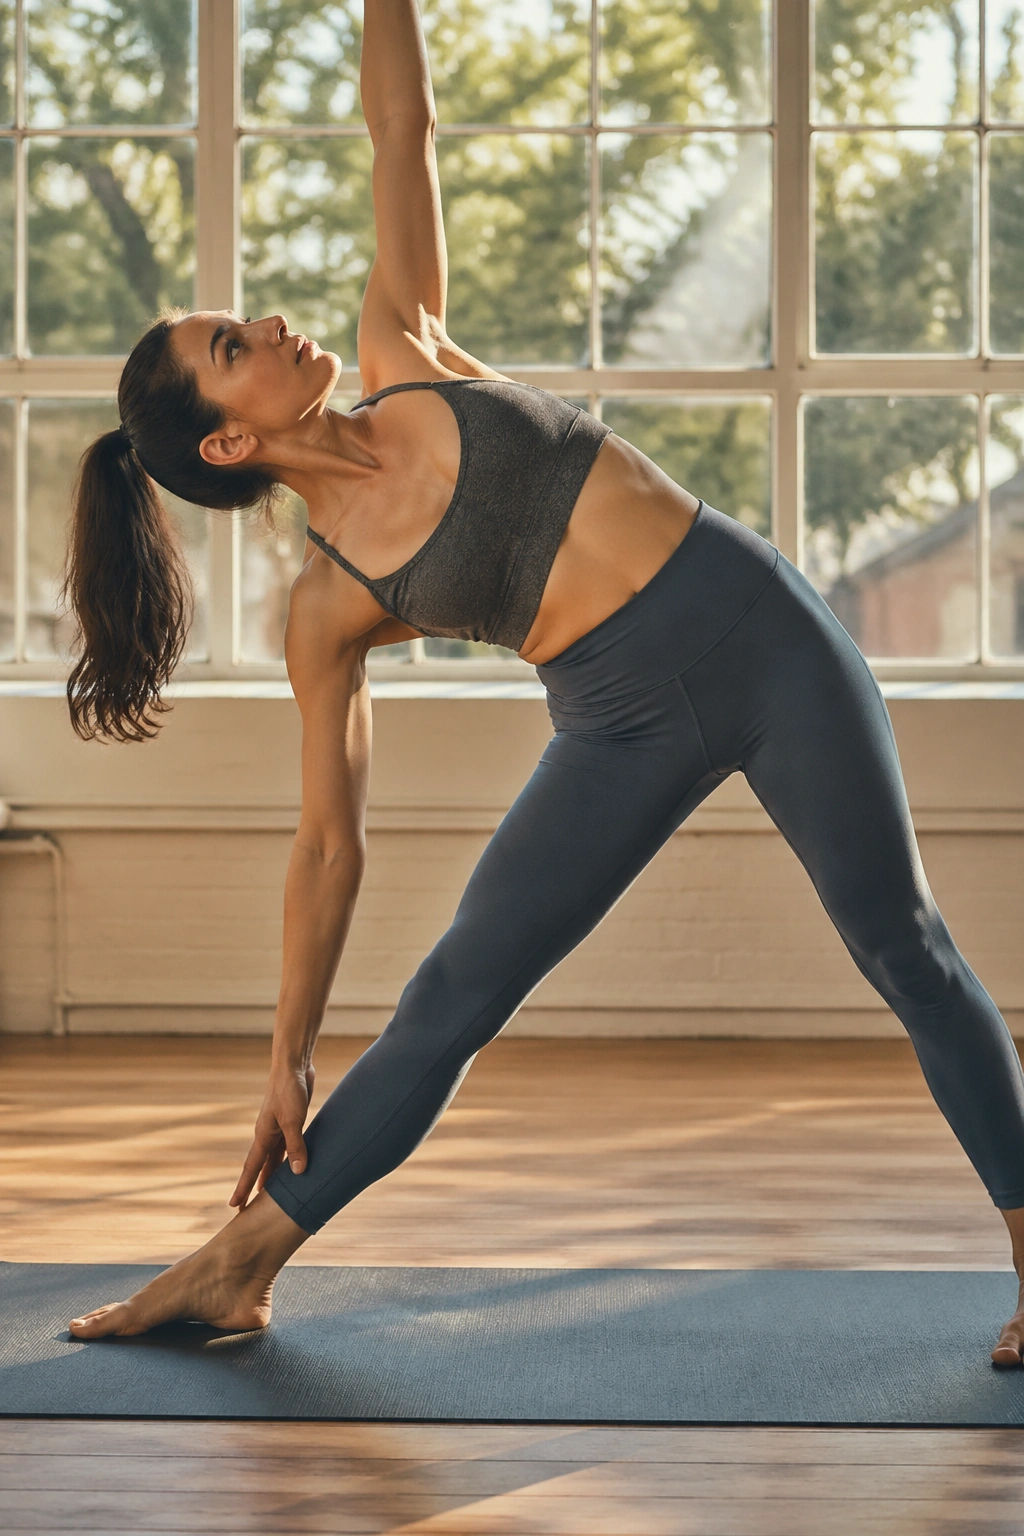
Triangle Pose has a way of making the hamstrings feel long, the standing foot grip the mat, and the whole pelvis ask for a little more patience.
It looks calm. It is not as easy as it looks. The front leg stays straight, the hips tip into a long line, and the torso rotates open while the standing leg does the real work of keeping you upright. The inner thigh of the front leg and the outer hip of the back leg both have jobs here, which is why Triangle can feel like a stretch and a strength pose at the same time.
What to Watch For
Keep a small bend in the front knee if the hamstring pulls too hard. That tiny bend often makes the pose safer and better. Hinge from the hip before reaching the hand down, and use a block under the lower hand if the floor turns the pose into a slouch.
A clean Triangle feels wide across the chest and steady under the feet. A messy one feels like you are folding sideways to chase the mat. Big difference. The first version trains the legs and hips. The second one mostly teaches your lower back to complain.
One more thing: the back leg should stay active, not lazy. Press through the outer edge of that foot and keep the thigh lifted.
8. Half Moon Pose for Balance and Glute Strength
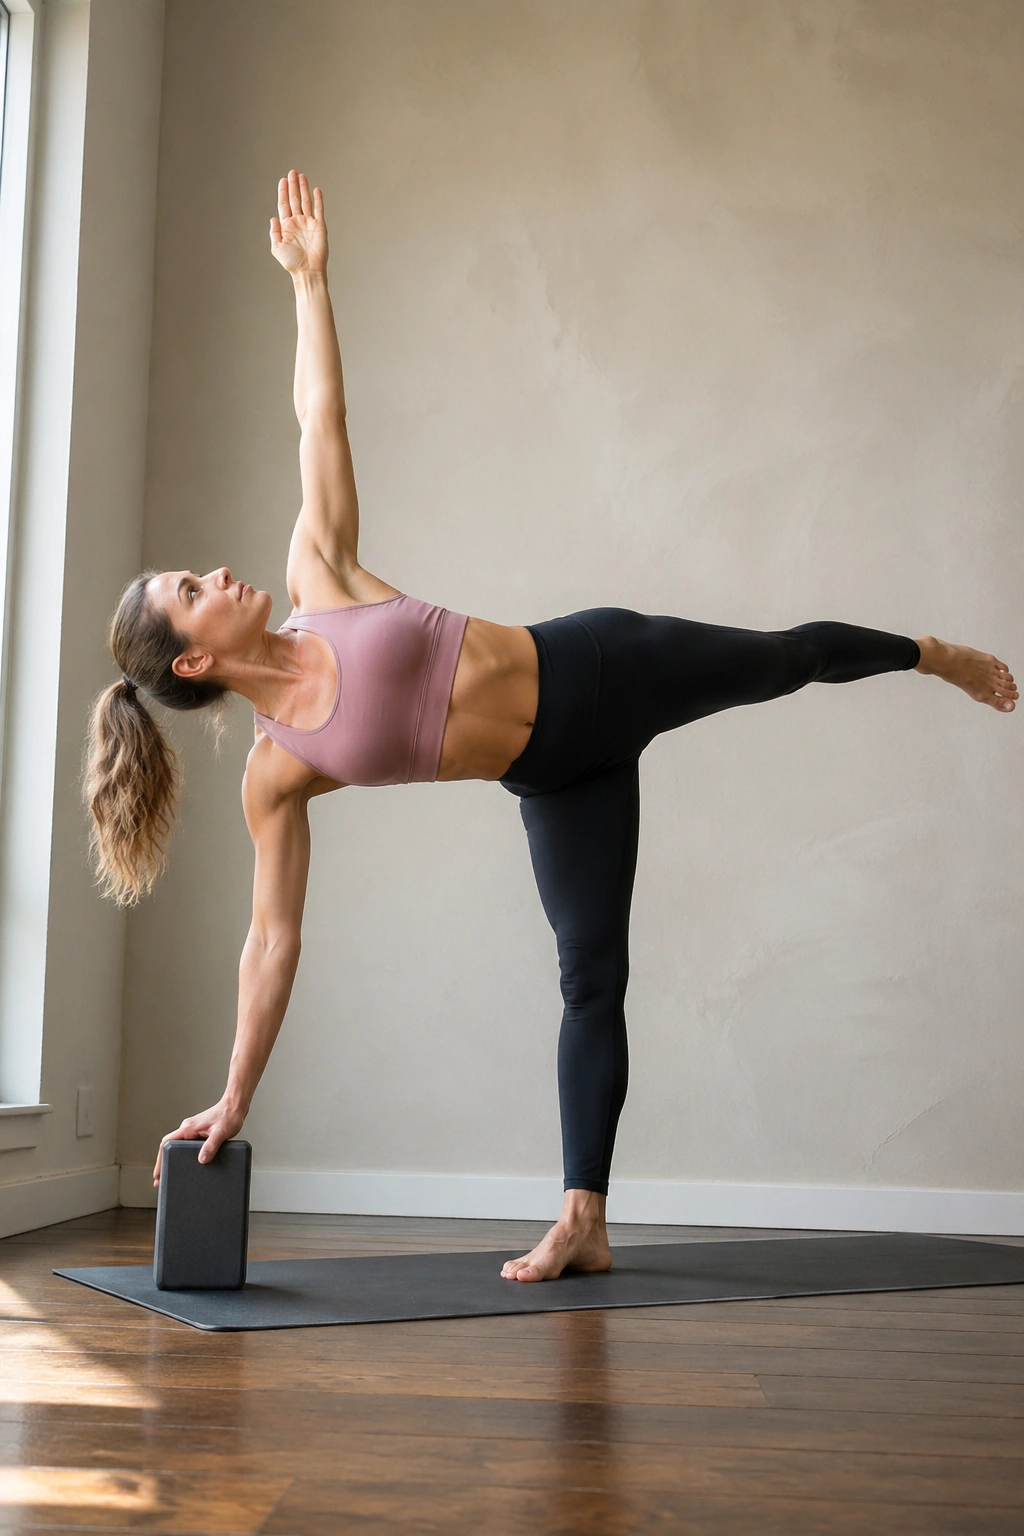
Half Moon is one of the better sneaky glute medius drills in yoga.
The standing leg does a lot here. It has to hold the pelvis level while the lifted leg reaches back and opens the hip. That means the outer hip of the standing side works hard to keep you from tipping over, and the ankle gets a quiet workout too. If your balance is shaky, that is not a flaw in the pose. It is part of the point.
A wall or block changes everything. Put a block under the lower hand, or keep the back of the lifted heel lightly against the wall while you learn the shape. Hold for 3 to 5 breaths, then lower with control. If the standing knee collapses inward, reset. That knee should stay soft but active, not pinned back or caving in.
This is one of those poses that looks small and feels huge. The range is tiny. The work is not.
9. Malasana for Ankles, Hips, and Adductors
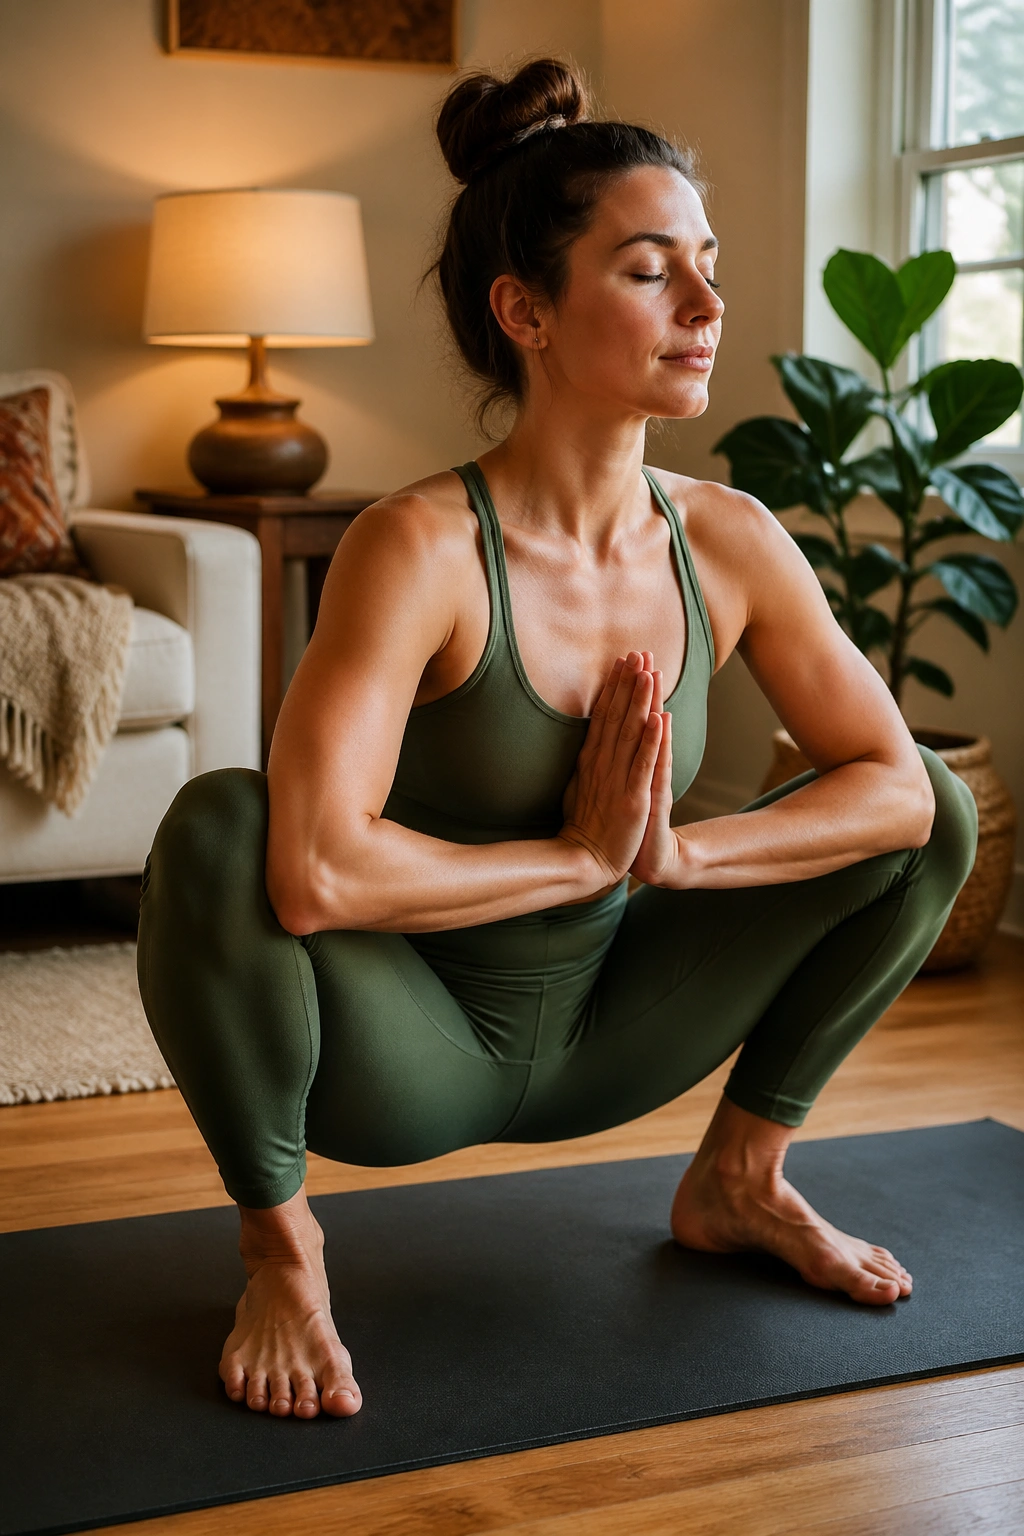
Can a deep squat be both a stretch and a strength pose? Yes. Malasana says so.
The heels may stay down or hover on a folded blanket, depending on your ankles and hips. Either way, the squat position asks the adductors to open, the ankles to dorsiflex, and the torso to stay tall while gravity does half the work. That combination makes it useful for stronger legs and hips because the position itself teaches your body how to sit into the lower body without collapsing.
How to Sit Deeper Safely
A blanket under the heels can take the pressure off tight calves. If the lower back rounds hard, place a block under the seat and stay higher. Press the elbows gently into the inner thighs, but do not shove the knees apart with force. Think of length first, then depth.
Malasana is a good place to breathe for 5 to 8 slow breaths. The longer you stay, the more the hips tend to soften, but the legs still have to keep you from face-planting into the floor.
A lot of people treat this as a hip opener only. I think that misses the point. It’s also a leg position. A useful one.
10. Skandasana for Side-to-Side Hip Strength
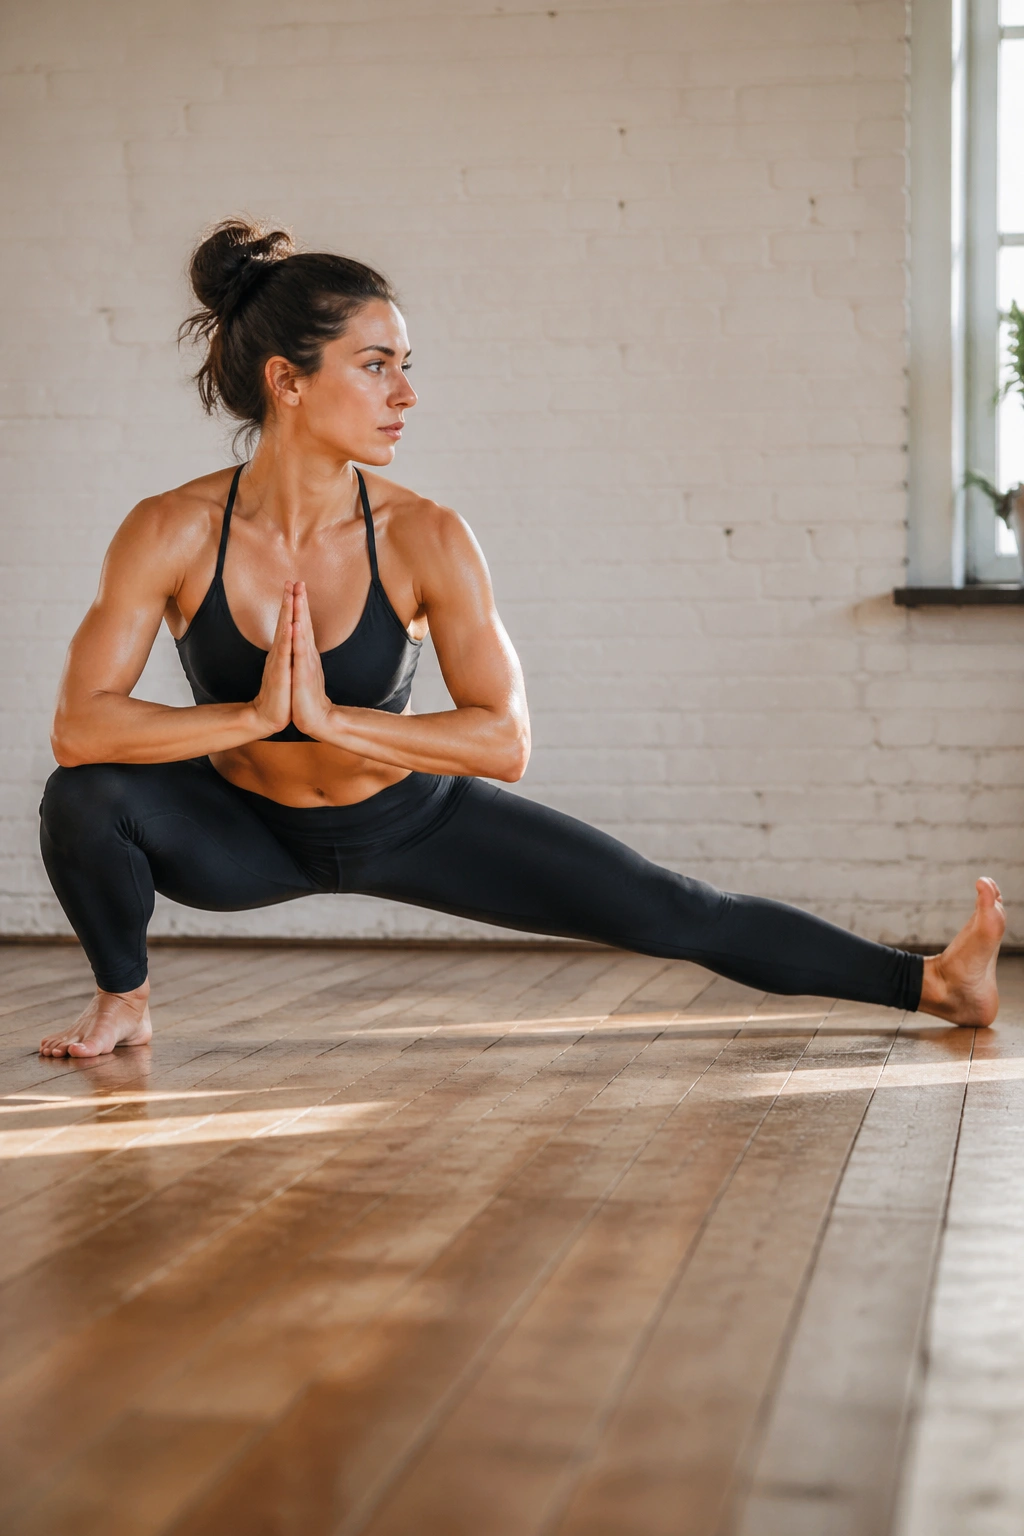
Skandasana feels a little like reaching down to grab something off the floor while moving sideways around a chair. Awkward? Sure. Useful? Very.
One leg bends deeply while the other stays long, and then you shift to the other side. That side-to-side load is gold for the inner thighs, outer hips, and the muscles around the knees. It also teaches the body to transfer weight without losing control, which most of us need more than we admit.
The easiest way to learn it is slow. Step wide, bend one knee, keep the opposite leg straight with the foot flexed or the heel grounded, then shift from side to side for 6 to 10 controlled reps. If your hips feel tight, stay higher. You do not need to drop into the deepest version to get the benefit.
I like Skandasana because it feels practical. Life is full of sideways movements: getting out of the car, stepping around a bag on the floor, dodging a child or a dog. This pose trains that motion without making a big speech about it.
11. Standing Figure Four for Hip Stability
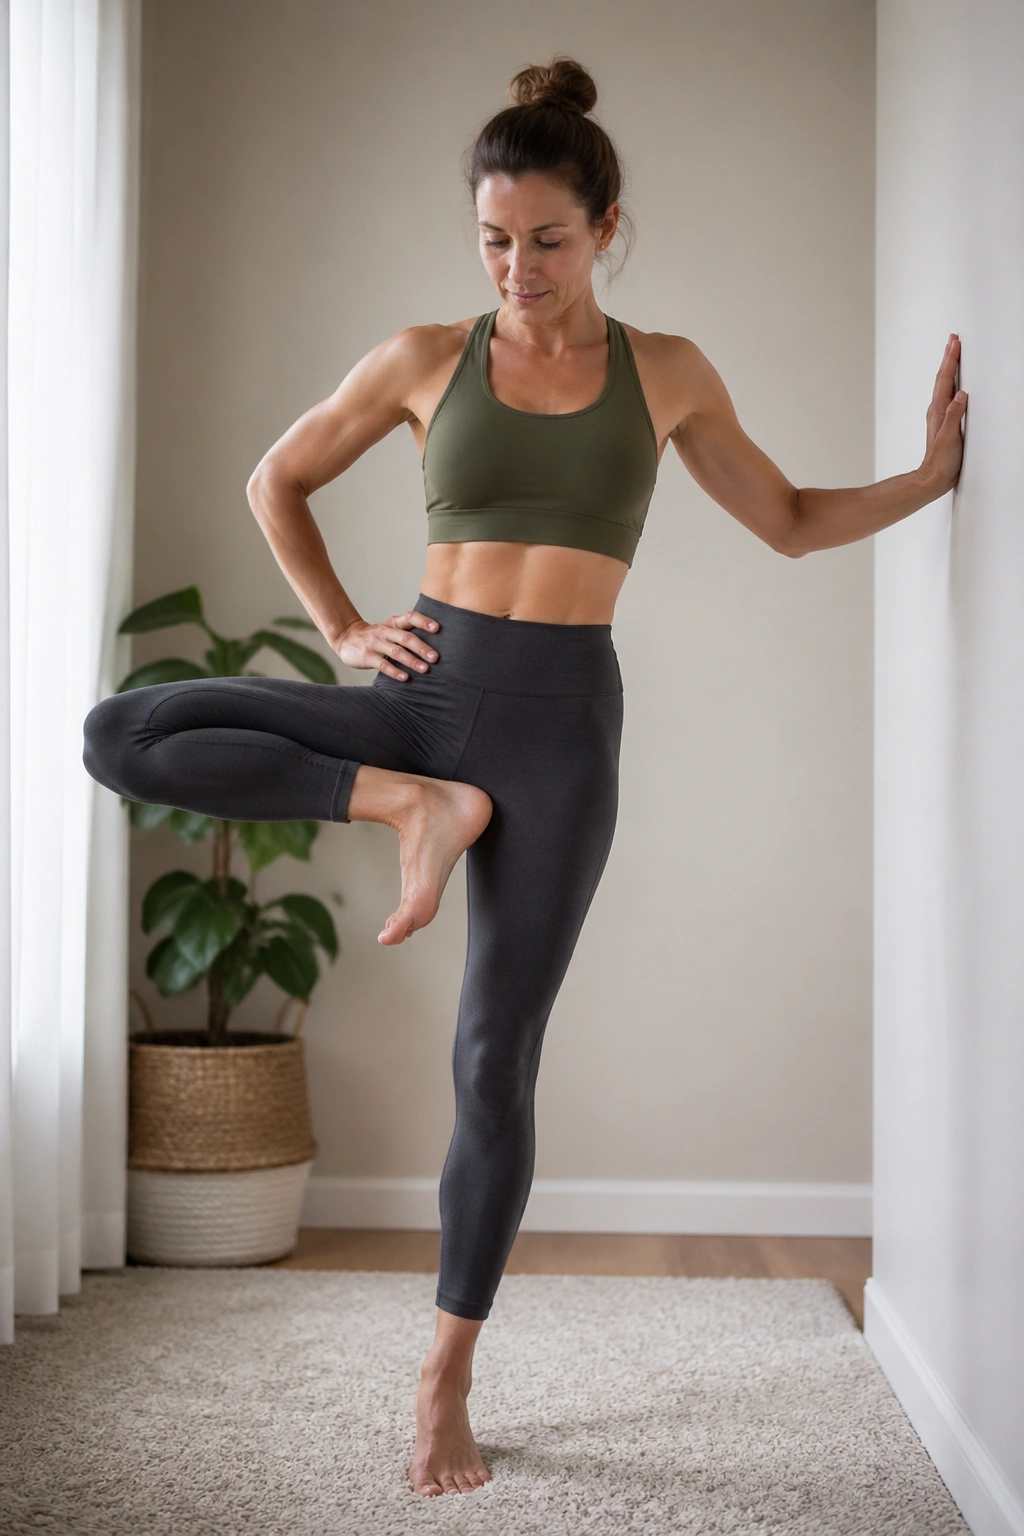
A single-leg balance can train the outer hip harder than a big floor stretch if you keep the standing leg honest.
That is the appeal of Standing Figure Four. One ankle rests over the opposite thigh, the standing leg bends, and the hips sink back like you are trying to sit into a small invisible chair. The glute of the standing leg has to hold you up, the outer hip steadies the pelvis, and the lifted leg gets a good stretch through the deep hip muscles.
Use a wall if you need it. Seriously, use the wall. A fingertip on the wall lets you focus on shape instead of panic. Keep the lifted foot flexed, not floppy, and hold the squat for 20 to 30 seconds before switching sides.
If the knee on the crossed leg aches, come out immediately. The pose should feel like a stretch in the hip, not a stab in the joint. That difference matters more than any aesthetic version of the shape.
12. Low Lunge with Quad Stretch for the Back Leg
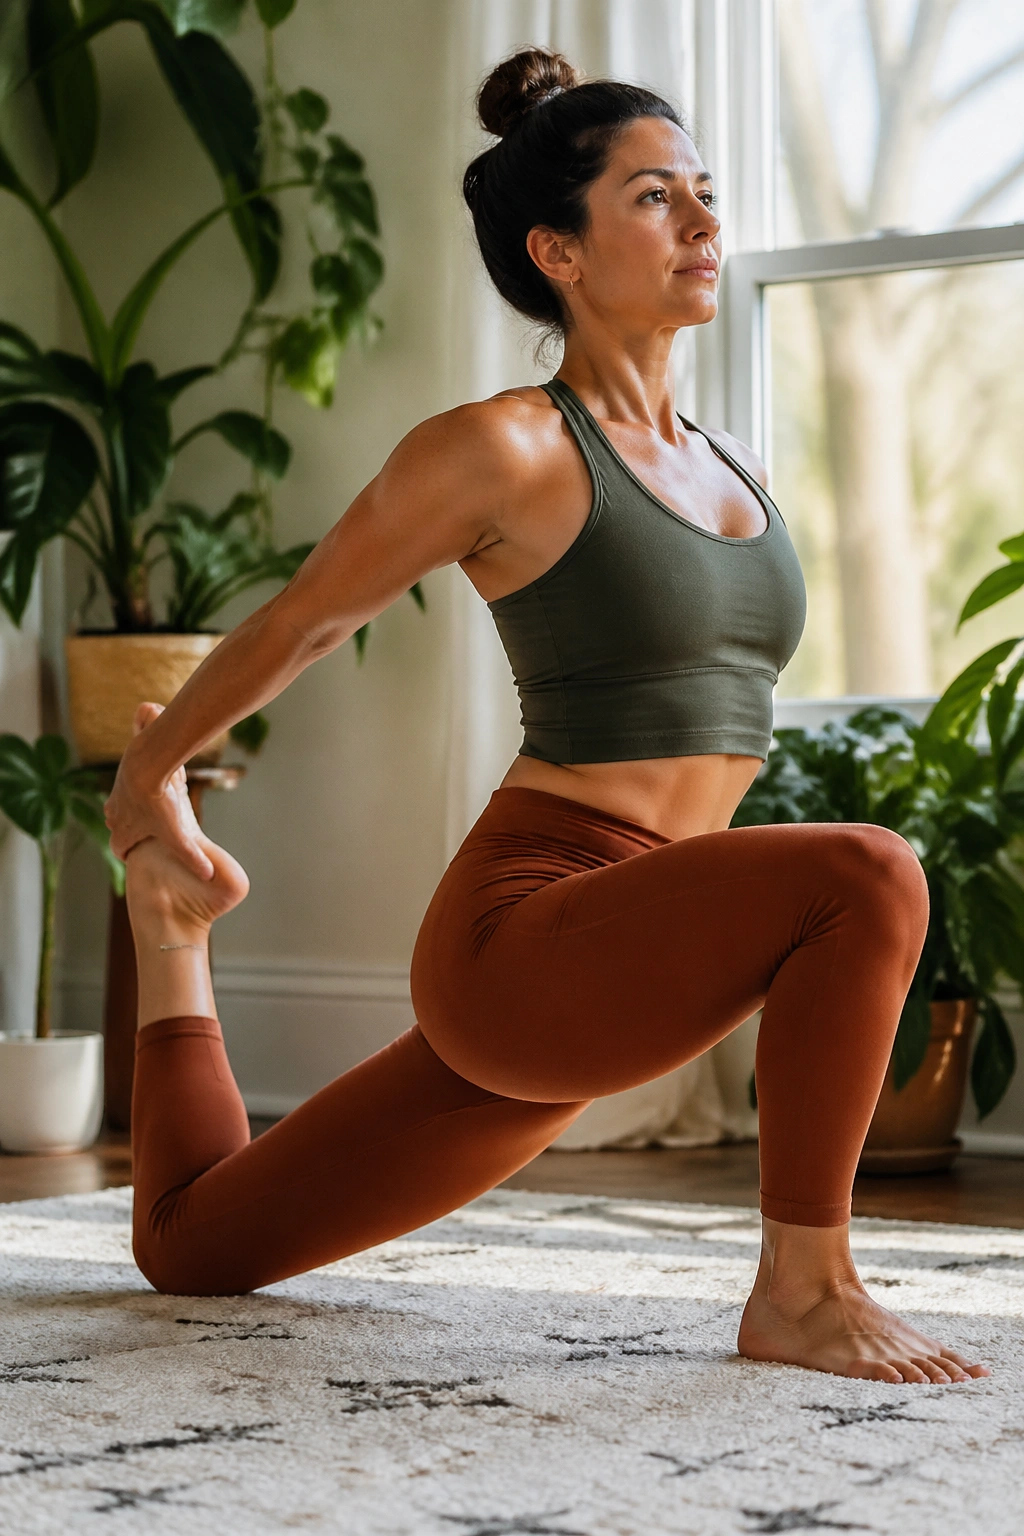
Low Lunge with Quad Stretch is one of those poses that looks like it’s about the back leg, but the front leg has to keep the whole thing from collapsing.
That front foot presses into the mat, the front hip stabilizes, and the back thigh stretches while the back knee stays down. Then, if you grab the back foot or use a strap, the quad opens too. The result is a clean hit to the front of the hip and thigh, which can feel glorious after a lot of standing work.
Back Knee and Pelvis
Pad the back knee with a blanket. A hard floor makes the pose fussy fast. Keep the front knee stacked over the ankle, tuck the tailbone slightly, and avoid yanking the back foot toward the seat. The stretch should build, not spike.
If reaching for the foot feels cramped, loop a strap around the back ankle and hold that instead. That gives you room to keep the chest open and the pelvis steady. Hold for 3 to 5 breaths, then switch sides. One side will usually feel easier. That’s normal enough. Keep going.
13. Half Split for Hamstrings and Calves
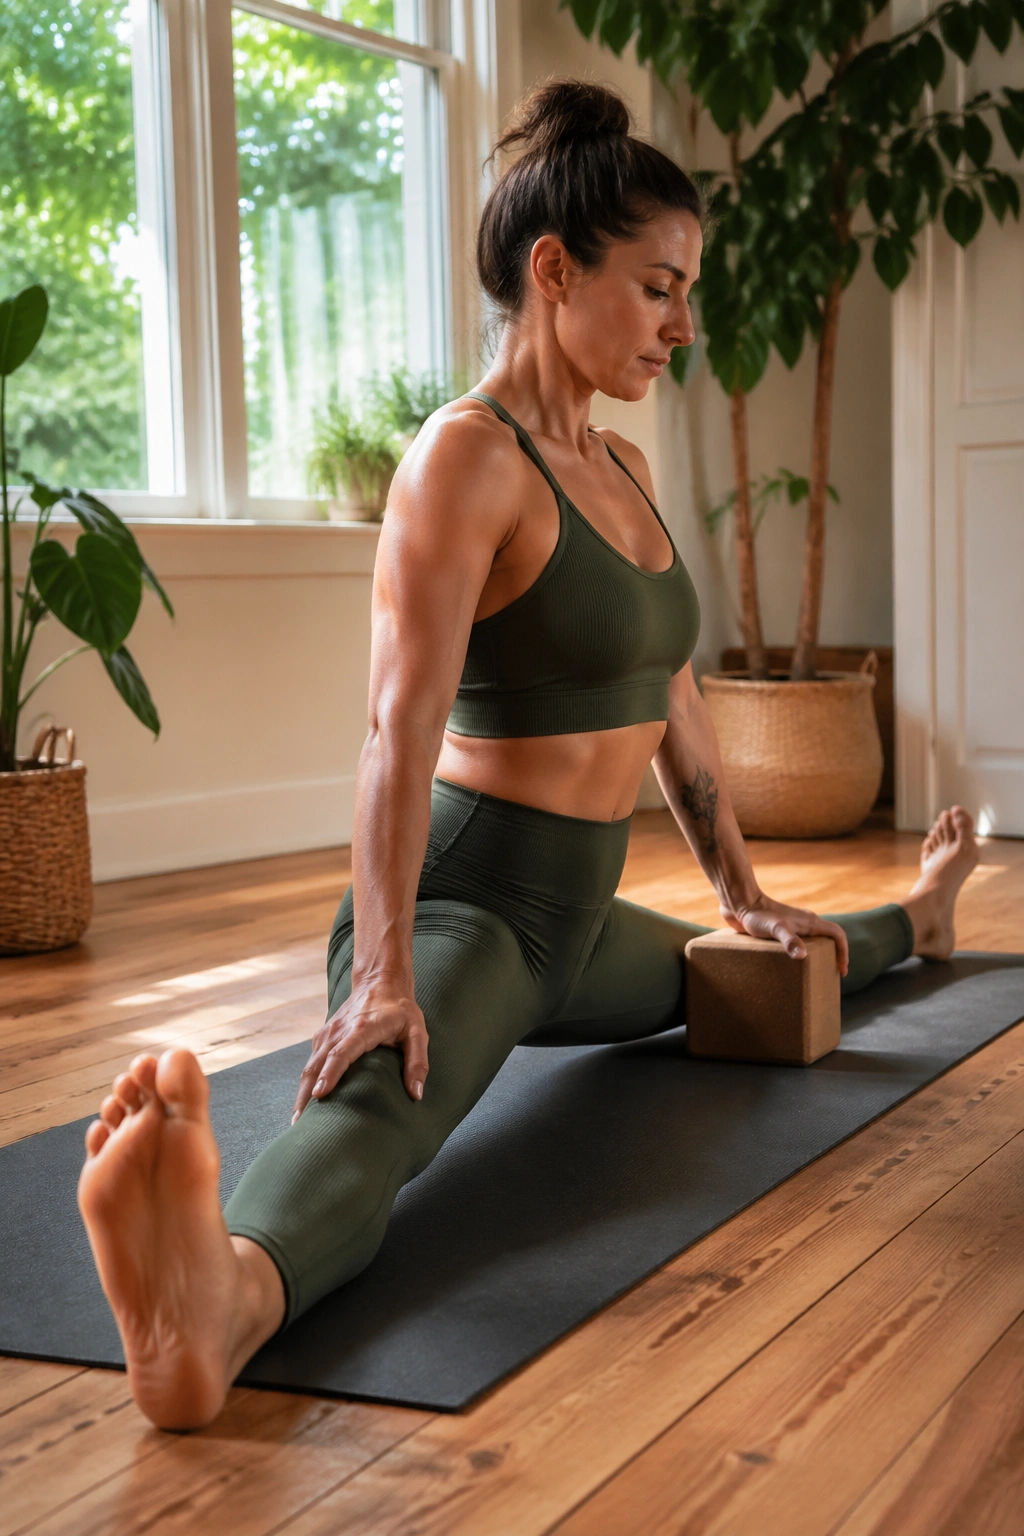
Half Split looks calmer than it is. If you let the front hip wander, the stretch gets sloppy in a hurry.
The front leg straightens, the hips shift back, and the toes of the front foot lift so the hamstrings and calves get a direct line of work. A block under each hand helps a lot. So does keeping the spine long instead of folding into a rounded shape just to chase the foot.
Unlike a casual hamstring stretch, Half Split asks you to control the pelvis while you lengthen the back side of the front leg. That makes it more useful for leg strength than people expect, because the muscles have to stay awake while they lengthen. Hold for 5 to 8 breaths, then come out slowly and switch sides.
A small bend in the front knee is fine. In fact, it often makes the stretch better by keeping the joint from getting cranky. Push the heel down through the floor first, then sit the hips back a touch more. That sequence feels cleaner than forcing the torso down.
14. Bridge Pose for Glutes and Hamstrings
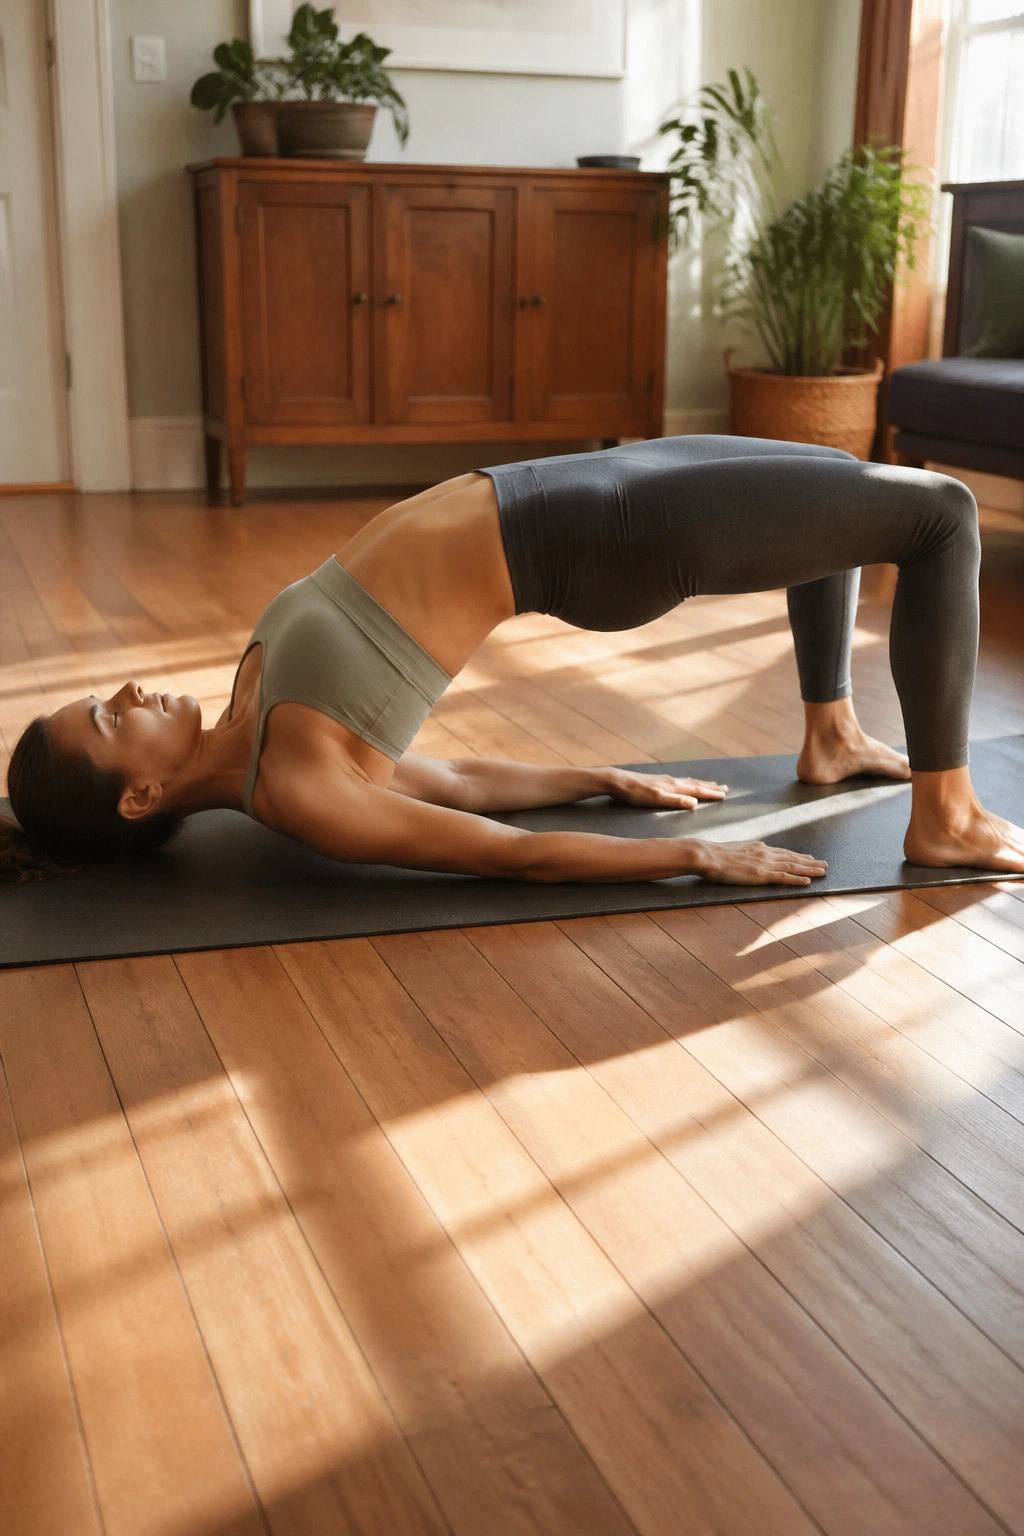
Bridge Pose is one of the best ways to wake up the backside of the body without leaving the floor.
The feet plant under the knees, the tailbone lifts, and the glutes and hamstrings take over while the front body opens. If you press evenly through both feet, the hamstrings usually stay involved without cramping, and the glutes do the heavy lifting they were built for. That matters because a lot of people walk around with sleepy glutes and overworked hip flexors. Bridge does the opposite pattern.
I prefer 8 to 12 active lifts when the goal is strength. Lift the hips, lower with control, and keep the knees from splaying out or knocking inward. If you hold instead, use 20 to 30 seconds and keep breathing steadily. Either version works, but the repeated lift often gives more direct muscle feedback.
And yes, a block under the sacrum is nice for rest. It is not the same thing as active Bridge. Good for recovery. Different job.
If the hamstrings cramp, move your feet a little closer to your seat or a little farther away. Small adjustments matter more than people think.
15. Pigeon Pose for Deep Hip Release
Why end a leg-strength list with a deep hip opener? Because strong hips need room to move, and Pigeon Pose gives that room back.
One leg folds in front, the other extends behind, and the outer hip of the front leg gets a long, direct stretch. The glutes and deep rotators around the hip tend to hold a lot of tension, especially if you spend time sitting. Pigeon helps untangle some of that. Not by force. By staying long enough for the area to soften.
Put a folded blanket under the front hip if one side hovers far above the floor. That keeps the pelvis level and saves the knee from twisting. Stay for 5 to 8 slow breaths, or longer if the shape feels steady and the joint feels clean. If the front knee hurts, back out and switch to a reclined figure-four stretch instead.
I like Pigeon because it reminds you that strength and release are not enemies. Tight hips can make the legs work harder than they should. Looser hips, in the useful sense of the word, let the legs do their job without so much noise.
That’s the real pattern here. Load the muscles. Open the joints. Keep both sides honest, and the whole lower body starts to feel more useful in daily life, not just on a mat.
