



Yoga can support slow, steady weight loss, but not because it torches calories the way a hard run does. It helps because it gets you moving often, asks your big muscles to do real work, and keeps your joints from feeling beaten up.
That matters more than people like to admit. A pose held for 5 breaths can be more useful than a frantic flow you hate. If your thighs shake in Chair Pose, your obliques fight for balance in Half Moon, and your shoulders have to hold their line in Plank, the work adds up. Not as a stunt. As a repeatable habit.
People usually think of weight loss as a math problem, but the day-to-day reality is messier: sleep, hunger, stress, and whether your knees ache after the second week. A practice that leaves you energized instead of wrecked tends to stick. And stickiness beats perfection every time.
The 22 poses below move from grounded standing work to core strength, balance, and recovery. Start with the ones that feel sturdy, keep your breathing steady, and use props without apology. The next standing hold is where the tone changes.
1. Mountain Pose for Posture and Breath Control
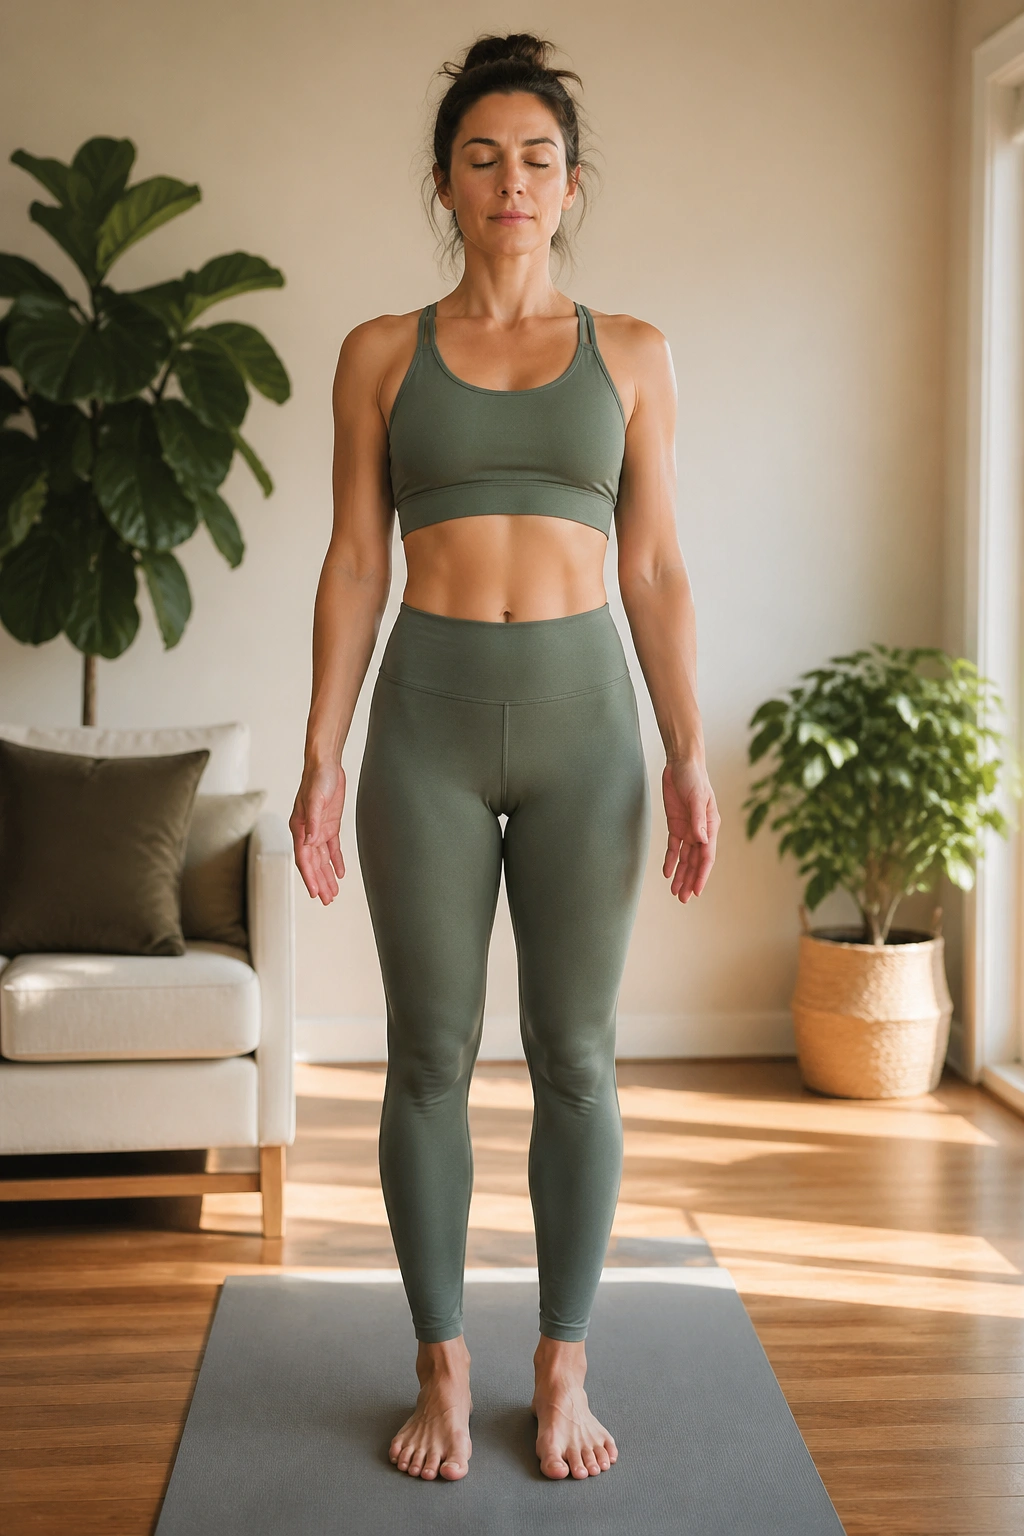
Mountain Pose looks almost too simple to matter. That’s exactly why people skip past it, and that’s a mistake.
Stand with your feet hip-width apart or together if that feels steadier. Press down through the four corners of each foot, then spread your toes and lift your kneecaps just enough to wake up your thighs. Your ribs should sit over your hips, not drift forward, and your shoulders should soften away from your ears.
Why It Matters More Than It Looks
Mountain Pose gives you a clean read on your body. If you notice one foot collapsing inward or your chin jutting forward, you’ve found a habit that can sneak into every other pose. Fixing those small leaks matters.
A strong standing base also makes the rest of your session feel cleaner. Less wobble. Less neck tension. Better breathing. That sounds tiny, but over a 20-minute practice, tiny changes stack up fast.
- Hold for 5 to 8 slow breaths between harder poses.
- Keep the weight even across both feet, not shoved into the heels.
- Relax the jaw on every exhale.
- Use a mirror once in a while if you keep drifting into one hip.
Tip: If your arches collapse, press the big toe mound and the outer heel into the floor at the same time. It wakes up the whole lower chain.
2. Chair Pose for Slow, Steady Weight Loss
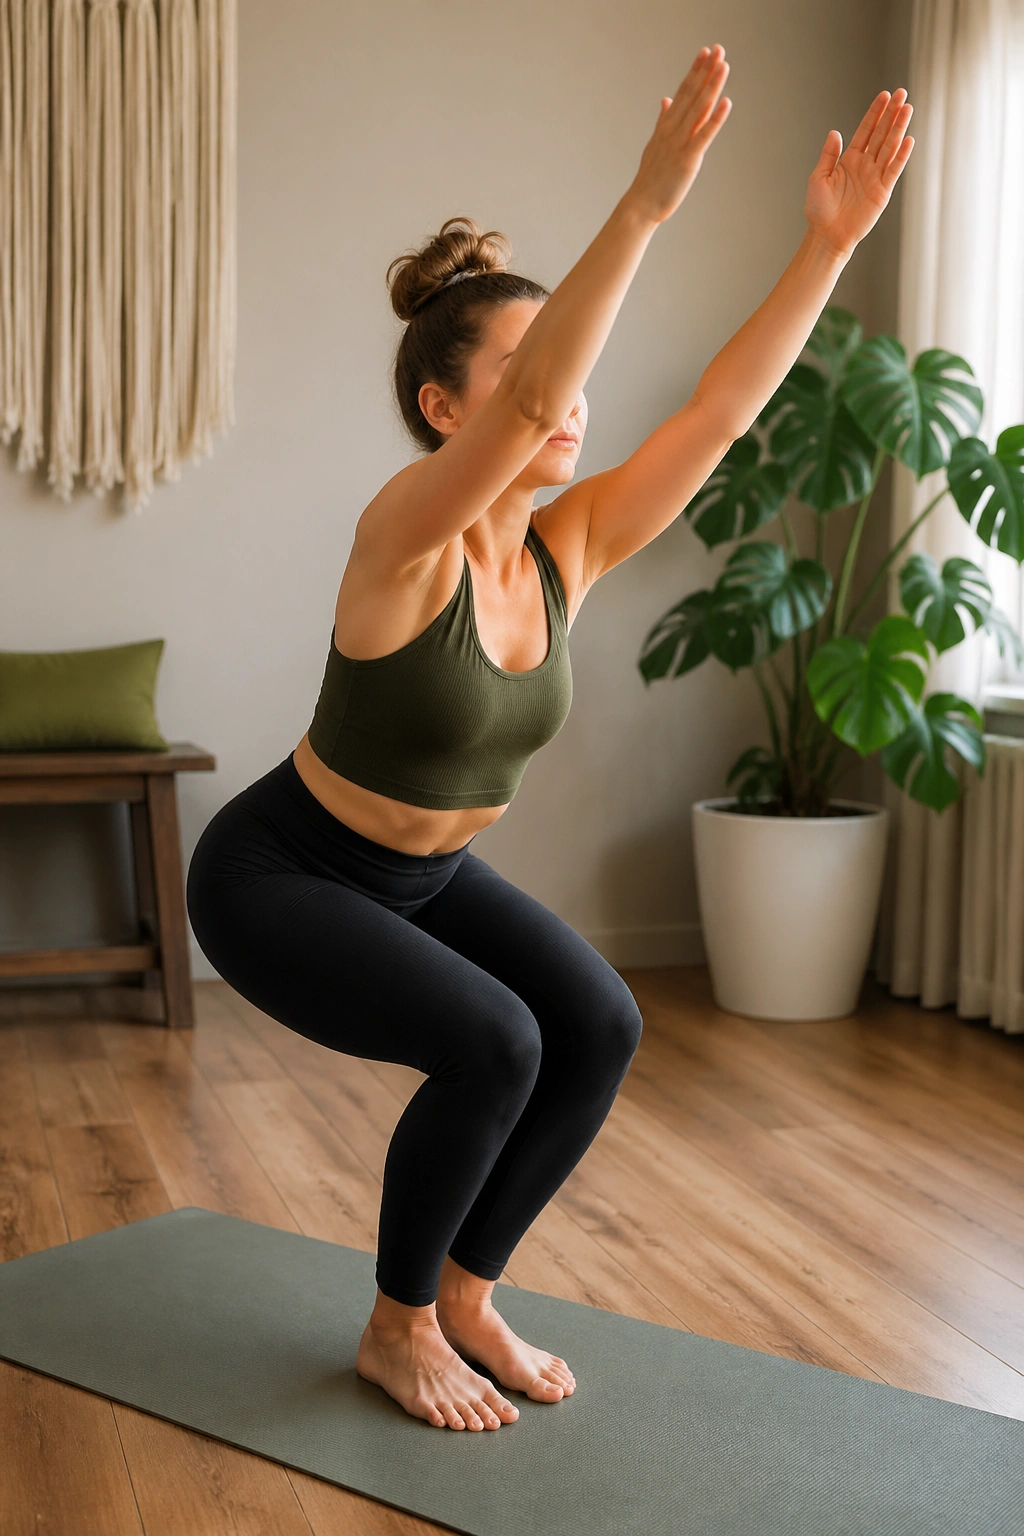
Chair Pose is one of the bluntest poses in yoga. It asks your legs to work, your core to brace, and your lungs to keep up. No drama. No hiding.
Sit your hips back as if you’re lowering into a stool that’s just a little too far away. Keep your weight in your heels, but don’t lift your toes off the floor to fake it. Reach your arms forward or overhead, and keep your chest from collapsing toward your thighs.
If you do this with care, your quads will light up within seconds. That burn is useful. It means you’re asking for muscular effort, not just moving around for the sake of movement.
Try 3 rounds of 20 to 30 seconds with a short rest between rounds. If your knees complain, shorten the hold and sit back less deeply. The point is steady work, not a heroic grimace.
3. Chair Twist for Core Bracing and Balance
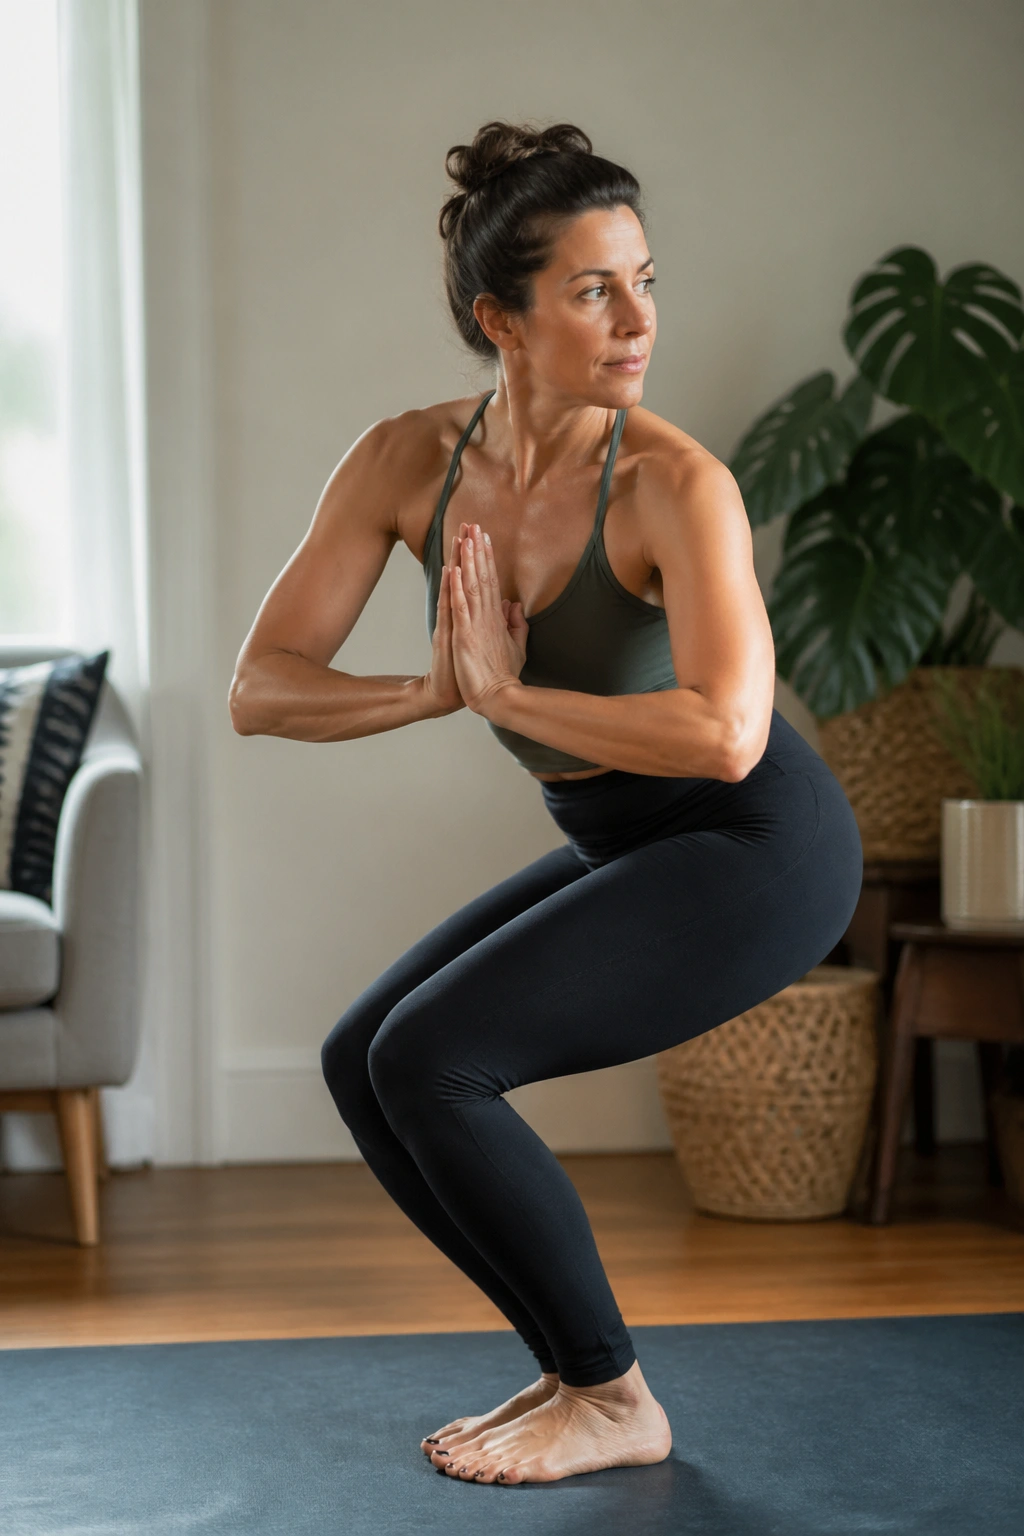
Why does a twist in Chair Pose matter so much? Because it forces the midsection to work while the legs keep holding.
Begin in Chair Pose, then bring your hands to prayer at the chest. Exhale and twist from the ribs, not just the arms. Keep the knees even with each other; the common mistake is letting one knee drift and turning the whole thing into a sloppy reach.
How to Use It
Hold the twist for 3 to 5 breaths on each side, then come back to center before switching. If you feel it mostly in the neck, you’re yanking too hard with the hands. If you feel it only in the lower back, shorten the twist and keep the chest a little more forward.
- Keep the hips level.
- Press the palms together firmly.
- Look over the shoulder only if your neck feels fine.
- Use this as a short interval after plain Chair Pose.
The real value here is that your core has to keep you from collapsing. That kind of work is quiet, but it’s honest.
4. Warrior I for Strong Legs and a Long Stance
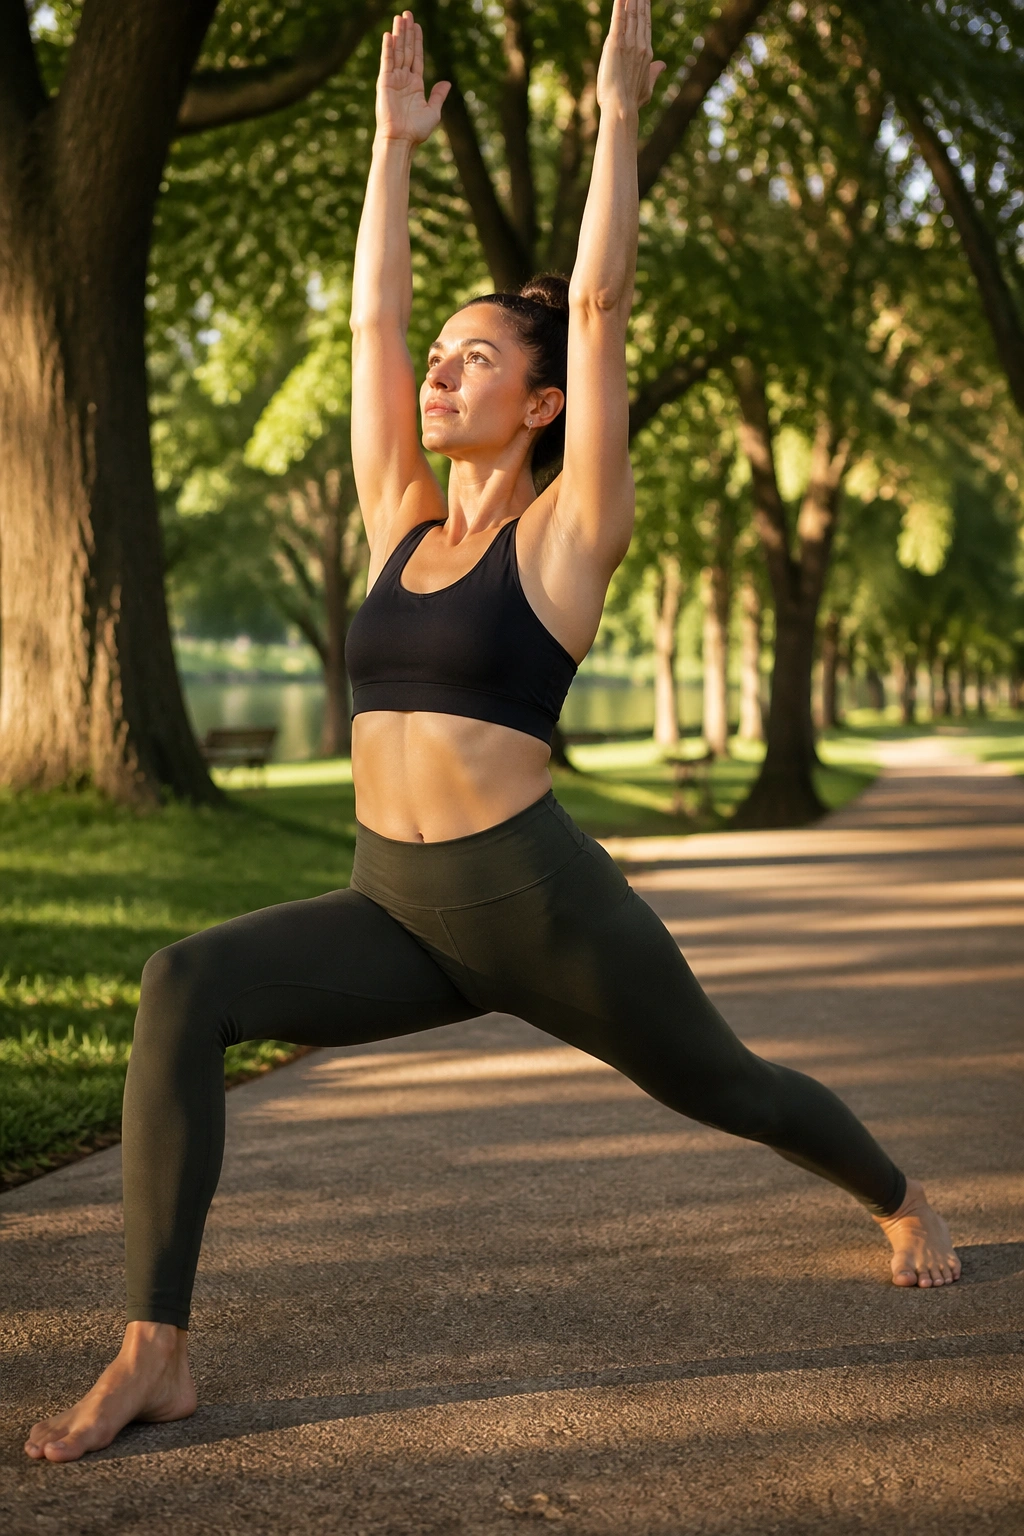
I still think Warrior I is one of the best “wake the body up” poses around. It makes your legs work, but it also trains you to stay tall while you work.
Step one foot back, turn the back heel down at a slight angle, and square your hips as much as your body allows. Bend the front knee so it stays over the ankle, then lift your chest and reach up through the fingertips. The back leg should feel alive, not lazy.
- Keep the front knee tracking toward the second toe.
- Press the back heel down without dumping weight into the outer edge of the foot.
- Draw the lower ribs in so you do not over-arch the low back.
- Hold for 4 to 6 breaths on each side.
The pose can feel awkward at first because the stance is long enough to be challenging but not so long that it becomes a stretch-only shape. That middle ground is where the work lives. And yes, that work is what makes it useful for slow, steady weight loss.
5. Warrior II and the Long Hold That Burns
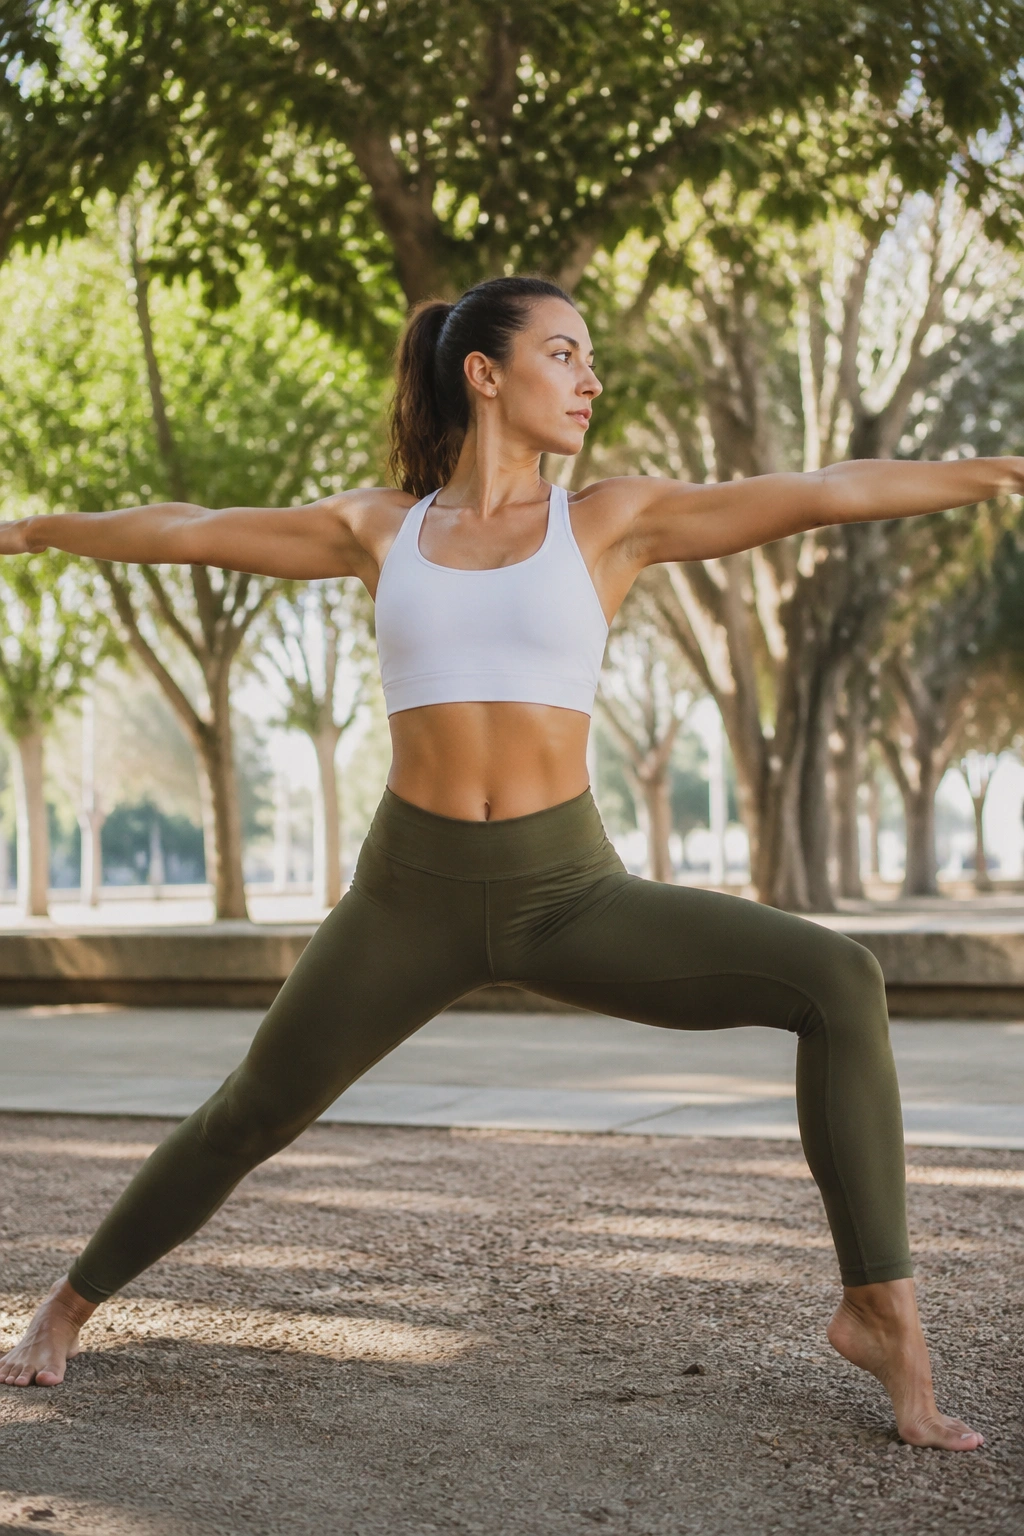
Warrior II looks calm. It isn’t.
The front thigh has to stay loaded, the back leg has to keep reaching, and the torso has to remain upright while your arms stretch in opposite directions. That combination turns a simple-looking stance into a long, draining hold if you stay honest with it.
Keep the front knee bent and level, with the shin roughly vertical. Let the back foot ground down at a slight angle, and turn your gaze over the front fingertips without scrunching your shoulders up. If your arms start to feel like dead weight, lower them a little and keep the chest wide.
A useful way to practice this pose is to hold it for 5 slow breaths, stand up for one breath, then come back in. Two rounds each side is enough to make your legs notice what’s happening. More is fine, but the first honest hold usually does the job.
It’s a plain pose. That’s why it works.
6. Reverse Warrior for Side-Body Length
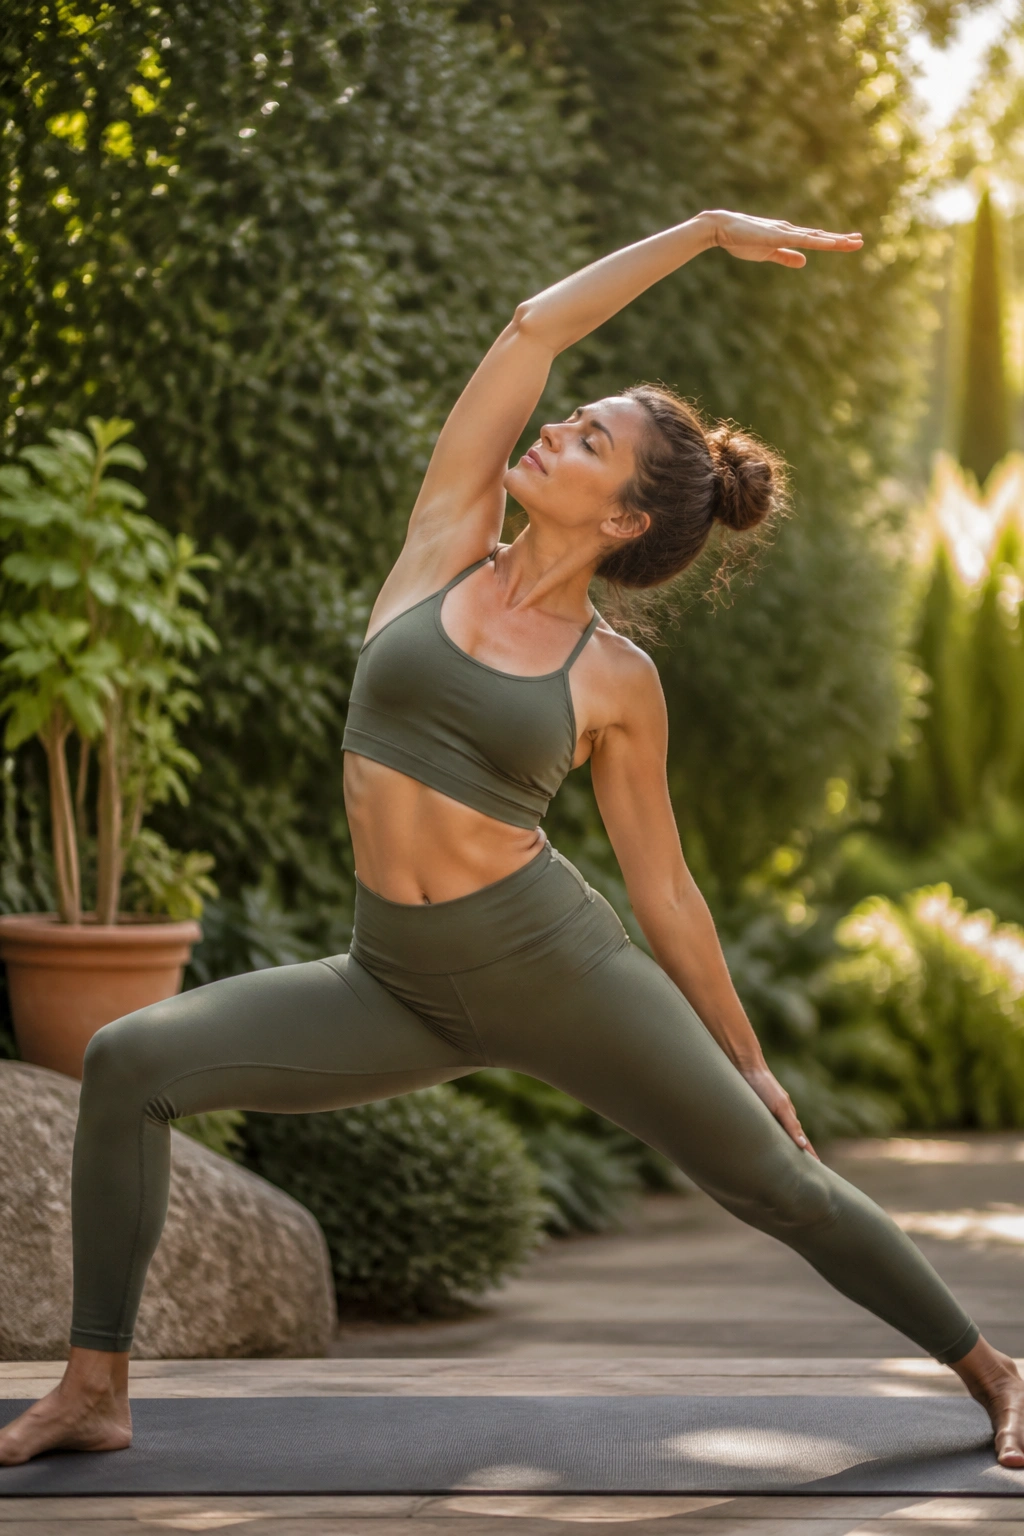
Unlike Warrior II, Reverse Warrior gives you a stretch through the side body without taking the front leg out of the game. That is what makes it such a smart follow-up.
Stay in your Warrior II base, then slide the back hand down the back leg while the front arm reaches up and over. The front knee stays bent. The ribcage opens. And the front thigh keeps doing its job, which means the pose still carries some load instead of turning into a floppy side bend.
The temptation is to throw yourself backward and hang on the low back. Don’t. Keep the tailbone heavy and the lift coming from the ribs and waist. If you feel a pinch in the lower spine, shorten the reach and keep the torso more upright.
Use Reverse Warrior for 2 to 3 breaths after Warrior II, then come back through center. It’s a small move, but it gives you a clean sense of control. That control is useful in every pose that comes after.
7. Extended Side Angle with a Deep Leg Load
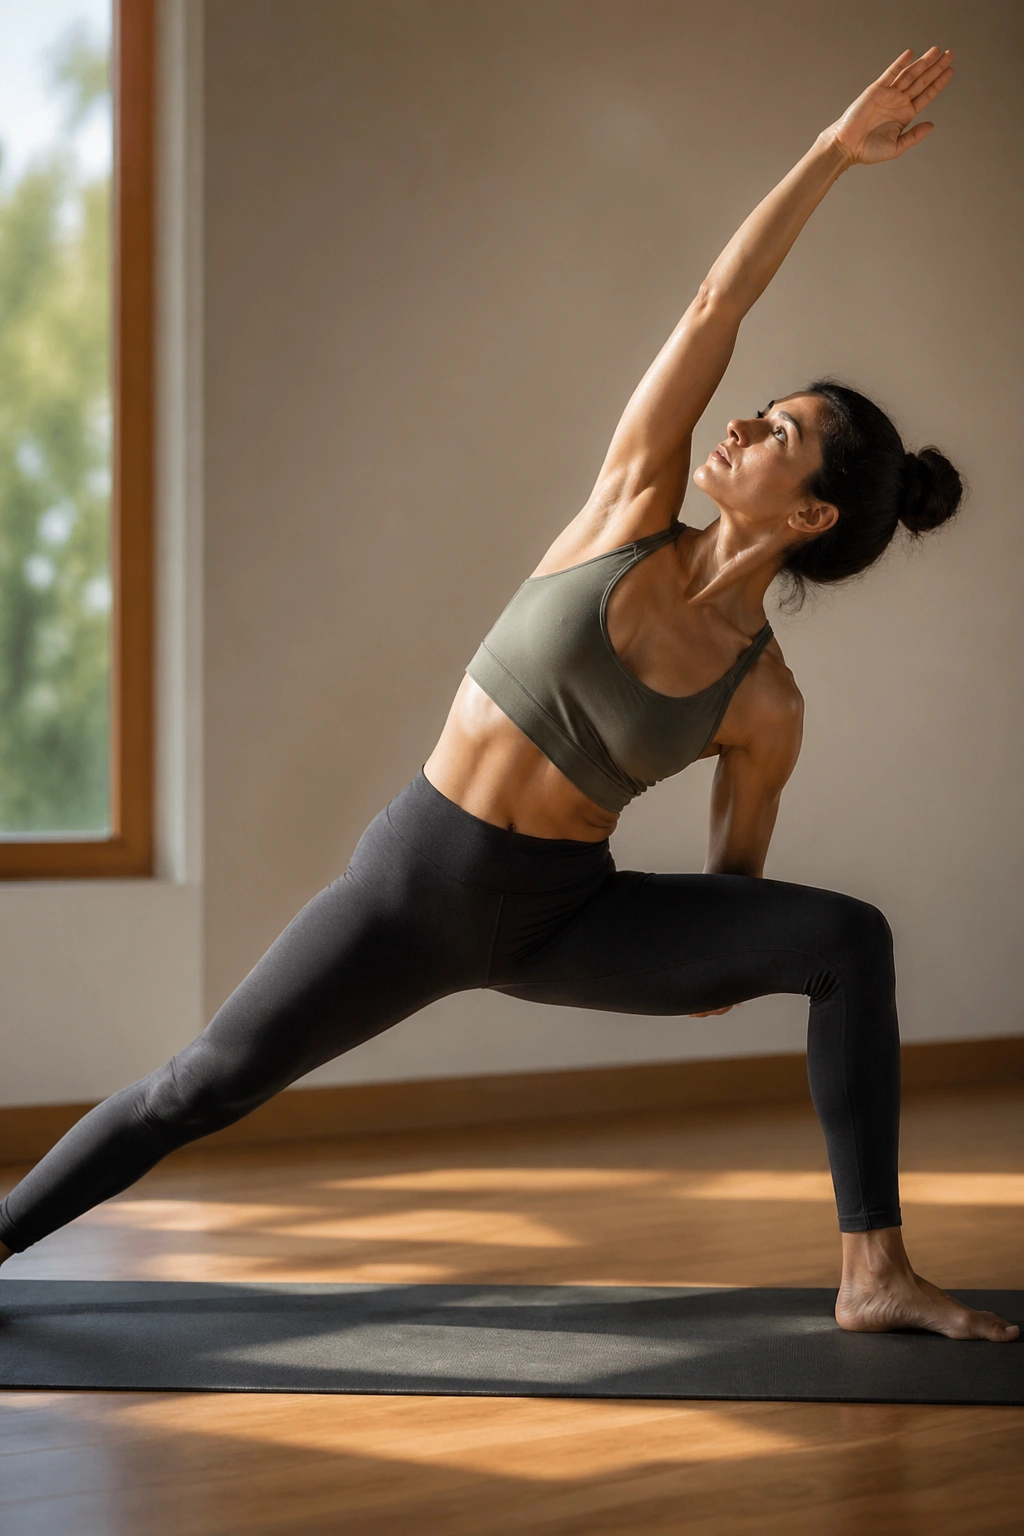
Extended Side Angle looks like a stretch. It behaves like a leg drill.
Drop into a lunge-based stance, then place the lower forearm on the front thigh or bring the hand to a block. Reach the top arm overhead so the body forms one long diagonal line from the back heel to the fingertips. The front thigh keeps working the entire time, and the side waist has to stay long instead of collapsing.
What Makes It Work
The pose gets better when you resist the urge to sink into the front hip. Stay active in the back leg. Keep the chest rotating open. If the floor feels far away, use a block on the high or middle setting so you can keep the spine long.
- Front knee stays bent and stable.
- Back foot grounds firmly.
- Top arm reaches past the ear if the shoulder allows it.
- Hold for 3 to 5 breaths on each side.
Important: If the front knee rolls inward, reset the stance before you go deeper. That one detail changes the whole pose.
8. Triangle Pose for Hamstrings, Hips, and Breath
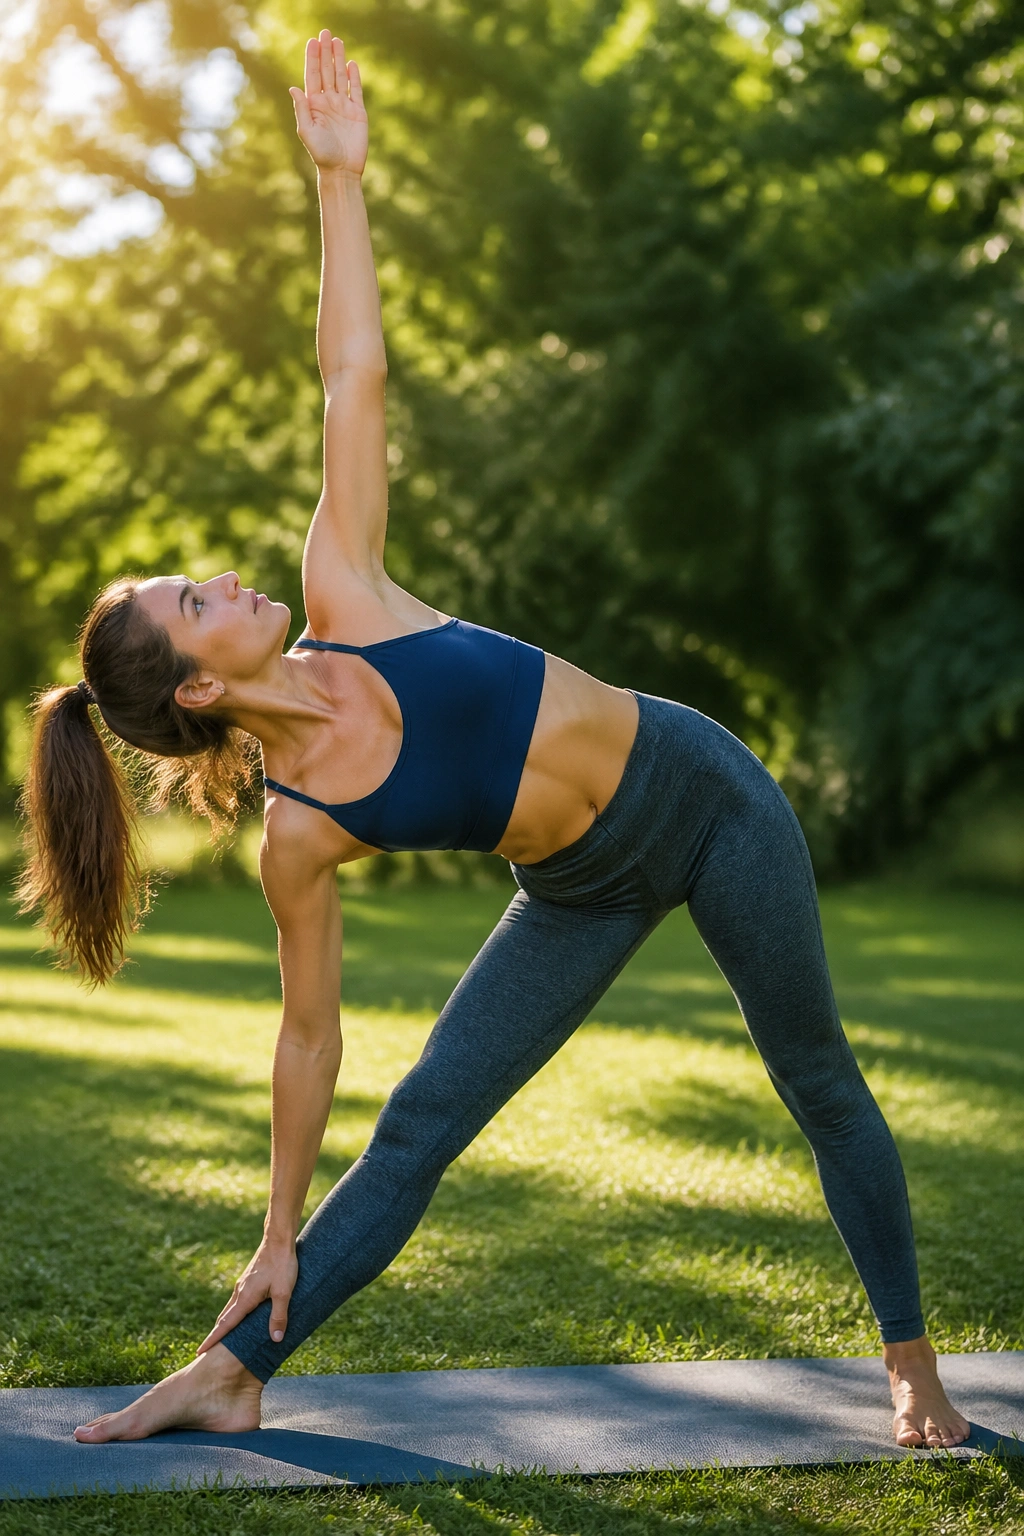
Triangle Pose is deceptive. It looks quiet, but it asks for long lines, firm legs, and a steady breath that does not get sloppy when the hamstrings complain.
Start with a wide stance, turn the front foot out, and hinge from the hip rather than folding in the waist. Reach forward first, then lower the hand to a block, shin, or the floor if your body really wants that. The upper arm stacks over the shoulder, and the chest opens without forcing the ribs to flare.
A lot of people chase the floor here and lose the pose. Better to keep the torso long and the front knee softly unlocked than to fold too fast and round through the back. The front thigh still works. The back leg still works. That is the whole point.
Try 2 rounds of 3 slow breaths on each side after your legs are warm. If your lower back feels crowded, shorten the stance a little and keep the top ribs from spilling forward.
9. Crescent Lunge for Slow, Steady Weight Loss
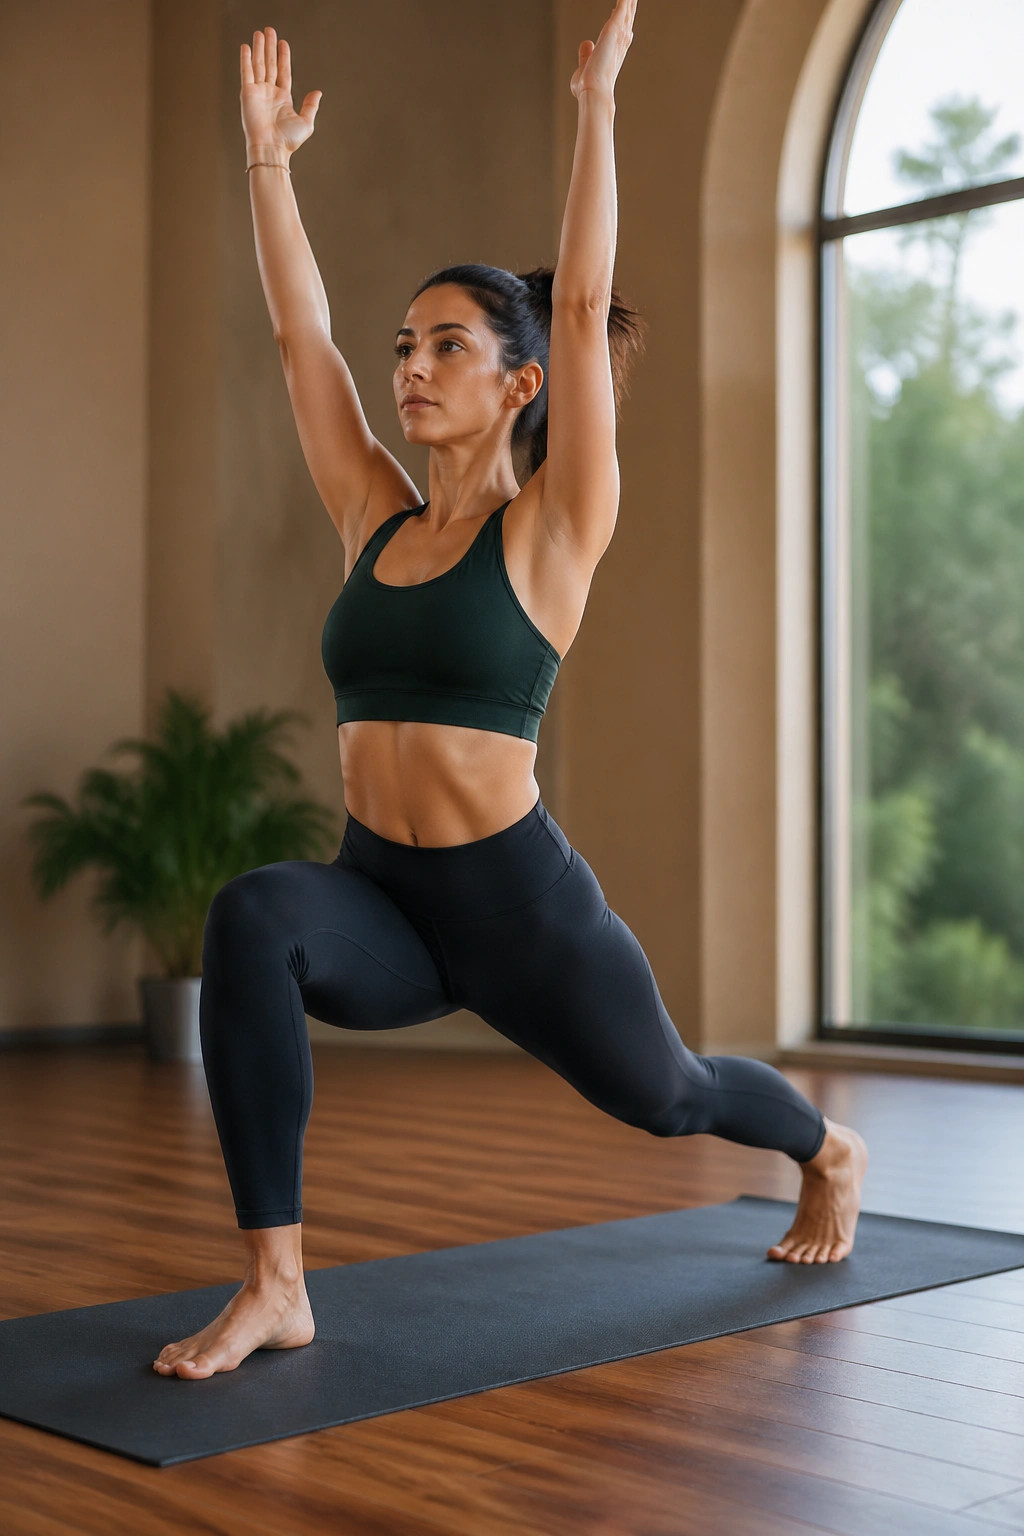
Want one pose that wakes up the quads, glutes, and core at the same time? Crescent Lunge does that job without a lot of fuss.
Step one foot forward and keep the back heel lifted. Bend the front knee and stack it over the ankle, then reach the torso tall instead of leaning into the front thigh. The hips can square forward as much as they comfortably can, but don’t force them flat if that dumps pressure into the lower back.
How to Get the Most From It
Stay here for 20 to 40 seconds per side, or work with 8 slow knee-bent pulses if a static hold feels too much. Both versions are useful. The hold builds patience. The pulses add a little more heat.
- Keep the back leg strong and straight.
- Draw the belly in on the exhale.
- Lift through the crown of the head.
- Lower the back knee for a gentler version.
If you’re building a short practice for slow, steady weight loss, Crescent Lunge earns its place because it is easy to repeat. Repetition matters.
10. High Lunge for Steady Glute Work
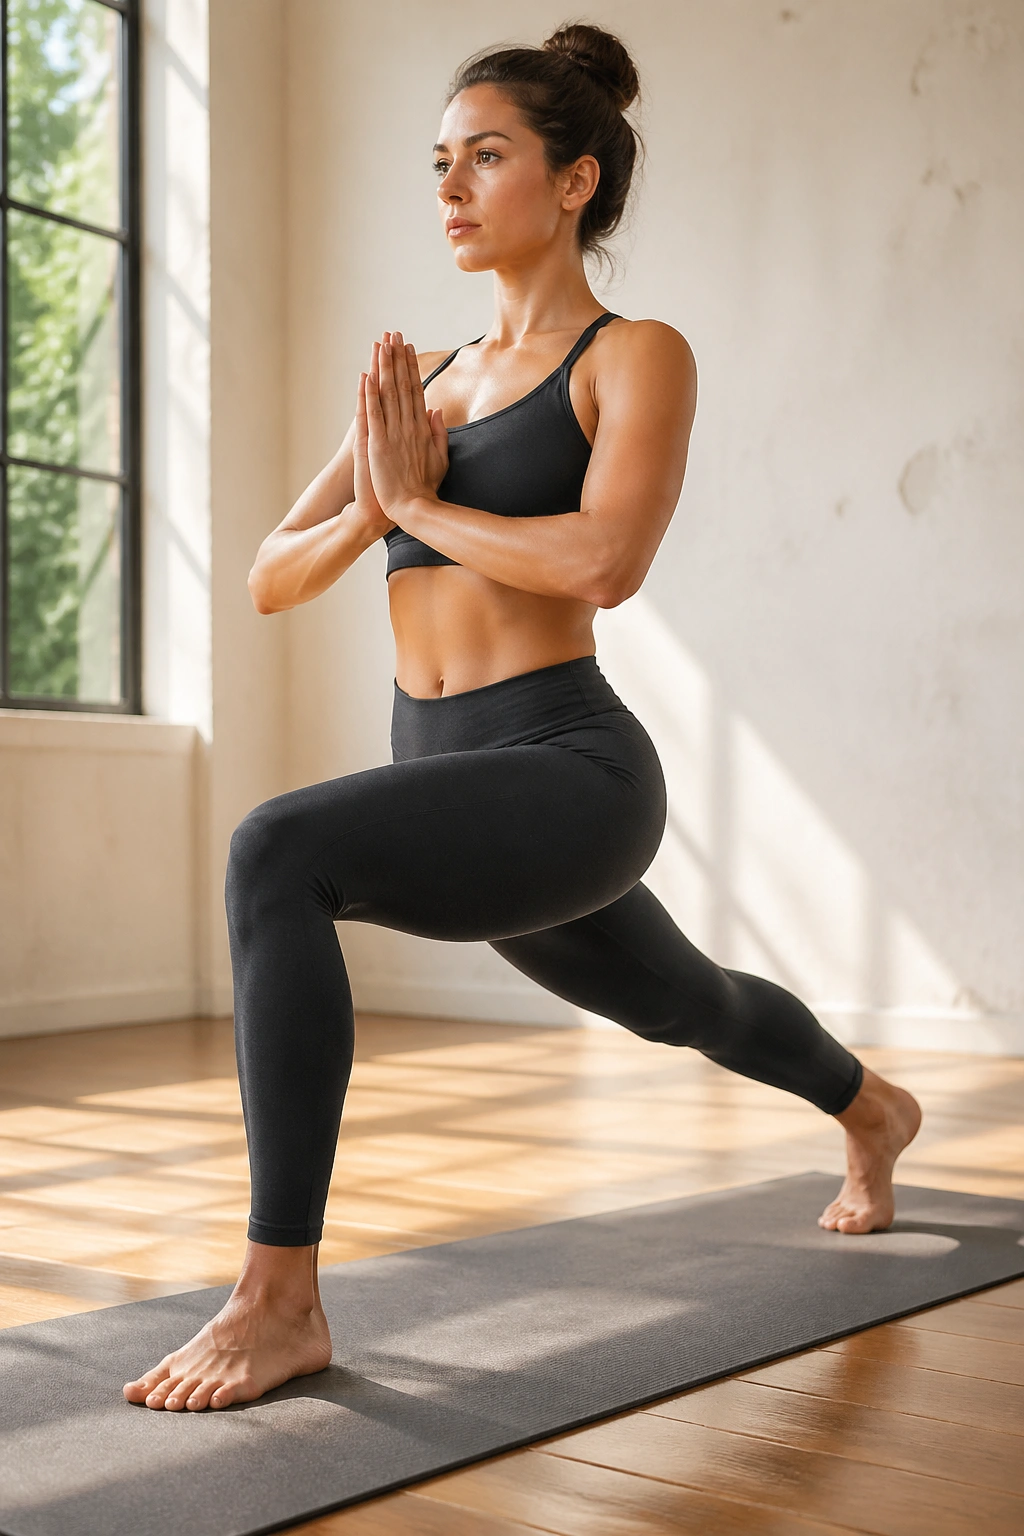
High Lunge is the pose that exposes weak links. That is not a bad thing.
Stand with one foot forward and the back heel lifted, then bend both knees just enough to keep the legs active. Unlike a deeper lunge, this version asks you to keep the pelvis steady while your whole lower body works to avoid wobbling. It feels a little unstable at first. That instability is the training.
Keep the feet on train tracks rather than a tightrope. The front toes point straight ahead, the back heel reaches back, and the torso stays upright. If your shoulders creep forward, pull them back over the hips and breathe into the ribs instead of the chest only.
- Hold for 4 breaths on each side.
- Hover the back knee an inch off the floor if you want more work.
- Use a wall or chair nearby if your balance is still waking up.
- Step out of the pose if the front knee caves inward.
It pairs well with Crescent Lunge, but it does not need to be rushed. Slow control is the entire point.
11. Plank Pose for Core Strength and Shoulder Endurance
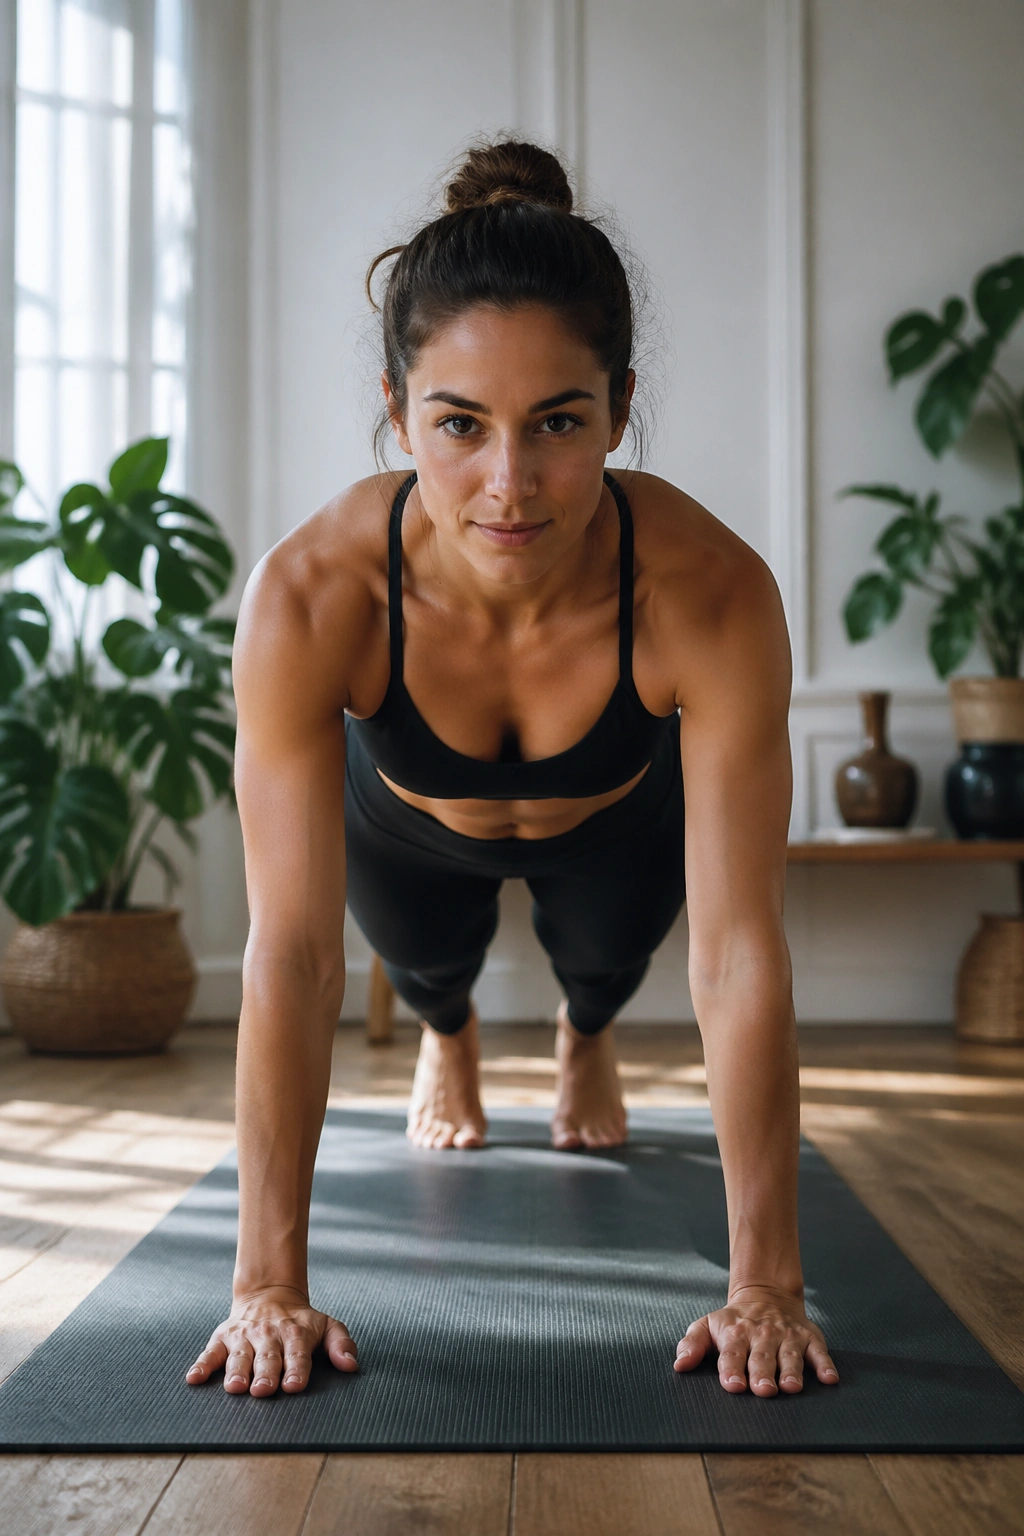
Plank Pose is not glamorous. Good. The boring poses are often the ones that pay rent.
Set your wrists under your shoulders, step both feet back, and create one long line from head to heels. Push the floor away through the hands while the belly lifts slightly toward the spine. The tailbone should feel long, not tucked under so hard that your lower back rounds.
Your first clue that the pose is working is usually the breath. It gets shorter if you let the ribs drop, so keep the exhale moving and the neck soft. If a full plank makes your low back sag, bring the knees down and keep the same shape from the shoulders to the knees.
No one needs a plank held for two minutes with ugly form.
Try 10 to 20 seconds, rest, then repeat 4 to 6 times. That structure is often better than one long hold because it lets you keep the shape clean. And a clean plank is worth far more than a strained one.
12. Side Plank for Obliques and Balance
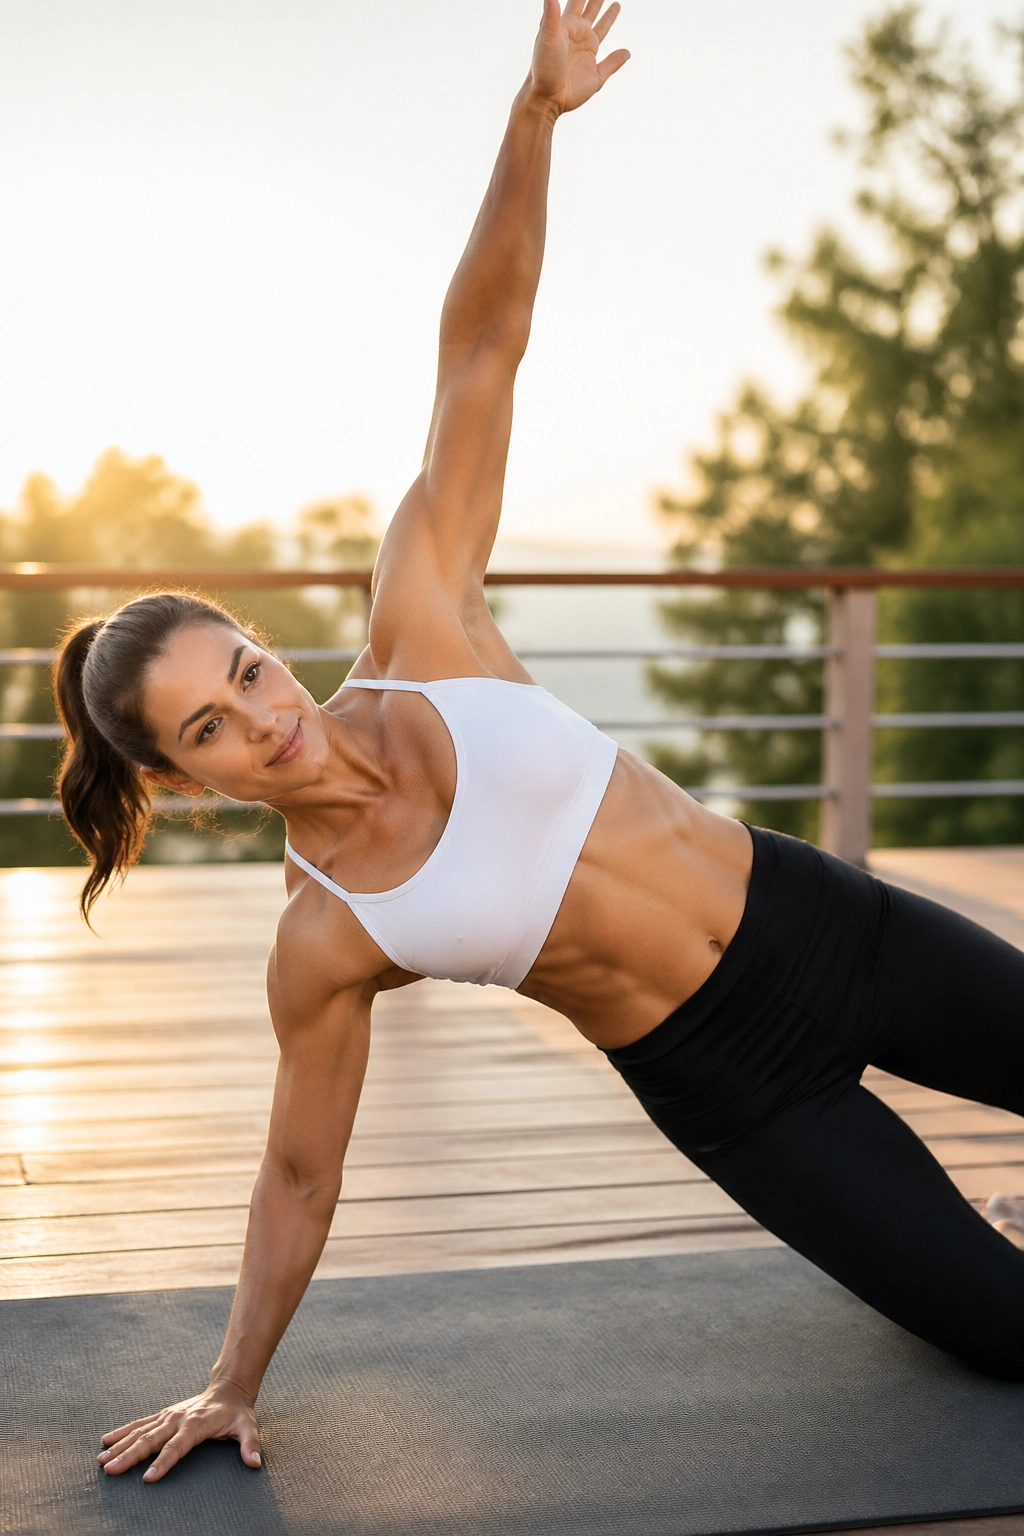
Side Plank changes the demands fast. Instead of spreading the work across the front body, it asks your obliques, shoulder, and side hip to hold everything together.
Stack the feet if your balance is there, or stagger them for more stability. Press the lower hand or forearm into the floor, lift the hips, and keep the top shoulder rolling back rather than collapsing toward the ear. The side body should feel long and active, not crunched.
If the full version feels like too much, drop the bottom knee to the floor and keep the top foot planted. That still trains the waist and shoulder without turning the pose into a wrist fight. A wall behind the back foot can help too, especially if you wobble when you lift the top arm.
A clean Side Plank for 15 to 25 seconds per side is enough to leave a mark. The nice thing is that the mark is useful. Stronger obliques make standing poses steadier, and steadier poses make the whole practice feel less chaotic.
13. Boat Pose for a Hard-Working Midsection
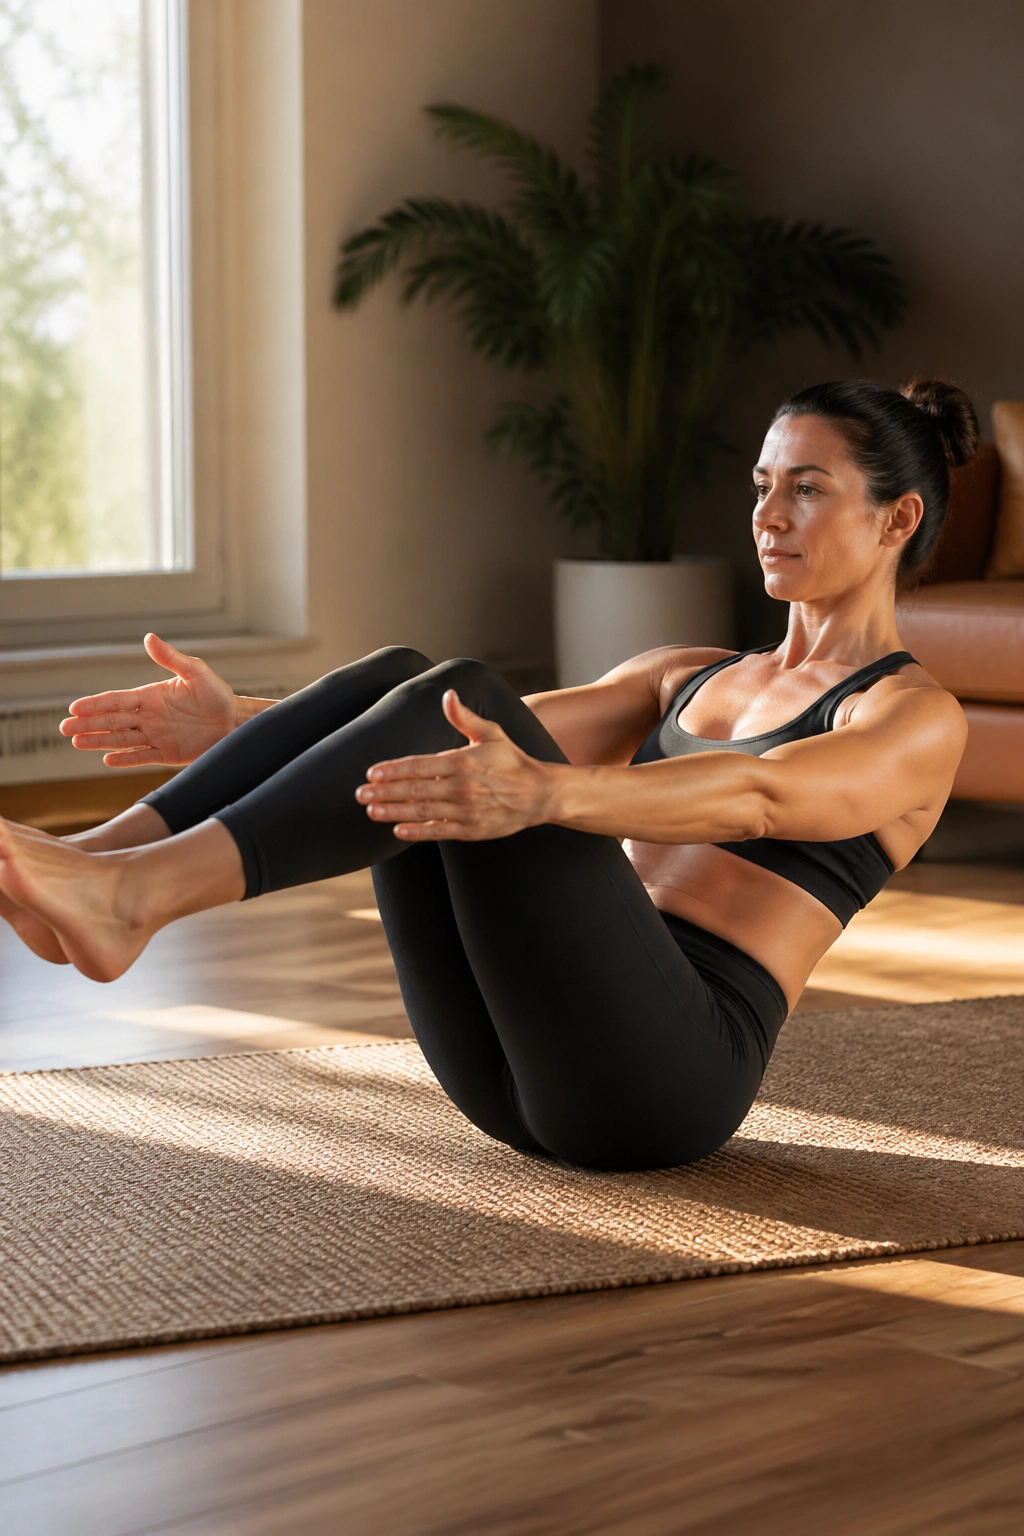
Boat Pose has a way of making the midsection honest. If the core is asleep, you find out fast.
Sit with your knees bent, lean back slightly, and lift the shins until the thighs hover. If your lower back rounds hard, keep the knees bent and bring the chest up instead of chasing straight legs. Long spine first. Fancy shape later.
Why the Shake Matters
The shaking is not failure. It’s feedback. Your body is learning how to hold itself up without dumping effort into the hip flexors or neck. That kind of control matters when the goal is slow, steady weight loss, because it turns a floor pose into active work instead of a passive stretch.
- Start with 3 rounds of 15 to 20 seconds.
- Keep the ribs from flaring open.
- Breathe into the side ribs, not just the belly.
- Use the hands lightly behind the thighs if needed.
Tip: Lower the legs only as far as you can keep the spine long. If the back rounds, you’ve gone too far.
14. Bridge Pose for Glutes and Hip Lift
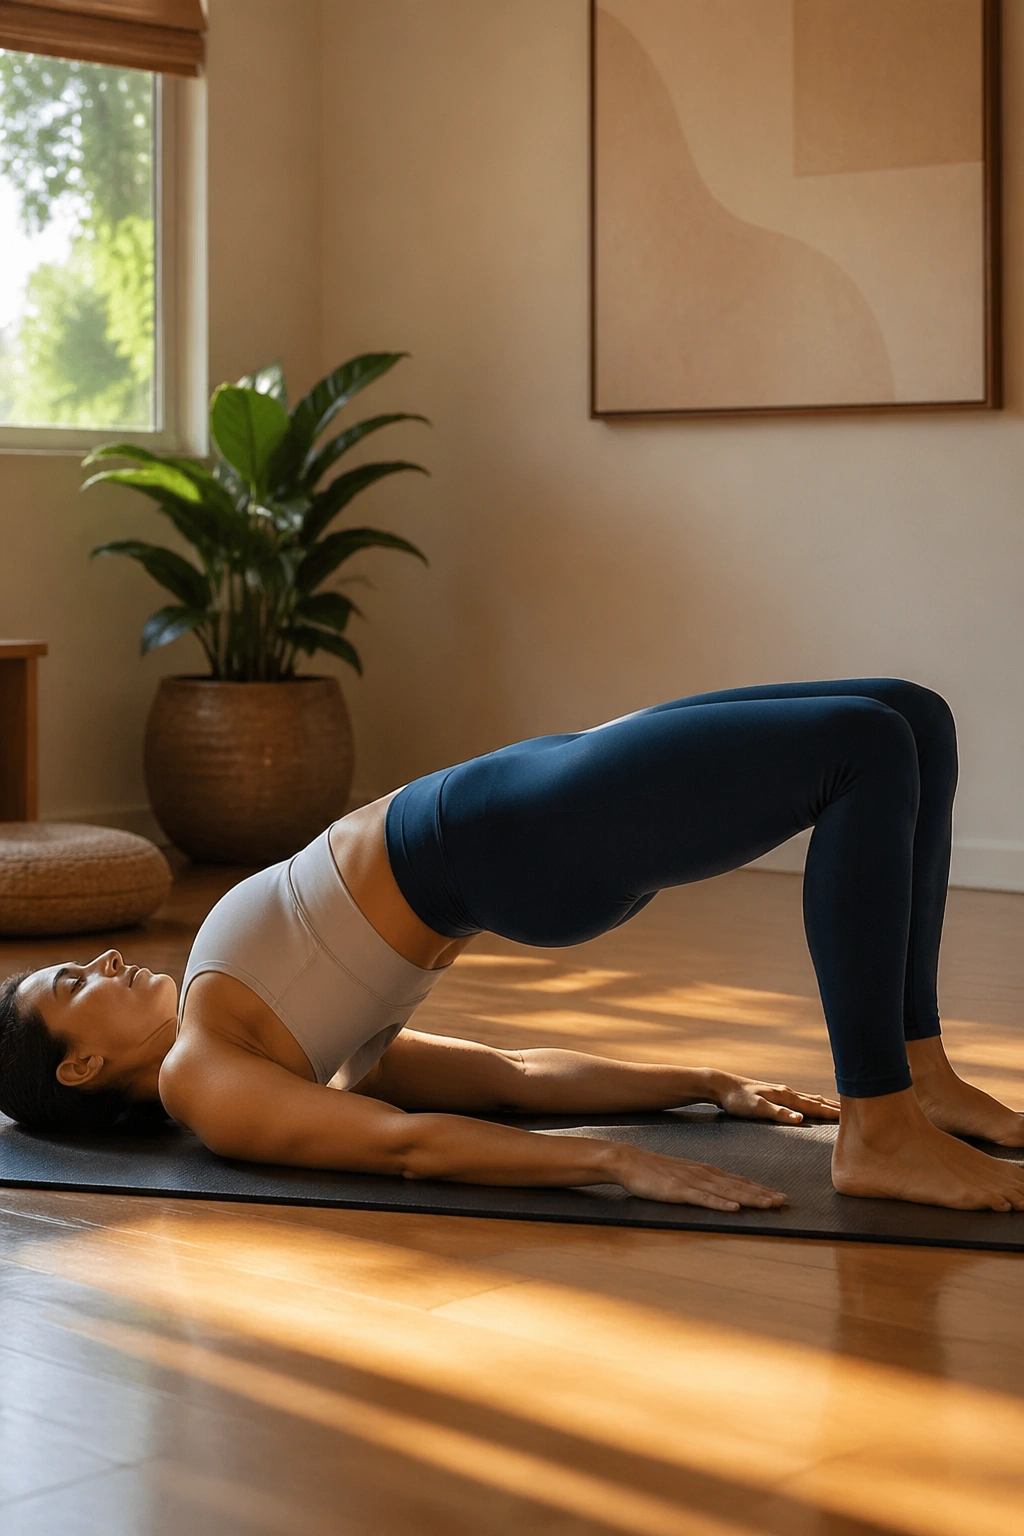
Bridge Pose is a glute exercise wearing yoga clothes.
Lie on your back, bend your knees, and plant your feet about hip-width apart. Press through the heels and lift the hips until the thighs and torso feel like one line. The glutes should engage, the hamstrings should help, and the front of the hips should feel like they’re getting a gentle opening rather than being jammed.
You can hold Bridge for 20 to 30 seconds or turn it into a slow repetition drill. Lower the spine one vertebra at a time, then lift again. That articulation is useful because it teaches the back and hips to move with more control. If your knees tend to flare outward, place a block lightly between them and keep a soft squeeze.
A good Bridge does not need to be huge. In fact, the medium-height version is often better because it keeps the work in the glutes instead of turning the pose into a low-back bend. Small and honest beats dramatic every time.
15. Locust Pose for Back Strength and Posture
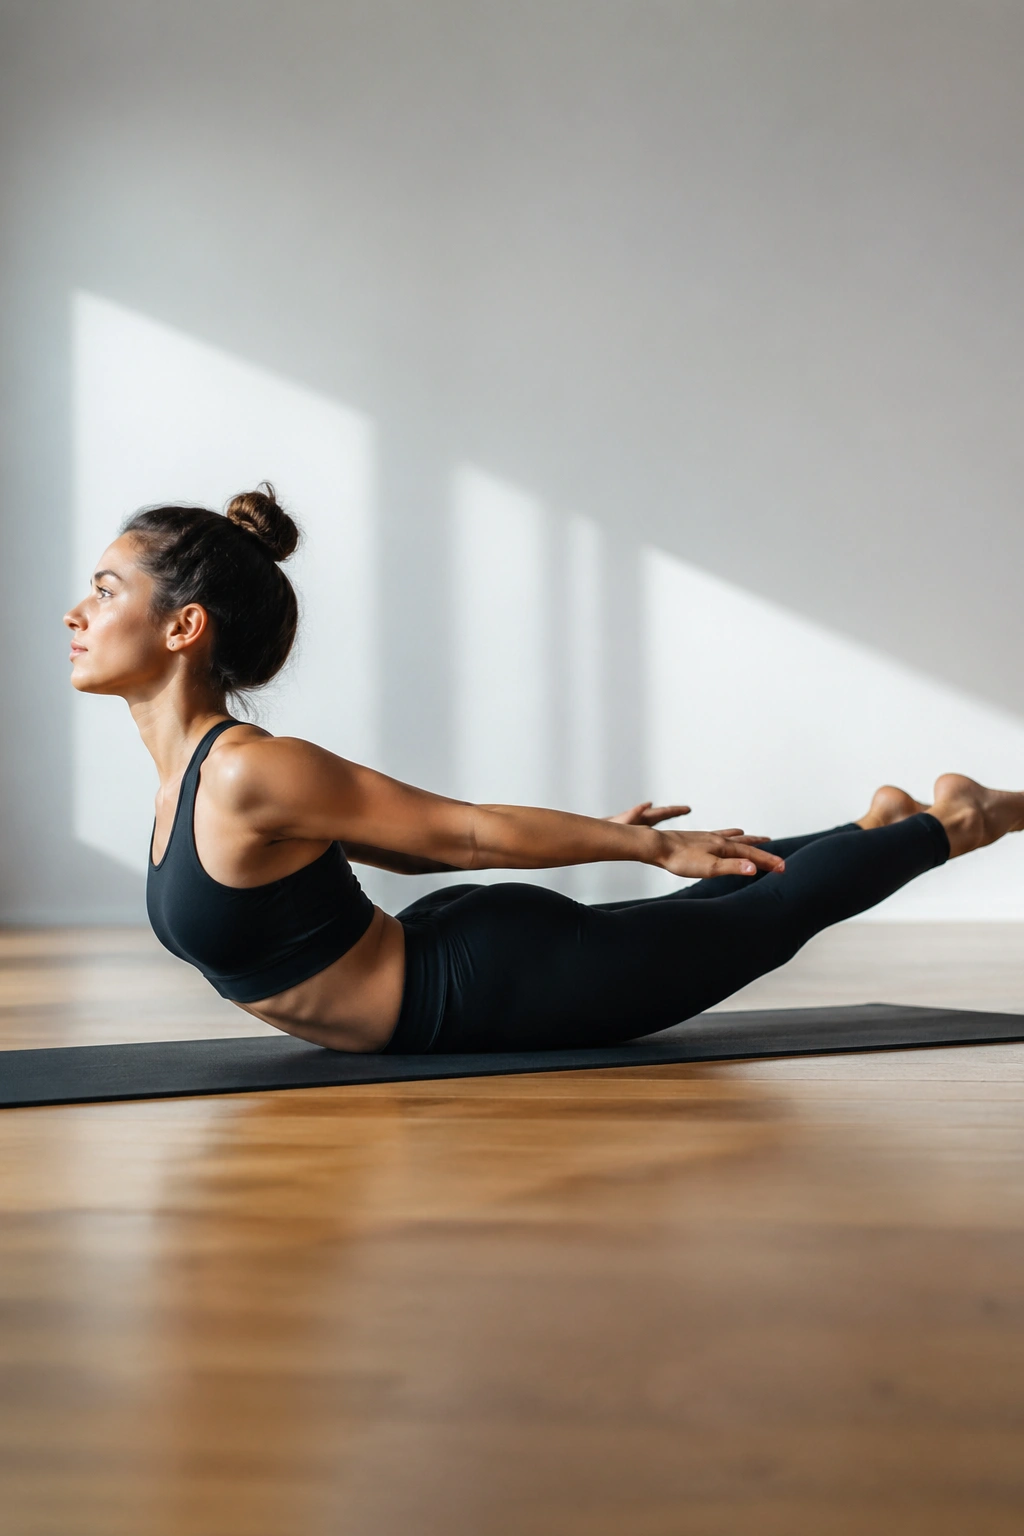
Why does a floor backbend belong in a weight-loss routine? Because a stronger back changes how you carry yourself everywhere else.
Lie face down with your forehead on the mat, then lift the chest, arms, and legs a few inches off the floor. You can keep the arms by your sides, reach them back, or take them into a cactus shape if your shoulders are tight. The key is to lift from the upper back and glutes without throwing the head up first.
How to Use It
Hold Locust for 3 to 5 breaths, lower, rest for one breath, then repeat 3 times. If that feels too much, lift only the chest and keep the legs grounded. That still wakes up the spinal muscles and keeps the movement clean.
- Keep the neck long.
- Press the pubic bone down.
- Reach through the toes.
- Lift, don’t fling.
A better posture makes standing poses feel easier. It also tends to make walking, sitting, and everything in between feel less sloppy. That matters more than most people expect.
16. Downward-Facing Dog for Slow, Steady Weight Loss
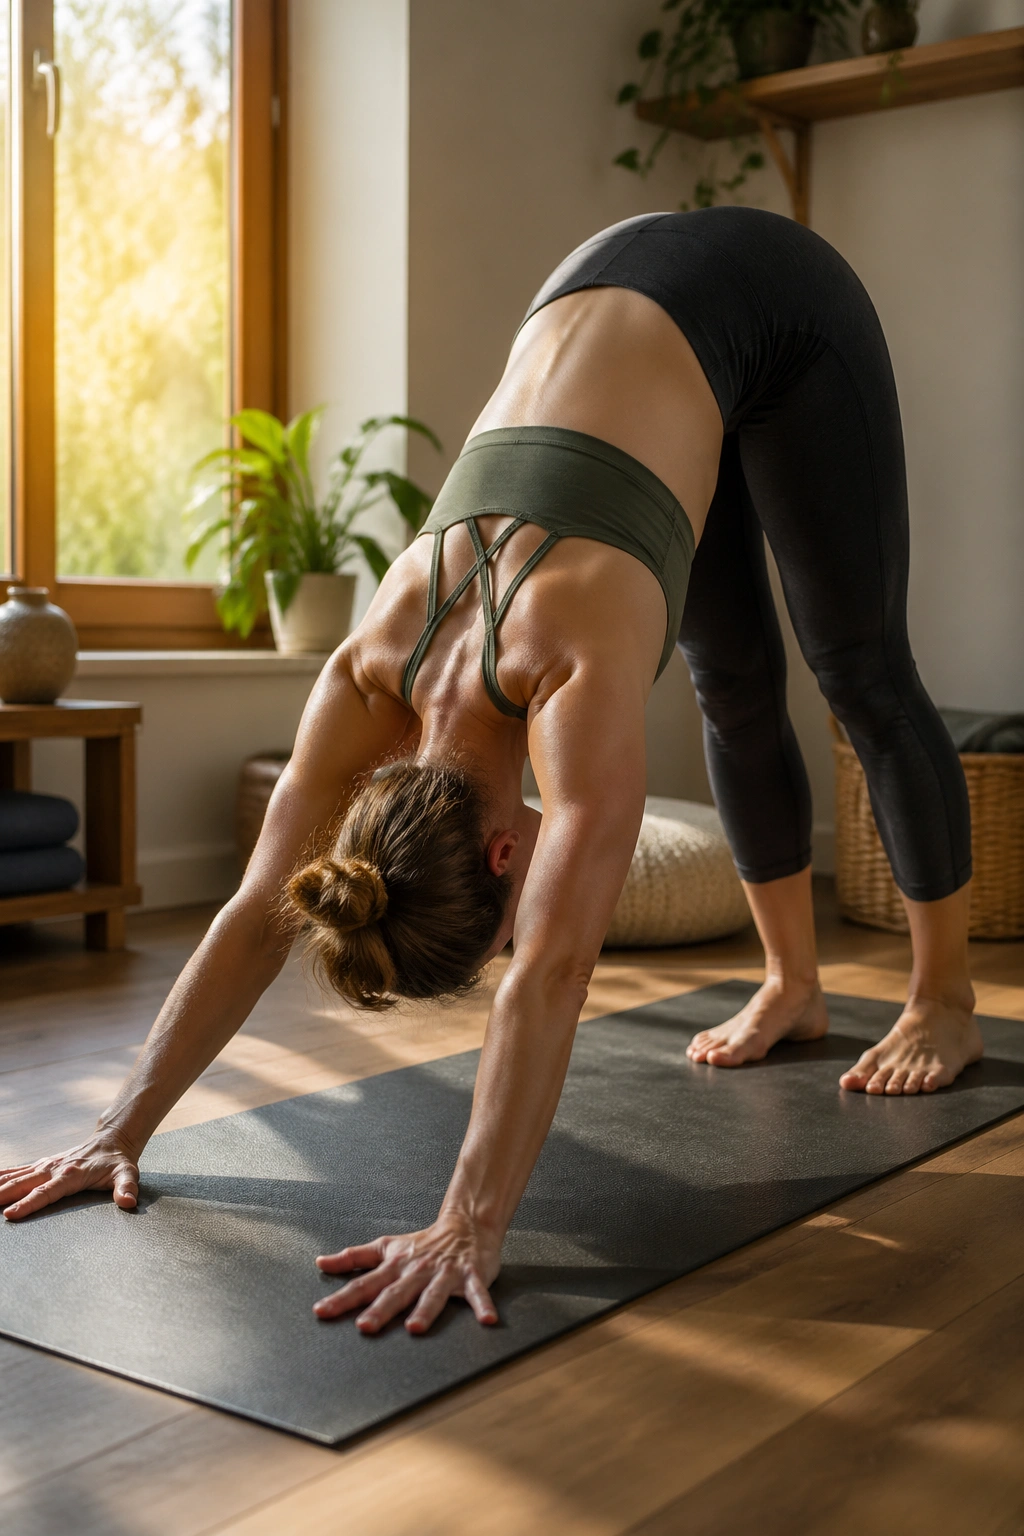
Downward-Facing Dog can feel like a rest. It isn’t, not really.
From hands and knees, tuck the toes, lift the hips, and push the floor away until your body forms an upside-down V. The hands press evenly, the shoulders move away from the ears, and the heels reach toward the mat without needing to touch it. If your hamstrings are tight, keep a soft bend in the knees. That is not cheating. That is better alignment.
- Spread the fingers wide and press through the knuckles.
- Pedal the feet for 6 to 8 slow breaths if the calves feel tight.
- Keep the head heavy but not hanging into the shoulders.
- Shorten the stance if the lower back rounds.
The pose asks for arm strength, shoulder stability, and hamstring length all at once. It also gives you a short reset between standing work and floor work. That combination is useful if you want a practice that feels full-body without being punishing.
17. Dolphin Pose for Shoulders, Abs, and Grip
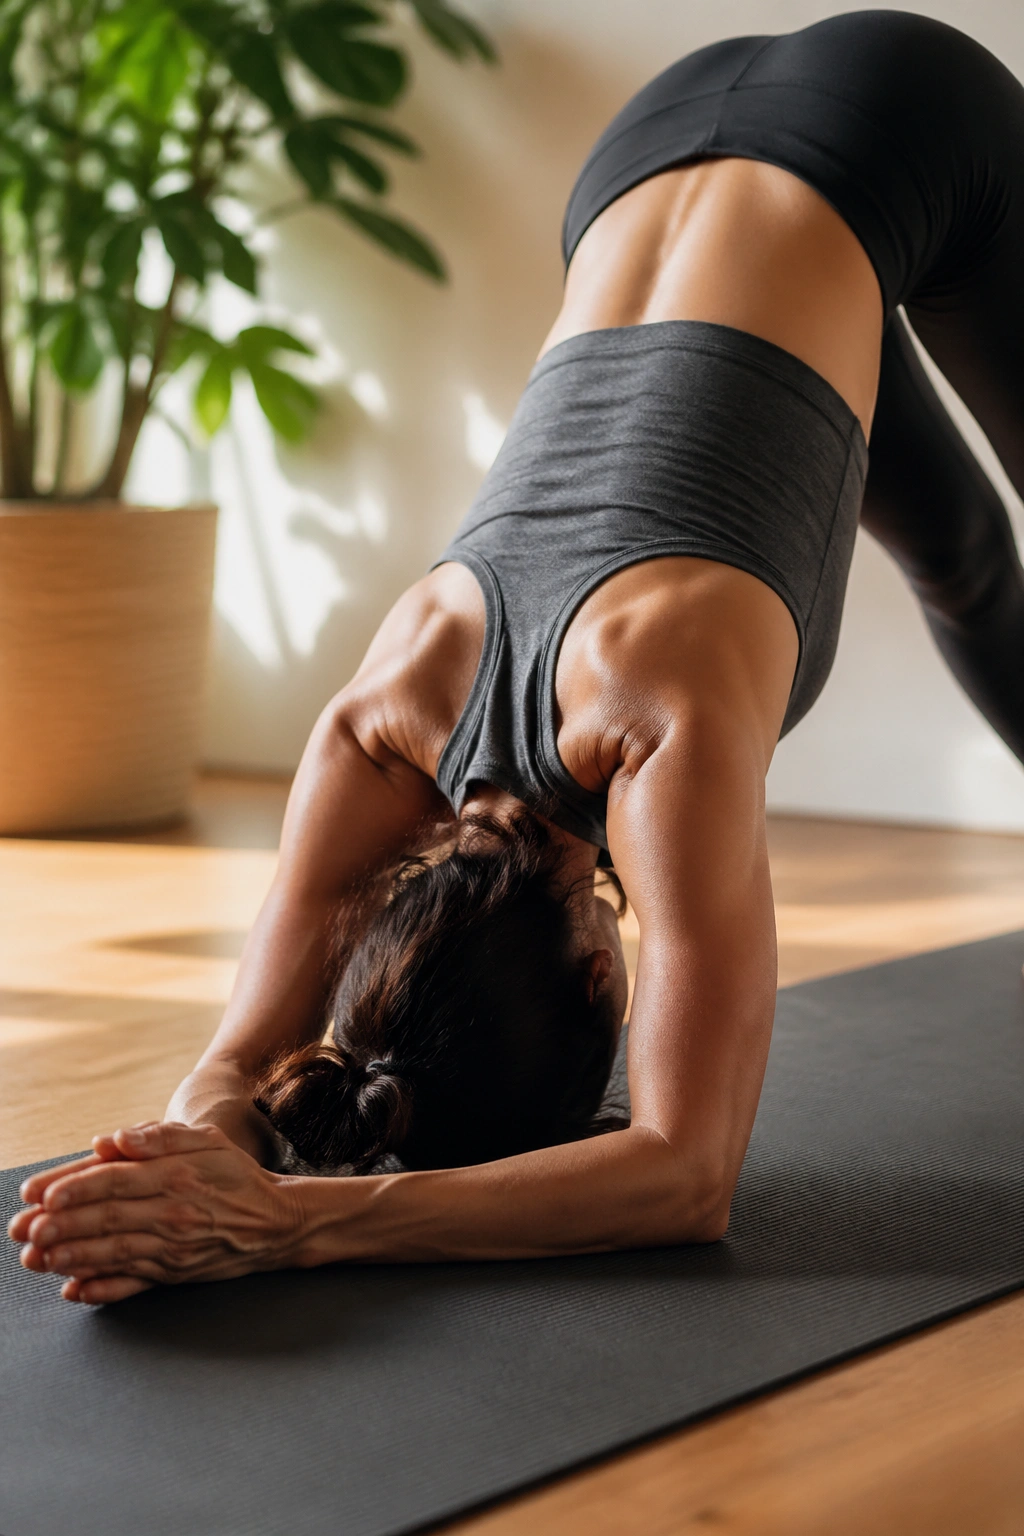
Dolphin Pose looks a bit like a forearm version of Downward Dog, and that rough description is accurate enough. It also happens to be much harder than it looks.
Place your forearms on the mat, elbows under shoulders, then lift the hips high and walk the feet in or out until the shape feels long. The shoulders have to stay active, the core has to stop the lower back from sagging, and the upper arms have to keep from collapsing inward. If you feel this mostly in the neck, back off right away.
A useful way to practice Dolphin is in short holds: 15 seconds, rest, repeat 3 or 4 times. That gives your shoulders time to work without turning the pose into a long grind. If the wrists are fussy, this is often friendlier than Downward Dog, which is one reason people keep coming back to it.
It’s not gentle. It’s just quieter than Plank, which can fool you for a moment.
18. Half Moon Pose for Balance and Hip Strength
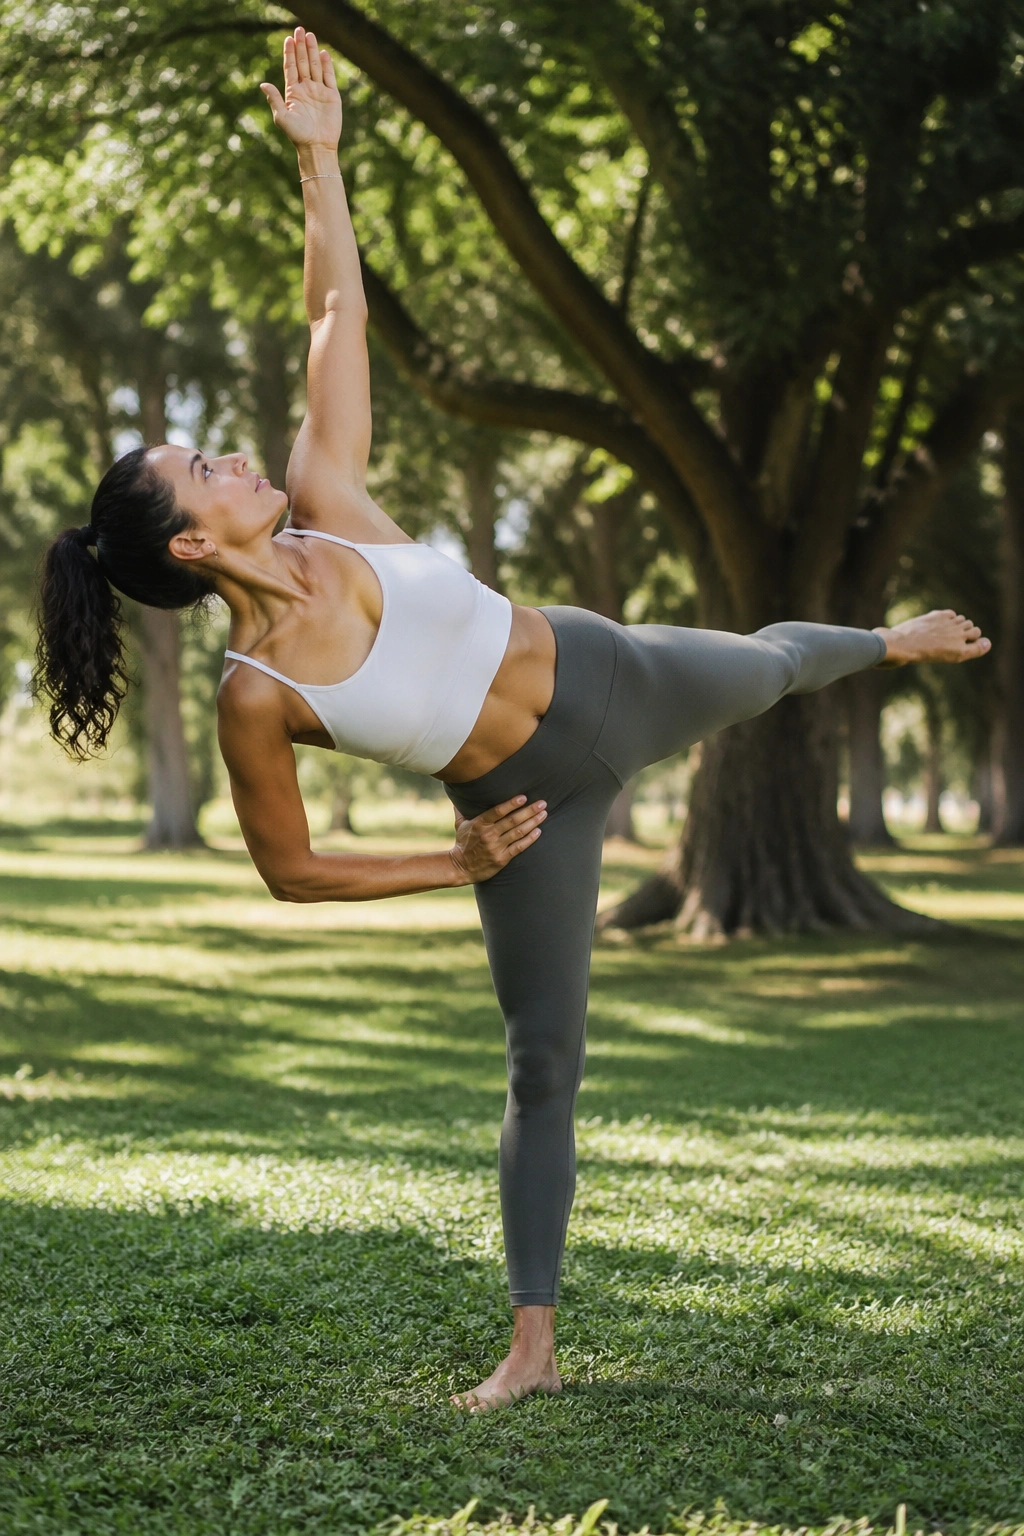
Half Moon Pose is the kind of balance work that makes your supporting leg tell the truth.
Start from Triangle or a short lunge, then shift the weight onto one leg and lift the back leg until it lines up behind you. The standing foot should feel like a tripod, the standing knee should stay soft, and the lifted leg should reach back rather than swing up by force. A block under the lower hand helps a lot, and a wall behind the lifted foot can save you from a face plant.
Unlike Triangle, Half Moon removes the back foot from the floor. That changes everything. The glute on the standing side has to wake up, the ankle has to stabilize, and the waist has to keep the torso from tipping too far. A few breaths here feel surprisingly long.
Try 2 to 3 breaths on each side, then come down before your form gets messy. If you stay until the wobble turns into a scramble, the pose stops being useful.
19. Warrior III for Full-Body Control
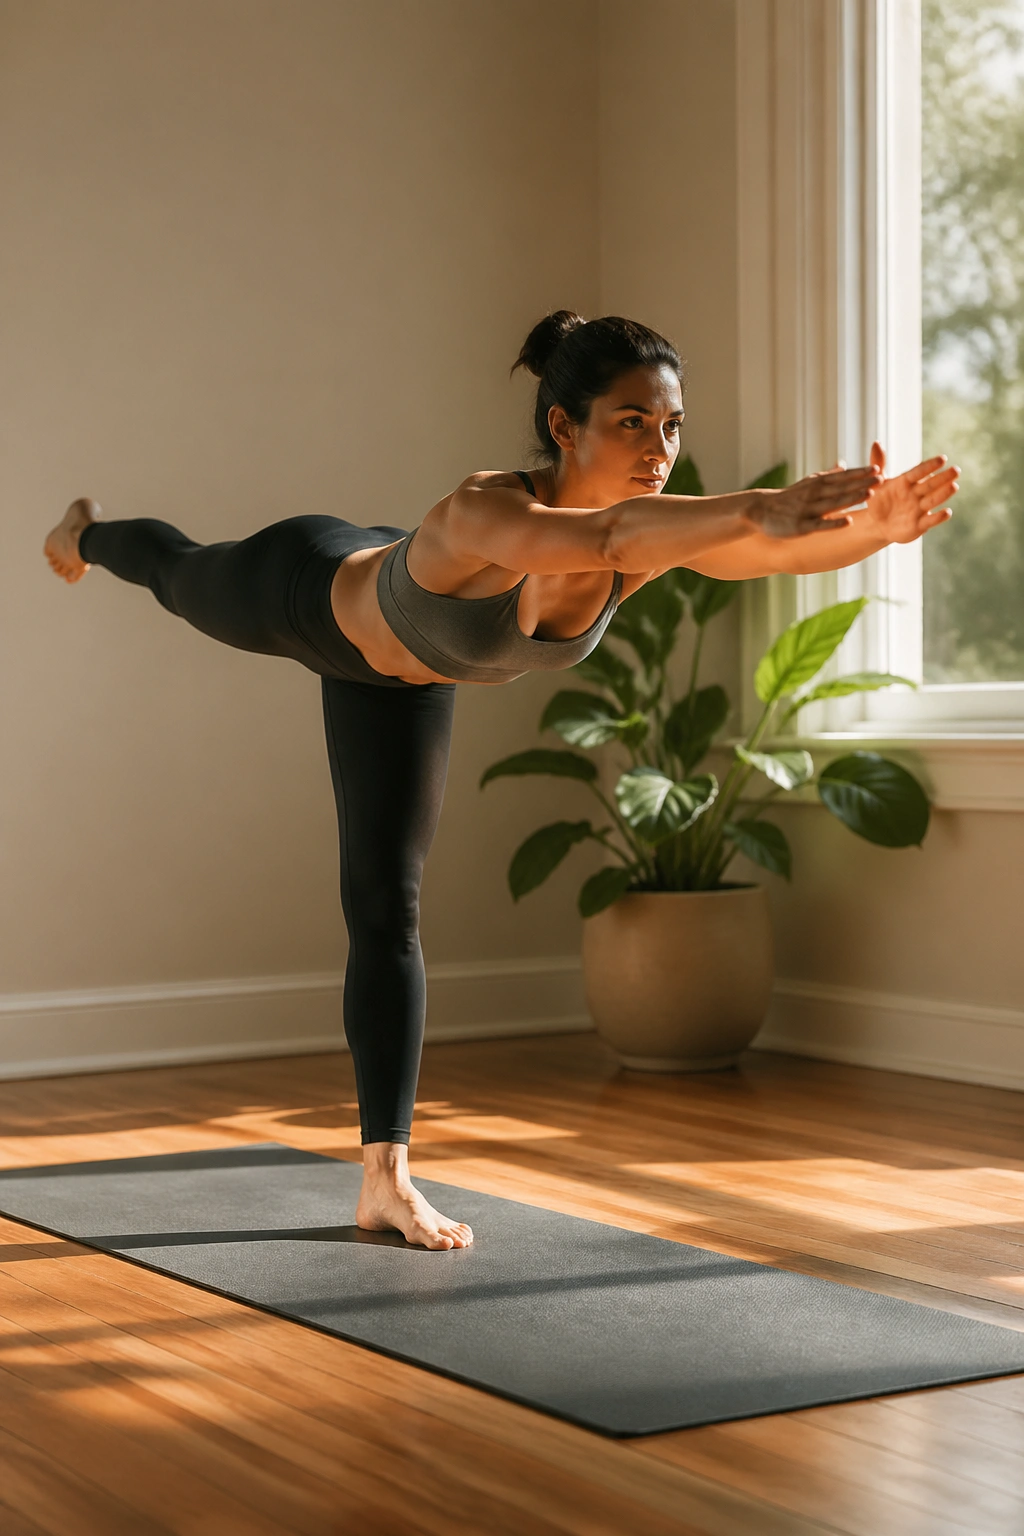
Warrior III turns the whole body into one long line. That line is hard to hold.
Hinge from the hips, send one leg back, and keep the torso and lifted leg reaching in opposite directions. The standing leg should stay slightly bent so the knee doesn’t lock. The hips want to square to the floor, but don’t chase perfect symmetry if it throws you off. A hand on a wall or chair makes the shape more workable, which is usually smarter than pretending balance should be effortless.
Why It Wears You Out So Fast
The pose asks for glute strength, foot control, and a lot of steady attention. If the lifted foot points too high, the low back may pinch. If the torso drops, the back leg drifts up and the whole thing turns into a hinge with no line. Slow is better.
- Hold for 3 breaths per side at first.
- Keep the gaze on one fixed spot.
- Reach through the lifted heel and the crown of the head.
- Use a block under the hands if the floor pulls you out of line.
That kind of control is good for more than yoga. It tends to spill into walking, standing, and the way you carry weight through your day.
20. Goddess Pose for Wide-Stance Leg Work
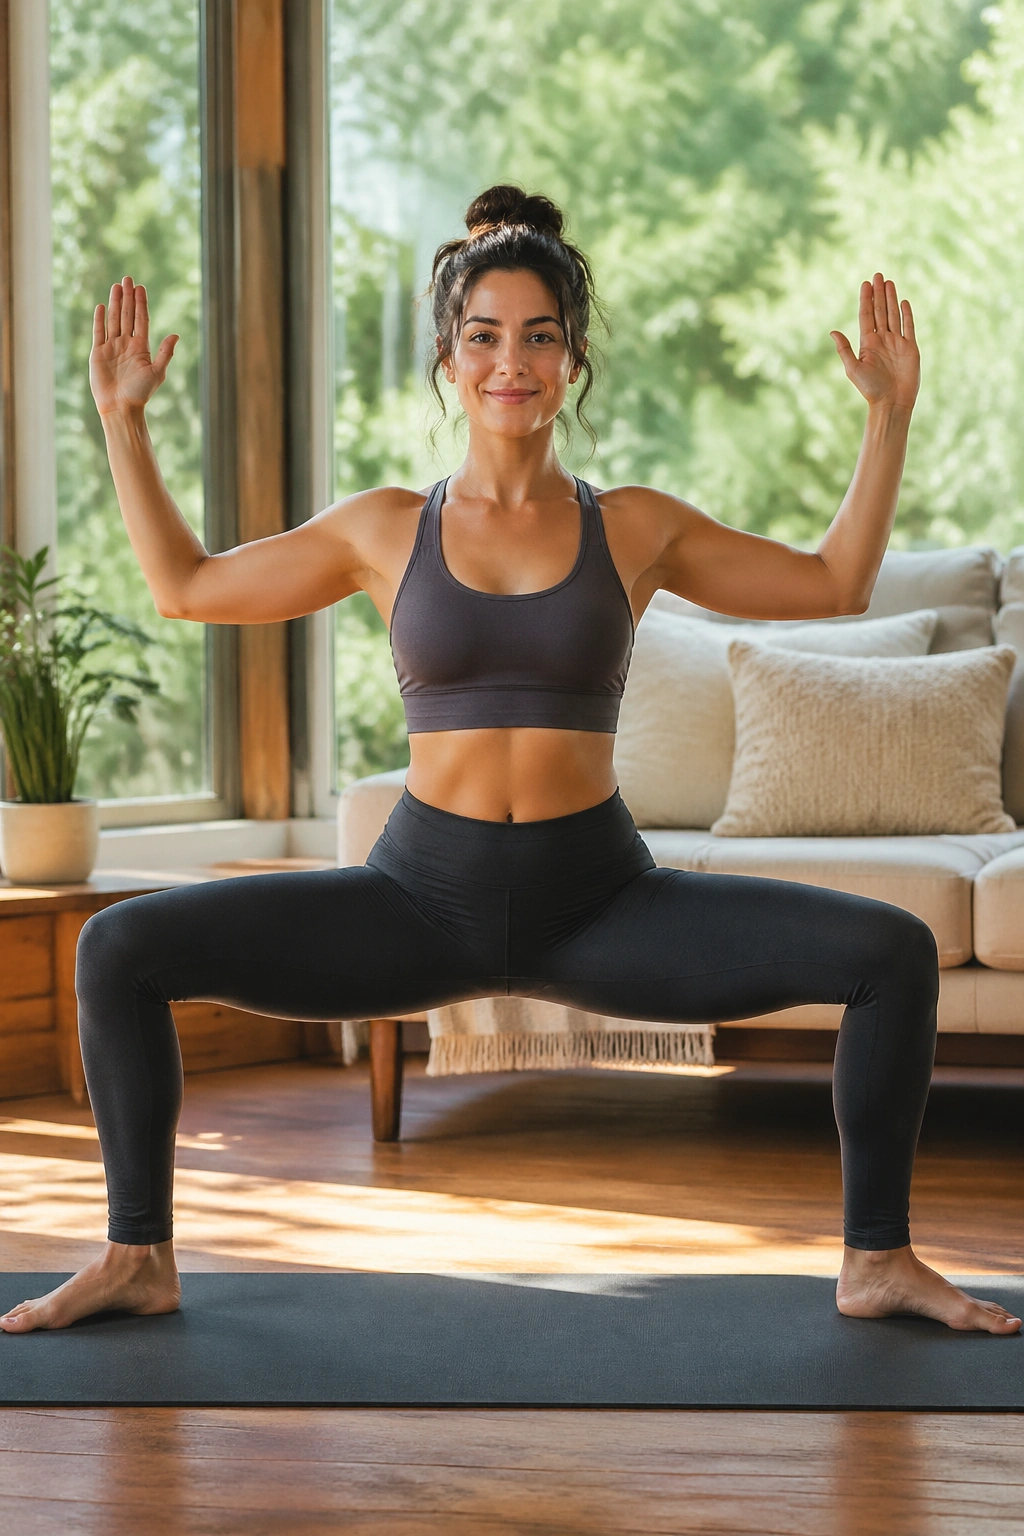
Goddess Pose is yoga’s squat, and it does not pretend otherwise.
Step your feet wide, turn the toes out slightly, and bend the knees over the toes until the thighs start to feel loaded. Keep the torso tall, the pelvis neutral, and the ribs from flaring forward. You can hold the arms in a cactus shape or at the heart. Either way, the legs know they’re working.
This pose is one of the easiest ways to add heat without a lot of setup. A 30-second hold with 8 slow pulses afterward can light up the inner thighs, glutes, and quads in a way that feels honest rather than flashy. If the knees drift inward, widen the stance a bit and turn the toes out less.
The nice part is that Goddess Pose is easy to repeat. That matters. You do not need a complicated sequence to get your body moving well. You need a shape you can return to without dreading it.
21. Crow Pose for Arm Balance and Total-Body Tension
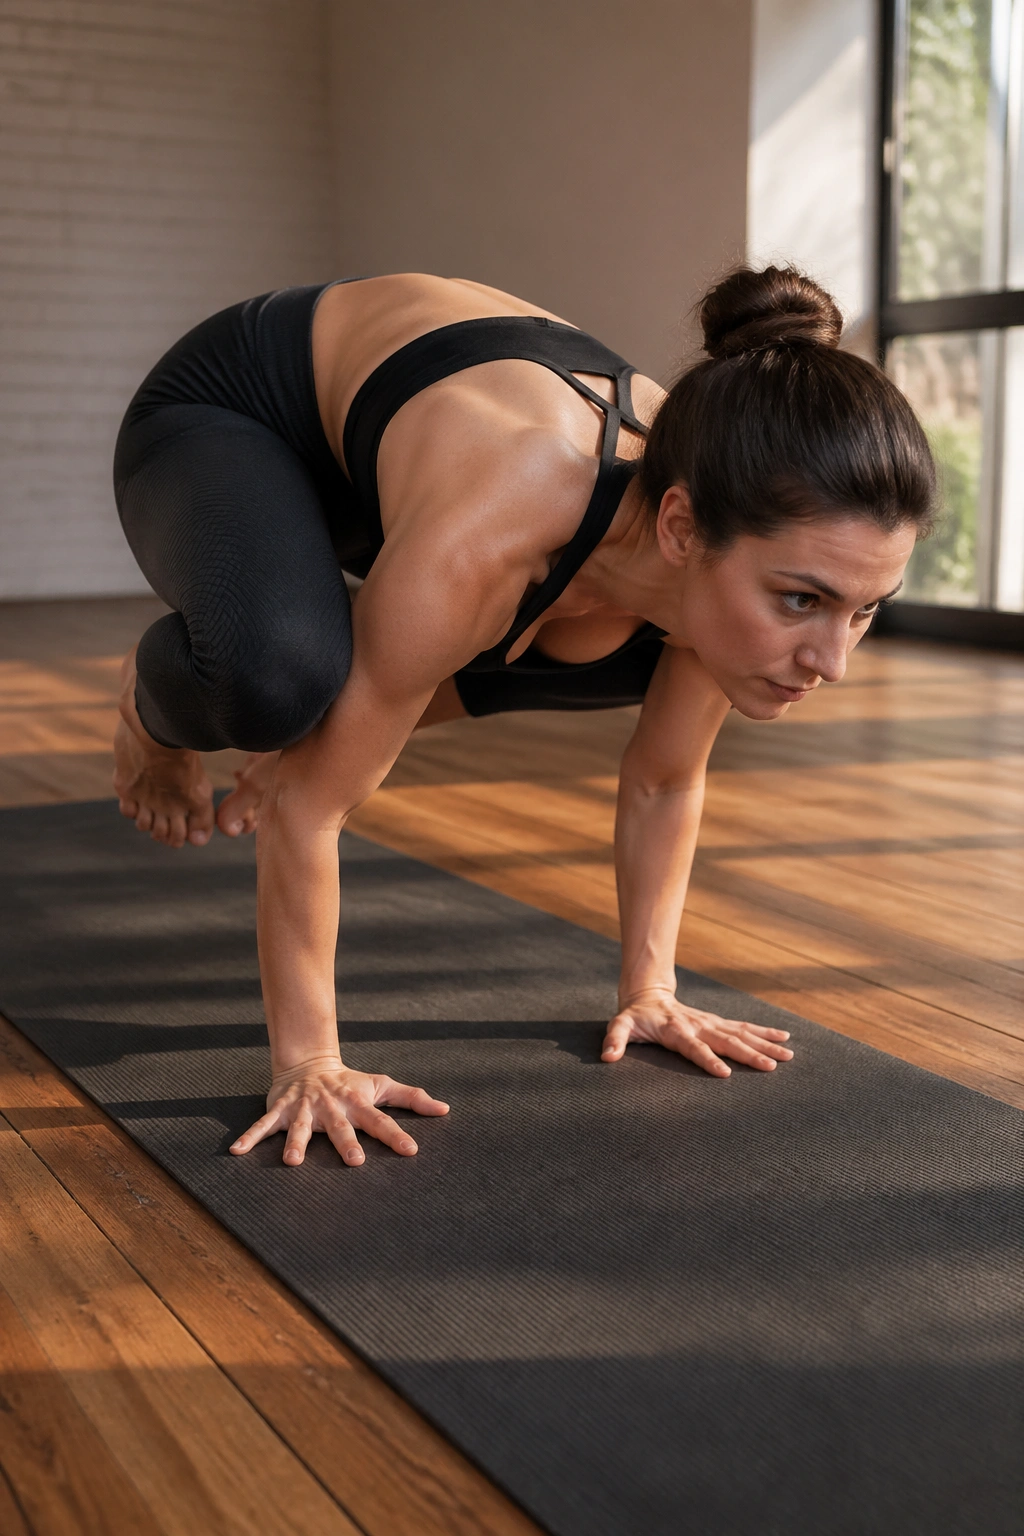
Does an arm balance belong in a slow, steady weight loss practice? Yes, if you treat it as control work, not as a stunt.
Squat down, plant the hands shoulder-width apart, and set the knees high on the backs of the upper arms. Lean forward until the feet feel light, then lift one foot, then the other if your body is ready. The real job here is not “floating.” The job is staying organized while everything wants to scatter.
How to Get the Most From It
Use a folded blanket or pillow under your face the first few times. Rock forward and back 3 to 5 times before trying to lift both feet. That tiny drill teaches the wrists, shoulders, and core where the balance point lives.
- Keep your gaze a few inches ahead of the hands.
- Press the floor away.
- Round the upper back slightly.
- Bail out gently if the wrists feel cranky.
Crow can be humbling. Good. Humbling keeps the ego out of the way, and the ego is often the part that makes people rush.
22. Legs Up the Wall for Recovery and Consistency
After a hard day, this pose looks like nothing. That’s the mistake.
Sit beside a wall, swing the legs up, and lie back so the hips are close to the baseboard or supported on a folded blanket if that feels better. Let the arms rest by your sides, close the eyes, and breathe slowly through the nose. The goal is not to “do” the pose. The goal is to come down from effort.
- Stay for 5 to 10 minutes.
- Keep a pillow under the hips if the hamstrings pull hard.
- Soften the jaw and the belly.
- Let the feet fall open naturally.
Recovery matters in a slow, steady weight loss plan because soreness and poor sleep can knock you out of the next session. A body that recovers well tends to move more often, and that’s where the real progress lives. Not in punishment. In repetition.
Use this pose after the stronger work above, or anytime your legs feel heavy and your head feels loud. A practice you can return to tomorrow is worth more than one that leaves you wiped out. Pick three or four poses, breathe through them, and come back the next day. That’s the whole game.
