



Recovery day is not a nap with a yoga mat. It’s the part of training where you give your body a chance to stop bracing, stop gripping, and stop acting like every muscle needs to win a small war.
That matters more for active athletes than most people admit. Runners carry tight calves and hip flexors. Lifters live with cranky lats, glutes, and a lower back that can feel wooden after heavy pulls. Cyclists, swimmers, court players, and weekend competitors all build the same kind of debt in different places.
The best yoga poses for recovery days do something a hard workout does not: they ask for length, breathing, and a little patience. Not a circus act. Not a test. If you’re holding your breath or making a face like you’re trying to deadlift the couch, you’ve gone too far.
I like recovery work that changes how you feel when you stand up afterward. So the poses below lean toward looseness, better range of motion, and a calmer nervous system — the stuff that helps you train again without feeling like you’ve been folded in half and left there.
1. Child’s Pose for a Quiet Reset
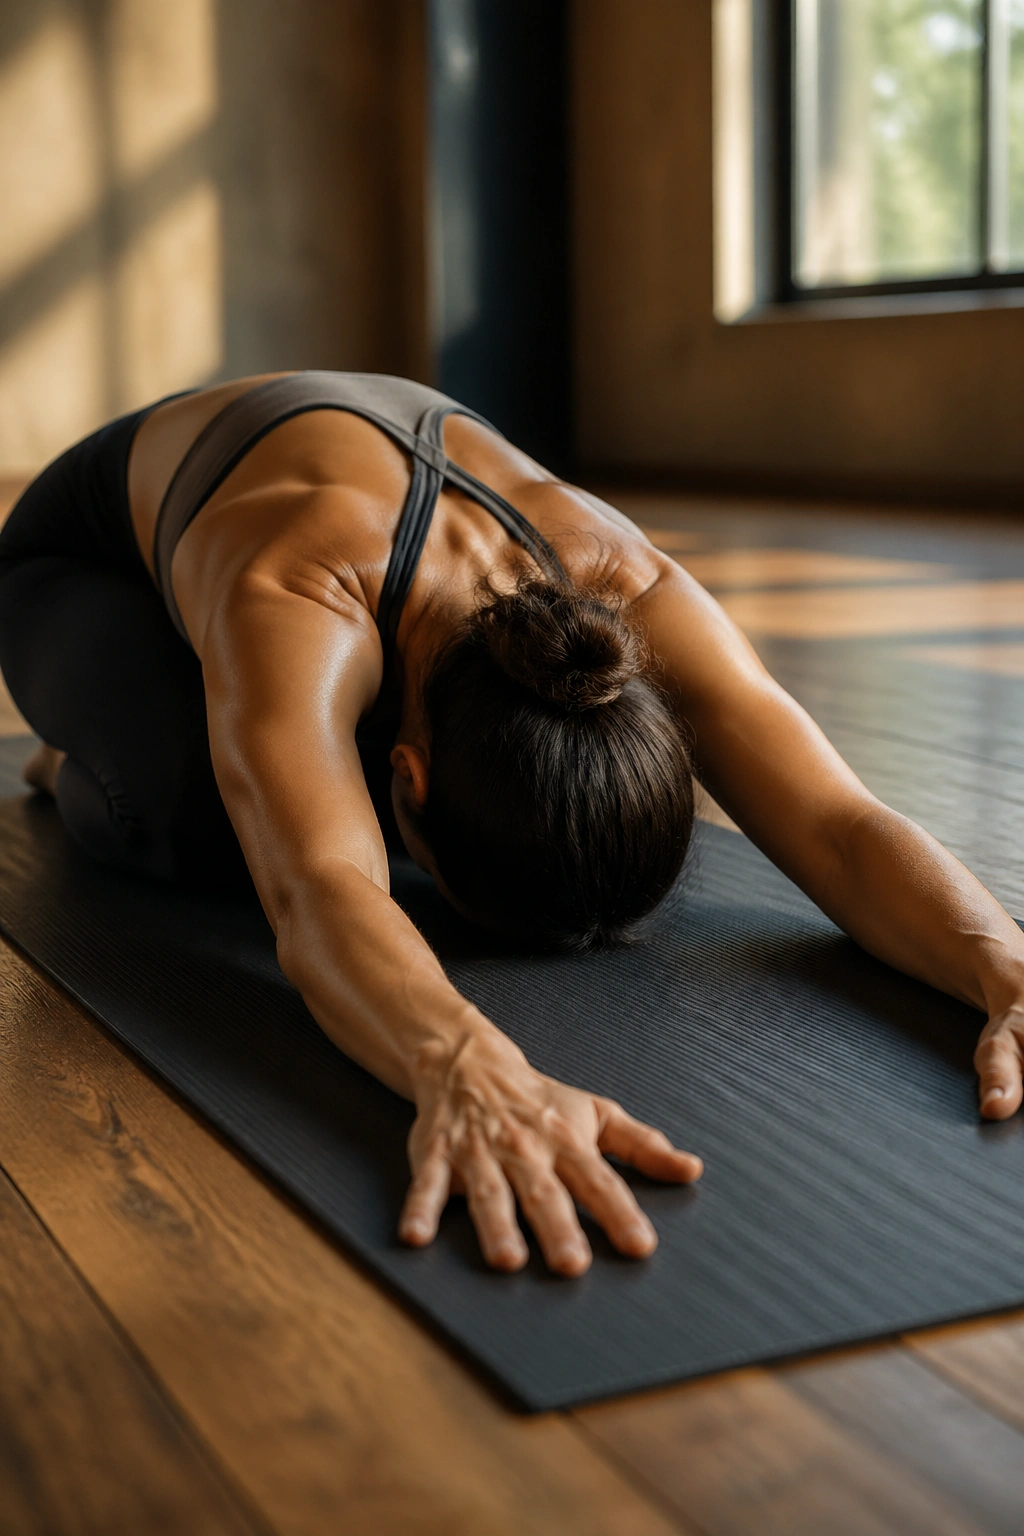
Child’s Pose is the pose I reach for when an athlete looks wound up, not just tight. It’s a small move, but it can take the edge off the whole session fast.
Drop your knees wide or keep them together, slide your hips back, and let your forehead rest on the mat or a block. If your shoulders are the bigger issue, walk your hands forward. If your hips are cranky, keep the knees closer together and put a folded blanket under your thighs.
Why It Helps on Recovery Days
Child’s Pose gives the lats, low back, ankles, and hips a place to soften without load. That’s useful after pull-ups, deadlifts, climbs, or anything that left your trunk feeling guarded. The long exhale is part of the work here. Slow breathing through the nose, then a longer breath out through the mouth, can make the whole back side of the body let go.
A lot of people rush past this one because it looks too easy. That’s a mistake. Easy is the point.
Small Tweaks That Matter
- Place a bolster or pillow under your chest if the low back feels pinchy.
- Keep your elbows slightly bent if your shoulders hate full reach.
- Hold for 5 to 8 slow breaths or longer if you feel your rib cage dropping.
- Skip the deep stretch feeling; you want unclenching, not strain.
Best use: after heavy lifting, climbing, swimming, or a stressful day that left your neck and back tight.
2. Cat-Cow for a Stiff Spine
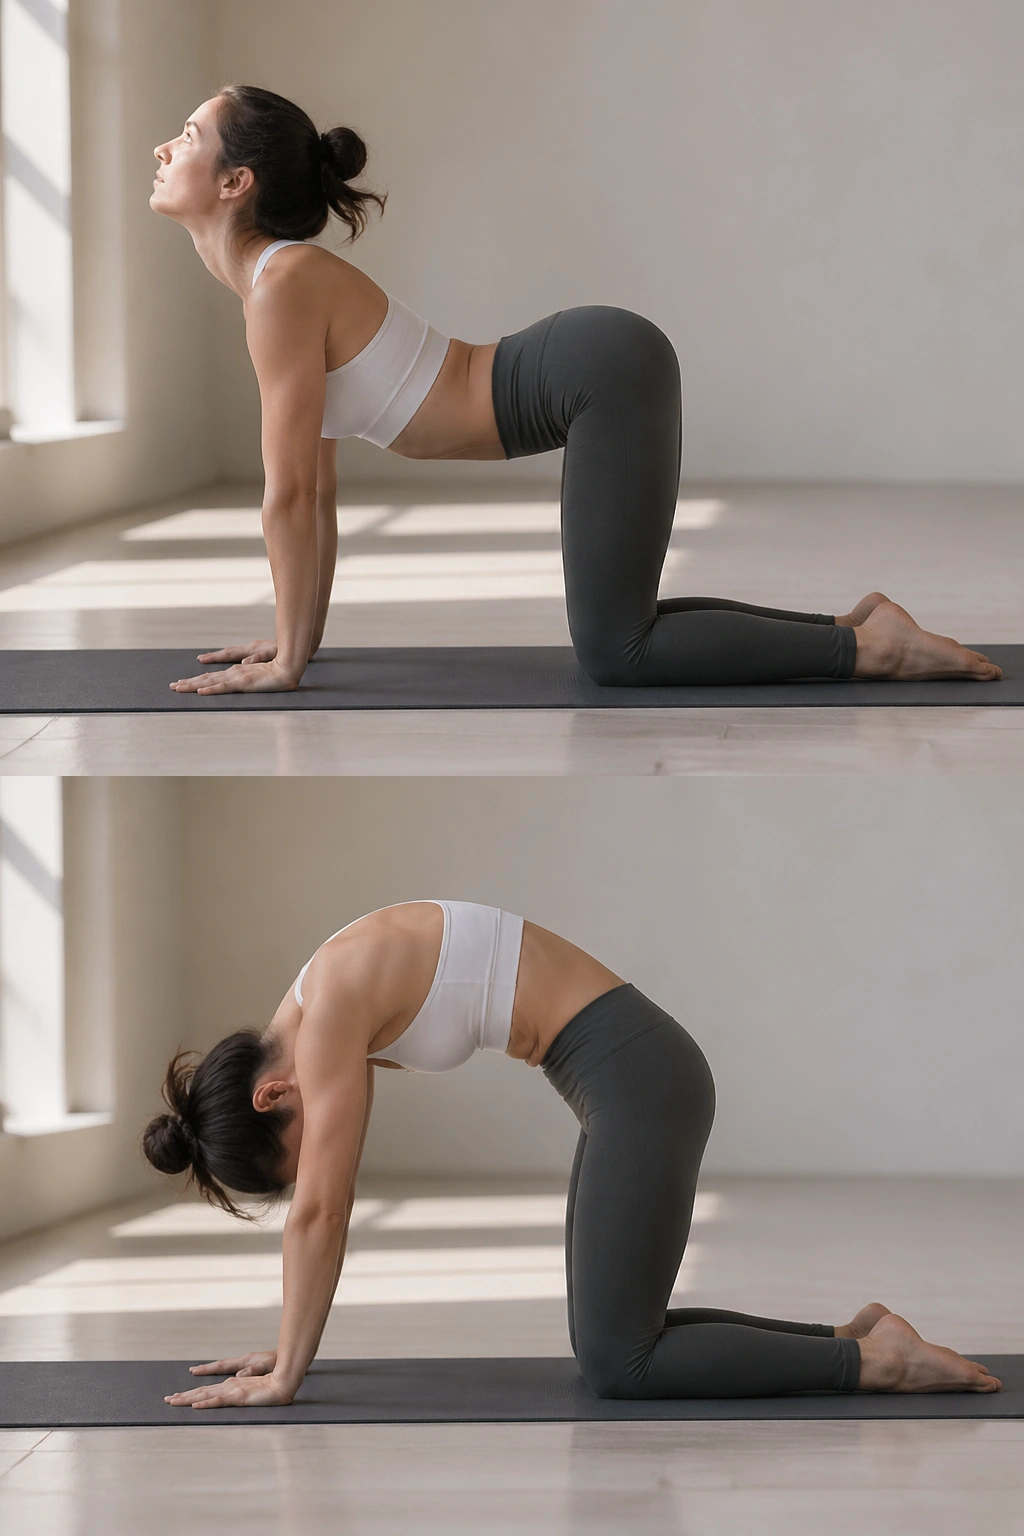
Why does a simple spinal wave help so much? Because a stiff back often needs motion before it needs stretching.
Cat-Cow moves the spine through flexion and extension in a controlled way. Get onto hands and knees, wrists under shoulders, knees under hips, and move slowly with your breath. Inhale into Cow, letting the belly drop a little and the chest widen. Exhale into Cat, rounding the back and pressing the floor away.
The value here is not drama. It’s rhythm. After sitting, running, or bracing under a barbell, your back often feels better after a few smooth repetitions than after one aggressive stretch.
What to Watch For
- Keep the movement small at first; don’t force the end range.
- Let the motion spread through the whole spine, not only the neck.
- Aim for 8 to 10 rounds.
- If your wrists get annoyed, make fists or come down onto forearms.
Cat-Cow is a good opener before the deeper poses in this list. It tells the body the session is about recovery, not performance. That’s a useful message.
3. Downward-Facing Dog to Unload the Back Side
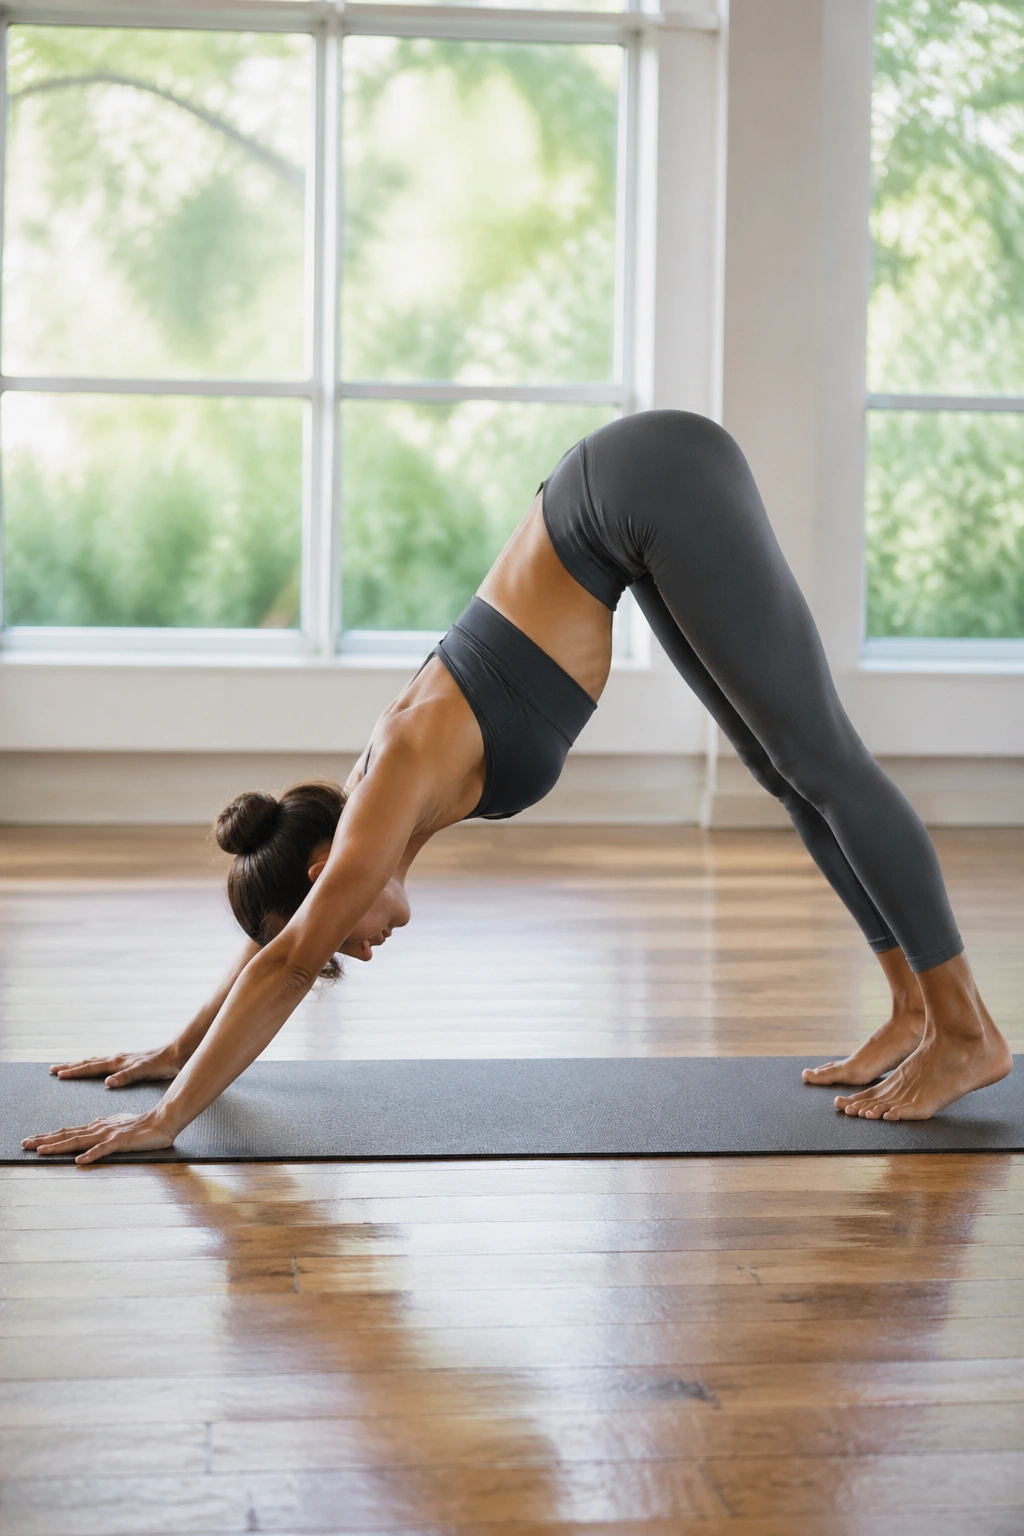
A lot of athletes treat Downward-Facing Dog like a hamstring contest. That’s not the move.
This pose works best when you bend the knees enough to keep the spine long. Press the hands firmly, lift the hips, and think about making space from your wrists to your sit bones. Pedal the feet slowly if the calves are tight. On recovery days, that little ankle action can feel like gold after running, sprinting, or field work.
Why It Feels Better Than a Standing Stretch
Standing hamstring stretches often let the lower back round and steal the work. Down Dog gives you a stronger shape, so you can get length through the shoulders, side body, calves, and hamstrings at the same time. That matters for athletes who spend a lot of time in one plane of motion.
The catch is easy to miss: if your shoulders are smoked from pressing or swimming, the pose can feel like too much. Bend the knees more. Shorten the stance. Work the shape, not the ego.
Quick cues:
- Hands shoulder-width apart.
- Feet hip-width apart.
- Heels do not need to touch the floor.
- Hold for 5 breaths, then come down and rest.
4. Low Lunge for Tight Hip Flexors
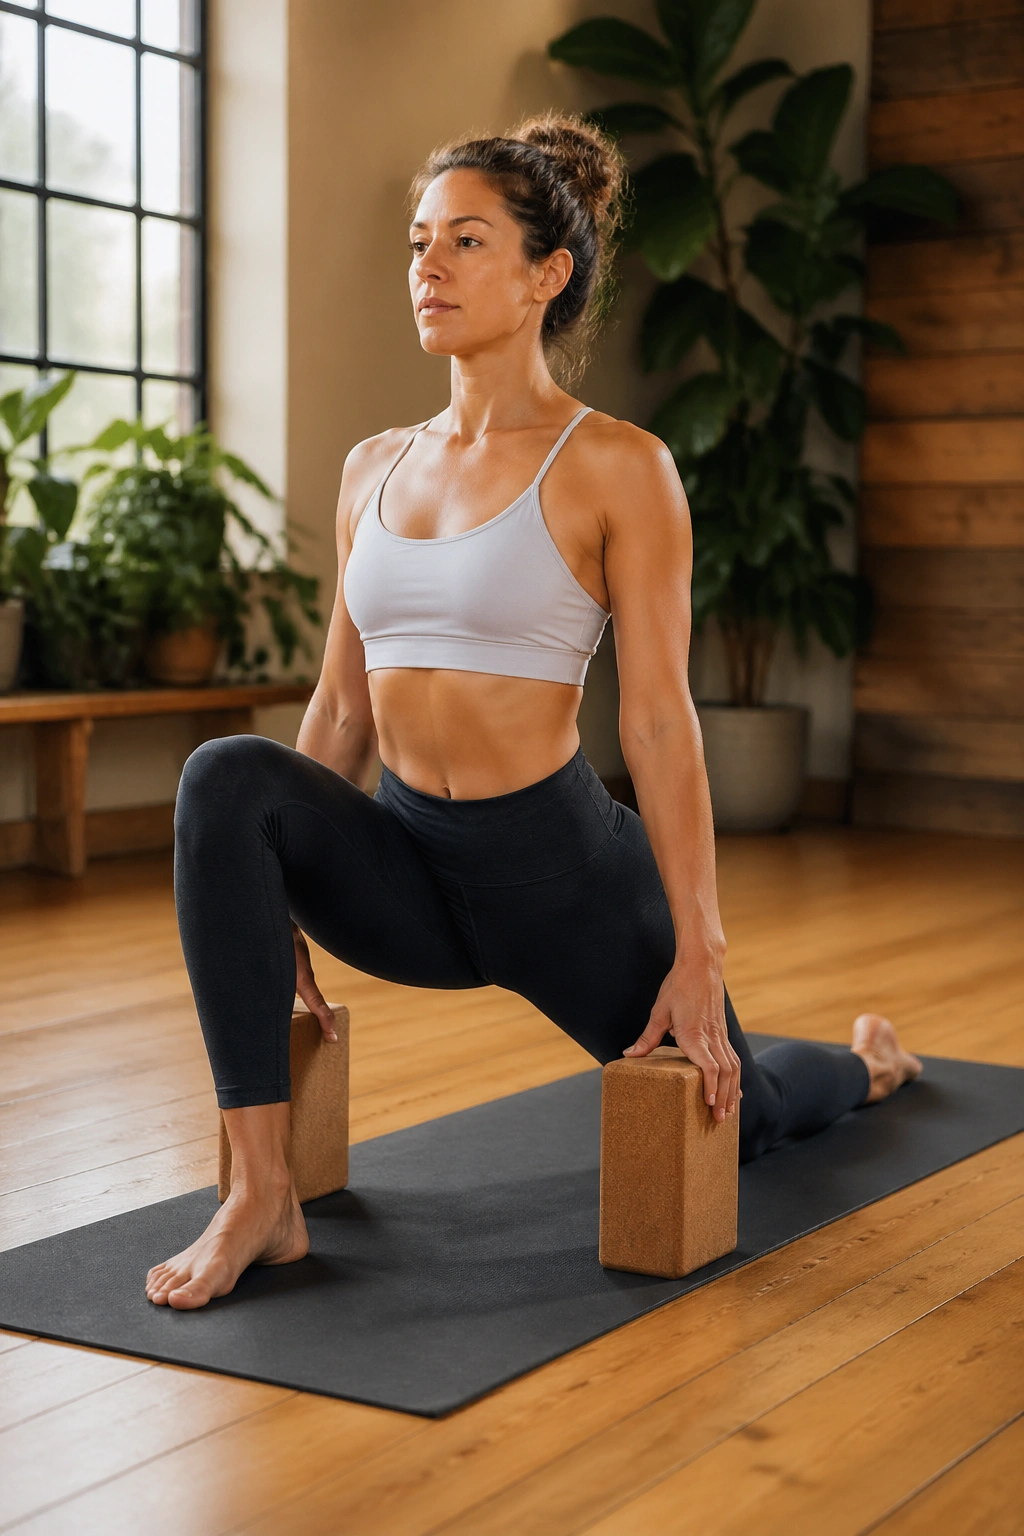
If you run, bike, skate, sprint, or lift, your hip flexors probably need attention more often than you think. Low Lunge is one of the simplest ways to get there.
Step one foot forward, lower the back knee, and pad it well. Keep your torso tall and let the front knee track over the ankle. You can stay upright, place hands on blocks, or lift the arms if your ribs stay calm. The stretch should land in the front of the back hip and upper thigh, not in the low back.
I prefer this pose after training days that were heavy on speed. Sprinting in particular makes the hip flexors do a lot of fast, repeated work. They get short and clingy.
How to Keep It Useful
- Tuck a towel under the back knee.
- Squeeze the glute on the back leg lightly.
- Hold 30 to 45 seconds per side.
- Keep the pelvis from dumping forward.
That last point matters. If you just lean back and hang, the pose turns sloppy. A steady shape gets more done with less strain.
5. Half Split for Hamstrings Without the Tug of War
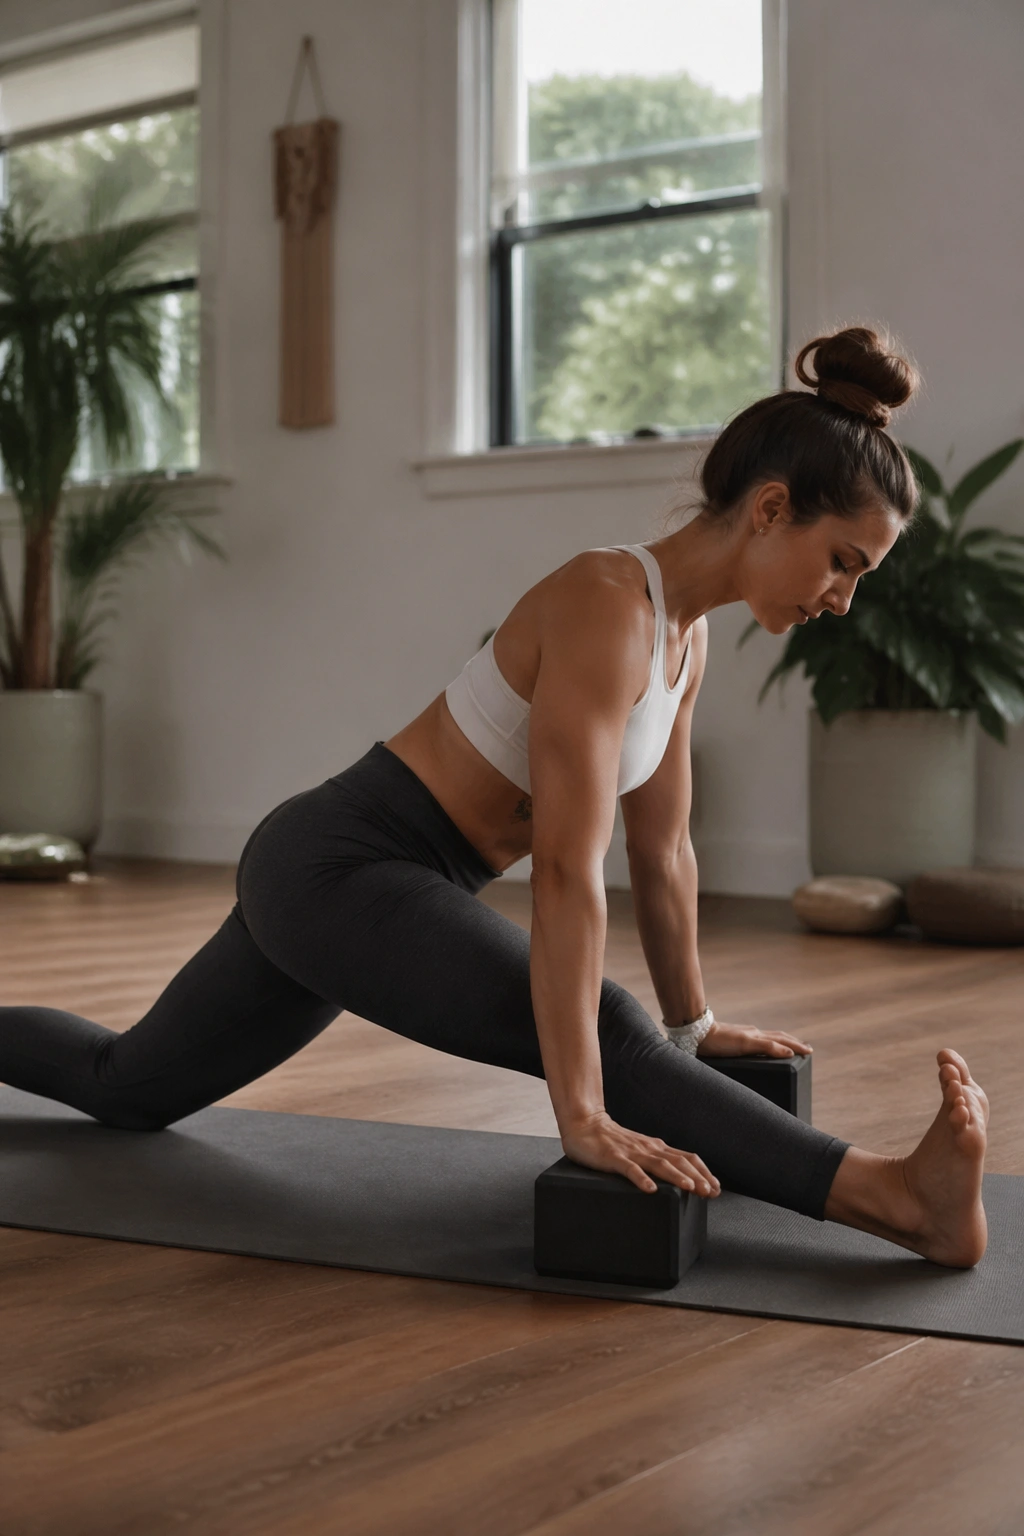
Standing toe touches look dramatic. Half Split is smarter.
From Low Lunge, shift the hips back and straighten the front leg while keeping the front foot flexed. Fold from the hips, not the waist, and stop early if the low back starts doing the work. Blocks under the hands make a big difference, especially for athletes with stiff hamstrings or tight calves.
What Makes It Different
Half Split lets you target the back of the front leg without dumping weight into the spine. That’s why I like it more than the classic bent-over stretch after a hard run or a heavy lower-body day. You can also keep the knee slightly bent if the back of the leg feels like it’s being yanked.
How to Use It
- Keep the front toes pulled back toward the shin.
- Slide the hips far enough back to feel the stretch, then stop.
- Hold for 5 breaths.
- Switch sides and breathe evenly.
If your hamstrings are reactive, go easier than you think you need. They usually reward restraint.
6. Lizard Pose for Hips That Feel Packed Shut
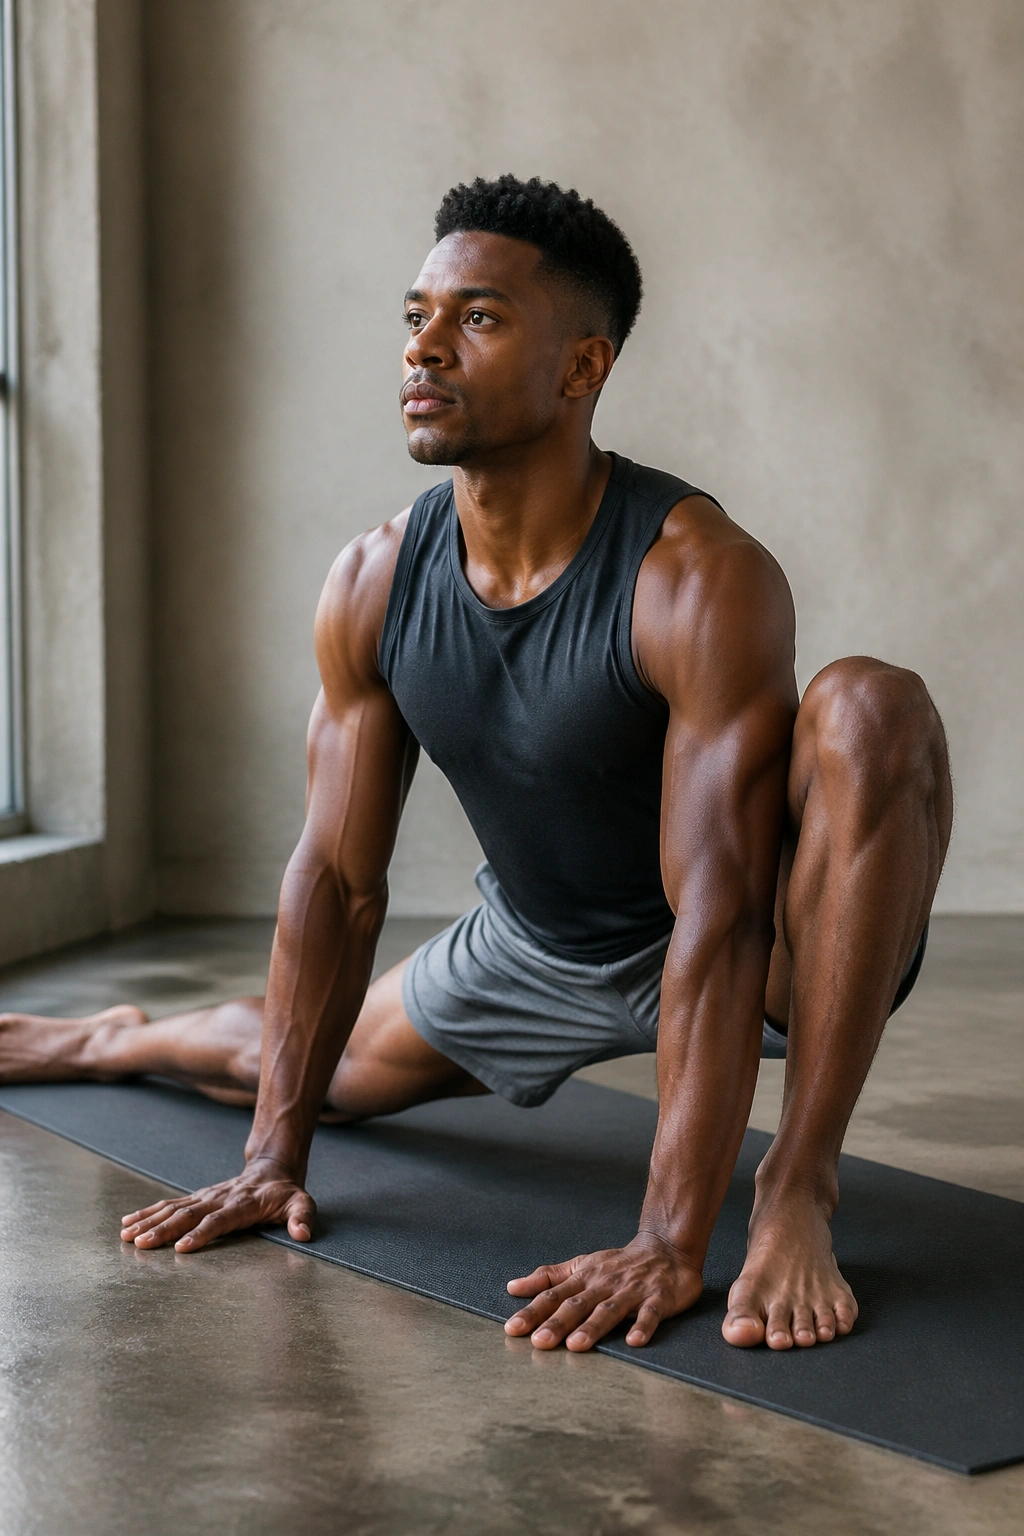
Lizard Pose is for the days when your hips feel like they’ve been stuffed into a drawer.
From a Low Lunge, step the front foot farther out and lower the hands inside the foot. Stay on the palms, come onto blocks, or take the forearms down if the shape feels good and the knees are happy. The inner thighs, outer hips, and deep front-of-hip area tend to light up here.
This pose can be intense. That’s fine. Intense and useful are not the same thing, though. Useful Lizard feels broad and spacious after a minute. Bad Lizard feels sharp, jammed, or pinchy.
A Few Real-World Adjustments
- Put a folded blanket under the back knee.
- Stay high if your groin is tight.
- Keep the front foot angled slightly out if needed.
- Use 30 seconds to 1 minute per side.
Runners, soccer players, and anyone who cuts or pivots hard usually feel this one fast. The trick is not to force the deepest version. The useful version is the one you can breathe in.
7. Pigeon Pose for Deep Glute Relief
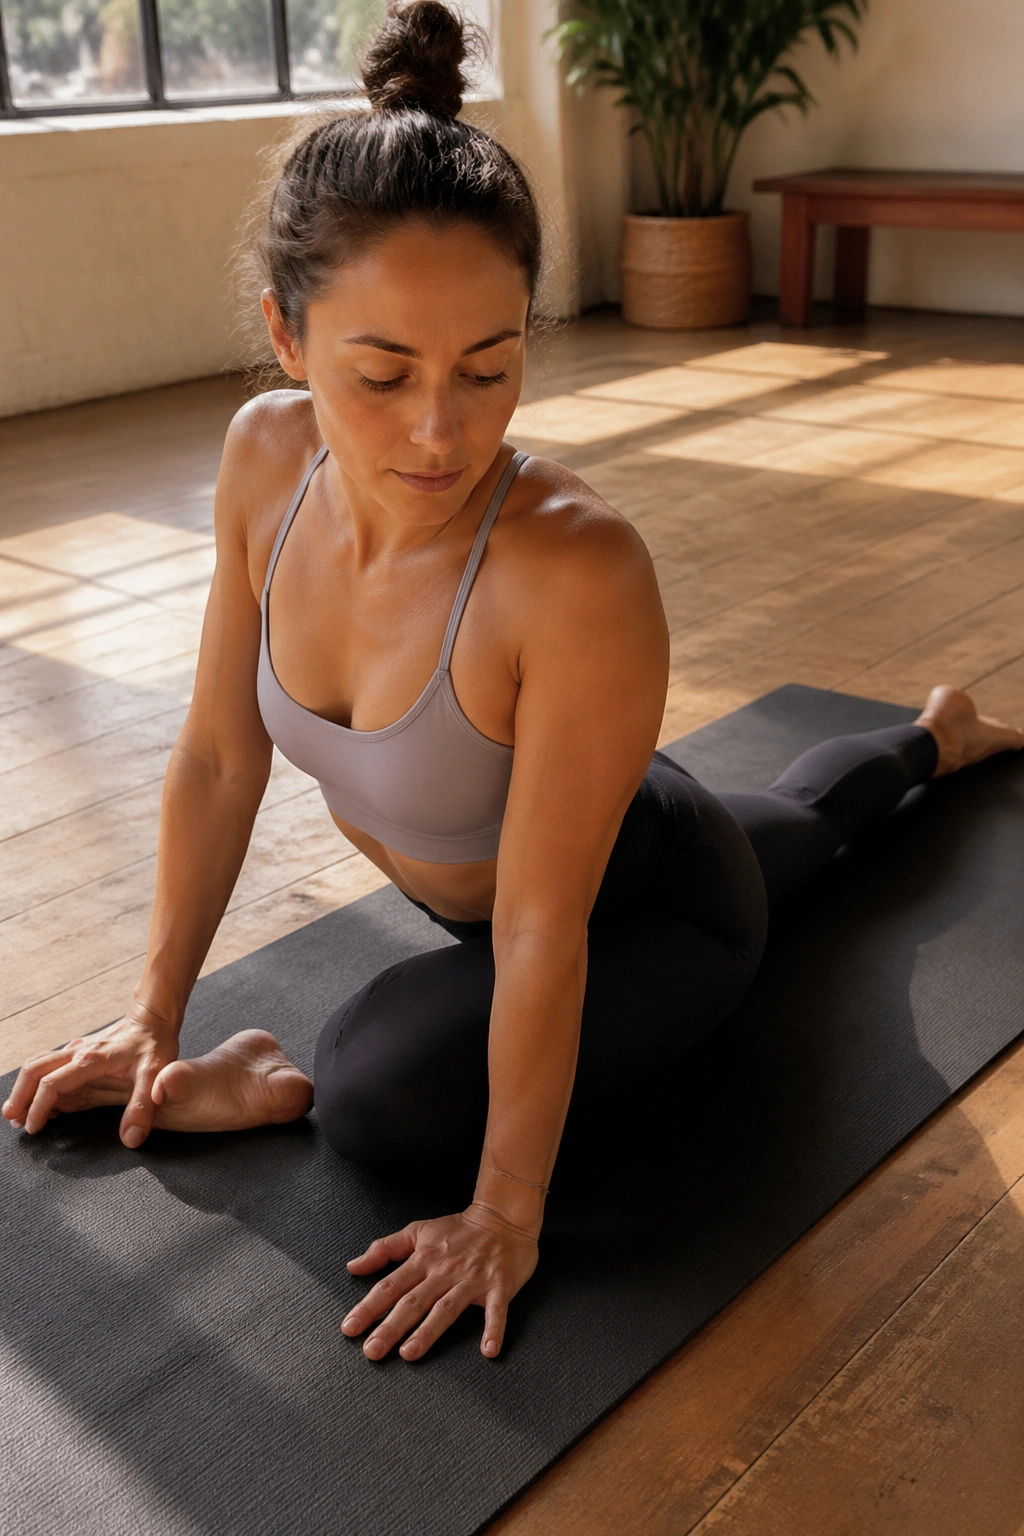
Pigeon Pose gets a lot of attention because it goes after the outer hip in a way most people feel immediately. It also gets abused for the same reason.
Come into the pose with care. Bring the front shin down, extend the back leg, and keep the hips as level as you can. If one hip is floating high in the air, slide a block or folded blanket under it. That support changes everything. It turns the pose from a fight into a stretch you can actually use.
Why Athletes Keep Coming Back to It
The glute complex, deep rotators, and surrounding tissue often tighten up after running, skating, or any sport with repetitive single-leg drive. Pigeon gives those tissues a chance to lengthen without the body trying to stand up and move away from the feeling.
Watch the Knees
- If the front knee hurts, back out immediately.
- Keep the front foot flexed to protect the joint.
- Hold 45 to 90 seconds if it stays comfortable.
- Use reclined figure four instead when the knees complain.
Pigeon is valuable. It’s also overrated when people push it too hard. Don’t.
8. Reclined Figure Four for a Gentler Hip Opener
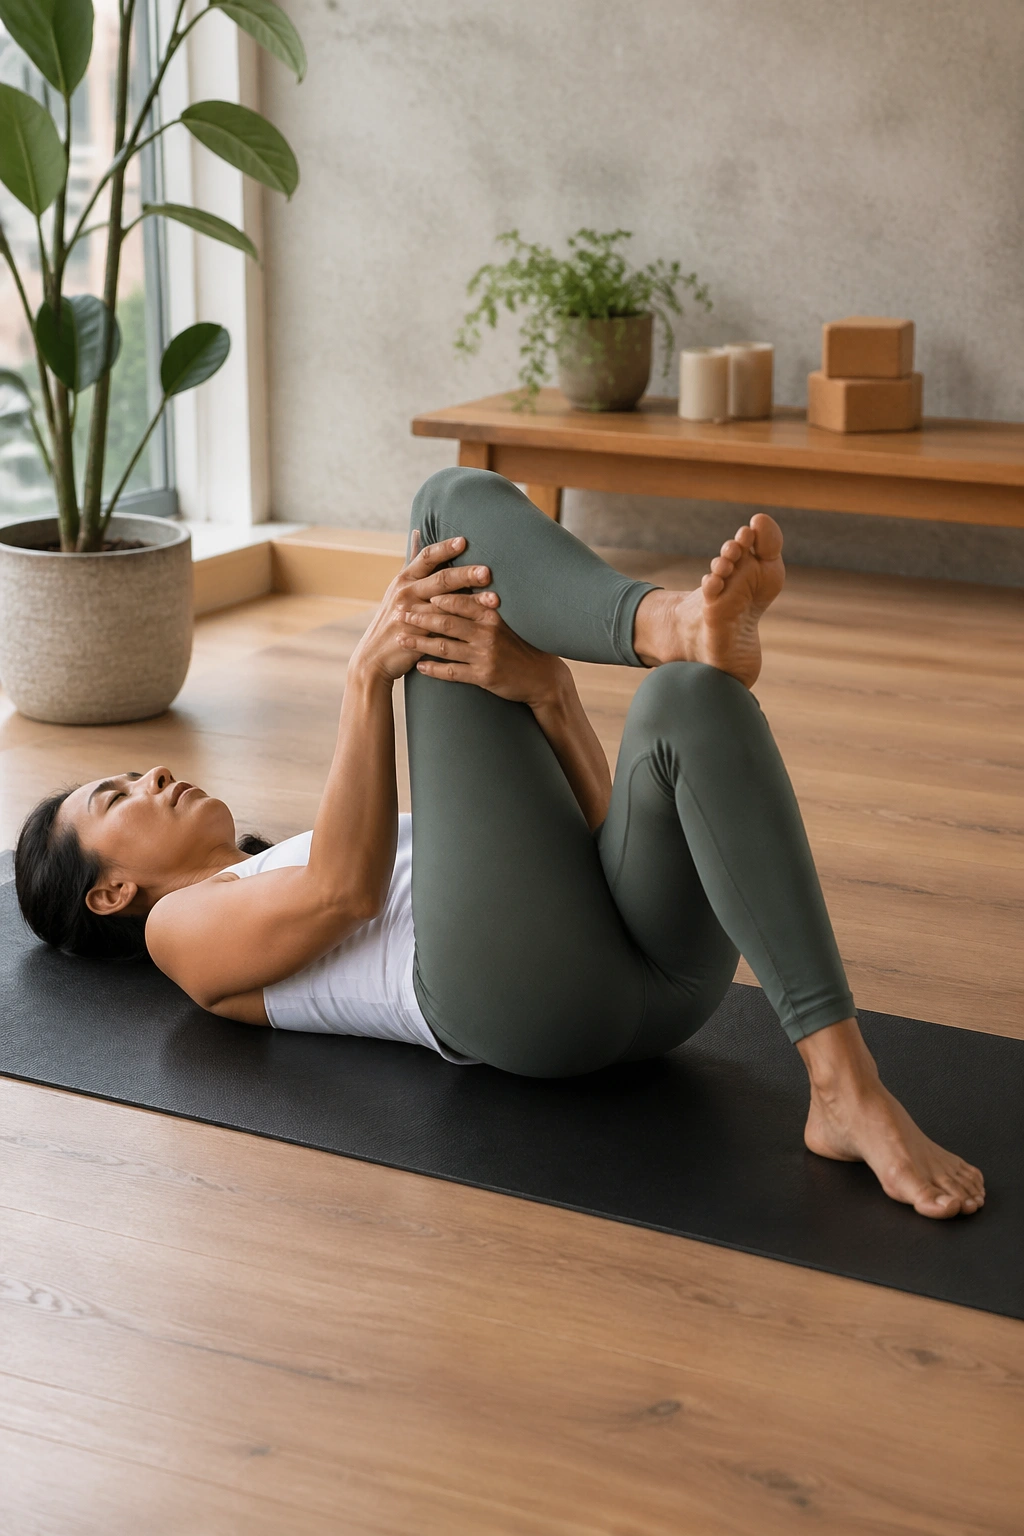
What if your hips need relief but your knees hate Pigeon? Reclined Figure Four is the answer I usually give first.
Lie on your back, cross one ankle over the opposite thigh, and draw the legs toward you. Keep the foot flexed on the crossed leg so the knee stays safer. You’ll feel this in the glutes, outer hip, and sometimes deep in the low back — a good sign if the sensation stays broad and non-sharp.
The nice thing about this version is that your body can relax more fully. Gravity does some of the work. You don’t have to balance, hold, or worry about tipping over. Recovery day should have some poses like that.
Good Situations for This Pose
- After long runs.
- After deadlifts or squats.
- After a match with lots of cuts and pivots.
- When the hips are tight but the floor-based version feels too much.
Hold it for 5 to 8 breaths on each side. If you need more room, keep the bottom foot on the floor instead of pulling both legs in. Simple adjustment. Big difference.
9. Thread the Needle for Tight Shoulders and Upper Back
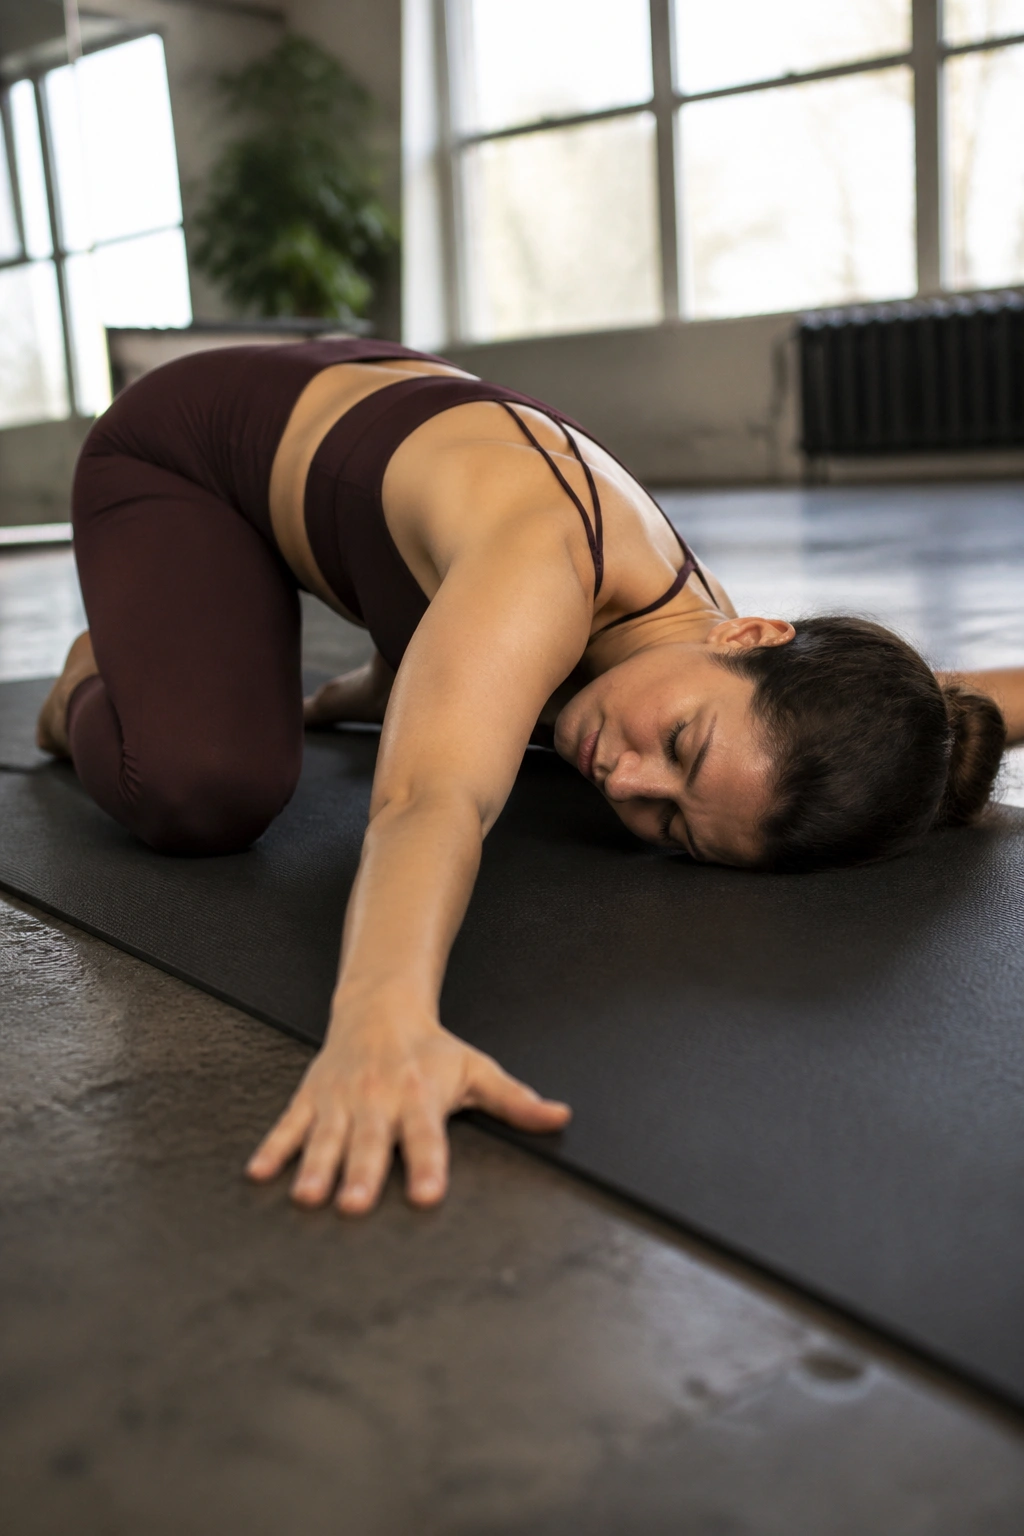
Shoulders that stay glued to the ears usually need rotation more than they need force.
Thread the Needle is a clean, low-drama way to get into the upper back. From hands and knees, slide one arm under the other and rest the shoulder and side of the head on the mat. You can keep the supporting hand under the face or reach it forward. The stretch should travel across the shoulder blade and upper back, not stab through the neck.
What Makes It Useful for Athletes
Swimmers, lifters, rowers, throwers, and climbers all load the shoulder girdle in slightly different ways. This pose gives the thoracic spine a chance to rotate while the shoulder blades settle. That combination often feels better than just yanking on the arm.
How to Get More From It
- Press lightly through the supporting hand to keep the chest from collapsing.
- Stack the hips over the knees instead of dumping weight forward.
- Hold for 4 to 6 slow breaths.
- If the neck feels crowded, place the head on a folded towel.
It’s a small pose. It does a lot.
10. Sphinx Pose for a Gentle Backbend
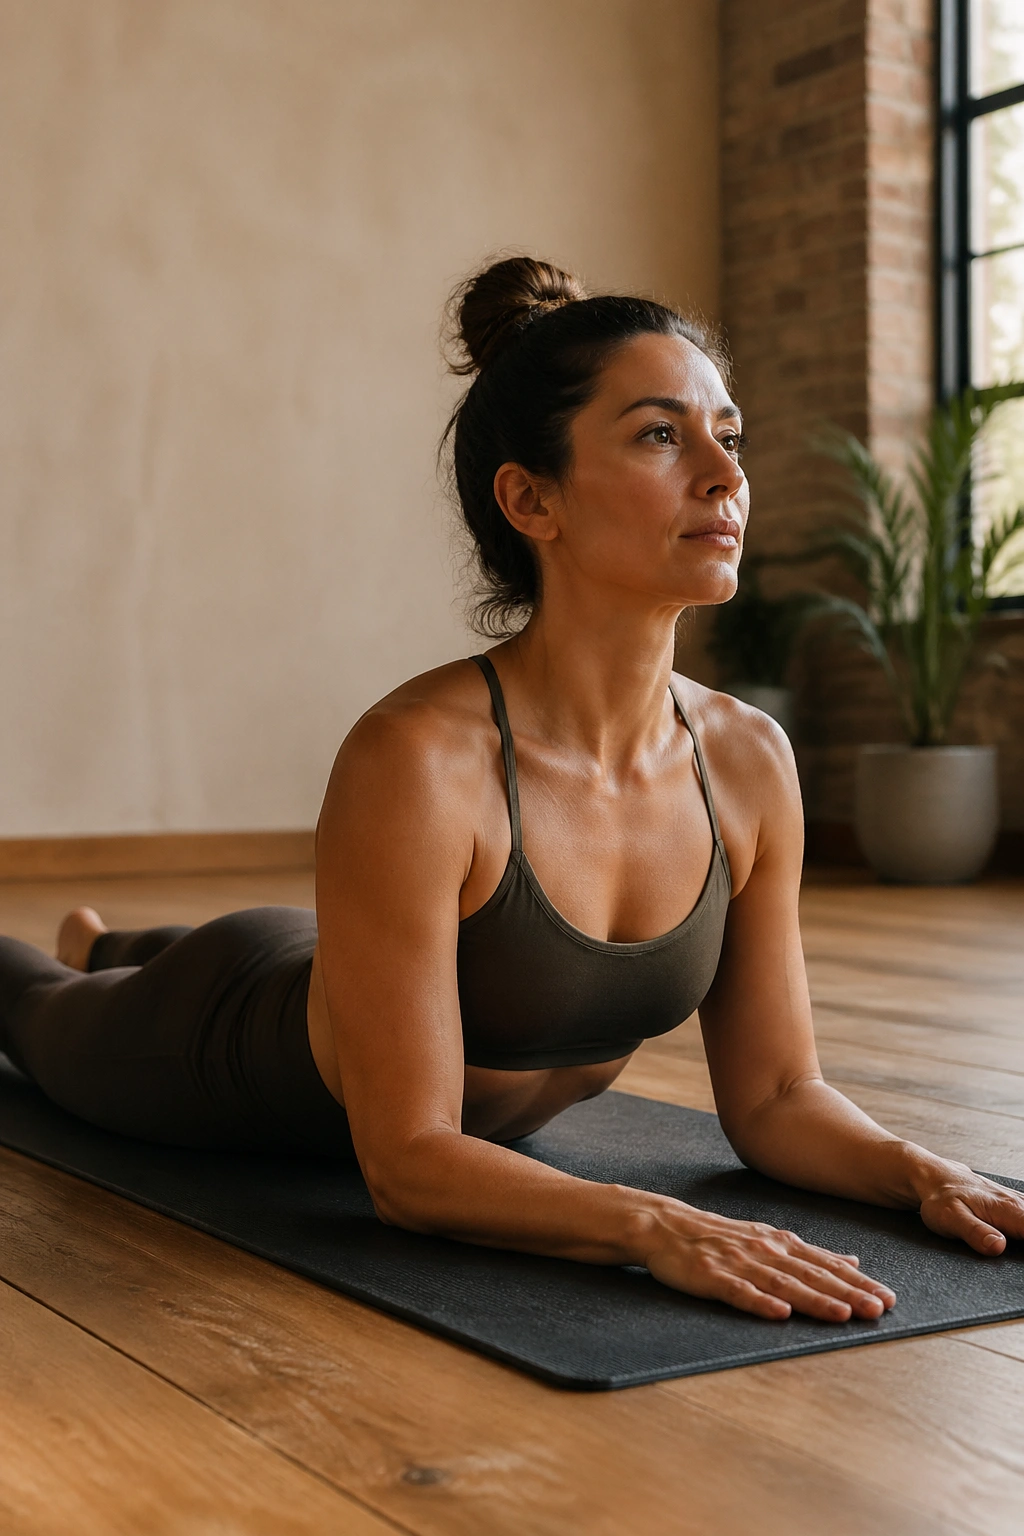
Sphinx is one of those poses people skip because it looks too calm. That’s a shame.
Lie on your stomach, bring the elbows under the shoulders, and let the chest lift just enough to create a mild backbend. Keep the glutes soft but not floppy, and let the low belly stay lightly engaged so the spine doesn’t get jammed. The goal is a soft opening through the front of the torso and the lower back, not a full bend.
Athletes who spend a lot of time in flexion — cyclists, rowers, lifters after heavy hinging — often feel better after a little extension work. Sphinx gives that without much strain.
A one-sentence rule: if the low back pinches, come out sooner.
You can hold this pose for 30 to 60 seconds, then lower down and rest your forehead on your hands. If you’re doing a longer recovery session, this fits nicely between hip openers and twists.
11. Cobra Pose for a Slightly More Active Spine Reset
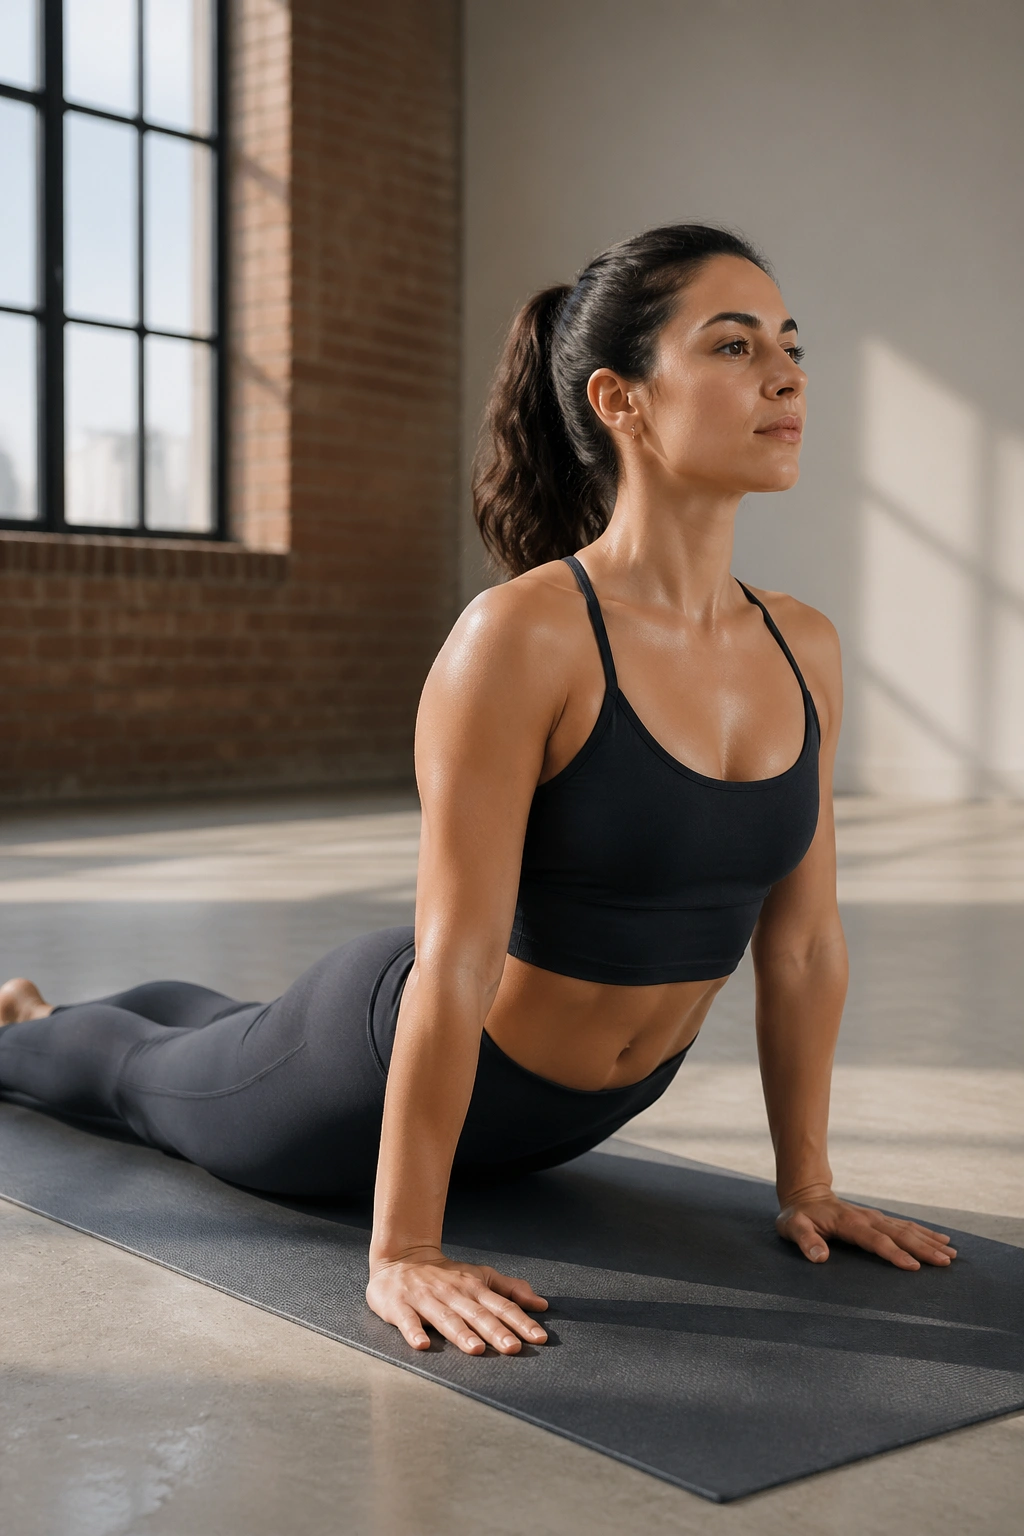
Cobra is different from Sphinx in one important way: you do a little more of the work.
Lie on your stomach, place your hands under the shoulders, and lift the chest only as high as feels clean. Elbows can stay bent and close to the ribs. Think of lengthening the front of the body, not cranking the spine backward. If the neck gets compressed or the low back feels like it’s taking over, lower down and reset.
Why It Belongs on Recovery Days
This is a good counterbalance to all the rounded positions athletes live in. Running, cycling, rowing, and desk time all ask the front of the body to shorten. Cobra gives you a bit of extension and wakes up the back muscles without turning the session into strength work.
A Few Tight Rules
- Keep the lift modest.
- Press the tops of the feet into the floor.
- Hold for 2 to 4 breaths, then lower.
- Repeat 3 to 5 times if it feels smooth.
Cobra should feel like a reset, not a performance.
12. Supine Twist for the Low Back That Feels Locked Up
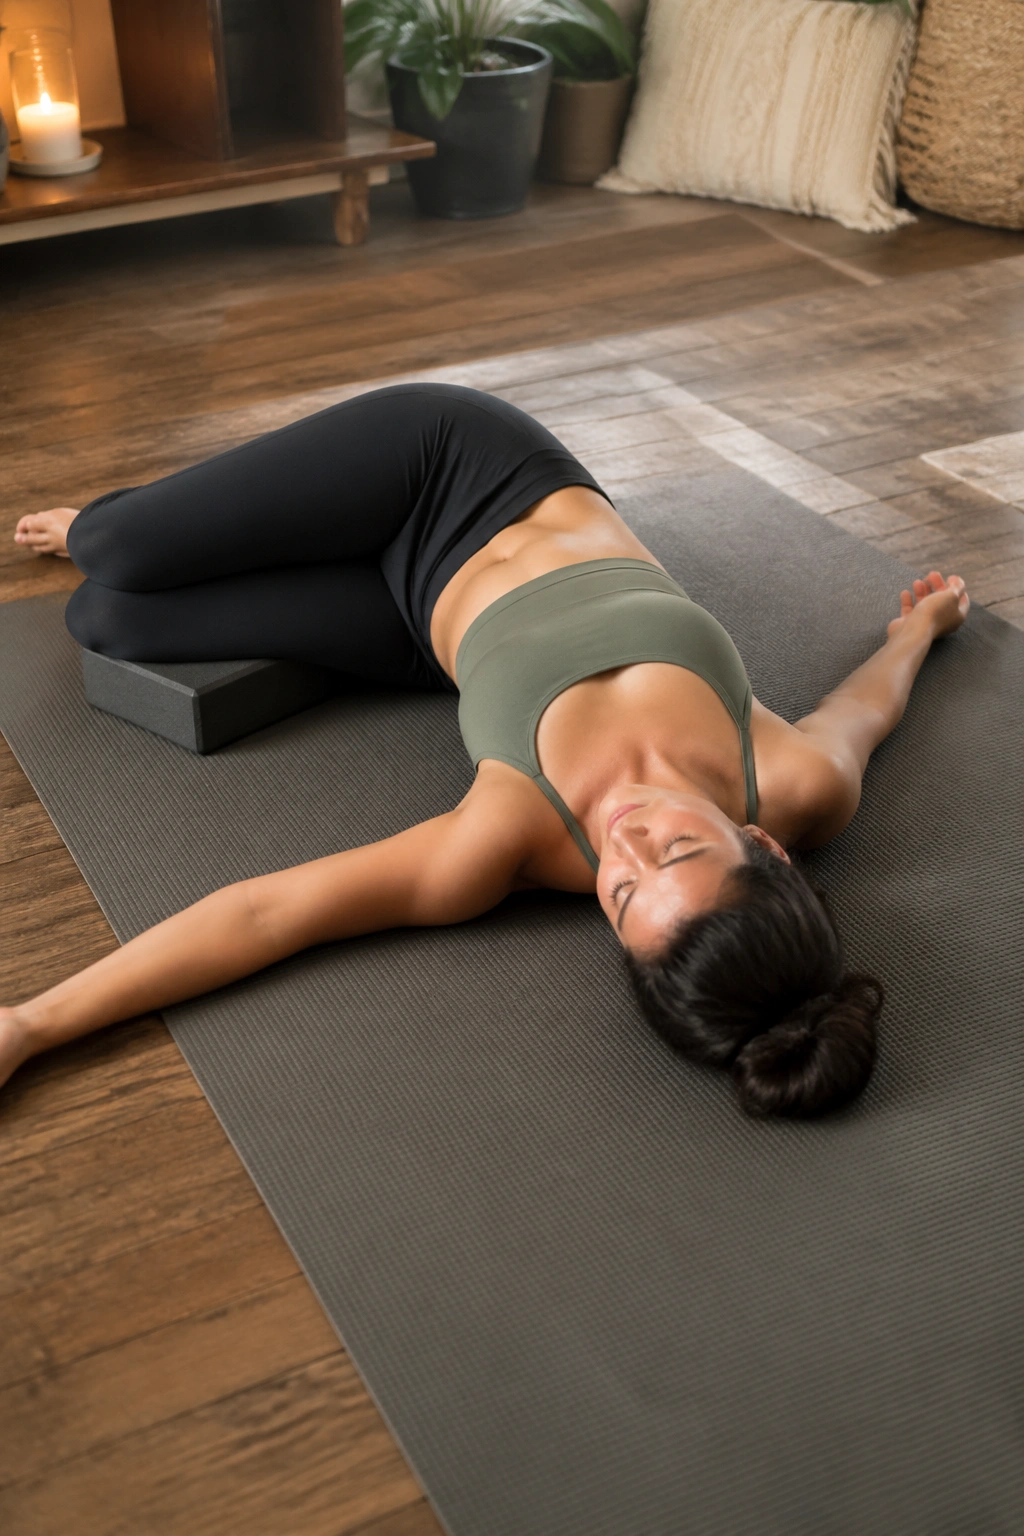
Twists are sneaky. They can feel mild right up until the moment your lower back sighs.
Lie on your back, draw the knees in, and let them fall to one side while the shoulders stay heavy on the mat. A pillow under the knees makes this friendlier. If the opposite shoulder floats up, don’t force it down. The twist belongs in the rib cage and spine, not in a wrestling match with gravity.
Why It Works So Well After Training
This pose gives the trunk a chance to rotate while the hips and back relax. That can feel especially good after heavy lifting, sprinting, or repeated one-direction sports where the body gets a little stuck in its favorite patterns. It’s not magic. It’s just good mechanics.
Easy Ways to Adjust It
- Keep the top knee stacked on a block or cushion.
- Extend the top arm only if the shoulder likes it.
- Stay for 45 seconds per side.
- Breathe into the side of the ribs that feels compressed.
I like this one near the end of a recovery sequence, when the body is starting to drop its guard.
13. Happy Baby for Hips, Inner Thighs, and Low Back
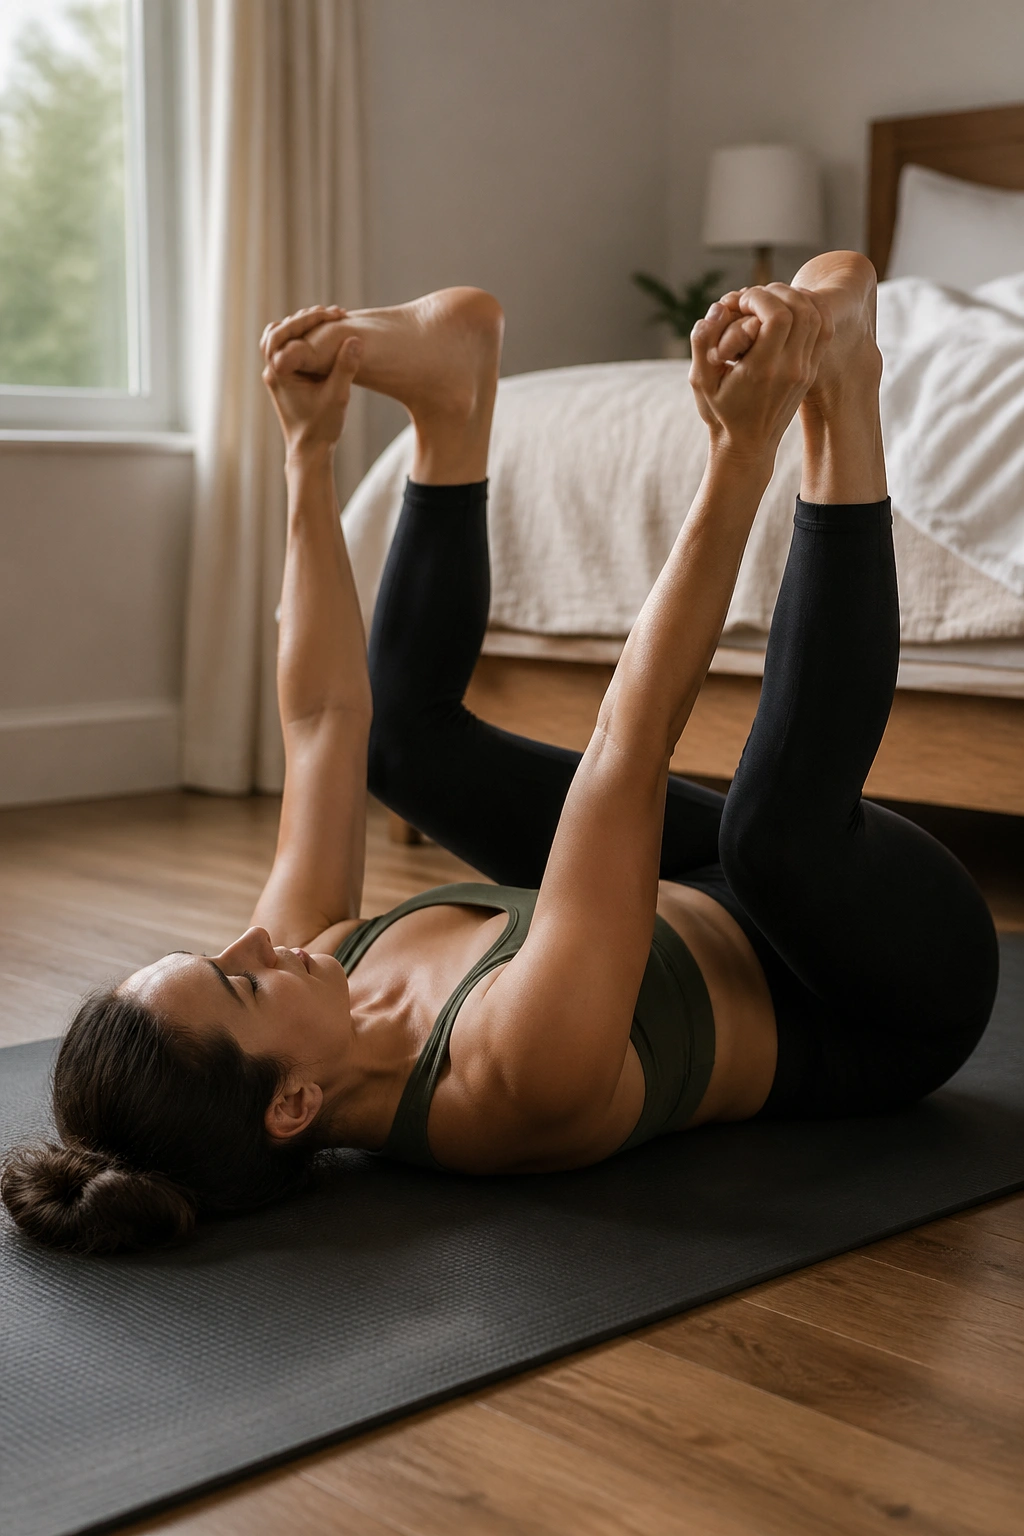
Happy Baby looks playful. Athletes know it can also be sneaky-hard in the right places.
Lie on your back, bend the knees toward the armpits, and hold the outer edges of the feet or the backs of the thighs. Keep the tailbone heavy. Let the knees drift toward the floor, but don’t yank them down. If grabbing the feet feels awkward, a strap around the thighs works fine.
The pose can help when the inner thighs, hips, and low back all feel like they’re arguing with each other. That’s common after squats, hill work, or a long stretch of hard training.
How to Keep It Comfortable
- Keep the ankles stacked over the knees.
- Rock side to side only if it feels smooth.
- Hold for 5 to 8 breaths.
- Use a yoga strap if your shoulders are tight.
Happy Baby is a good reminder that recovery doesn’t need to look serious to be useful. Sometimes the less dramatic pose is the one that lands best.
14. Legs Up the Wall for the End of a Long Day
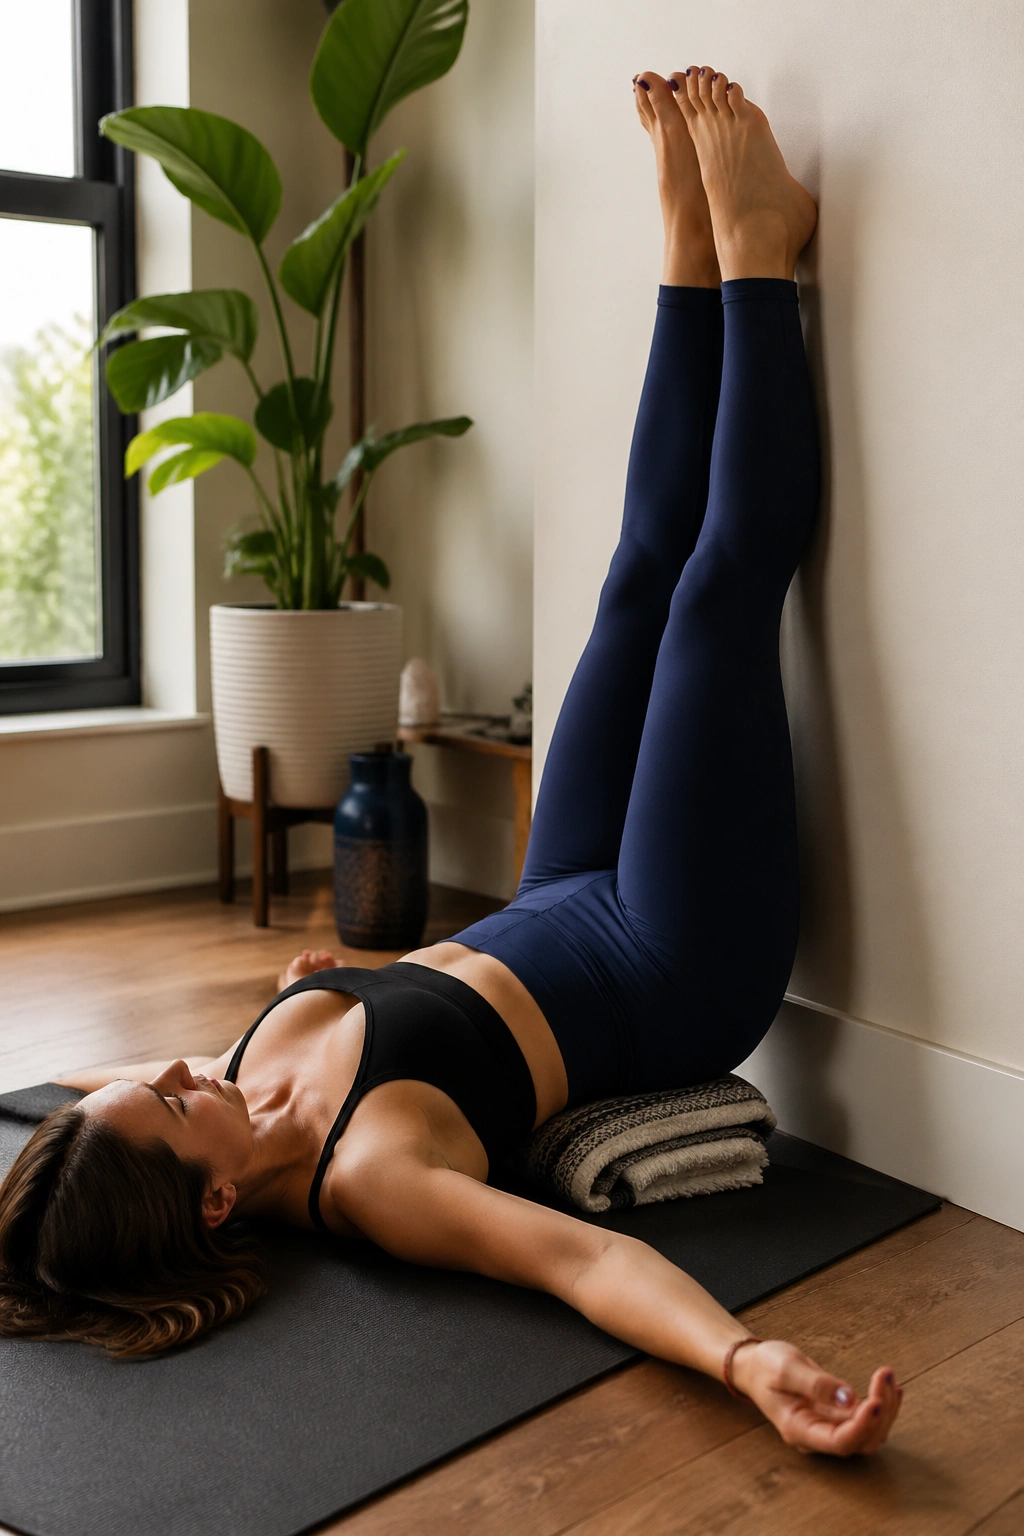
A lot of athletes underestimate how good this feels until they try it after a hard session or a day spent on their feet.
Scoot your hips close to a wall, swing your legs up, and let your arms rest out to the sides. If your hamstrings tug, slide a little farther from the wall. If your lower back wants support, place a folded blanket under the pelvis. The body should feel supported, not strained.
Why It Belongs in Recovery Work
This is one of the best low-effort ways to downshift. Your legs stop doing work, your feet get a break, and the whole system gets a chance to settle. I like it after events, travel, long standing shifts, or any day where the lower legs feel heavy.
Timing That Makes Sense
- Start with 3 to 5 minutes.
- Stay longer — up to 10 minutes — if it feels calming.
- Keep the jaw loose.
- Let the breath get slower without forcing it.
No drama here. Just quiet.
15. Bridge Pose to Wake Up the Glutes Without a Hard Workout
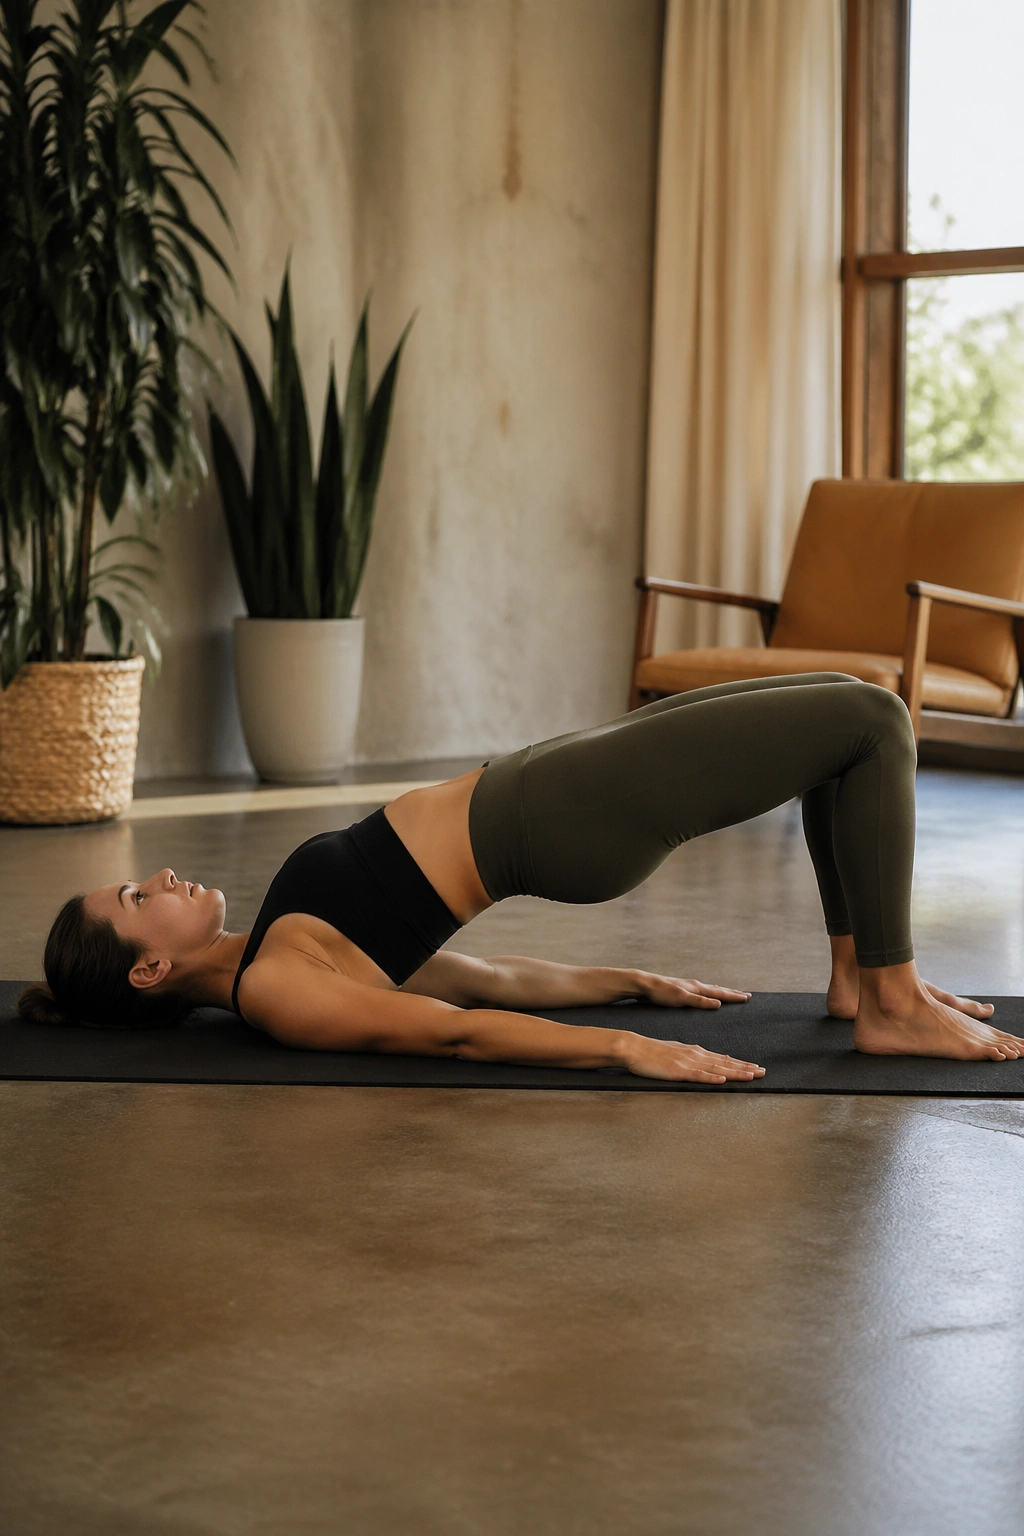
Bridge is where recovery and light strength meet in a pretty useful way.
Lie on your back, bend the knees, and plant the feet hip-width apart. Press through the heels and lift the hips until the body makes a long line from shoulders to knees. Pause at the top for 2 to 3 breaths, then roll down slowly. You can also do a set of short lifts, which is how I usually prefer it on recovery days.
Why It Helps More Than It Looks Like It Should
Glutes often get sleepy when athletes spend too much time sitting, running, or letting the quads do all the work. Bridge wakes them up without pounding the legs. That can help the hips feel more stable and the low back feel less loaded later on.
Keep It Clean
- Don’t push the ribs flare upward.
- Keep the knees tracking forward, not collapsing inward.
- Do 5 to 8 reps or hold for 20 to 30 seconds.
- Stop if the lower back takes over.
It’s a simple pose. It still matters.
16. Butterfly Pose for Inner Thighs That Need Some Room
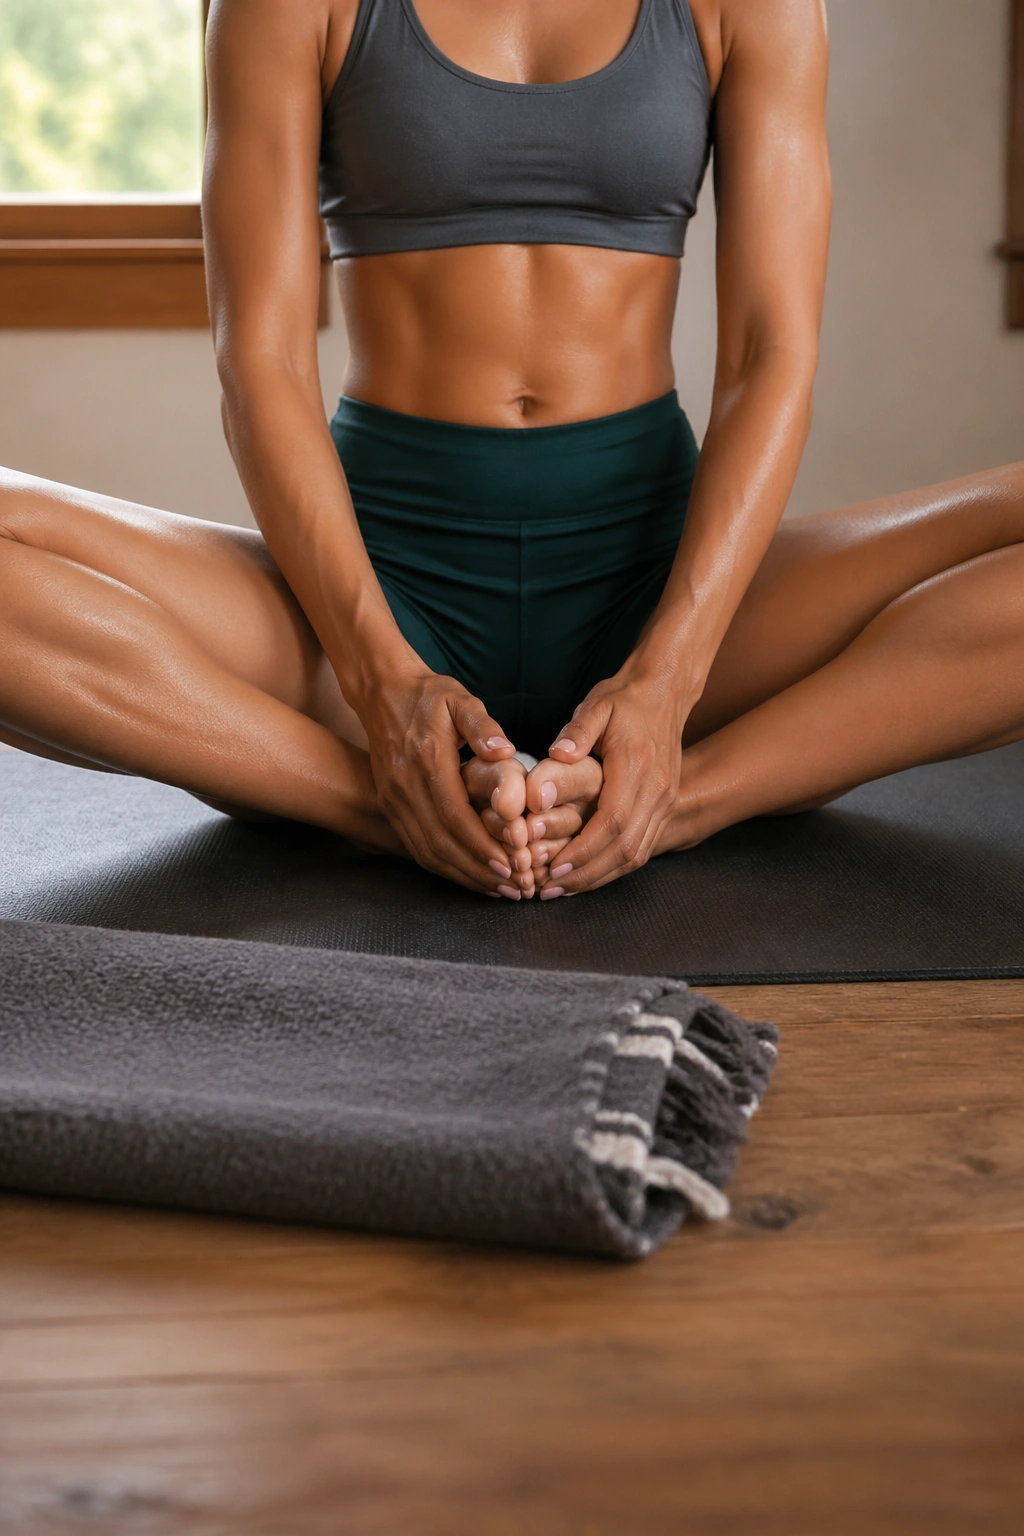
Butterfly Pose is a quiet fix for groin tension and tight hips, especially after sports that involve lunges, cuts, or wide stances.
Sit on a folded blanket, bring the soles of the feet together, and let the knees drop outward. Hold the feet where they are comfortable — not where they look nice. A lot of people sit too upright and force the knees down with gravity. Better to let the hips soften and the spine stay long.
The stretch lands across the inner thighs and the front of the hips. That can feel great after skating, martial arts, basketball, or any training block that has the legs moving in all directions.
A Better Way to Use It
- Support the knees with blocks if they hang uncomfortably.
- Hinge forward only if the low back stays relaxed.
- Hold for 1 minute or longer if breathing stays easy.
- Rock gently only if the motion feels smooth.
This one is not about conquering anything. It’s about giving the groin area a break from constant tension.
17. Garland Pose for Ankles, Calves, and Hips
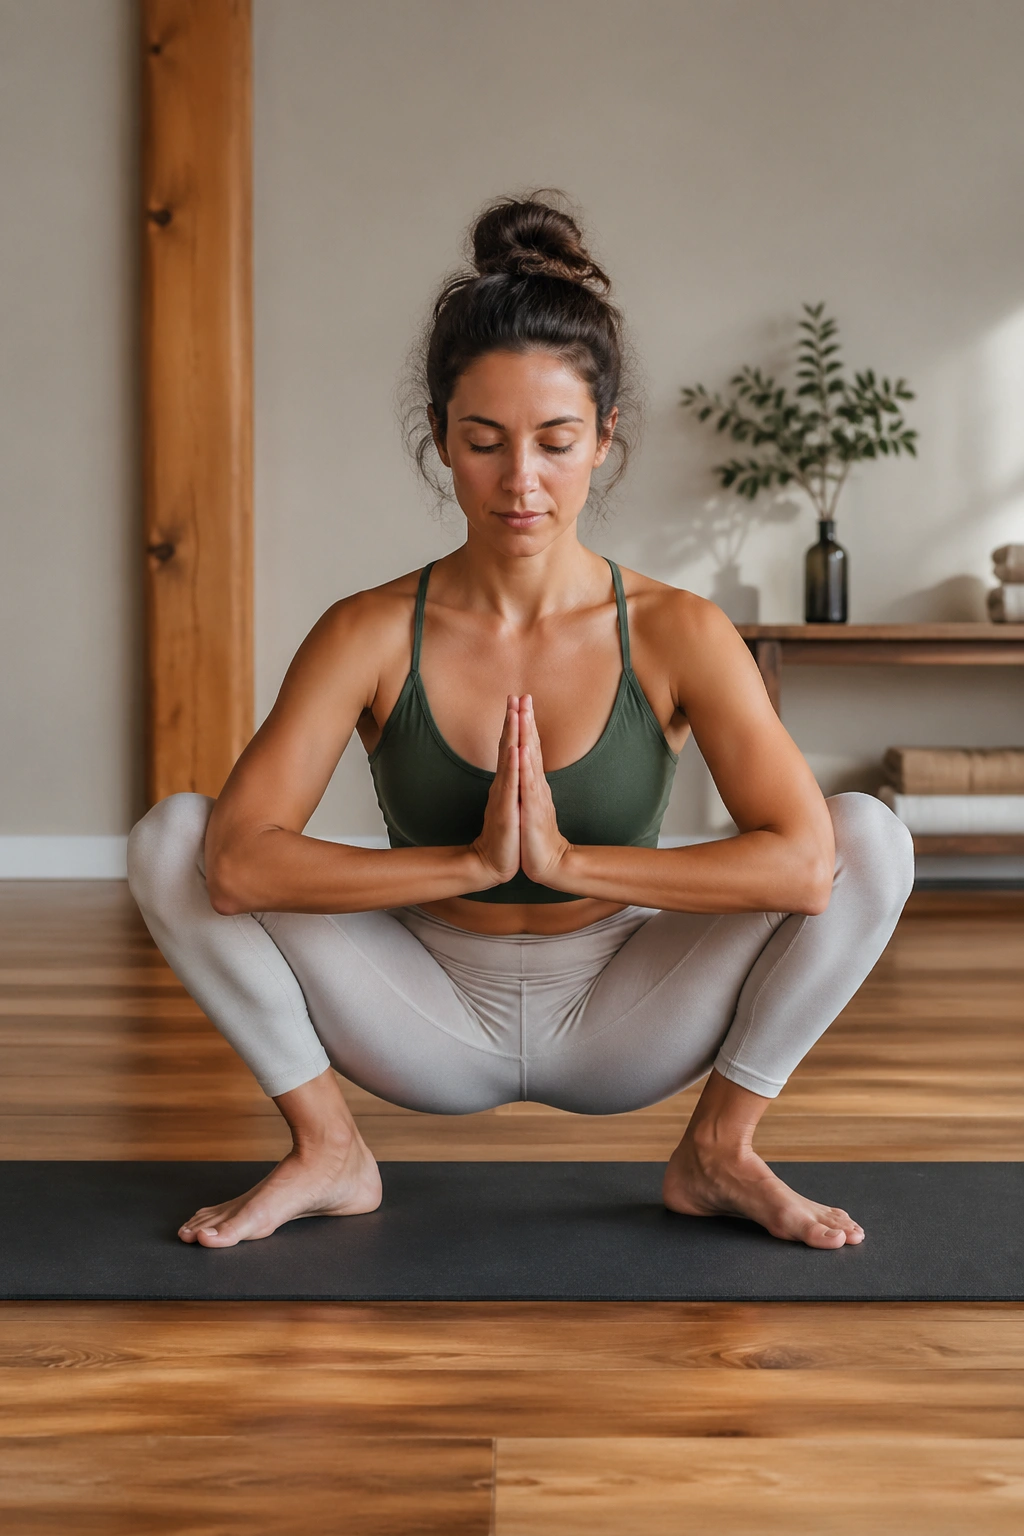
Garland Pose is a favorite of mine for athletes with stiff ankles who also need hip opening. It feels messy at first. Then it starts to make sense.
Squat low with the feet turned out slightly, heels down if possible. Bring the palms together at the chest and use the elbows to gently open the knees. If the heels lift, place a rolled towel under them or sit on a block. That makes the shape workable instead of theatrical.
Why This Pose Earns Its Place
A lot of lower-body mobility is lost at the ankles, not the hips. Garland lets you work both at once. It’s especially useful for lifters, sprinters, and field athletes who need ankle bend and hip depth for cleaner movement.
Quick Notes
- Keep the spine long.
- Shift weight evenly through the whole foot.
- Hold for 30 to 60 seconds.
- Exit slowly if your knees feel sketchy.
This pose is one of those ugly-at-first positions that pays off if you give it time. Not glamorous. Useful.
18. Seated Forward Fold for the Whole Back Line
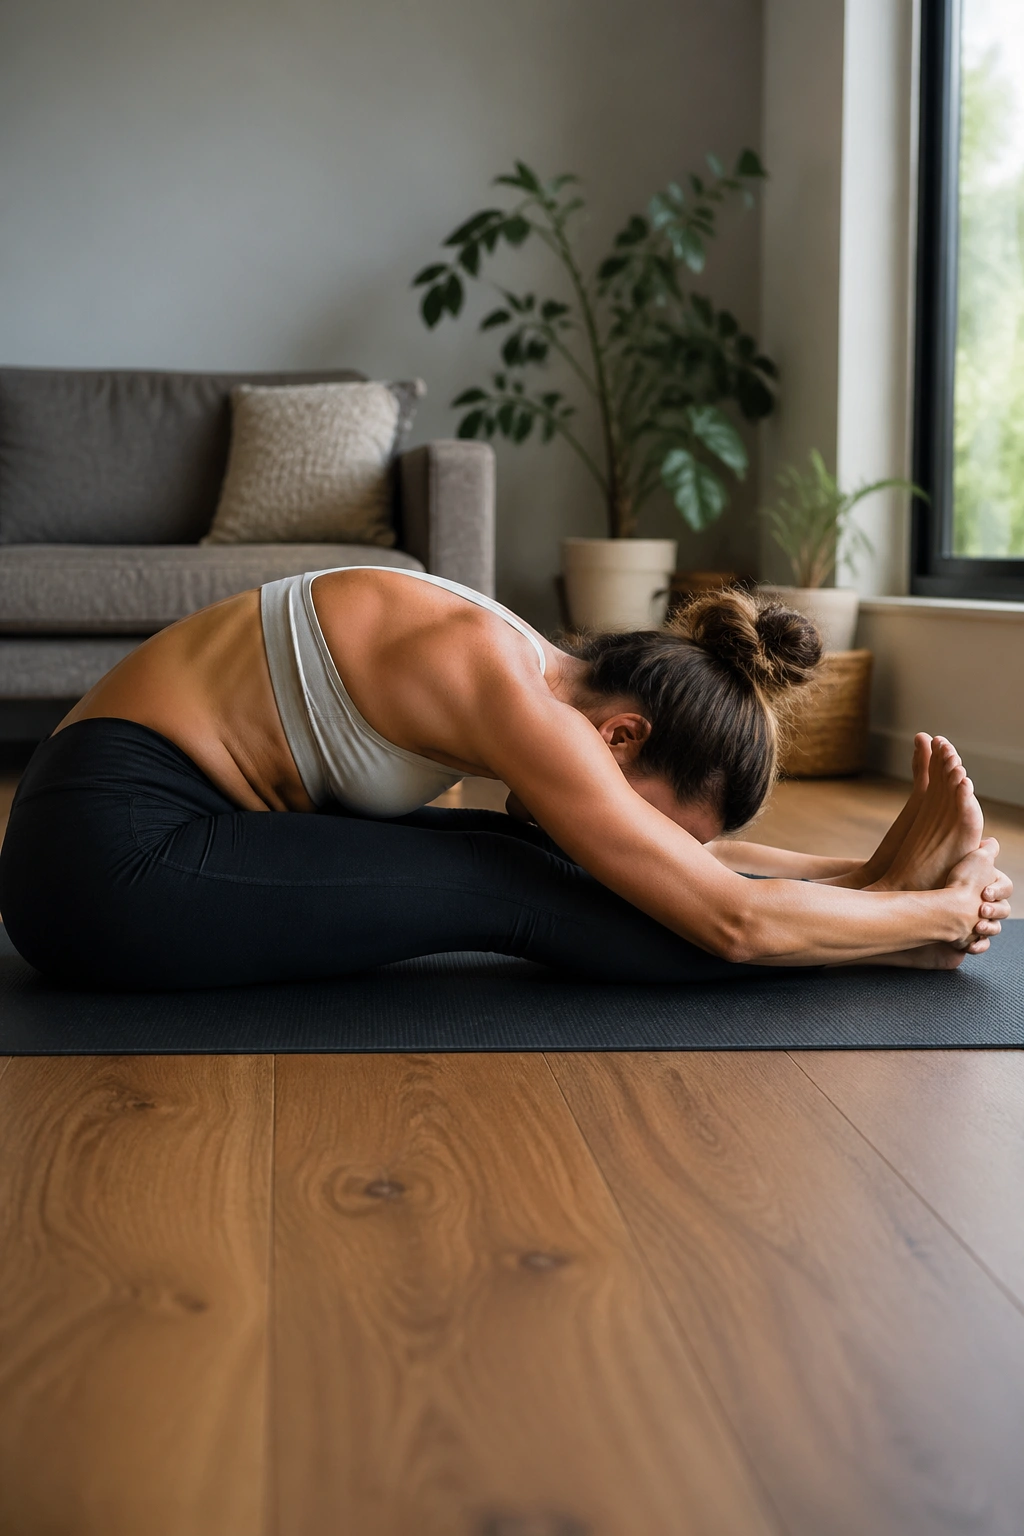
Seated Forward Fold can be either a smart recovery tool or a sloppy tug-of-war. The difference is how you enter it.
Sit with the legs extended, knees soft if needed, and tip the pelvis forward before folding. Reach for the shins, ankles, or feet only if the back stays long enough to do the work. A blanket under the hips helps many athletes sit more upright before they fold. That tiny change often makes the stretch feel better and reach farther.
The Version That Helps
This pose can calm the hamstrings, calves, and low back after running or repeated jumping. It also gives the body a quiet, contained stretch that’s easy to hold while breathing steadily.
The Version to Avoid
- Don’t force straight knees.
- Don’t yank yourself deeper with your arms.
- Don’t round hard just to look flexible.
- Stay for 45 seconds to 1 minute.
If you can keep the front of the body calm while the back of the legs opens, you’re doing it right.
19. Supported Fish Pose for the Chest and Front Shoulders
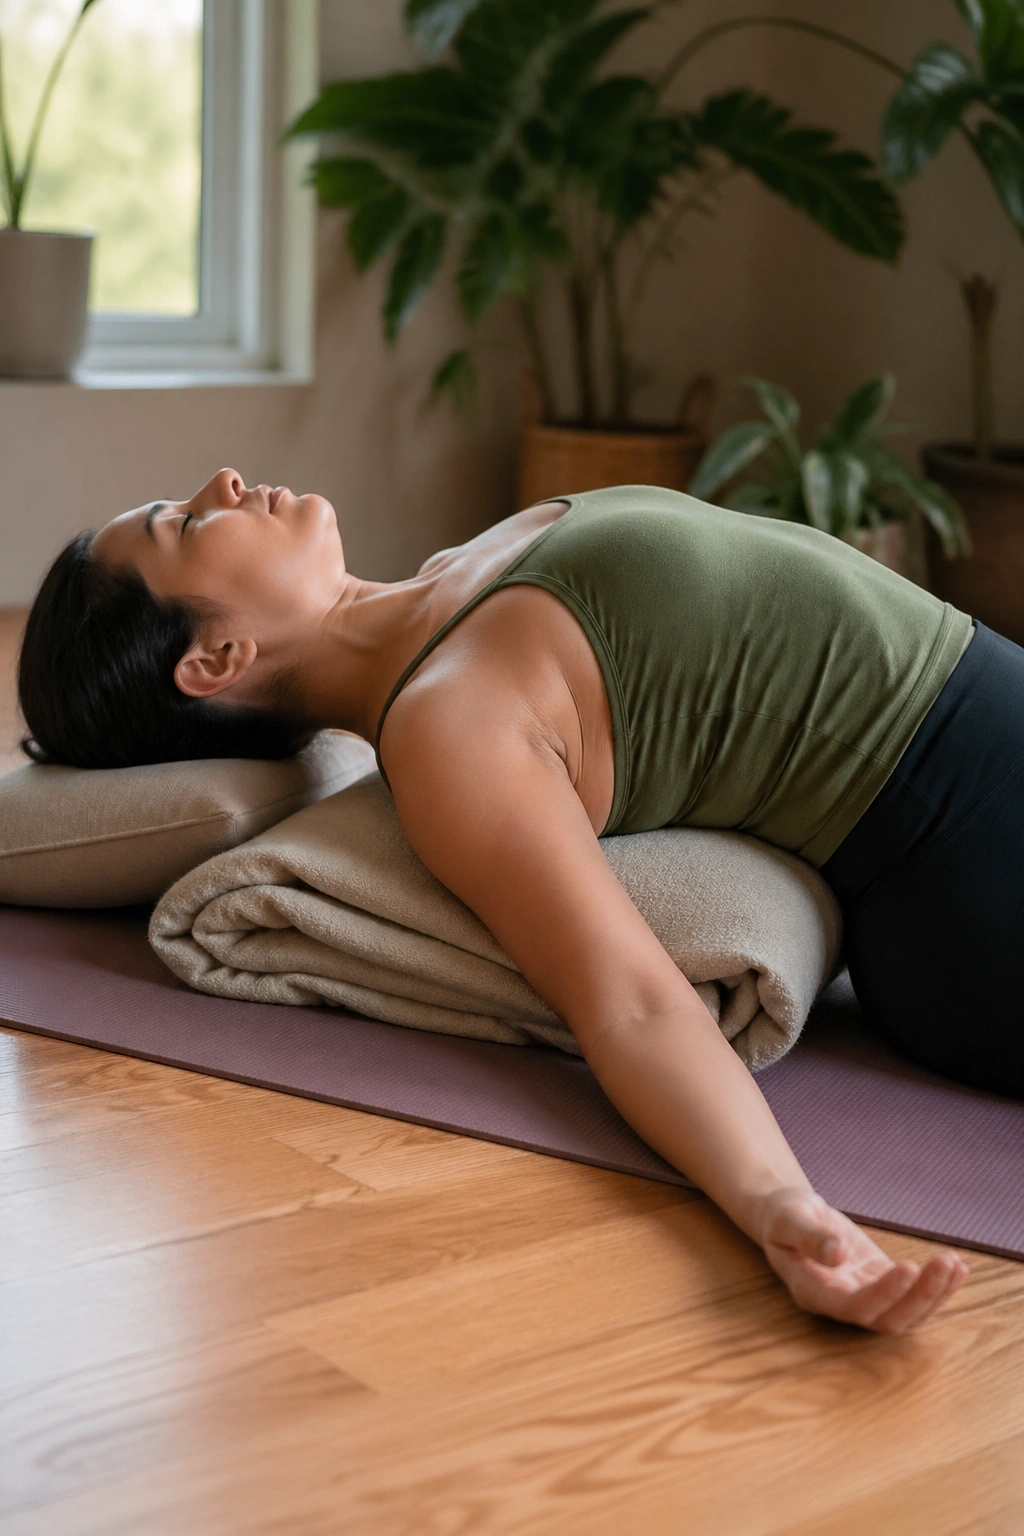
If your training pulls you forward all the time, this is the pose you probably need more than you think.
Fish Pose with support opens the chest, front shoulders, and upper back. Lie down with a block or folded blanket under the shoulder blades, then let the head rest lightly on the floor or on another small support. Arms can stay out wide or rest by the sides. The lift should feel broad and easy, not jammed in the neck.
Swimmers, lifters, cyclists, and anyone who spends too much time hunched over bars or a desk usually feel this one fast. It’s a simple way to reverse some of that forward pull.
Setup That Keeps It Safe
- Keep the chin slightly tucked.
- Use less height under the back if the neck feels crowded.
- Stay for 1 to 2 minutes.
- Come out slowly, especially if you feel lightheaded.
This pose is underrated because it’s quiet. Quiet is part of the benefit.
20. Corpse Pose for Letting the Work Land
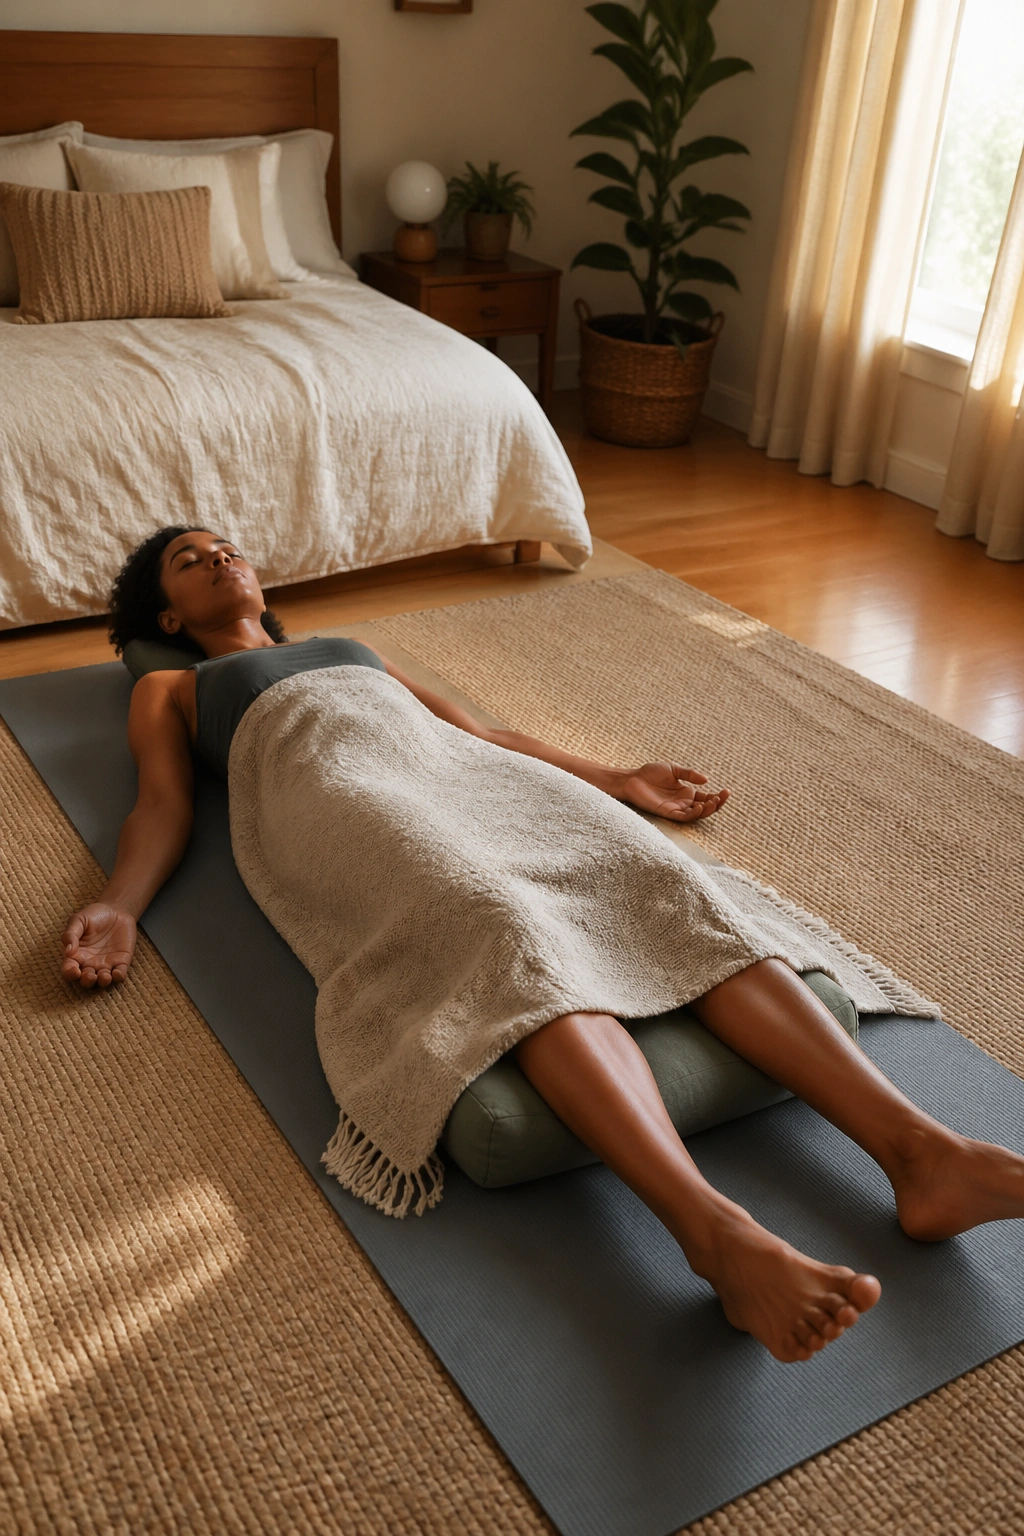
Corpse Pose is not filler. It’s the part where recovery actually sinks in.
Lie flat on your back, let the feet fall out, and rest your hands where they naturally land. A pillow under the knees can help the low back settle. A folded blanket over the body can make it easier to stop fidgeting. If your mind won’t shut up, count the exhale and ignore the rest.
This is where the body gets the message that the session is over. No gripping. No fixing. No performing.
How to Make It Count
- Stay for 5 to 10 minutes if you have the time.
- Let the tongue relax off the roof of the mouth.
- Keep the breath easy and unforced.
- If you drift off, that’s fine.
Recovery days often get skipped because they don’t look productive. Corpse Pose is the quiet proof that they are.
Final Thoughts
The smartest recovery yoga for athletes is usually the least dramatic version. Long holds are useful when they stay gentle. Active shapes help when they don’t turn into workouts. And a good sequence doesn’t try to hit every muscle with equal force — it matches the day’s training load.
If your legs are smoked, start with a hip opener and a twist. If your shoulders feel like concrete, spend more time in Child’s Pose, Thread the Needle, and Supported Fish. If your body feels wired and restless, finish with Legs Up the Wall or Corpse Pose and give yourself the full breath count.
Do a little less than you think you need. Then stand up and notice what changed. That’s the part that matters.
