



There is a specific kind of physical exhaustion that only exists in a barre studio—or your living room, provided you have a sturdy chair. It isn’t the breathless, lungs-on-fire fatigue of a sprint, nor is it the heavy, pounding exhaustion of lifting a massive barbell. It is the trembling, localized, muscle-quivering fatigue that starts in your quads and eventually makes it impossible to hold your leg up for one more second. That shake is the goal. When you feel it, you know the muscle is working to its absolute limit, pushed into a state of exhaustion that builds strength and definition without the impact of traditional high-intensity cardio.
Most people underestimate barre because the movements look small. You see someone pulsing their leg an inch at a time and think, how hard could that possibly be? The answer is revealed about three minutes into the first sequence. The effectiveness of barre lies in this isometric work. By holding a muscle in a contracted state and adding tiny, repetitive movements, you force the muscle fibers to fire rapidly. This creates endurance and tone. You do not need expensive equipment to replicate this; a high-backed chair, a countertop, or even the back of a couch serves as an anchor.
This collection of sequences is designed to target every major muscle group, from the deep stabilizers in your core to the hard-to-reach muscles in your glutes. You can mix and match these sequences to build your own workout, or perform them in order for a full-body challenge. Keep your movements controlled. Speed is the enemy of a good barre workout; precision and resistance are your best tools.
1. Warm-Up Pulse Sequence
Before you even think about heavy lifting or deep lunges, you have to wake up the muscles. This sequence gets the blood flowing to the legs and engages the core immediately. Stand with your feet in a first position—heels together, toes turned out like a ballet dancer. Keep your shoulders stacked directly over your hips and your ribs knitted together.
The Mechanics of the Pulse
Start with a shallow plié. As you bend your knees, imagine sliding your back down an invisible wall. Do not let your chest lean forward. Pulse at the bottom of the movement for thirty seconds. Then, lift your heels off the floor into a relevé. Hold that high lift while continuing to pulse for another thirty seconds. The goal is to keep the spine neutral and the glutes slightly engaged.
- Focus Point: Keep your tailbone tucked. If you arch your back, you lose the engagement in your lower abs.
- The Shake Factor: If your calves start to cramp, drop your heels for a second, stretch, and get right back up.
- Correction: If you feel this in your lower back, you are likely leaning too far forward or not engaging your abs enough.
2. Plie and Calf Raise Burnout
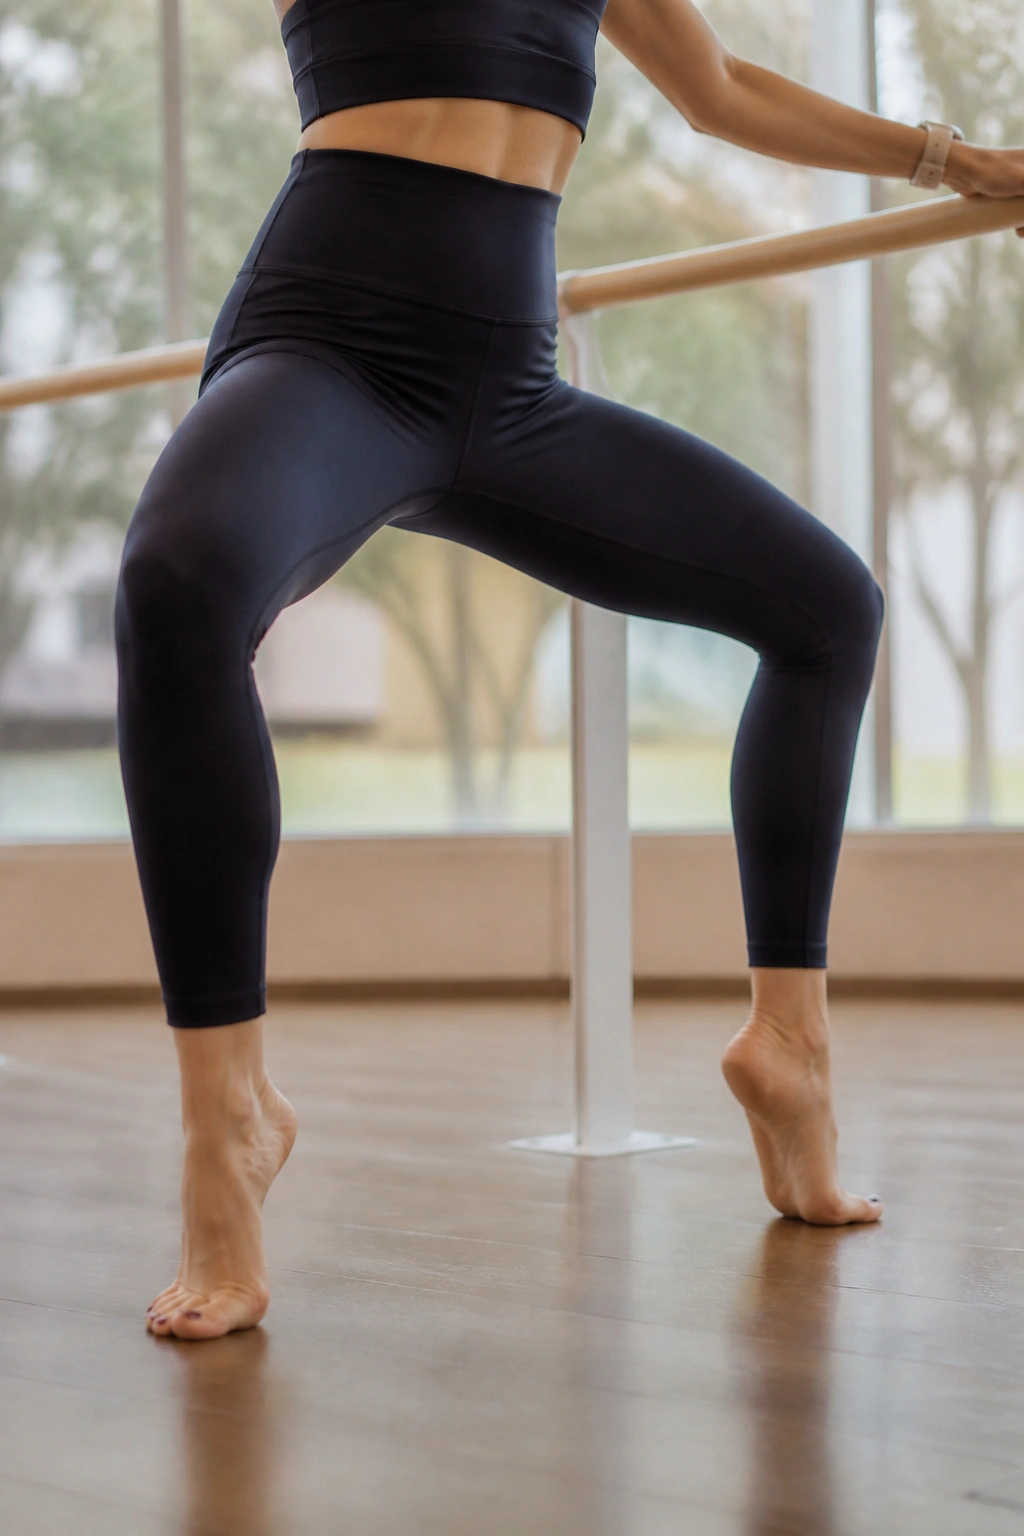
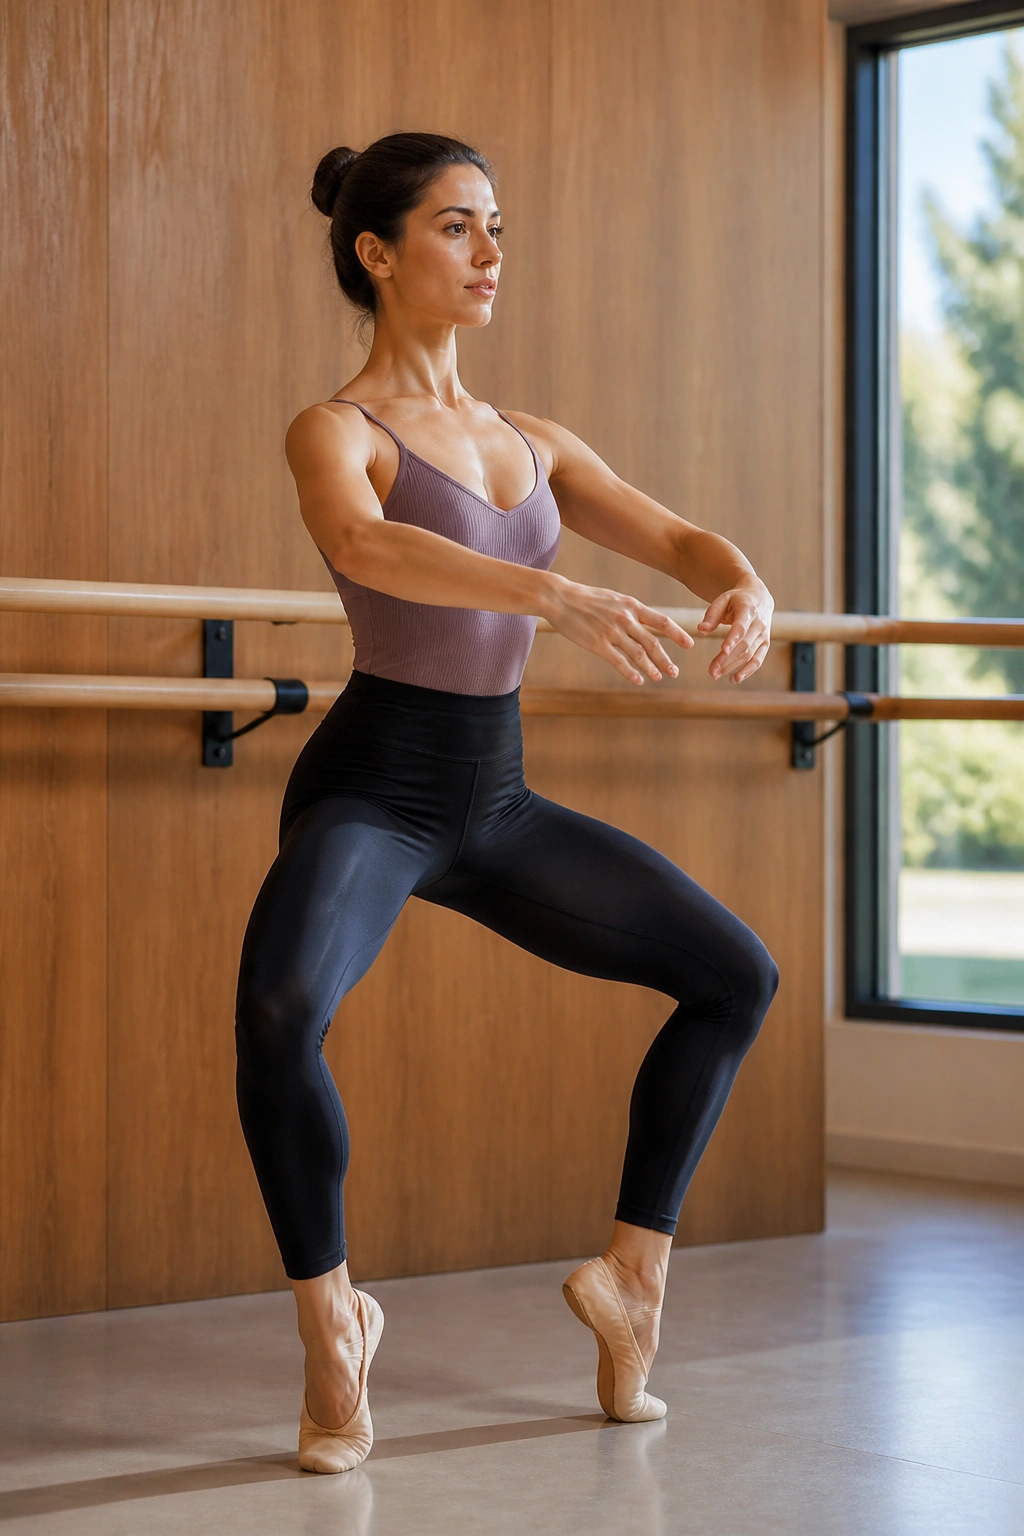
This movement is the bread and butter of barre. It strengthens the quads and calves while challenging your balance. Find your second position—wider than your hips, toes turned out significantly. As you sink into your plié, keep your knees tracking directly over your middle toes.
The Strategy: Don’t just bounce. Control the descent and the ascent. Go down for a count of two, hold for one, and press up for a count of two. Once you have the rhythm, lift your right heel, then your left, alternating for a full minute. Your thighs will start to protest. That is exactly what we want.
Common Mistakes to Avoid: Do not allow your knees to collapse inward. This is the fastest way to knee pain. If your knees are buckling, you are likely standing too wide. Bring your feet in an inch or two. Keep your weight evenly distributed between the big toe, the little toe, and the heel.
3. Parallel Second Position Lifts
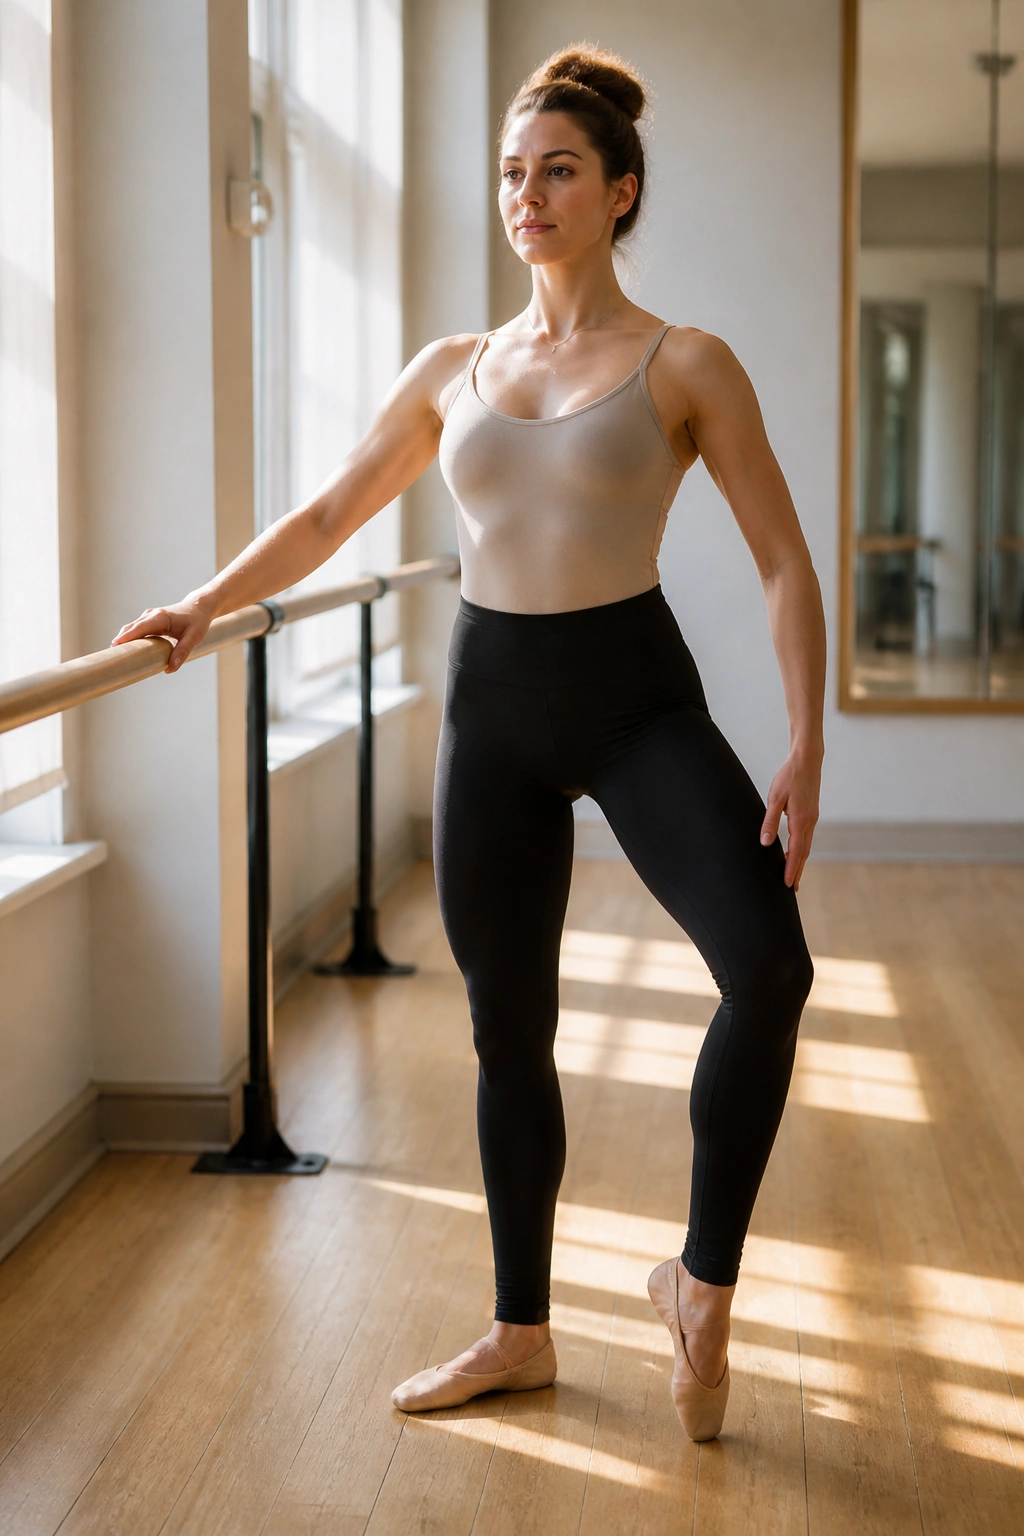
Sometimes, you need to step away from the classic ballet turnout to work the muscles differently. Parallel second position is a wider stance with feet pointing straight ahead. This targets the outer glutes and the quads in a way that feels surprisingly different from the turned-out version.
The Sequence
Lower into your wide squat. Hold the low position. Now, shift your weight slightly to the right side, lifting the left heel off the floor, then pulse the entire body downward. Switch sides after ten reps. Repeat this for three sets. It engages the obliques as you shift your weight and adds a stability challenge that keeps your core active throughout.
- Visual Cue: Imagine you are holding a block between your thighs. Keep that engagement constant.
- Pro Tip: Keep your hands lightly on the barre or chair for balance, but try not to put your full weight into them. Use them for stability, not for support.
4. Chair Pose Leg Extensions
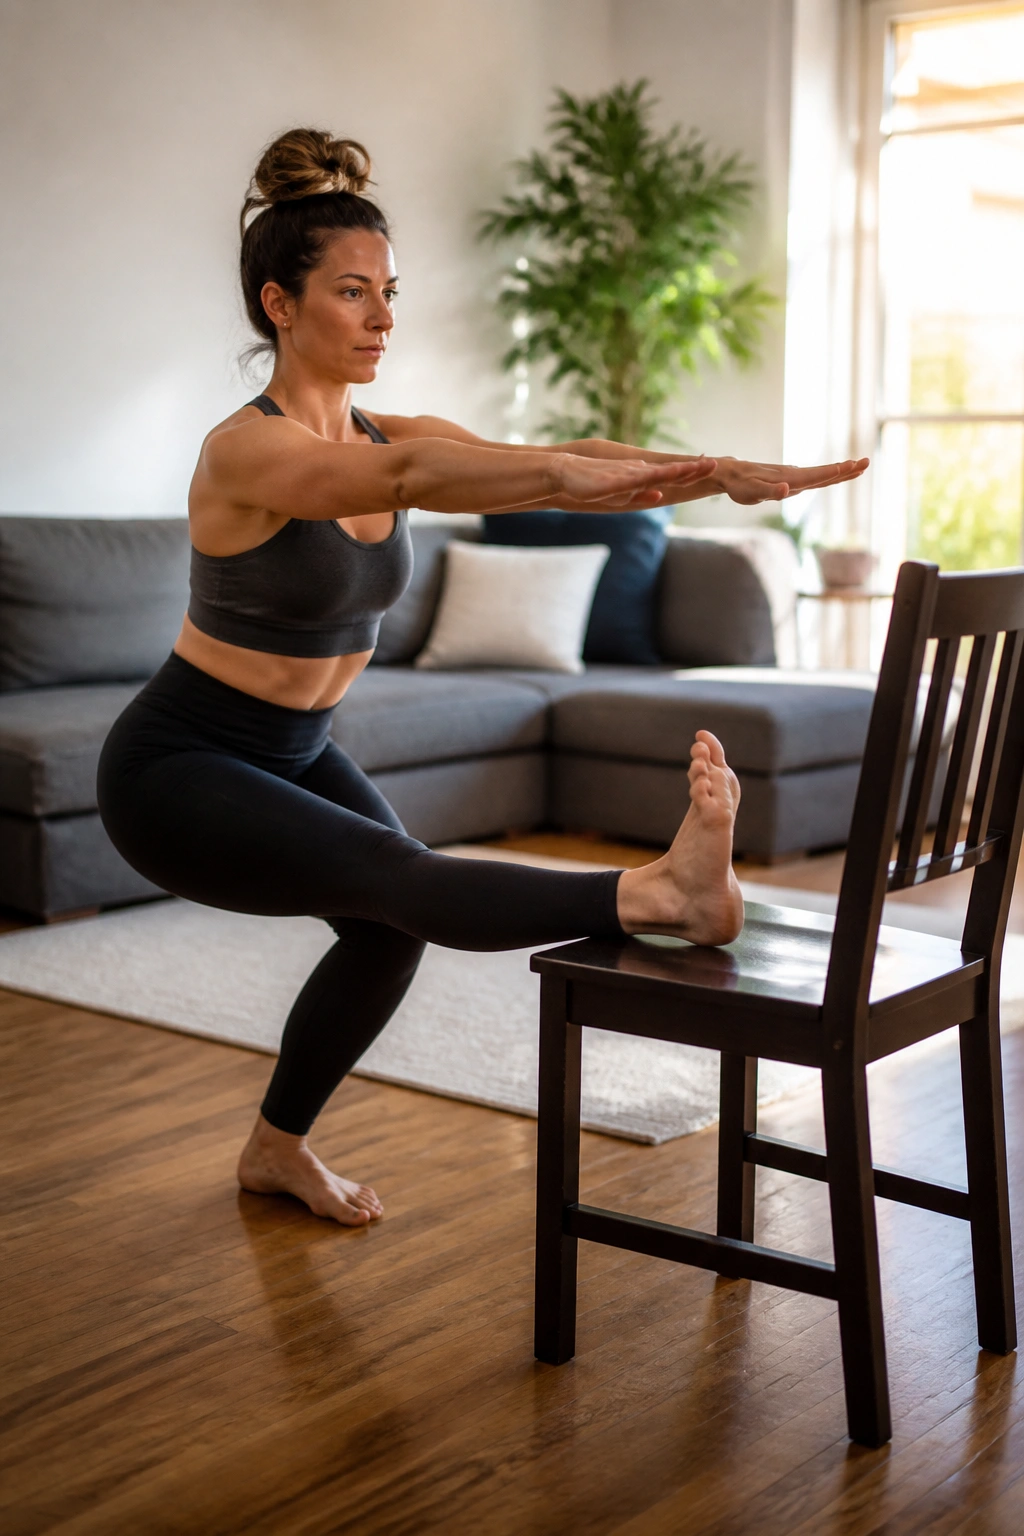
This is a deceptive move. It looks like a simple squat, but when you add the extension, it becomes a major core and hip flexor challenge. Stand parallel, feet hip-width apart. Sit back into a chair pose, keeping your weight in your heels. Lift your right leg slightly off the floor, keeping the knee bent.
How to Execute: Extend your right leg straight out, then pull it back in without ever coming out of the squat. Keep your left leg static—that is your anchor. Do fifteen extensions on the right, then fifteen on the left. The leg that is squatting will feel the burn much faster than the leg that is moving. That stationary leg is doing the real work of stabilizing your entire frame. If you find yourself wobbling, shorten your range of motion.
5. Arabesque Glute Kickbacks
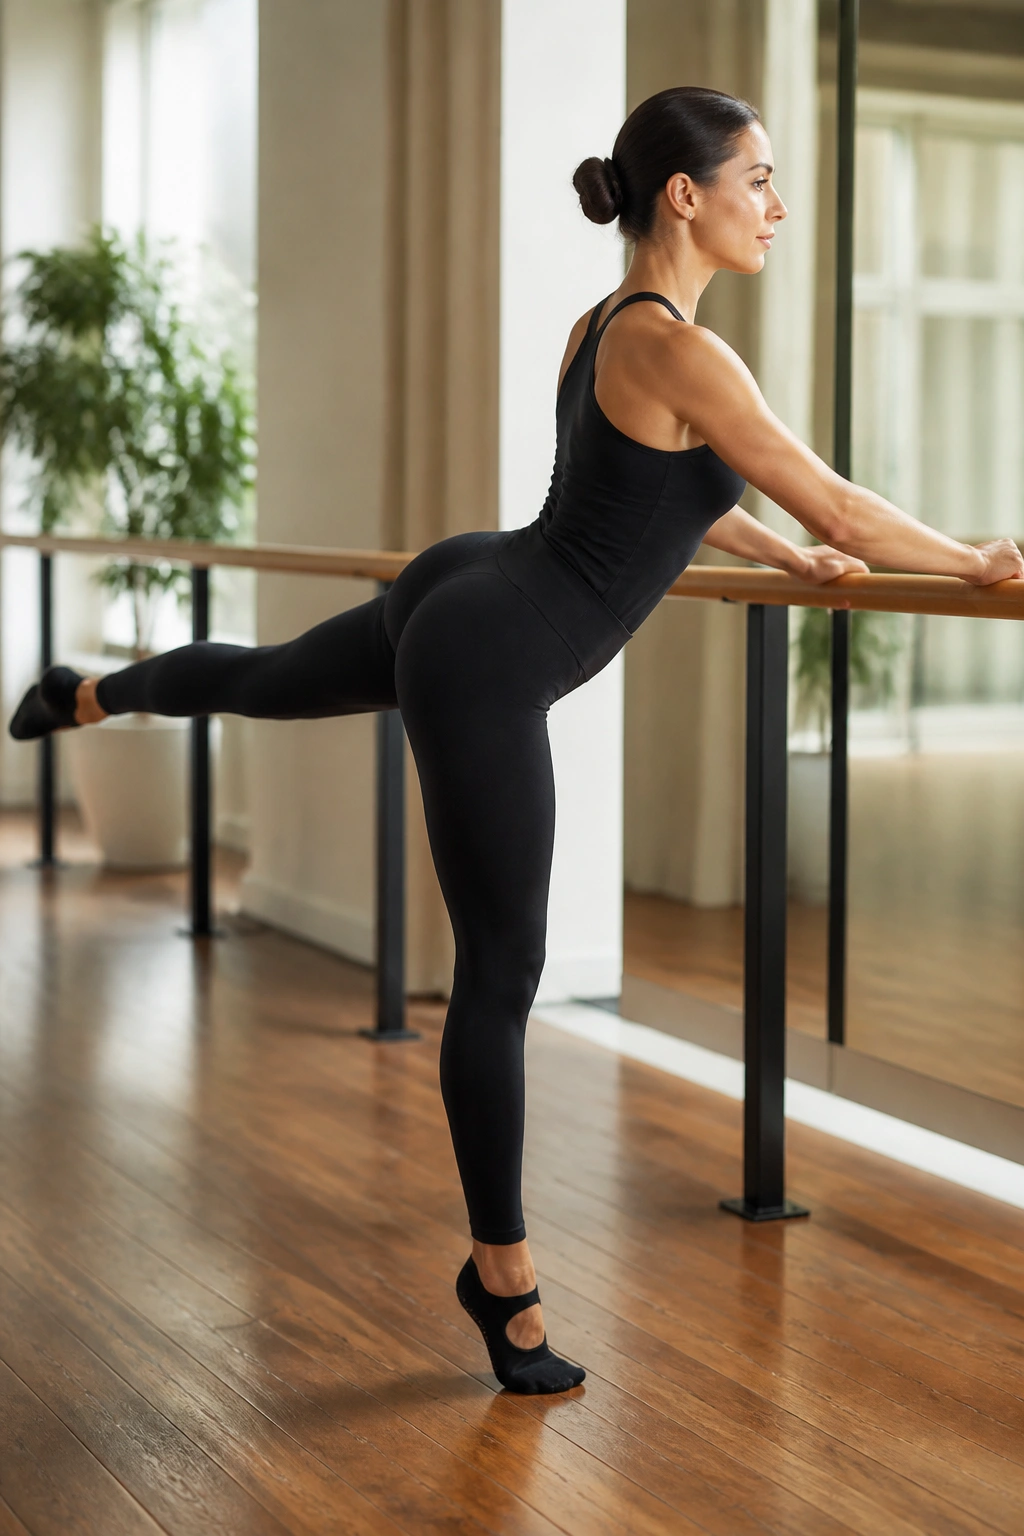
The arabesque is a staple for a reason. It is the ultimate movement for the gluteus medius and maximus. Stand facing your barre with hands resting lightly on it. Hinge forward at your hips, keeping your back flat—like a tabletop. Extend one leg straight back behind you, toe pointed.
Finding the Glute
Lift the leg just an inch higher than the hip line, then lower it back to hip height. You are not trying to reach for the sky; you are trying to squeeze the glute muscle to lift the leg. Keep the supporting leg slightly bent to protect the knee and engage the hamstring.
- Crucial Detail: Do not open your hip to the side. Your hips should remain square to the floor. If your hip opens, you are using your lower back, not your glute.
- The Pulse: After twenty lifts, hold the leg at the top and perform thirty tiny pulses. It should feel like a cramp is coming. Embrace it.
6. Side-Lying Leg Lifts
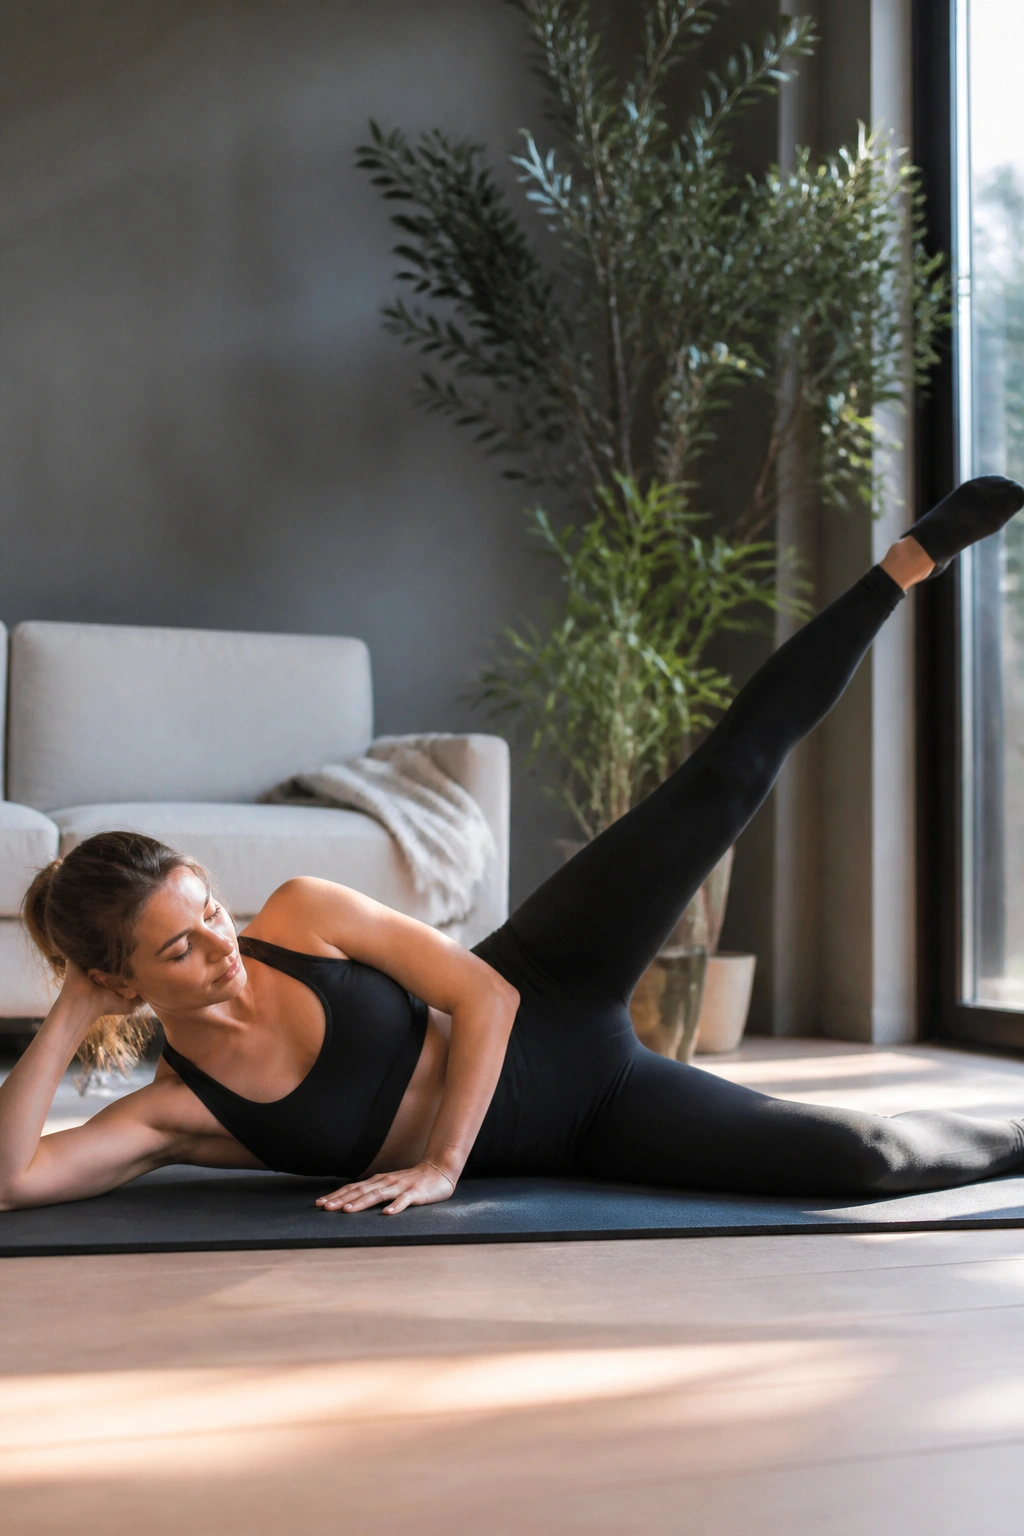
We are taking the work to the floor now. Lie on your side, legs stacked, bottom arm supporting your head. This position eliminates the balance component, allowing you to focus entirely on the lateral glute and hip stability.
The Action: Point your top toe. Lift the top leg as high as you can without tilting your pelvis backward. Lower it until it hovers just an inch above the bottom leg. Do not let it rest. Perform thirty repetitions. Then, hold the leg up and trace small circles with your toe—ten to the front, ten to the back. Your hip will feel a deep, burning fatigue. That is the muscle firing. Keep your abs tight to ensure your torso doesn’t wobble while your leg moves.
7. Clamshells for Hip Strength
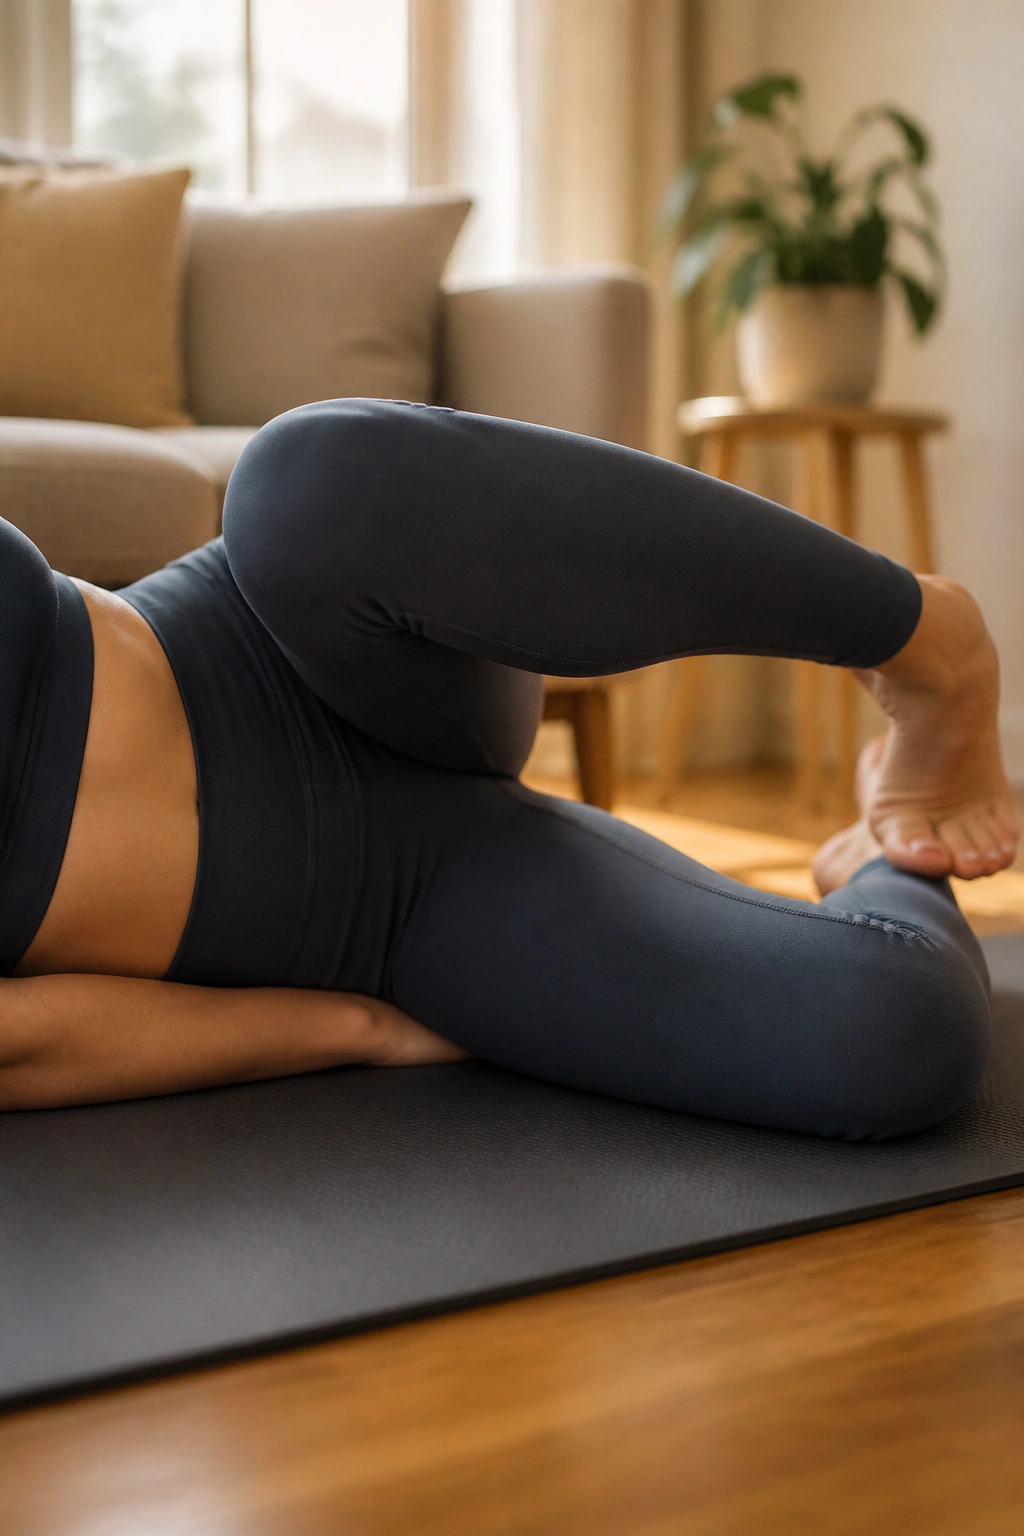
Clamshells are often used in physical therapy for a reason. They isolate the glute medius, the muscle responsible for hip stability. Lie on your side, knees bent at a 45-degree angle, heels touching.
The Sequence: Keeping your feet touching, lift your top knee toward the ceiling, rotating at the hip. Think of your legs as the shell of a clam opening. Close it with control—don’t let gravity snap it shut. The movement should be slow and deliberate. Perform twenty reps on each side. If you want to increase the intensity, place a small resistance band around your thighs just above the knees. The added resistance forces the muscle to work harder during the opening phase.
8. Tricep Dip and Extension Combo
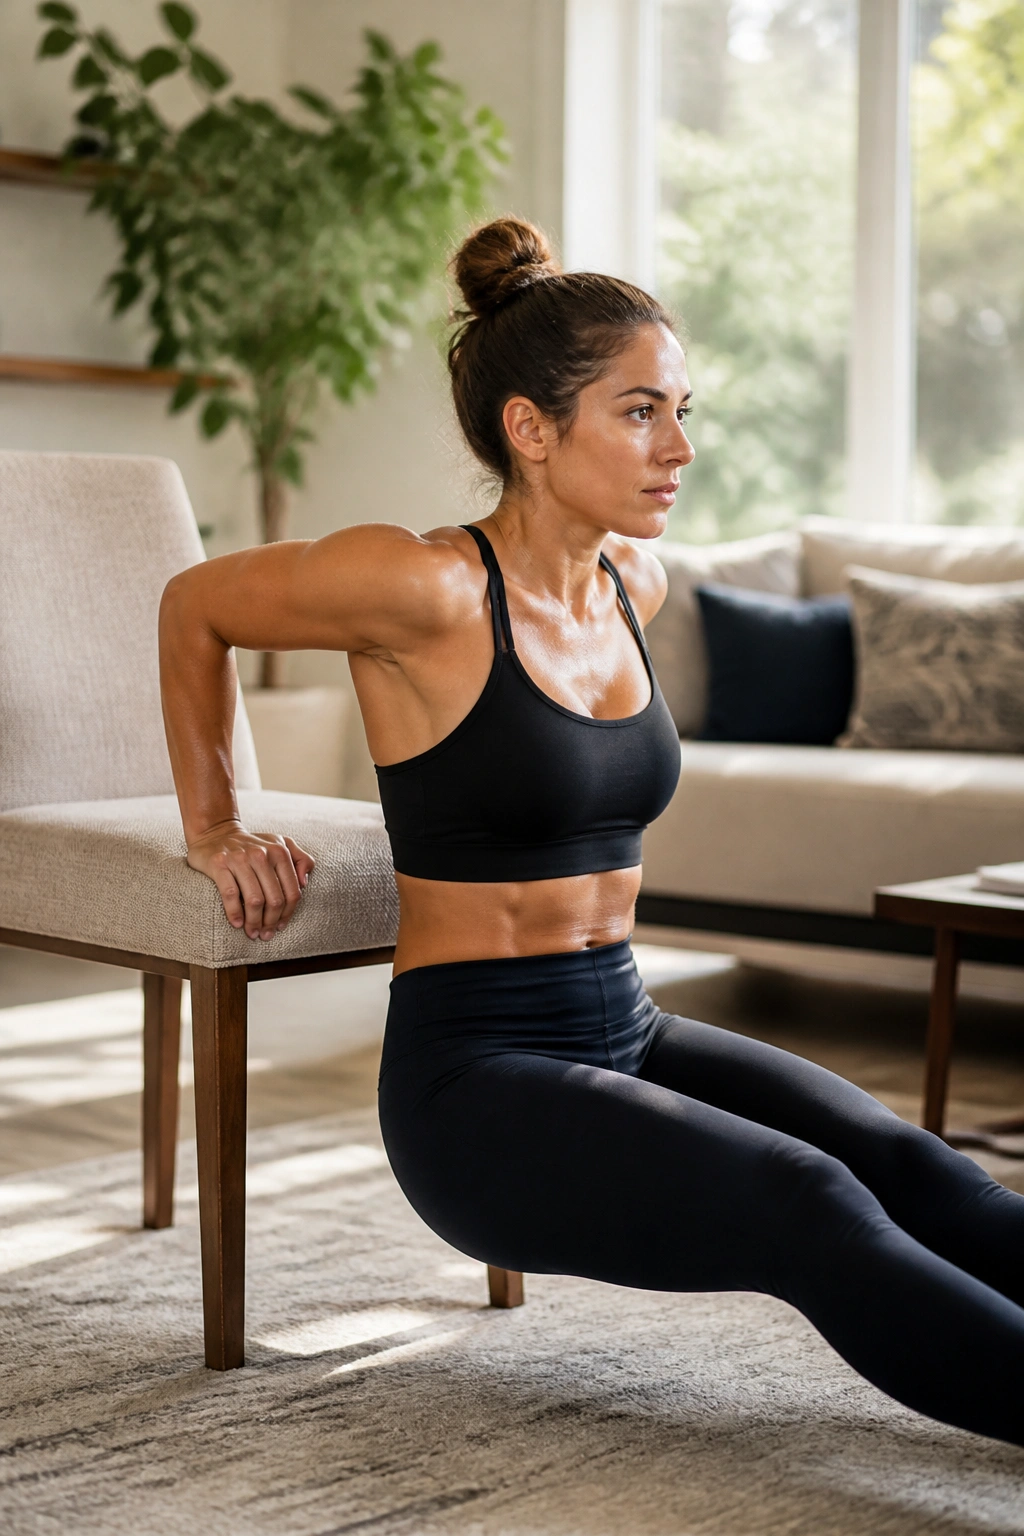
Barre isn’t just for legs. We need to work the upper body, specifically the triceps, to get that defined, sculpted look. Use a sturdy chair or the edge of a couch. Sit on the edge, hands gripping the seat. Slide your hips off, supporting your weight with your arms.
Perfecting the Form
Bend your elbows to lower your hips toward the floor, keeping your back close to the chair. Push back up using only your triceps. Do not use your legs to help you. Once you finish ten dips, hold the low position and pulse for ten counts. The trick is to keep your elbows pointing straight back, not splayed out to the sides. If your elbows wing out, you are using your shoulders, not your triceps.
9. Push-Up and Plank Flow
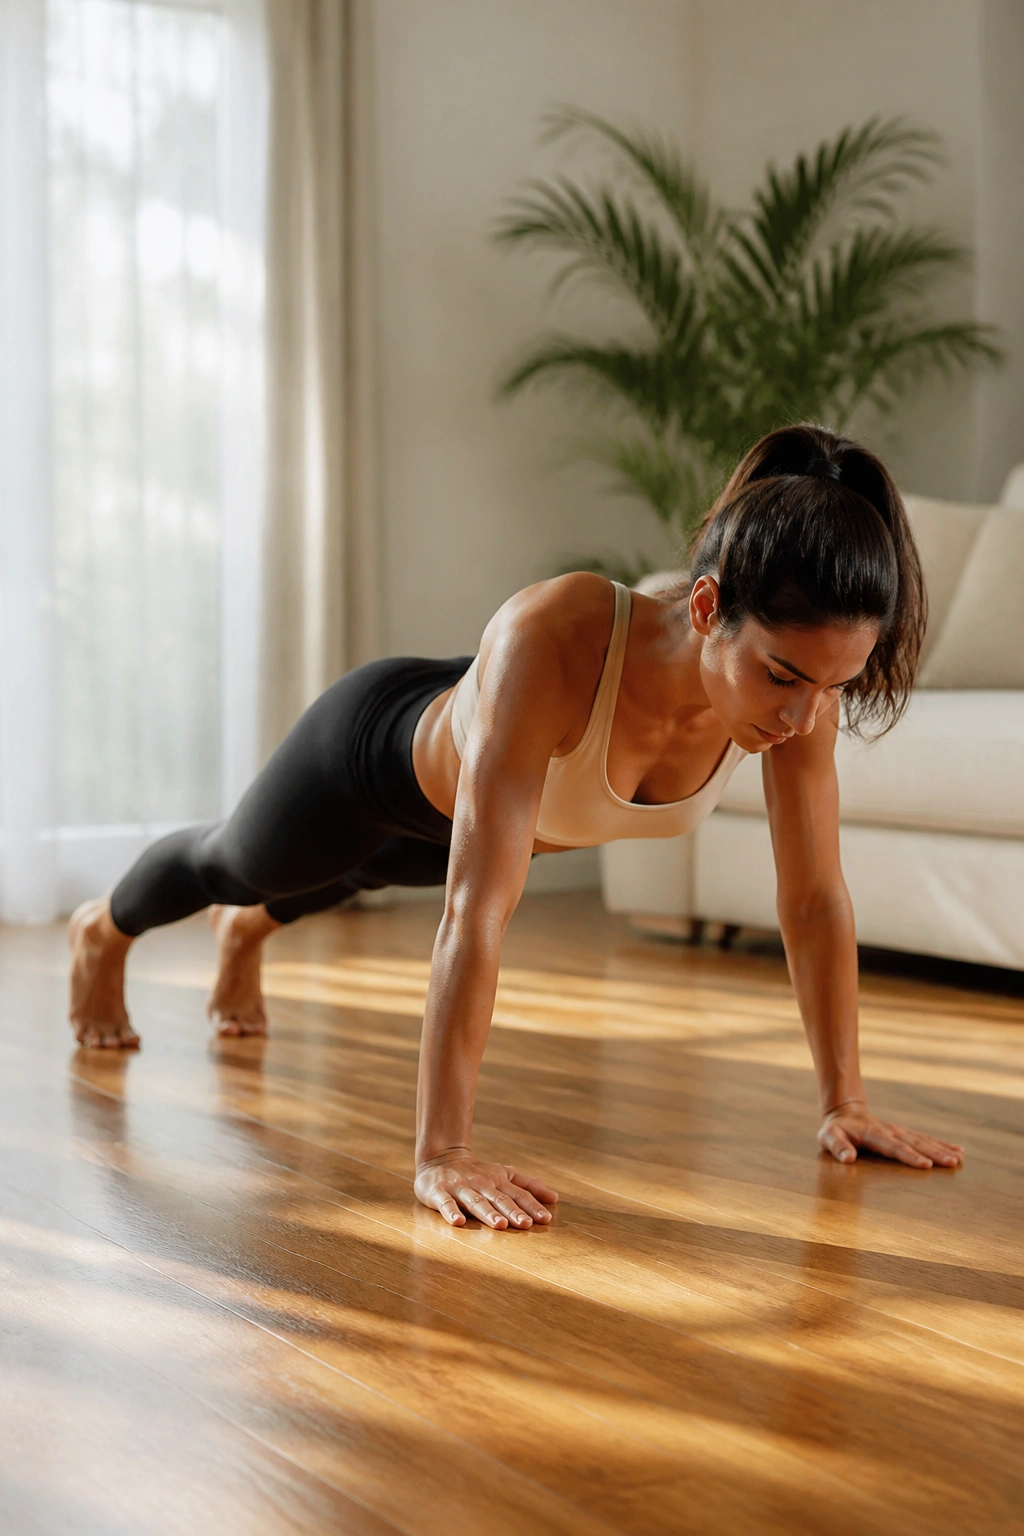
Push-ups are a full-body movement, but in barre, we focus on the plank alignment. Start in a high plank position, either on your hands or on your forearms. Keep your heels driving backward and your head in line with your spine.
The Flow: Perform one slow push-up, then hold the plank for three seconds. Shift your weight slightly forward onto your toes, then backward into your heels. Repeat this push-up-and-shift sequence ten times. This constant movement prevents you from sagging in the middle. Your core should be active from the moment you hit the floor. If your hips start to dip, drop to your knees—but keep that same plank alignment.
10. Bicep Curl and Lunge
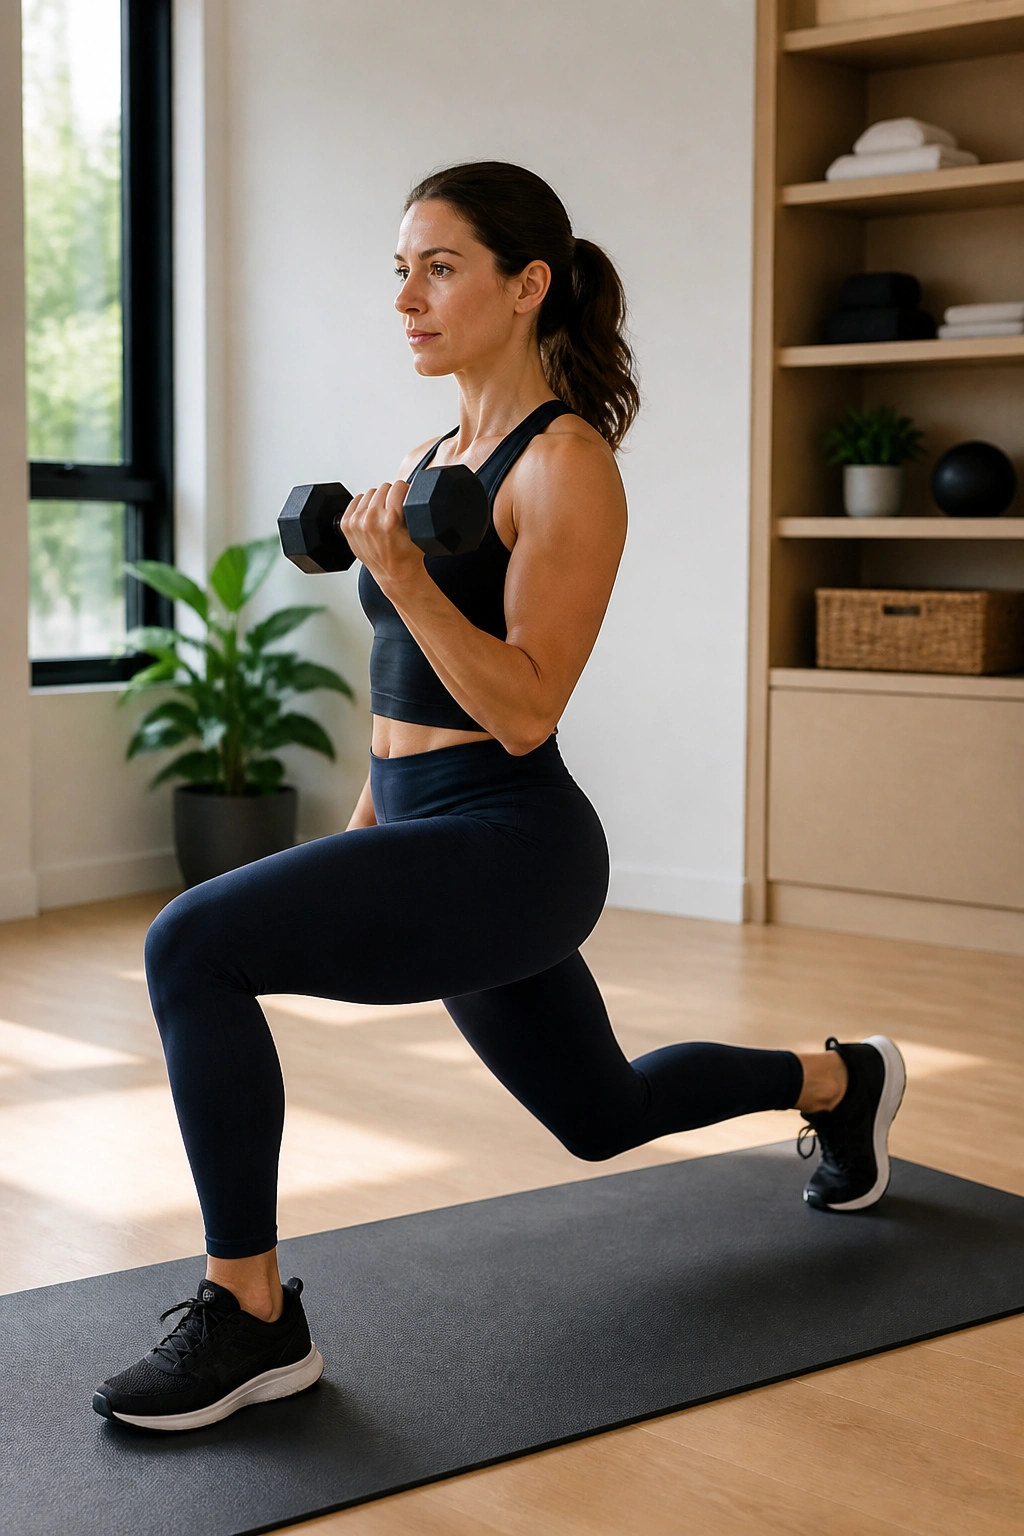
Why do one muscle group when you can do two? This is a compound movement that increases your heart rate while sculpting the arms. Step back into a deep lunge with your right leg. As you lower your back knee toward the ground, perform a bicep curl with your arms.
Coordination is Key: As you rise out of the lunge, lower your arms. Do this for twelve reps, then hold the lunge at the bottom and pulse your arms only—keeping the biceps engaged the entire time. Compound movements like this are efficient, but they require focus. If you find your balance is off, place your back heel against a wall for support.
11. Standing Core Rotation
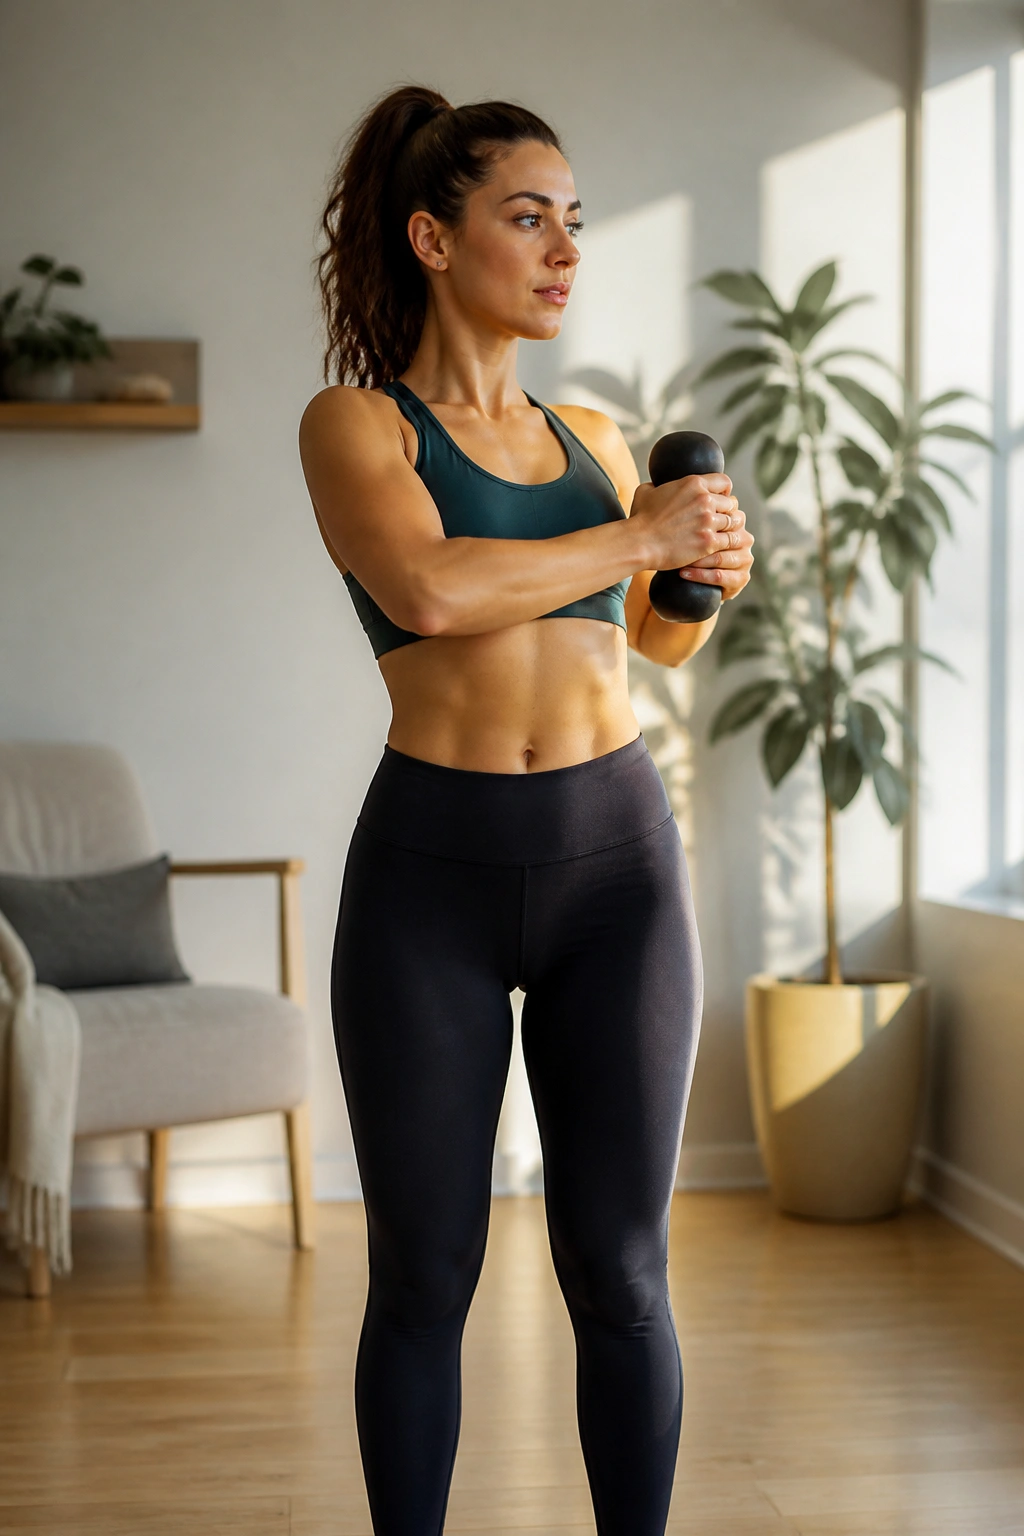
Barre is not just about the lower body; it is secretly a massive core workout. Stand with feet parallel, holding a light weight or simply clasping your hands in front of your chest. Hinge slightly at the hips, keeping your back straight.
The Twist
Rotate your torso to the right, then back to center. Then rotate to the left. As you rotate, ensure your hips stay perfectly still. You are twisting from the ribcage, not the waist. Perform twenty rotations total. This targets the obliques, those muscles on the sides of your core. If you feel it in your lower back, stop the rotation early. You are likely twisting too far for your current mobility.
12. Pilates-Style Hundred at the Barre
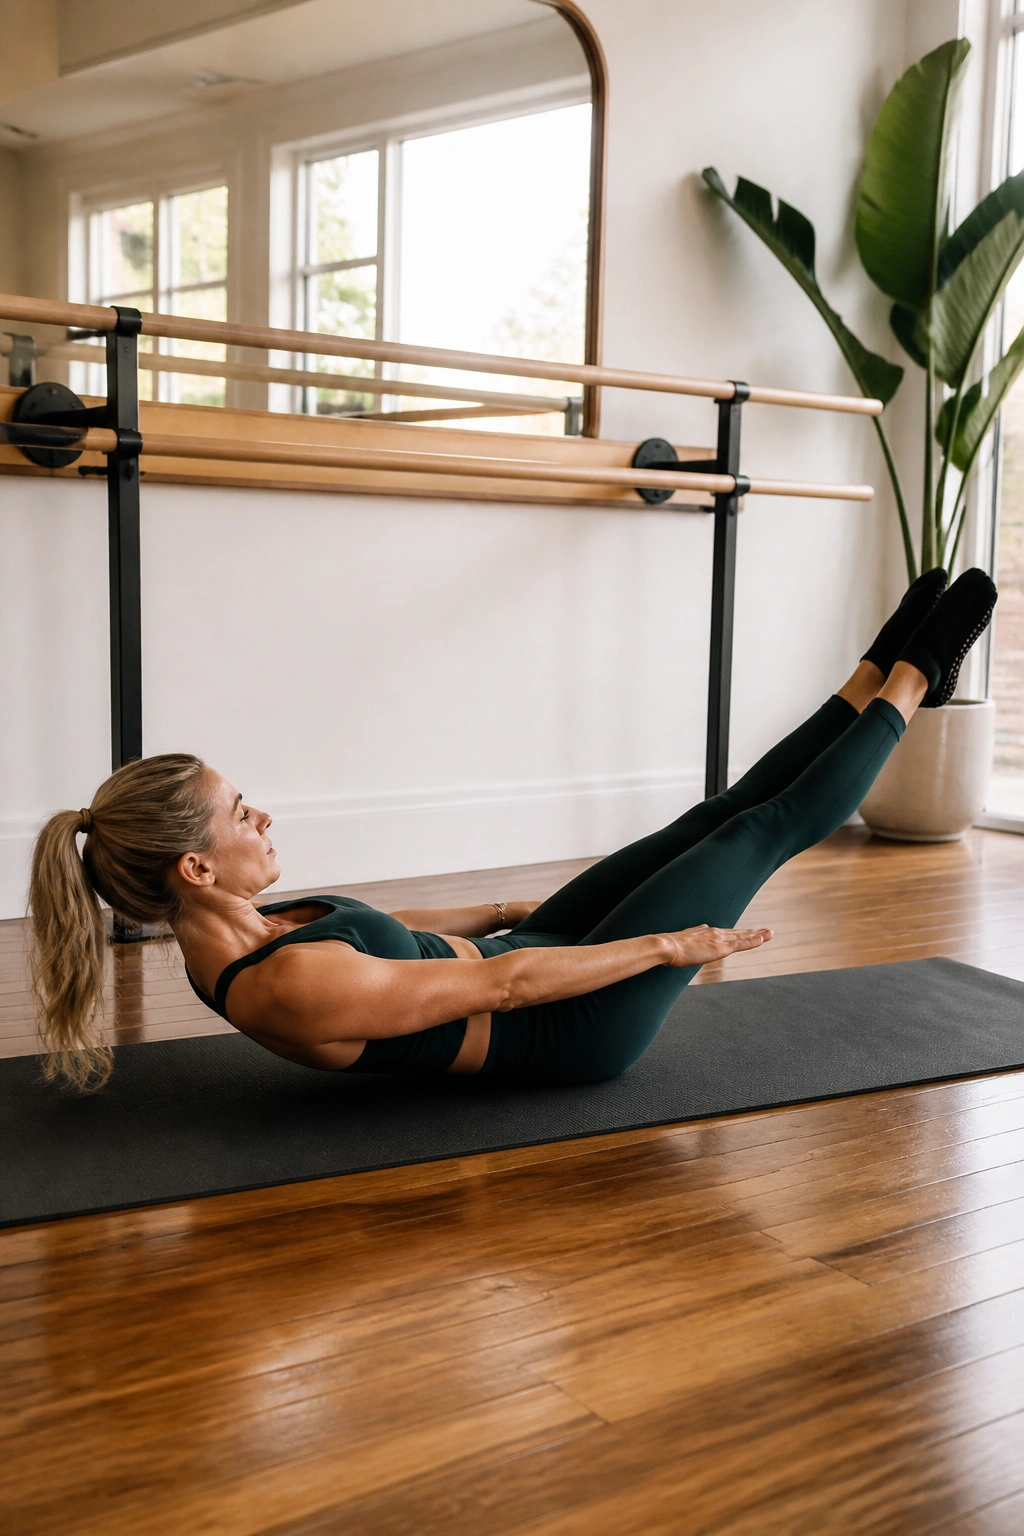
This is a classic Pilates move adapted for the barre. Lie on your back, legs in tabletop position. Lift your head, neck, and shoulders off the floor, looking toward your belly button. Extend your legs out to a 45-degree angle.
The Movement: Pump your arms up and down by your sides, inhaling for five pumps and exhaling for five pumps. Do this for ten full cycles. It creates heat, engages the deep transverse abdominals, and forces you to control your breath. Keep your lower back pressed firmly into the floor. If you feel your back arching, lift your legs higher toward the ceiling.
13. Plank-to-Pike Core Work
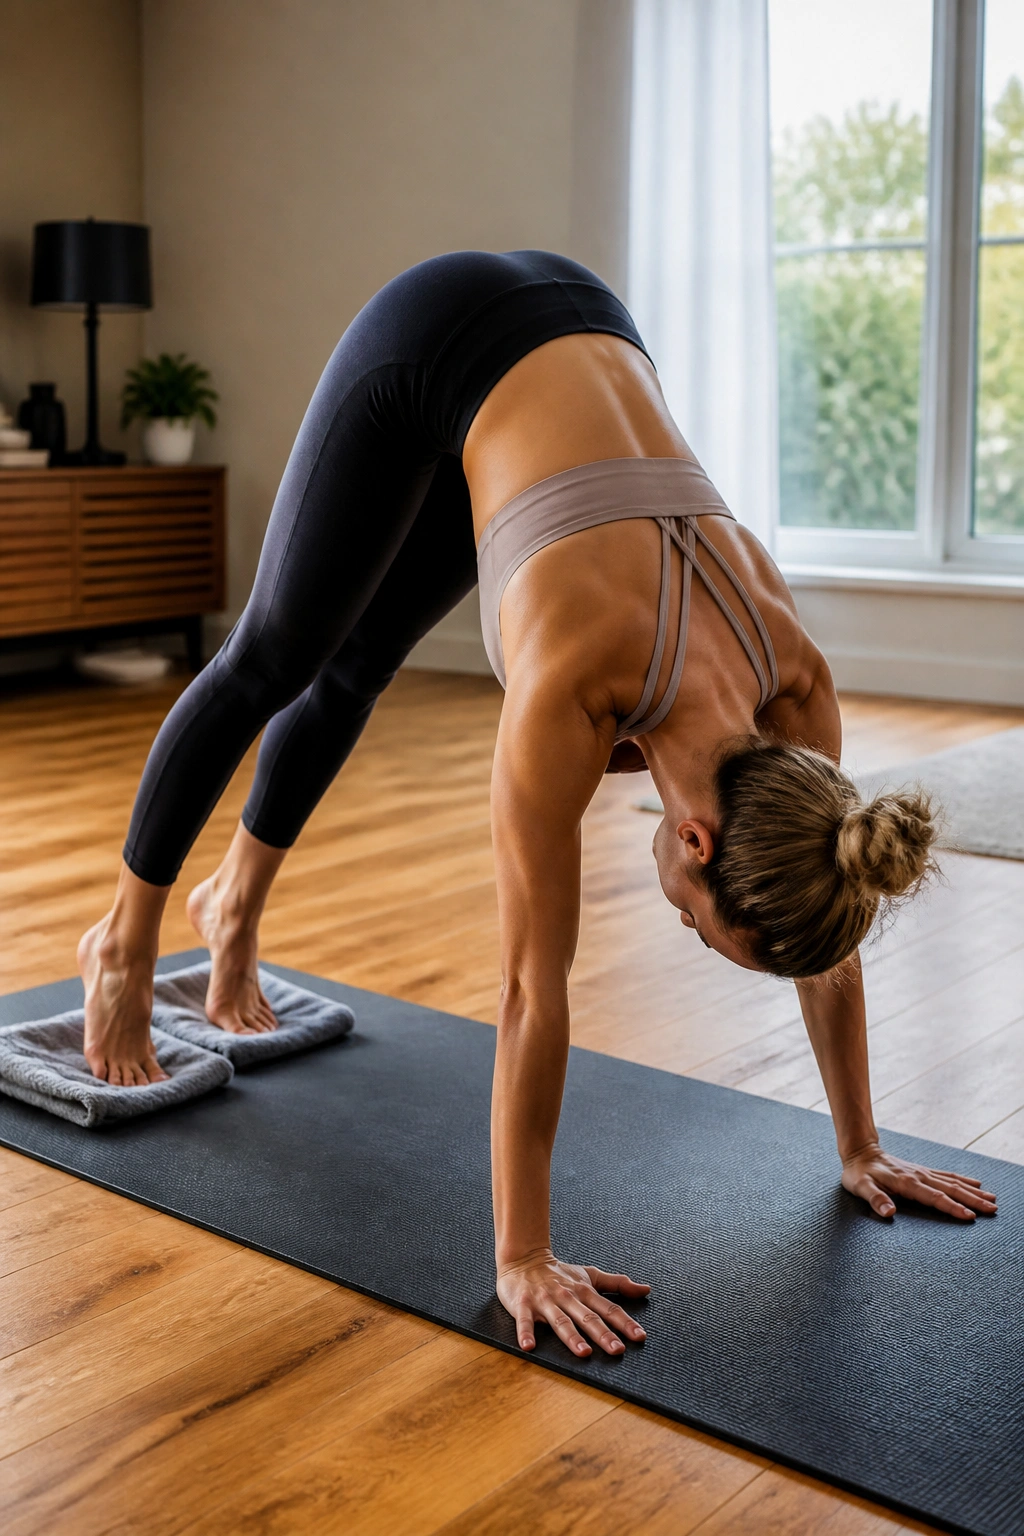
This move requires a smooth floor and a pair of socks—or two small towels. Start in a high plank position with your toes on the towels. Keep your legs straight and your core engaged.
The Action: Using your abs, pike your hips toward the ceiling, dragging your toes toward your hands. Your body should form an inverted V. Then, with control, slide your feet back out into the plank position. Do this slowly. If you move too fast, you will use momentum instead of your abs. Ten repetitions is usually enough to make the core feel like it is on fire.
14. Oblique Twists with Leg Lift
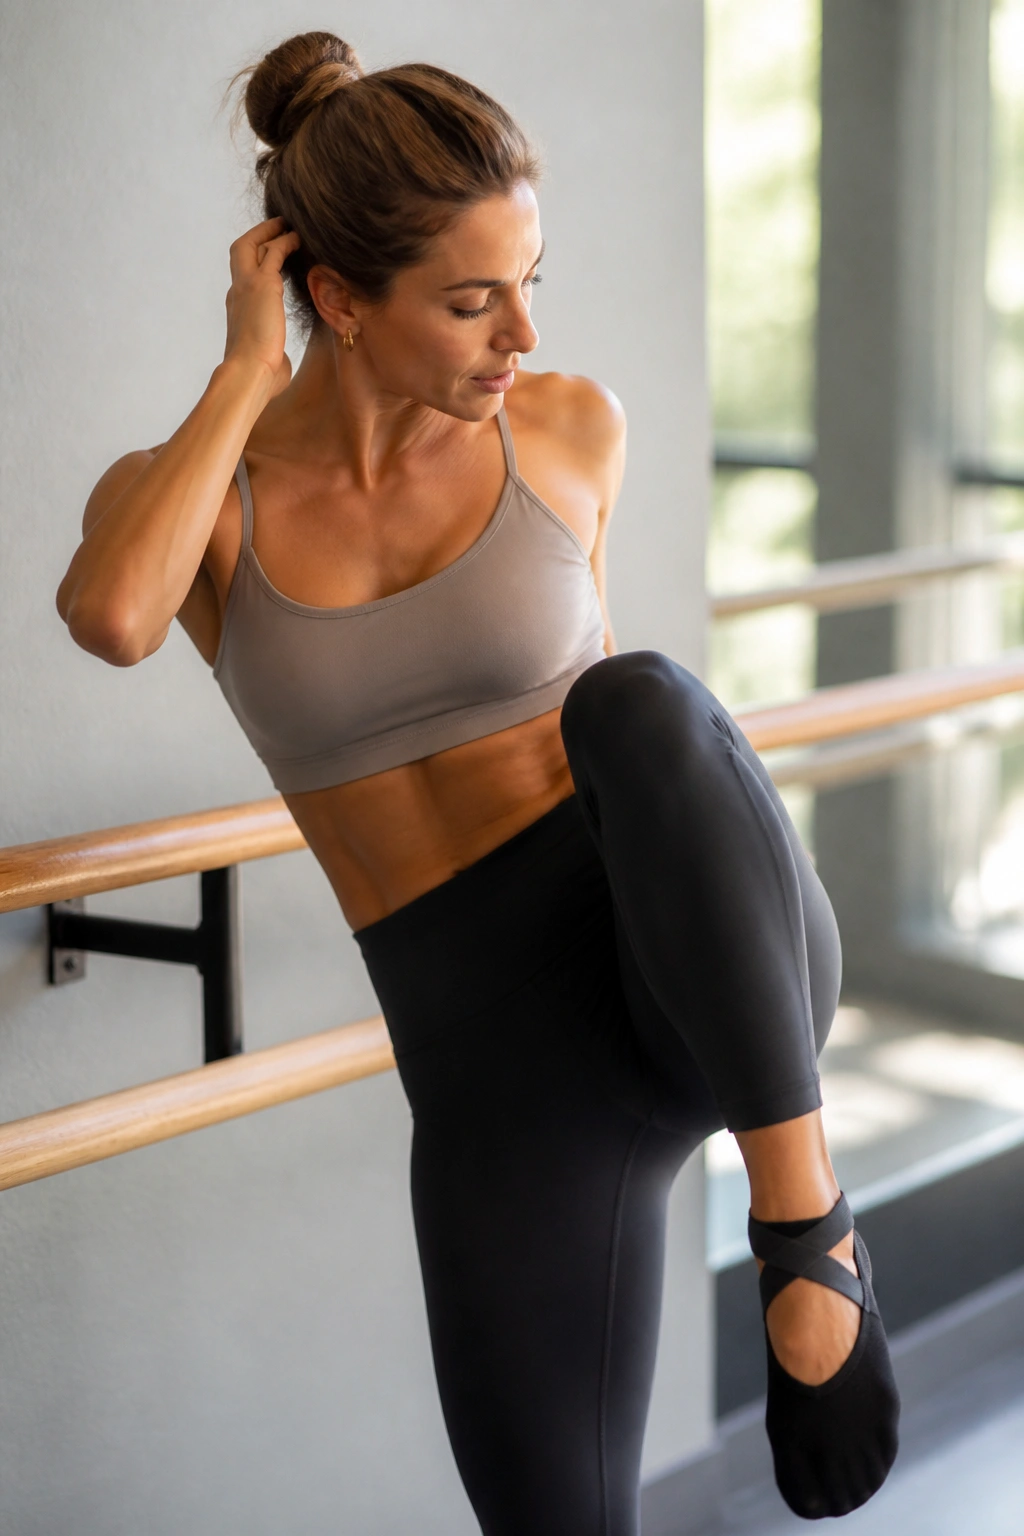
Return to standing, facing the barre. Rest your right hand on the barre and place your left hand behind your head. Lift your left knee out to the side, then crunch your left elbow down toward your left knee, creating a C-curve in your side.
The Squeeze
Extend the leg and straighten your torso, then repeat. You are essentially doing a standing side crunch. It is incredibly effective for the waistline. Do fifteen on the left side, then switch to the right. Keep your standing leg slightly bent to maintain stability and protect the joint.
- Key Detail: Don’t pull on your neck. Your hand is just a light guide. The work comes from your side abdominals.
15. Back Extension and Reach
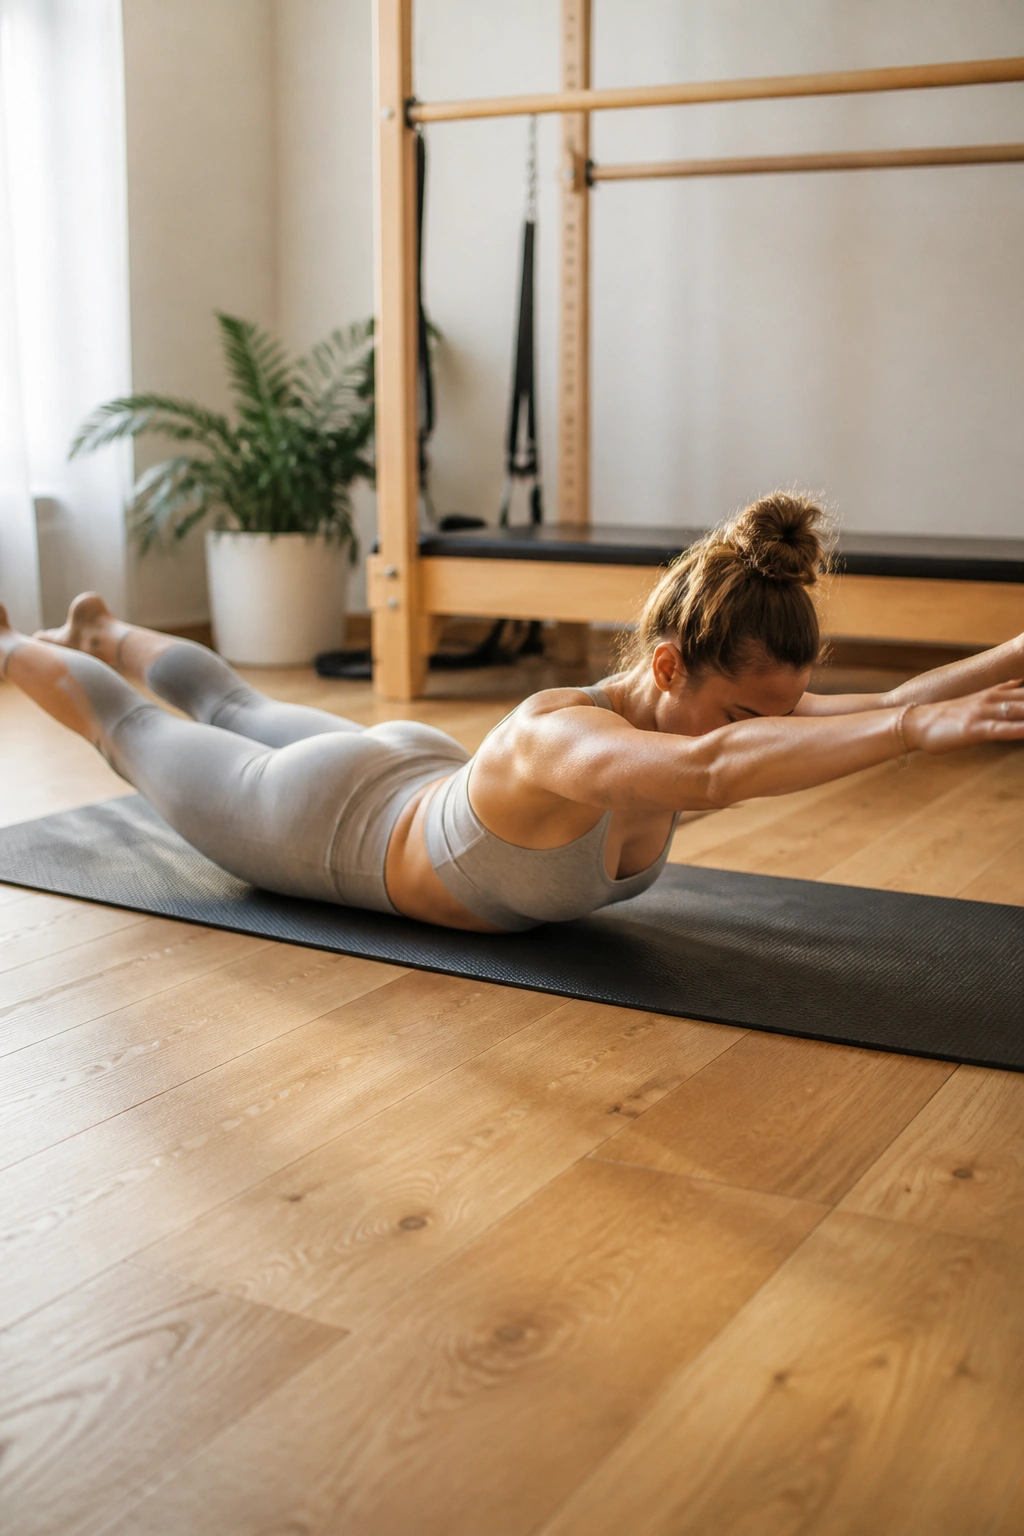
We spend so much time hunched over computers and phones that our back muscles often get weak and overstretched. Lie on your stomach, arms extended overhead, legs straight.
The Sequence: Engage your glutes and hamstrings to lift your chest and legs off the floor simultaneously, creating a gentle arch in your back. Hold for two seconds, then lower. Perform fifteen repetitions. This strengthens the erector spinae—the muscles that run along your spine—and improves your posture significantly. Keep your gaze at the floor so you don’t strain your neck.
16. Hamstring Curl and Pulse
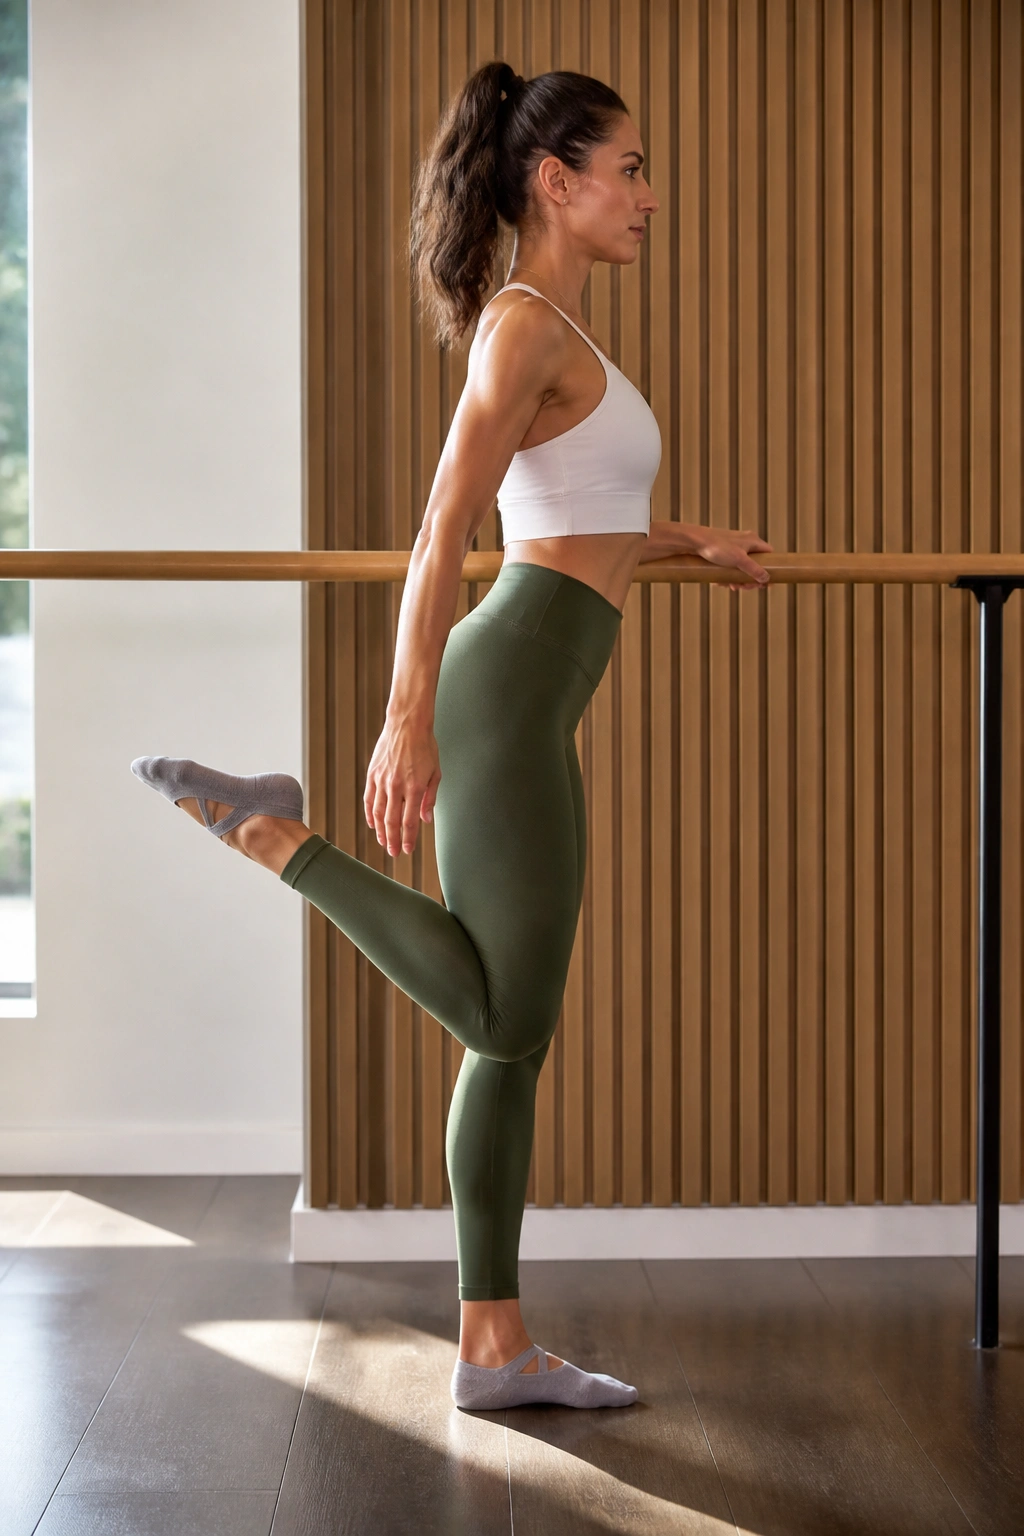
Stand facing the barre, holding on for balance. Shift your weight to your right leg. Lift your left leg behind you, bending the knee so your heel is close to your glute.
The Burn
Flex your left foot. Pulse that heel toward your glute. You are not moving the knee; you are squeezing the hamstring to bring the heel closer. Do thirty pulses. Then, hold the heel close and pulse the entire thigh upward, engaging the glute. The combination of the hamstring isolation followed by the glute activation is brutal in the best way possible.
17. Inner Thigh Squeeze with Ball
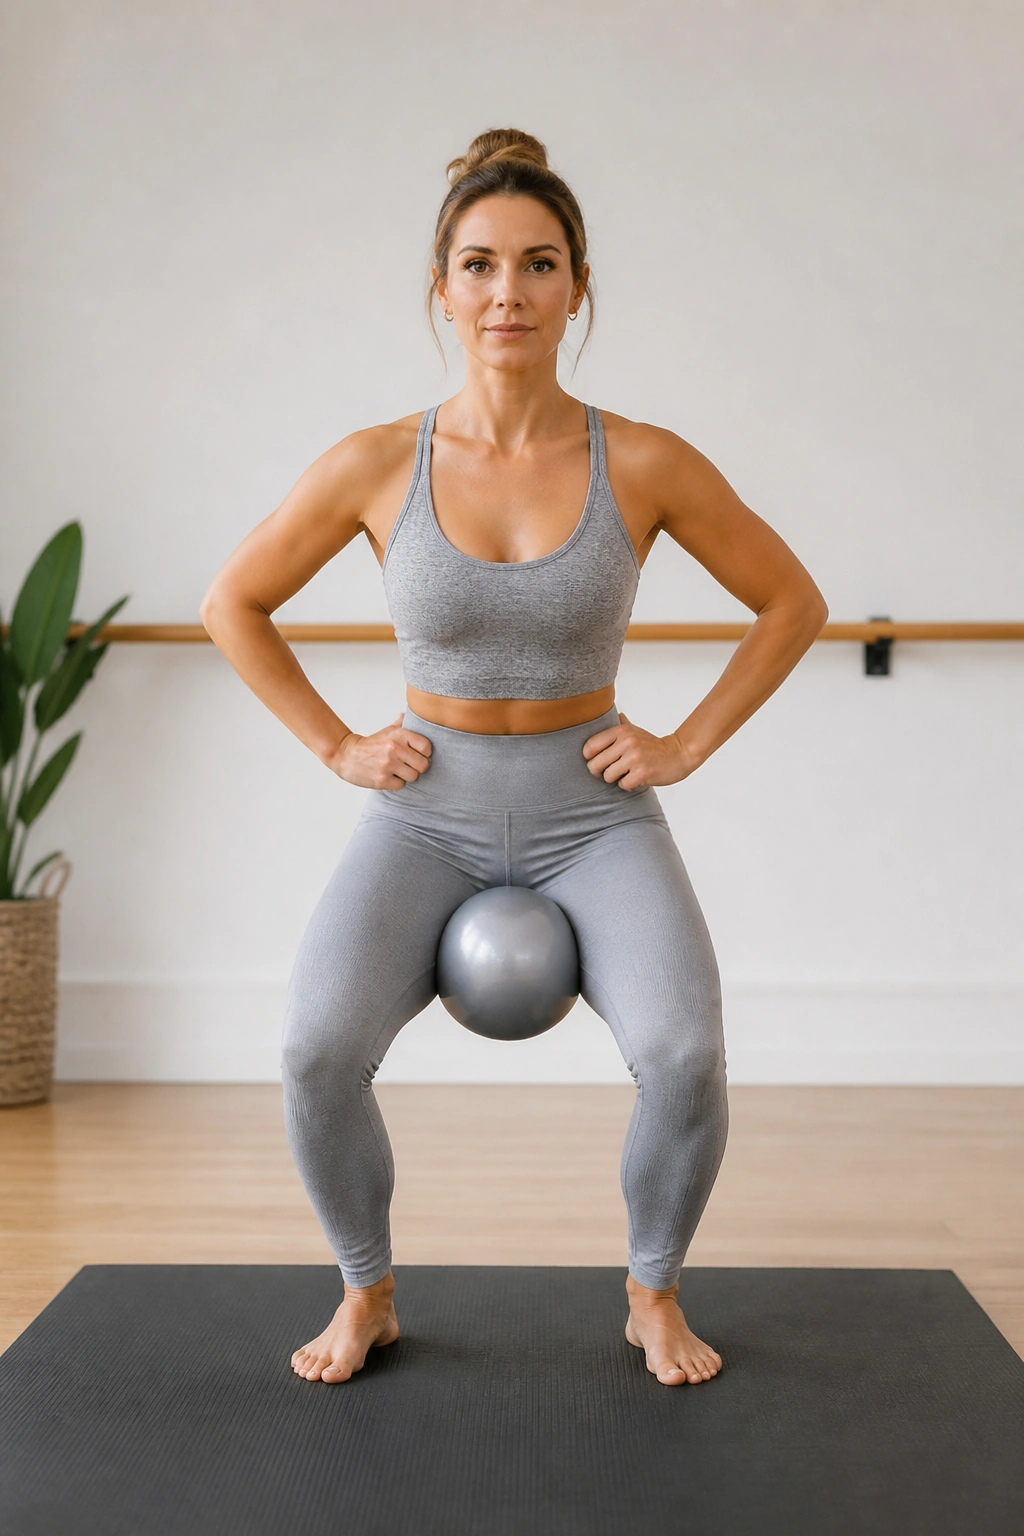
If you have a small Pilates ball or even a throw pillow, grab it. If not, you can use a rolled-up towel. Place the object between your inner thighs, just above the knees. Stand parallel.
The Sequence: Squeeze the ball with your inner thighs, engaging the adductors. While keeping the squeeze, perform twenty shallow squats. Then, hold the squat and pulse the squeeze for thirty counts. The inner thighs are a group of muscles we rarely target in daily life, so this movement will likely feel new and intense. Don’t let your knees cave in—keep them tracking forward.
18. Pretzel Pose for Glutes
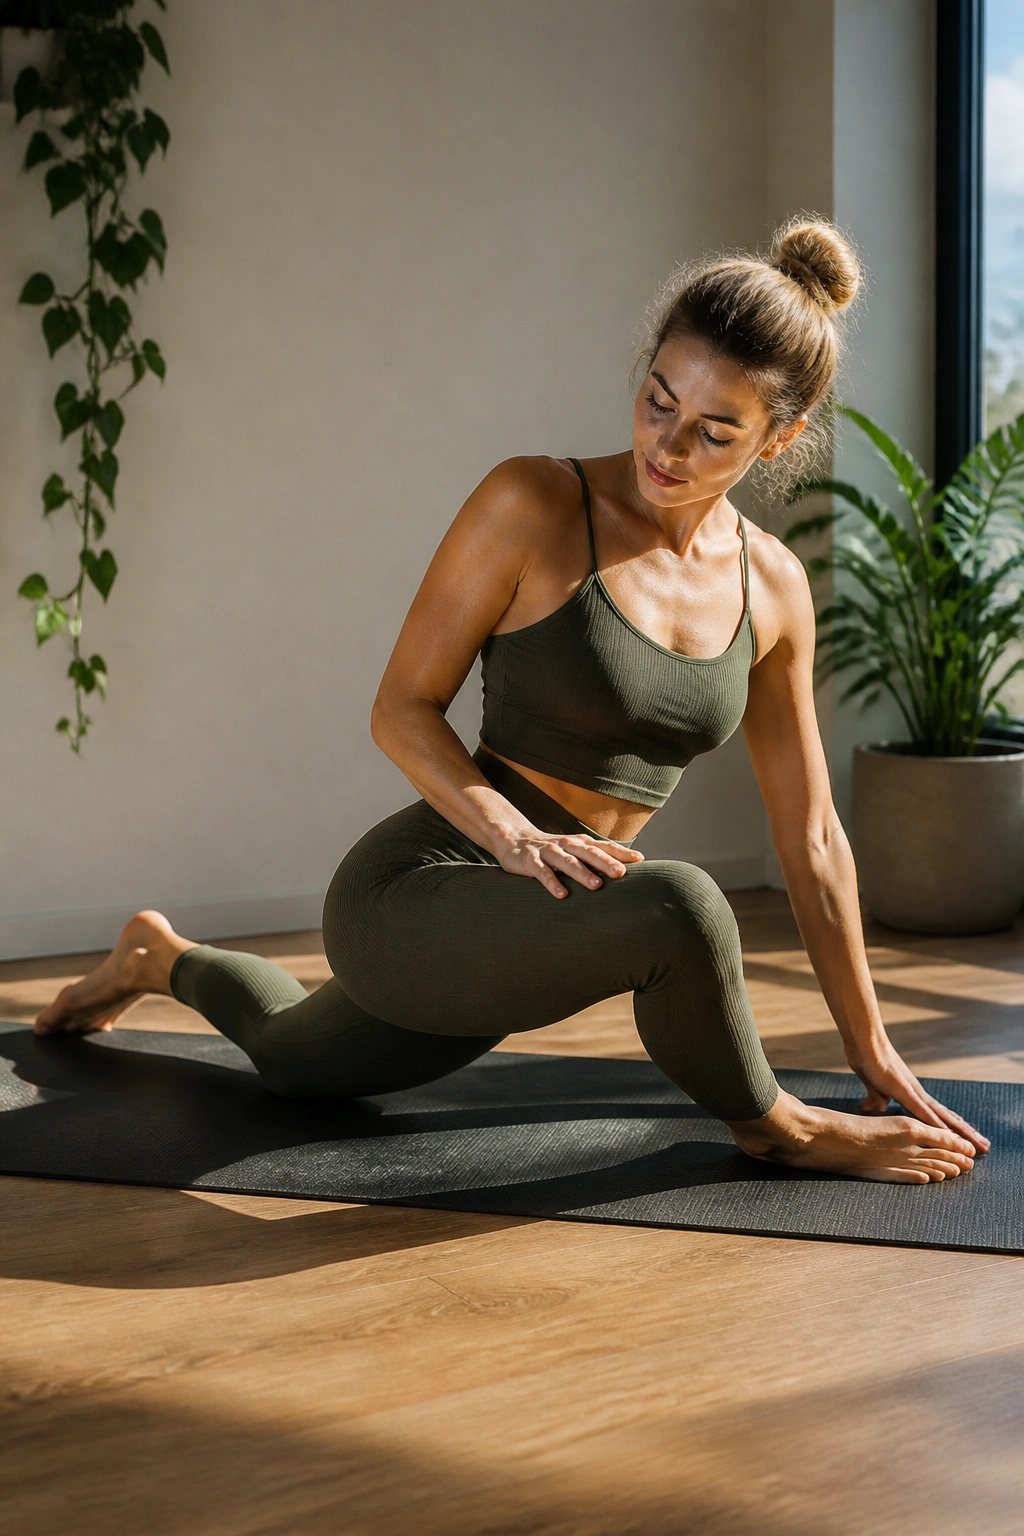
The “pretzel” is a legendary barre move. Sit on the floor, right leg bent in front of you at a 90-degree angle, left leg bent behind you at a 90-degree angle. Lean your torso toward the right, placing your right hand on the floor.
Finding the Muscle
Lift your back leg (the left one) off the floor, keeping the knee bent. Pulse the knee up and down. You should feel this deeply in the side of your glute. If you feel it in your hip flexor, lean your torso forward slightly. Twenty pulses, then hold at the top for ten seconds. Switch sides. It is awkward at first, but it is one of the most effective glute exercises you can do.
19. Standing Balance and Reach
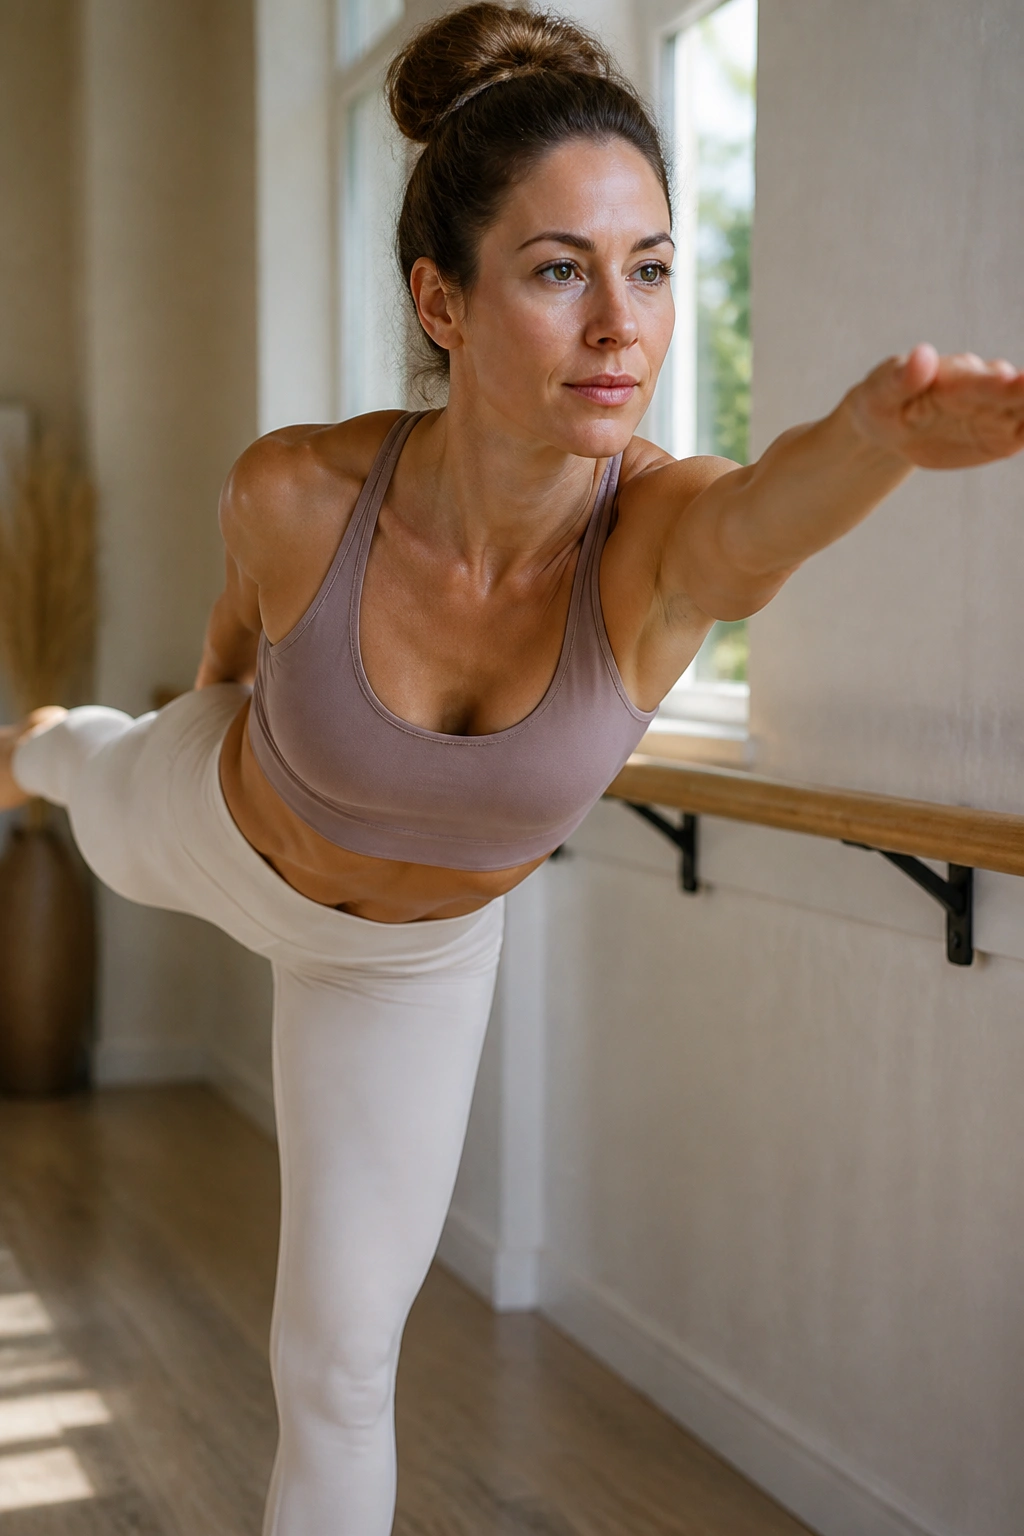
Balance is a core skill that diminishes if we don’t use it. Stand parallel, facing the barre. Lift your right leg behind you, keeping it straight. Reach your left arm forward.
The Action: Simultaneously reach your left arm and right leg longer, as if someone is pulling your fingertips and your toes in opposite directions. You aren’t necessarily lifting higher; you are lengthening. Hold for a count of ten, then lower. Repeat five times on each side. This is active stretching. It builds stability and forces your core to work in opposition to your limbs.
20. Forward Fold and Stretch Sequence
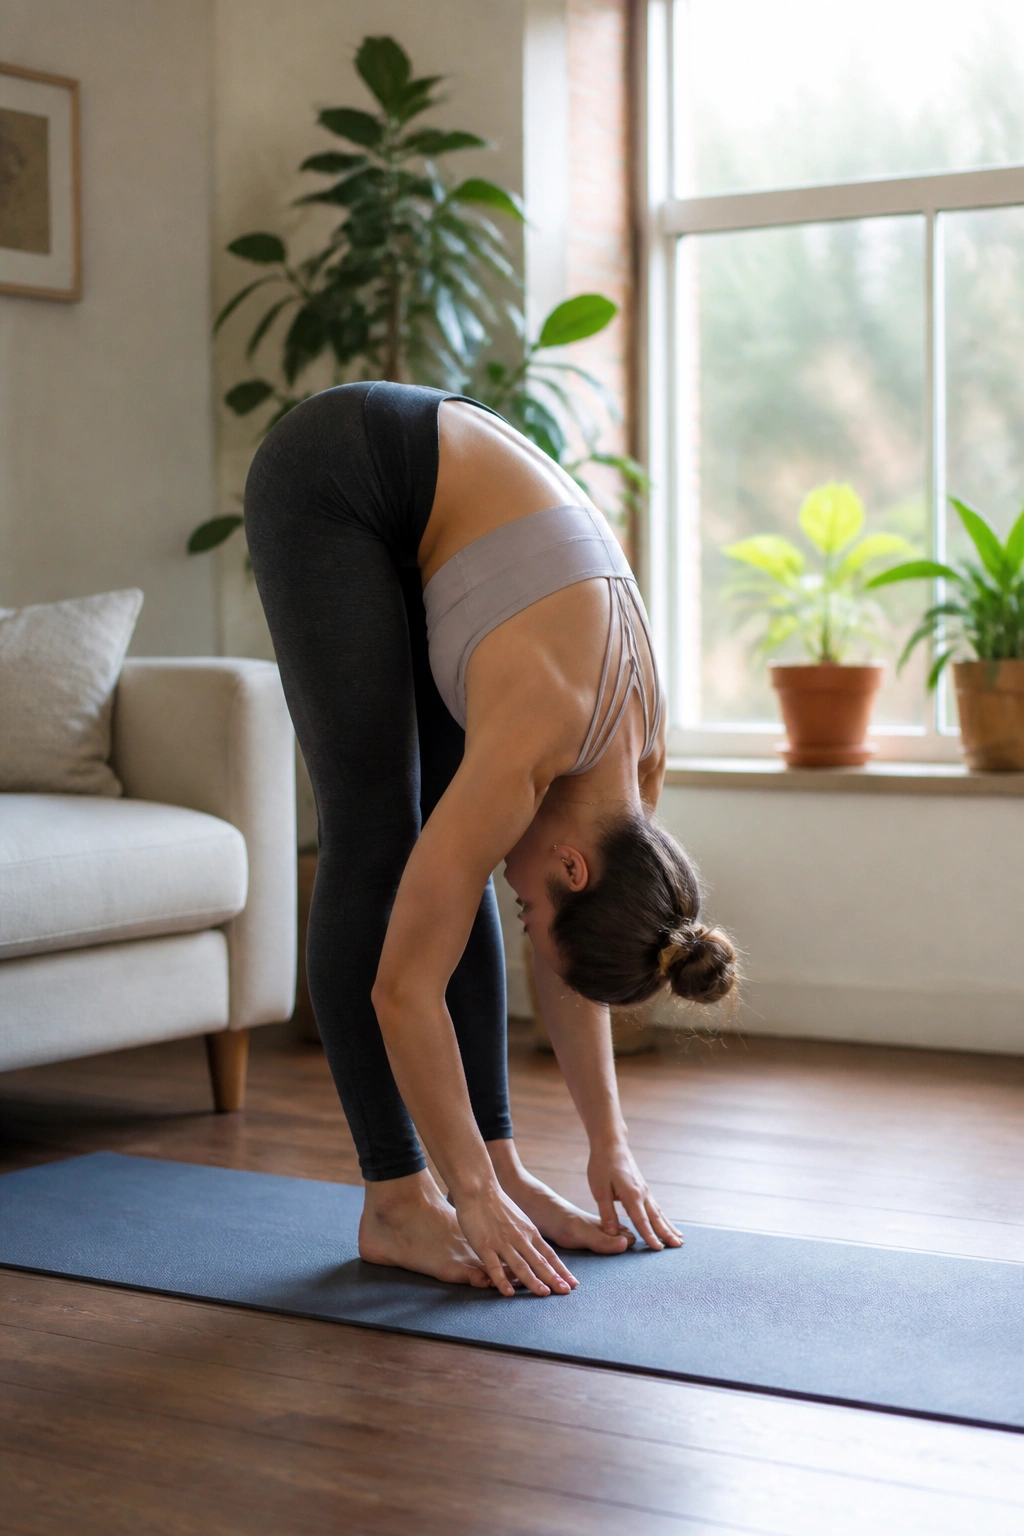
After all that burning, you need to lengthen the muscles. This isn’t just a break; it’s an active recovery sequence. Stand with feet hip-width apart. Hinge at your hips and fold forward, letting your head hang heavy toward the floor.
The Release
Bend your knees deeply, then straighten your legs as much as you can. Do this five times. Then, hold the fold and grab opposite elbows, gently swaying from side to side to release the tension in your lower back. This sequence decompresses the spine and gives your hamstrings a moment of relief after being under tension.
21. Swan Dive and Back Strengthening
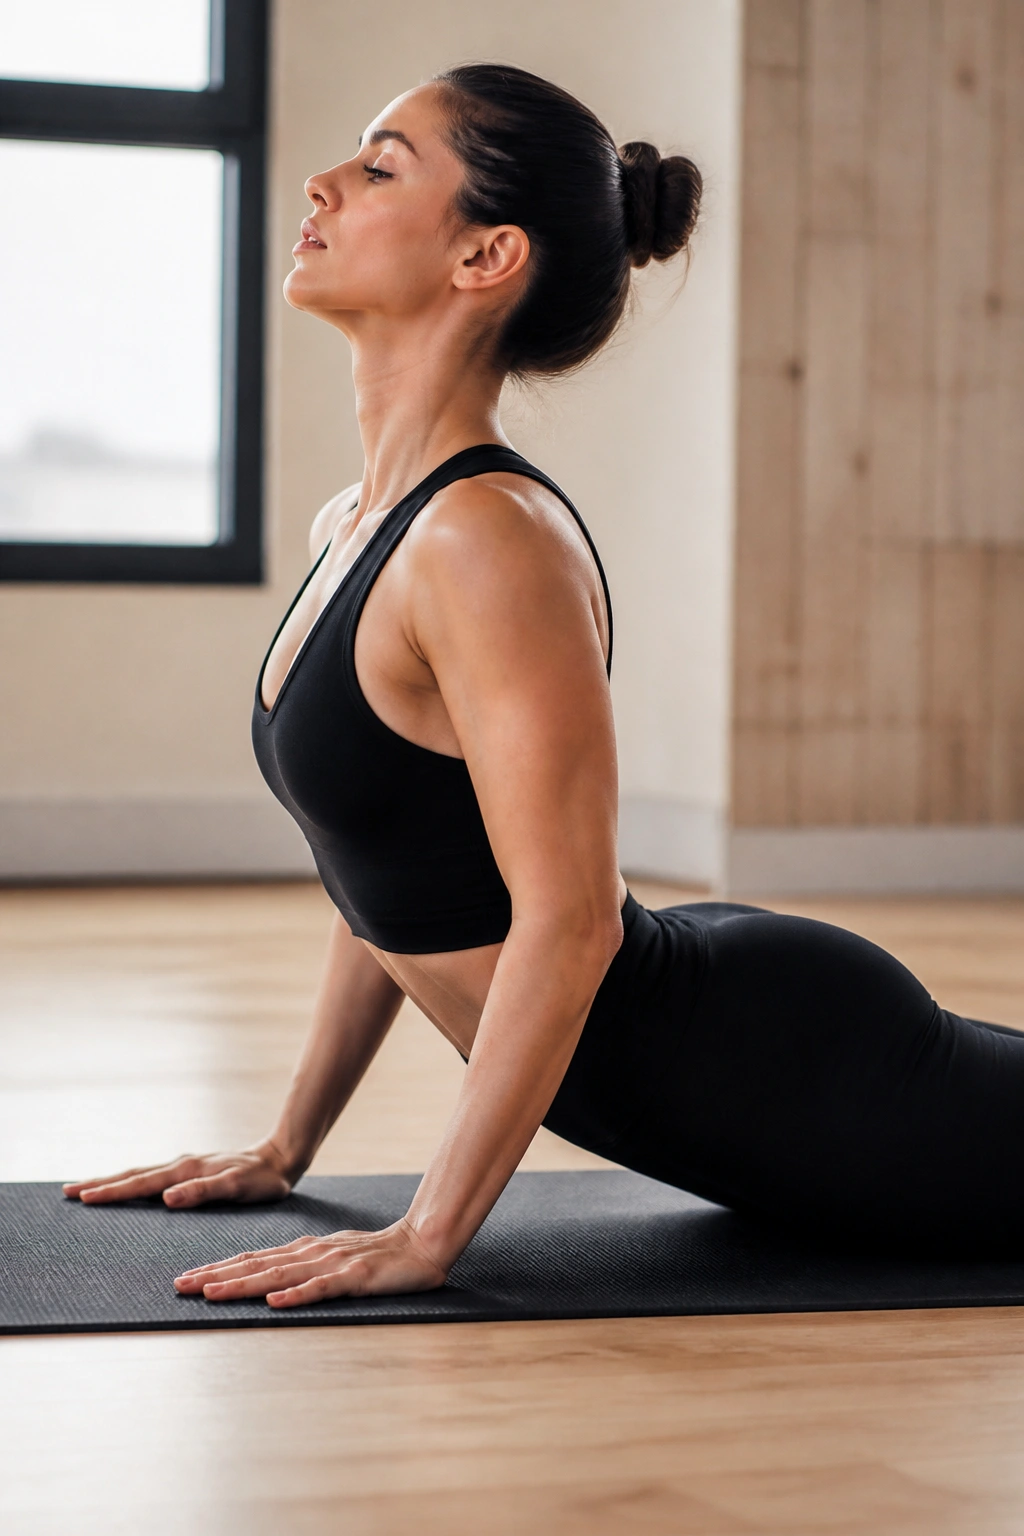
This is a Pilates-inspired back movement that feels glorious after a long day of sitting. Lie on your stomach, hands under your shoulders, elbows tucked into your ribs.
The Sequence: Inhale and press into your hands, lifting your chest off the floor, rolling your shoulders back and down. Keep your neck long. Exhale as you lower down with control. Do this ten times, moving with your breath. The movement should be fluid, like a wave. Don’t push so high that you crunch your lower back; focus on lengthening the front of your body while strengthening the back.
22. Single-Leg Squat Stability
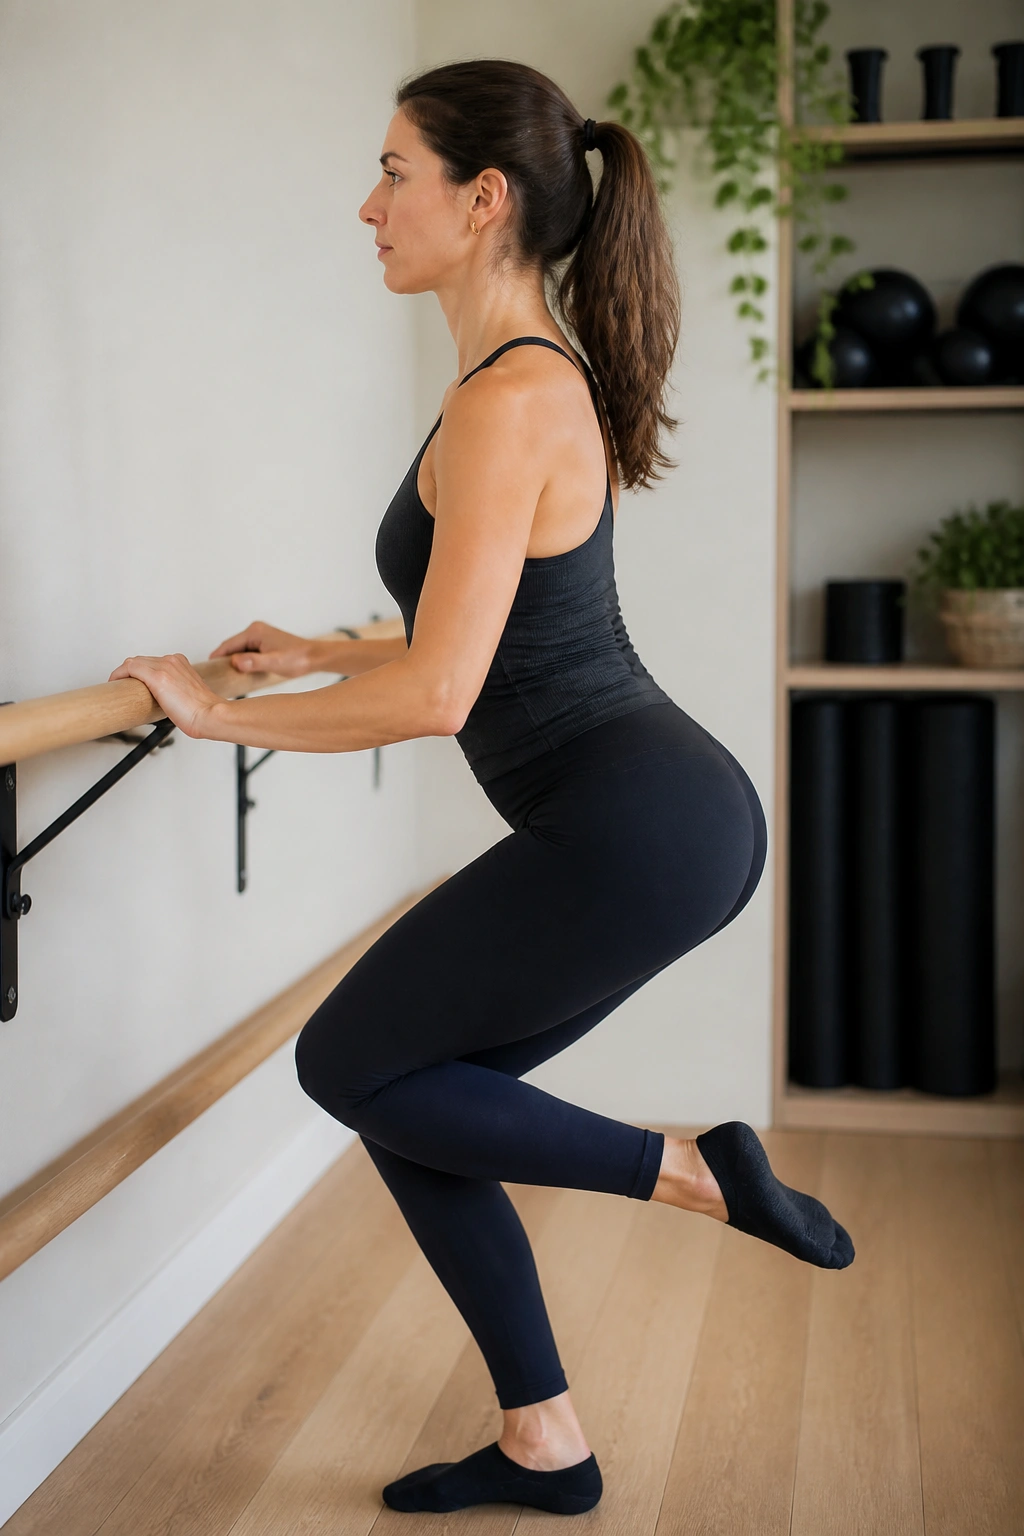
We are back to standing for some final stability work. Stand parallel to the barre, left side facing it, hand resting on it. Lift your right leg slightly off the floor, knee bent.
The Challenge
Perform a single-leg squat on your left leg. Keep your hips level—don’t let the right hip hike up. If you feel confident, take your hand off the barre for a second during the lowest point of the squat. Do ten repetitions. This is a true test of ankle stability and glute strength. It’s better to do five slow, controlled reps than ten shaky, messy ones.
23. The “Seat” Sculptor Series
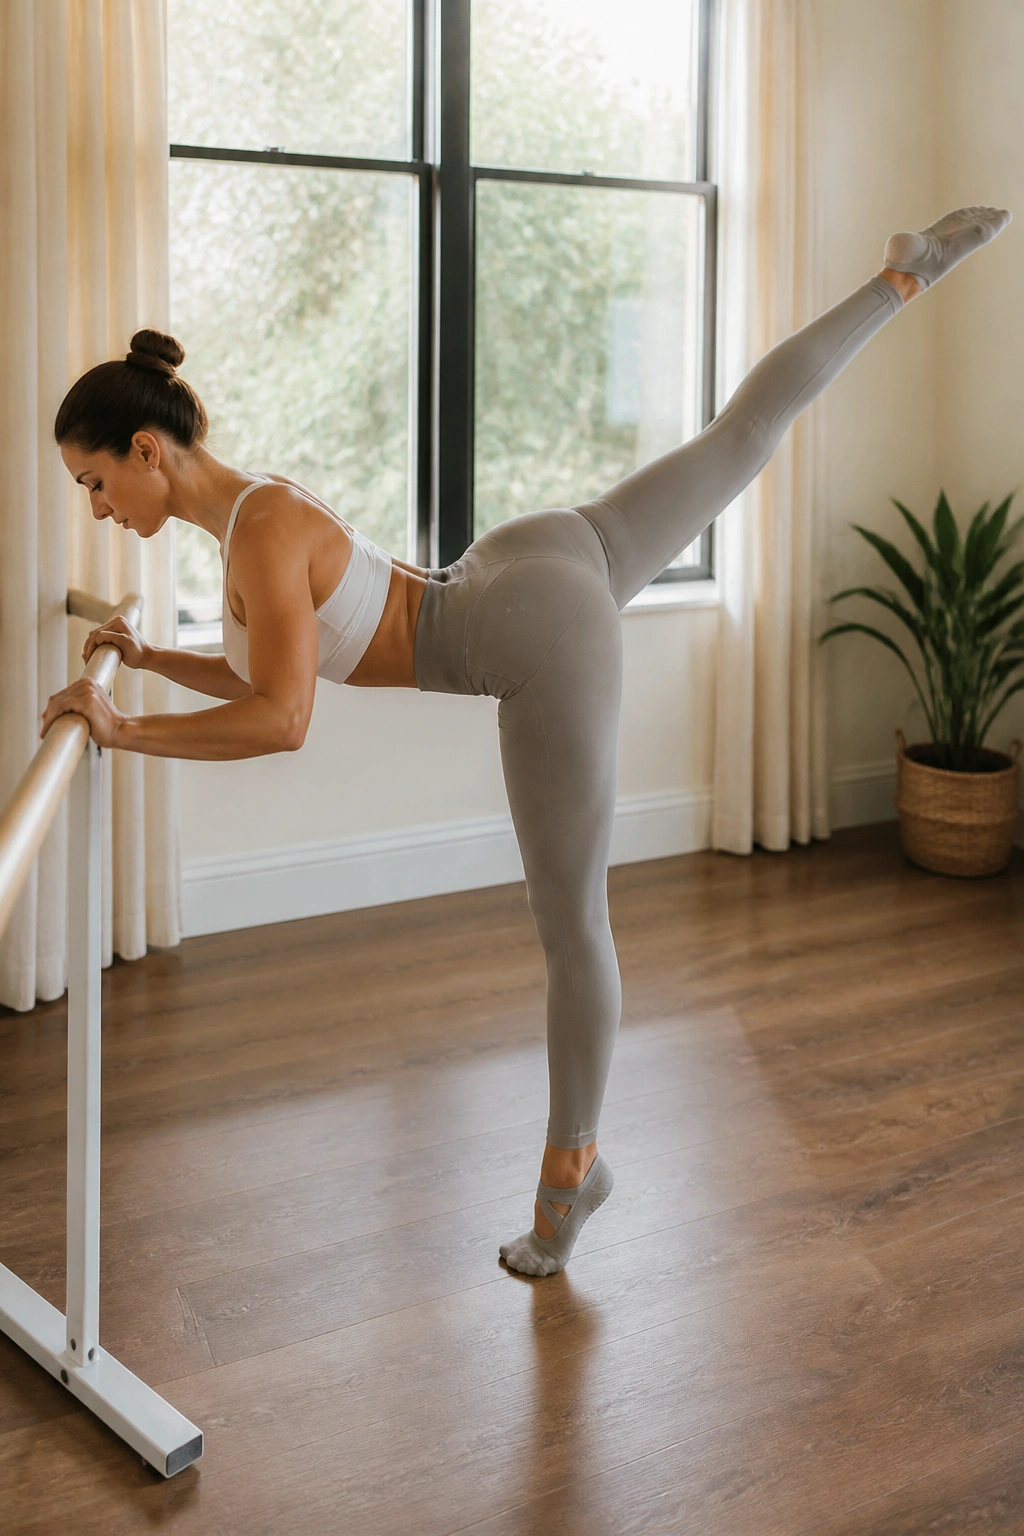
This series is designed to target the “seat”—the connection between your glute and your hamstring. Start in a plank position, hands on the barre. Bring your right knee into your chest, then kick it back into a high arabesque.
The Motion: Do not arch your back as you kick. Imagine you are stamping your footprint on the ceiling. Perform fifteen kicks, then hold the leg at the top and pulse for twenty counts. Switch legs. This requires serious core engagement to keep your torso stable while your leg works independently. If you find your back dipping, shorten the kick.
24. Weighted Shoulder Press and Squat
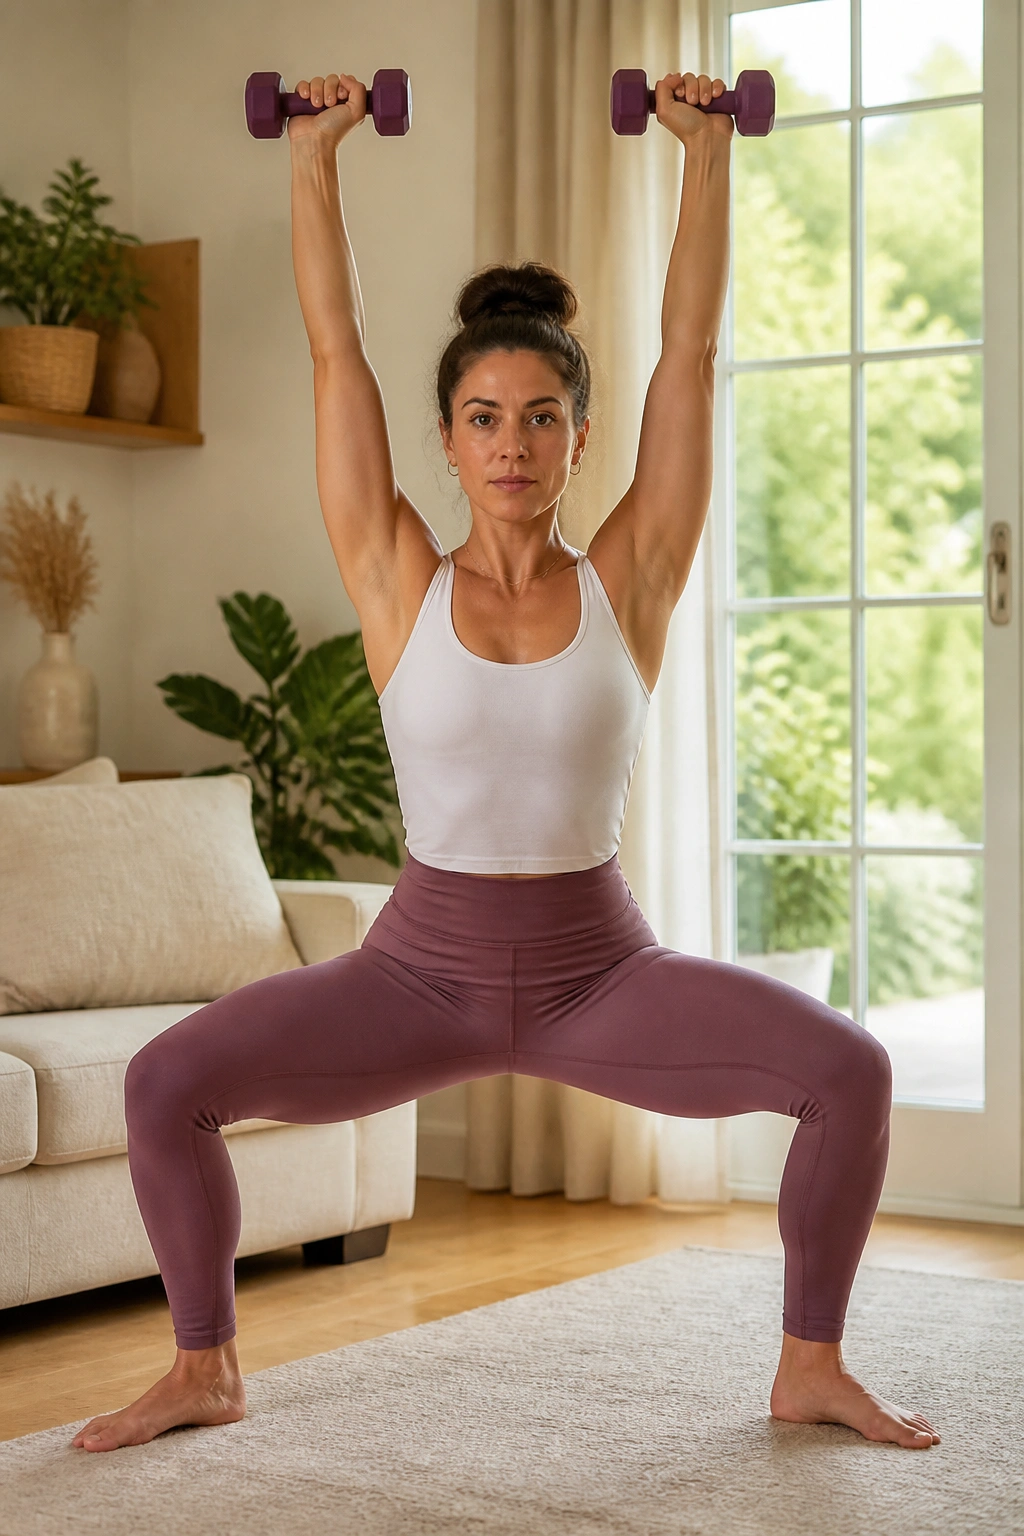
Grab a pair of light weights—one to three pounds is sufficient. If you don’t have weights, use two cans of soup. Stand in a wide second position.
The Sequence
Lower into a plié squat. As you squat, press your arms straight up toward the ceiling. As you stand, pull the elbows back down to your sides, squeezing your shoulder blades together. Do twenty reps. The coordination of the squat and the press will elevate your heart rate quickly. Keep your shoulders down away from your ears—do not let them shrug up as you press.
25. Cool Down and Lengthening Sequence
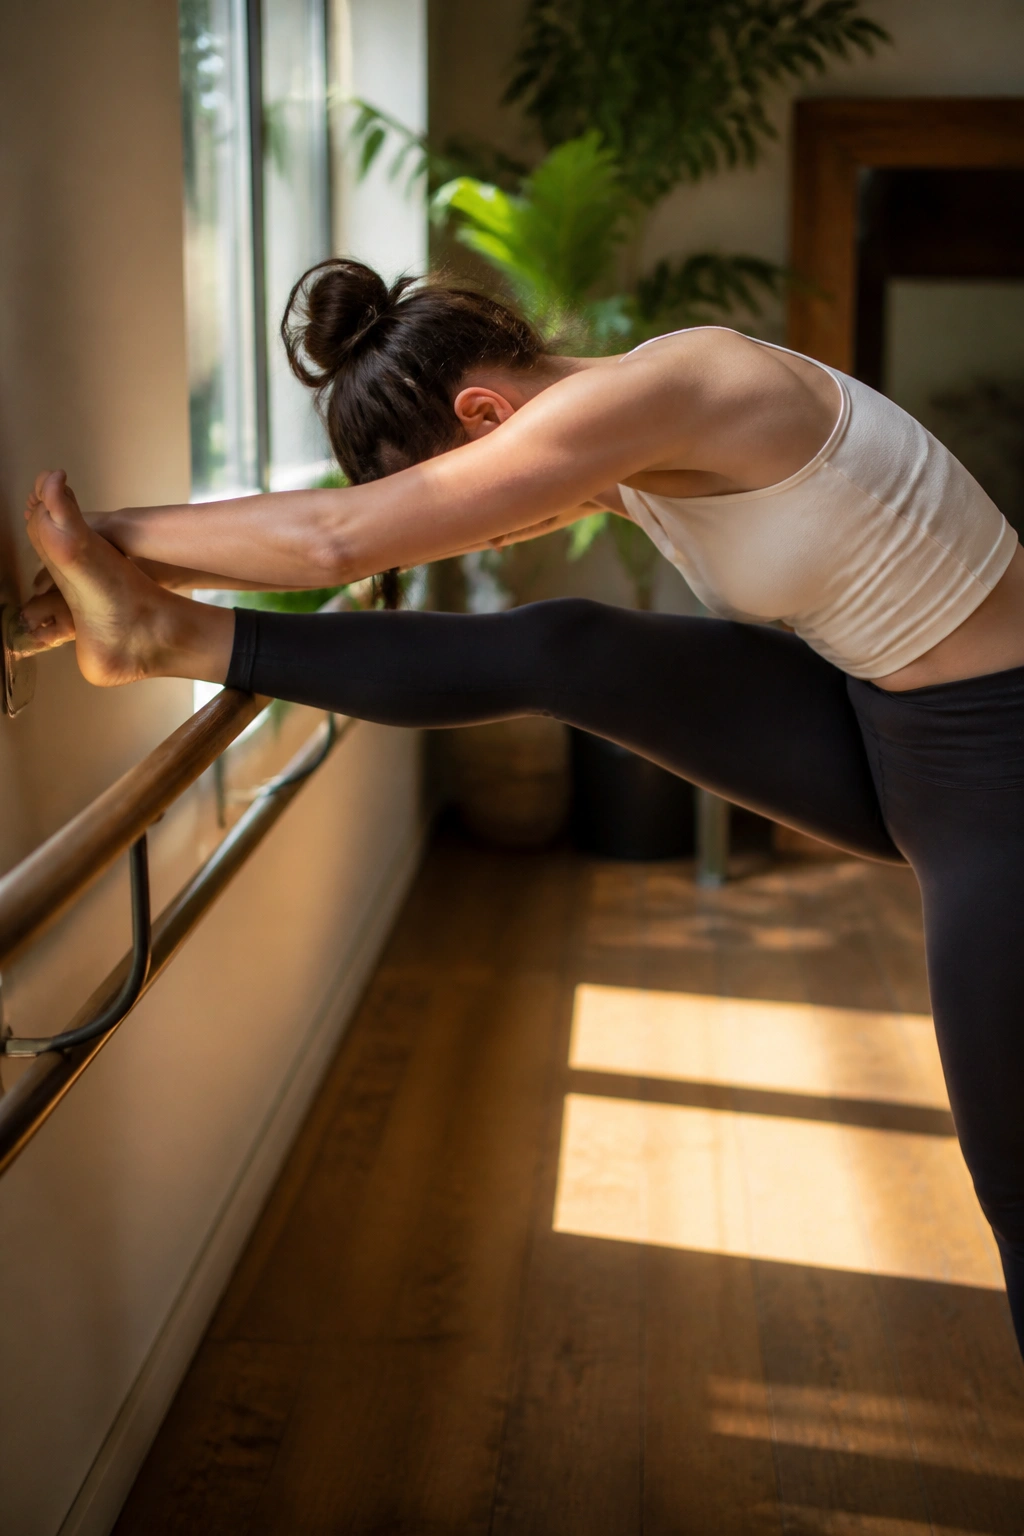
You made it through the sequences. Now, do not skip the cooldown. This is where the muscles set and recover. Stand facing your barre. Place your right heel on the barre, leg straight. Flex your foot.
The Lengthening: Fold forward over your leg, keeping your back flat. You will feel a deep stretch in the hamstring. Hold for thirty seconds. Switch to the left leg. Then, step back into a calf stretch, pressing your back heel into the floor. Finally, take a deep breath, reach your arms overhead, and drop them down. You have worked hard. Your muscles need this static stretch to prevent soreness and maintain flexibility.
Final Thoughts
Consistency is the secret to seeing results in barre. You do not need to do all twenty-five sequences at once. In fact, picking three or four and rotating them throughout the week is often more sustainable. Pay attention to how your body feels. If a movement causes sharp pain, stop immediately and adjust your form. Discomfort from muscle fatigue is expected; joint pain is a warning signal you should never ignore.
Barre is a practice of precision. It is tempting to speed through the movements to get to the end, but the real benefit is found in the slow, controlled resistance. The next time you find yourself trembling during a set of pulses, remember that the shake is proof of progress. It means you are challenging your limits. Keep showing up, keep focusing on your form, and the changes in your strength and stamina will follow.
