



Most back pain does not start with a dramatic injury. It starts with a chair, a weak upper back, a slouched rib cage, and a day that keeps getting longer than your body wants it to.
Back strengthening exercises at home work best when they train the whole support system, not just the muscles you can feel burning. That means the lats, rhomboids, lower traps, spinal erectors, glutes, and deep core all need some attention. If you only do one or two big moves, the weak links stay weak. And the back has a way of reminding you about that.
The good news is that you do not need a gym to make real progress. A floor, a wall, a backpack, and a decent resistance band can cover a lot of ground. Some of these moves are gentle and surgical. Others build honest strength and stamina. A few are there because the back likes to be trained in more than one position — lying down, kneeling, standing, and carrying.
Start with control. Then load. Then carry that strength into the rest of your day.
1. Bird Dog
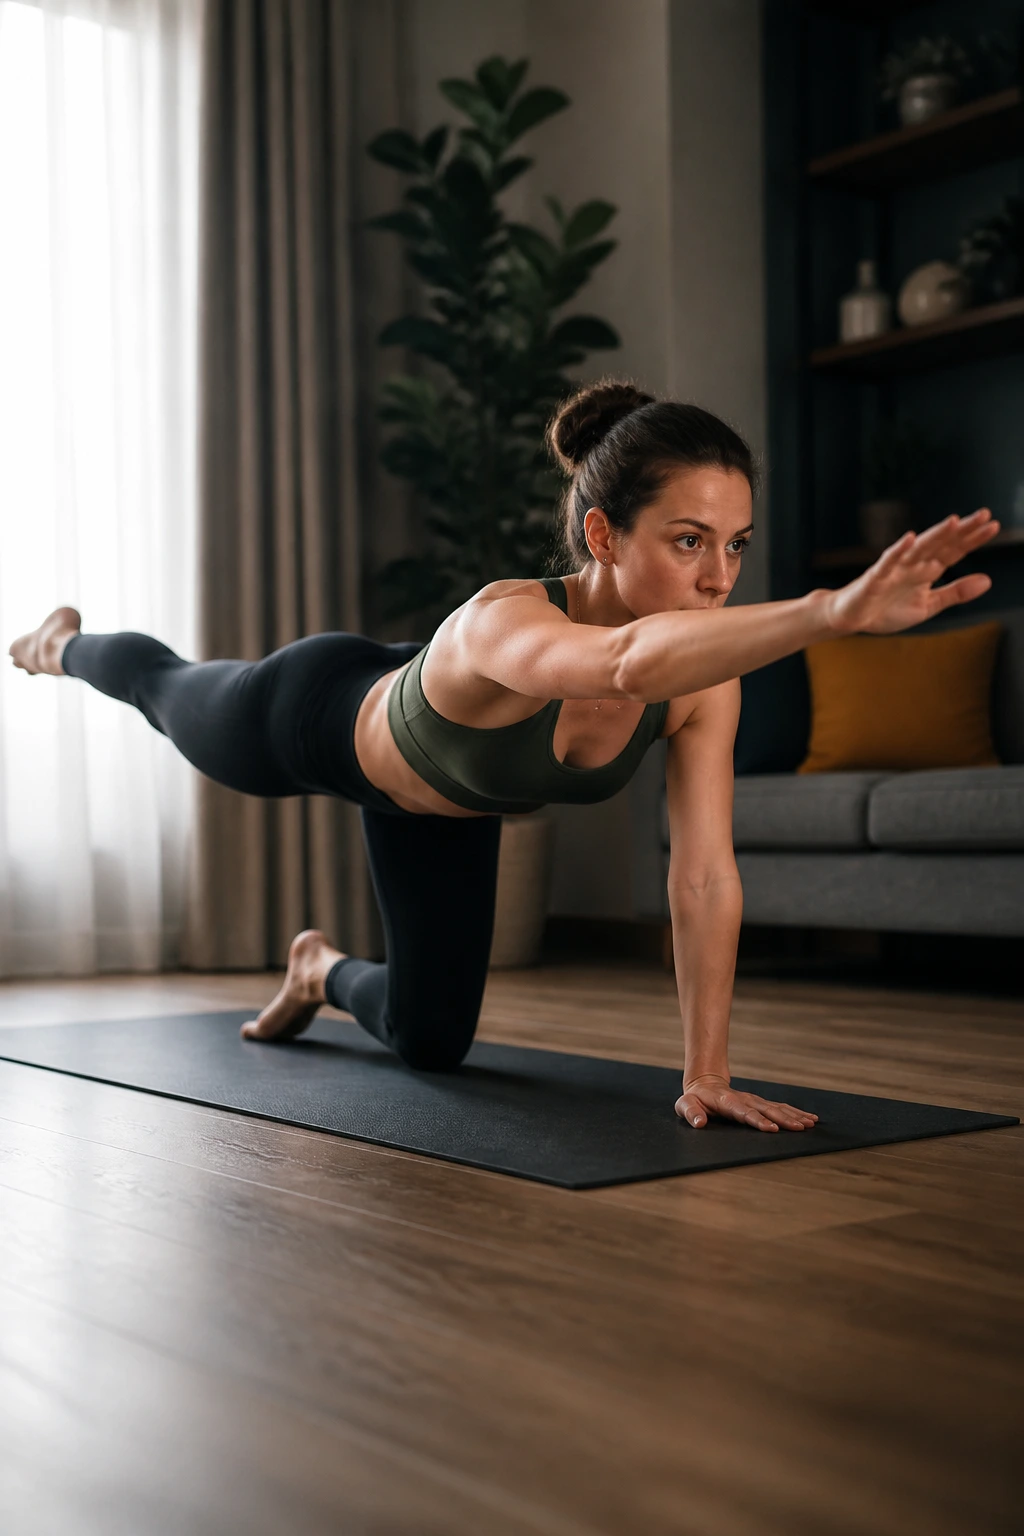
The bird dog looks almost too simple, which is exactly why people underestimate it. You’re teaching your spine to stay quiet while one arm and the opposite leg move, and that skill carries over to almost everything else you do. If your lower back tends to take over during bridges, rows, or even walking uphill, this is a smart place to begin.
Set up on hands and knees with your hands under your shoulders and knees under your hips. Reach your right arm forward and your left leg back until both are long, level, and steady. Hold for 2 to 5 seconds, then switch sides. Keep your hips square to the floor. No twisting. No arching.
Aim for 6 to 10 reps per side and make each rep look boring. That’s a compliment here. If your lower back pinches, shorten the range and slow down.
2. Dead Bug
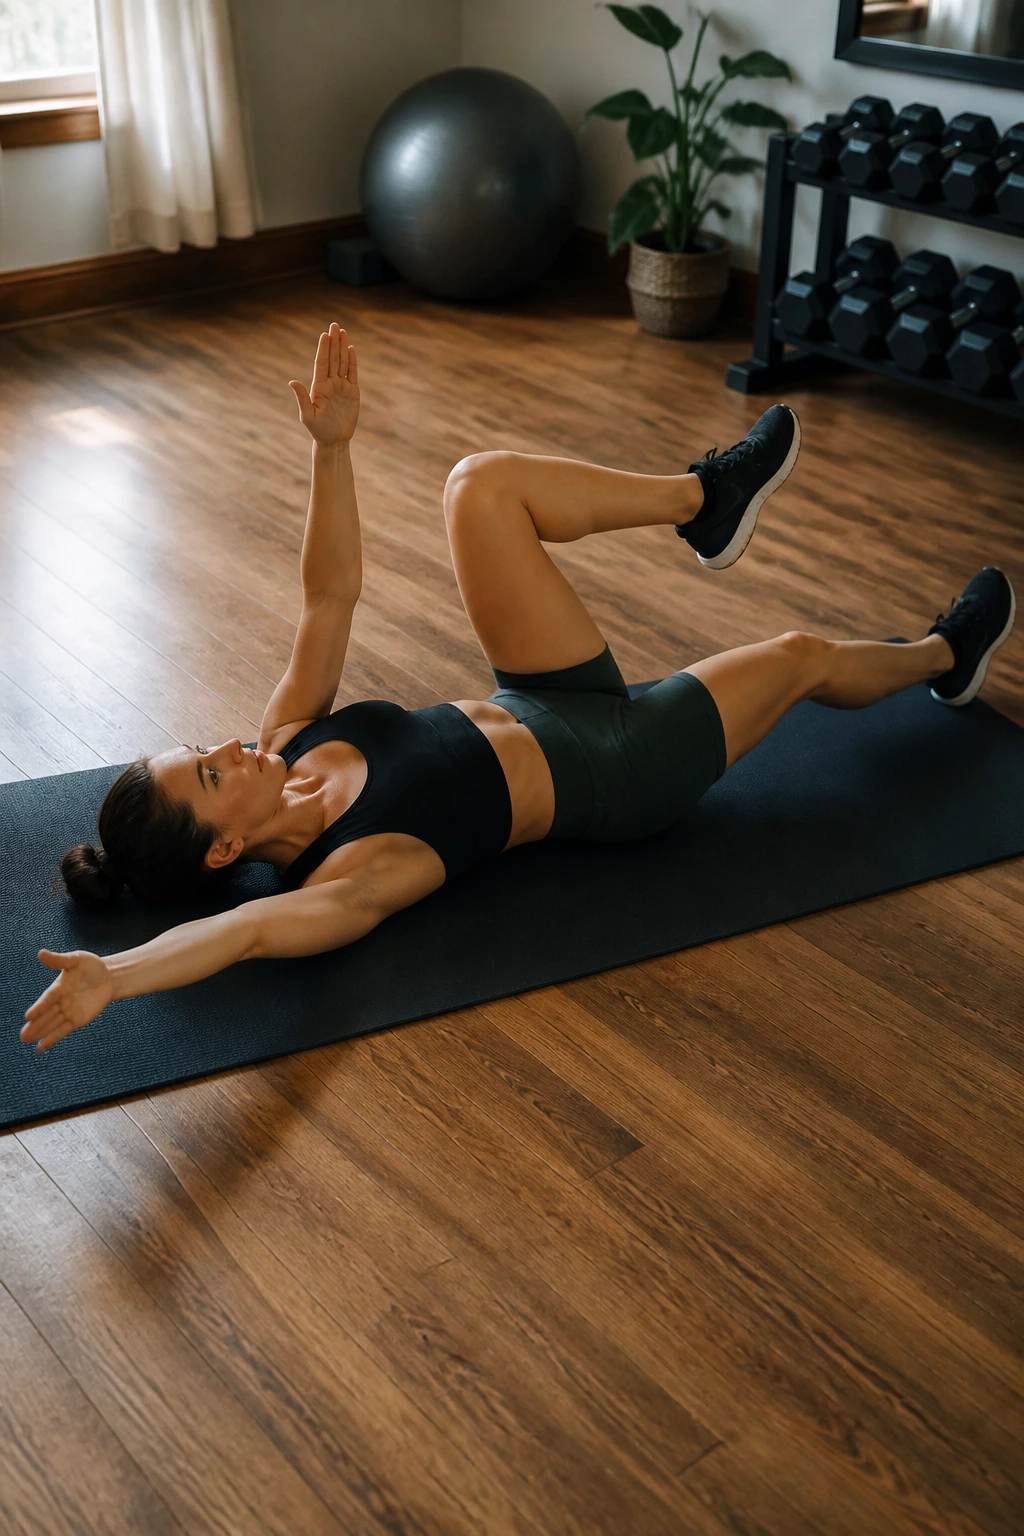
If bird dog trains your back to resist rotation, the dead bug trains it to resist chaos. Your spine stays long while your arms and legs move away from the center, and that’s a useful kind of strength for anyone who sits a lot or feels their lower back work overtime during core moves.
Lie on your back with your arms pointing straight up and your hips and knees bent at 90 degrees. Press your lower back gently into the floor. Lower your right arm and left leg toward the floor at the same time, then return to center and switch sides. The lower back should stay in contact with the ground the whole time. If it arches, go smaller.
A good starting dose is 6 to 8 reps per side, slow enough that you can feel control on the way down. It should feel deliberate, not rushed. This one rewards patience.
3. Wall Angels
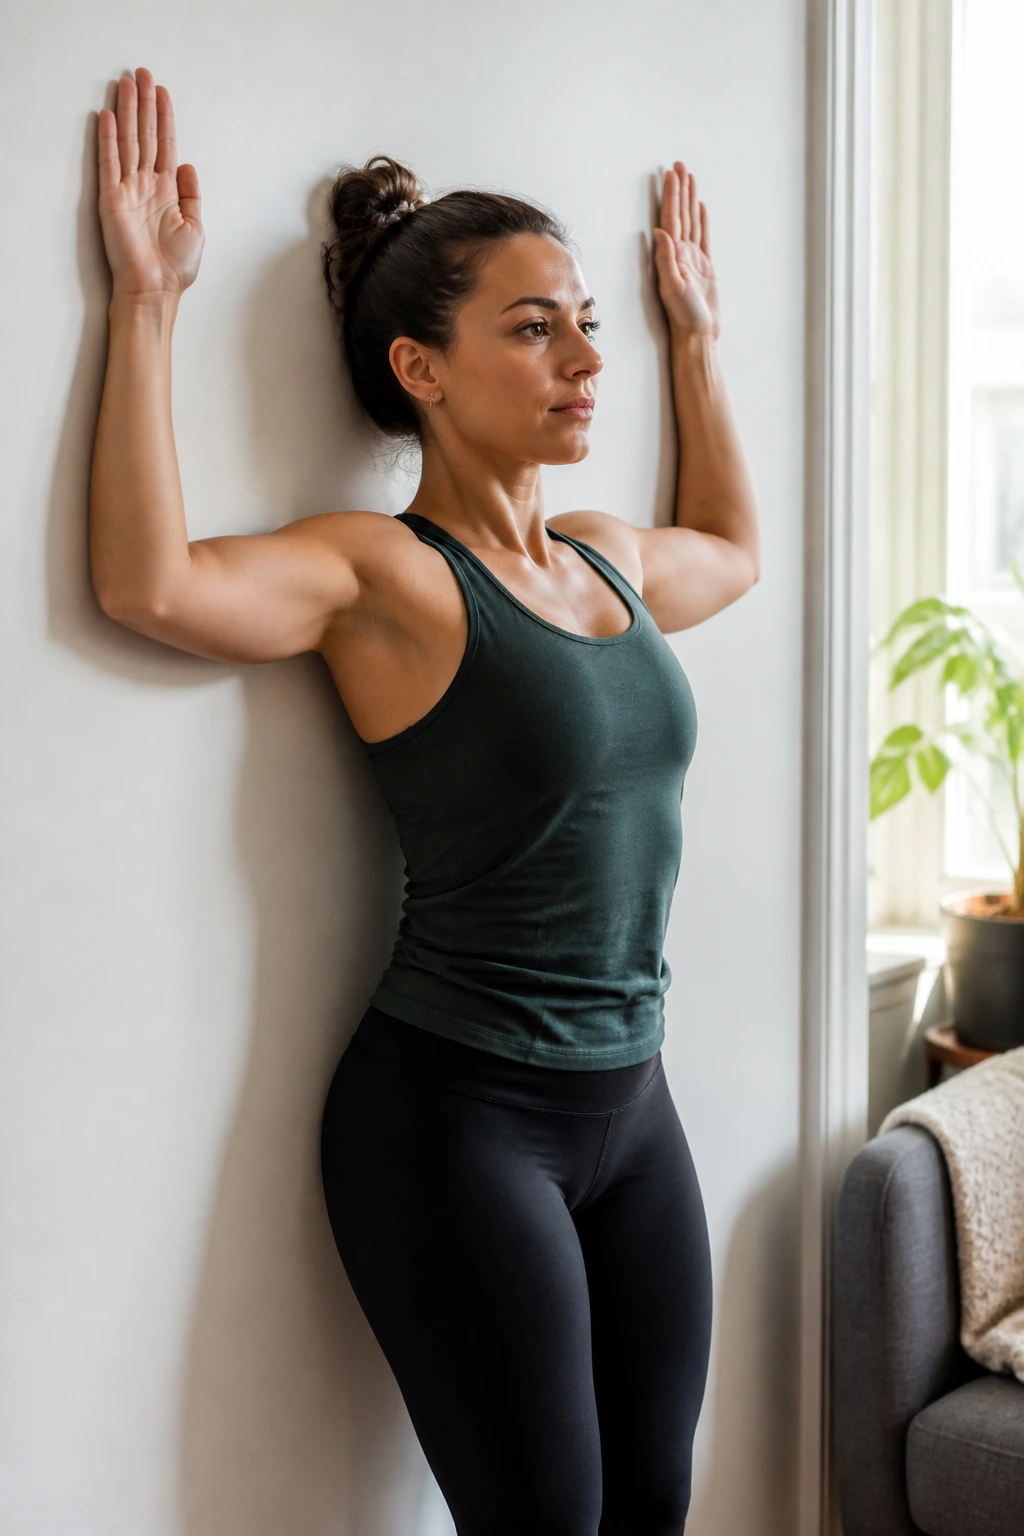
Wall angels are a back exercise disguised as posture work. They help the upper back and shoulder blades learn how to move without shrugging everything up into the neck, which is a very common problem after too much desk time or phone time.
Stand with your back against a wall, feet a few inches forward. Flatten your ribs gently, then place your elbows and forearms against the wall if you can. Slide your arms up and down like you’re making snow angels, but keep the movement smooth and small if your shoulders are tight. The goal is not perfect shape. The goal is clean motion.
Try 8 to 12 slow reps. If your lower back arches hard to cheat the movement, step your feet a little farther from the wall and reduce the range. That tiny adjustment makes the exercise much more useful.
4. Scapular Push-Up
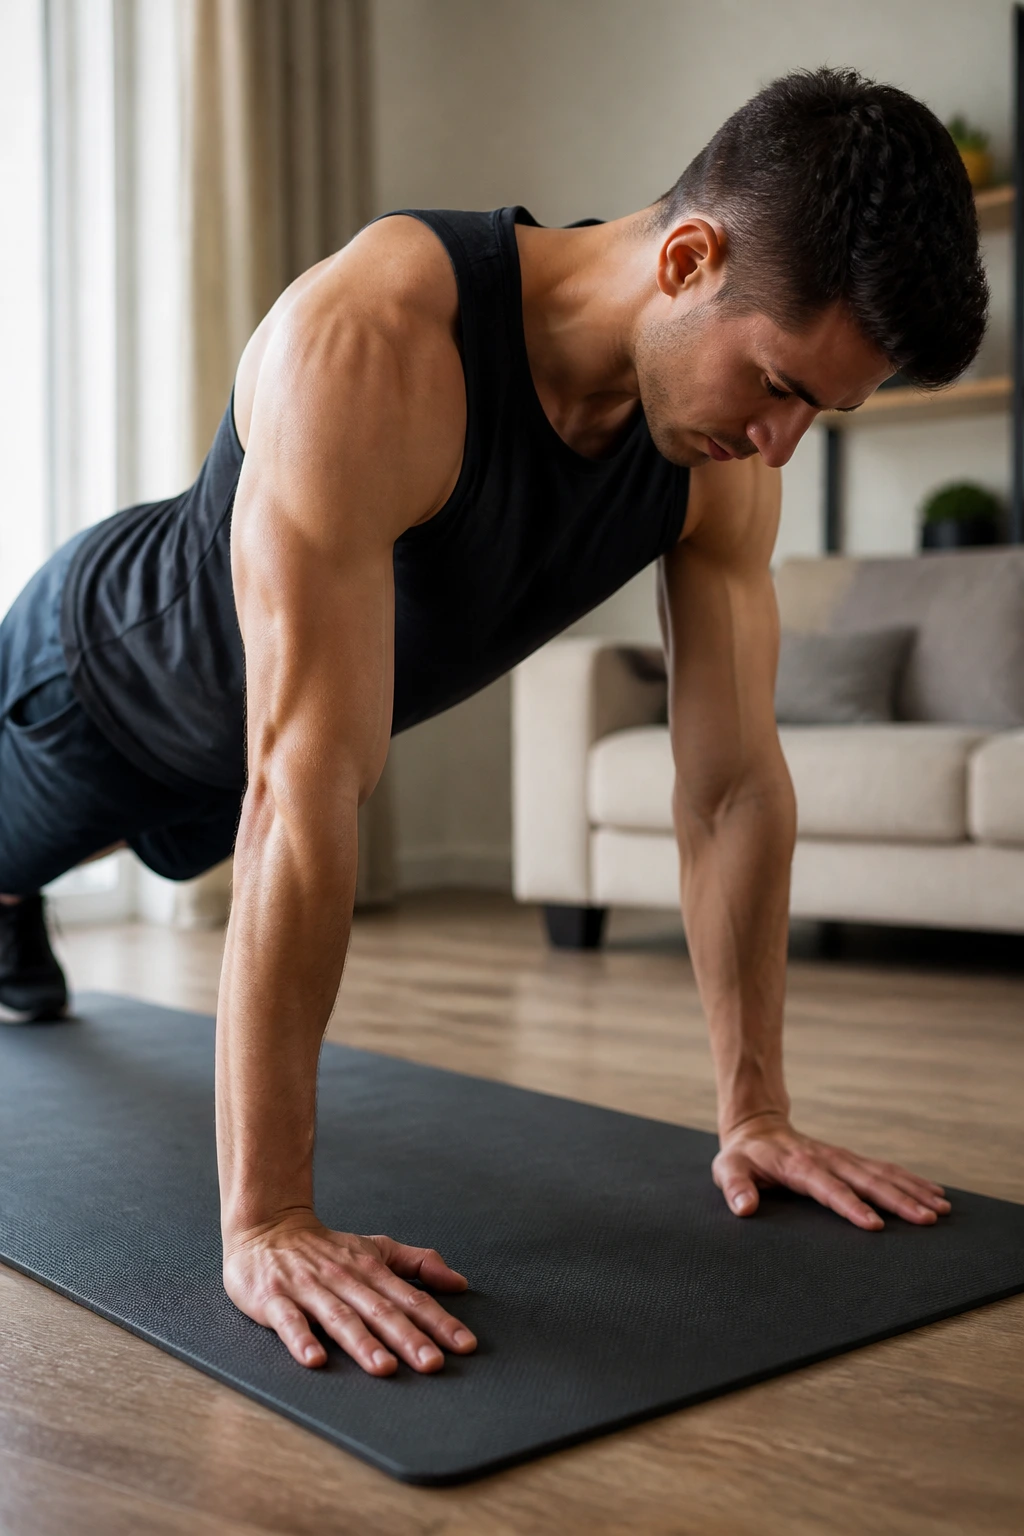
This one is sneaky. It looks like a push-up that forgot the elbow bend, but it’s really about the shoulder blades, which sit at the center of a strong upper back.
Get into a high plank with your hands under your shoulders. Keep your arms straight and let your chest sink slightly between your shoulder blades, then push the floor away so the shoulder blades spread apart. That’s the whole rep. The elbows barely move. The torso should stay long and firm.
Do 2 to 3 sets of 8 to 15 reps. You’ll feel it in the muscles around the ribs and shoulder blades, not in the arms. If the low back sags, shorten the set. Better crisp reps than messy ones.
5. Prone Y Raise
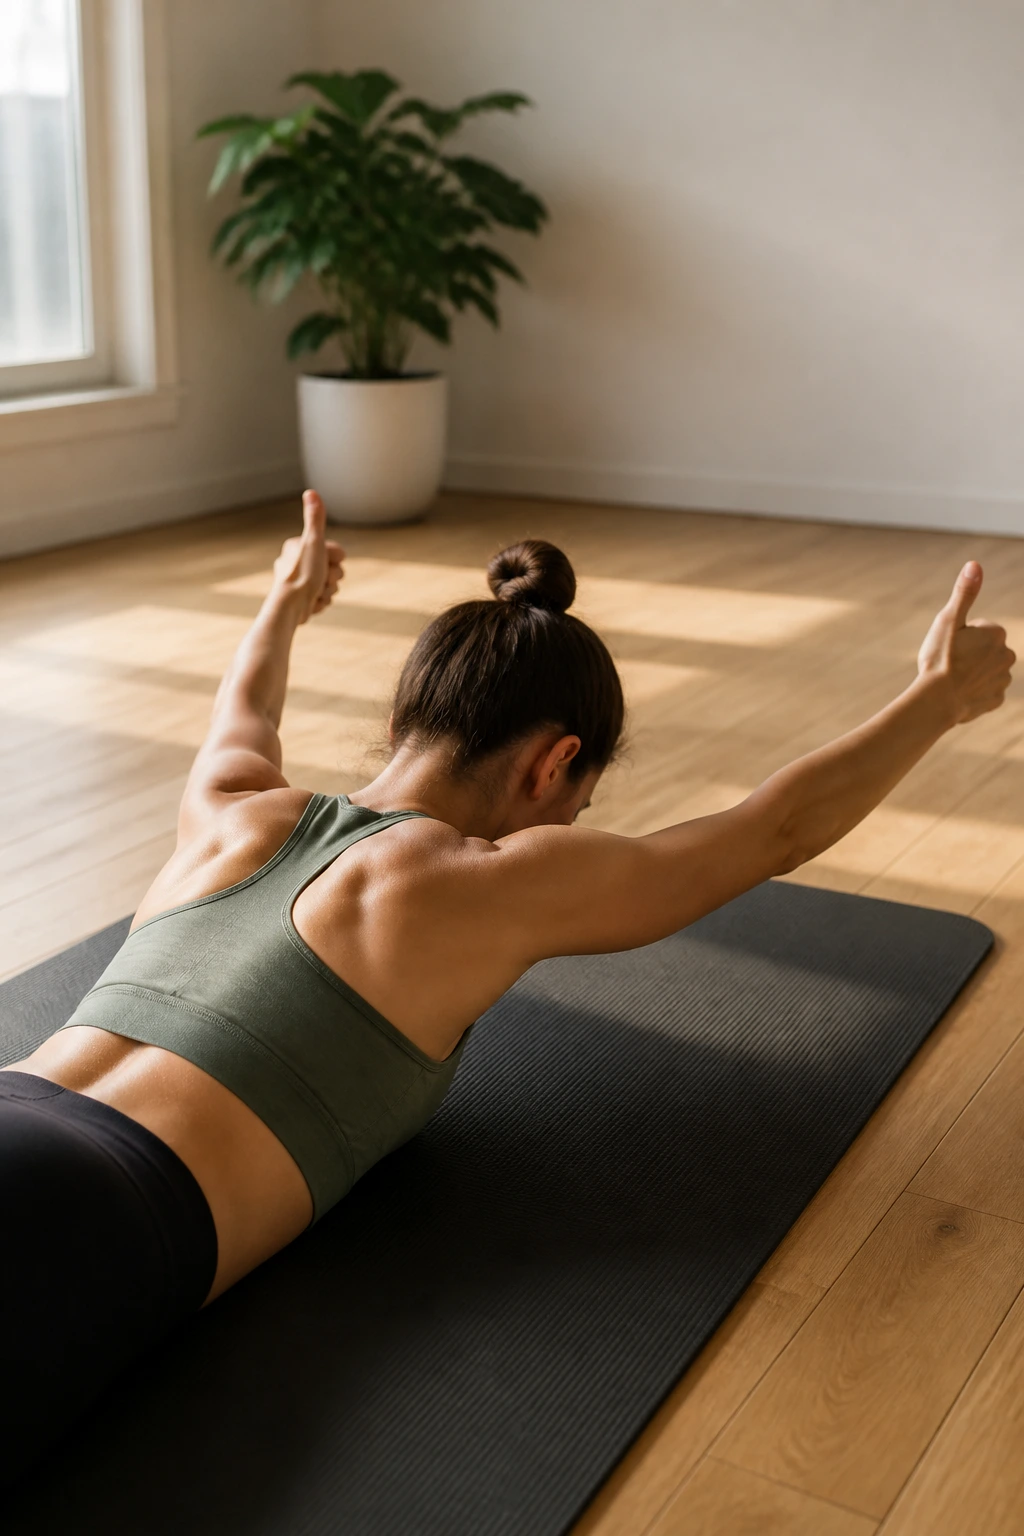
The prone Y raise is one of those exercises that looks tiny and feels oddly hard in the right places. It targets the lower traps and upper back, which are the muscles that help your shoulders sit where they should instead of creeping up around your ears.
Lie face down with your forehead on a folded towel. Extend your arms overhead into a Y shape, thumbs pointing up. Lift your arms an inch or two off the floor, pause, and lower with control. Keep your neck long. The movement should come from the shoulder blades, not from swinging the lower back.
Why it matters
When the lower traps are weak, the upper back often gets lazy and the neck starts doing too much. That’s a miserable trade.
Use 8 to 12 reps with a light squeeze at the top. If your thumbs turn inward or your ribs peel off the floor, the range is too big. Small and tidy wins here.
6. Prone T Raise
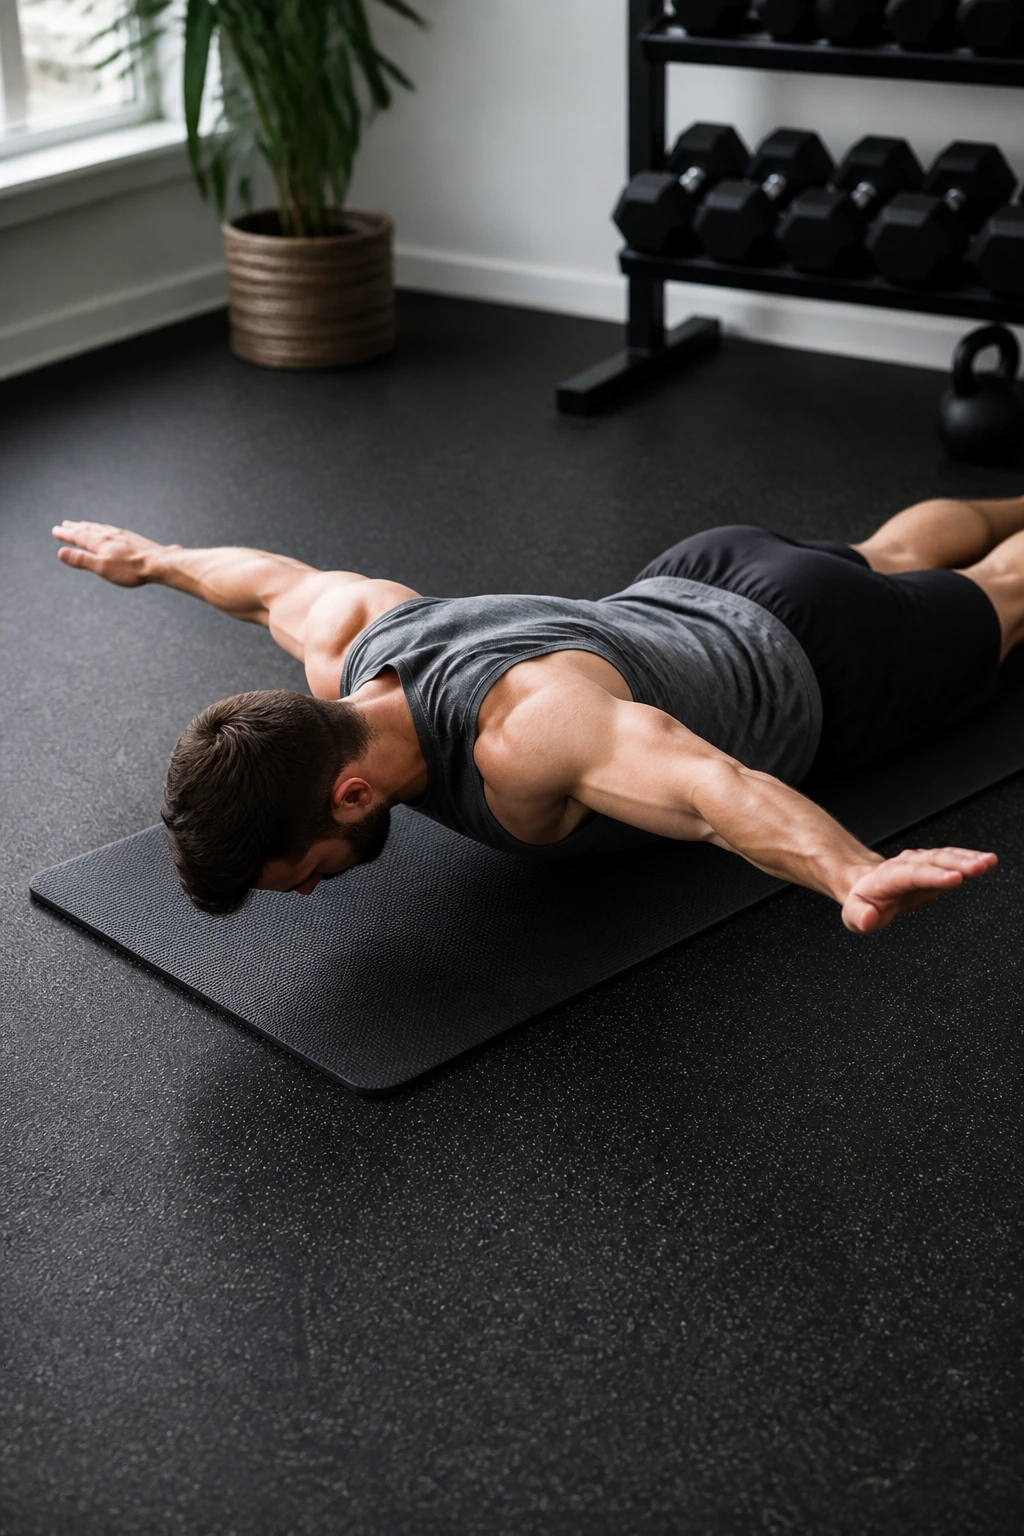
The prone T raise is the Y raise’s more horizontal cousin. It works the middle of the upper back and helps the shoulder blades pull together without turning into a shrug.
Lie face down with your arms stretched out to the sides, palms facing the floor or slightly forward. Lift both arms a few inches, hold for a second, then lower slowly. Keep your chin tucked and your rib cage heavy. A lot of people accidentally arch their low back here. Don’t.
This move pairs well with wall angels because the wall work teaches shoulder position while the floor work teaches strength. 10 to 15 controlled reps is a good target. If your traps take over and your neck feels tight, reduce the height of the lift and slow the lowering phase.
7. Prone W Raise
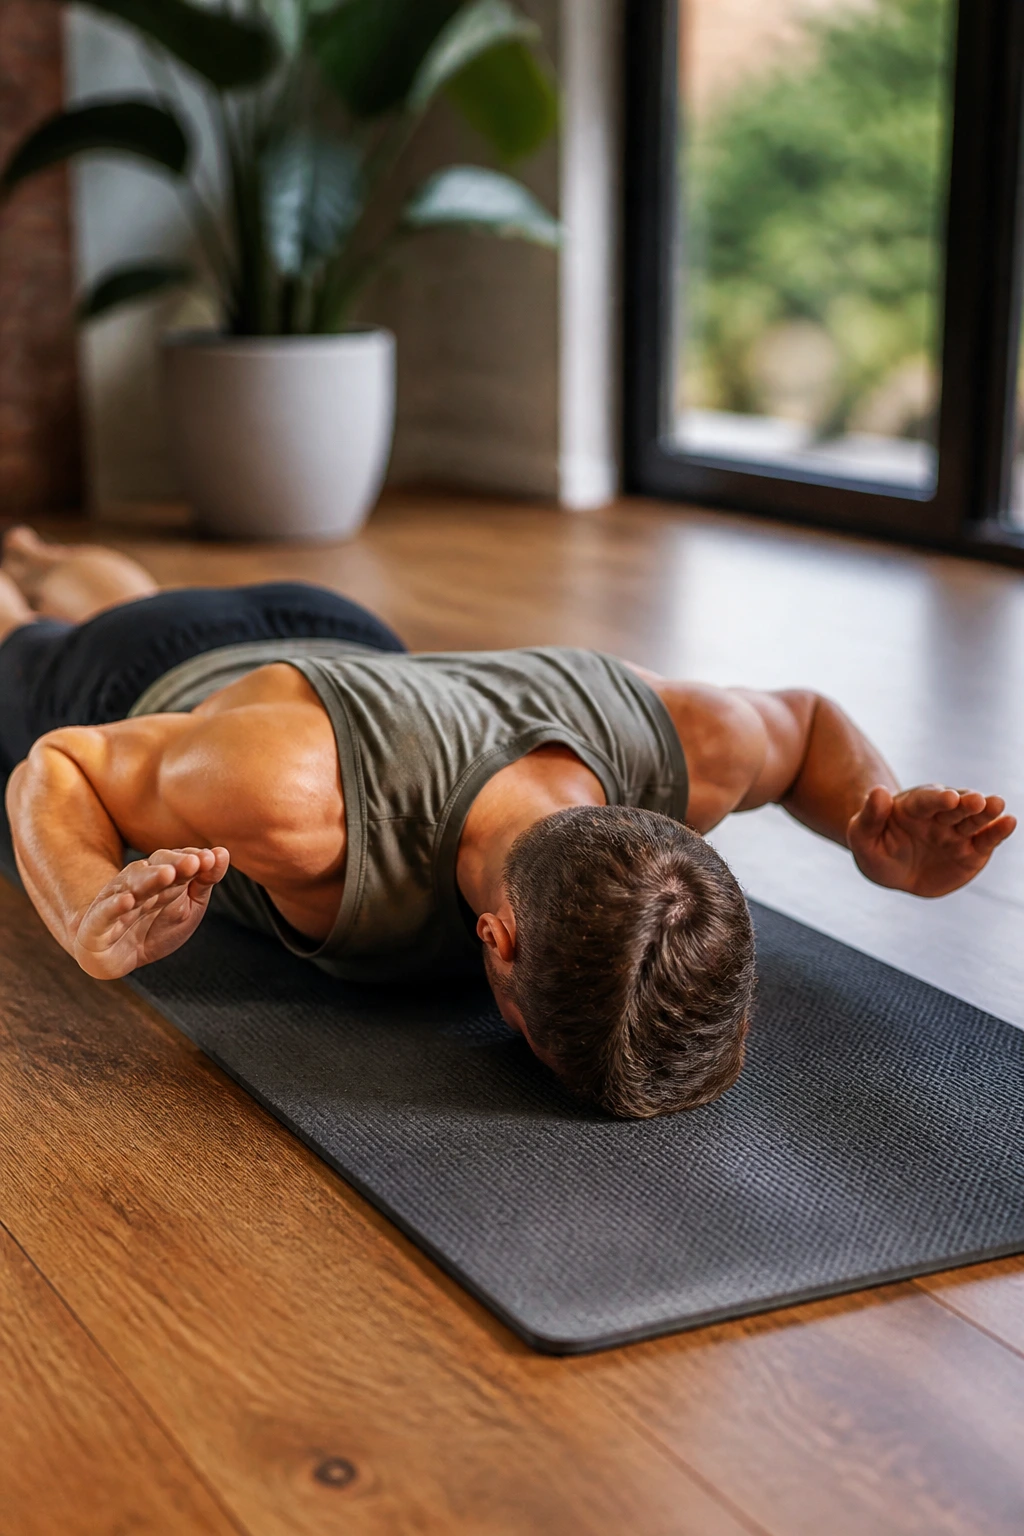
The prone W raise hits a slightly different angle and usually feels more concentrated between the shoulder blades. It’s the kind of exercise that doesn’t look dramatic on paper but shows up later when your posture holds better through a long workday.
Lie face down, bend your elbows, and shape your arms like a W. Lift your elbows and forearms off the floor a few inches, then squeeze the shoulder blades gently back and down. Lower with control. Keep the forehead down and the neck relaxed.
8 to 12 reps is enough. If your hands drift too far from your body, or if your shoulders creep toward your ears, you’ve lost the point of the move. The goal is a clean squeeze, not a big lift.
8. Superman Hold
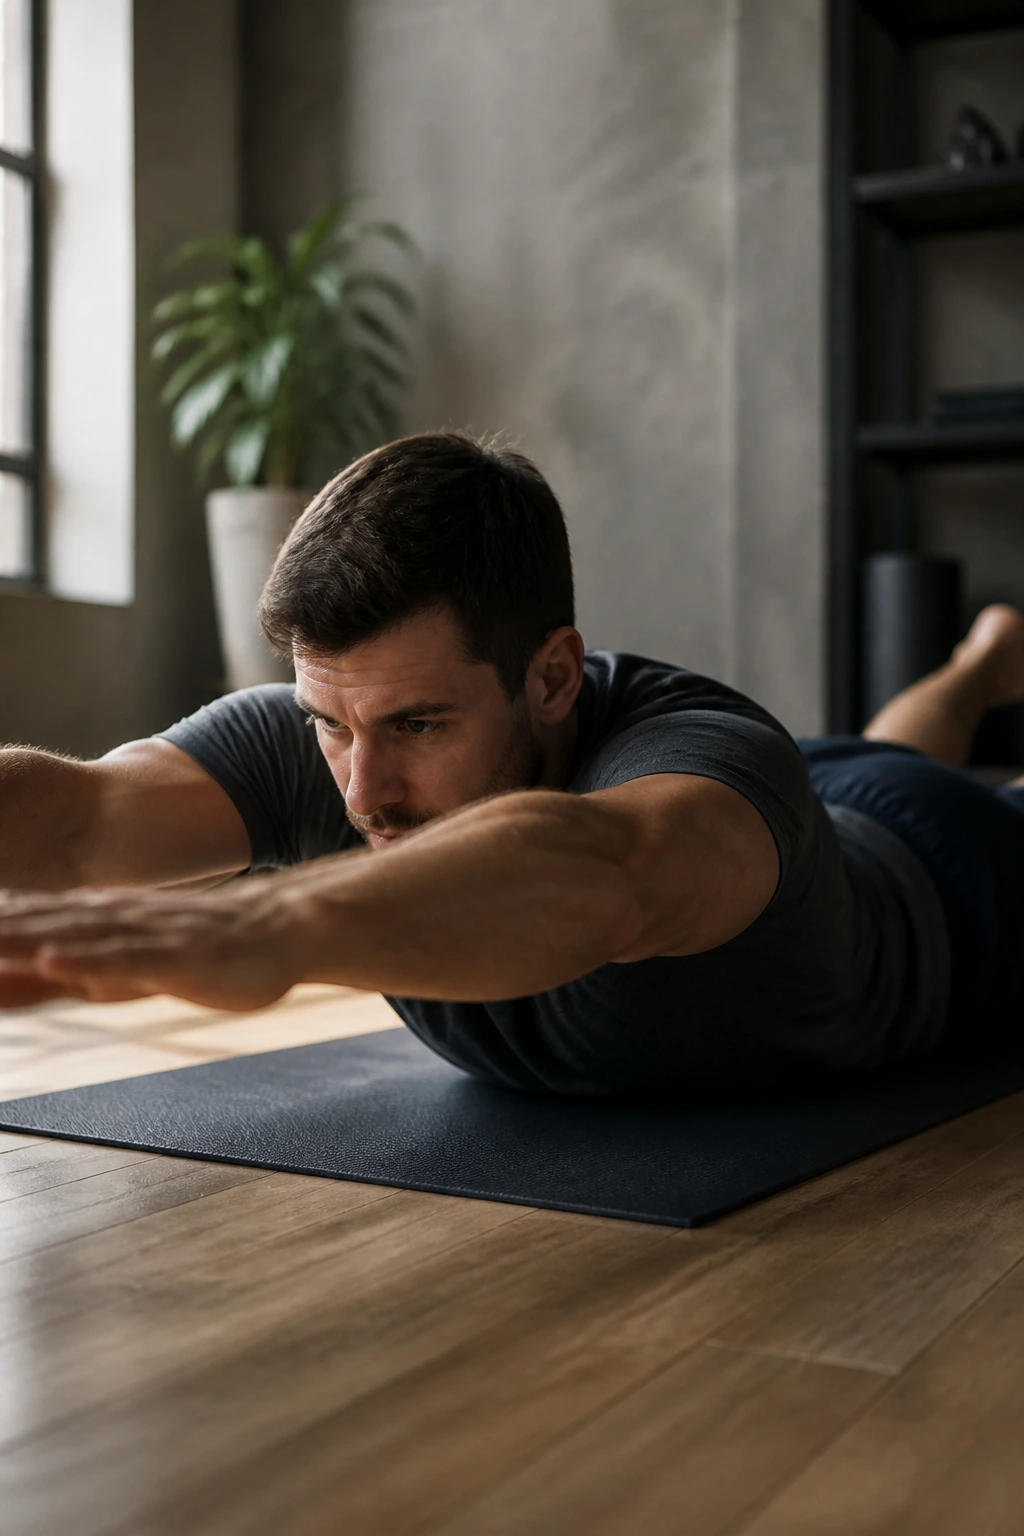
The superman gets mixed reviews because people often turn it into a huge, sloppy backbend. Done well, though, it gives the spinal erectors a straight-up endurance challenge.
Lie face down with your arms extended overhead. Lift your chest, arms, and legs slightly off the floor at the same time, then hold for 10 to 20 seconds before lowering. Think long, not high. You want a small lift that feels controlled through the whole back line.
A few rounds of 3 to 5 holds works well. If you feel this mostly in your lower back and nowhere else, lower the lift and brace your glutes harder. If it causes sharp pain, skip it. Some backs like this exercise more than others, and that’s fine.
9. Prone Cobra
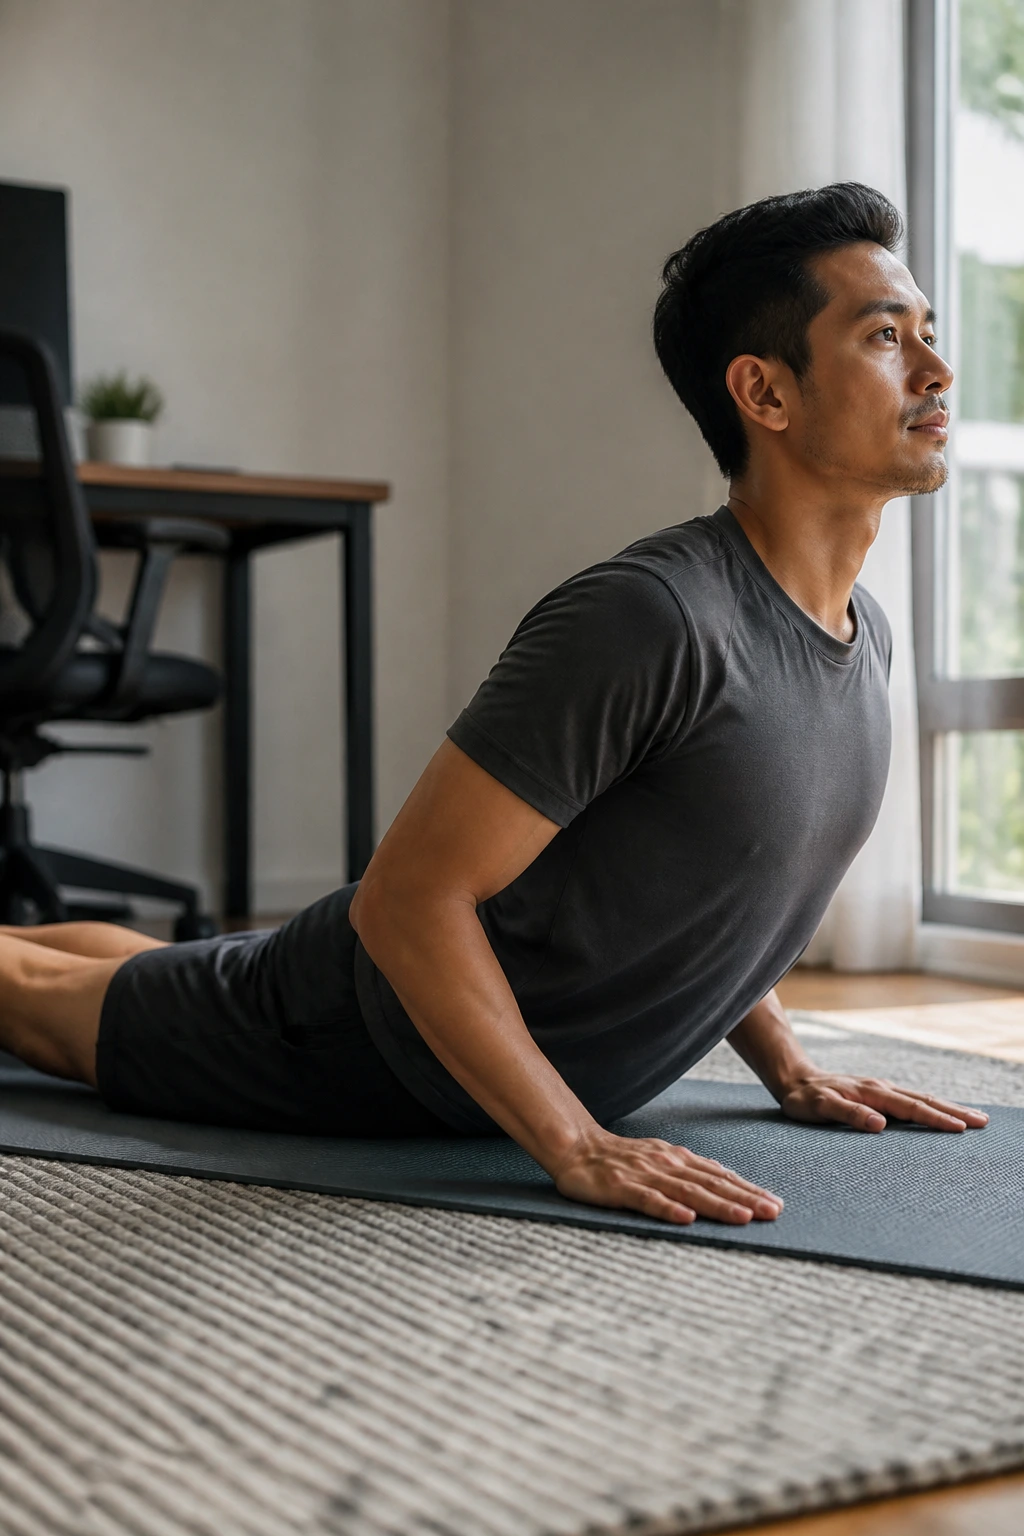
Prone cobra is a back-strengthening move that also teaches posture endurance. It’s less about brute force and more about learning how to hold your upper back in a better position without strain.
Lie face down with your arms by your sides and your palms turned down. Lift your chest slightly, rotate the palms outward if that feels natural, and gently draw the shoulder blades down and back. Your neck stays long. Your gaze stays down. Hold for 10 to 30 seconds and breathe.
This one works nicely as a posture reset between desk sessions. 2 to 4 holds is enough. If your lower back clamps hard, keep the chest lift smaller. The feeling should be engaged, not cranked.
10. Reverse Snow Angels
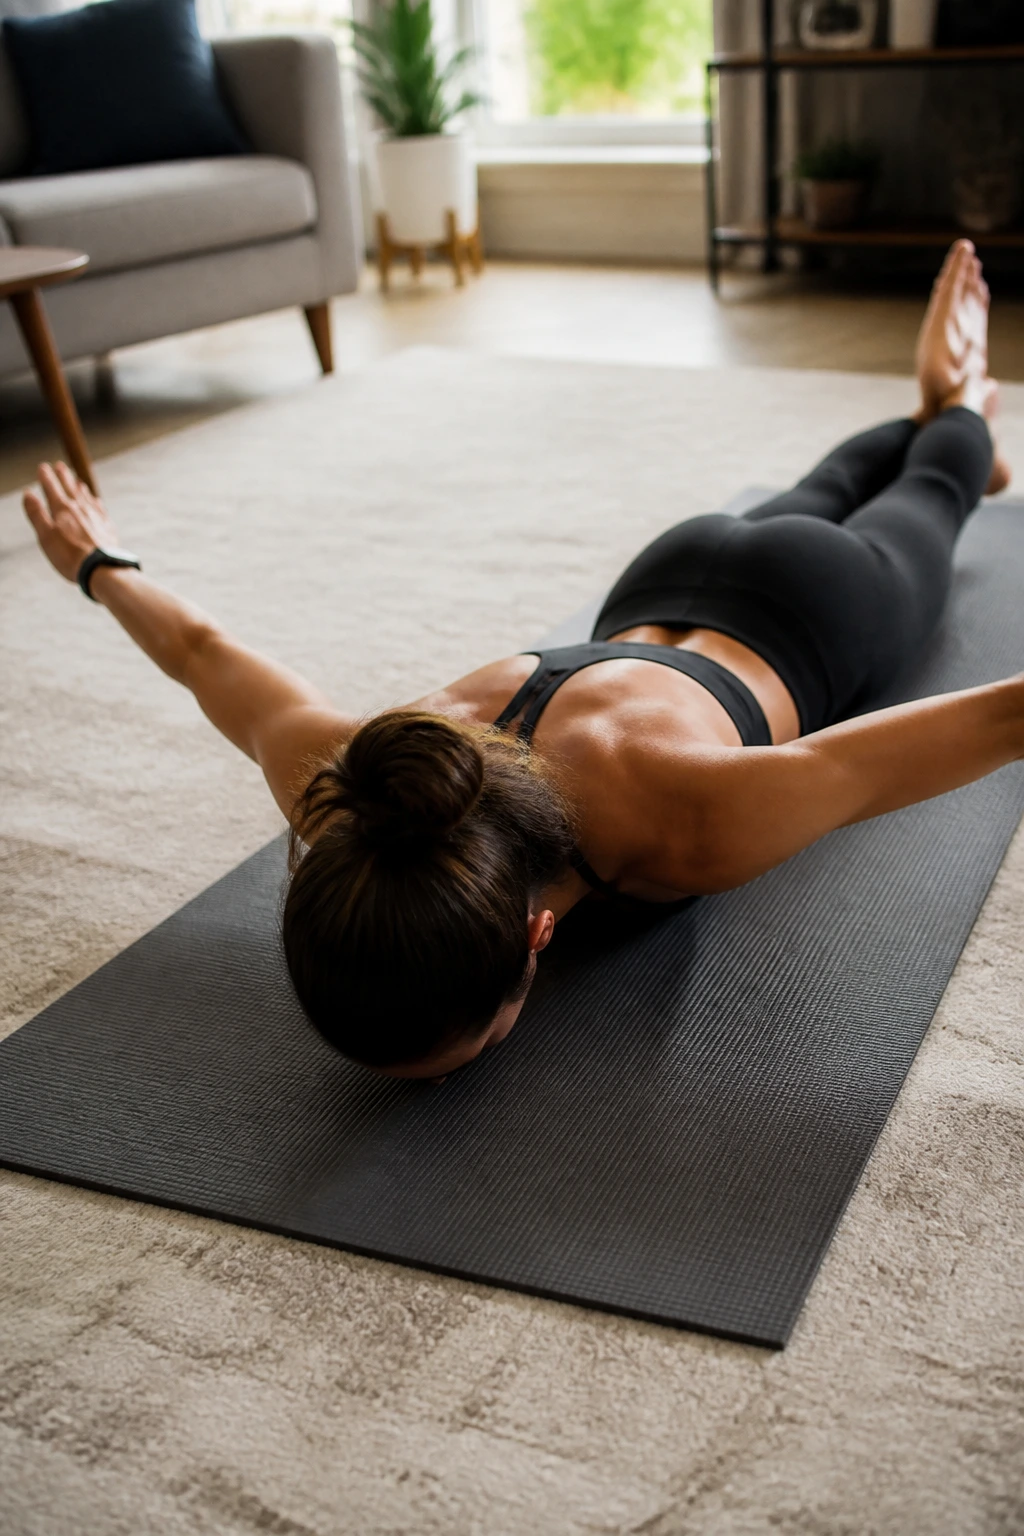
Reverse snow angels ask a lot from the upper back, and they do it without needing any equipment. They also expose side-to-side differences fast, which is useful if one shoulder blade moves better than the other.
Lie face down with your arms by your sides, palms down. Lift your arms slightly off the floor and sweep them out to a Y, then back down toward your hips in one smooth arc. Keep the chest low. Keep the ribs quiet. The motion should look like a slow, controlled sweep, not a splash.
You can start with 6 to 10 reps and keep the range modest. If the shoulders shrug or the lower back starts to pinch, shorten the sweep. These work best when the movement stays smooth from start to finish.
11. Glute Bridge
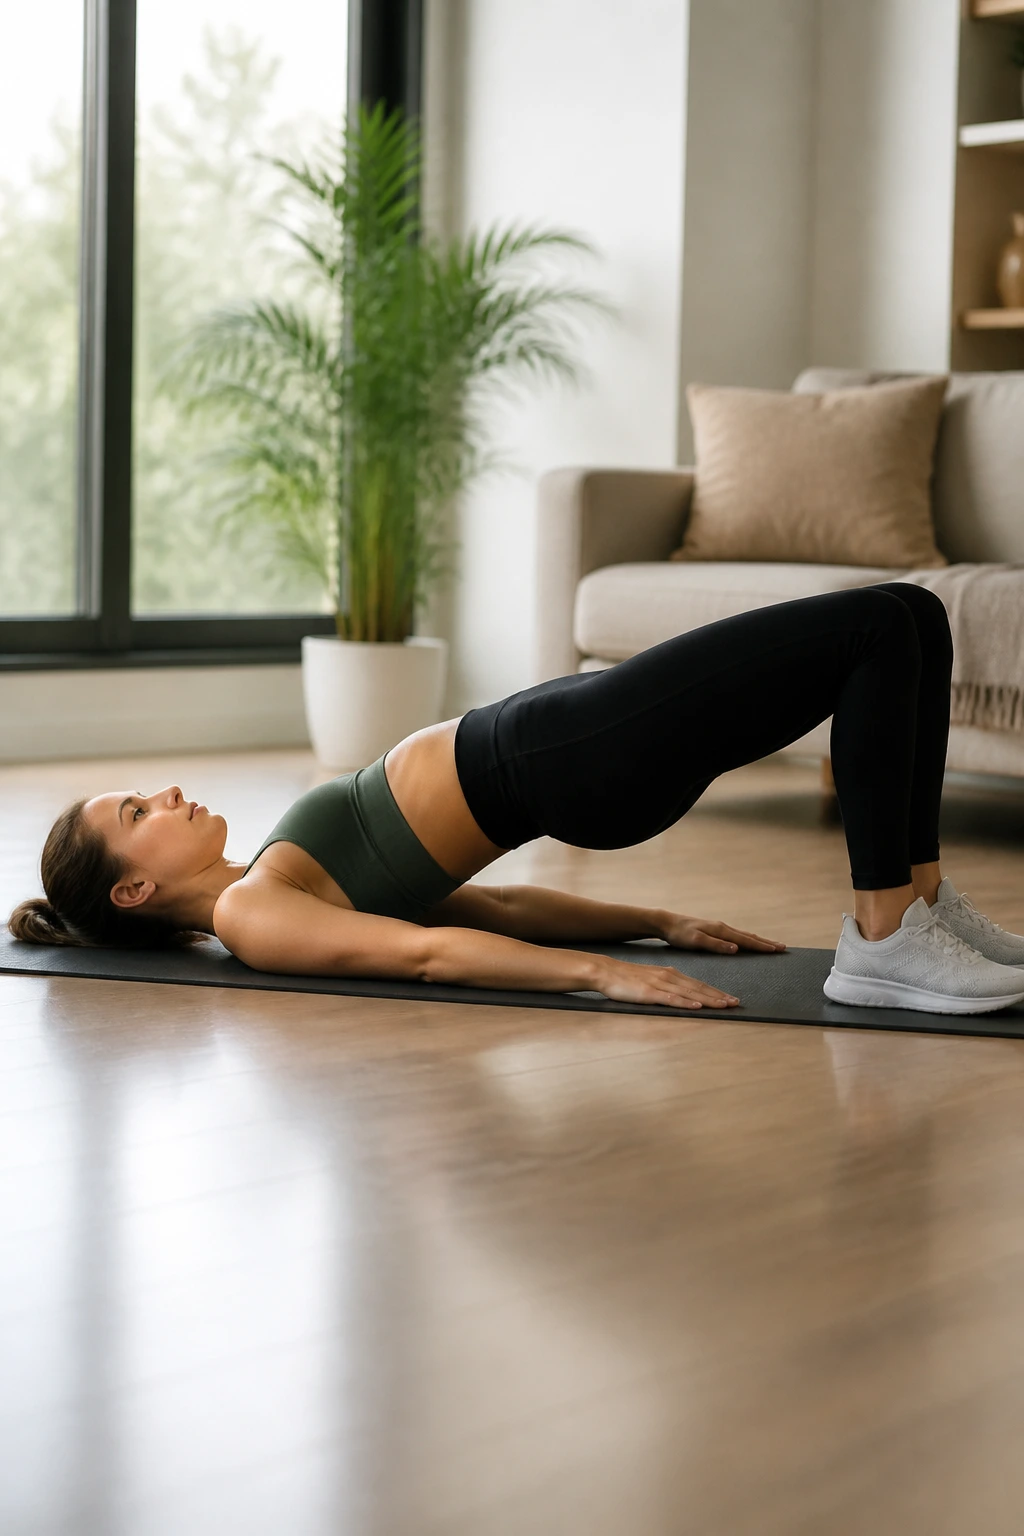
A strong back depends on the glutes more than most people want to admit. When your hips do their job, your lower back does not have to carry the whole load.
Lie on your back with your knees bent and feet flat. Brace lightly, squeeze your glutes, and lift your hips until your body makes a straight line from shoulders to knees. Pause at the top for 1 to 2 seconds, then lower under control. Don’t push the movement from your low back. Push through the heels and glutes.
Do 2 to 4 sets of 10 to 15 reps. If you feel hamstrings cramping, bring your feet a little closer to your hips. That tiny shift usually helps. This is a staple for a reason.
12. Single-Leg Glute Bridge
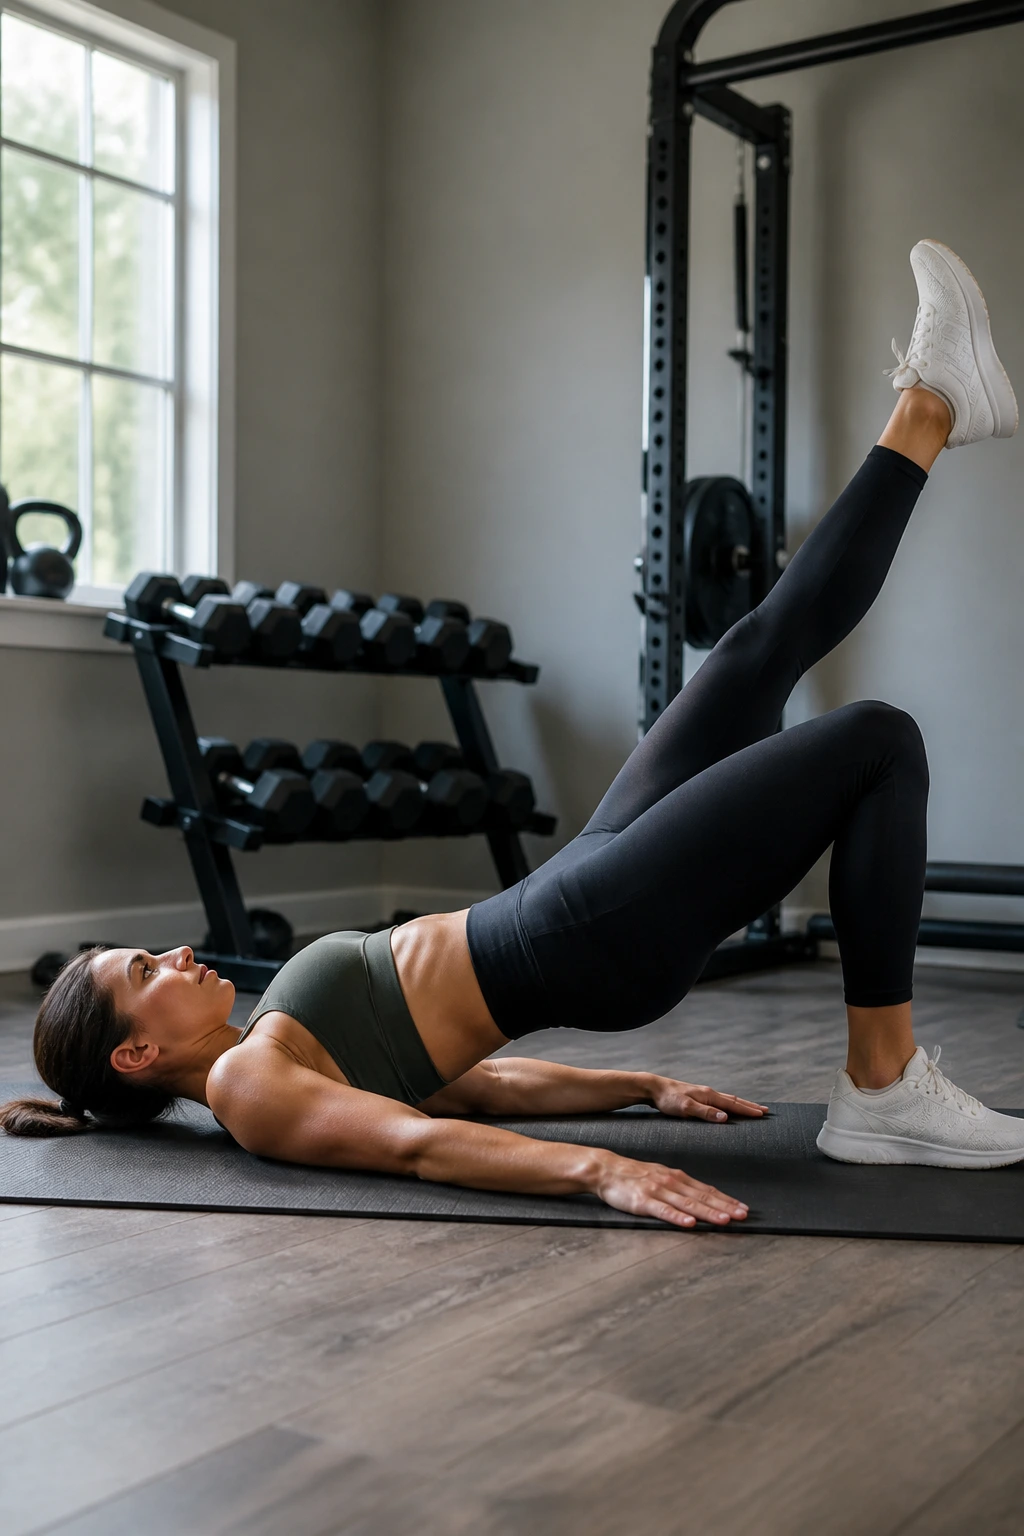
Once the two-leg version feels steady, the single-leg glute bridge adds a balance challenge that your back and hips can’t fake their way through. One side has to work harder, and that exposes weak spots fast.
Set up like a regular bridge, then extend one leg straight or keep the knee bent if that’s easier. Drive through the planted foot and lift the hips without letting them twist. Lower slowly. The pelvis should stay as level as possible. If one side drops, cut the range and clean it up.
6 to 10 reps per side is usually enough. A short pause at the top makes it tougher without needing any extra load. It’s a good exercise for runners, walkers, and anyone whose back gets cranky when the hips get lazy.
13. Quadruped Hover
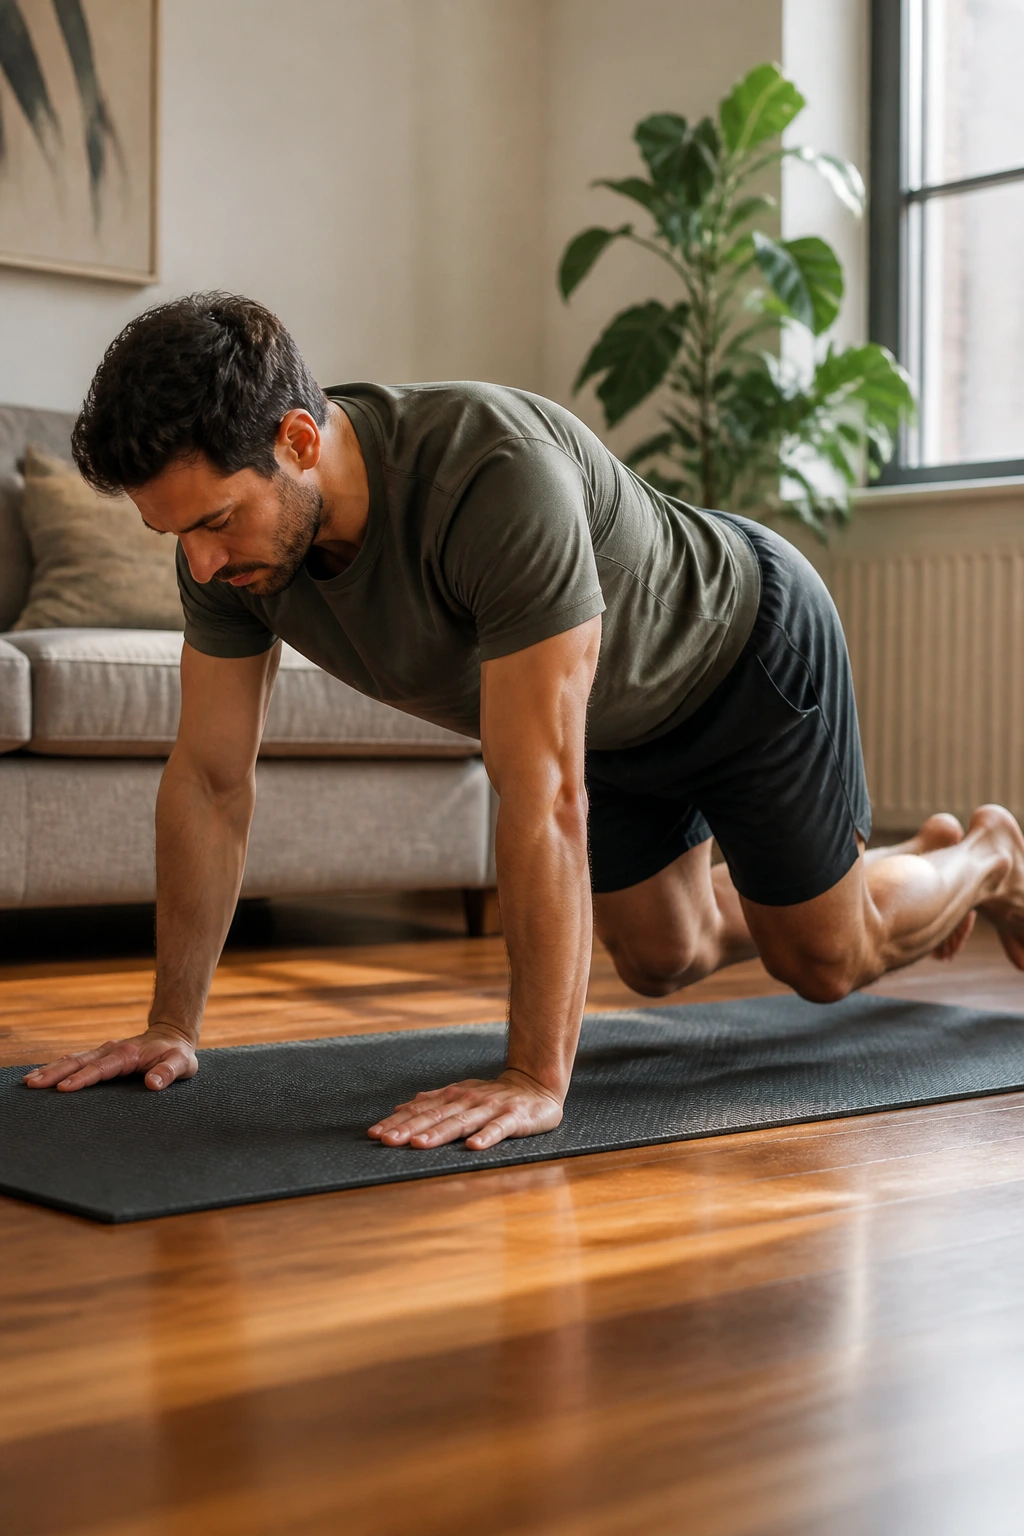
The quadruped hover is brutally honest. It asks your shoulders, back, and core to hold a stable position while you hover just above the floor. No fancy equipment. No tricks. Just tension.
Start on hands and knees, then tuck your toes and lift both knees an inch or two off the floor. Keep your back flat, your neck neutral, and your breathing steady. Hold for 5 to 15 seconds, then rest. The point is to stay square and calm, not to last forever.
Try 3 to 5 holds. If your shoulders shake, that’s fine. If your lower back rounds hard or your breath stops completely, the hold is too long. Short, clean holds build more useful strength than ugly, max-effort grinds.
14. Hip Hinge Good Morning
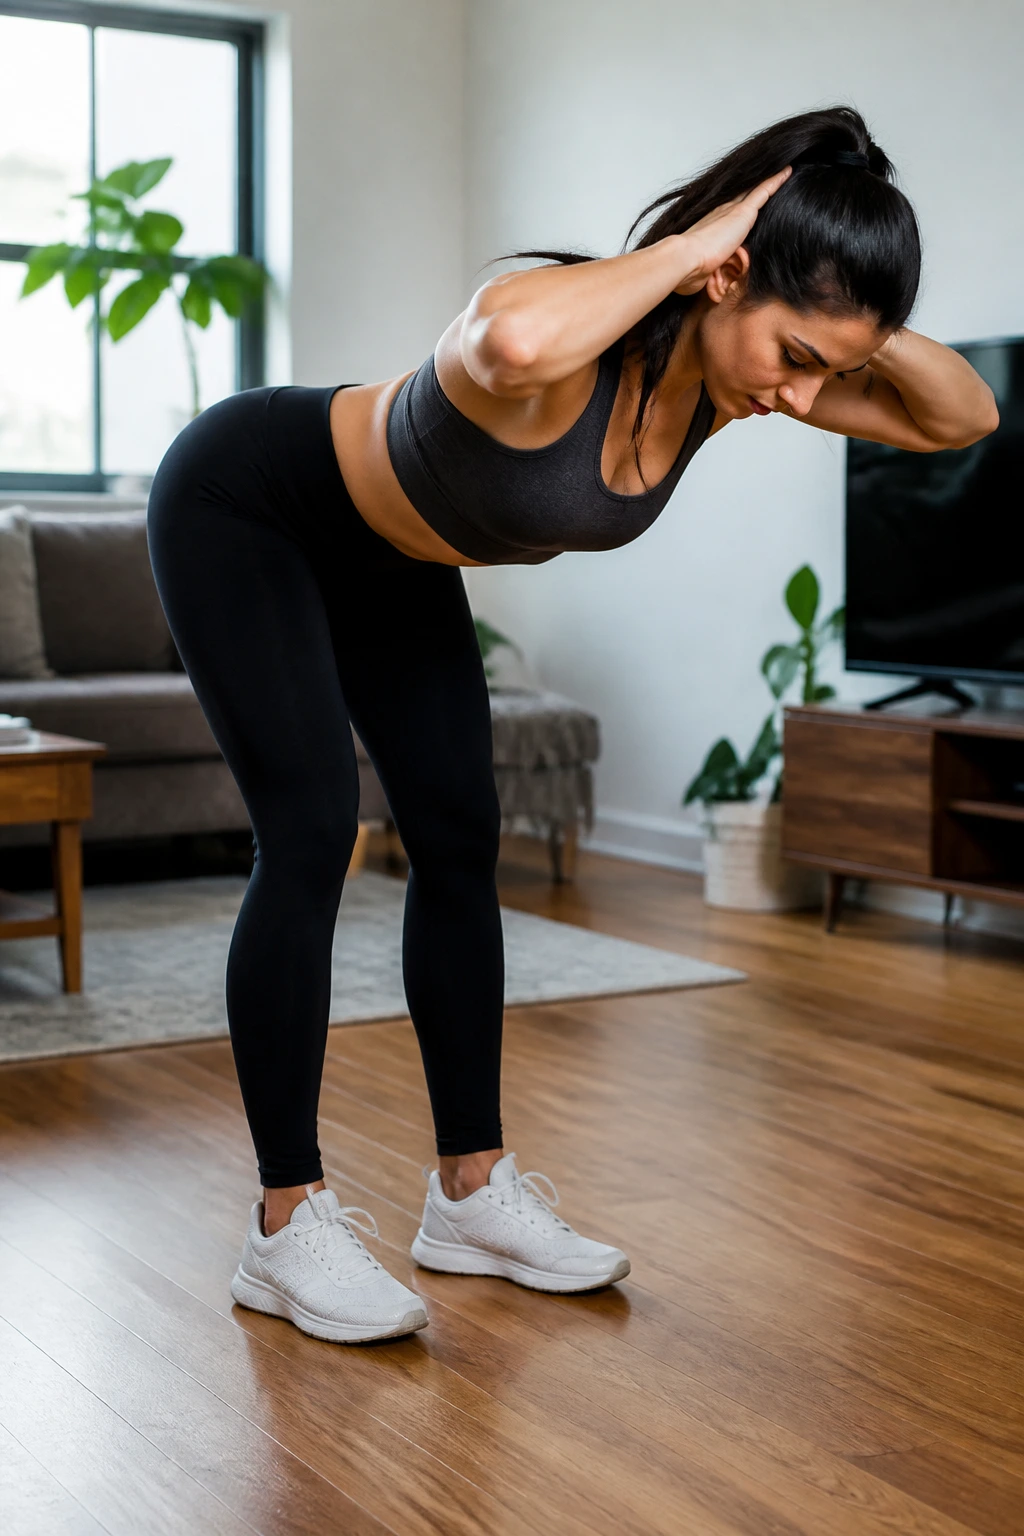
If you want a stronger back at home, you need to know how to hinge at the hips. The good morning teaches that pattern in a way your lower back can actually learn from.
Stand with feet hip-width apart and place your hands behind your head or across your chest. Soften your knees, push your hips back, and tip your torso forward with a long spine. Stop when your hamstrings tighten, then stand back up by driving the hips forward. The back stays long. The weight stays in the heels.
Begin with 8 to 12 reps using only body weight. Once it feels smooth, hug a backpack to your chest or wear it high on your back. The move should feel like a hinge, not a squat.
15. Backpack Romanian Deadlift
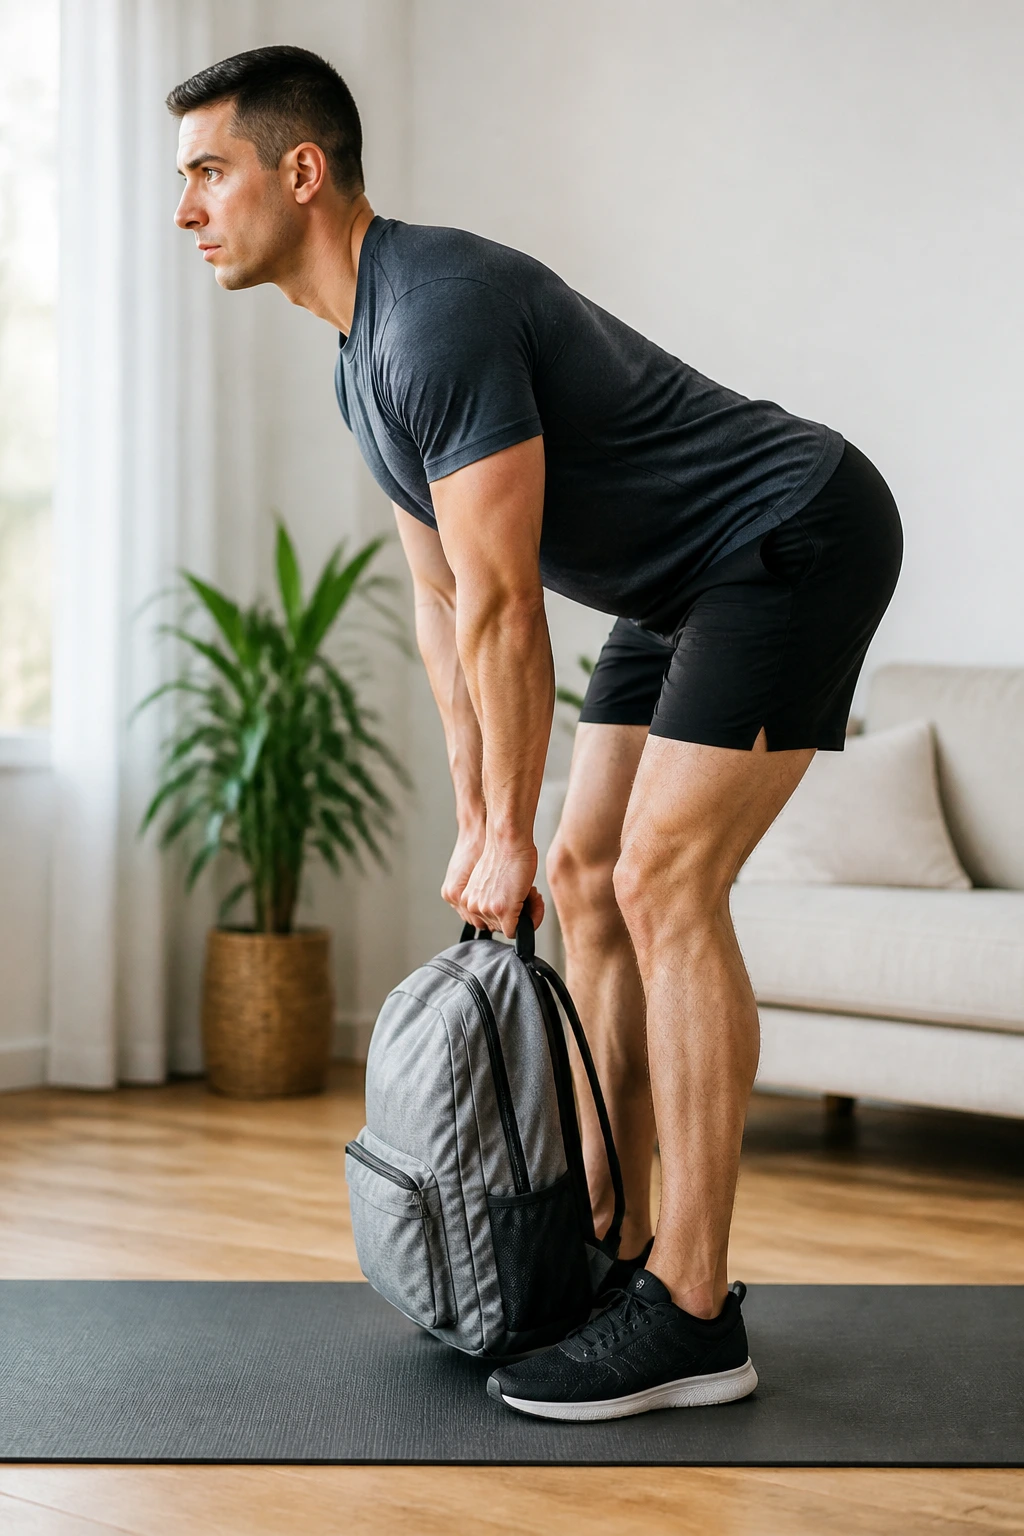
A backpack Romanian deadlift is one of the easiest ways to load your back work at home without buying a lot of gear. It trains the hamstrings, glutes, and spinal erectors together, which is a useful combo.
Hold a loaded backpack with both hands in front of your thighs. Push your hips back, let the backpack slide down the front of your legs, and stop when you feel a stretch in the hamstrings. Keep your chest long and your back flat. Stand by squeezing the glutes and driving the hips forward.
Do 3 sets of 8 to 12 reps with slow lowering. If the backpack bangs into your legs or you round your back to reach lower, the load is too heavy or the hinge needs work. Lighten it before it gets sloppy.
16. Backpack Bent-Over Row
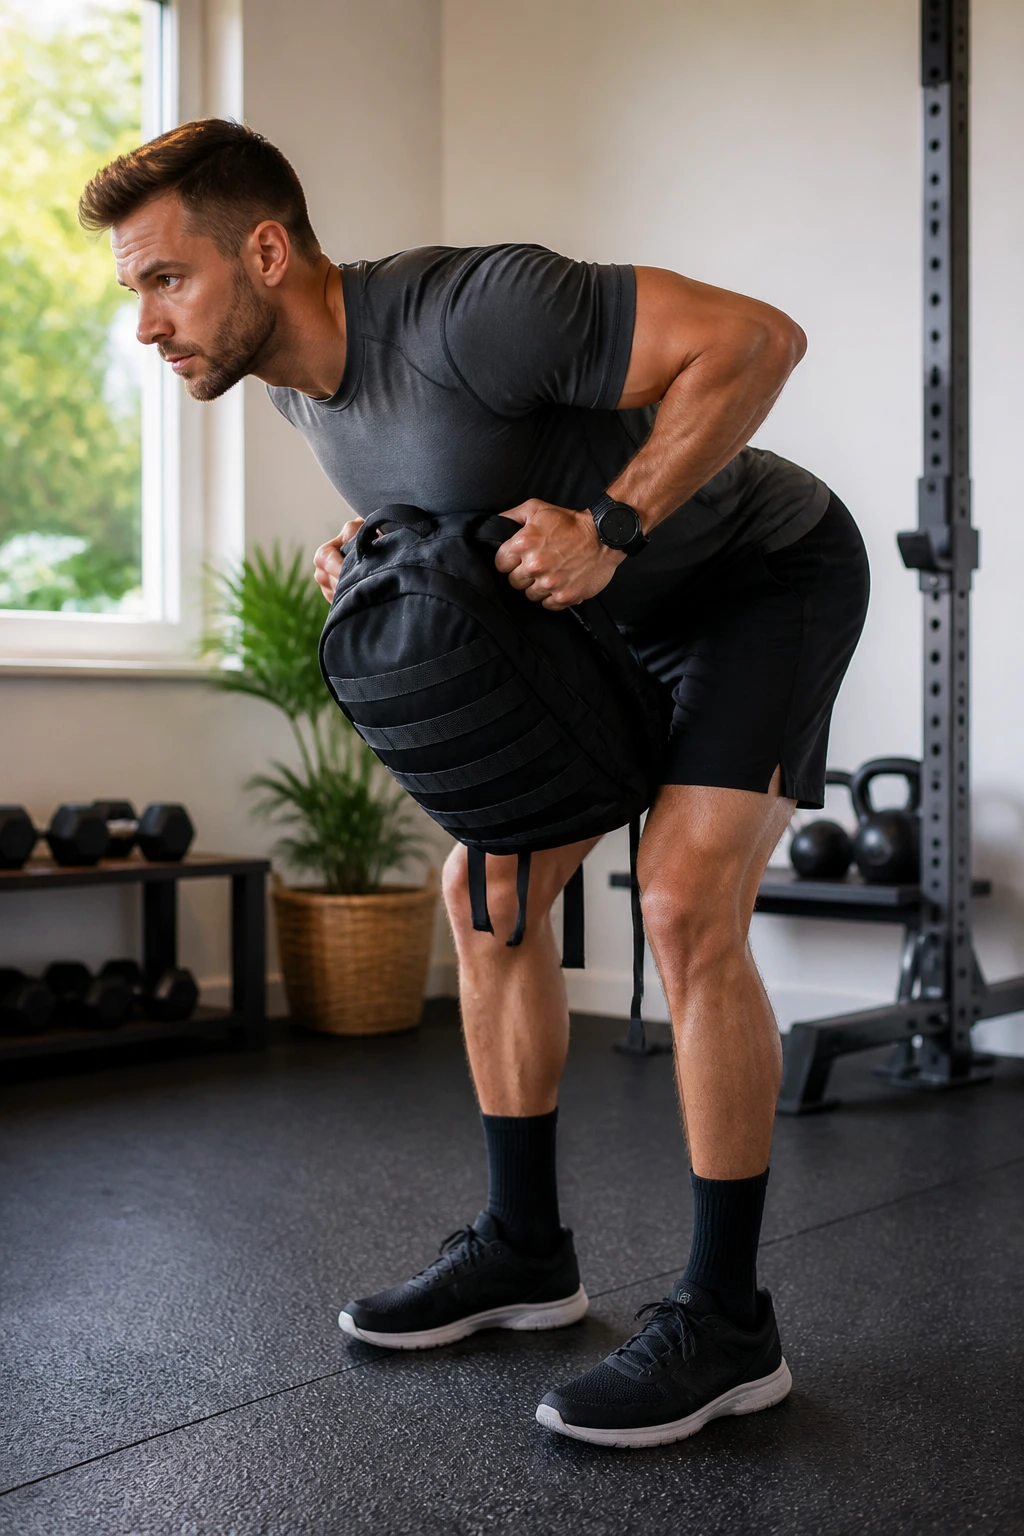
Rows are where a lot of people finally feel their back doing actual work. The bent-over row hits the lats and mid-back hard, and a backpack makes it easy to do at home.
Hold the backpack with both hands, hinge forward, and keep your back long. Pull the bag toward your lower ribs, pause for a second, then lower it until your arms are straight again. Keep your elbows close-ish to your body. The motion should feel like your shoulder blades are sliding back, not like your arms are yanking the bag around.
A solid start is 8 to 15 reps for 2 to 4 sets. Use a backpack that stays balanced and does not swing wildly. If your lower back gets tired first, stand a little taller and re-brace before the next rep.
17. One-Arm Backpack Row
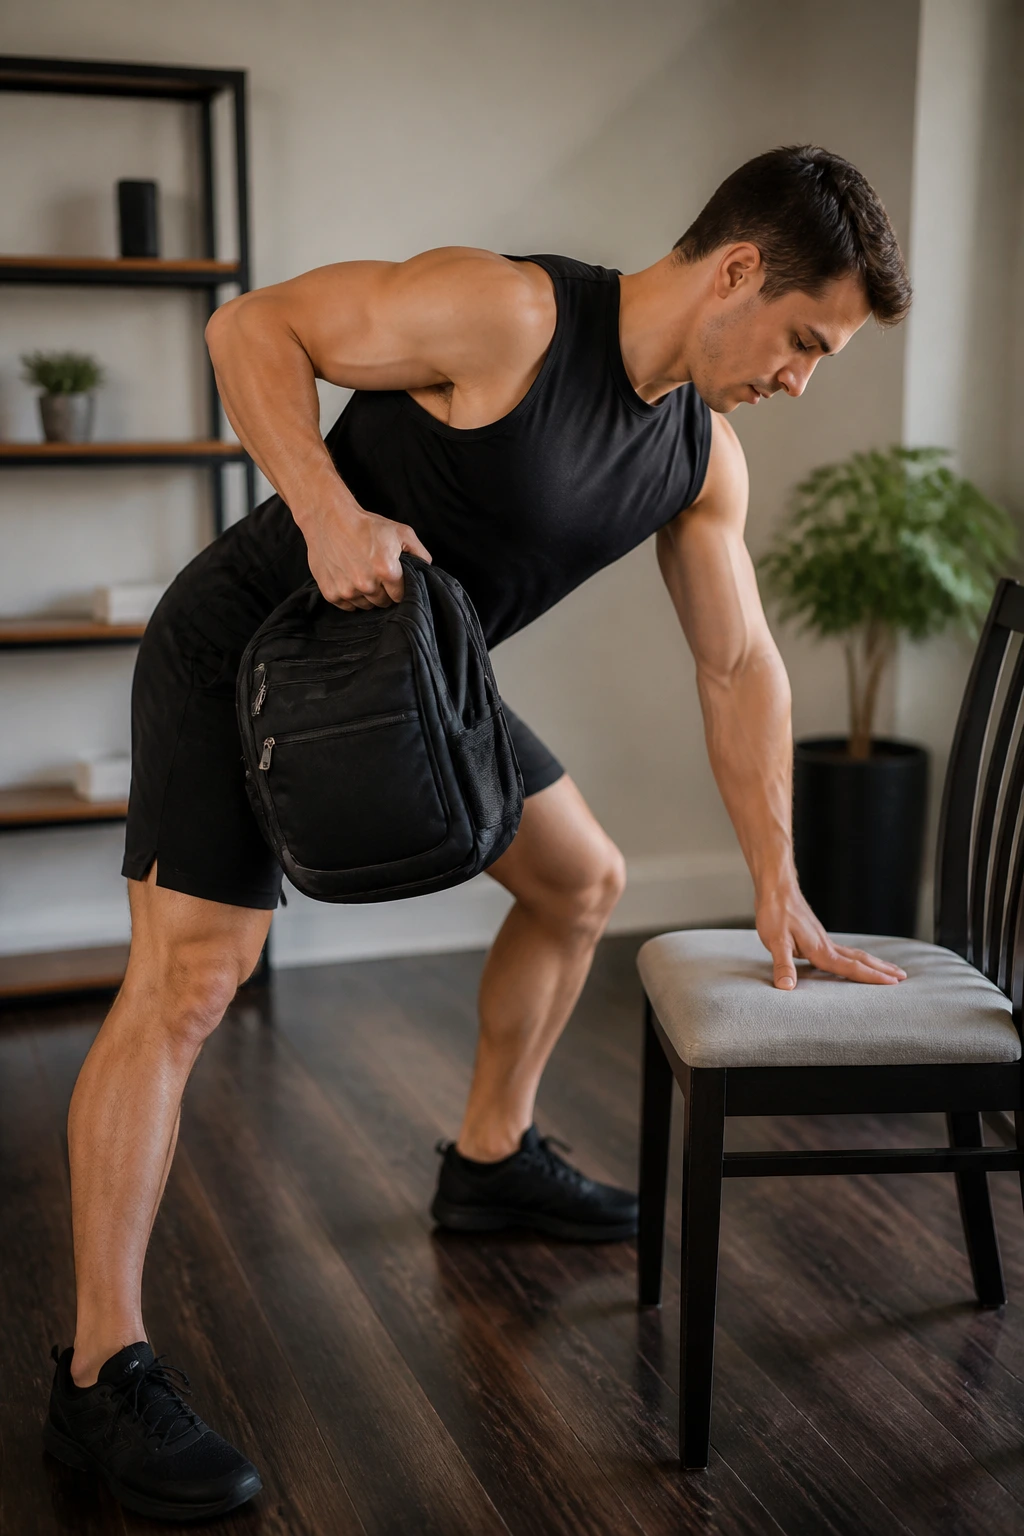
One-arm rows give you a cleaner feel for each side of your back. They also force anti-rotation, which means your trunk has to stay steady while one arm works.
Set one hand on a chair, bench, or sturdy table. Hold the backpack in the other hand and row it toward your hip. Pause, squeeze, and lower under control. Don’t twist the torso to help. If the body starts rotating, the weight is too much or the set is too long.
8 to 12 reps per side works well. This is one of those exercises where the last few inches matter. Pulling to the hip usually hits the lat better than pulling straight up to the chest.
18. Resistance Band Pull-Apart
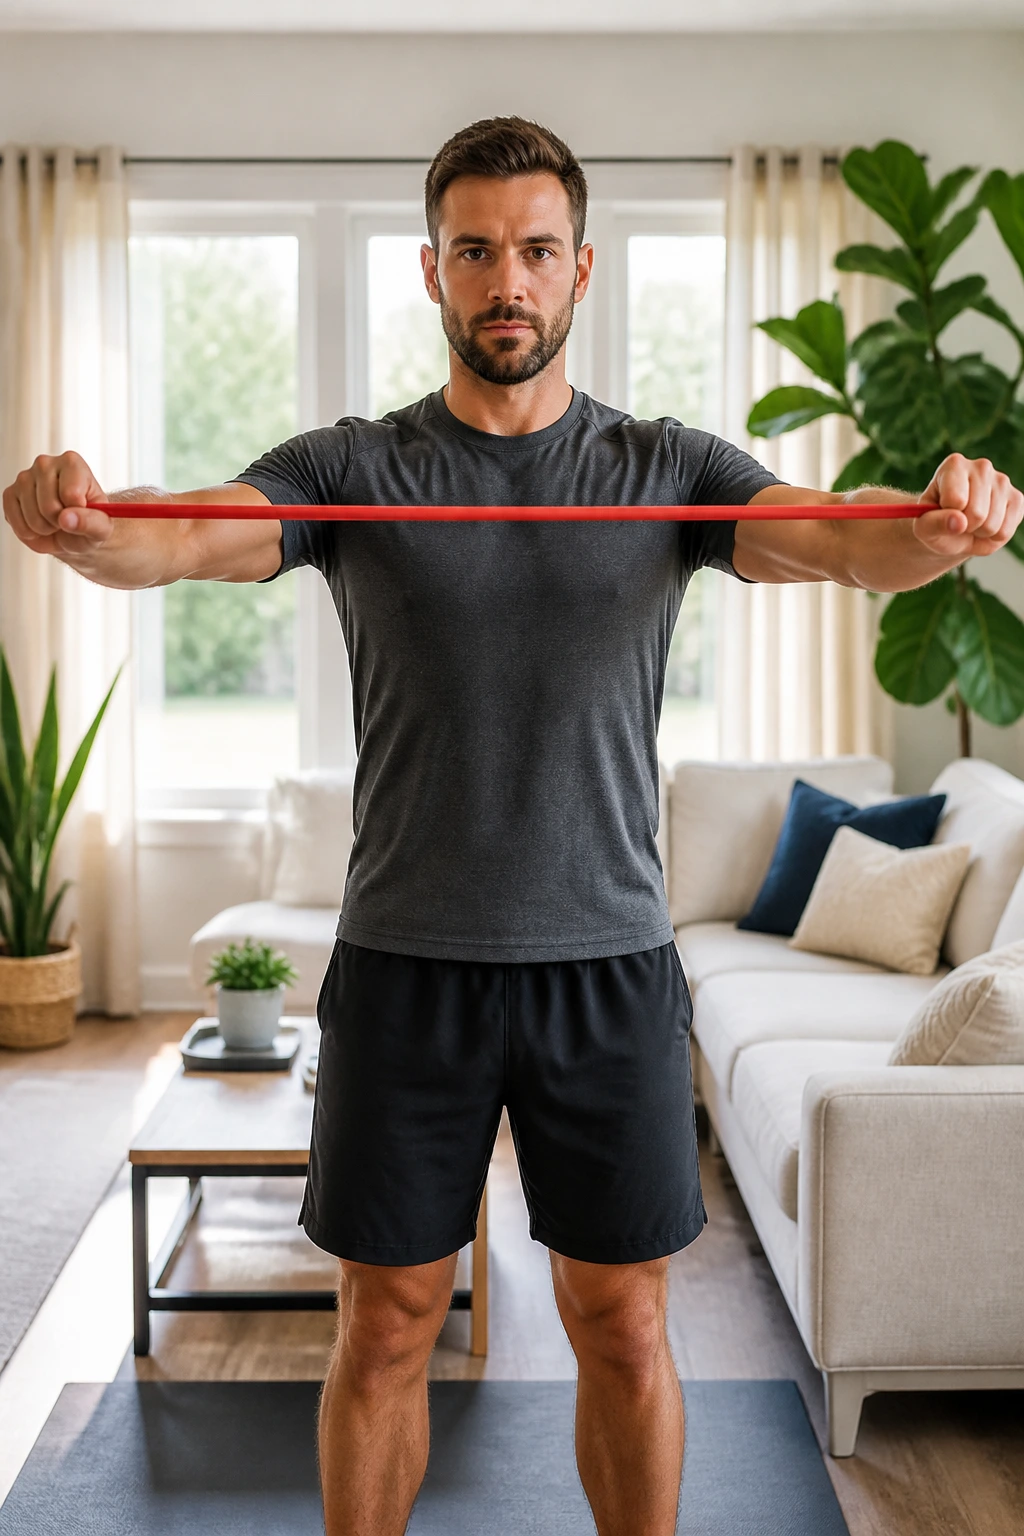
Pull-aparts are simple, yes, but they’re simple in the good way. They wake up the rear shoulders and upper back without putting much stress on the lower back, which makes them useful on lighter training days.
Hold a band at shoulder height with straight arms. Pull the band apart until it touches your chest or gets close, then return slowly. Keep the ribs down and the shoulders away from your ears. The band should feel like it’s trying to pull your arms forward; your job is to resist and open.
Aim for 12 to 20 reps. A light band can still be challenging if you move slowly and hold the open position for a second. If your neck tightens, relax the grip a little and reset the shoulders.
19. Band Face Pull
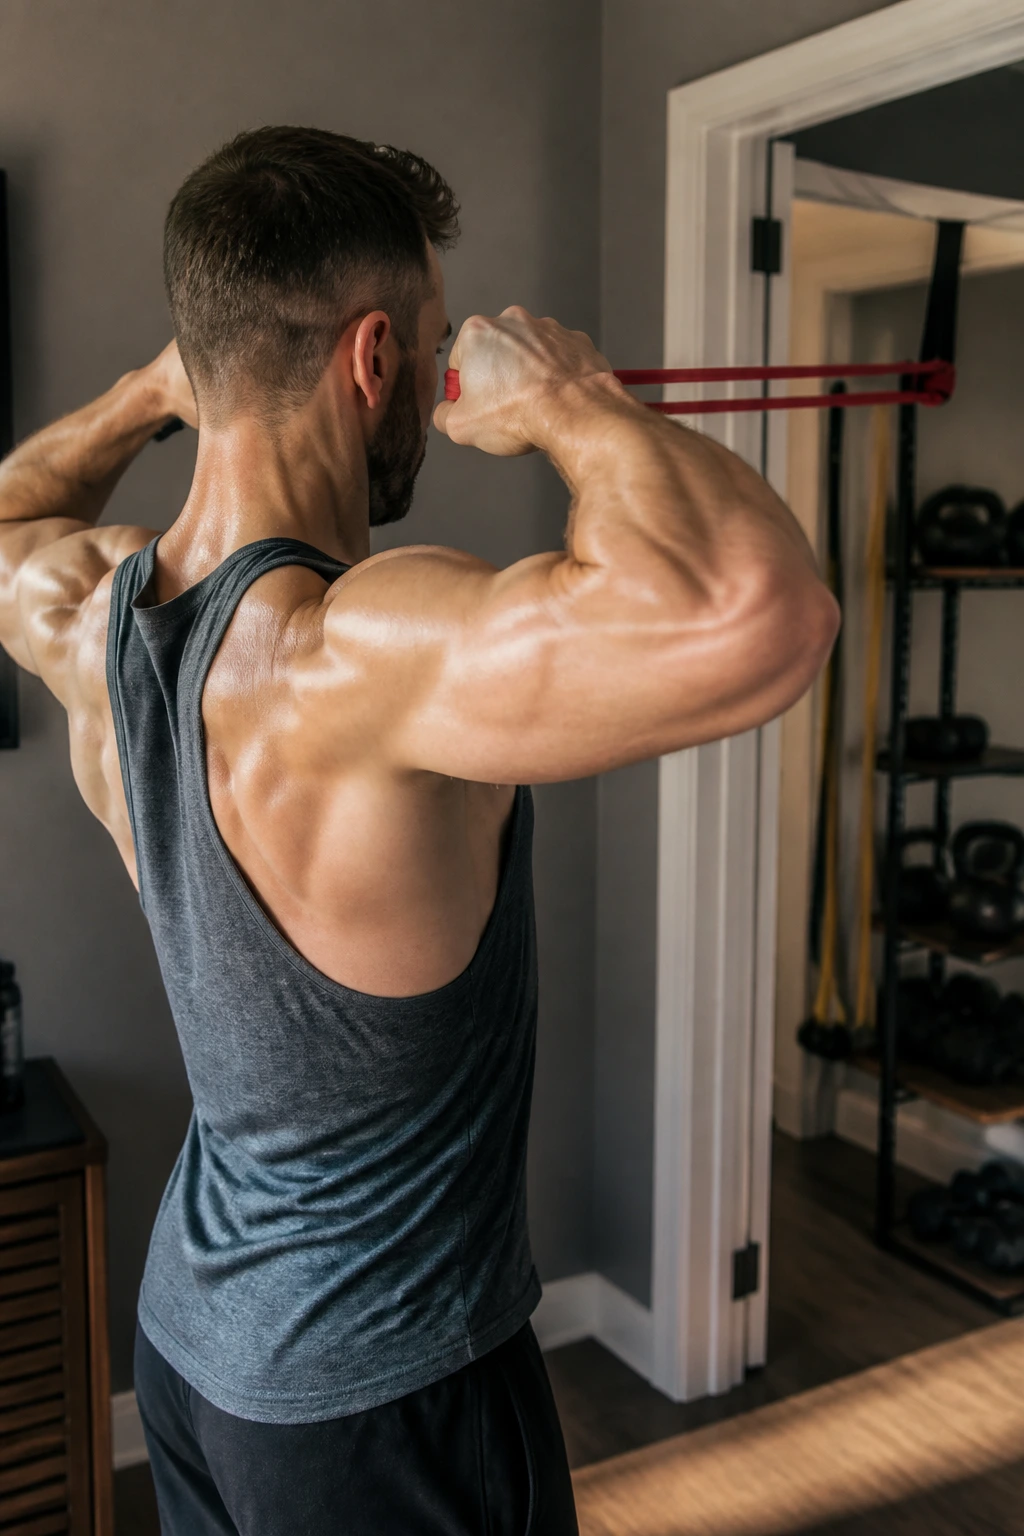
Face pulls are one of the best home moves for the upper back if you’ve got a band and a door anchor or sturdy attachment point. They train the rear delts, upper back, and external rotators together.
Pull the band toward your face with your elbows high and slightly out to the sides. Finish with your hands near eye level and your shoulder blades squeezed back and down. Lower with control. Don’t turn it into a shrug. That’s wasted effort.
10 to 15 reps per set is a good range. A slight lean back often helps, but don’t turn it into a whole-body yank. You want the back doing the work, not the momentum.
20. Plank Shoulder Tap
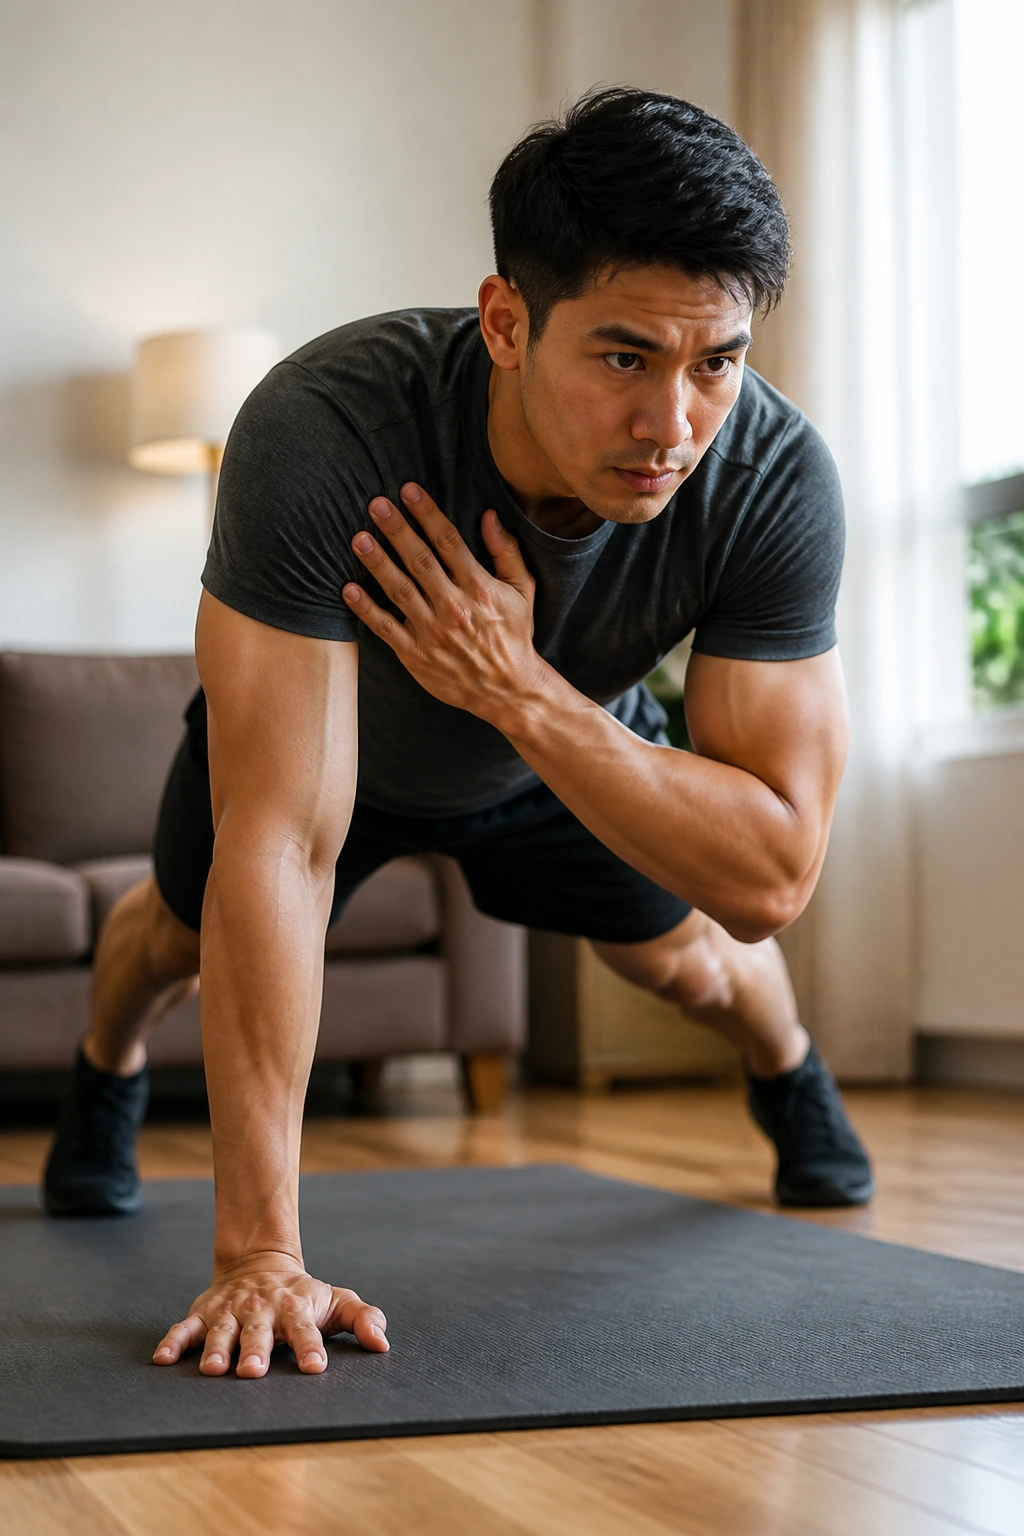
The plank shoulder tap is less about the shoulders than the name suggests. It asks your back and core to stop your torso from wobbling while one hand leaves the floor and comes back.
Get into a high plank with feet a little wider than hip width. Tap your opposite shoulder with one hand, then switch sides. Keep the hips still. A tiny shift is fine; a big sway means the set is too hard. The slower you go, the more the back has to stabilize.
Try 10 to 20 taps total. If your low back dips, widen your feet a bit more and shorten the set. It’s better to own a smaller range than to chase perfect-looking form and lose the point.
21. Side Plank
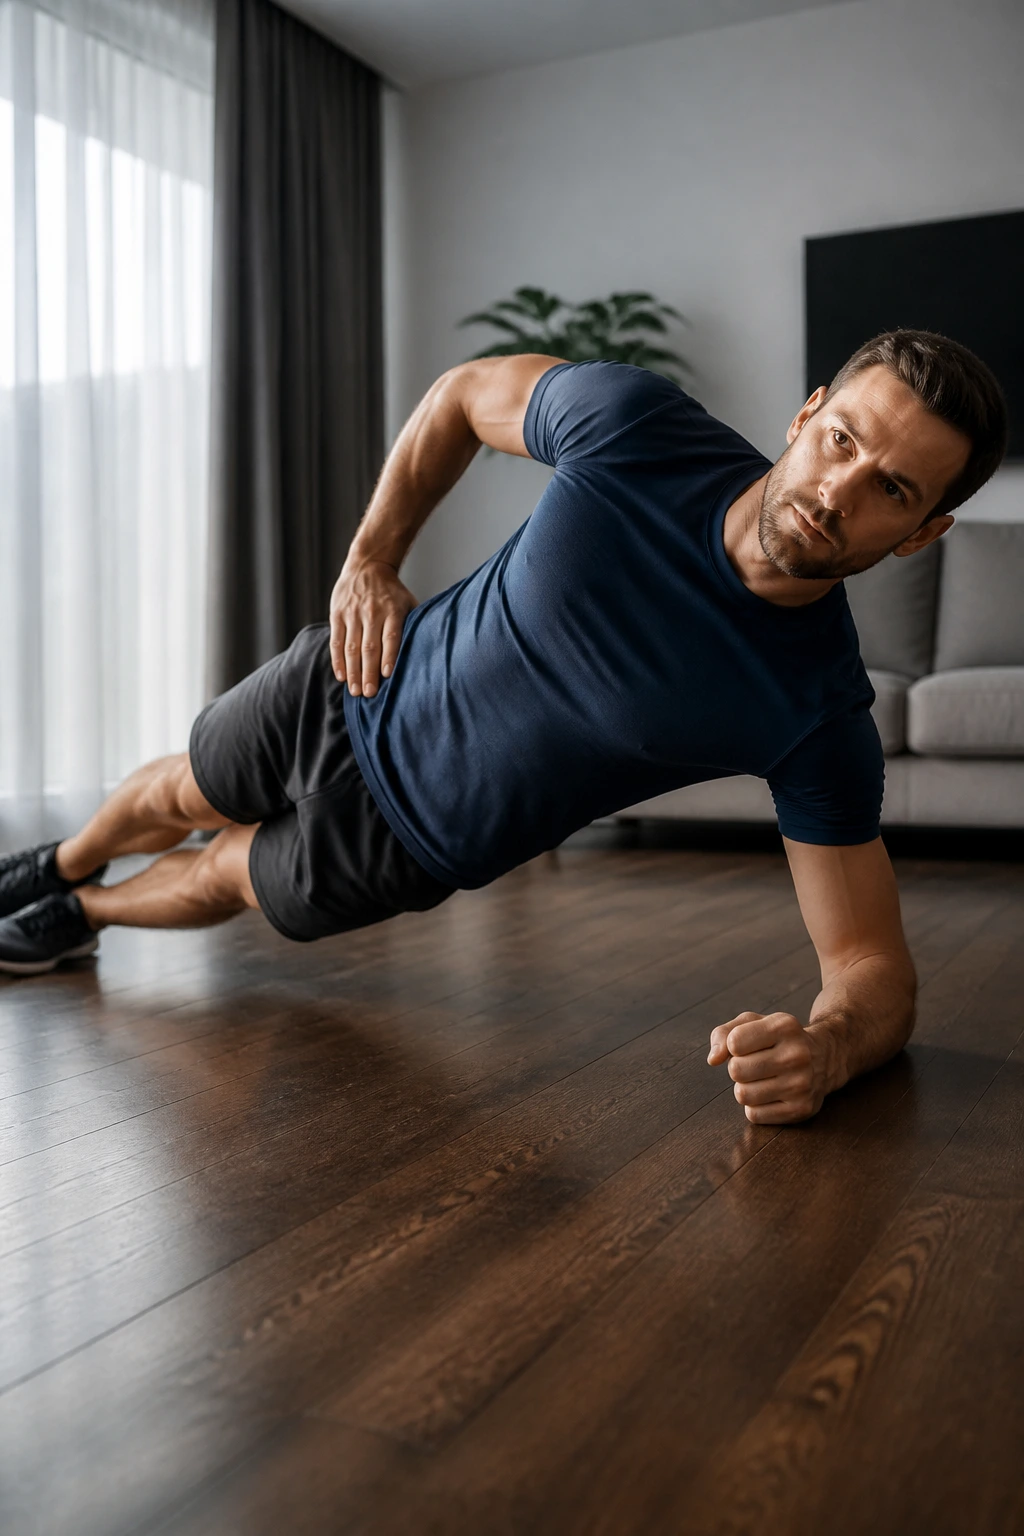
Side planks train the muscles along the side of the trunk, but they also teach the back to stay aligned when the body is under sideways load. That matters more than it sounds.
Set your elbow under your shoulder and stack your feet or place one foot in front of the other for more support. Lift your hips and make a straight line from head to heel. Hold and breathe. Don’t let the top shoulder collapse forward. Don’t let the hips drift back.
A starting hold of 15 to 30 seconds per side is enough. If that feels shaky, drop the bottom knee to the floor and build from there. Side planks are not glamorous. They are useful, which is better.
22. Suitcase Carry
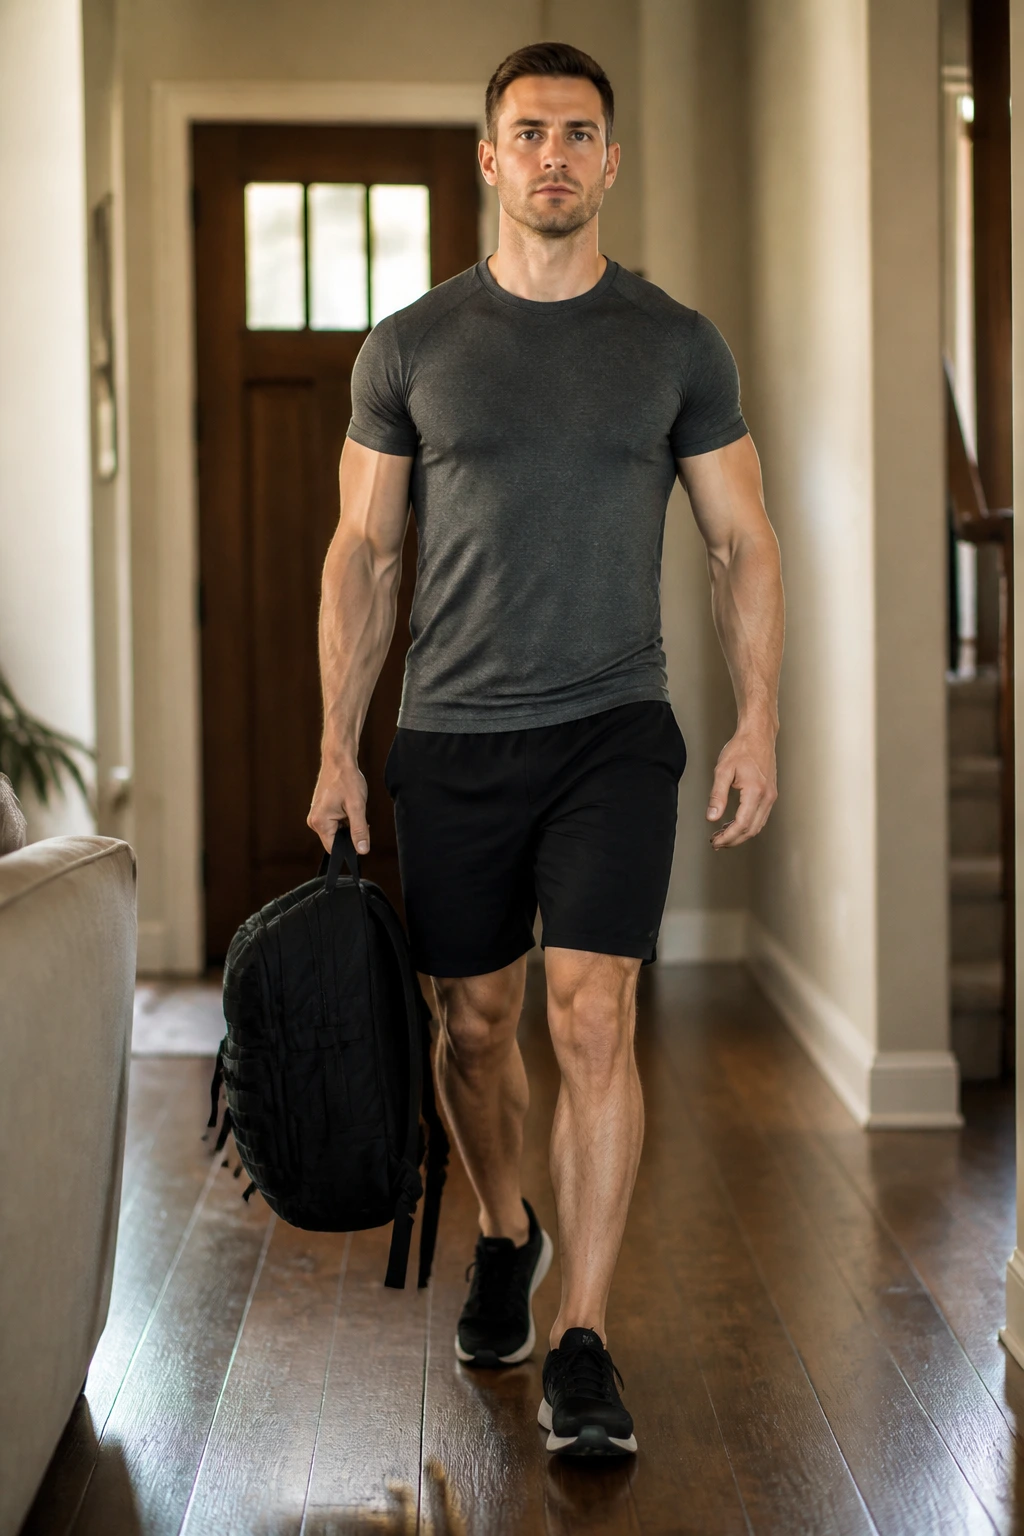
If I had to pick one home exercise that teaches real-life back strength, the suitcase carry would be near the top. You pick up one heavy object and walk with it without leaning. That’s it. And it works.
Hold a heavy backpack, water jug, or loaded grocery bag in one hand and walk slowly for 20 to 40 steps. Stay tall. Keep the ribs stacked over the pelvis. Do not tilt toward the weight. The back and obliques have to fight to keep you upright, and that’s where the value is.
Do 2 to 4 carries per side. This move often feels harder than it looks, especially if you’re used to slouching. Good. That means it found something useful.
23. Farmer Carry
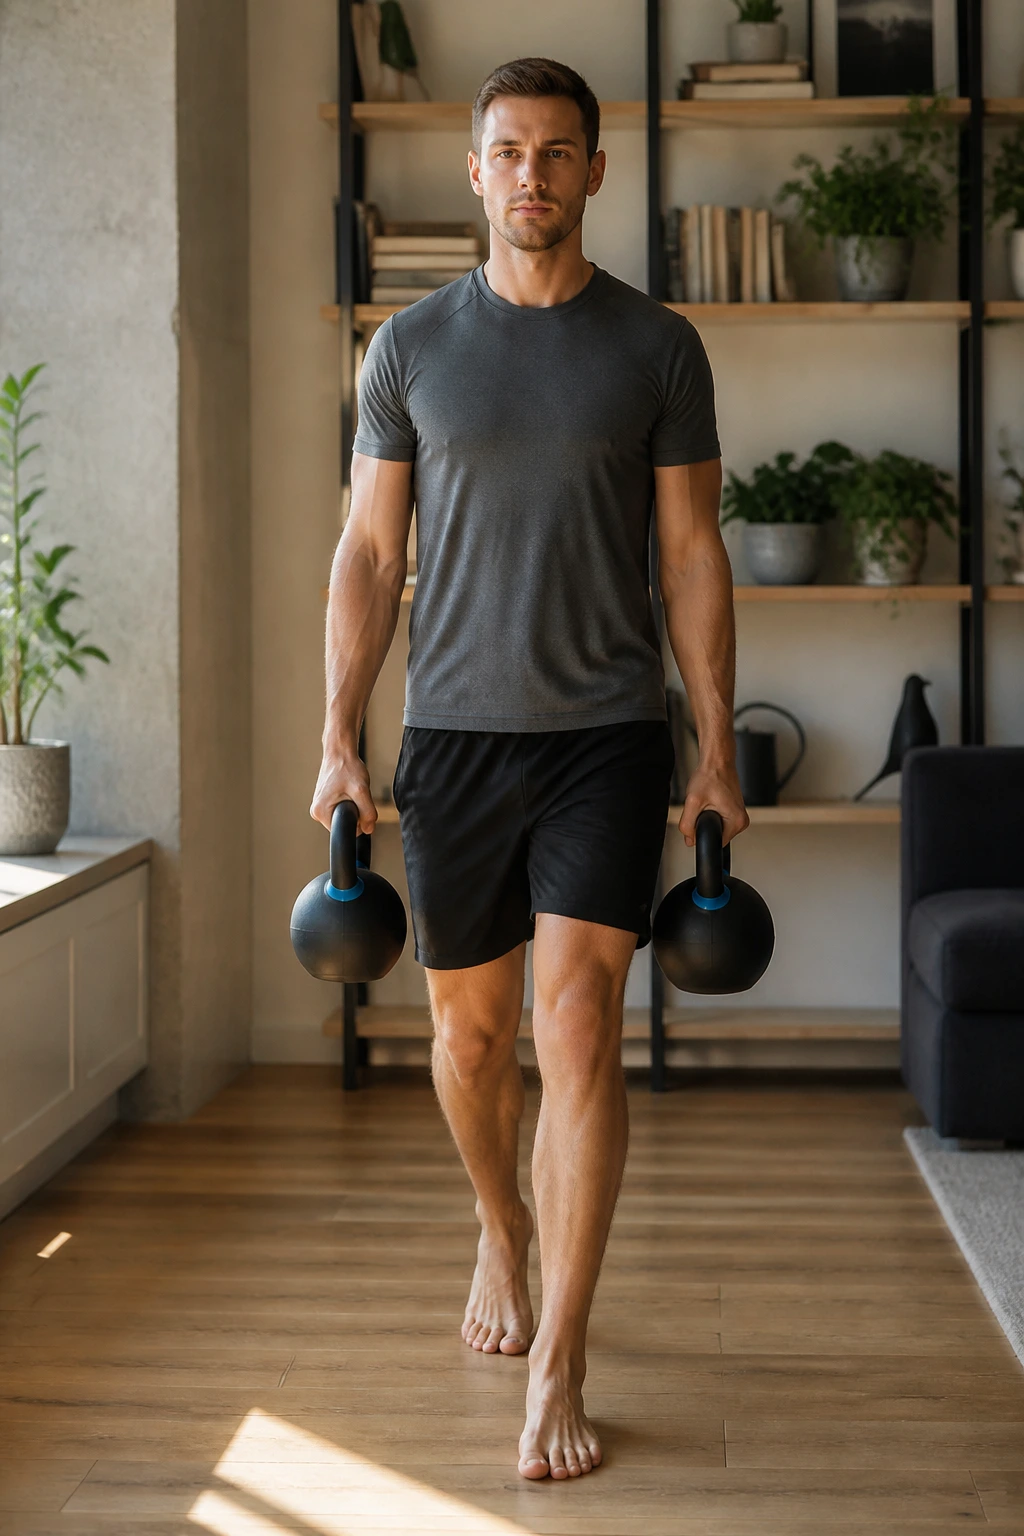
Farmer carries are the two-handed version, and they’re a little less sneaky but still extremely effective. They build endurance in the upper back, grip, and trunk at the same time.
Grab two equal loads — grocery bags, buckets, dumbbells, or water jugs — and walk 20 to 50 steps with a tall posture. Keep your shoulders level and your steps controlled. If one side feels dramatically heavier, adjust the load. The goal is symmetry, not a circus act.
A few rounds of 30 to 60 seconds is plenty. If your neck starts doing the work, drop the shoulders and reset your breathing. This is one of the simplest ways to make your whole back feel more solid.
24. Bird-Dog Row
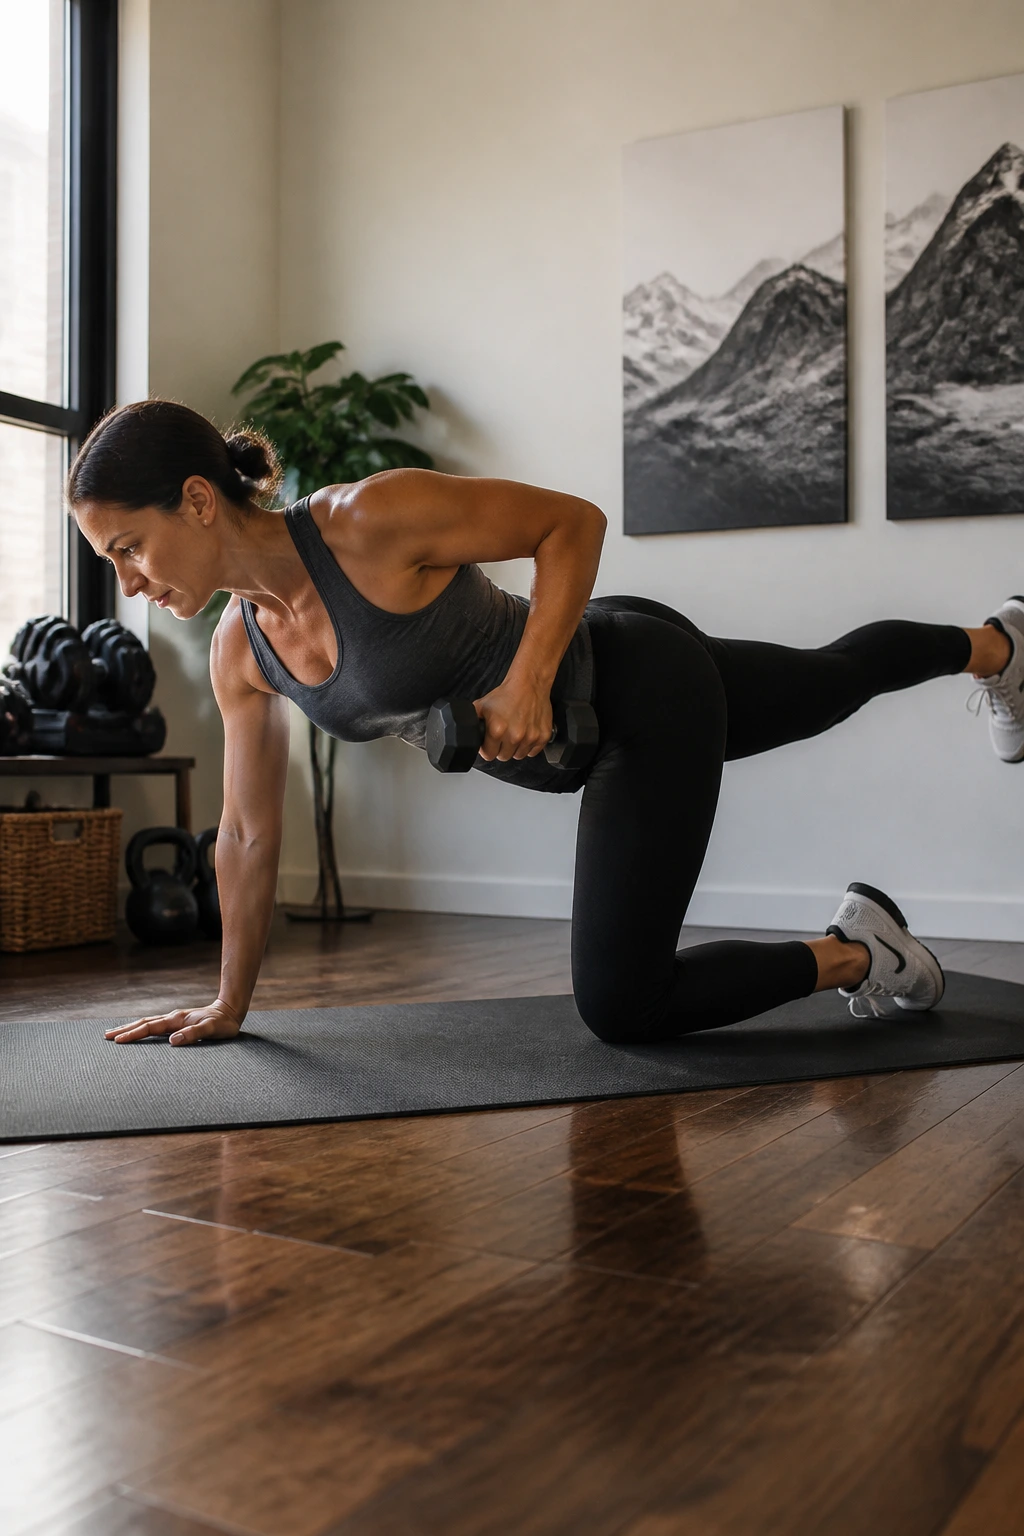
This one links stability and strength in a way that’s hard to fake. The row makes the back work; the bird-dog position forces the trunk to keep its shape while that work happens.
Set up in a bird-dog stance with one hand planted and the opposite leg extended. If you’re stable enough, hold a light backpack or small dumbbell in the free hand and row it toward your ribs without letting your hips twist. If that’s too much, keep both knees on the floor and row from a basic split stance instead.
Use 6 to 8 reps per side and move slowly. This is a more advanced pattern, so there’s no prize for rushing it. If the balance piece gets messy, regress to a plain one-arm row first.
25. Reverse Plank
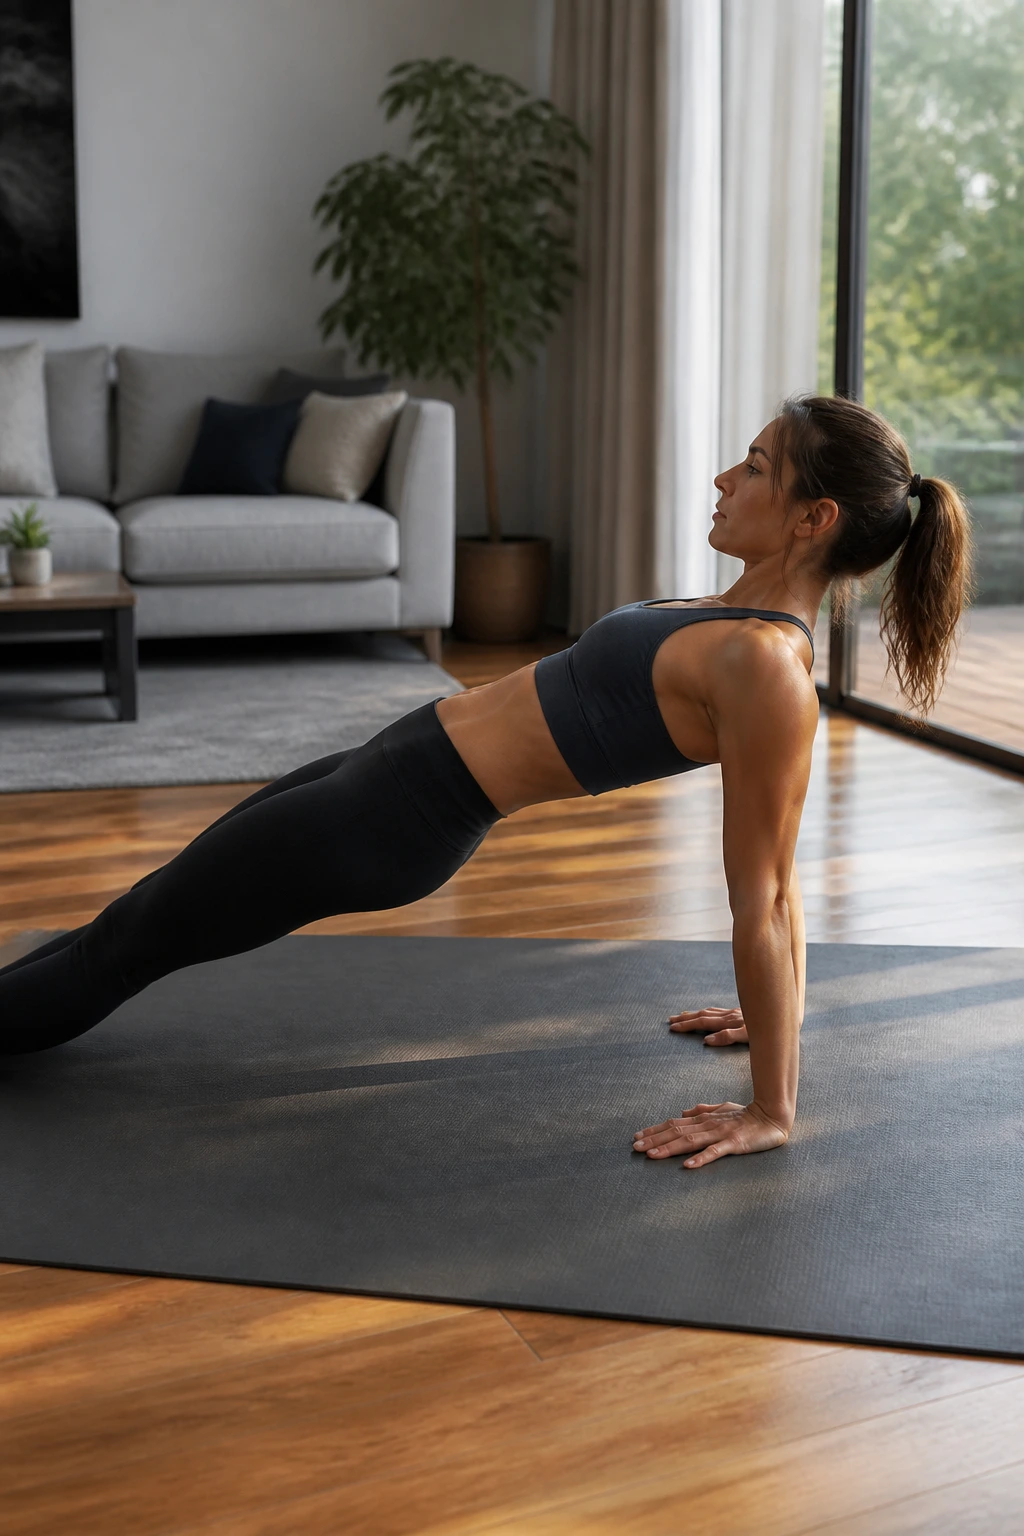
Reverse plank doesn’t get talked about enough, and that’s a shame. It trains the posterior chain — glutes, hamstrings, upper back — while opening the front of the body in a way that can feel oddly good after too much sitting.
Sit on the floor with your legs straight in front of you and hands behind your hips, fingers pointing toward your feet if that feels okay. Press through your hands and lift your hips until your body makes a long line. Keep the chest open and the shoulders away from the ears. Hold for 10 to 30 seconds, then lower slowly.
Try 3 to 5 holds. If the wrists complain, turn the hands slightly outward or bend the knees. This move is tougher than it first looks, and that’s part of why I like it.
Final Thoughts
The best back work at home is rarely the flashiest. It’s the stuff that makes your spine steadier, your shoulder blades cleaner, and your hips more useful. A few of these exercises are about pure strength. Others are there to teach control, which matters just as much.
If you only have time for a short session, pair one floor move, one hinge, and one carry. That gives you a lot of ground without turning the workout into a chore. And if a movement feels wrong in your lower back, back off the range, slow down, or switch to an easier option. That is not failure. That is good training.
The back likes consistency more than drama. Give it that, and it usually pays you back in the way that matters most: fewer aches, better posture, and a body that feels like it can hold itself together when the day gets long.
