



Trim belly fat over time takes boring work, not flashy moves. That is the part people hate, and it is also the reason yoga keeps earning its place in the conversation.
If your goal is a smaller waistline over time, the poses that matter most are the ones you can repeat without wrecking your knees, your back, or your schedule. Yoga helps most when it changes the hours outside the mat too — how you stand at the sink, how you breathe when stress spikes, how often you move after sitting for too long.
There is one thing worth saying plainly: no pose melts belly fat on its own. Not Mountain Pose. Not Boat Pose. Not a hundred crunches dressed up as yoga. What does work is a practice that builds core strength, improves posture, nudges you toward more activity, and keeps you consistent long enough for body fat to shift.
The list below leans into that reality. Some poses are sweaty. Some look calm but hit hard. A few are more about recovery and spinal mobility, and that matters more than people think. Start with the first one. It looks almost too plain to matter. It isn’t.
1. Mountain Pose: Build the Line That Everything Else Rests On
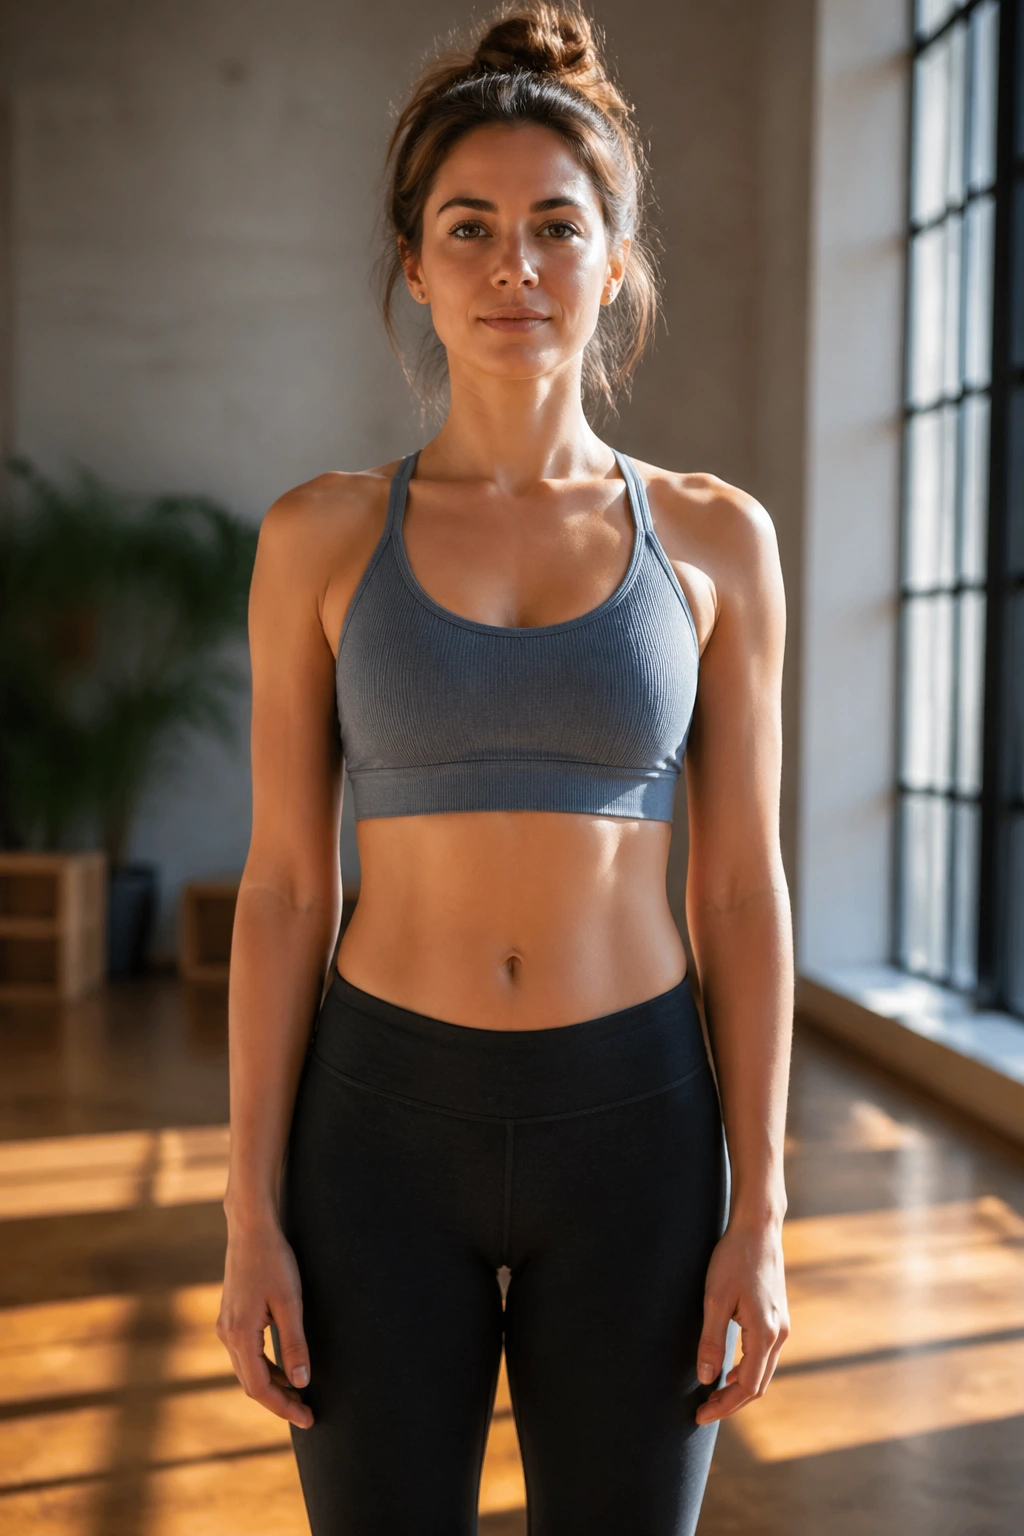
Mountain Pose looks easy because it is quiet, not because it is useless. The pose teaches you to stack your ribs over your pelvis, spread your toes, and stop hanging your belly forward when you stand. That alone can change how your midsection looks and feels by the end of a practice.
Why it matters more than it looks
When Mountain Pose is done well, your whole body wakes up. The feet press down evenly, the thighs stay active, and the lower belly draws in just enough to support the spine. You are not sucking in. You are organizing.
- Stand with feet hip-width apart or touching, whichever helps you balance.
- Lift the kneecaps without locking the knees.
- Let the shoulders soften away from the ears.
- Breathe low and slow for 5 to 8 breaths.
Tip: If you only remember one cue, keep your ribs stacked over your hips. That one change stops the sloppy swayback posture that makes the belly look softer than it really is.
Mountain Pose is also the easiest place to practice consistency. Ten calm breaths here before moving on can make the rest of the session cleaner, sharper, and a little more demanding in the right way.
2. Chair Pose: The Honest Thigh Burner
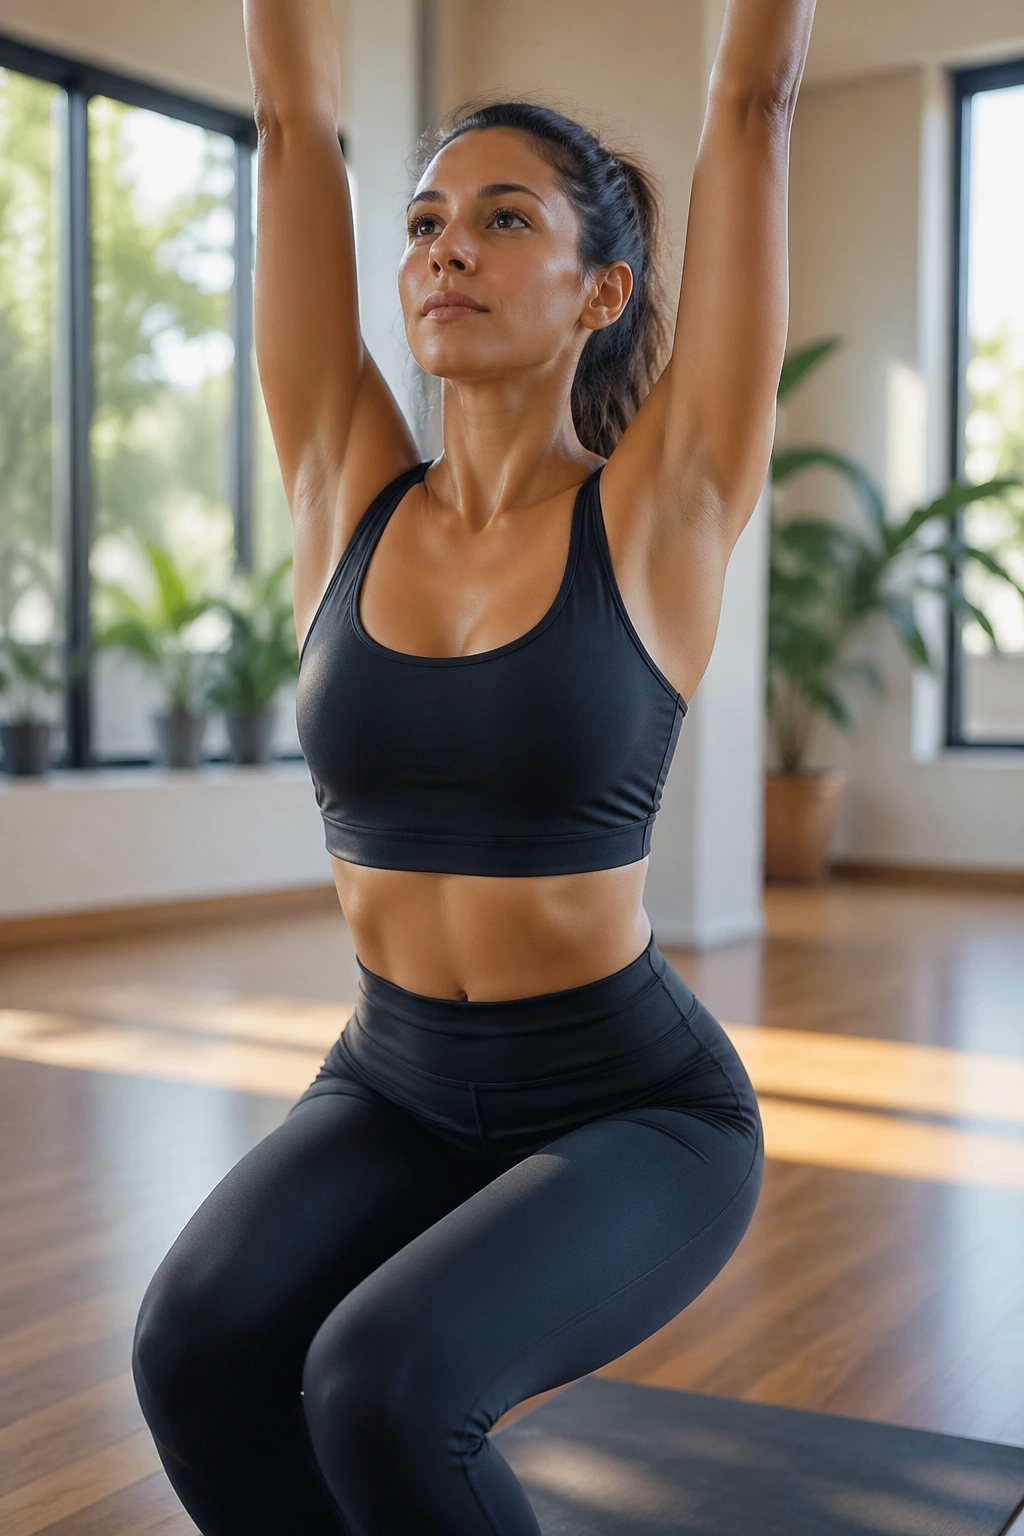
Chair Pose does not pretend to be gentle. Your quads light up, your glutes wake up, and your core has to brace just to keep the torso from collapsing forward. That is why it belongs on any yoga list for belly fat support: it asks for real work from the biggest muscles in the body.
The trick is not to drop so low that your low back takes over. Sit back as if you are reaching for a chair, keep weight in the heels, and hold for 20 to 40 seconds. If your neck tightens or your knees cave in, you went too deep.
A lot of people rush this pose. Bad idea. The best version is the one where your thighs burn, your breath stays controlled, and you can still lift through the crown of the head. Two or three rounds are enough to make the rest of the practice feel more athletic.
And yes, that matters for belly fat over time. More muscle engagement during a session usually means more calorie burn, but the bigger win is how Chair Pose teaches you to tolerate effort without falling apart.
3. Plank Pose for Belly Fat Support
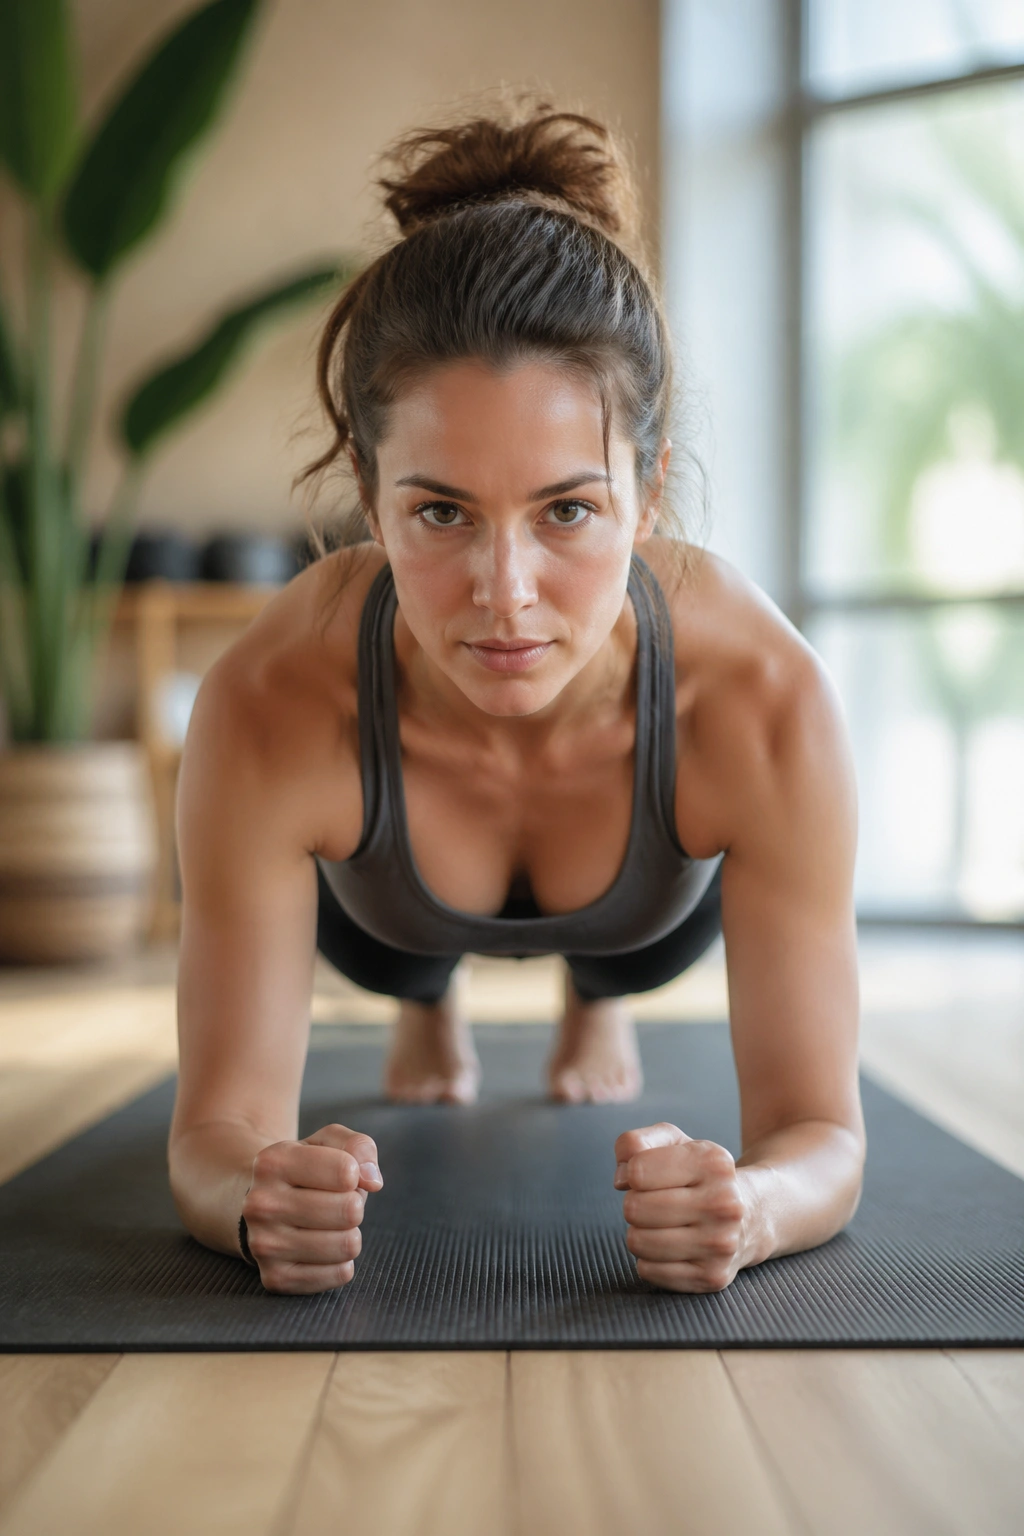
Why does Plank Pose show up in every serious core sequence? Because it forces the whole front line of the body to hold together under load.
You are not just working the abs here. The shoulders brace, the glutes stay on, the legs lengthen back, and the deep core muscles have to keep the spine from sagging. That is the sort of full-body tension that translates well to a tighter-looking midsection over time.
How to use it
Start with 20 seconds if you are new, or 30 to 45 seconds if you already have some core strength. Wrists should sit under shoulders, heels should drive back, and the neck should stay long. If the low back dips, drop the knees. If the wrists ache, come down and hold forearms instead.
A clean Plank should feel like a strong line, not a backbend. That is the whole game.
Repeat it 3 times with 20 to 30 seconds of rest, or fold it into a flow with Downward-Facing Dog and Chaturanga if your shoulders can handle it. Keep the breath smooth. The second you start holding your breath, the pose starts winning the wrong way.
4. Side Plank: The Waistline Workhorse
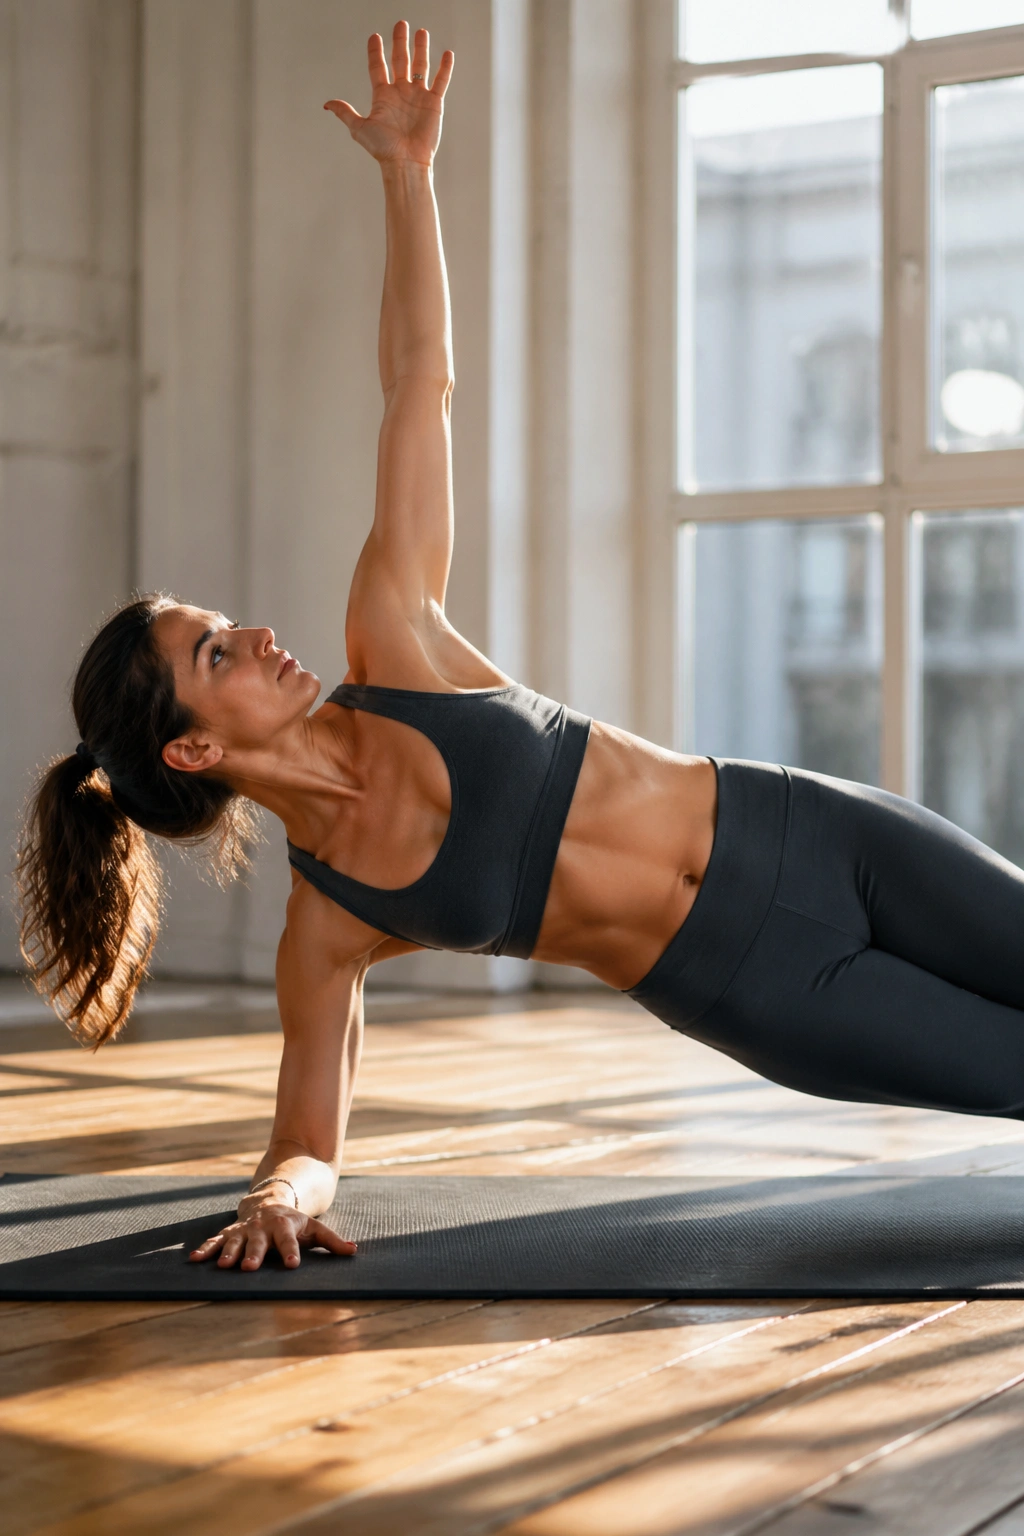
A lot of belly-fat-focused routines forget the sides. That is a mistake. The obliques are not magic fat burners, but they do help build the shape and strength that make the torso look tighter.
Side Plank asks for balance, shoulder stability, and lateral core strength all at once. One arm supports your body while the side of the waist keeps the hips from dumping toward the floor. You feel it fast. Sometimes too fast.
What to watch for
- Keep the supporting shoulder stacked directly over the wrist or elbow.
- Lift the hips high enough that the body forms one long line.
- Stack the top foot on the bottom foot, or place the top foot in front for balance.
- Hold 15 to 25 seconds per side to start.
Some people hate Side Plank because it exposes weakness. Fair enough. That is also why it works.
A bent-knee version is still a real version. Do not skip the pose just because the full shape looks clean on Instagram. A smaller, steadier Side Plank done with control will help you more than a wobbly full expression that makes your shoulder scream.
5. Boat Pose: The One That Makes Everybody Negotiate
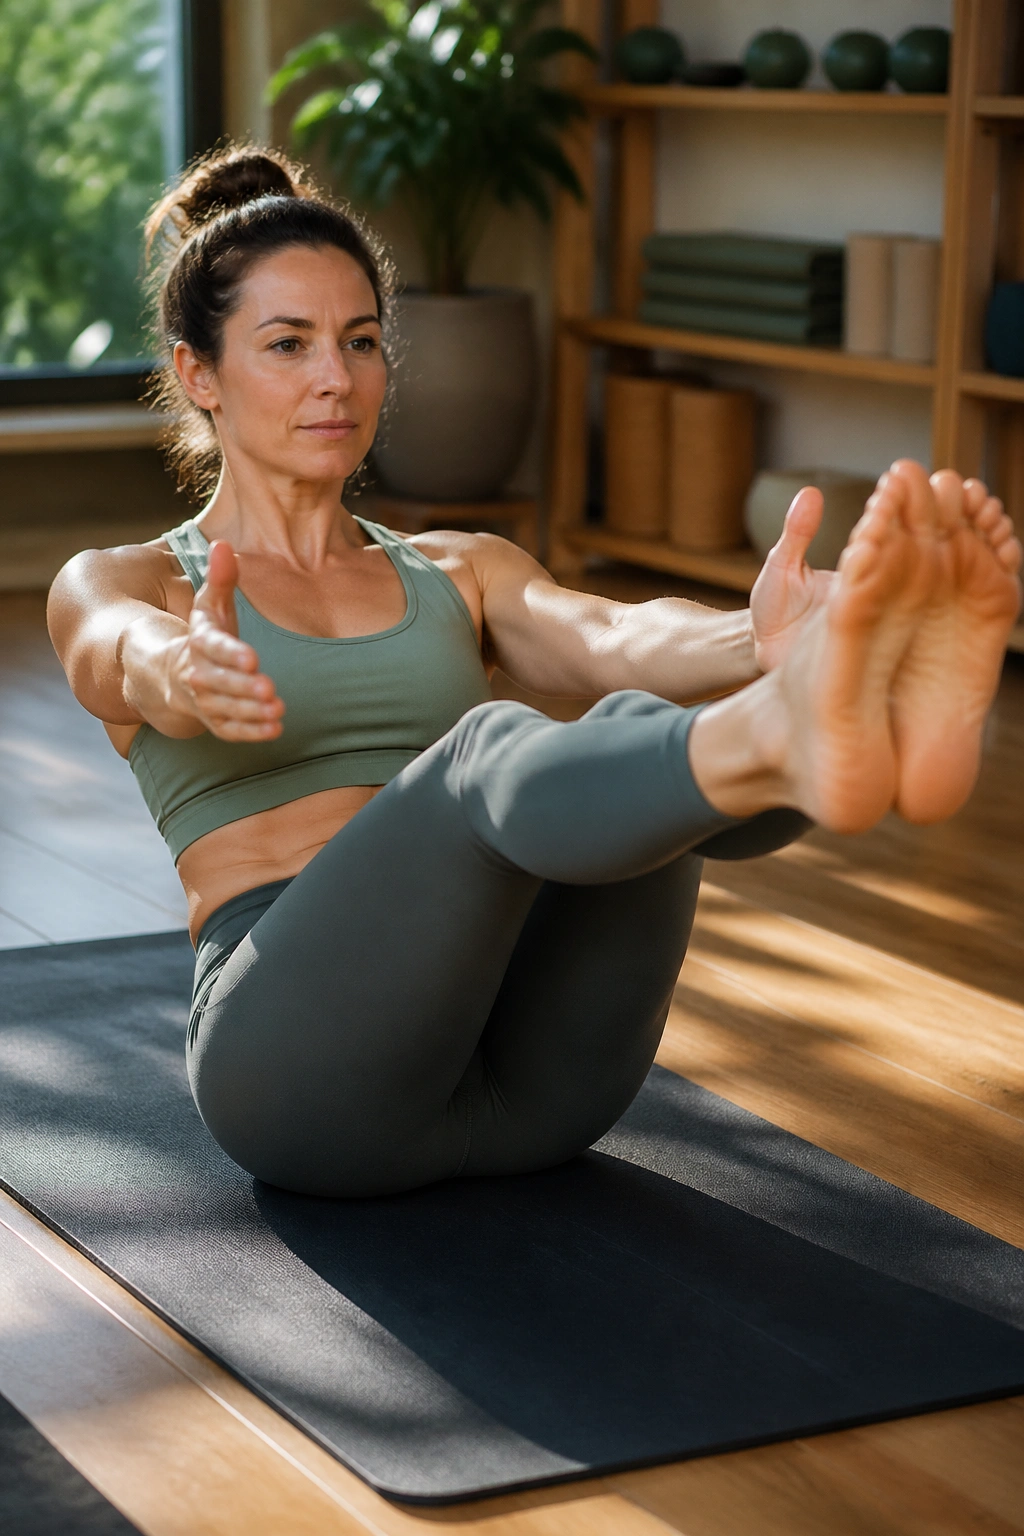
Boat Pose is rude. That is part of its charm.
Sit bones root into the mat, legs lift, and the front of the abdomen has to hold the torso together while the hip flexors try to pull everything downward. It is a blunt little test of core endurance, and it does not care whether you had a stressful day or not.
Use bent knees if needed. Seriously. Straight legs are not a badge of honor if your lower back is rounding like a question mark. The cleaner version is the one where your chest stays open, your spine stays long, and the abdomen does the work without forcing the breath into a panic.
A good target is 3 rounds of 15 to 25 seconds with a short rest between each. If your neck feels strained, keep your gaze forward rather than up. If your hips feel tight, lower the legs a few inches. That small adjustment often makes the pose ten times more usable.
Boat Pose helps belly fat goals indirectly, but in a useful way. It strengthens the core hard enough to make the rest of the practice feel more honest, and it tends to leave people with better awareness of how they carry their middle.
6. Crescent Lunge: Long Lines, Tight Center
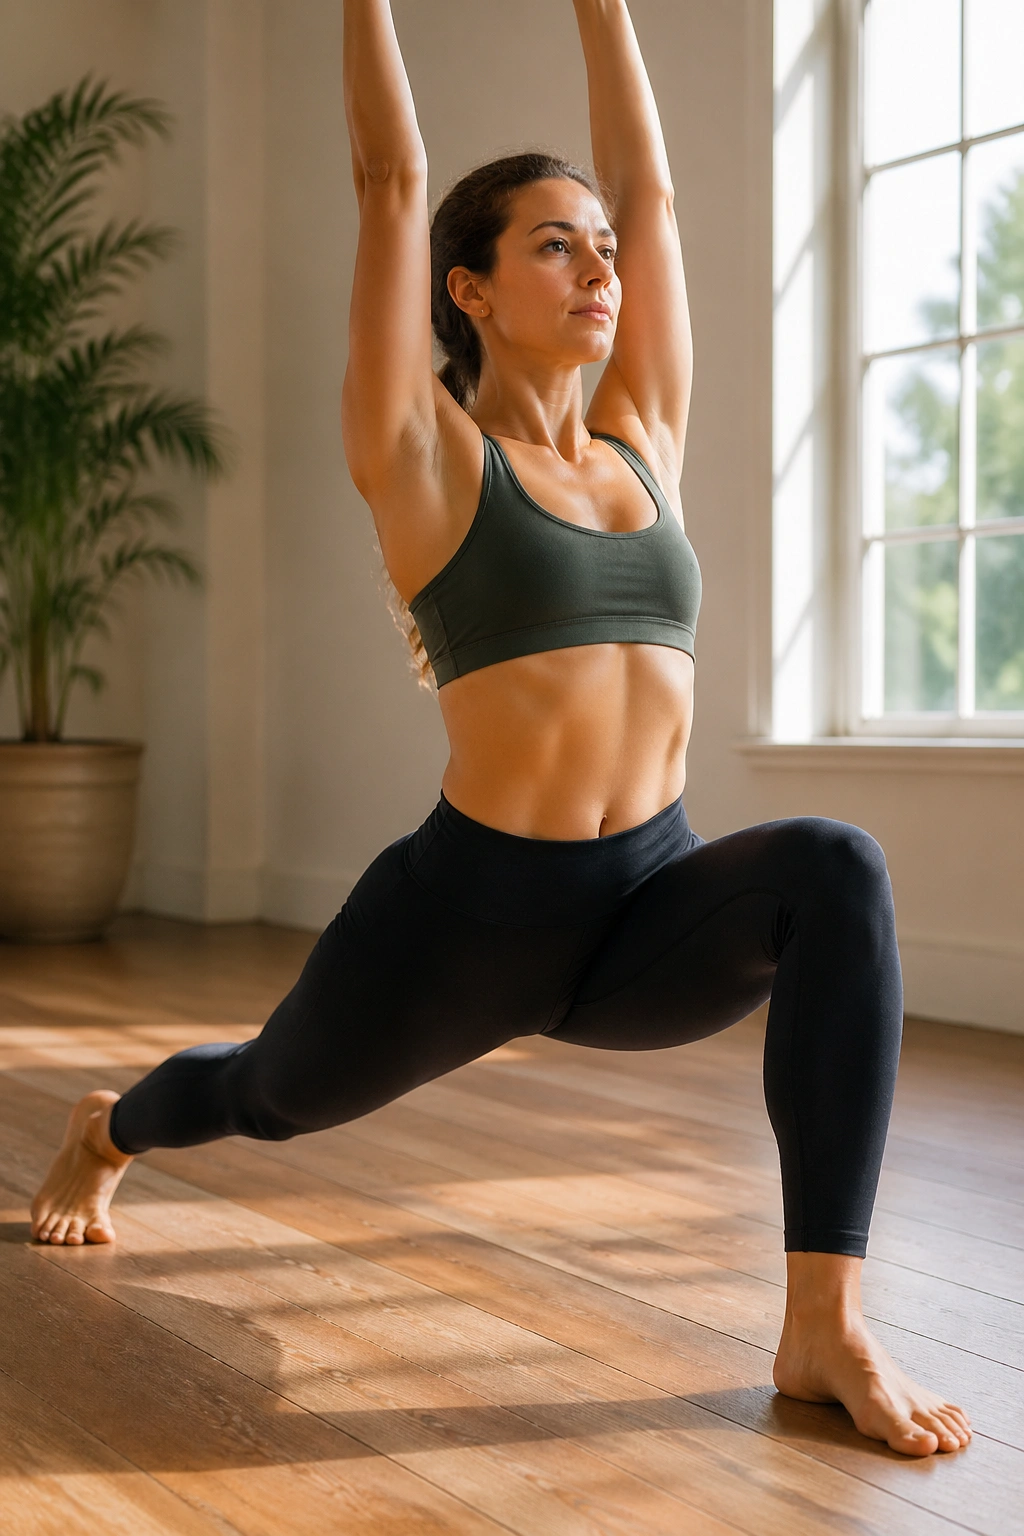
Unlike a static hamstring stretch, Crescent Lunge makes your legs and trunk do actual work. That is the difference.
One foot anchors behind you, the front knee bends, and the pelvis has to stay steady while the arms reach up. The front thigh burns, the back leg firms up, and the midsection has to keep you from twisting or tipping. It is a sneaky pose. It looks graceful and feels like exercise.
If you are trying to trim belly fat over time, this is the kind of shape that earns its place in the routine. It builds heat, improves balance, and helps you move with more control. Hold for 5 breaths on each side, then repeat once if your legs still have life in them.
Best way to use it
Keep the front knee over the ankle. Press the back heel away and imagine the hips squaring forward, even if they do not get perfectly square. That attempt alone wakes up the core.
You can lower the back knee to the mat on tired days. The pose still works. The point is clean effort, not performance.
7. Revolved Crescent Lunge: Twist Without Collapsing
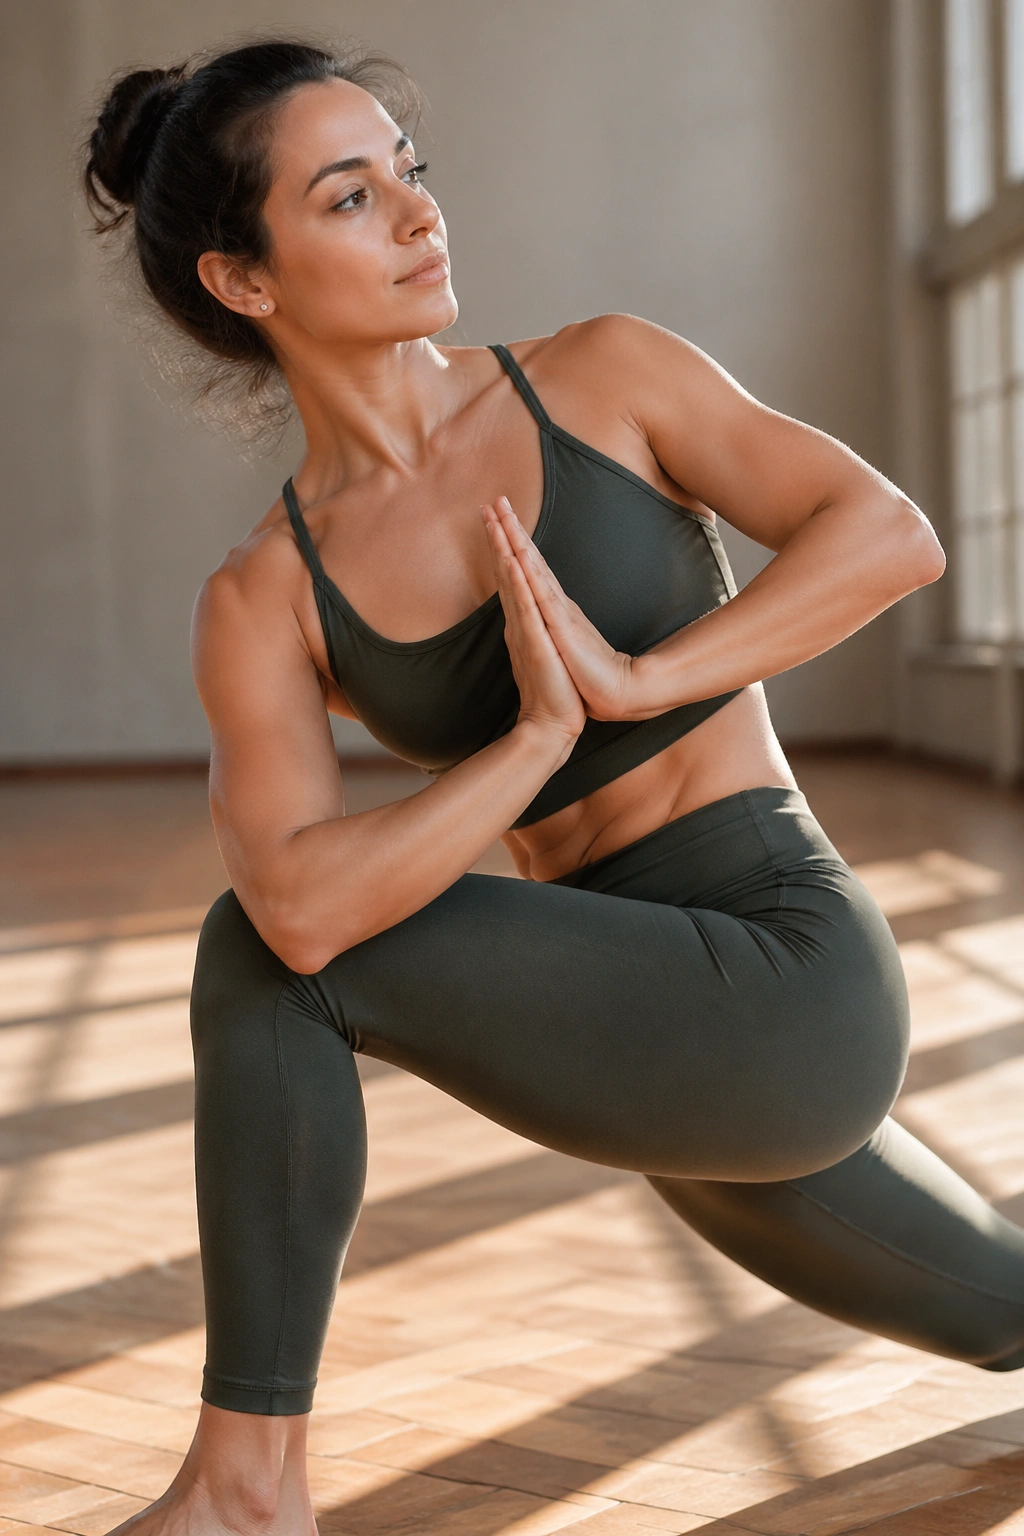
A controlled twist in a lunge is one of the cleanest ways to wake up the middle. Revolved Crescent Lunge asks the legs to stabilize while the torso rotates, which means the core has to resist wobbling instead of just crunching.
That matters. A lot of people think waist work is only about bending forward. It is not. Rotation and anti-rotation matter just as much, maybe more, because they train the body to stay strong while other parts move.
Keep the front knee bent, hands at heart center or reaching toward the ceiling, and turn from the ribs instead of yanking from the shoulders. The back heel may stay lifted, and that is fine. Inhale to lengthen. Exhale to twist a little deeper without losing the line of the spine.
Do not force the shape. If your hips open sideways and the twist becomes a slouch, back off. Three to five breaths per side is enough. Done well, this pose makes the obliques work, wakes up balance, and leaves the waist feeling far more engaged than a simple seated twist ever does.
8. Downward-Facing Dog: The Full-Body Reset That Still Works Hard
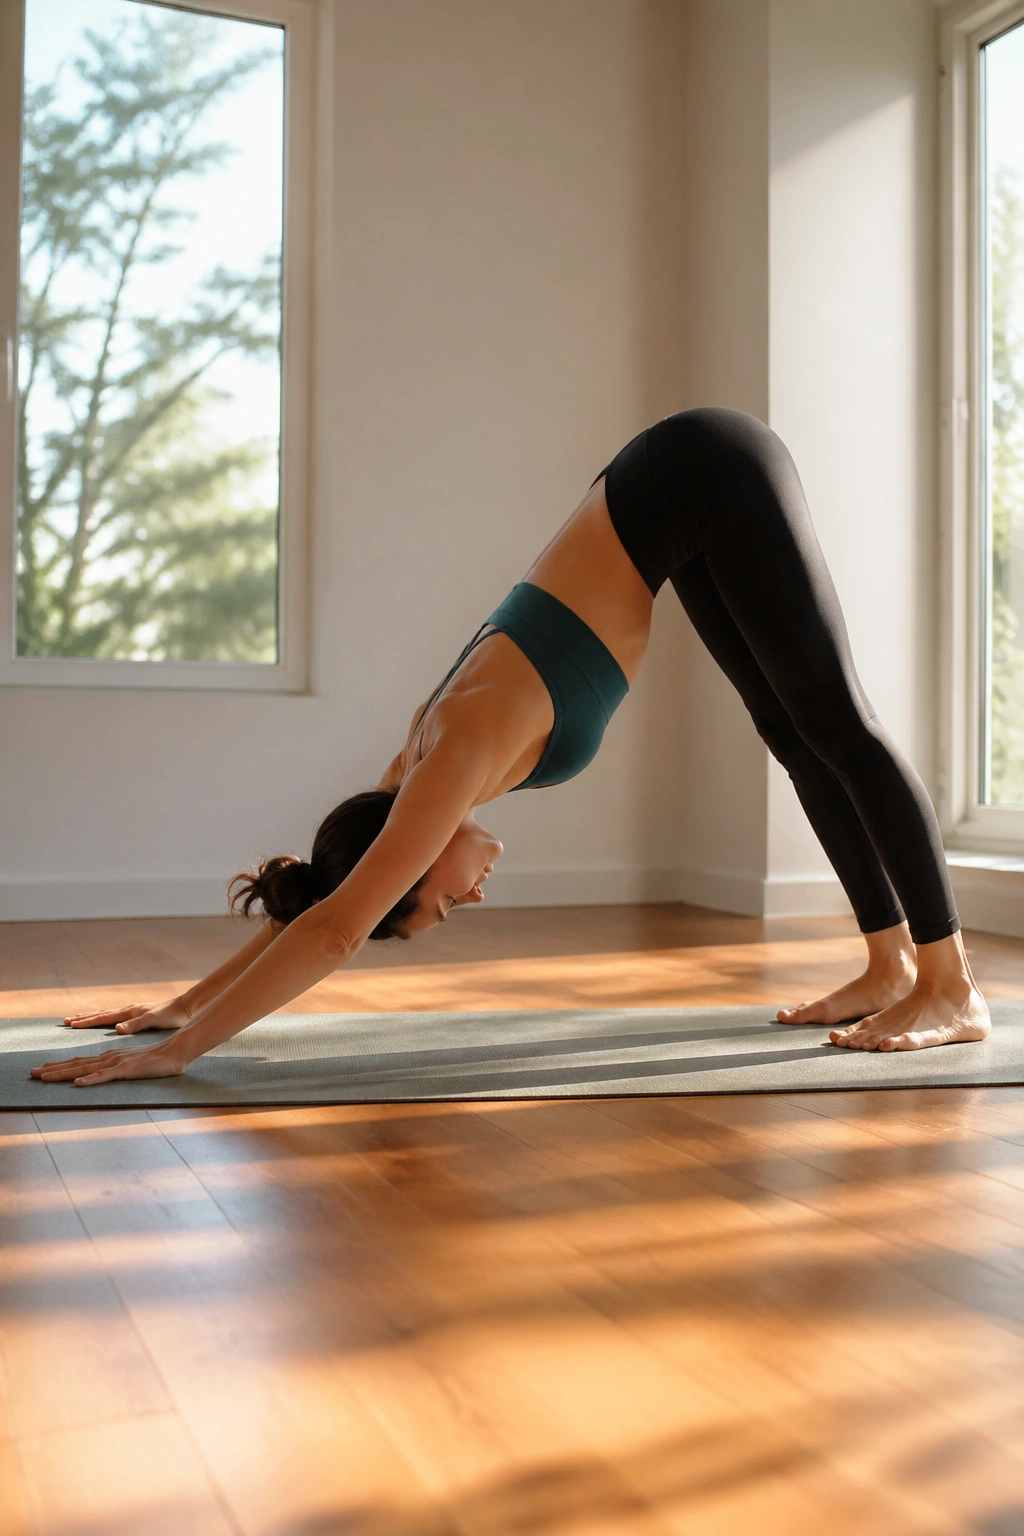
After a long day at a desk, Downward-Facing Dog is the pose that makes your back stop barking.
You press the floor away, send the hips up and back, and let the hamstrings and shoulders share the load. The core has to stay on so the spine does not dump into the low back. It feels like a stretch, but it behaves like a strength drill when you hold it long enough.
That is why it belongs in a belly-fat-friendly yoga sequence. It is not a direct abdominal burner. It is a full-body shape that raises effort, improves circulation, and gives you a clean way to move from one floor-based pose into the next without losing energy.
Keep knees bent if the hamstrings are screaming. That is not cheating. Straightening the legs at the cost of a rounded spine is worse. Hold for 5 to 8 breaths, pedal the feet if the calves are tight, and use the exhale to settle the ribs back.
The pose rewards patience. Push too hard and you feel cramped. Back off a little and it becomes one of the most useful positions in yoga.
9. Warrior III: Balance That Cheats Your Core
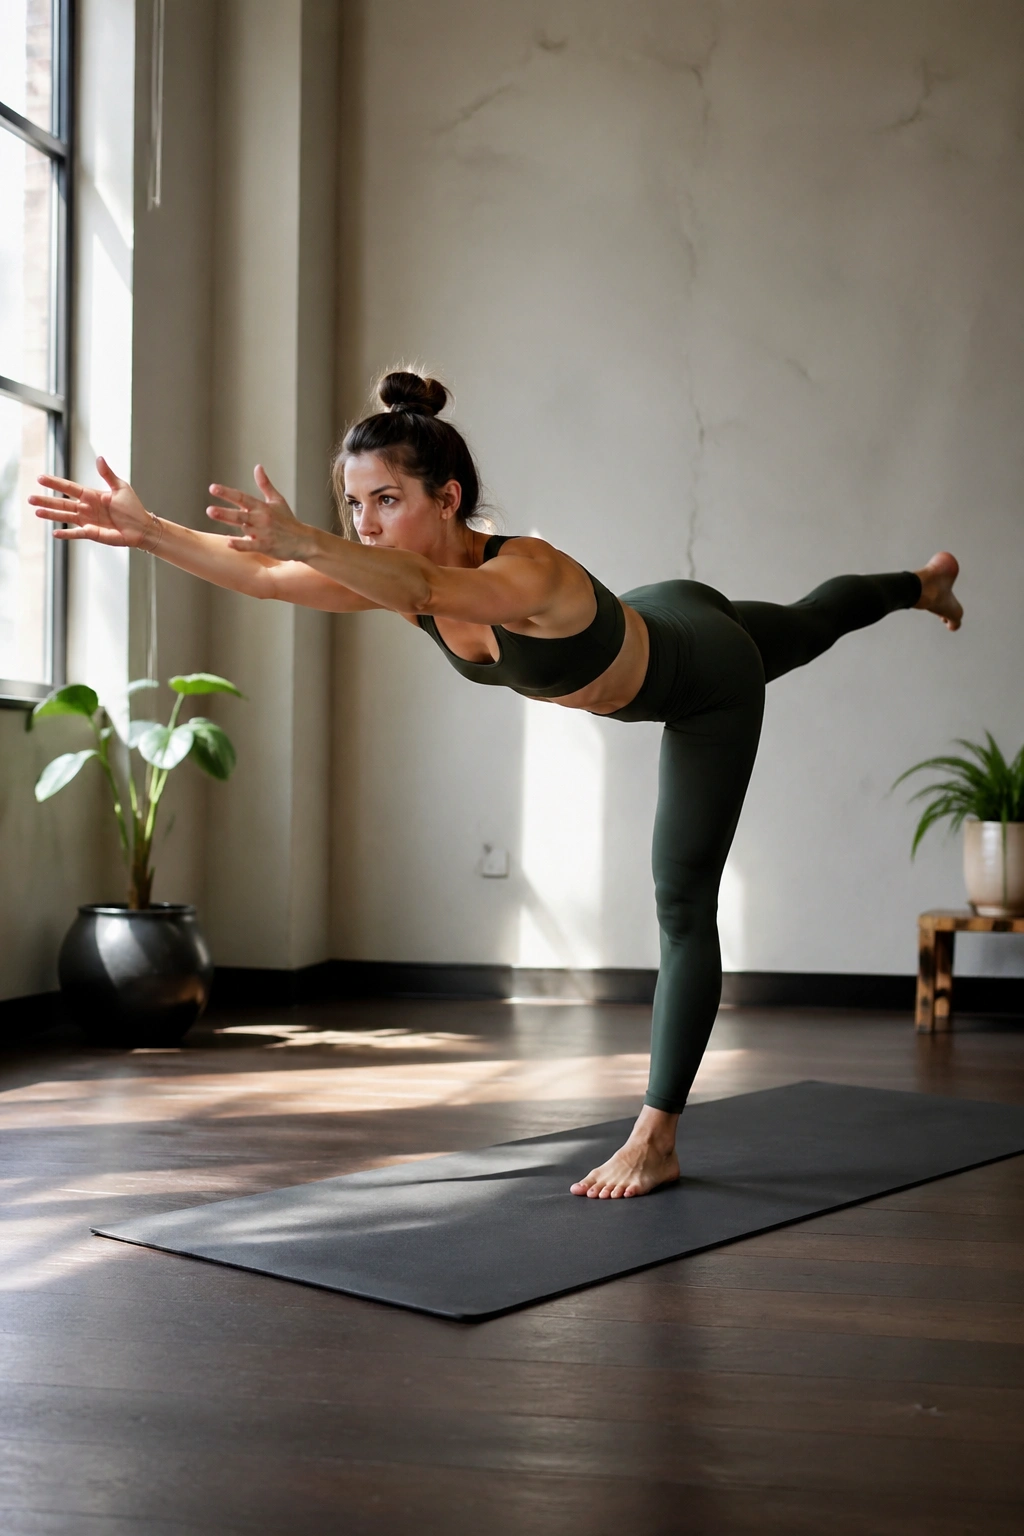
Stand on one leg and reach long enough, and your belly starts working before you even think about abs.
Warrior III is a hinge, not a kick. The torso tips forward, the lifted leg reaches back, and the standing leg has to do a ton of stabilizing while the core keeps the pelvis level. That combination makes the pose excellent for posture, balance, and deeper trunk strength.
What makes it count
- Hinge from the hips instead of collapsing the chest.
- Keep the standing knee soft, not locked.
- Reach the back heel long and active.
- Use a wall or chair if balance is shaky.
A clean Warrior III can feel like a long exhale held in place. The body is working, but it should not look frantic. Start with 3 breaths per side. If that feels easy, add a second round instead of forcing a longer hold.
There is a practical bonus here. Better balance often changes the way you walk, stand, and move through the day. That sounds small. It is not. Every little bit of extra muscle work adds up over time.
10. Triangle Pose for Belly Fat Support
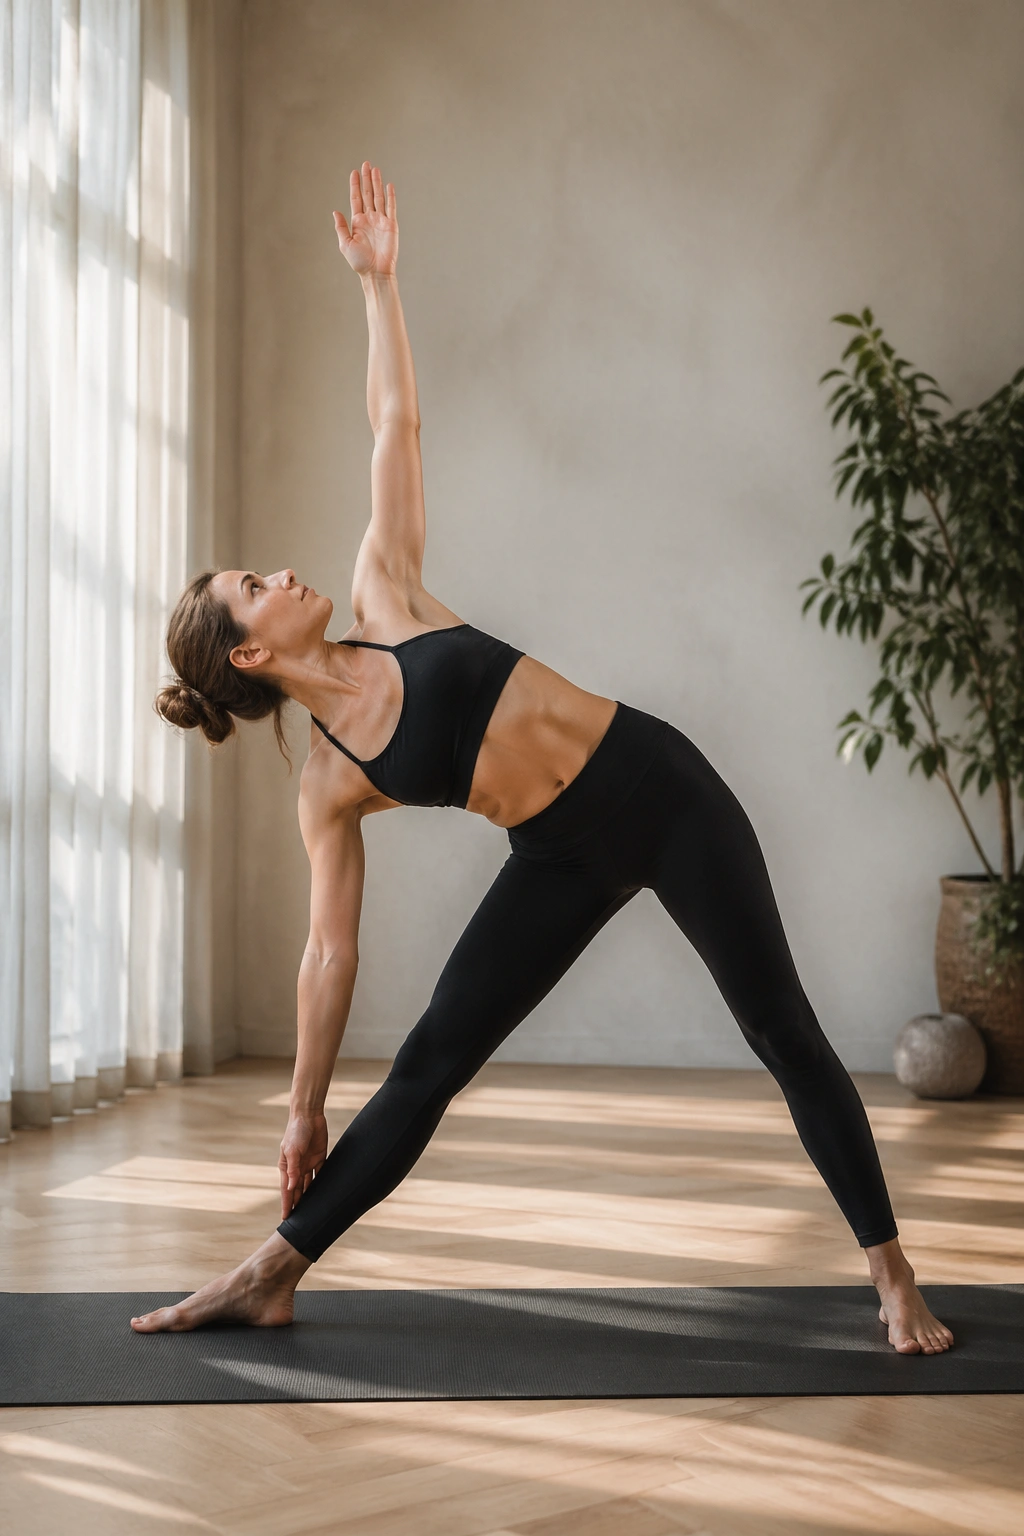
Triangle Pose looks peaceful, but the side body has to stay alive the whole time.
The front leg stays straight, the torso opens, and one hand reaches toward the shin, ankle, or a block. What keeps the pose from turning sloppy is the line from the foot through the waist up to the top hand. That line asks the obliques, the legs, and the deep postural muscles to stay awake instead of hanging out.
What to feel
The lower side waist should lengthen, not collapse. The front thigh should stay engaged enough to protect the knee. If your hand has to reach the floor, use a block or stack a few books under it. Long torsos and tight hamstrings do not mix well with floor-reaching heroics.
Triangle Pose helps more than people expect because it teaches the torso to organize itself while one side of the body stretches. That kind of control can make the belly look flatter when you stand, and it also builds a steadier, more efficient movement pattern.
Hold for 5 breaths per side. Then switch. The pose is calm, but it is not passive.
11. Half Moon Pose: Side Body, Glutes, and a Steady Center
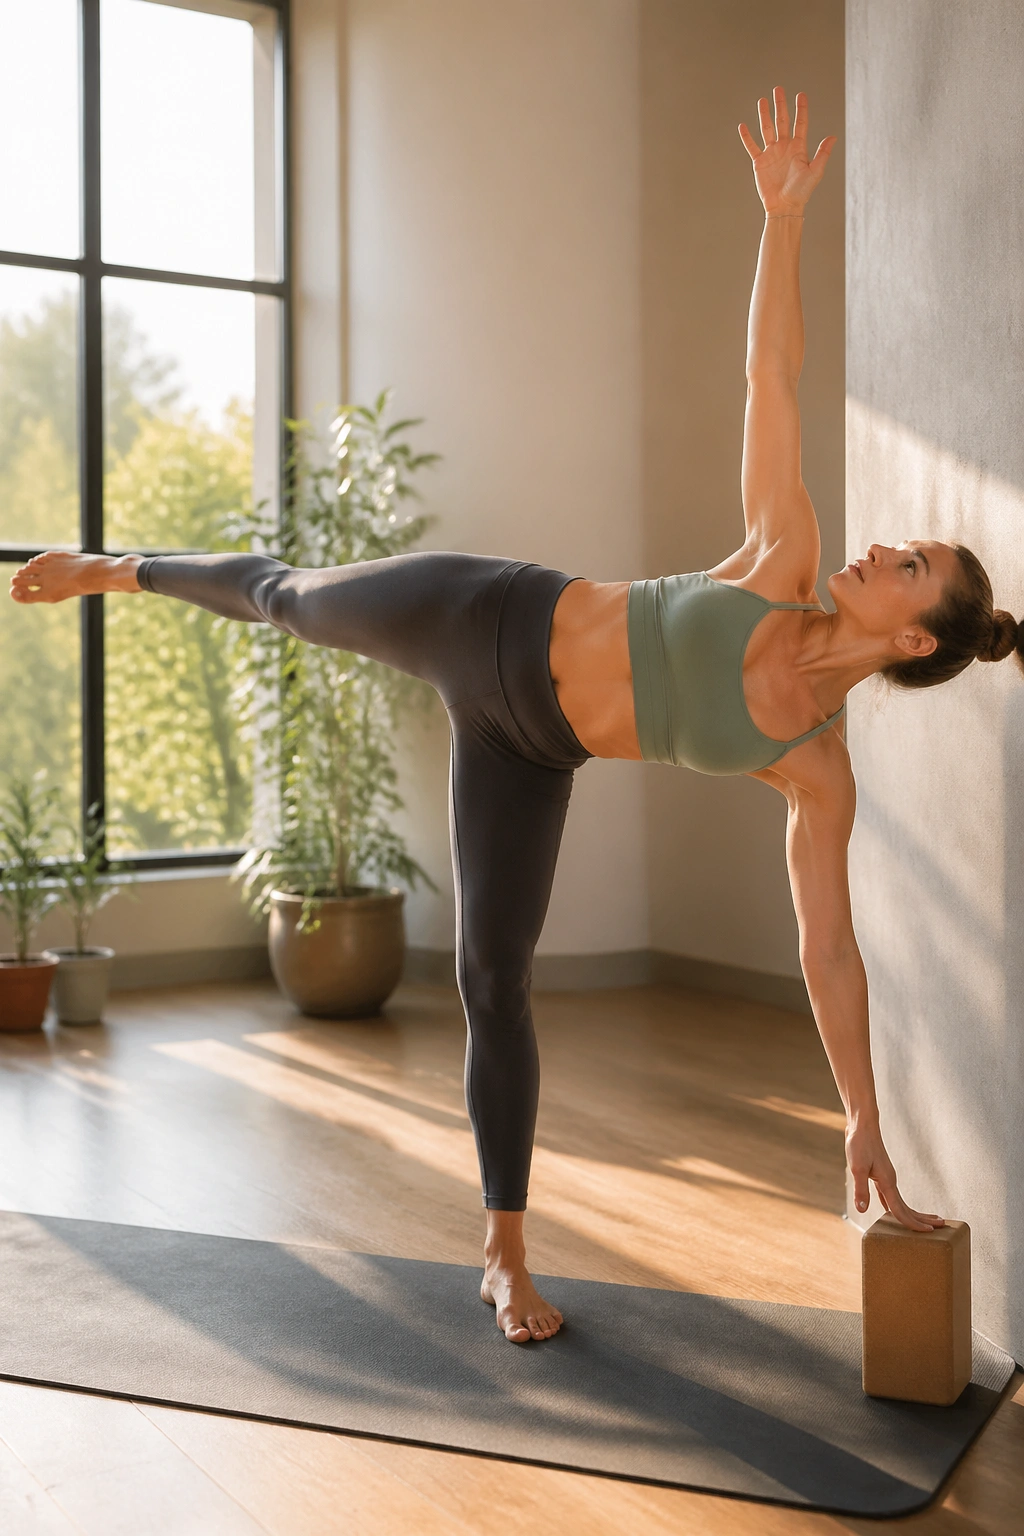
Unlike Triangle, Half Moon removes both hands from the floor. That changes everything.
Now the standing leg has to support nearly all the body weight while the lifted leg floats behind you and the torso stays open. The core works hard to keep you from tipping over, and the glute of the standing leg earns its keep. It is one of those poses that quietly exposes whether your midsection can stabilize under stress.
Half Moon is best for people who already have some balance confidence. A wall helps a lot. So does a block under the bottom hand while you learn the shape. Keep the lifted foot flexed, not floppy, and think about sending energy out through the heel rather than arching the lower back.
This pose matters for belly fat goals because it is demanding in a way that feels athletic. It burns energy, sharpens control, and makes the body work as a unit instead of a pile of disconnected parts.
If the full expression feels shaky, stay at the wall. Nobody gets extra points for falling over.
12. Bridge Pose: The Glute Pose That Saves Your Lower Back
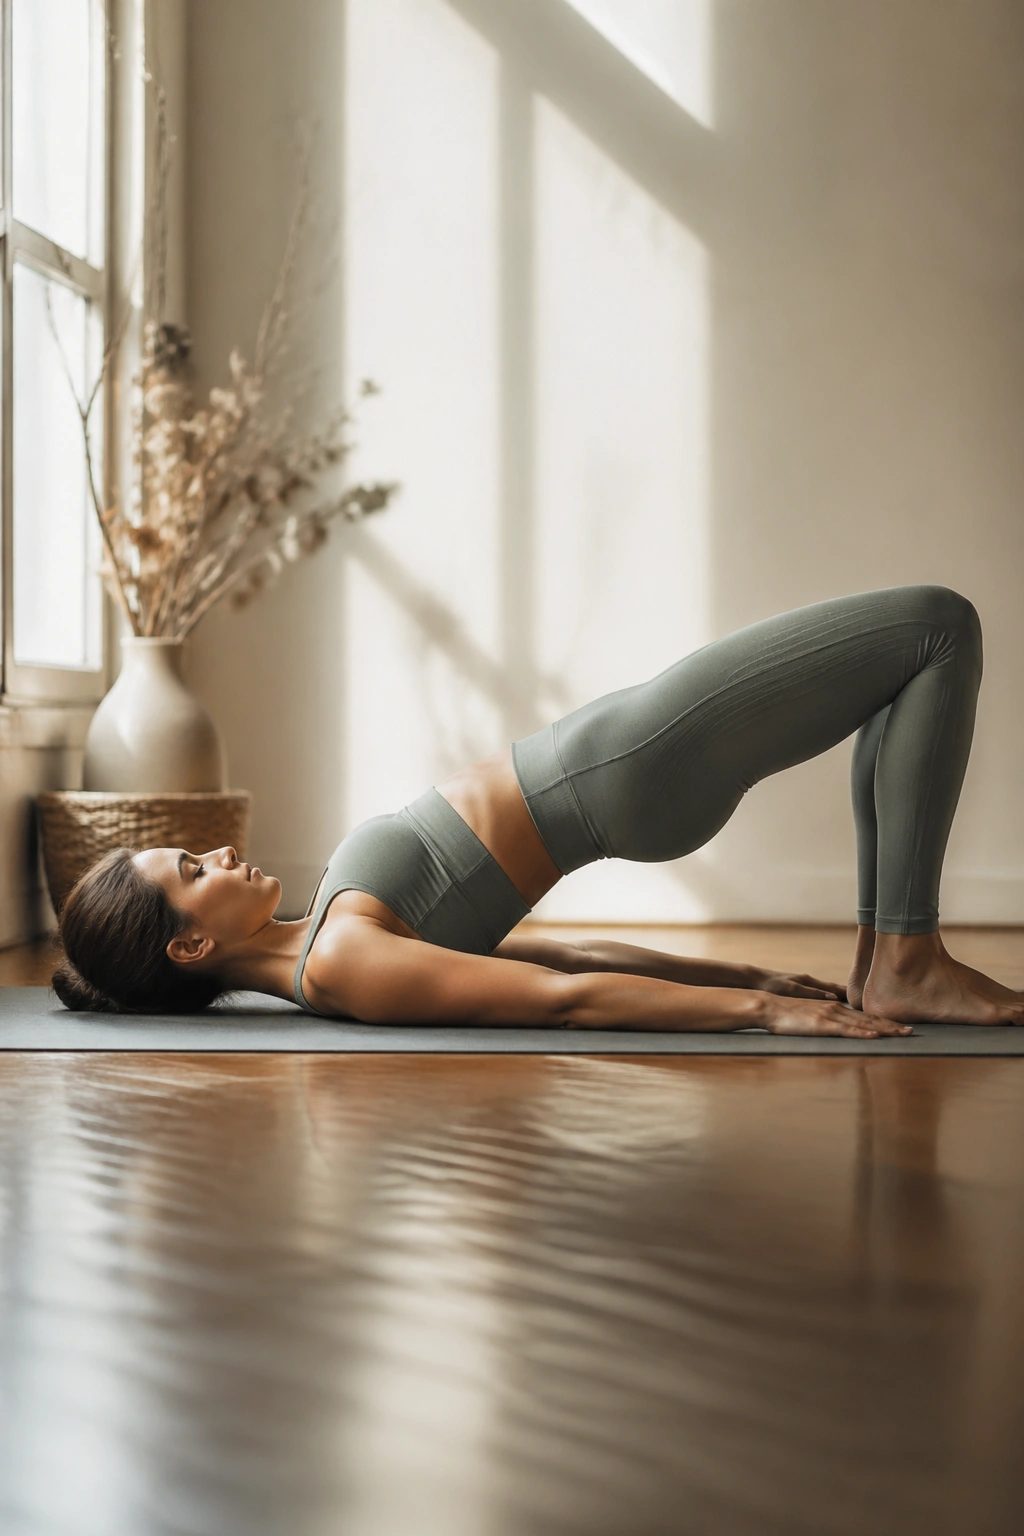
Bridge Pose is one of the few backbends most people can hold long enough to matter. That makes it useful, because the glutes, hamstrings, and lower abs get a real chance to work without the low back doing all the talking.
Lie on your back, bend the knees, and press the feet into the mat as the hips lift. The chest opens, the front of the body lengthens, and the spine gets a break from constant sitting. If you keep the knees parallel and avoid flaring the ribs, the core stays involved the whole time.
Bridge also plays a sneaky role in fat-loss support. Stronger glutes often mean better movement patterns in walking, stairs, and standing transitions. That extra daily efficiency can matter more than people admit. And if you want a bigger challenge, hold a block between the thighs or march one foot at a time while the pelvis stays level.
Hold for 5 to 8 breaths. Lower with control. A rushed Bridge is just a quick hip lift. A real one builds useful strength.
13. Locust Pose: Small Lift, Big Payoff
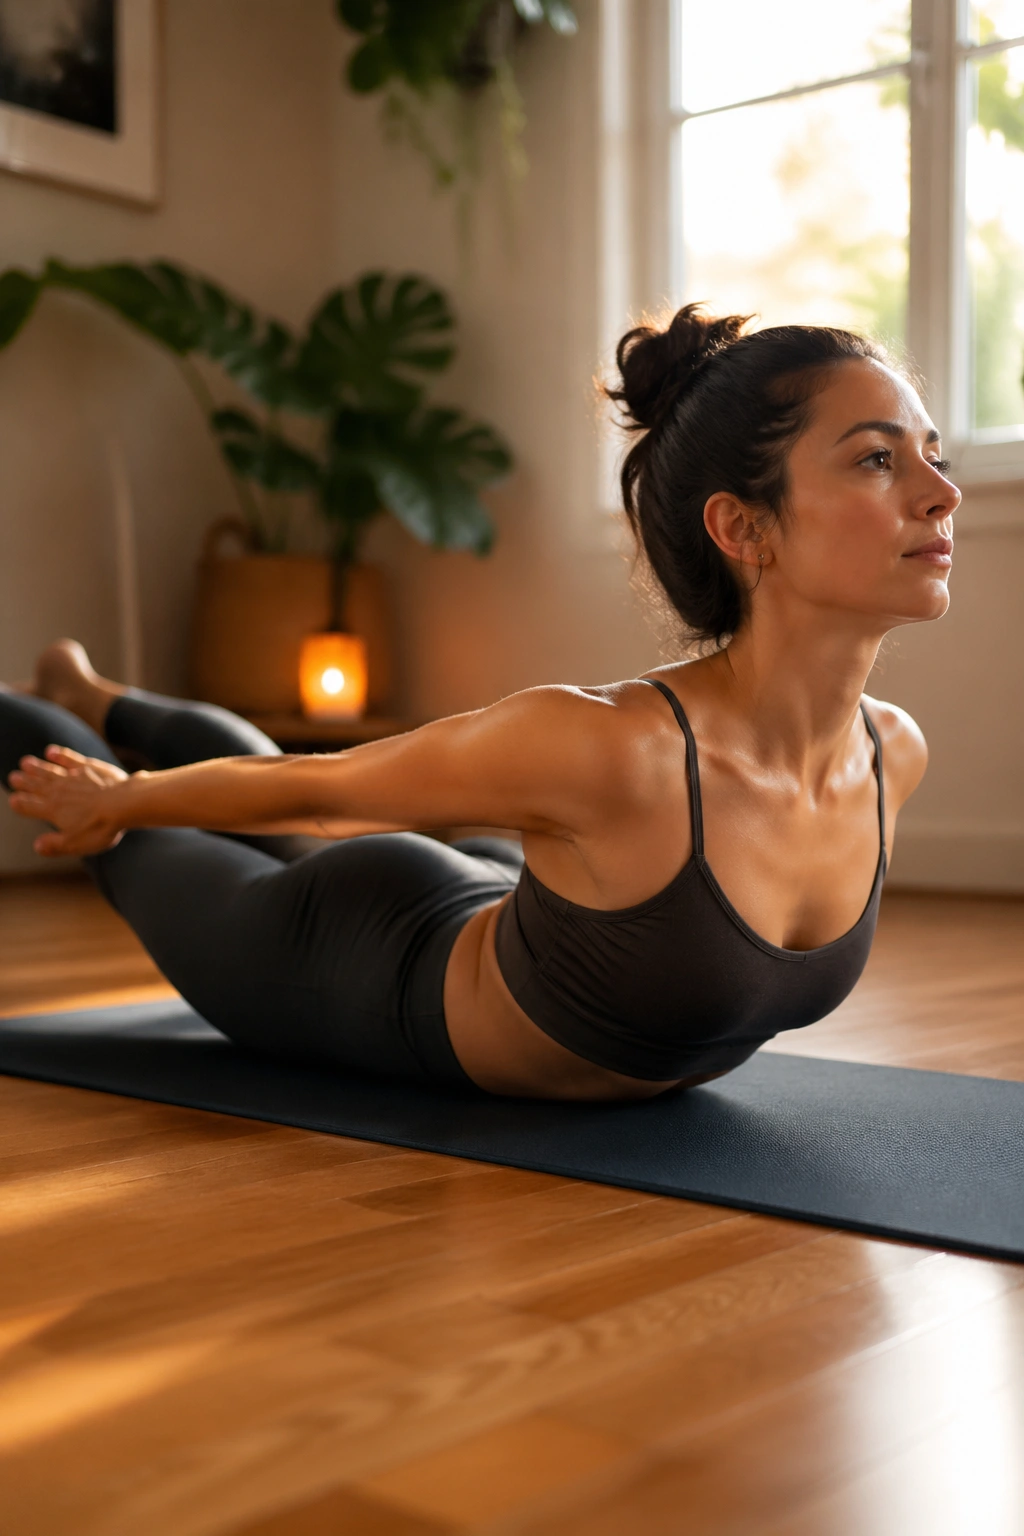
Why does a pose that barely leaves the floor show up in core work?
Because Locust Pose lights up the back body in a way most front-facing exercises miss. The chest lifts, the legs hover, and the spinal muscles, glutes, and hamstrings have to engage together to keep the shape from collapsing. That support feeds into better posture, which matters more for a flatter-looking middle than a lot of people think.
How to use it
Lie on your stomach with arms alongside the body or reaching back. Lift the chest and legs a few inches, not a foot. Keep the neck long and look slightly forward, not straight up. Hold for 3 to 5 breaths, lower, rest, and repeat once or twice.
The temptation is to crank into the lower back. Skip that. A lower, cleaner lift gives you more useful work and less cranky spine feedback.
Locust is not glamorous. Good. It does not need to be. It strengthens the muscles that help you stand taller, which can make the stomach look less slumped forward when you are off the mat.
14. Bow Pose: A Deep Backbend With Real Core Work
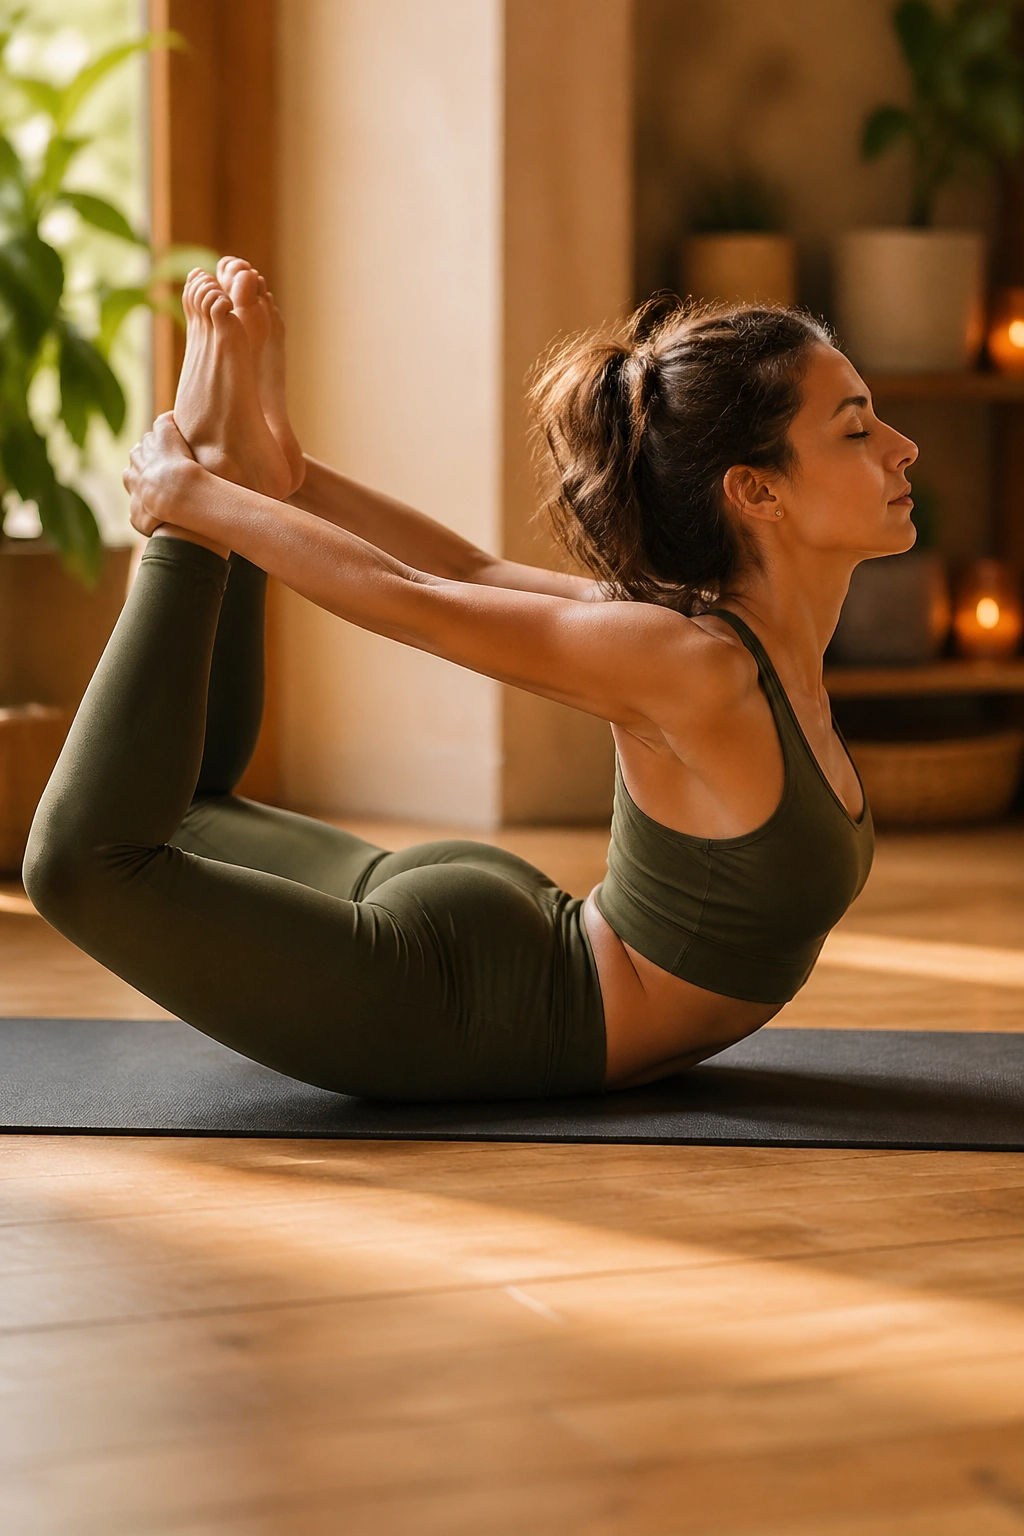
Bow Pose is not the place to improvise.
You lie on your stomach, bend the knees, reach back for the ankles, and lift the chest and thighs off the floor. The front body opens, the back body contracts hard, and the core has to keep the ribs from flaring into chaos. Done well, it feels powerful. Done badly, it feels like your lower back is negotiating a breakup.
What to watch for
- Warm up first with Cobra or Locust.
- Keep the knees about hip-width apart.
- Lift only as high as you can breathe through.
- Stop if the neck pinches or the low back jams.
Bow Pose can help belly-fat-focused practice because it is demanding, not because it is magical. It builds strength, makes you work through the whole front side of the body, and leaves you with a sharper sense of where your core actually is.
A lot of people skip it because it looks dramatic. Fair. Still, if your body tolerates it, Bow is a strong tool for both posture and power.
15. Cobra Pose: Gentle Strength for Stiff Bodies
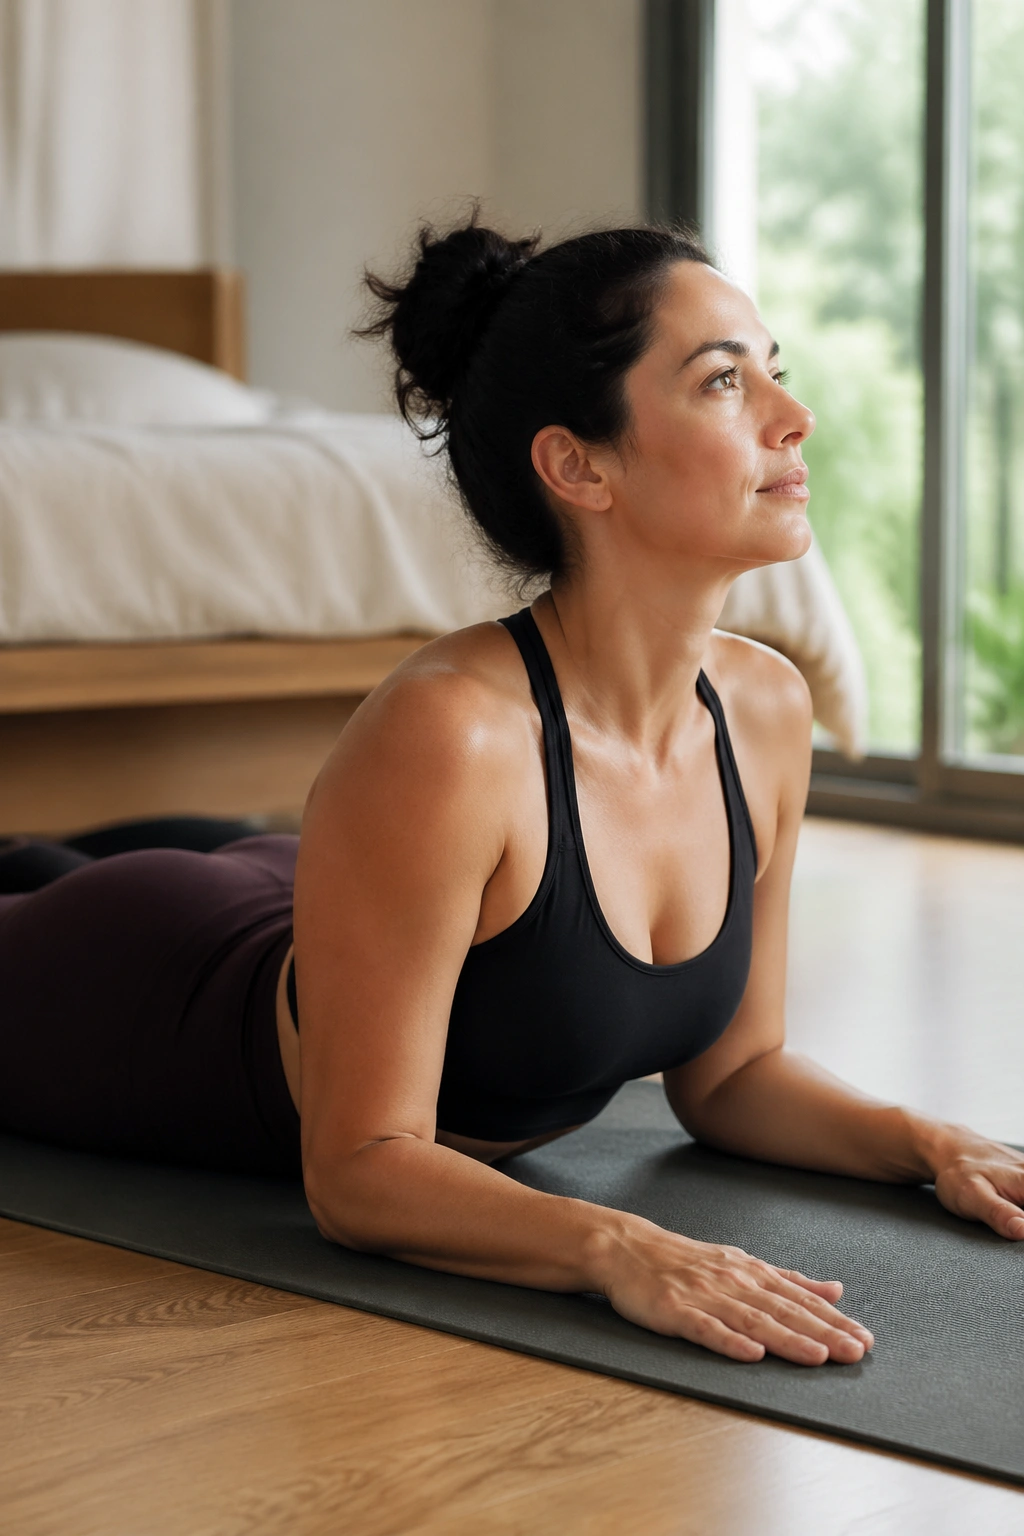
Cobra is the pose I reach for when someone’s front body has gone completely stale from sitting.
Hands press lightly into the mat, the chest lifts, and the spine moves into extension without the full load of a deeper backbend. The abs stay connected enough to protect the low back, and the shoulders roll away from the ears. That combination makes Cobra useful, especially for beginners who need strength without getting overwhelmed.
Do not force a huge lift. A low Cobra, with elbows bent and ribs still close to the floor, is often the better choice. The chest opens, breathing gets easier, and the stomach area has to stay lightly engaged to support the spine.
Hold for 3 breaths, lower, and repeat 2 or 3 times. You should feel the muscles along the spine working, not a jolt in the lumbar area.
Cobra will not burn as hard as Boat Pose. It does something different. It restores extension, which helps the rest of your practice feel less compressed and more balanced.
16. Cat-Cow: The Reset You Shouldn’t Skip
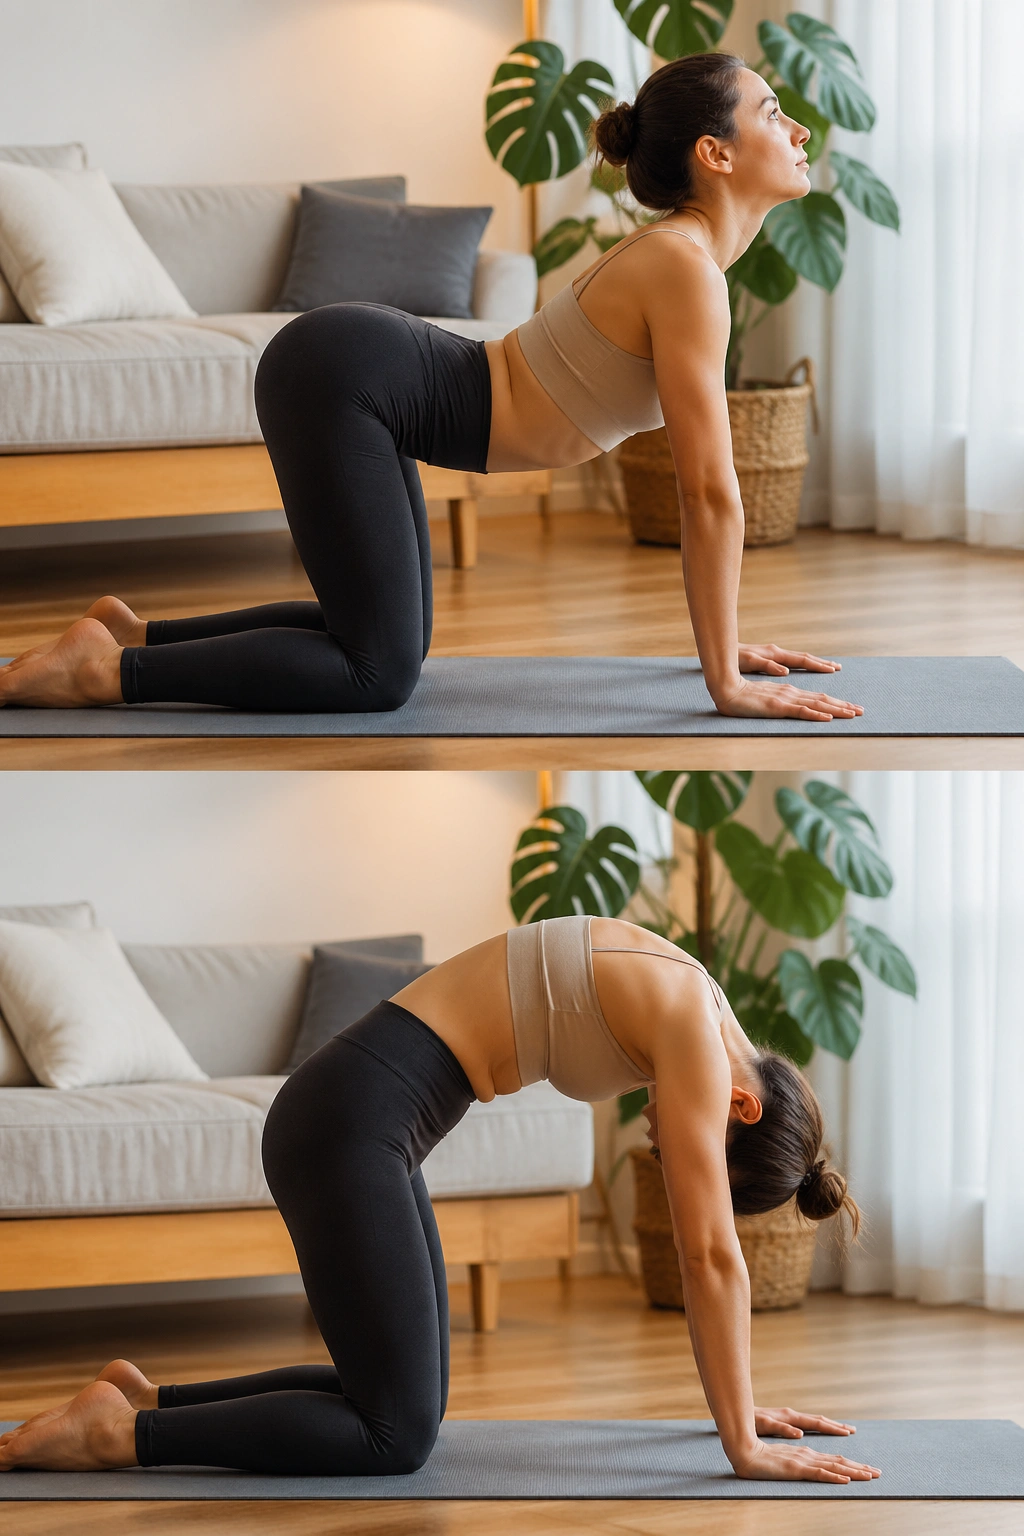
Cat-Cow does not look like fat-loss work, and that is exactly why people skip it.
Big mistake. The gentle flexion and extension of the spine wake up the core, warm the abdominal wall, and help your breath move more freely before harder poses. If your midsection feels tight, or your back feels stuck, Cat-Cow is the cleanest way to start changing that.
Why it belongs in this list
It improves spinal mobility in both directions. It teaches breath and movement to match. It also helps people who sit a lot stop moving like a cardboard cutout. That matters because tight, inactive backs often make core work clumsy and short-lived.
Use 6 to 8 slow rounds. Inhale as the chest opens and the tailbone lifts. Exhale as the spine rounds and the belly draws up. Keep the movement smooth, not theatrical.
If you only have five minutes before a fuller practice, Cat-Cow earns its place. It prepares the body without draining it. That makes the tougher poses work better.
17. Dolphin Pose: Shoulder Work That Reaches Deep
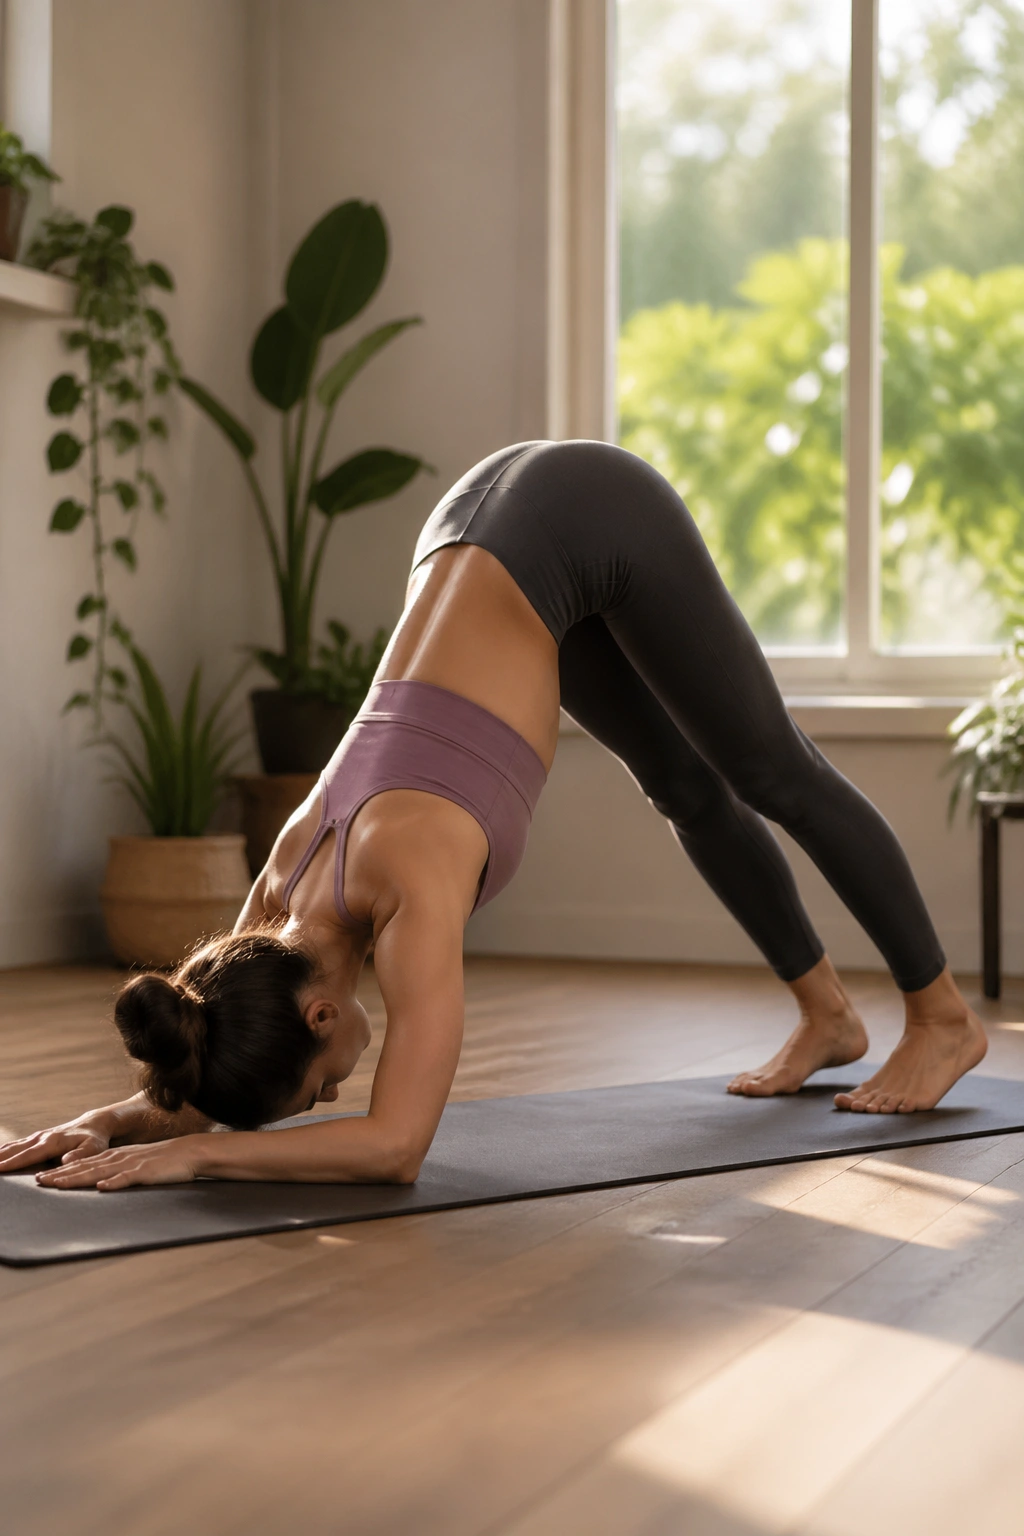
Dolphin Pose surprises people because it looks like a stretch and behaves like a strength drill. Forearms press down, shoulders work hard, hips lift, and the core has to keep the torso from collapsing into the floor.
That makes it a smart addition to a yoga routine aimed at trimming belly fat over time. The pose asks for upper-body support, trunk control, and a fair bit of patience. Nothing about it is lazy. Even the breathing gets more deliberate because the shape is demanding.
You can enter Dolphin from tabletop or forearm plank. Keep the elbows shoulder-width apart, press the forearms into the mat, and lift the hips up and back. Bend the knees if needed. That makes the spine longer and the pose far more usable.
Hold for 20 to 30 seconds, rest, and repeat once. If the shoulders are tight, stay short in the hold and work on clean alignment first. Good Dolphin is strong and quiet. Floppy Dolphin is just a shoulder argument waiting to happen.
18. Savasana: The Quiet Pose That Keeps You Consistent
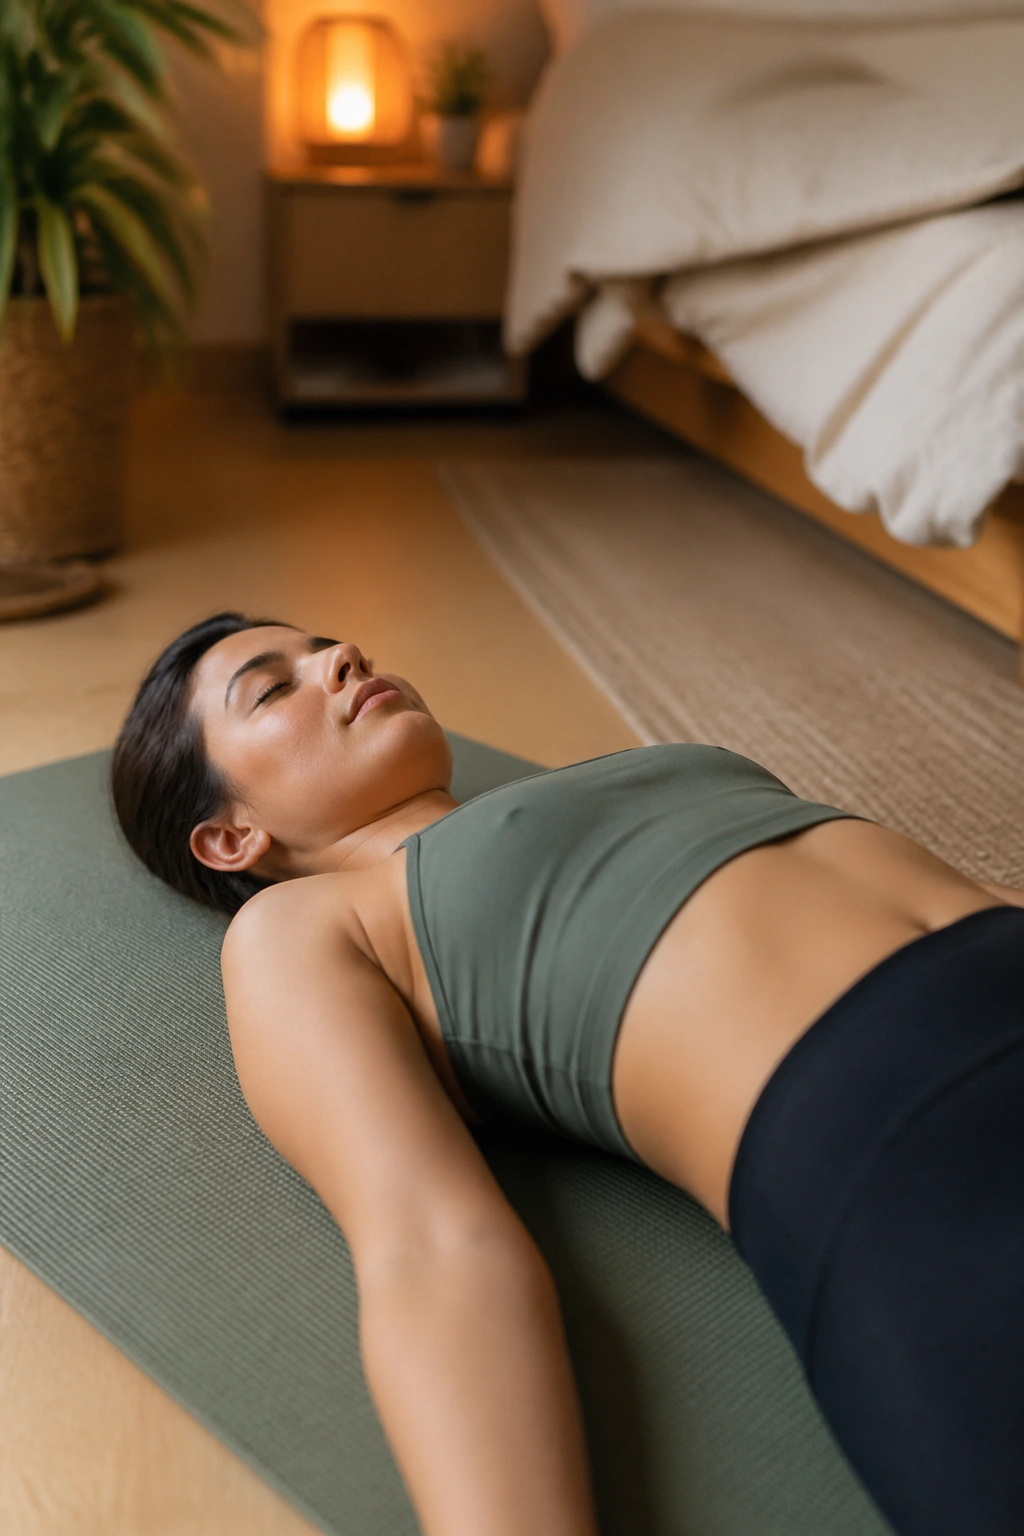
Can a still pose matter in a belly-fat routine? Absolutely.
Savasana is where the whole practice settles. Your breathing slows, the nervous system calms, and the work you just did has a chance to land instead of getting swallowed by stress. That matters more than people want to admit, because chronic stress tends to show up as poor sleep, more snacking, and less willingness to move the next day.
Lie flat, let the feet fall open, and soften the jaw. Stay there for 3 to 8 minutes if you can. If your lower back arches, place a rolled towel under the knees. If your mind races, count slow exhales from 1 to 10 and start again.
Savasana will not spike your heart rate. Good. It is the part that helps you come back tomorrow, and the day after that, without feeling like every practice has to be a performance.
That steadiness is what trims the waistline over time. Not drama. Not punishment. Repetition, recovery, and enough honesty to keep going when the shiny part is over.
