



Standing still can be the hardest part. The first week of yoga is rarely about fancy balance or deep backbends; it is about learning how your feet, ribs, shoulders, and breath behave when you slow down. If you want 22 yoga poses for beginners to learn the first week, the smartest picks are the ones that teach you how to stand, stretch, and recover without turning the mat into a fight.
A block, a wall, and a folded blanket are not signs you are doing it wrong. They are the tools that keep beginner yoga poses from becoming a tug-of-war with tight calves, cranky wrists, or a lower back that wants no part of the drama. Use them early. That habit pays off fast.
Hold each pose for 3 to 5 breaths at first. Move slowly, keep your jaw loose, and notice where the work lands. A good first week should leave you feeling clearer and looser, not wrecked.
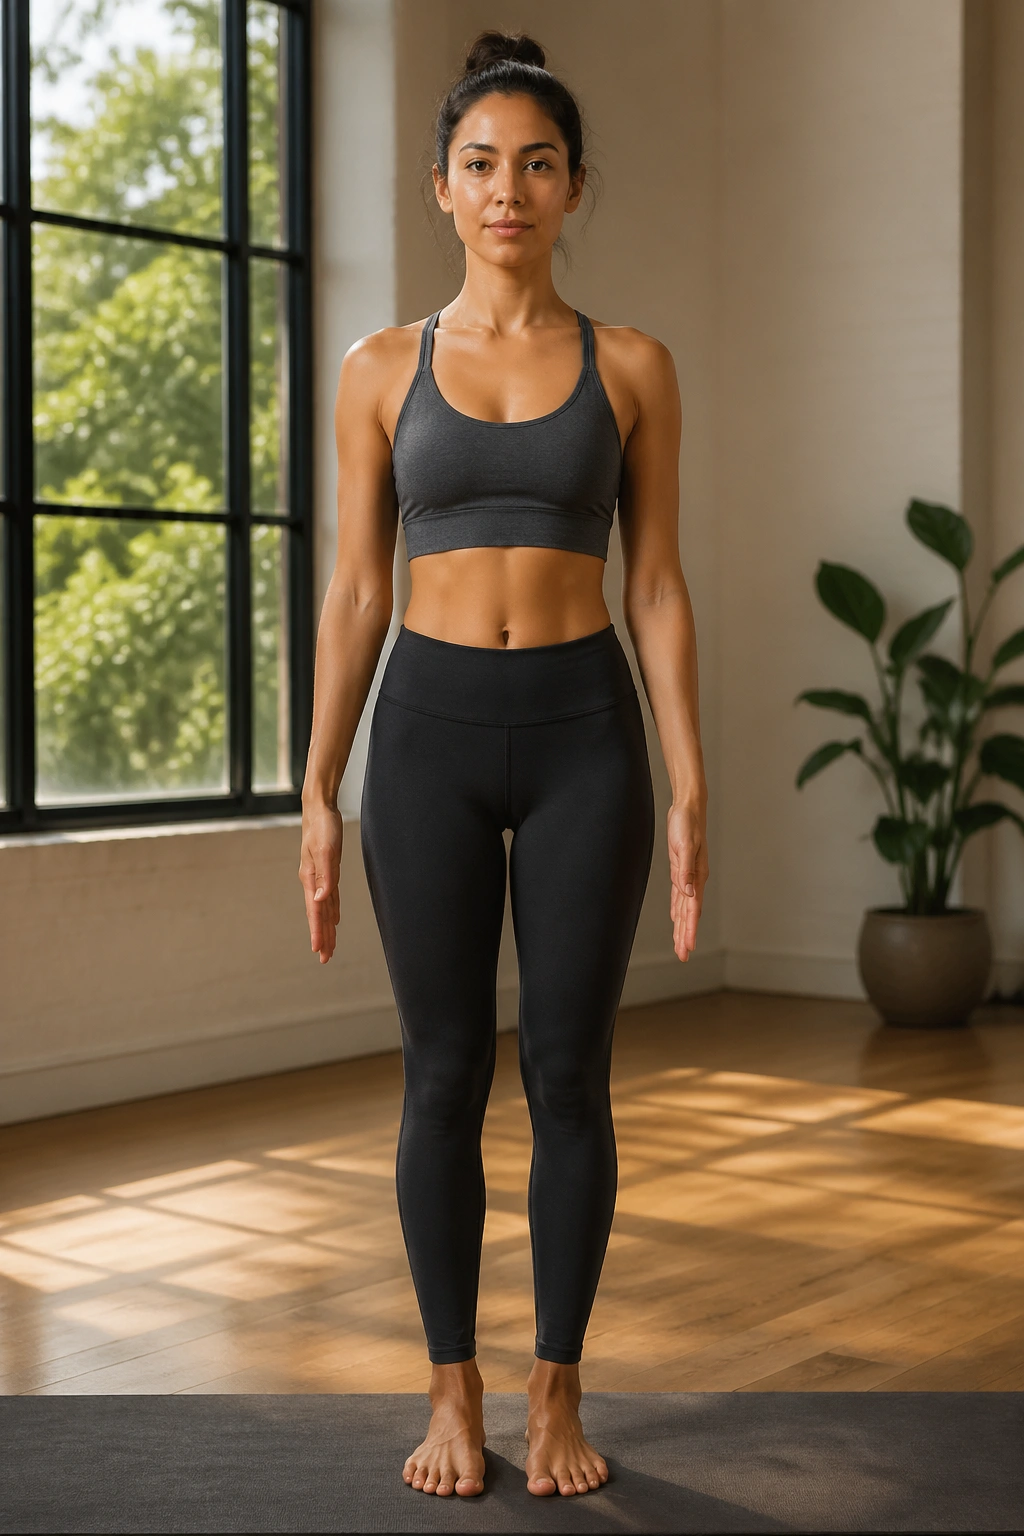
1. Mountain Pose
Mountain Pose looks like standing around, which is exactly why people rush past it. They miss the point. Tadasana teaches you how to place your feet, stack your bones, and stop hanging all your weight in one hip.
What to Feel
Stand with your feet about hip-width apart, or bring them together if that feels steady. Spread your toes, press down through the heel, big toe mound, and little toe mound, and let the kneecaps lift without locking. Your ribs should sit over your hips, not drift forward like you are reaching for the ceiling with your sternum.
A lot of beginners shrug their shoulders up near their ears. Don’t. Let the shoulders soften, palms face forward, and keep the back of the neck long. You are not trying to look impressive. You are trying to feel organized.
- Feet grounded: weight balanced across all four corners.
- Legs awake: thighs engaged, knees soft.
- Spine tall: rib cage stacked over pelvis.
- Face easy: jaw unclenched, eyes level.
Quick tip: press the floor down and imagine the crown of your head lifting up. That small upward reach changes everything.
2. Child’s Pose
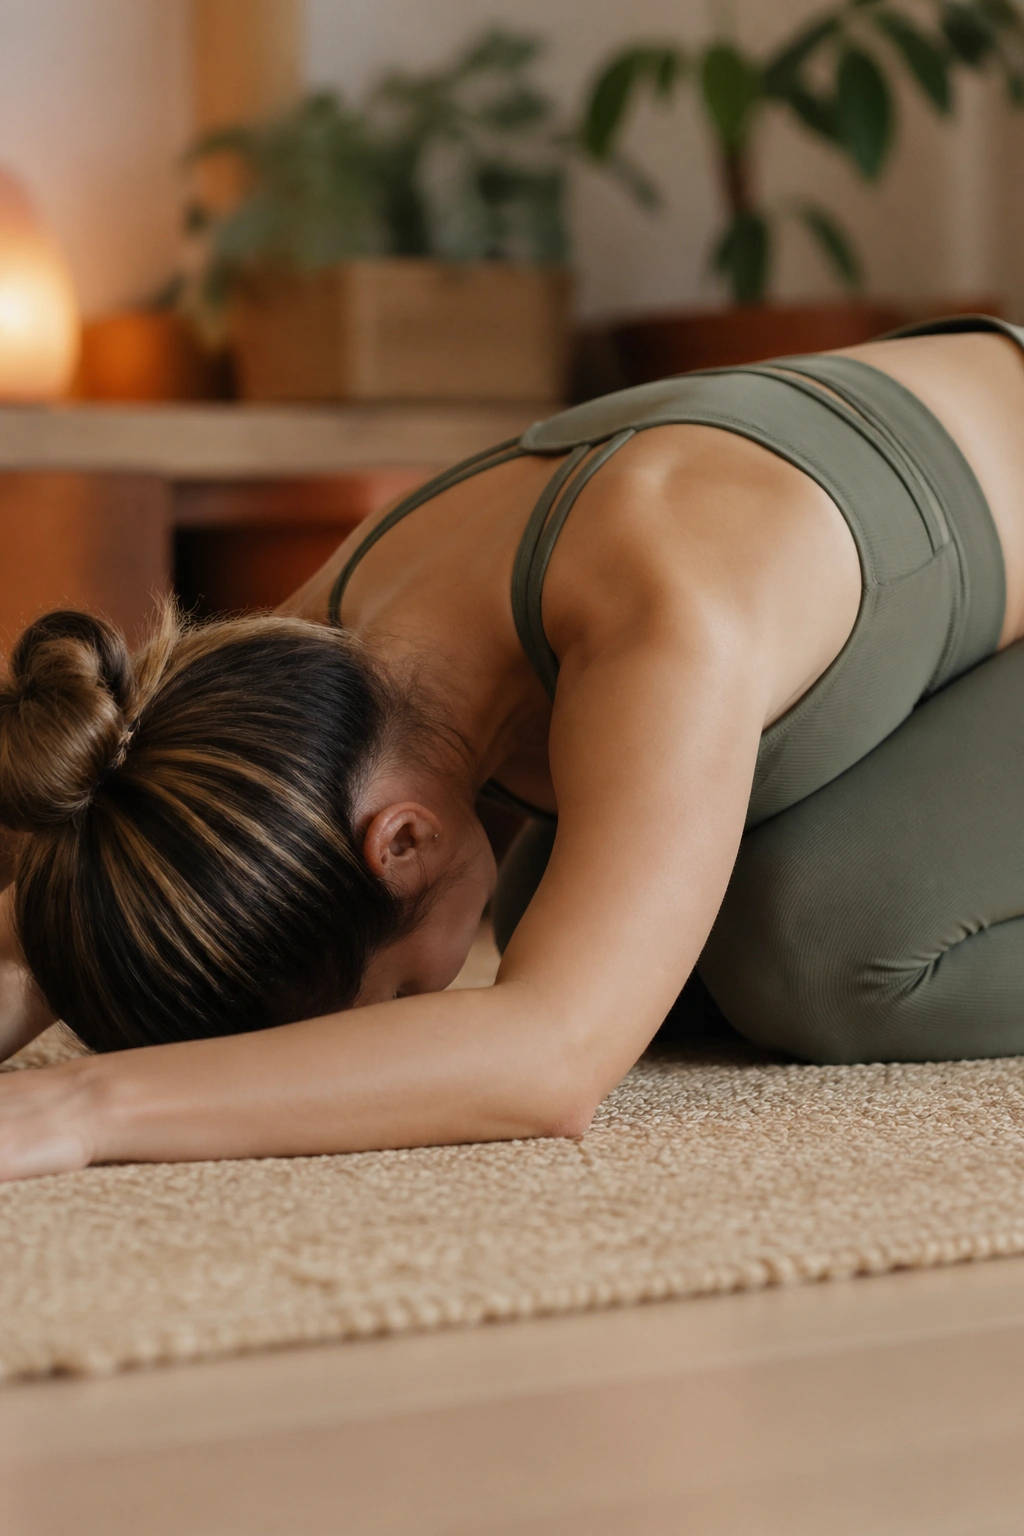
Child’s Pose earns its place because it lets the back widen instead of brace. That matters on day one, when even simple movement can feel louder than expected. Balasana is the pose that says, “No rush.”
Kneel with your big toes touching and knees apart, then fold forward until your torso rests between your thighs. If your hips are tight, place a folded blanket behind the knees or under the sit bones. Arms can reach forward, rest by your sides, or bend at the elbows if your shoulders are tired.
Breathe into the back ribs. That cue sounds tiny, but it changes the whole shape. If your forehead does not reach the floor comfortably, stack your fists or use a block. The goal is ease, not a perfect picture.
Easy on the breath. Easy on the neck.
I like this pose between stronger shapes because it resets the nervous system without flattening the lower back into a hard stretch. If your knees complain, widen them more or skip the pose for now and rest on your back instead.
3. Cat-Cow
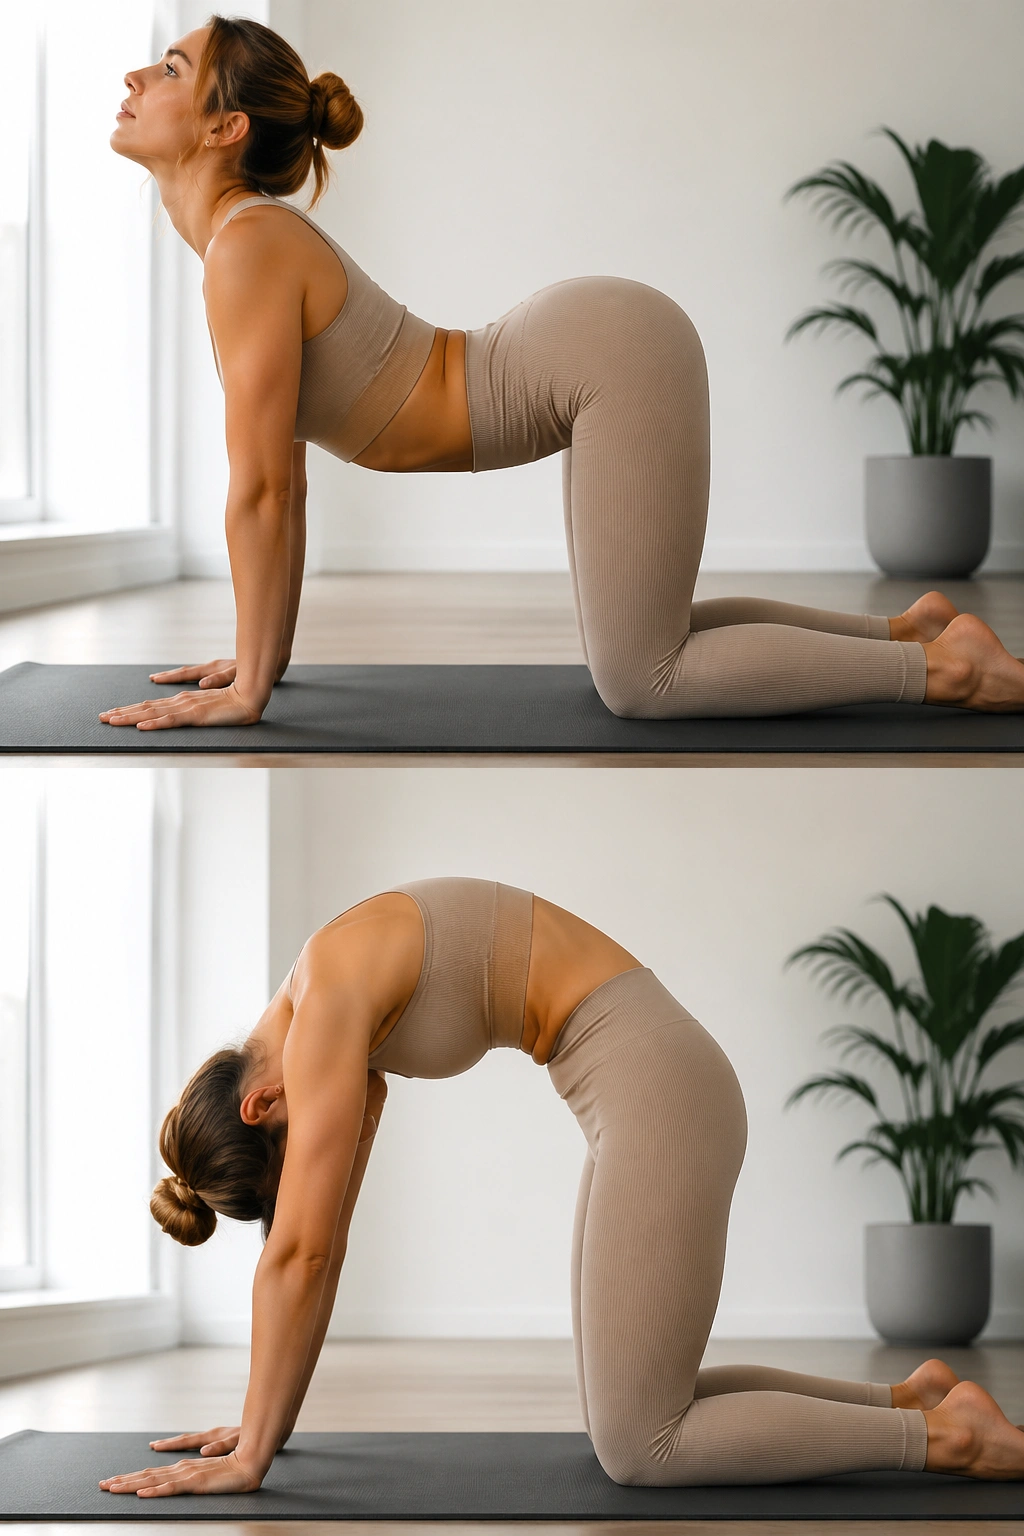
Why does Cat-Cow show up in nearly every beginner class? Because your spine likes this kind of movement, and your breath does too. Marjaryasana-Bitilasana is less about flexibility than about coordination.
How to Move It
Start on hands and knees with wrists under shoulders and knees under hips. On an inhale, tip the tailbone up, let the belly soften, and lift the chest forward into Cow. On the exhale, round the spine, press the floor away, and draw the navel gently in for Cat. The movement should feel smooth, not forced.
Keep the neck in line with the rest of the spine. If you throw your head back in Cow or drop the chin hard in Cat, the pose starts to feel jerky. Small motion is fine. Small motion is often better.
- Inhale to arch.
- Exhale to round.
- Move with the breath.
- Keep the shoulders away from the ears.
If your wrists are sensitive, make fists or place your hands on blocks. That little change can keep the whole practice from getting irritating halfway through.
4. Downward-Facing Dog
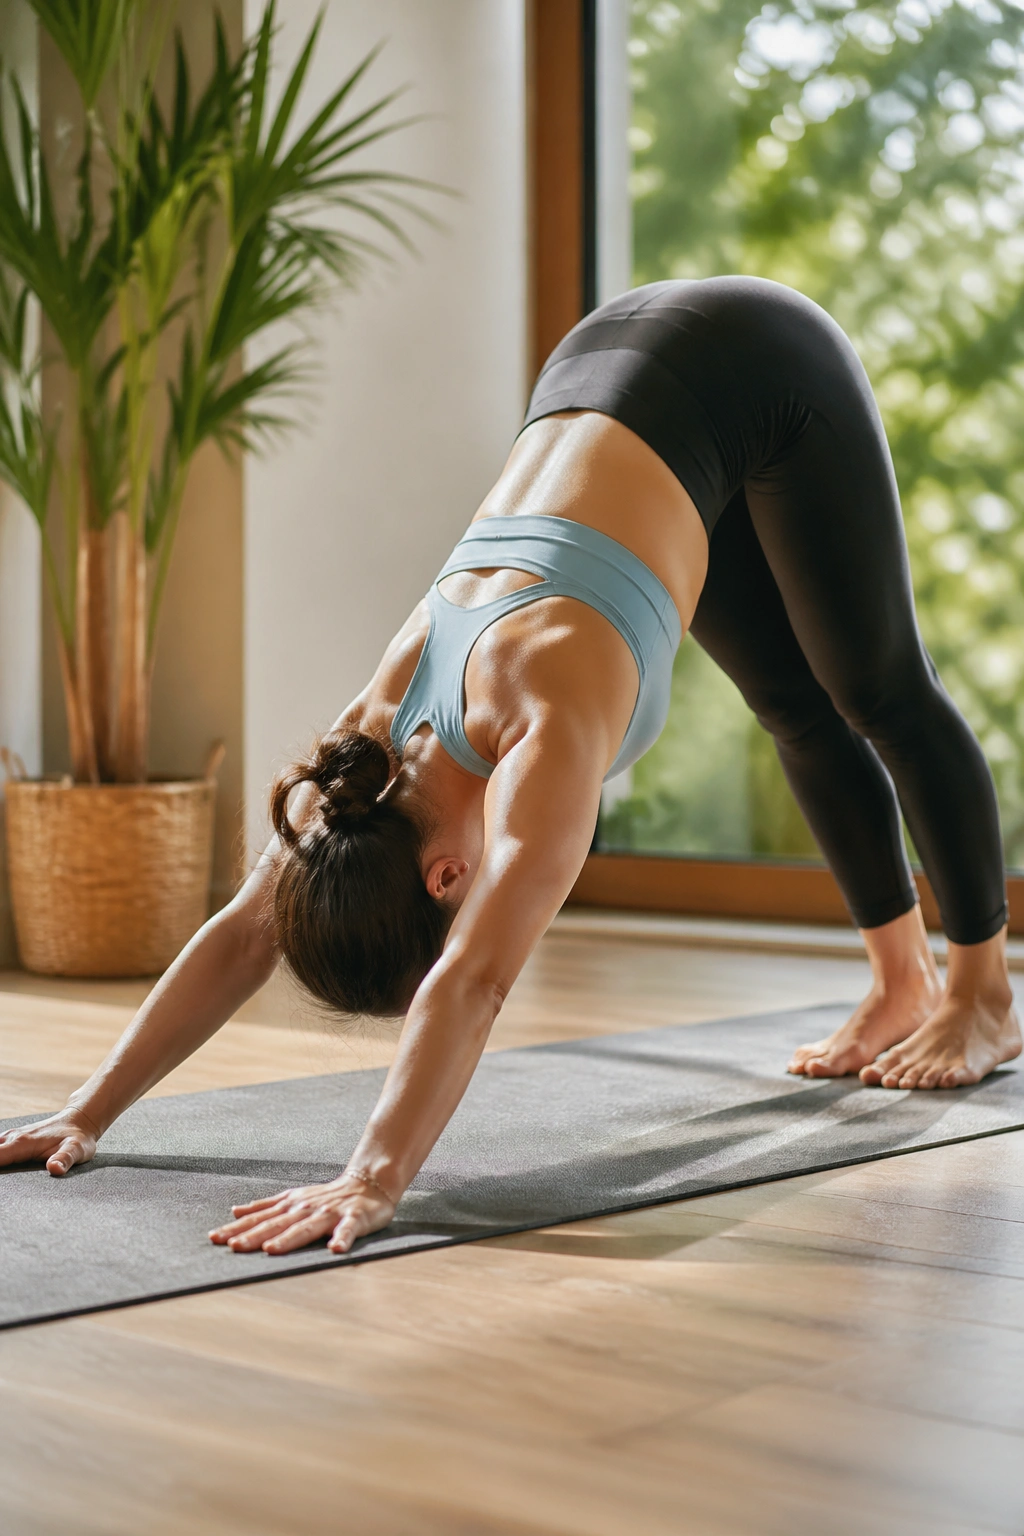
Picture the moment your heels hover an inch off the floor and your hamstrings start sending angry emails. That is normal. Downward-Facing Dog is famous because it stretches a lot at once, but beginners often make it harder than it needs to be.
Hands go shoulder-width apart, fingers spread wide like little suction cups. Hips lift back and up. Bend your knees as much as needed so the spine can lengthen; straight legs are not the prize here. Press the chest gently toward the thighs and let the heels stay light.
What to Watch For
- Hands root evenly, especially through the index finger and thumb.
- Elbows stay soft, not locked.
- Knees can bend a lot.
- Heels do not need to touch down.
If your shoulders feel jammed, walk your hands forward an inch or two. If your wrists ache, turn the hands slightly out or come back to Child’s Pose for a breath. A dog with bent knees is still a real dog.
The point is to create a long, steady line from wrists to hips. The stretch in the calves will come later.
5. Standing Forward Fold
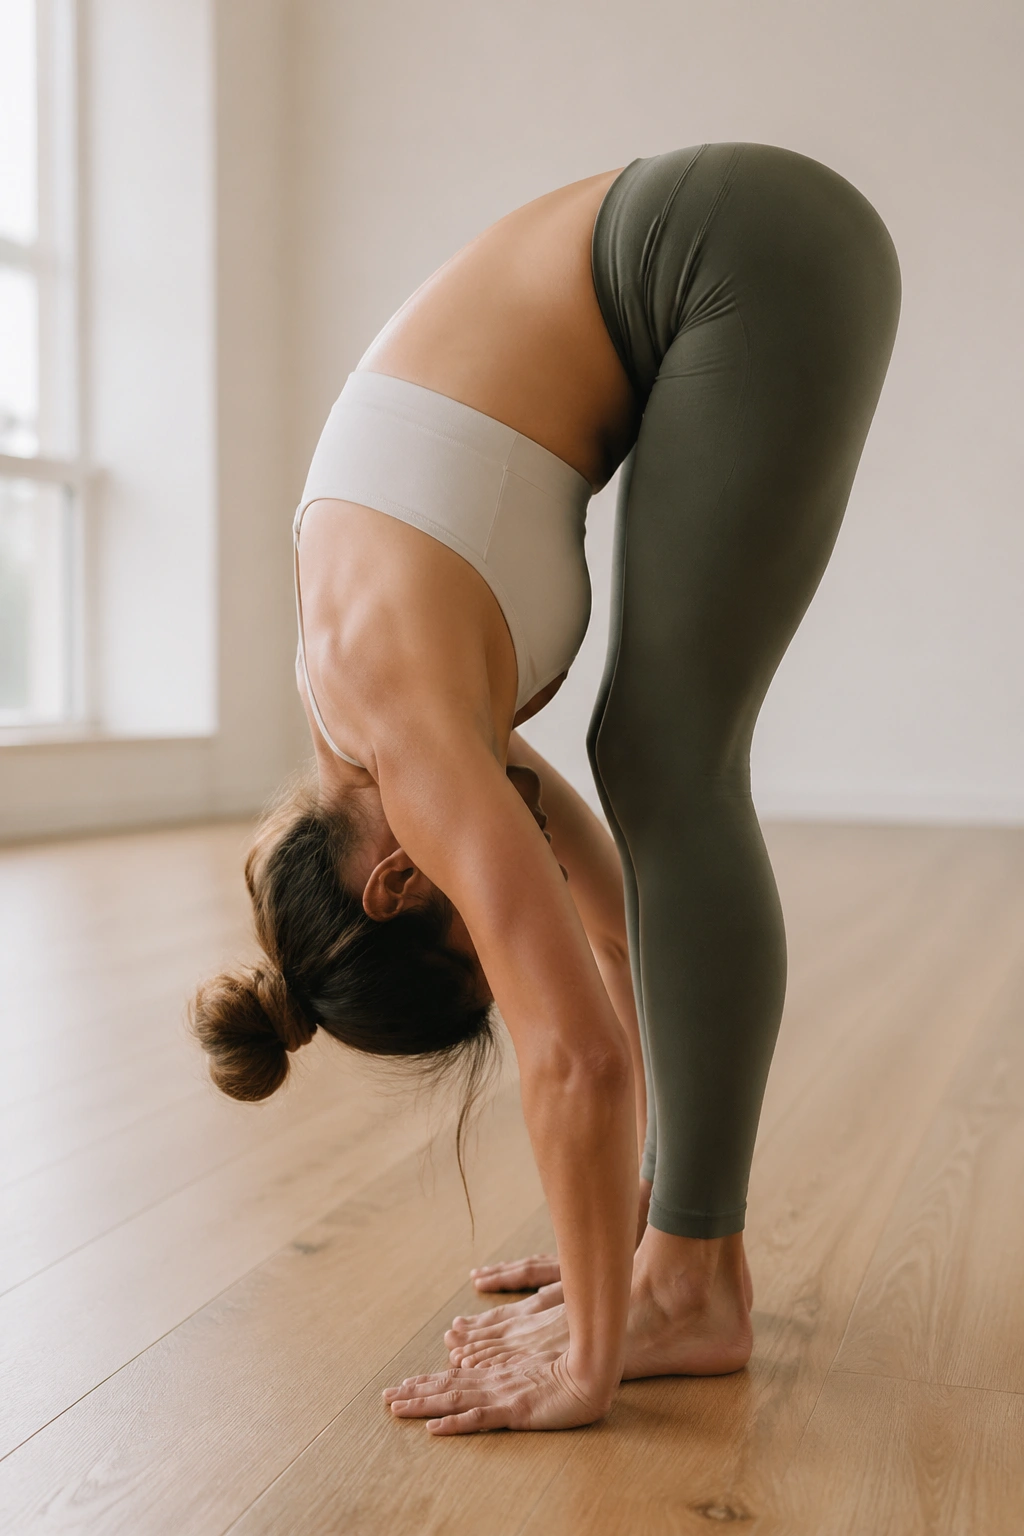
A forward fold looks lazy. It isn’t. Uttanasana asks your hamstrings, calves, and back to cooperate without the usual habit of gripping every muscle at once.
Start with feet hip-width apart. Hinge from the hips and let the torso drape forward, but keep a soft bend in the knees if the back of the legs feel like guitar strings. Hold opposite elbows, rest your fingertips on the floor, or place hands on blocks if the floor is a long way away. Any of those options counts.
Let the head hang. That one sentence matters. People often keep the neck braced as if they are posing for a passport photo. Release the jaw, soften the tongue, and let the weight drop toward the floor.
A halfway lift can be useful here too. Place hands on shins, lengthen the spine flat for one breath, then fold again. That small reset gives the low back a break and helps the stretch land in the right place.
If you feel dizzy coming up, rise slowly and stay bent at the knees longer next time.
6. Low Lunge
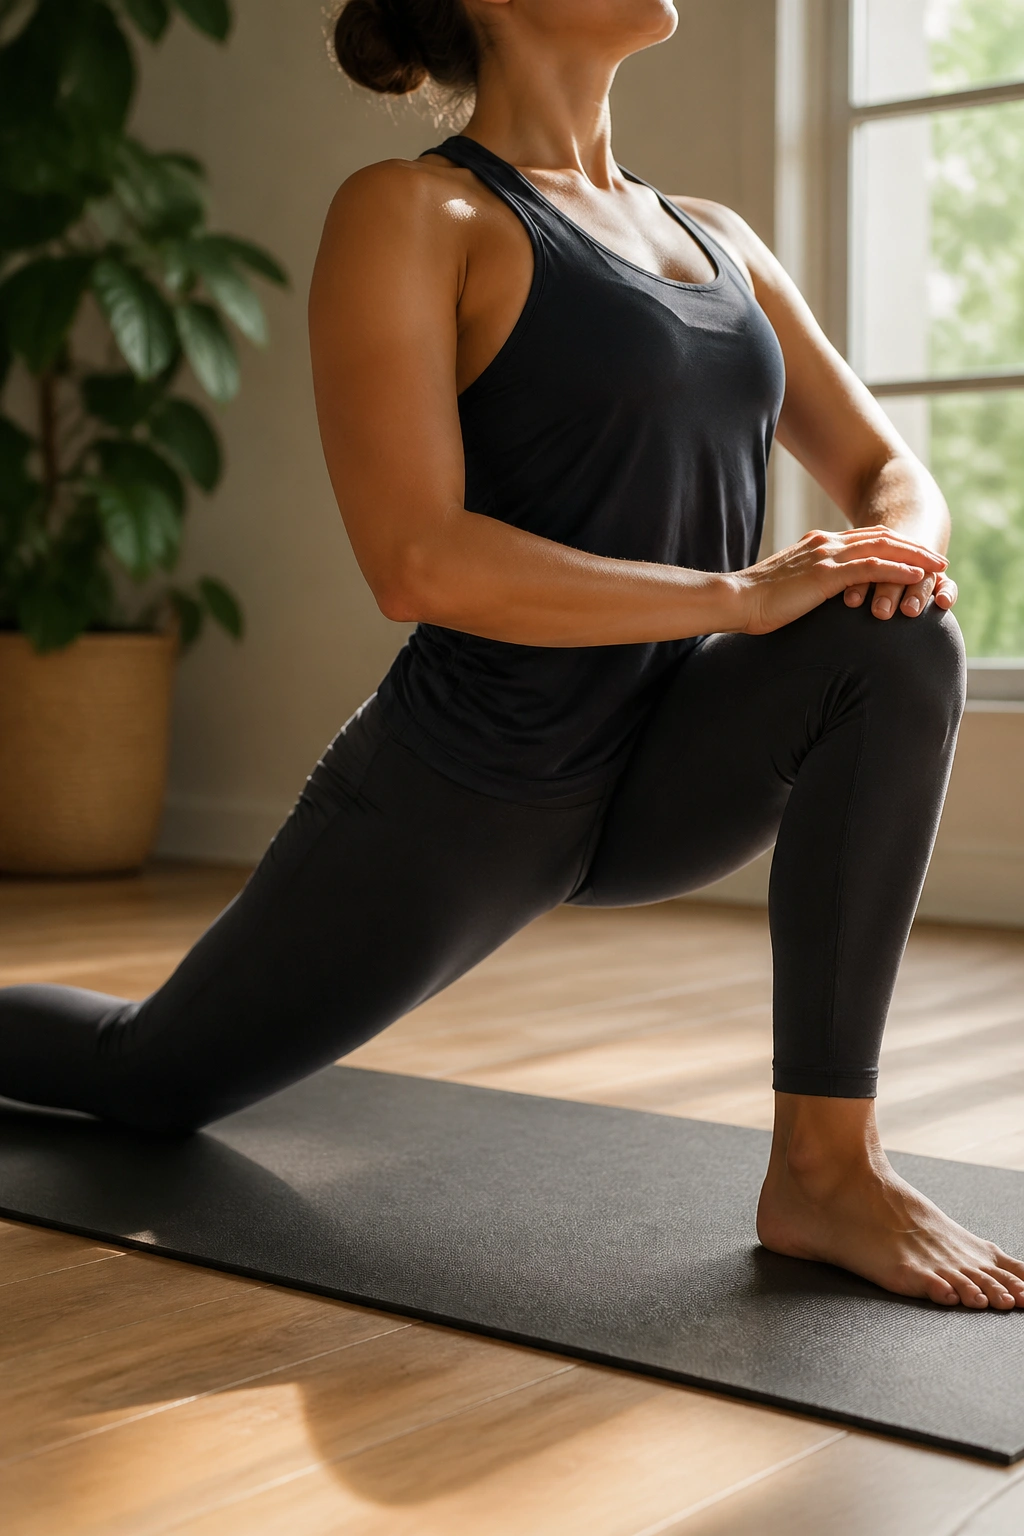
Low Lunge earns its place because it solves one very common problem: tight hip flexors. If you sit a lot, bike a lot, or just feel grumpy in the front of the hips, Anjaneyasana with the back knee down is a friend.
Compared with a high lunge, the low version gives you more control. You can place the back knee on a folded blanket, keep the pelvis steady, and focus on length instead of wobble. That makes it far easier for a first week practice.
Stack the front knee over the ankle, not way past the toes. Slide the back knee behind the hip, untuck the toes if that feels better, and lift the chest without dumping into the lower back. A mild glute squeeze on the back leg helps the front of the hip open without turning the spine into a hinge.
Hands can stay on the front thigh, reach overhead, or rest on blocks. If your balance gets sketchy, keep the hands low. Strong is good. Stable is better.
7. Cobra Pose
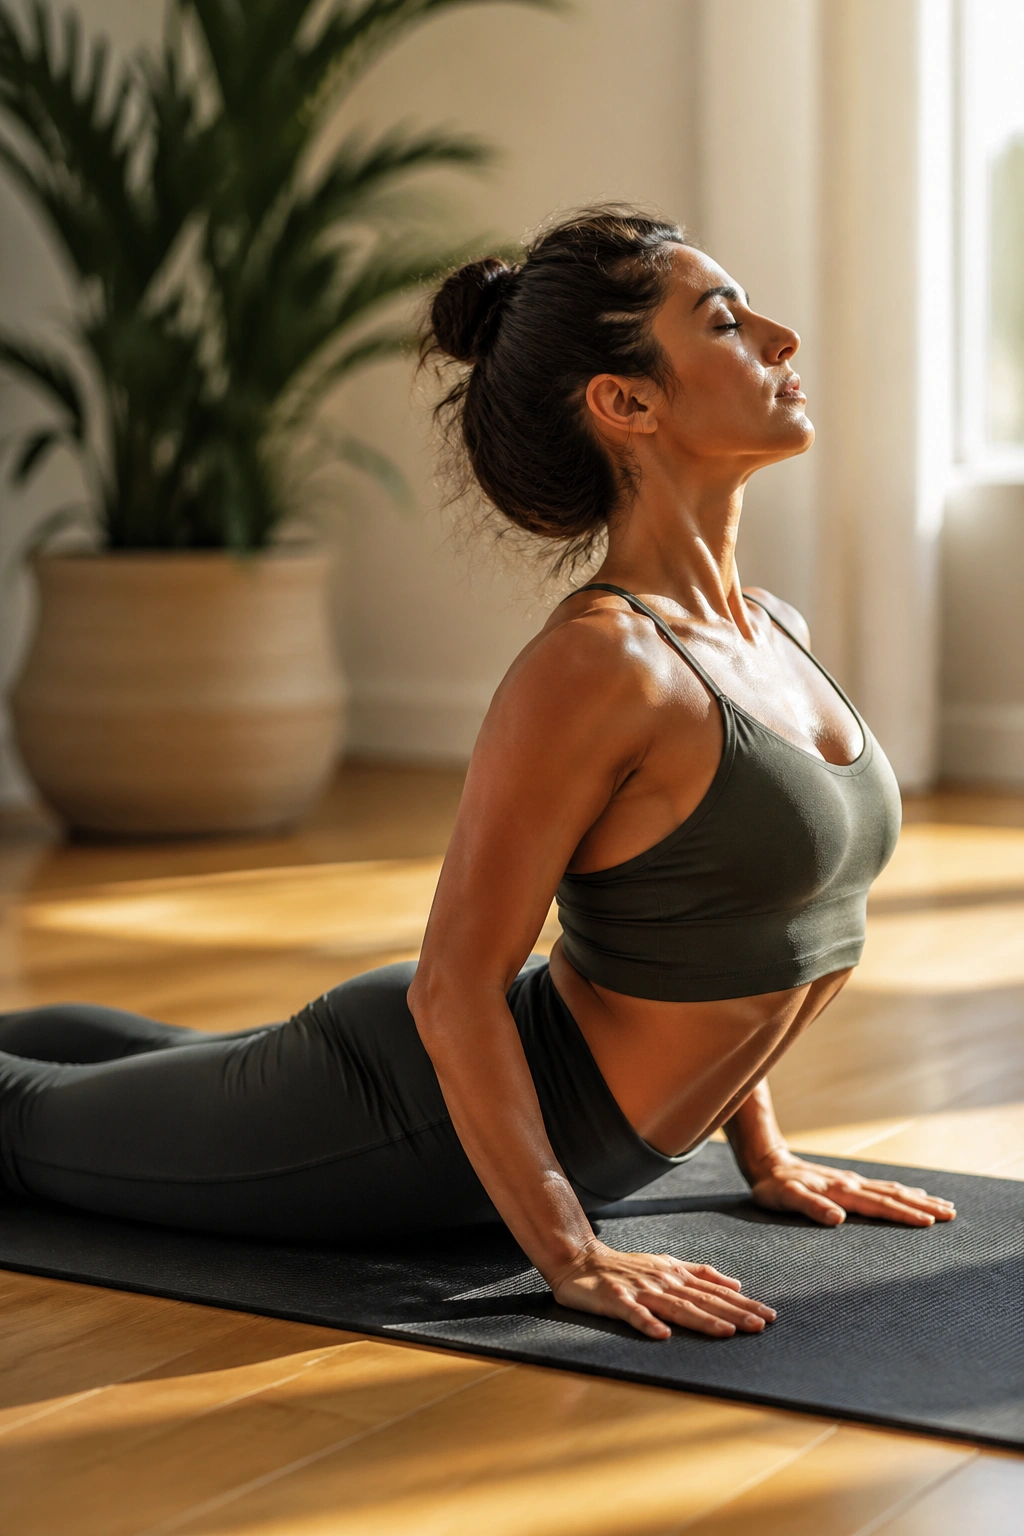
Cobra is the rare backbend that can feel kind to beginners. Bhujangasana opens the front of the body, wakes up the back muscles, and teaches you the difference between a lift and a crank.
What to Feel in Your Back
Lie on your stomach with the tops of the feet pressing into the mat. Place your hands under the shoulders, elbows bent close to the body, and press the pubic bone down lightly. On an inhale, lift the chest only 2 to 4 inches at first. That is enough.
The goal is length through the spine, not height. If the shoulders creep toward the ears or the lower back pinches, lower down and try a smaller version. You can also keep more weight in the hands and less in the low back.
- Tops of the feet stay active.
- Elbows hug the ribs.
- Chest lifts first.
- Neck stays long.
Important: if the lower back feels sharp, stop and drop to Sphinx Pose, which keeps the forearms down and the spine in a calmer position.
Cobra should feel awake, not angry. That difference matters.
8. Bridge Pose
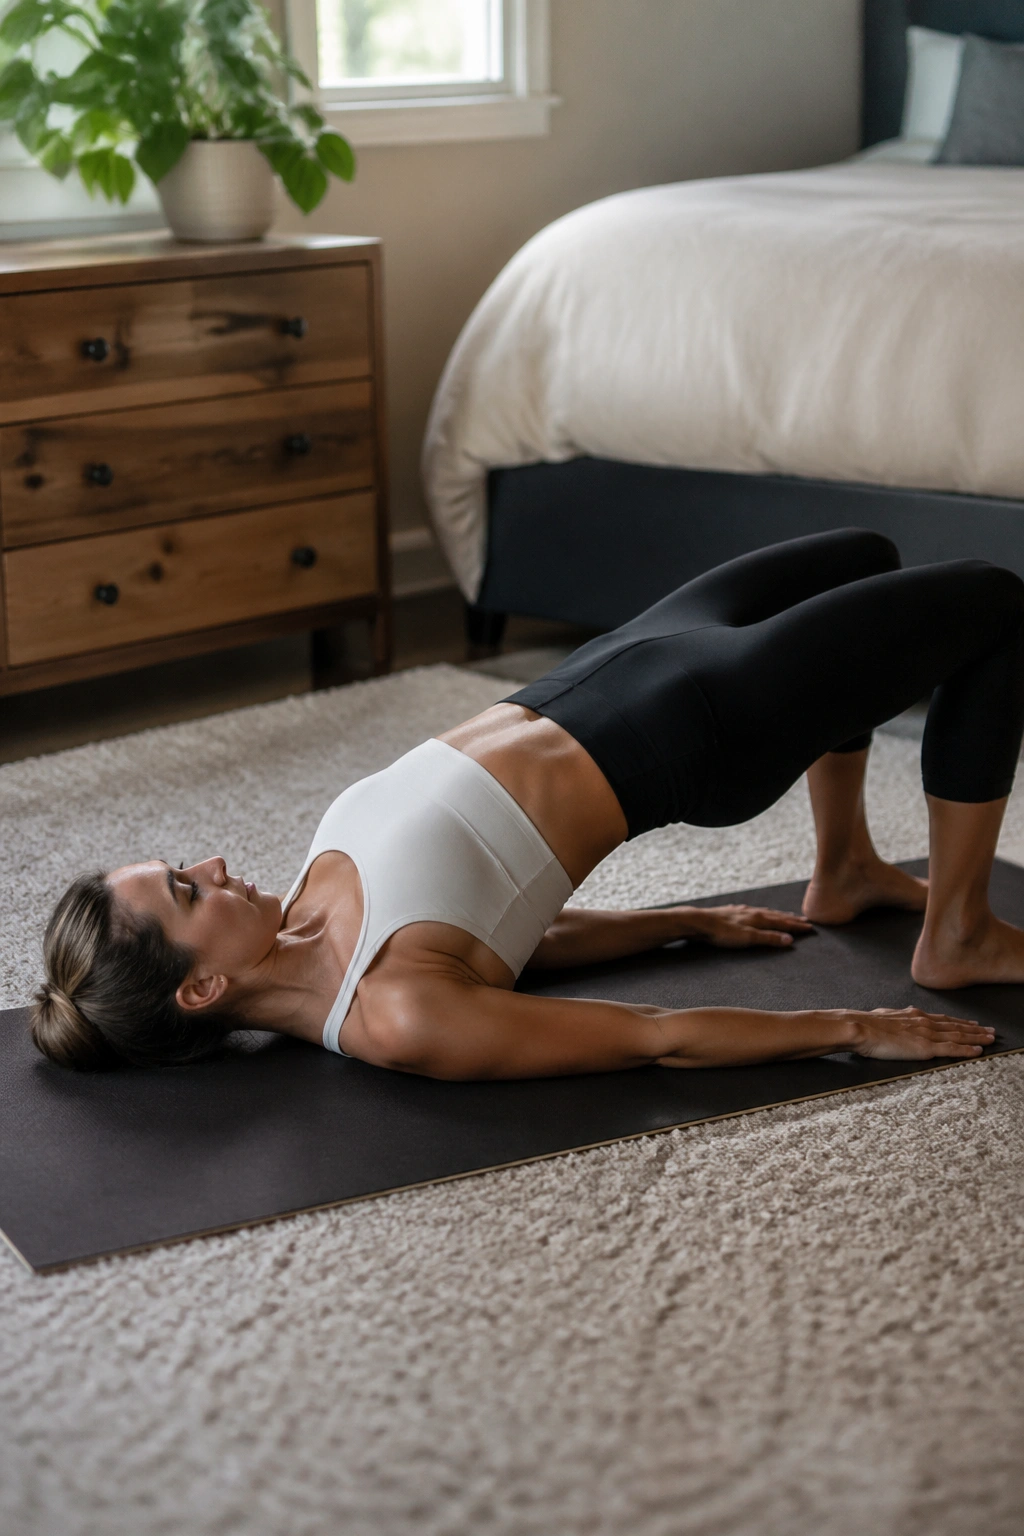
Bridge turns up in beginner classes for a reason: it wakes up the back side of the body without asking for circus-level flexibility. Setu Bandhasana works the glutes, hamstrings, and spine all at once, and it does not need to be dramatic to be useful.
Lie on your back with knees bent and feet hip-width apart. Slide the heels close enough that your fingertips can nearly brush them. On an exhale, press the feet down and lift the hips. If the hamstrings cramp, walk the feet a little closer to the sit bones. If the lower back feels pinchy, lift a little lower.
A tiny squeeze of the glutes is enough. People often clench too hard and turn the pose into a backbend contest with themselves. Don’t. Let the chest open, keep the knees parallel, and breathe evenly.
Supported Bridge is worth knowing too. Slide a block under the sacrum and rest there for a few breaths if you want a gentler version. That is not cheating. It is smart.
9. Tree Pose
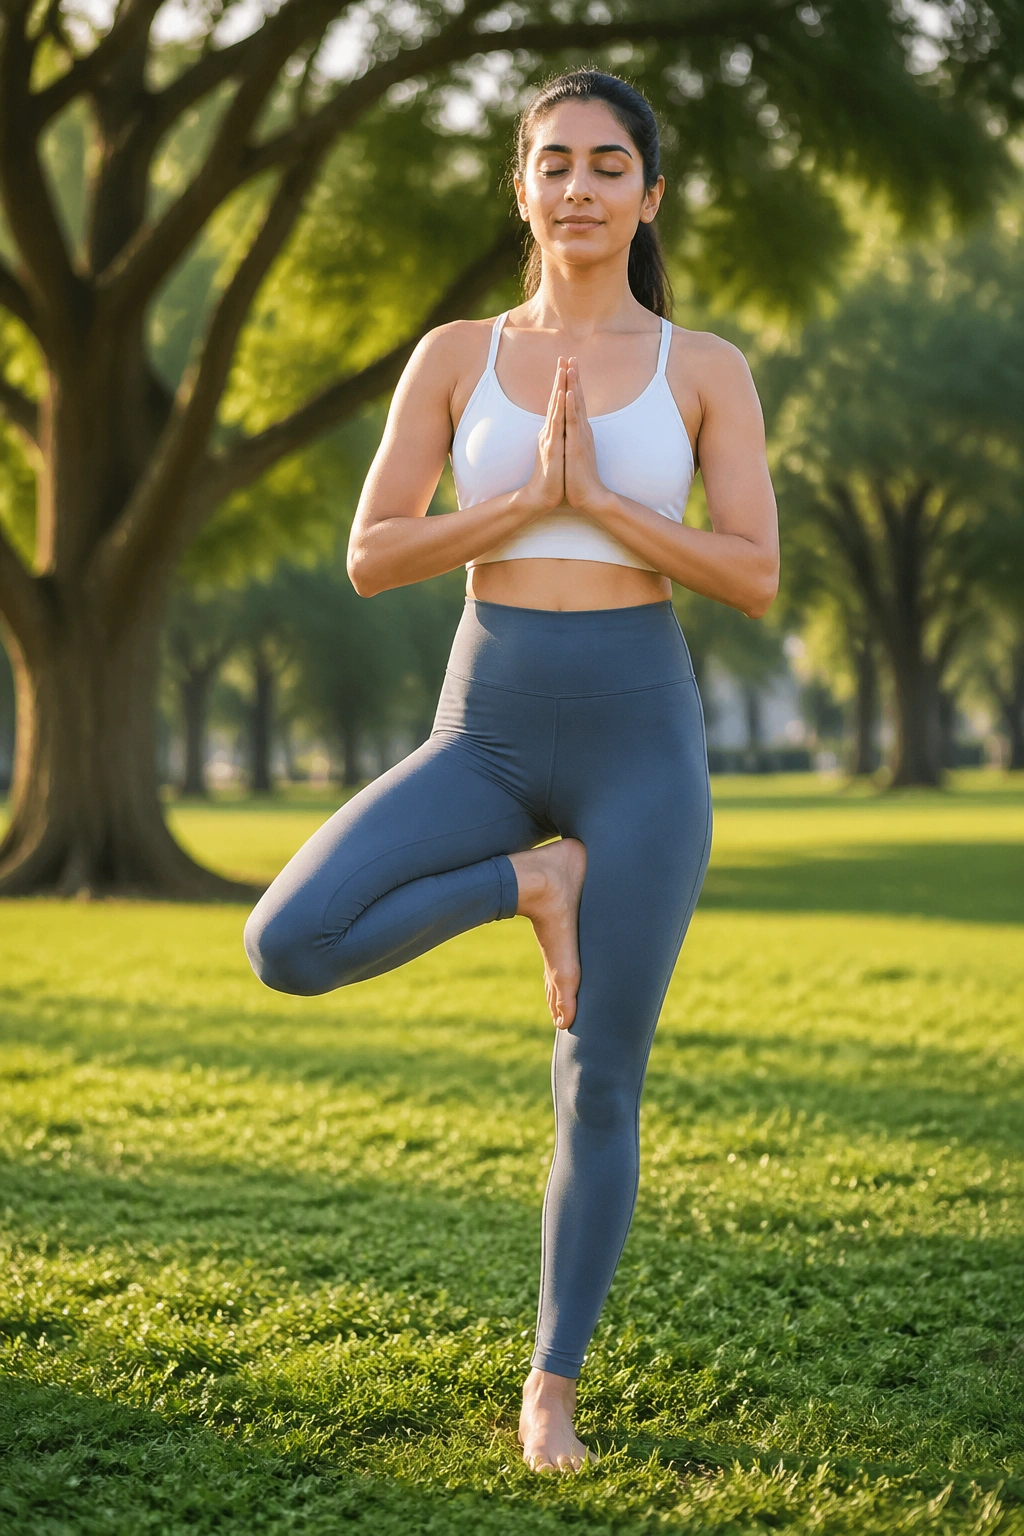
Why is Tree so humbling? Because balance exposes every lazy habit at once. Vrikshasana asks one leg to support you while the other leg finds a place to rest, and that is harder than it sounds on the first go.
How to Stay Steady
Start by standing tall in Mountain Pose. Shift your weight into one foot and place the other foot either at the ankle, the calf, or the inner thigh. Never press it into the knee joint. Pick a spot on the floor or wall and keep your eyes there.
- Standing foot roots down.
- Lifted foot presses lightly.
- Pelvis stays level.
- Gaze stays quiet.
If you wobble, use a wall. I would rather see a calm Tree with one hand on the wall than a dramatic one with a clenched jaw. The wall gives your foot something to trust while your balance wakes up.
The pose starts to make more sense once the standing leg grows active through the arch and outer hip. Then the rest of the body can calm down.
10. Warrior I
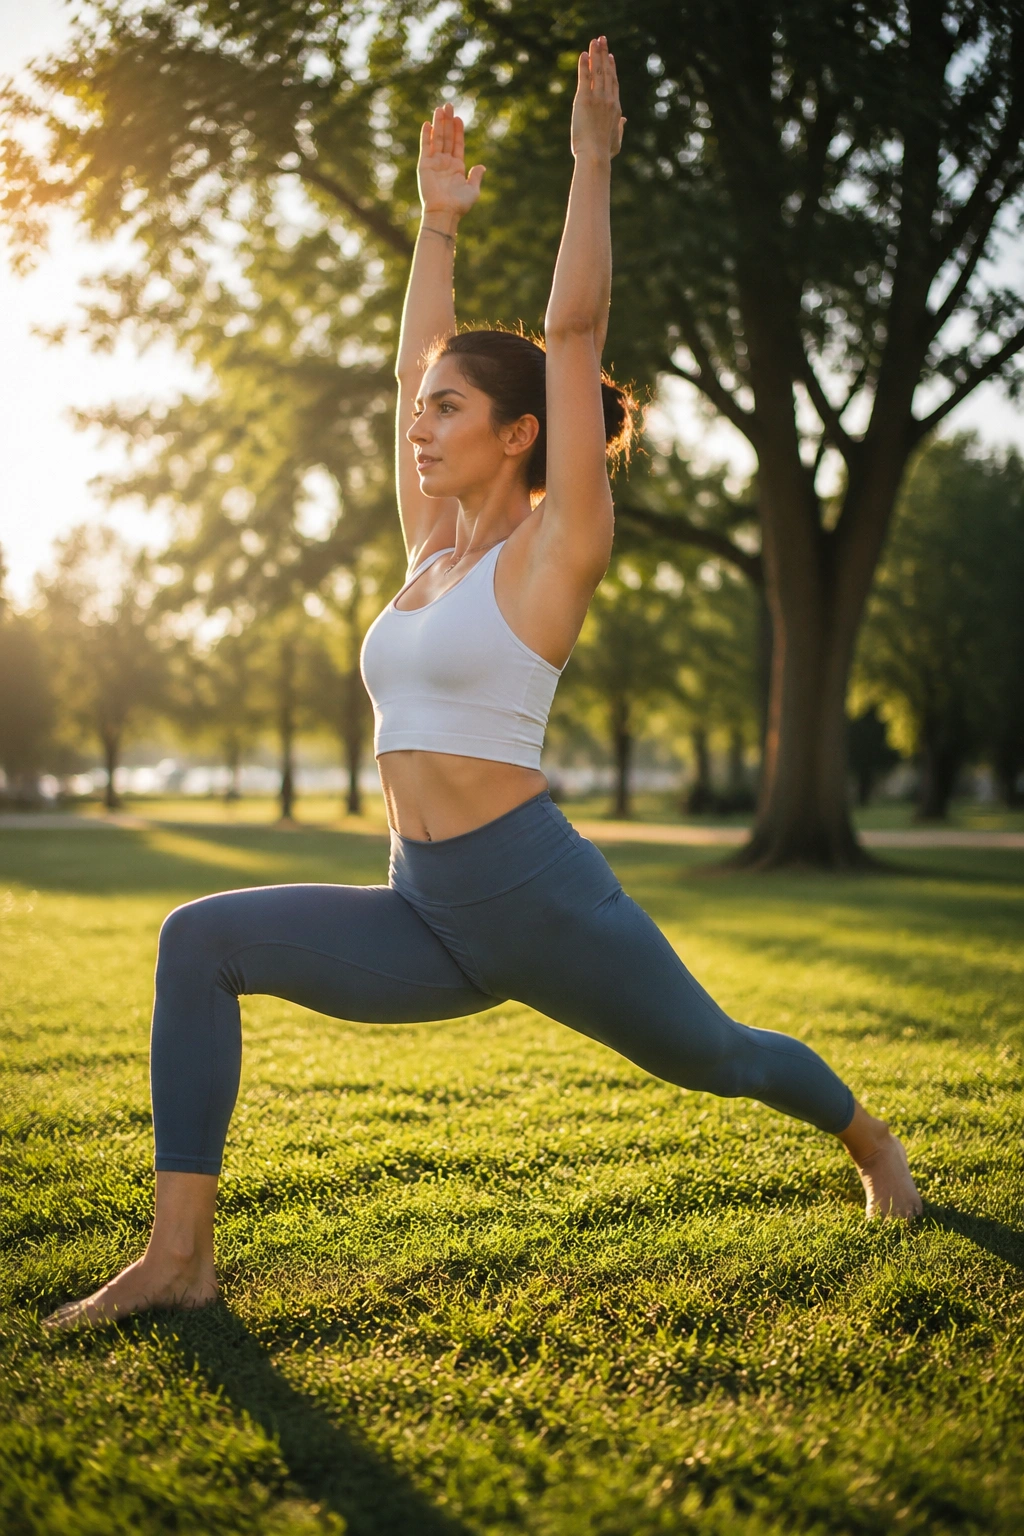
I have watched plenty of first-timers turn Warrior I into a wobbly lunge with a twisted back foot. That is usually a sign they are trying too hard to square the hips. Virabhadrasana I is a standing strength pose, but it also has a stretch hiding inside it.
Step one foot back and keep the heel grounded at roughly a 45-degree angle. Bend the front knee so it tracks over the ankle, then lift the torso tall. A lot of bodies need the hips to stay slightly open rather than perfectly squared, and that is fine. A strained lower back is not a badge of honor.
You can keep the hands on the hips, raise them overhead, or clasp them at the heart. If your shoulders are already working all day, the low-arm version may feel better. If your back leg cramps, shorten the stance a little.
- Front knee stays aligned.
- Back heel stays rooted.
- Chest lifts without arching.
- Back leg presses into the floor.
Perfect hip square is not the goal. A strong, stable stance is.
11. Warrior II
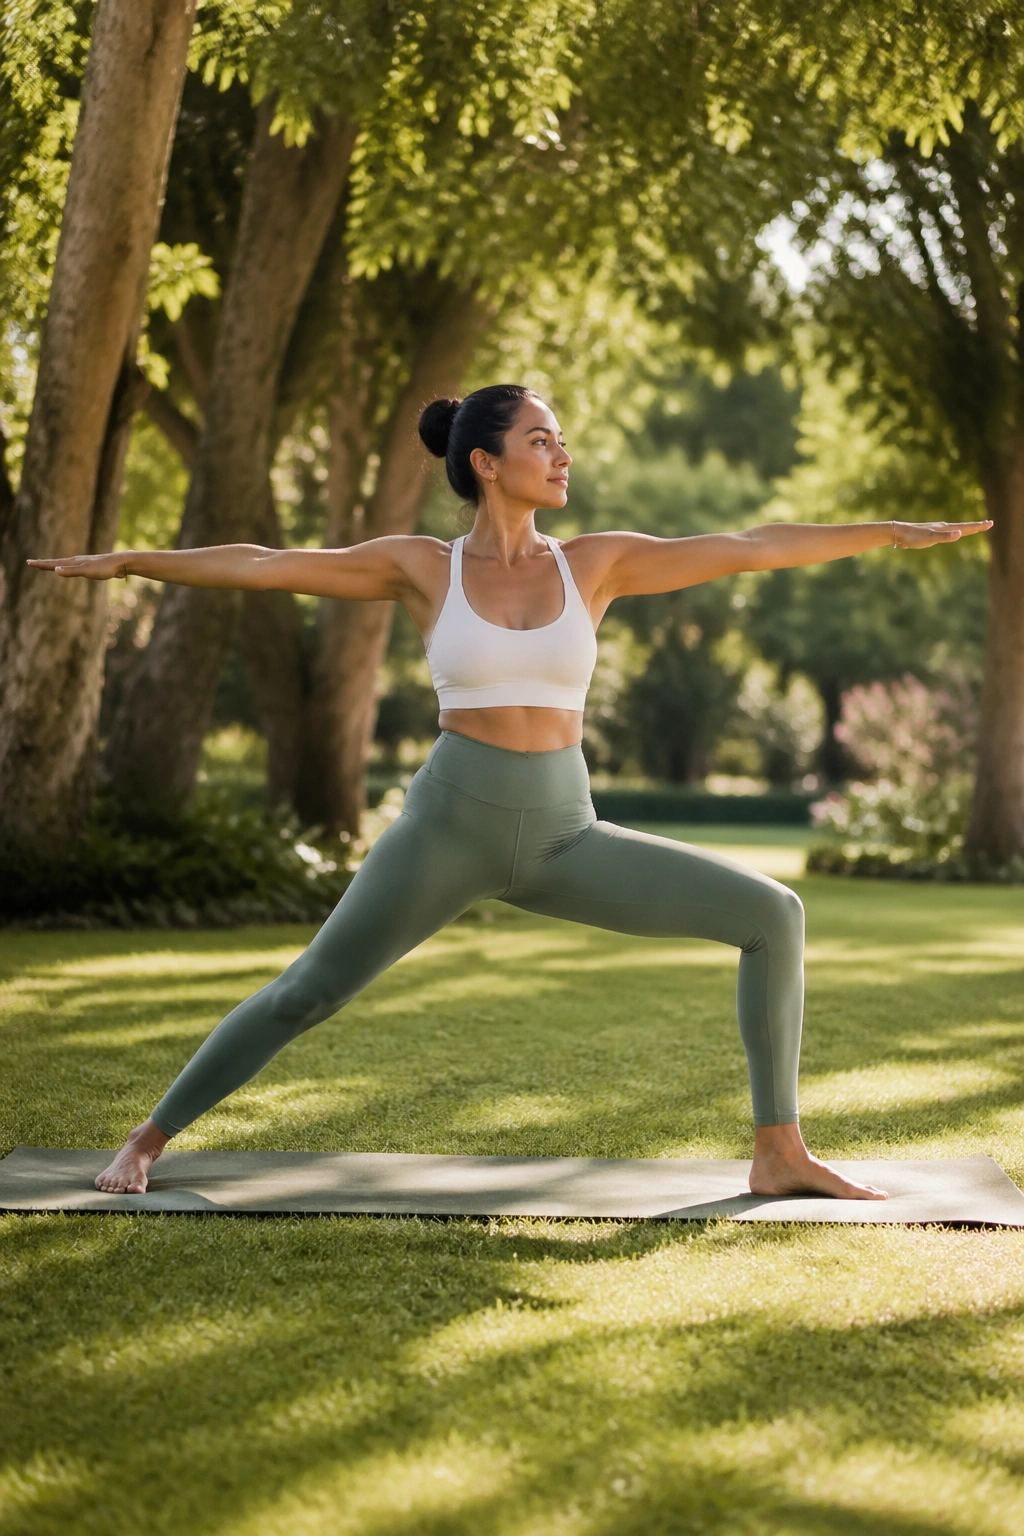
Warrior II is the standing pose that makes people feel instantly more awake. Virabhadrasana II opens the hips, trains the legs, and gives the upper body a job that does not require gripping the jaw.
Set the feet wide. Turn the front toes forward, angle the back foot in slightly, and bend the front knee until it stacks over the ankle. Reach both arms out at shoulder height and let the shoulders settle down away from the ears. The torso stays upright, not leaning over the front thigh like it is trying to eavesdrop.
The gaze can stay over the front middle finger if the neck feels happy, or it can look forward if turning the head makes the shoulders tense. That choice is personal and practical, not philosophical.
A clean Warrior II feels broad. The front thigh works, the back leg wakes up, and the chest stays open without being rigid. If your arms start shaking, lower them for a breath. That reset is often better than muscling through.
12. Triangle Pose
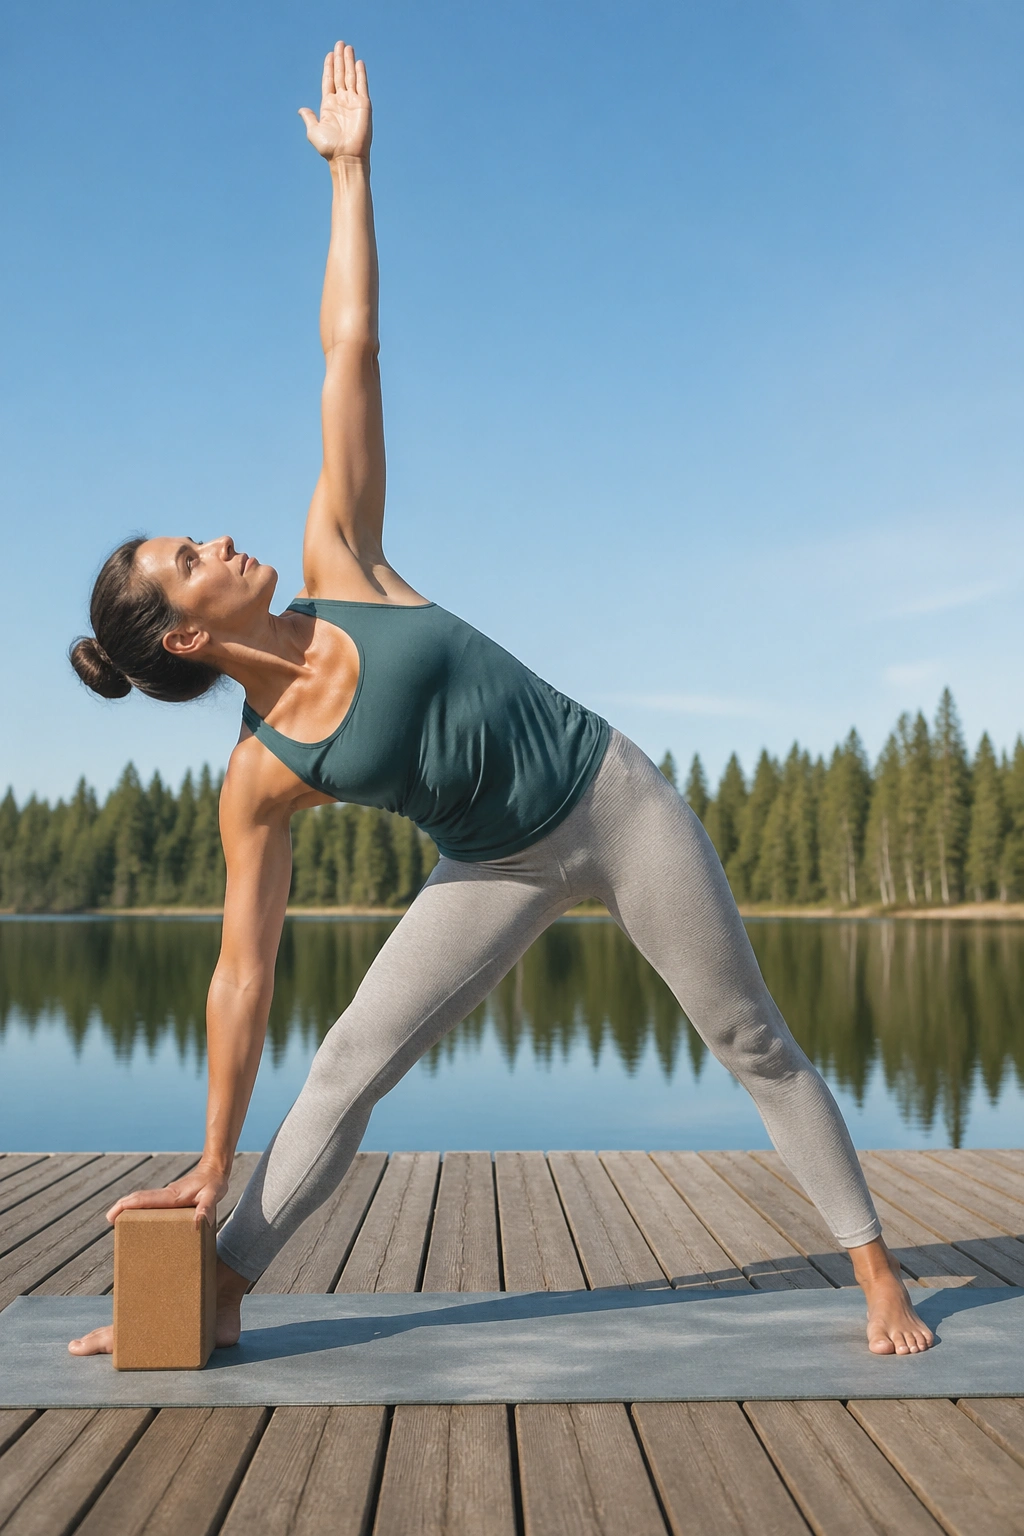
Triangle and Side Angle are cousins, but they do not feel the same. Trikonasana is the one that stretches the side body and hamstrings while asking for less knee bend than its neighbor.
Stand wide, turn the front toes forward, and tip from the hip until the torso reaches over the front leg. Rest the lower hand on a block outside the shin or on the shin itself if that keeps the spine long. The block is a useful tool here, not a beginner crutch. It keeps the chest from collapsing toward the floor.
Keep a micro-bend in the front knee. That tiny bend protects the hamstring and lets the pelvis stay more honest. Reach the top arm up with the chest open, but do not yank the shoulder blade back so far that the neck jams.
Triangle works well for people who want a side stretch that still feels organized. If you are very tight in the hamstrings, take it small and high. That version is often the better one.
13. Extended Side Angle
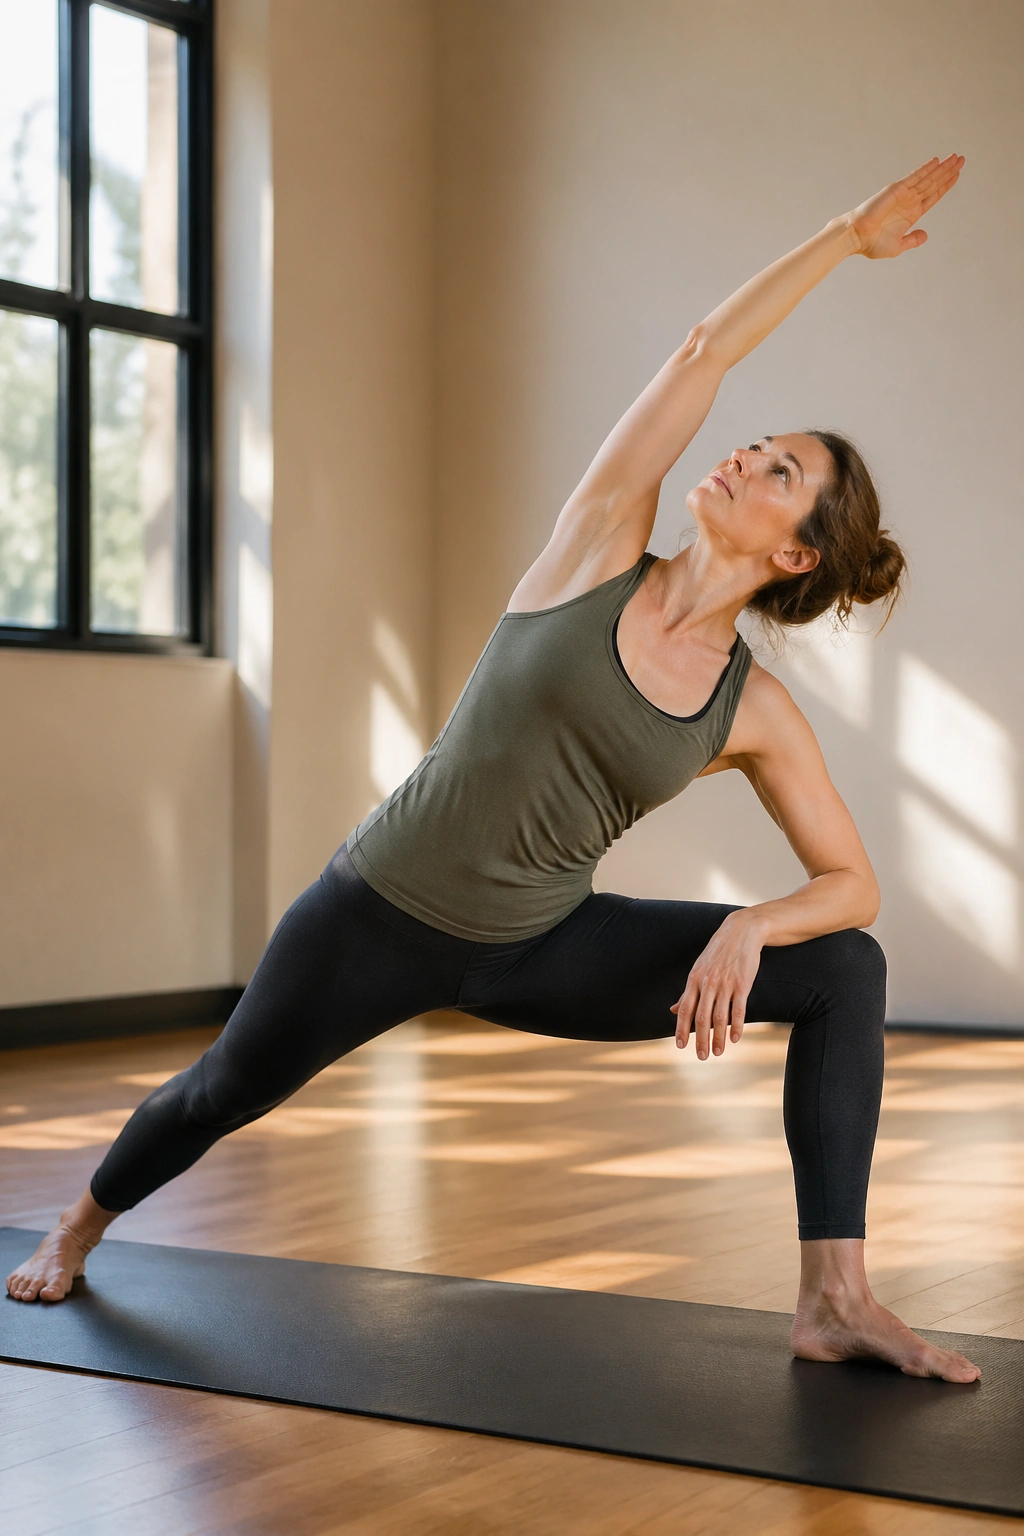
Extended Side Angle is where beginners start learning how to lengthen and root at once. Utthita Parsvakonasana looks simple from a distance, then you get into it and realize the body wants to shorten on one side and dump into the front thigh.
A Few Alignment Cues
Start from Warrior II. Bend the front knee, then place the lower elbow on the thigh or the hand on a block by the inside of the front foot. Reach the top arm over the ear and keep the line long from the back heel to the fingertips.
- Front knee stays tracking over the ankle.
- Bottom shoulder stays open.
- Back leg presses strongly.
- Chest rotates a little upward.
If the lower side of the waist collapses, use a block and stay higher. That one change keeps the ribs from folding into the hip. Beginners often try to reach the hand to the floor too soon. The floor is not the goal.
Best modification: keep the top hand on the hip for a few breaths if the shoulder feels tight. That makes the pose steadier and easier to breathe in.
14. Chair Pose
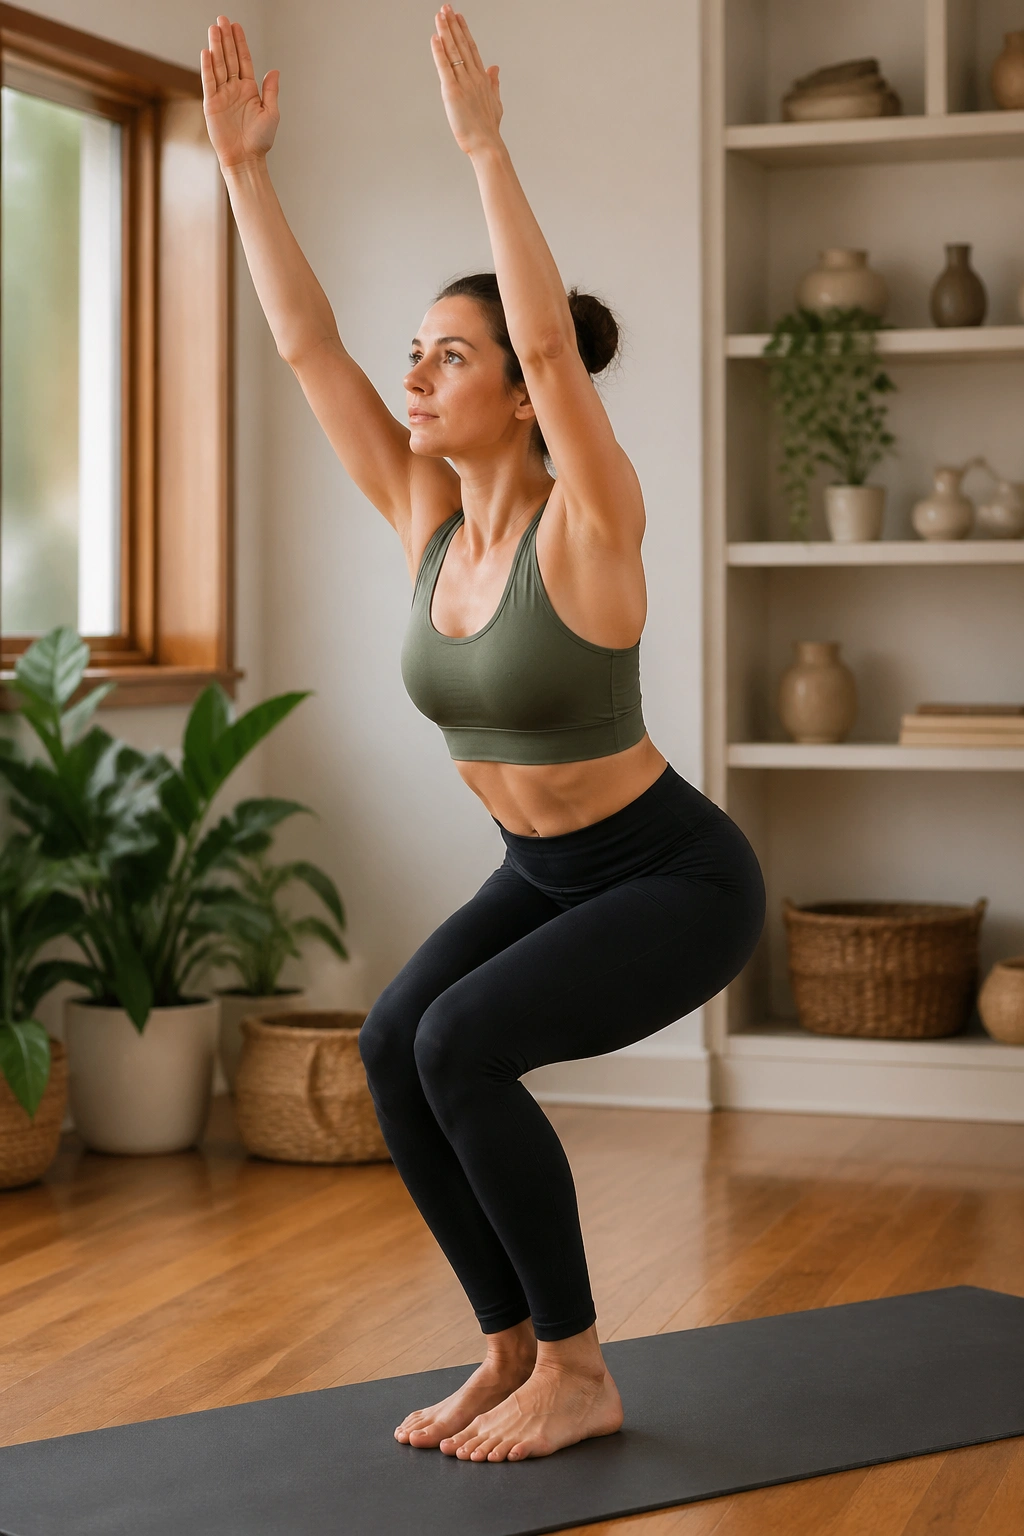
Chair Pose is the one that makes people sigh. Utkatasana looks like a tiny squat, but the work is sneaky: thighs burn, core wakes up, and the ankles have to stay honest.
Sit the hips back as if aiming for an invisible seat behind you. Keep the weight in the heels, not the toes, and let the knees track in the same direction as the middle toes. The chest can stay lifted, but do not flare the ribs forward to fake a deeper bend. That trick is common. It also makes the low back complain.
Arms overhead add heat fast. If that feels too much, keep the hands at the heart or extend them forward shoulder-height. I would rather see clean alignment than a deep bend with a twisted spine.
Ten to 20 seconds is plenty for a first week. Then stand up, breathe, and do it again if you want more. There is no medal for staying too long.
15. Seated Forward Fold
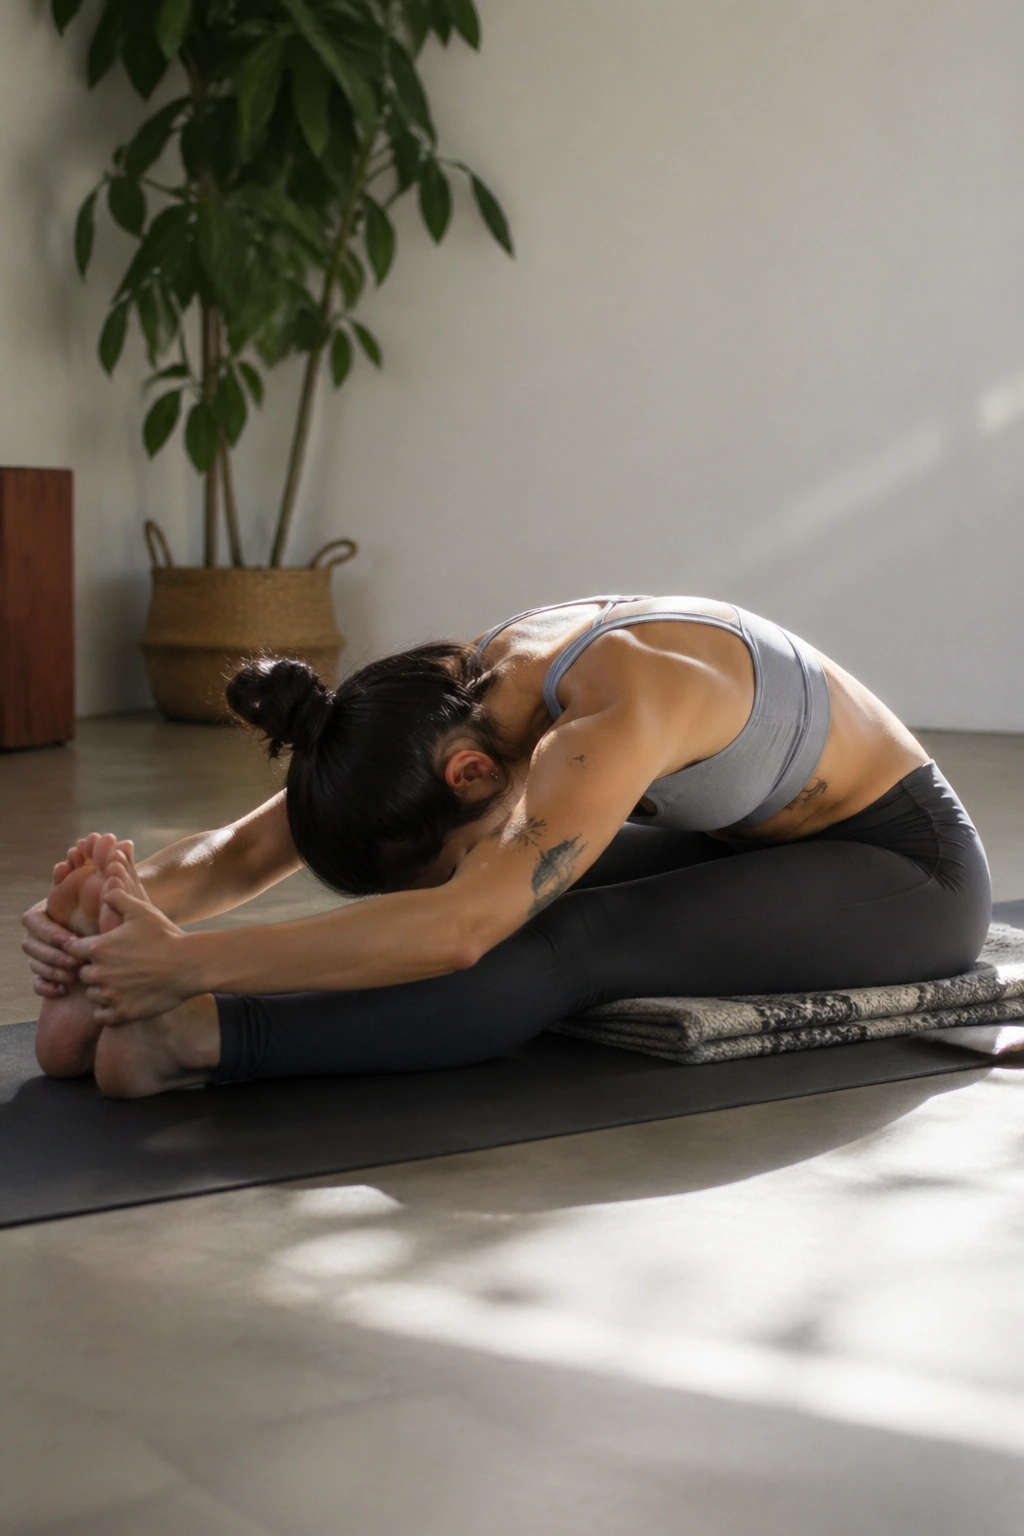
Do you need to touch your toes in Seated Forward Fold? No. Paschimottanasana works better when the spine stays long and the hamstrings get time to open without panic.
How to Make It Friendlier
Sit on a folded blanket if your pelvis tips backward. That one prop often changes the whole shape. Bend the knees a little, loop a strap around the feet if reaching is hard, and hinge from the hips before you fold.
- Sit bones grounded.
- Spine long before depth.
- Knees soft if needed.
- Strap around the feet if handy.
Reach the chest toward the feet, not the forehead toward the shins. That difference sounds tiny, but it keeps the pose from collapsing into the lower back. On the exhale, let the body soften a little more. On the inhale, lengthen again.
This pose rewards patience. If you force it, the hamstrings push back. If you give it a few breaths, it opens in a way that feels calmer and more useful.
16. Butterfly Pose
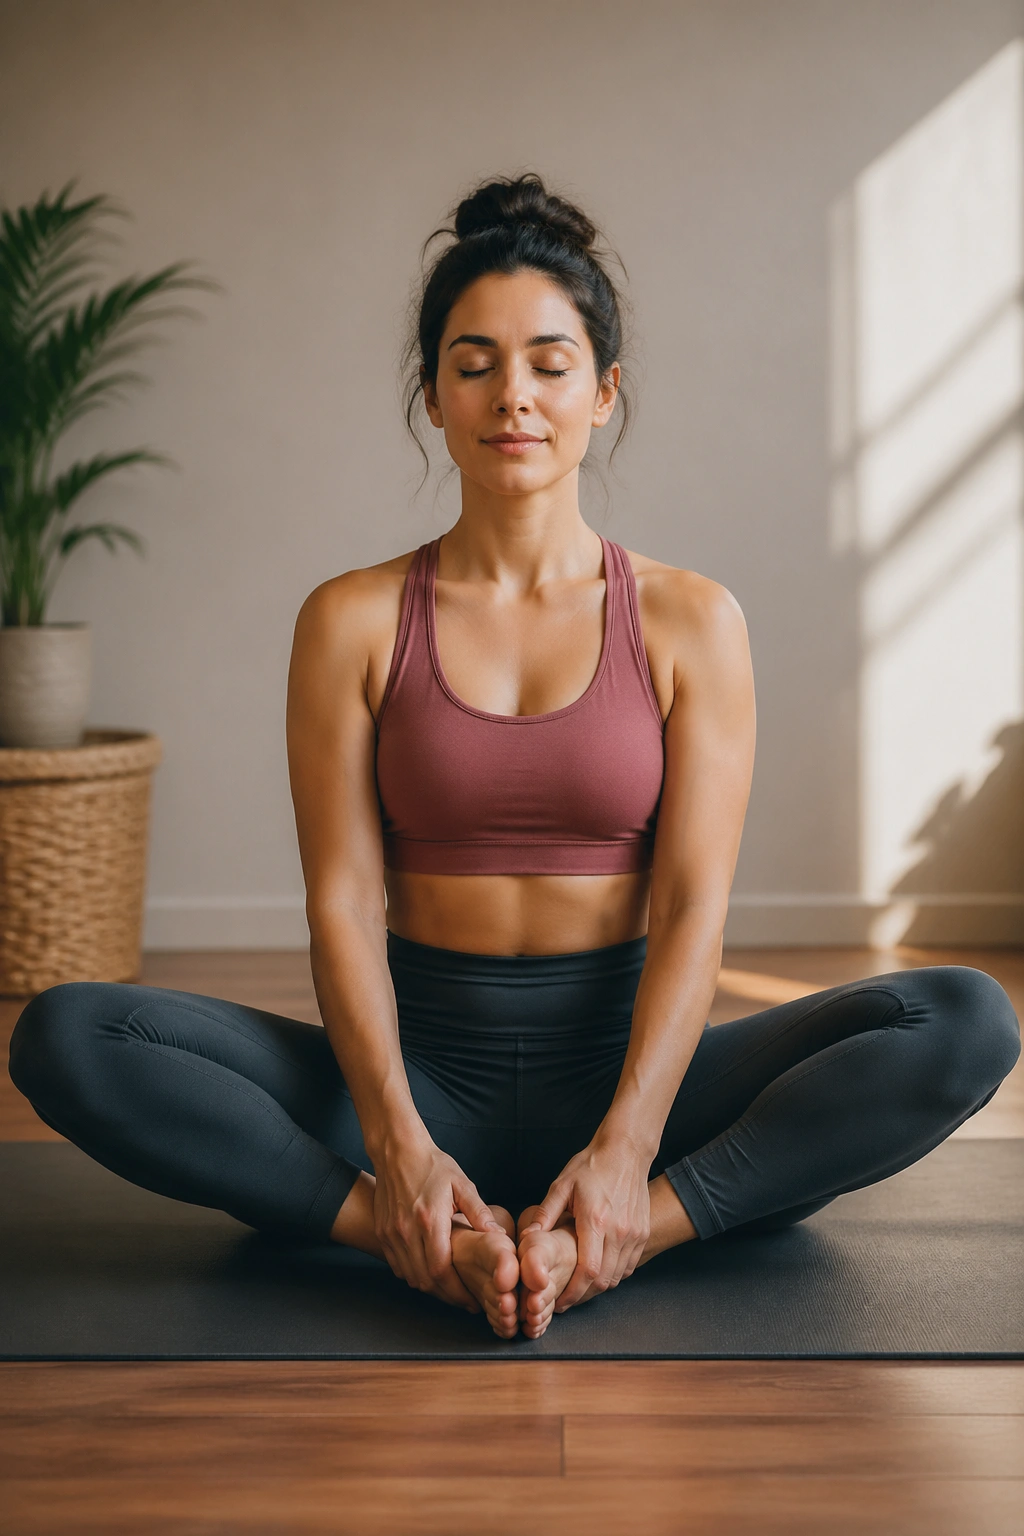
Butterfly Pose works best after a long day of sitting. Baddha Konasana opens the inner thighs and hips in a way that feels simple, but the body often has opinions about it.
Sit tall, bring the soles of the feet together, and let the knees fall outward on their own. Do not press them down with your elbows. That move tends to turn a friendly stretch into a tug-of-war. If the knees sit high, place blocks or cushions under them so the hips can relax.
Keep the spine long for the first few breaths. You can stay upright, hinge forward a little, or rest the forehead on stacked hands if that feels nice. The key is that the lower back should not collapse into a round lump.
No knee pressing. None.
Butterfly is one of those poses that gets better when you stop trying to make it happen. Sit, breathe, and let gravity do most of the work.
17. Reclined Figure-Four
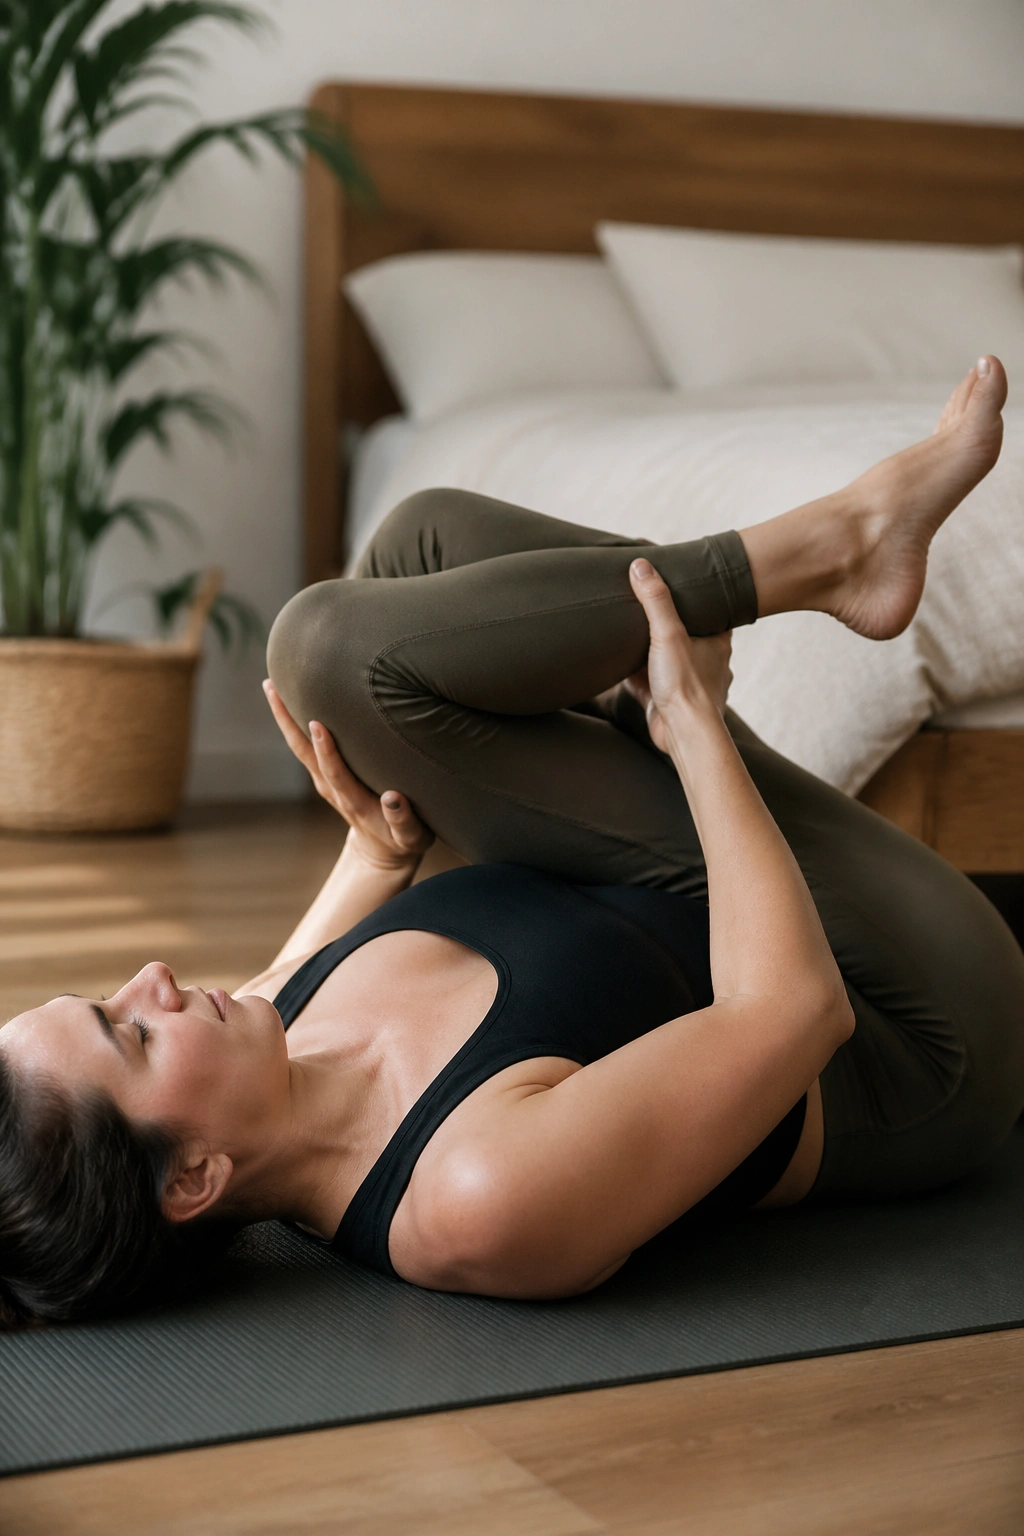
Reclined Figure-Four is the hip stretch people end up loving more than they expected. Supta Kapotasana can feel gentle in the lower back and direct in the outer hip, which is a useful combination for a beginner practice.
Lie on your back with both knees bent. Cross one ankle over the opposite thigh just above the knee, making a shape that looks like the number four. Keep the working foot flexed to protect the knee, then thread your hands behind the supporting thigh and draw it in only as far as feels easy.
The stretch should live in the outer hip and glute, not in the knee joint. If you feel knee strain, move the shin farther from the body or lower the foot a bit. You can also keep the bottom foot on the floor instead of lifting the thigh toward you.
This pose is one of the best choices after lunges or long standing work. It is quiet, but it gets the job done. That kind of stretch stays with people.
18. Happy Baby
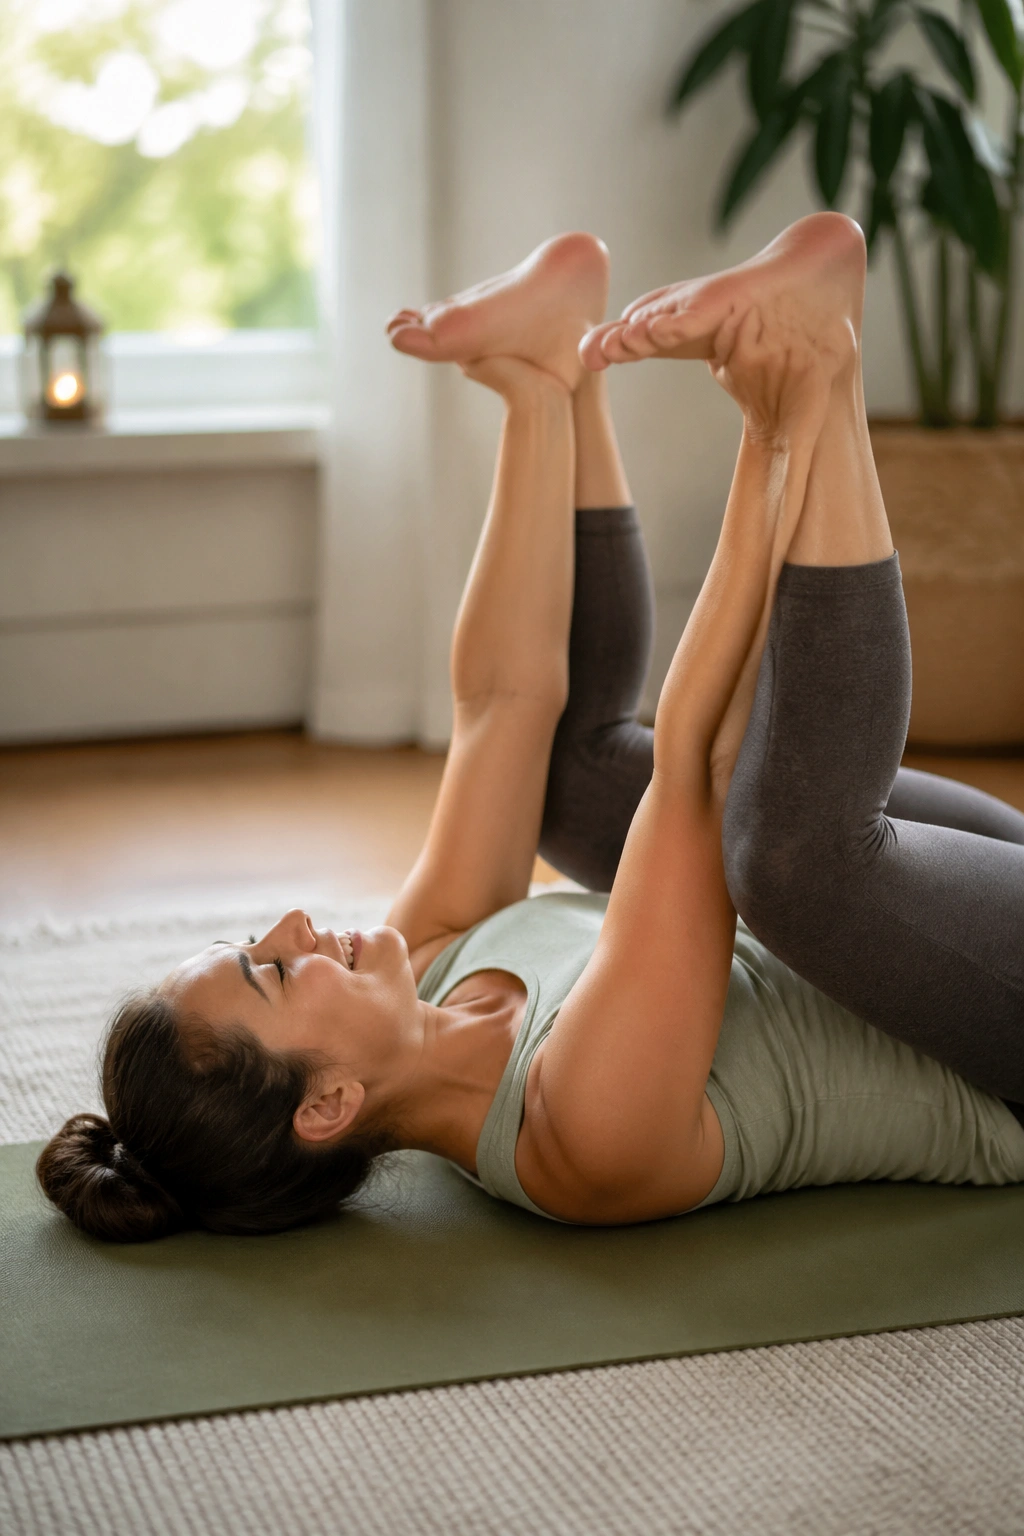
Happy Baby looks playful, but it is not a throwaway stretch. Ananda Balasana opens the hips, relaxes the lower back, and gives the spine a break from standing work and seated folds.
Lie on your back, bend the knees toward the chest, and hold the outer edges of the feet or the shins if that is easier. Let the knees drift toward the armpits while the tailbone stays heavy on the floor. A small rock side to side can feel excellent here, especially if the low back is feeling grumpy.
Keep the shoulders down. If the neck tightens, lower the head or hold the backs of the thighs instead of the feet. There is no prize for grabbing the toes if the rest of the body is upset.
Happy Baby is useful after stronger poses because it turns the legs inward and outward in a way that clears out stiffness. It is the kind of shape that often makes people laugh a little. Then they stay there for another breath.
19. Supine Twist
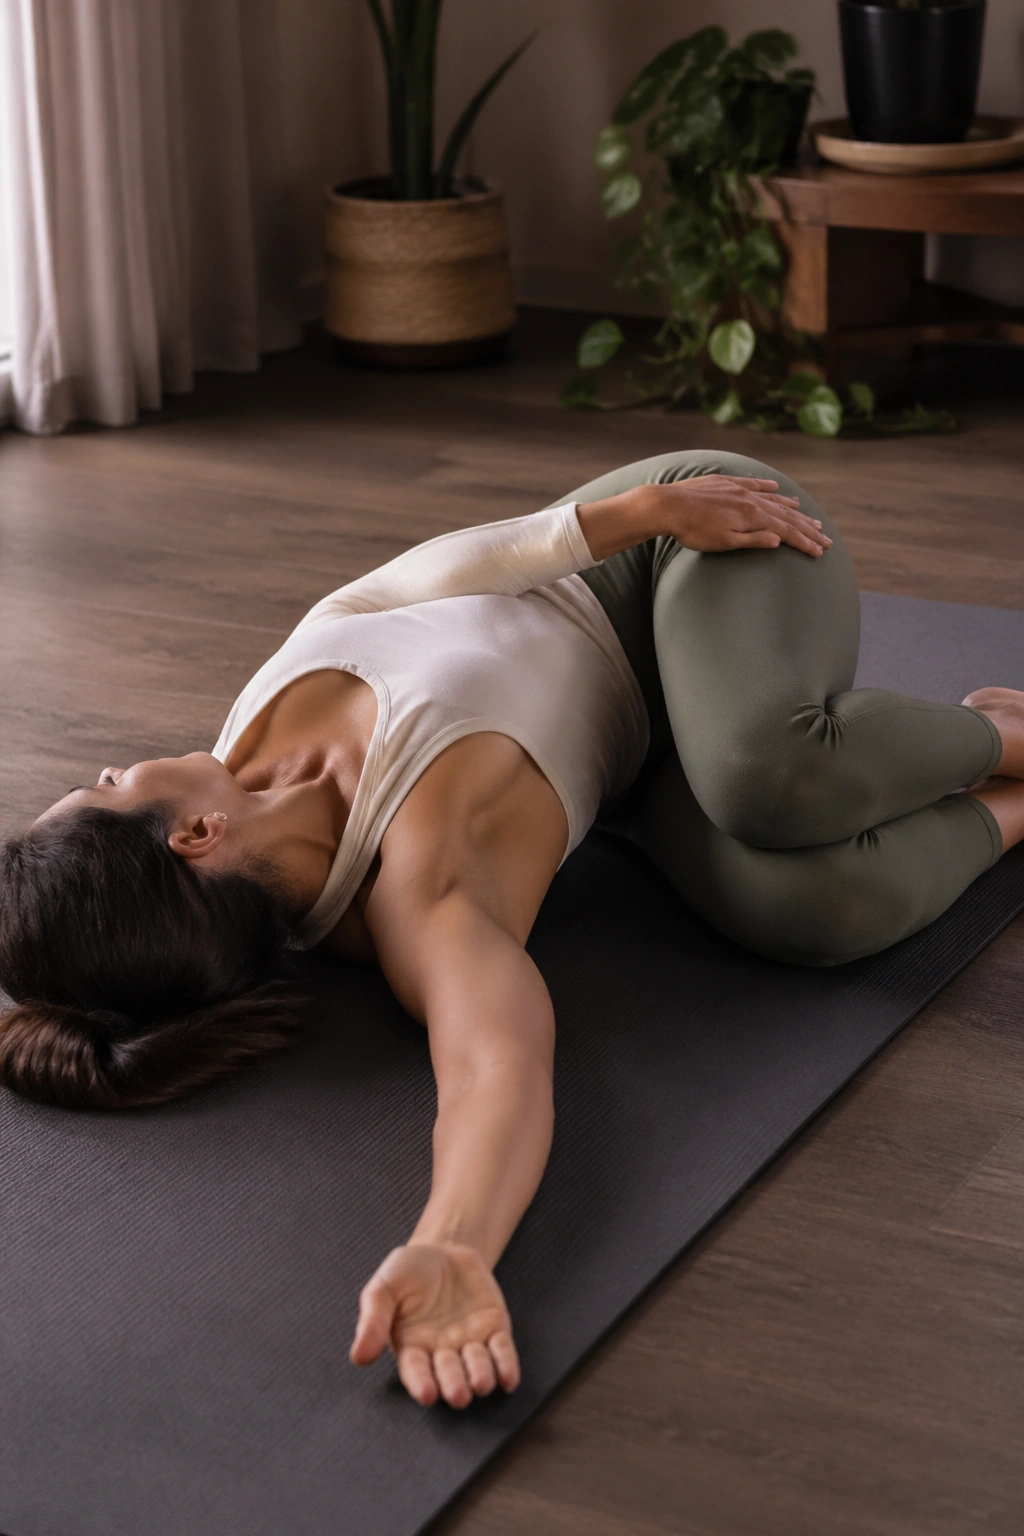
A twist should feel like a wring-out, not a wrench. Supta Matsyendrasana gives the spine rotation and gives the lower back a break when the setup is calm.
How to Set It Up
Lie on your back and draw both knees toward the chest. Let them fall to one side while the shoulders stay heavy. If the top shoulder lifts a lot, place a pillow or block under the knees so the twist stays softer. You can extend the top arm out at shoulder height and turn the head only if the neck feels okay.
- Knees together or stacked.
- Shoulders stay grounded.
- Breath stays smooth.
- Pillow under knees if needed.
The twist is usually held for 3 to 5 breaths per side. Longer is fine if the body likes it, but the sensation should remain mild and even. If one side feels much tighter, that is normal. Do not force them to match.
This is a strong finishing stretch after standing work because it quiets the body without asking for effort. That matters more than it sounds.
20. Legs Up the Wall
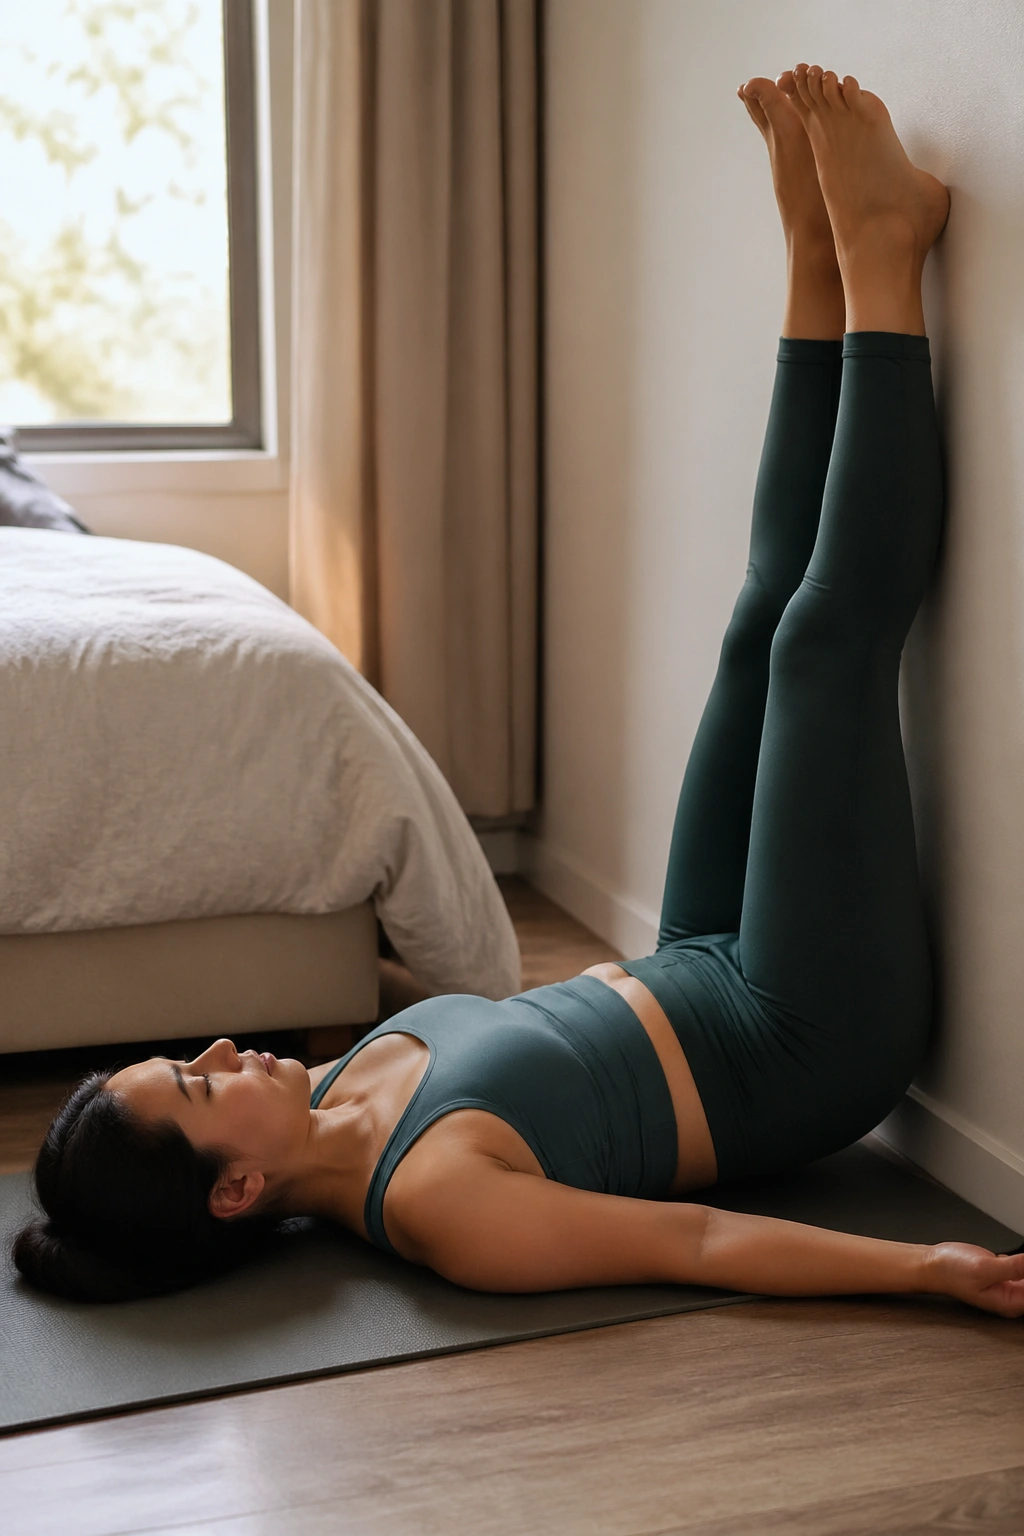
Legs Up the Wall is one of the easiest ways to downshift. Viparita Karani looks almost too simple, which is why people skip it and then miss out on the part of yoga that helps the body stop buzzing.
Scoot one hip close to a wall, swing the legs up, and let the back rest on the floor. If your hamstrings tug, slide a little farther from the wall so the legs can soften. You can also bend the knees and place the feet against the wall if straight legs feel too intense. A folded blanket under the hips is optional and often nice.
Five to ten minutes is a good first stretch of time. The breath usually slows on its own. The face unclenches. The lower back gets to do almost nothing, which is a strange luxury if you spend the day on your feet.
This is a smart pose after walking, standing, or a long commute. It is also good before bed, when the body needs to remember what quiet feels like.
21. Plank Pose
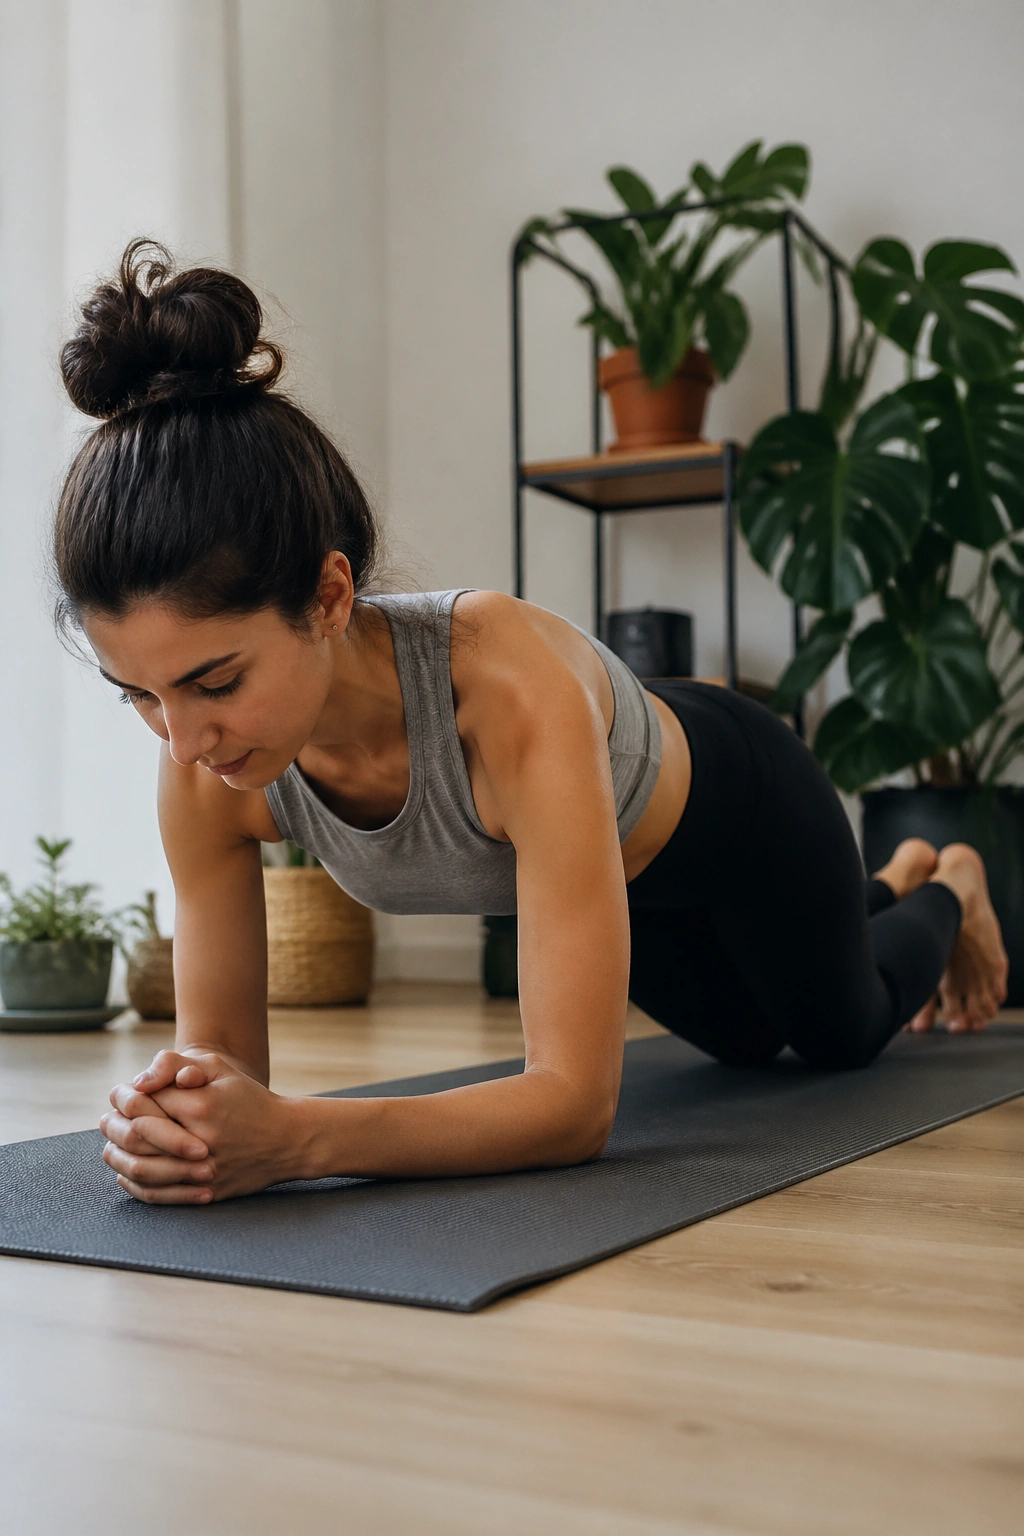
Why include Plank in a beginner stretch list? Because yoga is not only about opening the body; it is also about learning how to support it. Phalakasana builds the kind of steady core work that keeps the rest of the poses from collapsing.
How to Keep It Beginner-Friendly
Start with hands under shoulders and legs long behind you. If full Plank feels like too much, drop the knees to the floor while keeping the line from head to knees active. Push the floor away so the shoulder blades spread, and keep the belly gently engaged without holding your breath.
- Wrists under shoulders.
- Tailbone long, not tipped up.
- Neck neutral.
- Hold for 10 to 20 seconds.
If the wrists get cranky, place hands on blocks or come down to forearms. If the low back sinks, shorten the hold and reset. Plank is not a test you pass or fail. It is a chance to feel how the whole front body works together.
A few clean seconds beat a long messy hold. Every time.
22. Savasana
Savasana is where the body learns to stop fixing itself for a minute. Corpse Pose sounds blunt because it is blunt: lie down, let go, and do not turn recovery into another project.
Stretch out on your back with the feet falling open and the palms facing up. If your lower back arches too much, bend the knees or place a rolled blanket under them. A light blanket over the chest can make the body feel held, especially if the room is cool. That small bit of comfort matters more than people admit.
Soften the jaw. Let the tongue rest. Keep the breath natural and do not try to make it deep or special. Five minutes is useful. Ten is better if you have the time and the patience.
People often want to sneak up and leave early. Stay for one more breath. The practice does not end when the stretching stops; this is the part where the body takes it all in and stops bracing for the next thing.
