



Most people looking for yoga breathing poses for stronger lungs are not trying to turn themselves into a human bellows. They want something much simpler: a chest that feels less tight, a breath that doesn’t run away from them, and a little more control when stress, hills, stairs, or a hard workout make breathing feel messy.
That’s the useful frame. The lungs do not get “strong” in the same way a biceps muscle does, but the muscles around them absolutely can get better at their jobs. The diaphragm, the ribs, the intercostals, the neck, even the tongue and jaw all affect how easy a breath feels. When those pieces work with less tension, the whole system feels smoother.
And that’s where yoga earns its keep. Not as a magic fix. Not as a substitute for medical care. Just as a surprisingly practical way to train breath rhythm, rib mobility, and the habit of exhaling fully instead of gulping half-breaths all day long.
One more thing before we get to the poses: if a breathing drill makes you dizzy, panicky, or strained, stop. Easy wins here. Always.
1. Crocodile Breath in Sphinx Pose
Start low. That’s my bias, and it’s a good one.
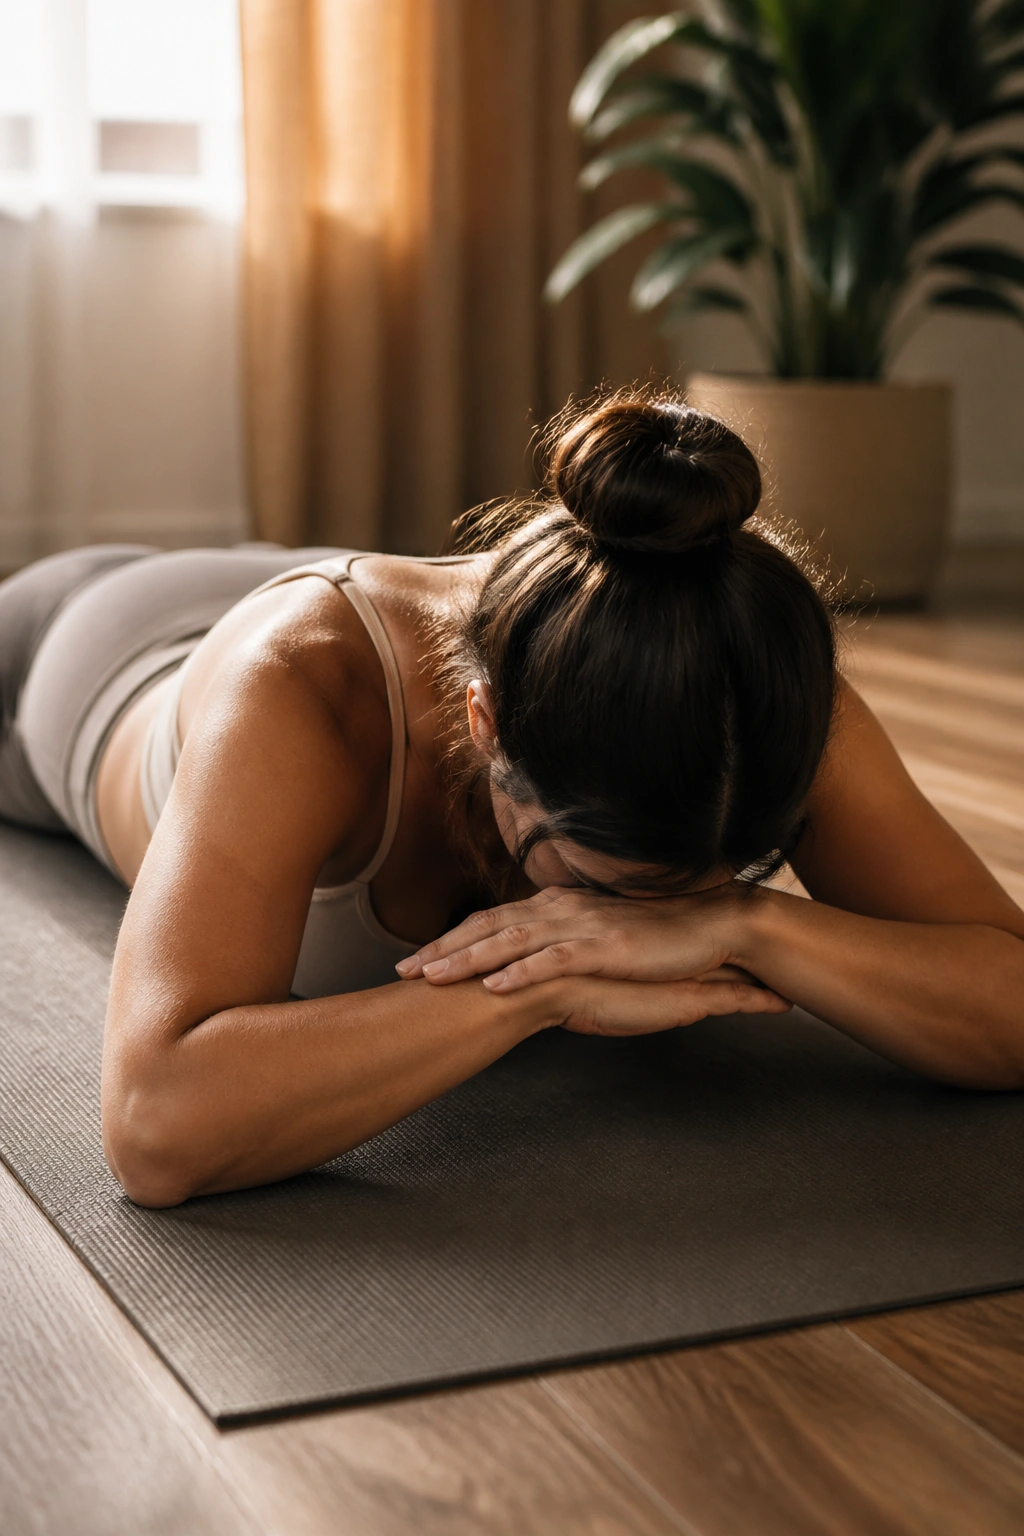
Crocodile Breath in Sphinx Pose is one of those plain-looking practices that does more than it seems. You lie on your belly with your forearms on the floor, chest gently lifted, and let the abdomen press into the mat as you breathe. That little bit of pressure gives your diaphragm a clear job. You feel the breath move into your back body, which many people never notice until they’re flat on the floor with the front of the body softened.
Why it helps
The floor gives you feedback. If you inhale and the belly pushes into the mat, you know the diaphragm is doing real work instead of sending every breath up into the upper chest. That matters when your goal is better breathing mechanics, not just deeper-looking inhales.
I like this pose for people who tend to shrug their shoulders while breathing. You can’t fake your way through it as easily.
How to do it
- Lie on your belly.
- Rest your forearms on the floor, elbows under shoulders.
- Let your forehead hover or rest on stacked hands.
- Breathe in through the nose for 4 counts.
- Breathe out for 6 counts and feel the belly melt down.
Keep the back of the neck long. If your low back pinches or your shoulders creep toward your ears, lower your chest a little. The goal is softness, not a backbend contest.
2. Diaphragmatic Breath in Constructive Rest
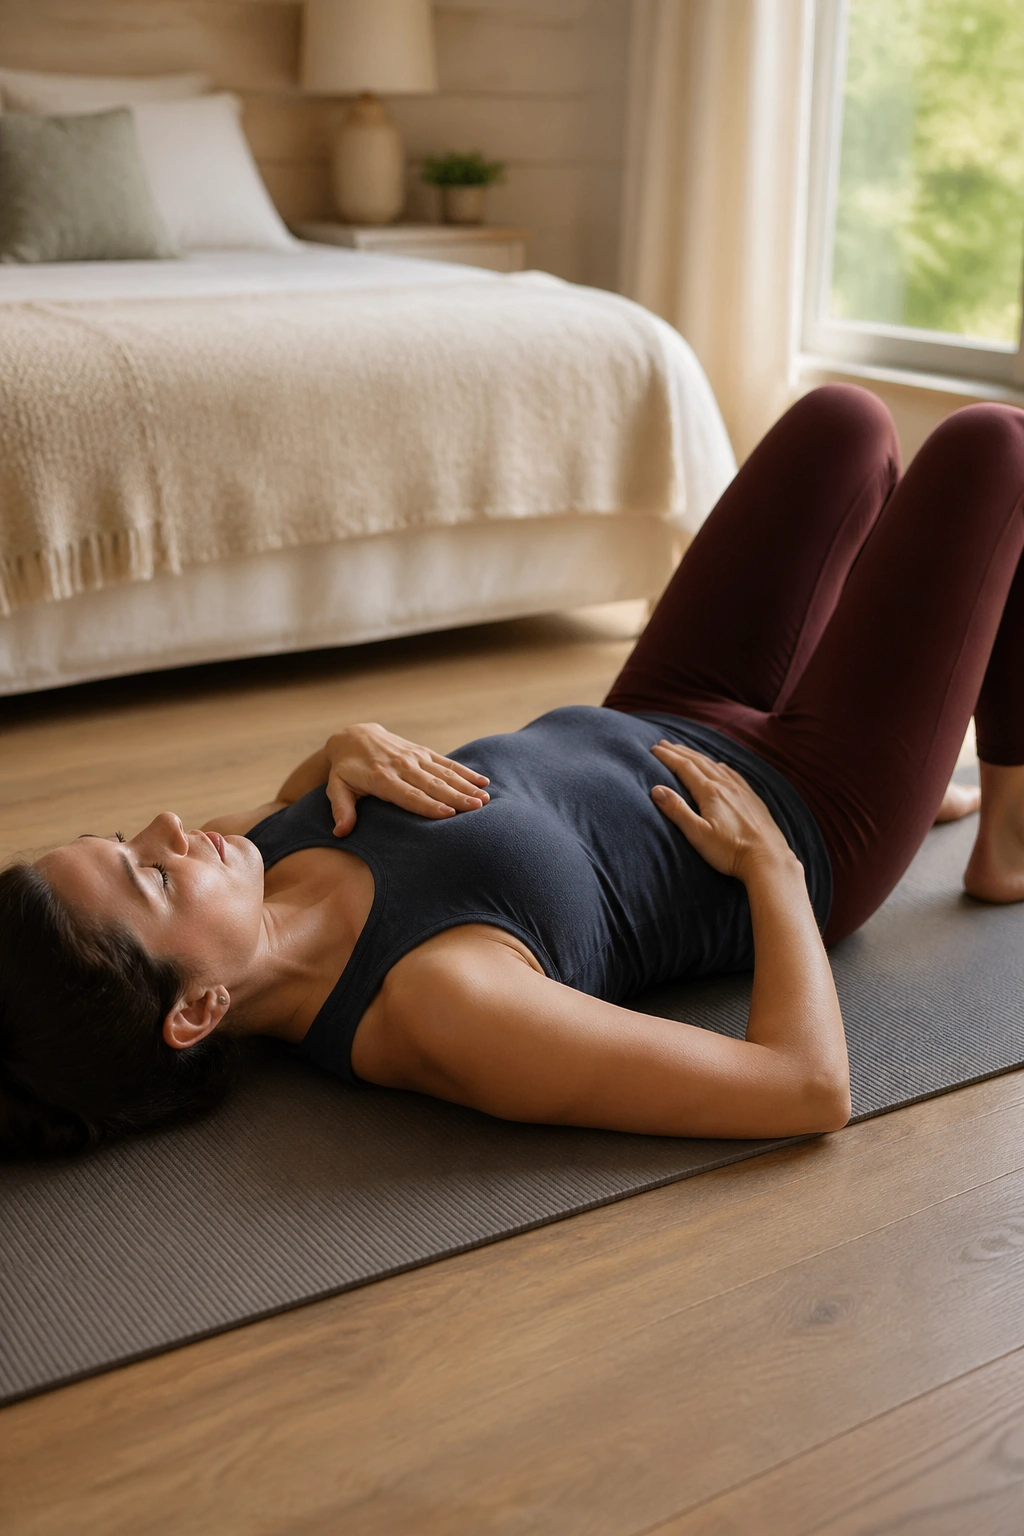
Why do so many teachers start here? Because it’s the fastest way to strip the breath down to basics.
Constructive Rest is simple: lie on your back, bend your knees, place your feet on the floor, and let the spine settle. Add diaphragmatic breathing and the whole thing becomes a quiet little reset. The ribs can move without fighting gravity, the jaw can unclench, and the abdomen can rise and fall without being pinned or squeezed.
The nice part is how honest it feels. If your breath is shallow, you notice it right away. If you’re holding tension in the belly, you notice that too. There’s nowhere to hide.
A clean way to practice
- Put one hand on your chest and one on your belly.
- Breathe in through the nose for 3 to 4 counts.
- Let the lower hand rise first.
- Exhale for 5 to 7 counts without forcing air out.
- Pause for a beat before the next inhale.
A few minutes here can change the tone of an entire practice. It also teaches a skill people forget in daily life: the exhale does not need to be dramatic to be useful. Short, soft, complete. That’s enough.
3. Ujjayi Breath in Mountain Pose
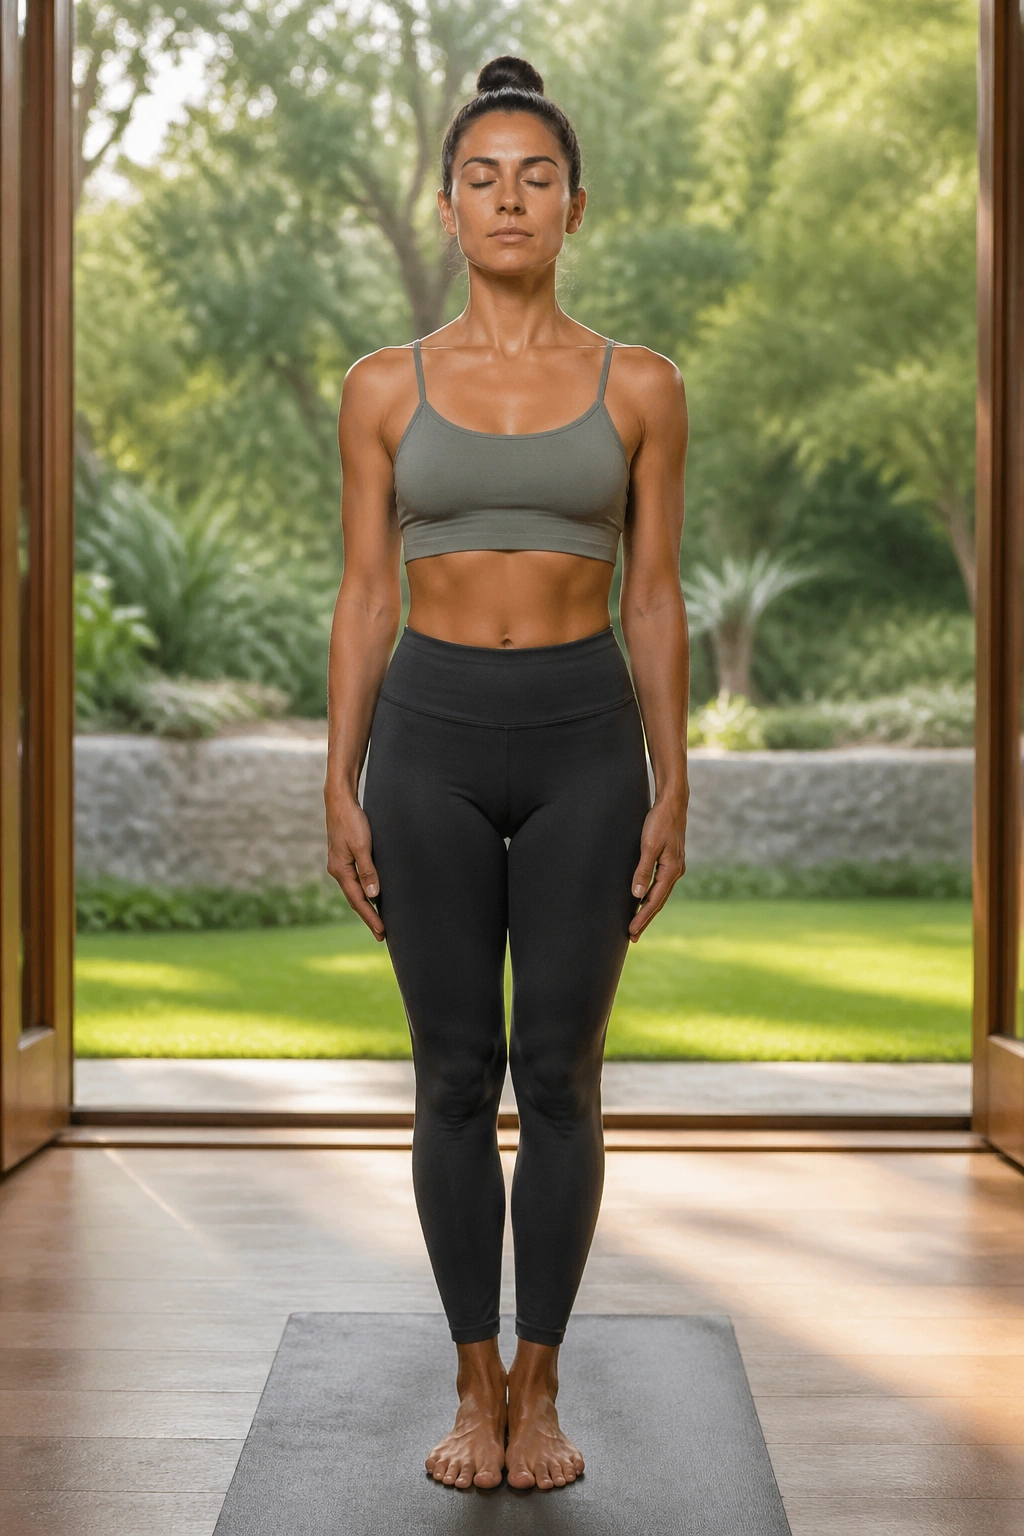
Standing still can be harder than moving. People hate hearing that, but it’s true.
Mountain Pose with Ujjayi breath is a clean test of whether you can keep the breath steady while the body is upright and organized. Ujjayi is the soft ocean sound made by slightly narrowing the throat as you breathe in and out through the nose. You’re not gasping. You’re not panting. You’re keeping the air smooth and even.
That little throat shape can slow the breath down without making it limp. It gives the mind something to track, which matters more than most people think.
What to watch for
- Keep the jaw loose.
- Let the tongue rest wide in the mouth.
- Breathe so the sound is quiet, not forced.
- Stand with the feet grounded and the ribs stacked over the hips.
If the breath gets noisy in a strained way, back off. A good Ujjayi breath feels like a whisper at the back of the throat, not a wrestling match.
And yes, this one transfers. Better than many fancier drills, honestly. If you can keep the breath even while standing in Mountain Pose, you’ve got a pattern you can bring into walks, easy runs, and those moments when life tries to steal your air.
4. Cat-Cow with Coordinated Breath
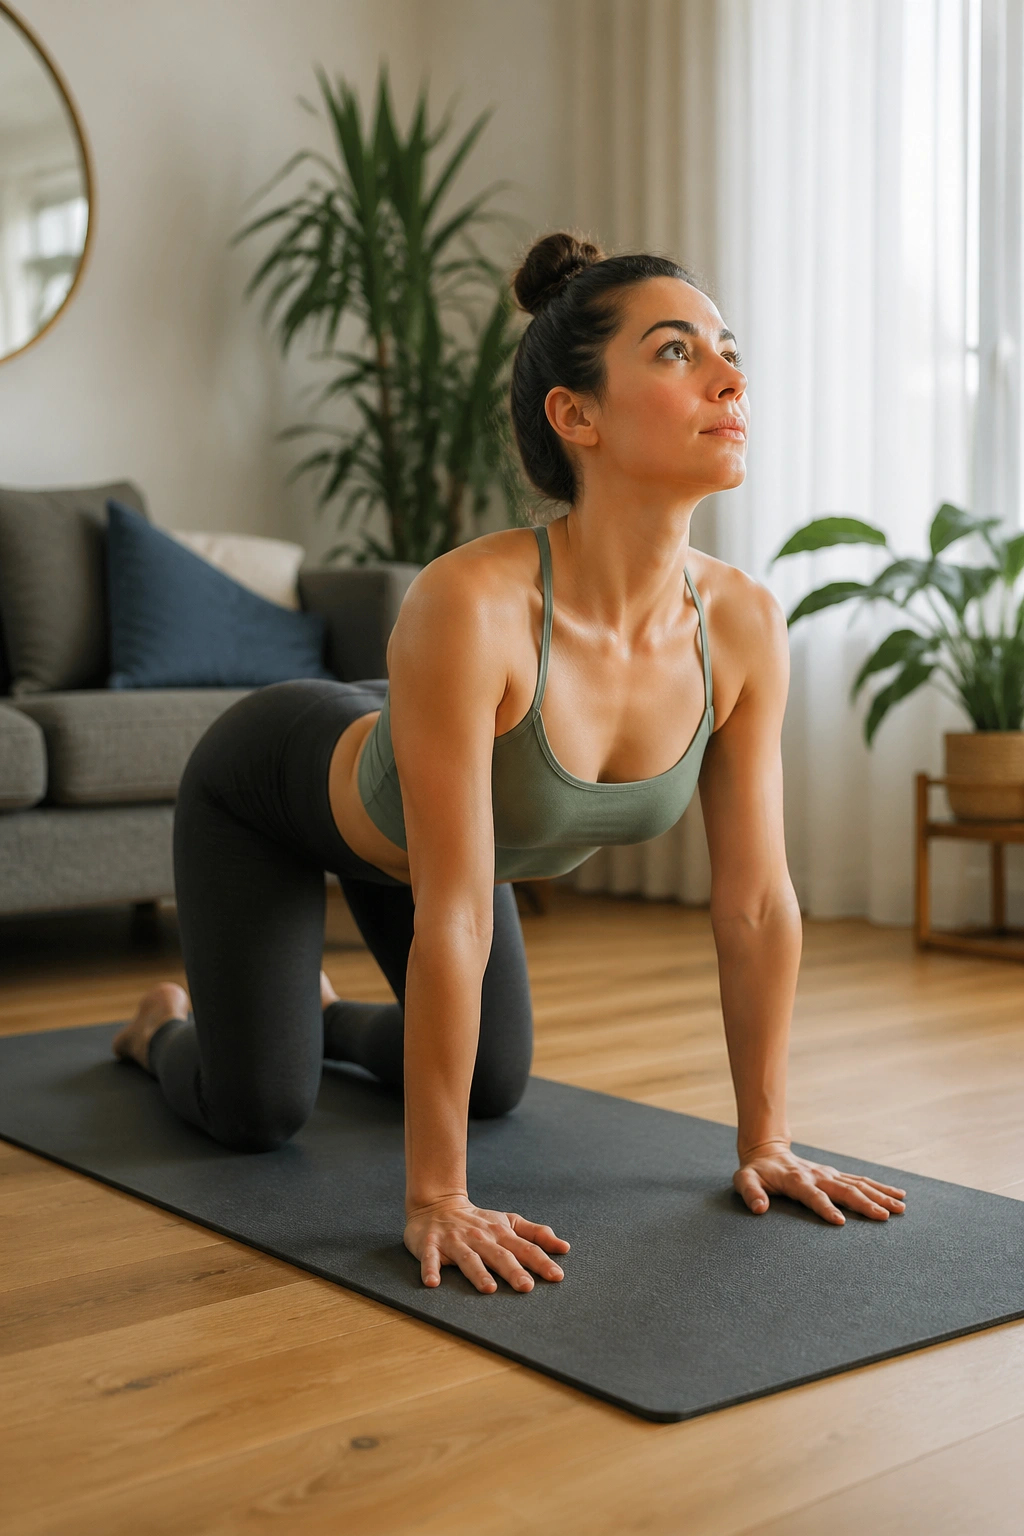
If your chest feels glued shut after a desk day, start here.
Cat-Cow is a moving breath drill, and that movement matters. On the inhale, the spine extends and the chest opens. On the exhale, the spine rounds and the ribs knit in. It sounds basic because it is basic, and that’s the charm. The pose gives you a clear rhythm: open on the inhale, gather on the exhale.
The breathing and the motion need to stay married. If you rush one and lag the other, the whole thing turns muddy.
How to make it useful
- Come to hands and knees.
- Inhale as you drop the belly and lift the chest.
- Exhale as you round the spine and draw the navel lightly up.
- Move for 6 to 10 slow rounds.
The real benefit is in the rib cage. People think of Cat-Cow as a spinal warm-up, which it is, but it also helps the ribs glide a little better with each breath. That can be a relief when your upper body feels stiff and your inhalation stops halfway up.
Don’t chase a huge range of motion. Smooth is better than big. If the breath stays even, the movement will clean itself up.
5. Seated Side Bend with Rib Expansion Breath
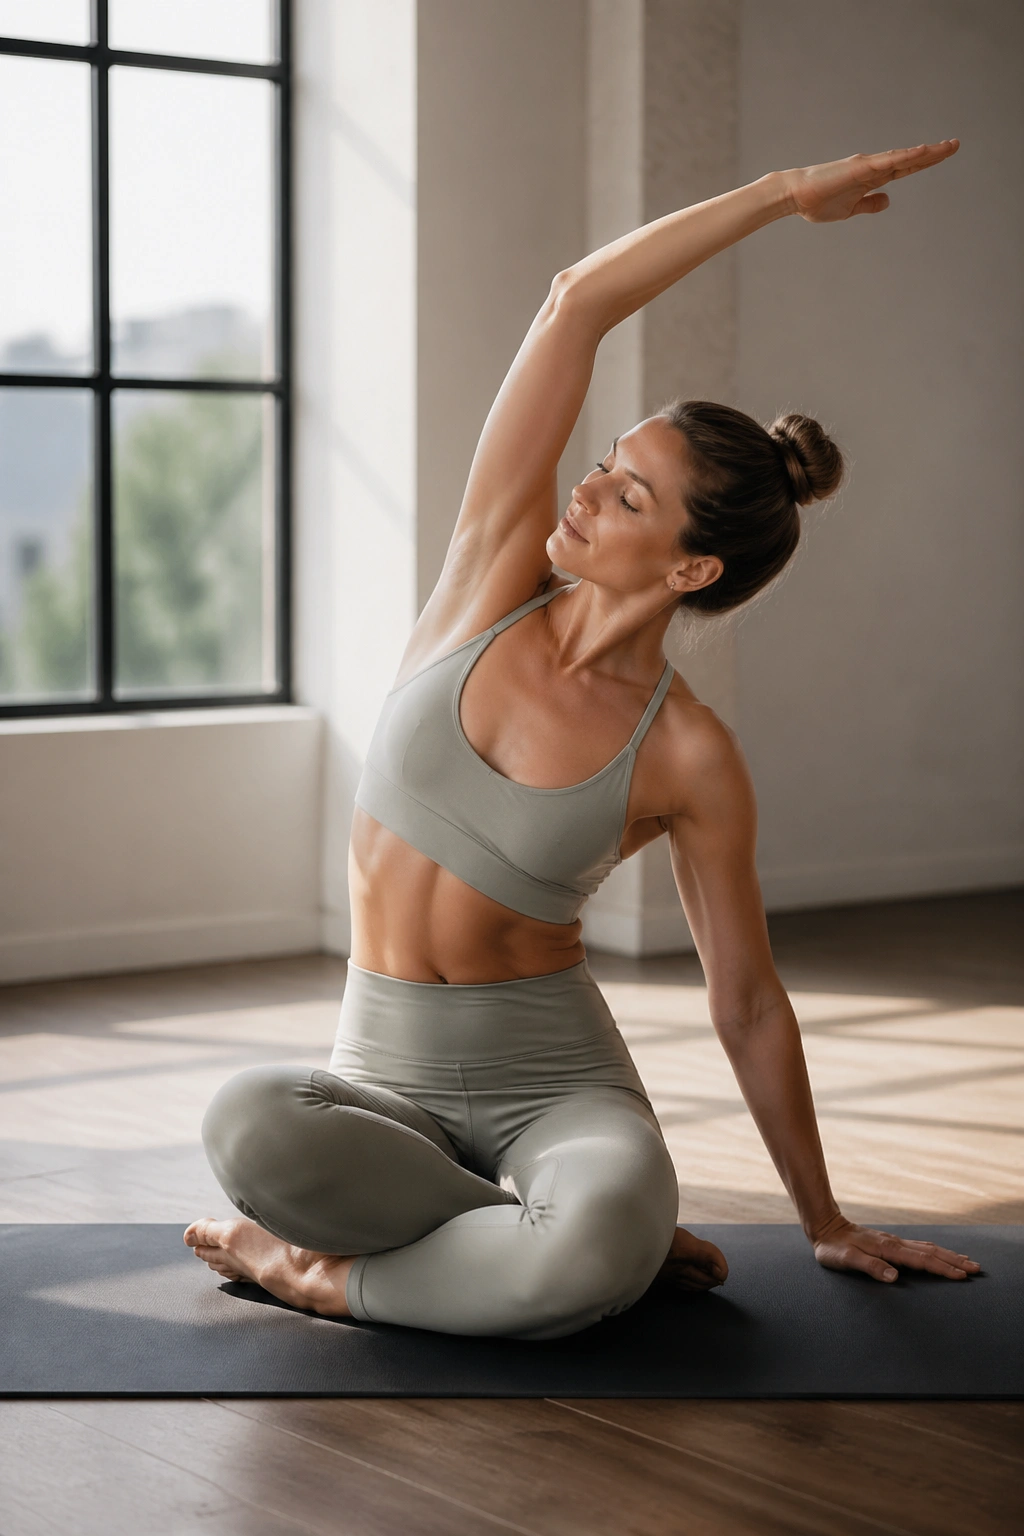
A side bend is where the ribs start to wake up.
Most people breathe straight into the front of the body and forget the sides entirely. A seated side bend corrects that fast. Sit tall, reach one arm overhead, and lean gently to the side while keeping both sit bones heavy. Now breathe into the open side body, especially the lower ribs. You’ll often feel the breath spreading into places that feel cramped or ignored.
It’s a quiet practice, which I like. No drama. No strain.
What makes it work
The pose lengthens the tissue between the ribs on one side and creates more room for a lateral inhale. That matters because full breaths are not just “belly breaths.” They’re 360-degree breaths. Front, back, and sides.
A few cues help:
- Keep the chest from collapsing forward.
- Think “length first, bend second.”
- Inhale into the ribs that are stretching.
- Exhale slowly and let the shoulders stay soft.
This is a good one if you sit a lot or carry tension in one side of the torso. It also pairs nicely with long exhalations, because the side body tends to open a little more on the way out.
6. Extended Exhale in Child’s Pose
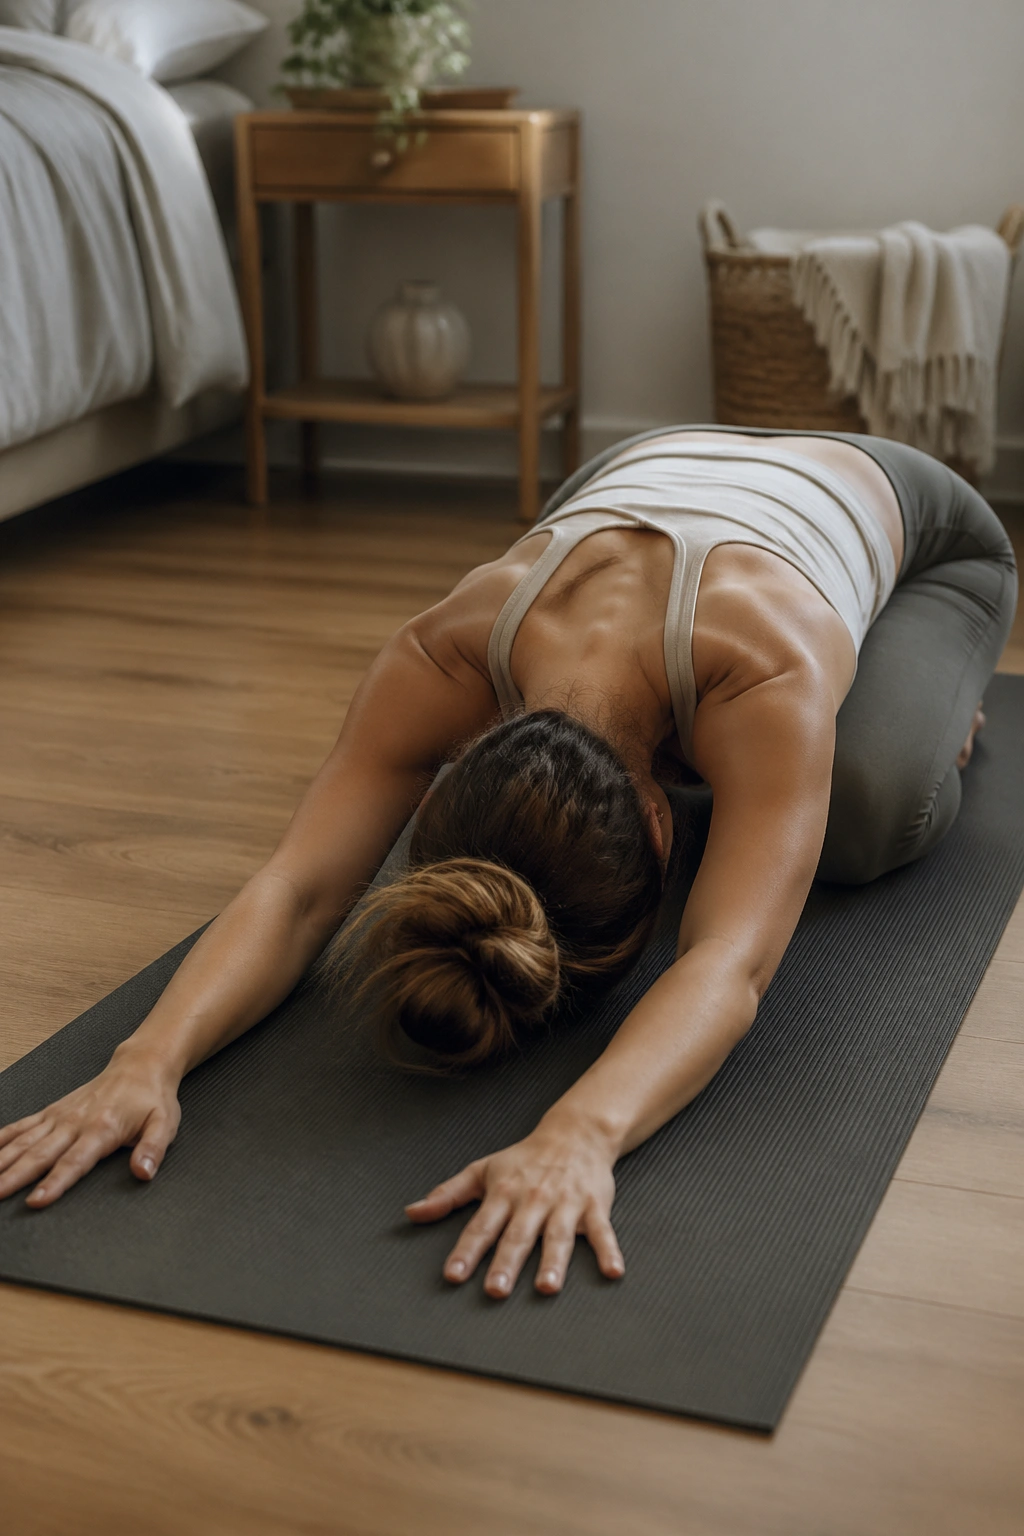
Child’s Pose looks restful, but the breath work can be sneaky.
With the hips back toward the heels and the forehead down, the body gets a chance to soften the front of the torso. Then you add an extended exhale, usually longer than the inhale. That ratio nudges the nervous system toward calm, and it also trains you not to rush the breath when the lungs feel crowded.
How to keep it clean
- Knees can be together or apart.
- Reach the arms forward or rest them by your sides.
- Inhale for 4 counts.
- Exhale for 6 to 8 counts.
- Repeat for 6 to 10 rounds.
If your forehead does not reach the floor, stack your hands or rest on a block. If your hips hate the position, place a folded blanket behind the knees. Small fixes matter more than brute force here.
A useful warning
Do not press the belly so hard into the thighs that the breath gets trapped. That’s a common mistake. You want enough compression to feel grounded, not so much that breathing becomes choppy.
7. Lion’s Breath in a Kneeling Seat
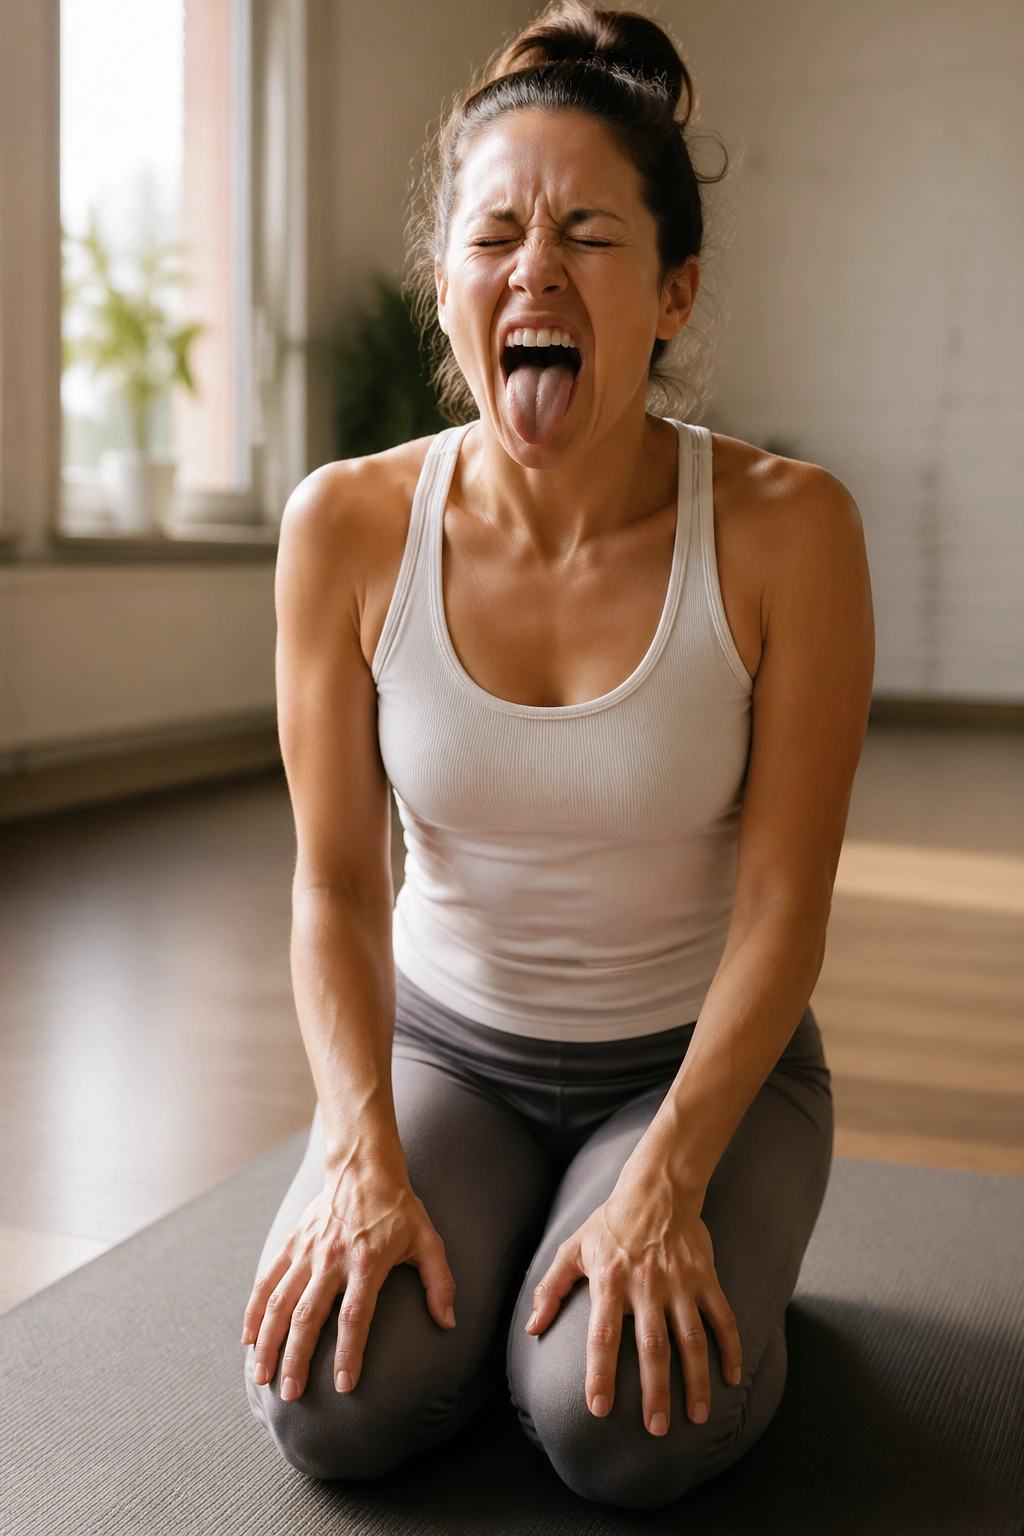
Lion’s Breath is the oddball in the bunch, and I mean that as praise.
You sit on your shins or cross-legged, take a full inhale, then open the mouth wide and exhale with a “ha” sound while the tongue extends and the face scrunches a bit. It looks theatrical. Fine. It also clears a surprising amount of tension from the jaw, throat, and upper chest, which is where many shallow breathers get stuck.
The exhale is the point. Hard.
Best uses for it
- After long periods of speaking.
- When the throat feels tight.
- Before breath practices that need a clean reset.
- When the face and jaw are clenching without you noticing.
I wouldn’t use Lion’s Breath as a mainstay for people who feel self-conscious or dizzy easily. It’s a release drill, not a marathon drill. One or two rounds are often enough.
And yes, it can make breathing feel freer afterward. Not because the lungs changed shape, but because the surrounding tension got out of the way.
8. Supine Bound Angle with Long Nasal Breaths
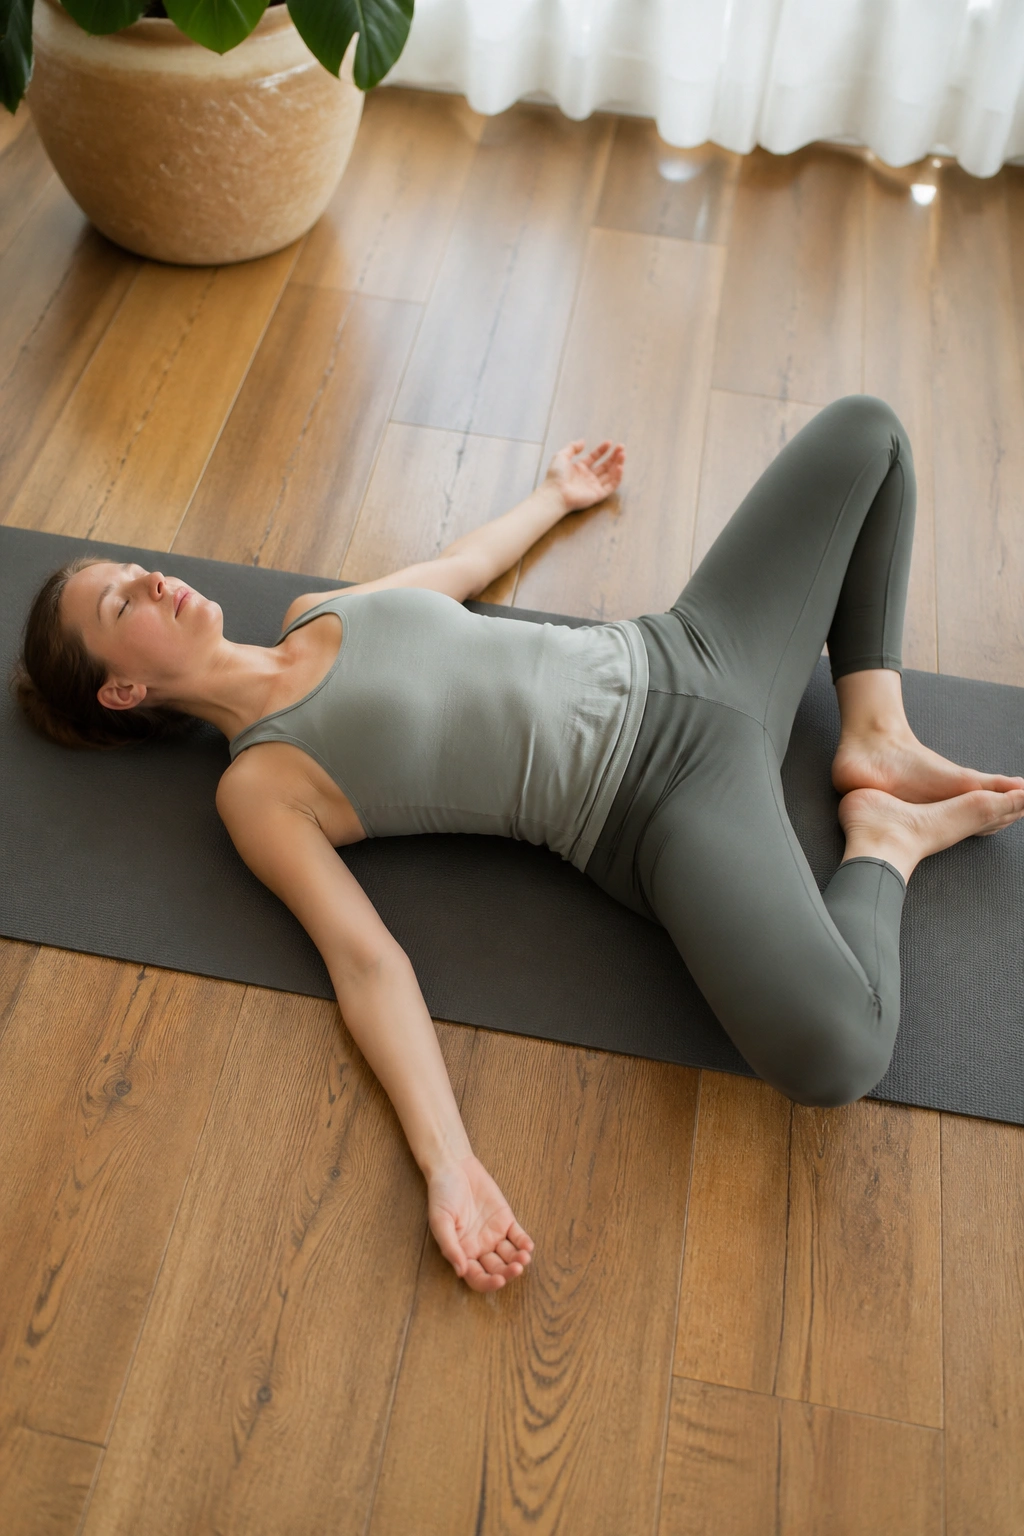
This one feels like lying inside a sigh.
Supine Bound Angle Pose—soles of the feet together, knees falling open—creates a passive chest-opening shape while the hips relax. Add long nasal breaths and the front body starts to settle. The sternum softens. The belly moves. The lower ribs stop bracing quite so hard.
People often underestimate how much hip tension affects breath quality. Tight hips don’t “block” the lungs, but they can keep the whole body in a guarded state. That shows up in the breathing sooner than most folks expect.
What to do
- Lie on your back.
- Bring the soles of the feet together.
- Support the thighs with blocks or blankets if needed.
- Inhale for 4 counts.
- Exhale for 6 counts or a little longer.
If the low back feels strained, slide a folded blanket under the pelvis. If the knees feel too heavy, support them. The pose should look soft from the outside and feel even softer from the inside.
No forcing. A comfortable shape with a smooth breath beats a deep shape with a clenched jaw every time.
9. Eagle Arms with Slow Breath
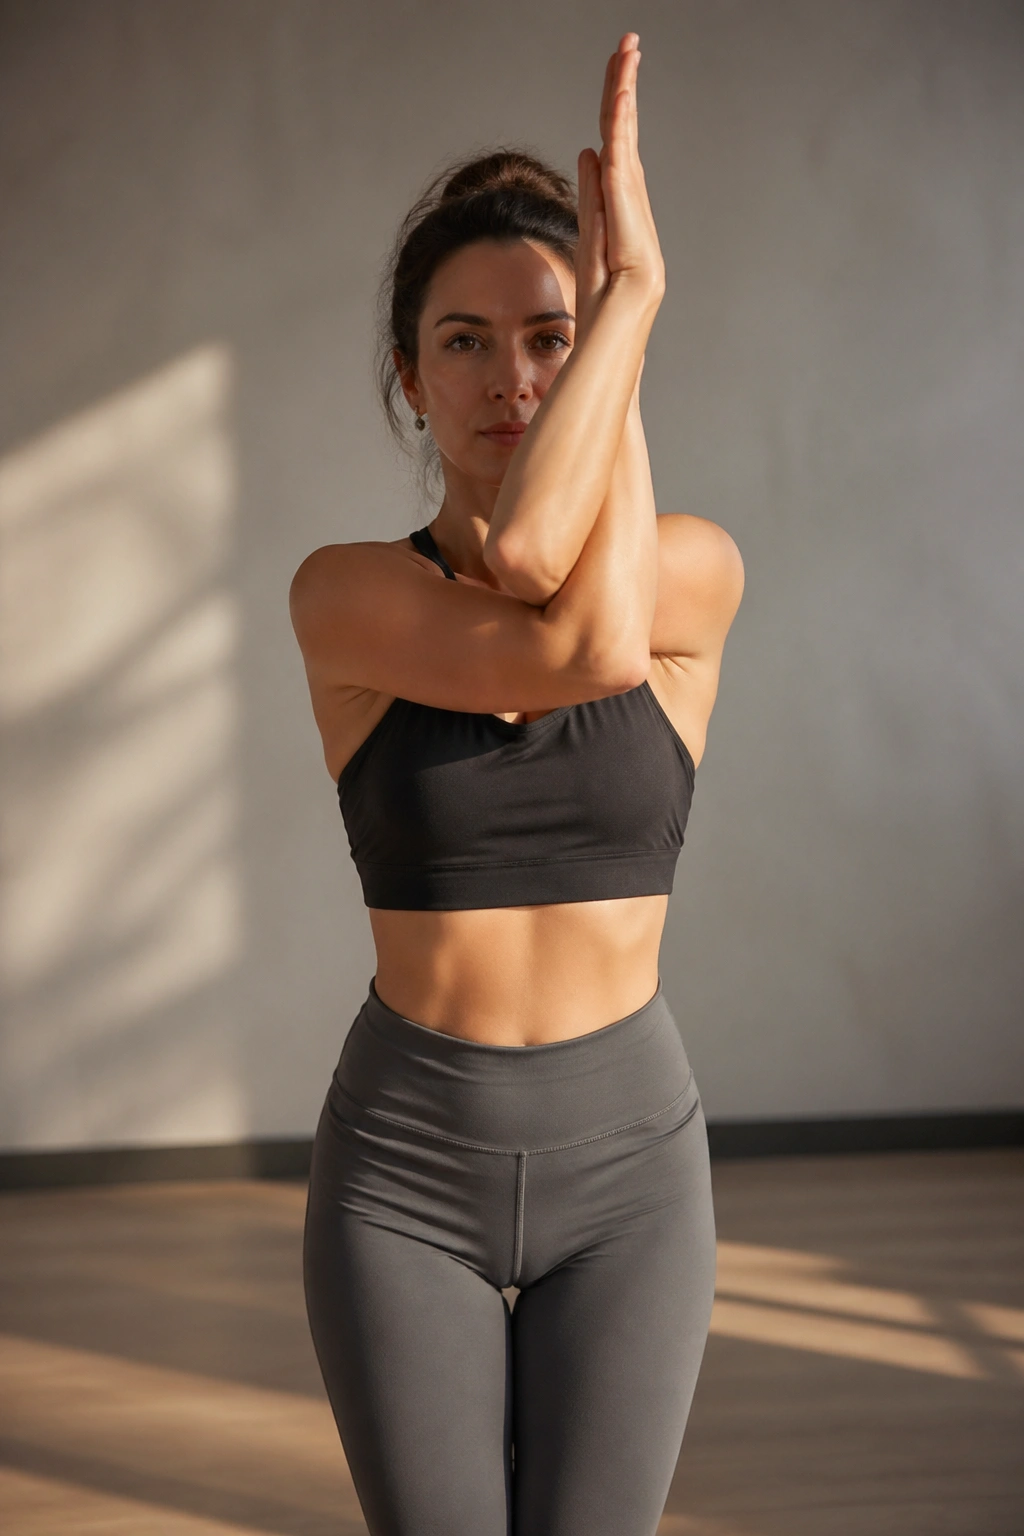
Crossing the arms in Eagle Arms does something interesting to the upper chest: it narrows the space a little, which sounds like the opposite of what you want. It isn’t.
That gentle compression creates contrast. When you then breathe slowly, you become more aware of where the breath is going and where it isn’t. The shoulder blades spread, the upper back wakes up, and the upper ribs have to cooperate instead of freeloading.
How to set it up
- Sit tall or stand in Mountain Pose.
- Wrap one elbow under the other.
- Lift the forearms if that feels good, or keep them lower.
- Inhale through the nose for 4 counts.
- Exhale for 6 counts while keeping the shoulders down.
This is a nice choice if your upper body feels braced from typing, driving, or lifting. The arms get a mild stretch, but the real value is the breath control that happens while the shoulders are slightly tangled up.
You can switch sides after 4 to 6 breaths. Most people have one side that feels more restricted, and that asymmetry is worth noticing.
10. Bridge Pose with Rib-Cage Breathing
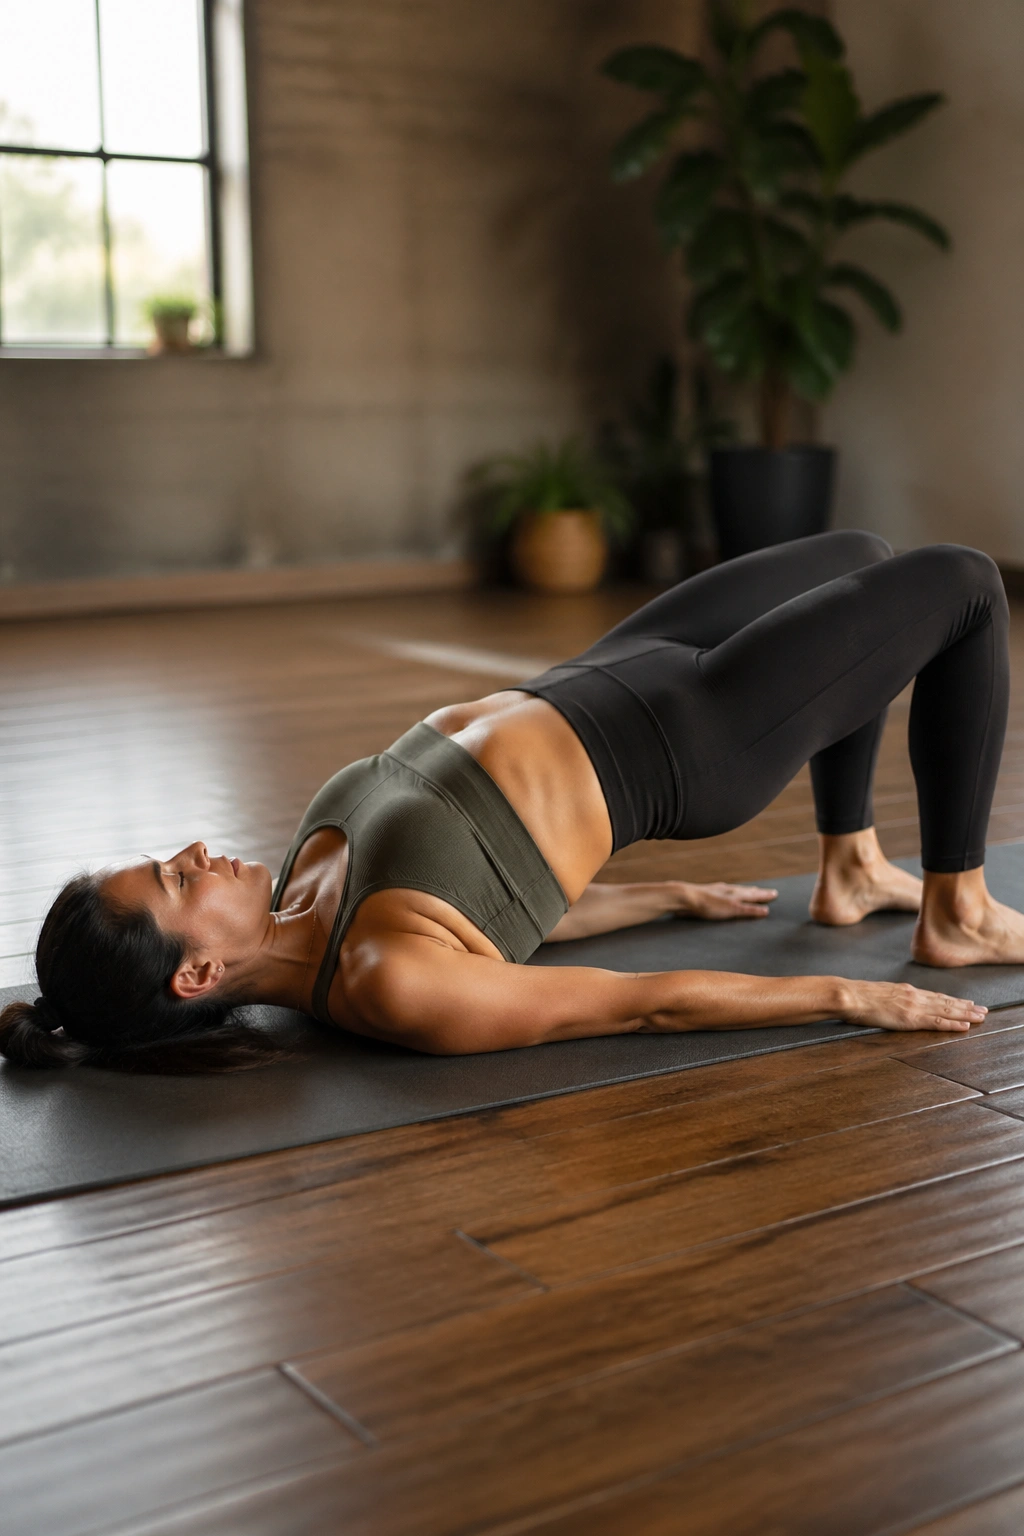
Bridge Pose can be gentle or bossy depending on how you do it.
Lift the hips only a few inches and the body gets a clean invitation to open the front line without jamming the low back. From there, rib-cage breathing becomes easier to feel. The front ribs widen on the inhale, the back body spreads on the mat, and the breath starts traveling where it often gets blocked by habit.
The mistake is going too high. People always want to crank it.
A better version
- Lie on your back with knees bent.
- Feet hip-width apart.
- Inhale and lift the hips just enough to feel the front of the chest open.
- Keep breathing for 5 to 8 cycles.
- Exhale and lower slowly.
If your neck feels crowded, shorten the lift. If your hamstrings cramp, move the feet a little farther from the hips. Those small adjustments make the breath steadier and the pose more useful.
Bridge Pose is one of the better choices for combining back-body strength with breathing awareness. You don’t need a giant arch. You need room.
11. Thread-the-Needle with Rotational Breathing
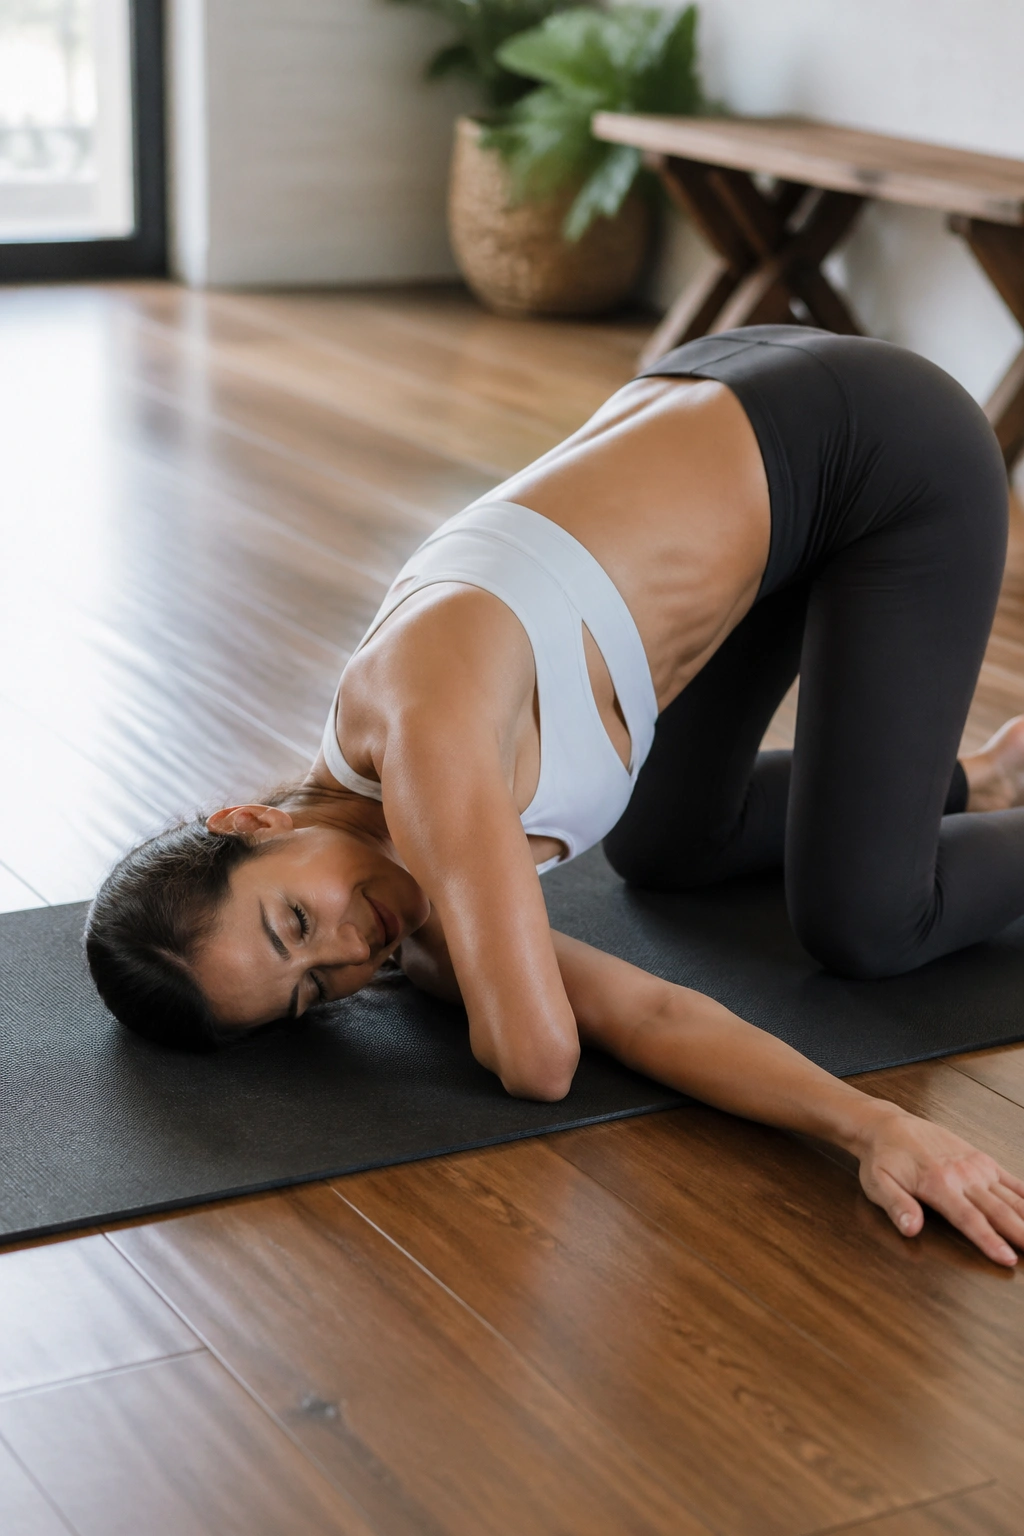
Ever notice how a twisted or rotated shape can make a breath feel “stuck” for a second, then freer on the next exhale? That’s the whole point here.
Thread-the-Needle gives the upper back a gentle twist while one shoulder settles toward the floor. The rotation can expose tight spots around the ribs and the back of the lungs, which is a clumsy way of saying the breath becomes easier to sense in places you usually ignore.
A useful sequence
- Start on hands and knees.
- Slide one arm under the other.
- Rest the shoulder and side of the head down if possible.
- Breathe into the back ribs for 4 to 6 slow cycles.
- Switch sides.
The trick is not to hunt for a huge twist. That usually just jams the shoulder and shortens the breath. Instead, let the exhale soften you into the pose a little more each round.
I like this one after Cat-Cow, because the spine is already a bit warm and the ribs are willing to move. It’s also one of the better “quiet” poses for people who carry breath tension in the upper back.
12. Half Fish Pose with Side-Chest Breath
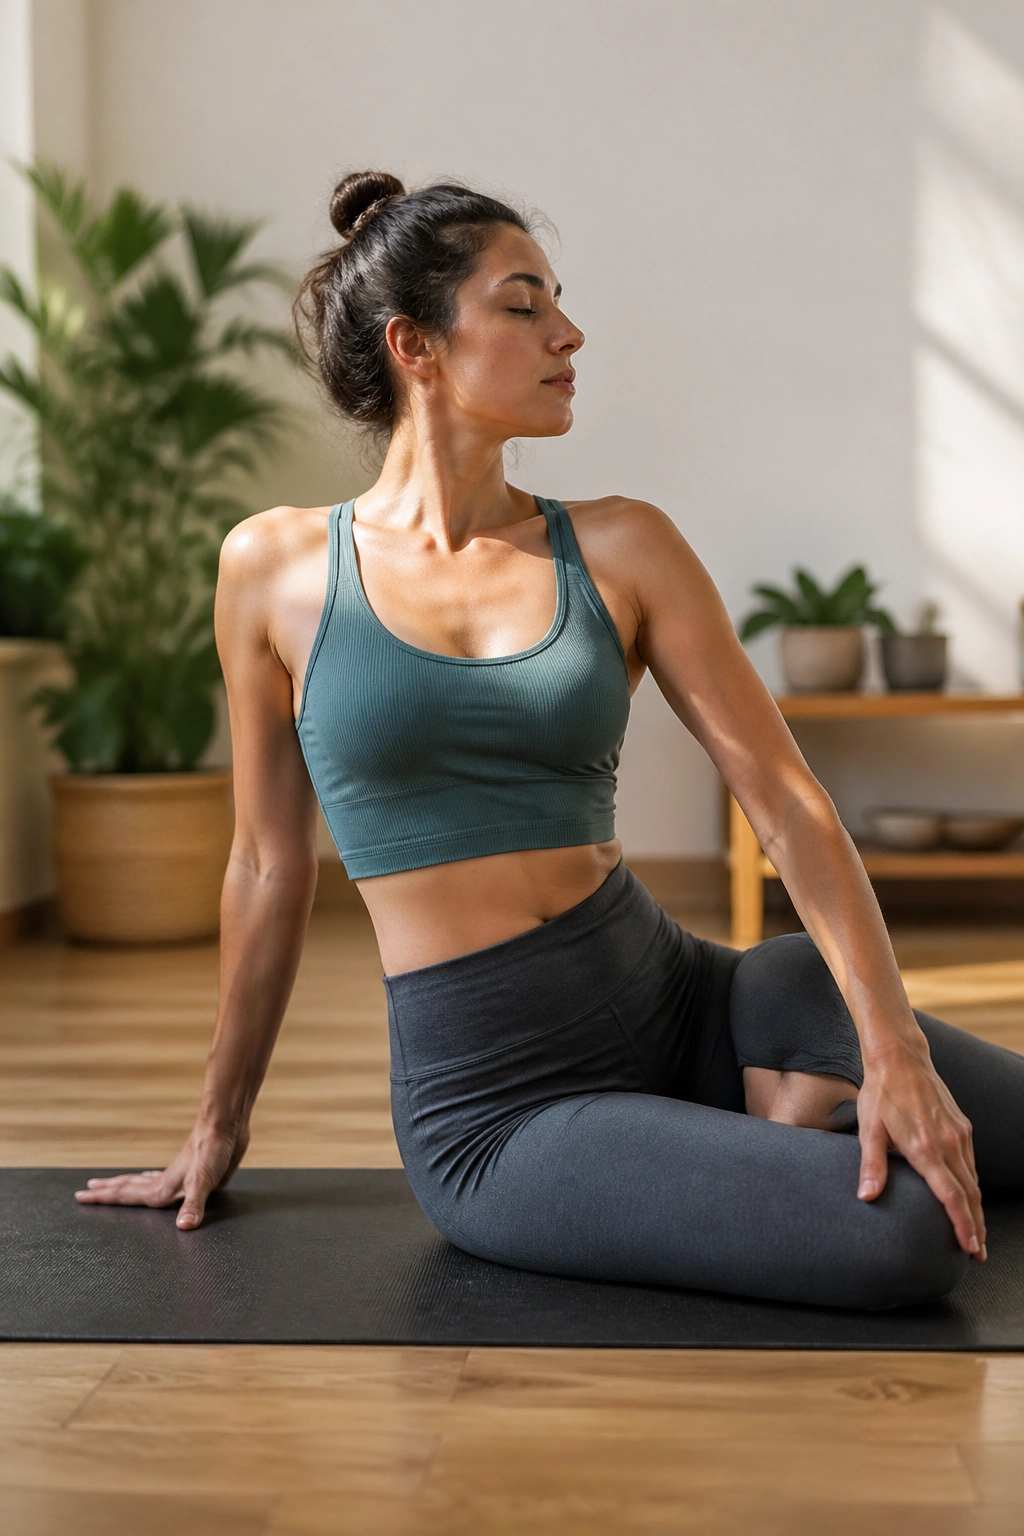
Half Fish Pose has a lovely bit of exaggeration to it.
One arm posts behind you, the other arm braces in front, and the chest opens to the side while the spine lengthens upward. It’s not just a chest opener; it’s a shape that asks the side ribs to spread and the upper chest to soften without collapsing. You feel a little proud in the pose, which sounds silly until you notice your breath getting less cramped.
That matters for people who breathe high into the collarbones.
What to feel
- Space across the front ribs.
- A gentle lift through the sternum.
- Breath that fills the upper chest without grabbing the shoulders.
- Enough rotation that the neck stays easy.
A folded blanket under the sitting bones can make a huge difference. So can bending the bottom leg if the hips are tight. You want this pose to feel like you can stay there for several breaths, not like you need to escape after one inhale.
It’s one of those postures that rewards patience. The opening is subtle at first, then the rib cage starts to cooperate more openly. That’s the good part.
13. Alternate Nostril Breathing in Easy Seat
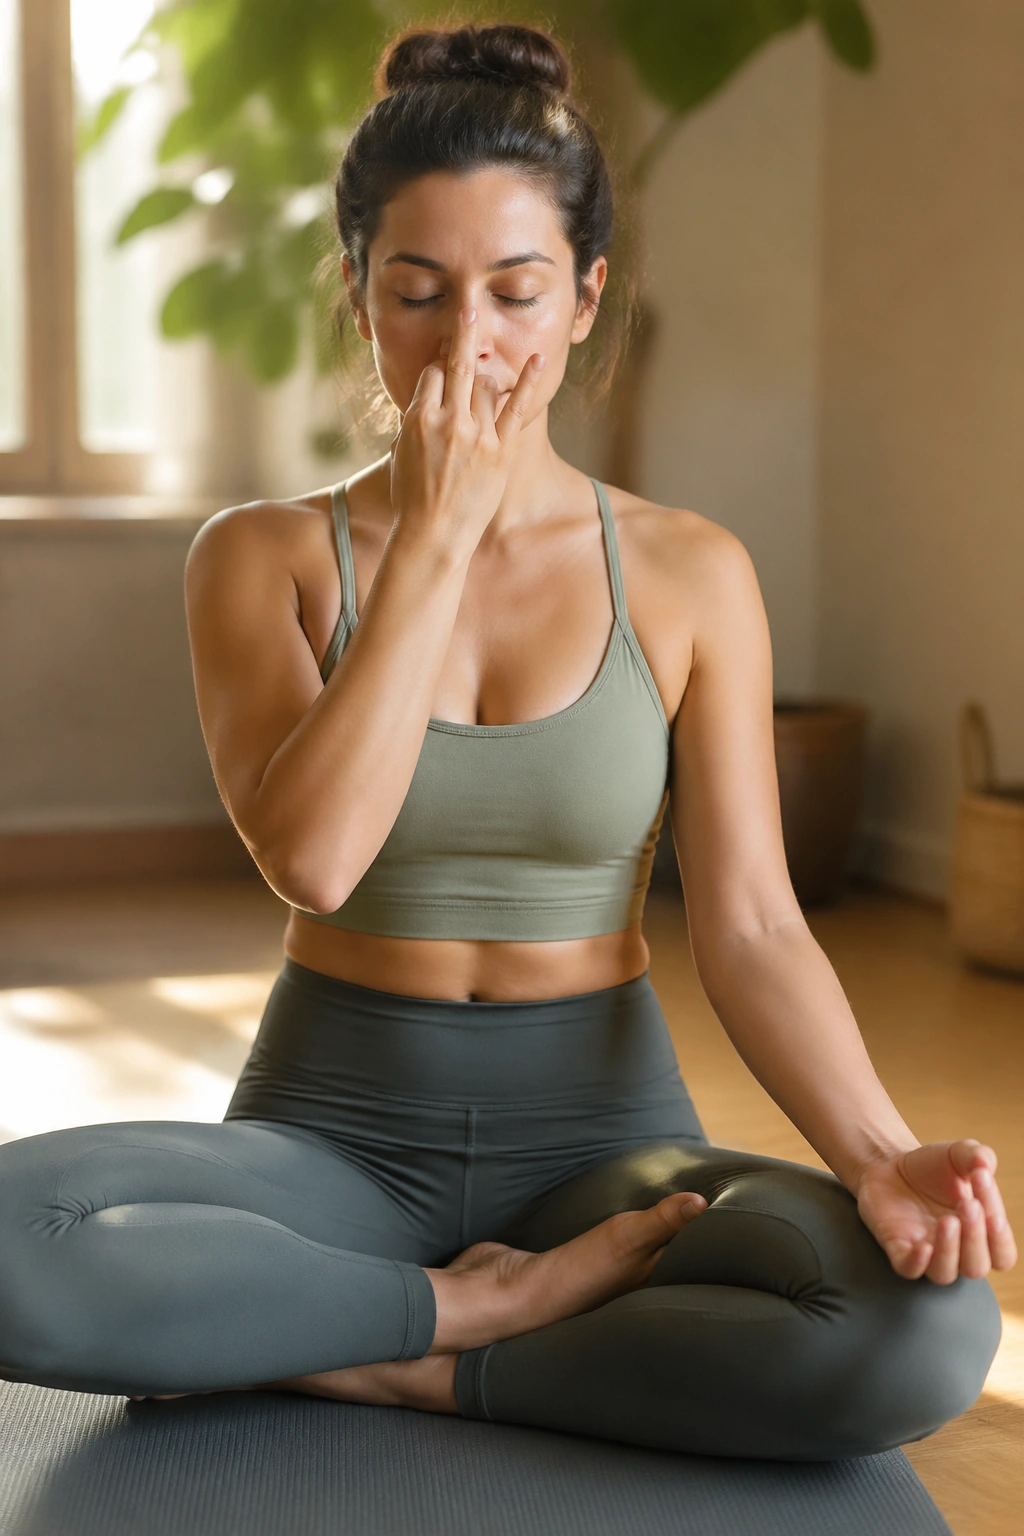
Alternate Nostril Breathing gets a lot of attention, and for good reason. It gives the mind a job and the breath a clean, measured rhythm.
Sit comfortably, use the fingers of one hand to gently close one nostril at a time, and breathe in and out through alternating sides. The pattern is simple. The effect is often more settling than people expect, especially when the breath feels scattered.
I prefer this one after a few physical poses, not before. The body settles first. Then the breath work lands better.
How to keep it from getting weird
- Keep the shoulders soft.
- Don’t pinch the nose aggressively.
- Use even, unhurried breaths.
- Stop if you feel lightheaded.
A lot of people turn this into a precision contest. Bad idea. If the fingers are clumsy or the breath feels strained, shorten the practice and come back to plain nasal breathing. The point is balance, not choreography.
For some people, this is the pose that makes breath practice feel organized for the first time. For others, it’s fine but not essential. Fair enough. I still think it belongs on the list because the structure it gives the breath is hard to beat.
14. Humming Bee Breath in a Comfortable Seat
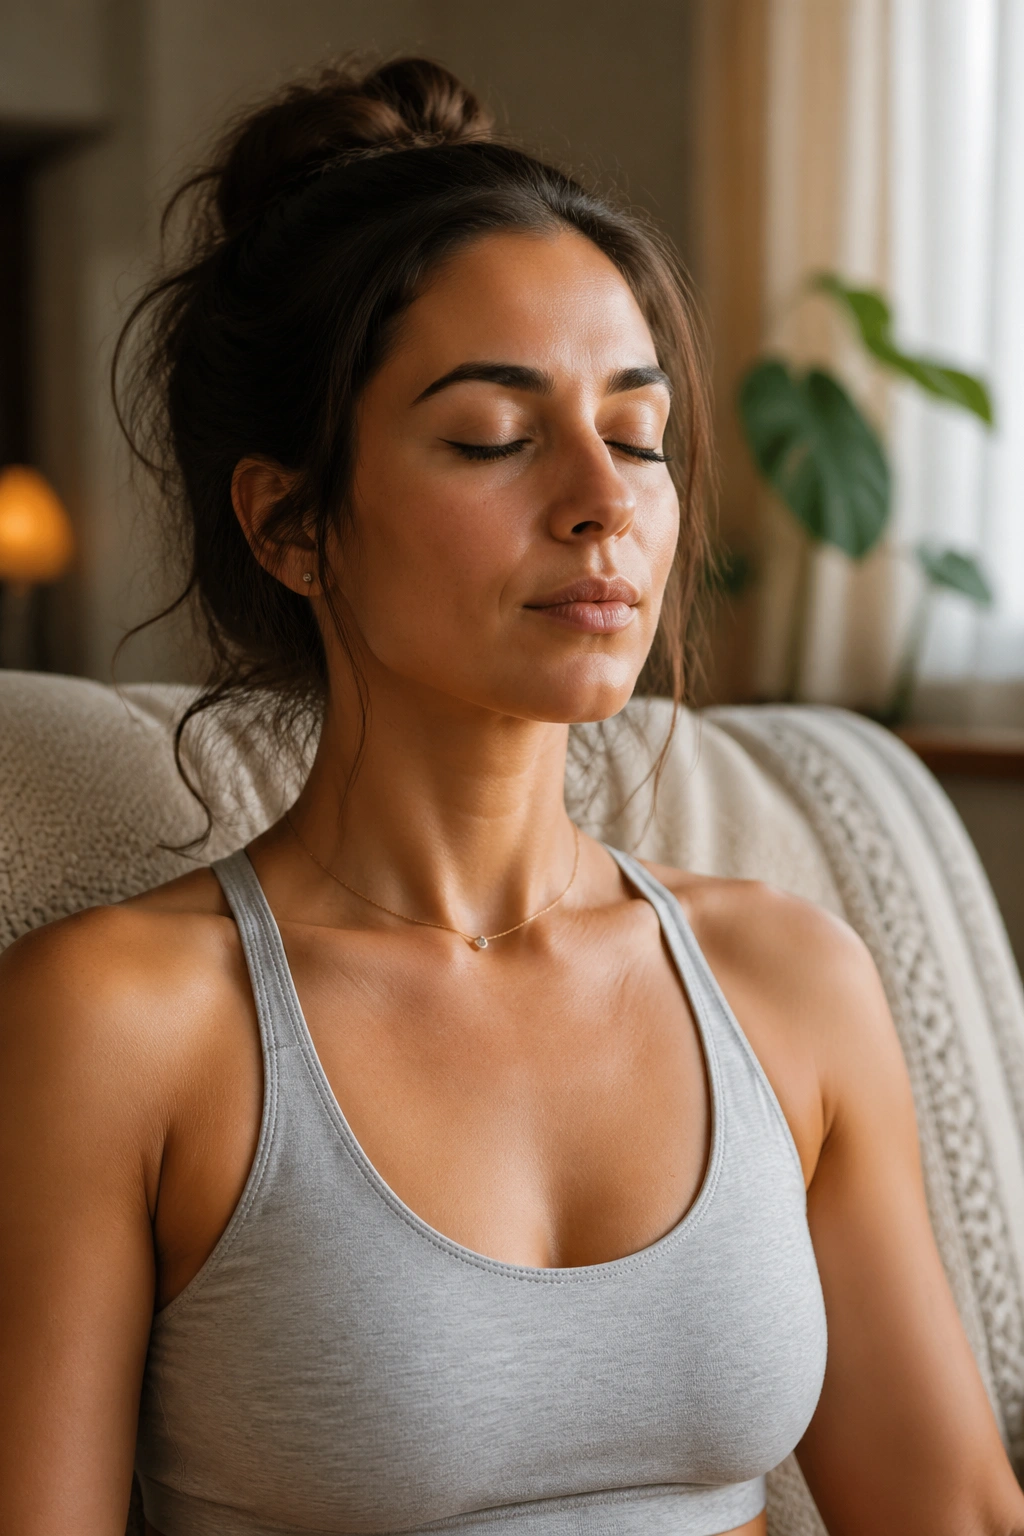
The hum matters more than the name.
Humming Bee Breath, often called Bhramari, adds a soft buzzing sound on the exhale. Sit tall, inhale through the nose, then exhale with a steady hum while keeping the lips closed. The vibration in the face and chest can be oddly calming, and it gives the exhale a long, even shape without making you work hard.
That long, audible exhale is the gift.
Try this shape
- Sit cross-legged or in a chair.
- Close the eyes if that feels okay.
- Inhale for 4 counts.
- Hum on the exhale for 6 to 8 counts.
- Repeat 5 to 8 rounds.
If the hum feels too loud, soften it. If you feel pressure in the ears, back off. You don’t need a big sound to get the effect.
This one is especially nice at the end of a practice or after a tense conversation. The face loosens. The jaw relaxes. The breath stops racing quite so much. That’s plenty.
15. Legs Up the Wall with a Box-Breath Finish
This is the one I reach for when I want the session to land, not just end.
Legs Up the Wall is simple: lie on your back with your legs resting vertically up a wall or on a chair, then settle into a box-breath pattern if it feels comfortable. Box breathing means equal counts for inhale, hold, exhale, hold. I usually prefer modest counts here—something like 4-4-4-4—because longer holds can feel too sharp after a long day.
A calm way to finish
- Sit beside a wall and swing the legs up.
- Let the hips rest on the floor or on a folded blanket.
- Inhale for 4 counts.
- Hold for 4 counts.
- Exhale for 4 counts.
- Hold empty for 4 counts.
If holds bother you, skip them. Use a steady inhale and a longer exhale instead. That’s still a strong finish, and in some bodies it works better.
The appeal of this pose is not drama. It is quiet. The legs are supported, the spine is unloaded, and the breath has room to get slow without effort. After a practice built around lung-friendly yoga breathing poses, this is a clean place to let the nervous system settle and keep the chest from tightening back up the moment you stand.
That’s the whole point, really. Not bigger lungs in the cartoon sense. Better breath habits. A chest that opens more easily. A body that knows how to exhale all the way out and start again without panic.
