



A neck that feels welded to your shoulders can ruin a whole day fast. One minute you’re answering emails; the next, you’re turning your whole torso just to glance over at the door.
Yoga poses for neck and shoulder pain relief work best when they stay small, slow, and a little boring-looking. That is not a bad thing. The flashy backbends people post online are usually not the move for a stiff, screen-tired upper body; the quiet stretches and gentle resets do far more heavy lifting.
Most of the trouble lives in predictable places: the upper traps, the base of the skull, the front of the chest, and the muscles that tug the shoulder blades forward after too many hours at a desk. If pain shoots down an arm, brings numbness or tingling, follows a fall, or comes with a nasty headache, skip the stretching and get checked. If it’s the usual tight, cranky, overworked feeling, soft movement can help more than people expect.
The trick is to stop forcing the neck to do the work of the whole upper body. Once the shoulders soften and the ribs start breathing again, a lot of that pressure eases off in a way that feels almost annoyingly simple.
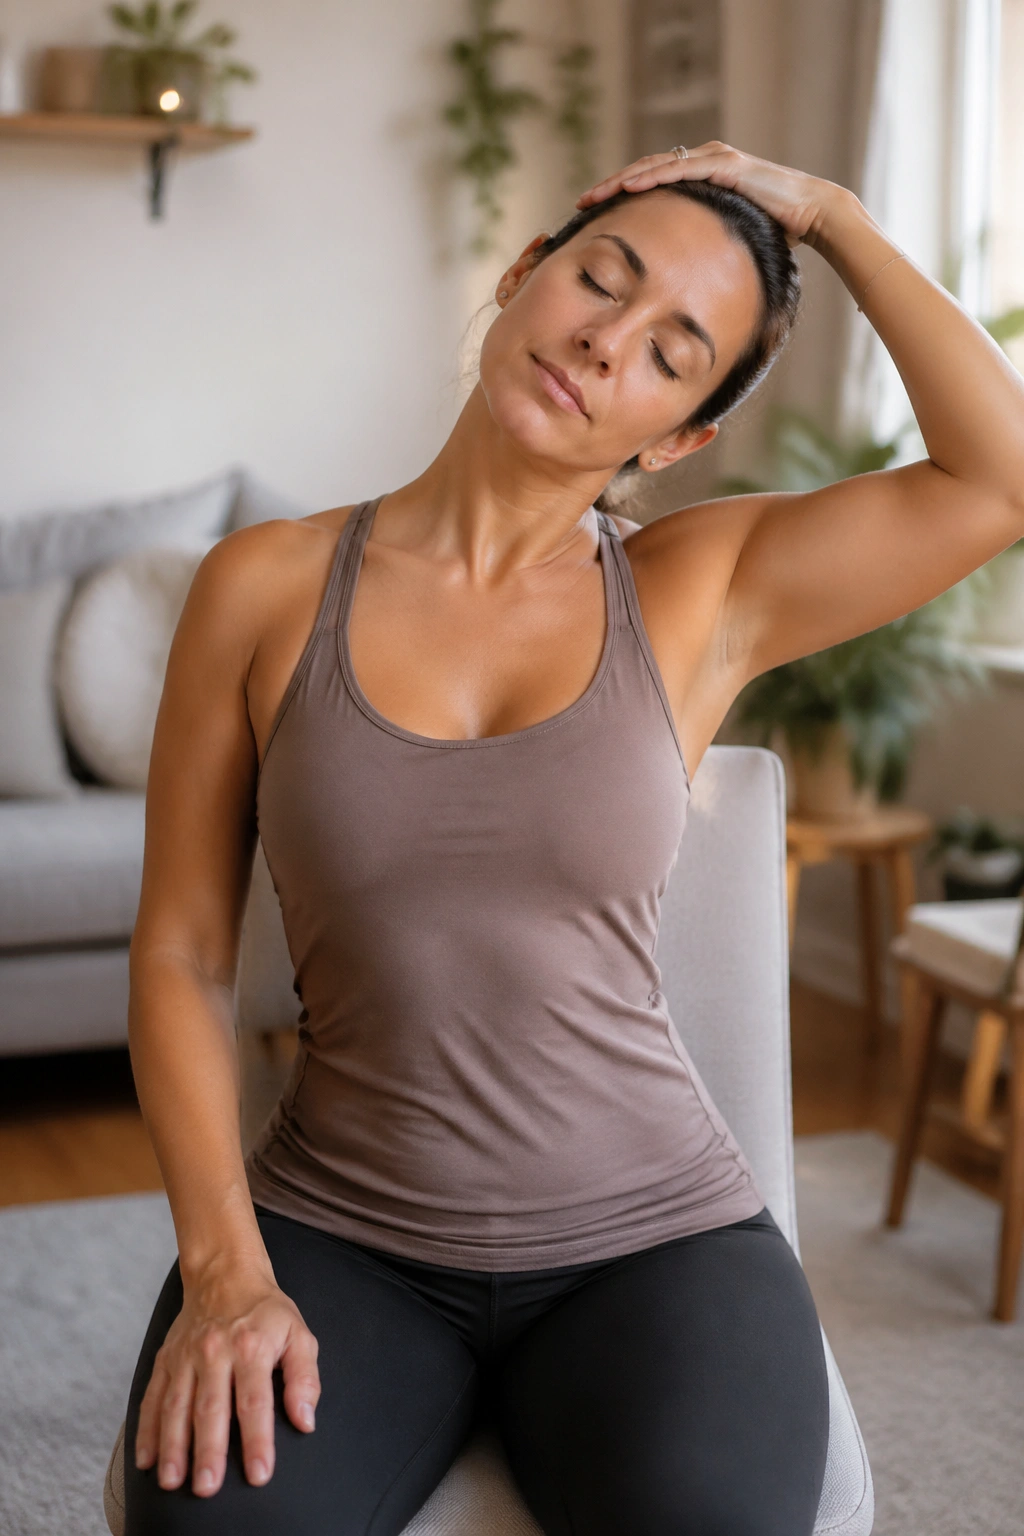
1. Gentle Seated Neck Side Bend for Neck and Shoulder Pain Relief
Start here if your neck feels raw, not injured. A seated side bend looks almost too mild, which is exactly why it earns its place on a bad day.
Sit tall in a chair with both feet flat and your pelvis heavy. Let your right ear drift toward your right shoulder without pulling on the head, then keep both shoulders down so the left side of the neck has room to lengthen. Hold it lightly for three to five slow breaths, then switch sides.
What it should feel like
- A soft stretch along the side of the neck.
- No pinching behind the ear.
- No sharp pull at the base of the skull.
- The opposite shoulder feels heavier, not braced.
Tiny motion. Big relief.
If your hand wants to rest on the side of the head, keep it feather-light. The hand is there as a guide, not a crank handle. I prefer this move before anything more active because it helps you notice how much you’ve been hiking one shoulder without meaning to.
2. Chin Tucks at the Wall
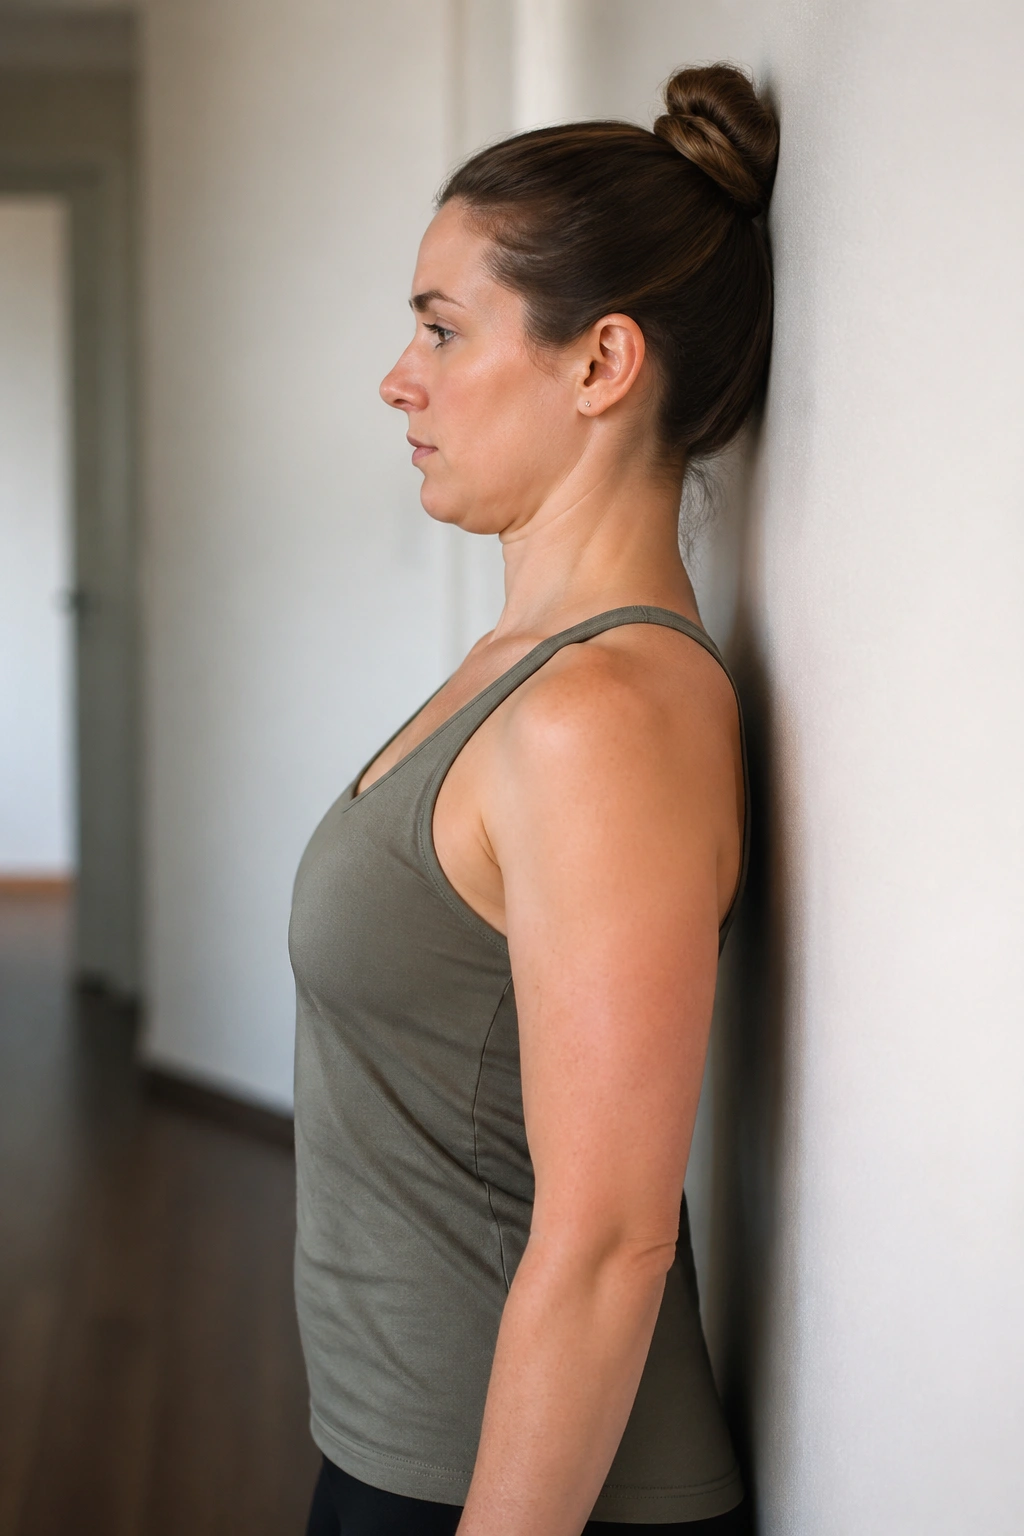
Why does a move that looks like you’re making a double chin help so much? Because a lot of neck pain comes from the head living a little too far forward, which makes the tiny muscles under the skull work overtime all day.
Stand with your back near a wall and your feet a few inches away from it. Keep your gaze level, then draw your chin straight back as if you’re sliding the back of your head toward the wall. Don’t tip your head down. Don’t jam your neck flat. The motion is small, almost shy.
How to use it
- Hold the tuck for 3 to 5 seconds.
- Repeat 6 to 8 times.
- Keep the shoulders relaxed the whole time.
- Stop if the front of the neck feels strained.
You can do these seated if the wall version feels awkward. I like them between longer stretches because they wake up the deep neck flexors without yanking anything around. That matters. A lot of people spend all day stretching the side of the neck and never teach the head how to sit back over the rib cage.
3. Cat-Cow for a Stiff Upper Back
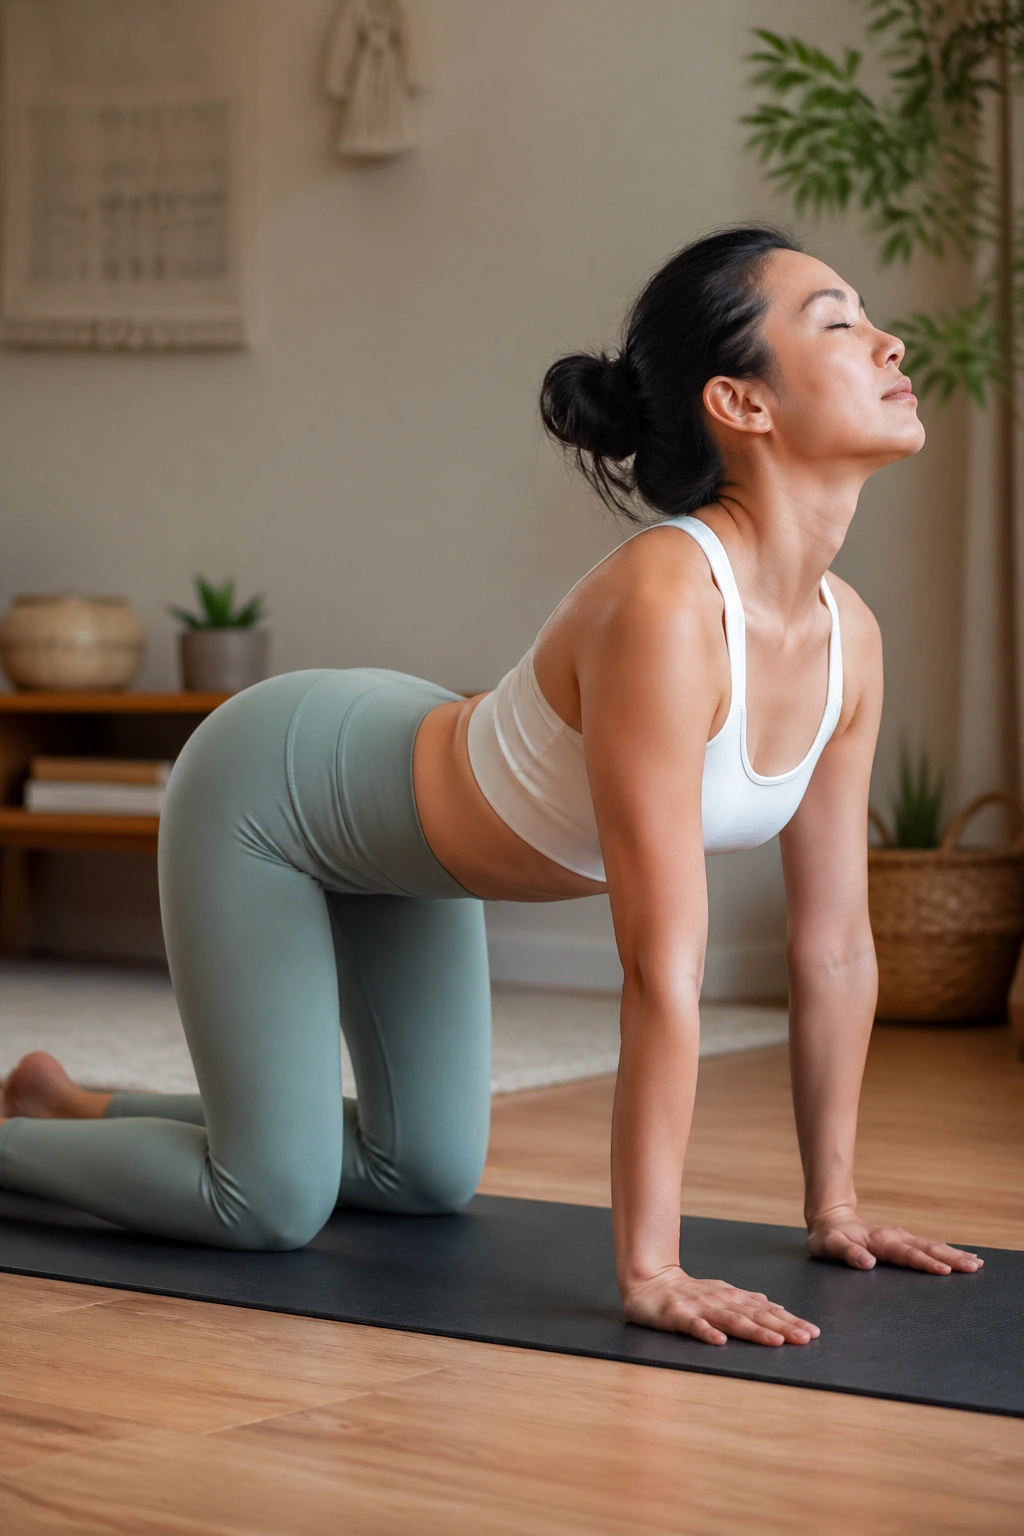
After an hour hunched over a laptop, Cat-Cow is the first thing I’d hand most people. It moves the whole spine, but the upper back and neck get the biggest payoff when you keep the range small and smooth.
Come onto hands and knees with your wrists under your shoulders and your knees under your hips. As you inhale, let the chest open a little and the tailbone lift. As you exhale, round the spine and let the chin tuck slightly. The key is to move like a wave, not a hinge.
A lot of people fling the head back in Cow and then wonder why the neck feels worse. Skip that. Keep the back of the neck long, and let the motion come from the ribs and upper back instead.
Do 6 to 10 slow rounds. If your shoulders are touchy, press the floor away gently and let the shoulder blades glide apart on the exhale. That small shift changes the whole feel of the pose.
4. Thread the Needle for Tight Shoulder Blades
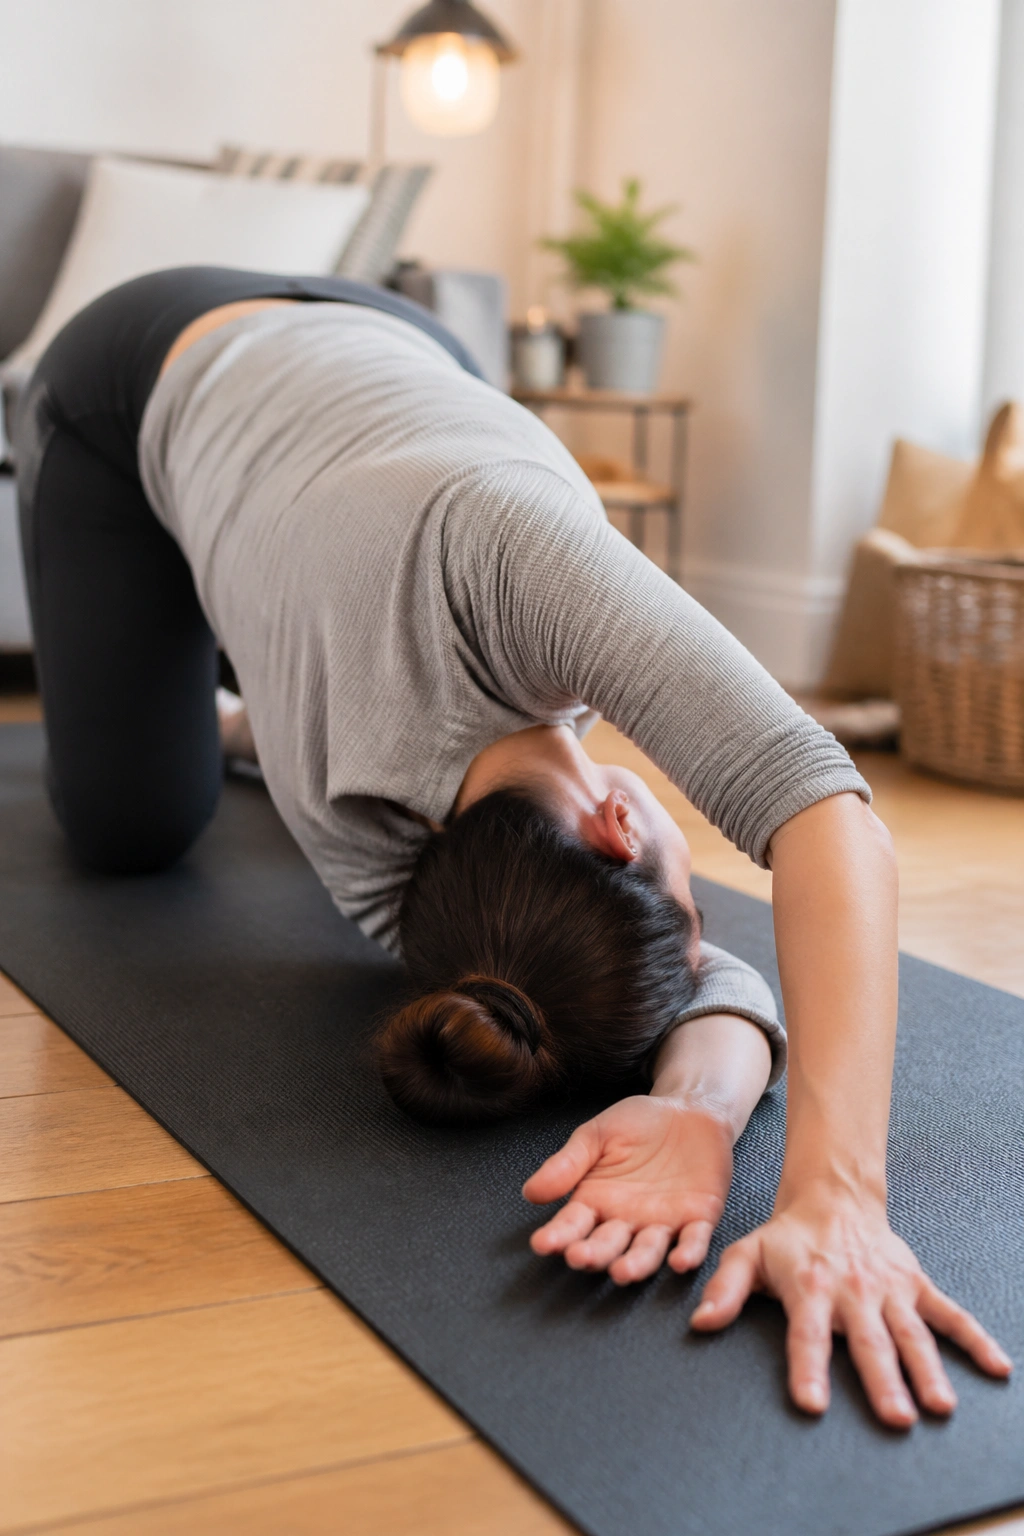
Not every shoulder opener needs to be aggressive. Thread the Needle is one of those rare stretches that can feel deep without feeling bossy.
Start on hands and knees. Slide your right arm under your left arm, palm facing up, and lower your right shoulder and temple toward the floor. Keep your left hand where it is, or walk it forward a few inches if you want a stronger stretch through the upper back. Stay for four to six breaths, then switch sides.
What makes it work
- It opens the back of the shoulder.
- It eases the space between the shoulder blade and spine.
- It encourages the upper back to rotate instead of the neck overworking.
Use a folded blanket under the supporting shoulder or under the head if the floor feels too far away. If your knees complain on hard ground, pad them. Simple fix. No need to suffer for a stretch.
This pose is one I’d use after Cat-Cow because it digs into the spots that usually stay clenched when the shoulders creep upward. You’ll know it’s doing something if your breath slows down by the third exhale.
5. Extended Puppy Pose
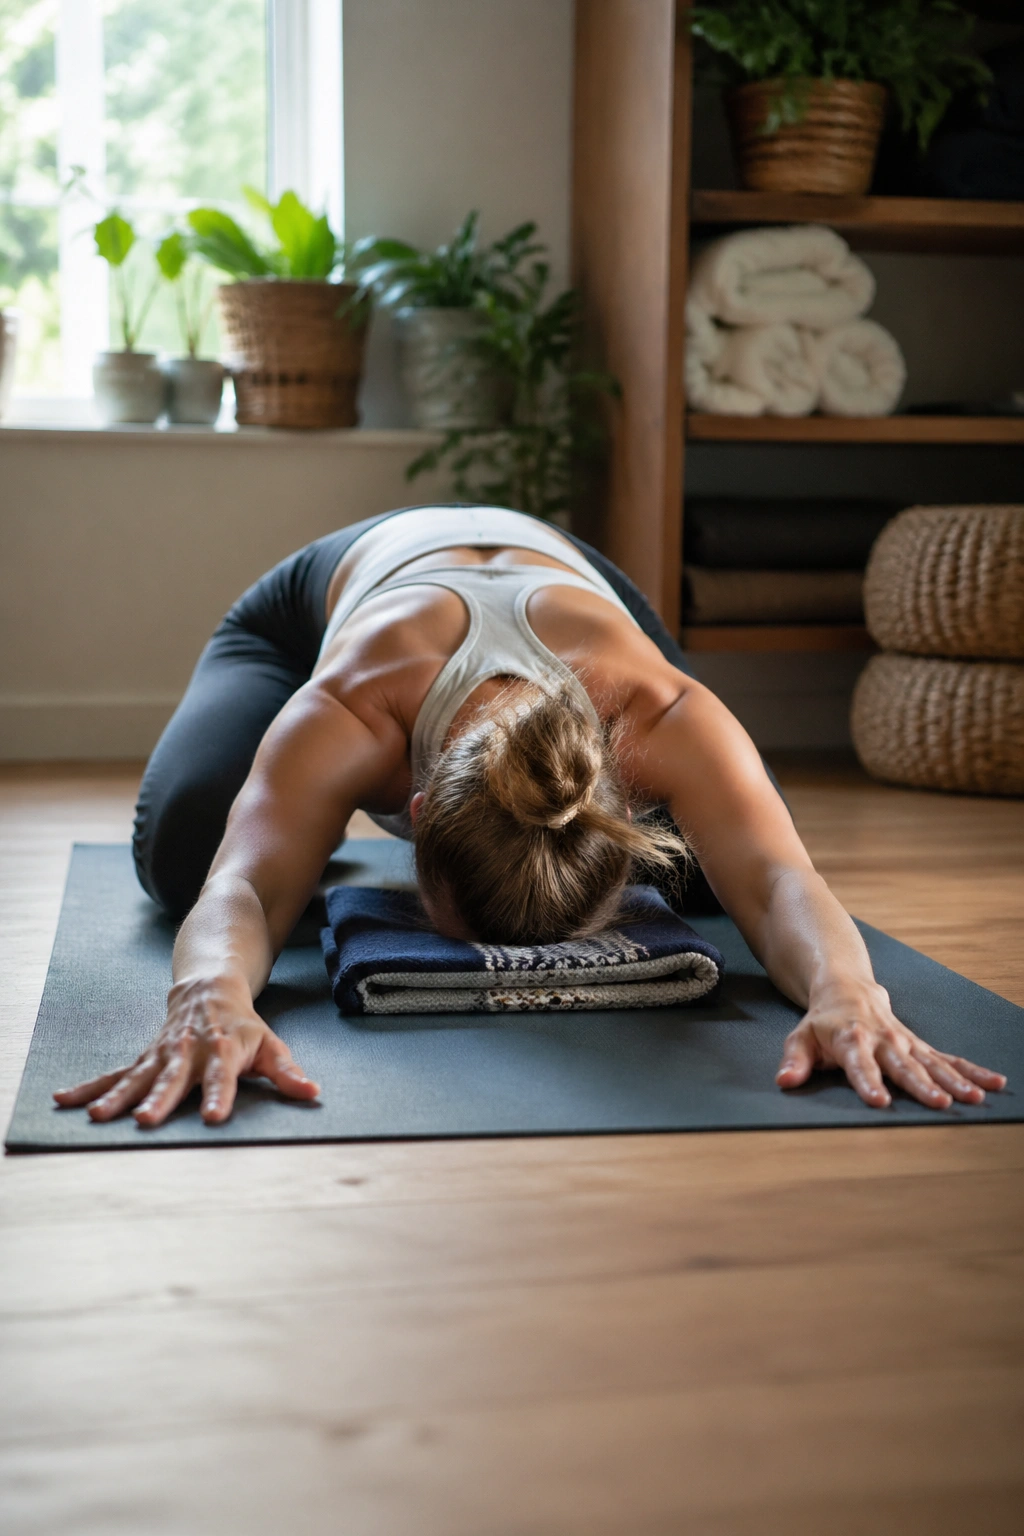
This one looks gentle in photos and then surprises people. Puppy Pose opens the chest, lats, and shoulders all at once, which can be a gift if your upper body has been folded forward for hours.
From hands and knees, walk your hands forward while keeping your hips stacked over your knees. Lower your chest toward the mat or toward a bolster, and let your forehead rest on the floor or a folded blanket. Your ribs will want to drop; let them soften, but don’t collapse into your lower back.
A cleaner setup
- Place a folded blanket under the knees if they’re sensitive.
- Slide a cushion or bolster under the chest if the floor feels too low.
- Keep the elbows straight but not locked.
- Breathe into the sides of the ribs, not just the front.
If the neck feels pinched, raise the forehead or switch to a supported version with the head a little higher. You should feel length, not strain. That distinction matters here more than almost anywhere else on the list.
I use this one carefully with tight shoulders, because it can be a bit much if the upper traps are angry. Short holds work fine. Twenty to thirty seconds is enough on a rough day.
6. Child’s Pose With Side Reach
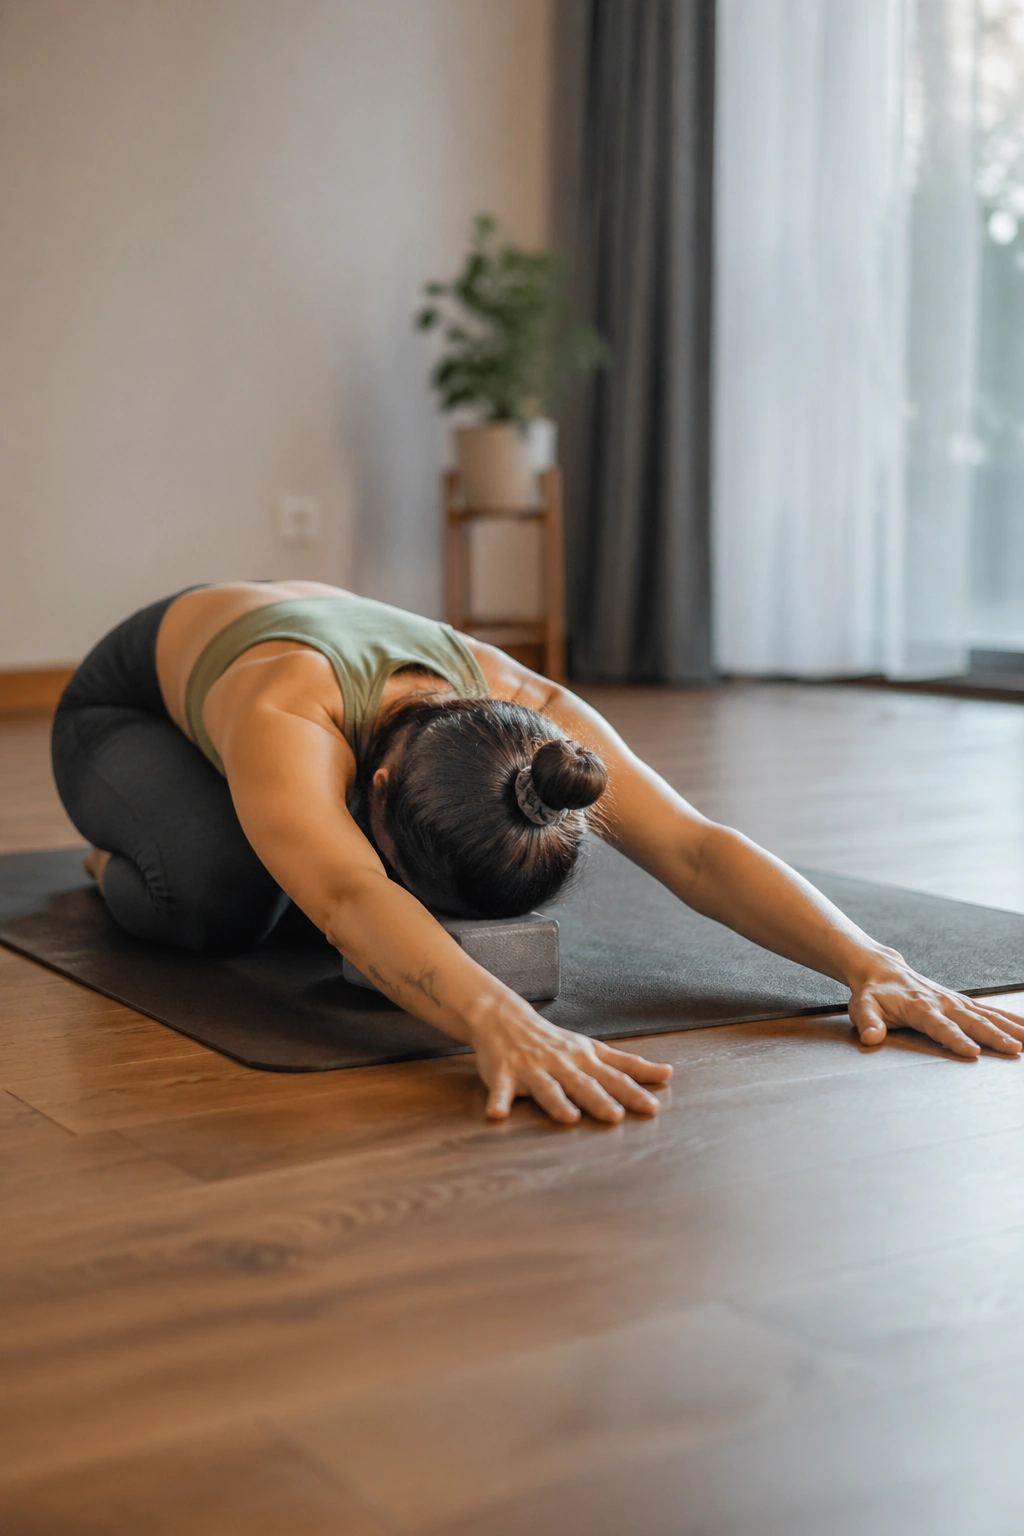
This is the sleeper pose. Tiny shift. Big difference.
From Child’s Pose, walk both hands over to the right while keeping the hips heavy toward the heels. You’ll feel the left side body open from the hip line all the way into the ribs, armpit, and shoulder. Then repeat on the other side. It’s a clean way to loosen the lat and the side of the torso, which often pulls on the shoulder girdle more than people realize.
How to make it kinder
- Put a pillow between the hips and heels if sitting back hurts.
- Stack fists or rest the forehead on a block.
- Keep the hands a little in front of the shoulders if the shoulders feel overloaded.
This is less about depth and more about where the stretch lands. If you aim the hands farther away, the side body gets a stronger pull. If you bring them closer, it softens into a calmer release. Both versions have a place.
A lot of neck tension gets worse when the ribs stop moving. This pose helps reverse that. Slow breathing into the side ribs makes the stretch feel wider, not harder.
7. Sphinx Pose to Wake Up the Upper Back
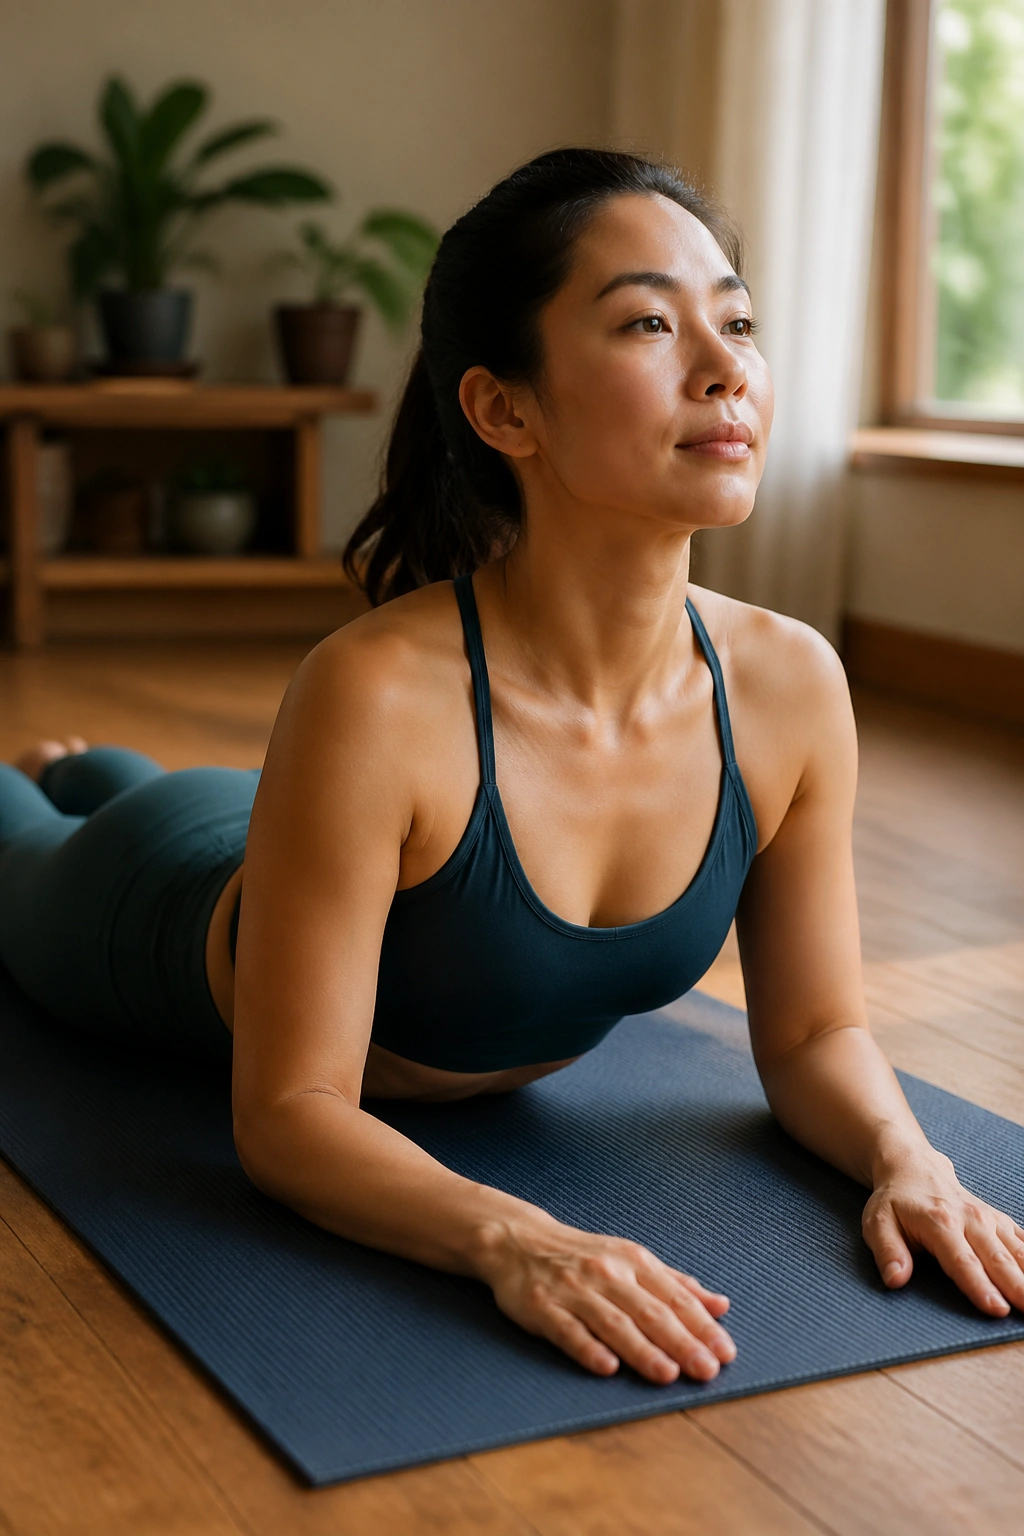
Lie on your belly and let the front of your body do some of the work for a change. Sphinx Pose is mild back extension, and that matters because a rounded upper back often drags the head and shoulders into a miserable position.
Set your elbows under your shoulders or a little in front of them. Press the forearms down, spread the fingers, and gently lift the chest without jamming the low back. Keep the back of the neck long. The gaze should stay a little ahead of the mat, not flung upward.
The feeling here should be broad across the collarbones and upper chest, with a little effort in the muscles between the shoulder blades. If the shoulders shrug toward the ears, back off. If the low back compresses, come down a bit. There’s no prize for forcing height.
Sphinx is one of the better choices when your shoulders ache from slumping because it asks the upper spine to re-engage. That’s the missing piece in a lot of desk-day stiffness. Stretching alone can feel good for ten minutes, then the body slides right back into the same shape. A little strength changes the pattern.
8. Eagle Arms for the Back of the Shoulders
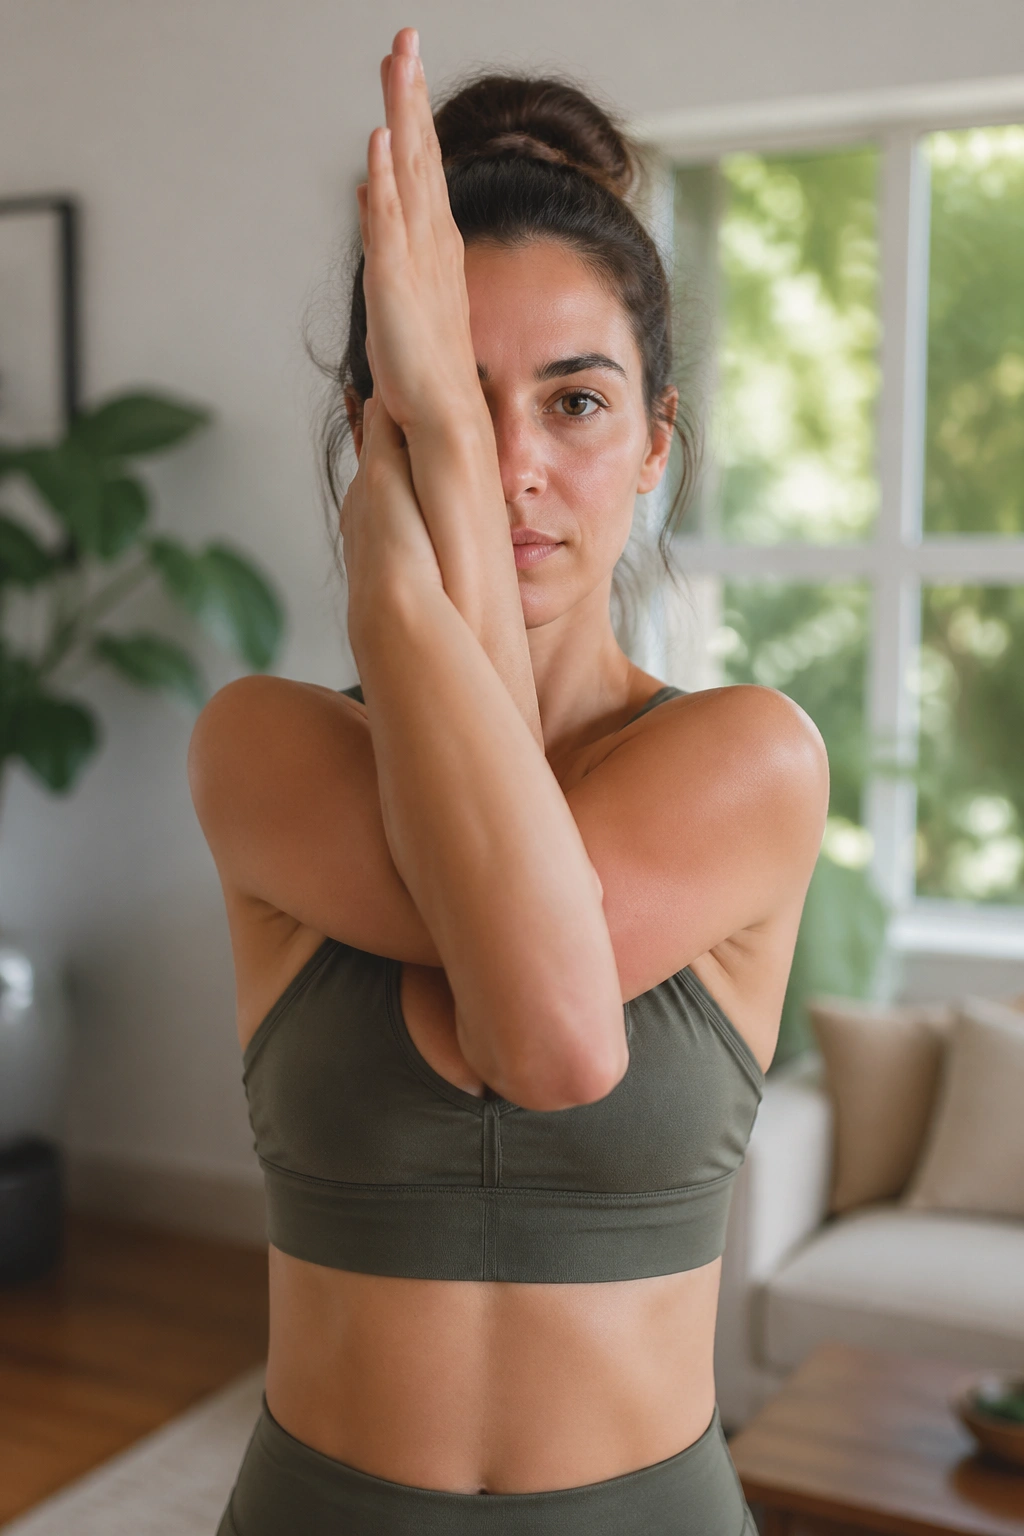
Why does a seated arm wrap help so much? Because it pulls the shoulder blades apart in a controlled way and gives the back of the shoulders a chance to unclench without hanging your whole body weight on a stretch.
Sit or stand tall. Cross your right arm under your left, bend both elbows, and either wrap the forearms or hold opposite shoulders if the full wrap feels cramped. Lift the elbows to about shoulder height and breathe into the space across the upper back. Stay for four to six breaths, then change sides.
How to get the most from it
- Keep the chin level.
- Let the ribs stack over the hips.
- Soften the jaw.
- If the wrists won’t meet, that’s fine.
People get discouraged by the hand position here. Don’t. The shape matters less than the shoulder blades spreading and the upper back settling. A strap between the hands works well, and so does simply hugging the shoulders while lifting the elbows.
This pose is a favorite after a long day of carrying bags, reaching for a steering wheel, or living with tense shoulders up near the ears. It’s small. It’s sneaky. It works.
9. Cow Face Arms for Deep Shoulder Opening
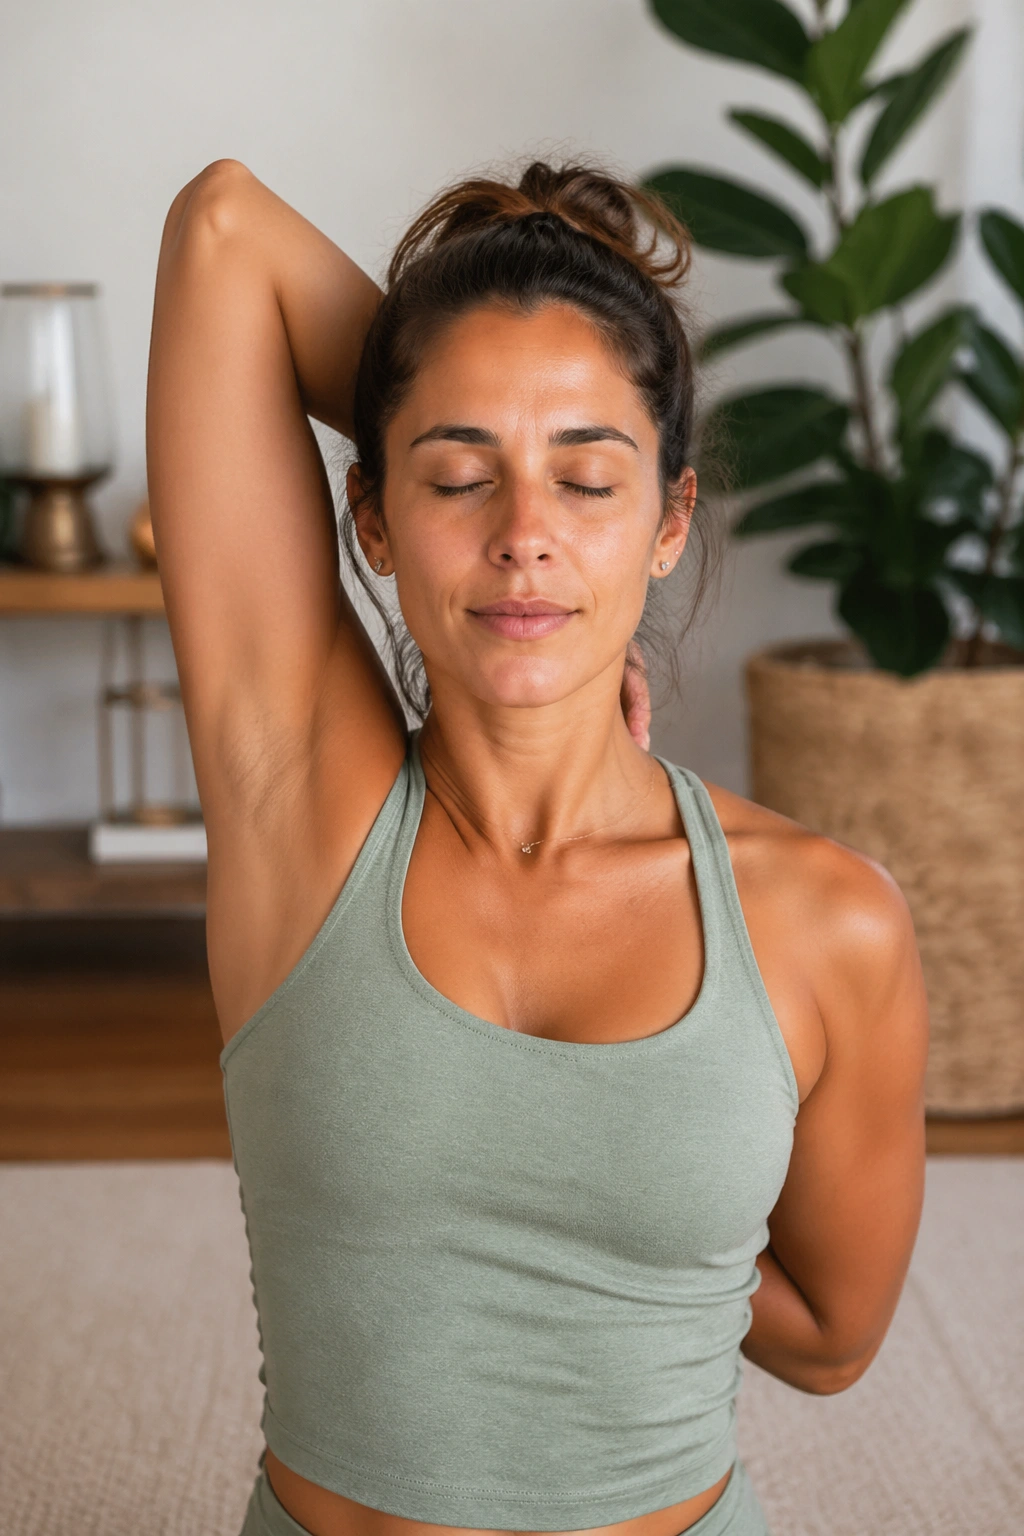
One hand reaching up the back and the other reaching down the spine can feel awkward at first, and that’s normal. Cow Face Arms asks the shoulders to move in a way most daily life never does.
Raise your right elbow overhead, bend it, and let the hand slide down the back. At the same time, turn the left palm back and reach the left hand up the spine. If the fingers meet, great. If they’re miles apart, use a strap or a small towel and stop chasing the bind.
A few things make this one safer. Keep the ribs from flaring, because that fake opening usually just arches the low back. Keep the neck long. And do not yank the top elbow with the other hand in an effort to “get deeper.” That’s how a shoulder gets annoyed.
I like Cow Face Arms in a seated position because the lower body can stay quiet while the shoulders work. If one side feels much tighter, spend a few extra breaths there, but keep the movement polite. The goal is a clean line through the front of the shoulder, not a dramatic win.
10. Standing Forward Fold With Rag Doll Arms
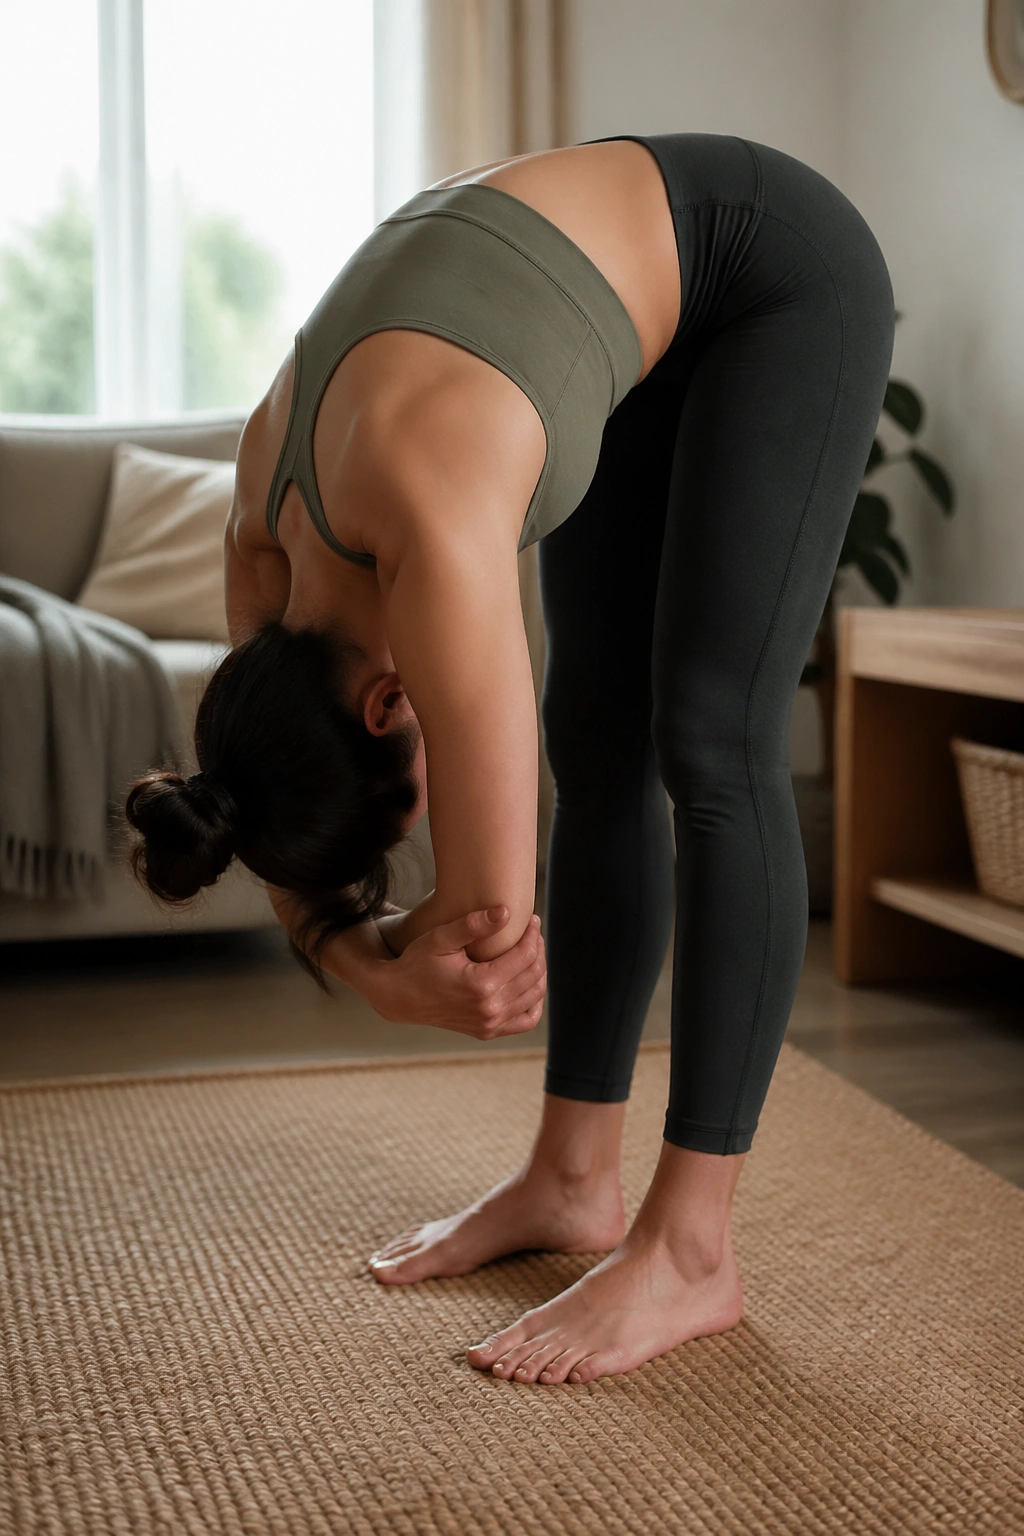
A good forward fold can feel like somebody turned the volume down in the whole upper body. Rag Doll arms make it even better because the shoulders finally stop holding themselves up.
Stand with your feet about hip-width apart, bend your knees generously, and fold forward from the hips. Grab opposite elbows or let the hands dangle toward the floor. Let the head hang. Let the jaw go slack. If a small sway feels good, rock a little from side to side.
A few useful details
- Keep the knees bent as much as you need.
- Don’t lock the legs straight if that rounds the neck.
- Come up slowly if you get dizzy.
- Keep the fold shallow if you have high blood pressure or feel pressure in the head.
This pose isn’t glamorous. Fine. It’s one of the fastest ways to remind the upper back that it can unhook from constant bracing. The longer you stay, the heavier the head seems to feel, and that weight can be a relief.
If you’re tight through the hamstrings, that’s not a failure. Bend the knees more. The benefit here comes from the release in the spine and shoulders, not from touching the floor.
11. Supported Fish Pose for a Tight Chest
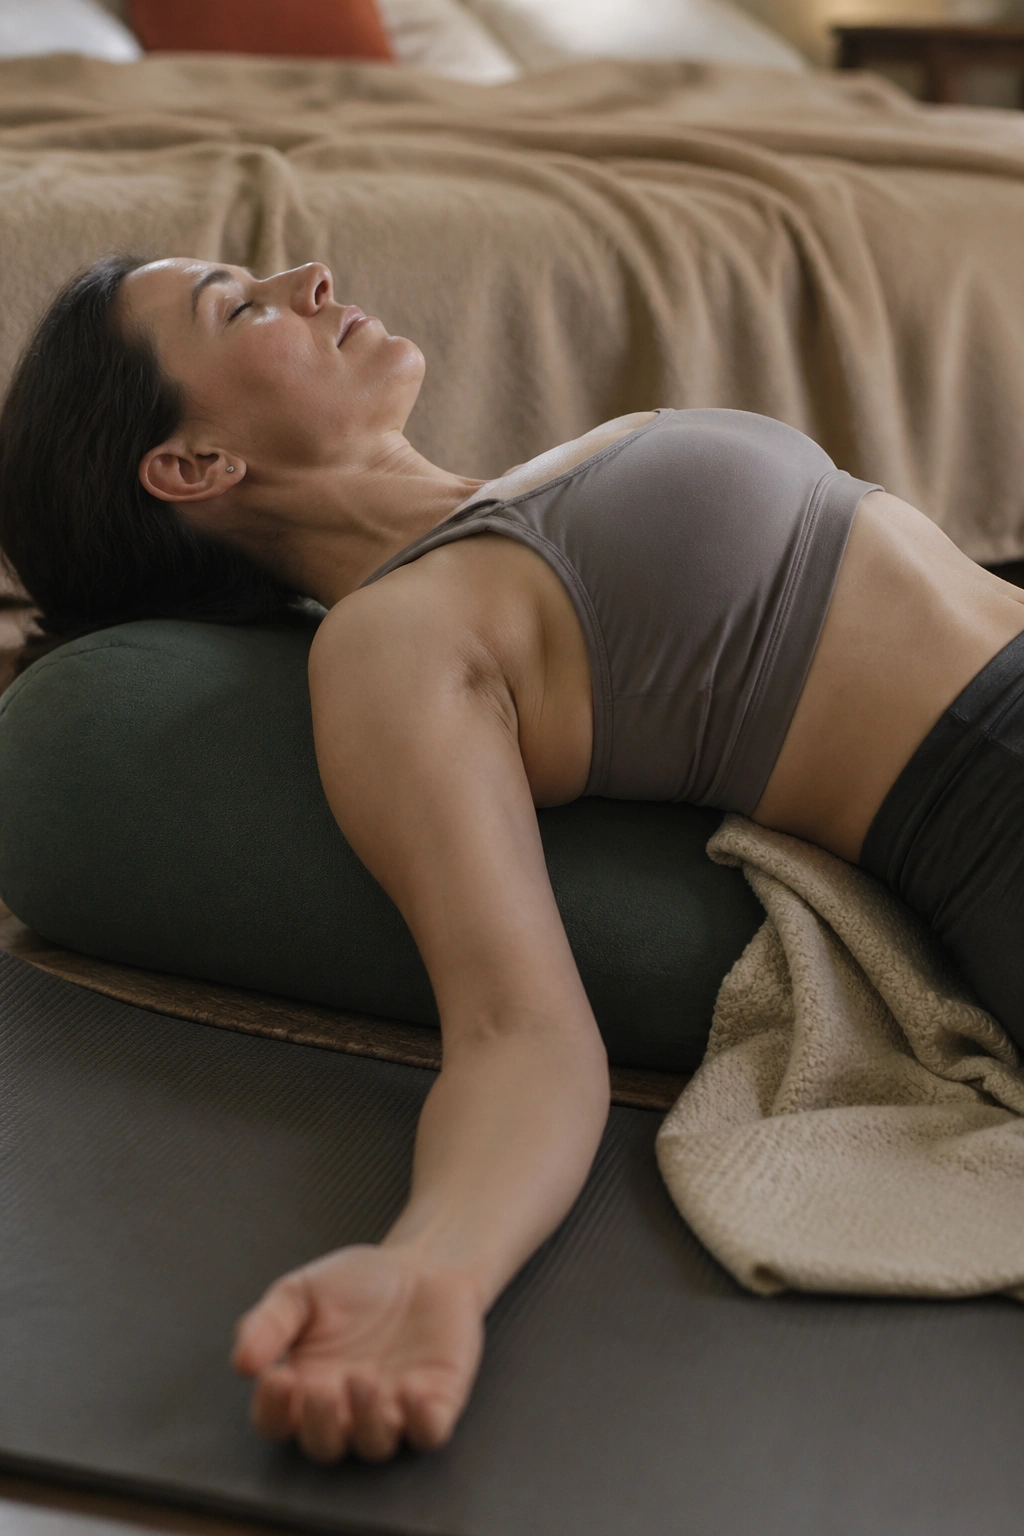
If your shoulders live in front of you, this one earns its spot. Supported Fish Pose opens the front body in a way that feels almost luxurious when it’s set up right, and it can undo a lot of the chest-tight, shoulder-forward posture that feeds neck pain.
Place a bolster or rolled blanket lengthwise under the upper back, with the support running from the low ribs to the back of the head. Let the arms rest out to the sides, palms open. If the neck feels exposed, tuck a folded blanket under the head so the chin isn’t tilting upward.
Setup that saves your neck
- Keep the support under the upper back, not the low back.
- Let the chin stay slightly tucked.
- Spread the collarbones wide.
- Stay for 1 to 3 minutes at first.
This pose can feel almost too open if you’ve been tightly folded forward all day. That’s normal. Start with a low bolster or a single thick blanket instead of building a huge prop tower. The point is a gentle opening across the chest, not a backbend contest.
It’s also one of the better choices for the end of a long session because it lets the front of the body relax while the shoulder blades settle down and widen.
12. Half Downward Dog at the Wall
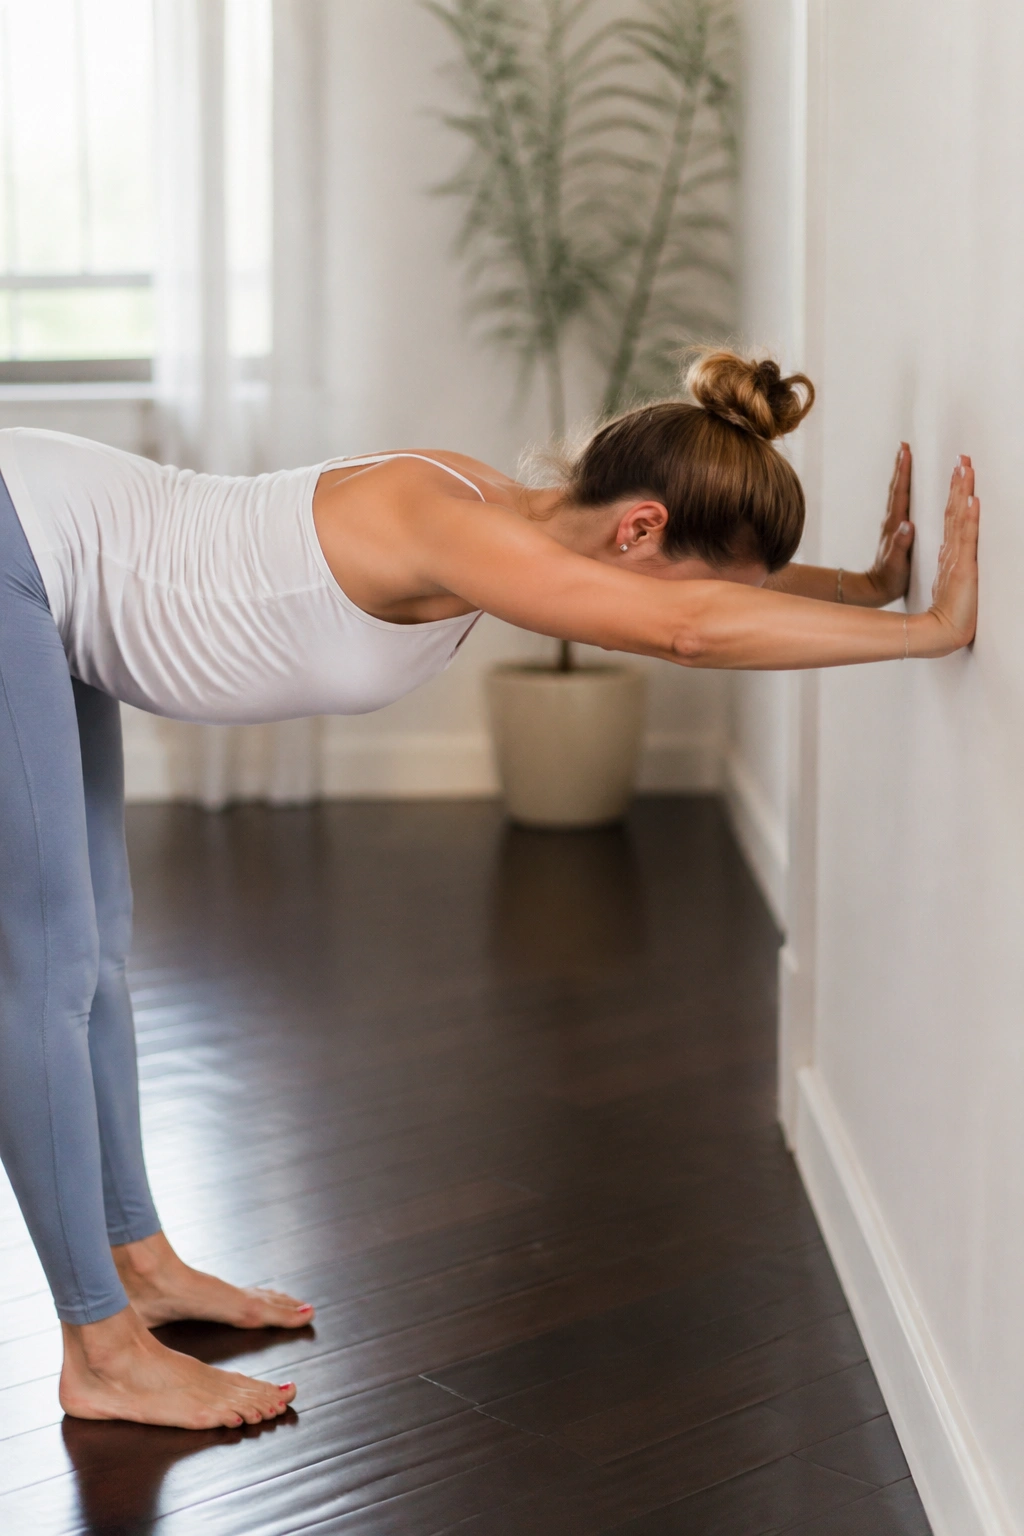
A wall version of Downward Dog is a safer bet when wrists or shoulders feel fussy. You still get the long line through the back body, but without dumping weight into the hands on the floor.
Stand facing a wall and place your hands on it at about hip height. Walk your feet back until your torso creates a long diagonal line. Press the hips back, keep the ribs from flaring, and let the chest melt slightly toward the floor while the shoulders stay away from the ears.
This variation works nicely when the mat version feels too intense. The wall gives you a place to push from, which wakes up the shoulder muscles without overwhelming them. Keep a small bend in the elbows if the joints feel locked. That tiny bend often makes the whole position smoother.
If the neck tends to tighten, keep the gaze a little down and forward rather than craning upward. You’re looking for length from wrists to hips, not a dramatic shape. A minute here can loosen the upper back enough that other poses feel easier afterward.
13. Reverse Prayer or Bound Hands Behind the Back
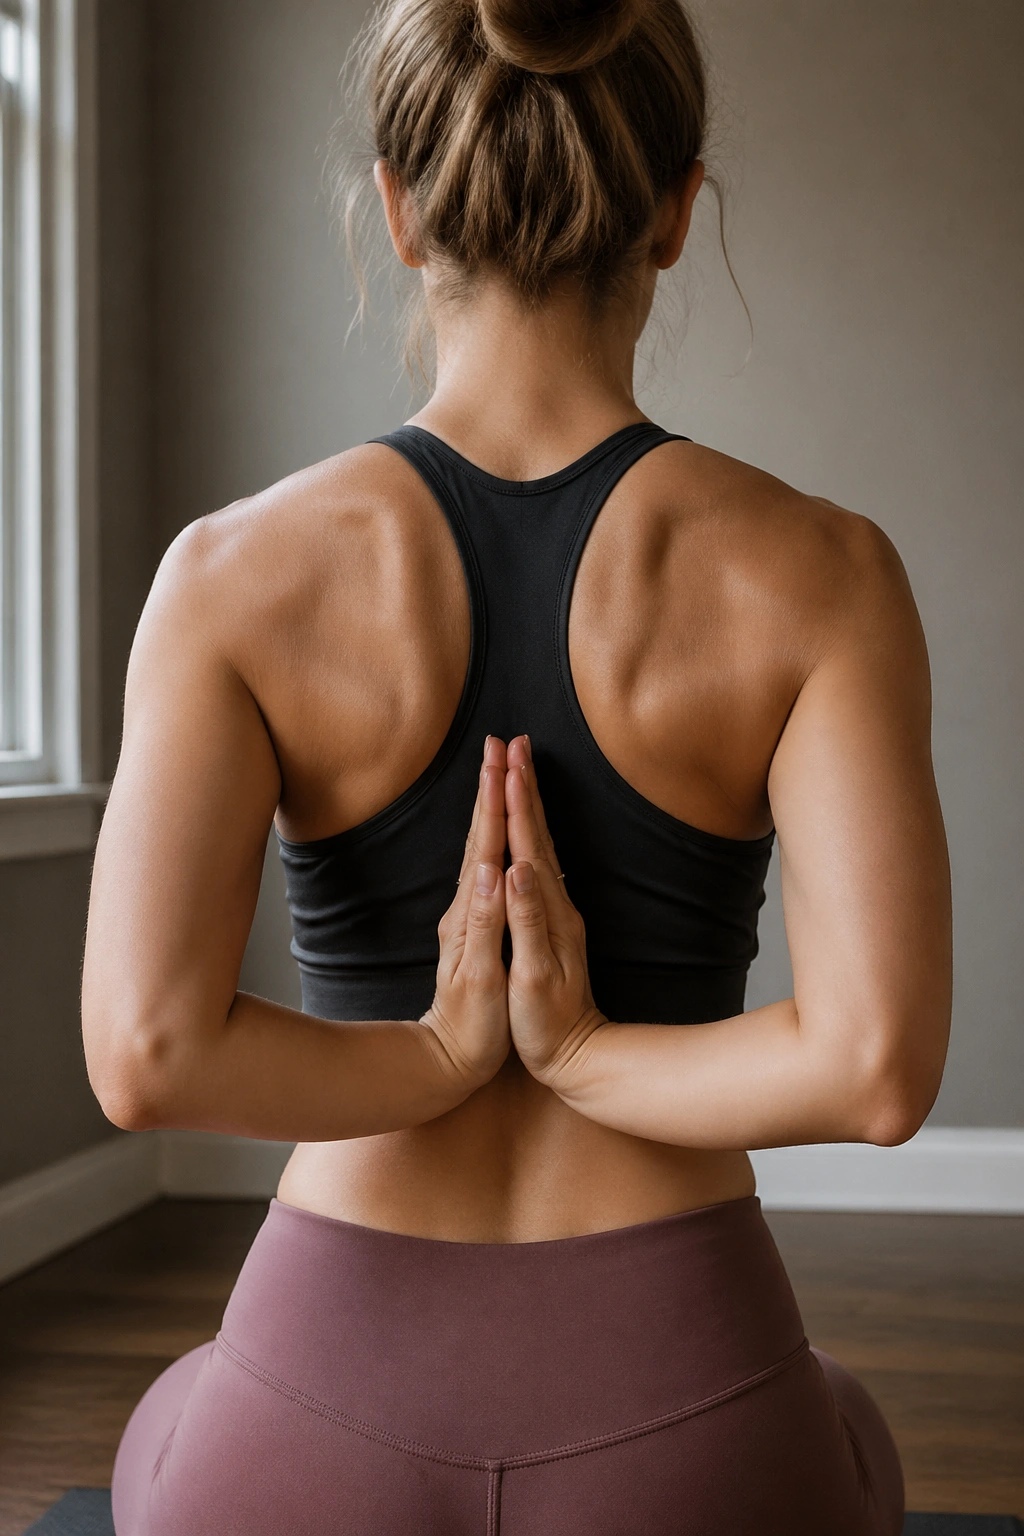
This is the one I avoid when someone is forcing flexibility. Done gently, Reverse Prayer or a simple hand clasp behind the back can open the front of the shoulders and help undo the rounded posture that often sits behind neck pain.
Stand tall or sit upright. Bring the hands behind the body and either press the palms together in reverse prayer or clasp the fingers loosely. If the shoulders won’t cooperate, hold a strap or towel between the hands instead. The chest doesn’t need to pop forward. It just needs a little honest opening.
A few seconds here can feel enough, especially if the shoulders are tight from keyboard work or carrying a lot of tension in the upper chest. Keep the ribs from thrusting forward. Keep the neck long. And if one shoulder pinches, back off and use the easier grip.
This pose pairs well with Eagle Arms because the two shapes work the shoulders in opposite directions. One gathers the back of the shoulders; the other opens the front. That balance matters more than chasing a deep bind that your body is not ready for.
14. Supine Twist With Neck Neutral
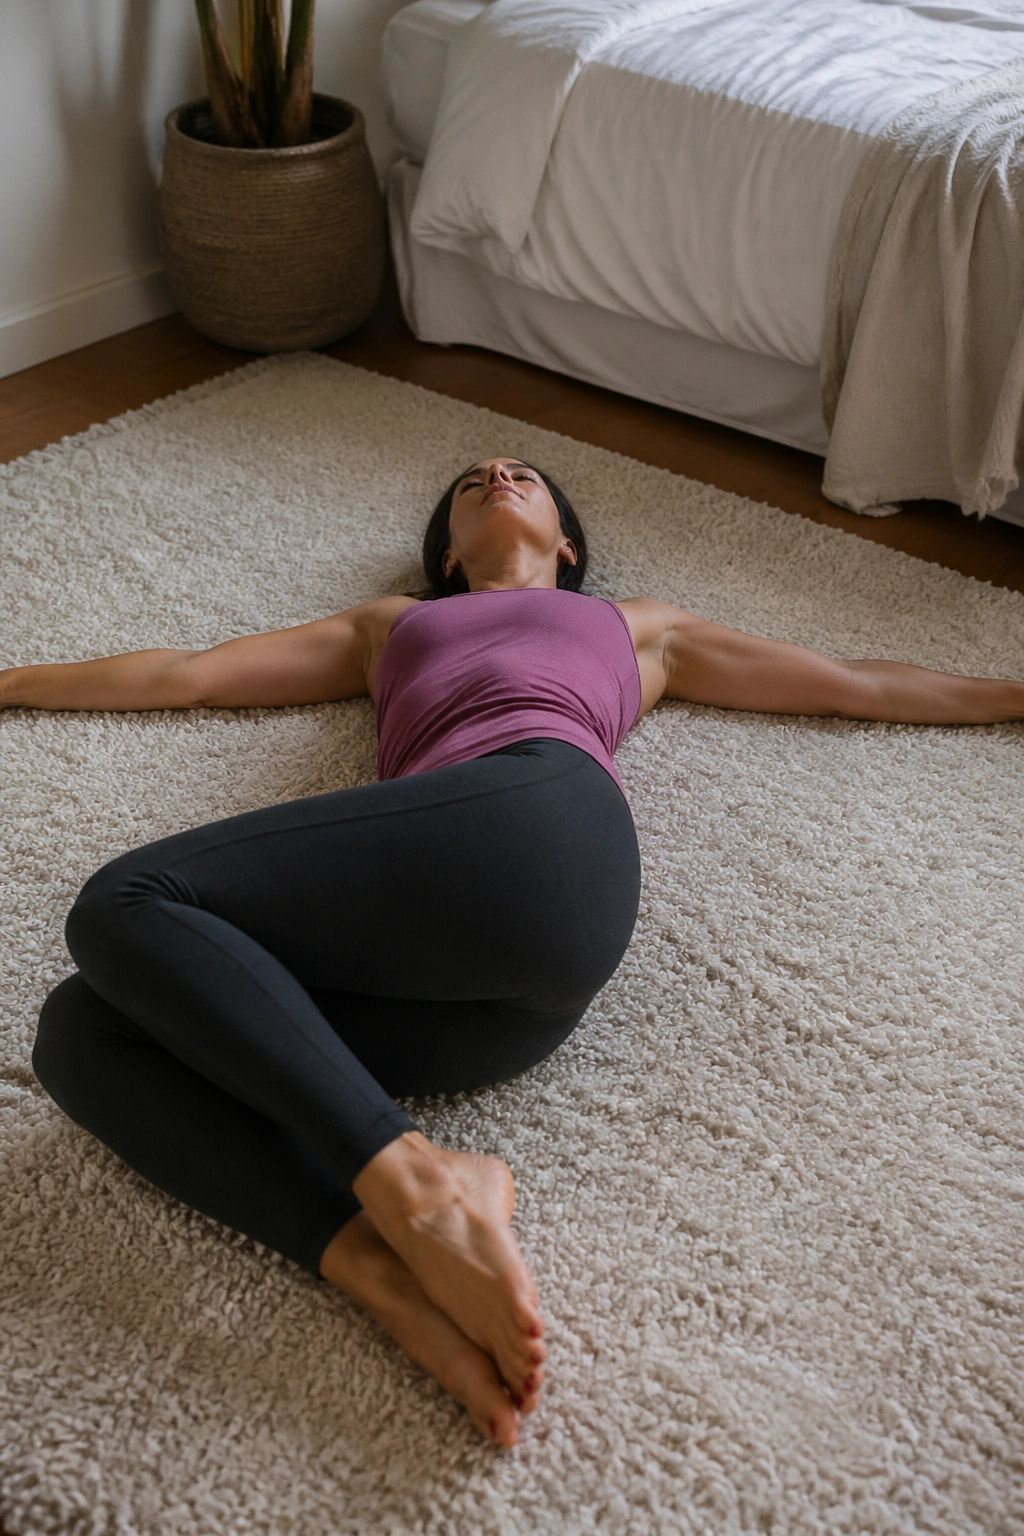
A twist should unwind you, not wring your neck.
Lie on your back and bring both knees toward your chest. Drop them gently to one side while keeping the opposite shoulder heavy on the floor. Put a pillow between the knees if the low back feels cranky, and let the head stay centered or turn only a little. A huge neck turn is not necessary here.
The useful part is the slow release across the upper back and the sides of the ribs. If your shoulders stay tight, widen the arms into a cactus shape. That often helps the chest settle and gives the shoulder blades a place to land.
I like this pose near the end of a sequence because it feels like a reset without asking for effort. You breathe. You soften. The body takes the hint. Hold each side for five to eight breaths, or longer if it feels clean and calm.
If a twist ever makes the neck feel pinched, skip the head turn and keep the face looking up. That small adjustment fixes more problems than people expect.
15. Legs-Up-the-Wall With Neck Support
When the whole upper body feels lit up, this is the finish I trust. Legs-Up-the-Wall sounds like a lower-body pose, but it does a sneaky amount of work for the neck and shoulders because it gives the nervous system a chance to stop bracing.
Sit sideways next to a wall, swing your legs up, and lie back with your hips a comfortable distance from the wall. If your hamstrings are tight, move farther out. If your lower back wants more support, place a folded blanket or thin cushion under the hips. For the neck, a small folded towel under the head can make a huge difference if you tend to crane upward.
A calm way to finish
- Rest the arms out wide if that feels good.
- Keep the jaw loose.
- Breathe into the belly and lower ribs.
- Stay for 5 to 15 minutes.
This pose is the one I reach for after a day of holding my shoulders somewhere near my ears. There’s no stretching contest here. Just a long, quiet exhale and enough support that the body stops arguing.
If you only have five minutes, take five. If you have more, stay longer and let the heaviness settle through the shoulders, the jaw, and the back of the neck. Quiet wins here. That’s the whole point.
