



A body that feels stiff, jumpy, or oddly heavy does not need punishment. It needs a few honest shapes that teach it how to stack, breathe, and let go without falling apart.
That is where yoga earns its keep. A solid practice can build leg strength, wake up the back line, calm a clenched jaw, and make the breath feel less shallow — all in the same 20 minutes.
These 22 yoga exercises for a stronger calmer body are not flashy, and that is the point. Some ask the thighs to work; others drain the static out of the hips, the lower back, and the ribs. The mix matters more than any single pose.
Start with the one that feels least threatening. Your body will tell you what comes next.
1. Mountain Pose
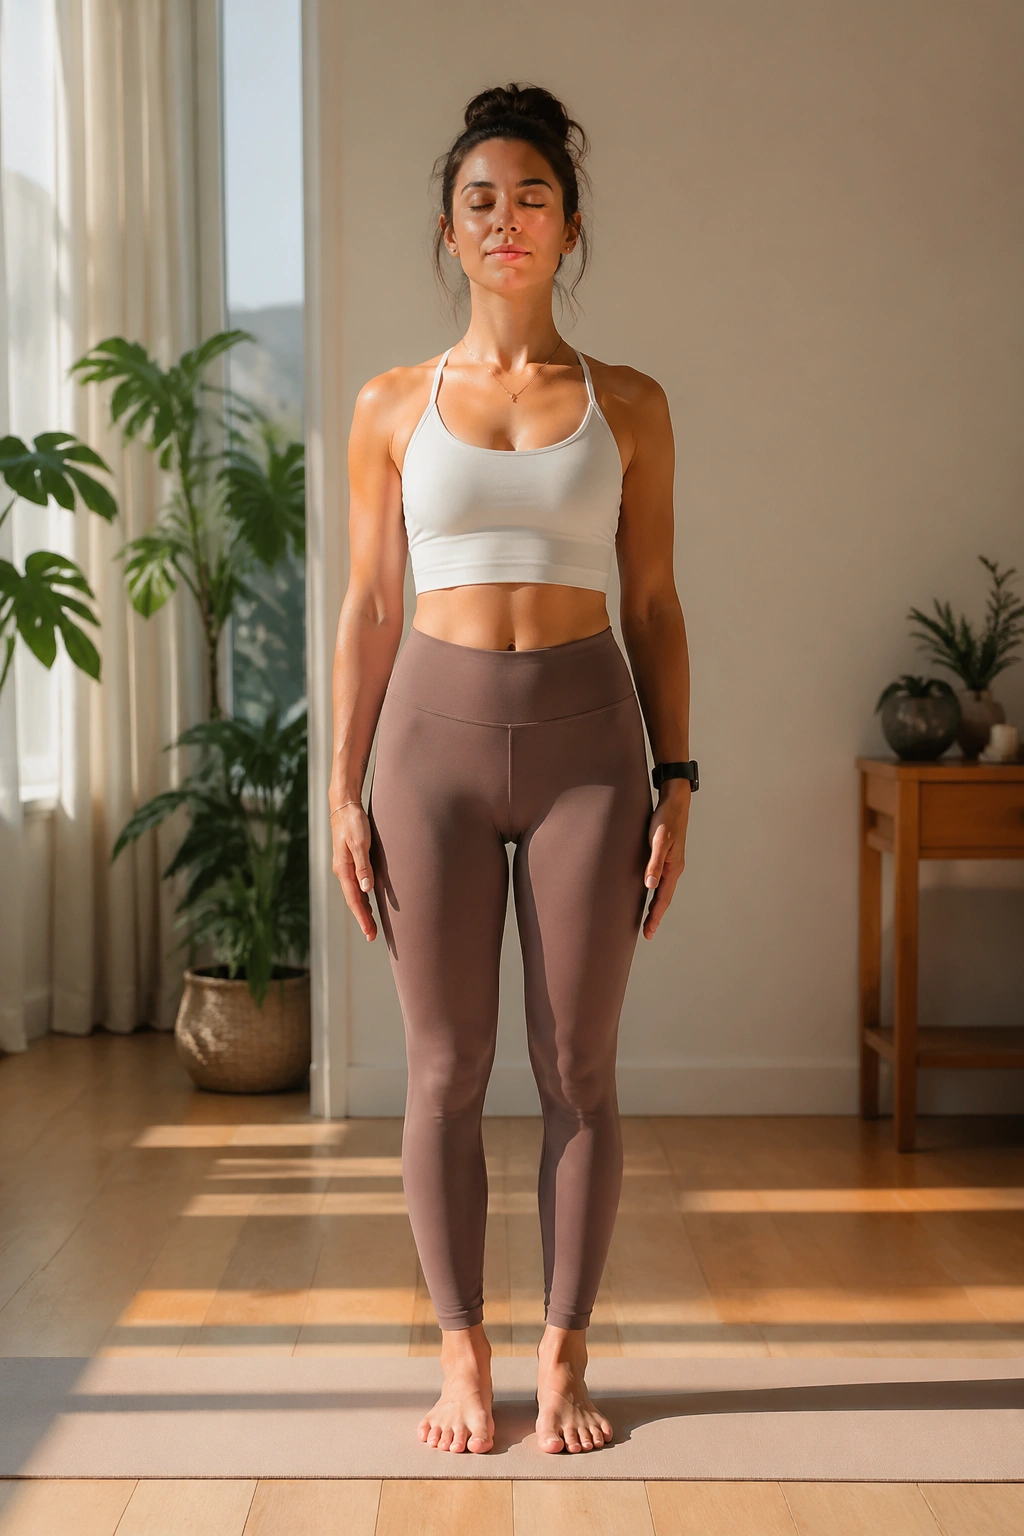
Mountain Pose looks simple because it is simple. That does not make it easy. Standing still with clean alignment is one of the fastest ways to notice where you habitually grip — the jaw, the toes, the lower belly, even the back of the knees.
Set your feet hip-width apart or together, whichever helps you stand without wobbling. Press down through the big toe mound, little toe mound, and heel on each foot, then lengthen up through the crown of the head. Let the ribs settle over the pelvis instead of flaring forward.
What to Feel in the Feet
- The weight should feel even, not dumped into the heels.
- The arches should be alive, not collapsed.
- The knees stay soft, not locked.
- The neck feels long, like someone gently pulled the top of your head upward.
A wall can help if you tend to arch your lower back. Stand with your shoulders, hips, and heels lightly touching it, then peel yourself away from the wall without losing that tall, quiet shape. That little bit of self-check often teaches more than a hundred rushed sun salutations.
2. Cat-Cow
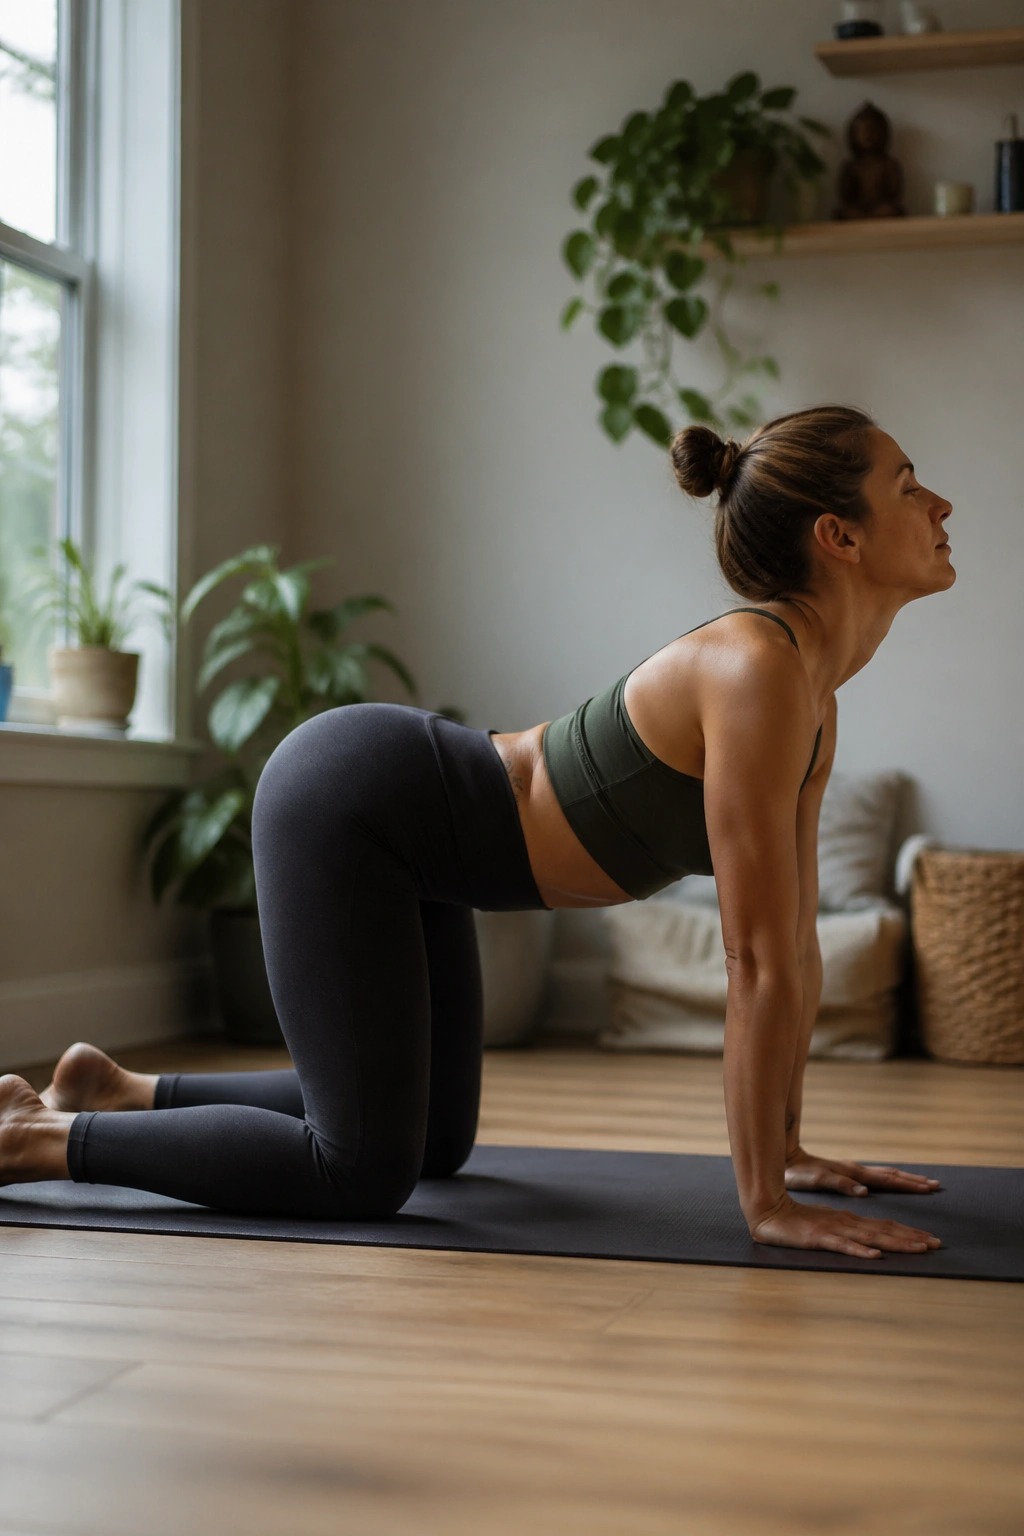
Why does cat-cow make a stiff back feel more usable? Because it gives the spine permission to move in both directions without asking for heroics. A lot of people live in one shape all day — rounded forward, chest collapsed, hips pinched — and the body starts to defend that pattern.
Come to hands and knees with wrists under shoulders and knees under hips. Inhale into cow, letting the tailbone tip up and the chest slide forward a little. Exhale into cat, drawing the belly up and letting the spine round from tailbone to neck.
How the Breath Drives the Motion
- Inhale to widen the front ribs.
- Exhale to knit the front ribs back in.
- Move slowly enough that the breath leads.
- Keep the elbows soft, not jammed straight.
Small circles matter here. Big, dramatic waves can feel satisfying for about twelve seconds, then they start pulling on the lower back. If your wrists are cranky, put your hands on blocks or make fists on the floor. The shape should feel like a conversation, not a fight.
3. Downward-Facing Dog
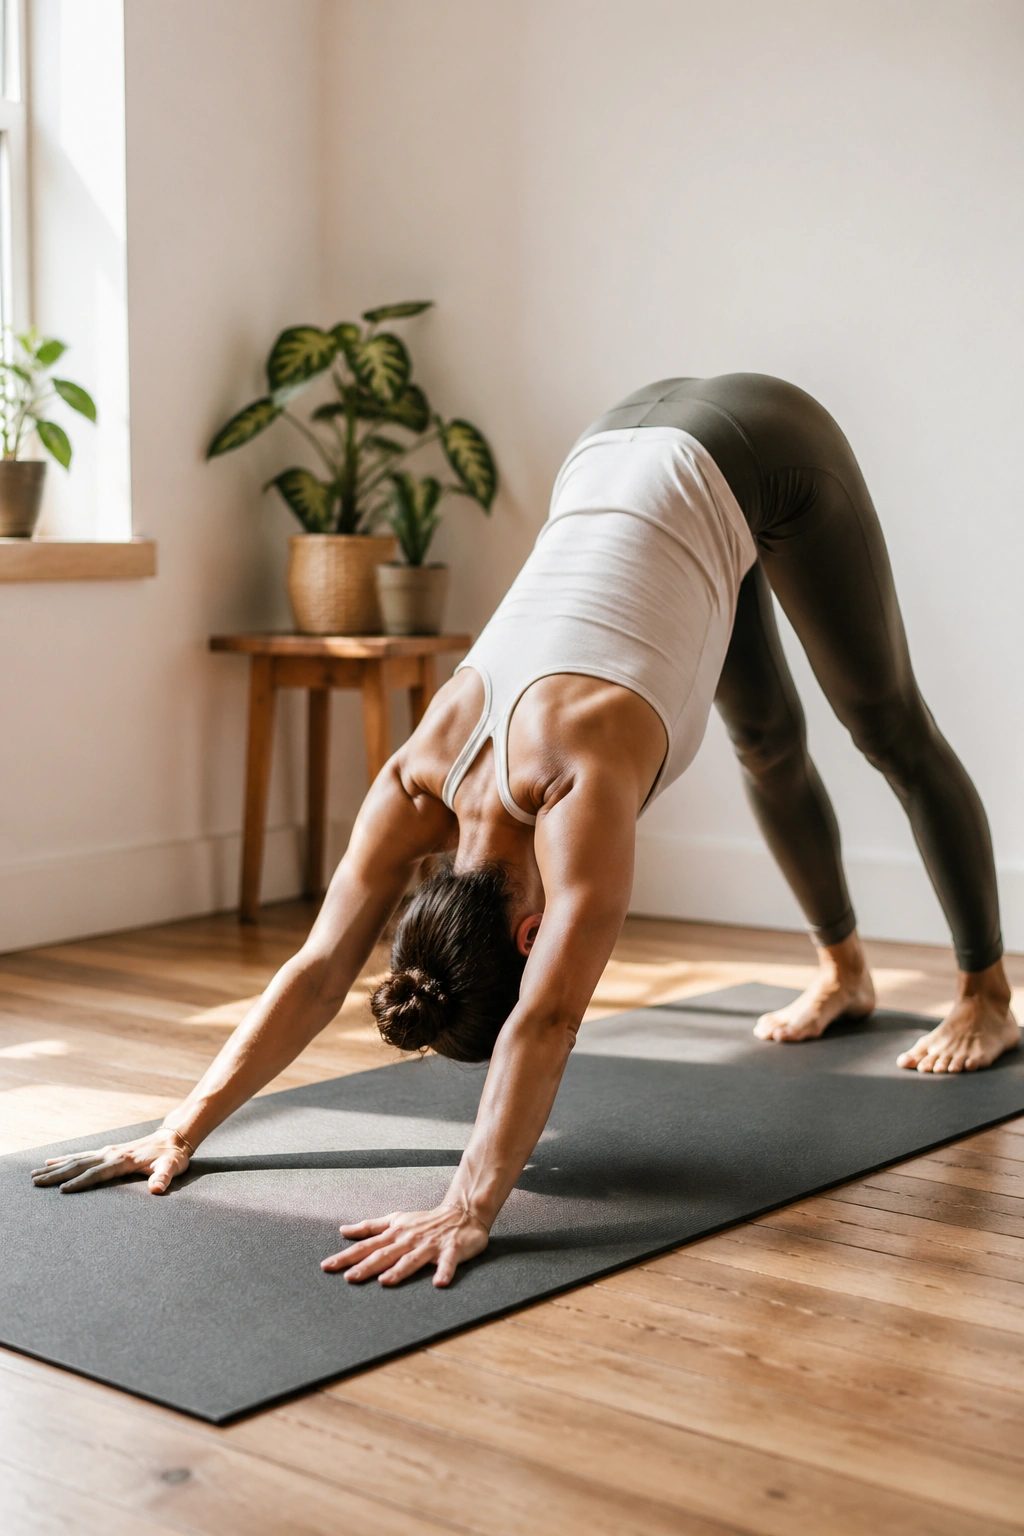
After a long day at a desk, downward dog often feels like a much-needed reset. The hips lift, the spine lengthens, and the whole back body gets a long, clean line from hands to tailbone. That line is what makes the pose feel both strong and calming.
Place your hands shoulder-width apart and step your feet back until you can make an upside-down V. Bend your knees as much as you need; straight legs are optional. What matters is that you press the floor away and let the spine lengthen before worrying about the heels.
Your shoulders should not be creeping into your ears. Push the mat away, widen across the upper back, and keep a tiny bend in the elbows if they tend to lock. That small bend is often the difference between a usable dog and a strained one.
I like this pose best when it feels roomy rather than aggressive. If your hamstrings tug, pedal the feet a little, bend one knee, then the other, and let the heels settle wherever they land.
4. Standing Forward Fold
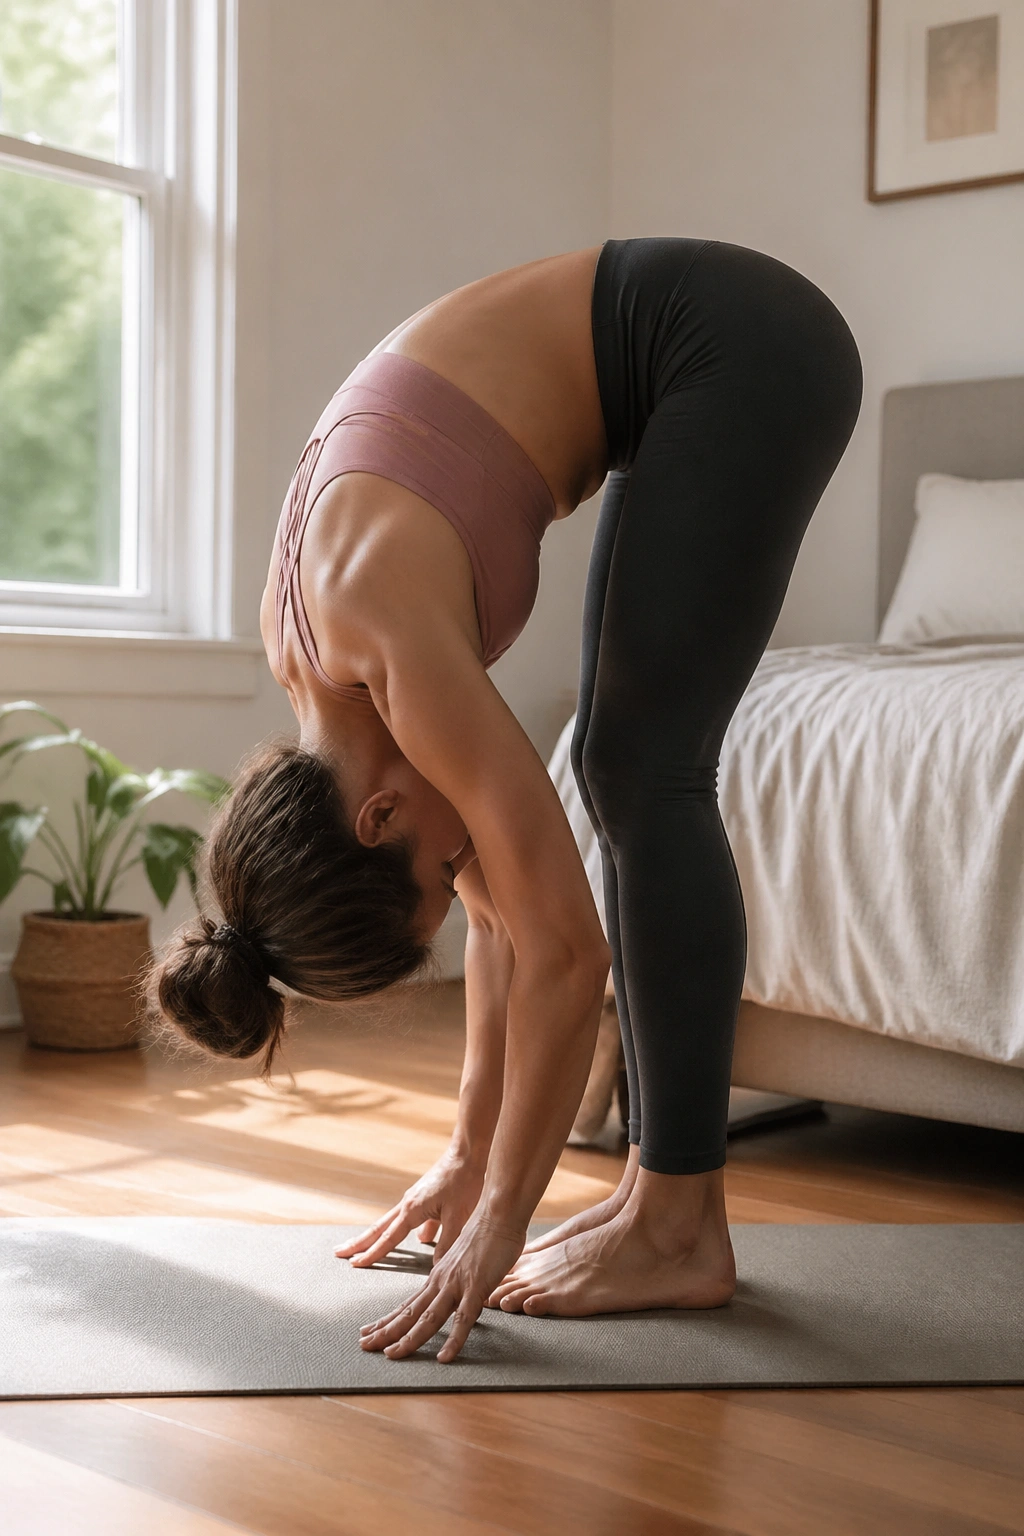
A forward fold does not need straight legs. In fact, forcing them straight is usually the fastest way to turn the stretch into a hamstring argument. Bent knees are not cheating. They are smart.
Start standing, then hinge at the hips and fold over your thighs. Let the head hang heavy, and keep enough bend in the knees that your lower back can release. You can hold opposite elbows if that feels better than reaching for the floor.
Bent Knees Are Allowed
A lot of people try to get lower by locking the knees and rounding the spine. That looks deep, but it usually steals the benefit from the hamstrings and sends the strain into the back of the knees. A soft knee gives you more room to fold from the hips.
If your hands do not reach the floor, place blocks under them. That gives the spine a cleaner line and keeps the fold from turning into a slump. The whole point is to let the upper body drop, not to win some imaginary contest.
Stay for a few breaths and notice the change in your face. The jaw often softens before anything else does.
5. Low Lunge
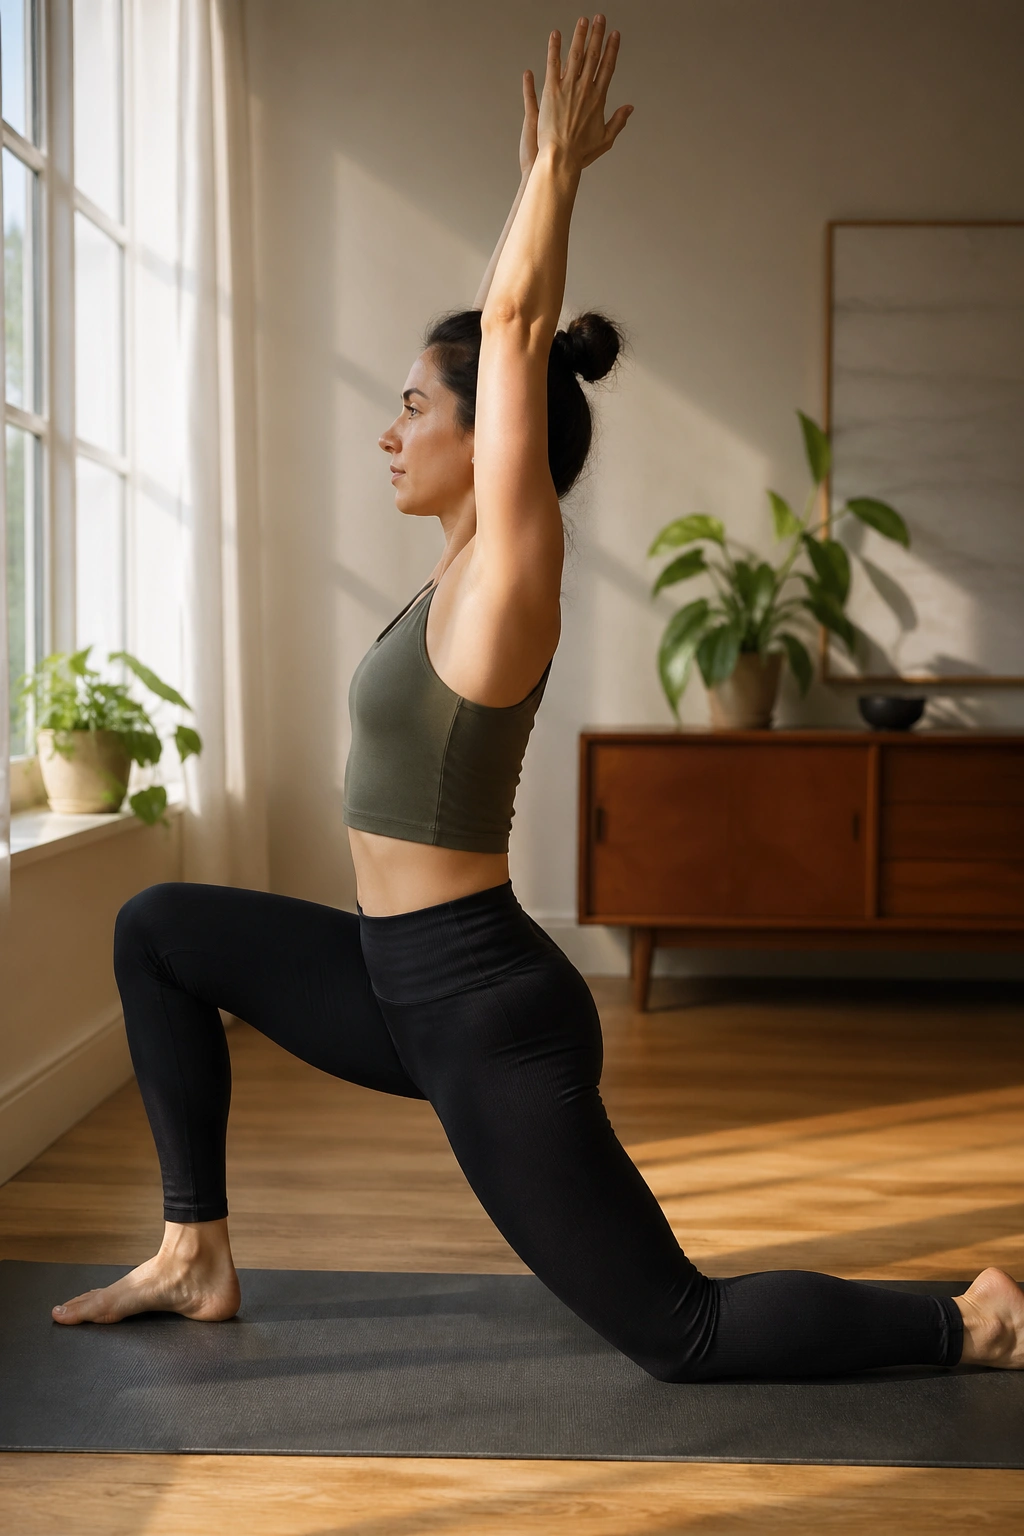
Drop into low lunge with the back knee down first. It is the safest way to enter the pose and the easiest way to keep the front hip honest. The stretch lands in the front of the back leg, where the hip flexors tend to shorten after too much sitting.
Stack the front knee over the ankle, then inch the hips forward only as far as you can keep your ribs from flaring. Squeeze the back glute gently. That tiny action helps open the front of the hip without dumping into the lower spine.
You can keep both hands on blocks, on the front thigh, or lift the arms overhead if that feels steady. I prefer blocks when the body is still waking up. They give you a place to land without collapsing.
Feel the back foot press into the mat. The pose gets stronger when the back leg is awake, not when the front hip is shoved forward like a drawer that does not fit.
6. Warrior II
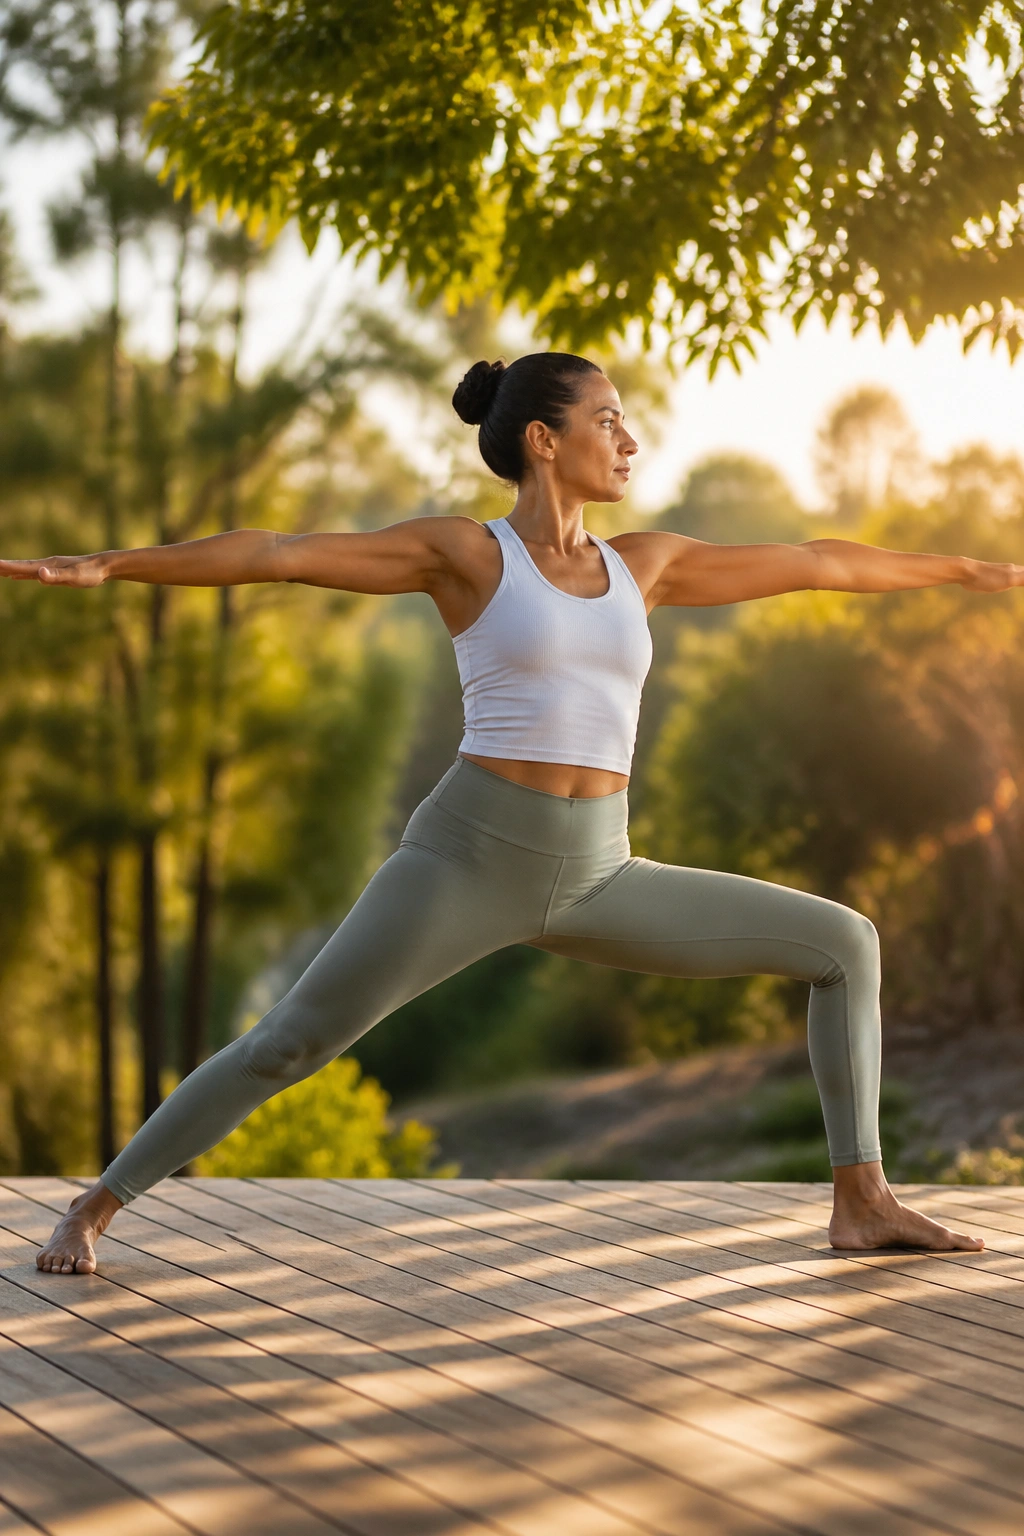
If your legs shake in Warrior II, that is the point. The pose asks for endurance, and endurance never arrives looking neat. It builds in small, slightly unpleasant doses.
Step the feet wide, turn the front toes forward, and angle the back foot in just a touch. Bend the front knee so it tracks over the second toe, then spread the arms out to a long line. The pelvis stays broad, not twisted toward the front leg.
- Front knee tracks over the middle toes.
- Back foot presses down through the outer edge.
- Arms stay parallel to the floor.
- Shoulders drop away from the ears.
- Gaze stays soft over the front hand.
Hold for five to eight breaths and notice where the work lands. Usually it shows up in the outer hip of the back leg, the front thigh, and the muscles between the shoulder blades. If the shoulders start climbing, lower the arms for a breath or two. That is not a failure. That is pacing.
7. Triangle Pose
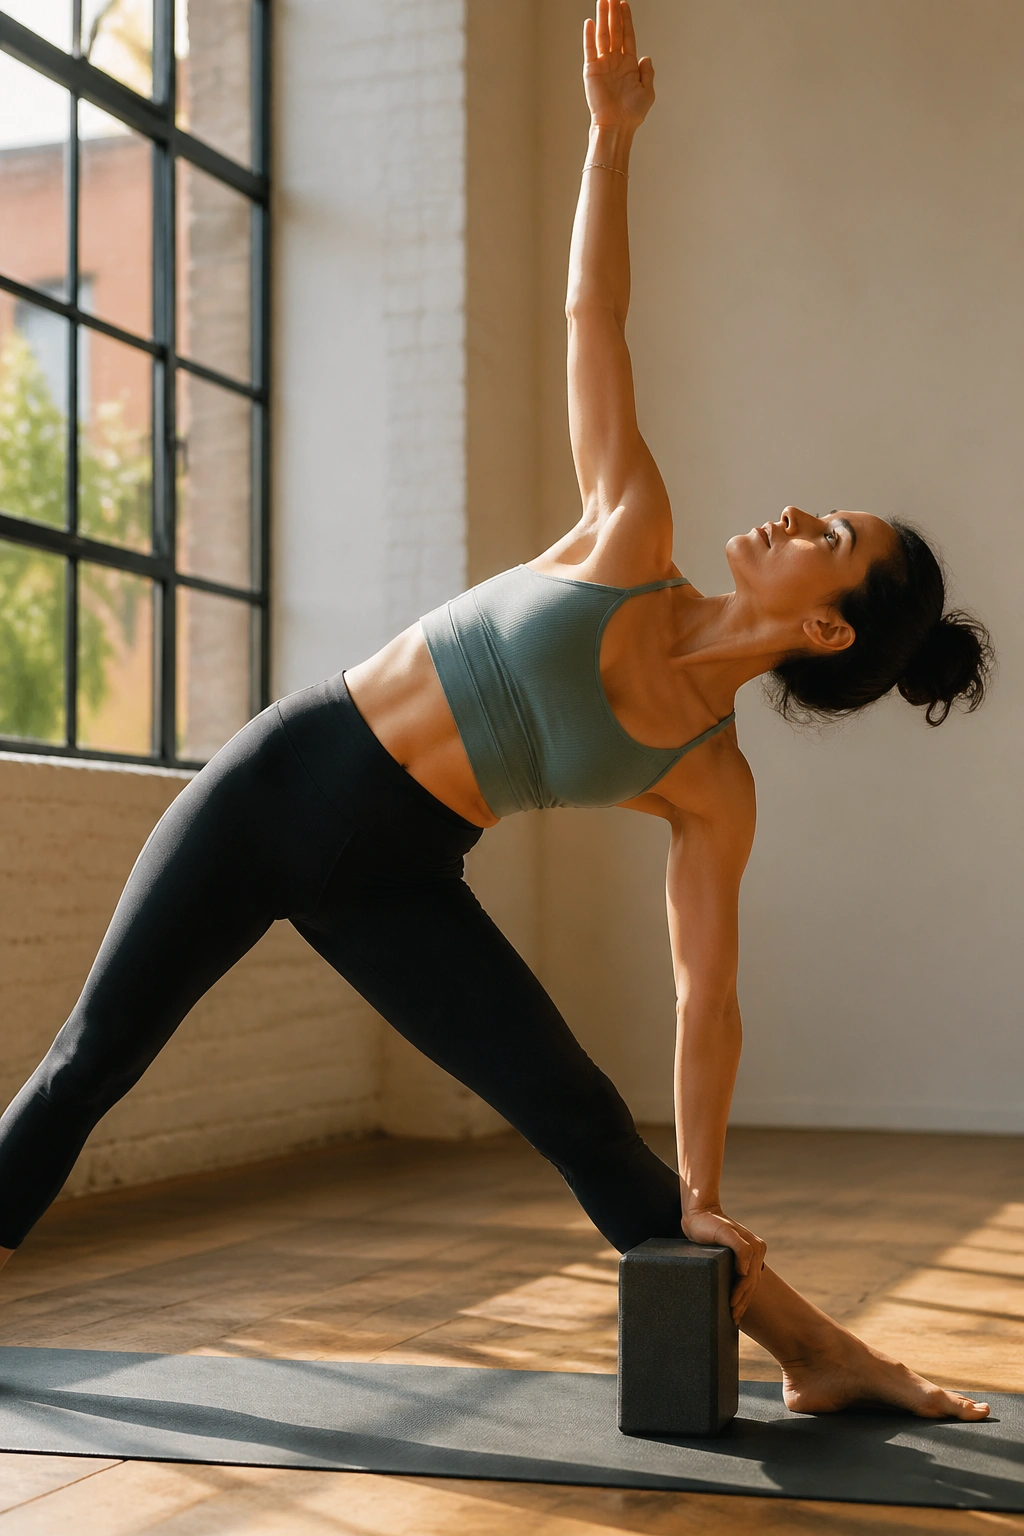
Why does triangle feel so different from side bending? Because it asks for length before depth. If you reach straight down too quickly, the pose collapses into the lower back or the bottom waist. If you make space first, it feels cleaner.
Start in a wide stance, then tip the torso over the front leg while keeping both sides of the waist long. Rest the lower hand on a block, on the shin, or on the floor only if the floor is actually there for you. The top arm reaches up without dragging the chest forward.
Use a Block
A block under the lower hand is not a beginner trick. It is a better shape for many bodies. It keeps the chest open, saves the hamstrings from a strain grab, and makes the twist in the rib cage easier to feel.
Look up only if your neck likes that position. I usually prefer a soft gaze straight ahead or down at the floor. The neck should feel like part of the pose, not a separate problem.
Triangle rewards patience. Hold the line, breathe into the side ribs, and let the pose become wide instead of deep.
8. Chair Pose
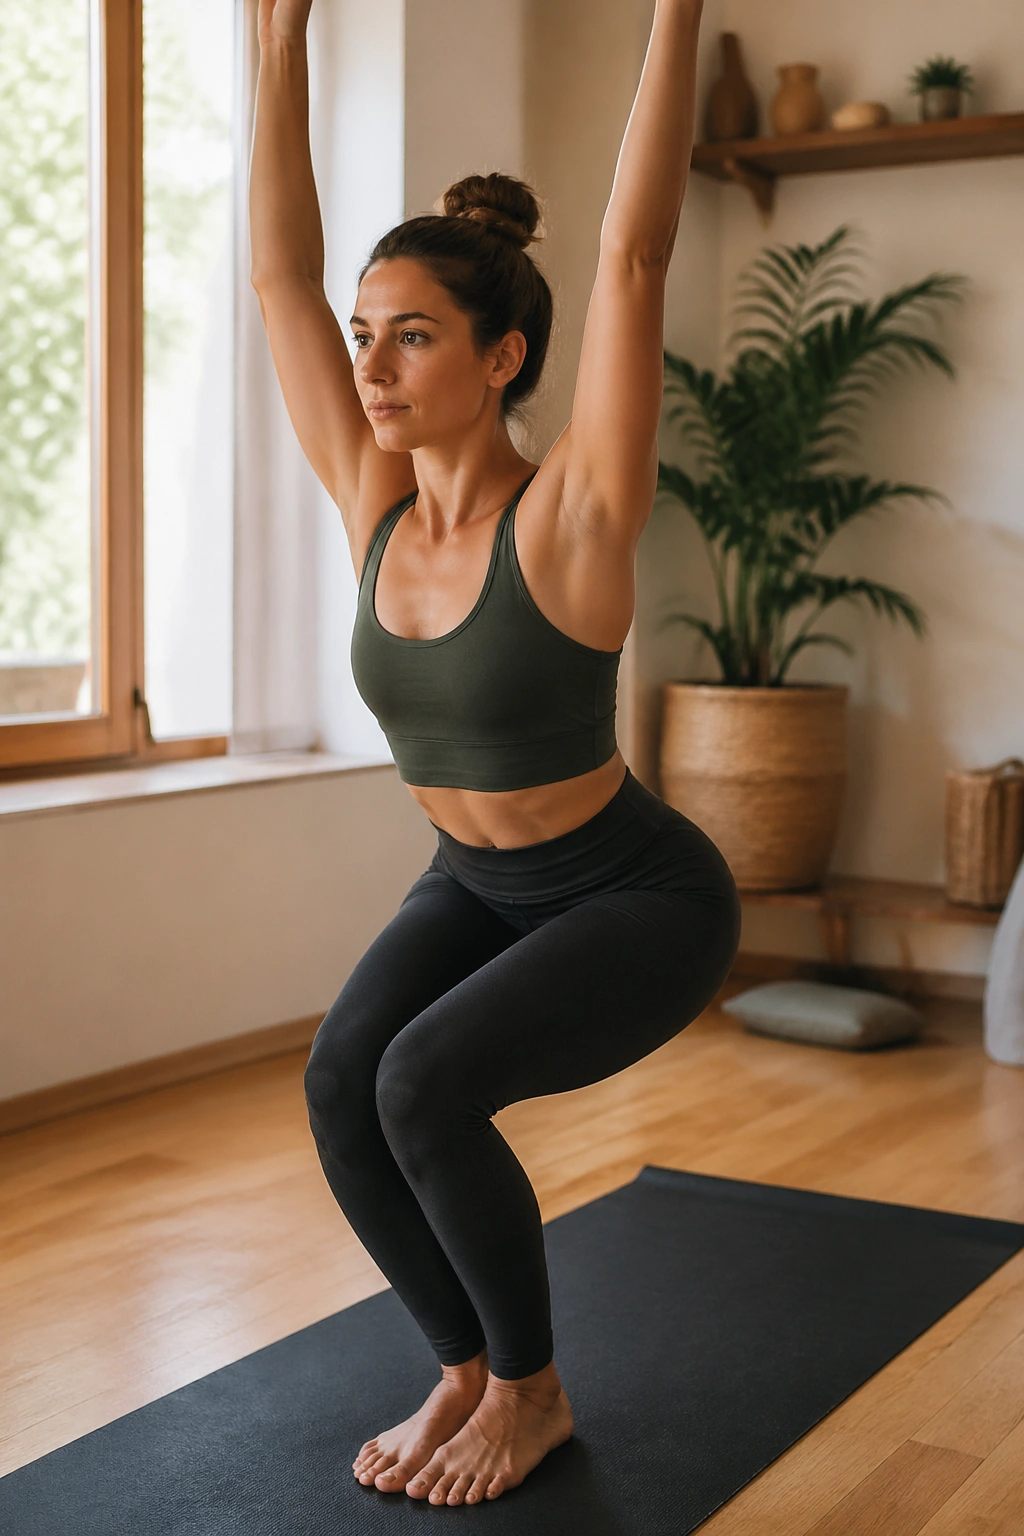
Burning thighs. Quiet breath. No drama. That is the whole deal with Chair Pose when it is done well.
Sit the hips back as if you are reaching for a chair that is a few inches too far away. Keep the knees bent, the weight spread through the whole foot, and the chest lifted enough that the lower back does not collapse. Arms can reach overhead or stay in a cactus shape if the shoulders are tight.
The pose works the front of the thighs, the glutes, the ankles, and the muscles that keep the torso from tipping forward. It also exposes balance habits fast. If the knees dive in, press them gently apart. If the ribs flare, knit them in.
Stay for three to five breaths, maybe longer if your legs can handle it. A good chair is not a squat contest. It is a steadiness test.
9. Bridge Pose
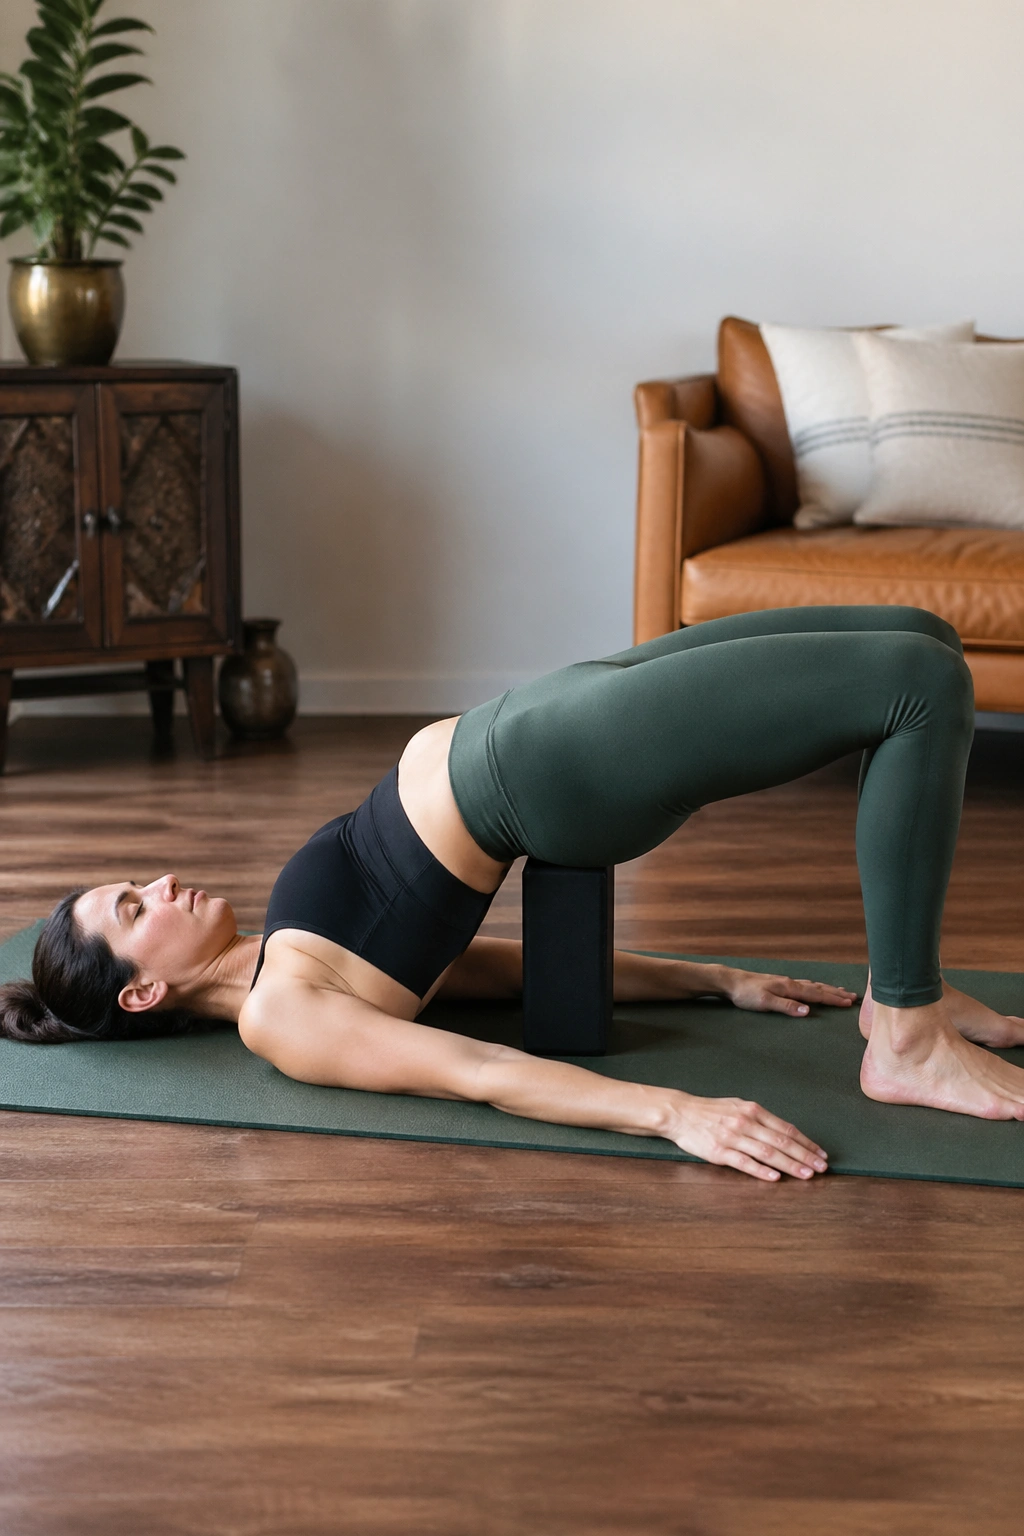
Bridge Pose is the backbend most people skip past, and that is a shame. It gives you spinal extension and glute work without the neck strain that bigger backbends can bring. It also feels surprisingly calming when you stop trying to make it dramatic.
Lie on your back with knees bent and feet hip-width apart. Walk the heels close enough to tap the fingertips, then press down through the feet and lift the hips. Keep the chin slightly tucked so the neck stays long.
Set-Up That Saves Your Back
- Feet stay parallel, not turned out.
- Knees track forward, not splaying wide.
- Lift only as high as you can keep the ribs from popping.
- If the lower back feels pinched, come down a little.
A block under the sacrum turns bridge into a supported rest pose, which is lovely after a strong practice. That version is less about effort and more about letting the front body open while the back body gets a break. I use it when the day has been a little too loud.
10. Plank Pose
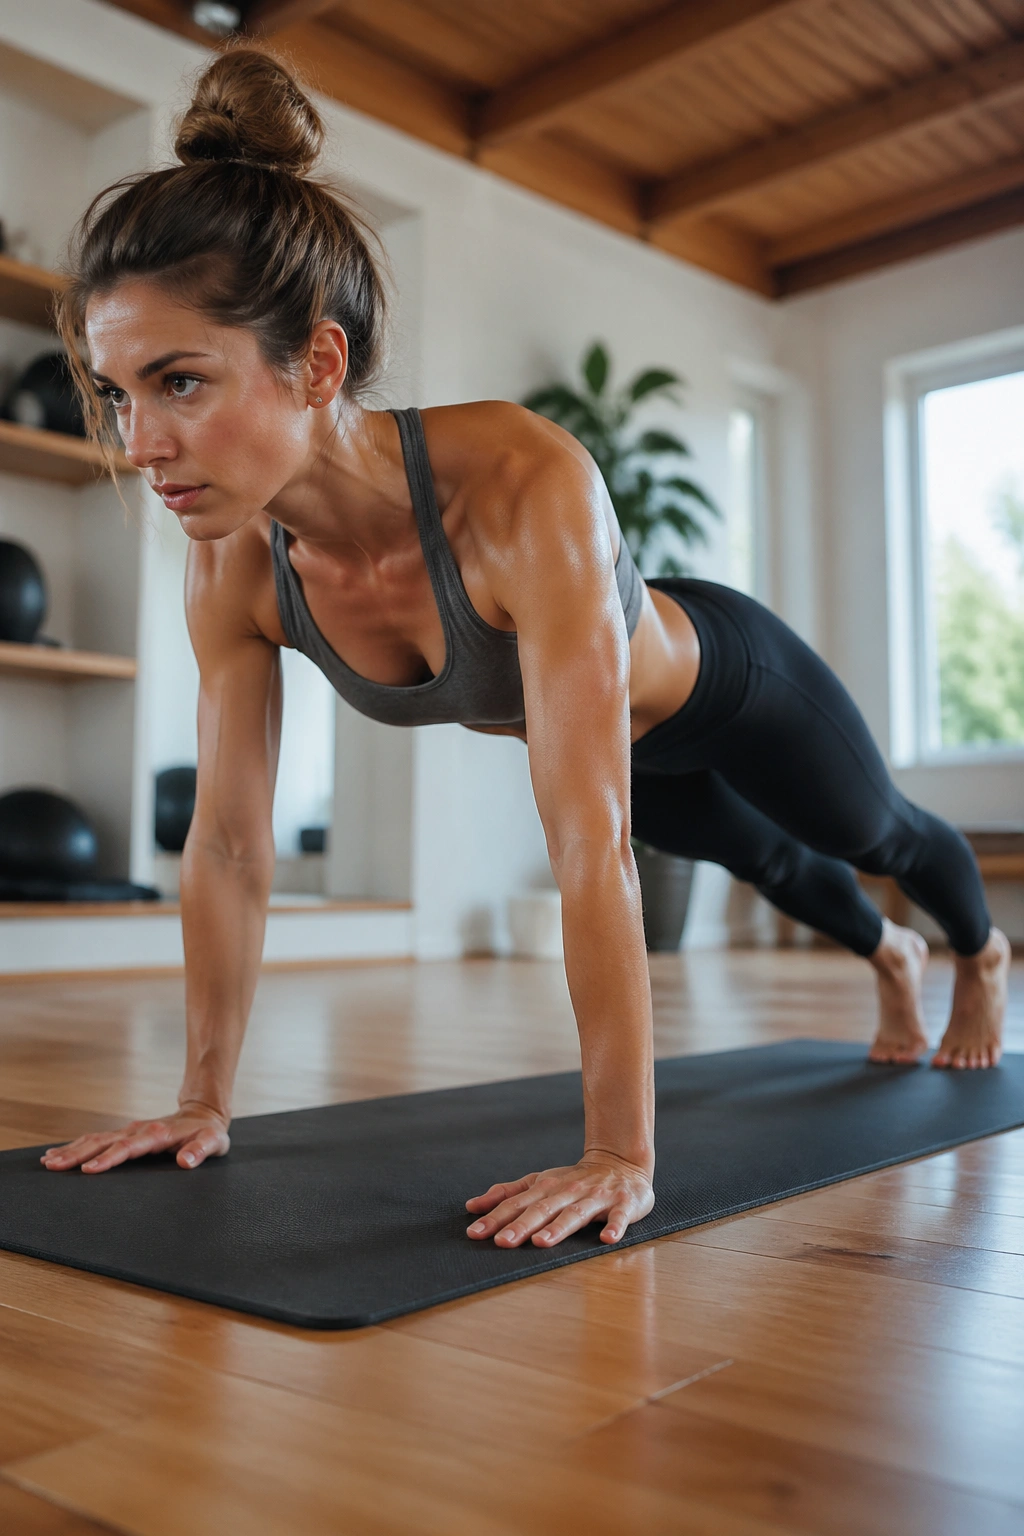
Plank is a whole-body checkpoint. It tells you quickly whether your shoulders, core, glutes, and feet are all paying attention or whether one of them has clocked out.
Set the hands under the shoulders and step the feet back so the body makes one long line. Push the floor away, draw the low belly gently toward the spine, and press the heels back. The neck stays in line with the rest of the body.
A clean plank is not about hanging on for as long as possible with a sagging middle. Twenty seconds of tidy work does more than a minute of sloppy wobbling. That matters.
- Keep the ribs from dropping toward the mat.
- Spread the fingers so the wrist pressure is not brutal.
- Think about length through the heels and crown at once.
- Drop the knees the second your lower back starts to pinch.
If you want strength that feels useful in daily life, plank is hard to beat. It teaches the body how to brace without clenching everything else.
11. Side Plank
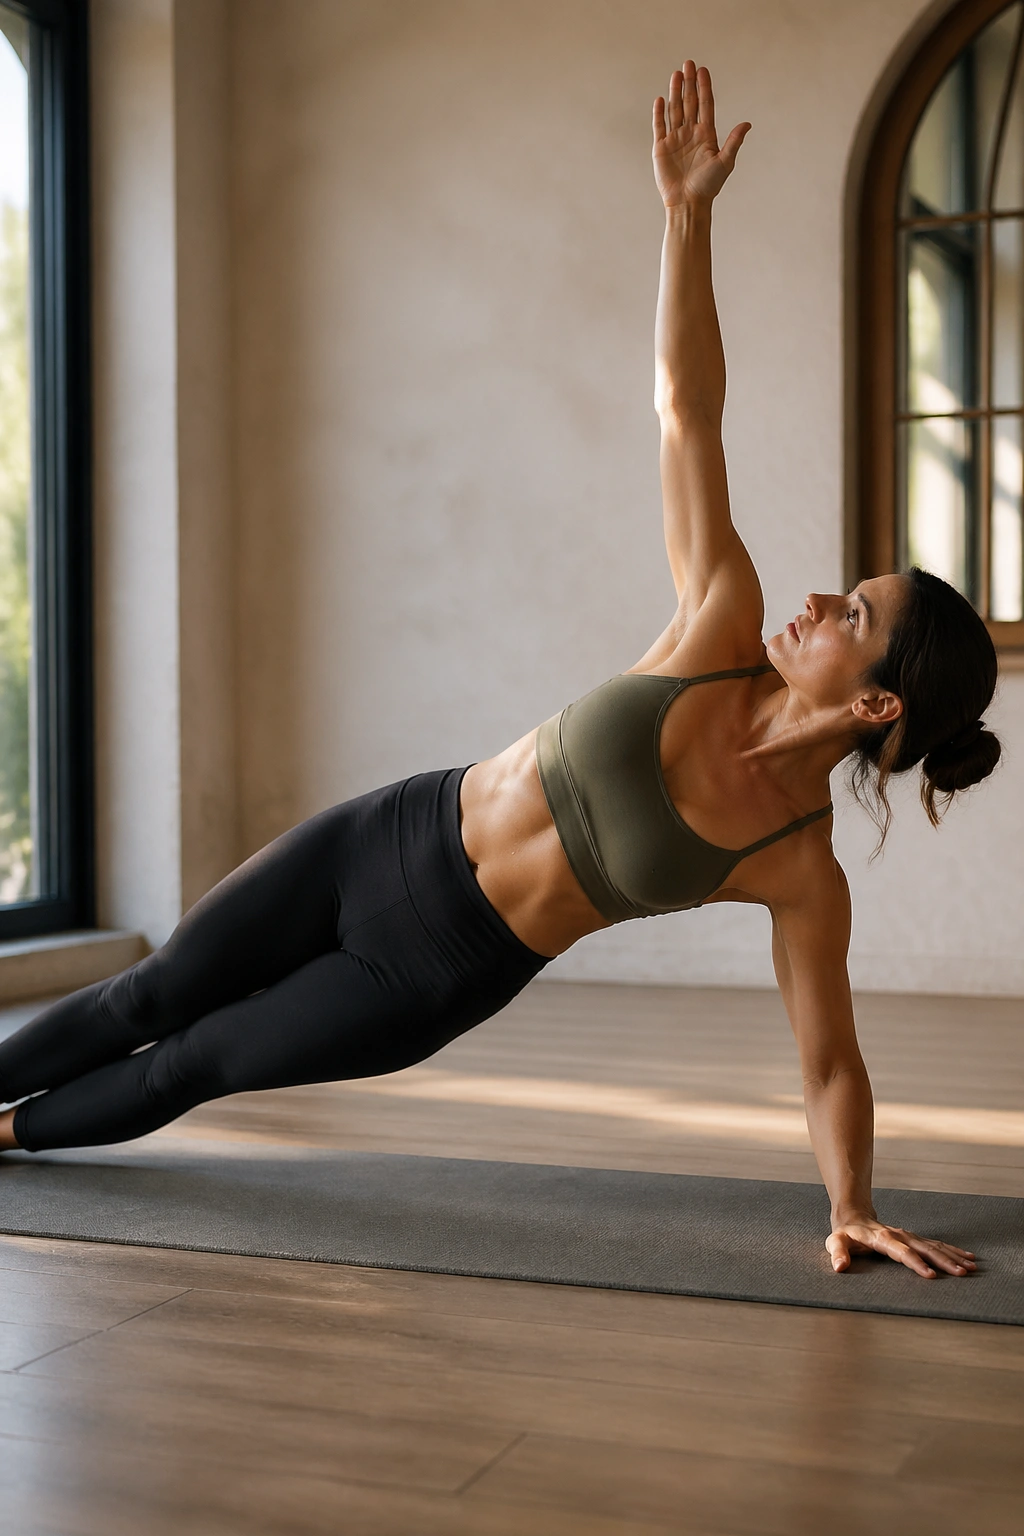
Side plank should wake up the waist on one side and the shoulder on the same side. That is the feeling you want. If it feels like the wrist is bearing all the weight, the setup needs work.
Start in a regular plank, then shift the weight into one hand and roll onto the outer edge of the same foot. Stack the feet if you can, or place the bottom knee down for a steadier version. Lift the top hip high enough that the side body does not collapse.
The obliques do a lot of quiet work here. So do the muscles around the shoulder blade. That is why this pose can feel shaky at first and strangely satisfying once it settles.
A few breaths in side plank teach more than a rushed minute. Wobble is fine. The goal is not to look statuesque; it is to build a body that can hold itself together from the side.
12. Cobra Pose
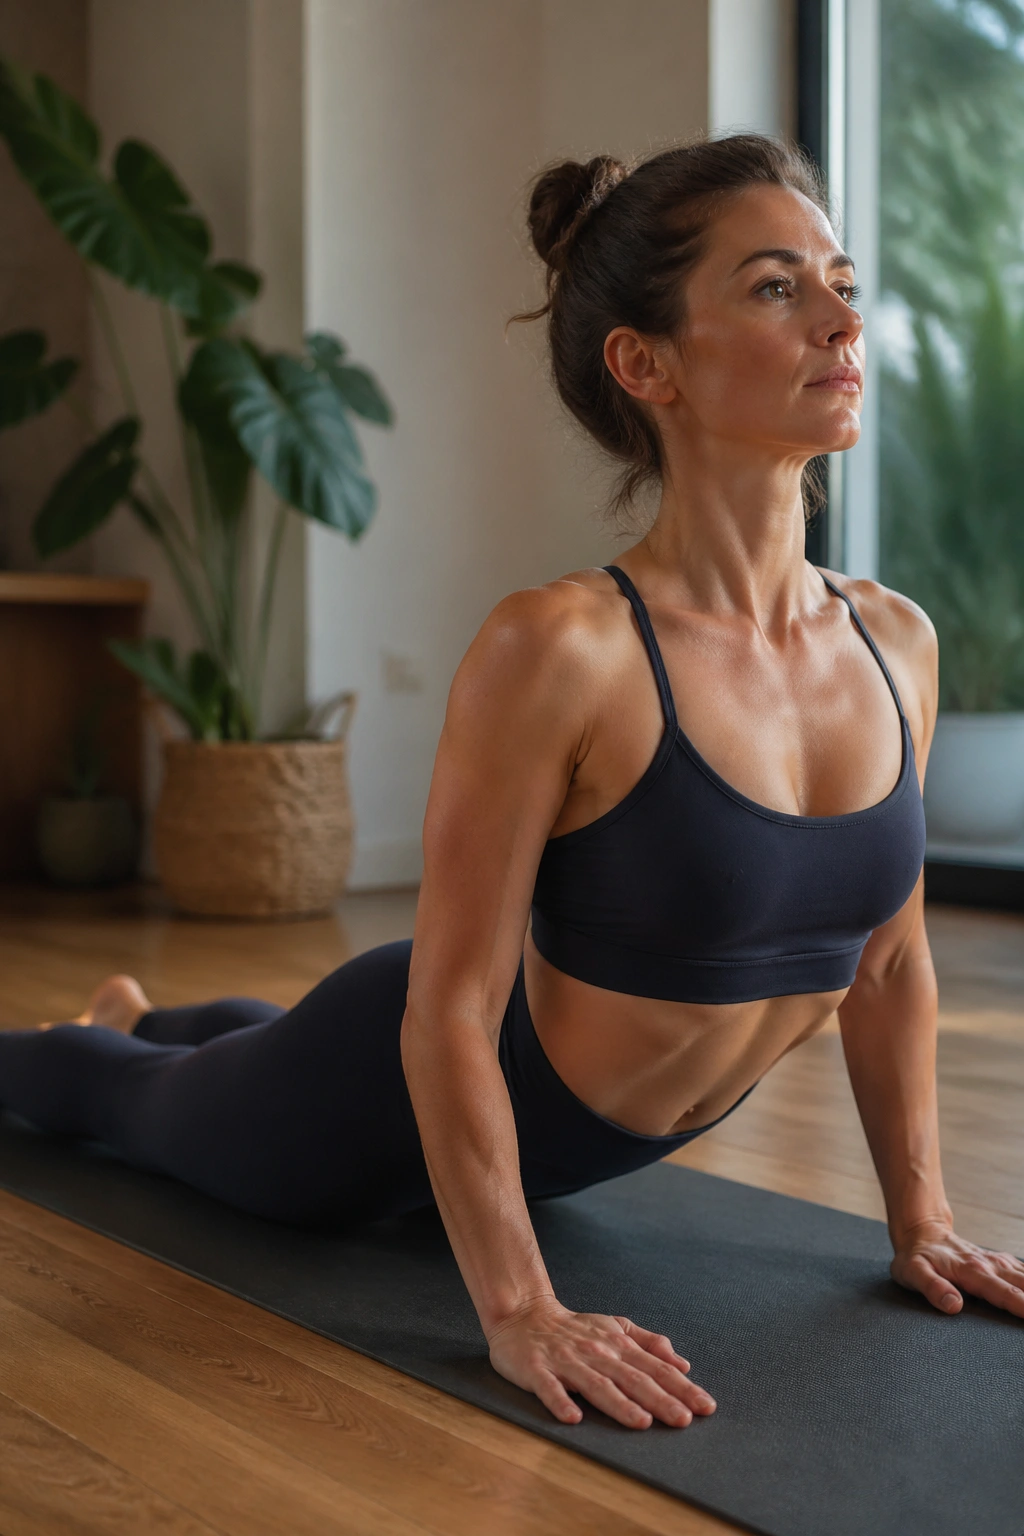
Cobra is the pose people rush, then blame their low back for the mess. The fix is smaller than you think. Lift less, lengthen more.
Lie face down with the tops of the feet pressing into the mat. Place the hands lightly under the shoulders and roll the chest forward and up just enough that the front ribs feel long. The pelvis stays heavy.
Tiny cobra counts. A low lift strengthens the spinal muscles without cranking the lumbar spine into a pinched arch. If the shoulders creep up, slide them down and away from the ears again.
The neck should feel long, with the gaze slightly forward and down. If you can only lift the chest an inch, that still counts. I never like a backbend that turns into a neck headache, and this one only does that when people try to make it bigger than it needs to be.
13. Locust Pose
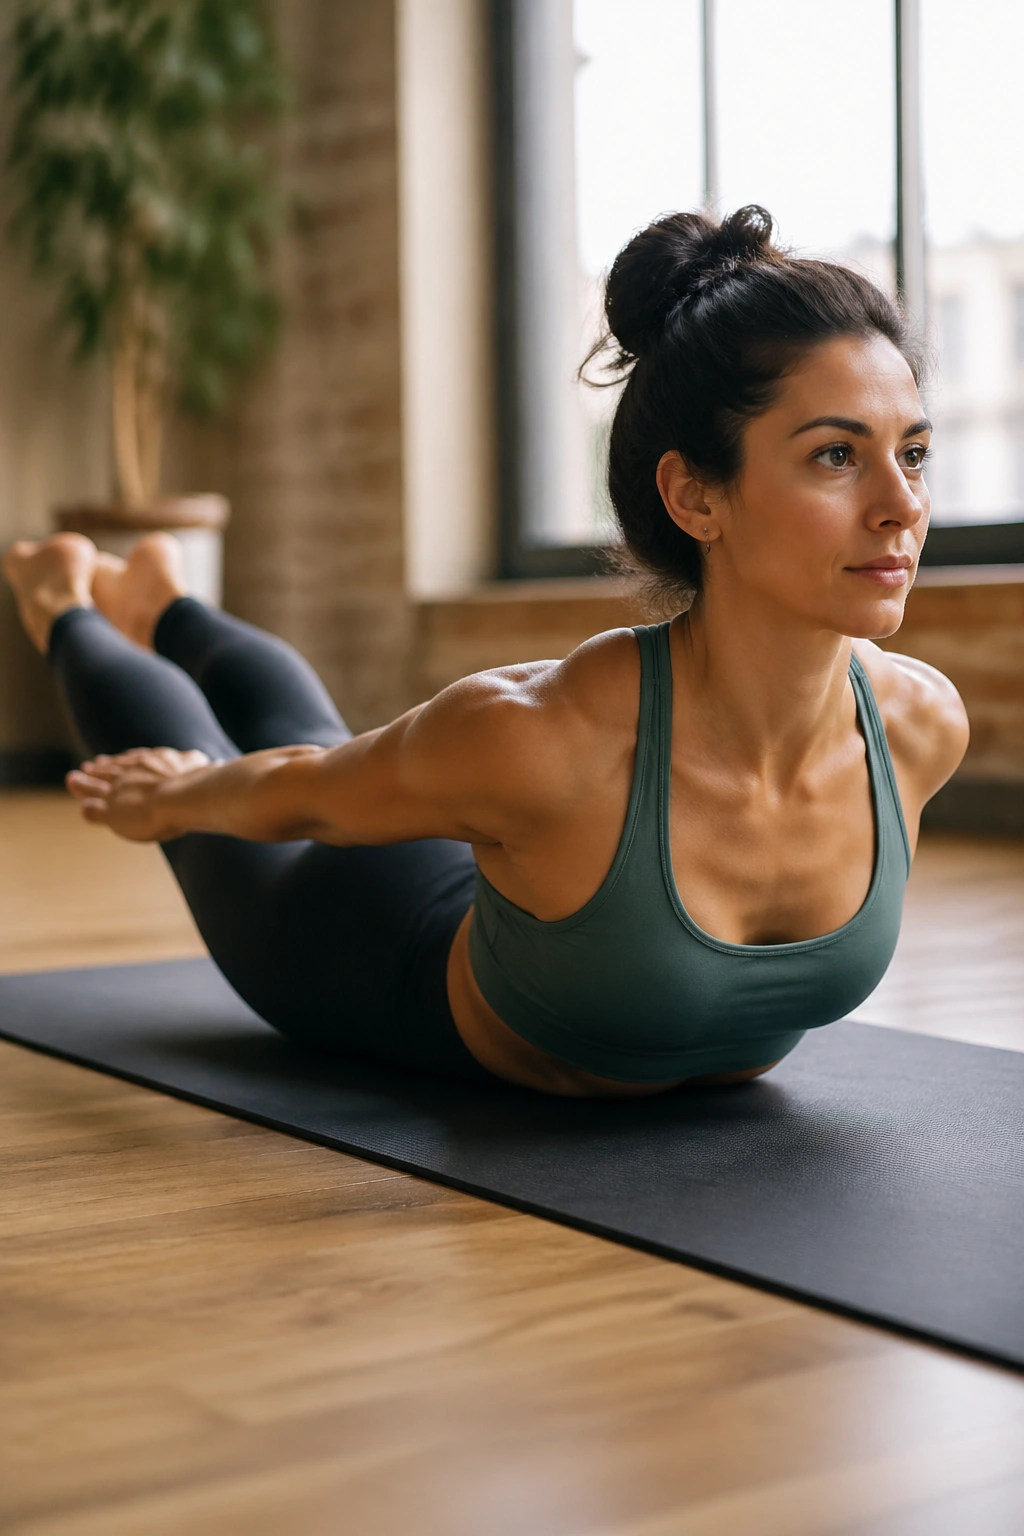
Why does locust feel harder than it looks? Because it asks the back body to work against gravity with no help from the hands or feet. That makes it a sneaky strength pose, especially for the glutes and the upper back.
Lie on your stomach with the arms by your sides, palms down. On an inhale, lift the chest, the legs, or both a little off the floor. Keep the pubic bone rooted, and let the back of the neck stay long.
Keep the Neck Long
- Look straight down, not forward.
- Keep the shoulders sliding away from the ears.
- Lift the chest first if the low back is touchy.
- Reach the fingertips toward the heels, or keep them by the sides.
Locust is plain work. There is no place to hide, and that is part of why it builds resilience so well. The shape is small, but the effort is not. A few controlled lifts are usually better than one giant heave.
14. Seated Spinal Twist
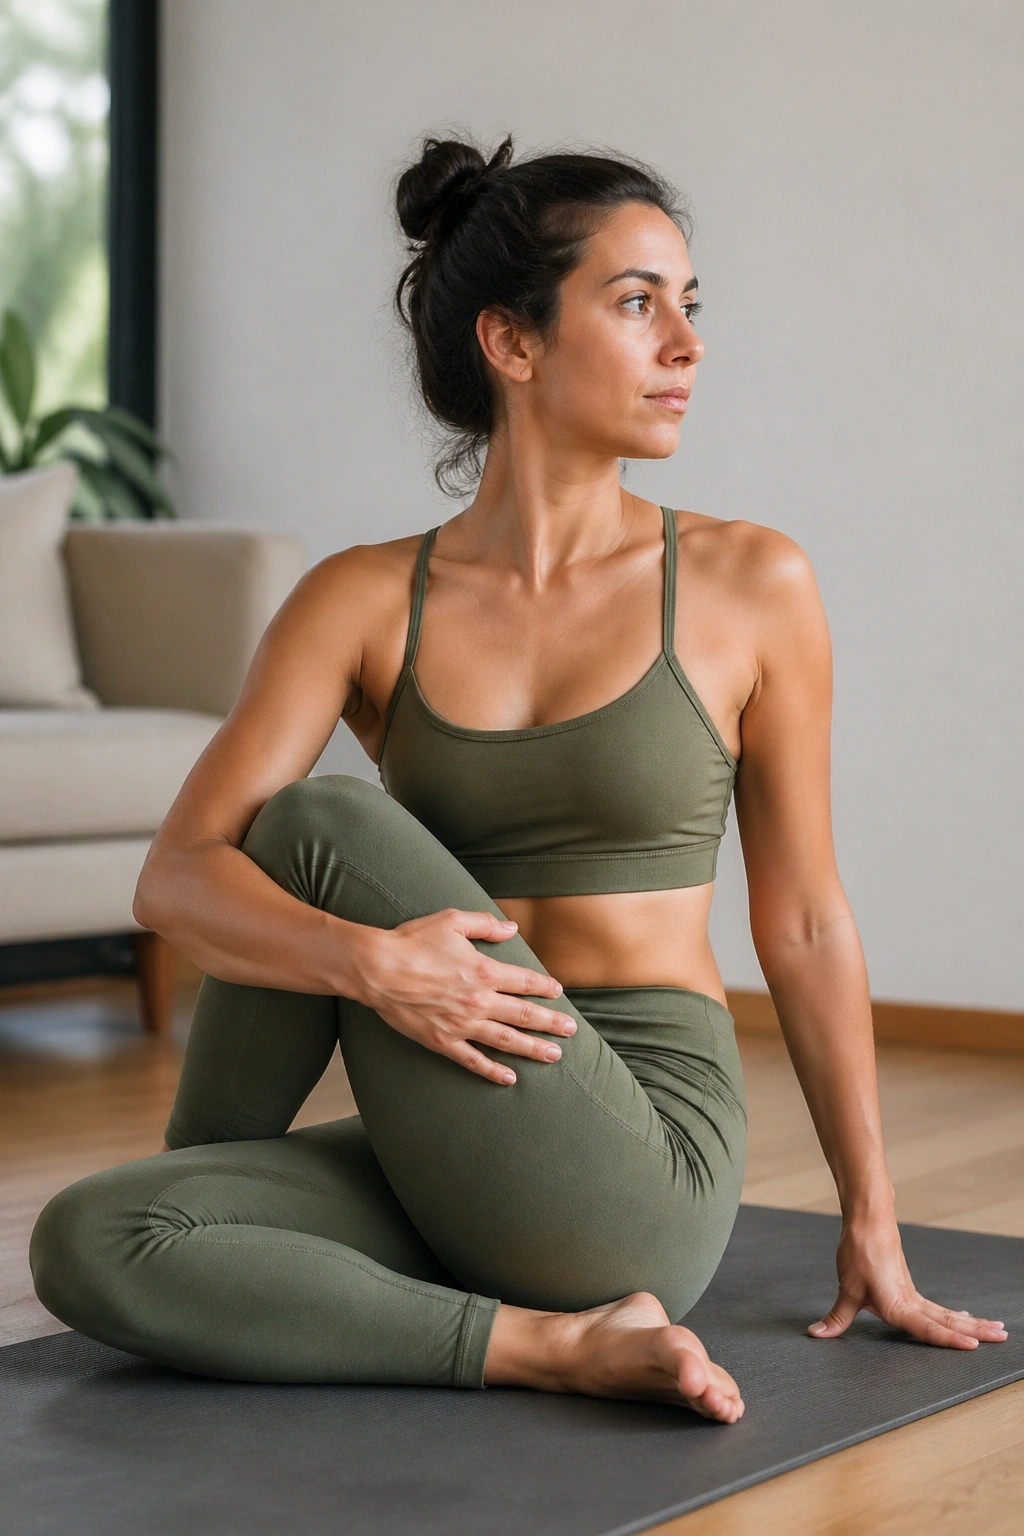
A seated twist after a long drive can feel like wringing out a towel. The torso gets a sense of rotation again, and the side ribs stop feeling glued together. That alone can shift the mood of a practice.
Sit tall with the legs stretched out or bent, then cross one foot over the opposite thigh or place it beside the other knee. Turn from the lower ribs first, then the upper ribs, and keep the spine long. The arm can hug the knee gently, but it should not yank the twist into place.
The twist comes from the trunk, not from forcing the shoulders around. If the pelvis is collapsing, sit on a folded blanket. That small lift can make the difference between a useful twist and a slouched one.
Breathe into the back ribs. They often feel wider than expected when the body stops guarding. If the low back feels pinchy, back off a little and keep the twist lighter.
15. Child’s Pose
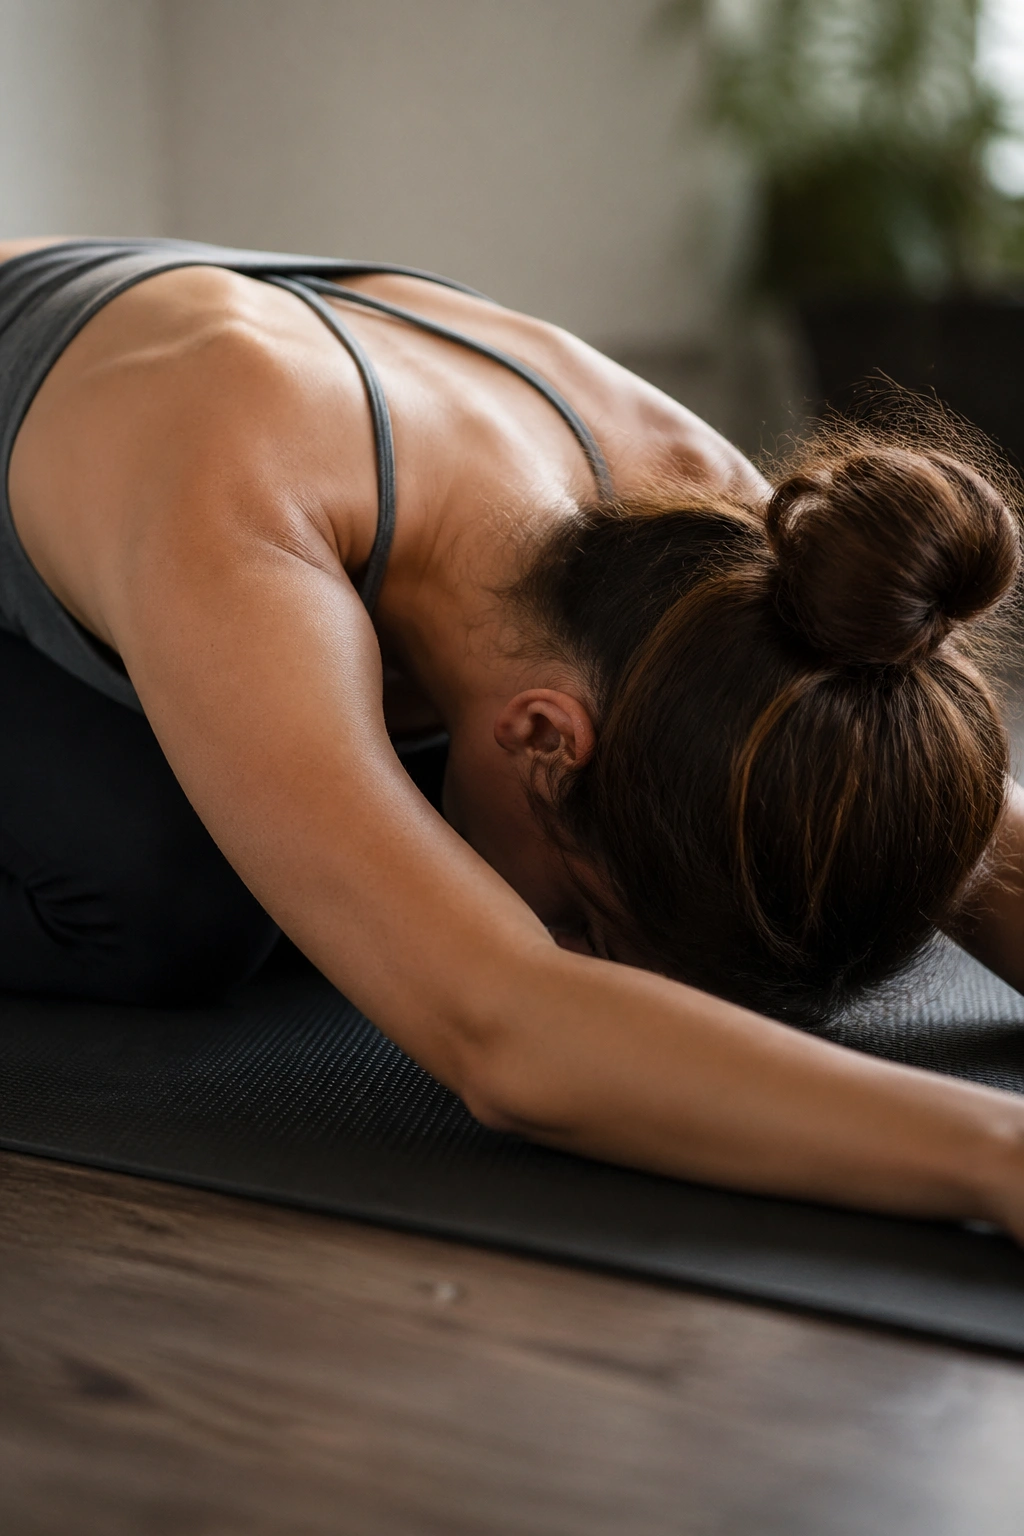
Child’s Pose earns its place because it changes the pace of the whole practice. The body folds inward, the breath gets quieter, and the nervous system gets a clear signal that effort is not required for every second of the day.
Kneel on the mat, bring the big toes together, and let the knees separate if your hips need room. Fold the torso forward and either reach the arms out or rest them by the sides. The forehead can touch the mat, a block, or a folded blanket.
It is not lazy. It is smart. A few slow breaths here can reset the jaw, soften the shoulders, and lower the sense of internal noise that sometimes lingers after a stronger sequence.
If the hips do not reach the heels, place a blanket between the calves and thighs or keep the seat lifted a little. Comfort matters here. If the pose feels like a cranky stretch, it stops doing its job.
16. Legs-Up-The-Wall
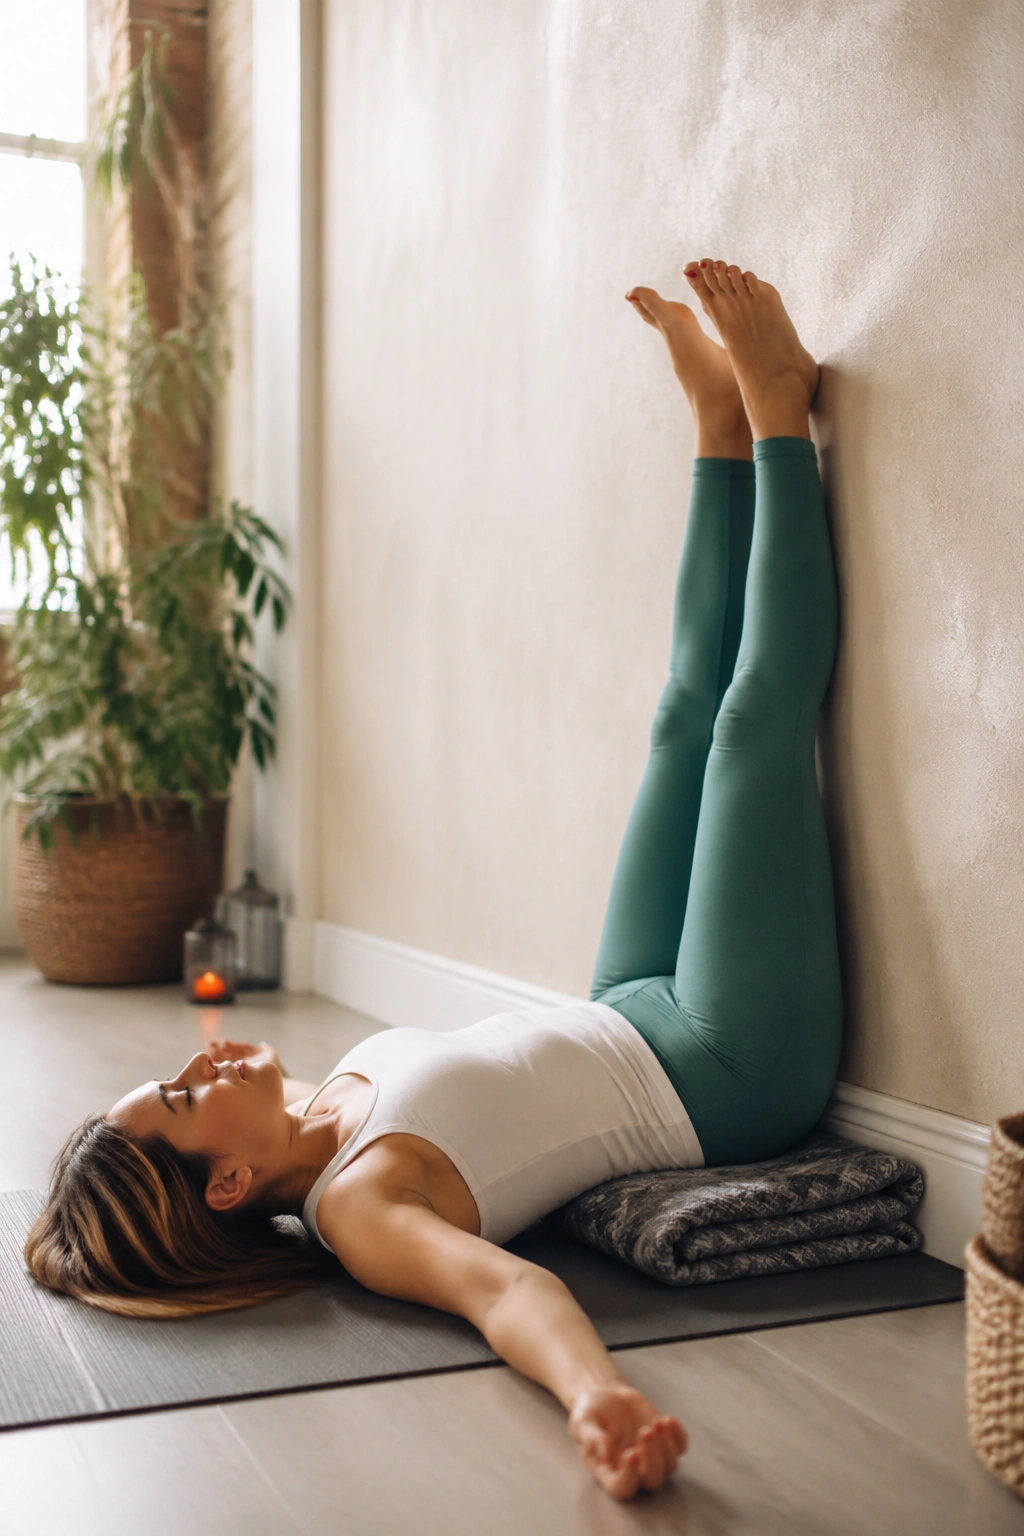
Why do legs-up-the-wall when you can lie flat? Because the slight inversion changes the feel of the pose. The legs get support, the lower back settles, and the whole thing becomes easier to stay in for more than thirty seconds.
Scoot one hip close to the wall, then swing the legs up so the backs of the calves rest against it. A folded blanket under the hips can help, but it is not mandatory. Bend the knees if the hamstrings pull hard.
This is one of my favorite recovery positions after standing for a long time. The body stops asking the feet to do all the work, and the breath usually slows on its own. That makes it useful after walks, runs, travel, or any day spent on hard floors.
Stay for five to fifteen minutes if it feels good. If you get dizzy or numb, come out sooner. The best version of this pose feels like the floor is holding you up instead of asking anything from you.
17. Garland Pose
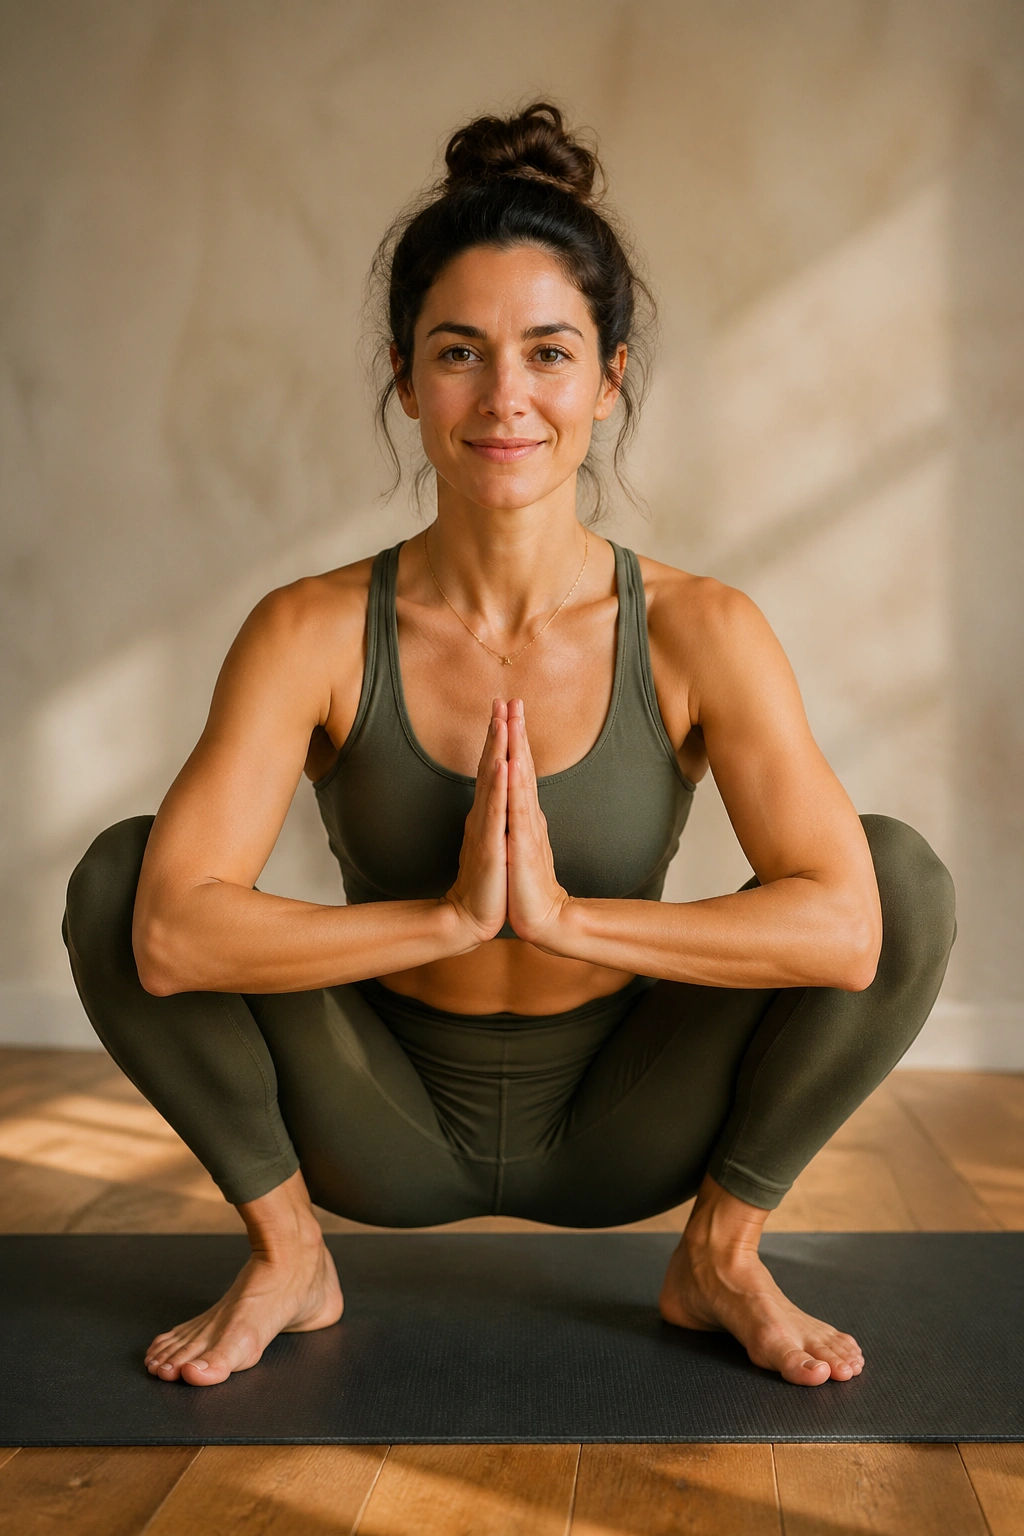
A squat that keeps your heels down tells you a lot about ankles, hips, and patience. Garland Pose, or malasana, looks simple from a distance and then surprises people with how much it asks of the lower body.
Stand with the feet a little wider than hip-width, turn the toes out slightly, and sink into a deep squat. Bring the palms together at the chest or rest the elbows inside the knees and press them out gently. Keep the chest lifted enough that the spine stays long.
- Heels may stay down, or they may need a folded blanket underneath.
- A block under the seat can make the pose more accessible.
- Keep the knees tracking in the same direction as the toes.
- Lengthen the tailbone toward the floor instead of tucking hard.
Garland opens the hips, calves, and ankles at the same time. That is a lot, and it can feel intense fast. If the low back rounds and the heels pop up, raise the seat a little and work from there.
18. Pigeon Pose
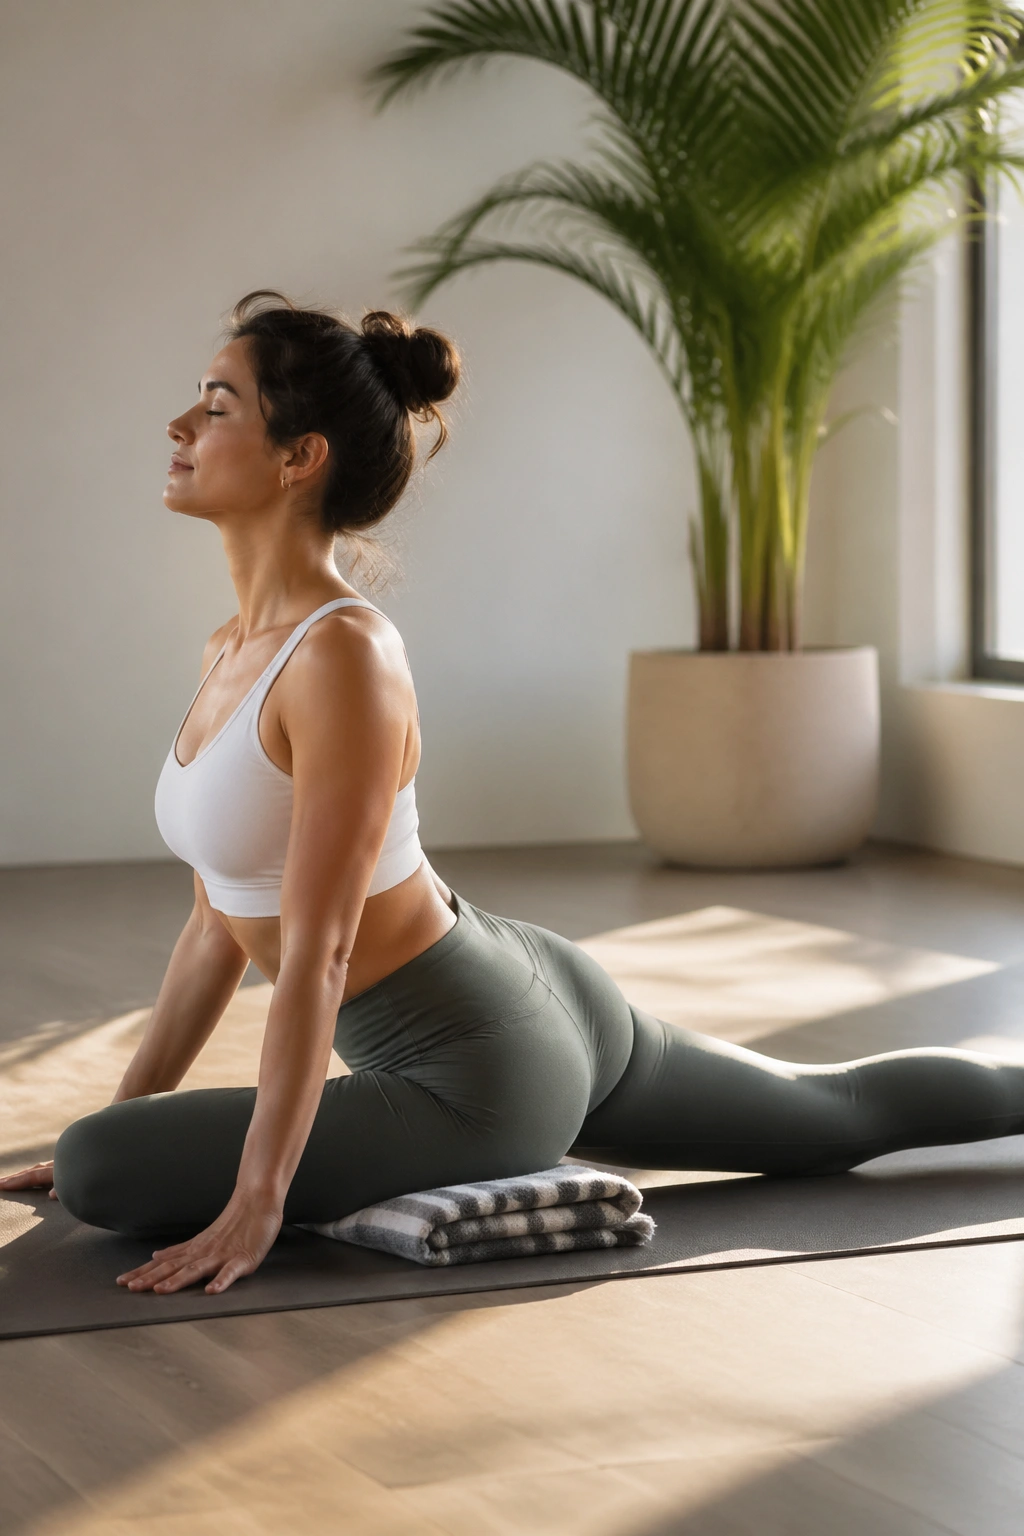
Pigeon can be a gift or a fight, depending on how you enter it. The front hip gets a deep external rotation stretch, and the back leg gets a long line through the thigh. That can feel rich, or it can feel like too much if you rush.
From hands and knees, bring one knee forward and angle the shin across the mat. Extend the other leg back behind you. Keep the front foot flexed to protect the knee, and place a folded blanket or block under the front hip if the pelvis is hanging in space.
Do not force the hips square. That cue has its place, but it gets overused. A little asymmetry is fine if it lets you stay longer and breathe more evenly.
If the front knee complains, come out and switch to a reclined figure-four. That option gives the same general hip opening without the same load on the knees. I reach for it a lot, because sometimes the quieter version is the better one.
19. Thread the Needle
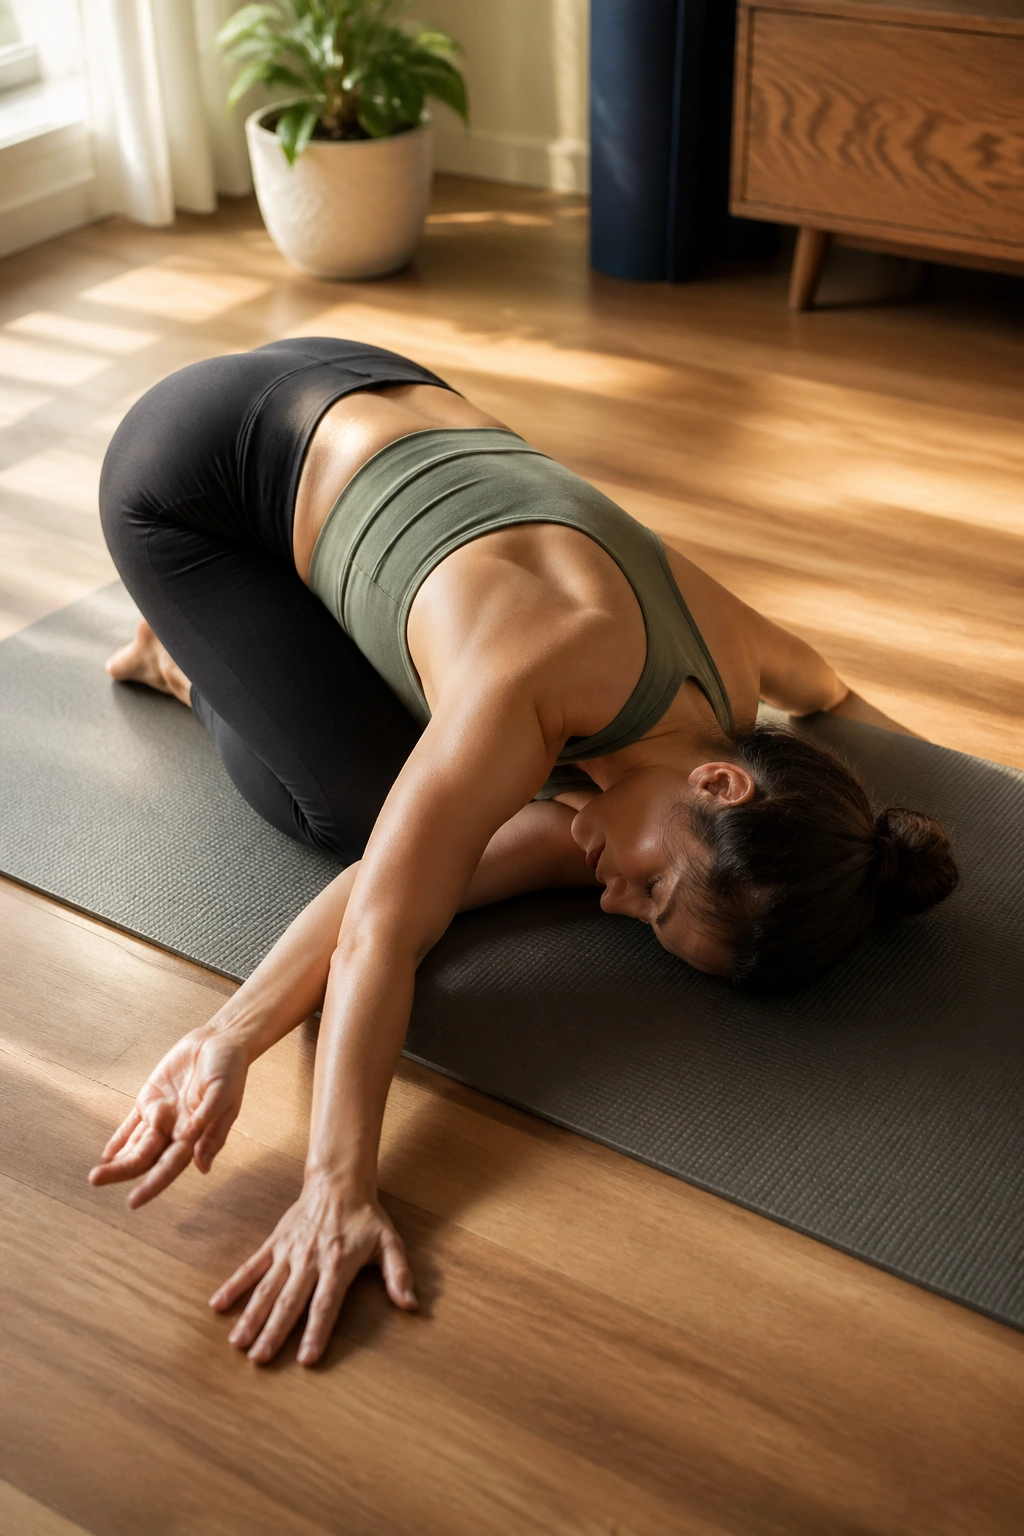
Thread the needle feels like sliding a shoulder blade under warm water. The upper back rotates, the shoulders loosen, and the breath can finally move into a place that has been holding on too tightly.
Start on hands and knees. Slide one arm under the body, palm up, and rest the shoulder and side of the head on the mat. The other hand can stay planted or reach forward if that feels stable.
Keep the hips stacked over the knees. If they drift back, the stretch changes and often stops hitting the upper back where it should. A block under the resting shoulder or head can make the floor feel friendlier.
This pose is gold for desk shoulders. It also has a nice aftertaste, if that makes sense — not a dramatic feeling, just a gentle opening that lingers. Give it a few breaths on each side and notice whether one shoulder is doing more work than the other.
20. Half Split
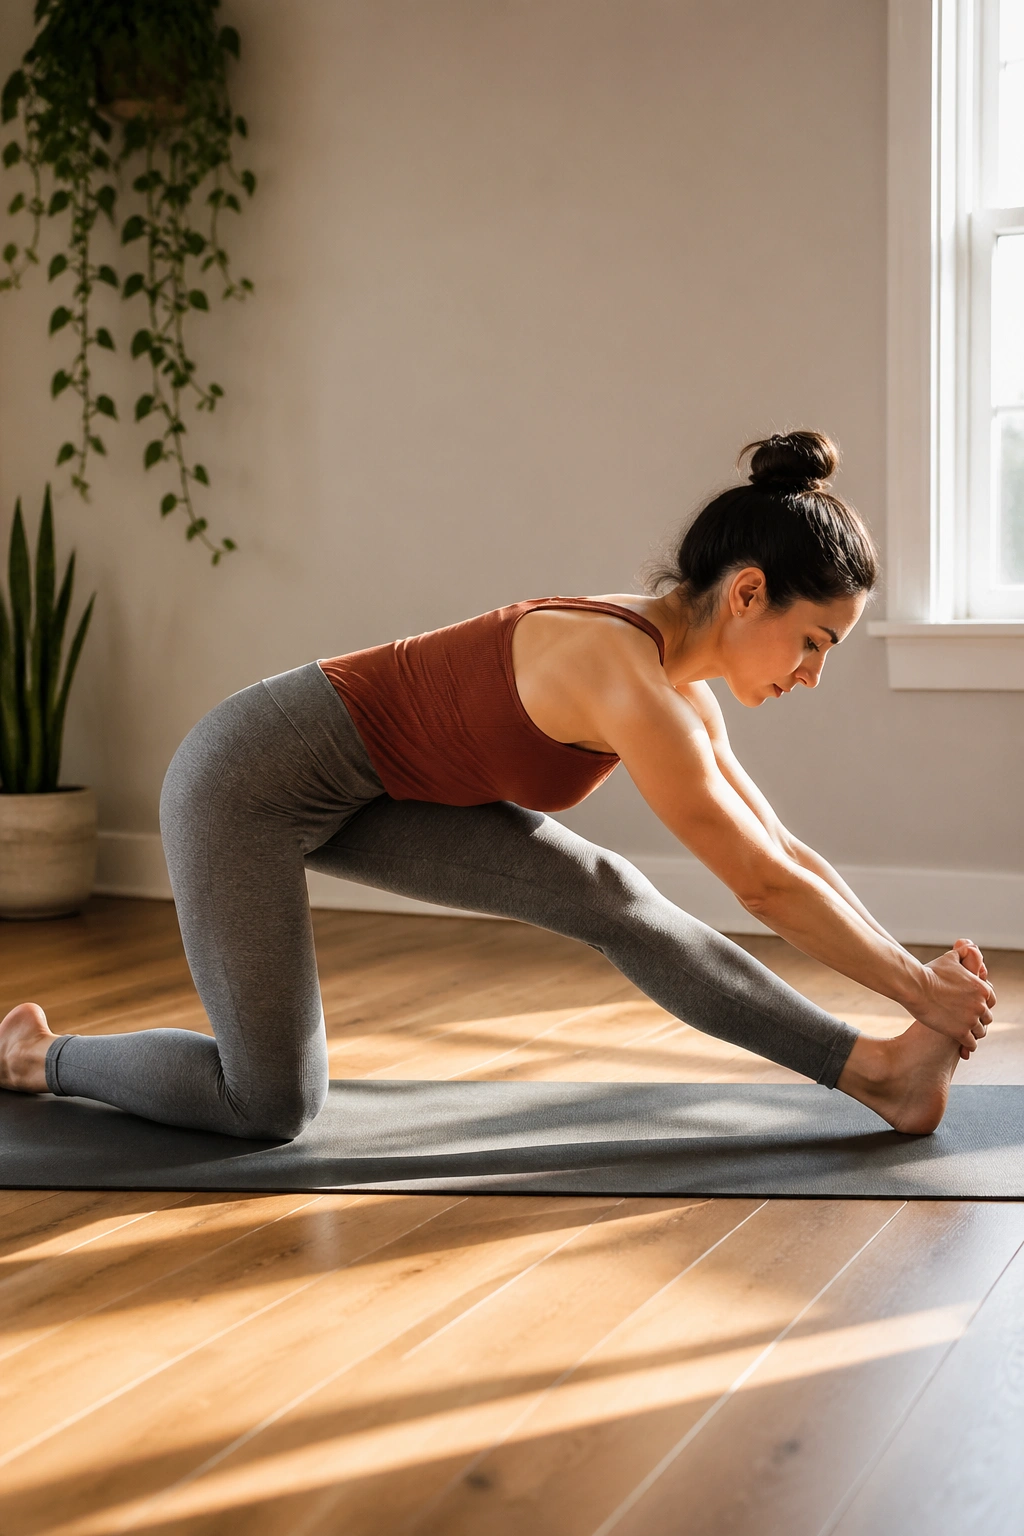
Half Split is the pose that tells the truth about tight hamstrings. There is nowhere to hide, and that is useful. The hips, spine, and back of the front leg all get involved at once.
Begin in low lunge, then shift the hips back and straighten the front leg as much as it can straighten without locking. Flex the front foot and fold forward from the hips. The chest should lengthen toward the thigh before it reaches down.
Square Hips, Long Spine
- Keep the front toes pointing upward.
- Use blocks under the hands if the floor pulls you into rounding.
- Draw the front heel back energetically, as if you were trying to drag it toward you.
- Stop before the lower back starts to hunch.
A lot of people think this pose is only about stretching the hamstring. It is not. It teaches the pelvis how to hinge and the spine how to stay long while the leg works. That is a much better deal than just yanking on the back of the thigh.
21. Reclined Figure-Four
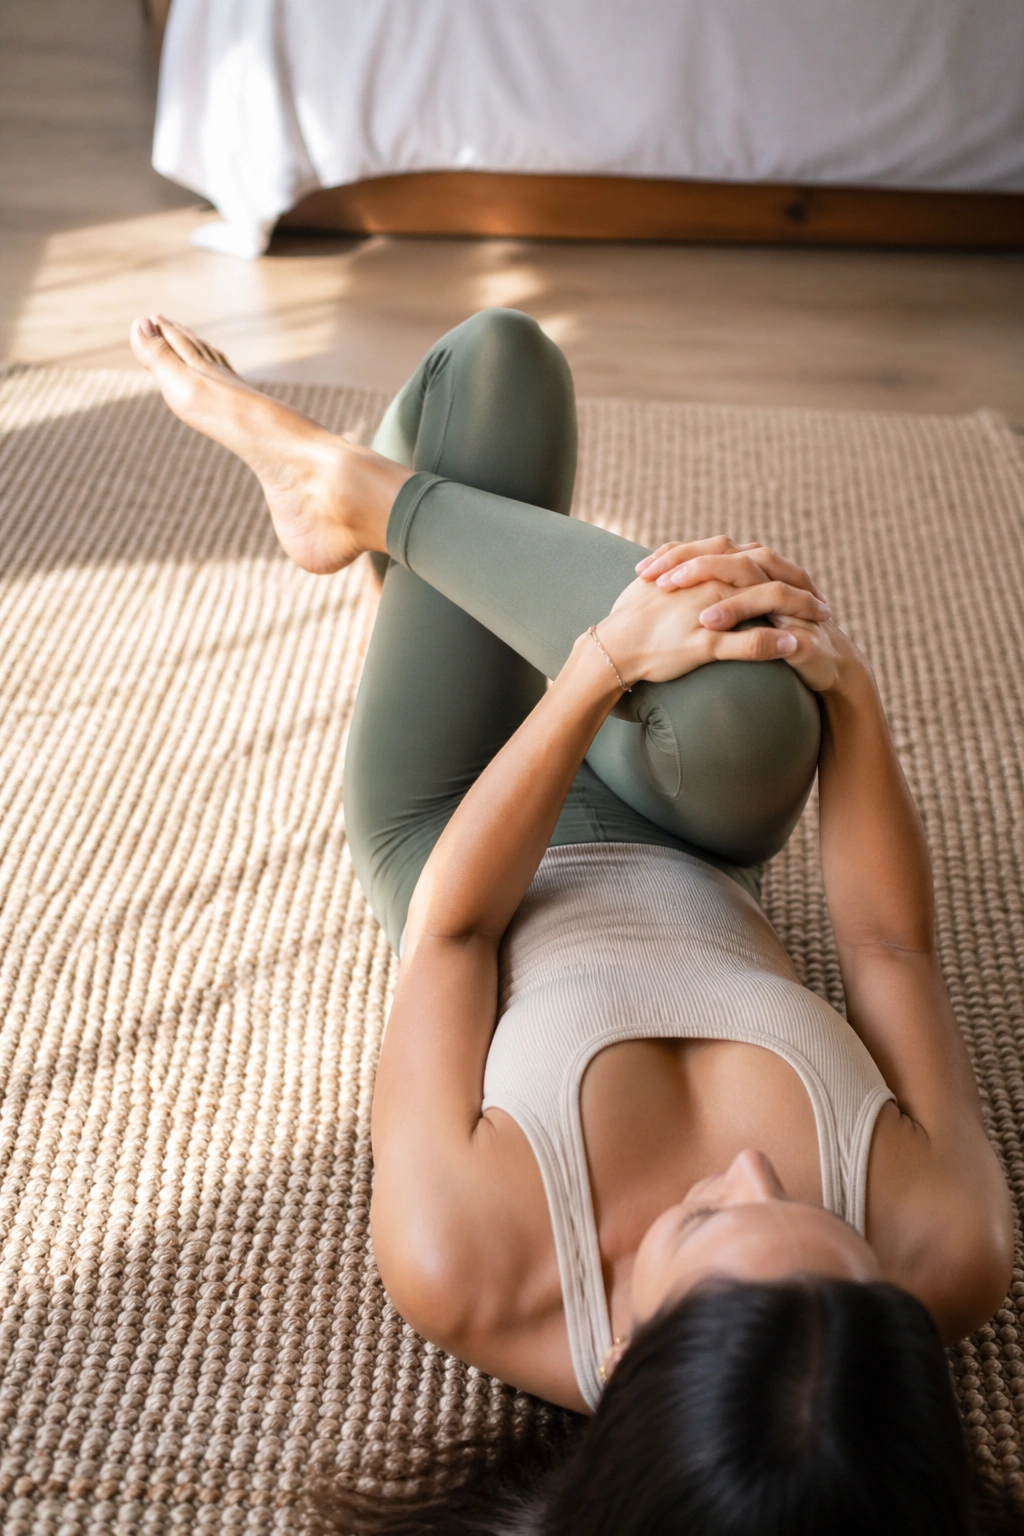
Reclined figure-four is pigeon with the brakes on. It gives the hips a slower, kinder stretch and keeps the wrists, knees, and spine out of the equation. I think of it as the pose you choose when your body wants the benefit but not the drama.
Lie on your back, cross one ankle over the opposite thigh, and draw the bottom leg toward you. The lifted leg can stay bent if that helps. Keep the ankle flexed so the knee feels supported.
This version is especially nice after walking, biking, or standing work. The outer hip opens without the weight of the torso pressing into the mat. That alone can make it feel easier to breathe.
If the knee feels sharp, back out and reduce the angle. The stretch should land in the glute and outer hip, not stab through the joint. A few slower breaths here often say more than a long, forceful hold.
22. Savasana
Savasana asks less than any other pose, which is exactly why people dodge it. There is no shape to conquer, no strength to display, no stretch to chase. You lie down and let the work settle.
Stretch out on your back, let the feet fall open, and rest the arms a few inches from the body. A folded blanket under the knees can take pressure off the lower back. If the room feels cold, cover the body with another blanket so the muscles do not stay slightly braced.
The real job here is release. Let the eyes soften, unclench the tongue from the roof of the mouth, and notice the breath without changing it much. After a practice that included strength and movement, the stillness can feel odd at first. That is normal.
Stay for at least a few minutes, longer if the body asks for it. Stronger and calmer are not opposites; they show up together when the body learns how to work and recover without fighting itself.
