



The best postpartum resistance band workouts do one thing well: they help you rebuild strength without asking your body to prove anything. That matters more than people admit. After pregnancy and birth, the center of the body can feel unfamiliar, the shoulders tend to round forward from feeding and carrying, and the hips often feel sleepy in ways a tough gym session won’t fix.
Bands are useful because they give you load and feedback at the same time. You can work on the parts that usually get ignored — breathing, ribs, pelvic floor control, glutes, upper back — without jumping straight into heavy weights or impact work. That’s a smart trade, not a timid one.
A lot of postpartum exercise advice gets stuck between two bad extremes: do nothing, or push through like nothing happened. Neither is helpful. If you see leaking, heaviness in the pelvis, sharp pain, or a doming ridge along the midline of the belly, that’s a sign to back off and choose a simpler version.
Start with the pieces that help you feel stacked and steady again. Then build toward the moves that feel more like training.
1. Postpartum Resistance Band 360 Breathing Reset
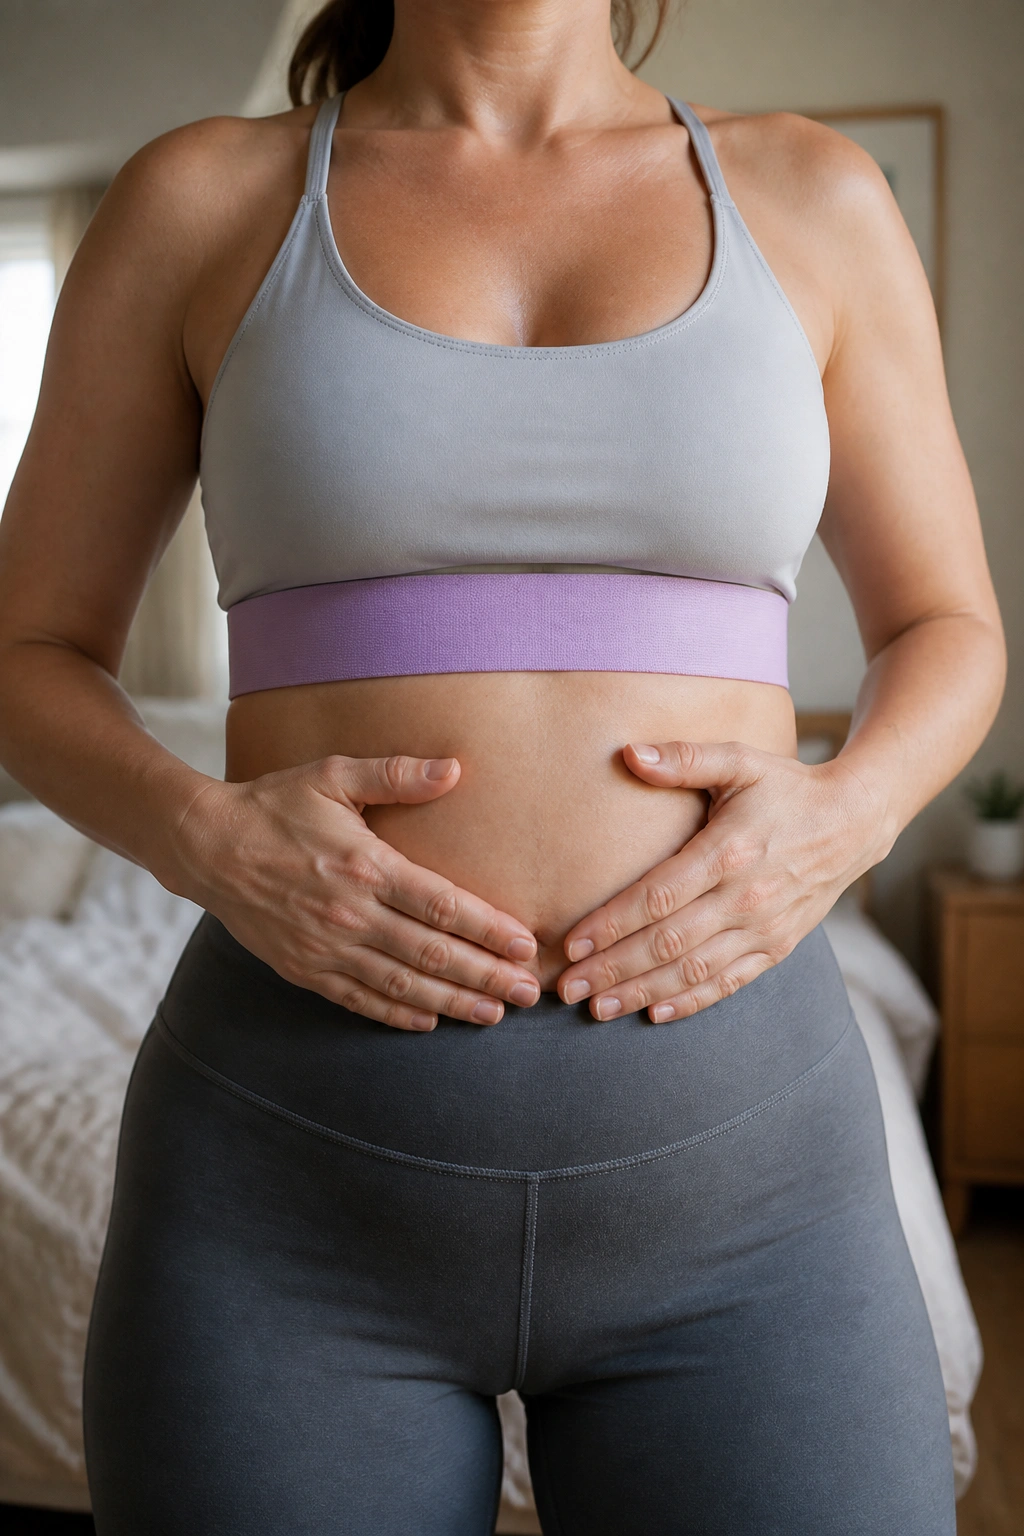
Start here. Seriously.
Wrap a light resistance band around the lower ribs while you stand, sit tall, or lie on your back with knees bent. Breathe in through your nose and try to send the air into the sides and back of your rib cage, not just your chest. On the exhale, let the ribs soften down and feel the belly gently narrow without bracing hard.
How to Set It Up
- Use a light loop or long band with gentle tension around the ribs.
- Take 5 slow breaths per round.
- Do 3 rounds before you move on to harder work.
The point is not to force a giant belly breath. It’s to remind the rib cage, diaphragm, and deep core to work together again. That can make a dead bug, row, or squat feel steadier almost right away.
If you had a C-section or a rough delivery, this kind of breathing often feels safer than jumping straight into core work. Keep it easy. The win is control, not effort.
2. Seated Band Row for Rounded Shoulders
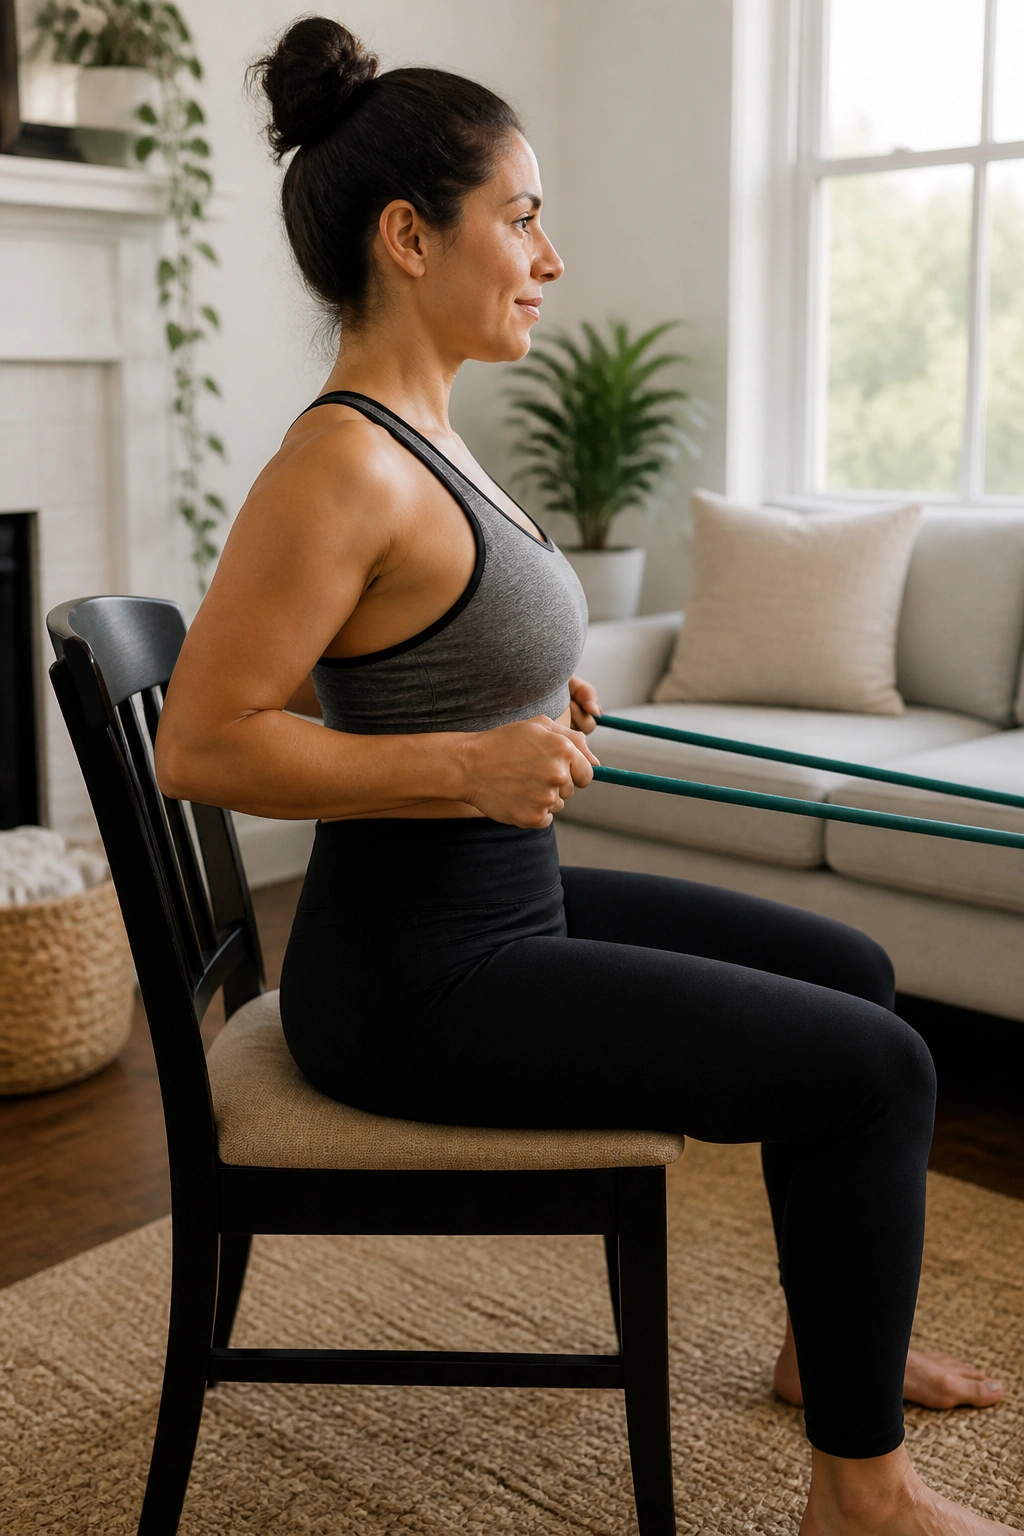
If nursing, bottle-feeding, rocking, and carrying have turned your upper back into a question mark, rows are your friend.
Sit on the floor or on a sturdy chair, anchor the band in front of you, and pull your elbows back along your sides until your shoulder blades slide toward your back pockets. Pause for one second. Then return slowly. Ten to 15 reps for 2 or 3 sets is a good start, and the last few reps should feel honest without making your neck take over.
Keep the chest soft. Keep the ribs from flaring. That little detail matters because postpartum ribs can stick out more than you expect, and rowing with a popped-up rib cage turns the whole move into a low-back shrug.
One cue I like: pull with your elbows, not your hands. It keeps the movement cleaner. It also keeps you from yanking the band like you’re trying to win a tug-of-war with a door.
3. Glute Bridge With a Mini Band
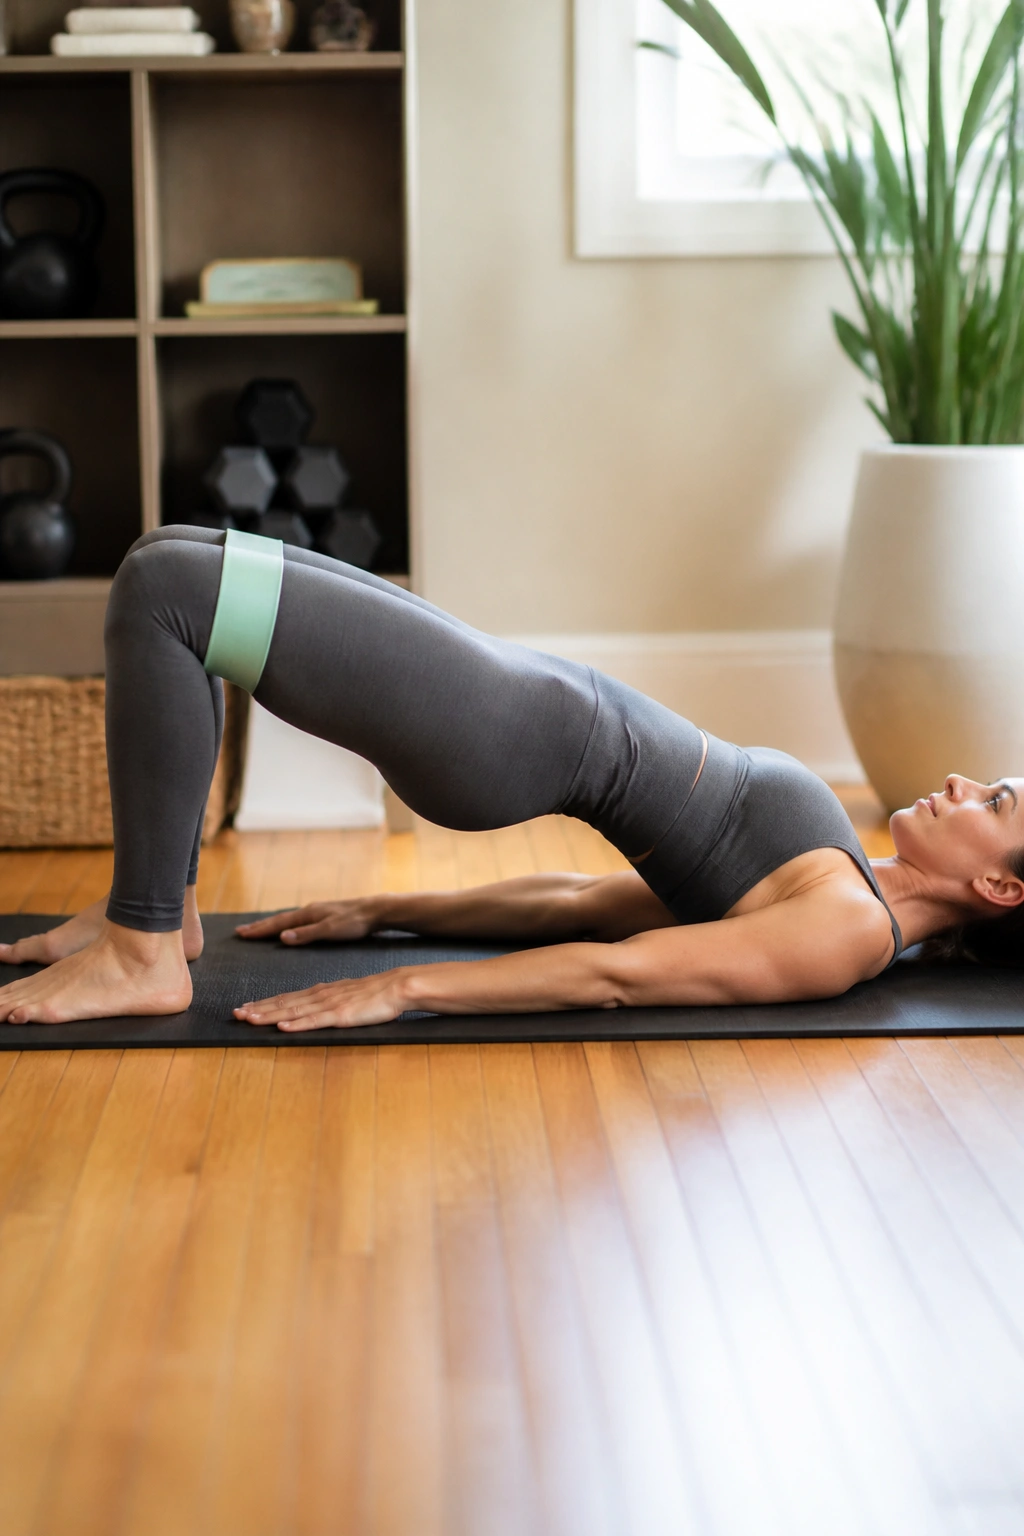
This one earns its place fast.
Lie on your back, bend your knees, place a mini band just above the knees, and press the knees out gently as you lift your hips. The lift should come from the glutes, not from arching the lower back. Think 8 to 12 reps for 2 or 3 sets, with a 2-second squeeze at the top if you feel stable.
Feet should stay flat. Don’t shove them too far away from your body or the hamstrings can steal the whole job. If that happens, walk your feet a little closer and make the lift smaller.
A good bridge feels like the back of the hips switch on and the front of the pelvis stays calm. That calm part matters. A messy bridge can make you feel stronger for five seconds and crankier for the rest of the day.
4. Clamshells for Side-Hip Strength
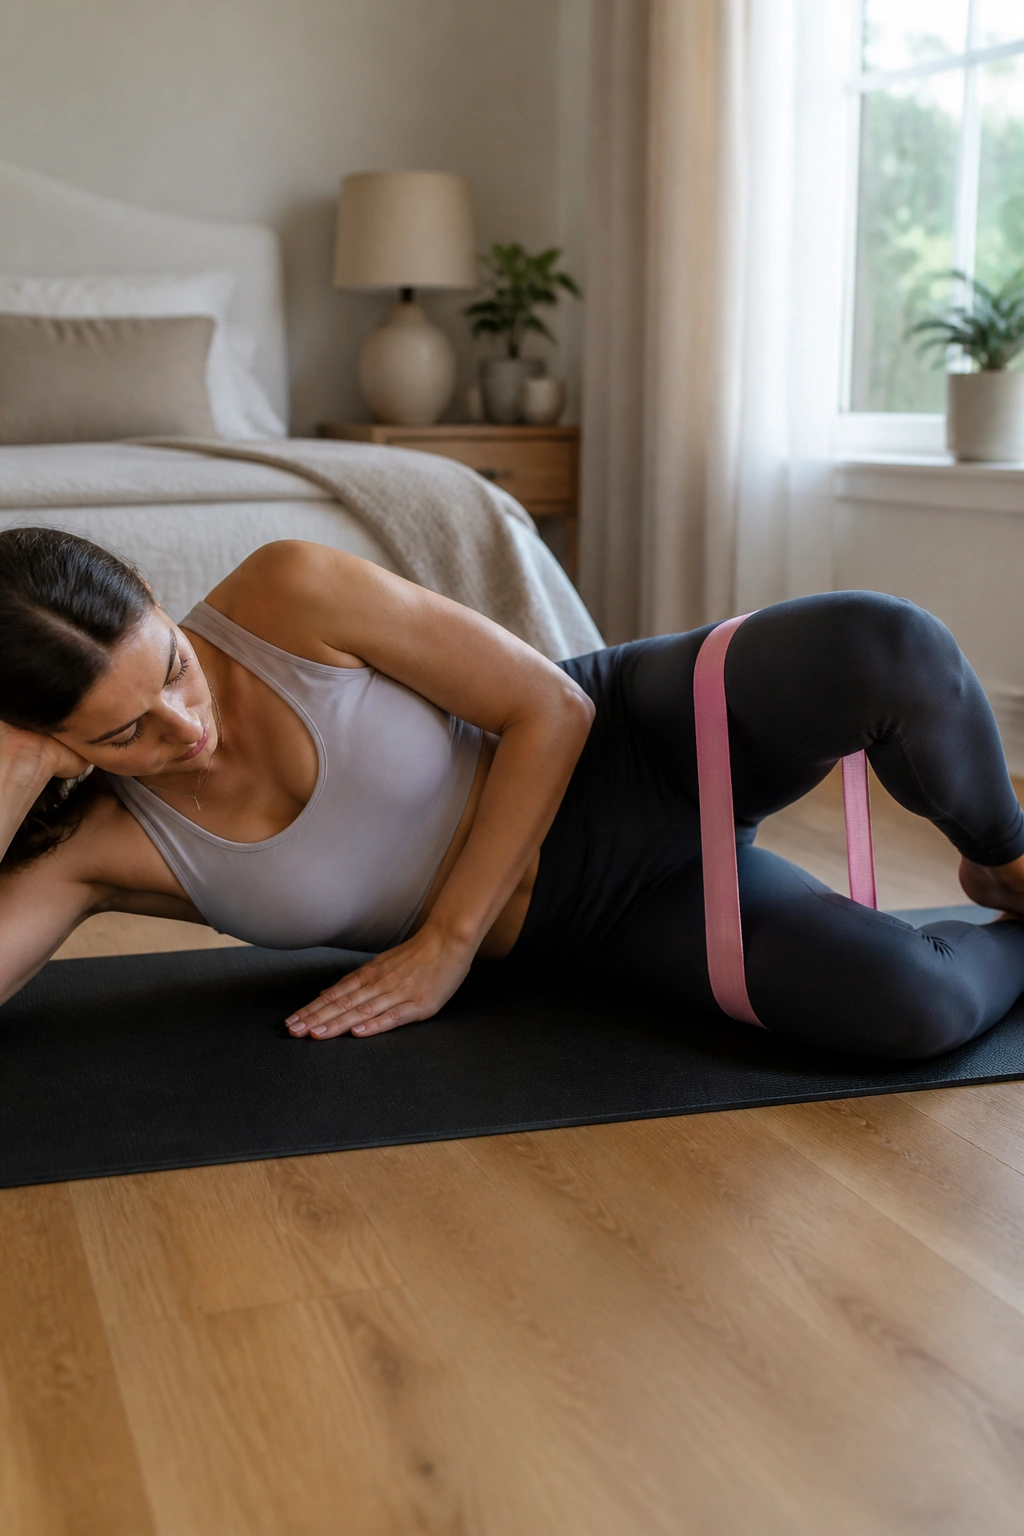
Why do clamshells still matter when everyone wants a move that looks more impressive?
Because the side hip is a workhorse. It helps keep the pelvis steady when you walk, climb stairs, shift a baby on your hip, or stand on one leg while wrangling a diaper bag. Put a band above the knees, lie on your side with knees bent, and open the top knee without letting your hips roll backward. Do 12 to 15 reps per side.
What to Watch For
- Keep the feet touching.
- Keep the pelvis stacked.
- Stop the motion before the lower back twists.
The range is small. That’s fine. Small range, clean reps. That’s the whole point.
If the front of your hip grabs first, slide your knees a little farther forward and think about opening from the outer glute instead of forcing the knee sky-high. The move should feel controlled, almost boring, and that’s a good sign.
5. Standing Pallof Press for Deep Core Control
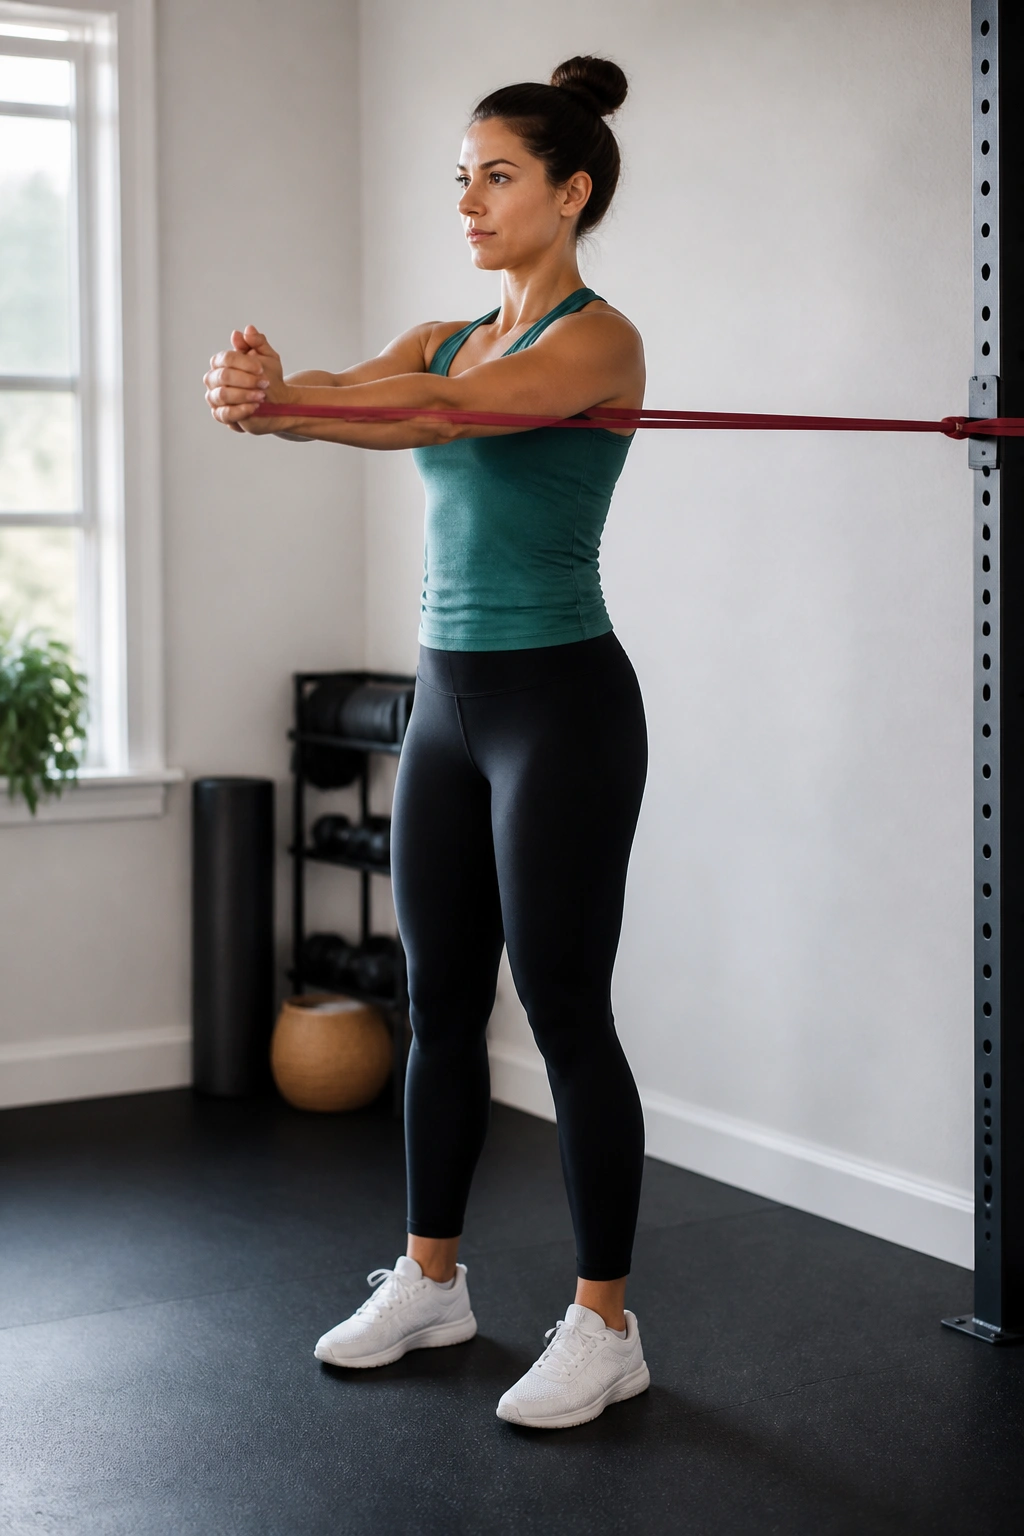
A standing Pallof press looks simple. It is not easy.
Anchor a band at chest height, stand sideways to the anchor, hold the band at the middle of your chest, and press it straight out until your arms are long. Hold for a second or two, then bring it back. Your torso should stay square. No twisting. No rib flare. No lean.
How to Use It
- Do 8 to 10 presses per side, or hold for 20 to 30 seconds.
- Keep your knees soft and your feet about hip-width.
- If you feel pressure down low, shorten your stance and reduce the band tension.
This is one of the best choices when you want core work without crunches. It trains the body to resist rotation, which helps with lifting, reaching, and carrying. That’s real-life strength, not gym decoration.
And yes, it can feel a little underwhelming at first. That’s fine. A quiet core is often a working core.
6. Dead Bug With Band Resistance
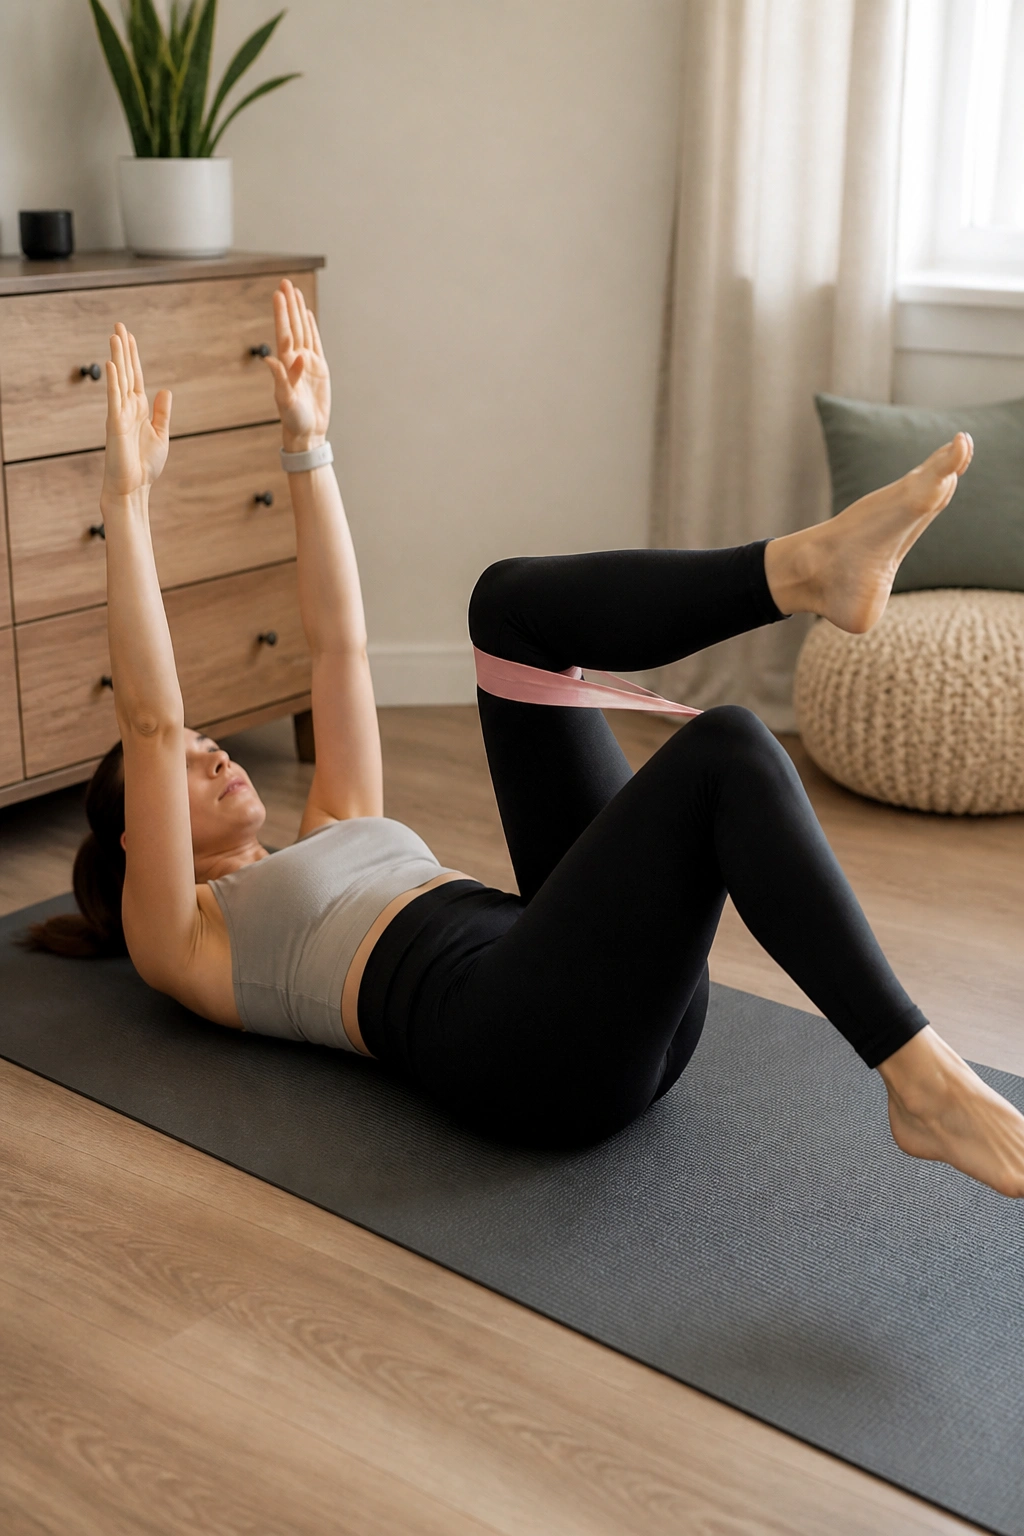
If crunches feel wrong but you still want to train the front of the core, this is the move.
Lie on your back with your hips and knees bent at 90 degrees. Place a light mini band around the thighs, then gently press the knees outward as you alternate lowering one heel toward the floor. Keep the ribs heavy and the lower back settled. Six to eight reps per side is plenty when you’re learning.
The band gives the legs a job to do, which helps the pelvis stay quieter. That matters more than chasing a dramatic burn. If your belly domes in the middle, make the motion smaller or keep both feet on the floor and just march one leg at a time.
A clean dead bug should feel steady through the trunk and a little tiring in the hips. If your neck is straining, your arms are probably doing too much.
7. Lateral Band Walks for Hip Stability
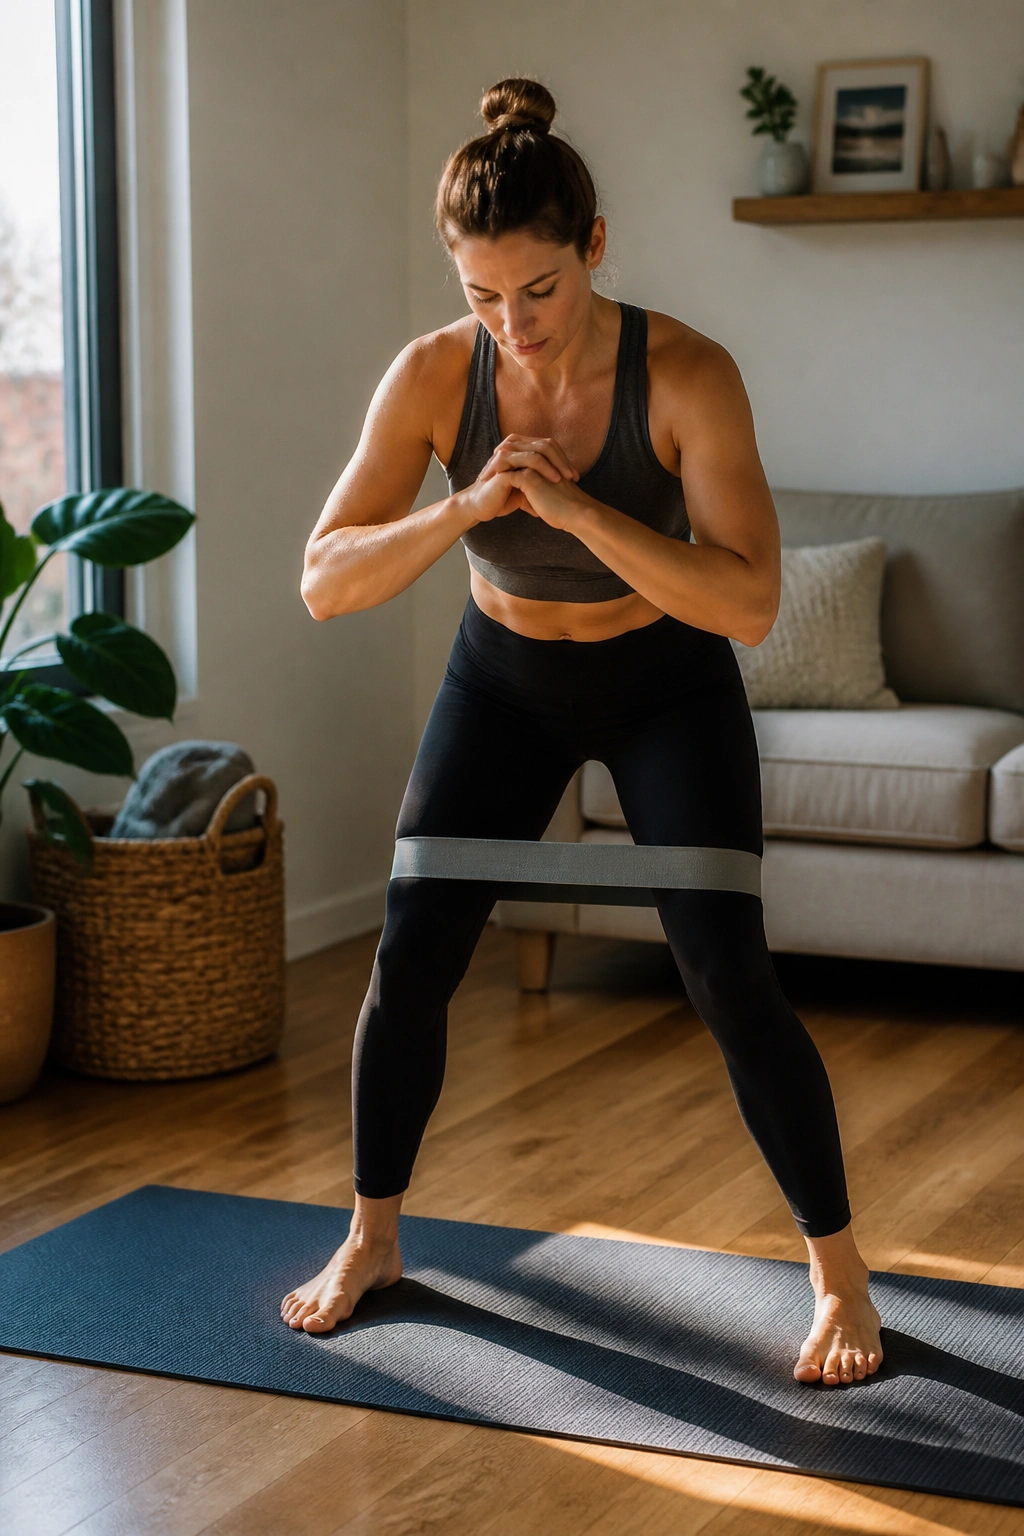
Tiny steps. Big payoff.
Place a mini band above the knees for an easier version or around the ankles for a harder one. Sit back slightly into a half-squat, keep the toes forward, and step side to side without letting the knees cave inward. Take 8 to 12 steps each way, rest, then repeat for 2 or 3 rounds.
When done well, this move wakes up the glute medius, the muscle on the side of the hip that keeps one hip from dropping when you walk. That can matter a lot postpartum, especially if your pelvis feels wobbly or your knees drift inward on stairs.
If the band at the ankles feels like too much, move it above the knees. That’s not cheating. It’s smart regression.
8. Bird Dog Row for Core and Back
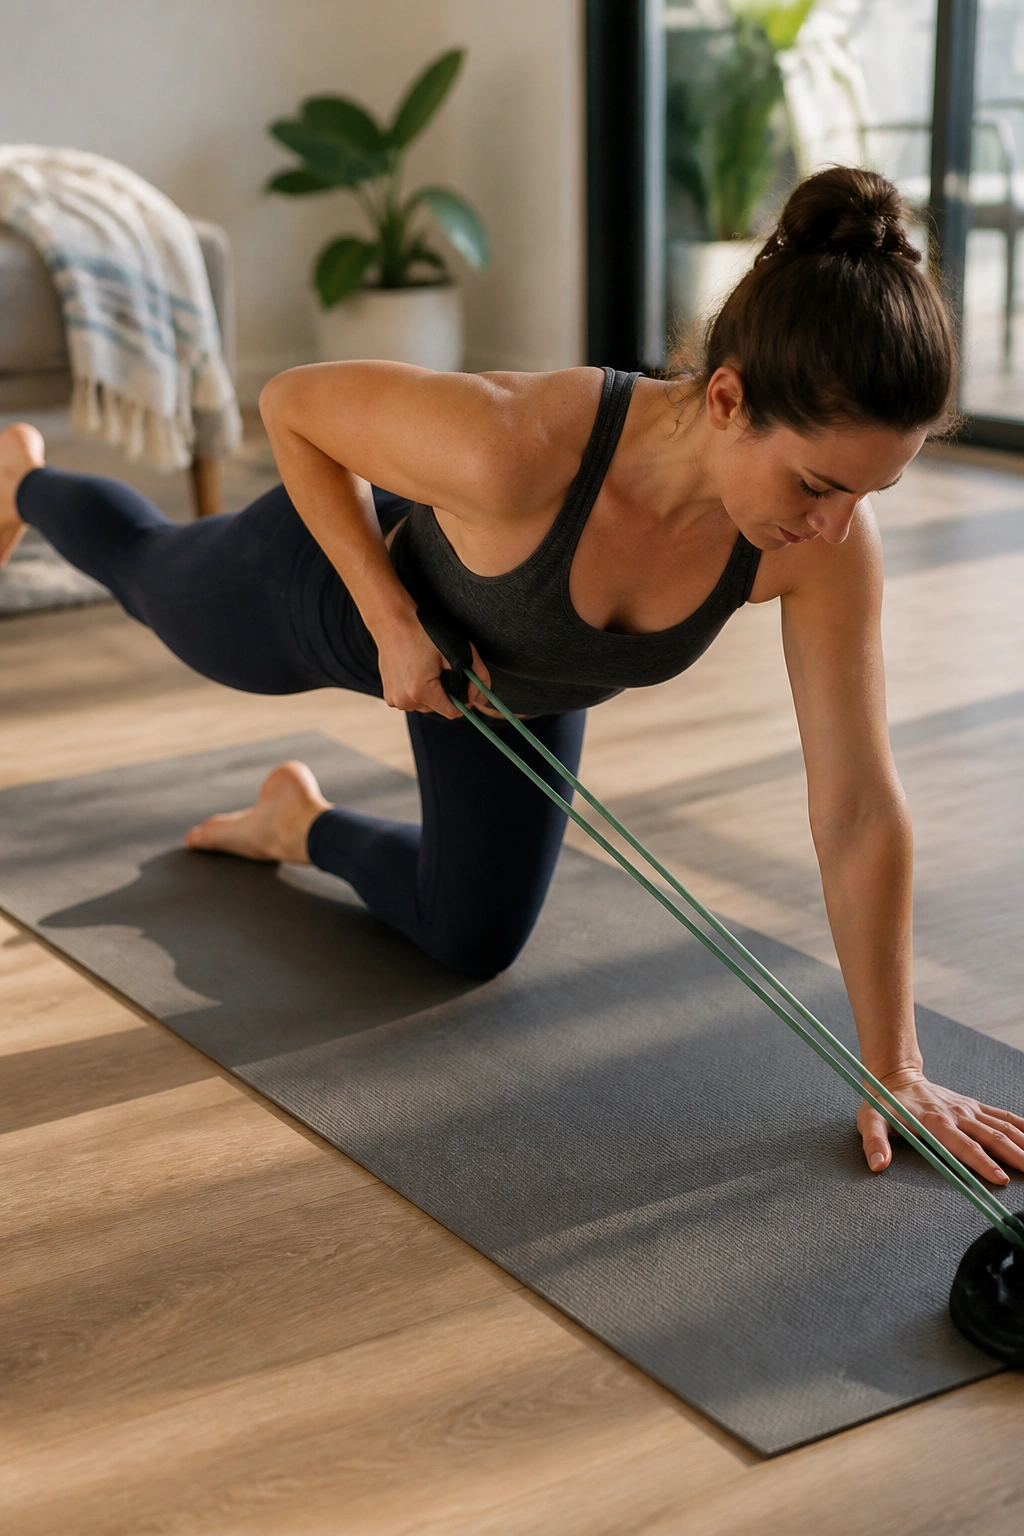
This is the move I’d hand to someone who wants full-body work but isn’t ready for planks or heavy loading.
Set up on all fours with a band anchored in front of you or under one hand. Extend the opposite leg behind you while you row with the working arm. Keep the hips level and the ribs from spilling open. A controlled 6 to 8 reps per side is enough to start.
The challenge here is not strength alone. It’s coordination. Your body has to stay organized while the arm and leg do different jobs, and that kind of control shows up everywhere else — carrying the baby seat, picking up toys, turning in the car, getting off the floor.
If the lower back sways or the pelvis spins, reduce the band tension and slow the rep down. Clean is better than ambitious.
9. Chair Squat With Band Tension
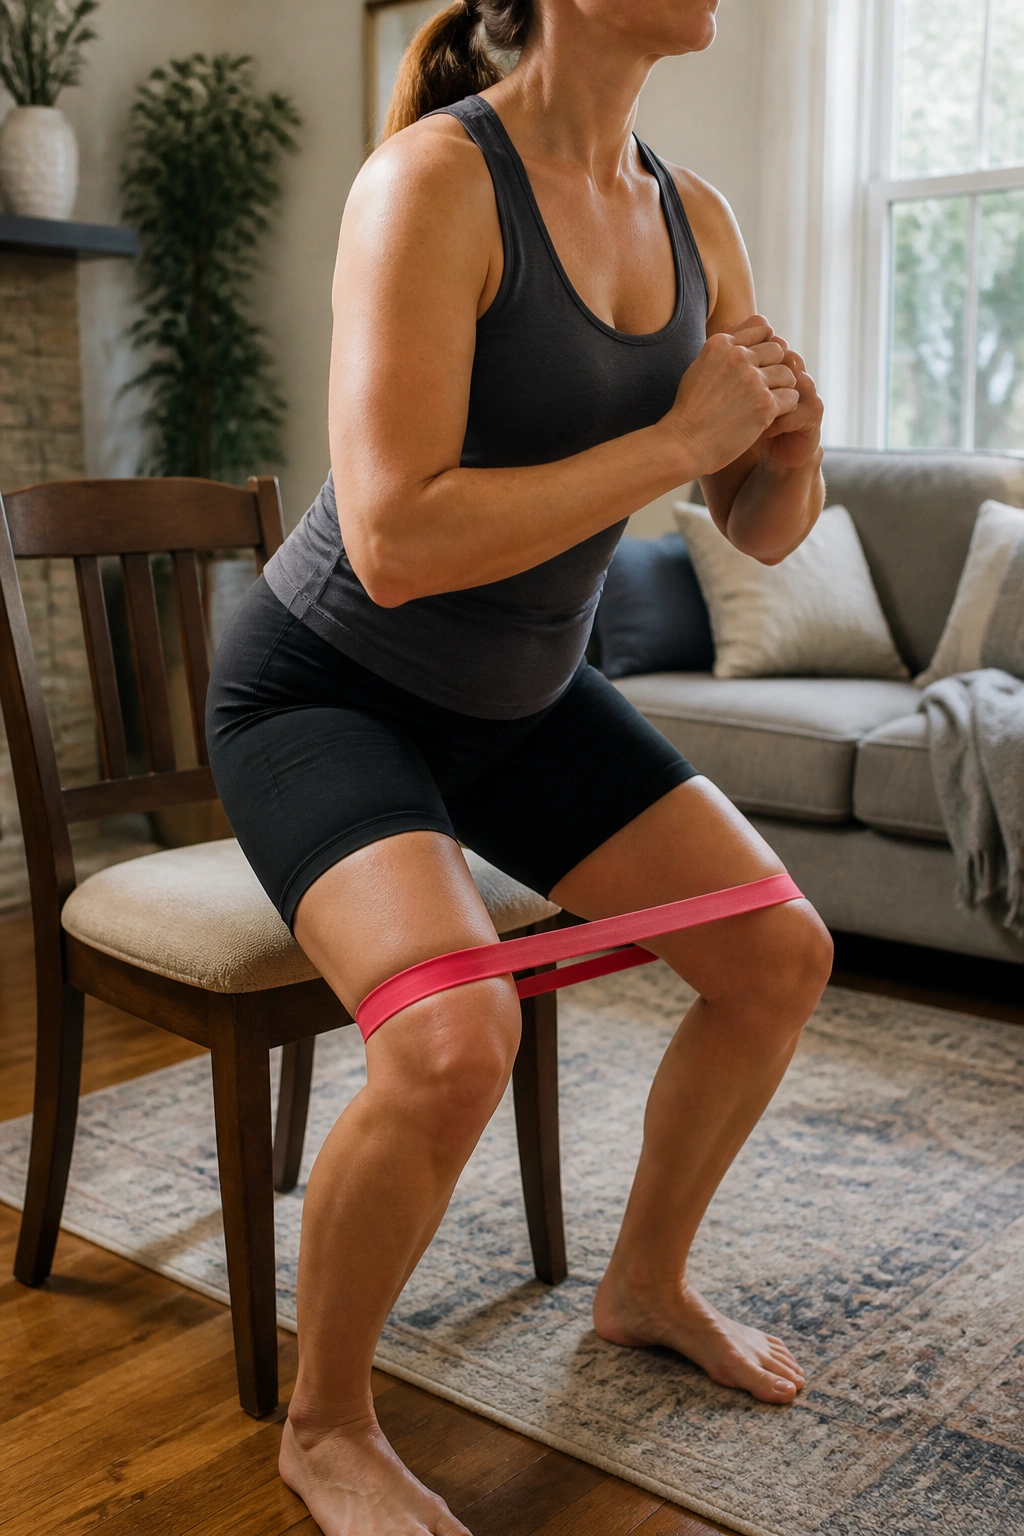
A squat to a chair feels ordinary, which is exactly why it works.
Place a mini band above the knees, stand in front of a sturdy chair, sit back until you lightly tap the seat, and stand again. Keep the chest proud without leaning back, and press the knees gently outward against the band on the way up. Aim for 8 to 12 reps for 2 or 3 sets.
This is one of the easiest ways to rebuild the muscles you use for standing up from the couch, lifting a car seat, and getting down to the floor without feeling like your legs are made of soup. Keep the movement smooth. Don’t drop into the chair.
One useful cue: imagine spreading the floor apart with your feet. That keeps the knees tracking well and helps the glutes show up instead of the lower back.
10. Band Pull-Aparts for Upper-Back Relief
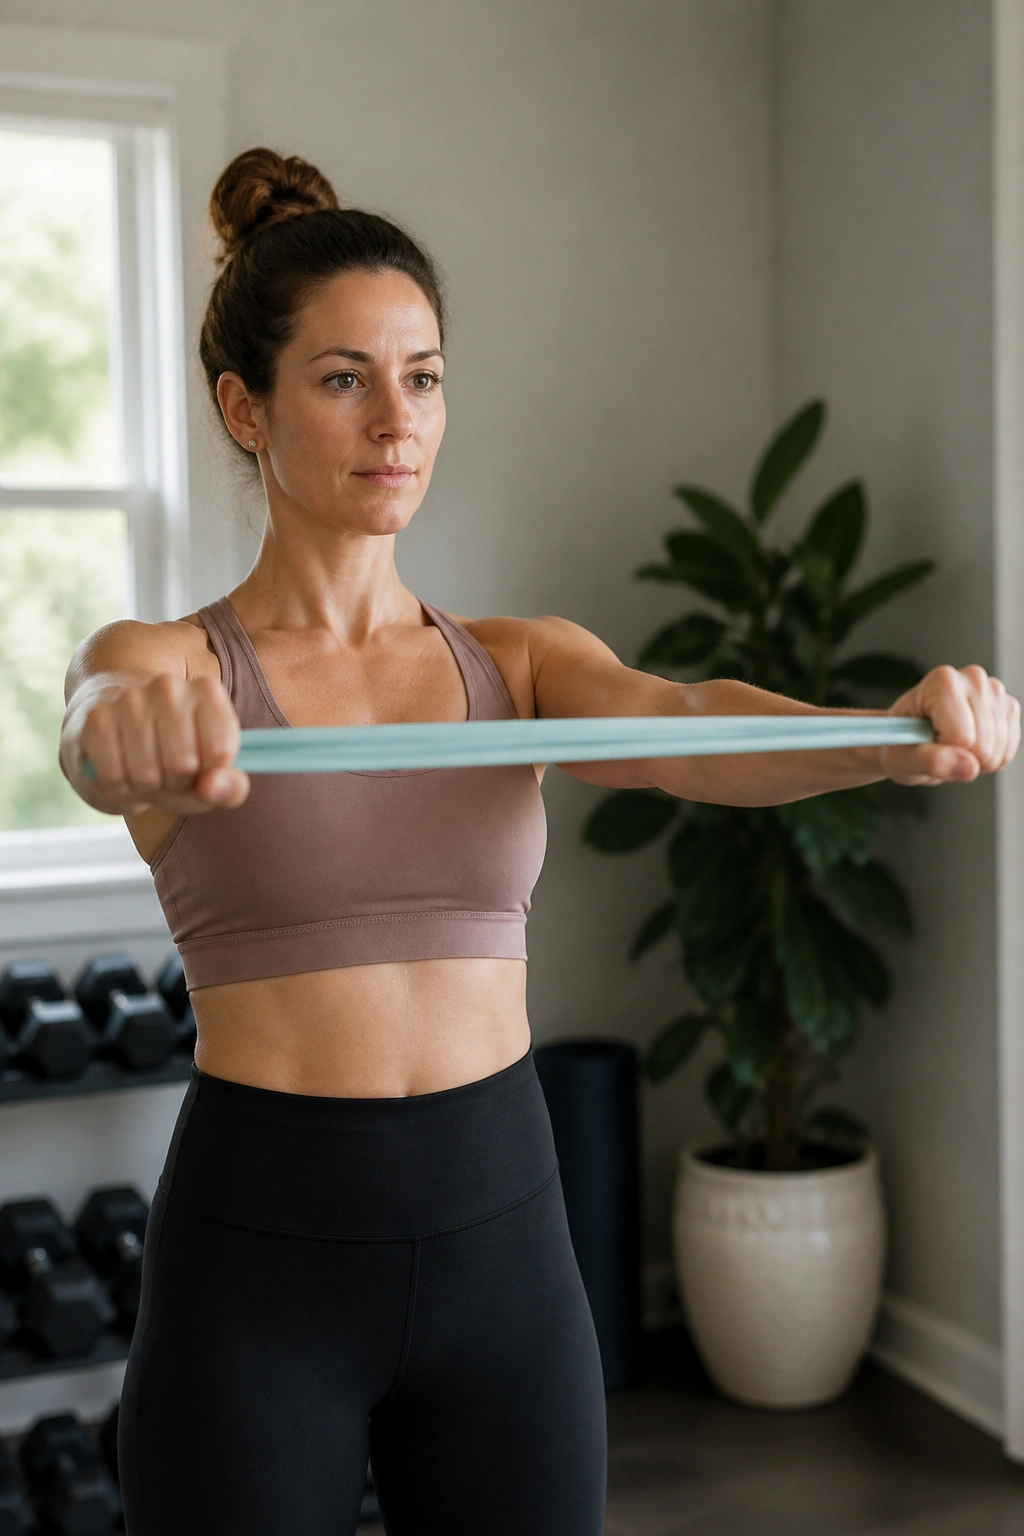
Pull-aparts are small, but they solve a real problem.
Hold a light band out in front of your chest with straight arms, then pull it apart until your hands move just past shoulder width. Pause, return slowly, and repeat for 15 to 20 reps. Keep the shoulders down and the ribs from popping up.
This move hits the rear shoulders and upper back, which can feel painfully underused after weeks of hunching over feeds, swaddles, and car seats. It also pairs well with rows, because rows pull the elbows back while pull-aparts open the chest line.
A lot of people overdo this by shrugging. Don’t. If your neck tightens, lower the tension and shorten the range. The band should feel like a useful tug, not a fight.
11. Half-Kneeling Chop and Lift
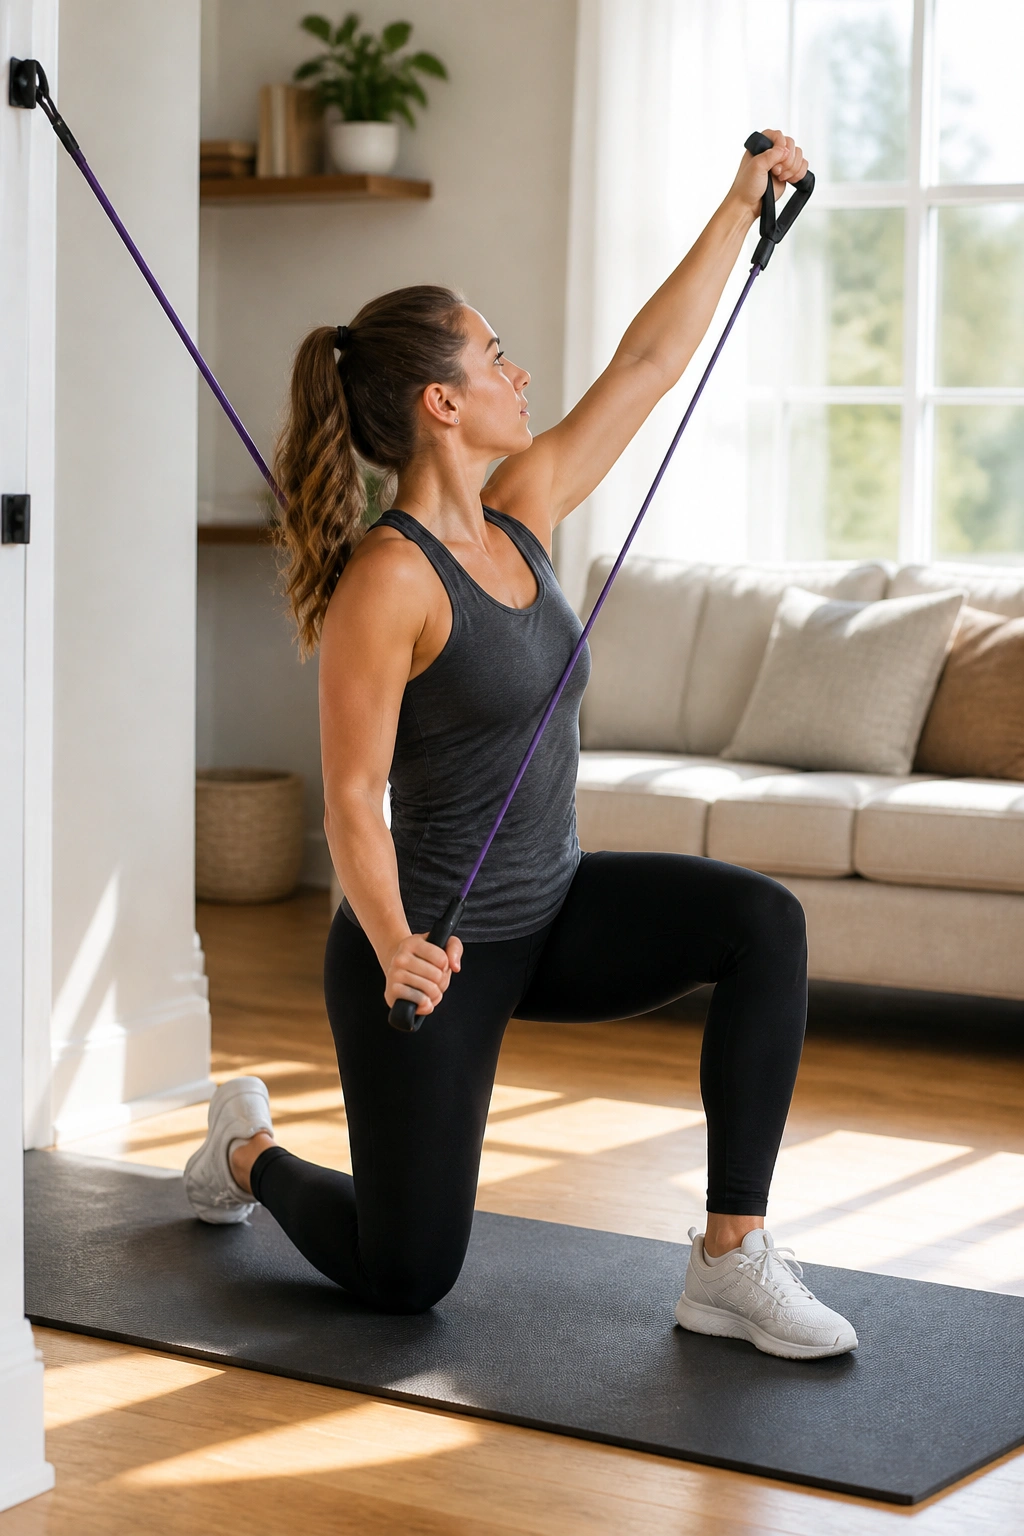
Half-kneeling is sneaky-good postpartum training.
Set one knee on the floor, keep the other foot in front, and anchor the band high for a chop or low for a lift. Pull the band across the body in a smooth arc while your torso stays tall and your hips stay steady. Do 8 to 10 reps each direction.
Why Half-Kneeling Helps
- It narrows the base, so your core has to do more.
- It gives the hips a chance to stay level.
- It teaches trunk control without impact.
That matters when you’re turning, reaching into a crib, or twisting with a baby on your hip. The move also gives you a clean way to train rotation without letting the spine throw the work into the low back.
If kneeling bothers the knees, pad them well or skip to a standing version. No prize for suffering on the floor.
12. Banded Good Morning for Hinge Strength
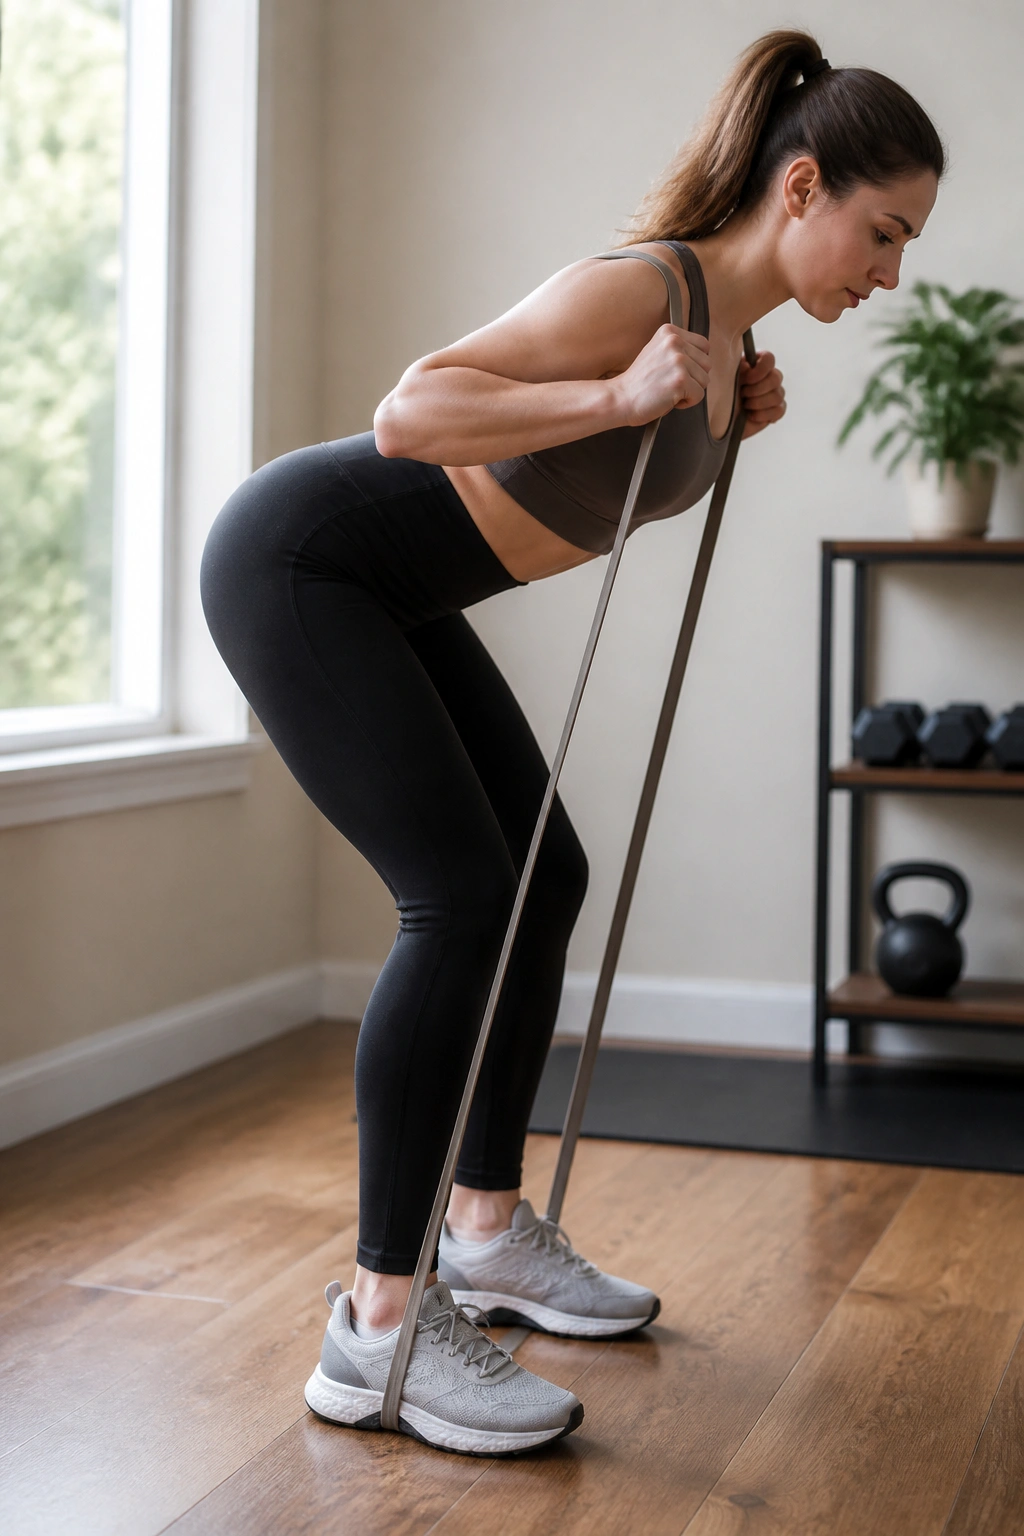
A good morning is a hinge, not a squat.
Stand on the band, hold the other end across the upper back or near the shoulders, soften the knees, and push the hips back until your torso tilts forward a bit. Then stand by squeezing the glutes. Do 10 to 12 reps, staying slow enough to feel the hamstrings load and release.
This pattern matters because postpartum life is full of hinges: picking up a laundry basket, lifting a stroller bag, grabbing a child from the floor. If the hips don’t know how to fold and extend cleanly, the low back tends to steal the job.
Keep the spine long. If the back rounds, reduce the range. A smaller, cleaner hinge teaches more than a bigger, sloppy one.
13. Split-Stance Row for Balance
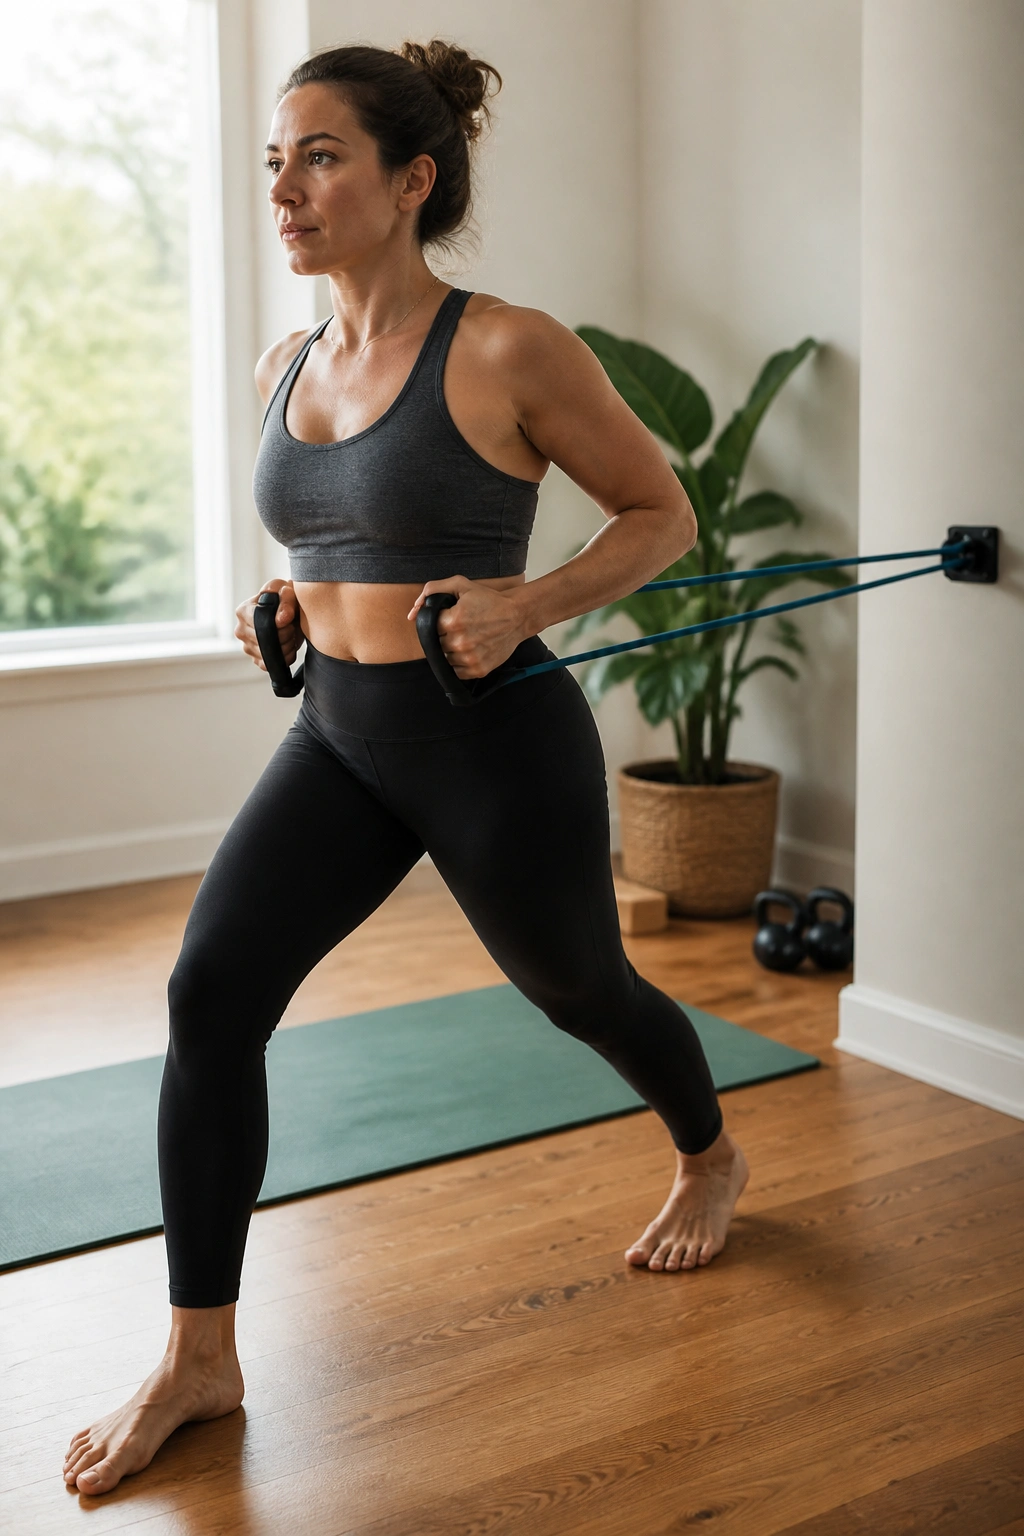
Try rowing without standing in a perfectly even stance. It changes more than people expect.
Put one foot a short step in front of the other, brace lightly through the front leg, and row the band while keeping the torso from drifting back. Ten to 12 reps per side is a solid target. Then switch legs and repeat.
The split stance makes the core and hips negotiate a little harder. That’s useful if one side of your body always feels busier than the other, which is common after months of baby carrying on the same hip or turning the same way over and over.
I like this one because it feels like real life. You’re not standing in a perfect textbook pose. You’re learning to stay stable while slightly off-center, which is exactly what motherhood asks for.
14. Side-Lying Leg Raises for Glute Medius
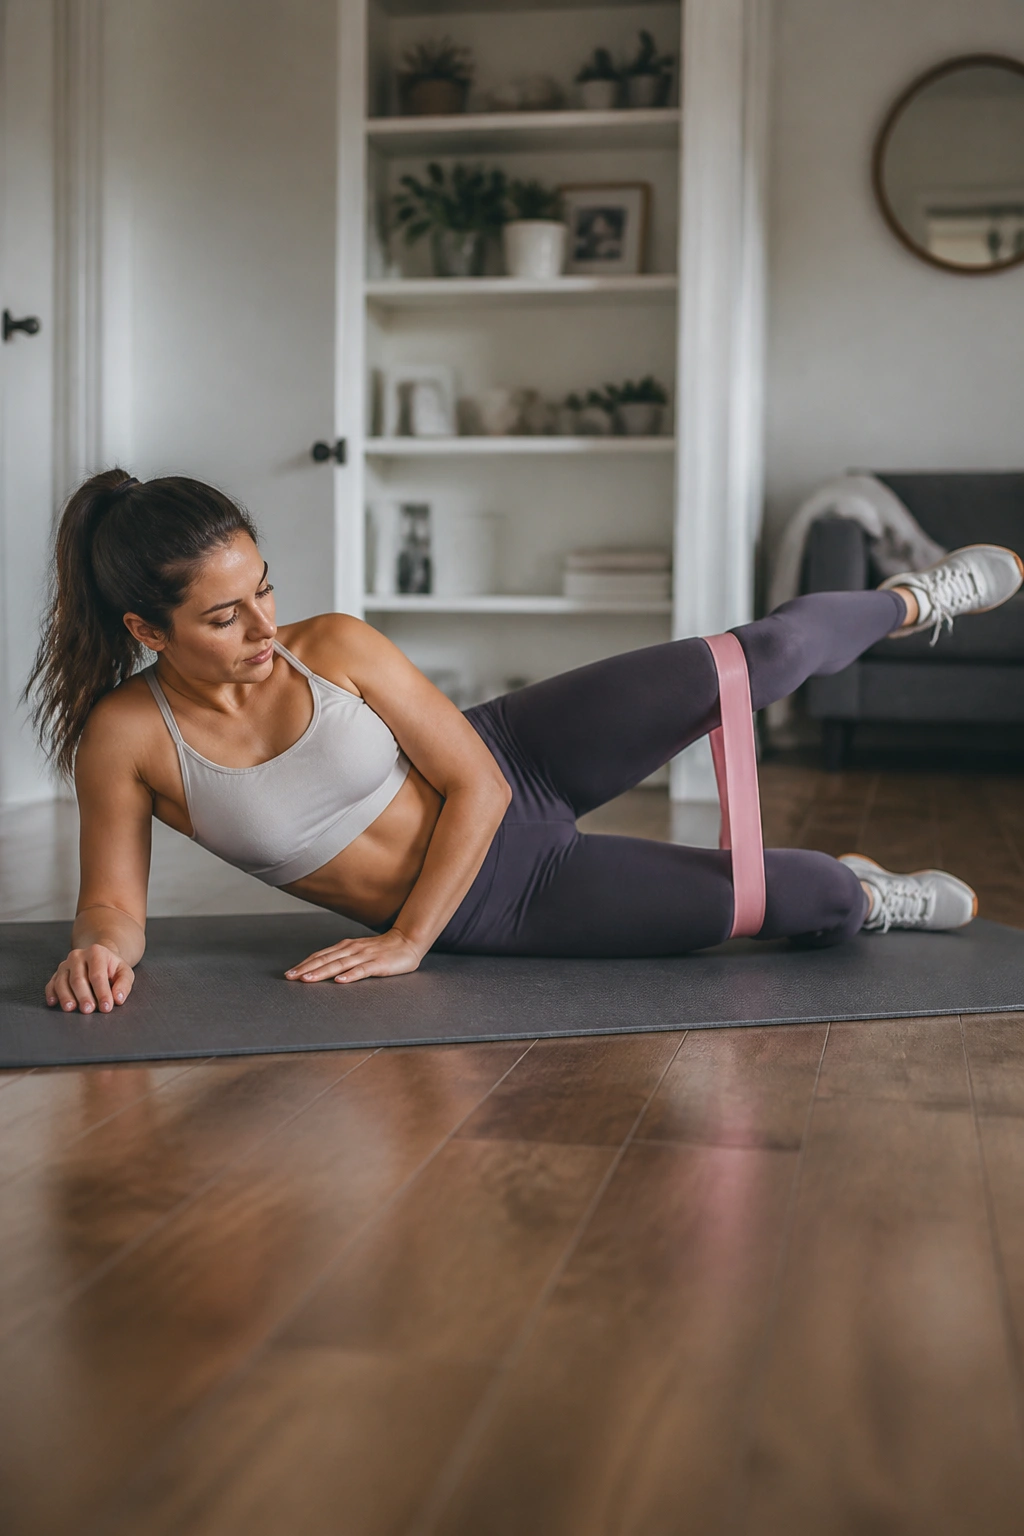
This one looks plain. It isn’t.
Lie on your side, stack the hips, and lift the top leg without rolling the pelvis backward. A band above the knees or around the ankles adds enough resistance to make the side hip work. Keep the toes angled a little downward to keep the front hip from taking over. Twelve to 15 reps per side is a good range.
If you feel the front of the hip more than the side of the butt, move the top leg slightly behind the body line. That small shift usually changes everything. The glute medius should do the work, not the hip flexor.
One slow set can tell you a lot about your hip control. If the pelvis starts tipping, stop sooner and clean up the form before you add more reps.
15. Standing Kickback for Posture and Glutes
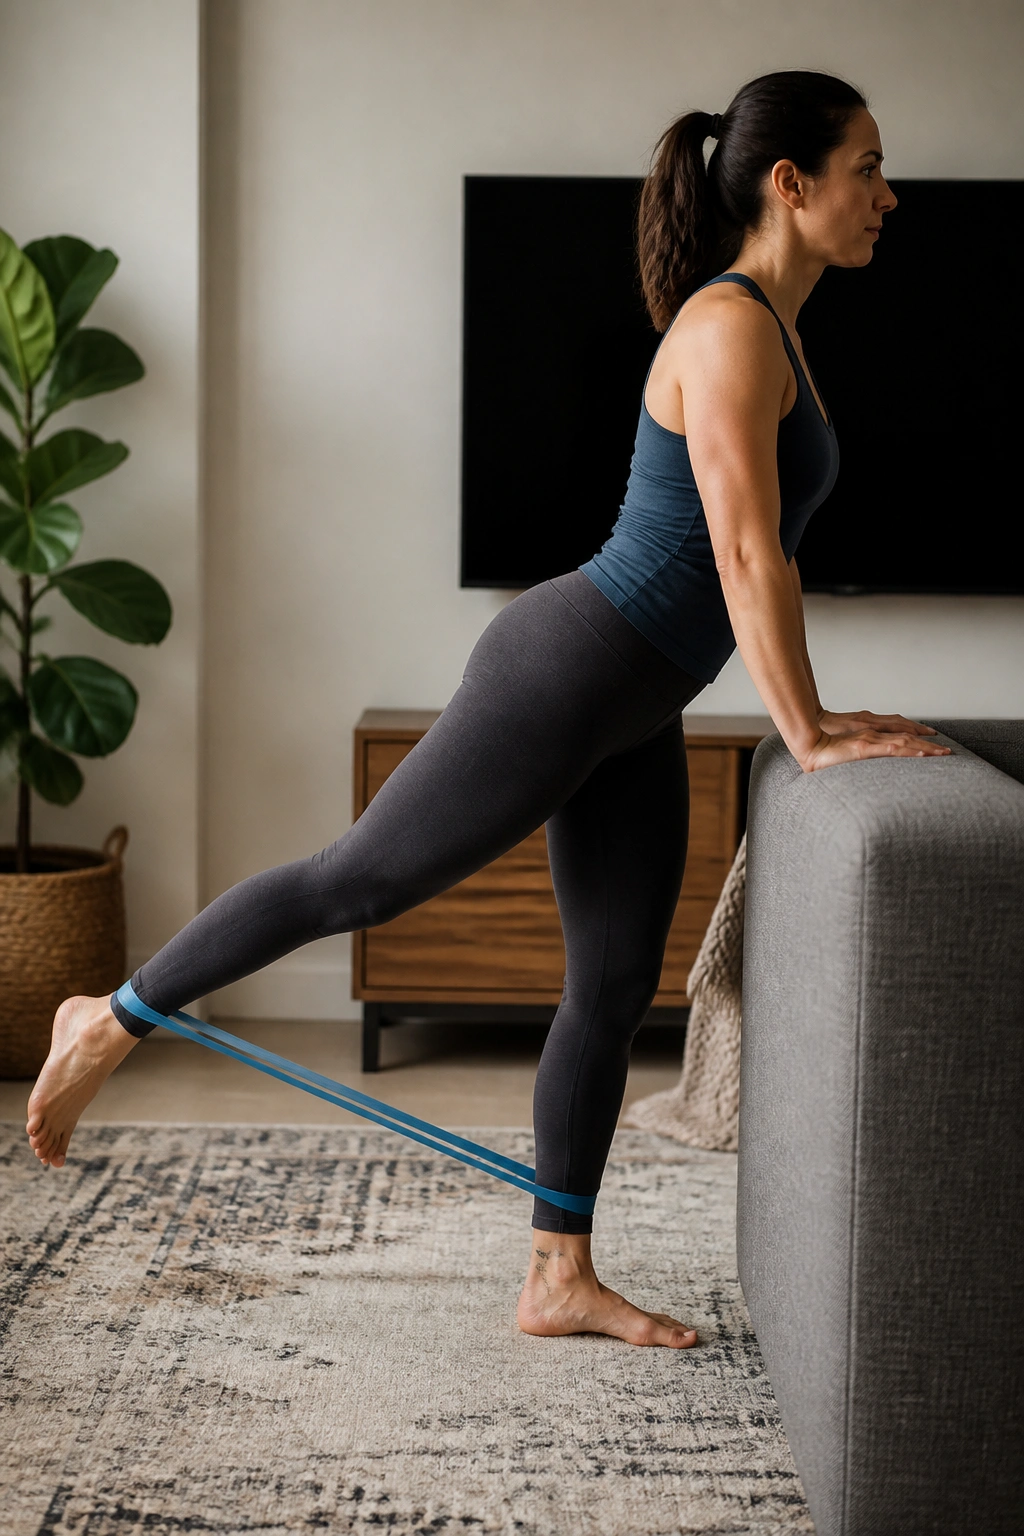
This is the standing version of a glute move that doesn’t require getting onto the floor.
Anchor the band low, loop it around one ankle, hold onto something sturdy, and kick the leg straight back without arching the low back. Keep the standing leg soft and the ribs stacked over the pelvis. Ten to 12 reps each side is enough.
The temptation is to fling the leg behind you. Don’t. The motion should come from the hip, not from a swing. If you feel it in the low back, shorten the range and slow down.
It’s a nice choice for the days when you want glute work but the floor feels like too much of a scene. There are plenty of those days postpartum. Use the standing option and move on.
16. Shoulder External Rotation With a Band
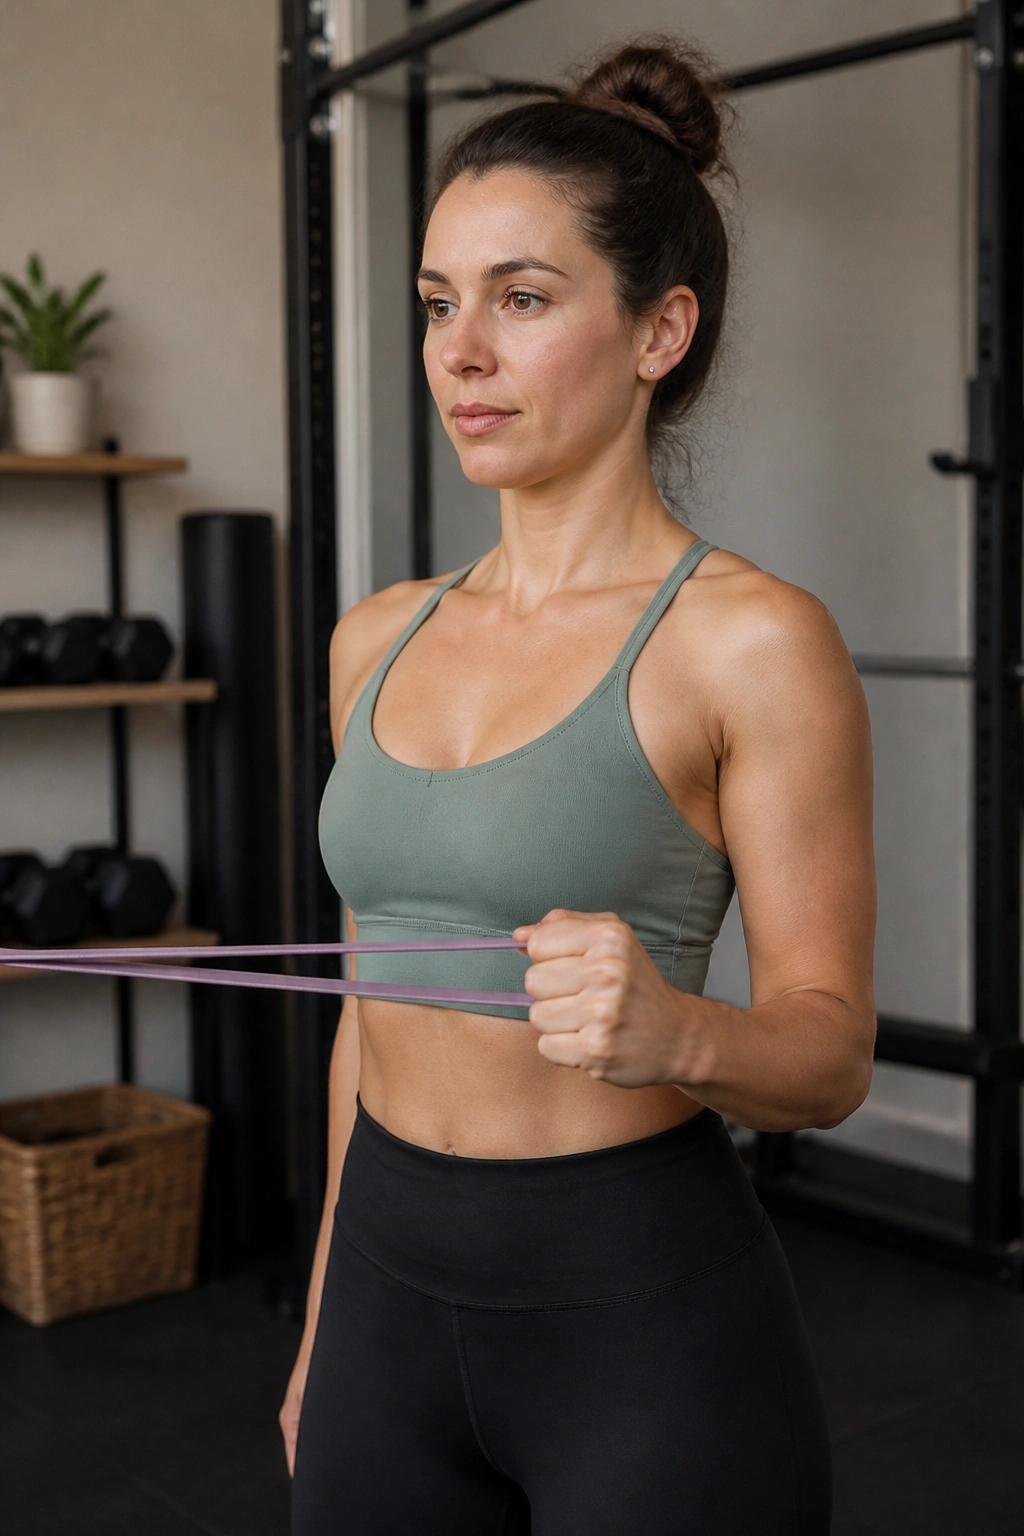
A small move can save a cranky shoulder.
Anchor a light band at elbow height, tuck the elbow against your side, and rotate the forearm outward while keeping the upper arm still. Think 12 to 15 reps per side, slow enough that the return path matters. Your wrist should stay in line with the forearm, and the ribs should stay quiet.
What You Should Feel
- A gentle pull in the back of the shoulder.
- No pinching at the front.
- No arching through the lower back.
This is a great pick if your shoulders feel dragged forward from carrying and feeding. It’s not flashy, and it will not leave you gasping. That’s the point. It keeps the shoulder joint clean and gives the upper back a chance to support all the pushing, lifting, and holding that piles up in daily life.
17. Marching Glute Bridge for Core Control
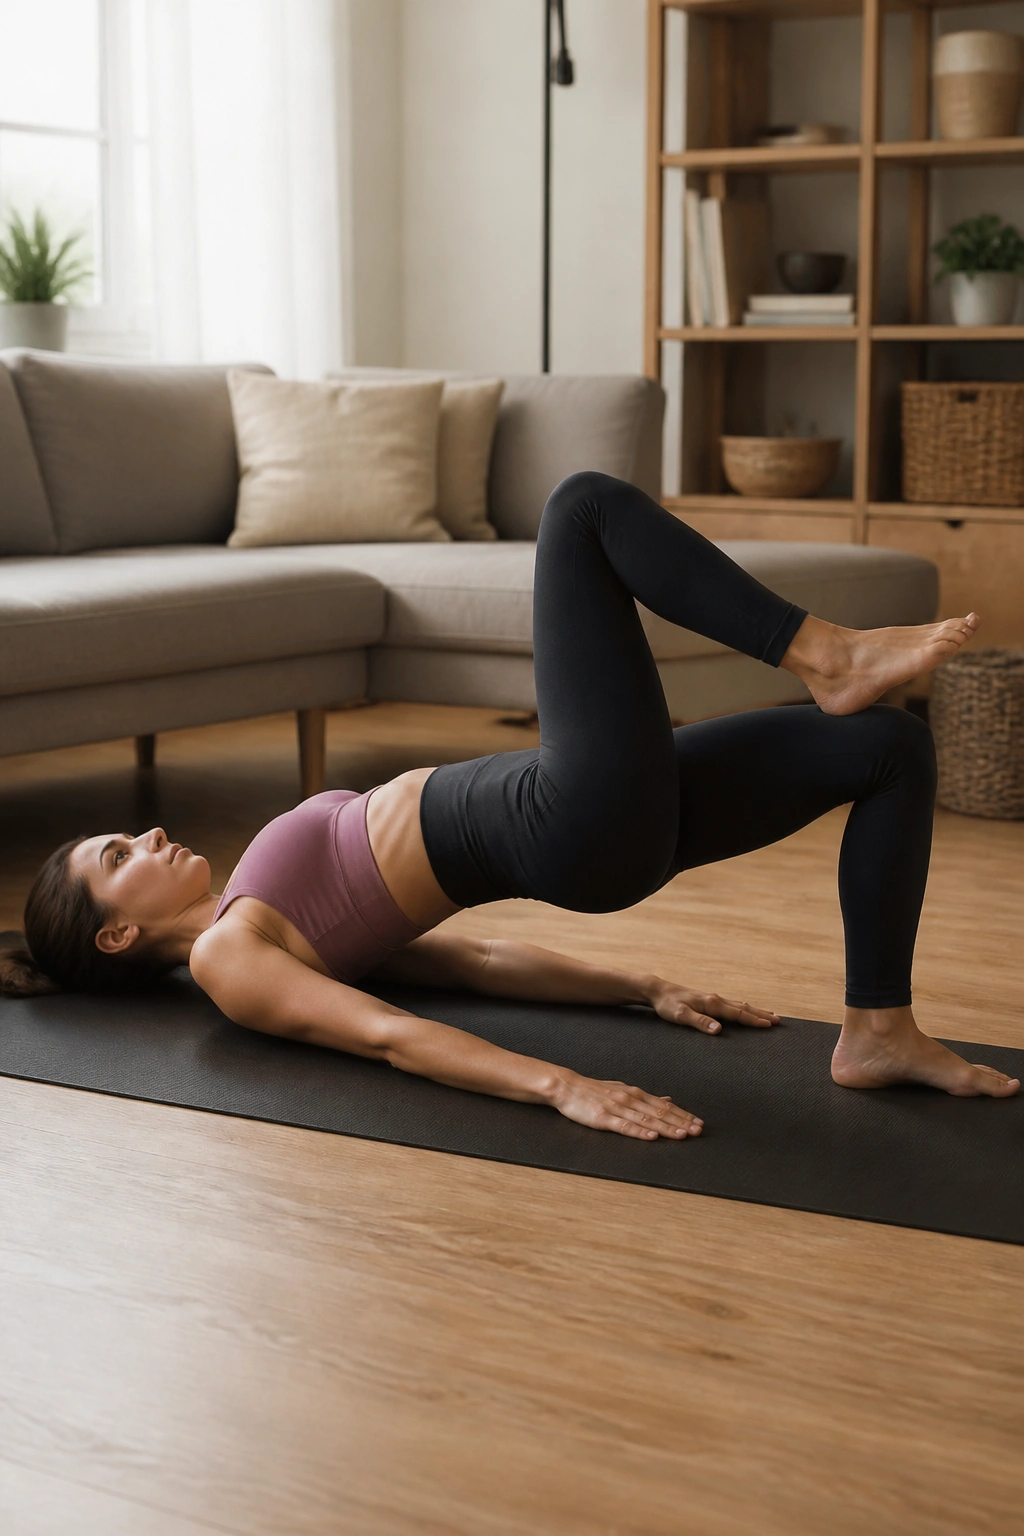
Once a regular bridge feels easy, marching makes it honest.
Lift into a bridge, hold the hips level, and raise one foot an inch or two without letting the pelvis dip. Put it back down and switch sides. Start with 6 to 8 marches per side. If the pelvis wobbles, go back to a normal bridge and keep building there.
This move asks the deep core to stay quiet while the legs move one at a time. That’s a useful skill for walking, carrying, and climbing stairs without feeling like the middle of the body is drifting around.
One sentence is enough here: If the bridge rocks, the march is too hard. Make it smaller and reclaim control before you chase the full version.
18. Reverse Lunge With Band Support
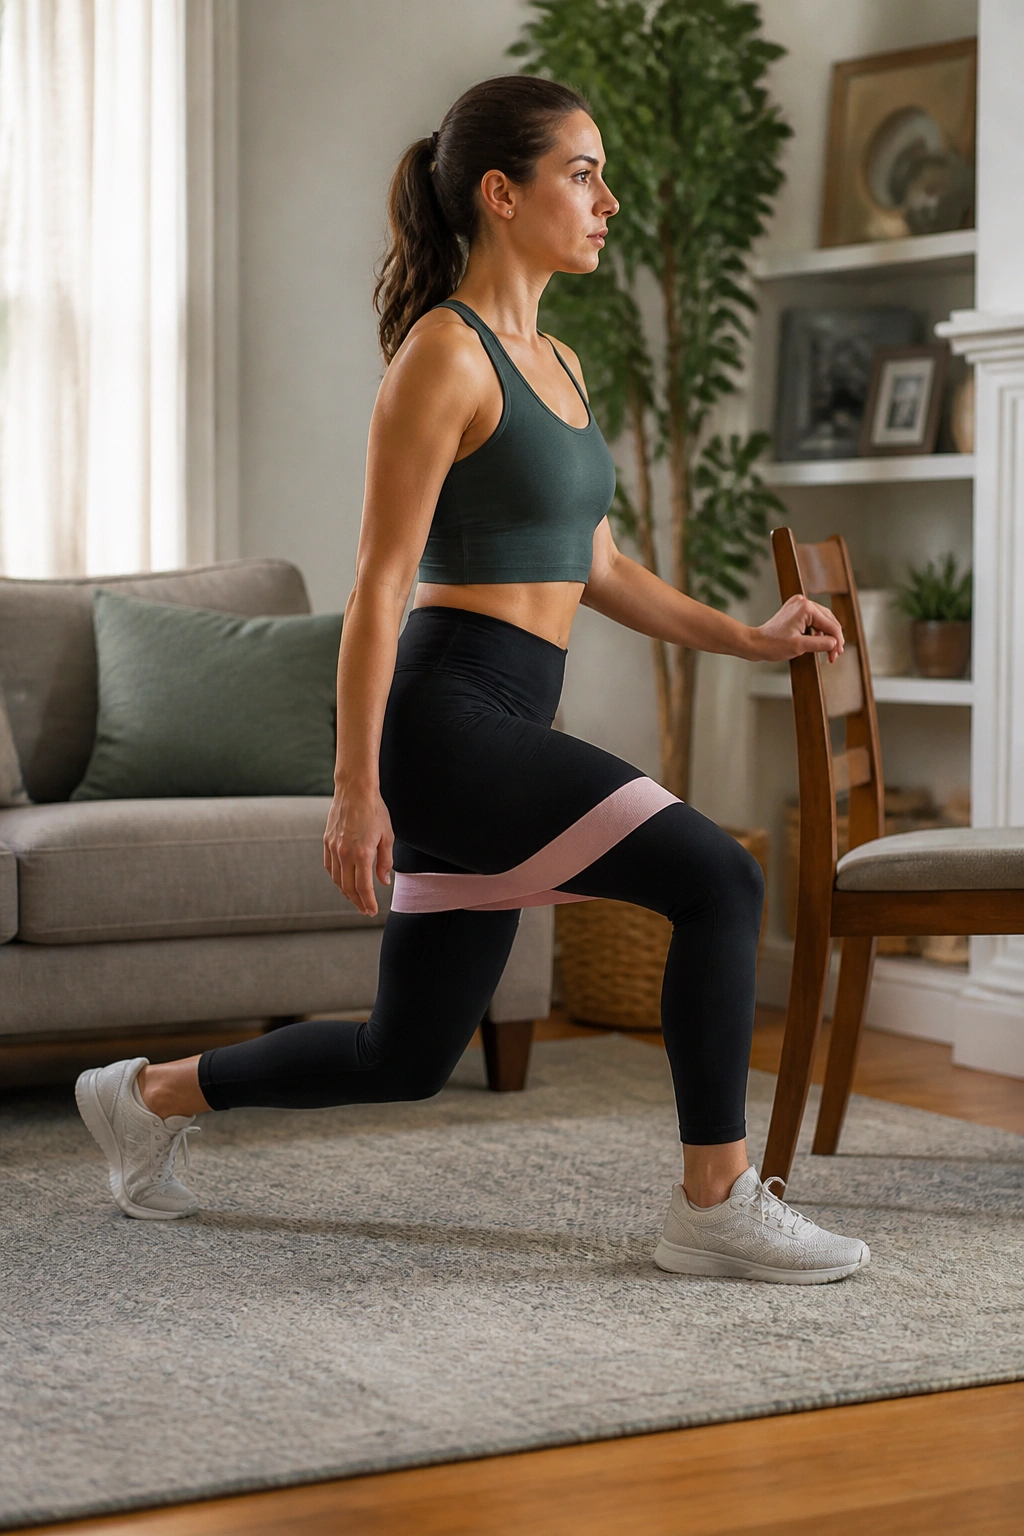
This is where single-leg strength starts to show up.
Place a mini band above the knees, stand tall, and step one leg back into a short reverse lunge. Keep most of your weight through the front heel, lower only as far as you can while staying steady, then stand. Try 6 to 10 reps per side.
Reverse lunges are kinder than forward lunges for many postpartum bodies because the backward step feels easier to control. They also train the legs to handle the start-and-stop rhythm of stairs, curbs, and getting up from the floor with a child in your arms.
If balance feels shaky, hold a wall or a chair with one hand. That support is smart, not weak. Clean movement beats a wobble every time.
19. Floor Press With a Band
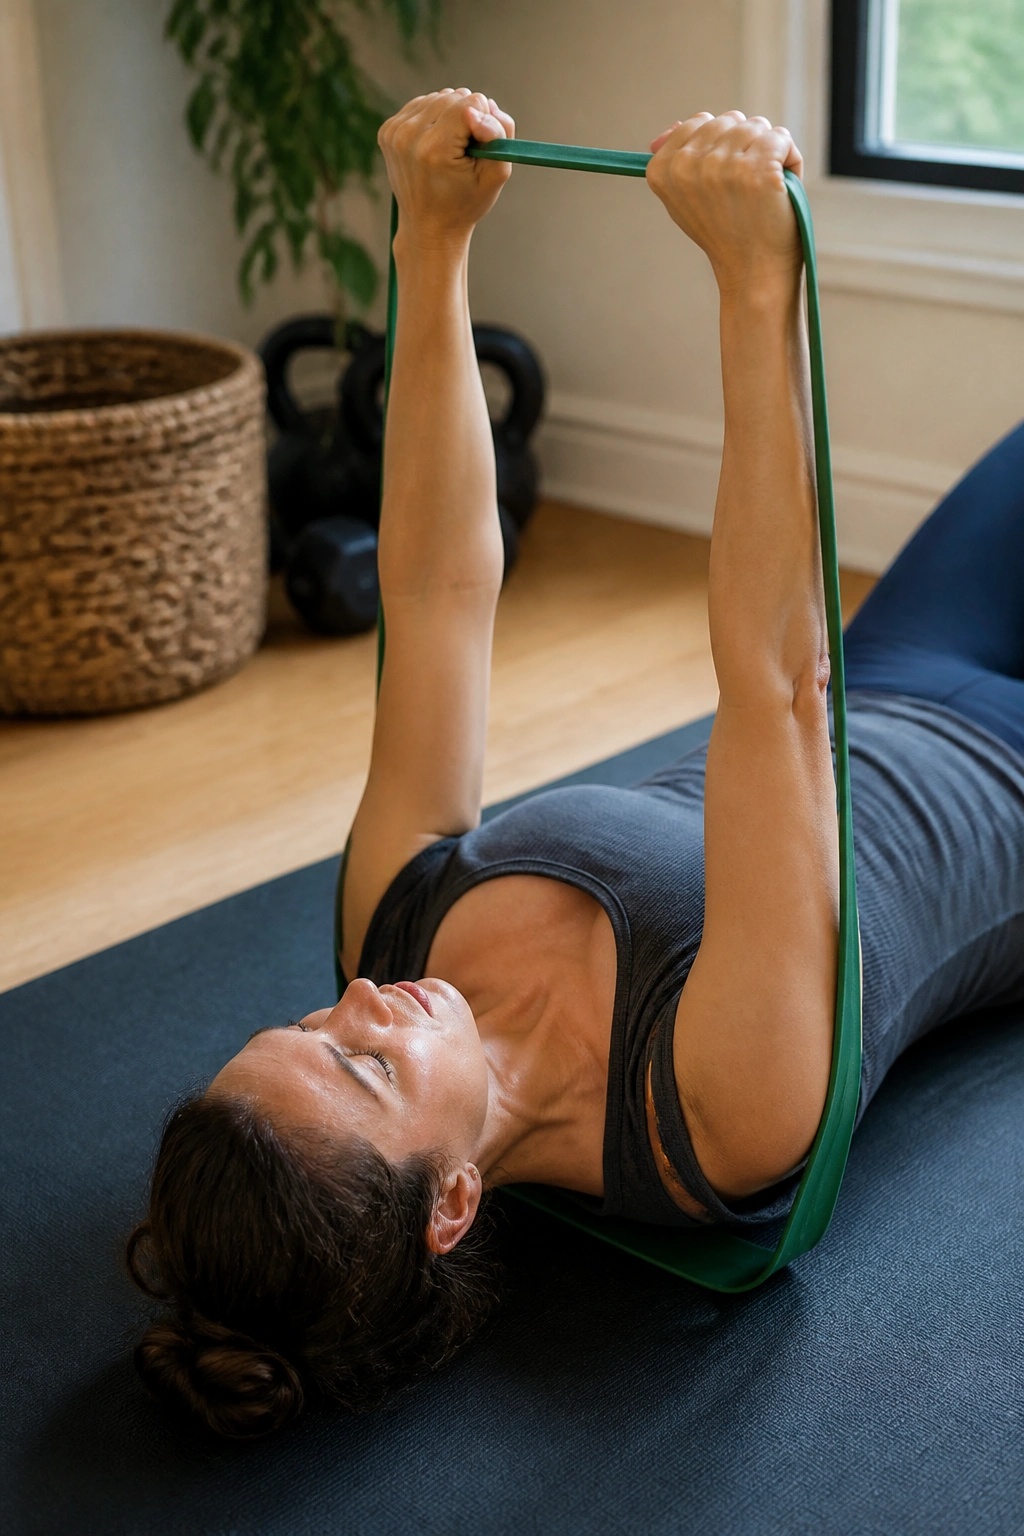
Not every upper-body move has to be a push-up.
Lie on your back, loop a band across the upper back and under the hands, and press the hands toward the ceiling until the elbows straighten. Lower with control until the upper arms touch or nearly touch the floor. Do 8 to 12 reps for a controlled set.
The floor gives you built-in range control, which is helpful if wrists, shoulders, or the core feel sensitive. It also keeps you from dumping weight forward like a full push-up might. That makes the press a cleaner option for rebuilding chest and triceps strength without too much drama.
A nice bonus: the floor keeps you honest. If you start arching or losing rib control, you’ll feel it fast.
20. Tall-Kneeling Anti-Rotation Press
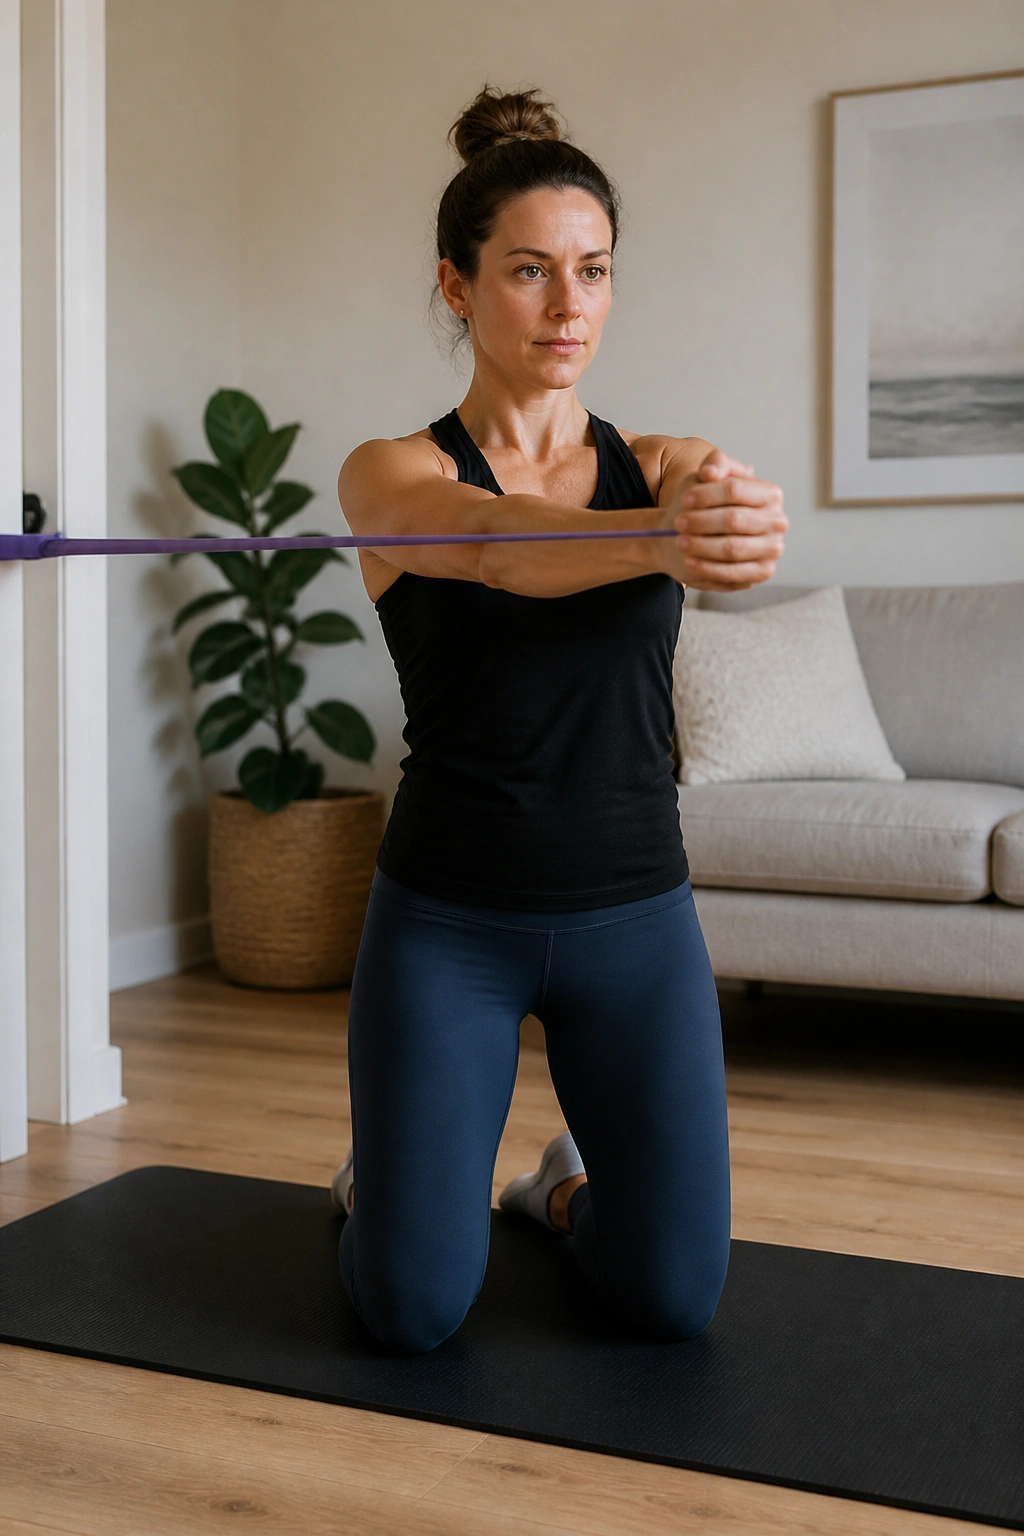
Tall-kneeling changes the whole feel of core work.
Set both knees on the floor, anchor a band at chest height from the side, and press the band straight out without letting the torso twist. Hold for a beat, bring it back, and repeat for 8 presses per side or 20-second holds. Keep the glutes lightly on so the hips don’t drift.
This one is a cousin of the Pallof press, but the kneeling position removes some help from the legs and makes the trunk work harder. That can be a good thing once the basic standing version feels easy.
If your knees complain, add padding. If your back arches, lighten the band. Tiny corrections make a huge difference here.
21. Postpartum Resistance Band Full-Body Circuit
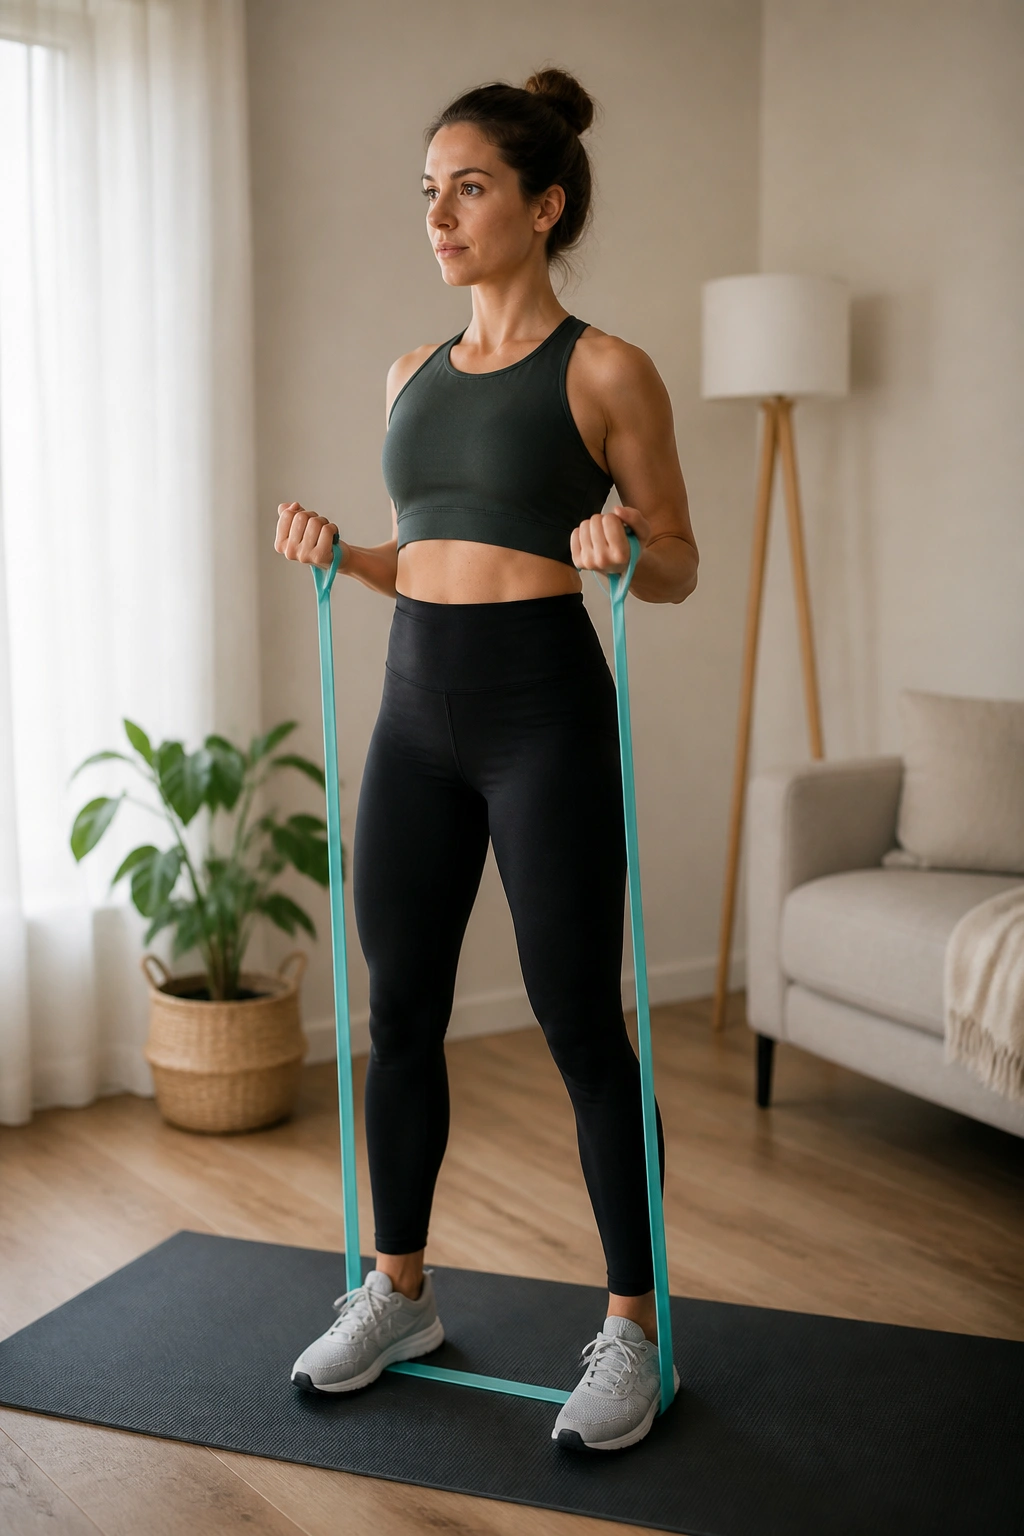
This is the workout you use when you want to feel like you trained, not just checked off a few rehab-style moves.
Pick a light to moderate band and run through the circuit below for 3 rounds. Rest 30 to 45 seconds between rounds, and keep every rep clean. If your form starts getting sloppy, stop one round early. That’s a smart session, not a failed one.
Simple Circuit
- 10 seated or standing rows
- 10 chair squats with band tension
- 8 dead bug reps per side
- 12 pull-aparts
- 10 glute bridges
Keep the pace smooth, not rushed. You should finish feeling worked, yes, but not wrecked. Postpartum resistance band workouts work best when they leave enough energy for the rest of the day.
If you want to make it tougher later, add a fourth round before you add a stronger band. More control first. More resistance second.
22. Five-Minute Band Cool-Down Flow
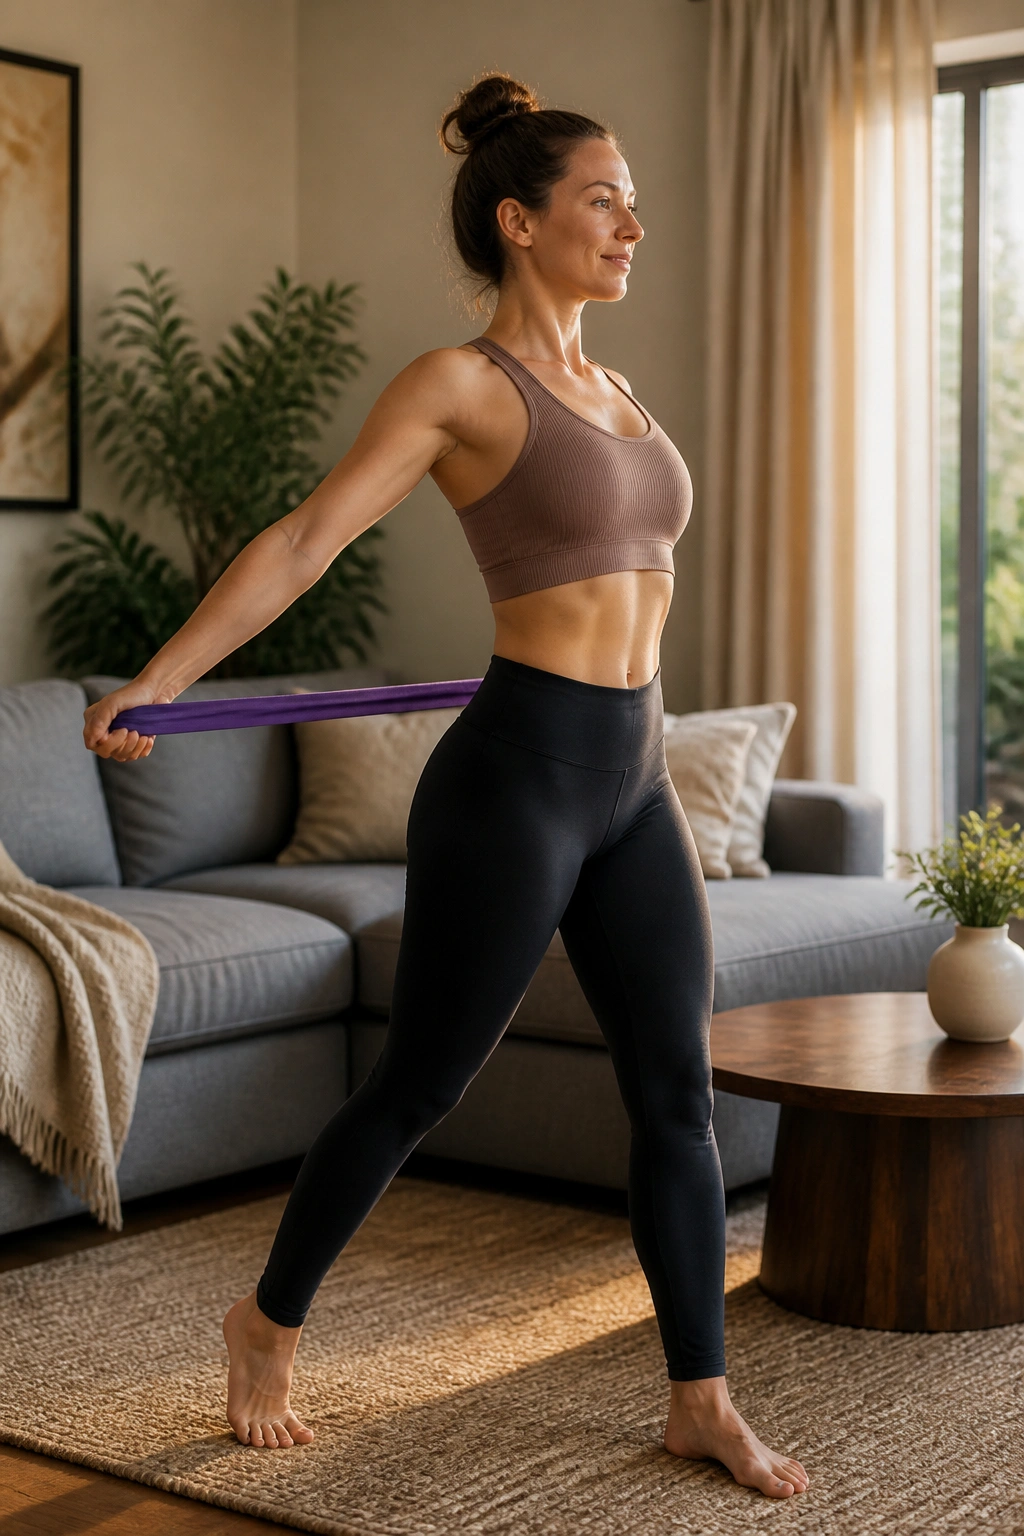
Finish with something that brings your body back down.
Use the band for a gentle chest opener, a hamstring stretch, and a side-body reach. Hold each position for 20 to 30 seconds and breathe slowly through the nose if you can. A simple flow might look like this: band-assisted chest stretch, seated hamstring floss, then child’s pose with the band reaching forward.
What matters here is not flexibility for its own sake. It’s the shift from work to recovery. That shift can help you feel less tight through the ribs, shoulders, and hips after the stronger moves.
A calm finish is not a bonus. It’s part of the training. When the body has spent months adapting, it tends to respond well to steady, repeatable cues — and this little reset does that without asking for much at all.
