



The best Pilates routines often start with almost nothing: a patch of floor, enough room to stretch your arms overhead, and the willingness to move slowly enough to notice what your body is doing. Strip away the reformer, springs, rings, and blocks, and mat Pilates gets honest fast. Your ribs flare or they do not. Your pelvis stays steady or it does not. There is nowhere to hide.
That is why zero-gear Pilates works so well at home. You are not fighting a machine. You are working against gravity, your own habits, and the small stabilizing muscles that tend to go missing after long hours in a chair. A lot of people expect bodyweight Pilates to feel easy. Then the shaking starts.
And the shaking is useful.
Some of these routines take 2 minutes. A few deserve closer to 8 or 10. Some are warm-ups, some hit the deep core, and a few sneak up on your glutes and upper back in a way that feels mild right up until rep 6. If your neck tends to grab during ab work, bend your knees more. If your low back takes over, shrink the range. Quality beats volume here by a mile.
1. The Hundred for a Fast Pilates Warm-Up
No move exposes lazy breathing faster than the Hundred. It looks like an ab exercise, and it is, but the bigger win is learning how to brace your trunk while the breath keeps moving. Lie on your back with your knees in tabletop or your feet planted if tabletop makes your hip flexors grip. Curl your head and shoulders up, reach your arms long by your hips, and start small arm pumps.
The classic rhythm is inhale for 5 pumps, exhale for 5 pumps, repeated 10 times for 100 pulses. If that feels rough on your neck, keep your head down for the first 3 breath cycles, then curl up for the last 2 or 3. You still get the breathing pattern, which is half the point.
What your core is doing
When you exhale fully, your deep abdominal wall has to cinch in without your ribs popping up. That is the part most people miss. A smaller curl with a better exhale will do more than a dramatic crunch with a flared chest.
Quick set
- Start with 5 breath cycles if you are new to mat Pilates.
- Move to 10 full cycles once you can keep your lower back heavy on the floor.
- Pump your arms from the shoulders, not from bent elbows.
- Keep your gaze toward your thighs so your chin does not jam into your chest.
Best cue: make the exhale long enough that your waist feels narrower by the end of it.
2. Pelvic Clock and Imprint for Low-Back Awareness
If your pelvis does not know where neutral is, everything above and below it gets messy. That sounds dramatic, though it is true. Pelvic clock work is one of the cleanest ways to build awareness before bridges, roll-ups, or leg lowers.
Lie on your back with knees bent and feet hip-width apart, about 10 to 12 inches from your seat. Picture a clock on the back of your pelvis: 12 o’clock points toward your navel, 6 toward your pubic bone, 3 and 9 toward your hip bones. Gently tip the pelvis toward 12, then toward 6. Then trace small circles around the whole clock face, 5 in each direction.
From there, move into imprint and release. Exhale and tilt the pelvis so the low back softly presses into the mat. Inhale and return to neutral, where there is a small natural curve under the lumbar spine. Do 8 to 10 slow reps.
This routine is gold for people who feel every core move in the low back. It teaches you the difference between bracing and flattening yourself rigid. Those are not the same thing.
If the movement feels tiny, good. Tiny is where the useful stuff lives here.
3. Roll-Down to Half Roll-Back for Spinal Mobility
Why does the full roll-up feel impossible for so many people? Partly because it asks for abdominal control, hip stability, spinal sequencing, and hamstring tolerance at the same time. Break it down, and the move starts making sense.
Sit with your knees bent and feet flat, hands reaching forward at shoulder height. Exhale and tuck your pelvis first, then roll back one bone at a time until your arms are parallel with your thighs and your low back is lightly rounded. Pause for one inhale. Exhale again and return to sitting without yanking from the neck or shoulders.
A slow half roll-back for 6 to 8 reps is often more useful than flinging yourself through 2 ugly full roll-ups. You are teaching the spine to articulate, not trying to win an award for momentum.
Try this pacing
Go down for a count of 4, hold for 1 breath, then come back up for a count of 4. If your feet lift, place them a touch wider. If your hip flexors grip, shorten the range until the work moves back into your abs.
One more detail: keep your shoulders soft. The second your upper traps take over, the move turns into a shrug with a side of frustration.
4. Single-Leg Stretch for Deep Core Timing
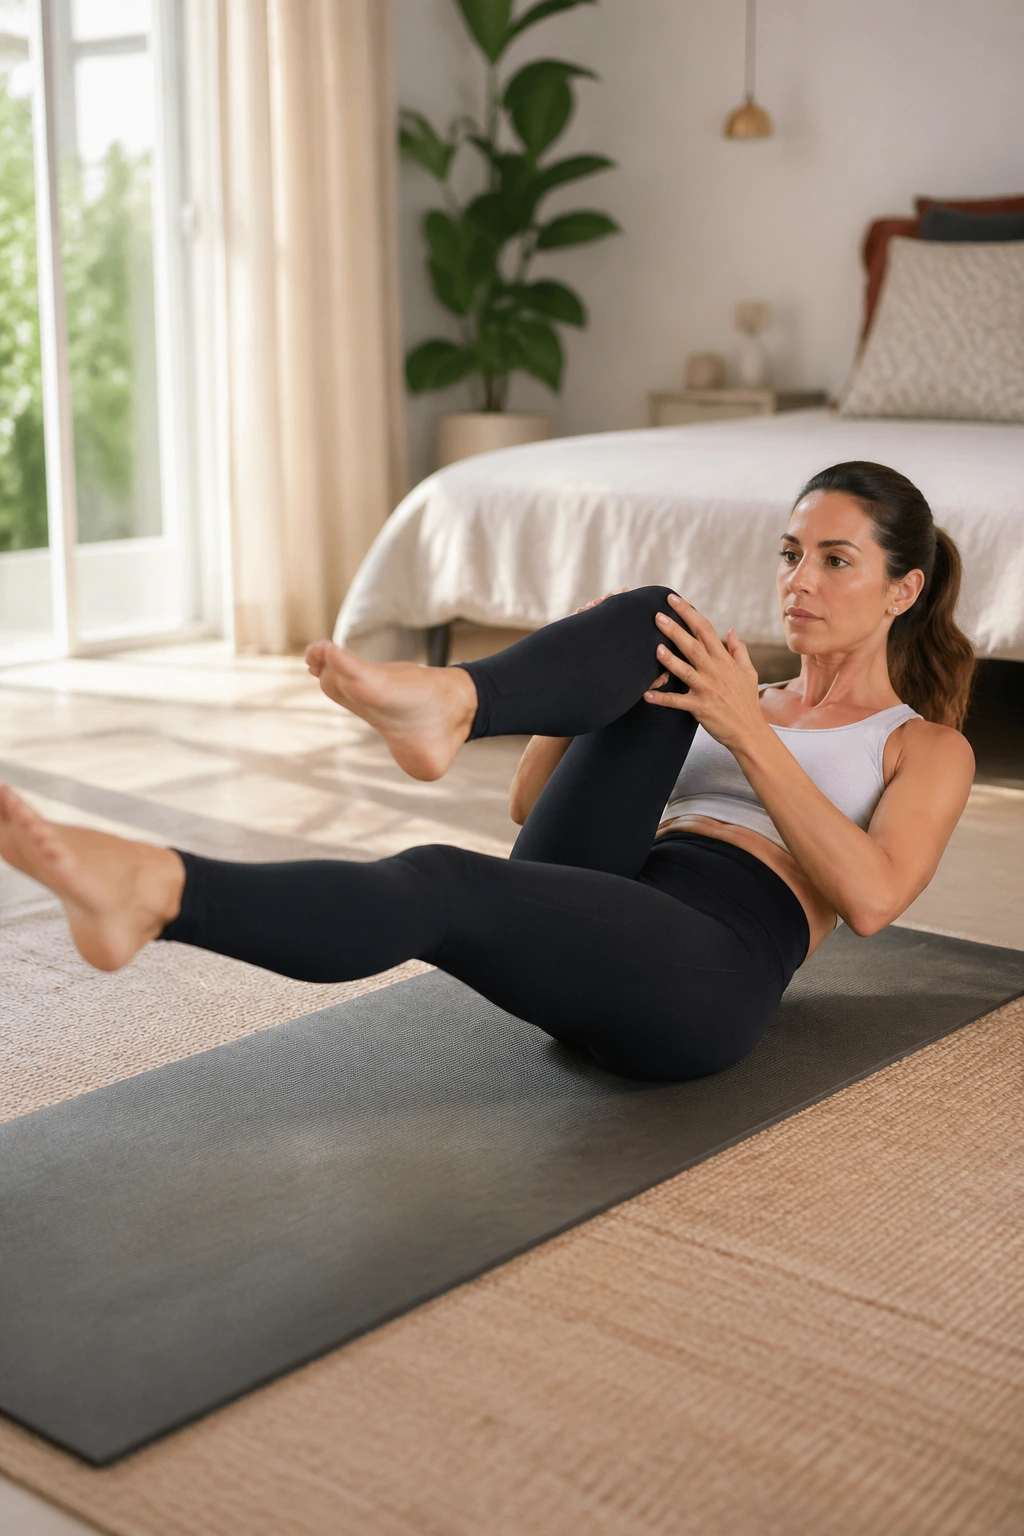
Picture the moment when one knee pulls in and the other leg reaches long without your pelvis rocking side to side. That timing is the whole routine. Single-leg stretch is not flashy, though it teaches control better than a pile of rushed crunches.
Set up on your back with your head and shoulders curled up, one knee hugged toward the chest, the other leg reaching out at roughly a 45-degree angle. Place one hand on the ankle and the other on the knee of the bent leg, then switch legs with the exhale. Move like you are sliding through thick water, not pedaling a bike.
A clean set looks like this:
- 8 to 12 switches per side
- Exhale on each change
- Bent knee draws in without tugging the neck
- Extended leg stays high enough that the low back does not peel up
Most people cheat by making the switch too big. Smaller is harder. Smaller also works.
If your neck gets tired first, put your head down and keep the leg pattern. If your front ribs pop, bring the reaching leg higher. You should feel lower abs, front-body control, and steady breath, not strain in the jaw.
5. Double-Leg Stretch for Full-Body Coordination
Double-leg stretch has a sneaky way of making even strong people lose their shape. Both arms move. Both legs move. Your trunk has to stay organized while everything else reaches away from center. That is why I like it so much.
Start curled up on your back with your knees pulled in and your hands resting lightly on the shins. Exhale to brace. Then inhale as your arms sweep overhead and your legs extend out, stopping well before your low back lifts. Circle the arms back around as you exhale and pull the knees in again. Aim for 6 to 10 slow reps.
Done well, the movement feels like the body is expanding and then gathering itself back together. Done poorly, it turns into flailing limbs with a sore neck.
There is a fix. Keep the legs higher than you think you need. Reach the arms only as far overhead as your ribs can stay down. If your shoulders live near your ears, send the arms on a lower diagonal rather than all the way back.
The win here is control during the reach. Plenty of people can curl up. Fewer can hold center while the lever gets longer.
6. Crisscross for Obliques That Actually Work
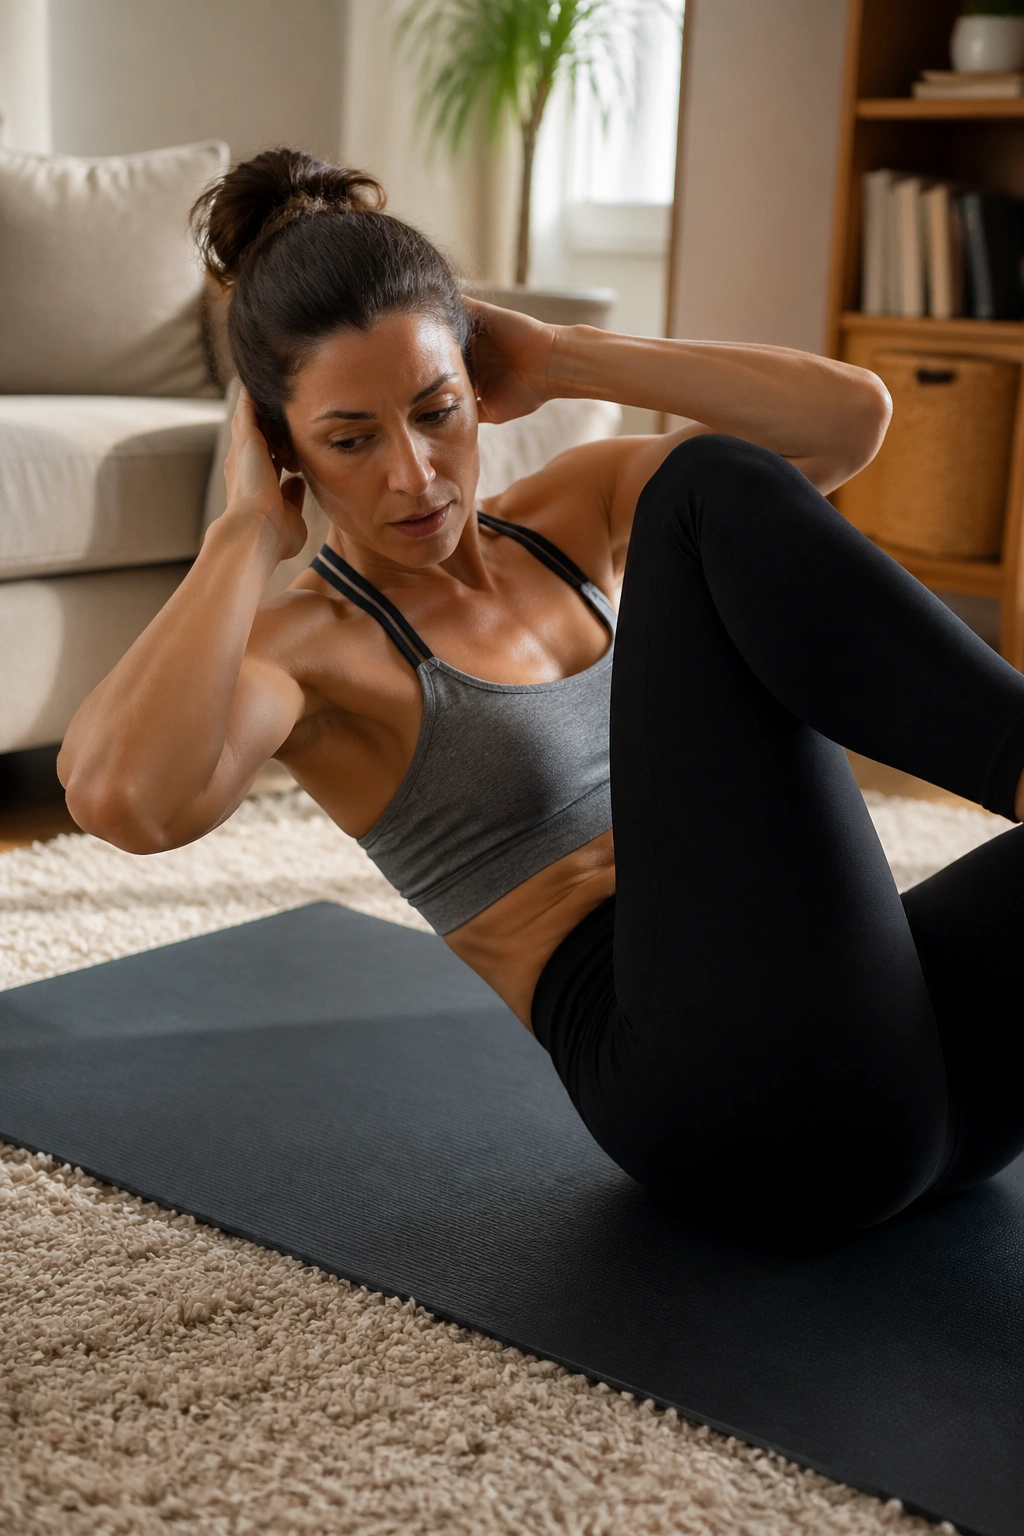
Unlike fast bicycle crunches, crisscross only earns its keep when you slow it down. If you have ever blasted through 30 reps and felt nothing but your neck, you were probably rotating the elbows and not the ribs.
Set up as you would for single-leg stretch: head and shoulders lifted, knees in tabletop. Extend one leg out while rotating your rib cage toward the bent knee. Then switch. The cue I use most is simple: turn the chest, not the elbow. Your elbow will follow on its own.
Pause for half a second at each side. That tiny hold changes everything. Suddenly the obliques have to decelerate the twist instead of letting momentum handle it.
This is a good routine for days when you want core work without endless spinal flexion. Try 6 to 8 reps per side, rest for 20 seconds, then repeat for 2 or 3 rounds. Keep the range modest at first.
Who benefits most? Anyone whose trunk feels stiff in rotation, anyone who sits all day, and anyone who wants ab work that reaches beyond the front of the stomach. If your hip flexors dominate, keep both knees bent tighter and the extending leg a touch higher.
7. Scissors for Hamstrings and Lower-Abs Control
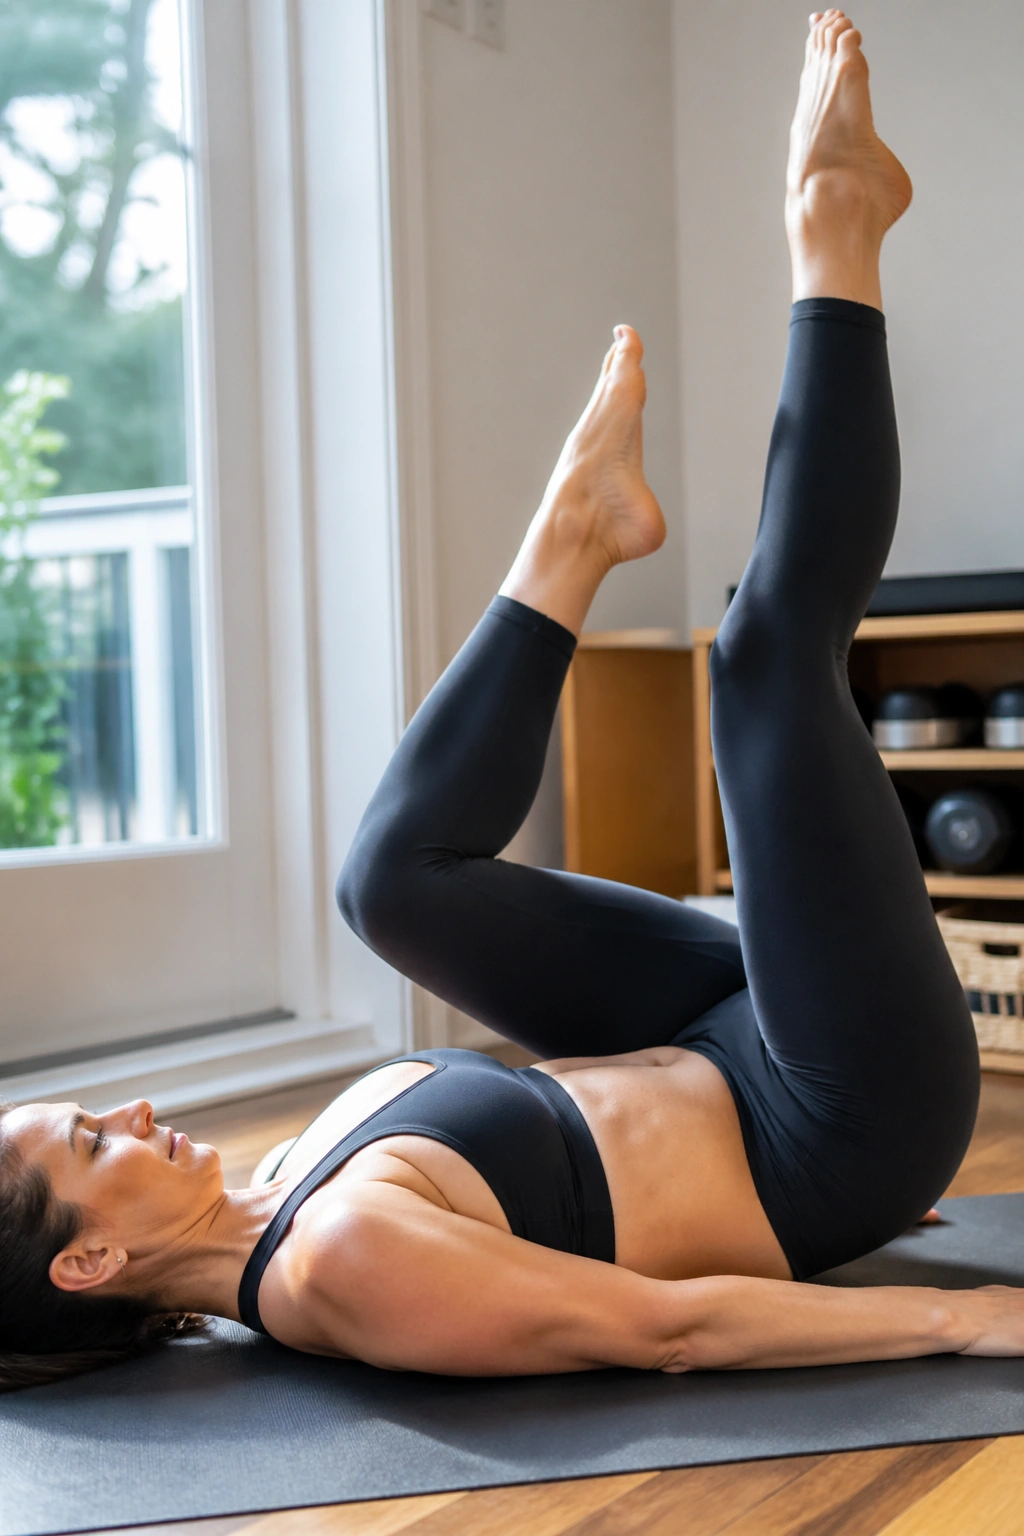
Scissors tells the truth about hamstrings. It also tells the truth about whether your core can hold your pelvis still while your legs move in opposite directions.
Lie on your back, curl up, and take both legs toward the ceiling. Hold behind one calf or thigh, extend the other leg long, and give the top leg two light pulses toward you before switching. Think of the lower leg reaching away from your center rather than dropping down. That reach wakes up the lower abs.
Where people lose it
The common miss is yanking the lifted leg so hard that the pelvis tucks under and the shoulders tense. You want a stretch sensation, not a wrestling match. Bend the top knee a bit if your hamstrings are tight enough to pull you out of position.
A strong set looks like this:
- 8 to 10 switches per side
- Top leg close to vertical
- Bottom leg long and active
- Rib cage quiet
- Neck soft enough that you can breathe
Best use: pair Scissors after the Hundred or Single-Leg Stretch, when the trunk is warm and your breath is already organized.
8. Double Straight-Leg Lowers for an Honest Core Test
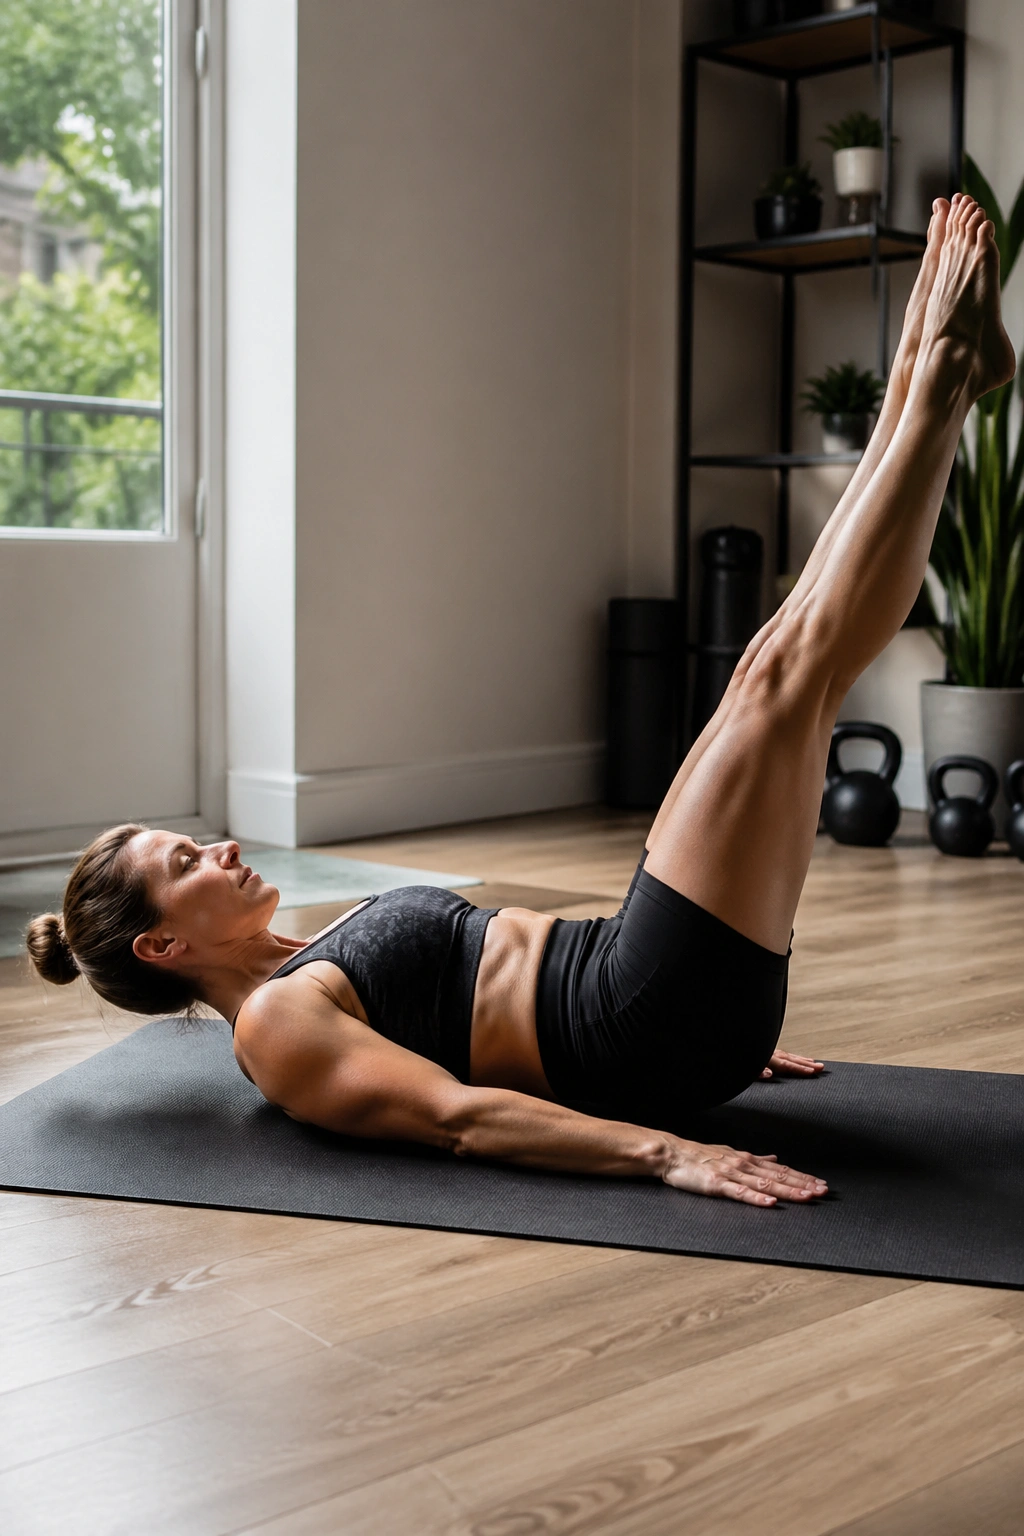
How low can your legs go before your ribs lift and your back arches? That is your range. Not the range you want. The range you can control.
Double straight-leg lowers are one of the cleanest bodyweight Pilates tests for trunk control. Lie on your back with both legs reaching up. Hands can go behind the head if your neck is fine there, or down by your sides if you want less strain. Exhale to brace, lower both legs slowly for a count of 3, then lift them back up for a count of 2.
Most people go too low on rep 1 and spend the next 5 reps trying to recover. Skip that. Lower the legs only until you feel your lower back want to peel up, then stop an inch before that point. Over time, the range usually grows on its own.
Use this range ladder
- Beginners: lower 15 to 20 degrees
- Intermediate movers: lower to about 45 degrees
- Advanced control: lower near the floor without the ribs popping
Do 5 to 8 reps. That is enough. If your neck complains, keep the head down and focus on the brace. You should feel deep abdominal effort, not low-back pressure.
9. Side-Lying Pilates Leg Sweeps for Hip Stability
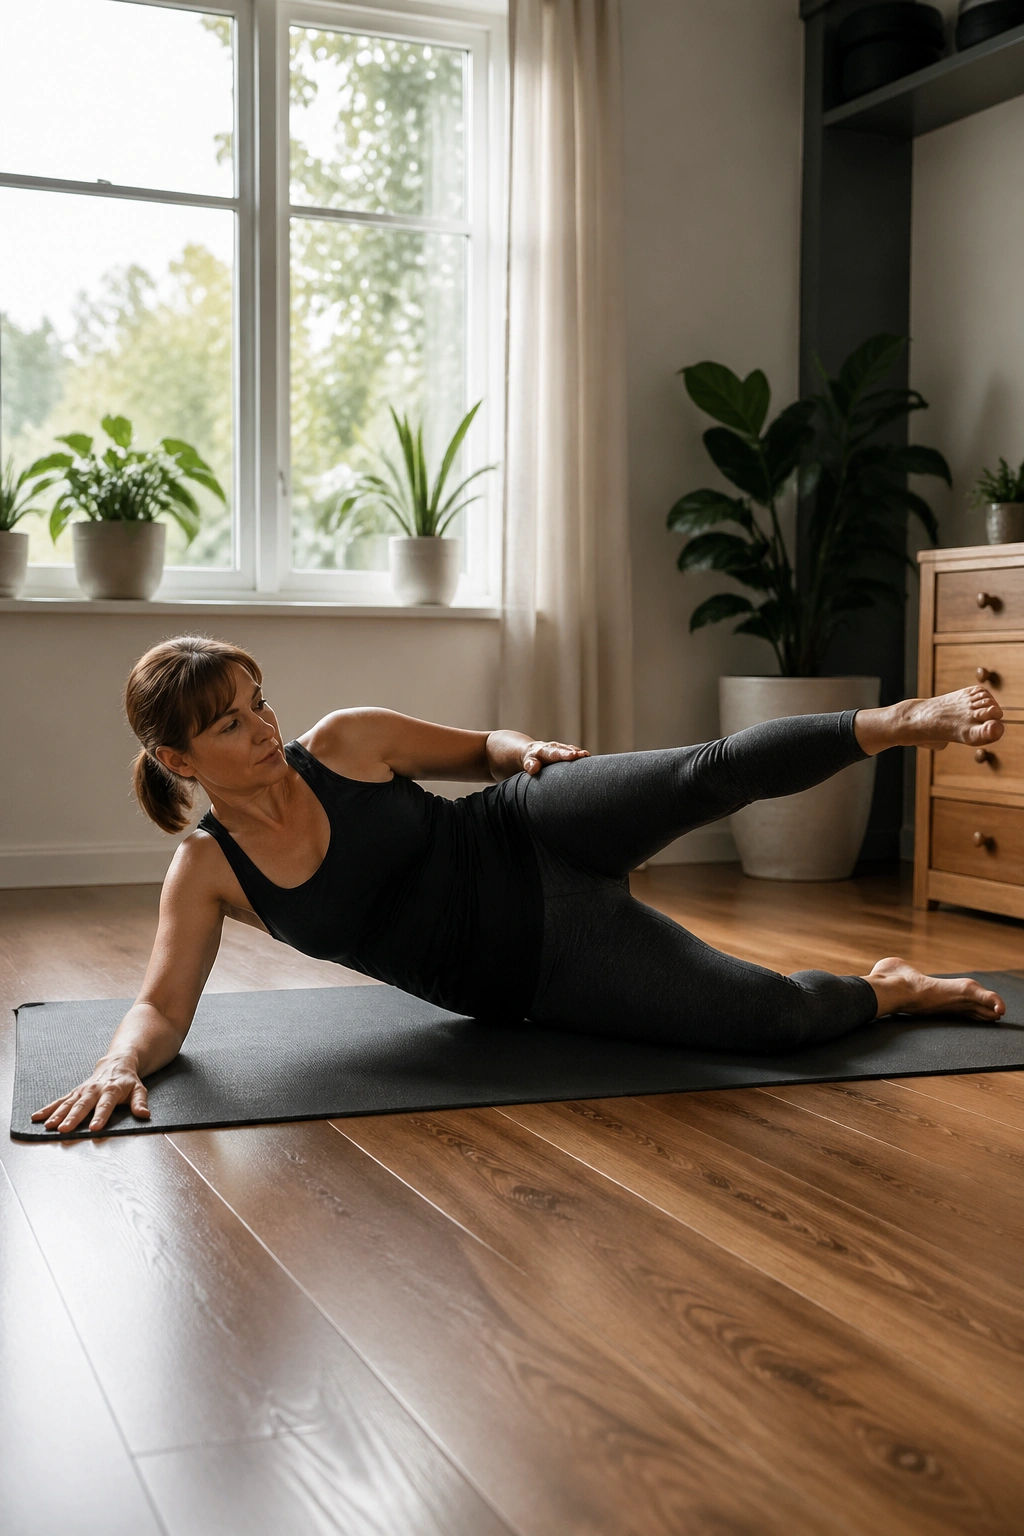
The first time you do side-lying leg sweeps with clean form, they feel almost too easy. Then you notice your top hip rolling backward, your waist collapsing into the floor, and your bottom shoulder creeping toward your ear. Suddenly the move gets interesting.
Lie on one side with your body in a long line, bottom arm extended or bent under your head. Lift the top leg to hip height, point the toes lightly, and sweep the leg forward 8 to 10 inches, then back 10 to 12 inches without letting the pelvis rock. That last part matters more than the size of the kick.
Best place to feel it
You want the work on the outer hip, side waist, and upper glute, with a steady sense of length through both legs. If you feel the front of the hip pinching, shrink the sweep and think of reaching the leg away before sending it back.
Try 10 slow sweeps forward and back, then 10 small circles each direction. Flip sides and repeat. This is one of the sharpest zero-gear routines for hip stability because it punishes sloppy alignment right away — in a helpful way.
10. Clam-to-Lift Series for Glute Med Strength
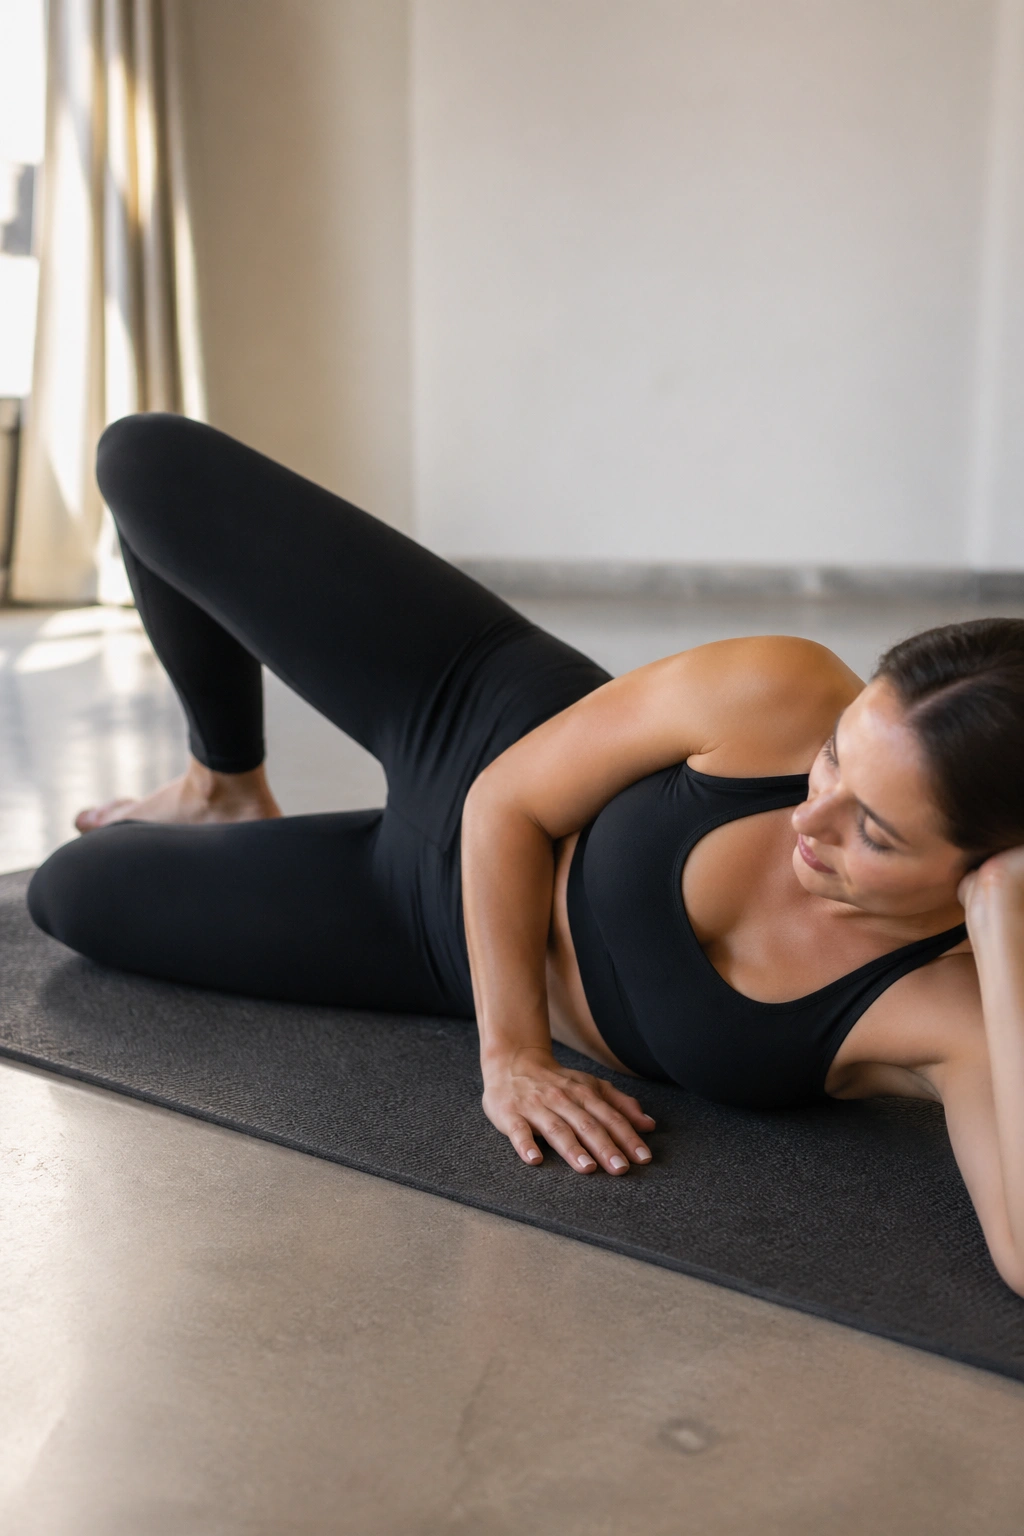
If clams never hit your glutes, your pelvis is probably rocking all over the place. The fix is not more reps. It is less motion and more control.
Lie on your side with knees bent to about 90 degrees and heels lined up with your seat. Keep your feet together and open the top knee like a book, then lower it with control. After 10 reps, hold the knees open and lift the whole top leg away from the bottom leg for another 8 reps. That second phase is where the side glute usually wakes up.
Run the series like this:
- 10 clams
- 8 clam holds with tiny top-leg lifts
- 10 straight top-leg lifts with the knee extended
- Repeat on the second side
Keep your top hip stacked directly over the bottom one. If your waist rolls backward, you are borrowing motion from the pelvis instead of asking the glute medius to do its job.
This routine is plain, almost boring, and wildly useful. Stronger side glutes help your knees track better, steady the pelvis during walking, and make side plank work feel less chaotic.
11. Bridge March for Pelvic Stability Under Load
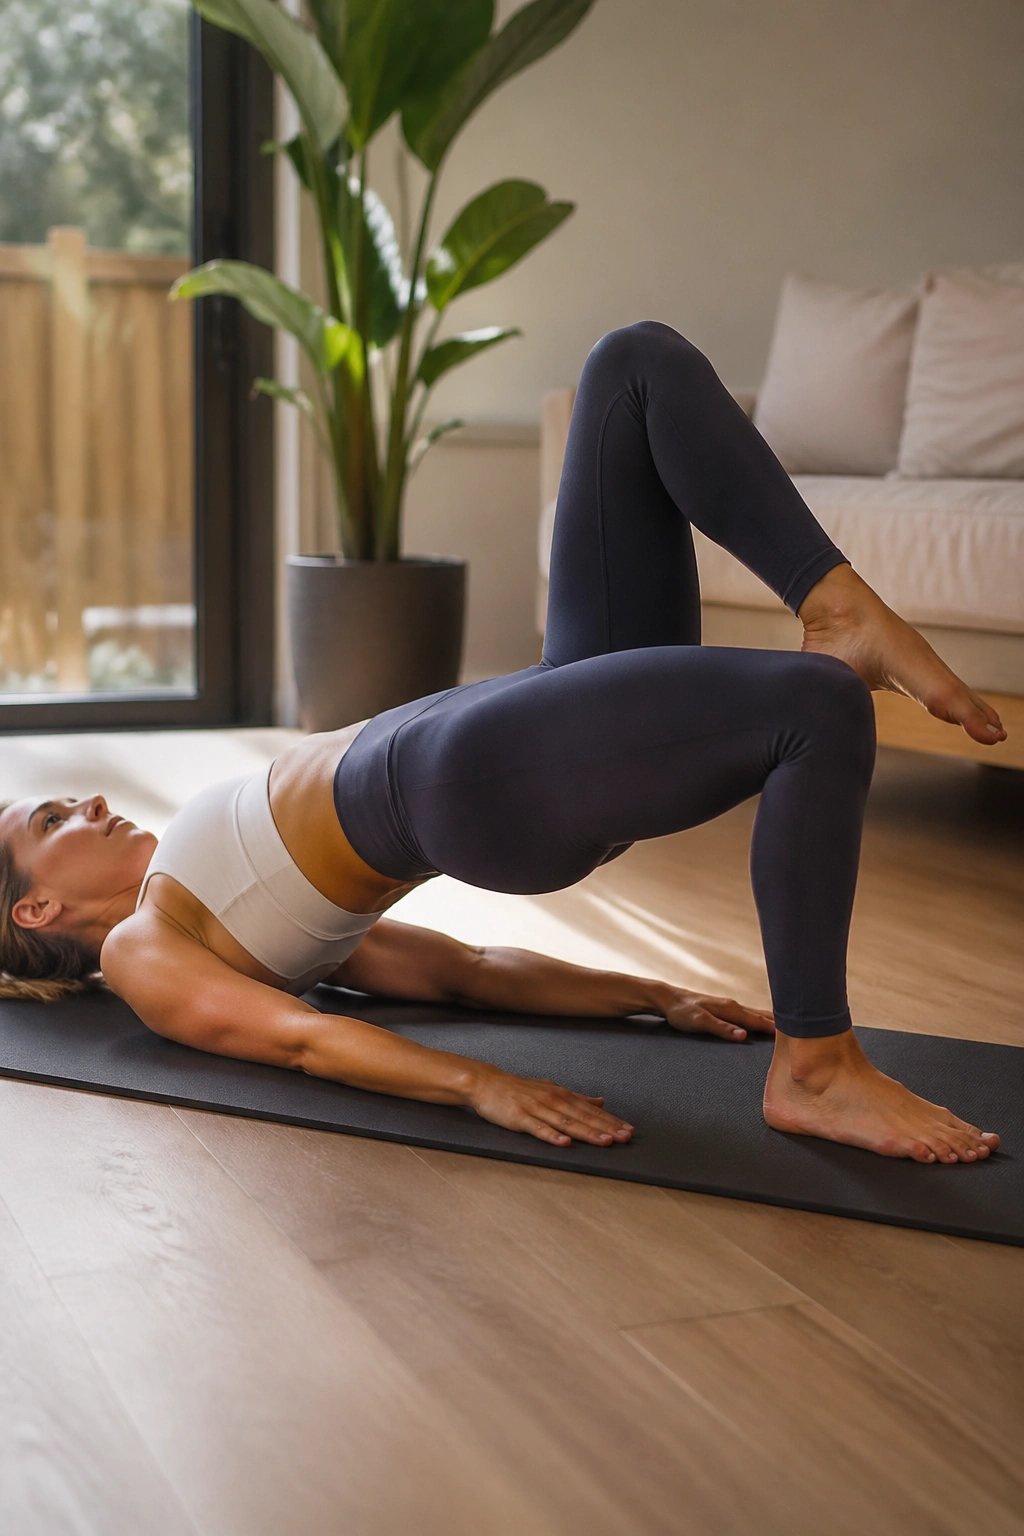
Lie down, plant your feet, and do not rush the bridge march. It looks mild. It is not. Once one foot leaves the floor, your pelvis has to resist rotation, your hamstrings have to stay engaged, and your trunk has to brace without hardening into a block.
Start with a standard bridge: feet hip-width apart, heels about a hand’s length from your seat. Exhale, peel the spine up, and stop when the knees, hips, and shoulders form a long diagonal line. Hold that bridge and lift one foot 1 to 2 inches off the floor, then place it down and switch sides. Tiny march. No dramatic knee drive.
Aim for 8 marches per side, lower down, rest for one breath, then do 2 or 3 rounds. Watch the front of your hips. If one side drops when the other leg lifts, you have found the weak spot.
A cue I like: imagine your pelvis is a bowl full of water. You are trying not to spill any as the legs alternate. That picture tends to clean up the move fast.
Hamstrings cramping? Walk your feet a touch farther away and lower the lift a little.
12. Shoulder Bridge Kicks for Glutes and Hamstrings
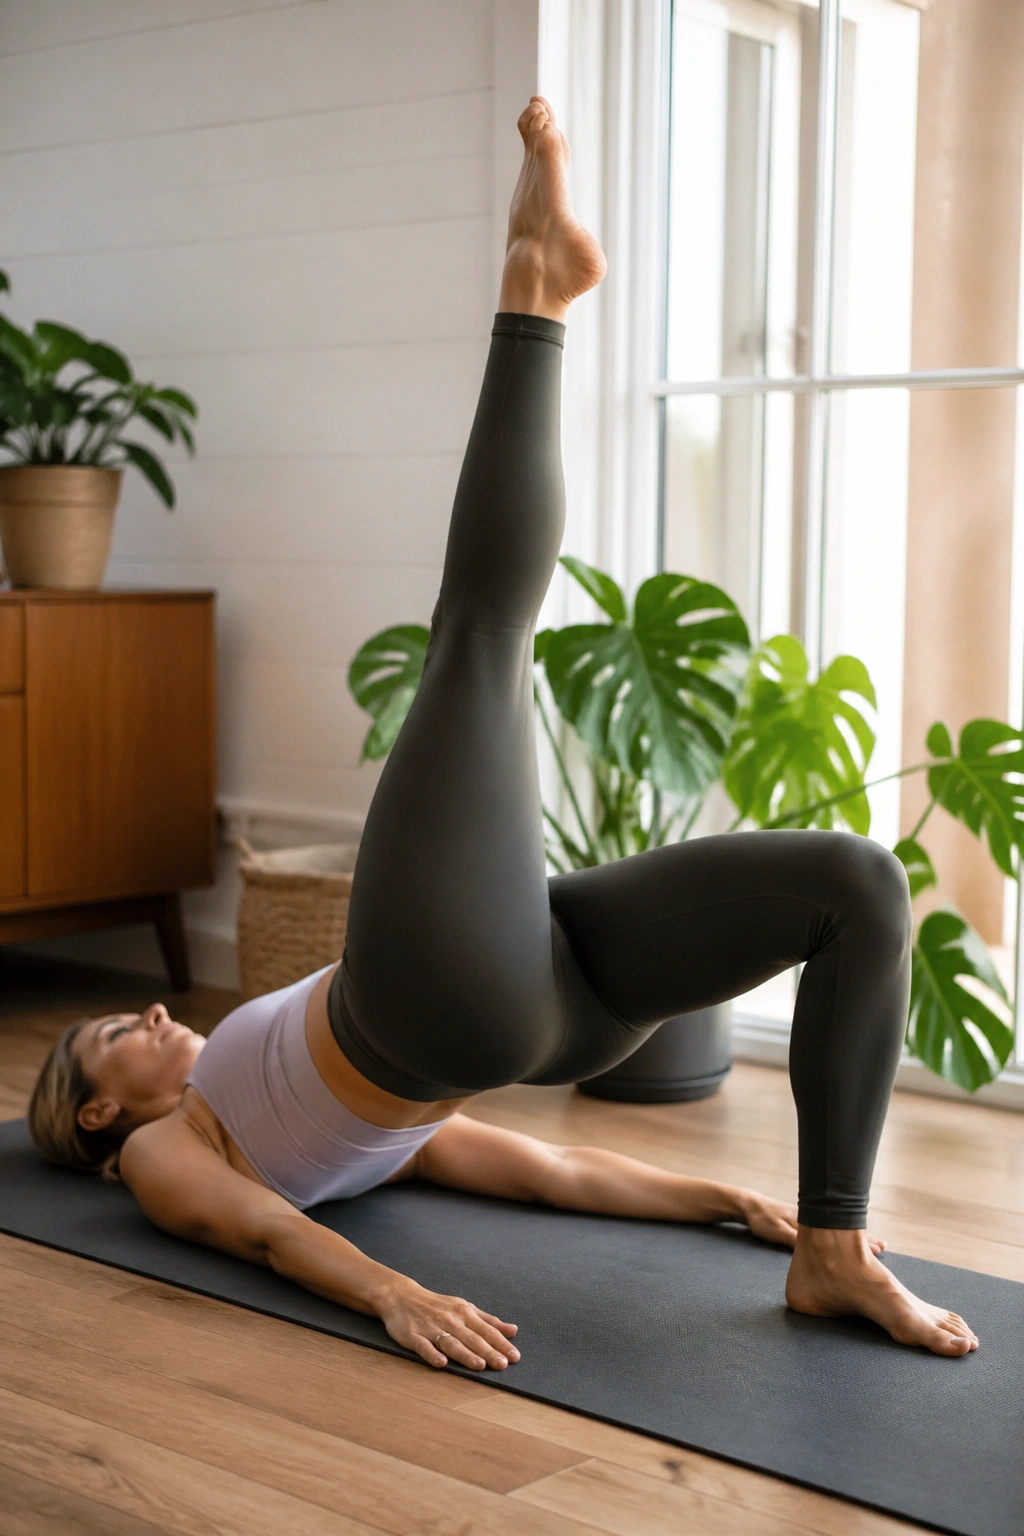
Small kicks. Big payoff.
This routine starts in a bridge, though it asks for more control than the bridge march because the working leg reaches longer. Lift into your bridge, extend one leg toward the ceiling, and keep both thighs close together. Then lower the lifted leg until the knees line up, kick it back up, and repeat 6 to 8 times before switching sides.
Run the sequence
- Lift into bridge and hold for 1 full breath.
- Extend one leg up without shifting the pelvis.
- Lower and lift that leg 6 to 8 reps.
- Swap sides.
- Lower the spine one bone at a time.
The challenge is not the kick. The challenge is what does not move while the kick happens. Your standing glute and hamstring do a ton of work, and your trunk has to keep the shape from wobbling.
If the supporting hamstring grabs hard, lower the hips a notch. If your ribs flare, soften the chest and breathe out longer before each leg set. Shoulder bridge kicks are one of my favorite mat options when someone wants stronger glutes but does not want endless squats.
13. Quadruped Hover and Reach for Cross-Body Strength
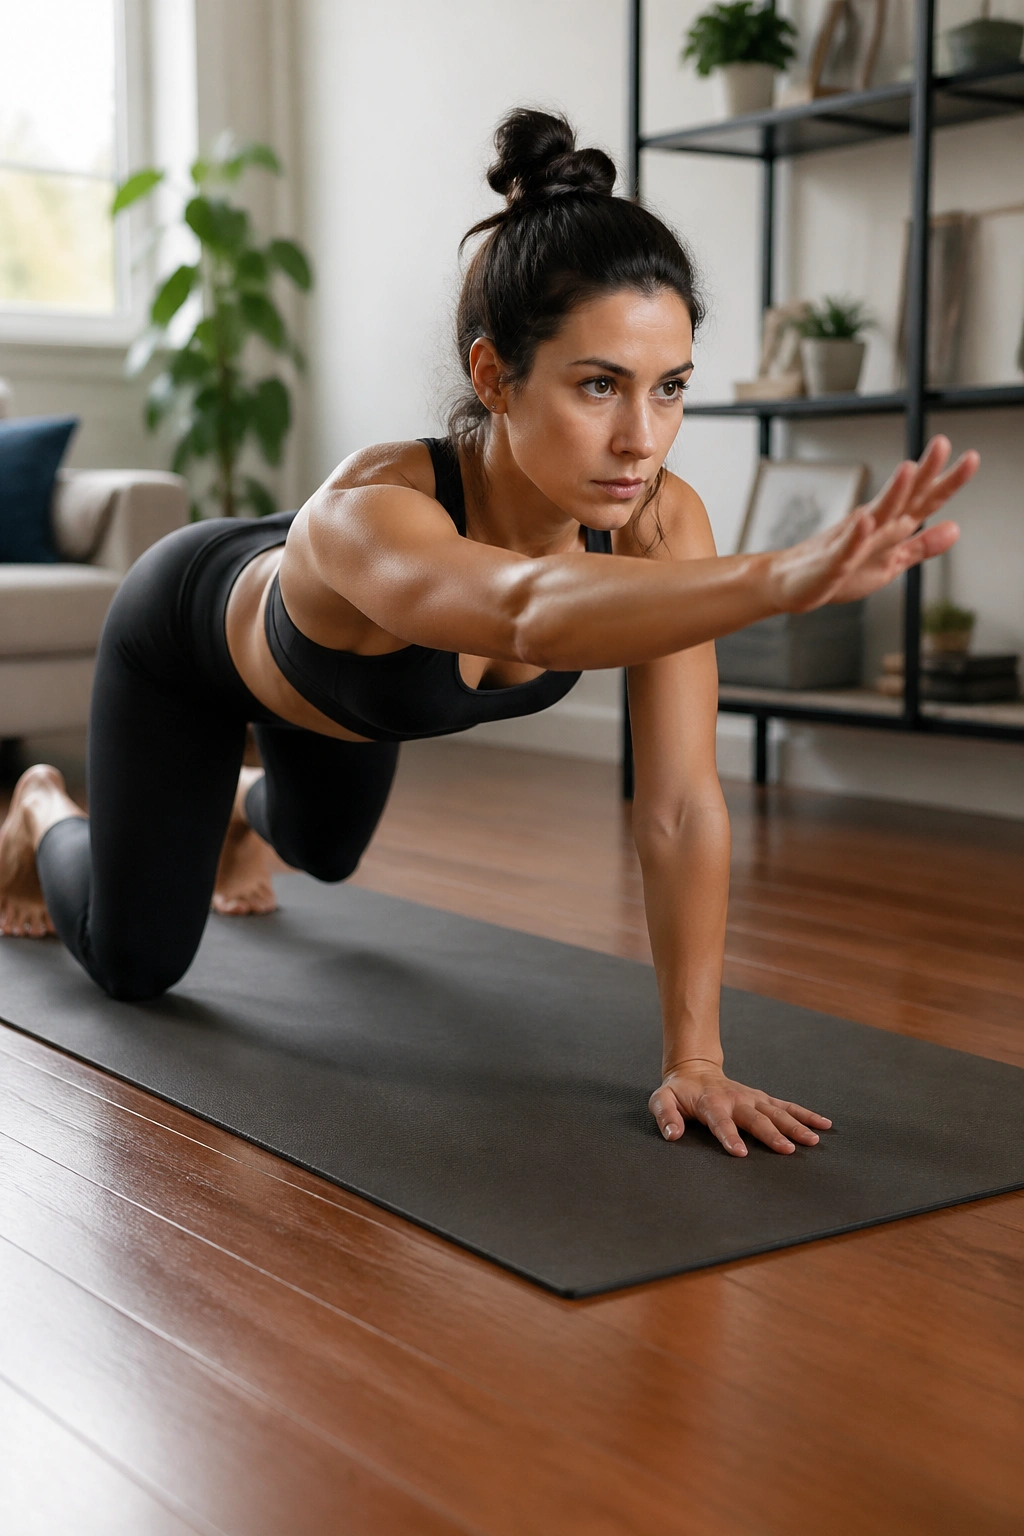
The hover begins as a faint shake under the navel. A few seconds later, your shoulders join the conversation. That is the appeal of quadruped hover and reach: a small movement with a lot going on under the hood.
Set up on hands and knees with wrists under shoulders and knees under hips. Tuck your toes, exhale, and lift your knees 1 to 2 inches off the floor. Hold for 10 seconds. Then, if that feels steady, reach one arm forward for a brief tap to shoulder height, place it down, and switch arms. Advanced version: alternate opposite arm and leg, though that is a big jump.
Where people cheat
Most people push the hips high, turning the hover into a mini bear pose. Stay low. Others hold their breath and clench everything. Better plan: one long exhale on the lift, one steady inhale during the hold.
Try this mini routine:
- Hover hold for 10 seconds
- Rest 10 seconds
- Hover with alternating arm reaches for 6 per side
- Rest, then repeat 2 rounds
You will feel shoulders, deep core, quads, and cross-body coordination all at once. If your wrists hate loaded extension, make fists or drop back to a plain tabletop reach.
14. Swan Prep for Upper-Back Extension
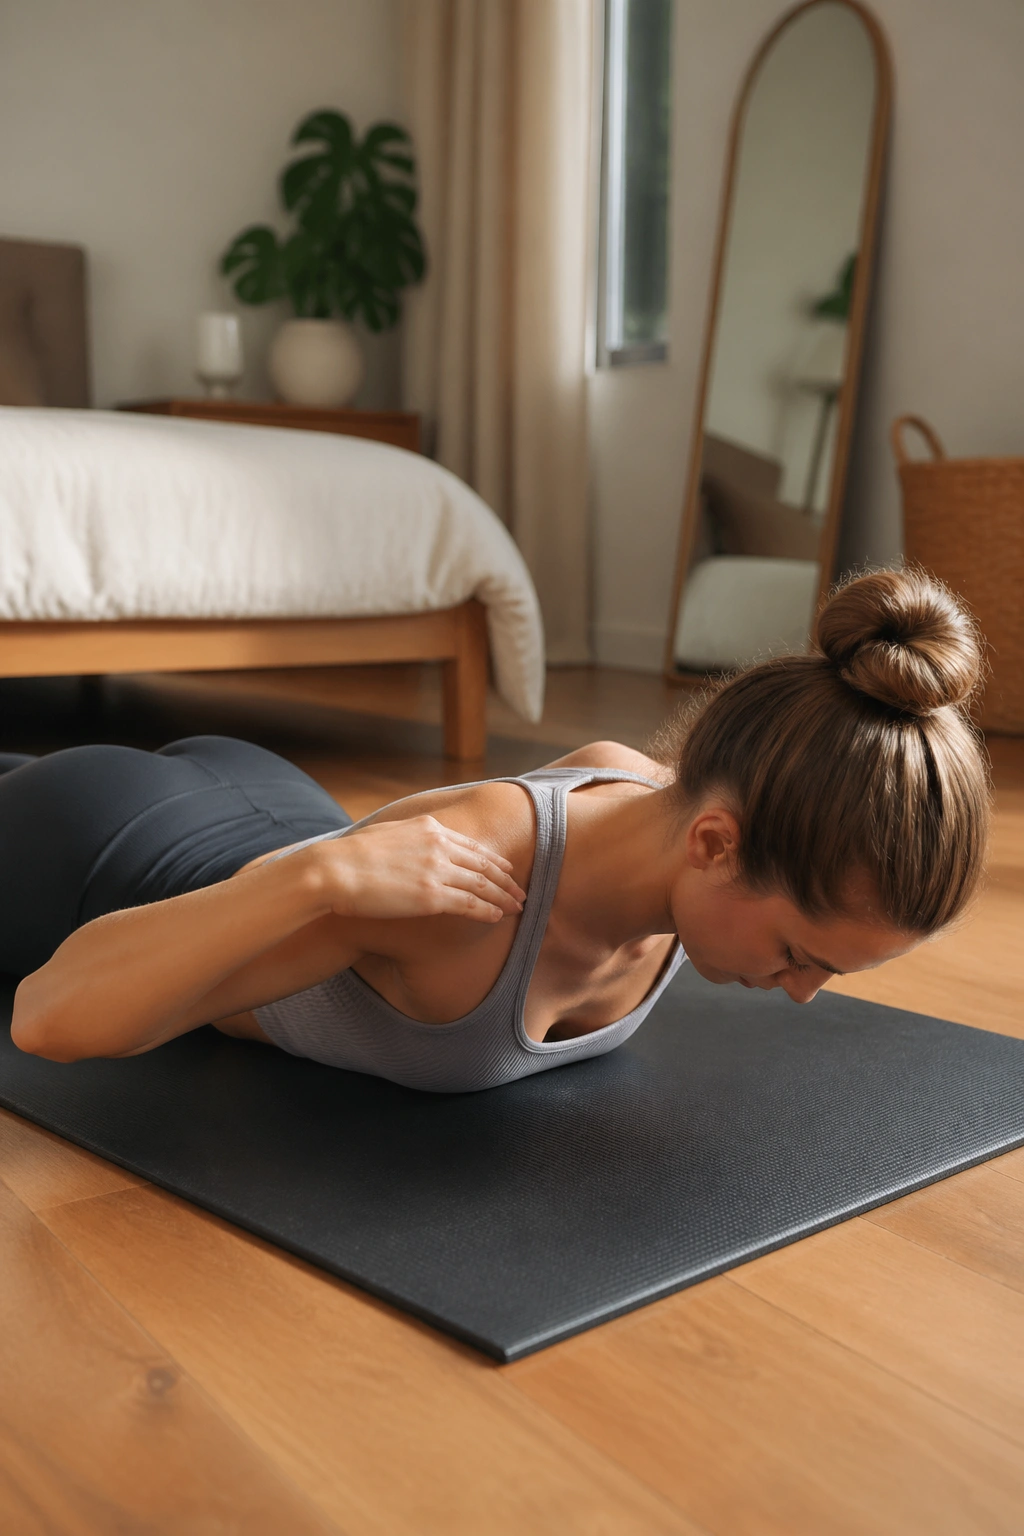
Most bodies spend too much time rounded forward. Swan prep is the antidote — not because it forces a giant backbend, though because it teaches the upper back to extend while the lower back stays out of trouble.
Lie face down with your forehead hovering or lightly resting, elbows bent, hands near the shoulders, and legs long behind you. On the inhale, lengthen through the crown of the head and lift the chest a few inches, aiming the breastbone forward rather than straight up. On the exhale, lower with control. The lift may only be 2 to 4 inches. That is enough.
The useful cue is “long first, lift second.” If you crank upward before lengthening, the low back grabs and the neck takes over. Think of sliding the sternum across the floor as it rises.
Do 8 slow reps, then rest with your head turned to one side for a breath or two. A good set wakes up the mid-back, back of the shoulders, and seat. A bad set feels pinchy in the lumbar spine. If you get the second option, reduce the height and widen the collarbones.
This one pays off for posture, desk stiffness, and anyone who wants stronger extension without loading a machine.
15. Swimming Pulses for the Entire Back Line
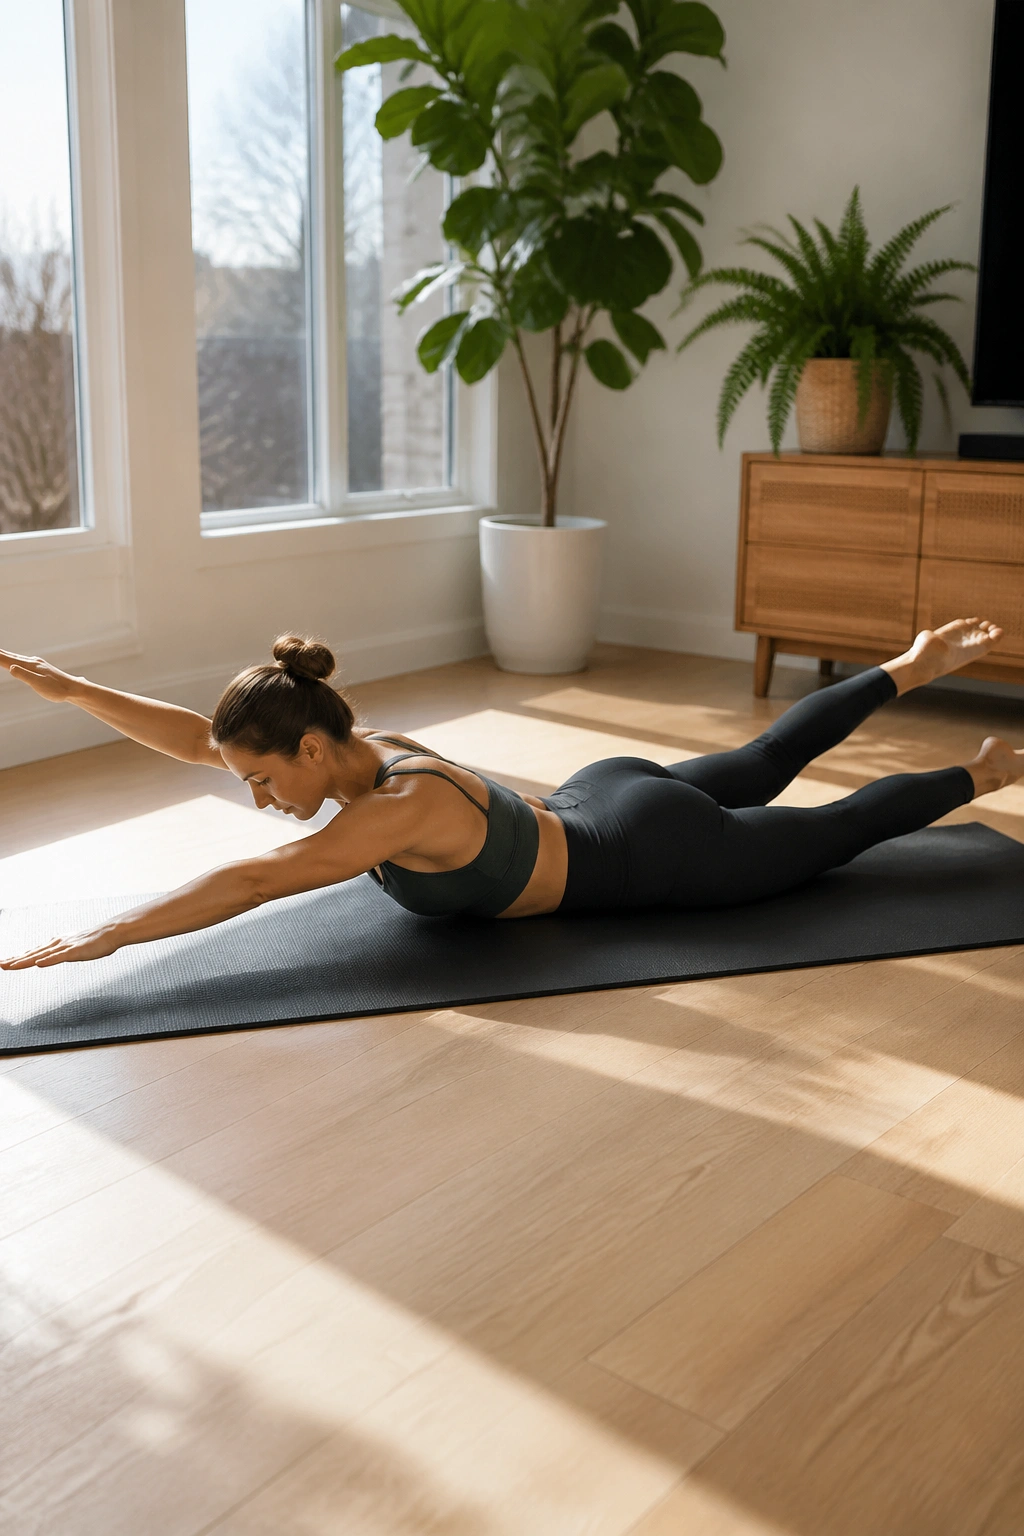
Can a move that looks like tiny fluttering actually tire your entire backside? Yes. Swimming does it by asking the arms, upper back, glutes, and legs to hold length while they alternate.
Lie face down with arms reaching overhead and legs long. Lift the right arm and left leg, then switch, alternating in a quick but controlled flutter. The chest stays lightly lifted, the gaze points down, and the ribs do not slam into the floor. Start with 20 pulses total, rest, then build toward 40 or 50.
How to pace it
A lot of people start too big. Better idea: lift each limb only as high as you can without the pelvis rocking. Small pulses from a long body feel harder than giant kicks from a loose one.
You can also break it into stages:
- 10 slow opposite-arm-and-leg lifts
- Rest
- 20 to 30 faster pulses
- Rest
- One final 10-second hold with arms and legs reaching long
If your neck tightens, lower the chest a little. If your low back compresses, narrow the lift and think length across the front of the hips. When Swimming is on, you feel the whole back line light up in a clean, even way.
16. Forearm Plank to Knee Taps for Controlled Heat
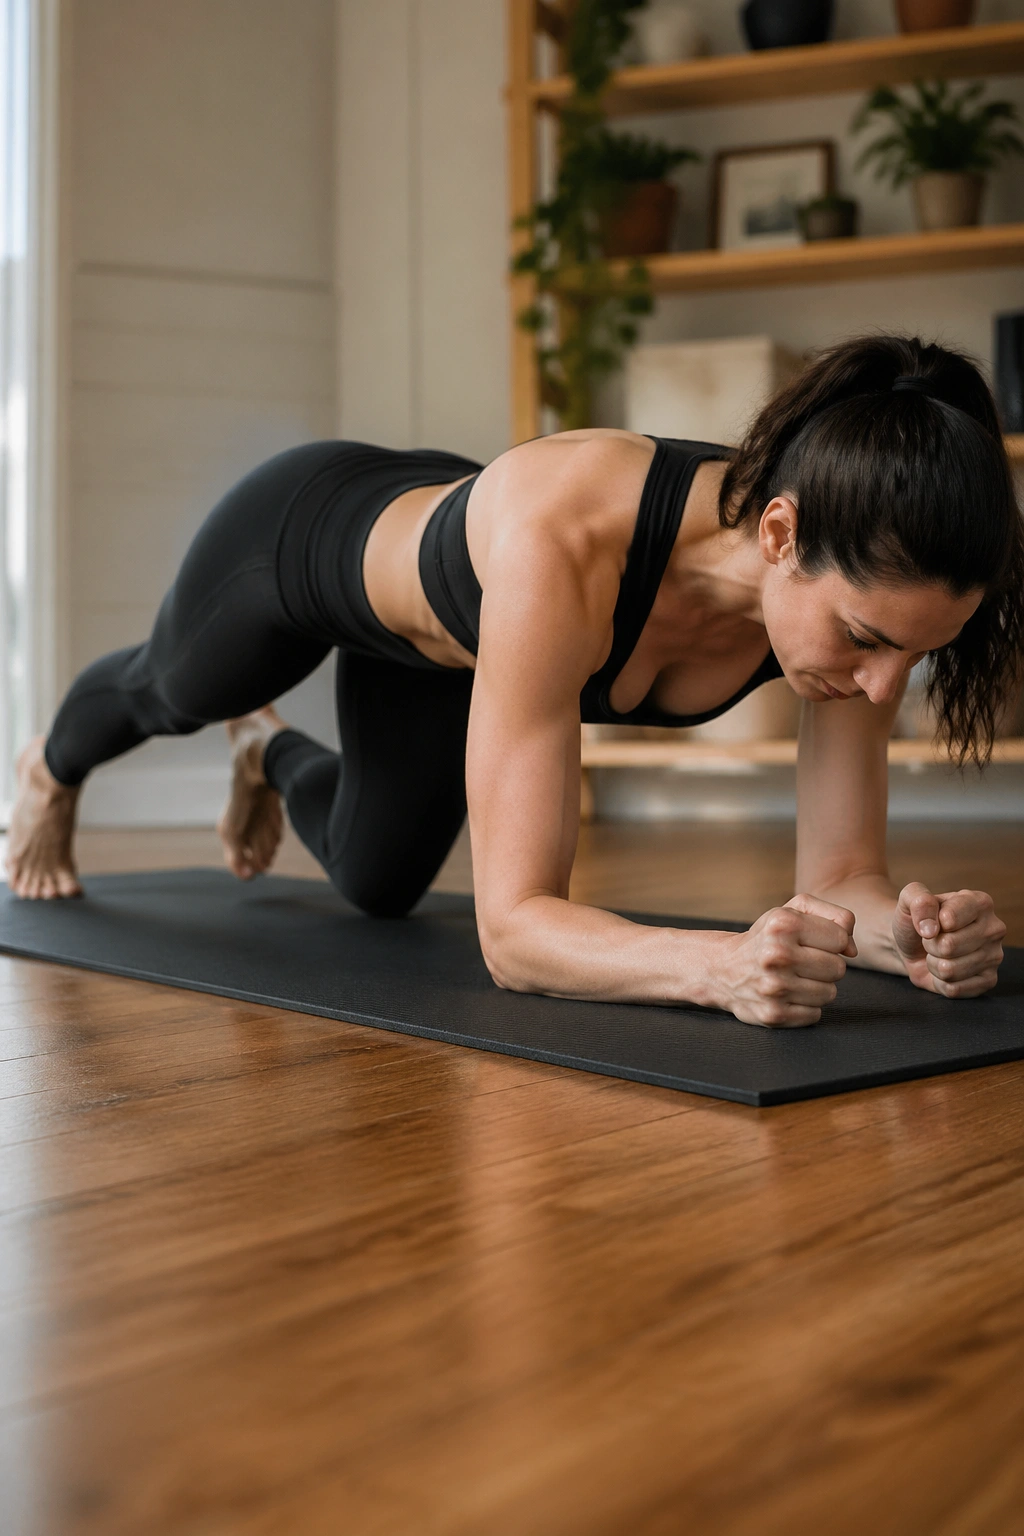
Plank on its own can drift into a shoulder endurance contest. The forearm plank with knee taps stays more honest because the trunk has to resist change every time the legs move.
Set up on your forearms with elbows under shoulders, legs long, feet hip-width apart. Hold a solid plank for 20 seconds, then lower one knee to the floor, lift it back up, switch sides, and keep alternating. The tap is light. The hips should stay level.
Use this sequence:
- 20-second forearm plank
- 10 alternating knee taps
- 10-second plank hold
- Rest 20 seconds
- Repeat for 2 to 4 rounds
What should you feel? Lower abs, side waist, serratus around the ribs, glutes. What should you not feel? A hanging low back and clenched jaw. If the move turns sloppy after 6 taps, stop there. Sloppy planks teach sloppy planks.
This is a sharp choice when you want a short no-equipment Pilates core routine that raises your heart rate a bit without turning into burpees. And yes, that distinction matters.
17. Side Plank From the Knee for Lateral Core Strength
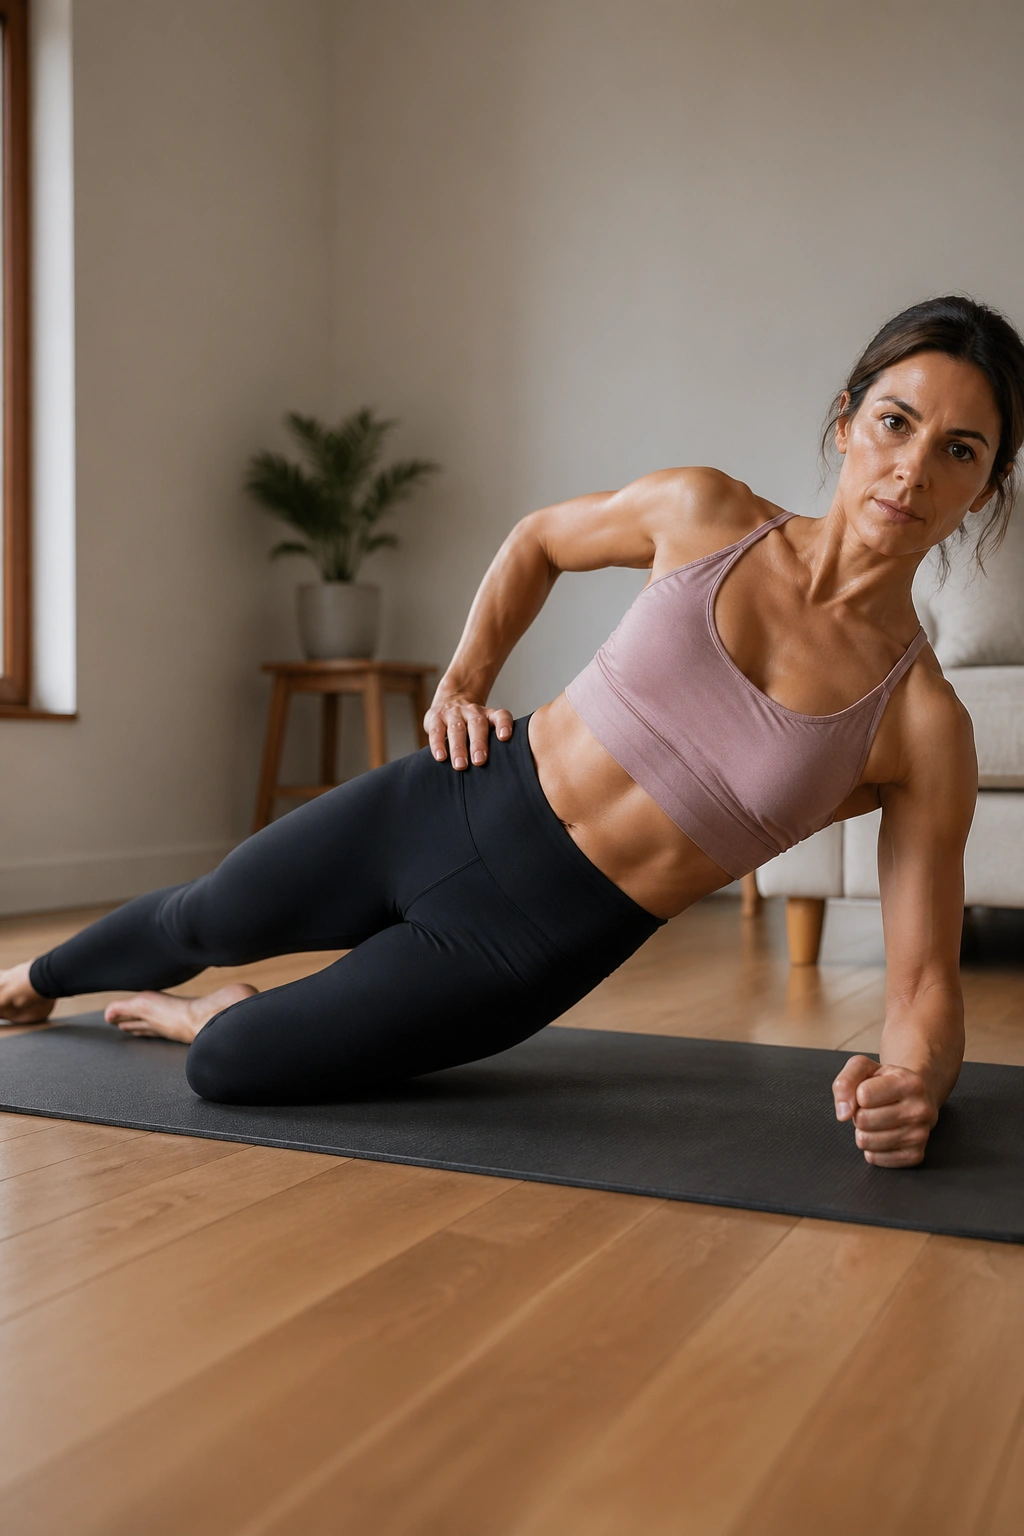
Full side plank gets all the attention. The knee-down side plank builds the part most people are missing: a stable line from the shoulder through the ribs into the side hip, without the drama of balancing on stacked feet.
Set up on one forearm with the bottom knee bent and the top leg extended long. Press the floor away and lift your hips until your body forms a diagonal line from the bent knee through the crown of your head. Hold for 15 to 30 seconds, then add a top-leg lift if you want more work for the outer glute.
The move asks for more than brute grit. Your bottom shoulder has to stay broad, your waist has to lift out of the floor, and your top ribs cannot roll backward. When all of that clicks, you feel one continuous side seam working from armpit to hip.
Try 2 holds per side, with 15 seconds of rest between. If your neck stiffens, check the forearm position. Elbow too far out from the shoulder will make the whole thing feel grim in a hurry.
A clean knee-down side plank often beats a sloppy full one. I will die on that hill.
18. Leg Pull Back Prep for Chest Opening and Posterior Chain
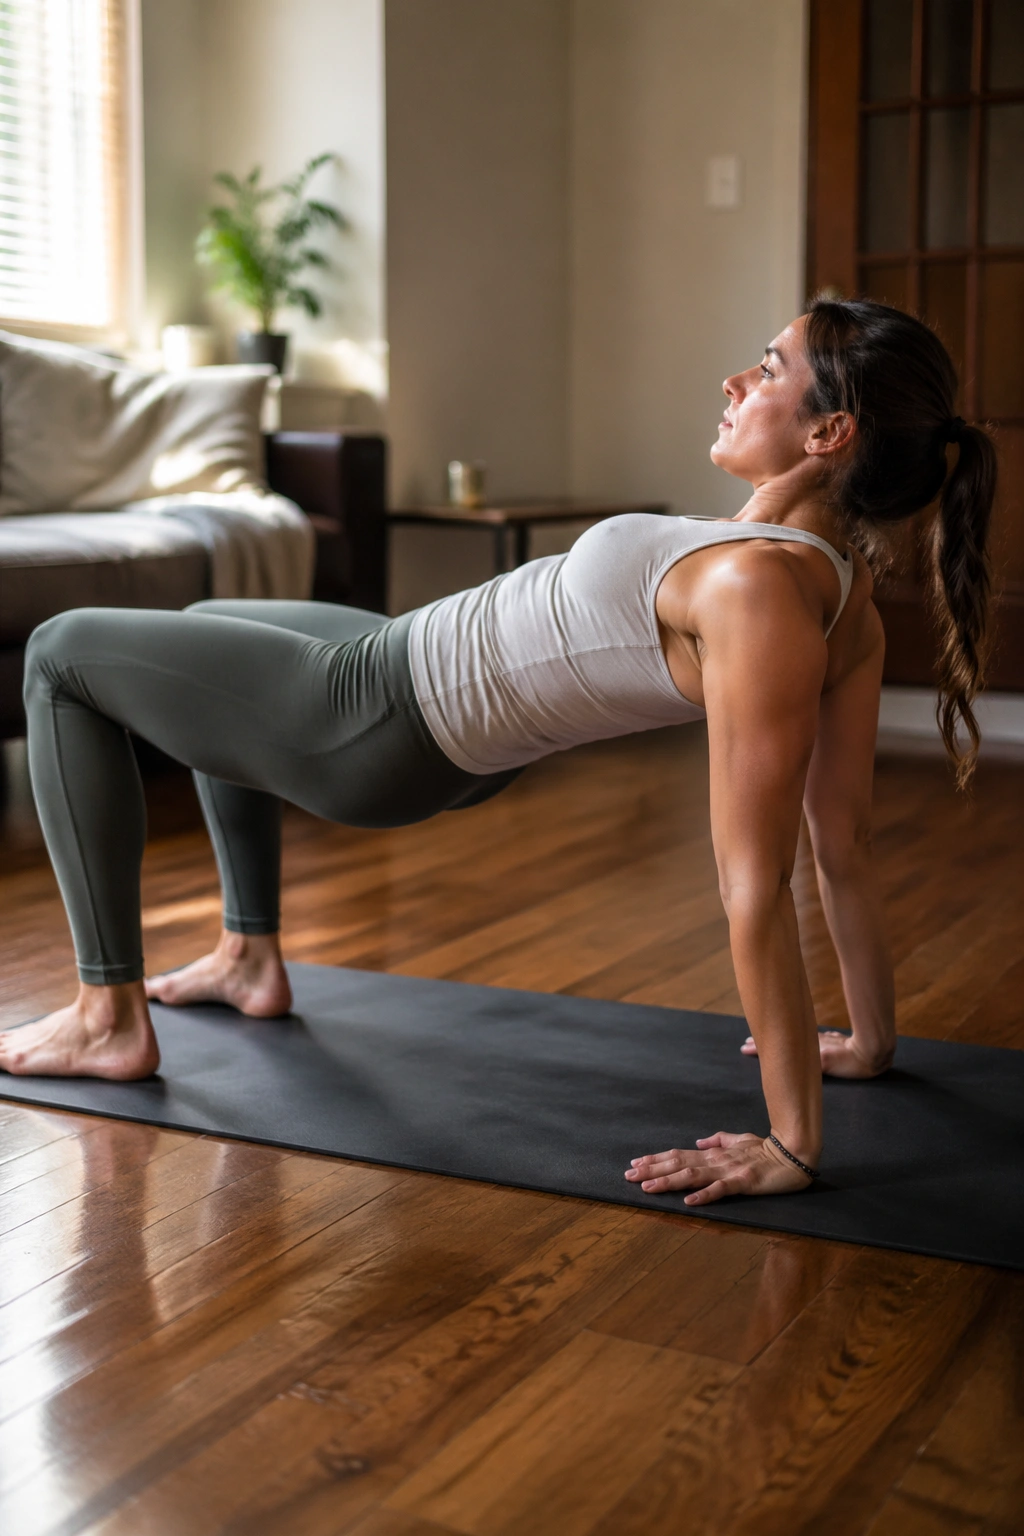
I keep coming back to leg pull back prep whenever too much desk time starts pulling my shoulders forward. It is part reverse tabletop, part shoulder opener, part glute wake-up, and it asks your backside to work in a long open shape that many people never train.
Sit with knees bent, feet flat, hands behind you with fingers turned out or slightly to the sides. Press through your feet and hands to lift the hips into a tabletop line from shoulders to knees. Hold for one breath. Then lower halfway down and lift again for 8 reps. If the shoulders feel solid, stay up and alternate small knee lifts.
The first hurdle is wrist comfort. If the full hand position feels rough, turn the fingers a bit wider and reduce the height. The second hurdle is chest position. A collapsed chest turns the move into a shoulder jam. Lift through the sternum and squeeze the glutes so the hips rise from behind, not from a shove into the low back.
A good set opens the front of the shoulders, lights up the hamstrings and glutes, and leaves you standing taller after. Not because of magic. Because the back body finally got a turn.
19. Spine Stretch Forward for Better Posture
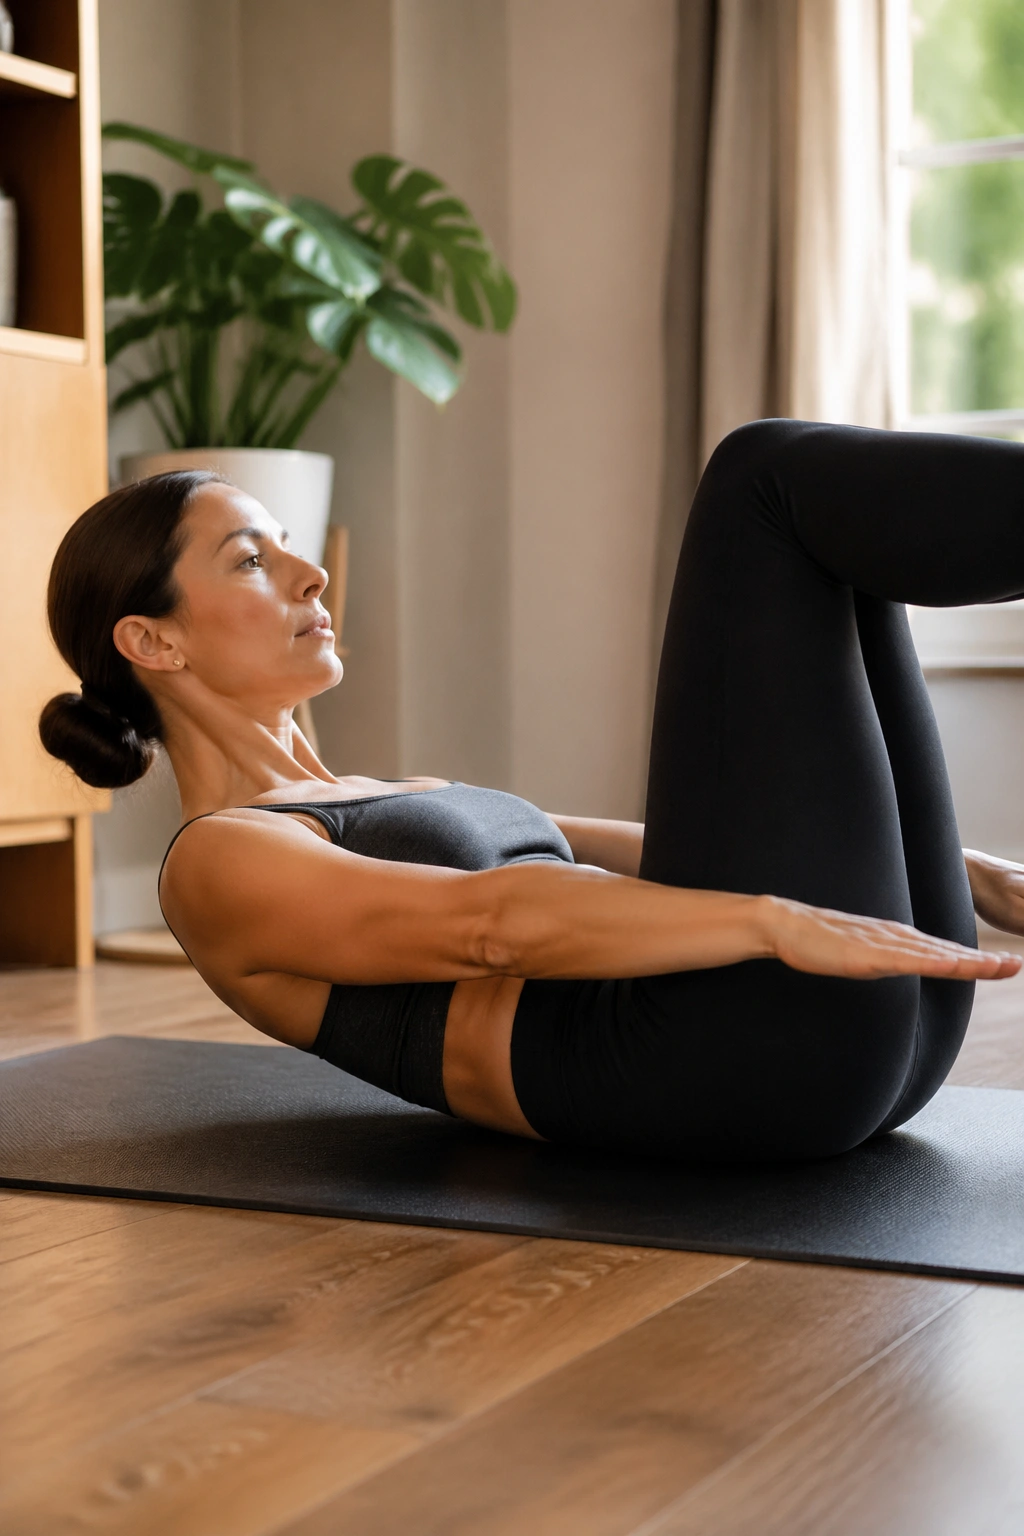
If you sit down and your pelvis rolls backward right away, Spine Stretch Forward will call that out fast. It is not only a hamstring stretch. It is a seated posture drill with controlled flexion layered on top.
Sit tall with legs extended a little wider than hips and feet flexed. If sitting upright is hard, bend the knees until you can stack the pelvis. Reach your arms forward at shoulder height. Inhale to grow tall through the spine. Exhale and nod the chin, then round forward one vertebra at a time as if you are leaning over a large beach ball. Inhale at the end range. Exhale and stack back up.
What to aim for
- 6 to 8 slow reps
- Weight balanced on the sit bones at the start
- Forward reach from the waist, not a collapse from the shoulders
- Return to sitting by stacking, not snapping upright
You should feel length along the back body and a strong sense of abdominal support during the return. The move looks calm. It is quietly demanding. That is often where Pilates shines.
20. Saw Rotation and Reach for Tight Mid-Backs
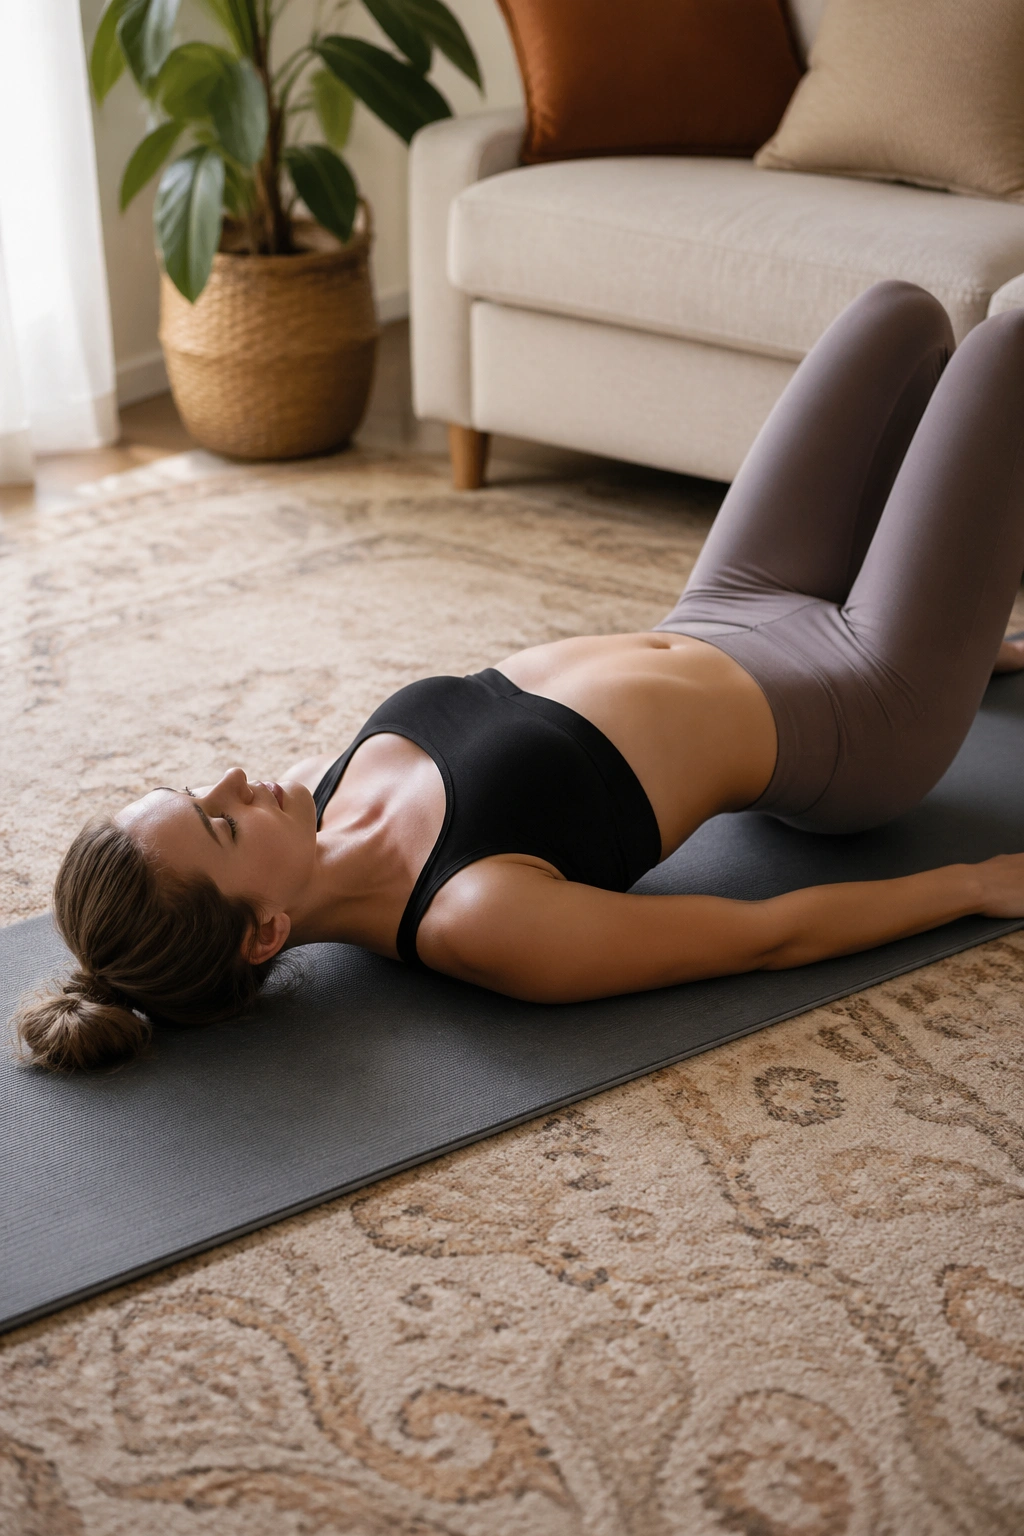
Saw is not a hamstring stretch with arm choreography. The heart of the move is rotation through the ribs and upper spine, then a forward reach that deepens the twist without yanking the shoulder out of place.
Sit with legs wider than hips and arms extended out to the sides. Inhale to rotate your torso to one side. Exhale and reach the front hand toward the little-toe side of the opposite foot while the back arm reaches behind you. Inhale to rise, return to center, then switch sides. Go for 5 to 6 reps each way.
The chest should feel broad even as you twist. If the back shoulder collapses forward, you lose half the benefit. I like to think of the rear arm reaching away like a counterweight, which helps the sternum stay open.
This routine is useful when your thoracic spine feels stiff, when standing rotation is limited, or when crisscross feels cramped and you want a more open version. Bend the knees if the pelvis keeps tucking under. Straight legs are optional. Clean rotation is not.
21. Teaser Prep Tuck-and-Extend for Balance and Control
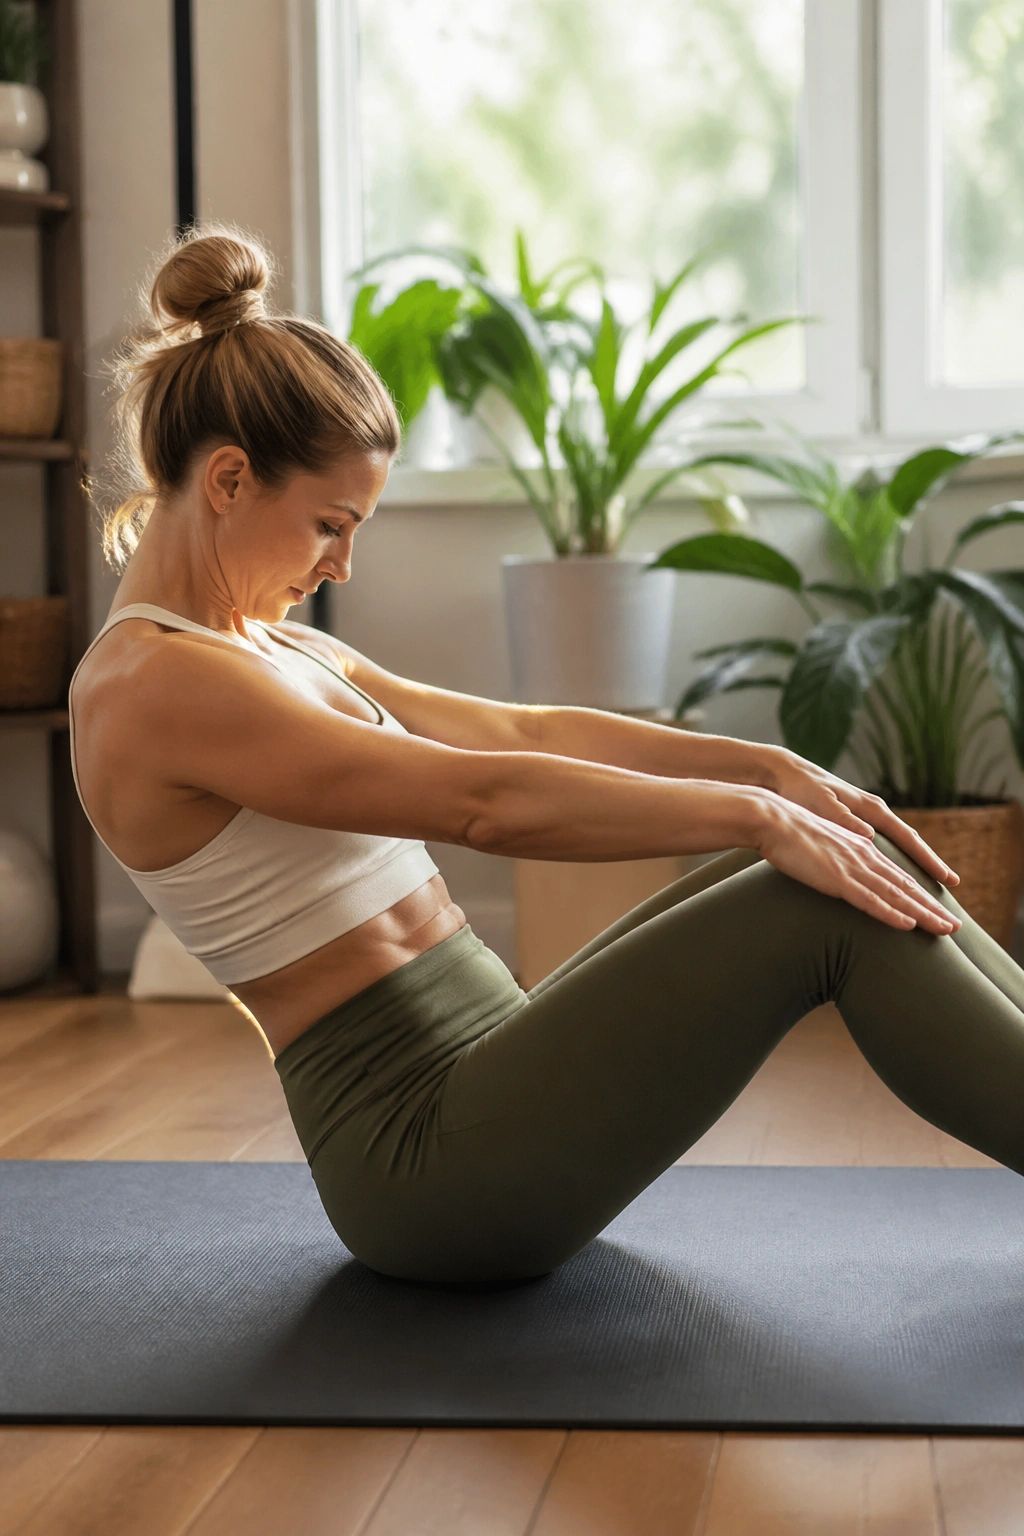
Teaser prep teaches the hard part of Teaser without the circus version. You do not need the full V-shape to train balance, trunk control, and hip flexor restraint. In many bodies, the prep is the smarter move anyway.
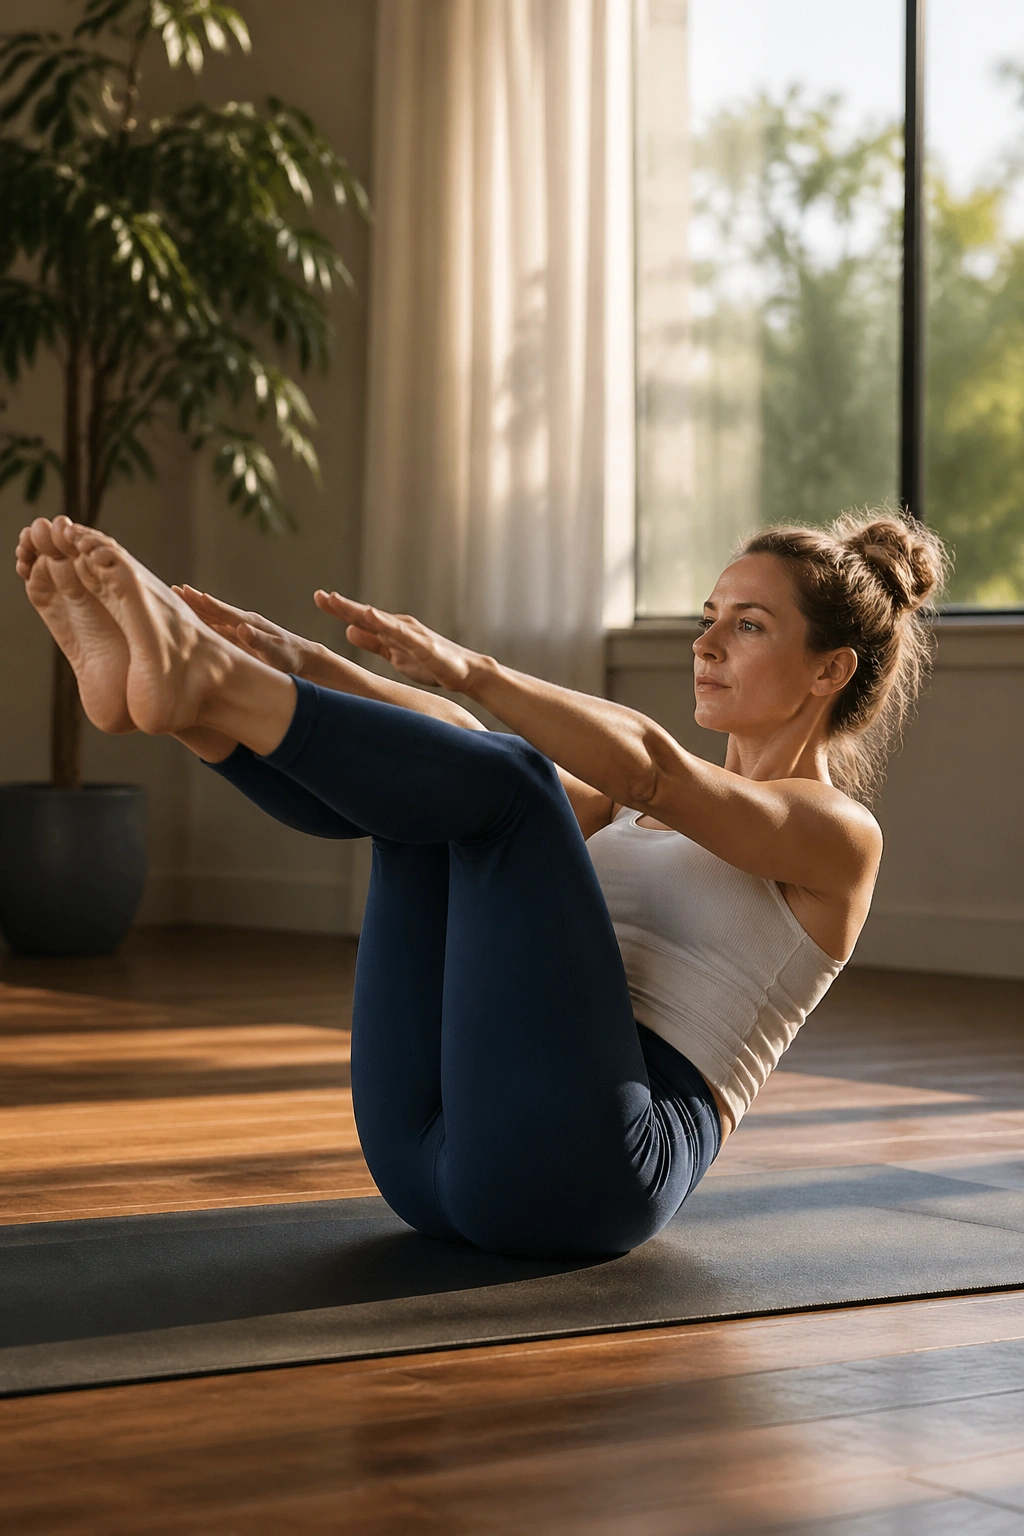
Start seated with knees bent, feet flat, and hands behind the thighs. Roll back onto the back of the sit bones until the feet float up and the shins come parallel to the floor. Hold that tuck for one breath. Then extend one leg, bring it back in, switch sides, and if you are steady, extend both legs together for 1 second before returning to the tuck.
Try this ladder
- 3 tuck holds
- 6 single-leg extensions per side
- 3 double-leg extensions
- Rest, then repeat 2 rounds
The trick is resisting the urge to collapse into the lower back as the legs lengthen. Think of lifting the chest through the curve of the spine. That cue sounds odd until you feel it.
If balance is impossible, keep one toe on the floor during the tuck. No shame there. Teaser prep works because it strips the move to its essentials: center, breath, and controlled leverage.
22. Standing Pilates Balance Reset for Days You Don’t Want the Floor
Some days you do not want to get down on a mat. Fair enough. A standing Pilates routine can still train posture, balance, foot control, and deep core timing without a single prop or a square inch of floor work.
Start standing with feet under your hips. Roll down slowly for 4 counts, bend the knees at the bottom, then roll back up. Next, shift onto one leg and lift the opposite knee to hip height for 5 breaths, keeping the pelvis level. From there, rise onto both tiptoes for 10 calf raises, lower, and finish with 8 slow bodyweight squats where the ribs stay stacked over the pelvis.
Here is a tidy sequence:
- 3 standing roll-downs
- 2 balance holds per side
- 10 calf raises
- 8 squats
- 20-second standing reach with arms overhead and ribs quiet
This reset is ideal in the middle of a workday, before a walk, or when travel leaves you with little space and even less motivation. It will not replace deeper mat work forever. It does not need to. It gets you moving, wakes up your alignment, and gives your body a cleaner starting point than the slumped shape most of us drift into.
Final Thoughts
You do not need 22 routines in one day. You probably should not try. Pick 3 or 4 moves that solve the problem in front of you — tight hips, sleepy glutes, shaky core control, stiff upper back — and do them with enough care that each rep looks like it belongs to the same person.
The zero-gear part is not the compromise. In mat Pilates, it is often the point. No springs, no straps, no frame to lean on. That makes the work more direct, and sometimes more humbling, which is a good trade.
If I had to choose a short starter stack, I would go with the Hundred, Bridge March, Side-Lying Leg Sweeps, and Spine Stretch Forward. Ten minutes. Slow breath. Clean form. Start there, then let the harder routines earn their place.
