



A flatter-looking belly usually has less to do with punishment and more to do with control. If your ribs flare, your pelvis tilts forward, and your deep core switches off the second a movement gets hard, no number of fast crunches is going to fix the way your middle looks and feels.
That is why Pilates workouts work so well for a flat belly plan. They ask your body to do the boring, useful stuff first: breathe well, stack the ribs over the pelvis, turn on the transverse abdominis, and stop letting the lower back do all the work. Once that starts happening, the waist often looks cleaner, the stomach feels less pushed out, and standing up straight stops feeling like an effort.
No, this is not spot reduction. Nothing is. But Pilates can change the shape of your midsection by changing how you hold yourself all day, and that matters more than people like to admit. A strong core that knows how to brace without gripping is a different animal from a tired belly that is always hanging on by sheer will.
The plan below starts gentle and gets more demanding as the days pass. That progression matters. Jumping straight into teaser variations on day one is how people end up with tight necks, angry hip flexors, and a lingering suspicion that Pilates is “not enough.” Day 1 starts with the thing most workouts skip.
1. Pilates Breathing Reset for a Flatter Midsection
Lie on your back with your knees bent, feet flat, and arms resting by your sides. This first workout is not flashy, and that is the point. If your breathing is shallow, your ribs are stuck open, and your lower belly pops forward every time you exhale, you need a reset before you need a burn.
Why This Comes First
I like this as day one because it tells the diaphragm and deep abdominals to talk to each other again. When you inhale through the nose, let the ribs widen to the sides and back. When you exhale, feel the lower ribs soften down and the lower belly draw in slightly, almost like zipping a snug jacket.
- Do 6 slow breaths with a 4-second inhale and a 6-second exhale.
- After each exhale, add 8 gentle pelvic tilts: flatten the low back into the mat, then release.
- Keep your neck soft and your jaw unclenched.
- If your low back arches hard, place your feet on a wall or a chair.
Pro tip: If you feel this mostly in your hip flexors, your feet are probably too far away. Scoot them closer.
What You Should Feel
The movement should feel quiet. Almost stubbornly quiet. Your belly should not push up like a dome; it should narrow and support from underneath.
By the end, the front of your torso ought to feel more organized, not tired. That is a good sign. Tired comes later.
2. The Hundred With Bent Knees and Low Back Support
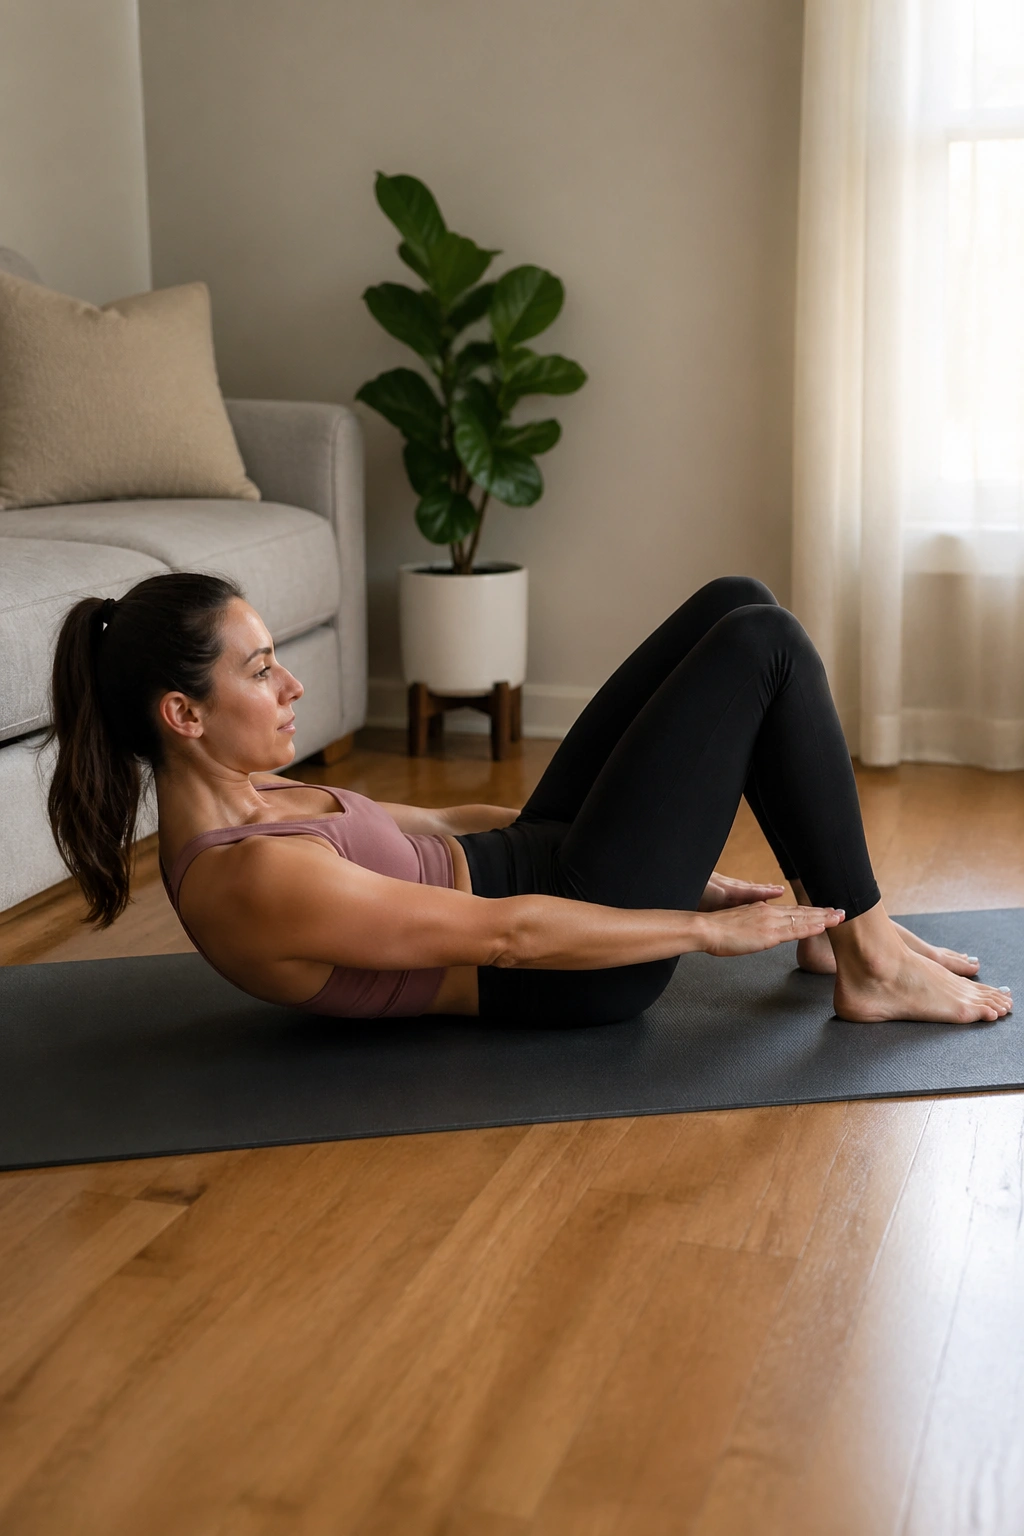
This is the move that wakes up the whole midsection without needing a single crunch. Done well, the Hundred is part breath drill, part abdominal endurance test, and part lesson in keeping your ribs from flaring when things get uncomfortable.
Start with your knees bent in tabletop if your back can stay quiet there. If not, keep both feet on the mat and lift only the head and shoulders a little, or skip the curl-up for now. Pump the arms briskly by your sides for 5 counts in, 5 counts out, aiming for 10 rounds if you are new to it.
The mistake most people make is rushing the arms and forgetting the torso. The arms are just there to give the breath a rhythm. The real work is in the deep wrap around your waist, the part that keeps your stomach from ballooning the second you get tired.
If your neck starts to grip, lower the head. If your back starts to arch, lower the legs. Simple fix. No drama.
This one feels better after the first few breaths, then nasty, then useful again. That is usually the right range.
3. Toe Taps That Teach Your Belly to Brace
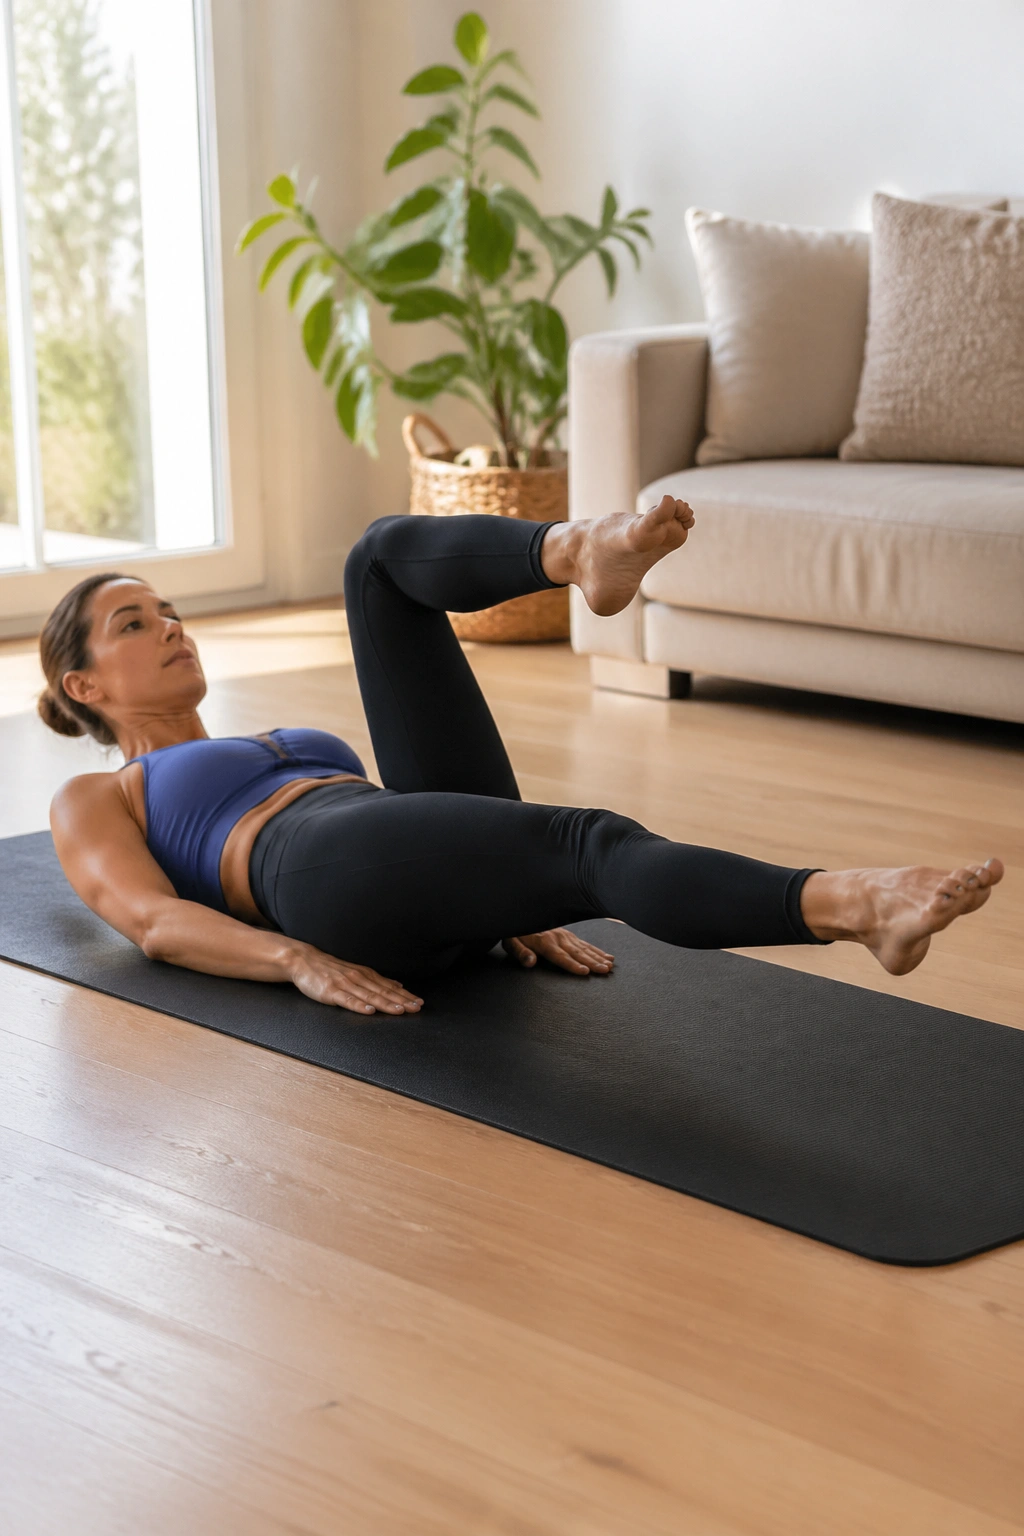
Why does such a small move burn so much? Because toe taps punish sloppy core control faster than almost anything else. One side of the pelvis wants to tip, the ribs want to pop up, and the belly has to learn how to resist that motion without hardening into a brick.
How to Do It
Lie on your back with your knees in tabletop. Keep one leg still while the other lowers to tap the floor lightly with the toes. Exhale as the foot lowers, inhale as it comes back up. Work for 8 to 10 taps per side.
What to Watch For
- The low back should stay heavy and quiet.
- Your ribs should not flare toward the ceiling.
- The moving leg should go only as low as you can control.
- If the belly domes, shorten the range immediately.
How to Use It
Do one set with both feet tapping alternately, then a second set with one leg held in tabletop while the other does all the movement. That little switch exposes weak spots fast.
One good rule: stop the rep before your back starts telling a different story than your abs.
4. Single-Leg Stretch for a Smaller Waistline Feel
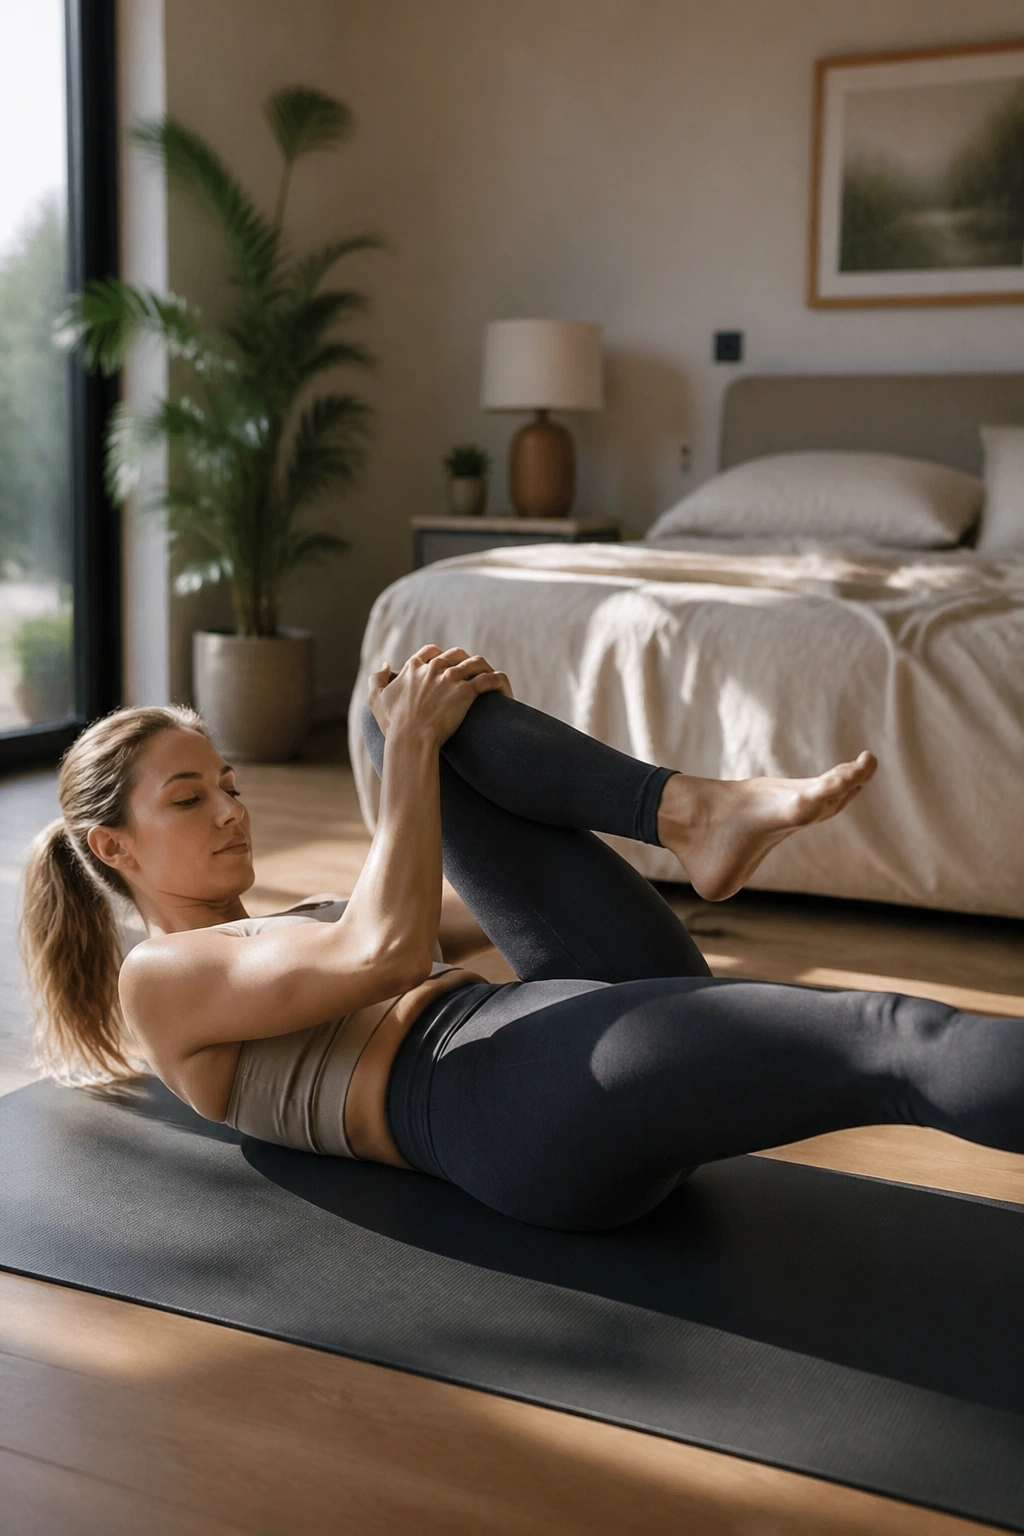
Picture someone who can do twenty crunches but still feels their stomach push forward the second they stand up. That is where single-leg stretch earns its place. It teaches the abs to hold shape while the legs move, which is where real midsection control starts.
One knee hugs in while the other leg reaches long and low, but not so low that the back arches. Switch sides in a steady rhythm for 10 to 12 total switches, then rest. Keep the shoulders soft and the chin slightly tucked, not jammed toward the chest.
The reason this works better than a frantic bicycle crunch is simple: the movement is slower, cleaner, and harder to fake. You cannot hide sloppy control when one leg is extending away from your body. The belly has to keep the torso from wobbling.
I prefer this move with the head down for beginners. There is no prize for lifting the neck too soon.
If you want a harder version, straighten the extending leg a little more and pause for half a second at the longest point. That tiny pause is rude. Also effective.
5. Half Roll-Backs and Roll-Ups for Deep Abdominal Control
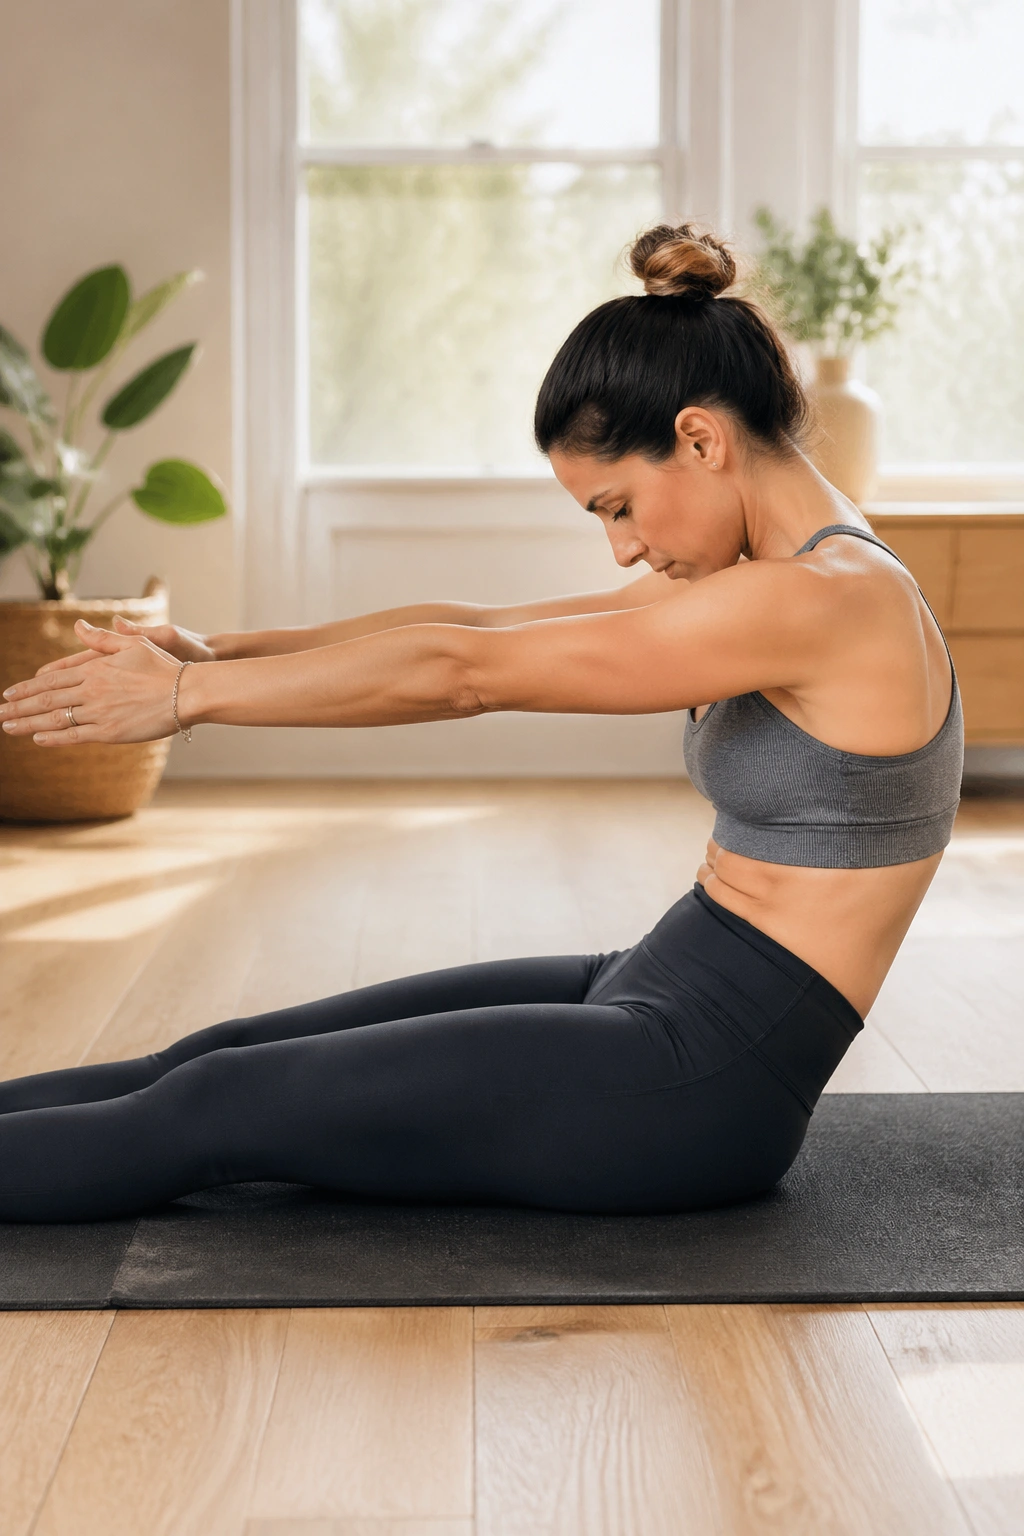
A lot of people treat roll-ups like a flexibility test. I don’t. They are a spinal articulation drill, a breath drill, and a clean way to teach the front body not to yank itself around.
Sit tall with your knees bent and feet on the floor. Reach your arms forward, round back one vertebra at a time until your lower back touches the mat, then curl back up with control. If that full version feels messy, do half roll-backs only. Six slow reps is enough for most people.
The best cue I know is this: let your ribs melt back before your shoulders do. That order matters. If the shoulders lead, the neck starts working too hard and the belly gets cheated out of the job.
Half roll-back version: hold behind the thighs, lean back to the point where the abs shake, pause, then come forward.
Full roll-up version: legs long, arms overhead, curl up one piece at a time. If your feet pop off the floor or your hip flexors seize, back up to the half version.
This one is a little boring until it suddenly isn’t. Then it gets honest.
6. Pilates Bridge Series for a Tighter Core and Better Pelvis Control
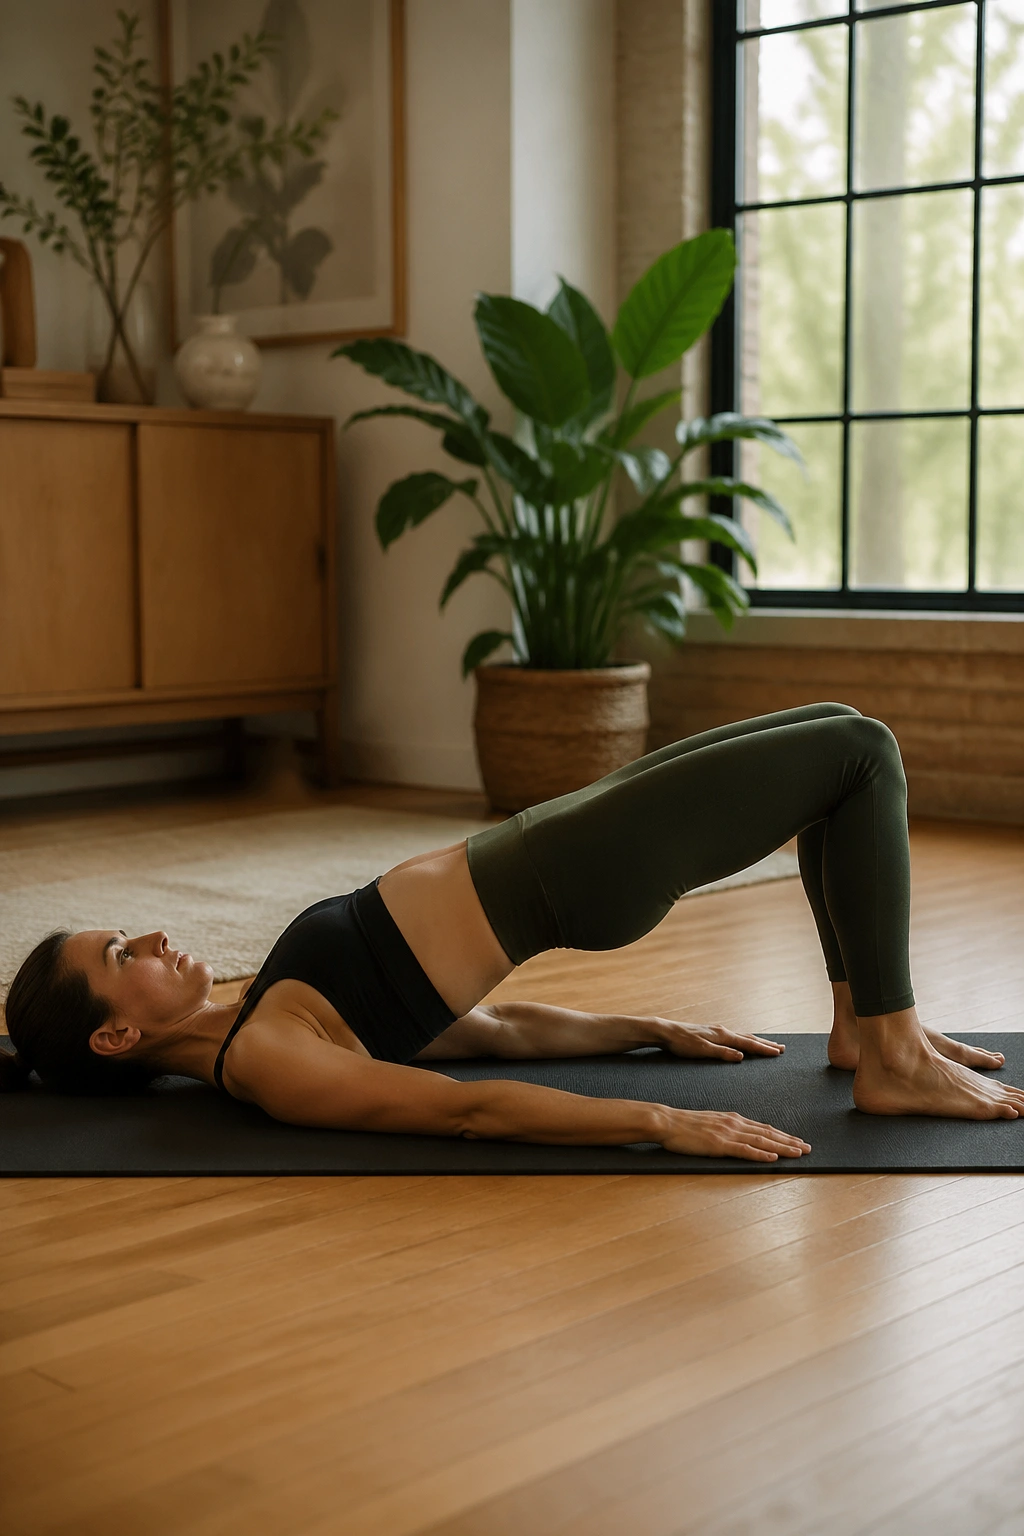
A bridge is not just a glute move. That is the lazy version of the story. In a good Pilates bridge, the glutes help, the hamstrings help, and the belly learns how to stop the pelvis from dumping into a sloppy arch.
Lie on your back, feet hip-width apart, and walk them in close enough that you can still keep the heels grounded. Exhale, tilt the tailbone slightly, and peel the spine off the mat until you reach a straight line from shoulders to knees. Lower one vertebra at a time. 8 to 10 lifts is plenty.
The difference between a bridge that helps your waist and one that just cranks your lower back is the finish. At the top, keep the ribs heavy and the pelvis level. Don’t throw the hips up like you are trying to impress somebody.
Make It Better
- Hold the top for 3 breaths on the last rep.
- Add a march at the top if your back stays quiet.
- Squeeze a small ball or pillow between the knees for extra inner-thigh work.
A bridge done well makes standing feel easier later in the day. That is the real payoff.
7. Side-Lying Leg Series for Obliques and Hip Stability
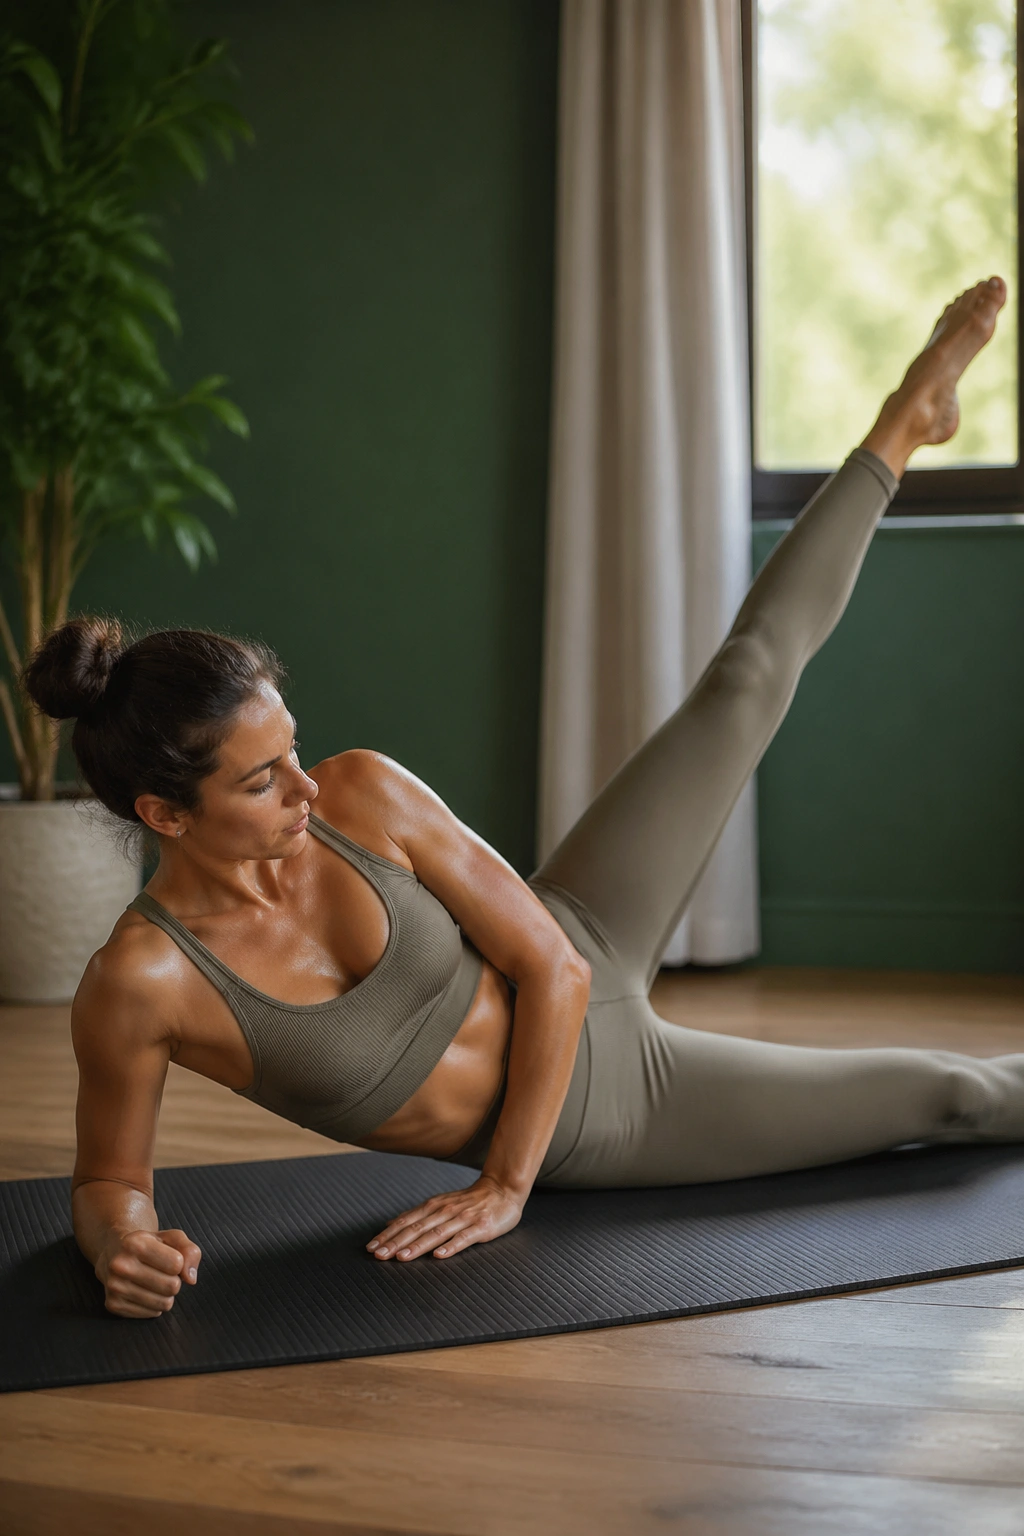
Side-lying work looks tame from across the room. It is not. Once the top leg starts moving, the waist has to stay braced, the hip has to stay stacked, and the obliques have to keep the trunk from rolling backward like a sleepy log.
Top Leg Series
Lie on your side with your bottom waist lifted slightly off the mat and your legs long. Lift the top leg for 10 small pulses, then circle it forward and back for 5 each direction. Keep the hips still. That is the whole game.
Bottom Leg Series
Then switch the challenge. Bend the top knee and lift the bottom leg in controlled little arcs for 8 to 12 reps. This burns in a sneaky way because the side waist has to keep you from collapsing into the floor.
What Makes It Useful
- Builds hip stability without pounding the joints.
- Trains the waist to stay narrow during leg movement.
- Helps the pelvis stop wobbling during walking and stair climbing.
If you want a flatter-looking belly, this side work matters more than it gets credit for. A stable pelvis changes the line of the whole torso.
8. Swimming for the Back Body and Better Posture
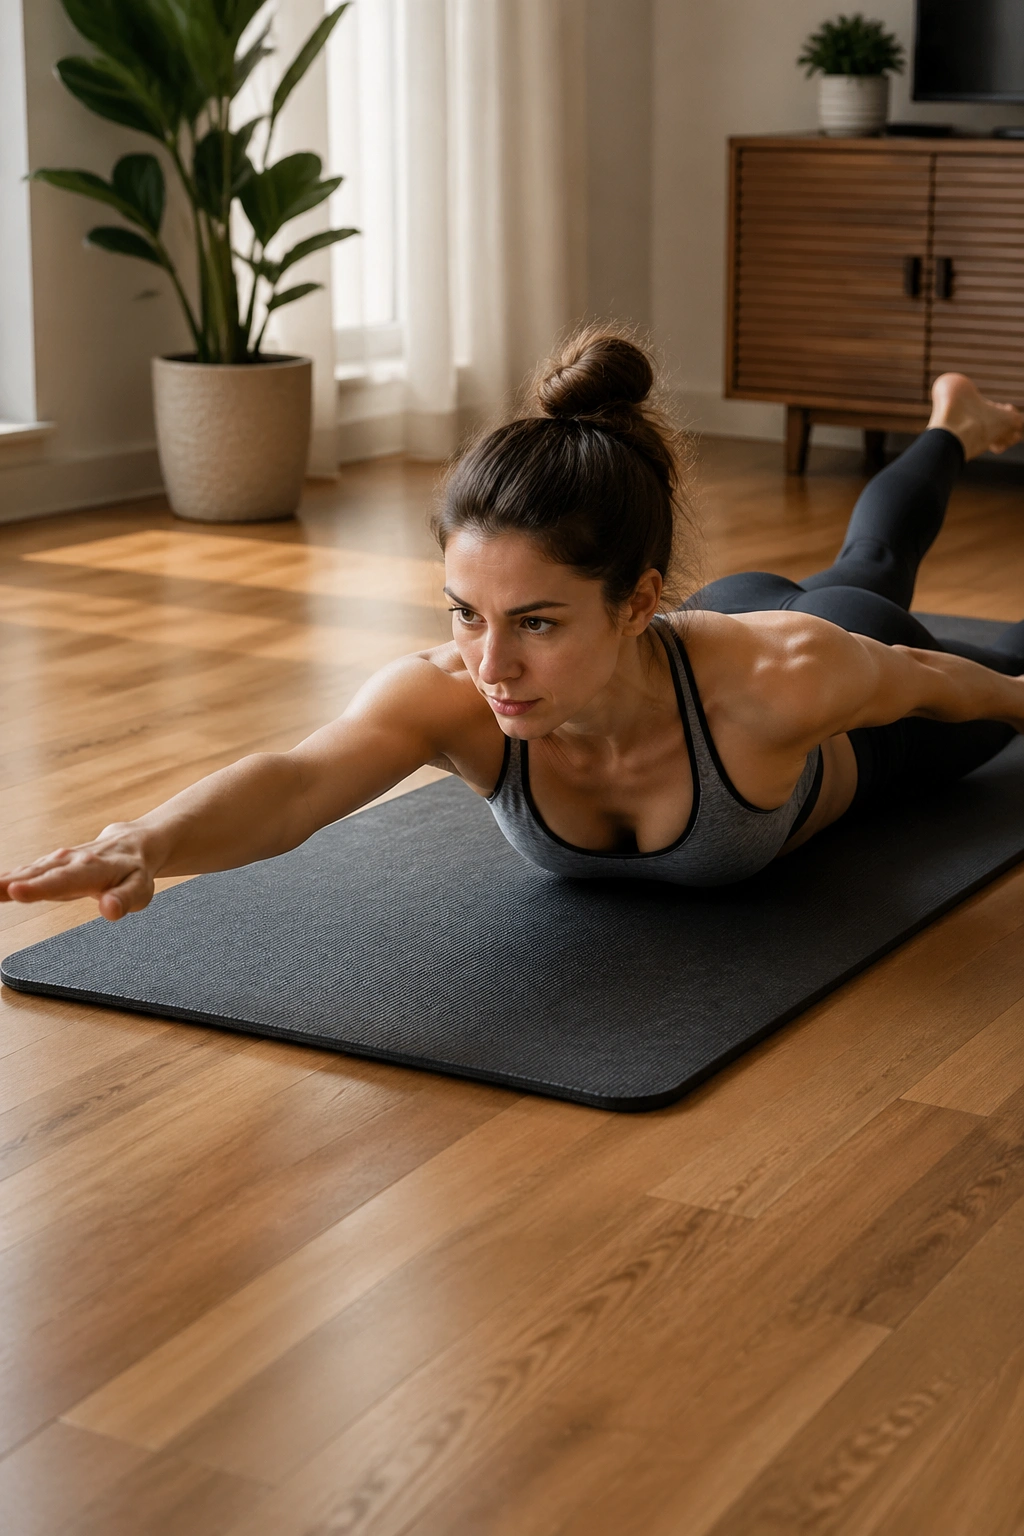
A belly can look bigger when the upper back rounds forward. That is the annoying truth people skip. Swimming fixes part of that by waking up the back body, especially the spinal extensors and glutes, so your chest can lift without a hard arch in the lower back.
Lie face down with your forehead on the mat and extend opposite arm and leg off the floor in a long, reaching pattern. Switch sides in a quick but controlled rhythm for 20 to 30 seconds, rest, then repeat 2 more rounds. The movement should feel long, not frantic.
Keep the neck in line with the spine. If you crank the head up, the shoulders bunch and the lower back usually takes over. Small lift. Long reach. That is the better shape.
I like this after side-lying work because the body finally gets a chance to balance all the front-body stuff with something that opens the chest and wakes up the back line. It is not just a posture exercise. It is a core exercise in disguise.
And yes, it can feel awkward at first. That is normal.
9. Forearm Plank Variations That Keep the Ribs Down
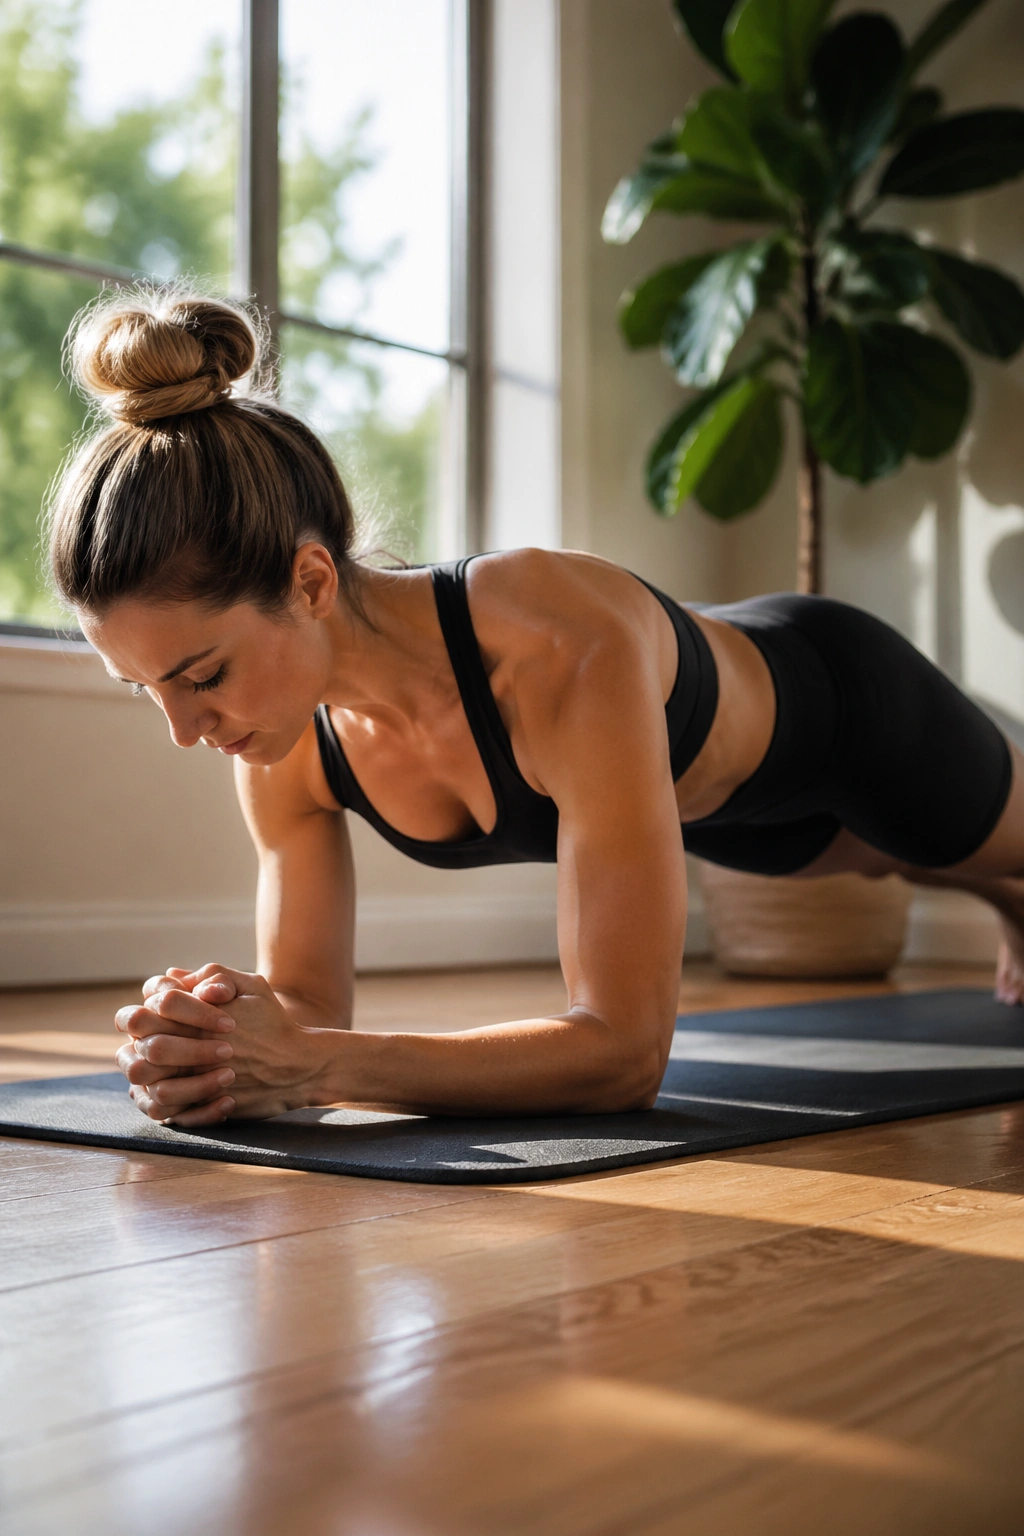
Can a plank help the belly look flatter? Yes, if you do it without turning it into a saggy bridge of shame. The point is not to hang on for a heroic minute. The point is to keep the ribs stacked, the hips in line, and the belly drawn in without holding your breath.
Start on your forearms and knees, then move to full plank only if the low back stays level. Hold for 15 to 30 seconds, rest, and repeat 3 times. If the hips sway, widen the feet a little. If the shoulders shake too much, stay on your knees.
What to Focus On
- Push the floor away through the forearms.
- Keep the tailbone long, not tucked hard.
- Exhale slowly and feel the lower ribs knit together.
- Stop the set the moment the low back starts to sag.
A lot of people treat planks like a punishment test. I don’t like that approach. A clean 20-second plank beats a miserable 60-second one every time.
If your wrists hate planks, use forearms. If your shoulders hate planks, elevate your forearms on a bench or couch. Adjusting is not cheating.
10. Crisscross With Slow Rotation and No Neck Tugging
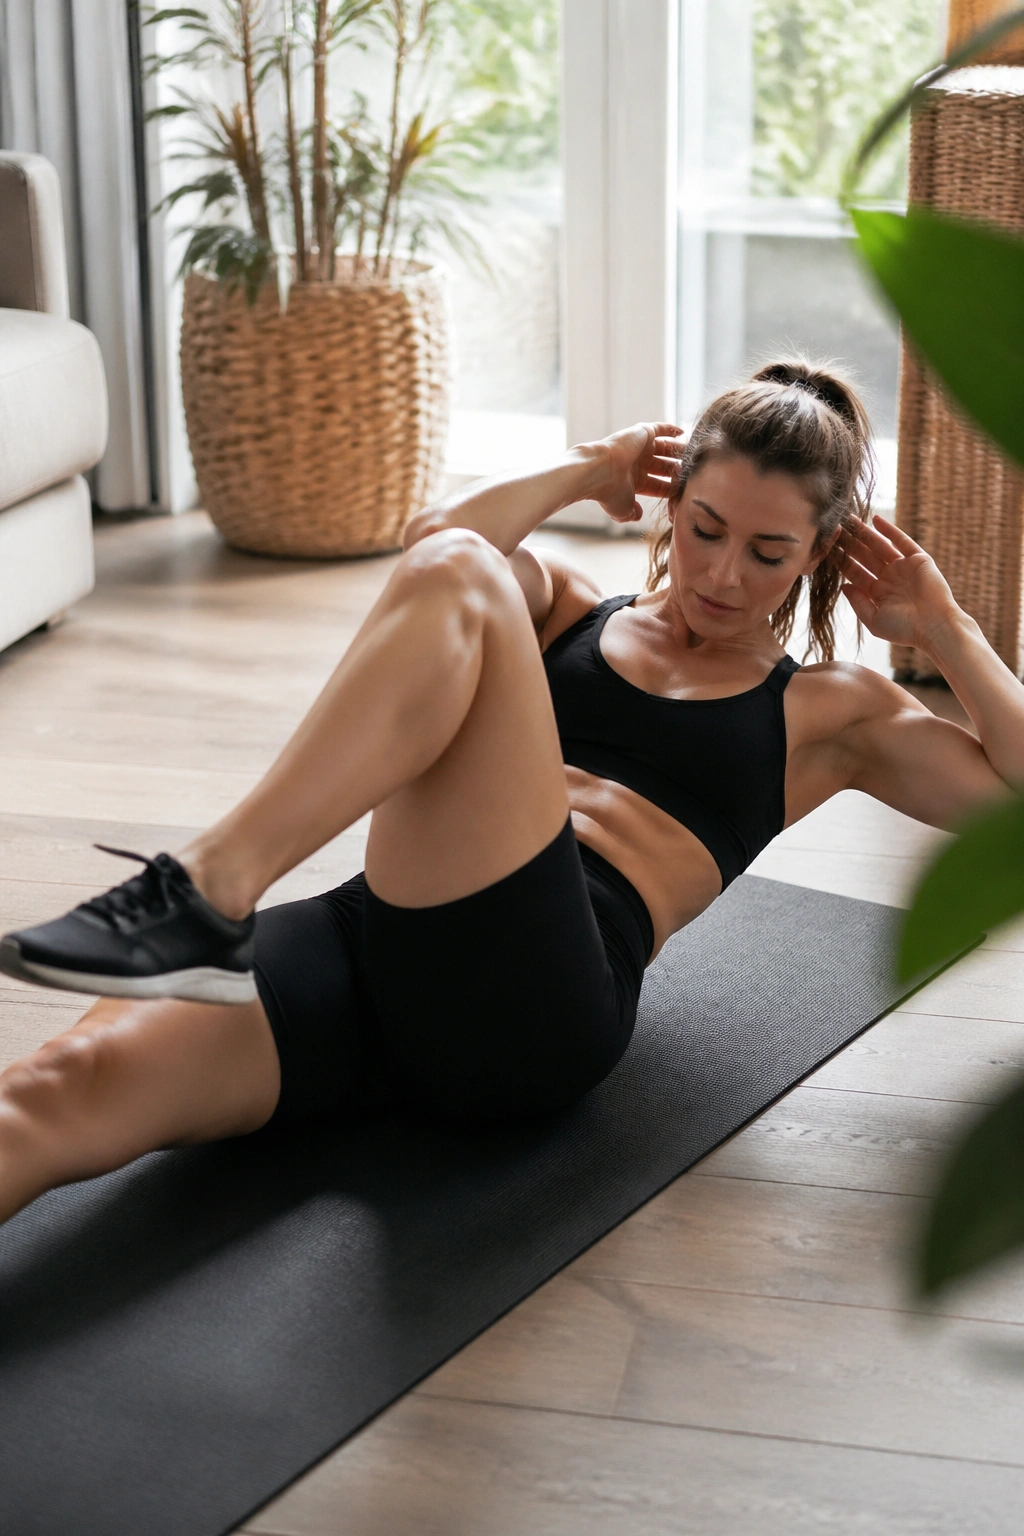
Crisscross is where a lot of people get greedy. They try to move fast, yank the head, and twist from the elbows instead of the waist. It turns into a mess fast. Slow it down, and the move becomes a sharp little test of oblique control.
Lie on your back, lift into a small curl if your neck allows it, and bring one shoulder toward the opposite knee while the other leg reaches away. Switch sides for 8 to 10 controlled reps per side. The reaching leg should stay long but not wild.
The best version of this move feels like the torso is doing the twisting, not the arms. Keep the elbows wide and the chin lightly lifted. If your neck starts barking, lower the head and keep the same leg pattern without the curl.
This one has a bite to it. Good.
The reason it belongs in a flat belly plan is simple: the obliques shape the side wall of the waist, and crisscross teaches them to work without letting the pelvis rock around like a loose chair.
11. Saw and Spine Twist for Clean Core Rotation
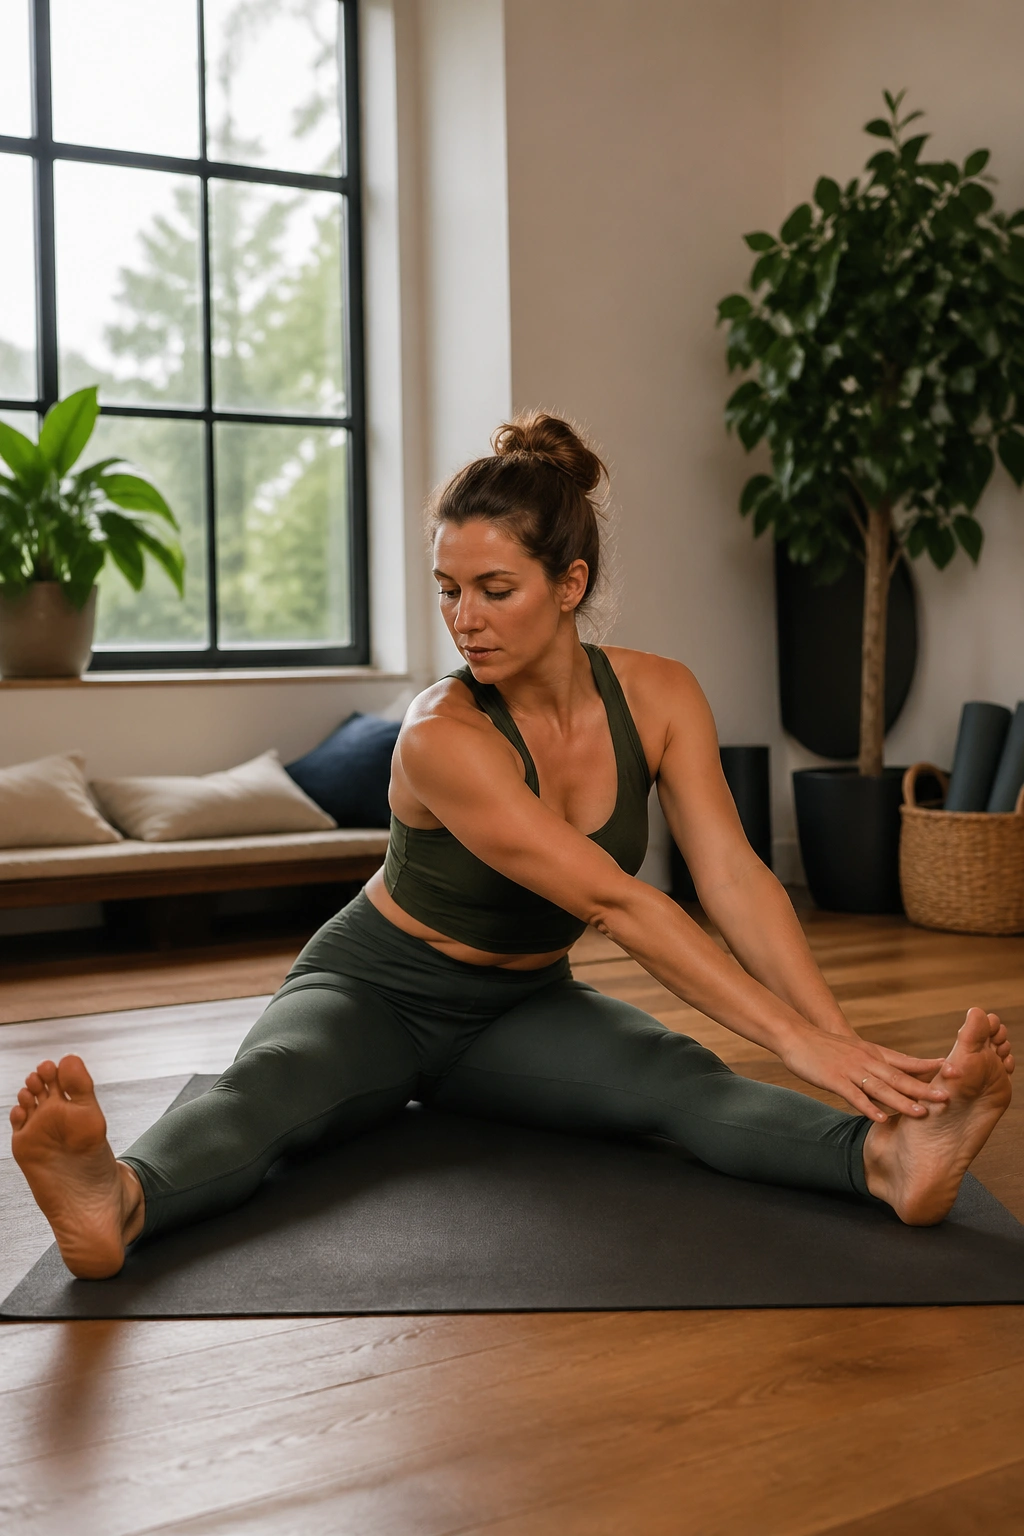
Unlike fast crunches, rotational Pilates work asks the waist to lengthen and turn at the same time. That is a better deal for your spine and a better match for how the torso actually moves during daily life.
Sit with your legs in a wide V, feet flexed, and arms stretched out to the sides. For the Saw, rotate and reach the opposite hand toward the outside of the pinky toe while keeping both sit bones grounded. Come back up tall before switching sides. Do 5 reaches per side.
For Spine Twist, sit taller, arms out, and rotate the ribs side to side in a smaller, cleaner motion. No jerking. No collapsing. 6 twists per side is enough.
The stretch through the back of the legs is part of the charm here, but the real work sits in the midsection. You have to control the turn or you tip over.
A lot of people skip these moves because they are not dramatic. Their loss. The waistline likes crisp rotation, and the body likes learning how to move without dumping into the low back.
12. Teaser Prep and Kneeling Core Work
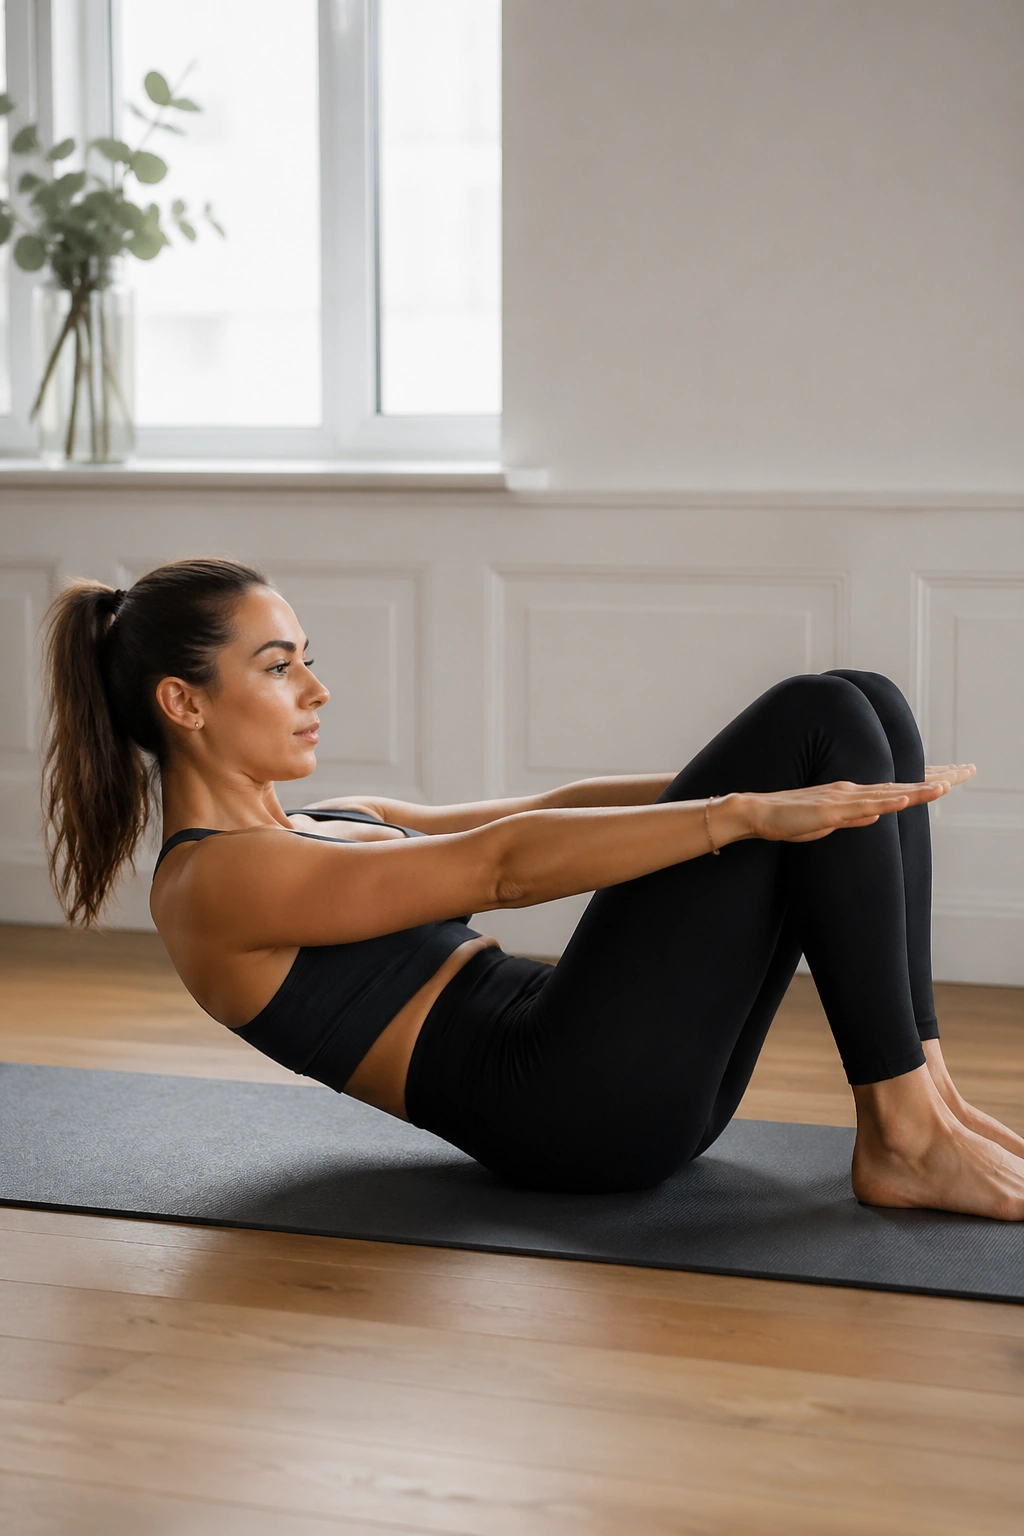
Teaser is the move everybody wants to jump to and the one most people rush past too soon. Smart move? Not really. Teaser prep teaches the same shape in pieces, which is a lot kinder to the spine and a lot better for the deep abs.
Teaser Prep
Lie on your back with knees bent. Reach the arms forward, curl the head and shoulders up, and lift one foot or both feet a few inches off the floor only if the belly stays flat and the neck stays long. Hold for 2 breaths, lower, repeat 5 times.
Kneeling Core Lifts
Then kneel with the toes tucked under, hands lightly behind the head or reaching forward, and lift the knees a few inches off the floor. Hold for 10 to 15 seconds. The hips should hover, not swing.
How to Keep It Useful
- Keep the ribs from popping forward.
- Stop if the belly domes.
- Use a towel under the knees if the mat is hard.
- Lower the difficulty before the lower back complains.
This day is where the plan starts feeling athletic. Not flashy. Athletic.
13. Leg Circles and Scissors for Pelvic Control
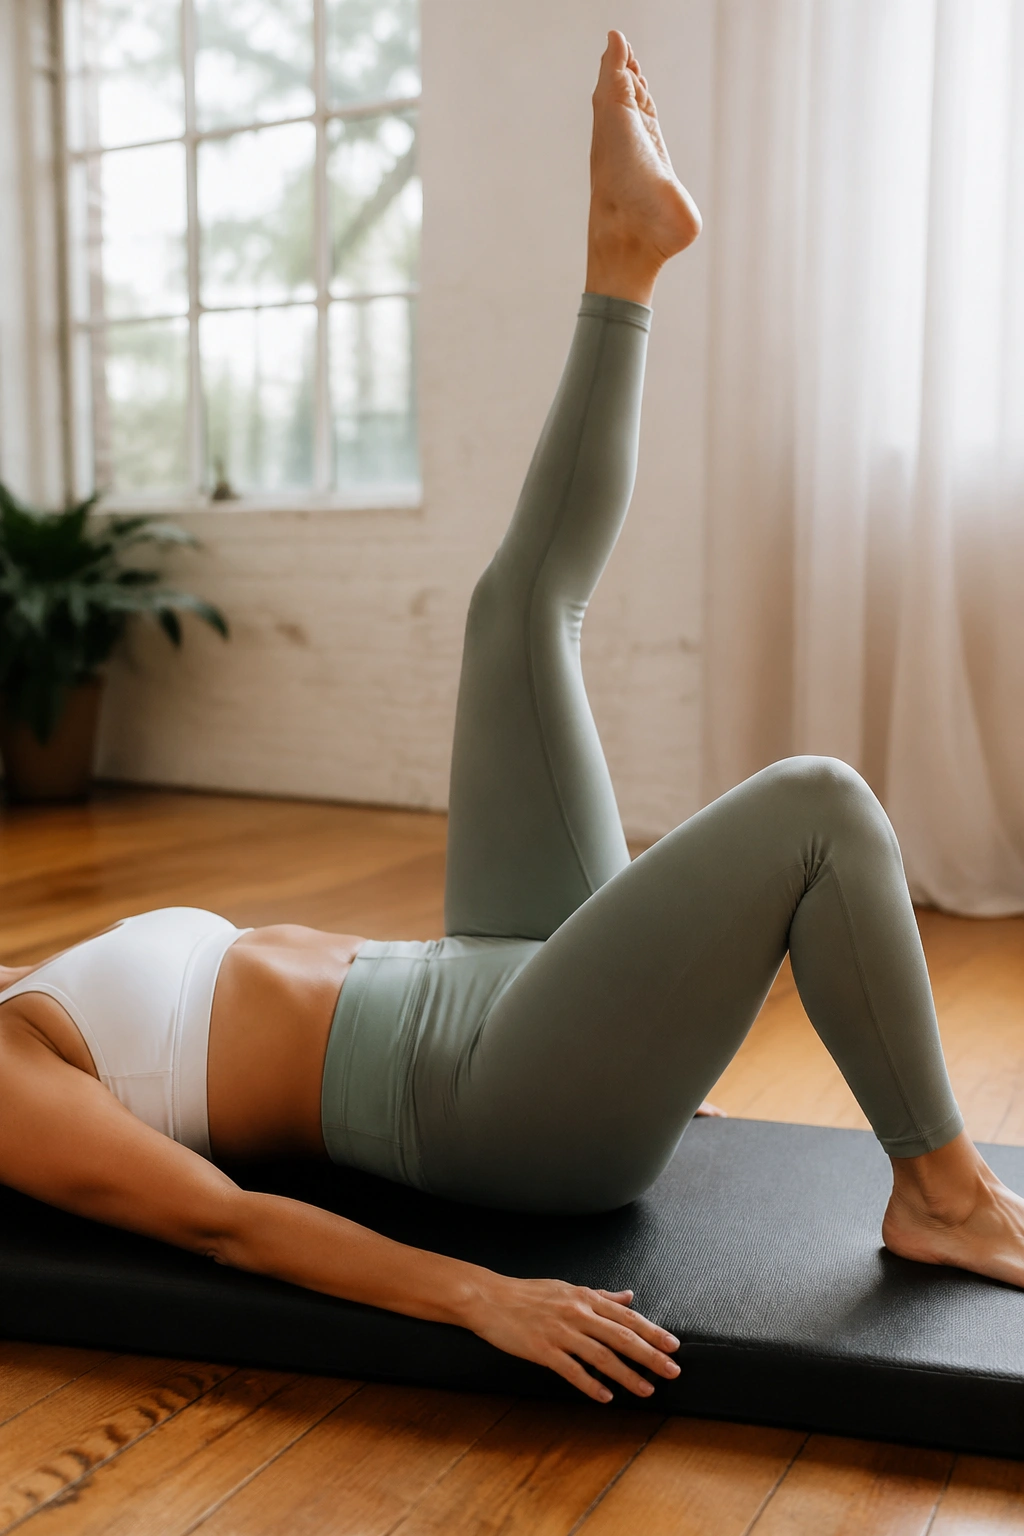
Your hips want to help more than they should. That is the problem. Leg circles and scissors expose that habit fast, because the pelvis has to stay quiet while the legs move through space.
Lie on your back and lift one leg toward the ceiling, then draw small circles about the size of a dinner plate. Five circles one way, five the other. Switch legs. Keep the opposite hip heavy. If the pelvis rolls, the circle is too big.
Scissors come next. Lift both legs, one slightly higher than the other, then switch in a controlled pulse for 6 to 8 switches. Do not let the lower back arch off the mat. If it does, bend the knees and shrink the range.
Small range. Big control. That is the whole point.
These moves can feel humbling because they do not look hard from the outside. On the mat, though, they force the belly to stabilize while the hip flexors and hamstrings do their own thing. That separation is a big deal if you want the midsection to look tighter and feel less jumbled.
14. Standing Pilates Flow for Posture and Belly Control
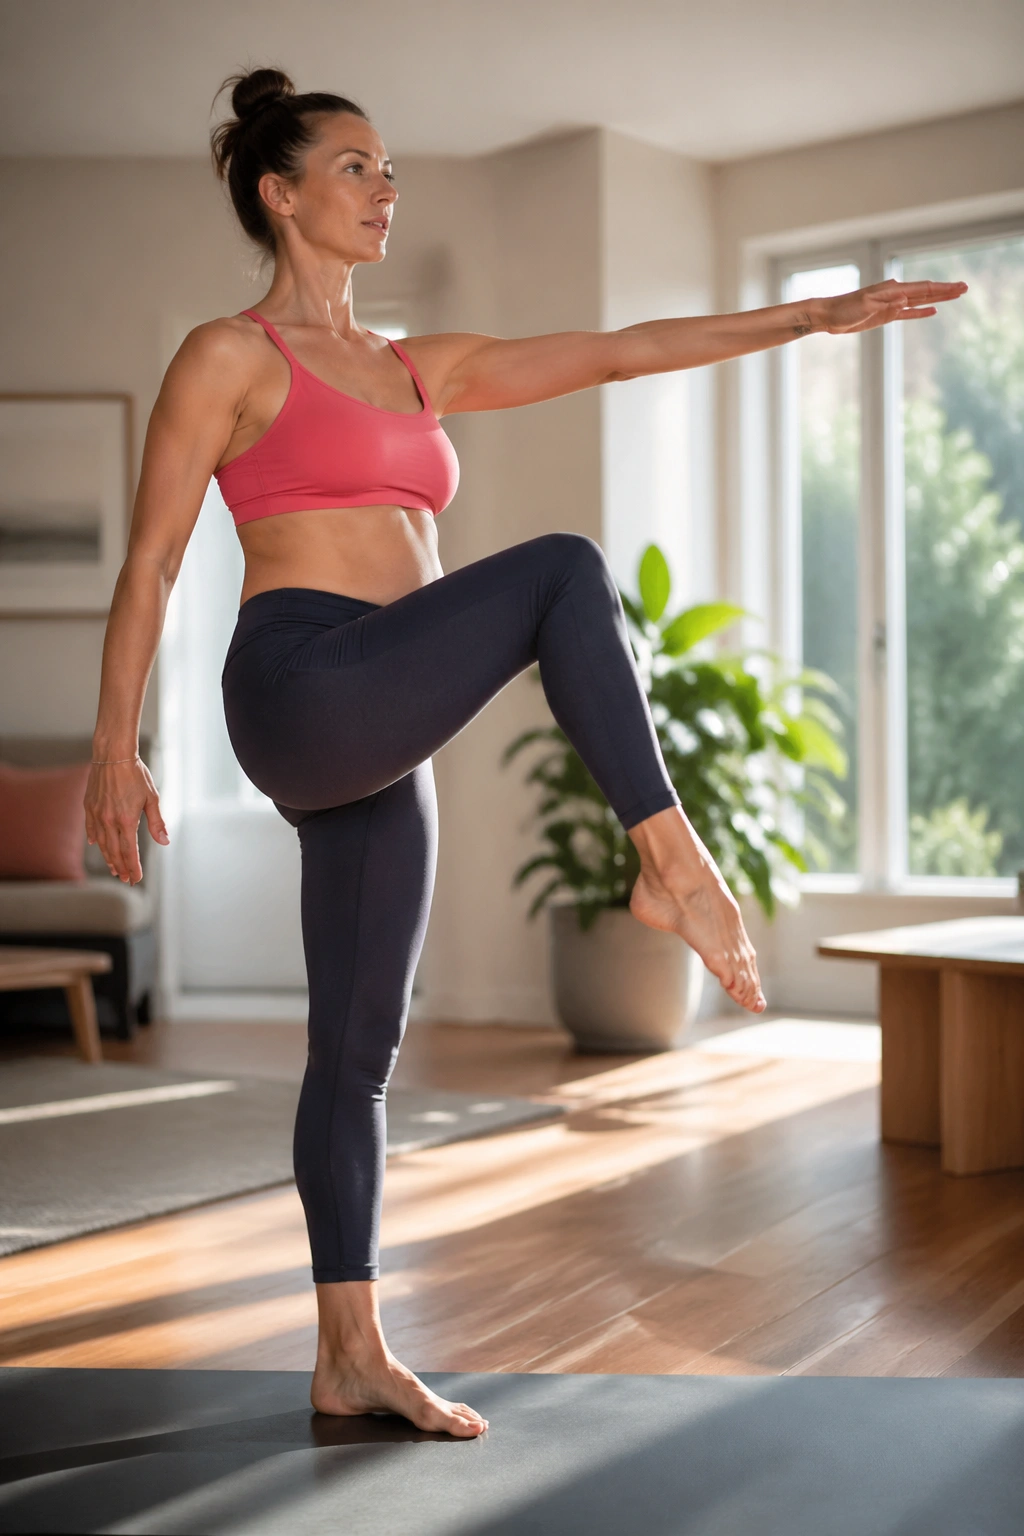
A strong core should show up when you are upright, not only when you are lying on a mat. That is why I like a standing day near the end of a flat belly plan. It turns the work into posture, and posture is where the visual payoff lives.
Start with a slow roll-down, stacking one vertebra at a time until your hands hang toward the floor. Roll back up through the spine. Then add a knee lift with opposite arm reach, a small side bend, and a calf raise. Do 2 rounds of the full flow, moving slowly enough that you can feel your ribs stay down.
Use These Cues
- Keep the weight centered over the middle of the foot.
- Lift through the crown of the head.
- Exhale before each knee lift.
- Stop if the low back starts arching.
Standing work is underrated because it teaches you what your body looks like when you are not braced on the floor. That matters. A belly that looks flatter in standing posture is usually a belly that learned better alignment, not one that got bullied into submission.
I love finishing with this because it makes the whole plan feel usable in real life.
15. The Full-Body Finish You Can Repeat
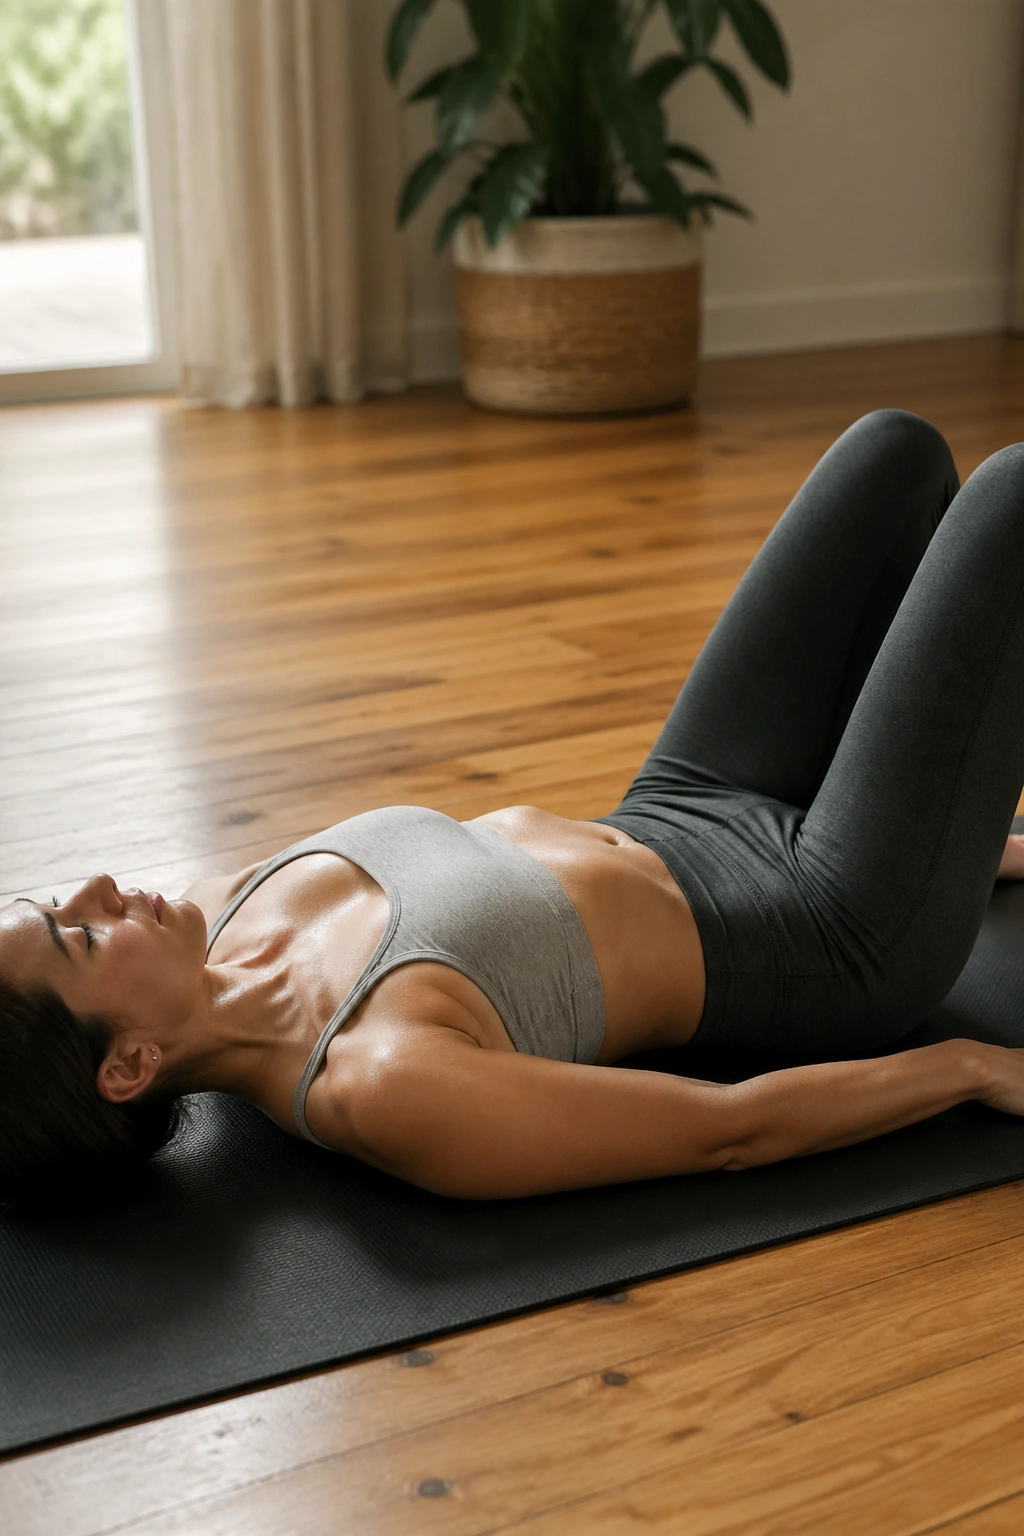
This last workout ties the whole 15 day Pilates flat belly plan together without turning into a circus. You do not need a pile of equipment or a fancy studio. You need enough control to move from the breath, through the core, into the limbs, and back again.
Try this final circuit once through:
- 6 breaths of 90/90 breathing
- 8 toe taps per side
- 8 bridge lifts
- 5 side-lying leg lifts per side
- 5 standing roll-downs
Move slowly. Rest for 20 to 30 seconds if your form starts to slide. If you want a second round, take it only if the belly stays flat and the ribs keep their shape. The whole circuit should feel crisp, not sloppy.
This is the point where you notice whether the earlier days paid off. The breath gets easier. The low back stops taking over so fast. The waist feels more organized when you stand, and that little change tends to carry into the rest of the day in a way people notice before they can name it.
If you repeat the plan after a short break, start again with the breathing reset instead of chasing harder variations. That choice saves your back, keeps your neck out of trouble, and makes the work more useful the second time around. Not glamorous. Useful. And that is the part that sticks.
