



Getting a sculpted, functional lower body does not require a gym membership, a rack full of weight plates, or even a single pair of dumbbells. Gravity is an incredibly reliable tool when you learn how to manipulate it. The secret to home training isn’t finding fancy equipment; it’s mastering mechanics. Most people fail to see results at home because they treat exercise like a chore to complete rather than a movement to refine. If you are just going through the motions, your muscles will plateau. If you focus on the stretch, the squeeze, and the control, your living room becomes the most effective training ground available.
The following list is curated to hit every angle of the lower body: quads, hamstrings, glutes, and calves. Some rely on explosive power, while others focus on high-tension stability. You do not need to do all of these in one workout. Instead, pick five or six that address your goals, group them by focus, and rotate them throughout your week to ensure you are hitting the legs from every necessary direction.
1. The Classic Bodyweight Squat
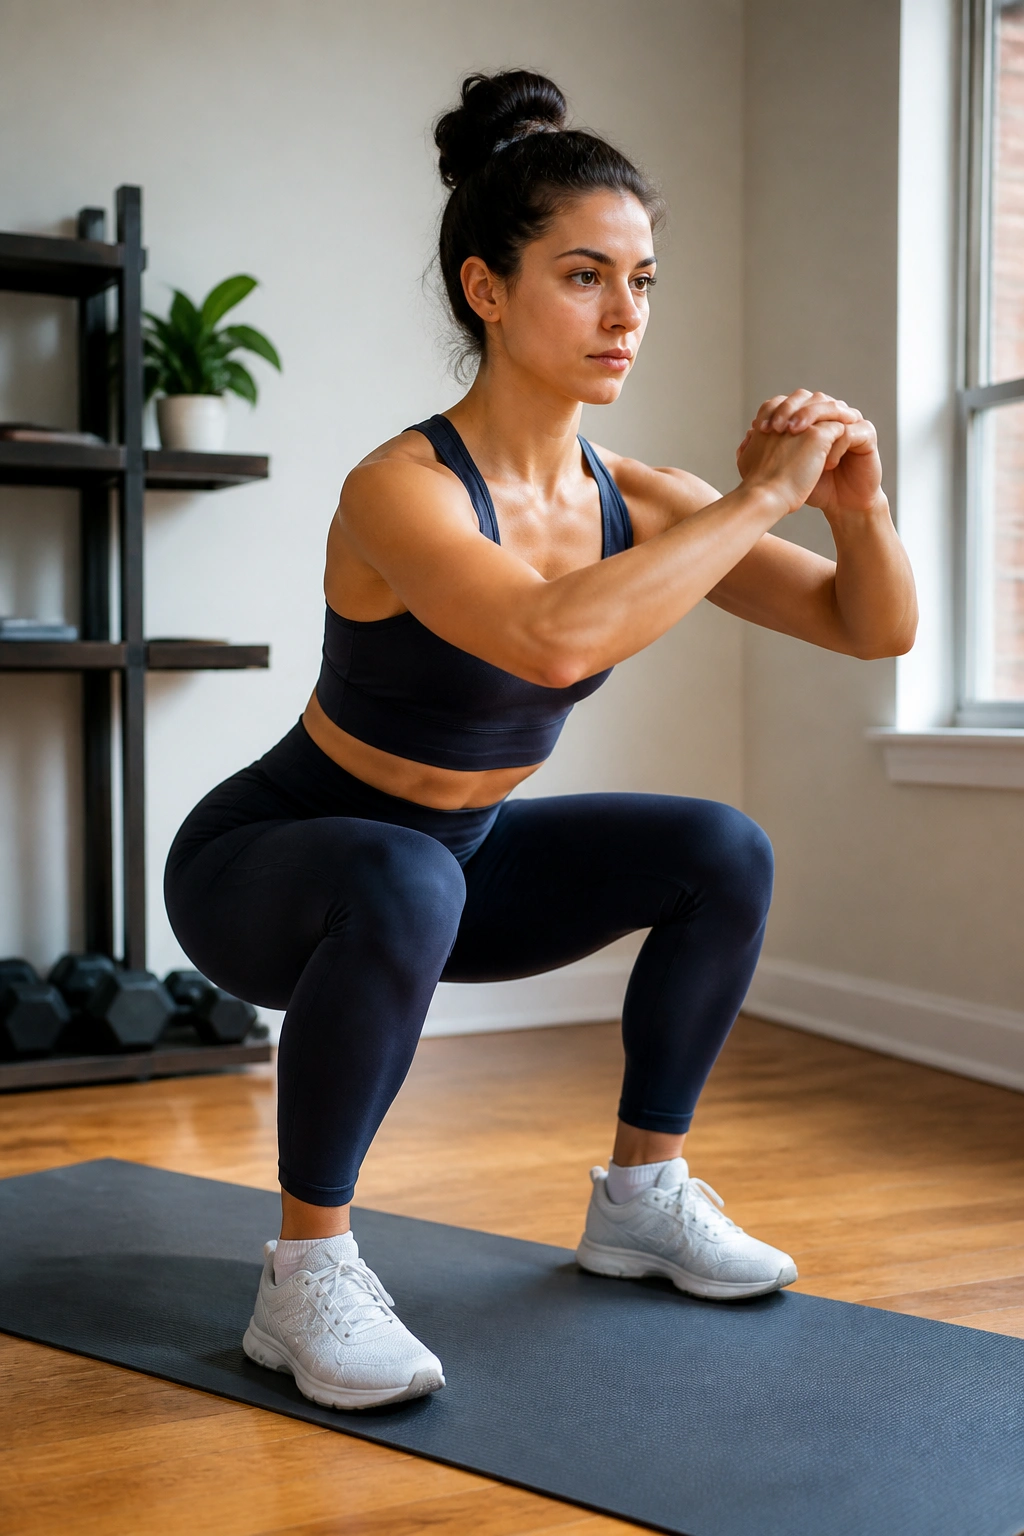
The squat is the fundamental movement pattern for human legs. Before you add a single pound of resistance, you must master the mechanics of moving your hips back and down. If you do this with sloppy form, you are just training your knees to hurt rather than training your legs to grow.
Why Mechanics Matter
Most beginners make the mistake of letting their heels lift off the ground, which shifts all the tension into the knees. When you squat, imagine you are sitting back into a chair that is just out of reach. Your weight should be distributed evenly across your entire foot, with a heavy emphasis on your heels.
The Execution
- Stand with your feet shoulder-width apart, toes pointed slightly outward.
- Keep your chest proud and your core braced as if someone is about to punch you in the stomach.
- Lower your hips until your thighs are parallel to the floor, or as low as your mobility comfortably allows.
- Drive through your heels to return to the standing position, squeezing your glutes at the very top.
Pro tip: If you find your chest falling forward, hold your arms straight out in front of you or overhead for a counterbalance.
2. Reverse Lunges
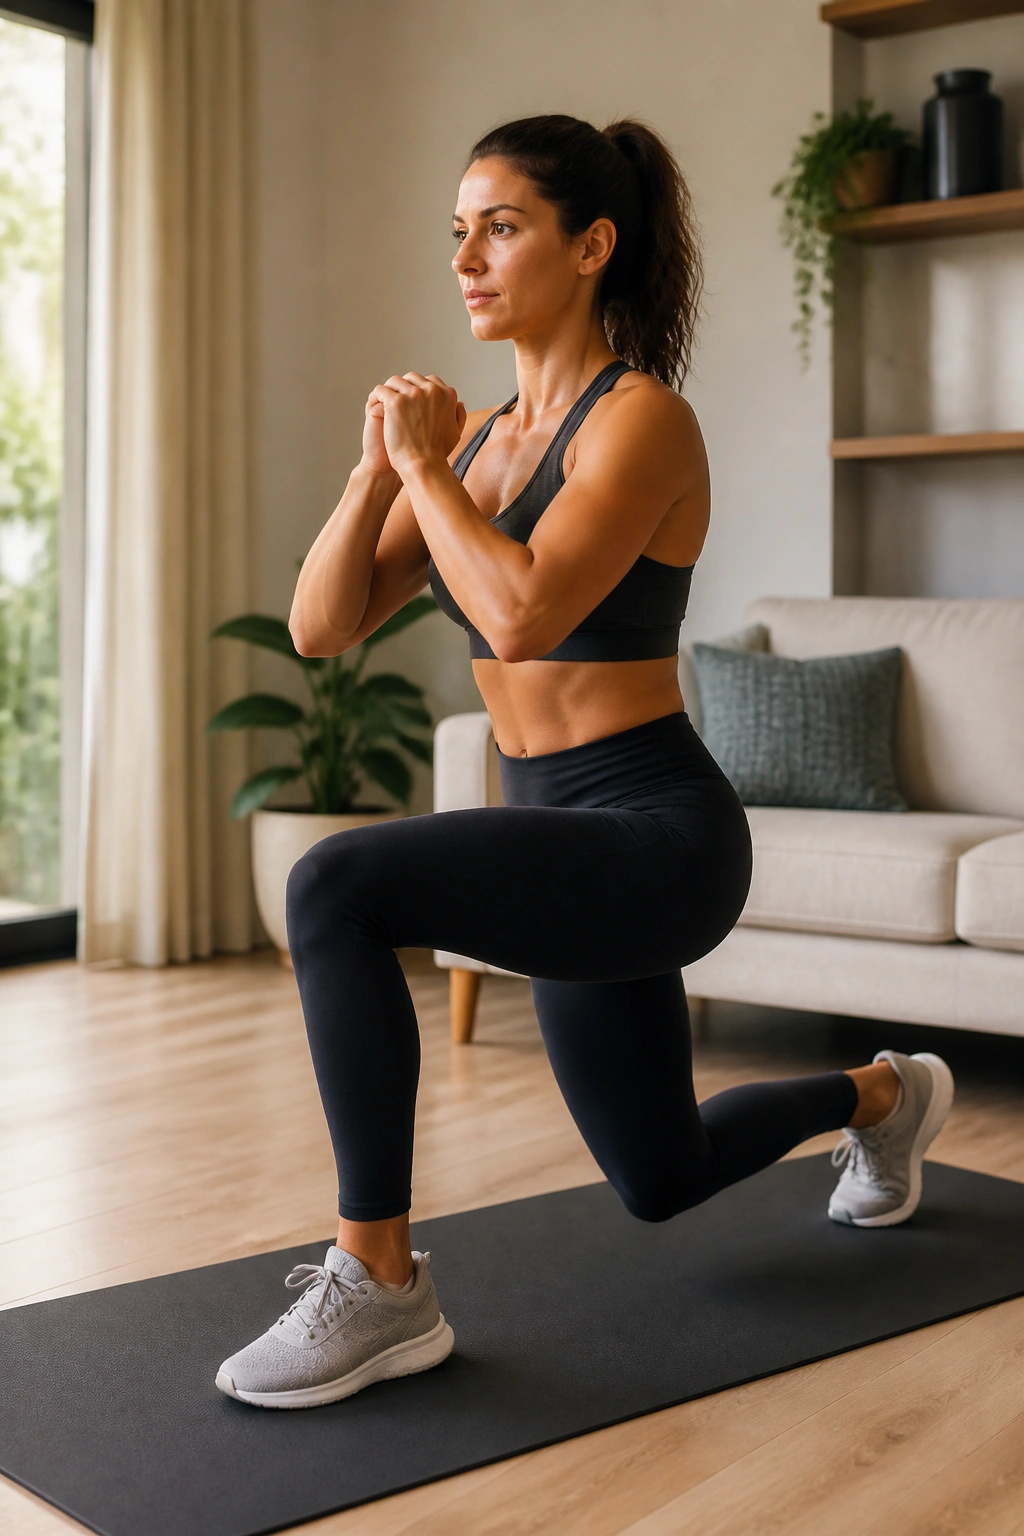
Forward lunges are popular, but they can be aggressive on the knee joints if you don’t have the stability to handle the forward momentum. Reverse lunges are a superior home-friendly alternative. They naturally force you to keep your shin vertical, which protects your joints while keeping the focus squarely on your glutes and hamstrings.
When you step backward, you are forced to stabilize your entire frame on the stationary front leg. This creates a massive demand for balance. You will notice that one side feels significantly more stable than the other; that is entirely normal. Use your stronger side to gauge your form and your weaker side to identify where you need more focus.
To get the most out of this movement, keep your torso upright. Leaning forward is fine if you are targeting the glutes, but a vertical torso places a higher demand on the quad of the front leg. Experiment with both positions to see where you feel the most activation.
3. Glute Bridges
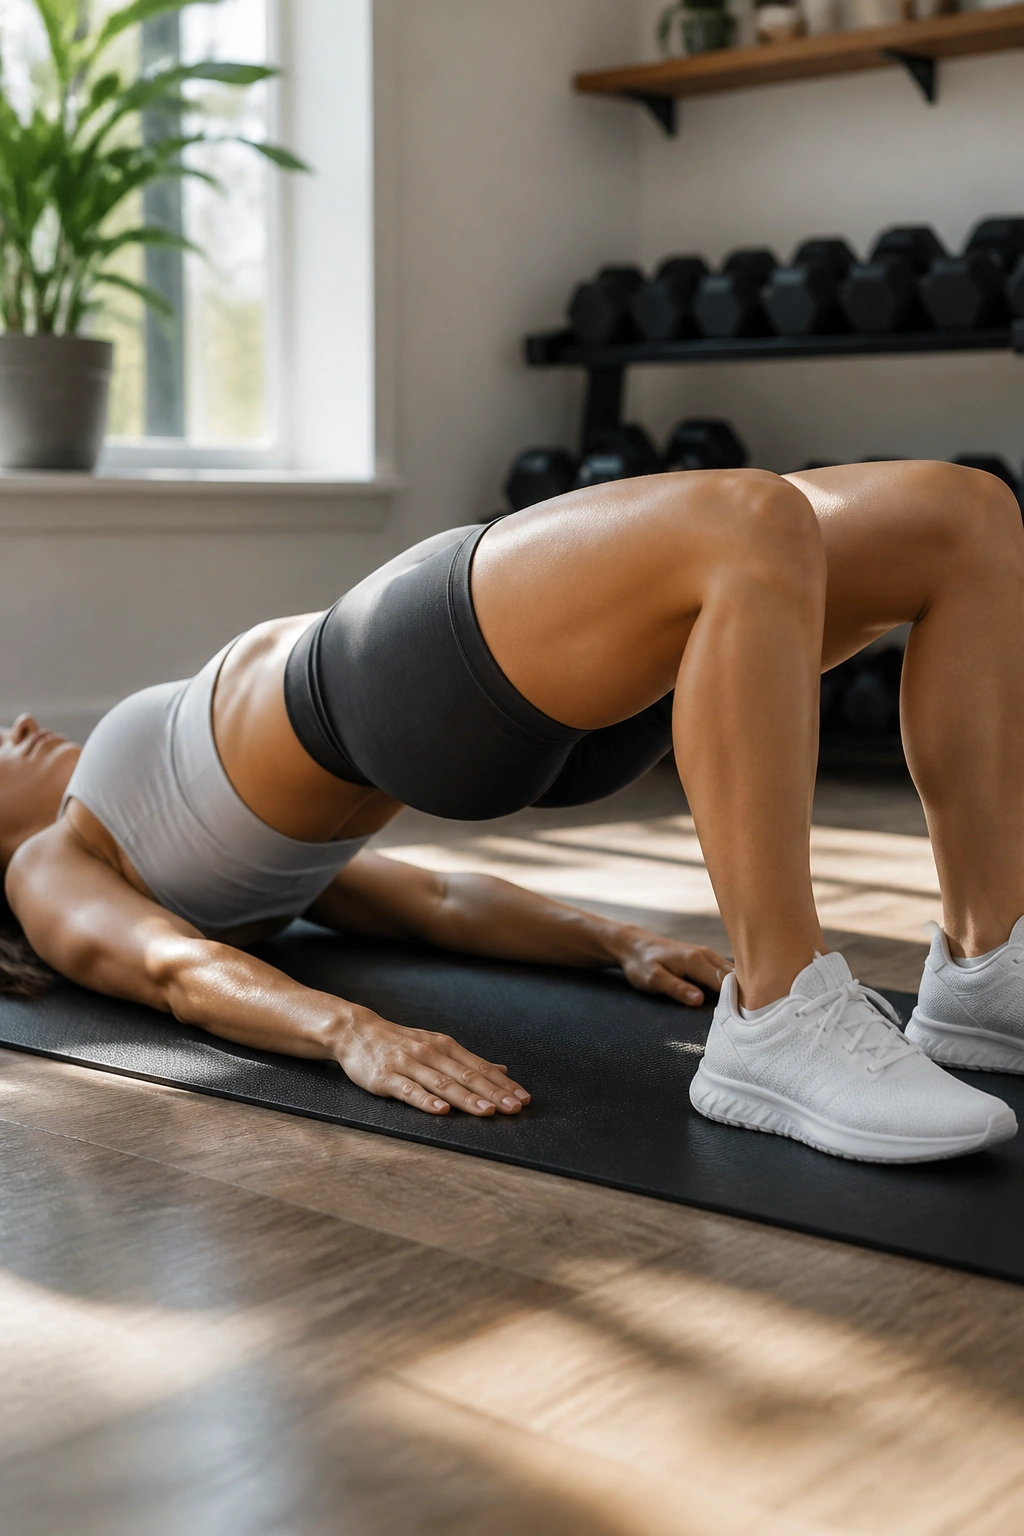
If your goal is to grow your glutes without destroying your lower back, the bridge is your primary tool. It is an isolation exercise that is deceptively simple. Most people just push their hips up, but that is not the goal. The goal is to drive your heels into the floor and use your glutes to hinge at the hips.
The Anatomy of a Perfect Bridge
Lay flat on your back with your knees bent and feet flat on the floor, about six inches from your butt. Dig your heels into the ground. As you lift, think about tucking your pelvis under—a posterior pelvic tilt. If you don’t tuck, you are likely overextending your lumbar spine to get higher, which is exactly how you invite back pain.
Common Pitfalls
- The Slipping Foot: If your feet slide away, your hamstrings are doing all the work. Keep them tight to your body.
- The Neck Crank: Don’t look at the ceiling and crane your neck. Keep your chin tucked toward your chest to maintain a neutral spine.
- The Half-Rep: If you aren’t feeling a burn in your cheeks, you aren’t at the top of the movement. Squeeze at the peak for a full second.
4. Lateral Lunges
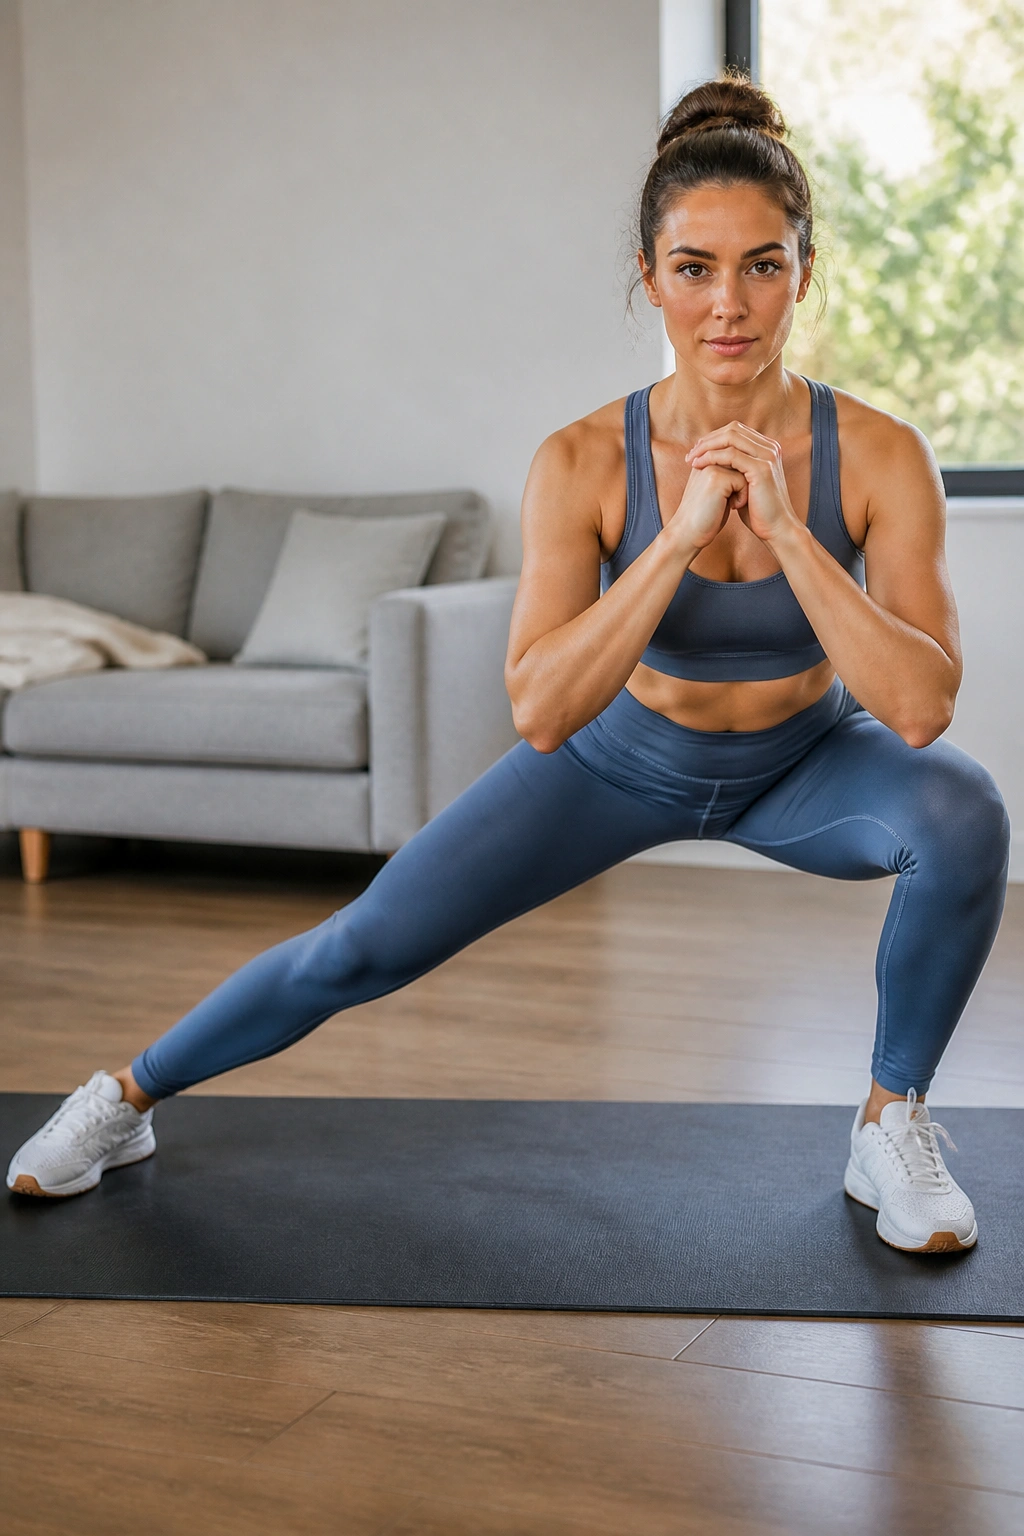
We spend almost all of our time moving forward and backward. When you only train in the sagittal plane—straight lines—your hips become tight and immobile. Lateral lunges force you to move in the frontal plane, which hits the inner thighs (adductors) and glute medius, the muscle responsible for hip stability.
When you step out to the side, keep the trailing leg perfectly straight. Drive your hips back as if you are trying to touch your butt to the wall behind you. You should feel a distinct stretch in the groin of the straight leg. That stretch is where the work happens.
If you find yourself wobbling, do not use your arms for balance. Instead, focus on gripping the floor with your toes. This creates a stable foundation that allows you to push deeper into the lunge. Do not force the depth; if your heel starts to come up on the working leg, stop just before that point and work on increasing your mobility over time.
5. Sumo Squats
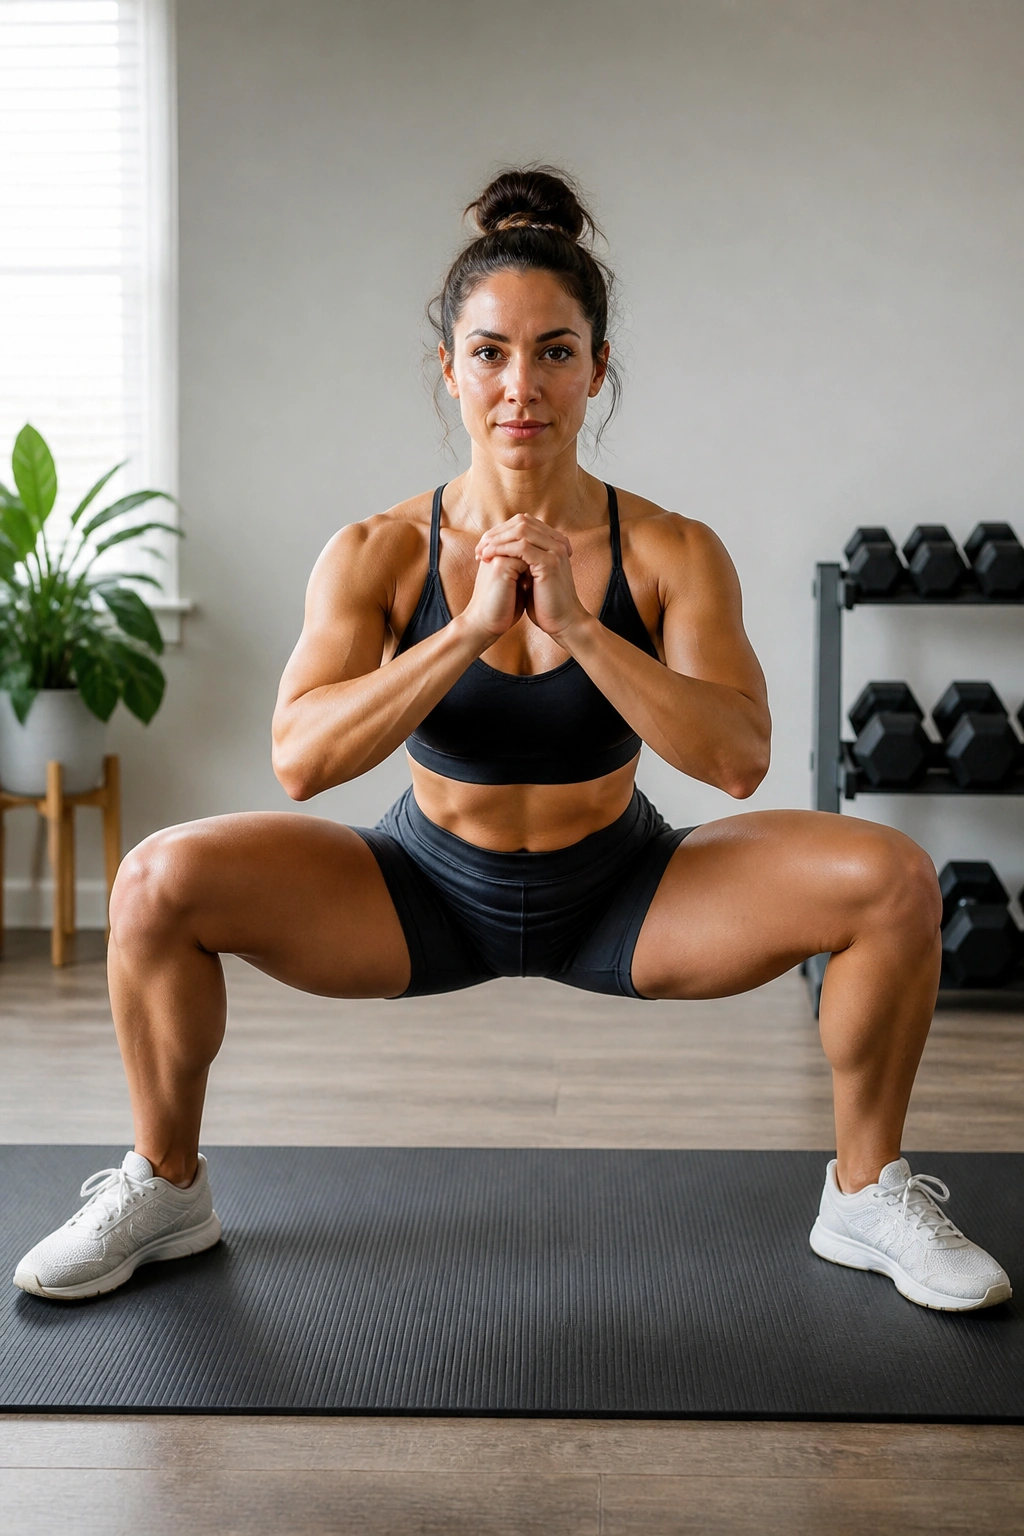
The sumo squat is the best quad-killer in the home workout arsenal. By taking a wide stance with your toes pointed outward, you shift the mechanical advantage. The wide stance forces your adductors to work harder and limits your ability to use the lower back for assistance.
Start with your feet significantly wider than your shoulders. Turn your toes out to about 45 degrees. As you descend, your knees should track directly over your toes—do not let them cave inward. If your knees collapse toward the center, your glutes aren’t firing, and you are putting unnecessary strain on the meniscus.
To add intensity without weights, slow down the eccentric (lowering) phase. Take a full three seconds to reach the bottom. That time under tension is what builds muscle fibers. Pause at the bottom for one second to kill your momentum, then explode upward, focusing on squeezing the inner thighs as you return to standing.
6. Bulgarian Split Squats
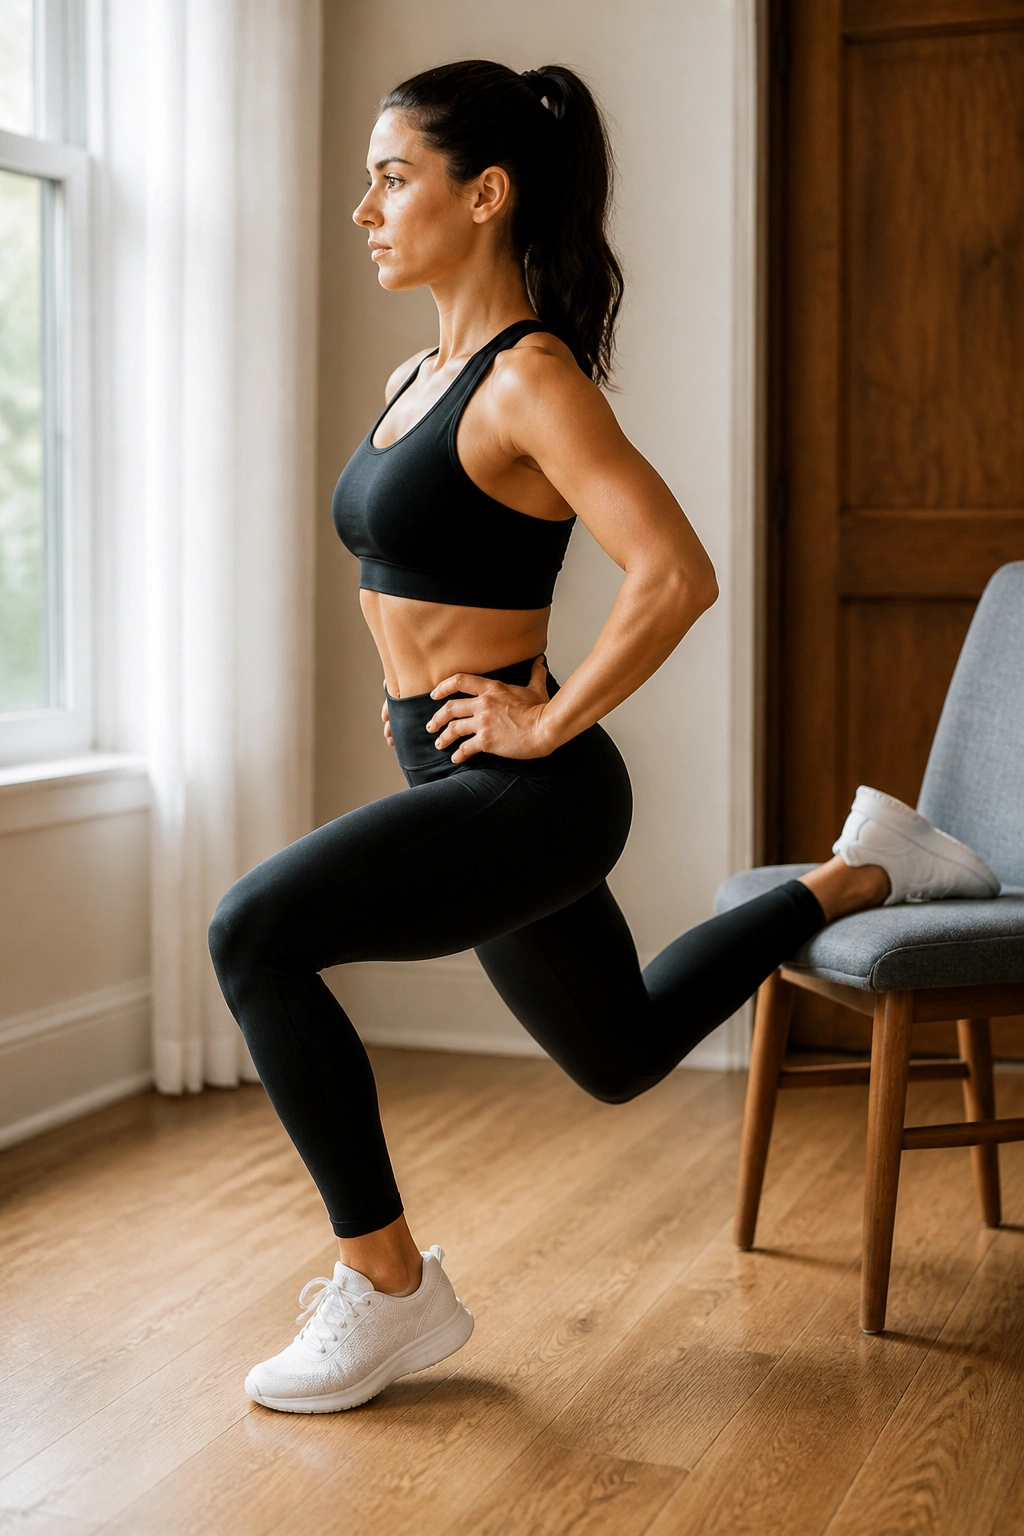
If you want to simulate a heavy leg day with zero equipment, this is the exercise. It is a unilateral movement, meaning you are training one leg at a time. This doubles the load on the working leg, making even bodyweight reps feel intense.
Place one foot behind you on a couch, chair, or sturdy ottoman. Step the other foot forward, far enough that when you descend, your front knee doesn’t track way over your toes. If you are too close to the chair, the movement feels cramped and pushes your knee past your toes, which can be irritating.
Balance is the primary challenge here. To make it easier, stare at a single point on the wall in front of you. To make it harder, slow the descent to a crawl. If you feel the burn in your quads, you are doing it right. If you feel it in your glutes, you are probably leaning your torso forward, which is also a valid way to perform the movement. Choose the angle that targets the muscle group you want to prioritize.
7. Wall Sits
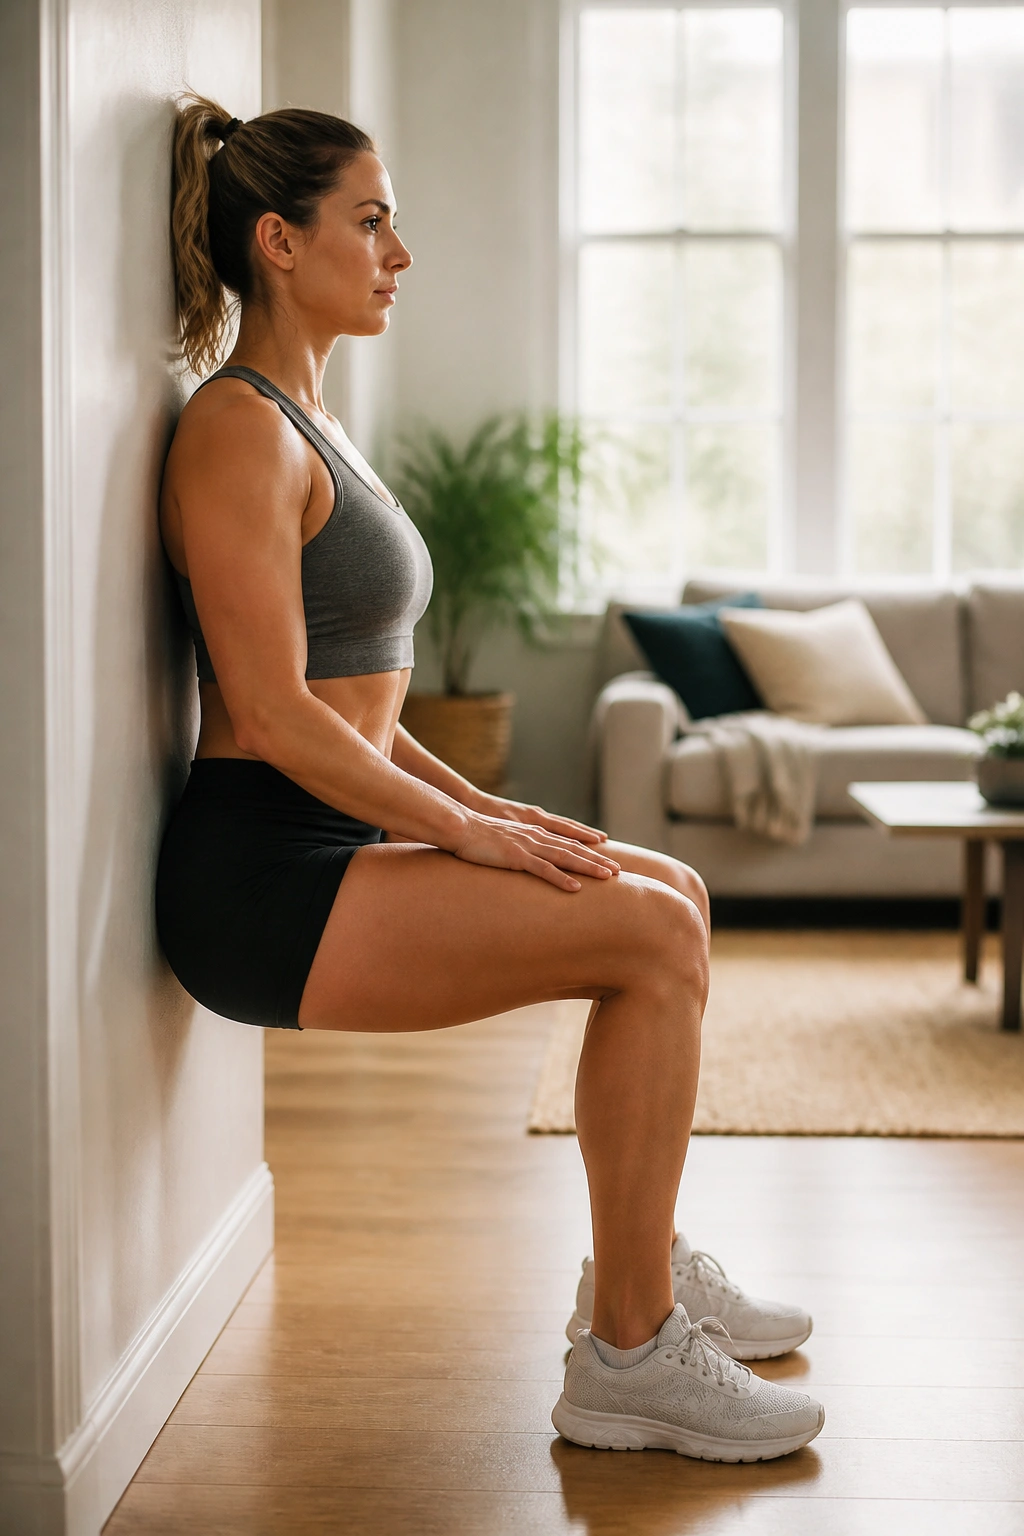
Isometrics are often ignored, but they are essential for building knee health and muscular endurance. The wall sit is a simple, brutal exercise that requires nothing but a vertical surface. It teaches you to maintain tension when your muscles are screaming to quit.
Slide your back down a flat wall until your thighs are parallel to the floor. Keep your feet flat—no toes. Your knees should be at a 90-degree angle. If they are higher, it is too easy. If they are lower, you are essentially doing a squat, which is fine, but the wall sit is designed for holding a static position.
The mistake people make is relaxing their glutes. Your glutes should be engaged and pressed into the wall. Think about creating a “shelf” for your butt. If your legs start to shake, that is the goal. Do not come out of the pose until you absolutely have to.
8. Clamshells
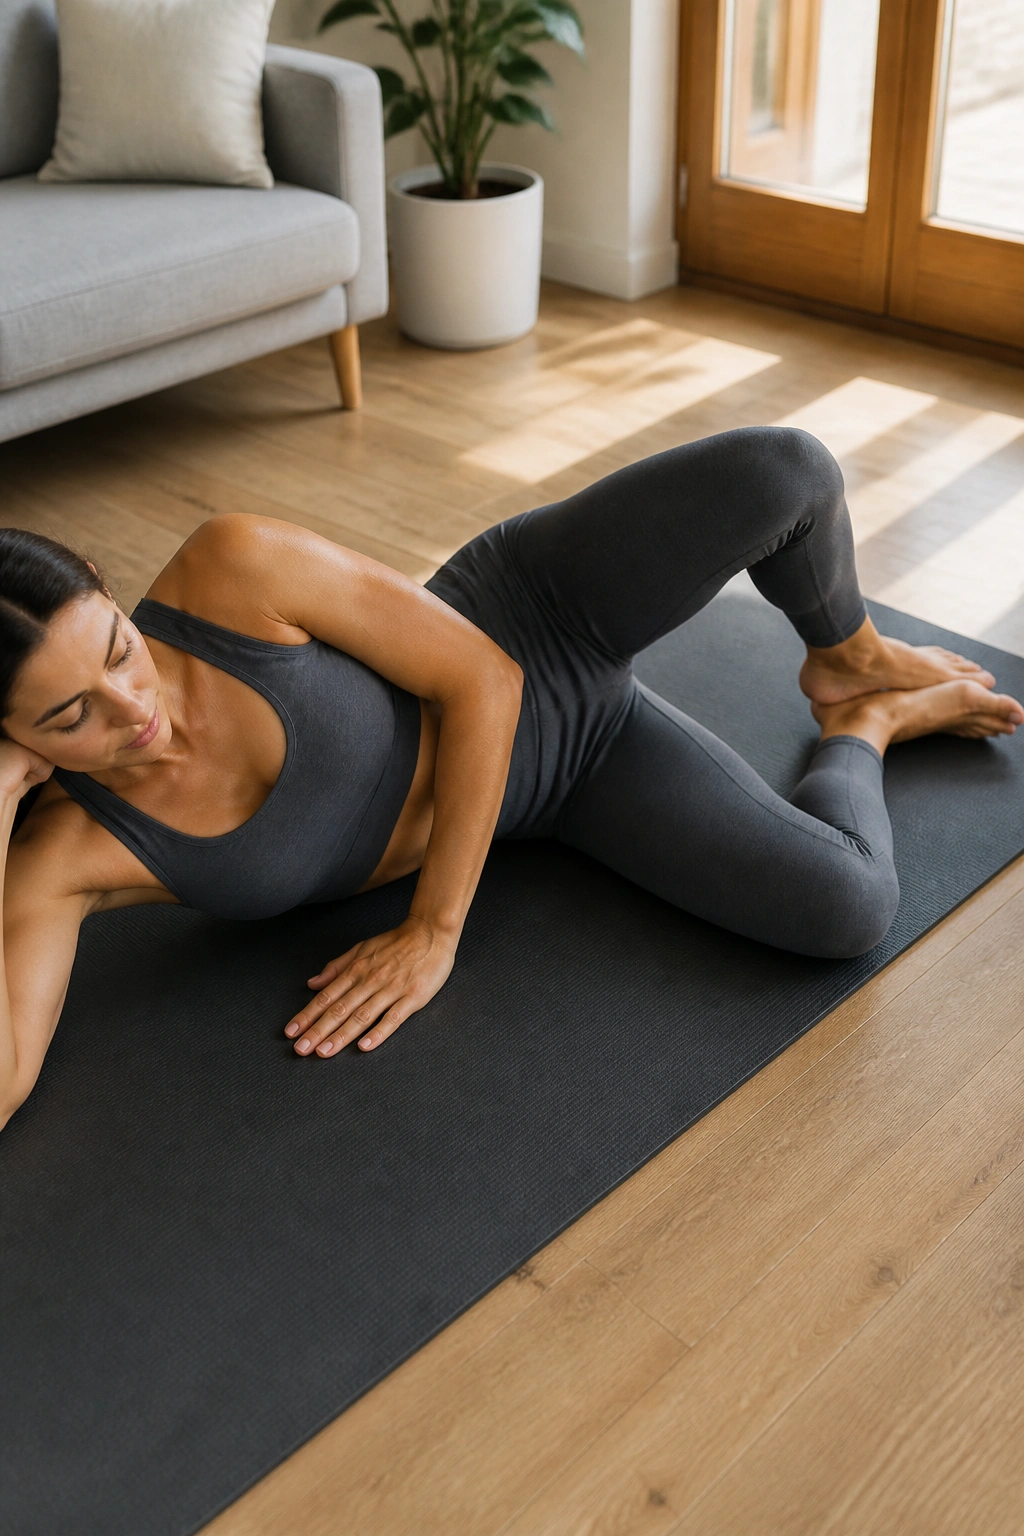
The glute medius is the muscle that gives your glutes that “shelf” look from the back and side. Unfortunately, it is almost impossible to hit with heavy squats. Clamshells, done lying on your side, are the gold standard for activating this muscle group.
Lie on your side with your knees bent at a 45-degree angle. Keep your feet touching throughout the entire movement. Lift your top knee as high as you can without letting your hips roll backward. This is the crucial part: if your hips tilt, the exercise is doing nothing for your glute medius and everything for your lower back.
Perform these slowly. The temptation is to use momentum to swing your leg open. Instead, focus on the contraction at the top. You should feel a distinct burn in the side of your hip within ten to fifteen reps. If you don’t feel it, you aren’t doing it right—slow down and verify your hips are square to the wall.
9. Fire Hydrants
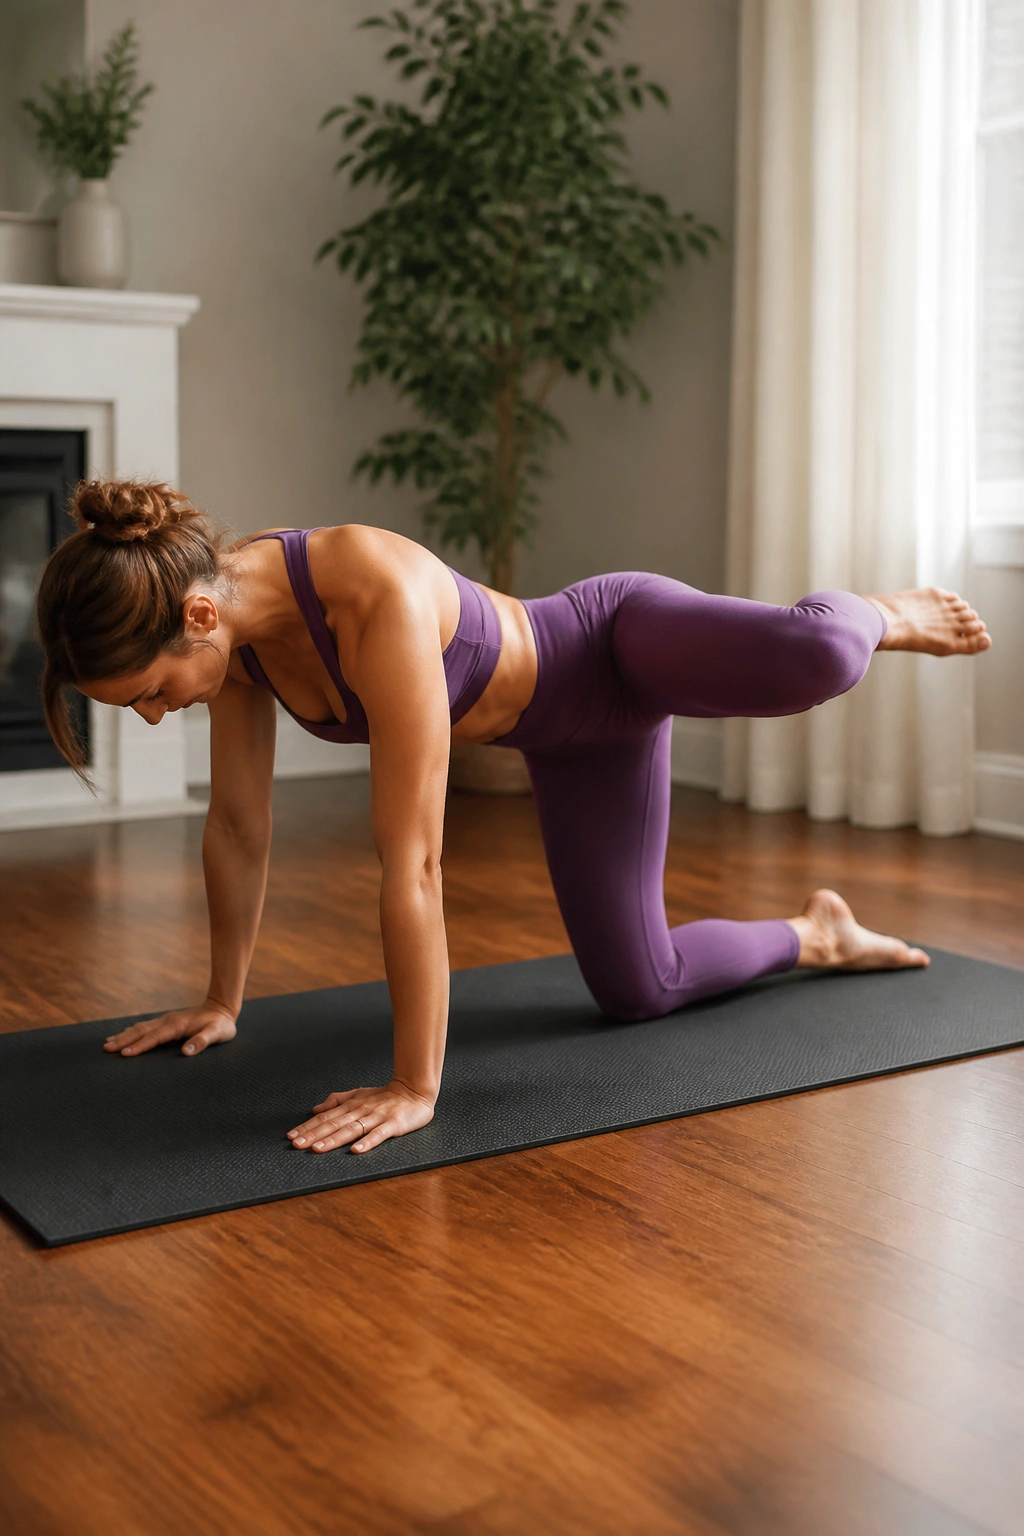
Named for the obvious reason, this move looks strange, but it is one of the most effective ways to isolate the glutes from the hips. It requires zero equipment and hits the hip abductors and rotators, which helps with overall pelvic stability.
Start on all fours, with your hands directly under your shoulders and your knees under your hips. Keep your spine neutral—don’t arch your back toward the floor. Lift one knee out to the side while keeping it bent at 90 degrees. Think of a hinge. Your hip is the pivot point.
Do not allow your torso to rotate to compensate for the lift. If your body is rocking, your range of motion is too big. Shrink the movement and focus on keeping your hips perfectly level. You will likely find that one side has a much greater range of motion than the other; work to balance this out over time.
10. Donkey Kicks
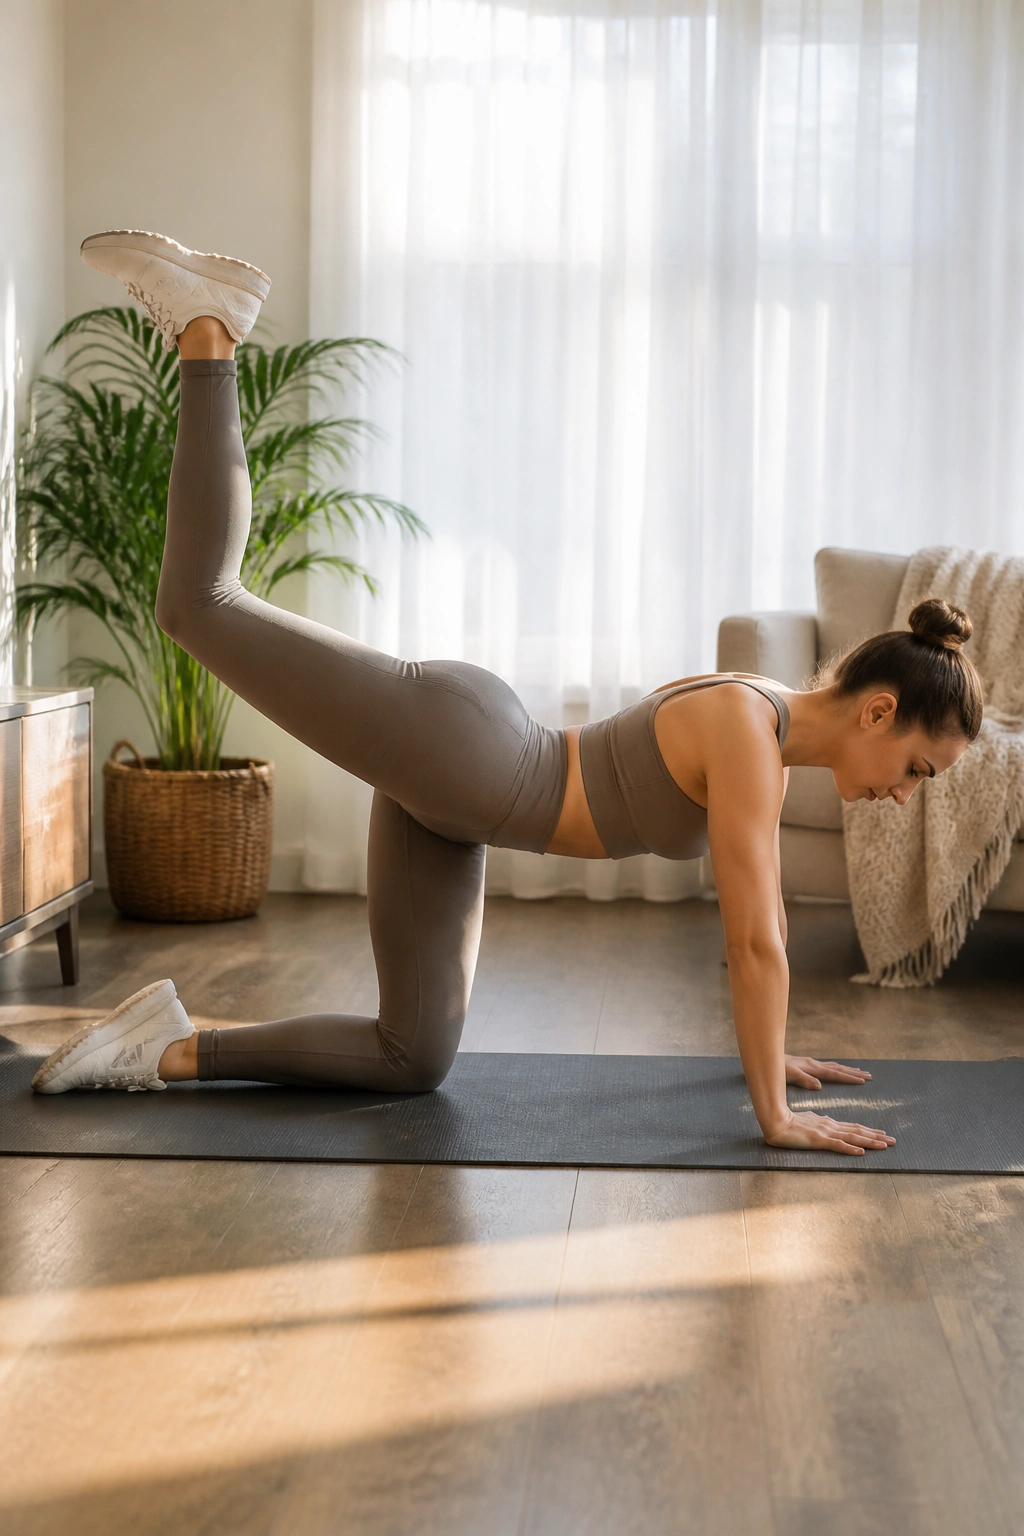
Donkey kicks are the classic glute isolation move. They allow you to hit the gluteus maximus—the largest muscle in the body—without putting any pressure on your spine or knees. This is perfect for those who are just starting their fitness journey or dealing with joint sensitivities.
Get into a tabletop position. Kick one leg upward toward the ceiling, keeping the knee bent at a 90-degree angle. The sole of your foot should face the ceiling. Imagine you are trying to stomp a footprint onto the ceiling above you.
Avoid the “lazy back” trap. Many people arch their lower back as they kick. This kills the glute activation and puts all the pressure on your vertebrae. Keep your core tight and your back flat. If you feel like your back is moving, stop your leg higher up before it arches.
11. Curtsy Lunges
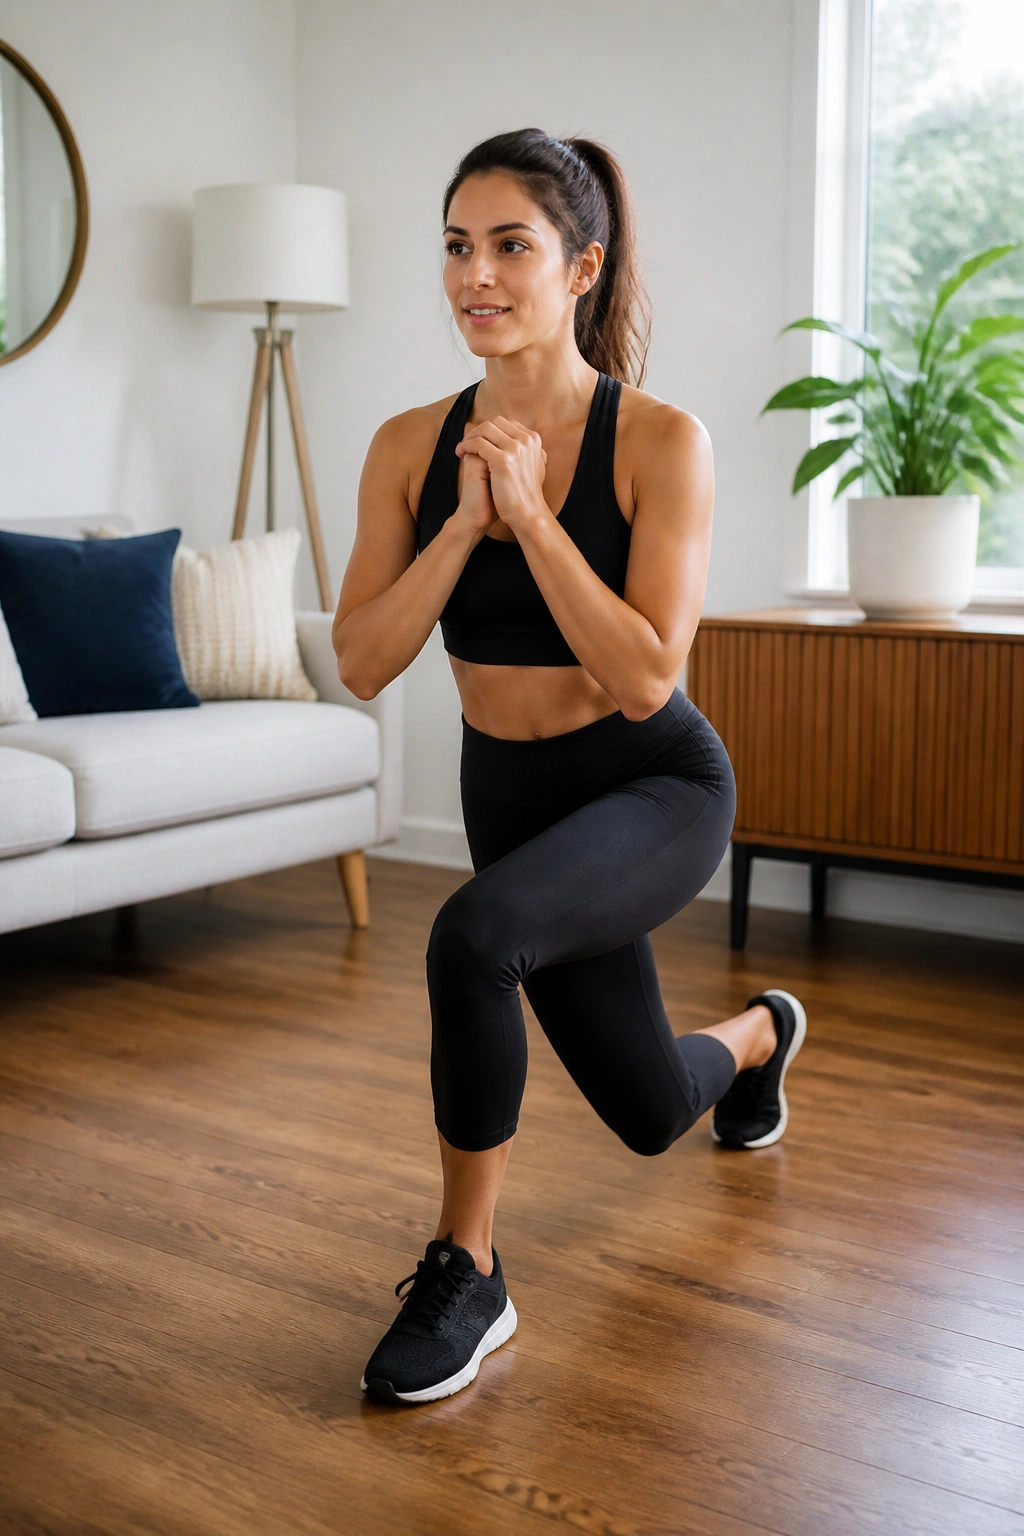
The curtsy lunge is a sophisticated variation of the standard lunge that targets the glutes in a way that very few other exercises can. By crossing your back leg behind your front leg, you stretch the glute medius and minimus, forcing them to stabilize you in a compromised position.
Start standing, then step one foot back and across your midline, as if you were curtsying. Lower your back knee toward the floor. The front knee should remain stable, not collapsing inward. This requires significant coordination.
Because this is a balance-heavy move, do not try to speed through it. If you lose your balance, just tap your toe and reset. Over time, you will find you need that tap less and less. The stretch you feel in your outer glute is exactly what you are aiming for.
12. Single-Leg Deadlifts
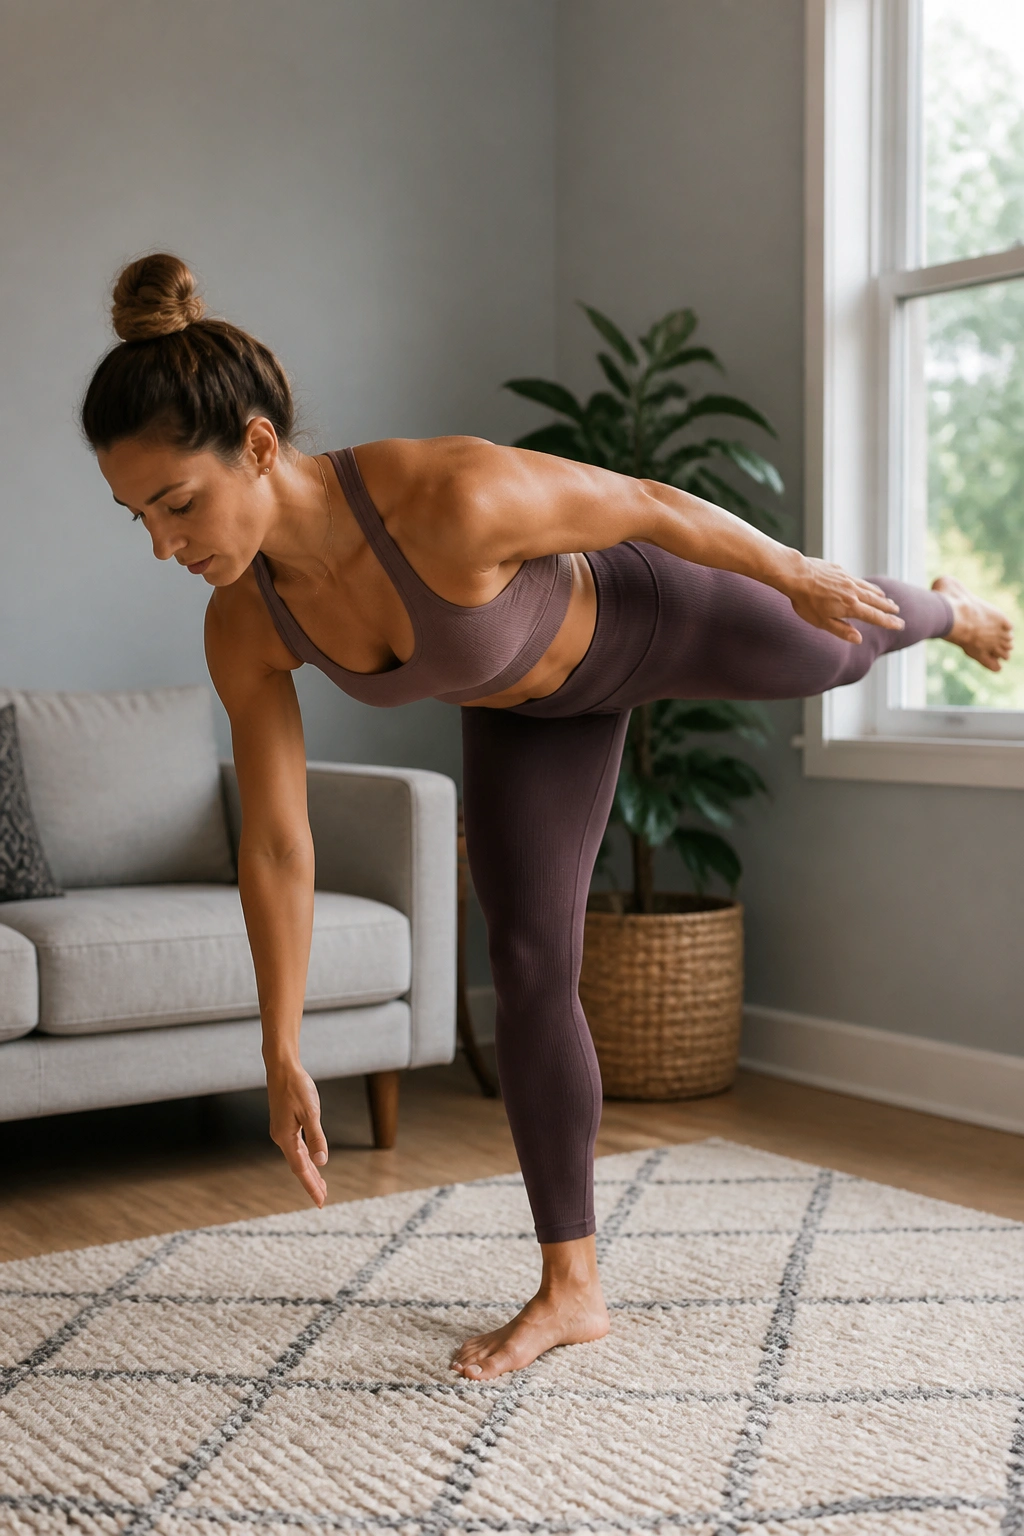
The single-leg deadlift is the king of posterior chain exercises. It hits the hamstrings and glutes while requiring immense core stability and ankle strength. It is challenging, but once you master it, it becomes one of the most productive moves in your arsenal.
Stand on one leg, with a slight bend in the knee. Hinge at your hips, bringing your torso toward the floor while extending the other leg straight back behind you. Your body should form a “T” shape at the bottom.
If you wobble, it’s not because your legs are weak—it’s because your stabilizer muscles are untrained. Focus on pushing the heel of your elevated foot toward the wall behind you. Imagine you are a balance scale. Keep your hips square to the floor; don’t let your raised hip open up toward the ceiling.
13. Glute Kickbacks
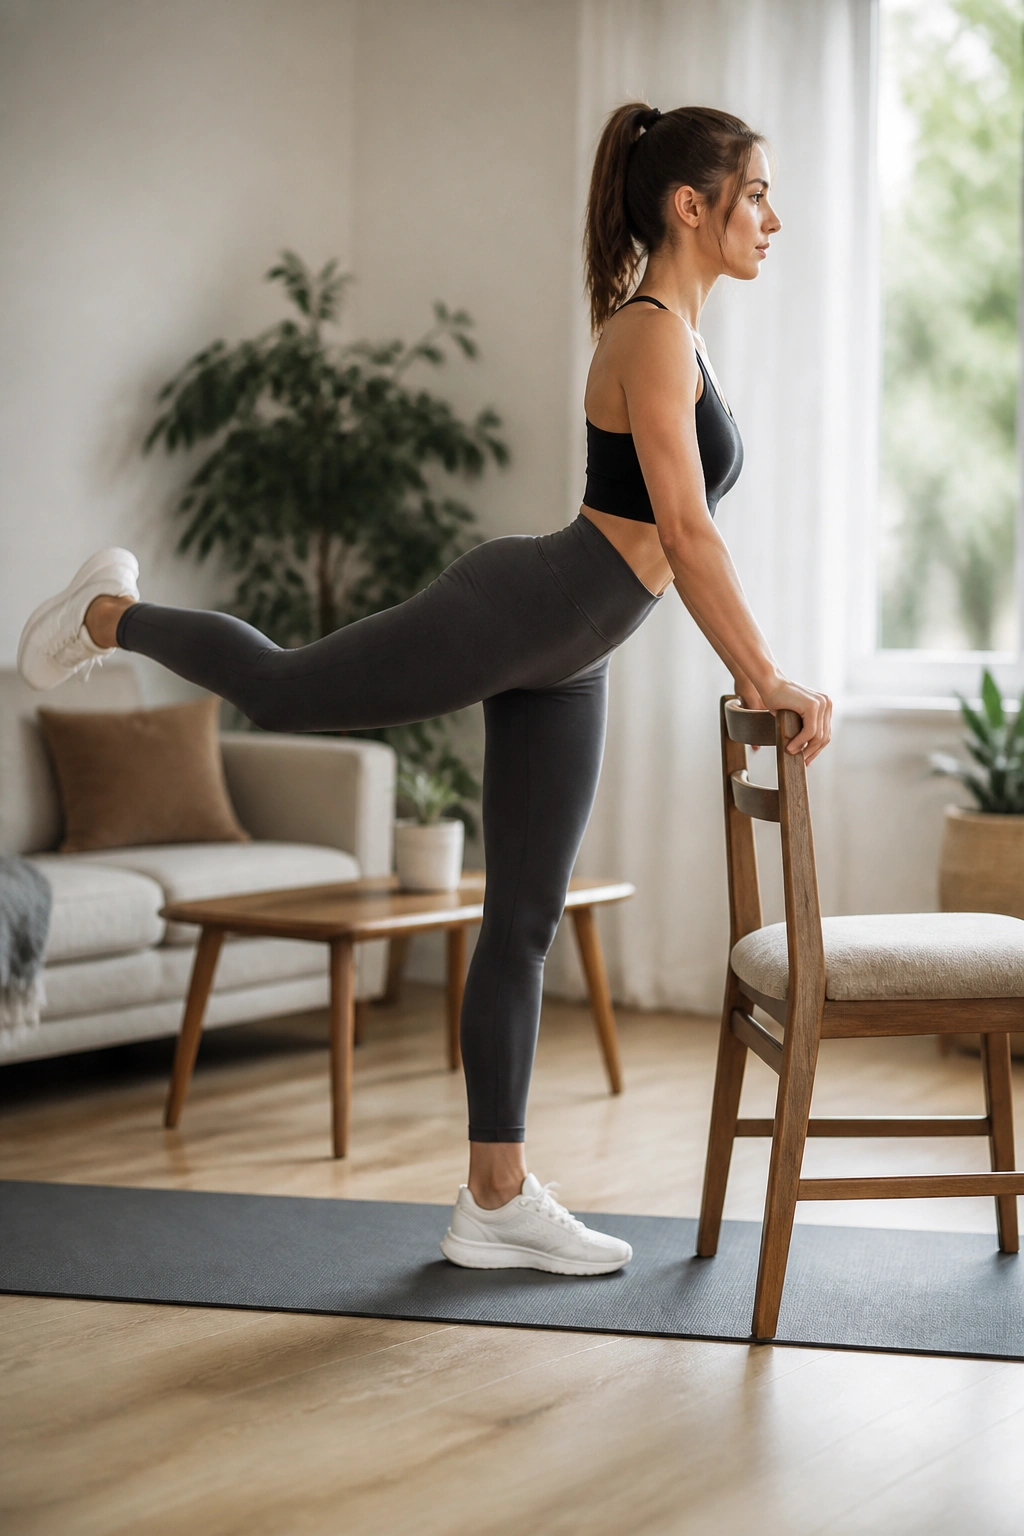
This is a subtle, high-tension movement. Unlike donkey kicks, where the knee is bent, glute kickbacks are performed with the leg straight. This changes the leverage, placing more emphasis on the connection between the hamstrings and the glutes.
Stand facing a chair or wall for balance. Keep your torso upright. Extend one leg straight back behind you, squeezing your glute as hard as possible at the top. Do not let your back arch.
The range of motion here will be small. That is okay. If you try to kick your leg way up, you will inevitably compensate by arching your back. Focus on a tight, controlled squeeze. Think about pulling your heel toward the ceiling using only your glute muscle.
14. Frog Pumps
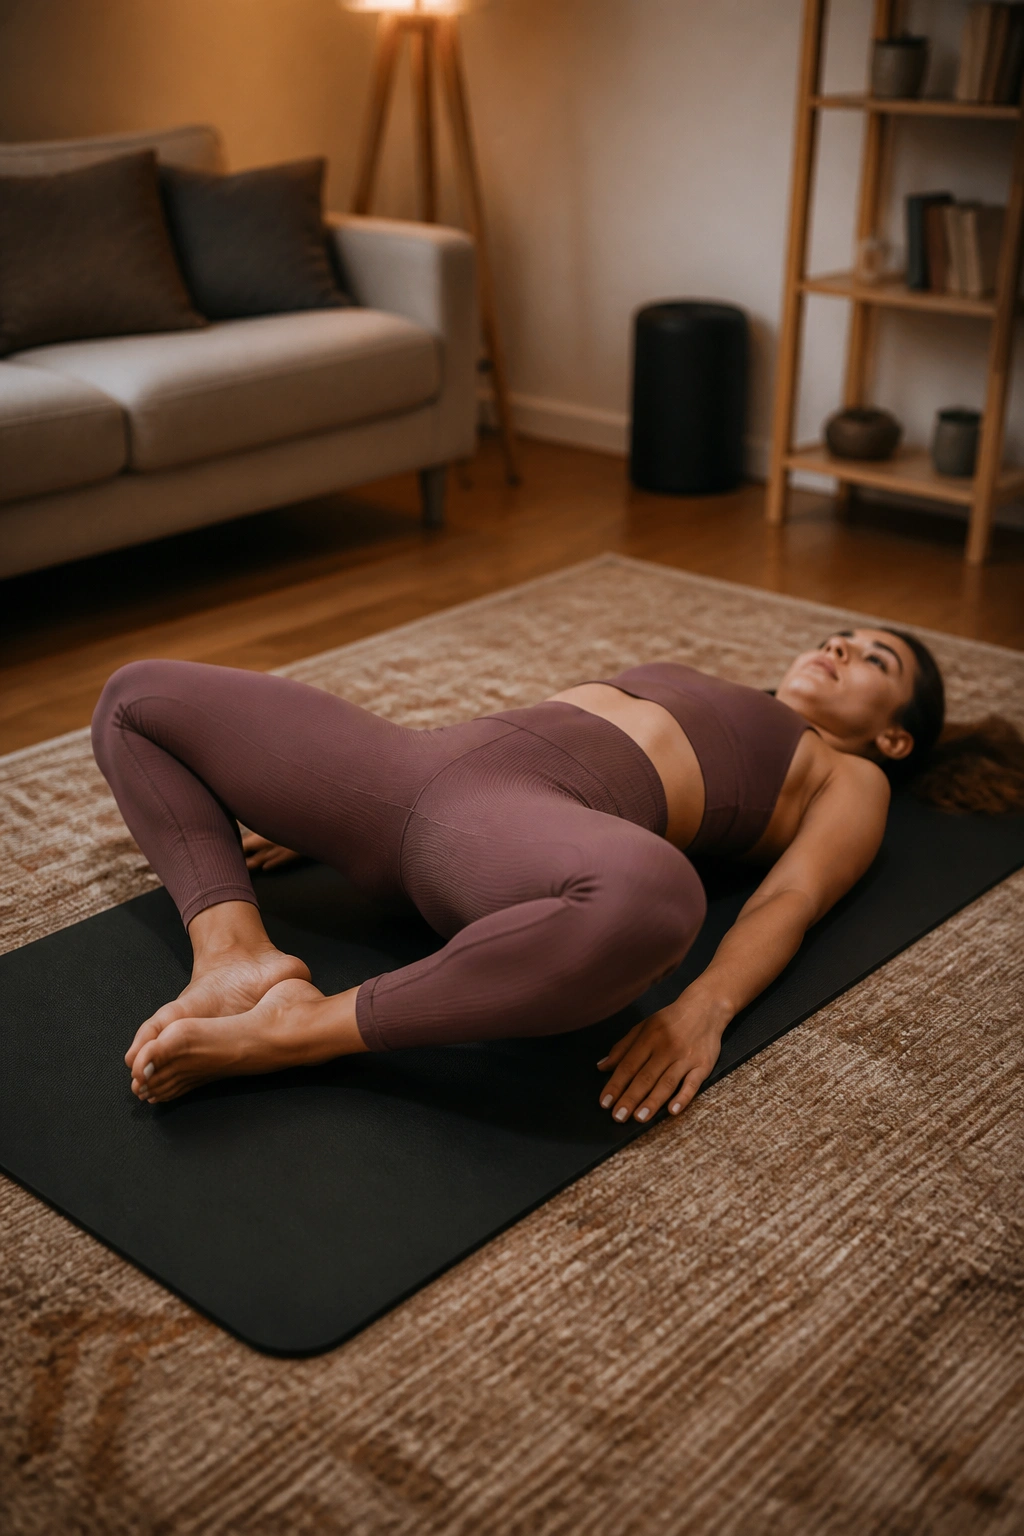
Frog pumps are a unique variation of the glute bridge. By placing the soles of your feet together and letting your knees fall outward, you put your glutes in a pre-stretched position. This makes them work much harder to lift your hips.
Lie on your back, feet pressed together, knees wide. Perform a glute bridge by pushing your hips toward the ceiling. Because your knees are wide, you cannot use your quads to help. It is pure glute power.
This move is a massive burner. You don’t need a lot of reps to feel the fatigue. Aim for high volume—twenty to thirty reps—to really push the muscles to failure. It is the ultimate finisher for a lower body session.
15. Side Leg Raises
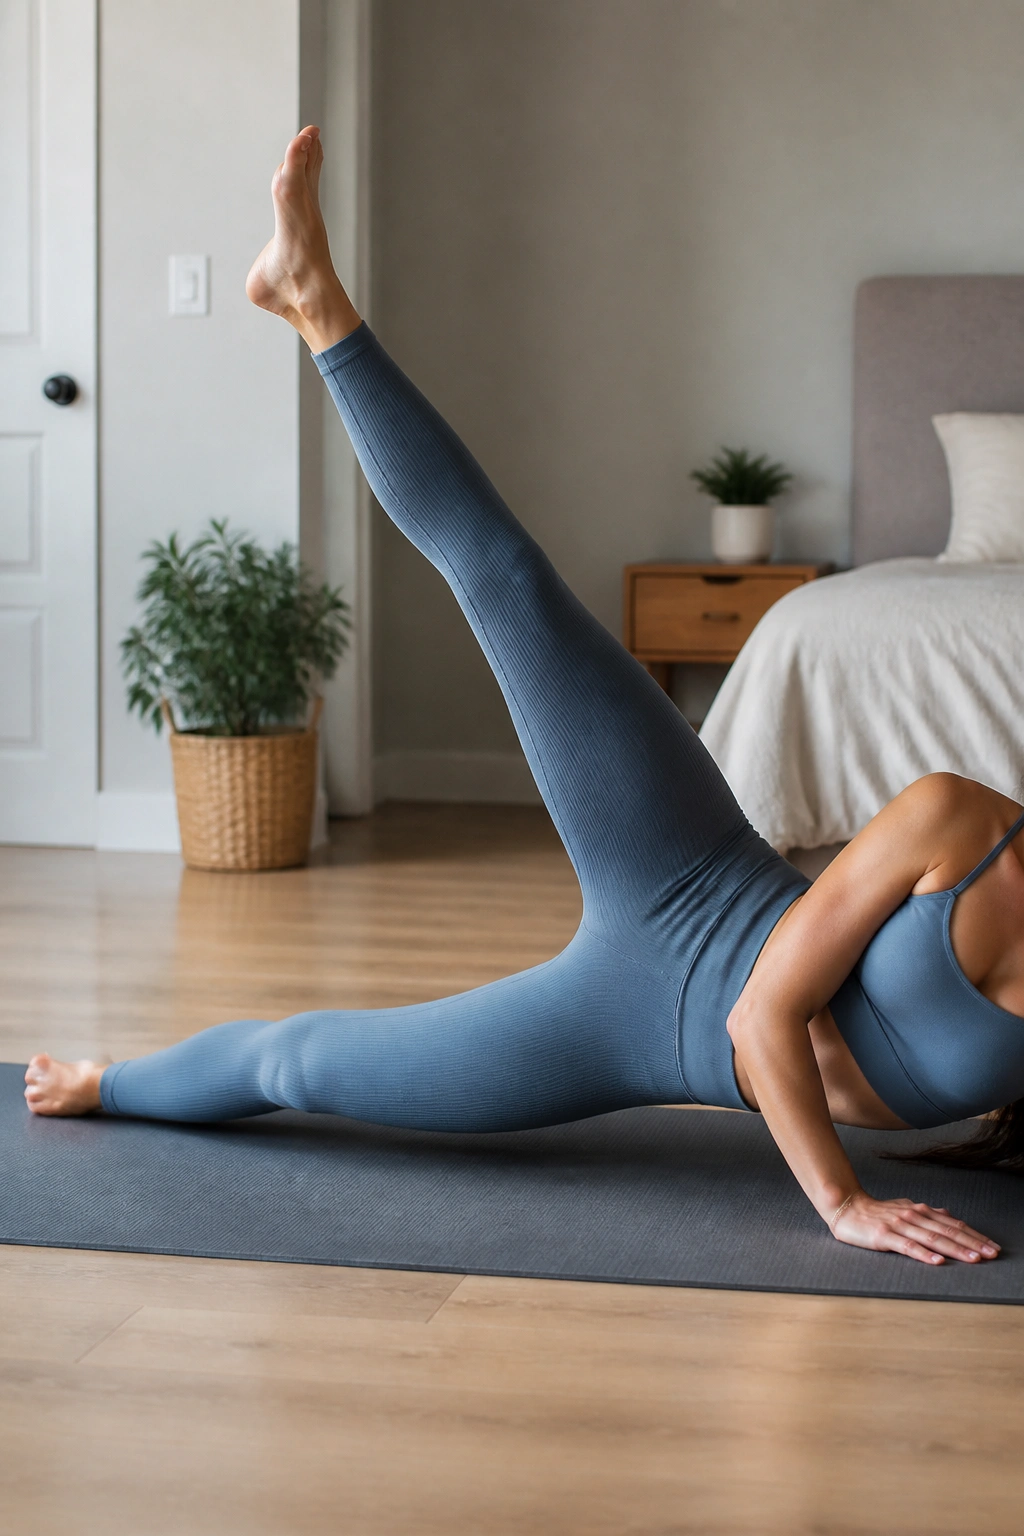
This is a deceptively simple move that effectively hits the side of the hip. It is excellent for those who struggle with hip weakness or knee pain, as it strengthens the muscles that track the kneecap correctly.
Lie on your side, legs stacked. Lift your top leg toward the ceiling, keeping your foot flexed. The key here is not height, but angle. If you let your toes point toward the ceiling, you are using your hip flexors. If you keep your toes pointed straight forward, you are hitting the glutes.
Keep the movement slow. If you feel like you are just flailing your leg around, you are missing the point. Control the downward phase just as much as the upward phase. That resistance on the way down is where the muscle fibers get torn and rebuilt stronger.
16. Step-Ups
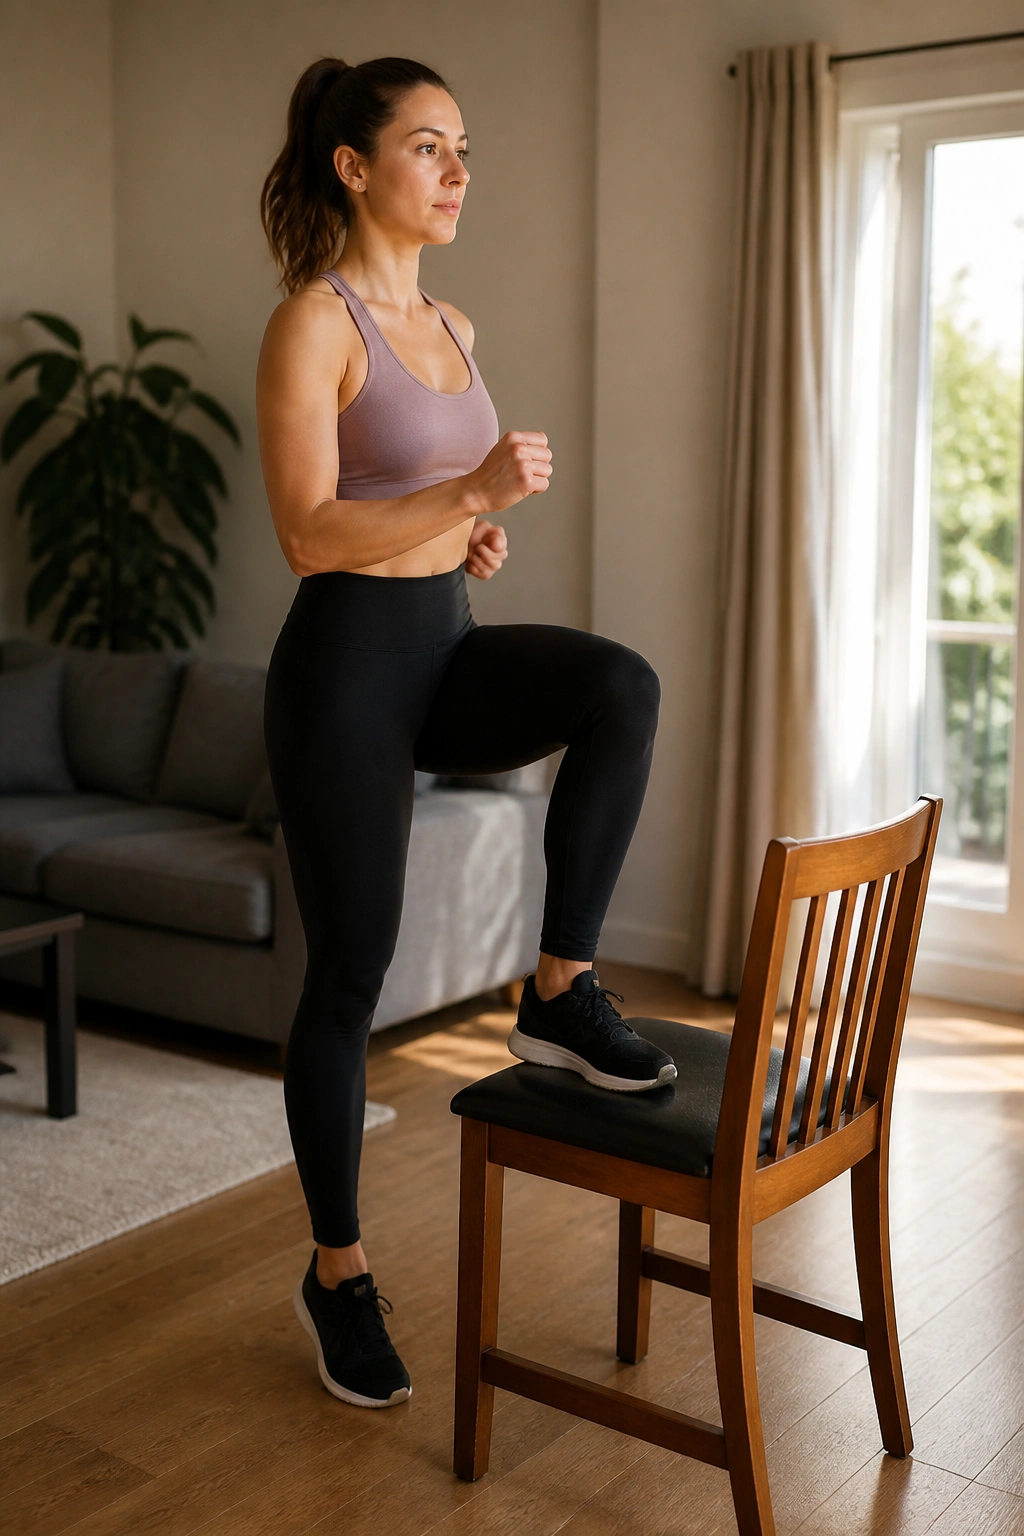
You likely have a staircase or a sturdy chair in your house. That is all you need for step-ups. This is a functional movement that builds explosive power and quad strength. It mimics climbing stairs, which we do every day.
Place one foot on the surface. Drive through the heel of that foot to lift your entire body up. Do not push off with the back foot; the back foot should only be there for safety if you stumble. The working leg does 100% of the heavy lifting.
Control the descent. Do not just drop back down to the floor. Lower yourself slowly, taking two or three seconds to return to the starting position. This eccentric control is what really builds strength and defines the muscles in the legs.
17. Cossack Squats
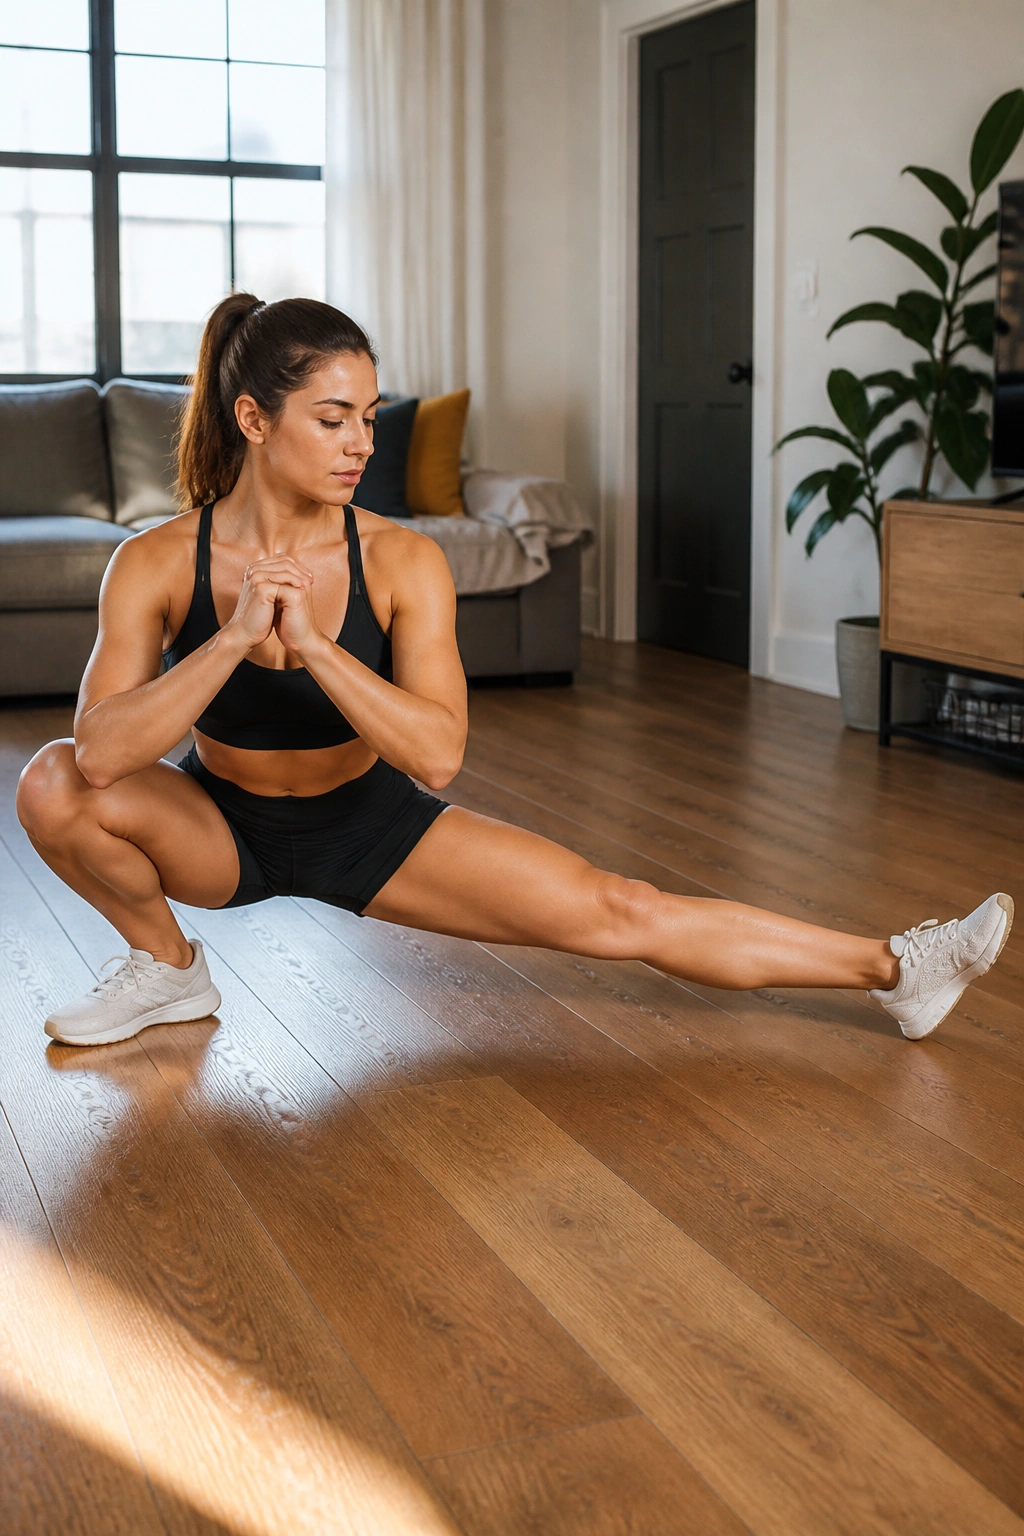
Cossack squats are a combination of a side lunge and a deep squat. They are exceptional for hip mobility and adductor strength. If you want to improve your flexibility while building leg muscle, this is your go-to.
Take a very wide stance. Shift your weight to one side, sinking into a deep side lunge while the other leg remains straight. Try to keep the heel of your bent leg flat on the floor. This will be difficult for most people at first.
If your heel comes up, don’t worry about it. Just go as deep as your mobility allows. Over time, you will find that you can sit deeper and deeper. This move also works wonders for your balance and core stability because you are constantly shifting your center of gravity.
18. Calf Raises
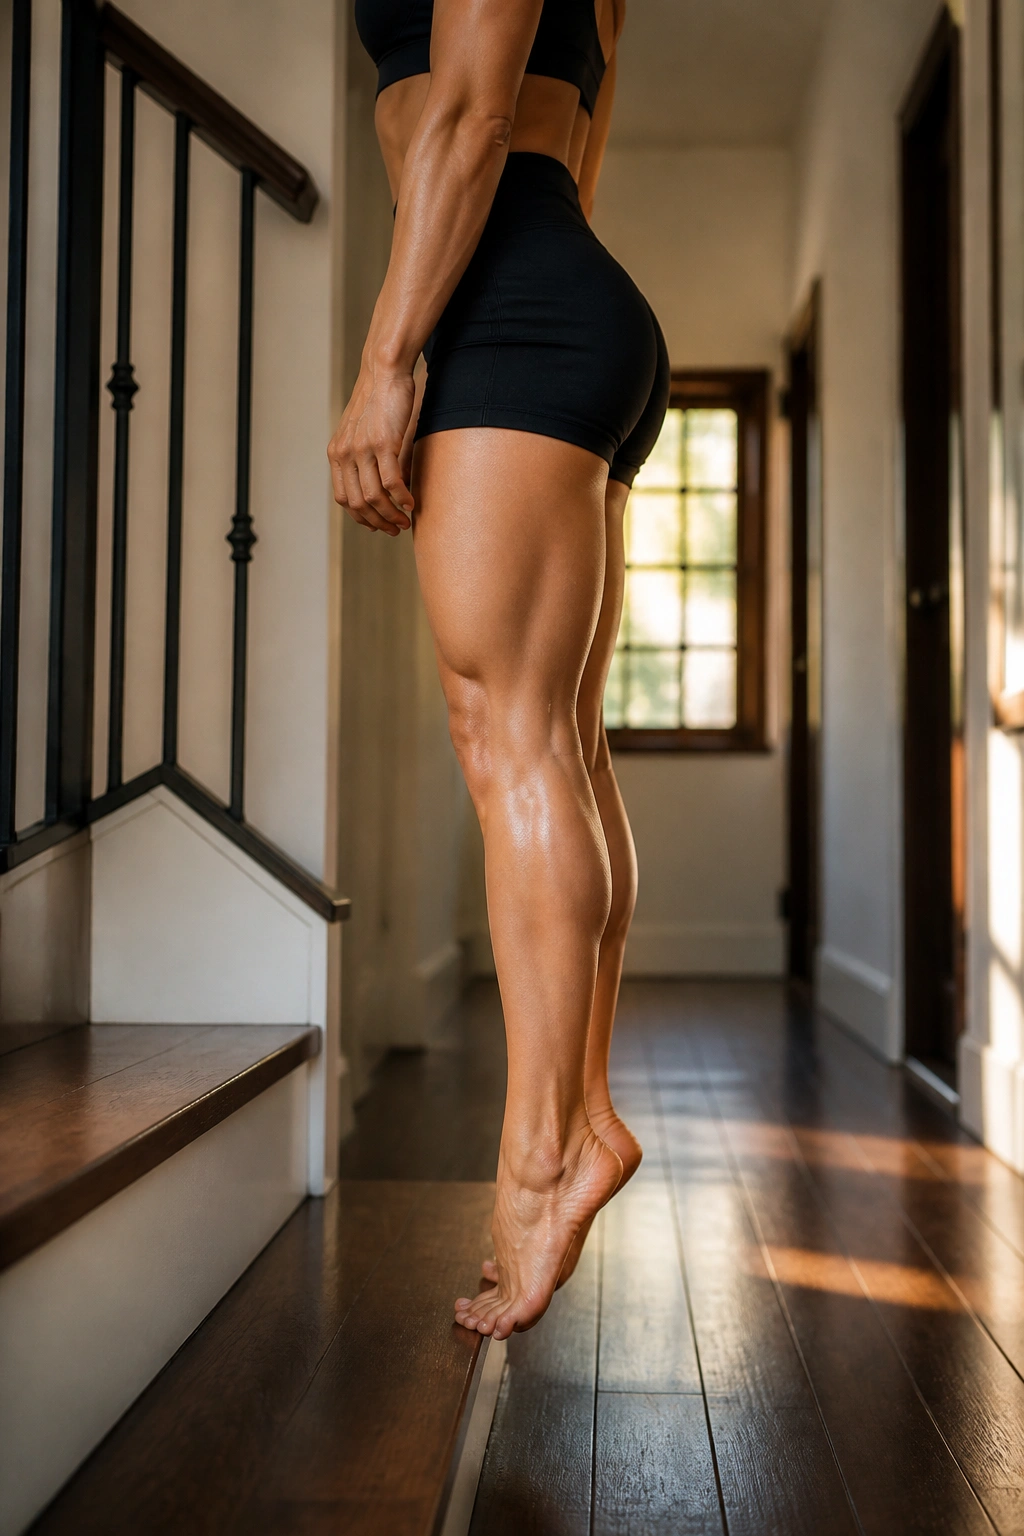
Do not neglect the lower legs. Calf raises are simple, but they are often performed incorrectly. Most people bounce through the reps, using their Achilles tendon rather than the muscle belly of the calf.
Stand on the edge of a step or a flat floor. Rise up onto your toes, holding the peak for a full second. Then, lower yourself slowly. If you are on a step, let your heels sink below the level of the step to get a full stretch.
The calves are a dense muscle group that can handle high volume. Do not be afraid to perform 20 to 30 reps per set. If you are not feeling a burn, slow down. The tempo is the difference between a wasted set and a productive one.
19. Pistol Squat Progressions
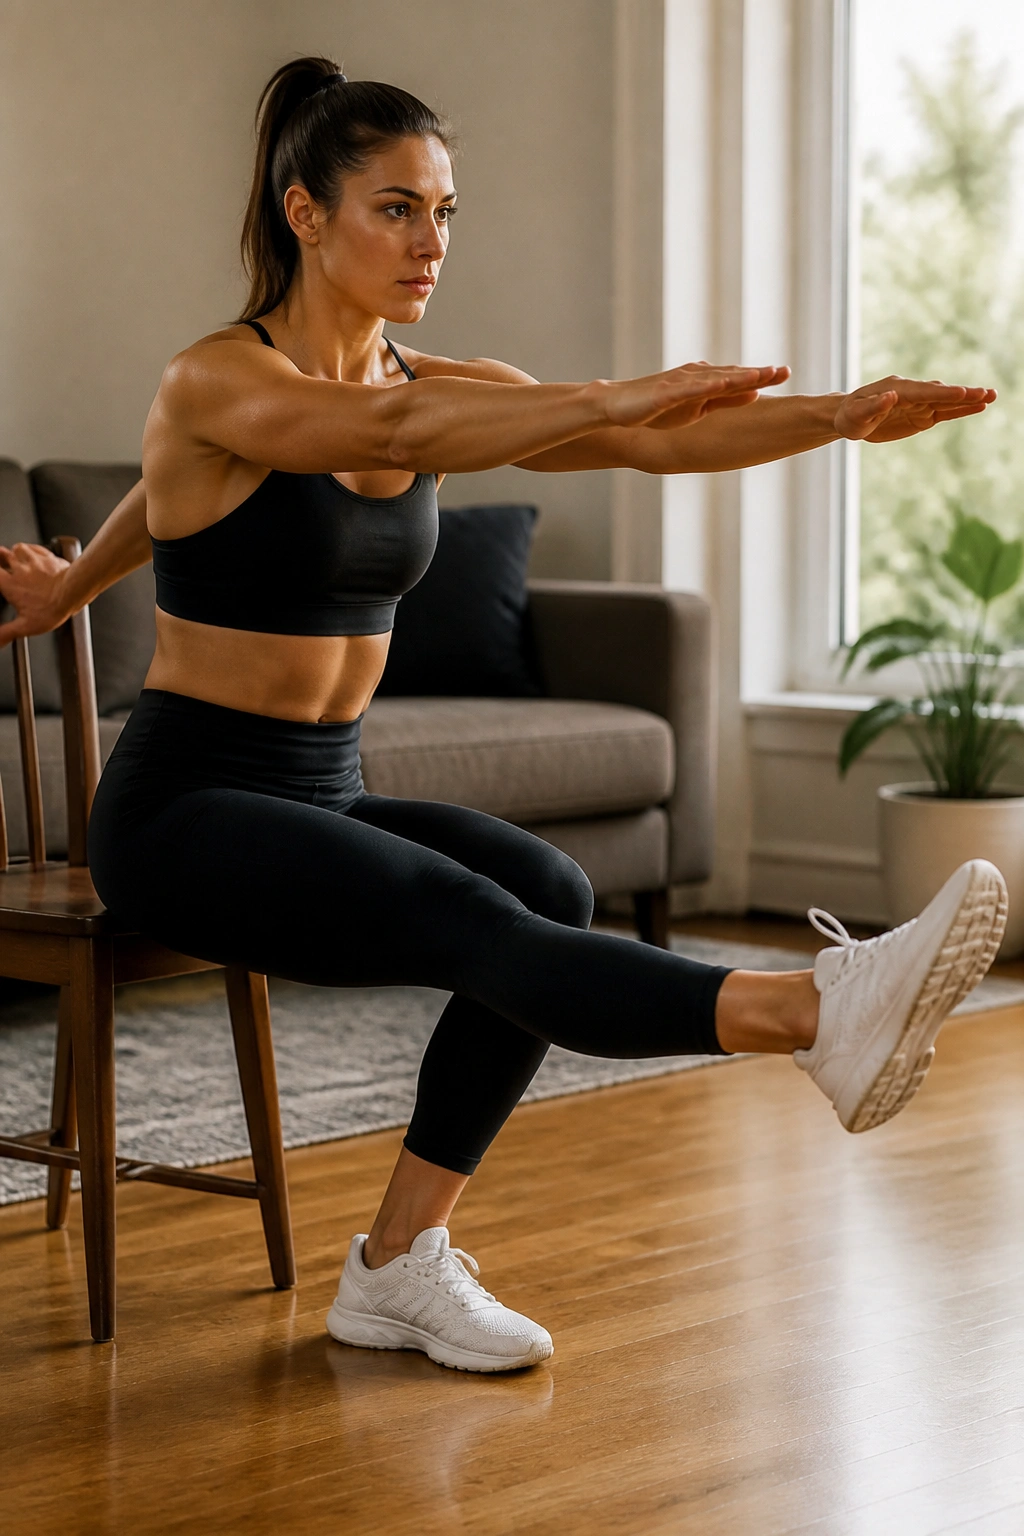
The pistol squat—a one-legged squat—is the gold standard of bodyweight leg training. It requires balance, strength, and mobility. Most people cannot do a full pistol squat immediately, which is why we use progressions.
Start by sitting on a chair and standing up on one leg. Once that is easy, perform the same movement without sitting down, just using the chair for balance. Eventually, remove the chair entirely.
Do not be discouraged if you fall over. This is a highly technical movement. Your nervous system needs time to learn the balance. The progress you make on these will translate to every other movement in your routine.
20. Glute Bridges with Abduction
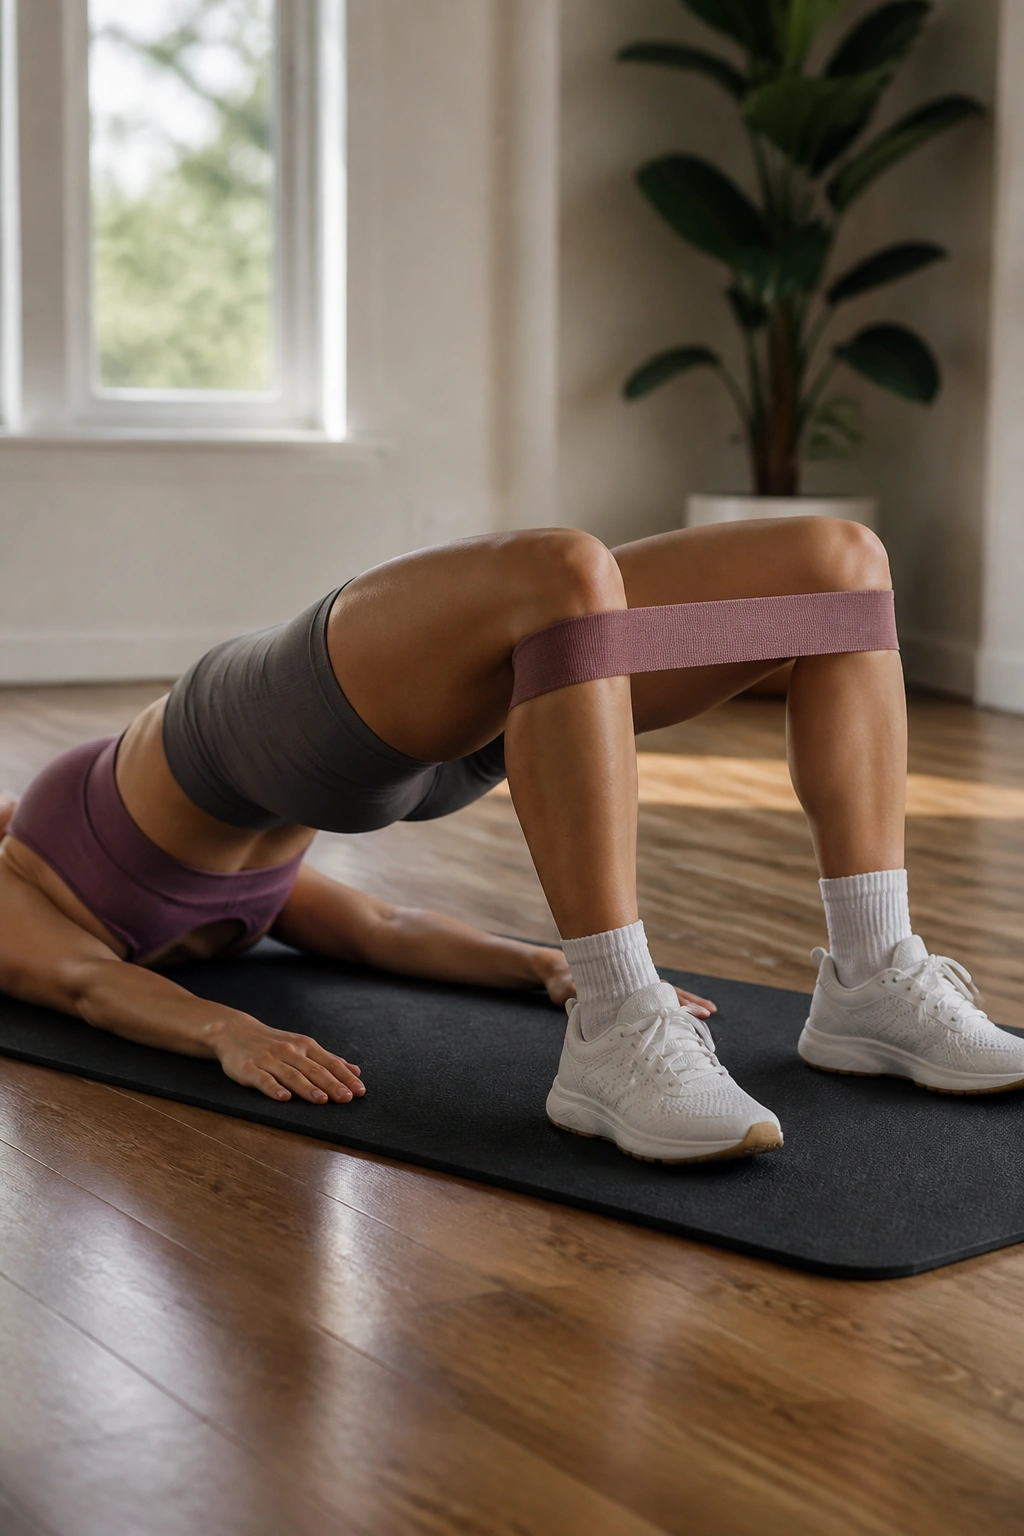
This is a “burnout” move. Take the standard glute bridge, but as you reach the top of the movement, open your knees slightly outward. This engages the glute medius at the peak of the contraction.
This is a small, precise movement. It should feel like a pulsing sensation in your glutes. Perform a set of regular bridges, then finish with twenty of these “abduction” reps. Your glutes will be burning, which is the exact feeling you want when trying to stimulate growth.
Do not rush these. The squeeze at the top is the entire point. If you do them too fast, you lose the tension. Keep it slow, rhythmic, and intentional.
21. Reverse Hyperextensions
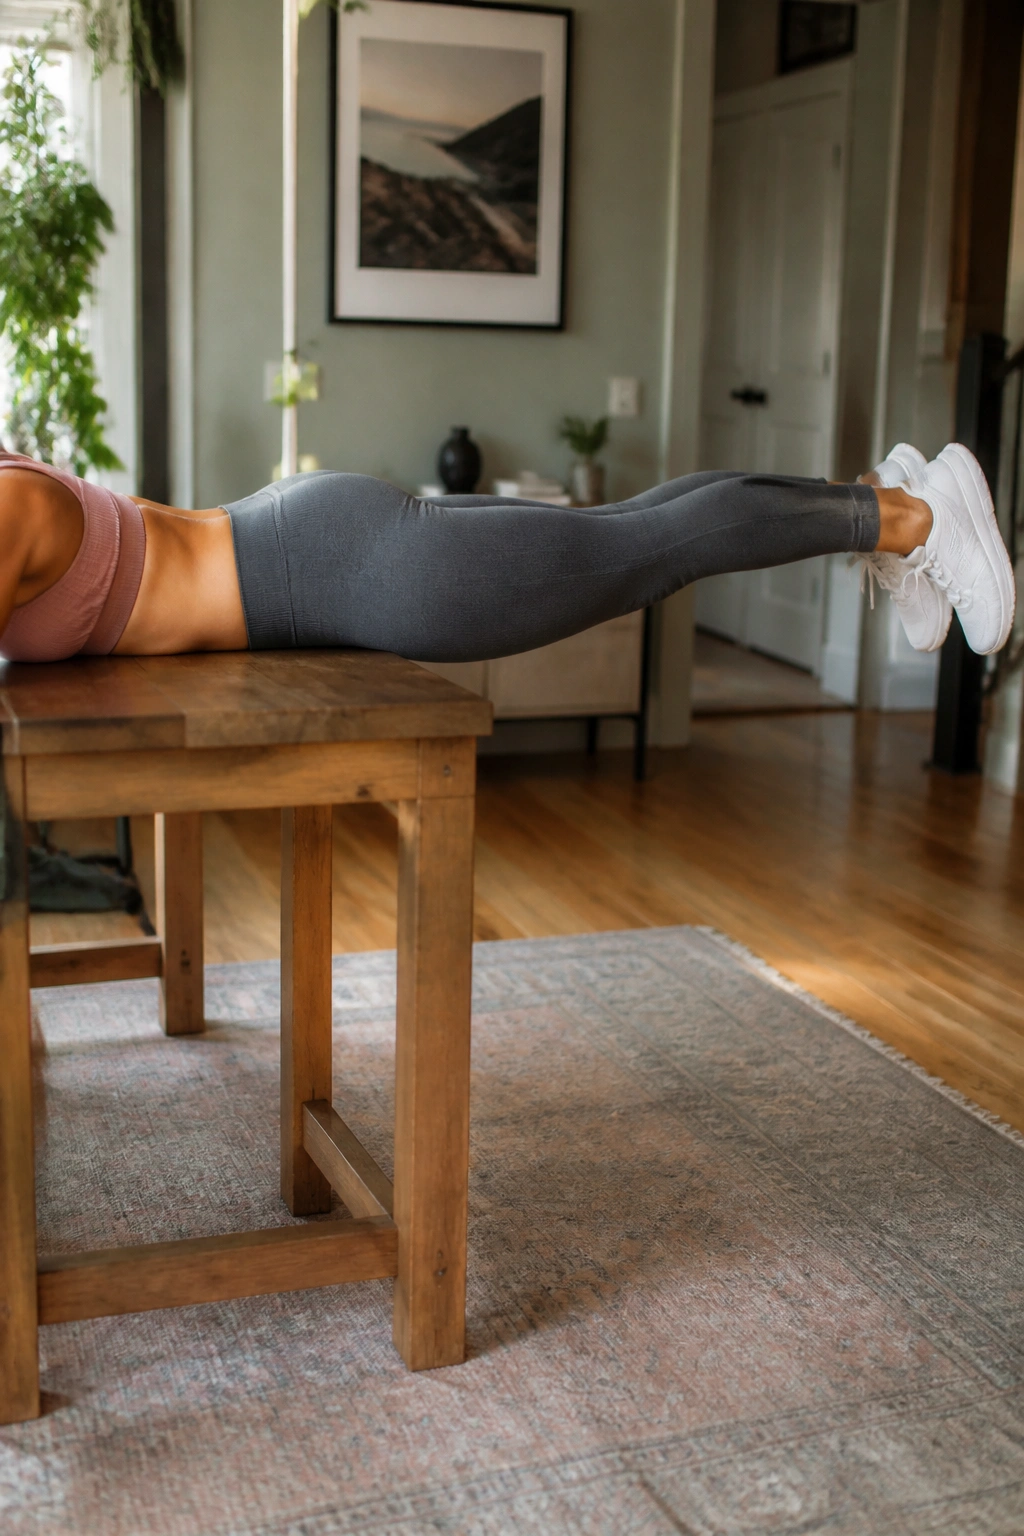
Typically performed on a fancy gym bench, you can mimic this at home using a sturdy table or a high bed. This move targets the glutes and lower back, helping to counteract the effects of sitting all day.
Lie across a table or sturdy surface, with your hips at the edge and your legs hanging off. Hold onto the table for support. Lift your legs until they are parallel to the floor, squeezing your glutes as hard as you can.
Ensure that your range of motion is controlled. Do not swing your legs wildly. The focus is on the glute contraction. If you feel pressure in your lower back, your range of motion is too high. Stop just before that point.
22. Box Jumps
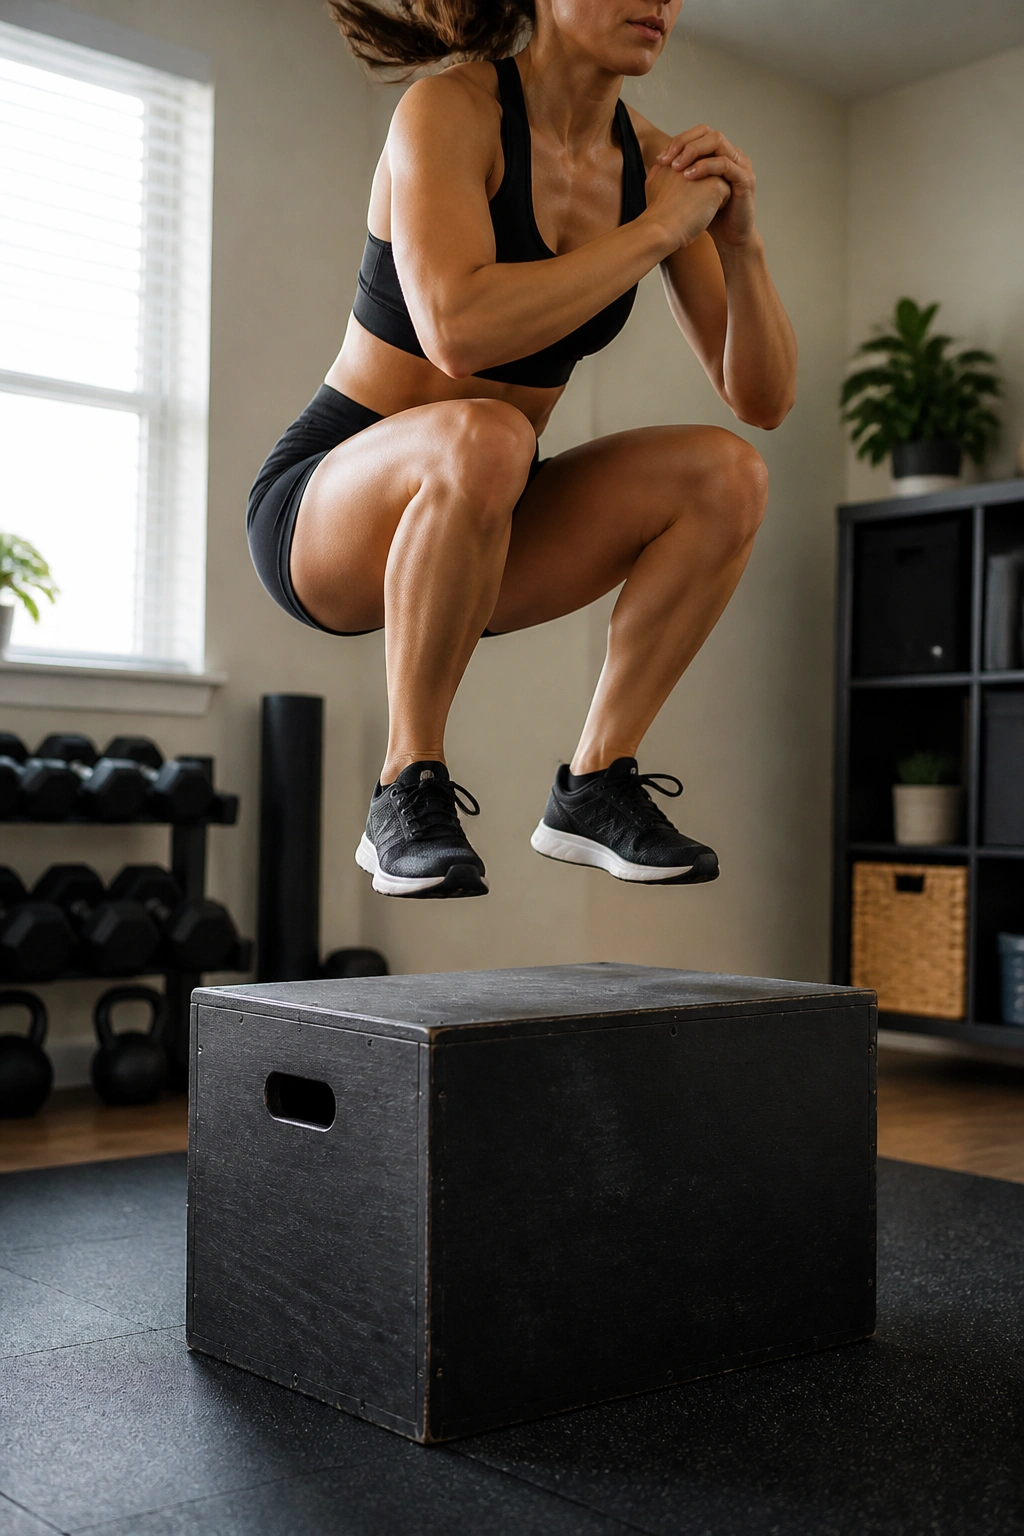
Plyometrics are essential for explosive power. If you have a stable chair or ottoman (that isn’t going to slide), you can use it for box jumps. If you aren’t ready for jumping, simple step-ups with a hop at the top serve the same purpose.
The key to box jumps is the landing. You should land softly, like a cat. If you are making a loud thud, you are landing with too much impact. Soft landings require you to engage your core and leg muscles to absorb the force.
Start small. You don’t need a massive jump to get the benefits. A low box allows you to focus on the landing mechanics, which is where the muscle engagement happens. As you get more confident, you can move to higher surfaces.
Final Thoughts
The effectiveness of these twenty-two exercises hinges entirely on your commitment to form. You could perform these movements every single day, but if you are just rushing to hit a number, your results will be minimal. Muscles do not know what a “repetition” is; they only understand tension, time under load, and progressive challenge.
If you find a particular movement feels “easy,” you are likely doing it too fast or with poor control. Slow down. Use a mirror if you have one, or record a video of yourself on your phone to check your form. Seeing your own movement is the fastest way to correct the errors that hold back progress.
Remember that recovery is the other half of the equation. You aren’t building muscle while you are working out; you are building muscle while you are resting. Eat enough protein, prioritize sleep, and listen to your body. If your joints ache, take a day off or focus on active recovery like walking. Consistency over the long term will always beat intensity in the short term. Stick with it, keep your form strict, and the results will follow.
