



Most lower ab workouts fall apart for one boring reason: people move their legs, not their pelvis. So they crank through reps, feel their hip flexors, maybe their quads, and then wonder why the lower stomach still looks the same and the low back feels cooked. If your goal is to train the area people mean when they talk about belly fat, that distinction matters more than the exercise name.
There’s another piece people do not love hearing, though it matters. No ab move burns fat from one exact patch of your stomach. Lower ab training builds strength and muscle in the front of your core, helps you brace better during bigger lifts, and can make your midsection look tighter as body fat drops. The fat-loss part comes from the bigger picture: food intake, daily movement, sleep, stress, and enough resistance training to keep muscle on your frame.
Still, the right exercises make a difference. A clean reverse crunch feels nothing like a sloppy leg throw. A hanging knee raise with a tucked pelvis lights up the lower portion of the rectus abdominis in a way that loose swinging never will. If your back pops off the floor during leg lowers, that’s your cue—not to grind harder, but to scale back and own the position.
Pick 4 to 6 movements, do 2 to 4 rounds, and aim for either 8 to 15 reps or 20 to 40 seconds per exercise. Start with the drills that teach control. The flashy stuff can wait.
1. Reverse Crunch
If I had to start most people with one lower ab exercise, it would be the reverse crunch. It trains the motion people miss: curling the pelvis toward the rib cage instead of swinging the legs around like a pendulum.
Lie on your back with your knees bent to about 90 degrees and your shins parallel to the floor. Exhale, press the small of your back into the ground, and lift your tailbone an inch or two off the floor. That tiny lift is the point. If your knees fly toward your face but your hips never curl, the lower abs are not doing much.
Keep the tempo slow—1 second up, 2 to 3 seconds down. A set of 10 to 15 reps done this way hits harder than 30 sloppy ones.
The common mistake is momentum. People rock, kick, and drop. Skip that. Think curl, pause, lower with control.
Best use: early in the workout, right after your warm-up, when your core is fresh enough to learn the position.
2. Dead Bug
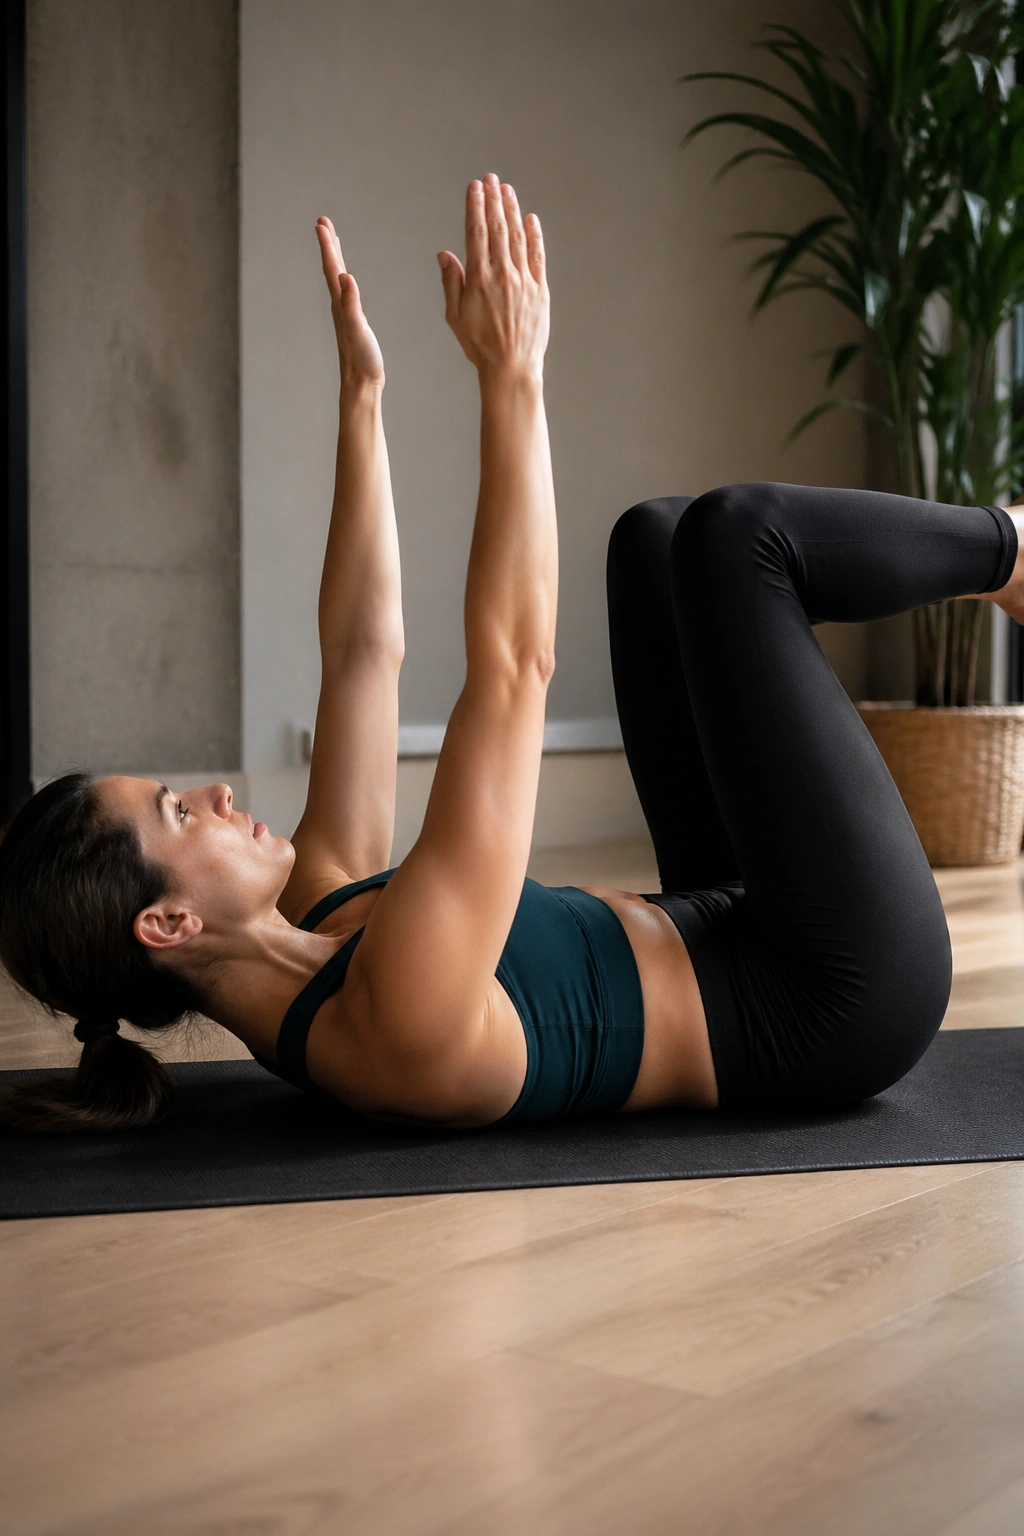
Want a move that teaches your abs to stay locked while your arms and legs move around them? Dead bugs do that better than most fancy core drills.
Start on your back with your hips and knees both at 90 degrees. Reach your arms toward the ceiling. Breathe out until your ribs sink down, then slowly extend one leg and the opposite arm without letting your low back peel off the floor.
Why It Works
Lower ab training is not only about curling upward. It is also about resisting extension—stopping your spine from arching when your limbs move away from center. Dead bugs train that skill.
When you do them right, they feel controlled, almost quiet. No jerking. No neck strain. No rush.
Form Cues That Matter
- Keep each rep slow enough to take 3 to 4 seconds on the way out.
- Stop the leg the moment your back wants to arch.
- Breathe out through pursed lips as if you’re fogging a mirror.
- Aim for 6 to 10 reps per side.
This one looks easy. It is not. And that’s why it works.
3. Bent-Knee Leg Lowers
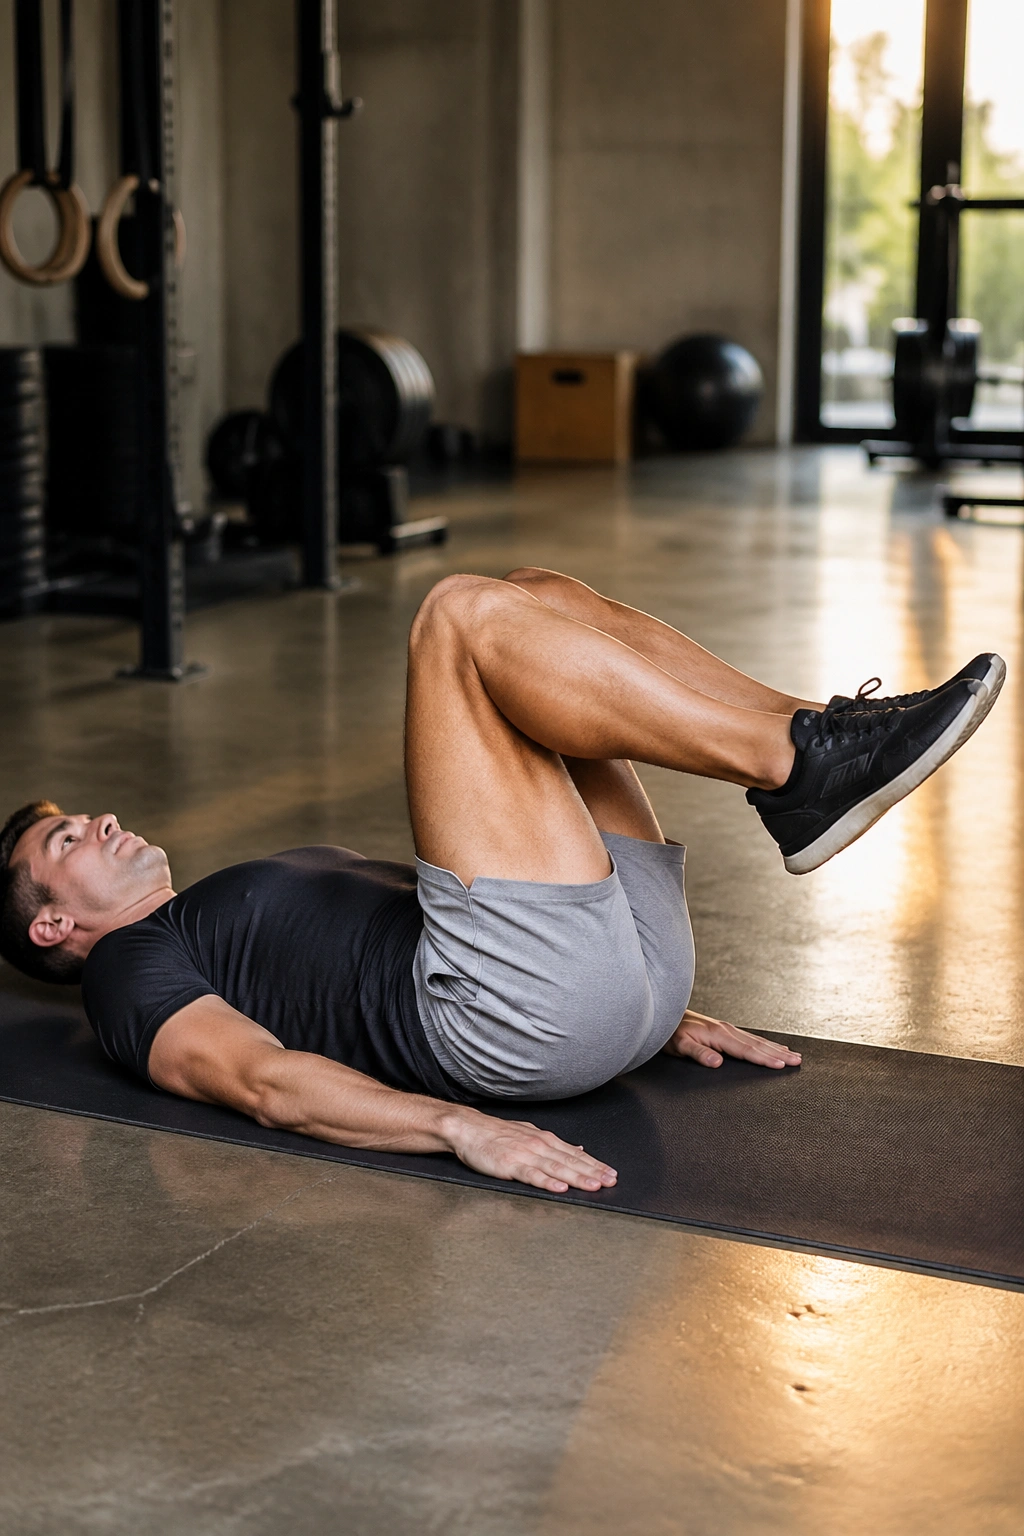
Straight-leg raises get all the attention, but bent-knee leg lowers are often the smarter first stop. Shorter lever. More control. Less cheating.
Lie flat, lift your knees over your hips, and bend them to 90 degrees. Brace your midsection, then lower both heels toward the floor as slowly as you can. Stop a couple of inches before your back loses contact with the ground, then bring the legs back up.
That shortened lever gives you room to learn how to keep your pelvis stable. You’re building the pattern before you load it harder. Smart training looks like that a lot of the time—less drama, better reps.
Try 8 to 12 reps. If two legs feel rough, use an alternating version and lower one foot at a time.
A small towel under your lower back can help. The second you feel the towel lose pressure, you’ve gone too far on the descent.
4. Straight-Leg Raises
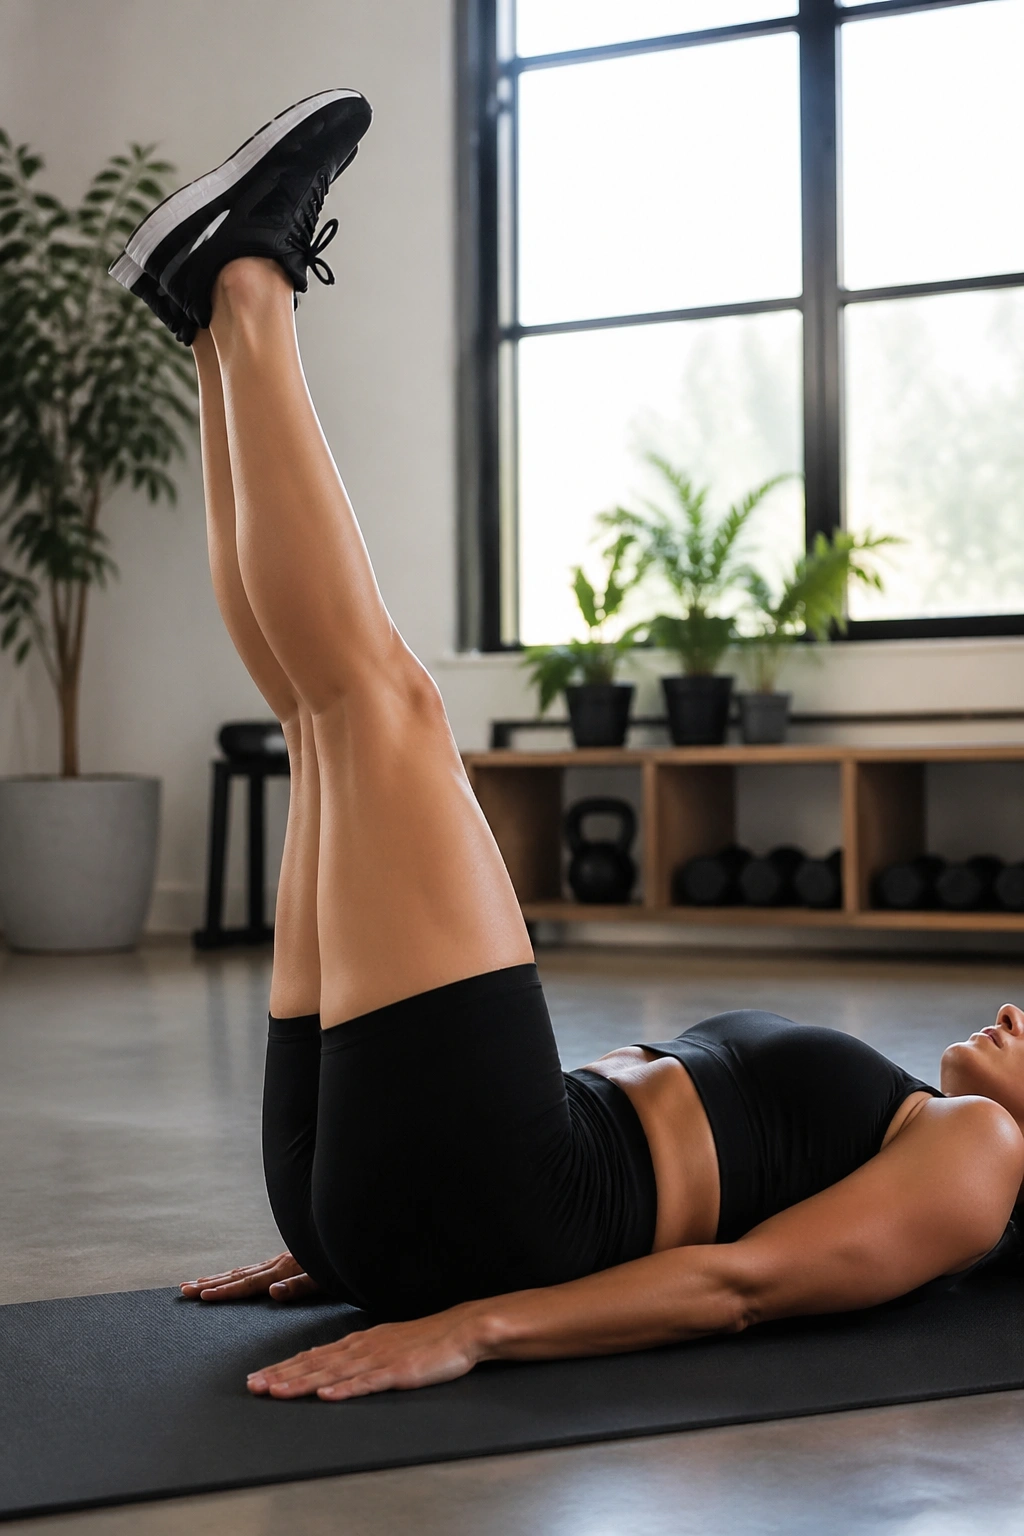
Walk into any gym and you’ll see someone doing leg raises at top speed with their hands jammed under their hips. I get why. The move feels hard. It looks like lower ab work. But the version that pays off is slower and meaner.
Lie on your back with both legs straight. Brace first. Then raise your legs to about 70 to 90 degrees, lower them with control, and stop before your back arches. For many people, that stopping point is higher than expected. That’s fine. Better a shorter clean range than a full range with no core control.
Use These Cues
- Point your toes softly and keep your knees unlocked, not rigid.
- Lower for 3 seconds.
- Pause for 1 second just above your stopping point.
- Do 6 to 12 reps.
Hands under the glutes can help if your pelvis tilts forward too fast, though I’d treat that as a short-term assist, not your forever setup. The long-term goal is owning the position without props.
5. Flutter Kicks
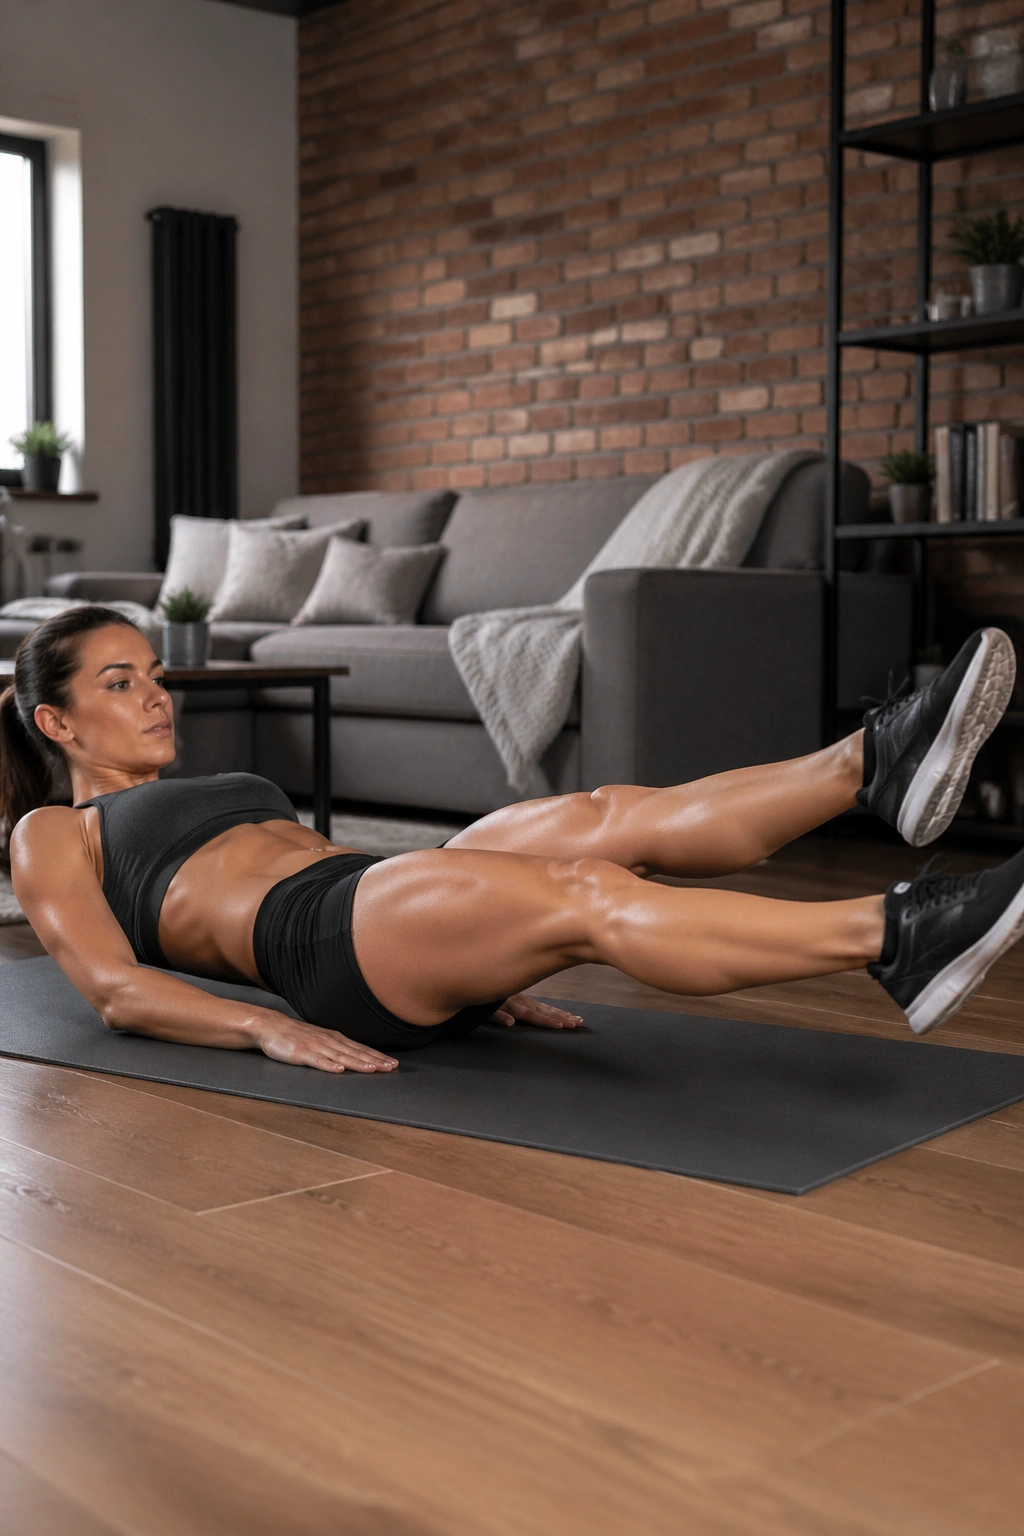
Flutter kicks punish sloppiness fast. Done well, they create a steady, deep burn low across the abs. Done badly, they turn into a hip-flexor contest.
Lie back, tuck your pelvis slightly, and lift both legs a few inches off the floor. Then alternate quick up-and-down kicks in a small range—about 6 to 10 inches. Small is the keyword. Huge kicks look busy and usually feel wrong.
You want your abs locked, your ribs down, and your chin relaxed. If your neck tightens first, place your hands lightly by your sides or underneath your hips for a short block of training while you build enough control to go without.
Go for 20 to 40 seconds. If your back starts lifting after 12 seconds, make 12 your set. That’s still honest work.
This one fits well in a fat-loss circuit because it keeps tension on the trunk while your heart rate stays up.
6. Scissor Kicks
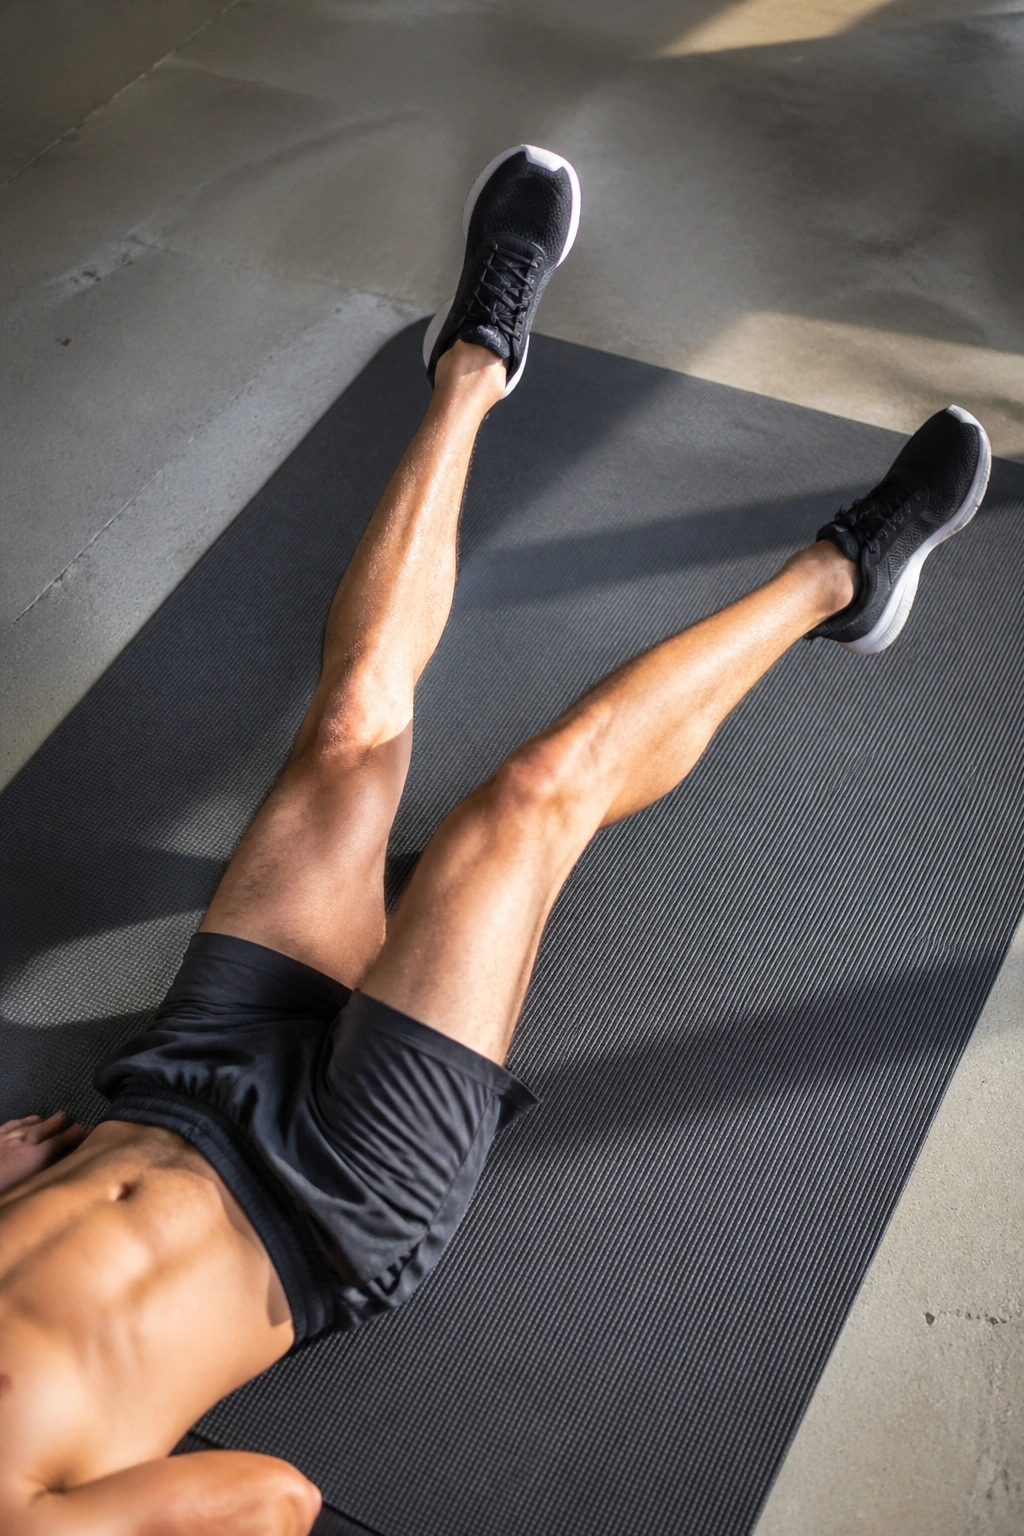
Unlike flutter kicks, which move mostly up and down, scissor kicks add a crossing pattern. One leg passes over the other, then switches. That crossing motion pulls in the lower abs and inner thighs together, and it exposes shaky pelvic control in a hurry.
Start in the same setup you’d use for flutter kicks: on your back, legs hovering a few inches up, rib cage down, tailbone slightly tucked. Cross one leg over the other, open, switch, and repeat in a smooth rhythm.
Who gets the most from this? People who can already hold a clean low-leg position for 20 seconds without the back arching. If you’re not there yet, build with dead bugs, bent-knee lowers, and hollow holds first.
Keep the set short—15 to 30 seconds is enough. Past that, the quality tends to fall off.
And don’t chase speed. The lower abs respond to tension you can keep, not motion for its own sake.
7. Toe Taps with Heel Lowers
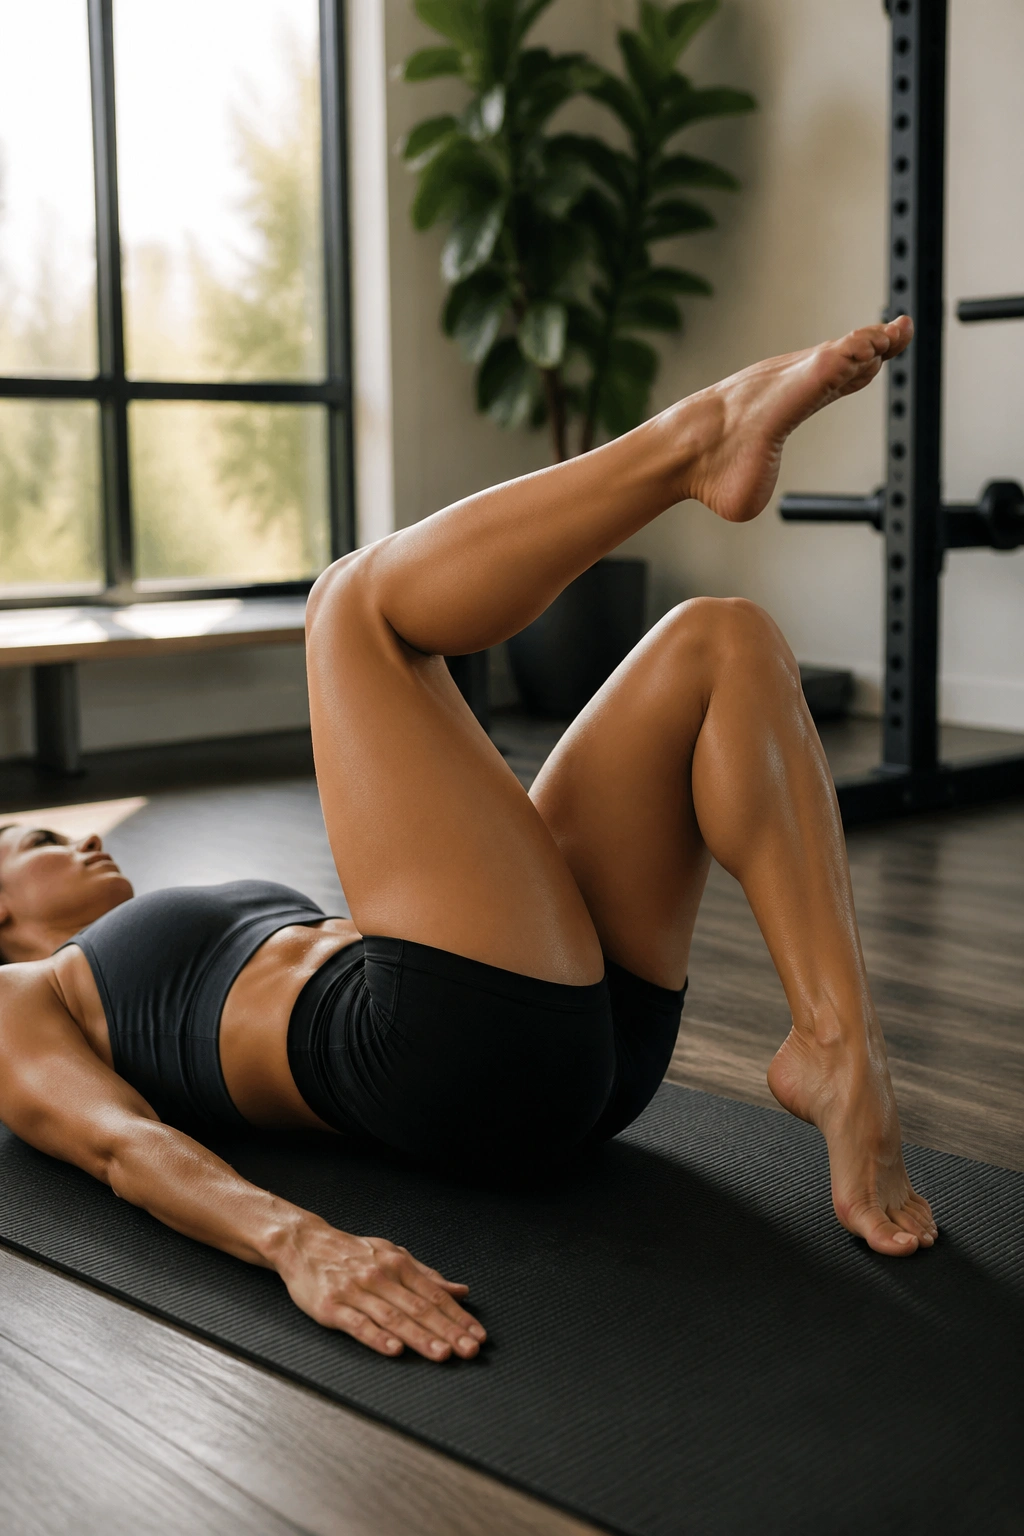
This is one of those beginner-friendly moves that still humbles trained people when they slow down and breathe right. Toe taps with heel lowers teach you to move from the hips while the trunk stays quiet.
Lie on your back with your knees stacked over your hips. Tap one heel to the floor, bring it back, then do the other side. Once that feels solid, lower both heels together and return.
The Breathing Part Matters
Exhale as the heels travel down. That breath helps pull the ribs inward and gives the lower abs a cleaner shot at keeping your spine from extending.
A lot of people rush this drill. Don’t. The whole point is control.
Try this sequence:
- 8 taps per side
- Then 6 to 8 double-heel lowers
- Rest 20 to 30 seconds
- Repeat for 2 to 3 rounds
If you need a reset, place one hand on your lower ribs and one near your waistband. You should feel both areas stay organized rather than popping upward.
8. Hollow Body Hold
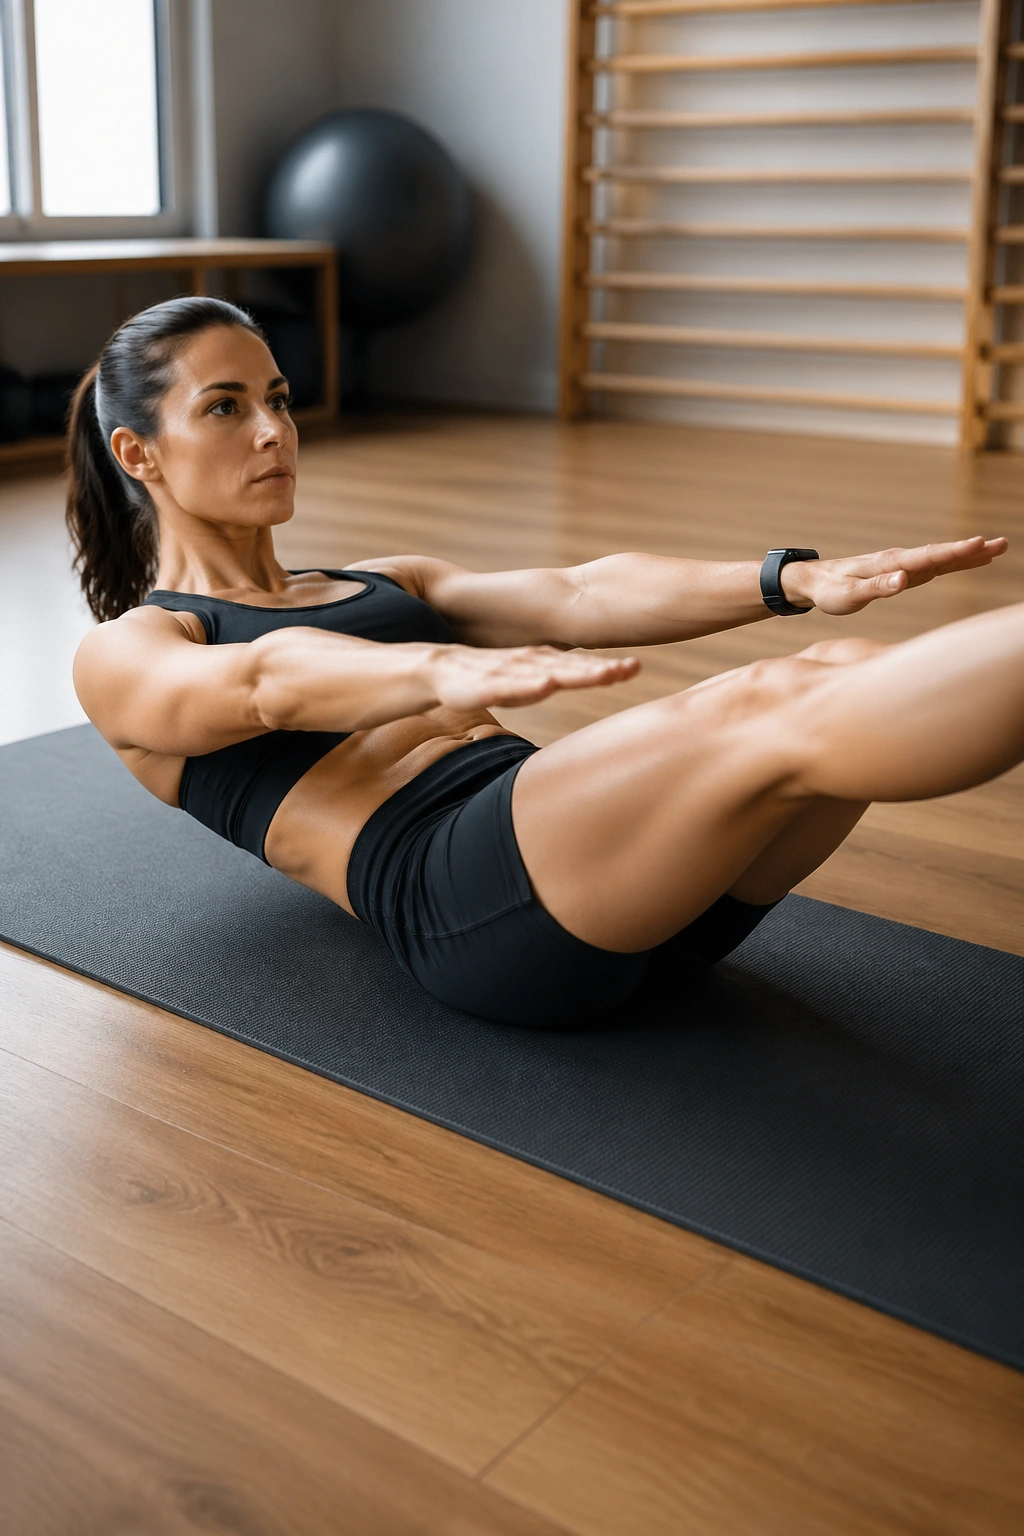
Few bodyweight moves expose a weak lower core like a hollow hold. You either own the shape or the shape owns you.
Start on your back. Press your lower spine into the floor, lift your shoulders slightly, and extend your legs and arms away from the center until you find a position you can hold without losing that back contact. For some people, arms by the sides and knees bent is plenty. That’s not a downgrade. That’s the correct version for that day.
A clean hold for 15 to 30 seconds does more than long ugly sets. Your abs should feel like they’re pulling your front body inward, not like your hip flexors are yanking your legs around.
There’s a mental side to this one. The position looks static, yet it asks for constant small corrections—ribs down, thighs tight, breath under control. You’re teaching your body to resist extension the whole time.
When it clicks, you’ll feel a broad band of tension from below the navel up toward the sternum.
9. Mountain Climbers
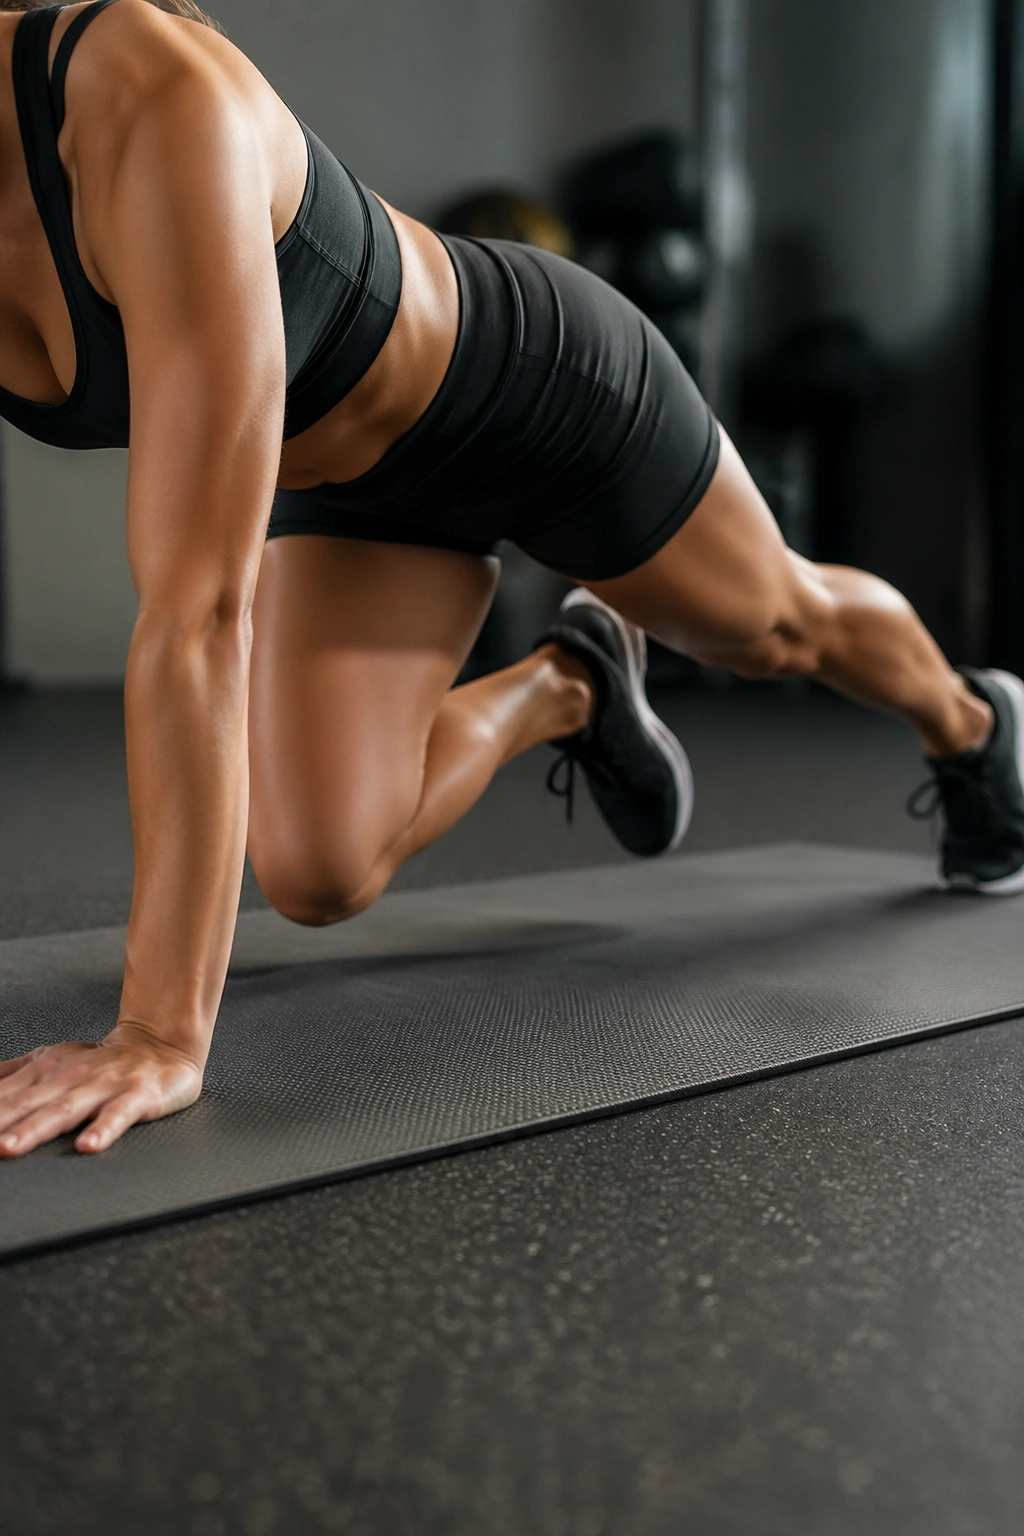
Hear me out: mountain climbers are only a lower ab exercise if you stop treating them like floor cardio. Most people blast through them with bouncing hips and loose shoulders. That turns a useful move into noise.
Set up in a high plank with your hands under your shoulders. Squeeze your glutes, keep your torso long, and drive one knee toward your chest without letting your hips pop up or sag down. Switch sides in a steady rhythm.
Done this way, mountain climbers train the lower abs through anti-extension while adding a conditioning hit. That mix matters if your bigger goal is trimming belly fat, because the move raises heart rate without asking for equipment or much space.
Try 20 seconds hard, 20 seconds easy for 4 to 6 rounds. Hard means crisp knee drives. Easy means slower, cleaner reps—not collapsing on the floor.
Your shoes should make less noise than you expect. Quiet feet usually mean better control.
10. Slider Mountain Climbers
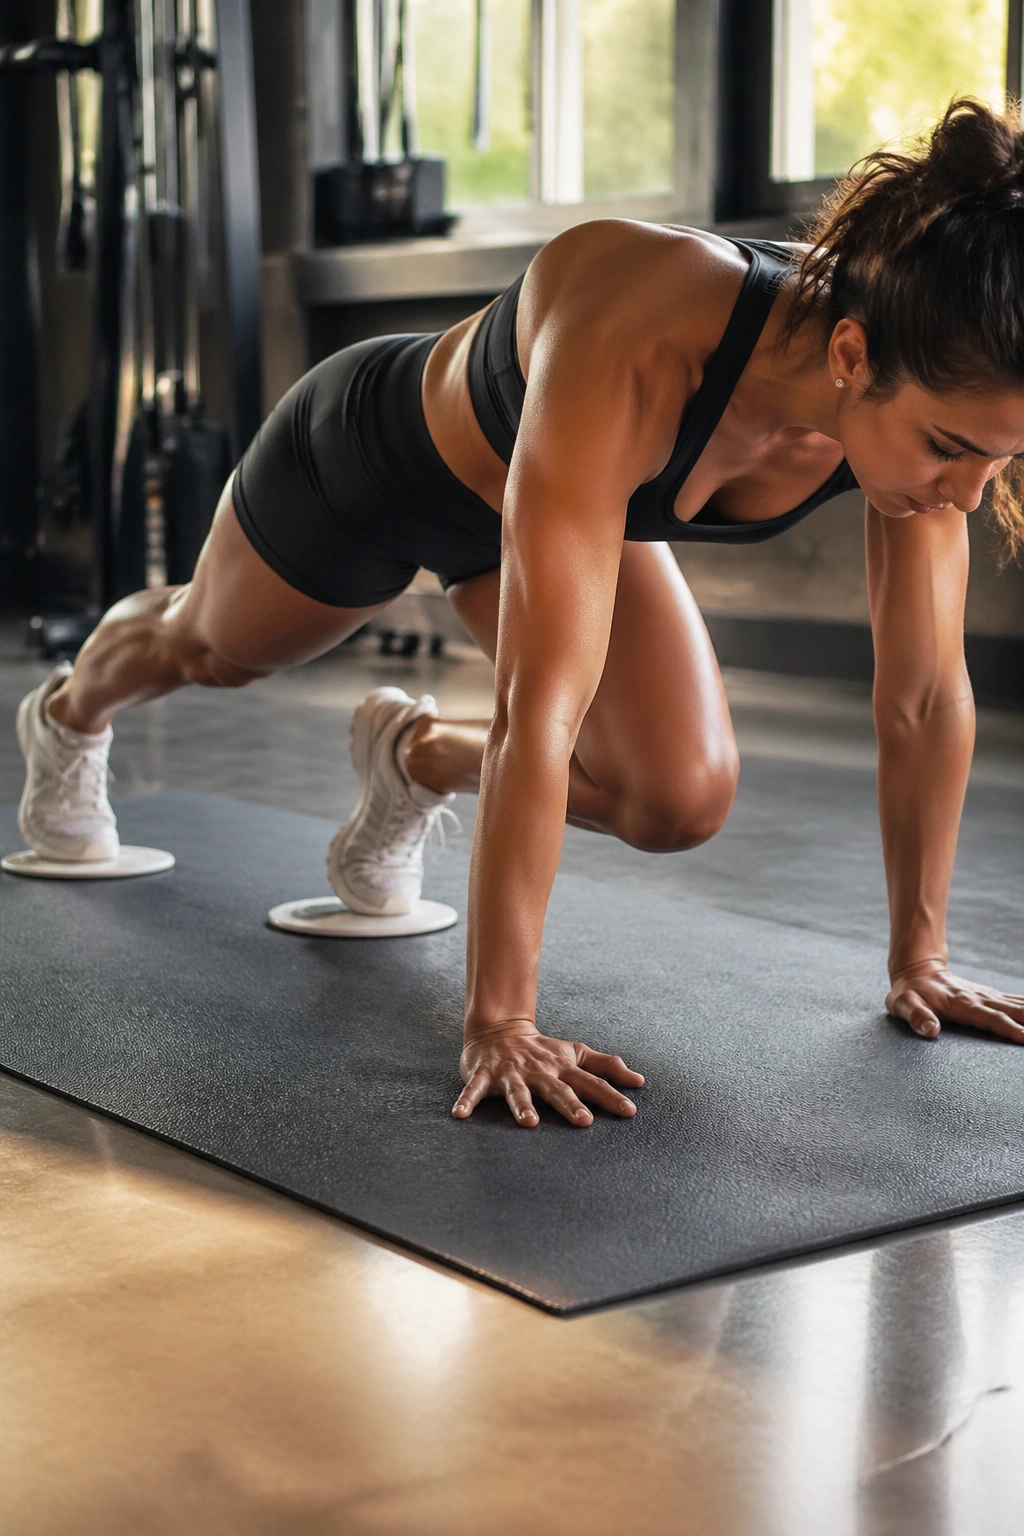
Take regular mountain climbers and put your feet on furniture sliders or small towels. The whole move changes. The floor stops giving you free momentum, and your abs have to pull each knee through.
That extra friction is gold. You get longer time under tension, smoother reps, and fewer wild hip swings. On hardwood, carpet, or even a gym floor with gliding discs, the setup is simple and the payoff is immediate.
Run them two ways. Go slow and strong for 8 to 12 reps per side, or use a timed set of 30 seconds and keep the pace controlled. If your shoulders drift behind your wrists, reset. If your low back sinks, shorten the range and pull one knee only halfway in.
This version is harder than it looks. People usually find out around rep six.
Use sliders when bodyweight work has gone stale but you are not ready for hanging movements yet.
11. Plank Knee Tucks
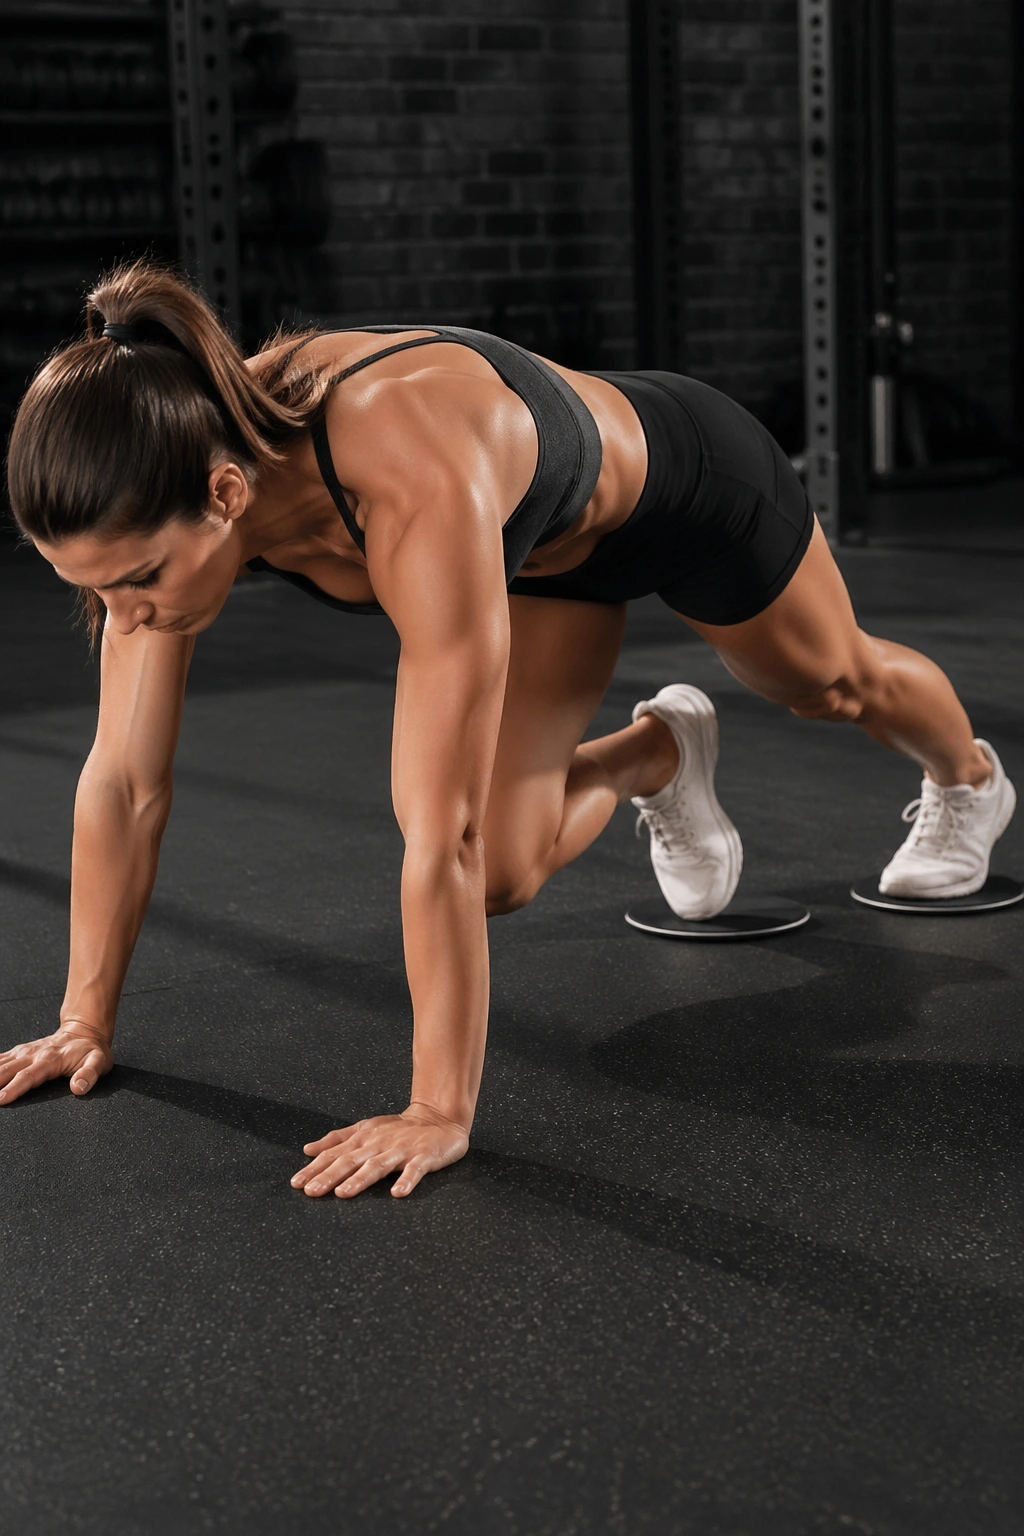
This move sits somewhere between mountain climbers and pikes. The key is pulling the knees toward the chest without letting the shoulders dump backward.
Start in a high plank with both feet on sliders, socks, or a suspension trainer. From there, draw both knees in under your torso, pause, and extend them back slowly.
What to Watch For
- Keep your shoulders stacked over your hands.
- Pull the knees in for 1 second, lower out for 2 seconds.
- Stop the set once your hips start bouncing up and down.
- Aim for 10 to 15 reps.
A lot of lower ab exercises are limited by neck strain or grip. This one is not. That makes it useful for circuits, especially after upper-body work when hanging from a bar feels like too much.
If the double-knee version is rough, use alternating tucks. Same idea. Less chaos.
12. Hanging Knee Raises
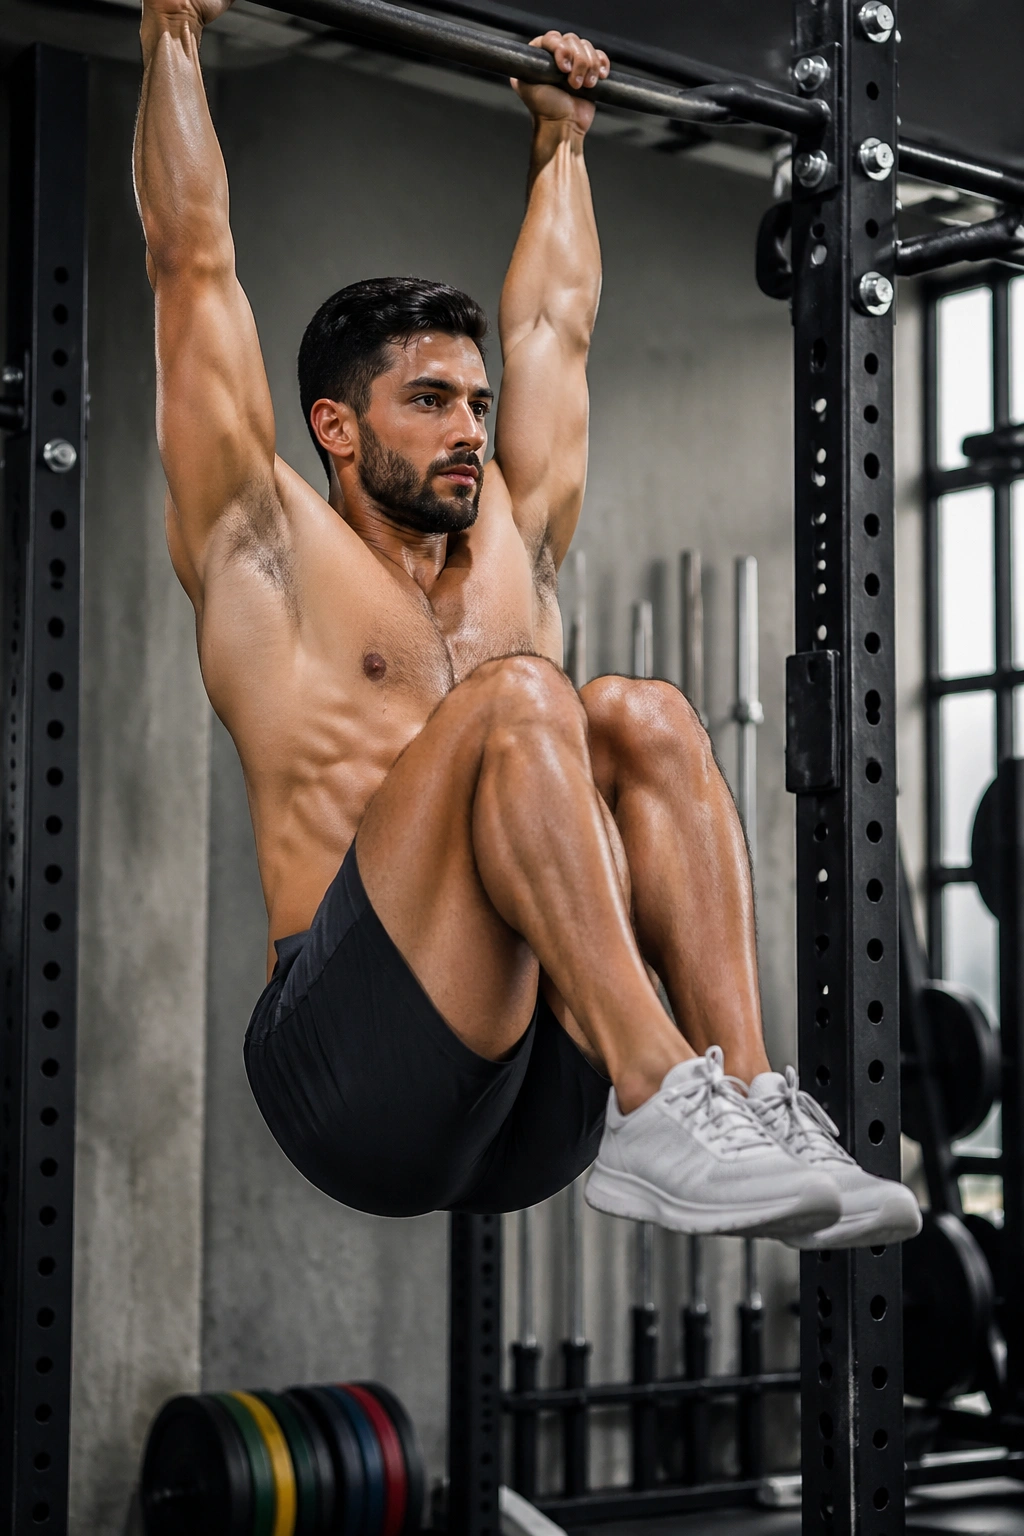
The first clean hanging knee raise someone does is often a surprise. The exercise feels shorter than expected. The knees do not need to shoot all the way to your chest. The magic is in the pelvic tuck at the top.
Hang from a pull-up bar, set your shoulders down away from your ears, and bring your knees upward while curling your pelvis under. Think zipper to ribs. Pause for a beat, then lower without swinging.
This movement asks a lot more than abs. Grip strength, shoulder stability, and body control all show up. That’s why it carries over so well to other training.
If you swing, stop the set. Swinging rep after rep teaches you the wrong rhythm. Start from a dead hang each time if needed. There is no shame in singles.
Shoot for 6 to 12 controlled reps. If that is too much, use a captain’s chair station or begin with reverse crunches until your trunk can handle the harder lever.
13. Hanging Straight-Leg Raises
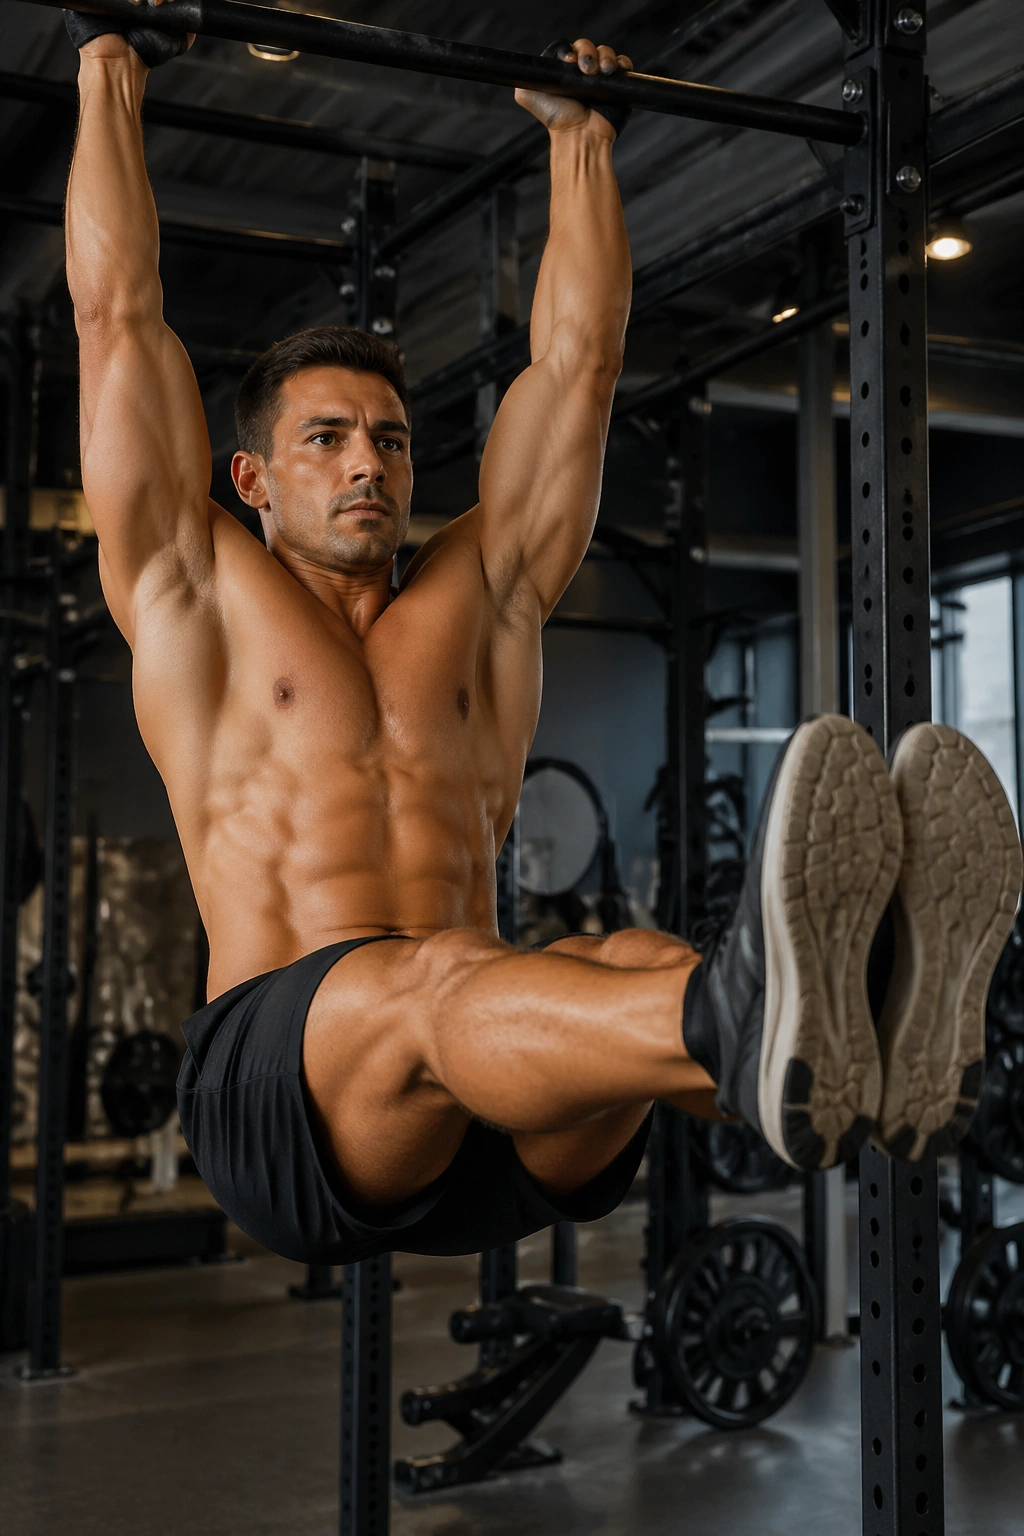
Compared with hanging knee raises, straight-leg raises hit harder because the lever is longer. Same trunk position. More demand. A lot more.
Raise your legs with the knees long but not locked stiff, and bring them to around hip height or a little higher while keeping your torso from turning into a swing. Lower under control. The descent matters as much as the lift.
Who should use these? People who can already do 10 clean hanging knee raises with no momentum and no shoulder shrugging. If that base is not there, forcing straight-leg reps usually turns into a hip-flexor yank.
A crisp set is 5 to 10 reps. You do not need more.
Try thinking about your tailbone curling slightly forward at the top instead of only thinking “lift legs.” That cue changes the feel fast. It brings the lower abs back into the job and keeps the movement from turning into a hanging leg toss.
14. Captain’s Chair Leg Raises
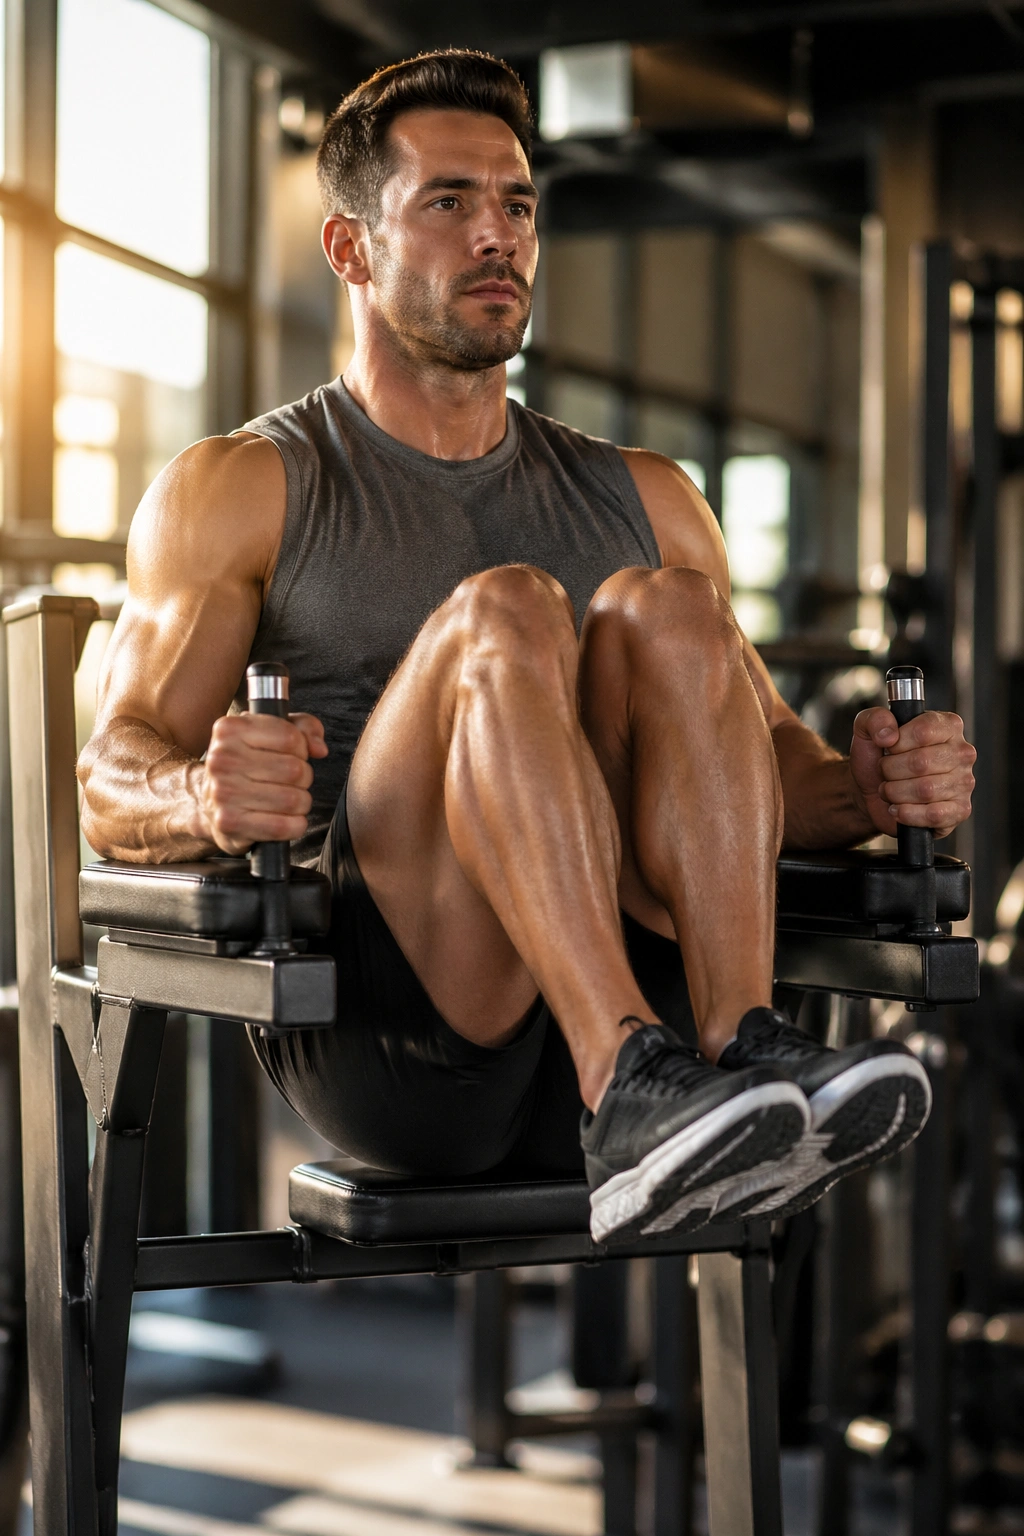
Not everyone has the grip for hanging work, and not everyone should fight the pull-up bar on day one. Captain’s chair leg raises solve that problem by giving your back and forearms support.
Set your elbows on the pads, press your upper back into the support, and lift your knees or straight legs upward while tilting the pelvis. The machine does not make the move easy; it trims away a few limits so you can focus on the abs.
This version is useful if you’re tired from rows, pull-ups, carries, or anything else that fries your hands before your core even gets a fair shot. It’s also a strong option for people whose shoulders hate long hangs.
Use 10 to 15 reps with a clear pause at the top. If straight legs pull your back off the pad and ruin the position, go back to bent knees.
Clean reps on the captain’s chair still count. More than count, actually—they often teach the pattern better.
15. Garhammer Raises
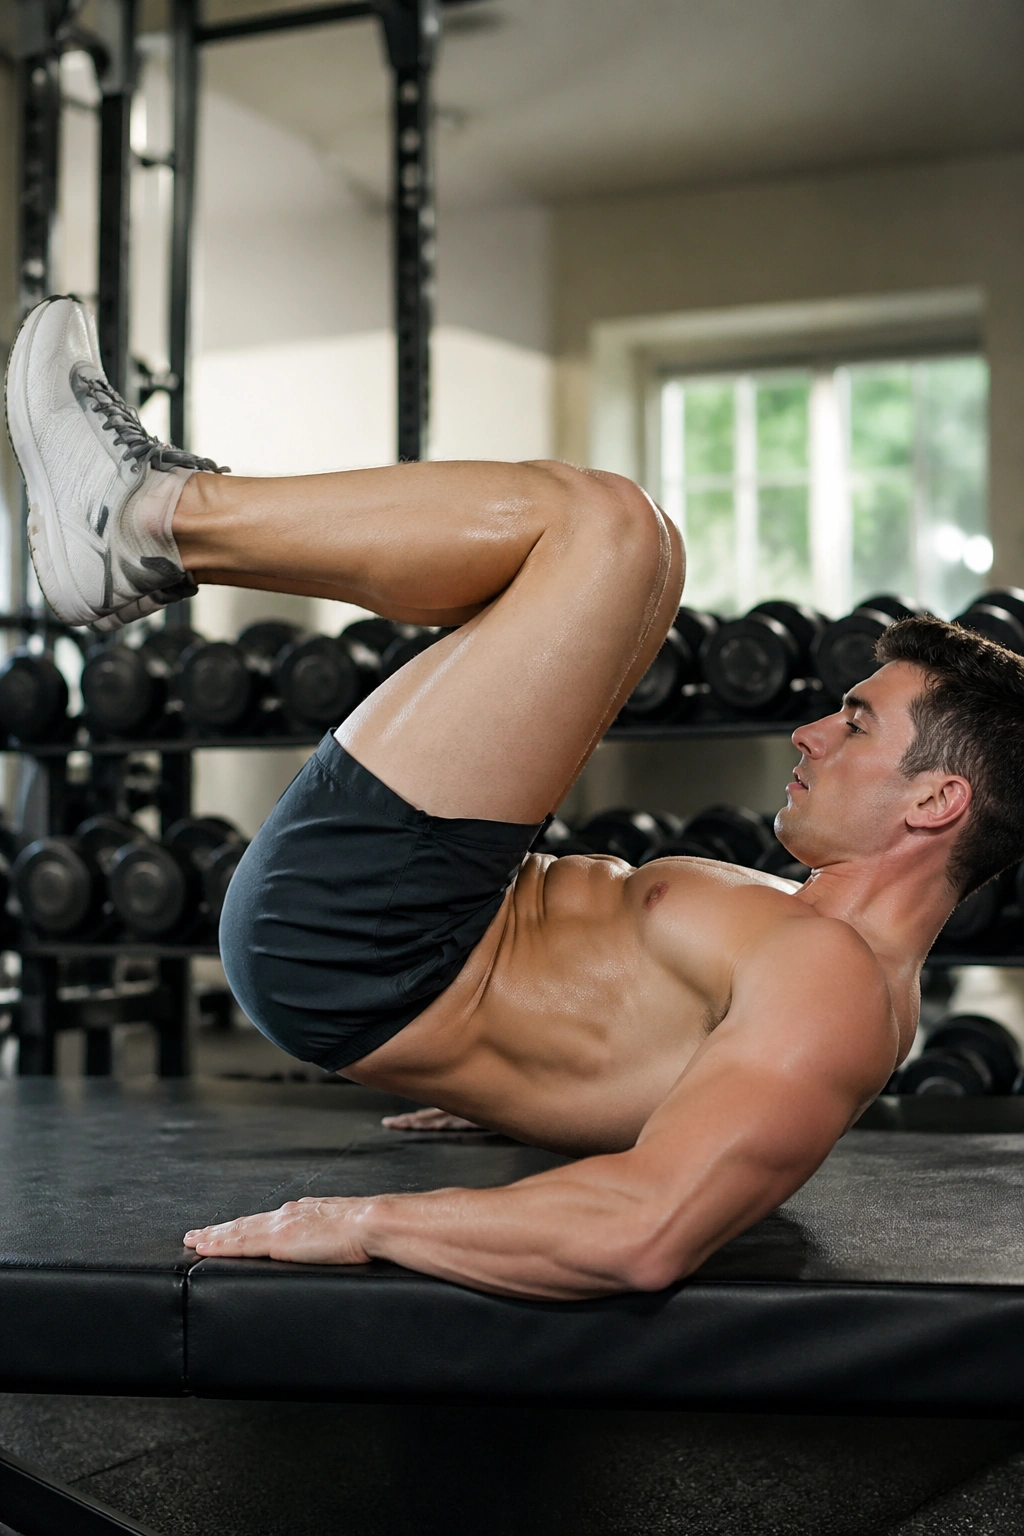
A lot of gym-goers have never heard of the Garhammer raise, which is a shame, because it’s one of the sharpest lower ab drills around when you do it right.
Lie on a bench or the floor with your hips and knees bent to 90 degrees. From that tabletop shape, pull your knees toward your chest by curling your pelvis off the surface. The knees move, sure, but the main action is the same one you need in reverse crunches: tailbone up, not thighs swinging.
Why This One Feels Different
Because the knees start bent and high, the hip flexors have less room to steal the rep. You can zero in on the pelvic curl.
Keep it tight:
- 8 to 12 reps
- 1-second squeeze at the top
- 2 to 3 seconds on the way down
If your thighs slam into your stomach and you still do not feel the abs, you’re rushing. Slow it enough that the curl becomes obvious.
16. Seated In-and-Outs
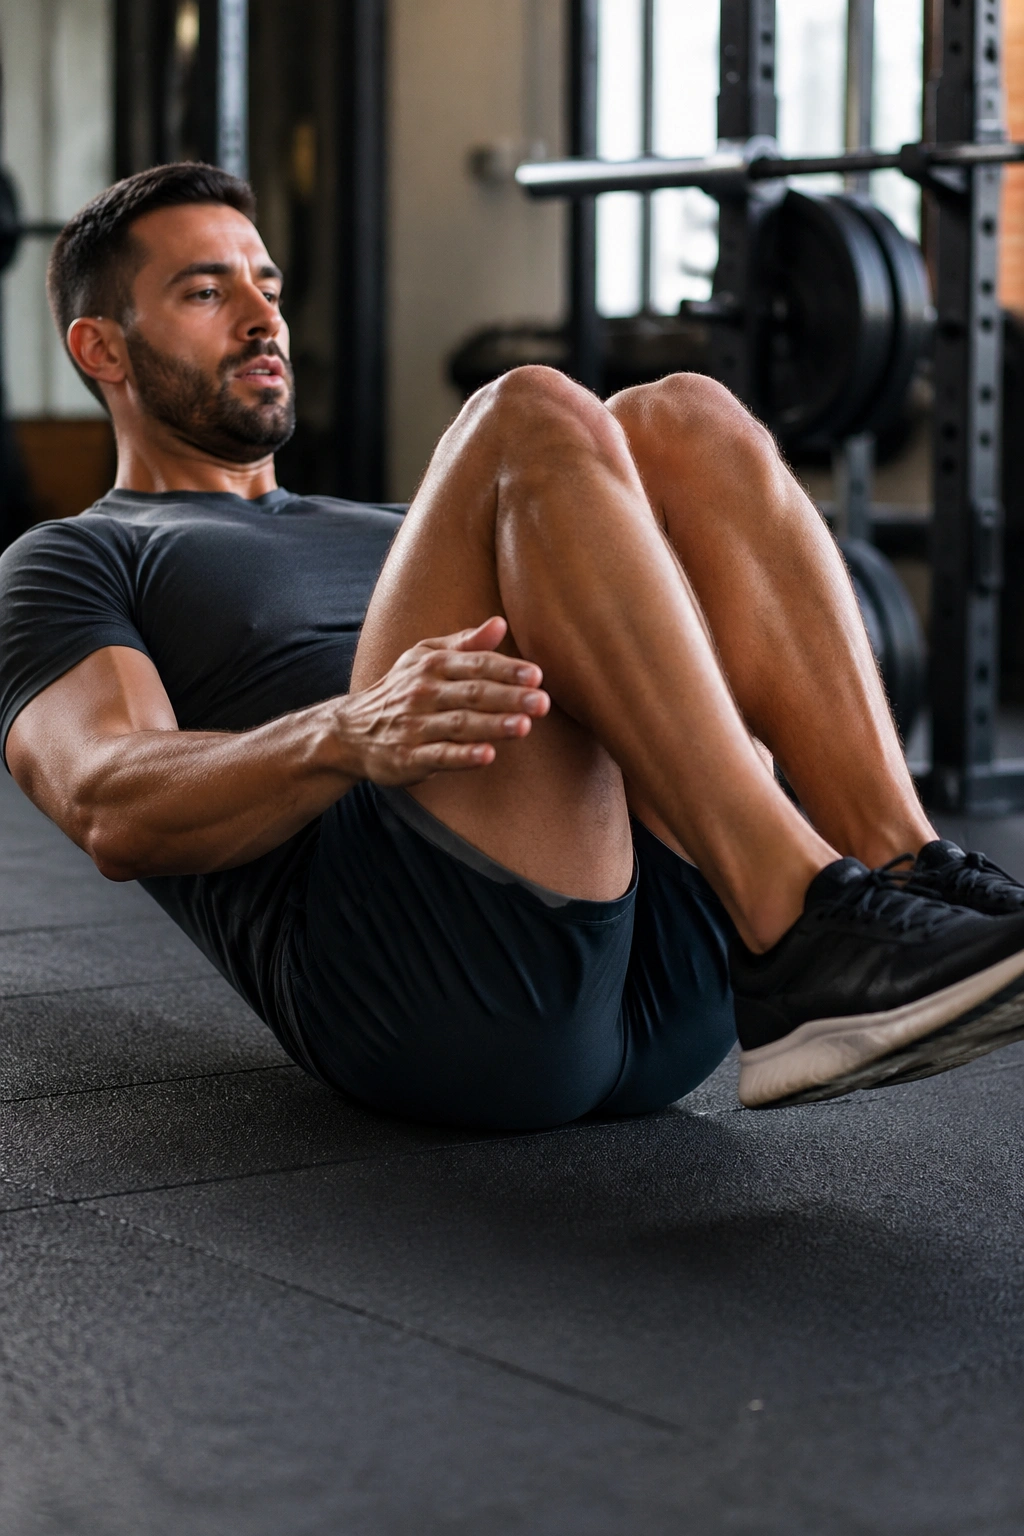
This one looks old-school because it is. Still works.
Sit on the floor or the edge of a bench, lean back to about 45 degrees, and extend your legs out while keeping your chest lifted. Then pull your knees toward your torso and squeeze through the lower part of the abs. You can keep your hands on the floor lightly for balance or float them forward if you want more challenge.
The trick is keeping the torso stable enough that the abs—not momentum—drive the tuck. If you rock backward and forward each rep, the move loses its edge.
A clean set might look like this:
- 12 to 20 reps
- Short pause in the tucked position
- Feet never touching the floor until the set ends
This is a strong finisher because it burns fast and needs no setup. Put it late in the session when you want one more bout of tension without lying down again.
17. V-Sit Knee Tucks
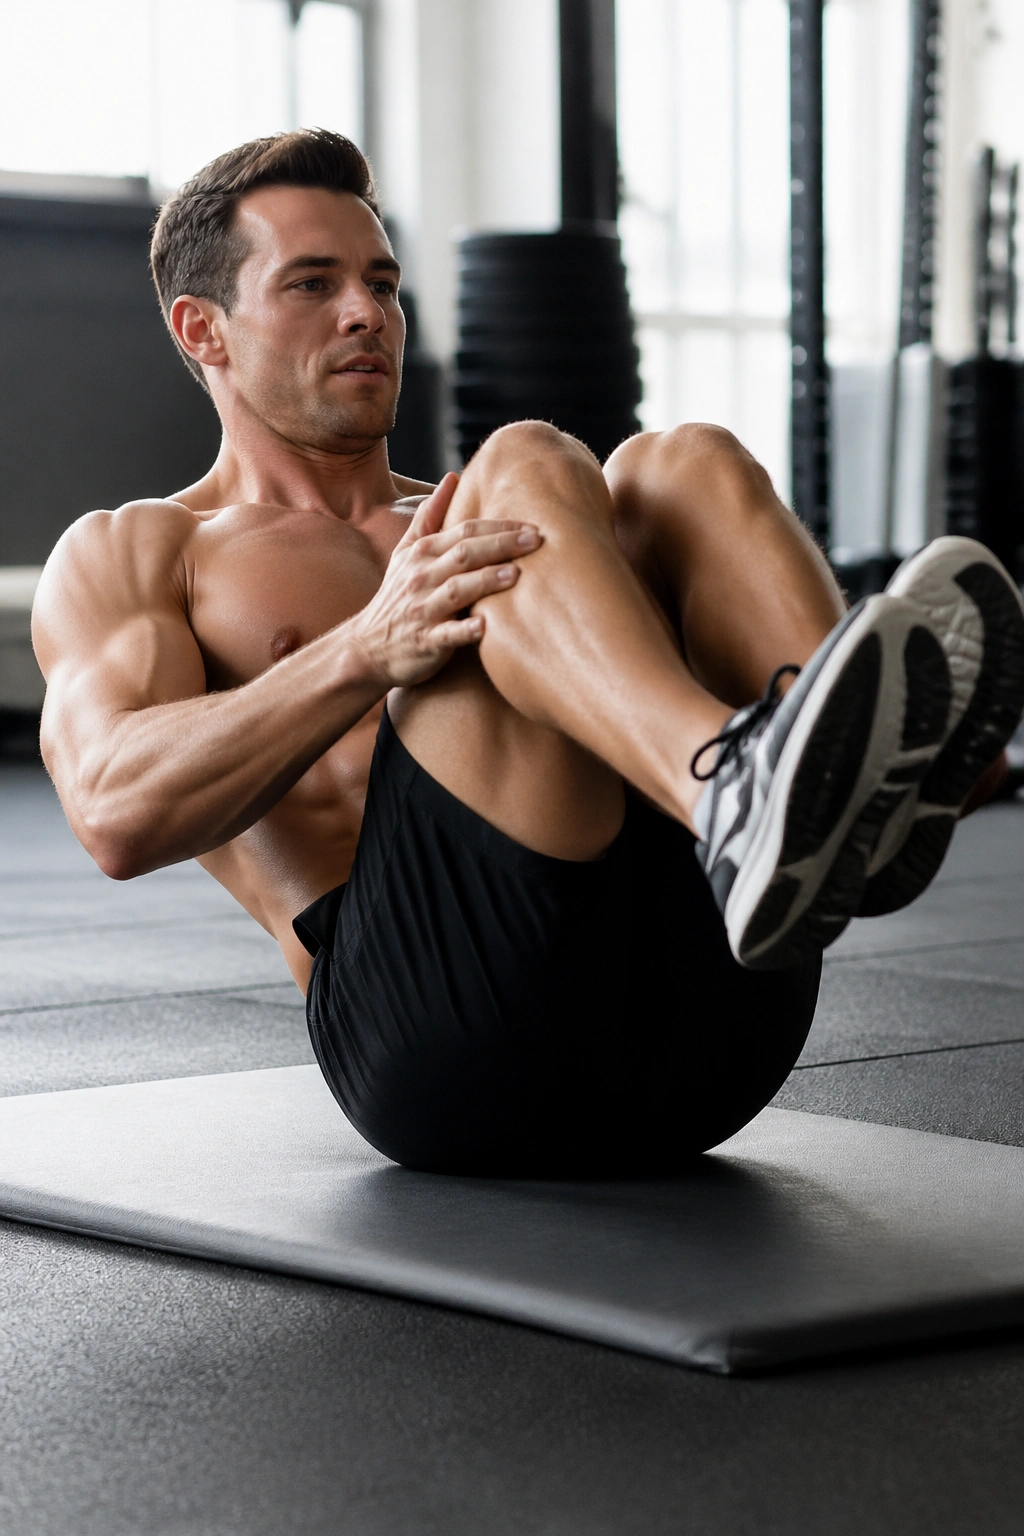
V-sit knee tucks punish lazy posture. The second your chest caves or your low back rounds too hard, the whole shape falls apart.
Balance on your sit bones with your torso angled back and your legs off the floor. Pull your knees in while bringing your chest slightly toward them, then extend back out under control. You’re not collapsing into a crunch. You’re keeping a long spine while the abs pull the legs inward.
This move has a balance demand that changes the feel from seated in-and-outs. Smaller support base, more coordination, less room to hide. A set of 8 to 12 reps can be enough if you hold the end ranges for a beat.
Use this when floor drills feel stale but hanging work is still out of reach. It bridges that gap well.
And yes, you will wobble. That’s part of it.
18. Sprinter Sit-Ups
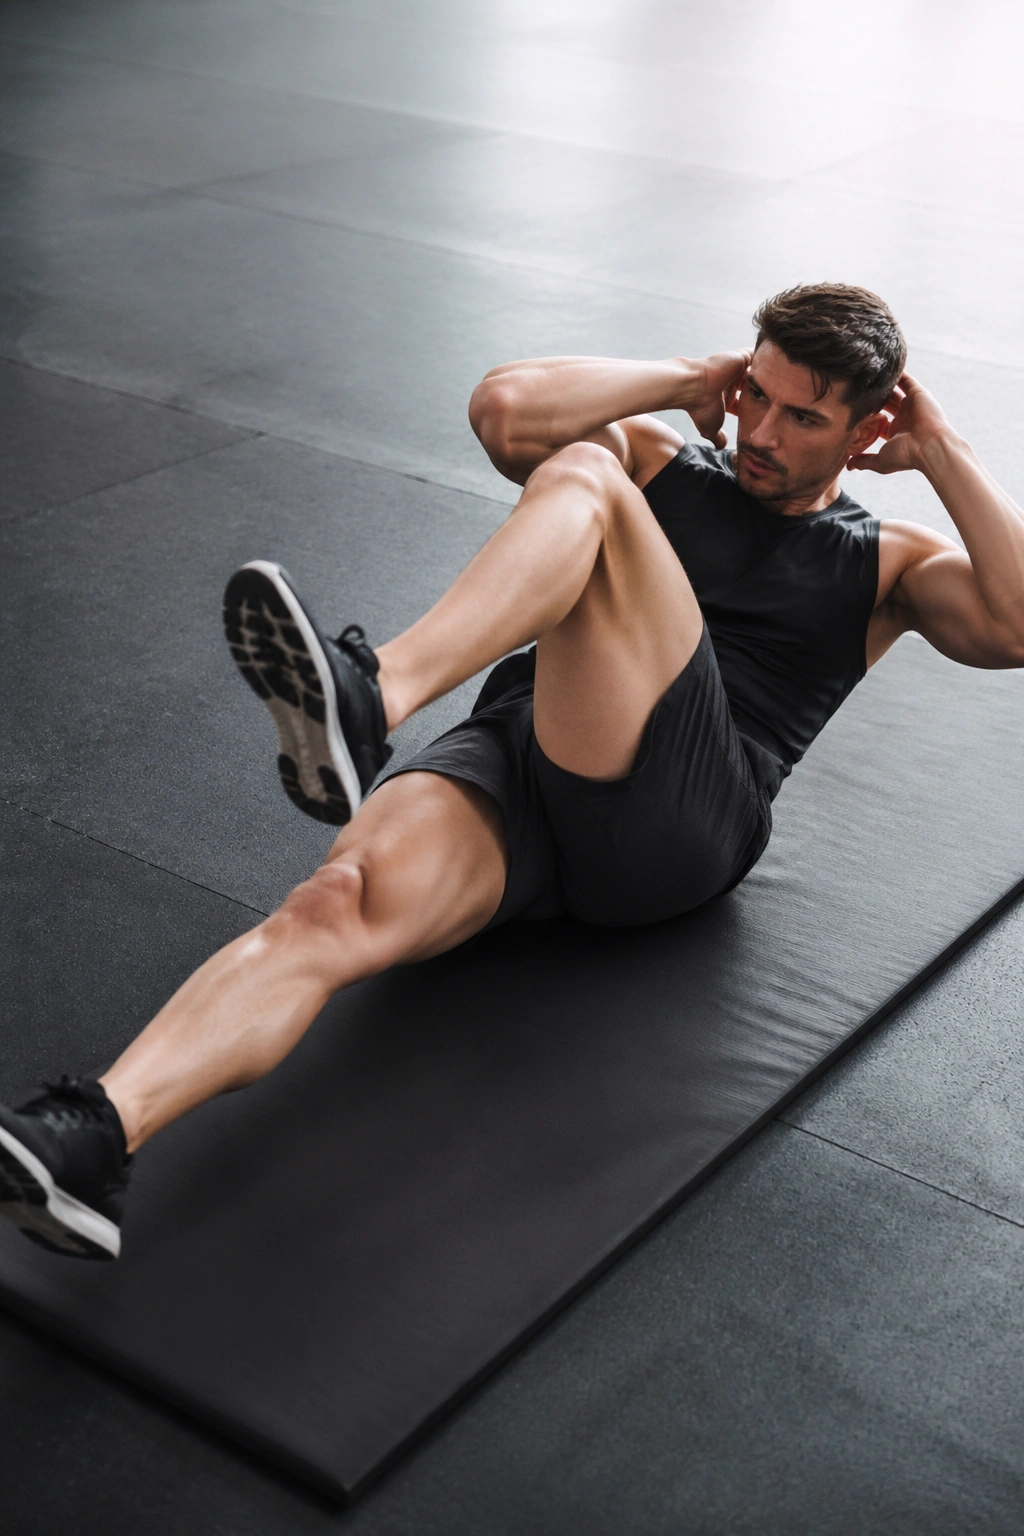
This is the rare ab move that feels athletic rather than isolated. One leg stays long, the other knee drives up, and the opposite arm comes through like you’re sprinting out of the blocks.
Lie flat, then sit up while pulling one knee toward the chest and driving the opposite elbow toward it. Alternate sides. The lower abs work on the leg drive and the return to the floor, while the whole trunk has to organize quickly.
I like this one in circuits because it breaks up the monotony of lying there doing tiny controlled reps—useful, yes, but not always fun. Sprinter sit-ups add rhythm and a bit of pulse without turning into flailing.
Go for 10 to 16 reps per side. If your feet slap the floor and your neck takes over, slow down and reduce the range.
There’s no need to race. Crisp side-to-side changes hit harder than frantic ones.
19. Swiss Ball Knee Tucks
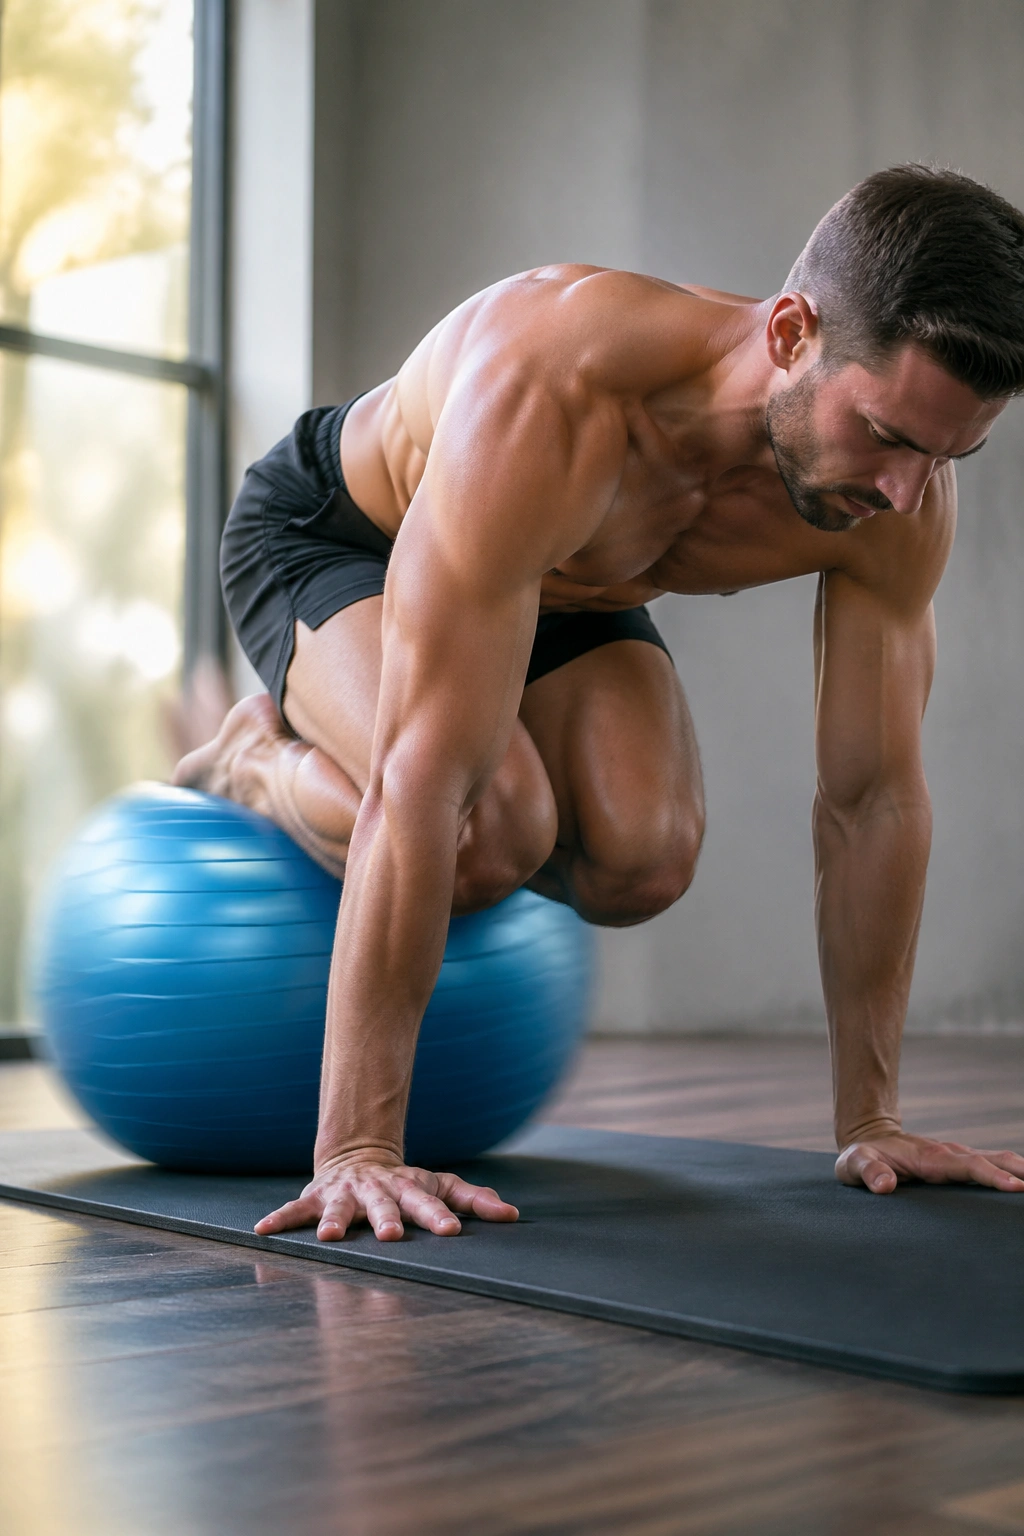
Put your shins on a Swiss ball, hands on the floor, and roll into a plank. That setup alone wakes up the trunk. Then pull your knees toward your chest and roll the ball inward without letting your shoulders drift backward.
Why the Ball Changes Things
The unstable surface asks your core to brace before the tuck even begins. Small wobbles force your lower abs, obliques, and deep core to react the whole time.
Use 8 to 15 reps. Pause briefly in the tucked position, then extend back out with control. If the ball shoots sideways, widen your hands a touch and slow the movement down.
This variation earns its place when you want bodyweight core work that feels more demanding without adding reps forever. It is also a sneaky shoulder challenge, so place it before push-ups or pressing if your upper body fatigues fast.
Messy ball work is a circus act. Clean ball work is core training.
20. Swiss Ball Pikes
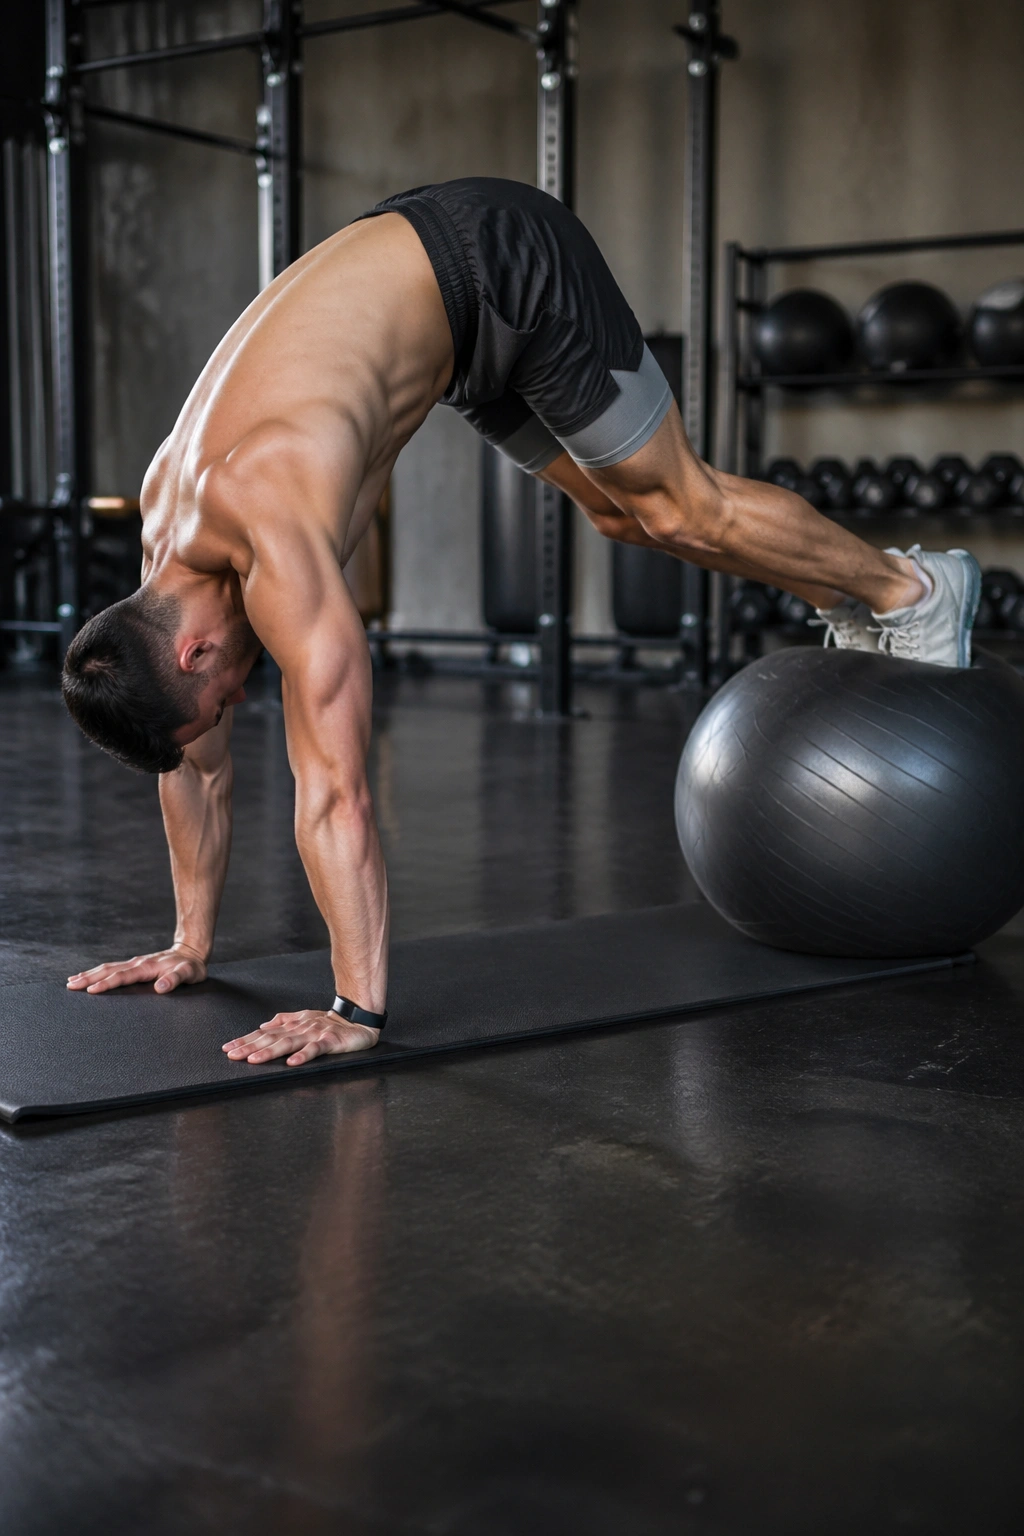
Swiss ball pikes are the harder cousin of ball knee tucks. Same general setup, but now you lift your hips toward the ceiling while keeping the legs long.
That longer lever changes everything. The abs have to brace, pull, and control the shift of your center of mass all at once. You’ll feel the lower portion of the rectus abdominis, the deep trunk, and the shoulders trying to stay stacked as the ball rolls toward your hands.
Do 6 to 10 reps. Fewer is fine. This is not a high-rep move for most people.
A useful cue: think hips up, ribs down. If you only think about raising the hips, many people dump into the low back or shrug into the shoulders. Keep the trunk compact and the motion smooth.
Use pikes after you’ve built good control with knee tucks. Jumping straight to these tends to end in shaky reps and rolled ankles.
21. Slider Pikes
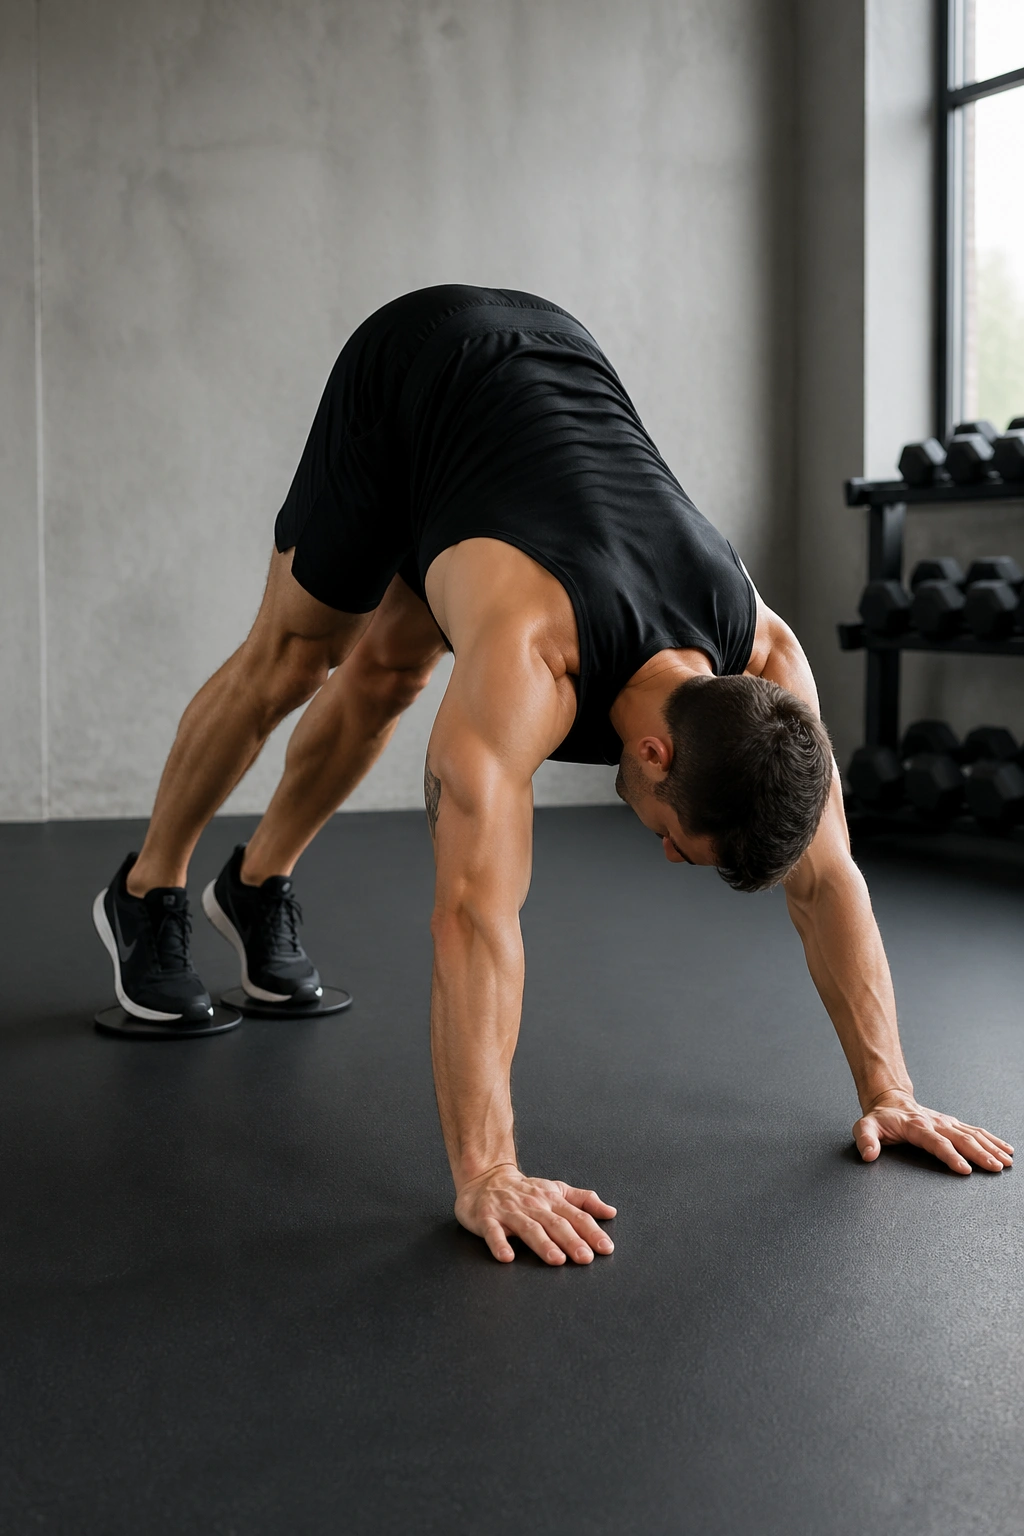
No ball? No problem. Slider pikes give you much of the same lower ab challenge with less side-to-side wobble and more direct control over the path.
Set up in a high plank with both feet on sliders. Press the floor away, then pull your hips up and back into a pike while your feet glide toward your hands. Lower slowly until you’re back in plank.
This move is nasty in the best way. The abs have to pull the pelvis into position, and the shoulders must stay active enough to stop the whole thing from sagging. It feels like a plank, a leg raise, and a pike had an argument and decided to work together.
Start with 6 to 12 reps. If full pikes are too much, shorten the range and think of making a soft inverted V rather than chasing a huge hip lift.
You’ll know you went too far when the movement shifts from smooth glide to frantic foot scraping.
22. Dragon Flag Negatives
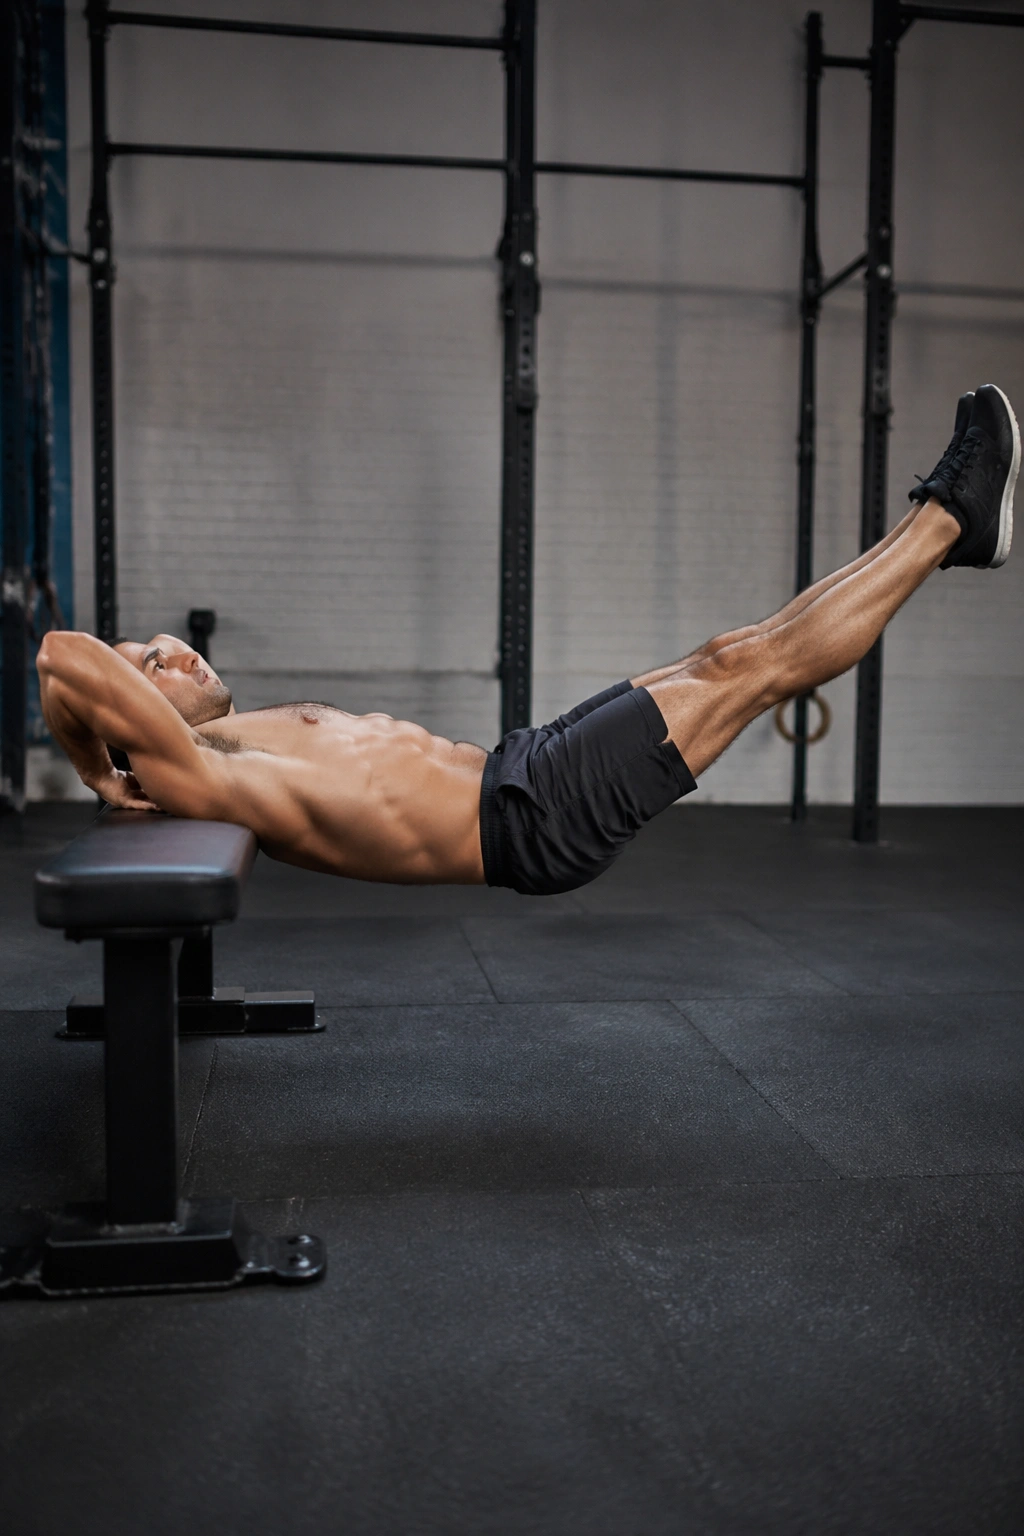
This one is the deep end. Dragon flag negatives are not a beginner move, and that is fine. Save them for the point when easier drills feel controlled and your trunk strength has caught up with your ambition.
Lie on a bench and hold behind your head for support. Lift your body so your shoulders stay on the bench while your torso, hips, and legs form one straight line. Then lower that line down as slowly as you can—3 to 5 seconds is a solid target—before resetting.
The reason this variation works is the negative, or lowering phase. Eccentric control builds brutal tension through the front of the core without asking you to complete the full concentric dragon flag.
Keep the body rigid. No folding at the hips. No loose knees. If the low back arches, end the rep there.
A tiny dose goes a long way:
- 3 to 6 reps
- Full rest between sets
- No fatigue-chasing nonsense
Use these as strength work, not as a burnout.
Final Thoughts
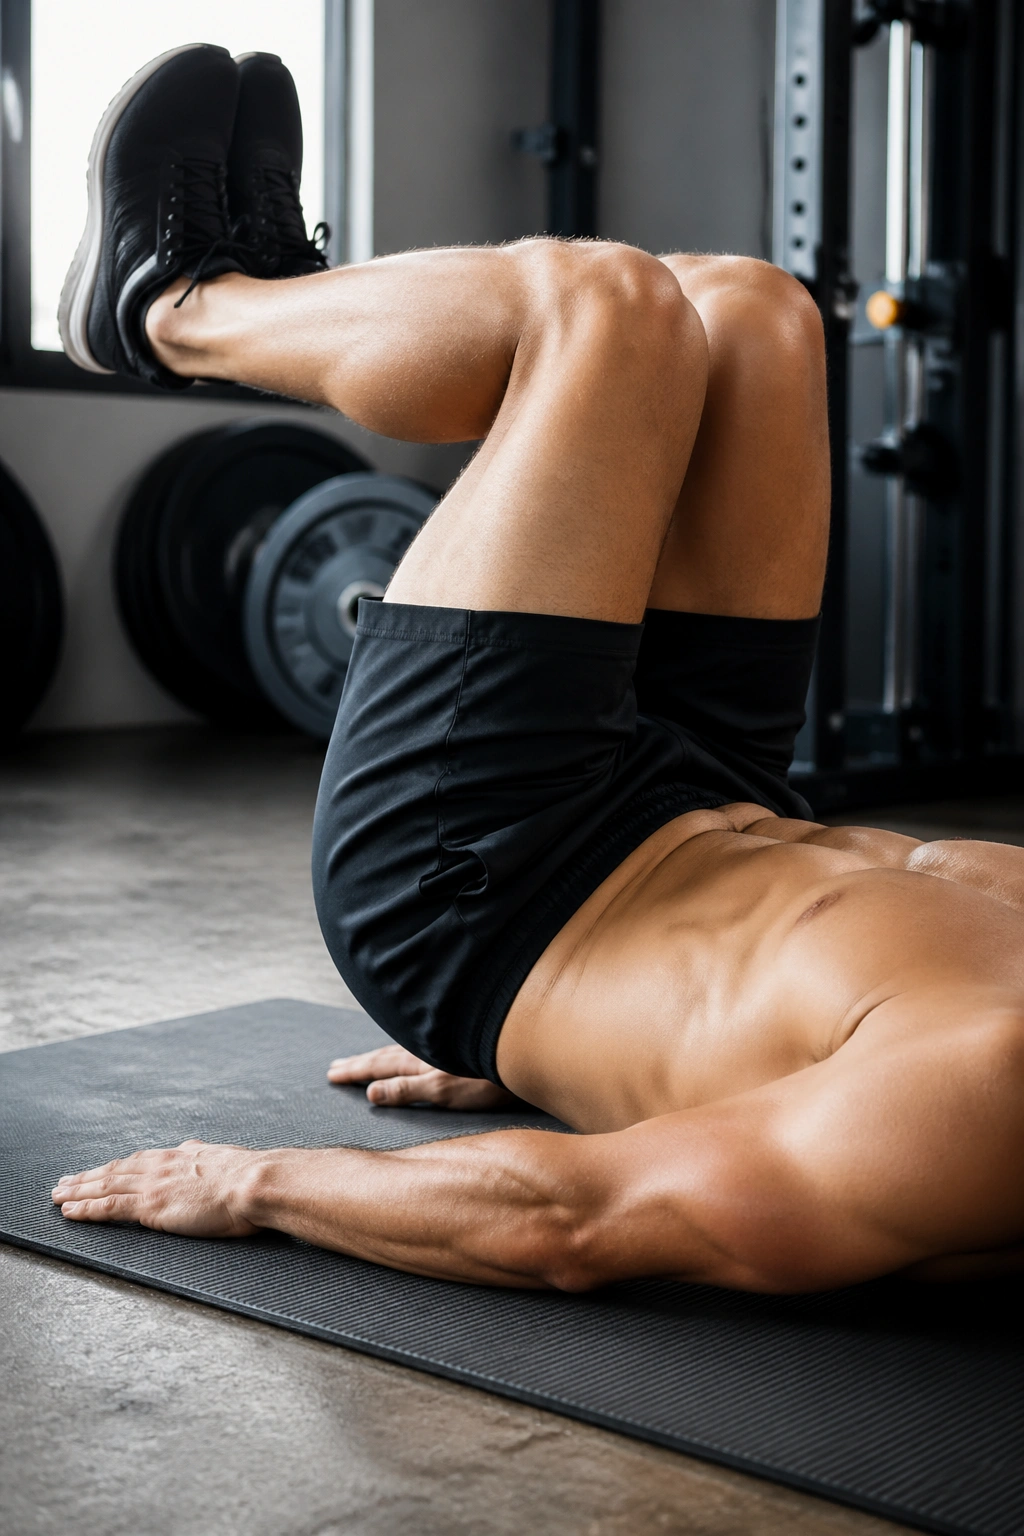
If you want lower ab workouts that help with belly fat, train the abs for strength and control, then handle fat loss with the bigger habits that move body weight and waist size: enough protein, more daily steps, loaded strength work, and food intake that matches the goal. That combination beats doing 200 random crunches and hoping the lower stomach gets the memo.
Start with the drills that let you keep your pelvis in position—reverse crunches, dead bugs, bent-knee lowers, hollow holds. Earn the harder stuff. Hanging raises, pikes, and dragon flag negatives feel better and work better when you have that base.
One last practical note. Two or three core sessions a week is enough when the reps are honest. The lower abs do not need punishment. They need clean work, repeated often enough to matter.
