



If a workout plan promises that 50 crunches a day will melt your waistline, close that tab. The best belly fat workouts for women over 60 are not endless ab routines; they are the moves that raise your heart rate, keep your muscle, and let you train again tomorrow without angry knees or a barking low back.
Belly fat gets stubborn for reasons that have nothing to do with laziness. After menopause, fat storage often shifts toward the abdomen, while muscle mass tends to slide the other way unless you give your body a reason to hold onto it. That deep abdominal fat—visceral fat—is the kind linked with blood sugar trouble, heart risk, and that firm, round midsection many women notice even when their arms and legs have barely changed.
And no, you cannot spot-reduce it. You can shrink it with a smart mix of cardio, strength work, core stability, and consistency. Public health exercise guidance lands in the same place over and over: aim for regular moderate aerobic work, add strength sessions each week, and do not neglect balance. I’d go one step further: if you’re over 60, I would take chair squats, brisk walking, carries, and controlled core drills over high-rep sit-ups every single time.
A small warning before you start: if you have chest pain, unexplained dizziness, uncontrolled blood pressure, a recent surgery, severe osteoporosis, or a hernia, get medical clearance first. If you have pelvic floor symptoms, exhale on the hard part of each move and skip any drill that makes you bear down. Start lower than your ego wants. The women who make the best progress are rarely the ones who begin hardest.
1. Brisk Walking Intervals Among the Best Belly Fat Workouts for Women Over 60
Walking is still the workhorse. It is low impact, easy to scale, and far more effective than people give it credit for when you stop strolling and start using pace changes on purpose.
A flat, comfortable walk is fine for recovery days. Belly fat tends to respond better when your body gets nudged out of cruise control, though, and intervals do that without forcing you into all-out effort. For many women over 60, the sweet spot is a brisk pace where you can talk in short phrases but would not want to sing.
A clean way to structure it
- Warm up for 5 minutes at an easy pace.
- Walk briskly for 2 minutes.
- Slow down for 1 minute.
- Repeat that cycle 7 to 10 times.
- Cool down for 5 minutes.
Use your arms. That changes more than people think. A strong arm swing lifts your pace, wakes up your upper back, and raises your heart rate without asking your knees to pound harder.
If outdoor walking feels uneven underfoot, use a treadmill with a 1 to 3 percent incline instead of cranking up the speed. Incline walking is sneaky—gentler than jogging, tougher than it looks, and excellent for the glutes that support your stride. I’ve seen many women do better with incline than with speed, especially if balance or hip stiffness is part of the picture.
2. Sit-to-Stand Chair Repeats
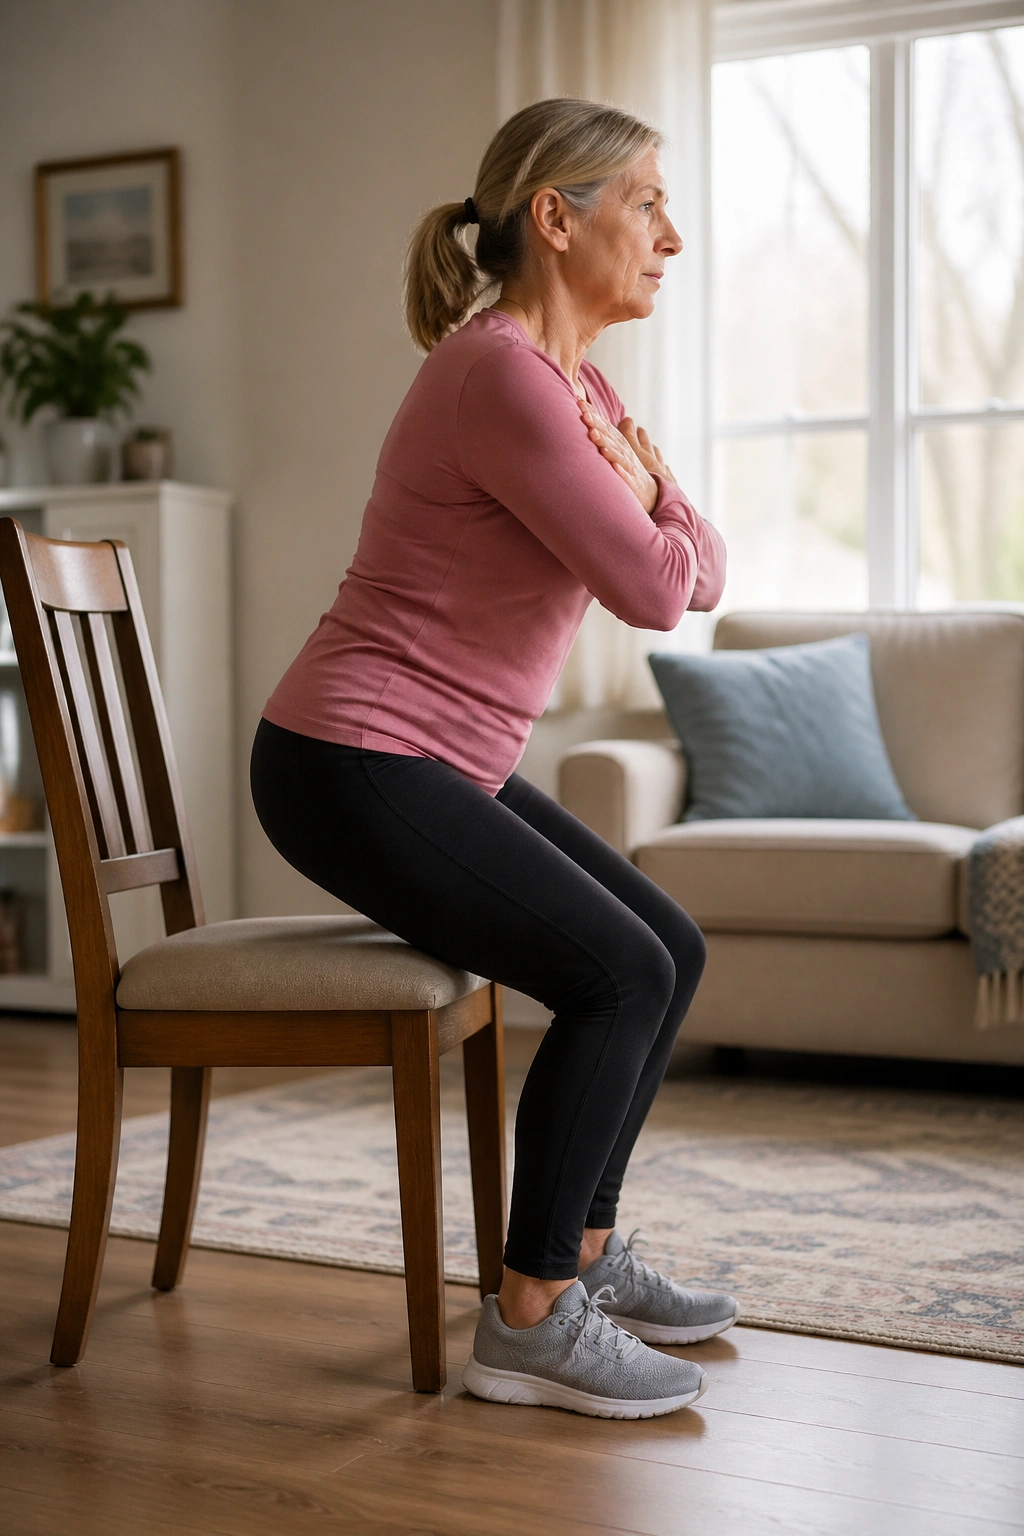
How many times do you stand up from a chair in a day? More than you notice, until it starts feeling heavy.
That’s why sit-to-stand repeats belong on this list. They train your legs, hips, and core in one of the most useful movement patterns you have. They also carry over to stairs, getting out of the car, and every “down and up” task that keeps daily life independent.
Use a sturdy chair that lets your knees sit around a right angle—many standard dining chairs work well. Plant your feet hip-width apart, lean your chest forward a bit, press through your whole foot, and stand up without rocking back first. Then sit down under control. That lowering phase matters more than people think.
Start with 2 sets of 8 to 10 reps. If that feels easy and clean, move toward 3 sets of 12 to 15. Hands can rest on your thighs at first. Later, cross your arms over your chest or hold one dumbbell at your sternum like a goblet squat.
Knee pain during the first few reps often means the chair is too low. Add a folded towel or a firm cushion, then try again. You are not cheating; you are picking the right range of motion for your joints. That is smart training, not soft training.
3. Low Step-Ups on a Stair or Platform
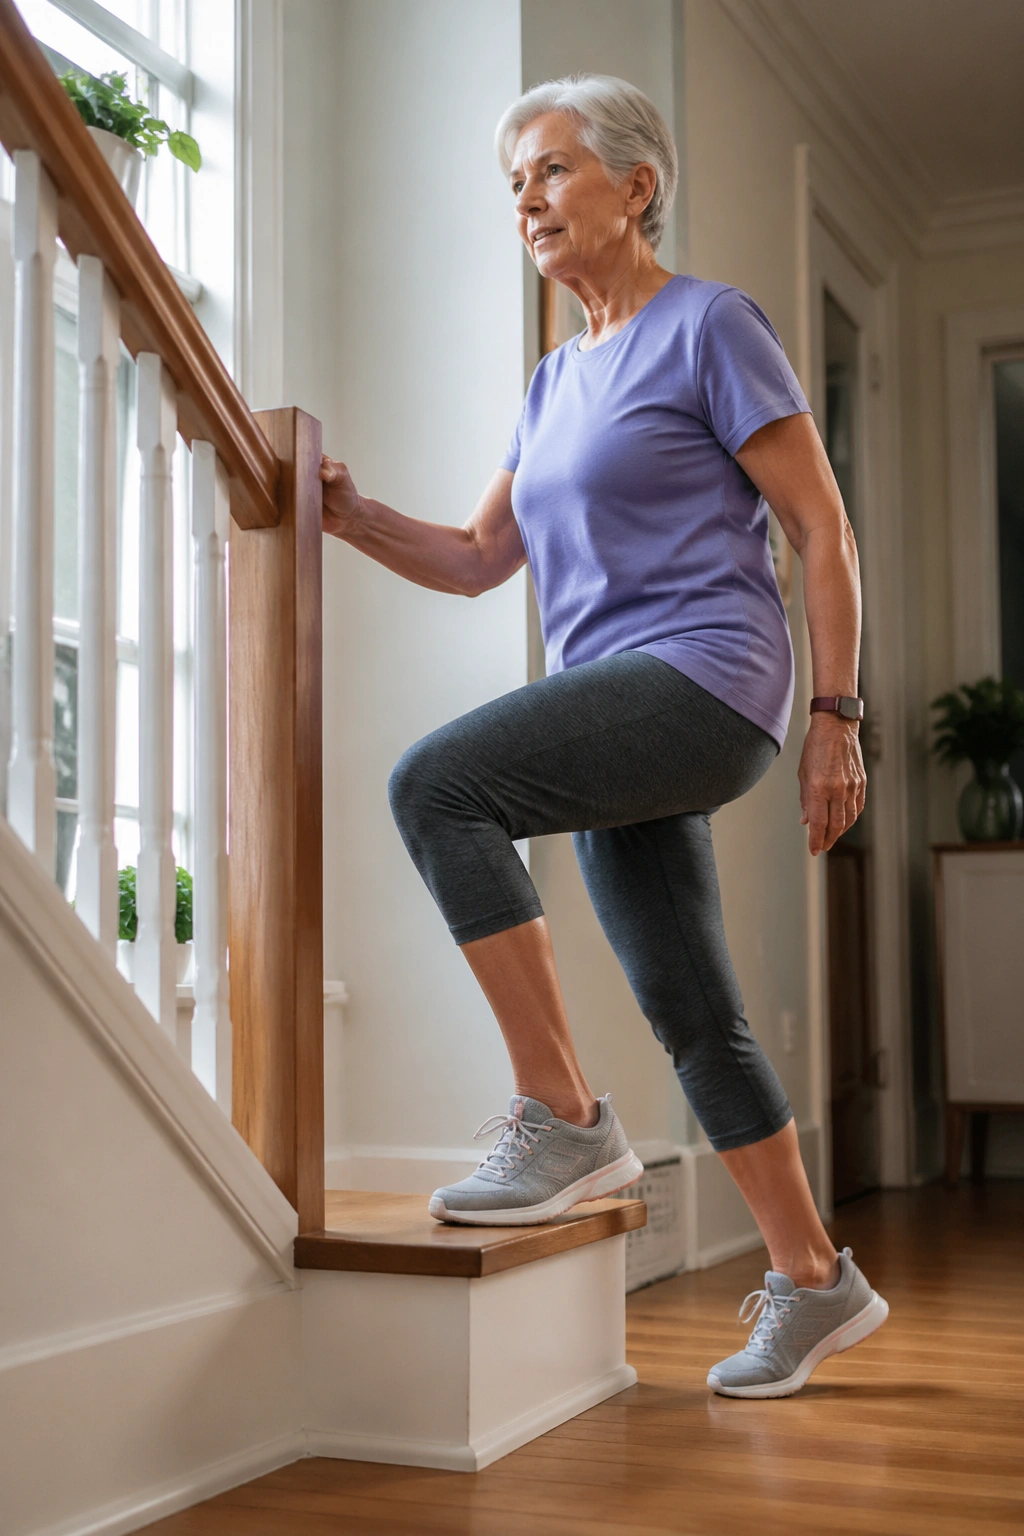
A single step can humble you fast.
Step-ups raise the heart rate, work the hips and thighs, and build the kind of one-leg strength that keeps walking steady. They also show you, with zero sugarcoating, whether one side is weaker than the other.
Set the height low first
A 4- to 8-inch step is enough for most beginners. Use the bottom stair, an aerobic step, or a low platform that does not wobble. Put your whole foot on the step, press through the heel, stand tall at the top, then lower slowly. Switch sides each rep or do a short block on one leg before changing.
A simple setup looks like this:
- 8 to 10 reps per leg
- 2 to 3 sets
- Rest 45 to 60 seconds between sets
Do not push off hard with the trailing foot. The lead leg should do most of the work. If your shoulders start tipping or your knee caves inward, the step is too high or you’re moving too fast.
Countertop support is fine. So is a railing. Balance support lets you train the target muscles instead of wasting effort trying not to wobble. Over time, you may notice that climbing actual stairs feels less dramatic, which is one of those quiet wins that matters more than a flattering mirror angle.
4. Seated March-and-Punch Cardio
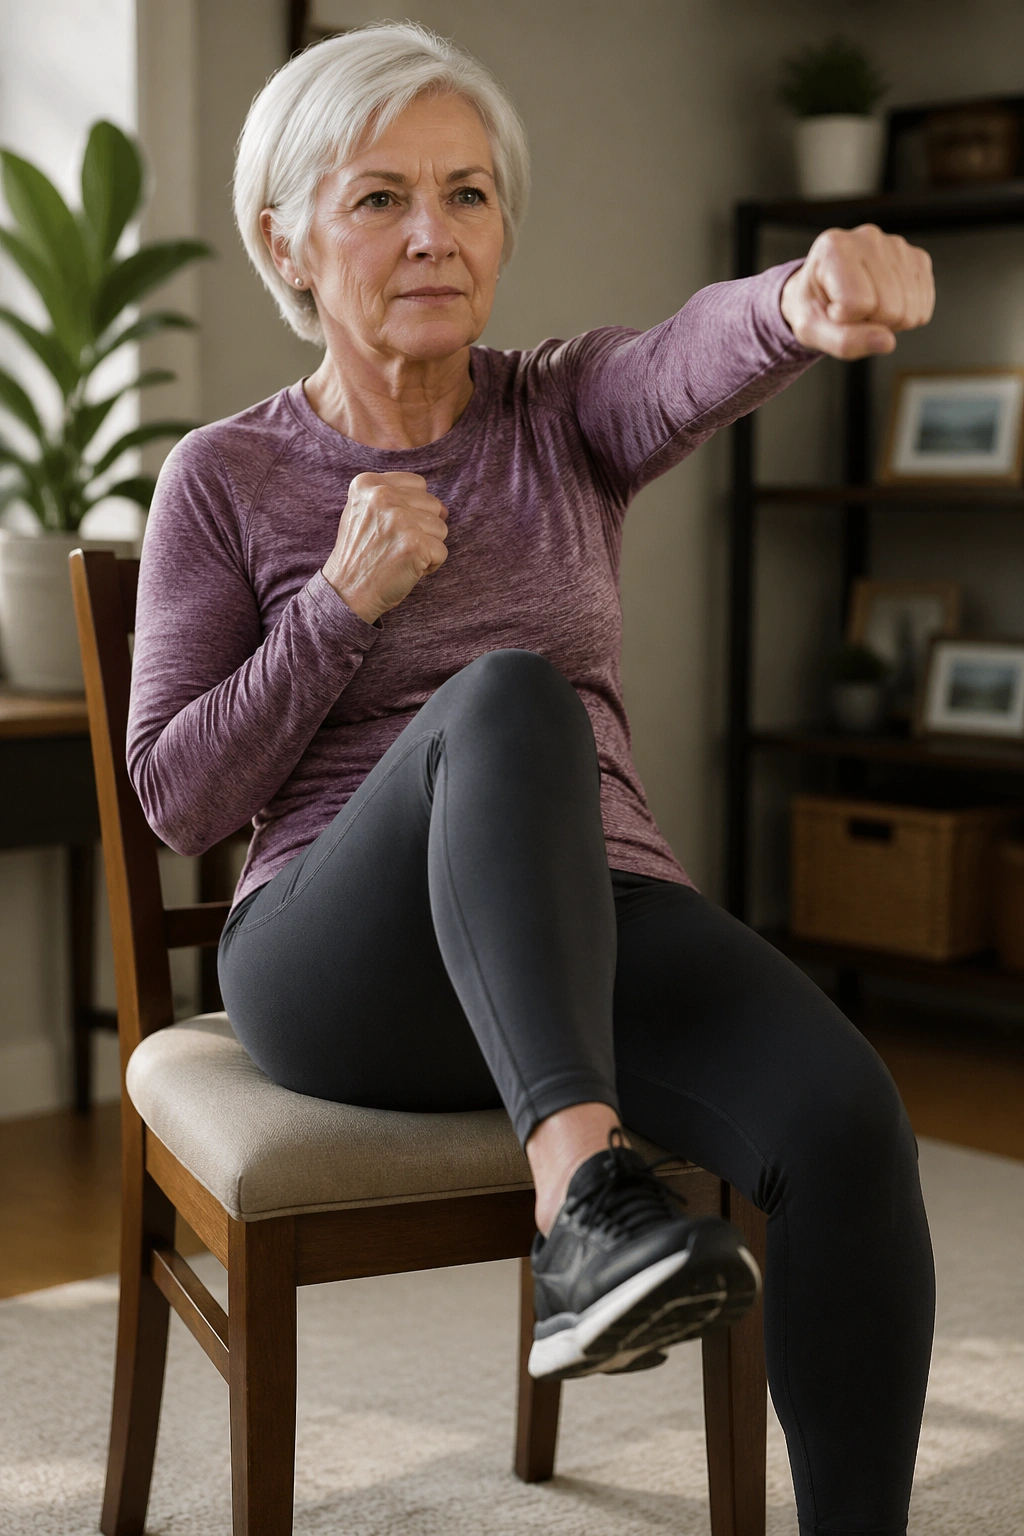
Not every fat-loss workout needs to happen standing.
For women dealing with balance issues, foot pain, neuropathy, or a rough arthritis day, seated cardio circuits can still get the heart pumping. The trick is intent. If you sit and lazily wave your arms around, nothing much happens. If you drive the knees, pump the arms, and punch with speed, you can build a surprisingly solid session from a chair.
Try this 10-minute block on a sturdy chair:
- March fast for 30 seconds
- Throw alternating jabs for 30 seconds
- March with bigger arm swings for 30 seconds
- Throw cross-body punches for 30 seconds
- Rest for 30 seconds
- Repeat 4 times
Sit tall rather than collapsing into the chair back. Keep the rib cage stacked over the hips, and let the belly tighten naturally as the arms move. Your shoulders should feel warm, your breathing should pick up, and your legs should feel like they are working—not coasting.
This one is also handy on low-energy days. Some workouts ask a lot of setup, floor space, or nerve. A chair, a timer, and 10 honest minutes can carry you farther than a plan that looks impressive and never gets done.
5. Resistance-Band Rows with a Core Brace
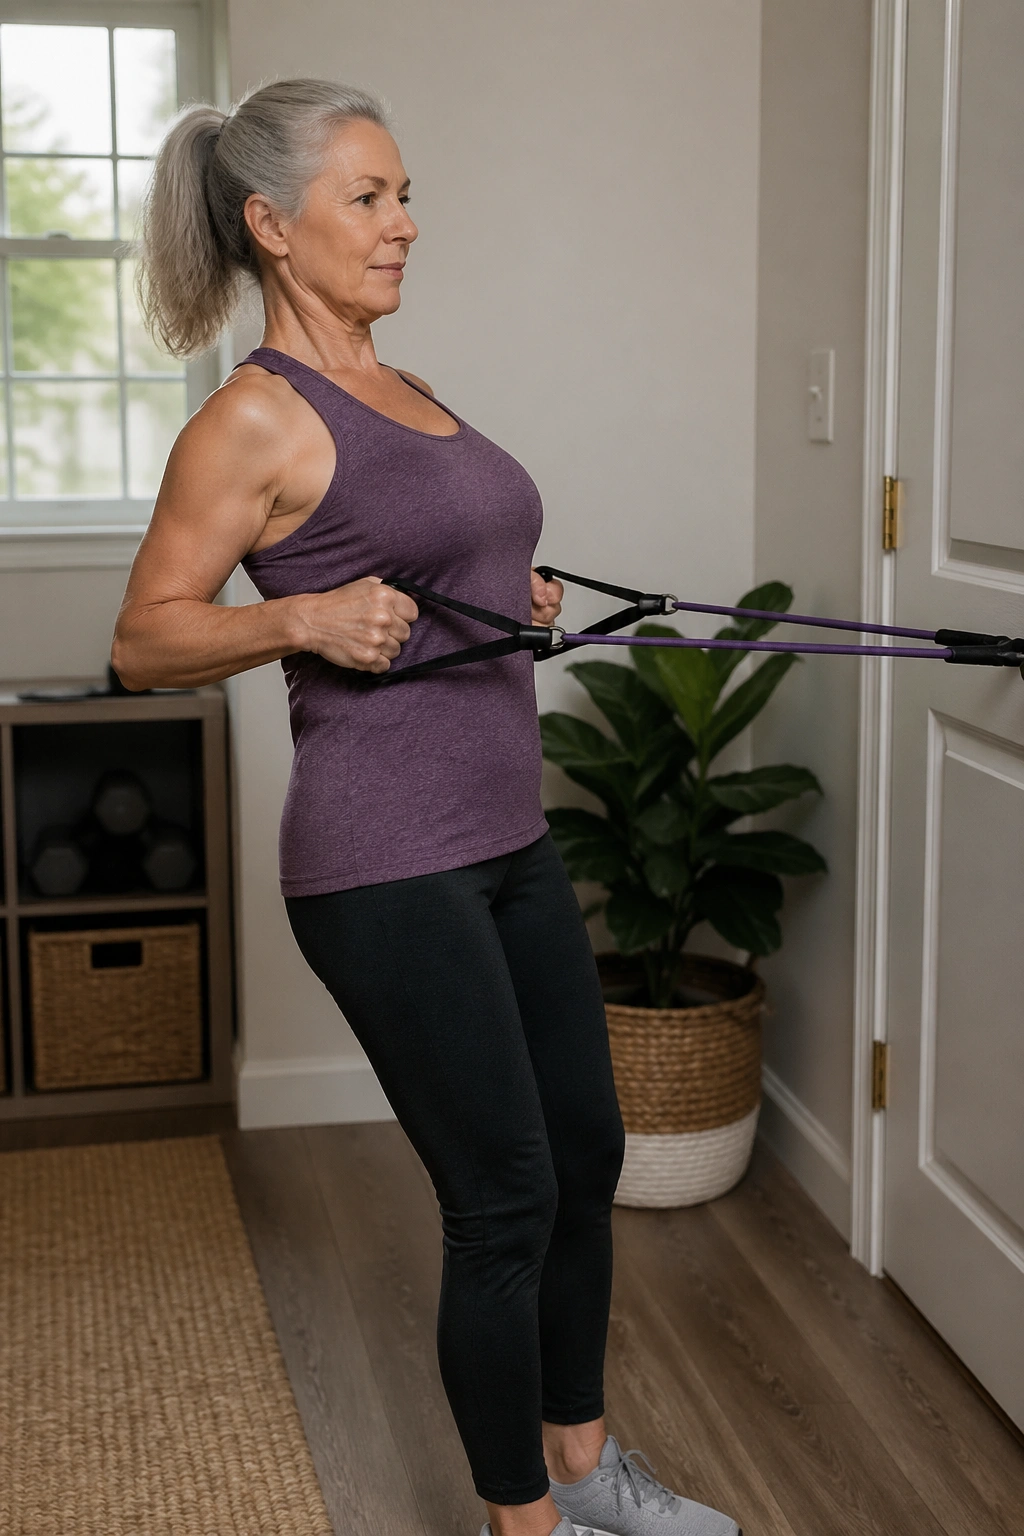
If your posture folds forward by lunchtime, your workouts will feel harder than they need to. Band rows fix part of that problem while quietly training the midsection to resist sway and overextension.
Anchor a resistance band at chest height in a closed door or around a fixed post. Step back until there is mild tension in the band, soften your knees, and hold the handles with palms facing each other. Pull your elbows back toward your ribs, pause for a beat, then return slowly.
The brace matters here
As the band pulls you forward, your abdominal wall has to stabilize your trunk. That is the hidden gift in this move. You are not twisting, crunching, or yanking on your neck. You are learning how to hold your torso steady while your arms move, which is what your core is supposed to do most of the time.
A few cues I use a lot:
- Exhale as you pull.
- Keep your chin level.
- Do not lean backward to “win” the rep.
- Pause for 1 second with the shoulder blades pulled back.
- Aim for 10 to 15 reps for 2 to 4 sets.
Rows also support better walking mechanics. When your upper back is stronger, arm swing gets easier and your chest stays more open. That can make brisk cardio feel less cramped. It is not glamorous. I do not care. Unglamorous moves are often the ones that work longest.
6. Farmer’s Carries with Dumbbells or Grocery Bags
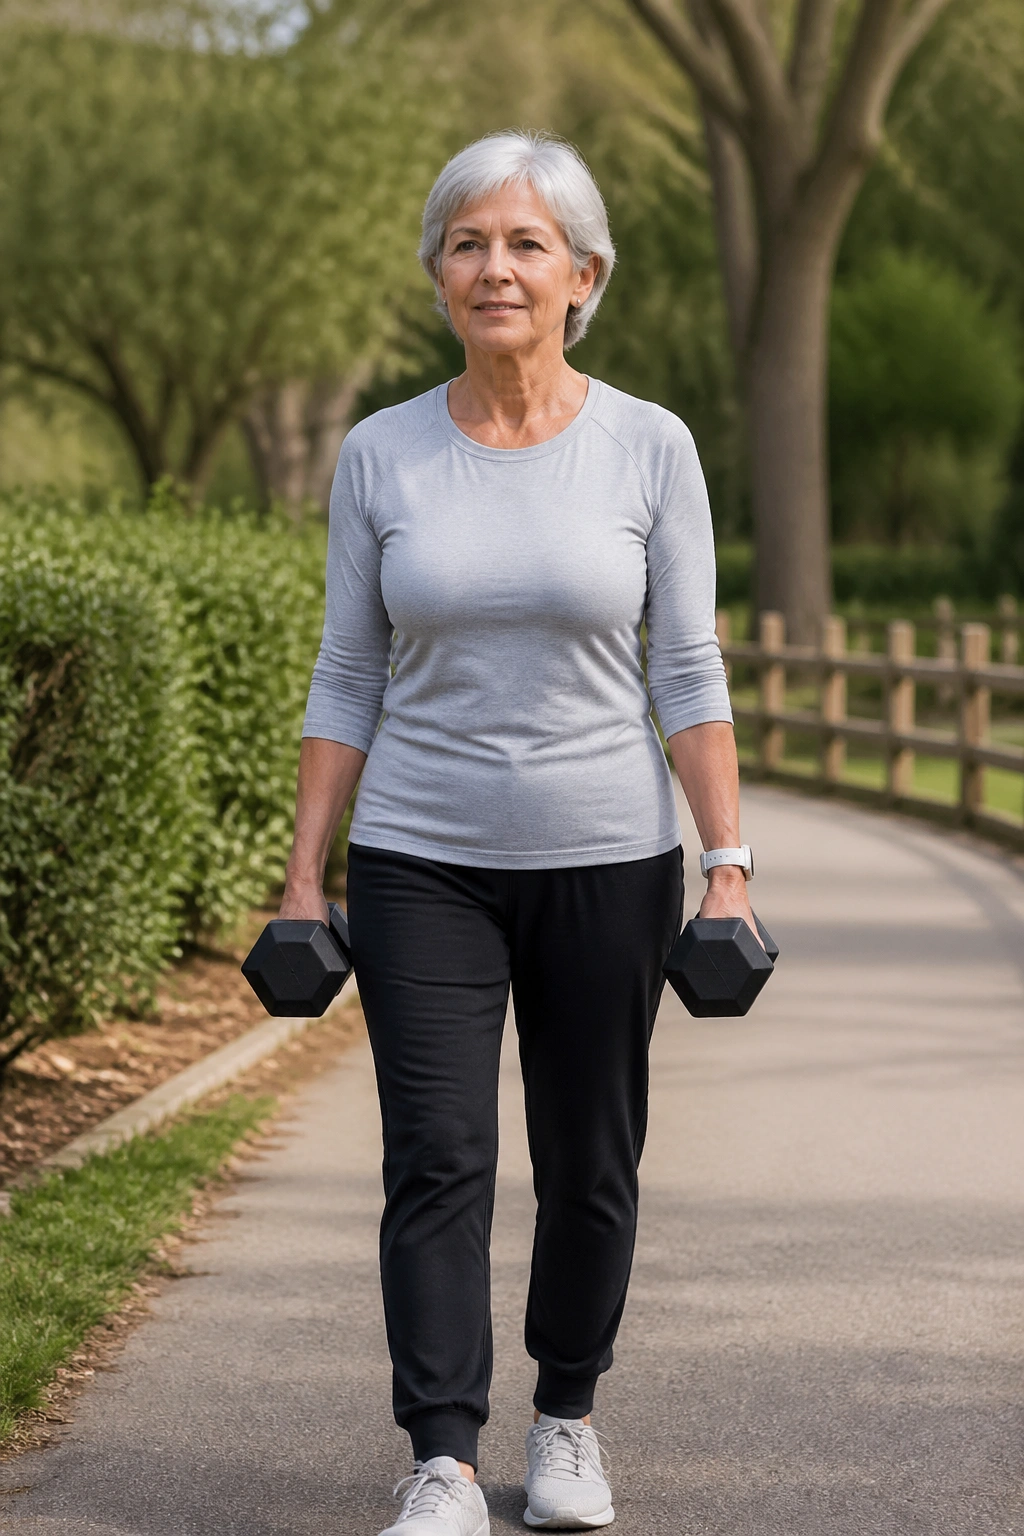
Carrying things is real life strength. No machine in a gym copies it well.
Pick up a pair of dumbbells, kettlebells, or even two equally loaded grocery bags. Stand tall, let your arms hang at your sides, and walk for 20 to 40 seconds without letting the weights bang against your legs or drag you into a side bend. Rest, then repeat for 4 to 8 rounds.
This is a belly fat workout in the honest sense, not the gimmicky sense. Carries do not “target the lower abs.” What they do is force your trunk, hips, grip, and upper back to work together while you move under load. Your heart rate climbs. Your posture tightens. Your step gets firmer.
A strong starting load for many women over 60 is 8 to 15 pounds in each hand, though some will need less and some can handle more. You should feel challenged by the last 10 seconds, not panicked by the first 5. If both weights feel like too much, try a suitcase carry with one weight in one hand, then switch sides. That version lights up the side waist fast because your body has to fight the urge to tip.
I would pick carries over side bends every day of the week. They train the core the way daily life asks for it—steady, upright, under tension, moving through space.
7. Wall Push-Ups with an Added Knee Drive
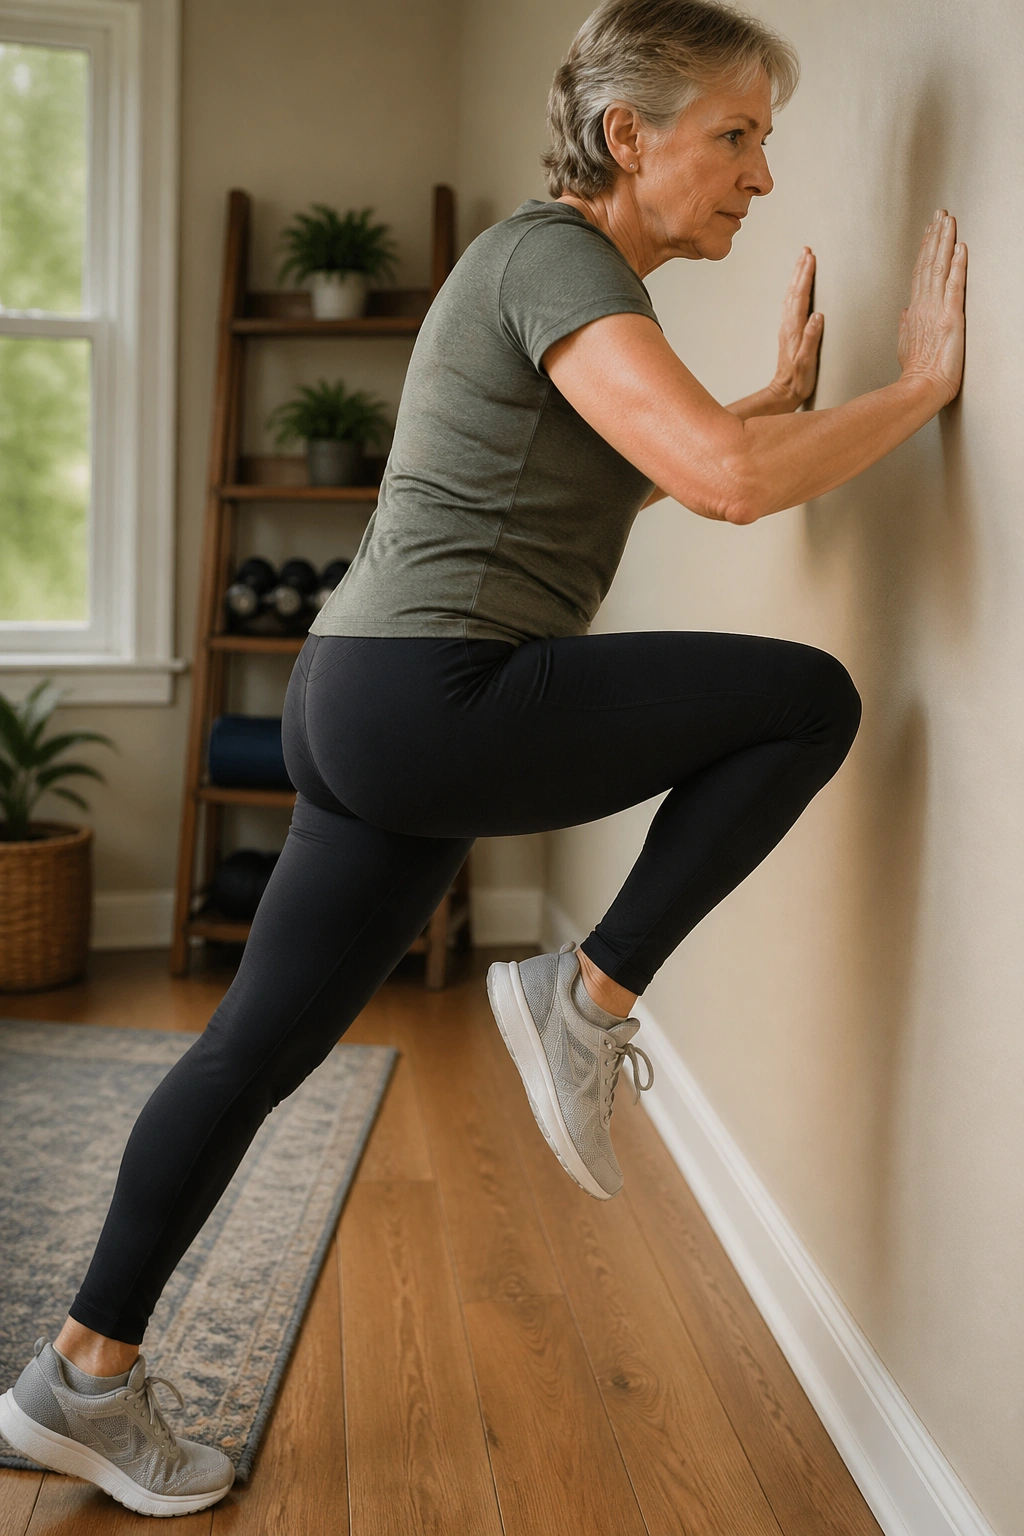
Push-ups for a smaller waist? Yes, when you use them well.
A wall push-up is friendly to wrists, shoulders, and confidence. Add a knee drive after each rep, and it becomes a neat upper-body-plus-core combination that gets more done in less time.
Stand facing a wall with your hands a little wider than shoulder-width. Walk your feet back until your body is in a straight line from head to heel. Lower your chest toward the wall, press back, then bring one knee up toward your chest before placing the foot down again. Alternate sides.
Why the wall works so well
Floor push-ups are fine if you own them. Many women over 60 do better on a wall or sturdy countertop because the angle cuts joint strain while still training the chest, shoulders, triceps, and trunk. You can also keep breathing normally, which matters if you tend to hold your breath on effort.
Try 2 to 3 sets of 8 to 12 push-ups, pairing each rep with a knee drive. If the wall becomes easy, move to a countertop. If your shoulders complain, bring your hands a bit higher and keep the elbows about 30 to 45 degrees from your torso rather than flaring them straight out.
This one sneaks up on you. After a set or two, the chest is warm, the arms feel worked, and the midsection has done more stabilizing than most people expect.
8. Shadowboxing Rounds for Women Over 60 Who Want Less Belly Fat
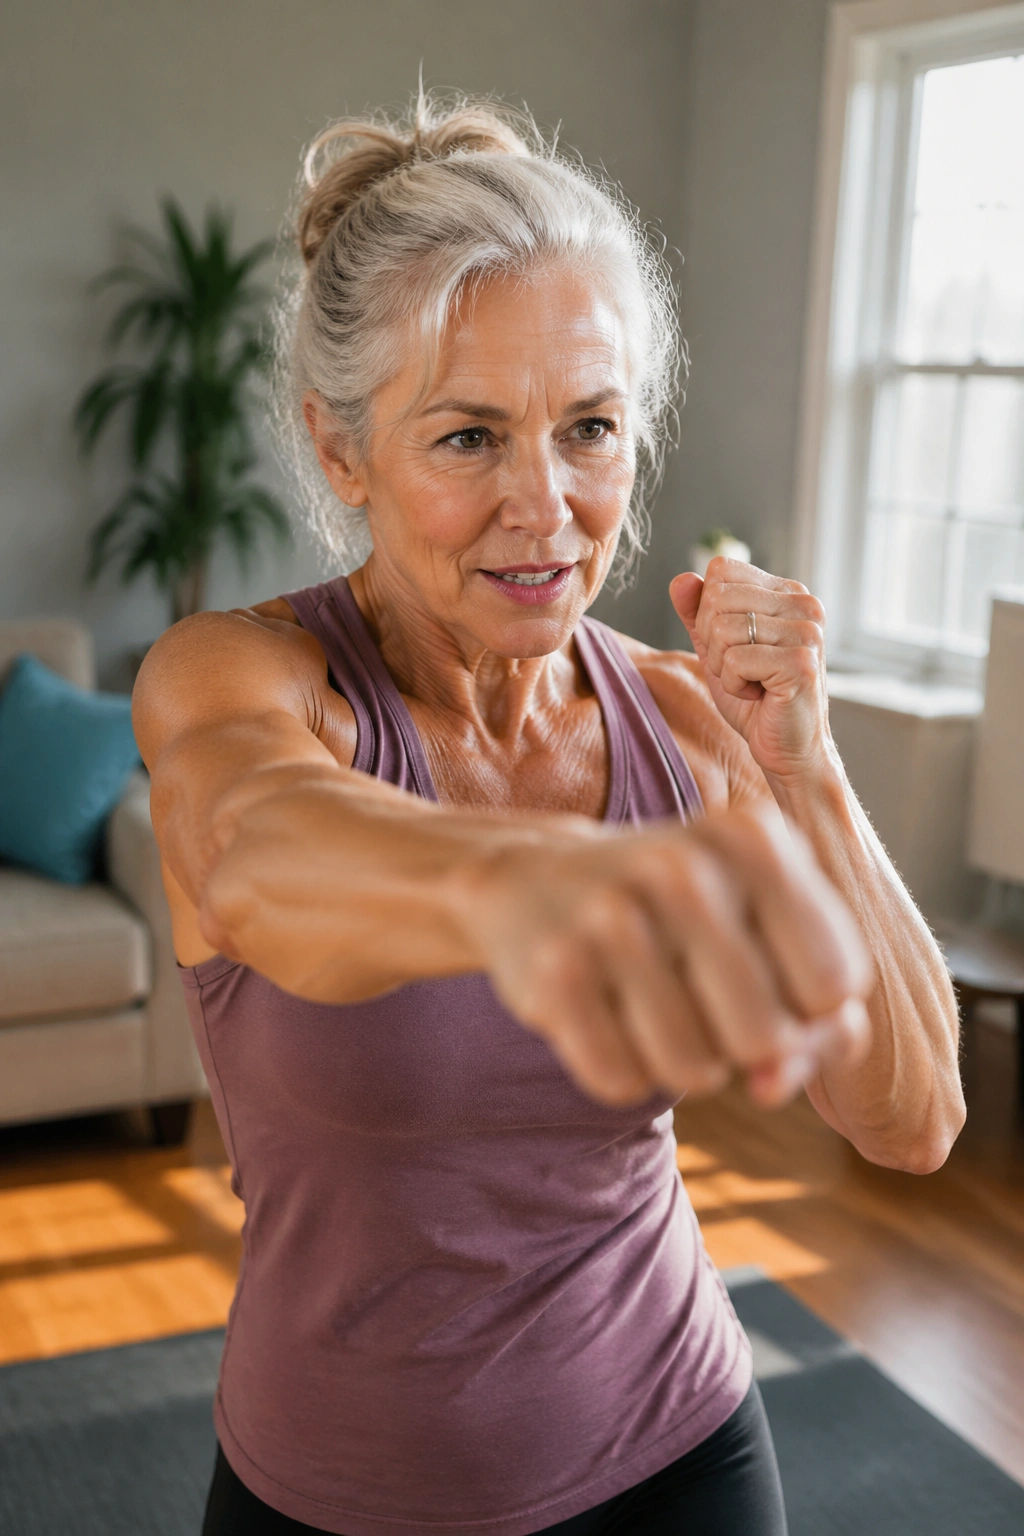
A few fast punches can leave you breathing hard in a hurry.
Shadowboxing is one of my favorite cardio options for women who hate machines and get bored with plain marching. It asks for rhythm, coordination, footwork, and arm speed, all without impact if you keep it controlled.
Stand with feet about hip-width apart, knees soft, and hands up near cheek level. Throw a jab with one arm, a cross with the other, then reset. Keep the punches snappy rather than forceful. You are training speed and rhythm, not trying to knock down a door.
A smart round plan:
- Punch for 30 to 45 seconds
- Rest or march in place for 20 to 30 seconds
- Repeat for 6 to 10 rounds
Mix in jabs, crosses, uppercuts, and short hook patterns if your shoulders tolerate them. Let the feet pivot a little, though not wildly. If you have osteoporosis or a touchy back, keep trunk rotation modest and avoid whipping through the spine.
The reason shadowboxing works so well is simple: the arms tire, the legs keep moving, and your heart has to keep up. Wear thin-soled sneakers or work on a mat if the floor feels slick. And loosen your hands. Clenched fists waste energy and make the neck tense—two things you do not need.
9. Mini Squat to Overhead Press
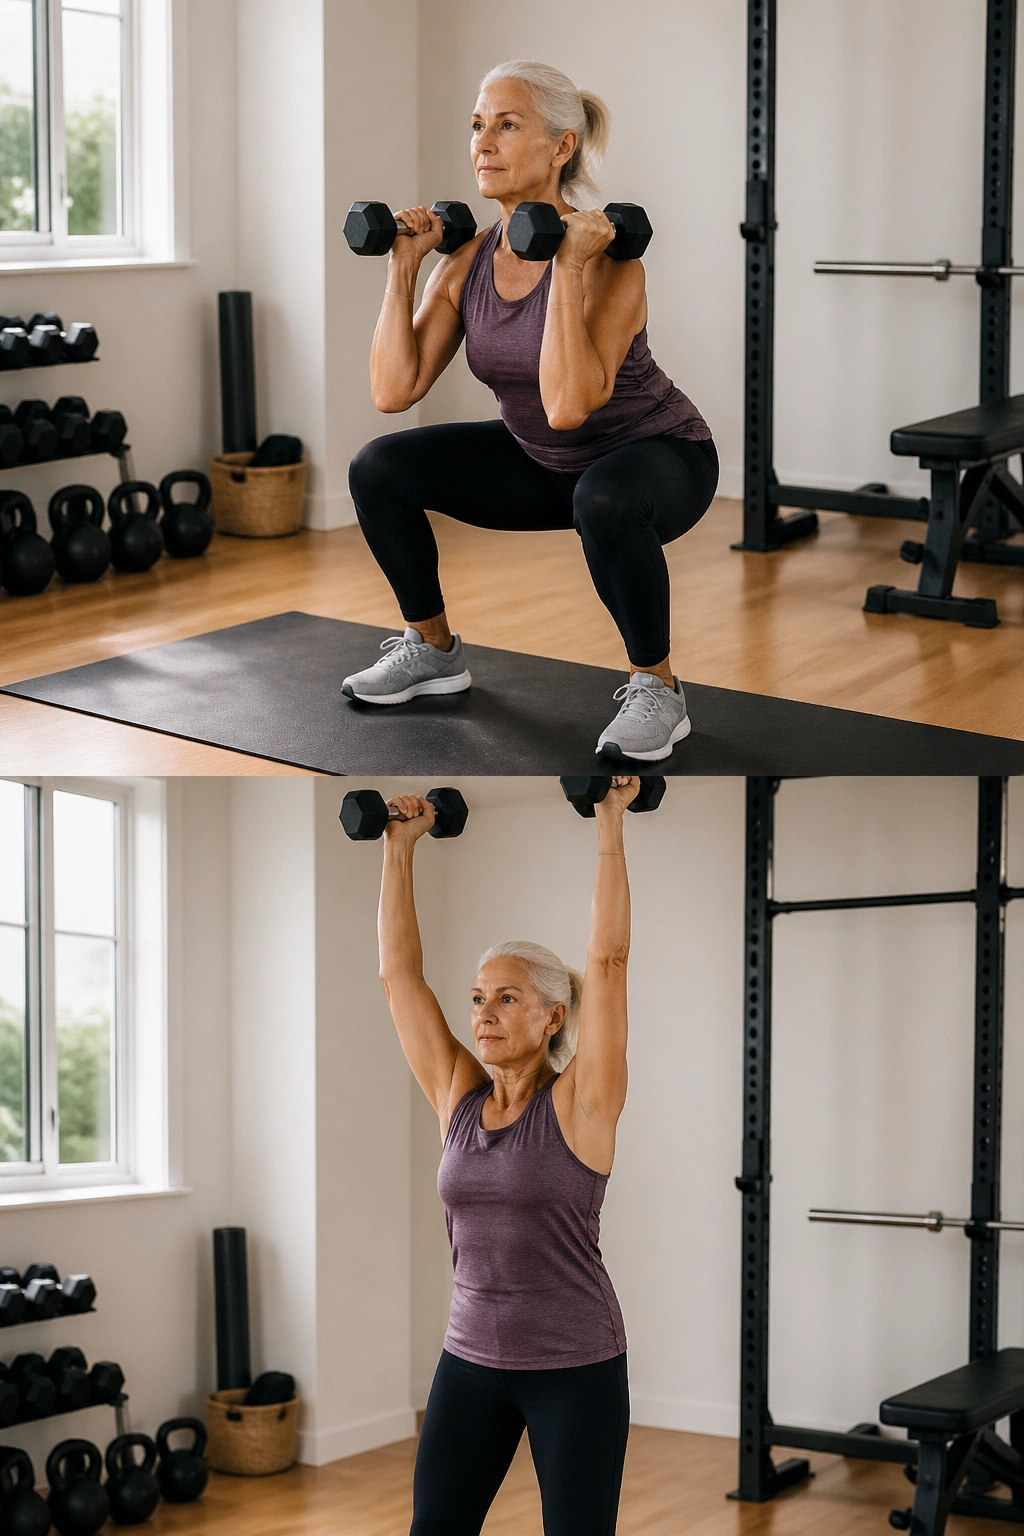
Light dumbbells can make your lungs work. They do not need to be heavy to count.
The mini squat to overhead press links lower-body strength with an upper-body push, which means more muscle working at once and a higher heart-rate response than either move alone. That matters when the goal is trimming belly fat while keeping the joints calm.
Hold a pair of 3- to 8-pound dumbbells at shoulder height. Sit your hips back into a shallow squat—think 4 to 6 inches down, not an all-out deep squat—then stand and press the weights overhead. Lower the dumbbells back to your shoulders with control and repeat.
Use 6 to 10 reps for 2 to 3 sets. Exhale as the weights go up. If you feel pressure in your face or catch yourself bearing down, the load is too heavy or the pace is too fast. Slow it down.
Shoulder trouble changes the rules here. If pressing overhead pinches, swap the press for a front reach, a chest press with bands, or no arm move at all. The squat still has value. Women with blood pressure concerns often do better with a controlled standing press rather than a hard overhead drive.
This one has a nice side benefit: it teaches you to transfer force from the feet through the trunk into the arms. That chain weakens with age unless you ask it to stay sharp.
10. Glute Bridges for a Stronger Waistline from the Ground Up
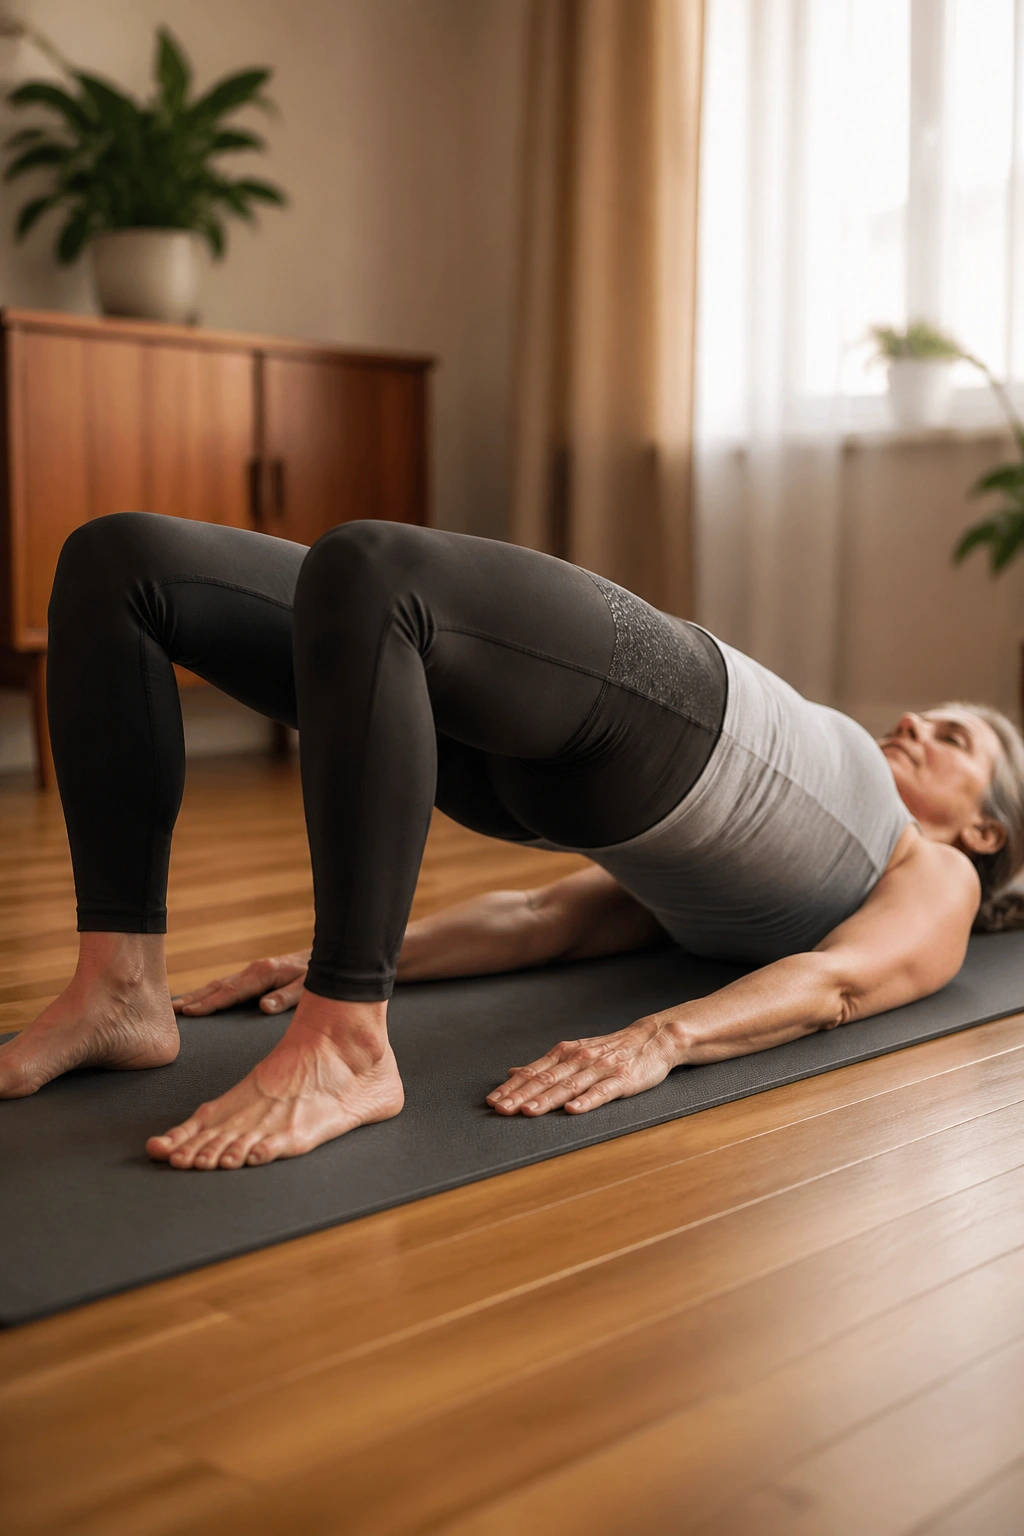
Your glutes matter.
When the hips are weak, the low back often tries to take over. Glute bridges help correct that by training the backside while teaching the ribs and pelvis to line up better—a small detail, though one you feel in walking, stairs, and long bouts of standing.
Lie on your back with knees bent and feet flat, about 8 to 10 inches from your hips. Press through your heels, squeeze your glutes, and lift until your knees, hips, and shoulders form a gentle line. Hold for 2 seconds, then lower slowly.
Aim for 10 to 15 reps and 2 to 4 sets. If your hamstrings cramp, bring the heels a bit closer to your body and think “glutes first” before you lift. If getting to the floor is awkward, try them on a firm bed at first—though a solid floor gives better feedback.
This is not a giant calorie-burn move by itself. It earns its place because stronger hips make the higher-output workouts easier to tolerate. Better walking. Better step-ups. Less low-back grumbling after chores. Sometimes the move that changes your shape is not the flashy one; it is the move that lets you keep doing the rest.
11. Bird Dog Holds
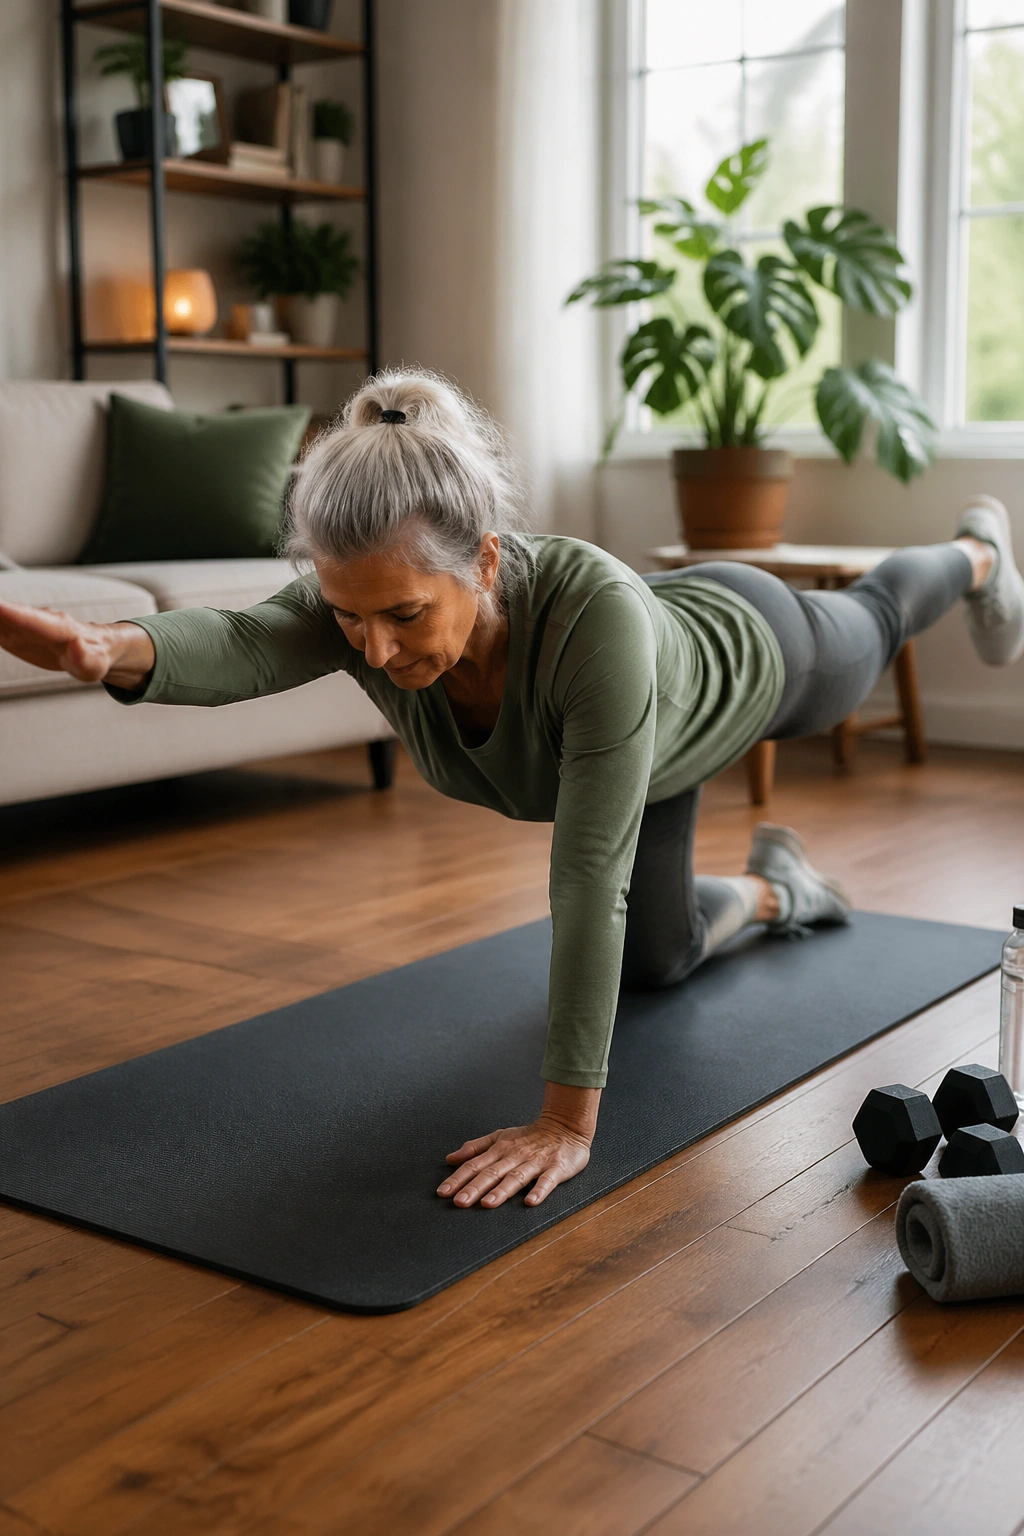
If your balance gets shaky during standing exercises, bird dog holds give you a calmer way to train stability.
Come to hands and knees with your hands under your shoulders and your knees under your hips. Tighten your midsection as if zipping up a snug pair of pants, then reach one arm forward and the opposite leg back. Pause for 2 to 3 seconds, return, and switch sides.
Make the floor friendlier
- Fold a towel under your knees if kneeling feels rough.
- Use fists or hold light dumbbells if flat palms bother your wrists.
- Shorten the reach if your back starts sagging.
- Do 6 to 8 reps per side for 2 to 3 sets.
The goal is not height. A leg kicked too high usually means the low back is arching. Keep the hips level, the gaze down, and the movement quiet. Quiet is harder than dramatic.
Bird dog is one of those drills that looks easy until you try to stop every wiggle. Done well, it trains the deep core and the muscles around the hips and shoulders to stabilize together. That skill carries into almost everything on this list.
12. Dead Bug Reps
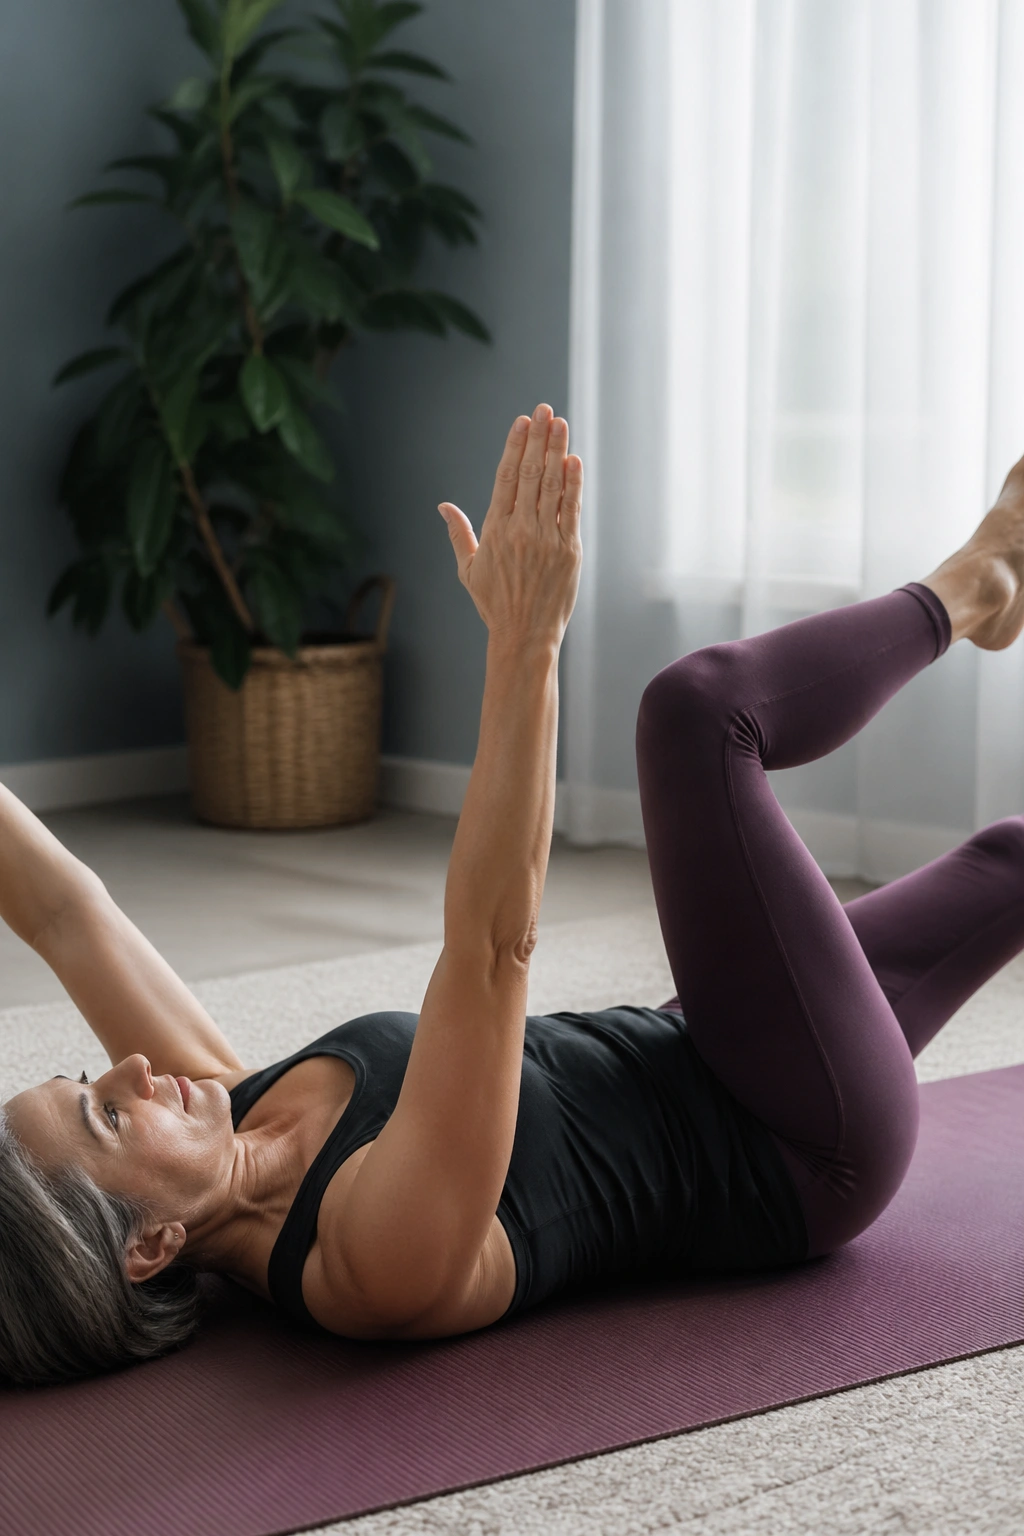
The dead bug looks harmless until you try to keep your ribs down through the whole set. Then it turns into one of the best anti-arching core exercises around.
Lie on your back with your arms pointed toward the ceiling and your knees bent at 90 degrees over your hips. Gently press your low back toward the floor without flattening yourself so hard that you cannot breathe. Lower one heel toward the floor while the opposite arm reaches overhead, then return and switch sides.
Move slowly—about 3 seconds down, 1 second pause, 2 seconds up works well. Stop the leg before your back pops up or your ribs flare. That stop point is your range. It may be halfway down at first. Fine. That still counts.
Start with 5 to 8 reps per side. If both arm and leg together feel messy, keep the arms still and lower only the legs. If getting onto the floor is too much on a given day, use the bed and accept that the support will make the exercise easier.
Dead bugs do not burn big calories. I still rank them high. A stronger brace lets you walk faster, carry heavier bags, and squat with more control. That kind of payoff spreads into every other session you do.
13. Standing Knee Drives at the Counter
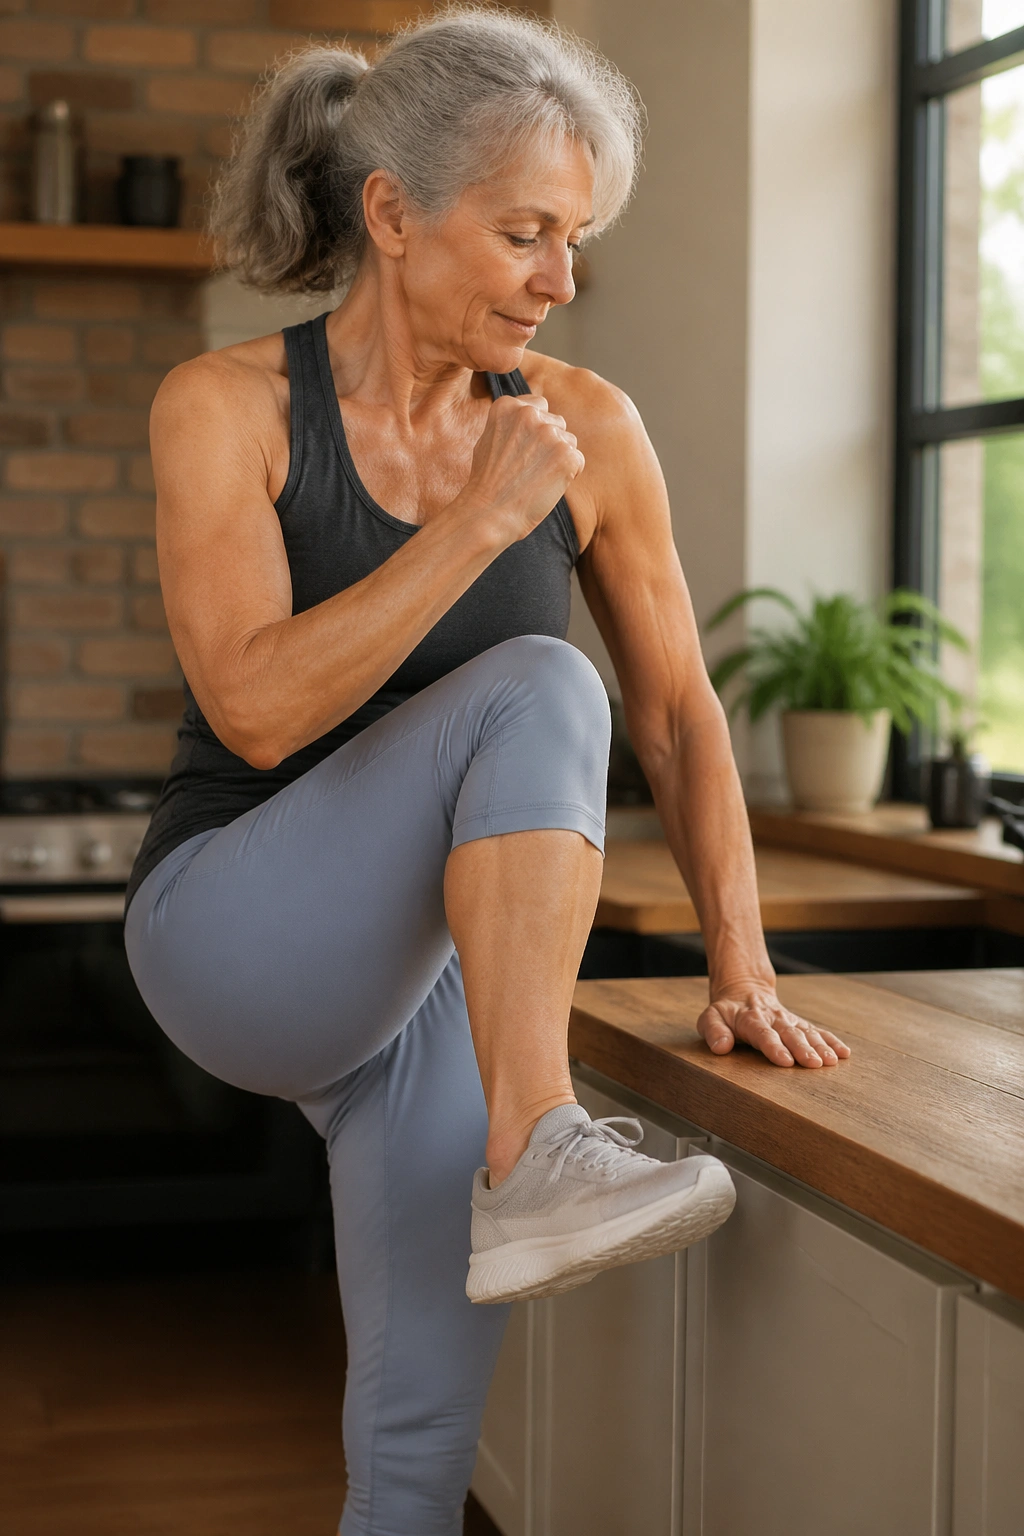
No mat. No floor transfer. No problem.
A standing knee drive can be done at a kitchen counter, next to the back of a sturdy chair, or in the middle of the room if your balance is solid. It hits the lower abs and hip flexors a bit, though the real value is the cardio bump and balance challenge when you do it in timed rounds.
Stand tall, hold the counter lightly if needed, and drive one knee up toward hip height while pulling your opposite arm down as if you are crunching standing up. Place the foot back down and repeat with rhythm. After 20 to 30 seconds, switch sides.
A brisk little finisher
- Right knee drives for 30 seconds
- Left knee drives for 30 seconds
- Side steps for 30 seconds
- Heel raises for 30 seconds
- Rest for 30 seconds
- Repeat 3 to 5 rounds
Lift with control rather than snapping the knee up. A short pause at the top makes the trunk work harder. If your hip pinches, lower the knee height and keep the torso tall.
This is one of those sneaky moves that fits into real life. Waiting for the kettle? Two rounds. Watching the news? Three rounds. Belly fat loss likes accumulated work, not only formal workouts in matching clothes.
14. Wall Side Plank Holds
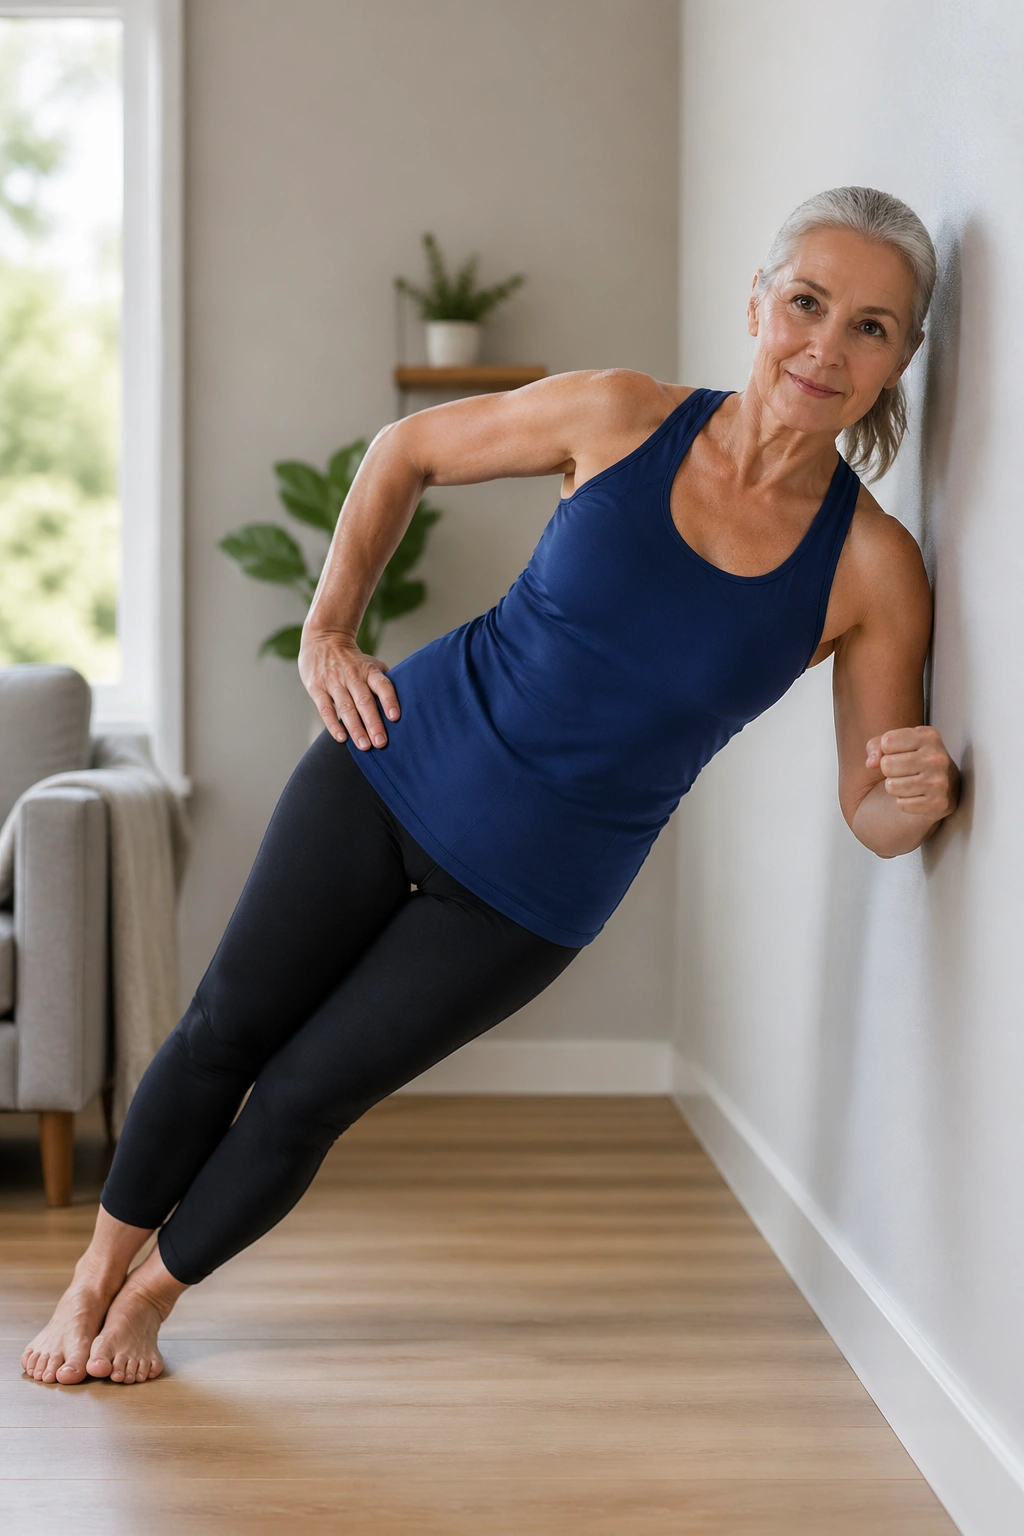
I like wall side planks more than floor side planks for many beginners past 60. They train the side waist without the shoulder strain and awkward floor setup that makes floor planks a hard sell.
Stand sideways to a wall and place your forearm on it with the elbow under the shoulder. Step your feet away from the wall until your body forms a straight diagonal line. Press the forearm into the wall, lift through the side of your waist, and hold.
Start with 15 to 20 seconds per side for 2 to 4 rounds. As you get stronger, move your feet a bit farther from the wall or extend the top arm upward.
A few details matter here:
- Keep your head in line with your spine.
- Do not let the lower ribs sag toward the wall.
- Stack one foot slightly in front of the other if balance feels shaky.
- Breathe out slowly every few seconds instead of holding tension.
These holds train the obliques in a way that matters for daily life: resisting side bend, stabilizing the trunk, keeping the pelvis from swaying. If your shoulder does not like this position, swap it for a suitcase carry. Same region, different tool.
15. Water Walking or Aqua Jogging
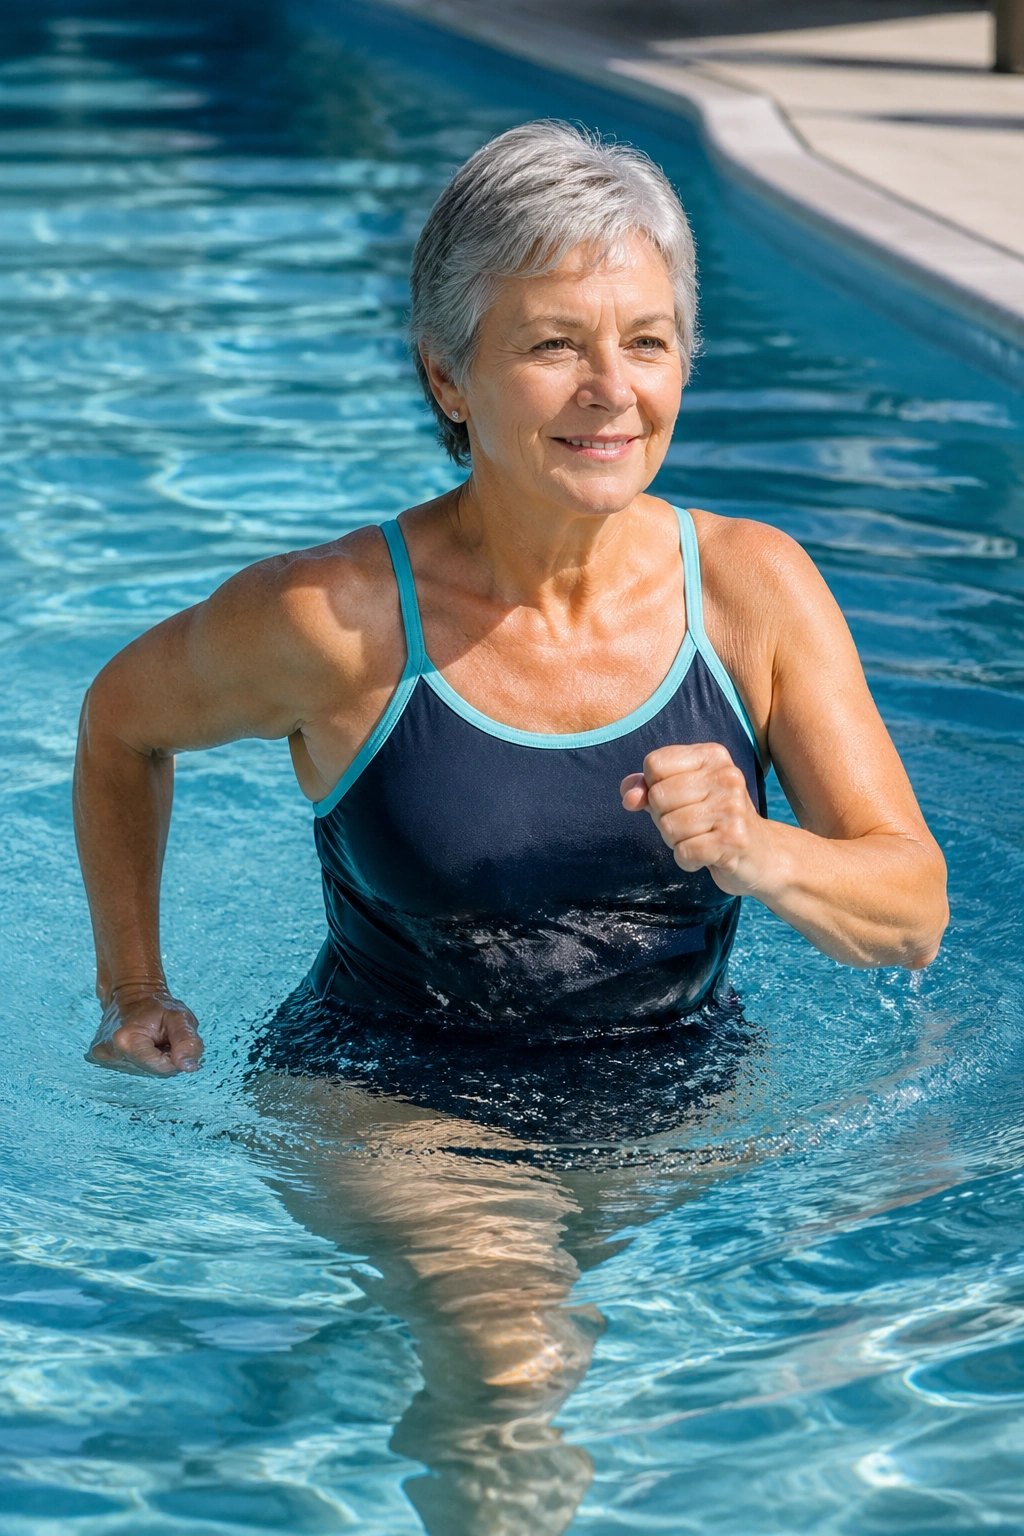
The pool gives you resistance in every direction and takes load off the joints at the same time. That combination is hard to beat if your knees complain on land.
Water walking in chest-deep water can turn into a strong cardio session fast if you stop paddling lazily and start driving through the water. Walk forward, backward, and sideways. Push the water behind you with your hands. Pick up the pace for short blocks, then recover.
Try 15 to 30 minutes with this pattern:
- Walk briskly for 1 minute
- Ease off for 1 minute
- Repeat for the length of your session
Deep-water jogging with a flotation belt is another option if you are comfortable in the pool. It keeps impact near zero while making the core and hips work harder than many people expect. Water dumbbells can add upper-body work, though I would master plain walking first.
One caution: water can mask effort. You may not feel sweaty, and the cool temperature can trick you into thinking you are not working. Use your breathing as the gauge. If you are breathing deeper and your arms and legs feel loaded, the session is doing its job.
16. Stationary Bike Intervals, a Smart Belly Fat Workout for Women Over 60
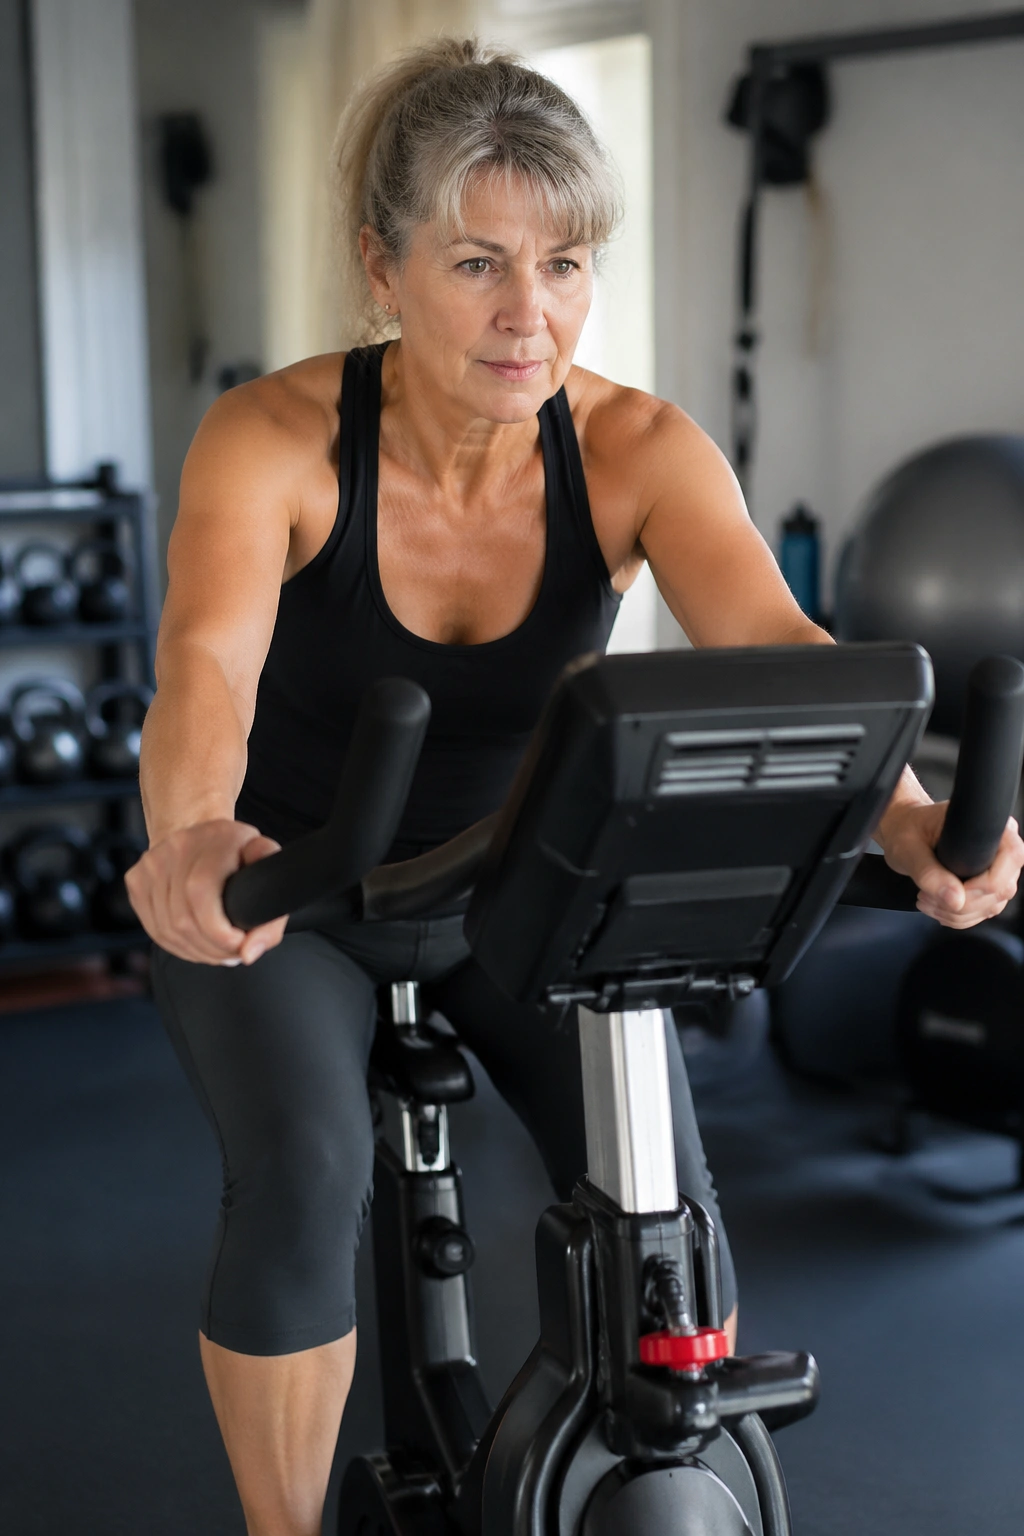
A bike makes progress easy to measure, which is one reason I like it for belly fat loss. You can track time, resistance, and cadence without guessing.
A recumbent bike works well if balance or back fatigue makes upright cycling uncomfortable. An upright bike gives you a little more trunk demand. Both can work. What matters is whether you pedal hard enough during the work blocks to break out of the lazy middle.
A reliable interval session
- Warm up for 5 minutes at an easy pace.
- Pedal harder for 40 seconds.
- Recover for 80 seconds.
- Repeat 8 to 12 rounds.
- Cool down for 5 minutes.
During the harder block, aim for a pace that makes conversation choppy. Resistance should feel firm but smooth—enough to challenge the legs without grinding the knees. On many bikes, a cadence around 70 to 90 RPM suits women who have cycled before, though plenty will prefer a slower turnover with a touch more resistance.
Bikes shine on bad-weather days and on weeks when the joints want less pounding. They are also forgiving when energy is uneven. Even 12 to 18 minutes of intervals counts. A short ride done with intent beats a long ride spent checking the clock.
17. Low-Impact Dance Cardio Circuits
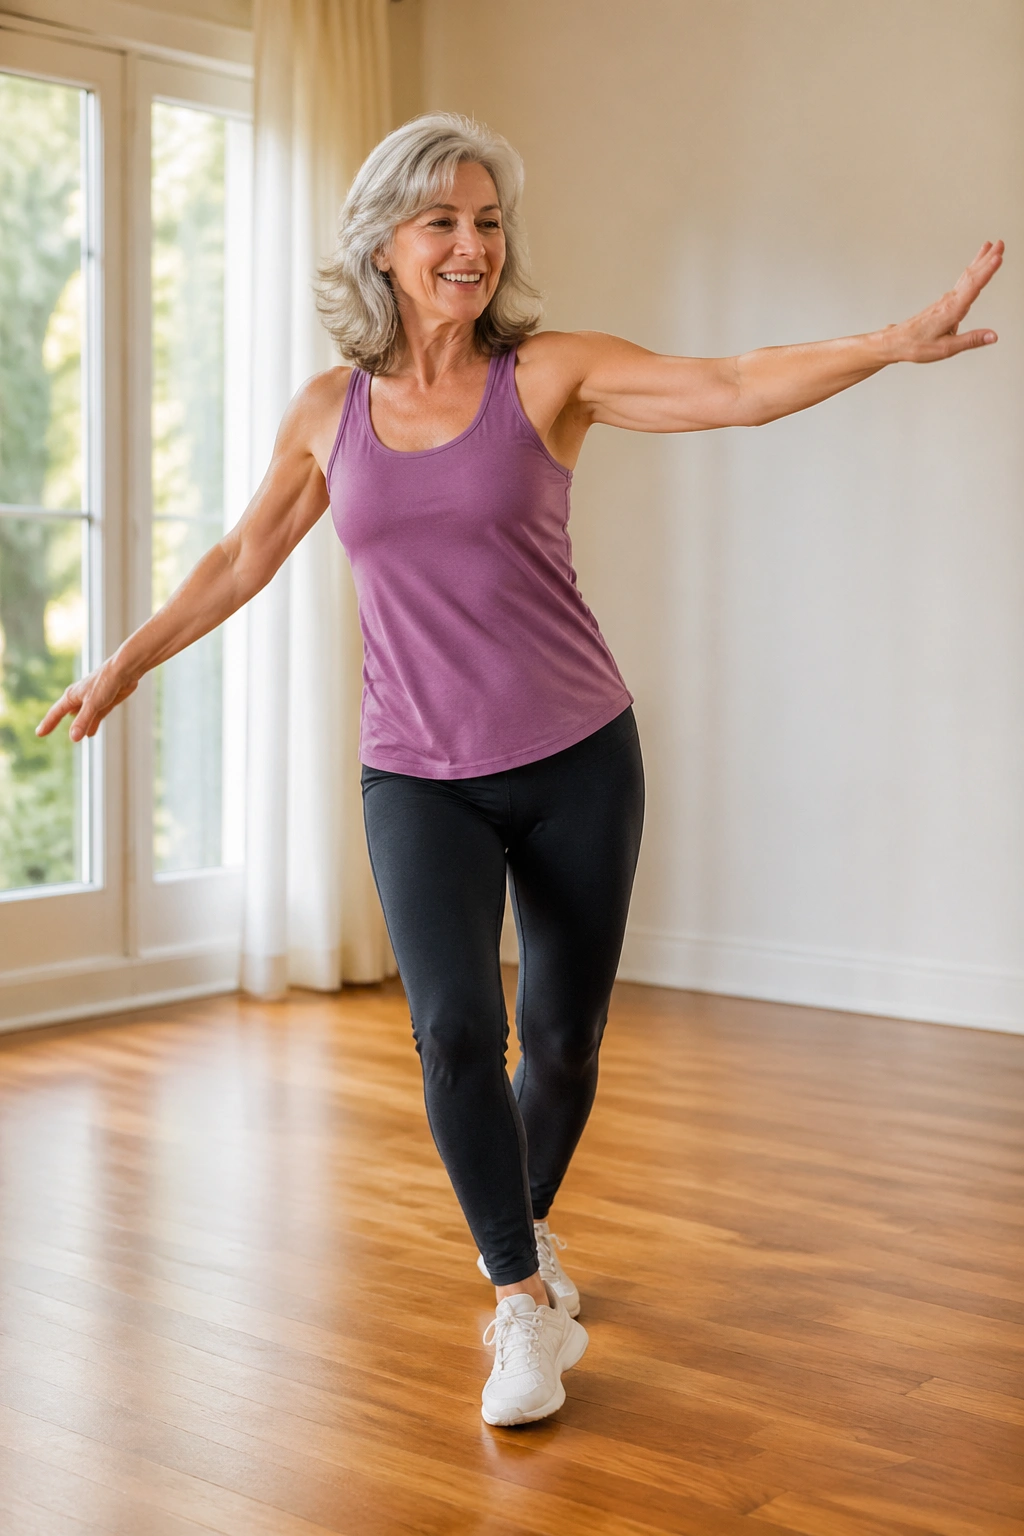
The best workout on paper is worthless if you cannot stand it.
That is why low-impact dance cardio deserves a spot here. If music makes you move longer than a timer does, use that. Compliance is not a boring side issue; it is half the battle.
Build a circuit from step-touches, hamstring curls, side taps, grapevines without the jump, knee lifts, and overhead reaches if your shoulders allow them. Keep one foot close to the floor at all times. No hopping needed.
A song-by-song setup
- Song 1: step-touch and arm swings for 3 to 4 minutes
- Rest for 1 minute
- Song 2: grapevine, knee lifts, side taps for 3 to 4 minutes
- Rest for 1 minute
- Song 3: hamstring curls, marches, boxer steps for 3 to 4 minutes
Repeat with a new playlist if you want a longer session. A 15- to 25-minute dance workout can stack up a solid calorie burn without feeling like punishment. If you have downstairs neighbors, your floors—and your knees—will appreciate the low-impact version anyway.
I have watched women stick with dance circuits long after they gave up on machines. That matters more than exercise snobbery. Belly fat responds to repeatable work, and repeatable work often looks a lot more like moving to a favorite song than suffering through a joyless routine.
Final Thoughts
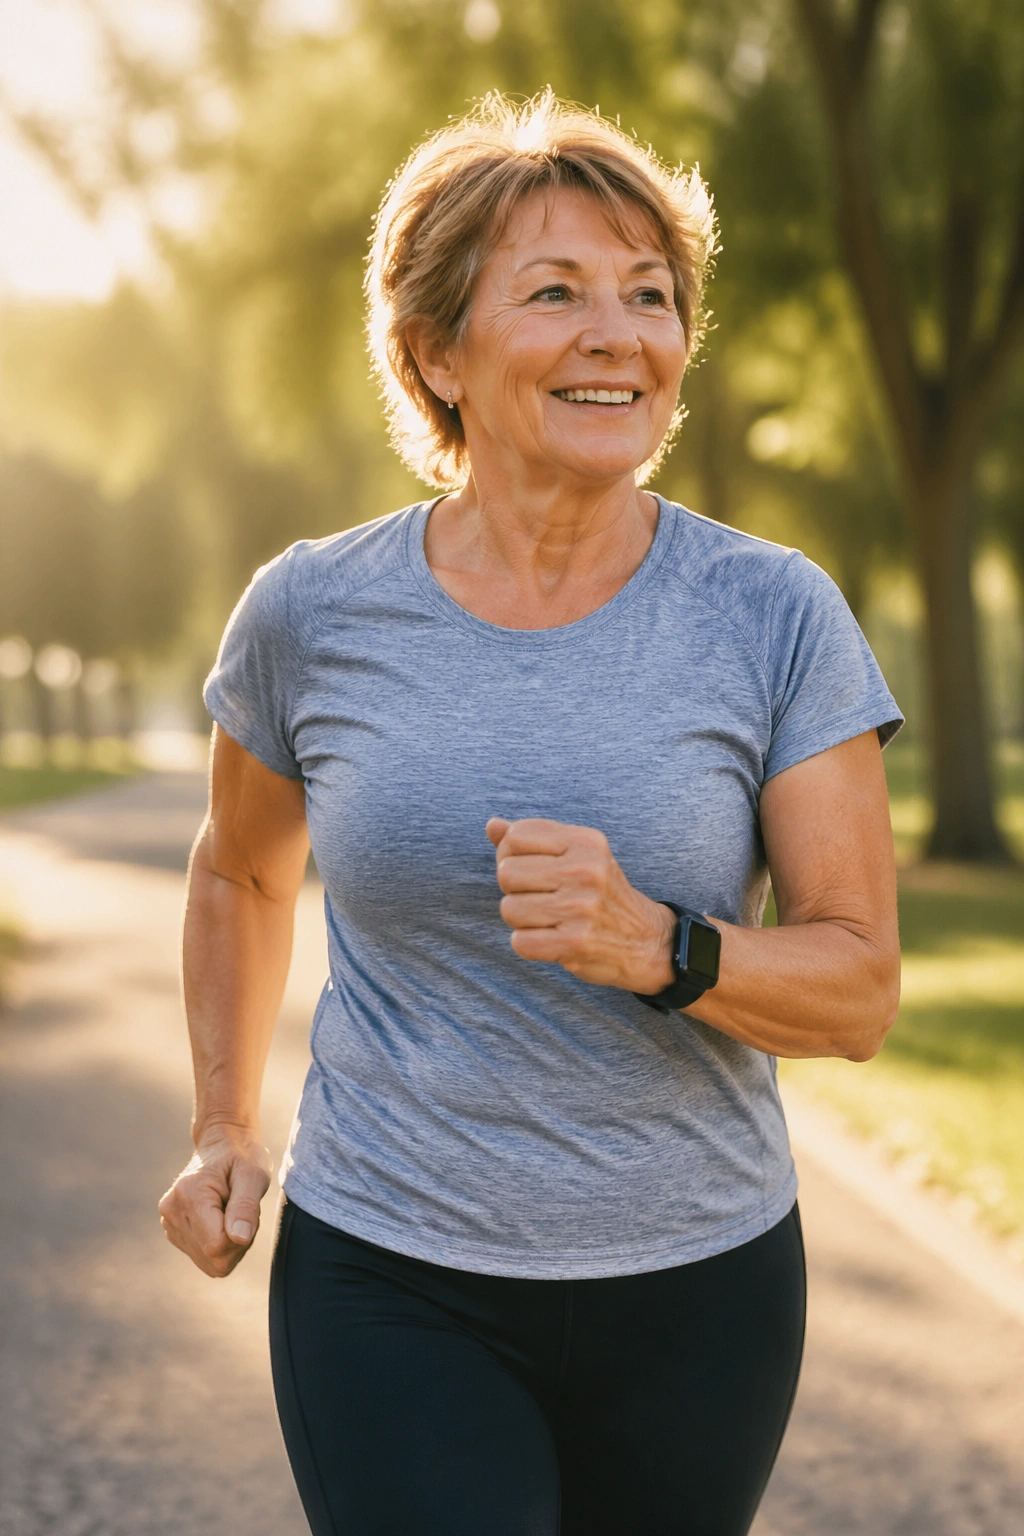
If you want these workouts to change your waistline, do not try all 17 in one heroic week. Pick 4 to 6 moves that cover the bases: one interval cardio option, one leg-strength move, one upper-body move, one carry, and one core drill. Stay with those for a month or two, then add variety if you still want it.
A strong starting week could look like brisk walking intervals twice, chair sit-to-stands twice, band rows twice, carries twice, and dead bugs or bird dogs on most days for 5 to 8 minutes. That is not flashy. It is the kind of plan that survives busy schedules, sore knees, travel, and plain old low motivation.
Skip the idea that you need to feel wrecked after every session. Your waist does not care whether a workout looked hard on social media. It responds to steady effort, enough muscle work to protect lean mass, and cardio that asks a little more of you than a casual stroll. Keep showing up, keep the form clean, and let the boring consistency do its quiet work.
