



The first smart workout after birth is usually the one that looks almost boring.
Postpartum workouts at home need a different job than the fitness plans people love to shout about online. Your body has been through pregnancy, labor, surgery for some, sleepless nights for most, and a whole lot of carrying, feeding, twisting, and hunching. That is a messy mix. So the best place to start is not with punishment or sweat-dripping heroics. It’s with control, breathing, and movements that make your core and hips feel organized again.
The details matter more than most people admit. If you leak a little when you stand, feel heaviness in the pelvic floor, notice doming along the midline of your belly, or get a tugging feeling around a c-section scar, that’s not a sign to push harder. It’s a sign to choose a different move. Small, clean reps beat big messy ones. Every time.
So this list starts low and stays honest. Some of these are recovery drills. Some are strength moves. Some are cardio that won’t batter your joints or pressure system. All of them can be done at home with a mat, a chair, a wall, a stair, or a household item that doesn’t mind being lifted for 30 seconds.
1. Diaphragmatic Breathing with Rib Expansion
Breathing is the first rep. That sounds almost too simple, but it is the piece most postpartum bodies are missing when everything feels tight, weak, or disconnected. A slow inhale that spreads the ribs and a long exhale that gently narrows them helps reset pressure in the trunk, which matters for the pelvic floor, the deep core, and even how your back feels by the end of the day.
What It Should Feel Like
- One hand on your ribs, one on your belly.
- Ribs widening out to the sides on the inhale.
- A quiet, longer exhale, almost like you’re fogging a mirror.
- The lower belly drawing in slightly, not hard.
Do 5 to 8 breaths while lying down with knees bent, or sit upright if lying flat feels weird. If you catch yourself sucking in or bracing your stomach, ease off. This is not an abdominal workout yet. It’s a reset.
Tiny cue: try to make the exhale last a count of 6 while the inhale lasts a count of 4. Slow wins here. Every time.
2. Pelvic Floor Relax-and-Lift Practice
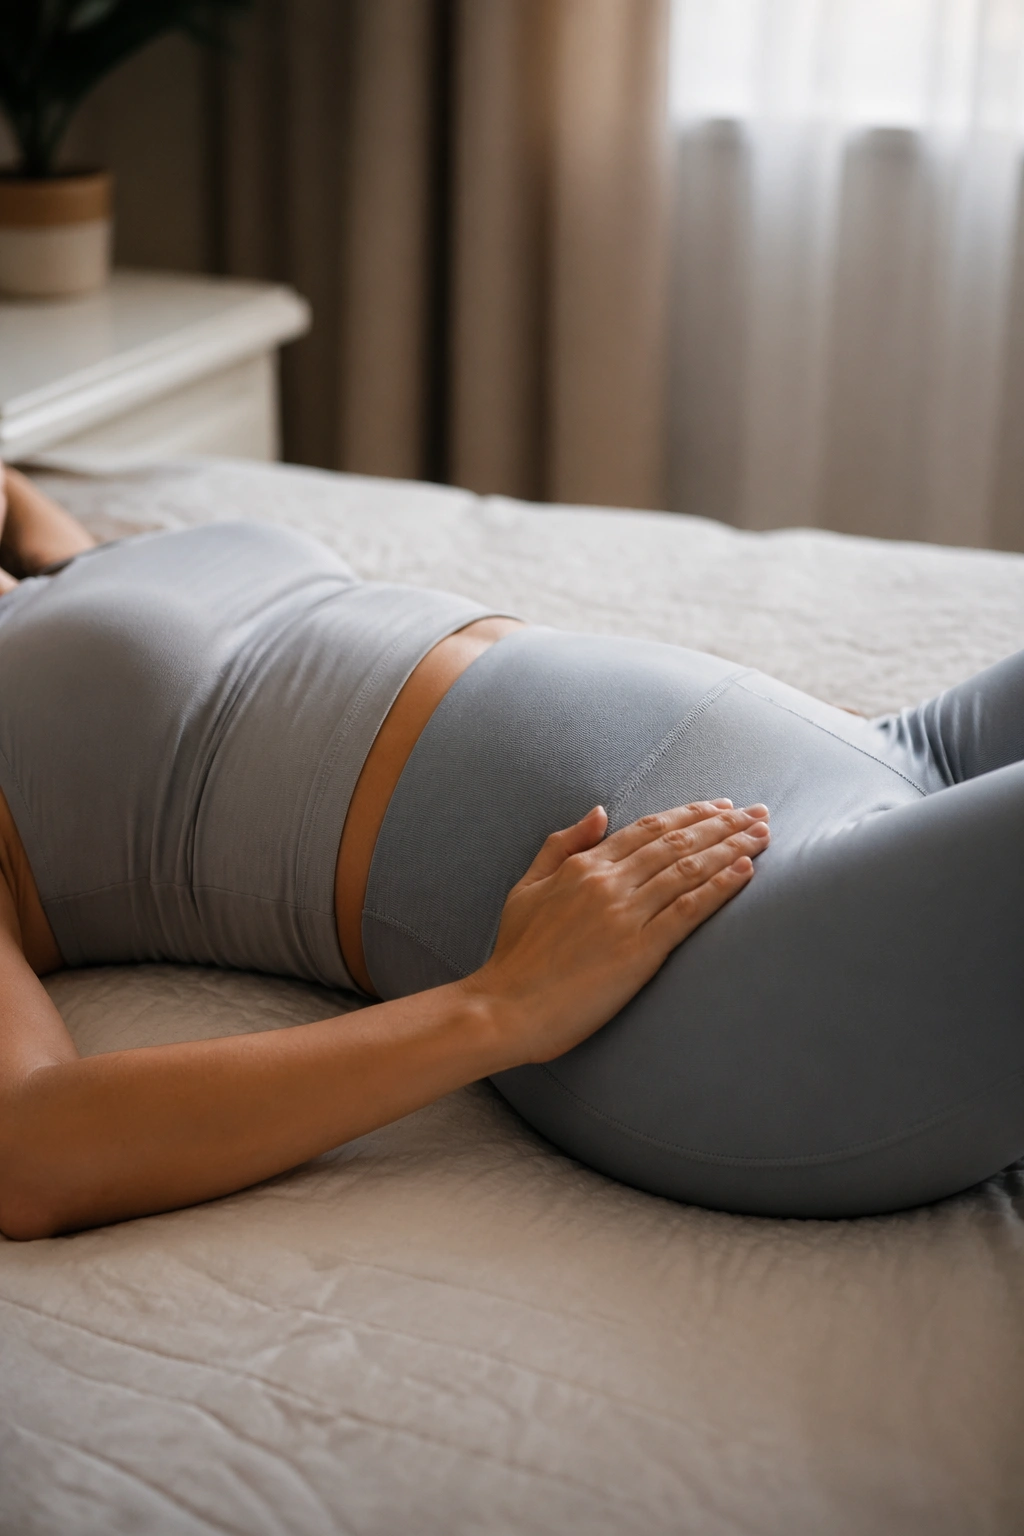
Why squeeze all day when the real skill is knowing how to relax and lift on purpose? A lot of people jump straight to hard Kegels and never learn the softer side of pelvic floor work, which is a problem if the muscles are already tense, sore, or guarding after birth.
The trick is to think of a gentle elevator, not a clamp. On the exhale, imagine the muscles at the base of the pelvis drawing up 20 to 30 percent. Then let them fully soften on the inhale. That full release matters. A lot. Tight muscles are not stronger just because they are clenched all the time.
What to watch for
- No butt squeeze.
- No breath holding.
- No pulling the belly in hard.
- No pain, burning, or pressure.
Start with 5 slow reps. If you feel any heaviness or a downward pressure, cut the effort in half. The goal is control, not force. That distinction saves people from doing too much too soon.
3. Heel Slides on the Floor
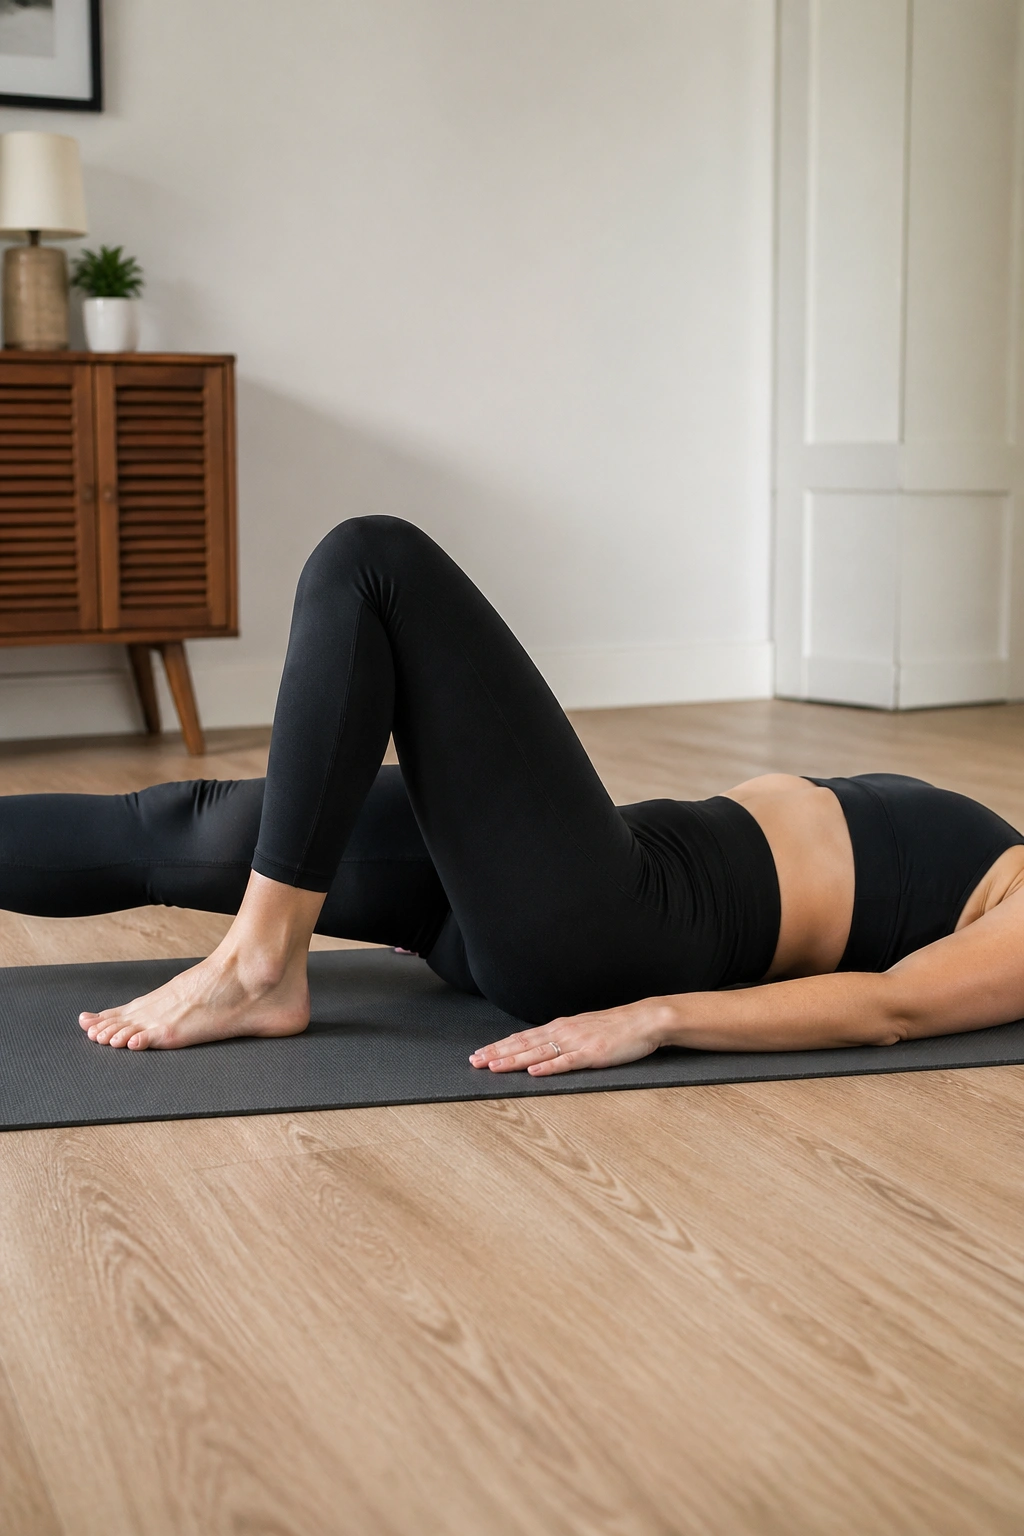
Heel slides are one of those ugly-simple exercises that work because they force honesty. You lie on your back with your knees bent, keep the pelvis quiet, and slowly slide one heel away from you while exhaling. If the belly domes or the low back arches off the floor, the movement is too big right now.
This is a very good early core drill because it asks your deep abdominal wall to hold shape without a lot of pressure. It also gives you a clean read on how each side is doing. One side may feel smooth. The other might wobble or shake. Fine. That’s information, not failure.
How to make it cleaner
- Keep the ribs heavy.
- Move one leg at a time.
- Stop the heel before the lower back starts to lift.
- Slide back in on an inhale.
Five reps per side is enough to begin. Use a towel under the heel if your floor drags. Small range, quiet trunk. That’s the whole game here.
4. Glute Bridges
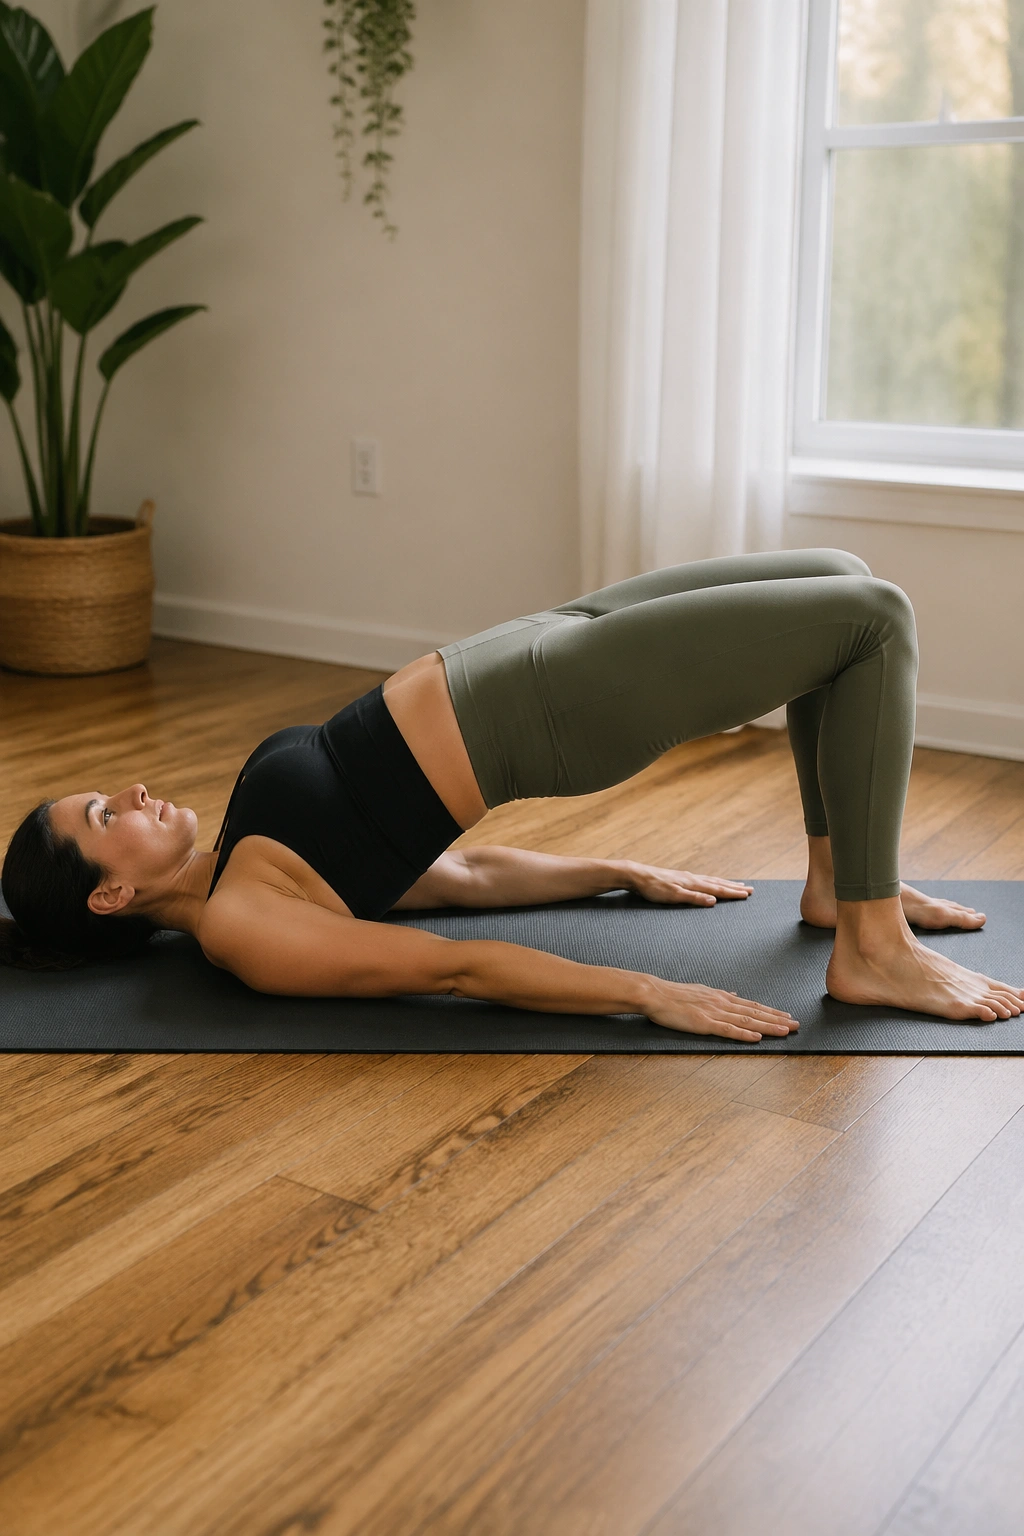
Glute bridges are the move I reach for when hips feel sleepy and the back is doing too much work. They wake up the glutes, help with pelvic stability, and give your trunk a chance to practice holding pressure without strain. Done well, they feel steady and clean. Done badly, they become a lower-back exercise with a fancy name.
Lie on your back, knees bent, feet flat. Exhale as you lift the hips just until the body forms a long line from shoulders to knees. You do not need to climb high. In fact, too much height usually means the ribs are flaring and the low back is stealing the work.
A few smart cues:
- Press through the whole foot, not just the toes.
- Keep the chin slightly tucked.
- Pause 1 second at the top.
- Lower with control.
If a c-section scar feels tuggy, shrink the range and slow down. No sharp pain, no pinching, no rushing. Six to 10 reps is plenty for a first round.
5. Cat-Cow on Hands and Knees
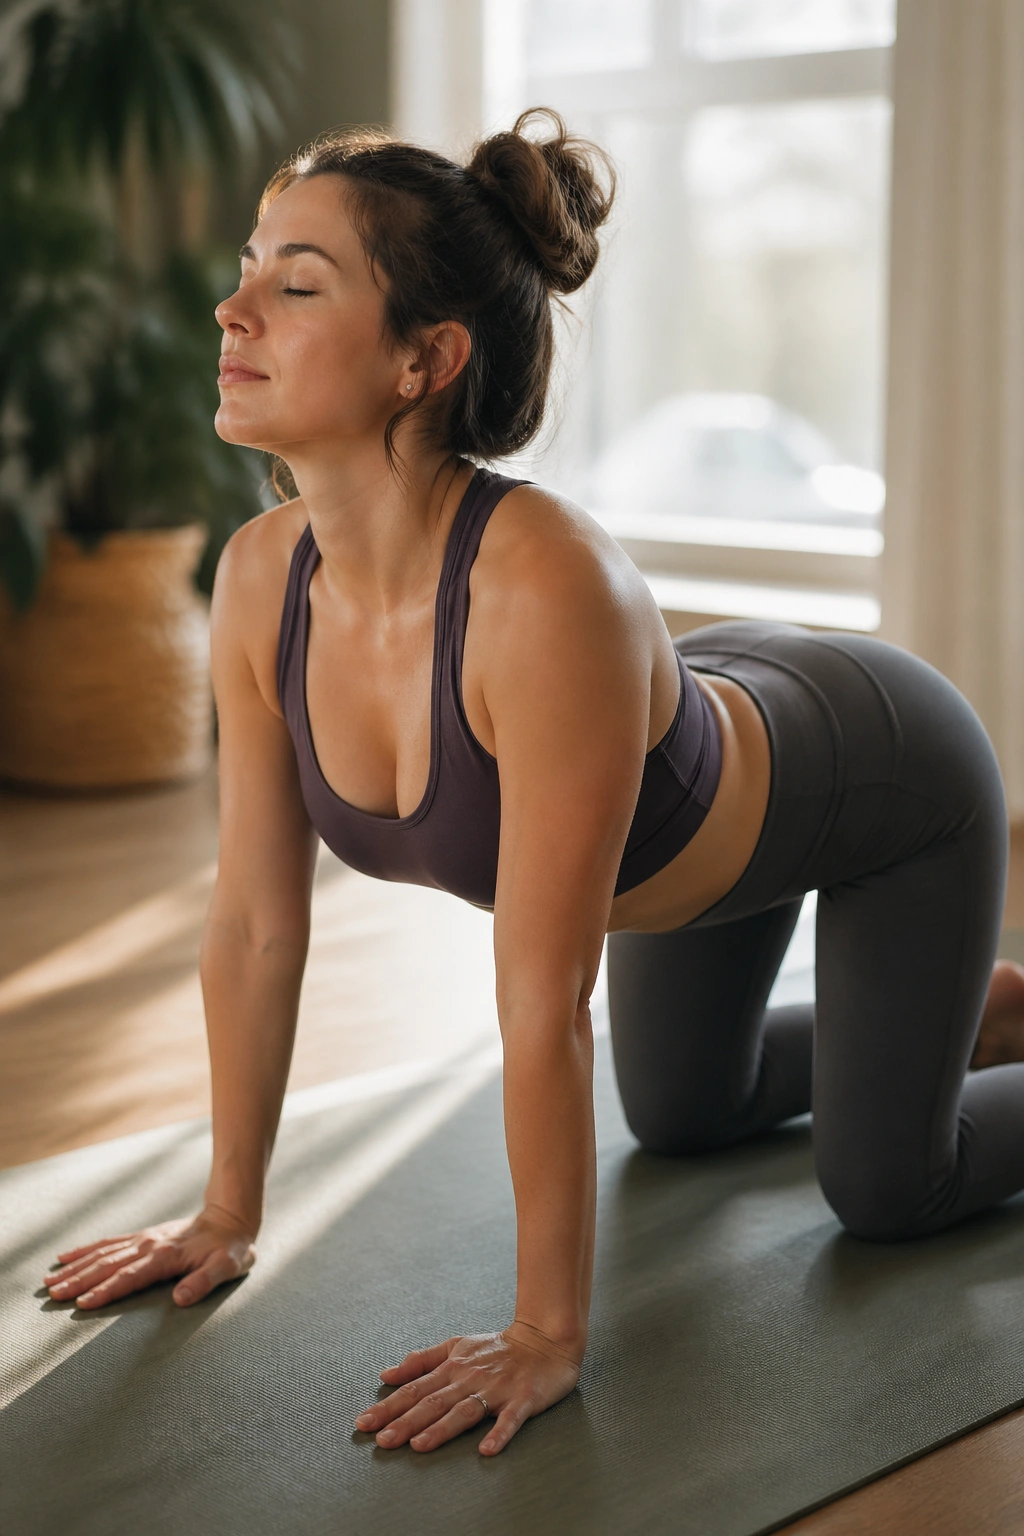
This one feels like a sigh for your spine. Cat-cow is a gentle way to move the back after hours of feeding, carrying, and hunching over a tiny human. It is also kinder than most people expect, which makes it easy to skip. Don’t.
Start on hands and knees with wrists under shoulders and knees under hips. Inhale as you tip the tail and let the chest open a little. Exhale as you round the spine and let the belly draw in softly. Keep the motion slow enough that you can feel every inch of it. Fast cat-cow turns into flailing. Slow cat-cow changes how the back feels.
If wrists hate the floor, use fists or hold the edge of a couch. If knees complain, place a folded towel under them. Comfort makes the movement useful. Pain just makes you shorten the range and tense up.
One minute is enough. Two is nice. Three can feel like magic after a long day.
6. Bird-Dog Reaches
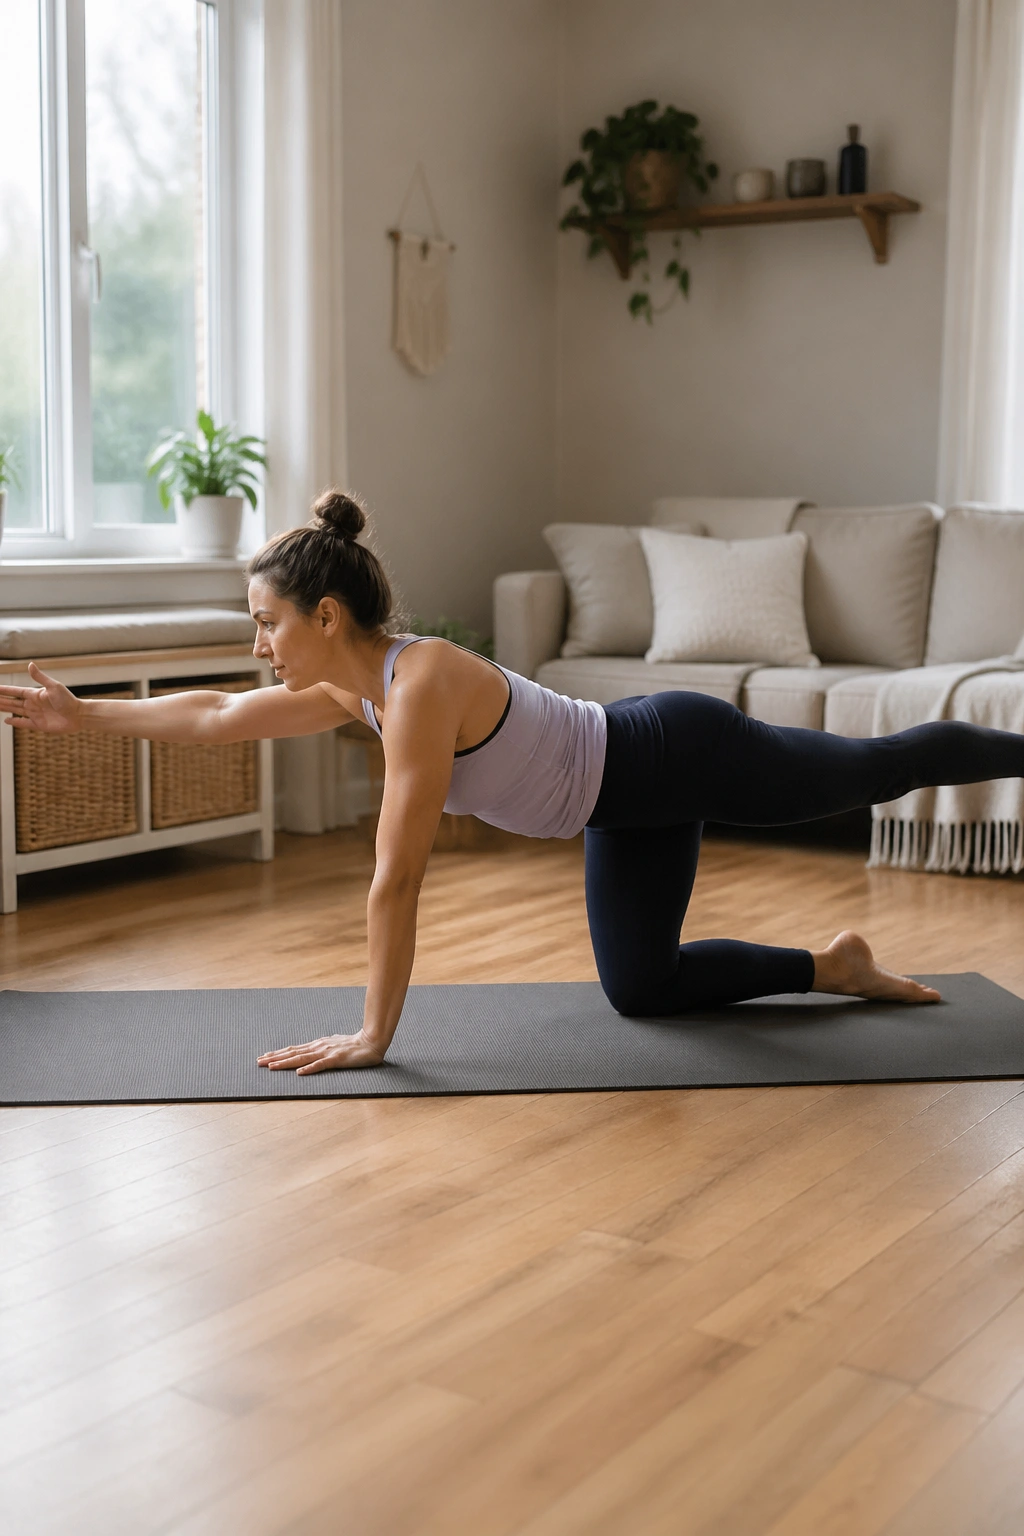
Bird-dog is a stability drill dressed up like a balance exercise. It teaches the trunk not to twist when an arm or leg moves, which matters for carrying, lifting, and walking upstairs with one hand occupied by a baby seat or a laundry basket.
Start on hands and knees. Reach one leg back first and keep the hips level. If that feels steady, add the opposite arm. The goal is not height. It is stillness. A raised arm that drags your ribs open is less useful than a lower arm that stays quiet.
You can make this easier in three clean stages:
- Toe slide back.
- Leg reach only.
- Opposite arm and leg.
Hold each reach for 2 to 3 seconds, then return with control. If your lower back talks too loudly, shorten the lever and reduce the range. A clean 4-inch reach beats a wobbly 14-inch one. That’s not a small detail. It’s the whole point.
7. Side-Lying Clamshells
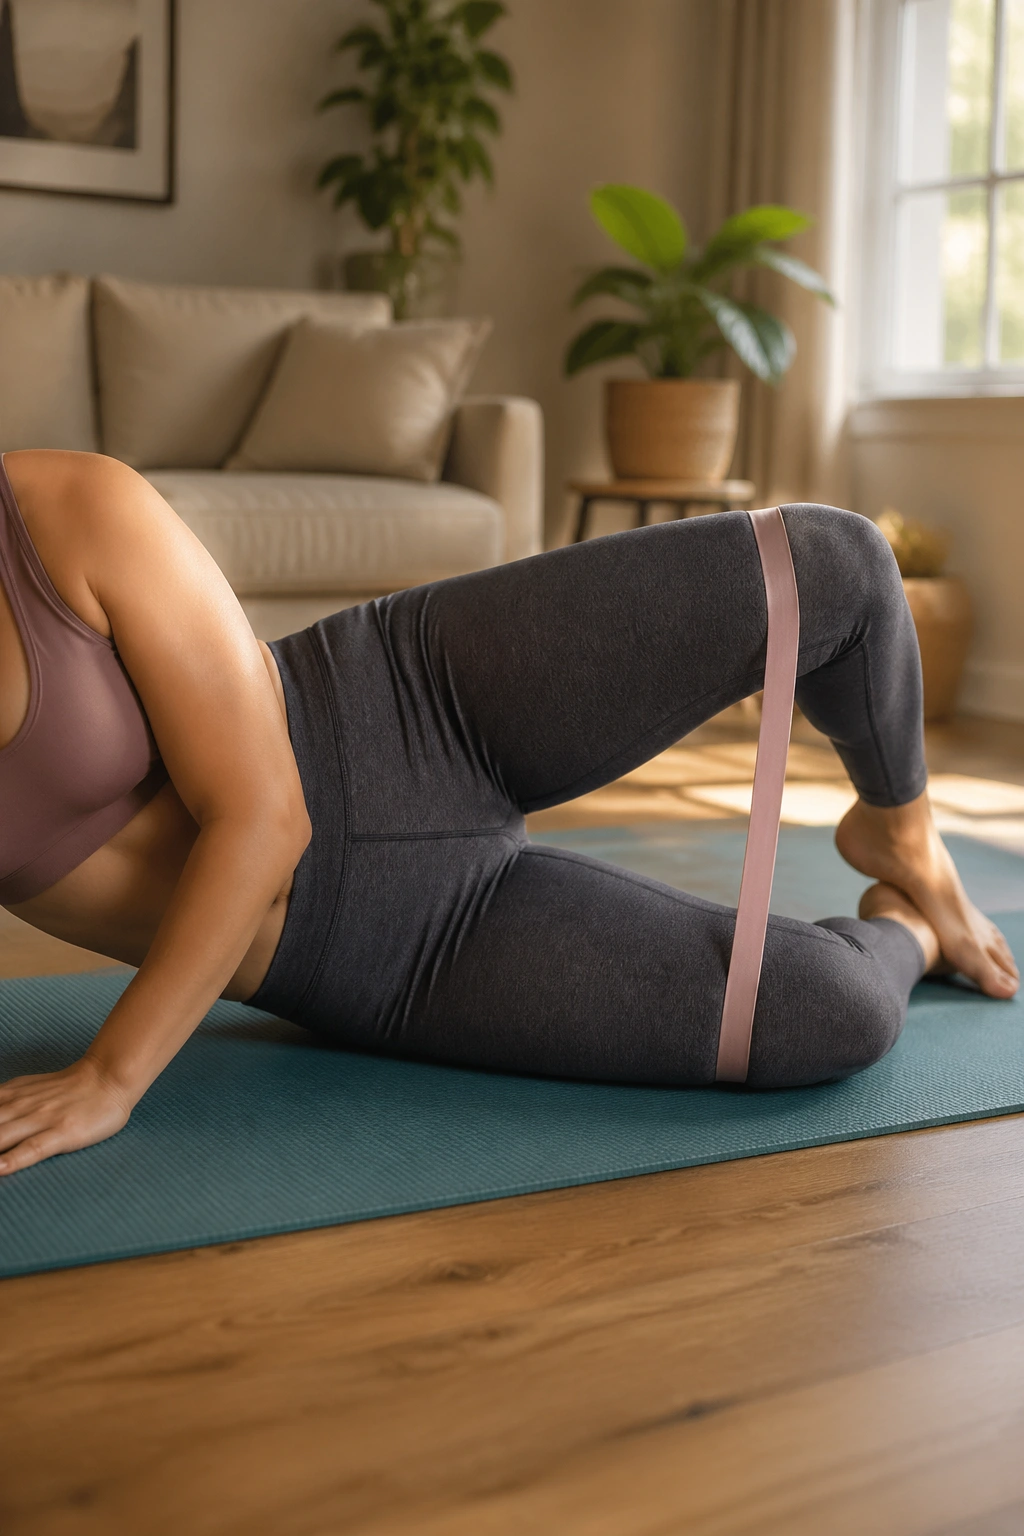
If your hips feel wobbly when you walk, climb stairs, or stand on one leg to get dressed, clamshells are worth your time. They target the side glutes, especially the glute med, which helps keep the pelvis steady. That sounds boring. It isn’t. Weak side hips can make everything feel harder.
Lie on your side with knees bent and feet together. Keep your hips stacked. Then open the top knee like a clam shell, without rolling the pelvis backward. That cheating move is common, and it steals the work right out of the exercise.
A mini band above the knees can add resistance, but it’s optional. Start with 10 to 12 slow reps per side. The burn should sit in the side of the butt, not the front of the hip or the low back.
If you feel the back twisting, go smaller. Tiny range. Clean reps. Annoyingly effective.
8. Seated Marches
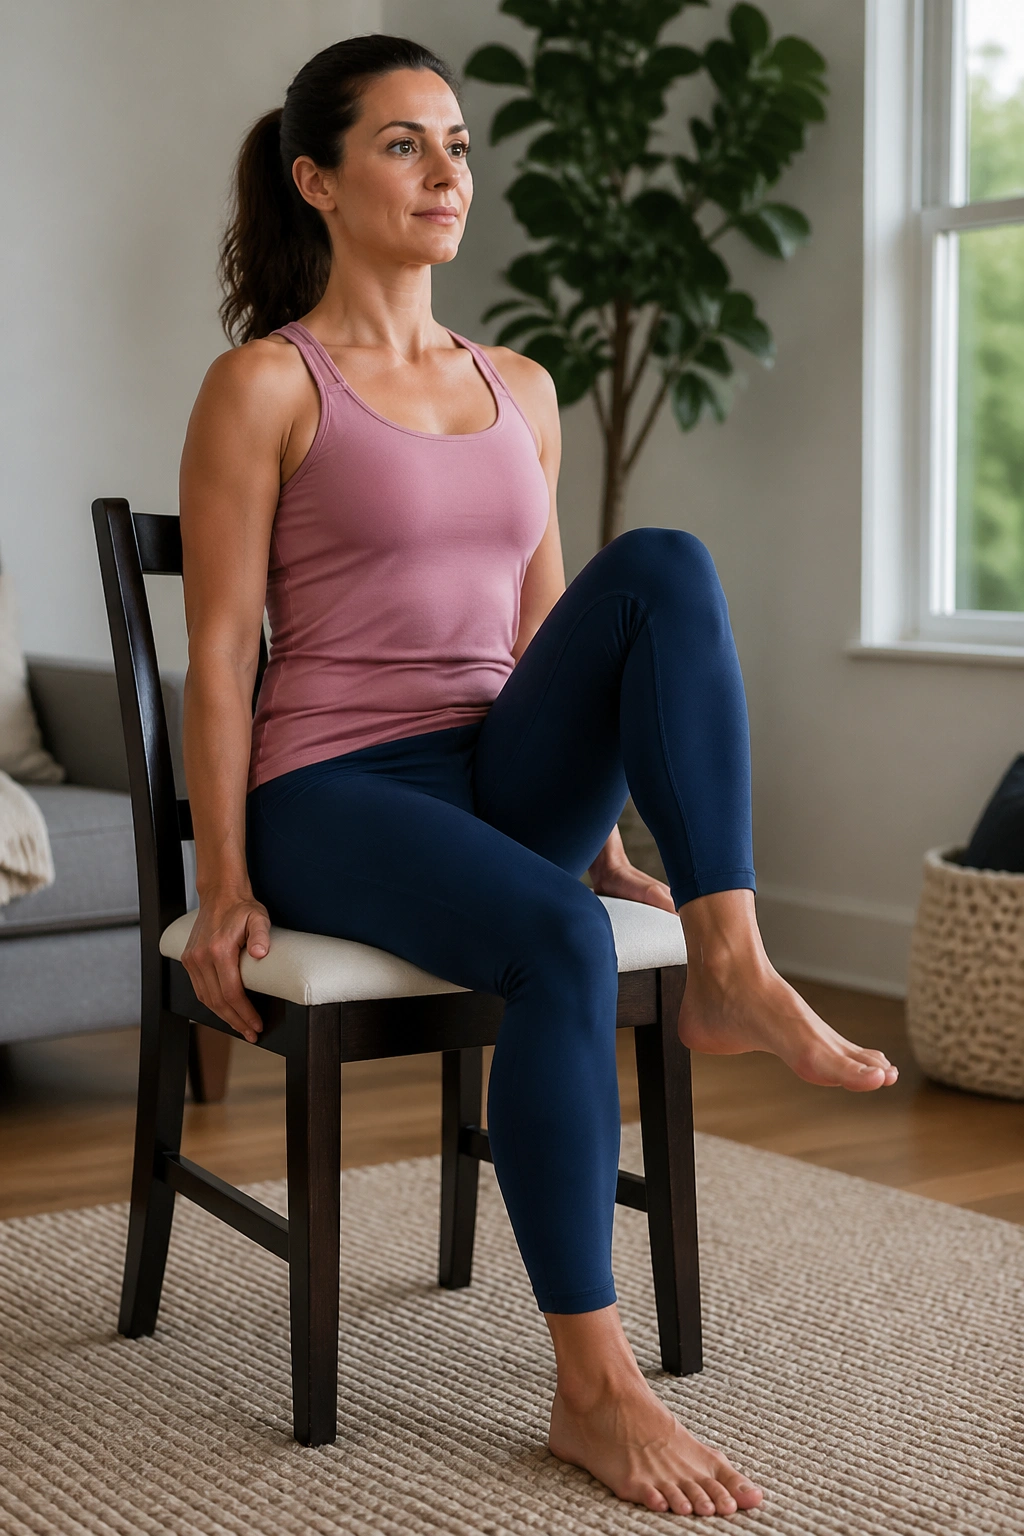
Some days standing exercises feel like too much. Seated marches are the rescue move for those days, and they’re more useful than they look. They train hip flexors, lower abs, and posture without loading the pelvic floor with bouncing or impact.
Sit tall on a sturdy chair with both feet flat. Exhale and lift one knee a few inches, then lower it slowly on the inhale. Keep the torso upright and the ribs stacked over the pelvis. If you lean back or rock side to side, the movement is too big.
This is a good choice while you’re waiting for water to boil or before a feeding session. You can do 8 to 10 reps per side in about a minute. That’s enough. No need to turn it into a contest.
Why it works
- Low pressure.
- Easy to scale.
- Good for early core re-entry.
- Gentle on tired legs.
Small effort. Clean shape. That’s the sweet spot.
9. Wall Push-Ups
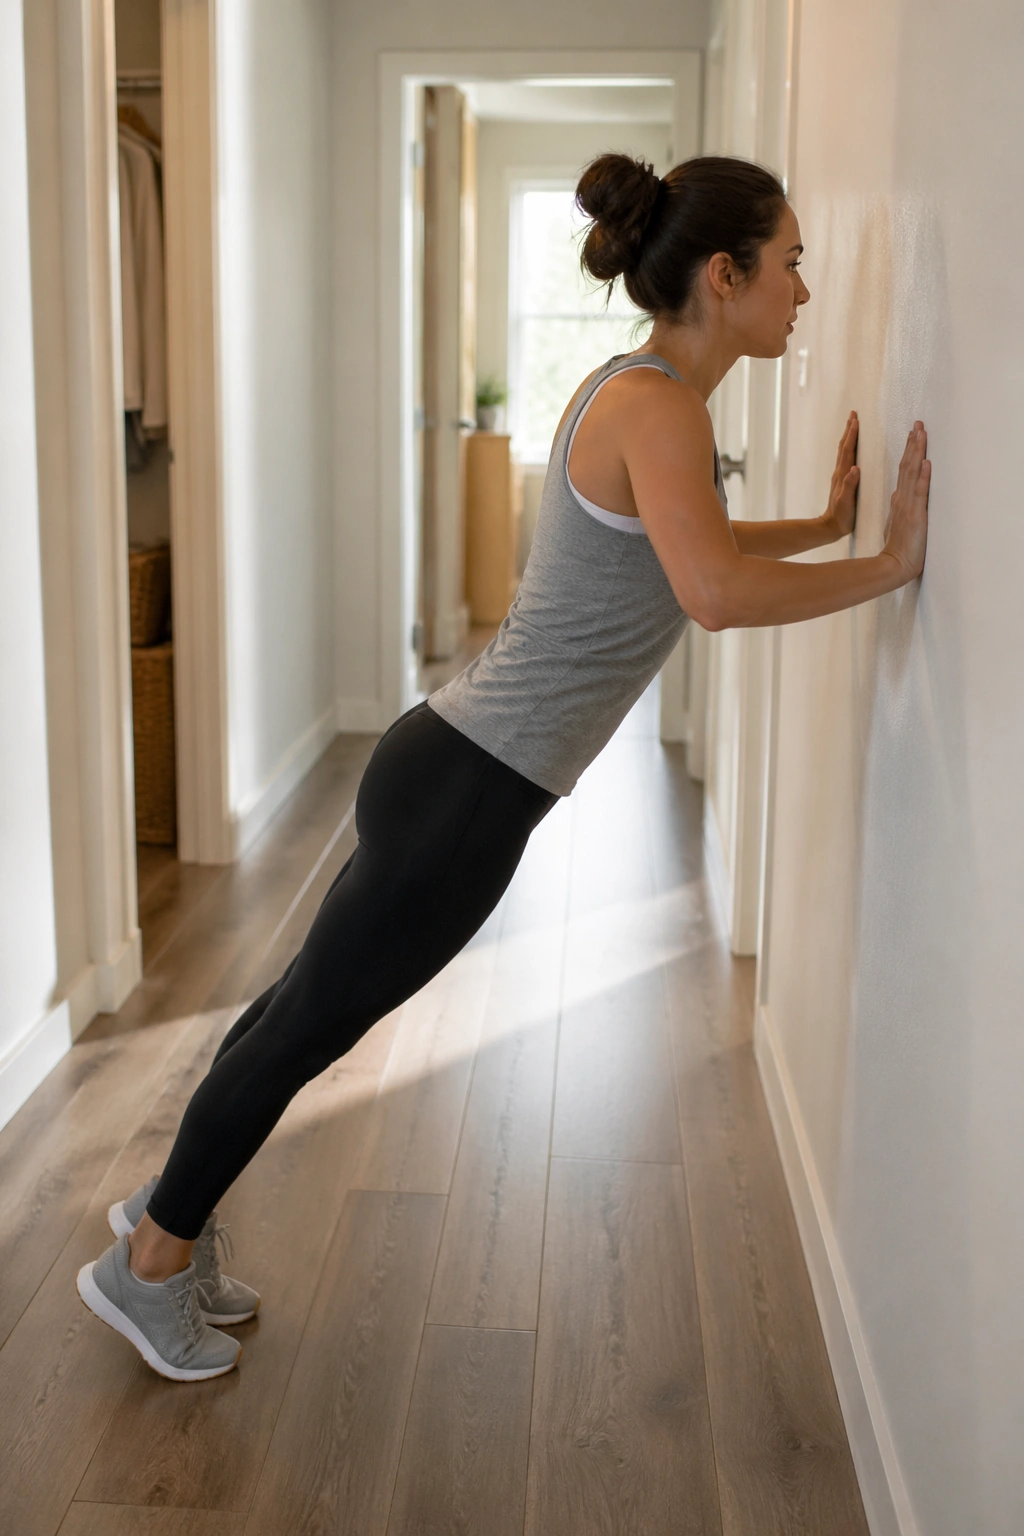
Wall push-ups are where upper-body strength starts to feel sane again. They build the chest, shoulders, and triceps while asking your core to stay organized. They also spare the wrists and abdominal wall, which is more than I can say for a lot of floor work that gets rushed too early.
Stand an arm’s length from a wall. Place your hands at chest height, a little wider than shoulders. Bend the elbows and bring the chest toward the wall, then press back out. Keep the body in a straight line and the elbows angled about 30 to 45 degrees from the ribs.
If that feels easy, walk your feet back a little. If it feels hard in the shoulders, stand closer. You control the angle. That’s the useful part.
Good cues
- Exhale as you press away.
- Keep the neck long.
- Don’t let the lower back sag.
- Stop before the shoulders shrug up.
Eight to 12 reps is a solid start. Faster is not better here.
10. Sit-to-Stand from a Chair
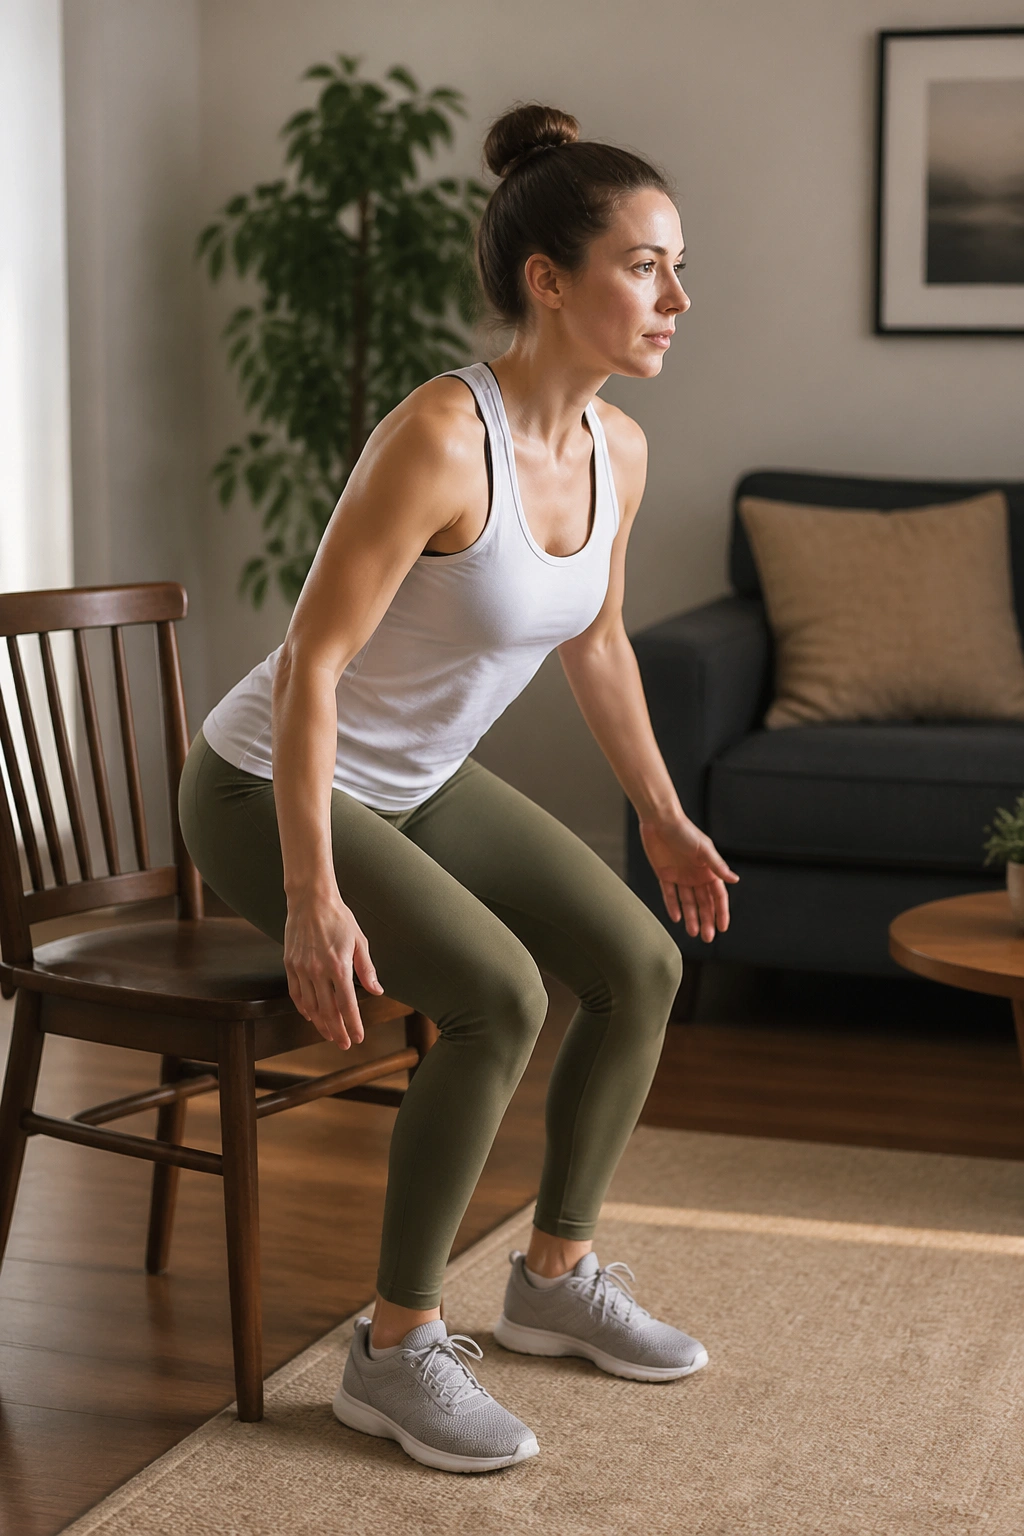
This is a daily-life strength move in disguise. If you can stand from a chair without flopping, pushing off hard with your hands, or holding your breath, you’re building a very real kind of postpartum strength. It carries over to couches, toilets, car seats, and every awkward low surface in the house.
Set your feet under your knees, lean forward a touch at the hips, and exhale as you stand. Sit back down slowly. If the chair is too low, place a folded blanket on it. If you feel unstable, hold the armrests lightly. The goal is to own the motion, not suffer through it.
A lot of people go too fast here and lose the hinge. Slow down. Feel the pressure in the whole foot, especially the heels and midfoot. That alone changes the move.
If your knees cave in or your chest folds hard, the chair is probably too low. Raise it. Five clean stands beat fifteen ugly ones.
11. Supported Bodyweight Squats
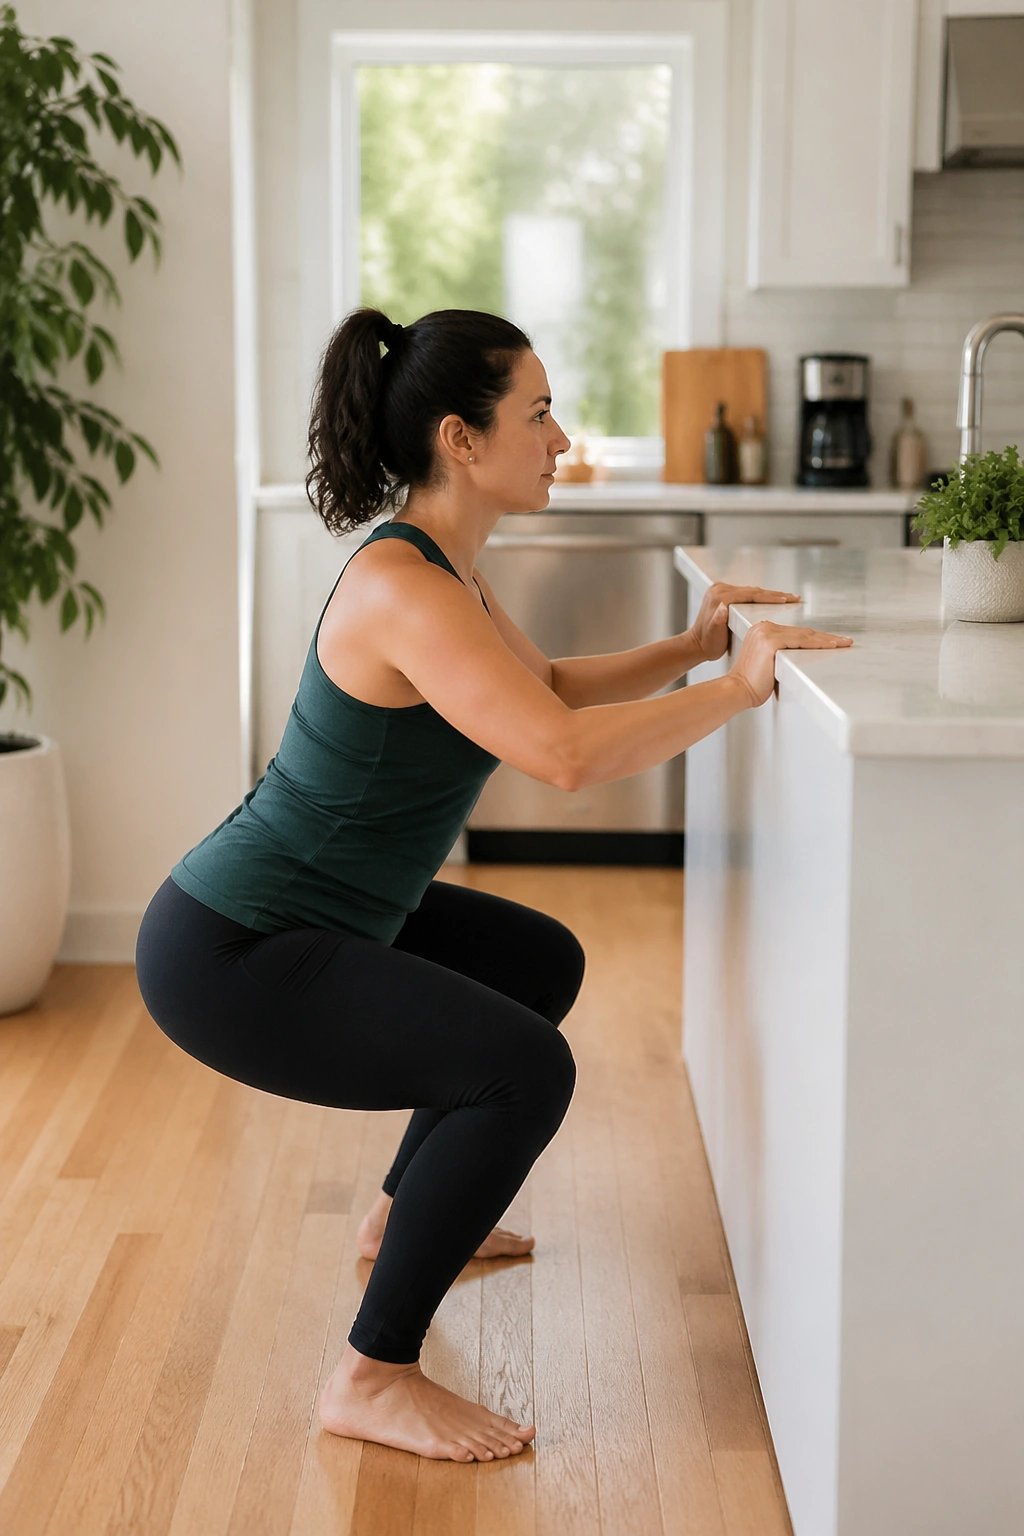
Once sit-to-stands feel stable, squats are the next step. They’re a bigger version of the same pattern, and they train the hips, thighs, and trunk in a very usable way. The support piece matters. Hold a counter, table edge, or doorway if balance is shaky.
Stand with feet about hip-width apart. Sit the hips back and down until you reach a depth that feels smooth. Then stand by pressing the floor away. Keep the chest proud enough to breathe, but not so lifted that the ribs flare.
A lot of postpartum bodies do better with a short pause at the bottom. One second is enough. It makes the squat less bouncy and gives the glutes a chance to help.
Keep an eye on this
- Knees track over the middle toes.
- Heels stay down.
- Breath keeps moving.
- No bearing down.
If you feel pressure in the pelvic floor, reduce depth and slow the descent. That’s not a setback. It’s the correct adjustment.
12. Standing Calf Raises
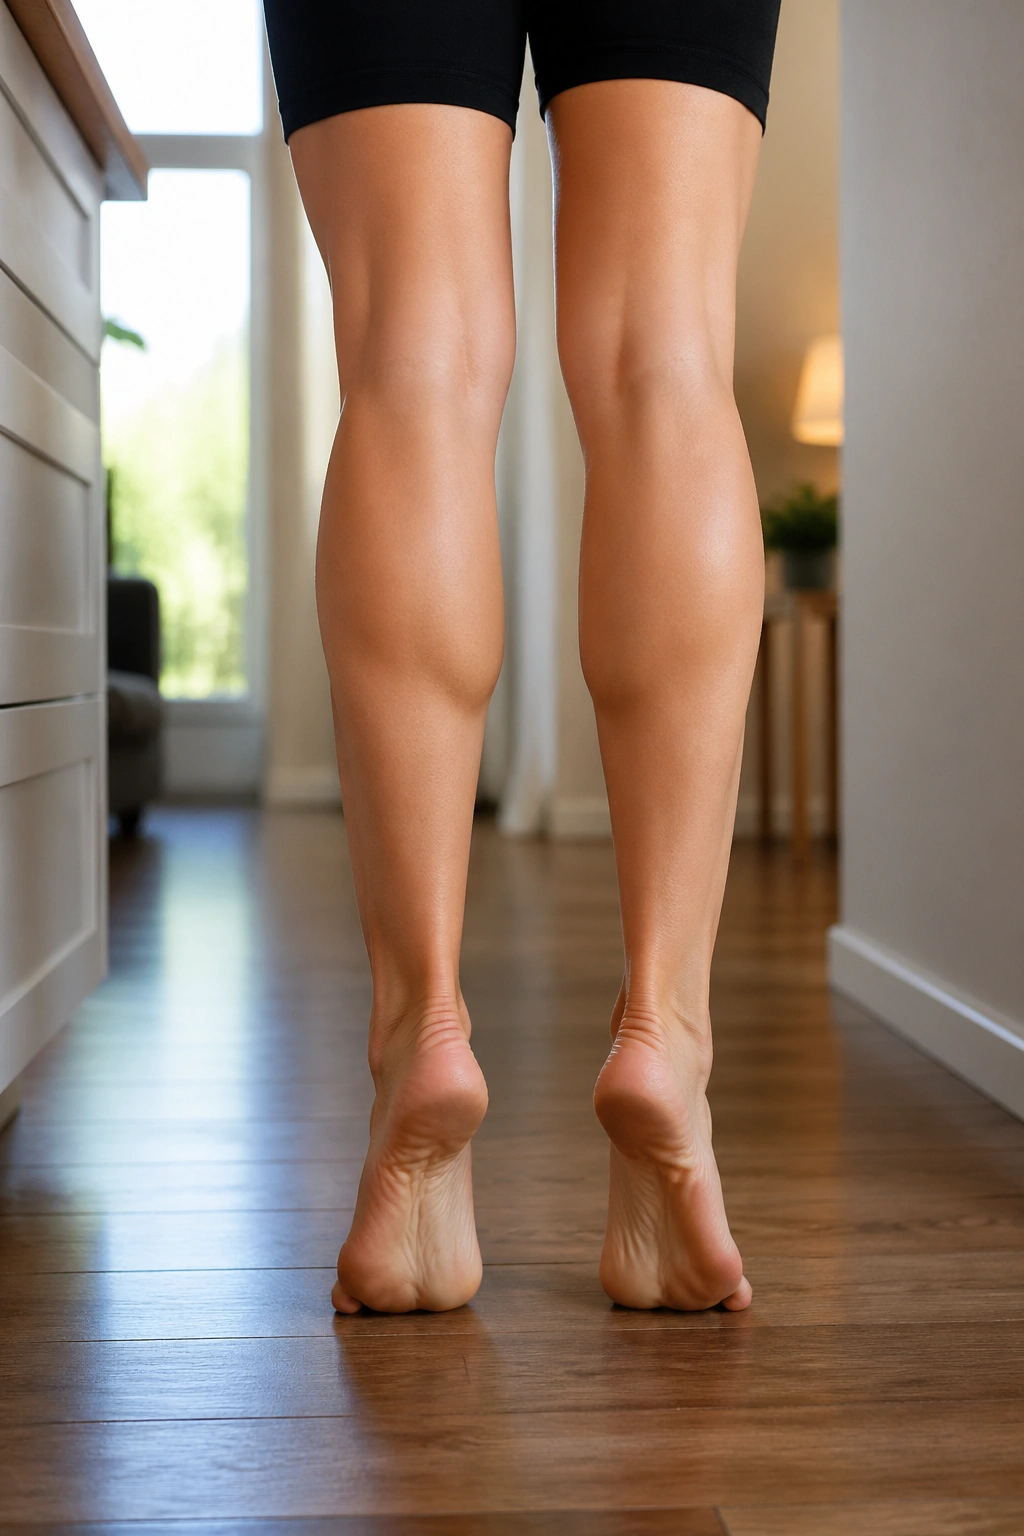
Calf raises barely get any praise, which is ridiculous. They improve ankle strength, help with circulation, and train the lower legs without stressing the core much at all. They’re also easy to do while brushing teeth, waiting on a kettle, or standing near the counter with one hand on a baby monitor.
Stand tall with feet parallel. Rise onto the balls of the feet for a second, then lower slowly until the heels touch the floor again. The lowering phase matters more than people think. That is where control lives.
You can do both legs together, or one leg at a time if balance is good. Keep the hips level and the toes pointing forward. If the ankles wobble, hold onto something. No prize for making it fancy.
Ten to fifteen reps, two rounds, and you’re done. That kind of work sneaks up on the lower legs in a good way.
13. Dead Bug Heel Taps
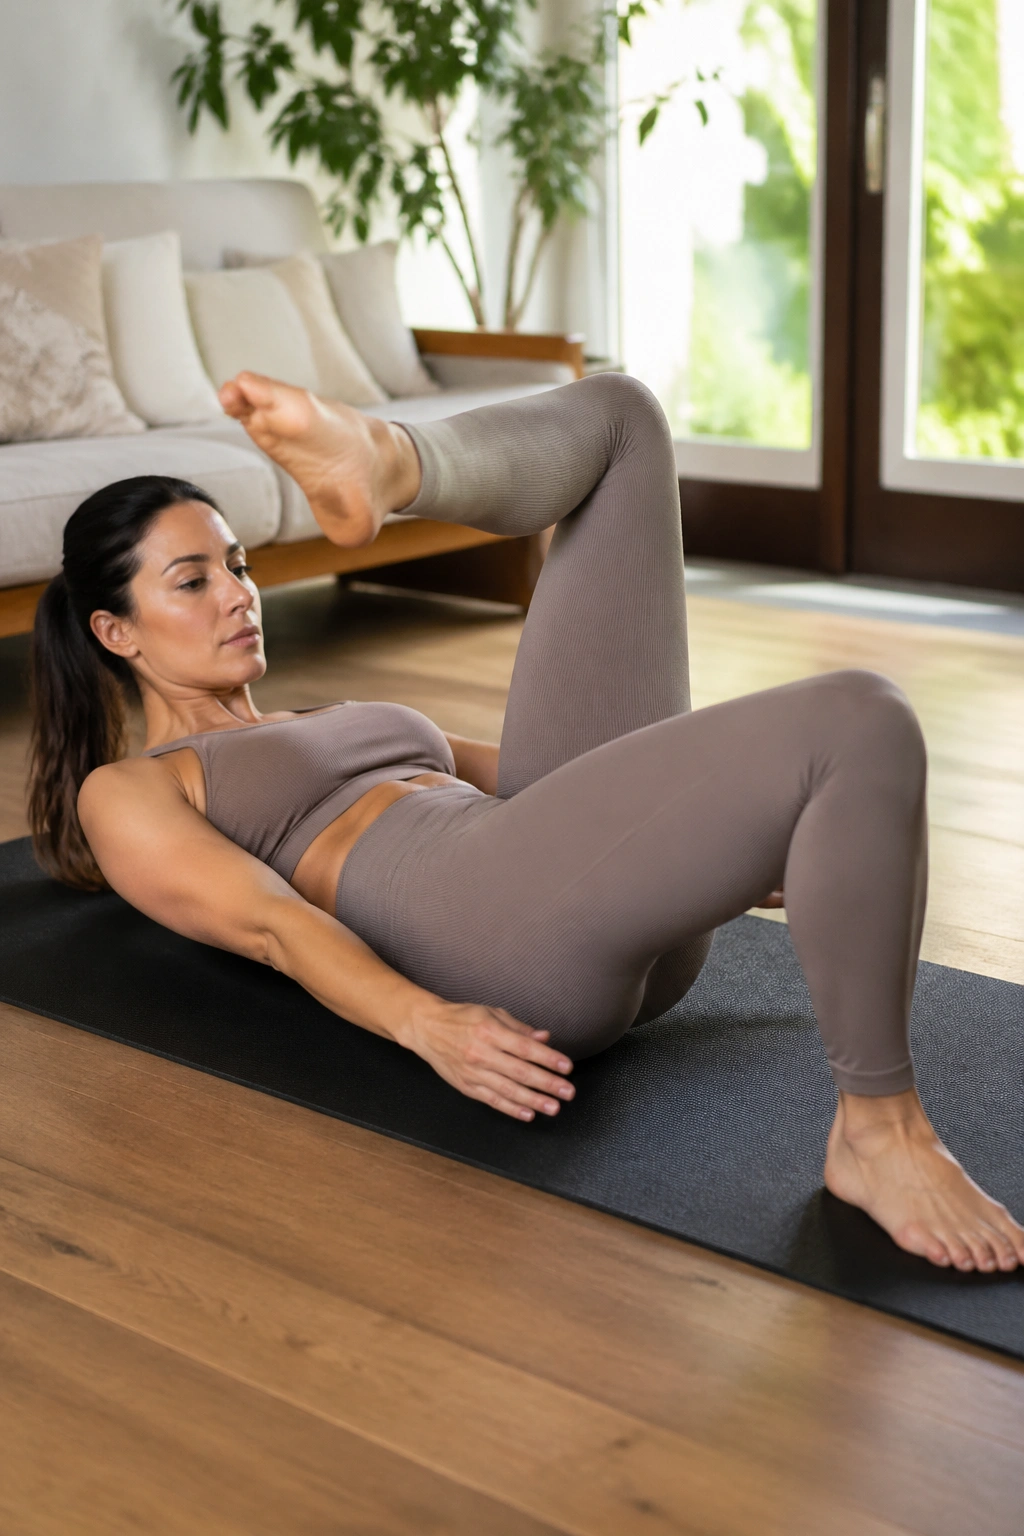
Dead bug heel taps ask for a lot more trunk control than they look like they should. They’re useful when heel slides start feeling too easy, but full crunch-style work still feels like a bad idea. That middle ground matters.
Lie on your back with knees bent over the hips. Exhale, brace gently, and lower one heel to tap the floor while the other leg stays still. Bring it back and switch sides. The lower back should stay heavy. If it arches or the belly forms a ridge down the middle, the lever is too long.
What to watch for
- Neck strain.
- Midline doming.
- Breath holding.
- Pelvis rocking side to side.
Start with one heel tap per side, then build to 5 or 6 each. You can also keep the toes hovering higher if the floor is too much. Shorter range, slower tempo, better control. That combination is what makes the move useful.
14. Side-Lying Leg Lifts
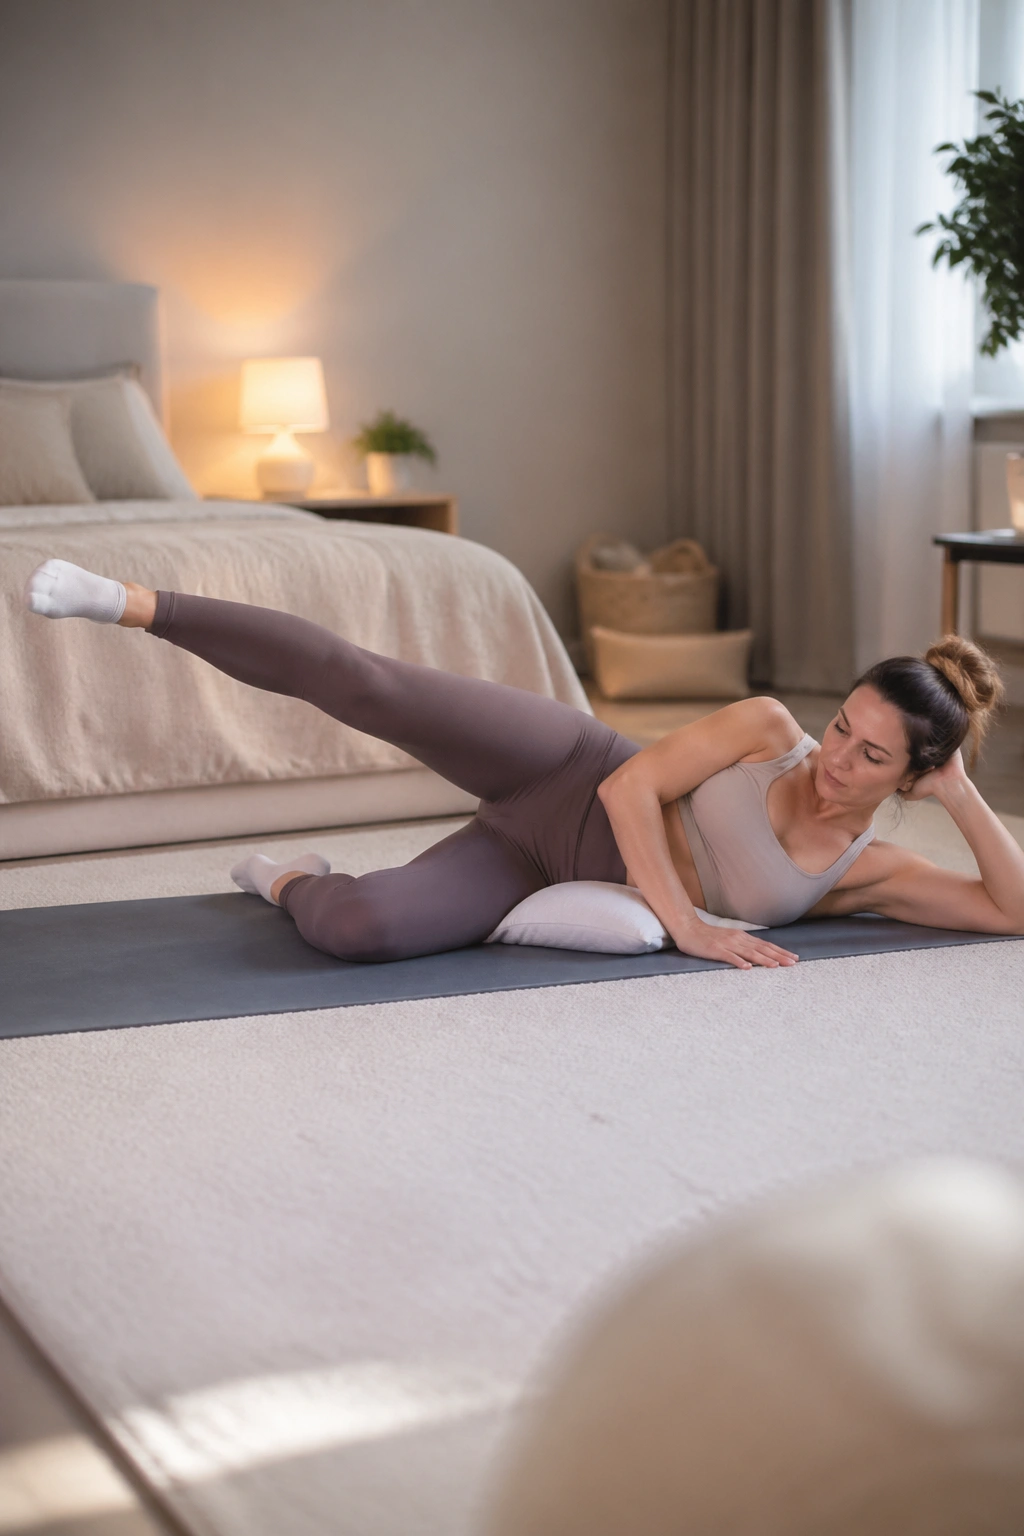
Clamshells hit the side glute from one angle. Side-lying leg lifts hit it from another. Together, they cover more of the hip than most people realize. This matters because the outer hip does a lot of quiet work when you walk, carry, squat, and shift weight from side to side.
Lie on one side with the bottom leg bent and the top leg straight. Keep the top toes pointed just a little down or straight forward, then lift the leg 12 to 18 inches. Lower slowly. If you turn the toes up, the hip flexor can take over. If you swing the leg, the lower back will try to join the party.
A pillow under the waist can help if the side body feels strained. Keep the lift small and deliberate.
You should feel this on the side of the upper butt, not in the lower back. Ten reps per side is enough on day one. Maybe twelve later. No need to chase fatigue.
15. Modified Side Plank from the Knees
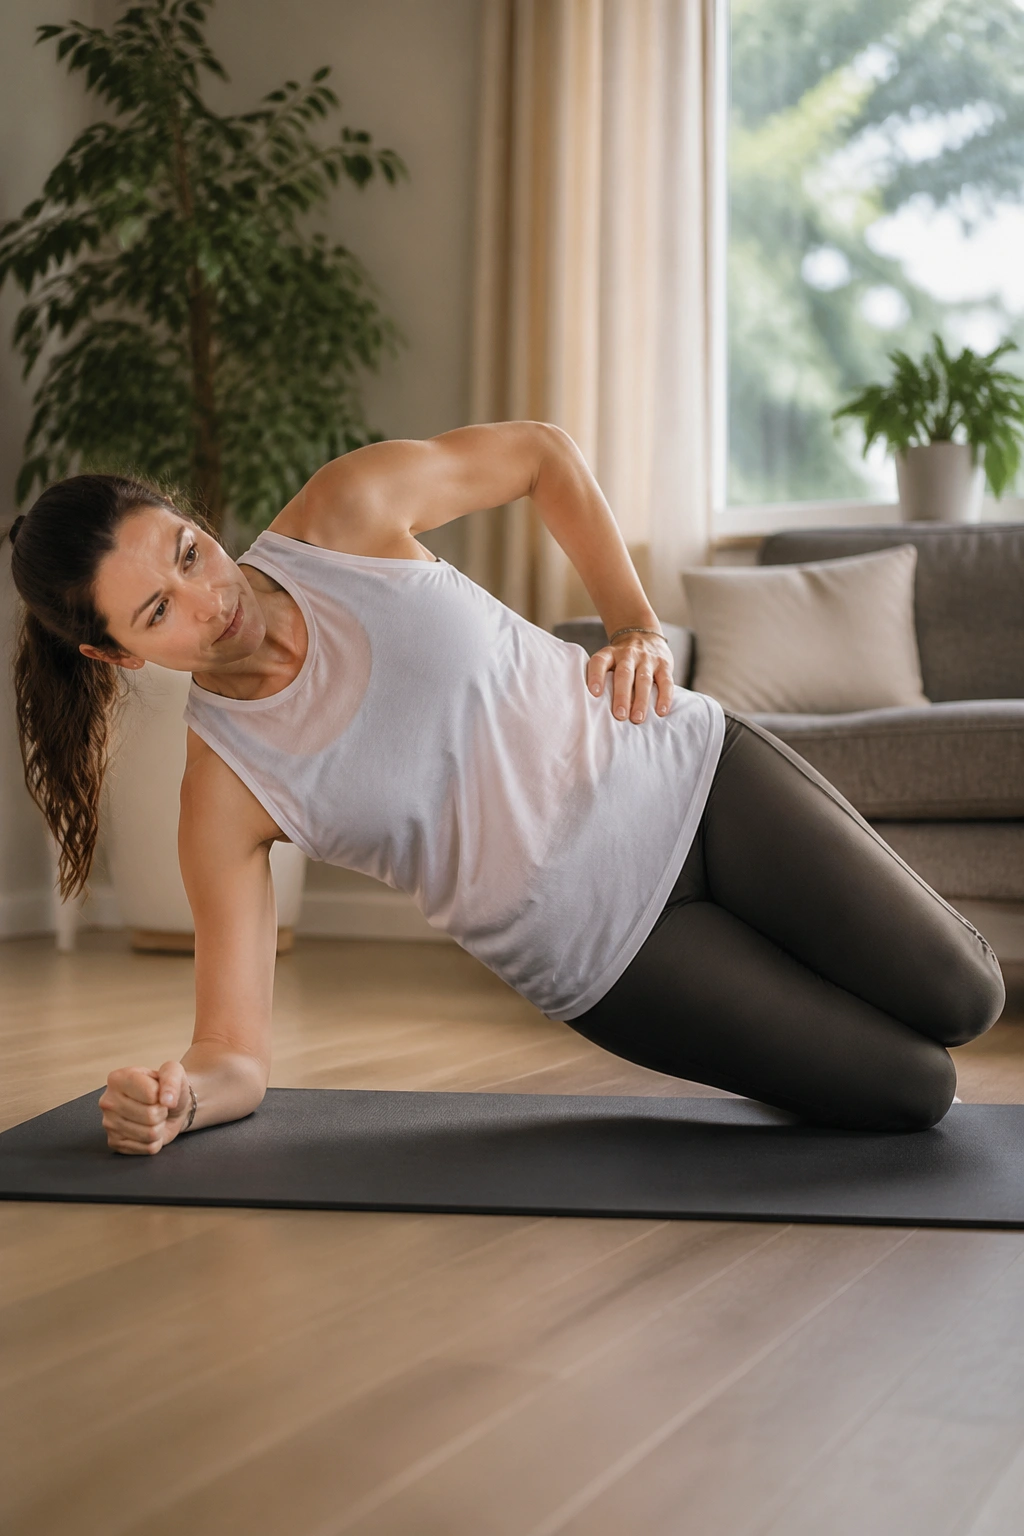
Side planks are where many people rush into the deep end and regret it. The full version looks impressive. It is also far less forgiving than the kneeling version, which is the one I actually like for postpartum strength work.
Set up on one forearm with knees bent and stacked. Lift the hips so your body makes a straight line from shoulders to knees. Hold for 10 to 15 seconds at first. If the shoulder hunches or the waist collapses, come down and reset. The movement should feel firm, not grim.
This is a clean way to train the side body and obliques without a lot of pressure through the front of the abdomen. It can help if you notice your torso feeling unstable during carries or walks.
Make it better
- Press the forearm into the floor.
- Keep the chest open.
- Breathe through the hold.
- Drop the hip before form fades.
A few short holds are better than one shaky marathon.
16. Countertop Plank Shoulder Taps
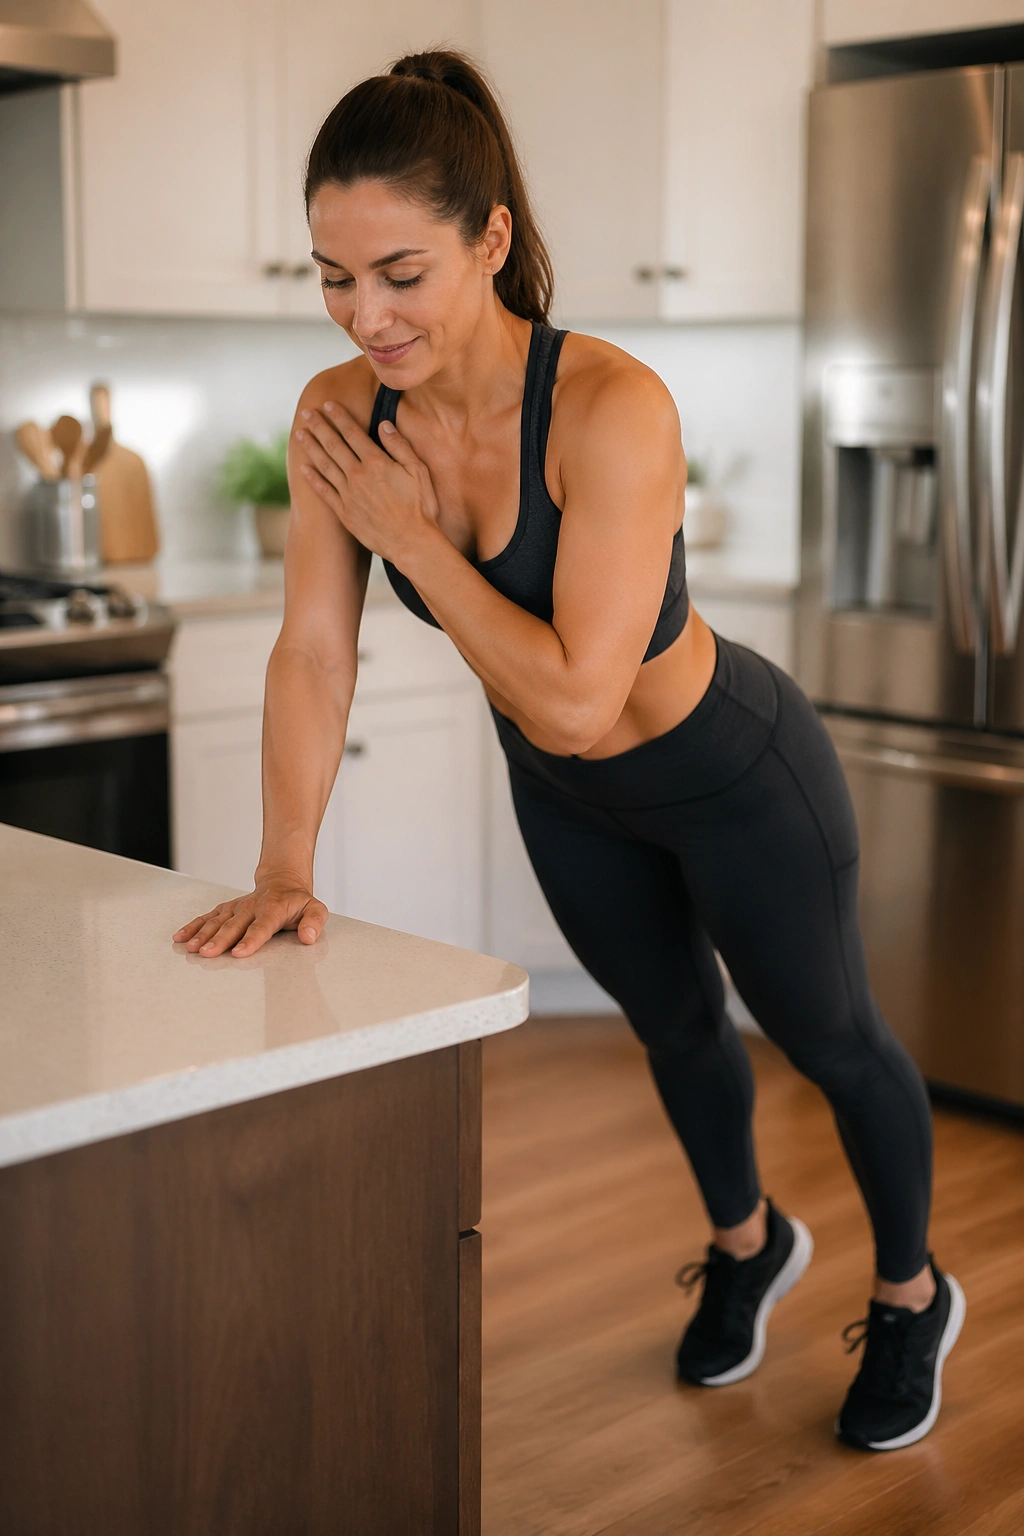
A countertop plank is a civilized plank. I mean that in the best way. You get the shoulder and trunk challenge without the full bodyweight load of the floor version. That makes it a smart bridge between wall work and harder core exercise.
Place both hands on a counter, walk your feet back, and make a straight line from head to heels. Tap one hand to the opposite shoulder, then switch. The hips should stay almost still. If they sway like a shopping cart, the stance is too narrow or the angle is too steep.
This is a good move once wall push-ups feel easy and your core can handle a little motion. Keep the taps slow. Fast taps turn into sloppy shifting.
A quiet torso is the goal. Six taps per side can be enough. If the lower back complains, move closer to the counter and make the angle easier.
17. Step-Ups on a Stair
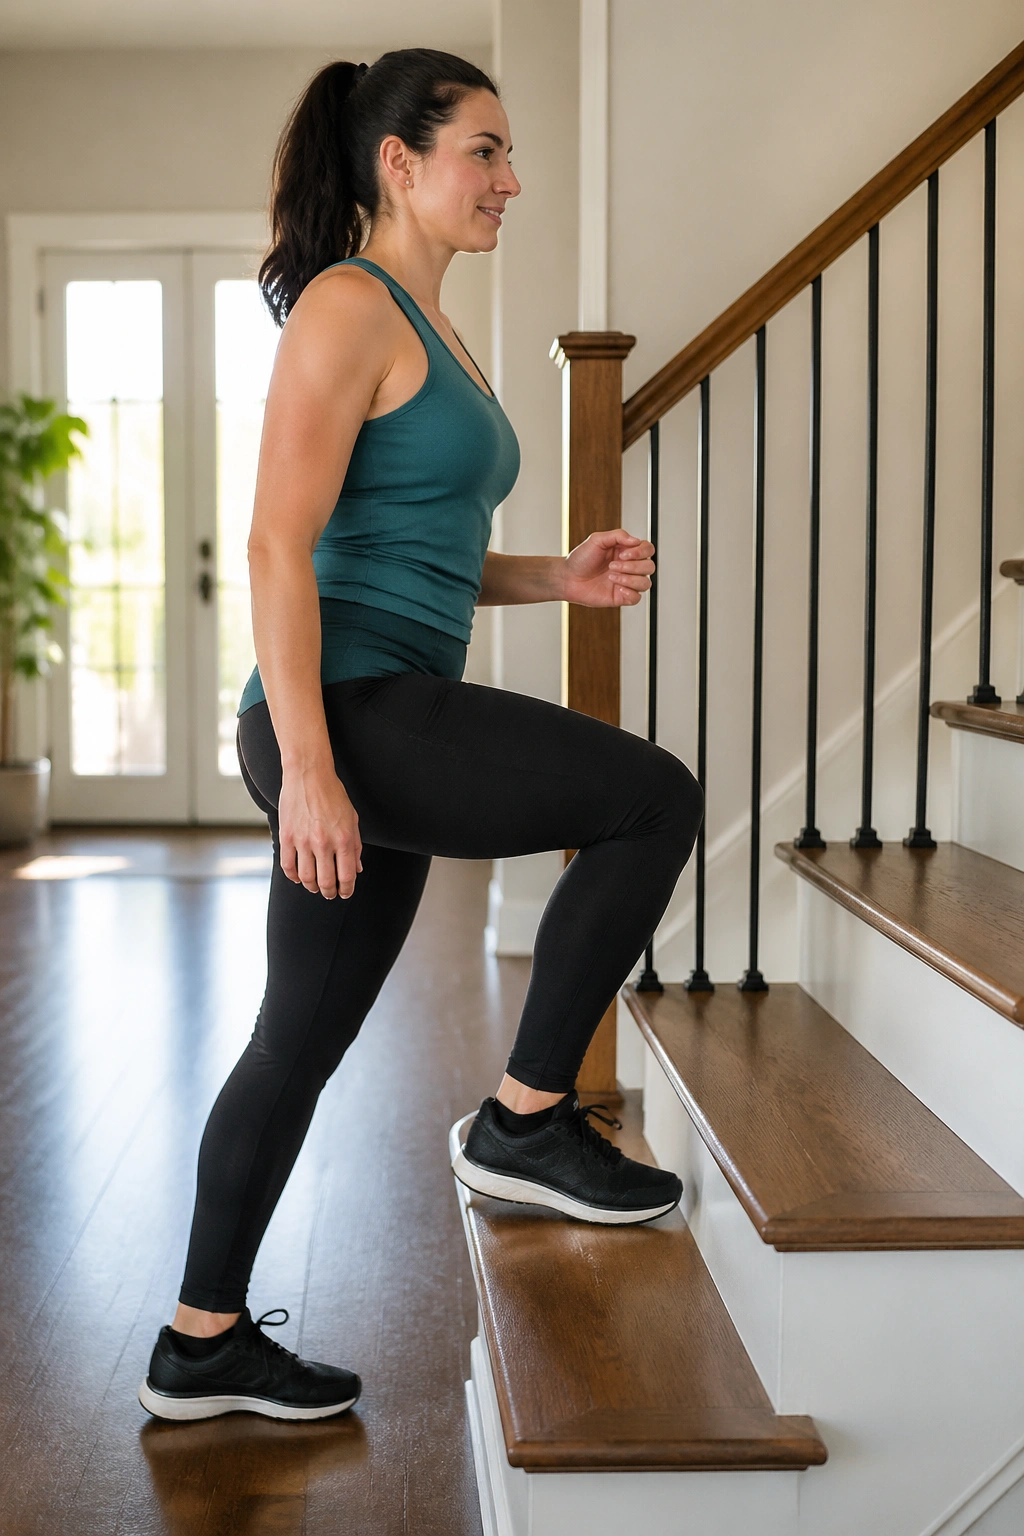
Step-ups are one of the most useful lower-body workouts you can do at home because stairs are already there, already loaded, and already annoying enough to count as real life. They train the thighs, glutes, balance, and single-leg control in a way that carries over to climbing stairs with a baby in one arm.
Use a bottom stair or a low sturdy step. Put the whole foot on the step, lean slightly forward, and stand up by driving through the planted heel and midfoot. Step back down with control. Hold the railing if you need it. That is not cheating. That is smart.
Alternate lead legs so one side doesn’t do all the work. If one knee feels cranky, make the step lower or slow the pace.
A few clean reps tell you more than a sweaty set ever will. Keep the pelvis level and the torso tall. That’s where the benefit lives.
18. Low-Impact Shadow Boxing
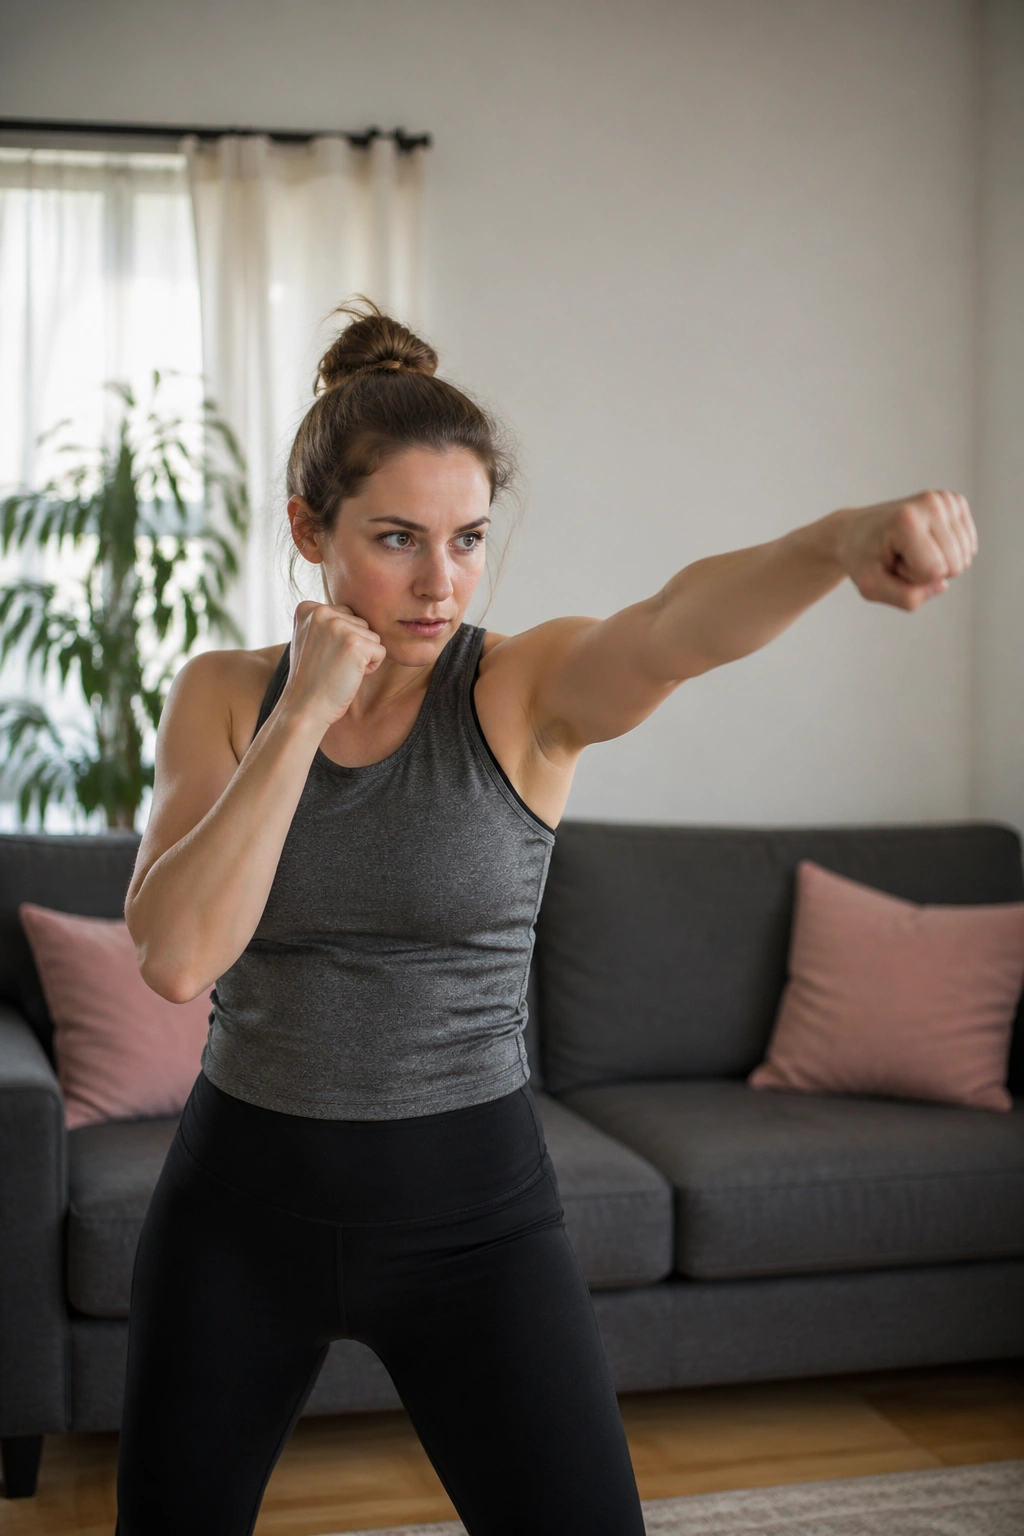
Shadow boxing is a sneaky cardio move that wakes up the whole upper body without pounding the joints. It also gives you a way to raise your heart rate in short bursts, which can feel better than long, relentless workouts when sleep is fragmented and time is thin.
Stand with soft knees and hands up near the face. Punch forward with one arm, then the other, or mix in light hooks and uppercuts if your shoulders like that. Exhale with each punch. Keep the feet planted or take tiny steps instead of bouncing.
Thirty seconds on, 30 seconds off works well. Three to five rounds is plenty. If the core feels braced hard or the pelvic floor gets heavy, shorten the round and slow the punches.
What makes it useful
- Low impact.
- Easy to scale.
- Good mood shift.
- Works in a small space.
It feels a little ridiculous at first. Then it starts to feel good.
19. Stair Walk Intervals
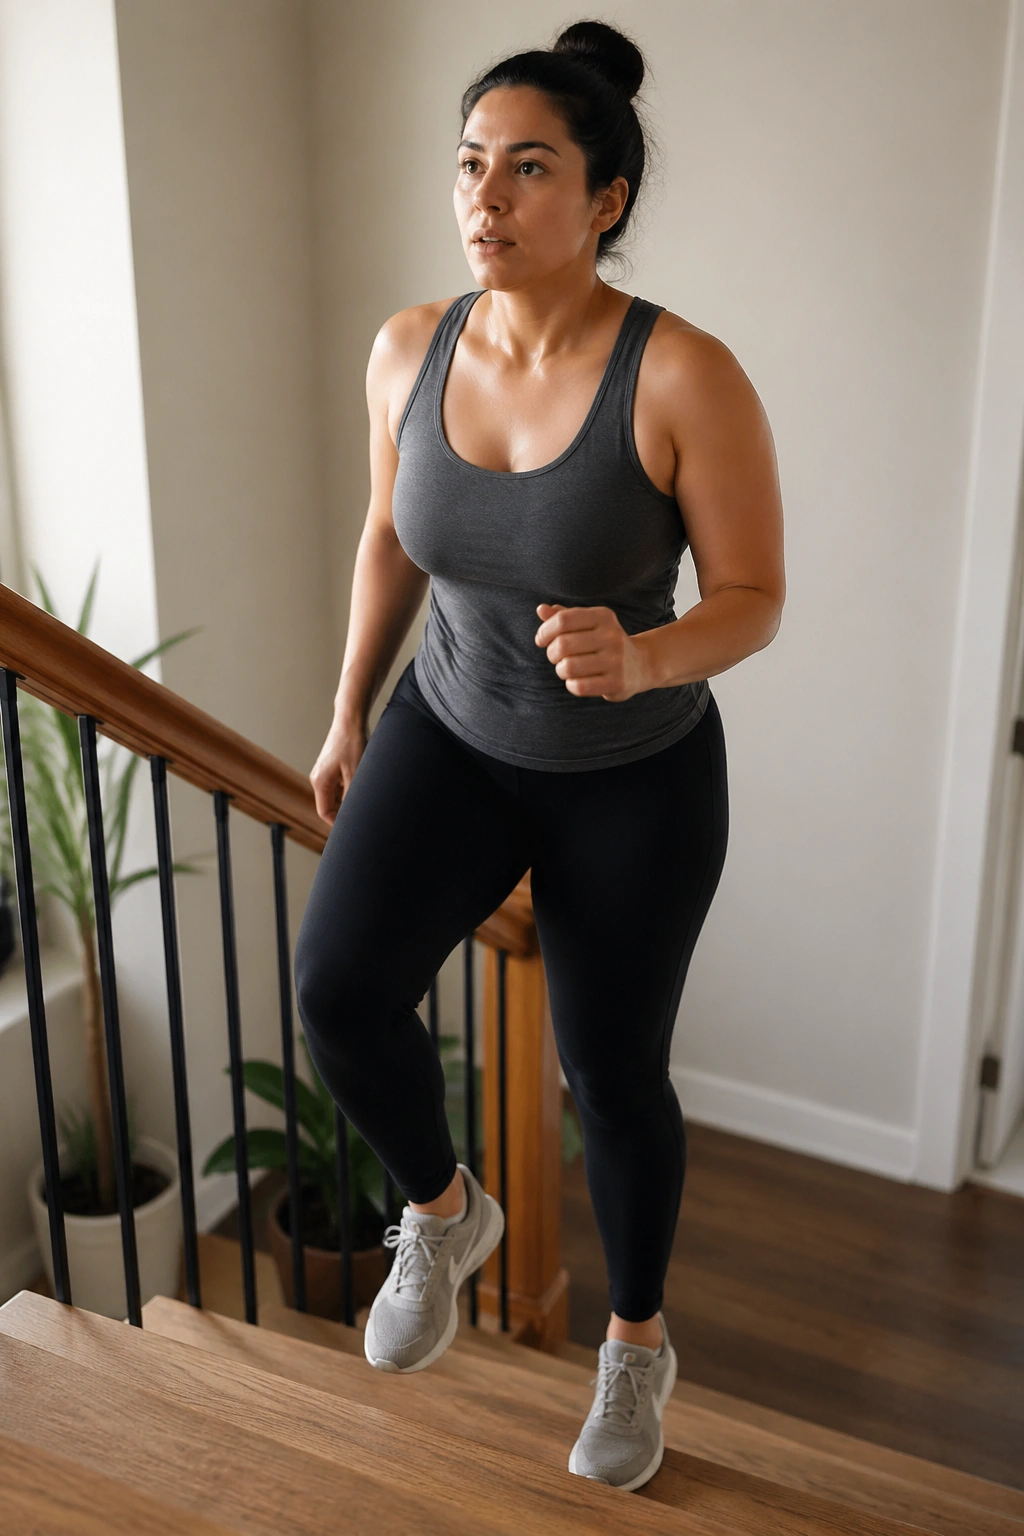
Walking stairs in short intervals gives you cardio, leg work, and a dose of real-world challenge without needing a treadmill or a driveway. It’s the kind of exercise that looks ordinary and still leaves your legs buzzing a bit.
Pick one flight, or even half a flight if that’s what you have. Walk up at a steady pace, rest at the top, then walk down carefully. Keep the steps smooth and the breathing even. If you can talk in short sentences while you’re moving, you’re probably in the right zone.
A railing is smart. So is wearing shoes with a secure sole if the stairs are slick. Do not race this. Racing turns it into a balance test nobody asked for.
Two to four rounds can be enough. More is not automatically better. If your pelvic floor feels heavy, switch to flat ground walking and come back later.
20. Farmer Carries with a Household Weight
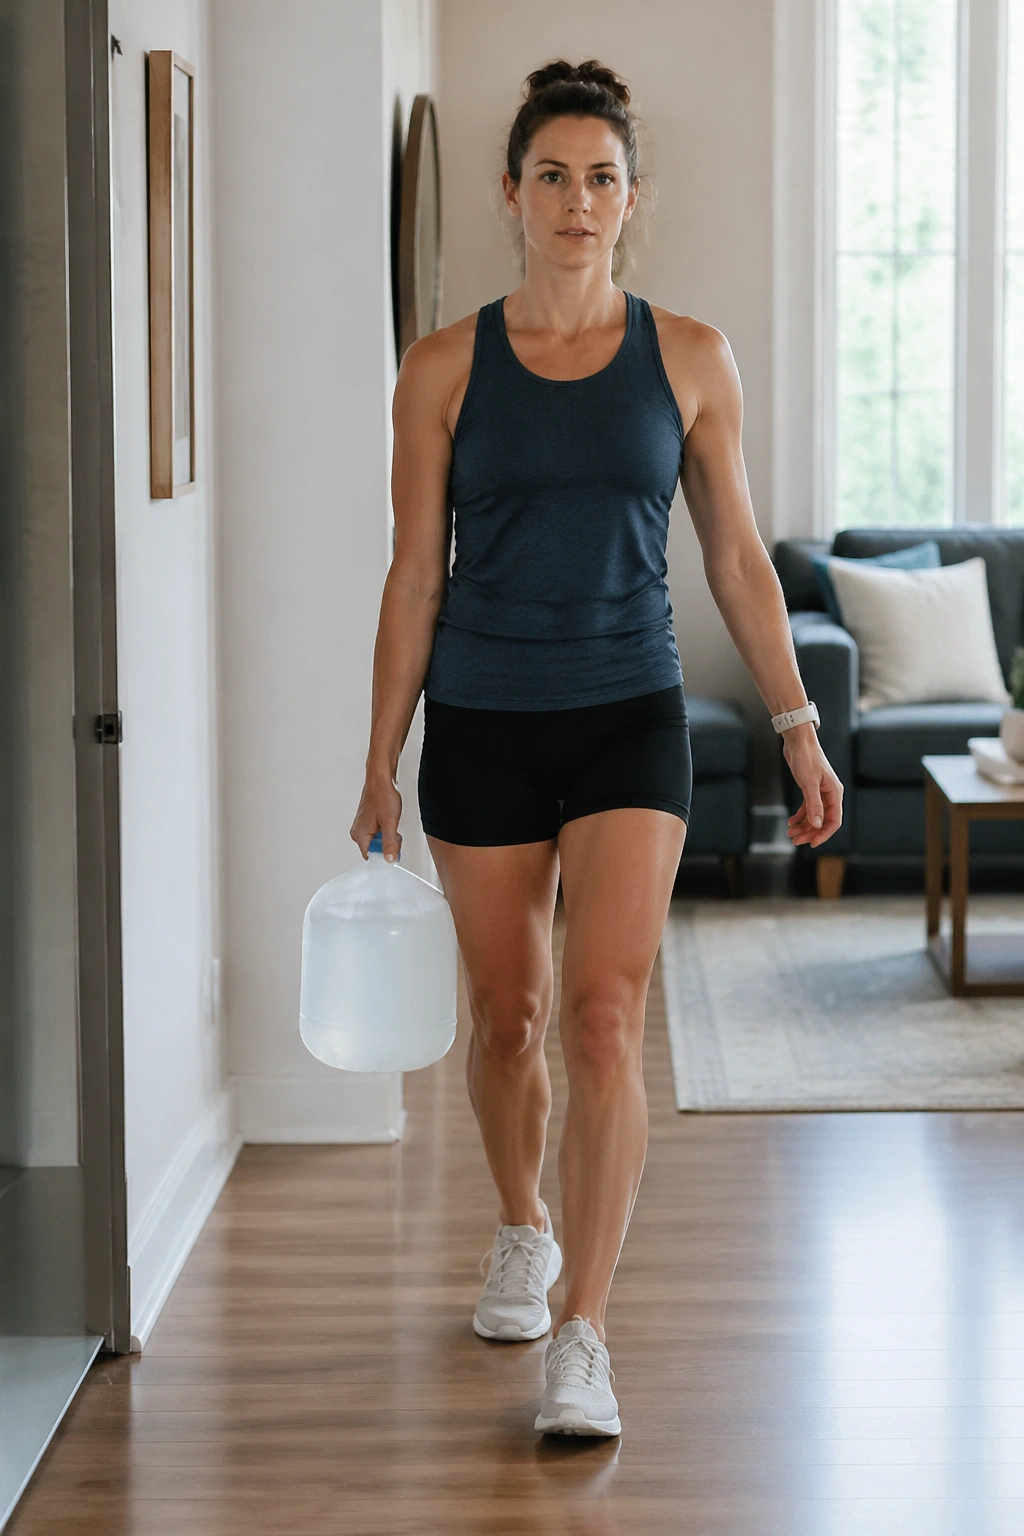
Farmer carries are one of my favorite home exercises because they look simple and expose every weak link in posture. You pick up a weight in one hand, stand tall, and walk. That’s it. But holding a load without leaning, shrugging, or twisting is far from nothing.
Use a water jug, detergent bottle, backpack, or grocery bag. Hold it on one side, keep the ribs stacked over the pelvis, and walk 20 to 40 seconds. Then switch sides. If you have room, do a suitcase carry with just one hand. If not, march in place.
The core has to work hard to stop you from tipping. The shoulder has to stay quiet. The glute on the standing side has to help. It’s a full-body lesson in control.
Clean cues
- Don’t lean toward the load.
- Keep the neck long.
- Breathe while you walk.
- Short steps are fine.
This one looks humble. It is not.
21. Baby-Wearing Walk and Gentle Dance Steps
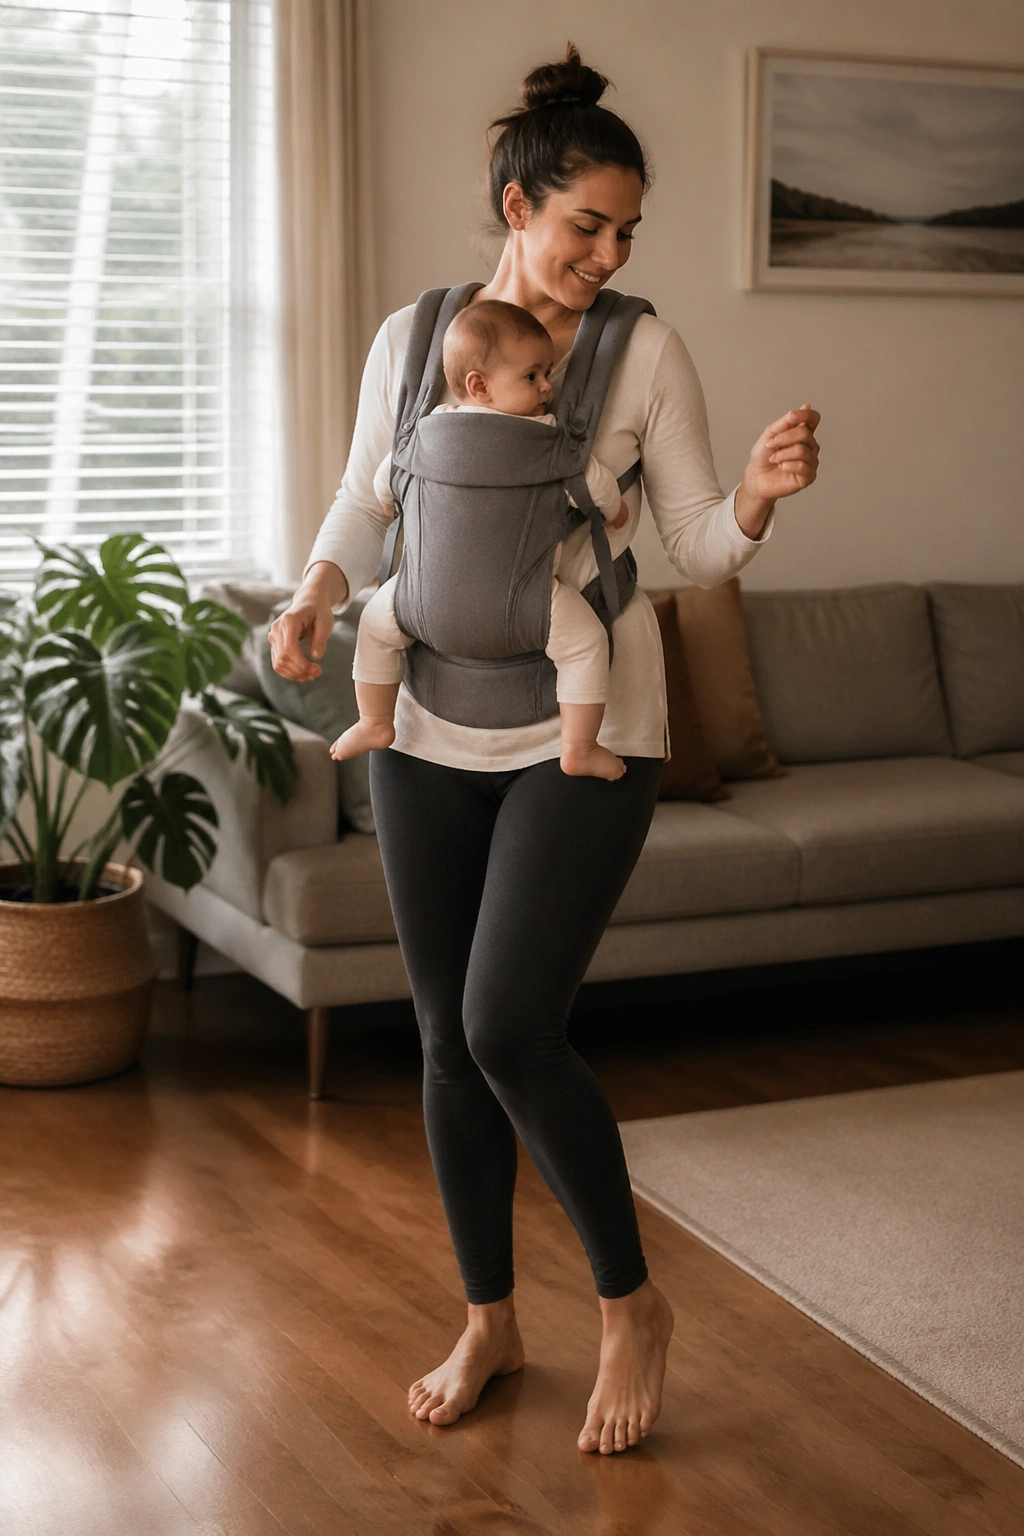
Here’s a workout that often happens by accident and can be turned into something useful on purpose. Put the baby in a secure carrier, keep the steps small, and walk or sway around the house with a little rhythm. No bouncing. No twisting hard. No trying to turn it into a fitness class.
The point is to raise heart rate a bit while holding good posture and staying aware of pressure. Keep the ribs over the pelvis, soften the knees, and move like the floor is slippery. That usually keeps the motion kind and the baby happy, which is a nice bonus.
If baby-wearing makes your back or pelvic floor feel off, skip it and do the same pattern without the carrier. A slow kitchen dance is still movement. So is marching in place while holding nothing at all.
Comfort and control beat intensity here. You’re building tolerance, not proving a point.
22. Glute Bridge Marches
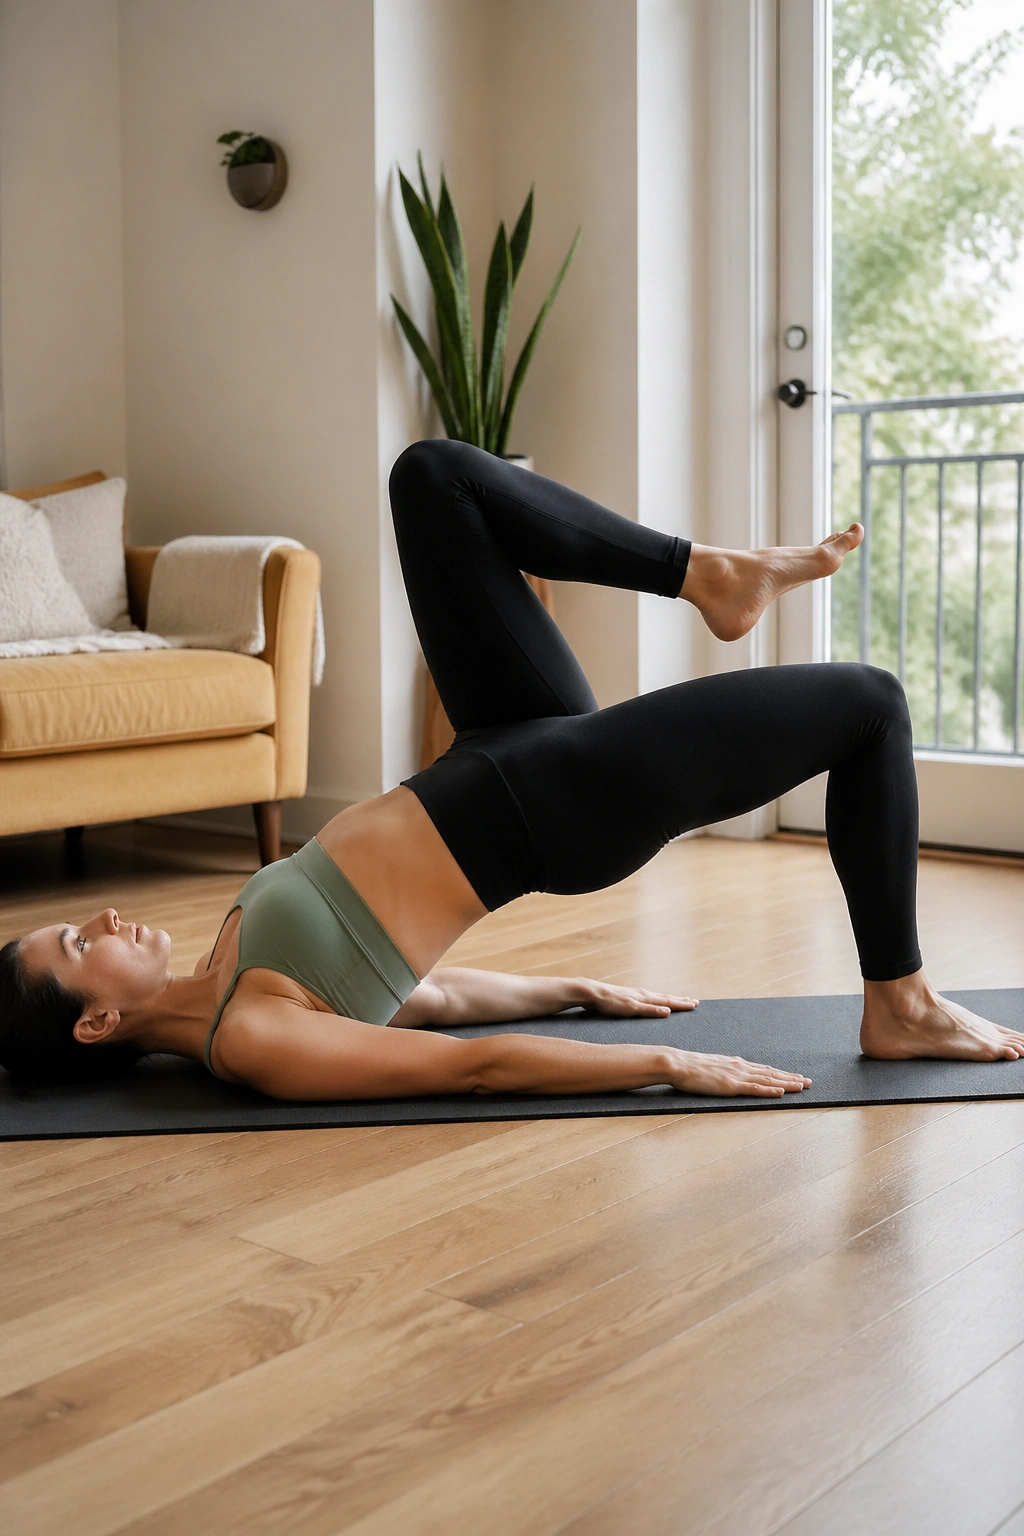
Once ordinary bridges feel stable, bridge marches add a little asymmetry and ask the trunk to resist shifting. That makes them a nice bridge between basic core work and harder dynamic work. The name is almost too literal. Fine by me.
Set up in a bridge position, lift the hips, and keep them there while one knee floats up a few inches, then returns. Switch sides. The pelvis should stay level. If one side drops hard, go back to plain bridges and stay there a while longer.
This move is more demanding than it looks. That’s the charm. It catches the deep core without a bunch of crunching or bouncing.
Use this rule
- If the hips wobble, reduce the lift.
- If the lower back arches, lower the hips.
- If the neck gets tight, take a break.
- If the belly domes, regress.
Four marches per side is enough to start. Clean form first. Always.
23. Reverse Lunges with Chair Support
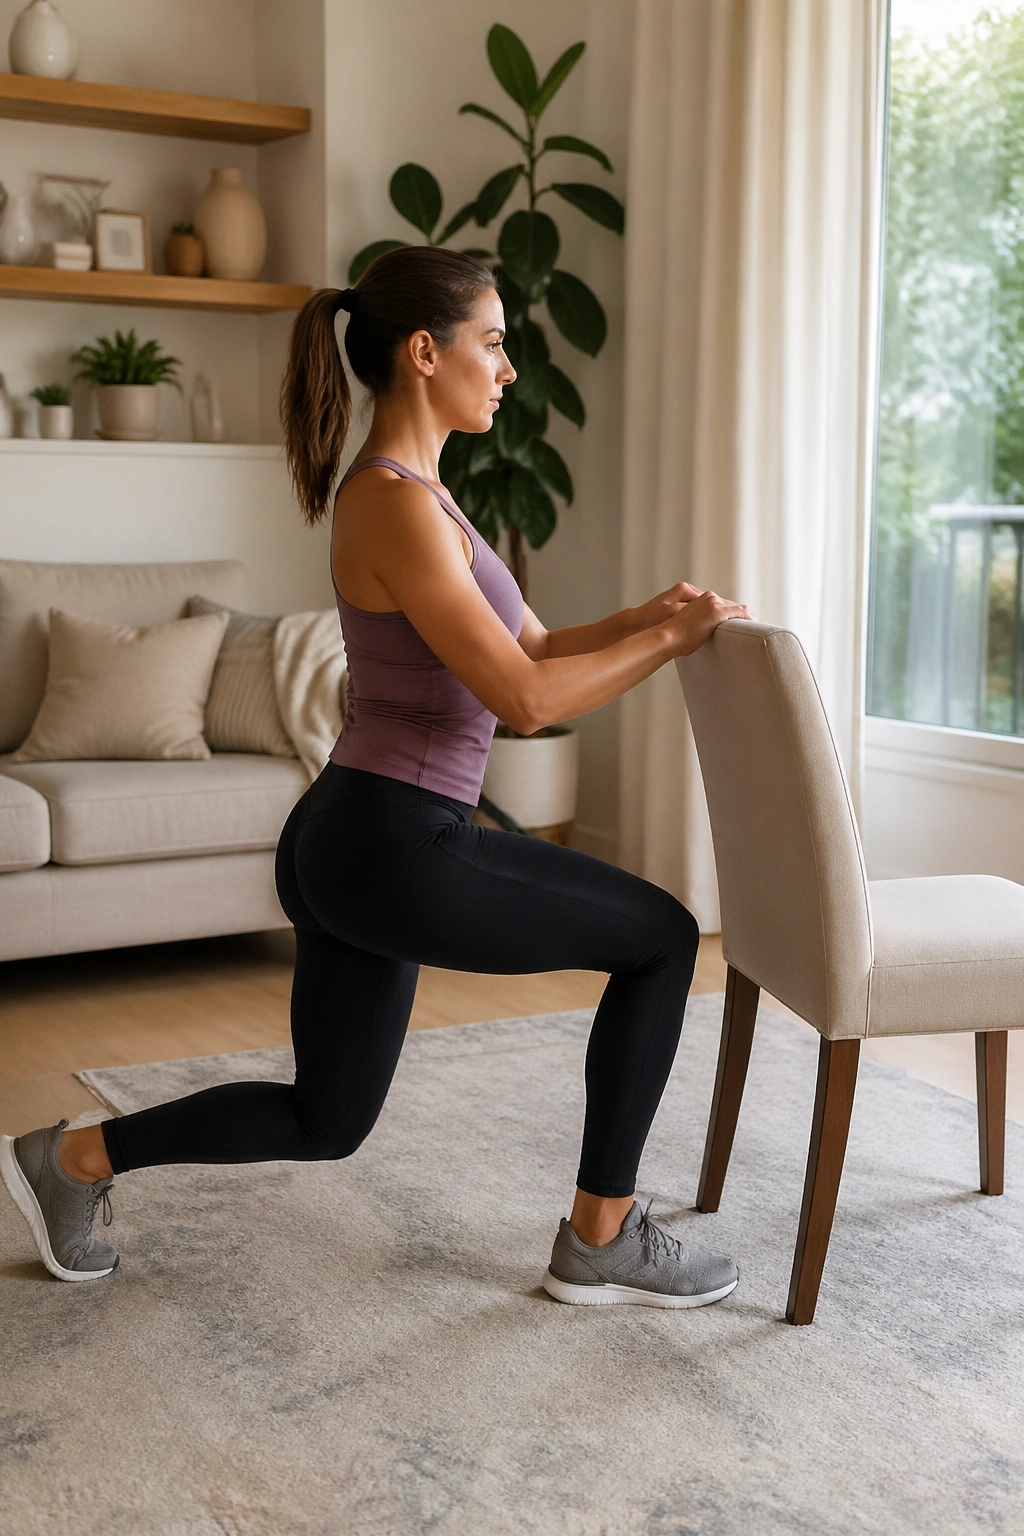
Reverse lunges are kinder than forward lunges for many postpartum bodies because you step back instead of jamming weight forward. The movement builds leg strength, balance, and hip control while giving the front knee a little more mercy.
Hold the back of a chair or a counter. Step one leg back, lower gently until both knees bend, then press through the front foot to stand. Keep the torso upright and the front heel grounded. A tiny step back is fine. You do not need a dramatic split stance.
If balance feels shaky, keep the range short. If knee pain shows up, shrink the depth or switch to split-stance holds instead of full lunges.
The back leg is there for balance. The front leg does the real work. Six reps per side can be enough for a first round, and it often feels more productive than it sounds.
24. Seated Overhead Press with Light Weights
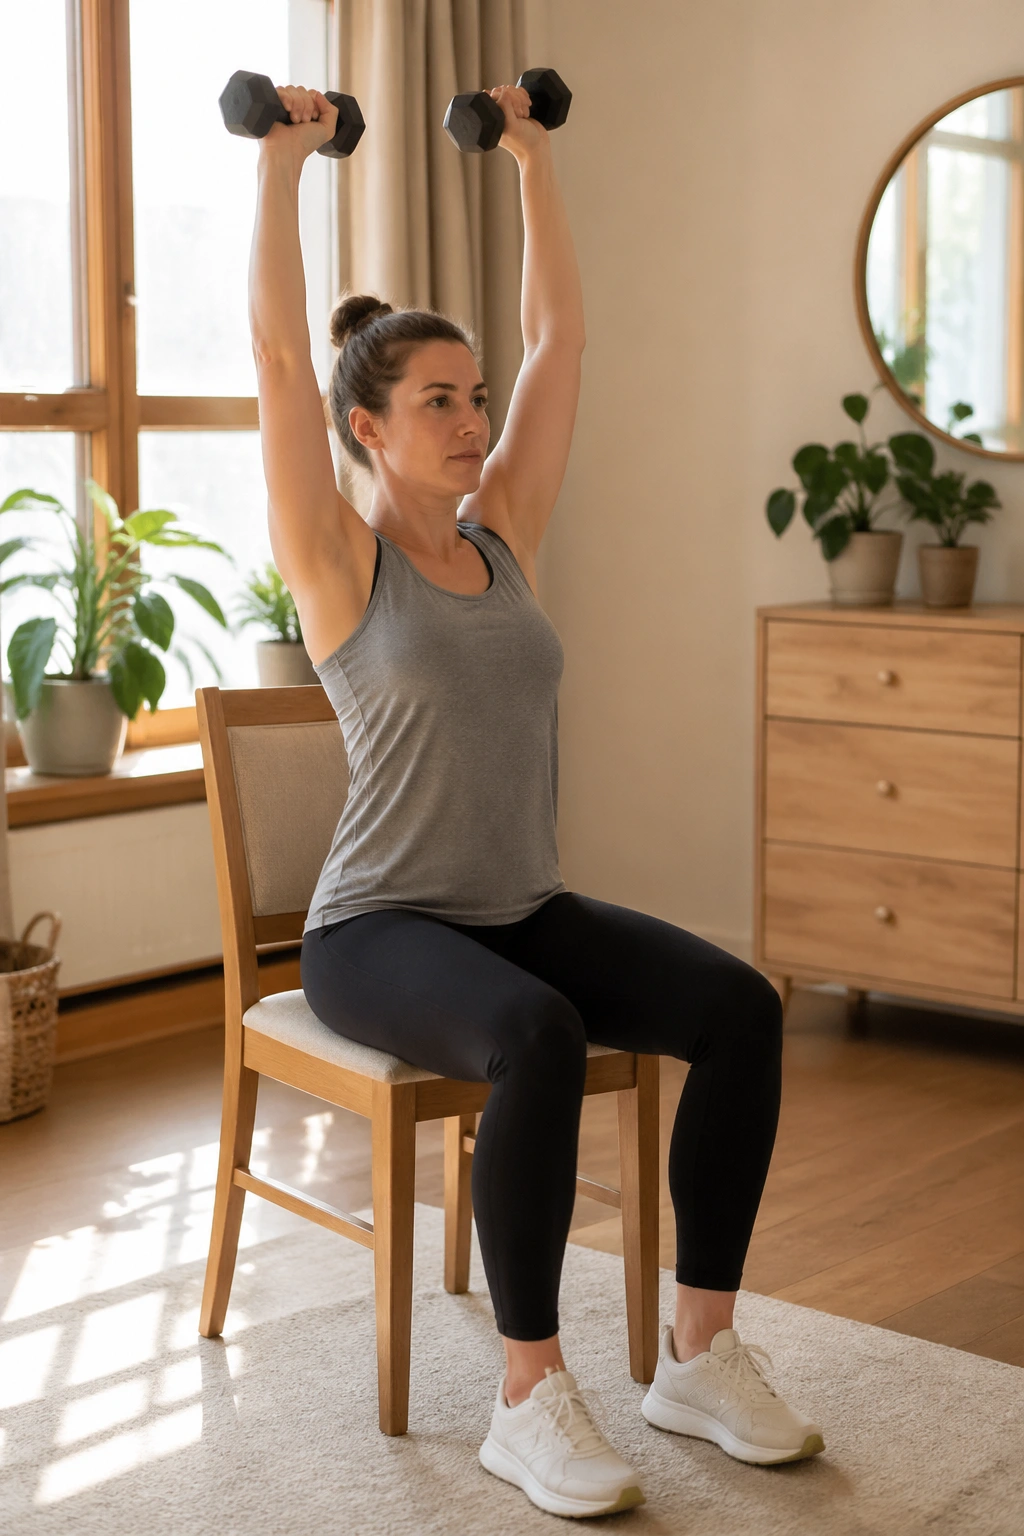
This is the upper-body move that helps when your shoulders have spent weeks curling forward around feeding, holding, and carrying. A seated overhead press trains the deltoids and upper back while keeping the lower body out of the equation.
Sit tall on a chair with feet flat. Hold light weights, water bottles, or canned goods at shoulder height. Exhale and press them overhead, stopping before the elbows lock hard. Lower slowly. Keep the ribs from flaring up like a fish belly. That is the main cheat to avoid.
If one arm is weaker or the core feels unsteady, press one side at a time. That lets you keep better shape and often feels cleaner. Start light. Much lighter than your ego wants.
Good signs
- No neck shrugging.
- No back arching.
- No breath holding.
- Smooth lowering phase.
Eight reps is plenty. The goal is better posture, not a shoulder showdown.
25. Five-Minute Recovery Flow and Stretch Reset
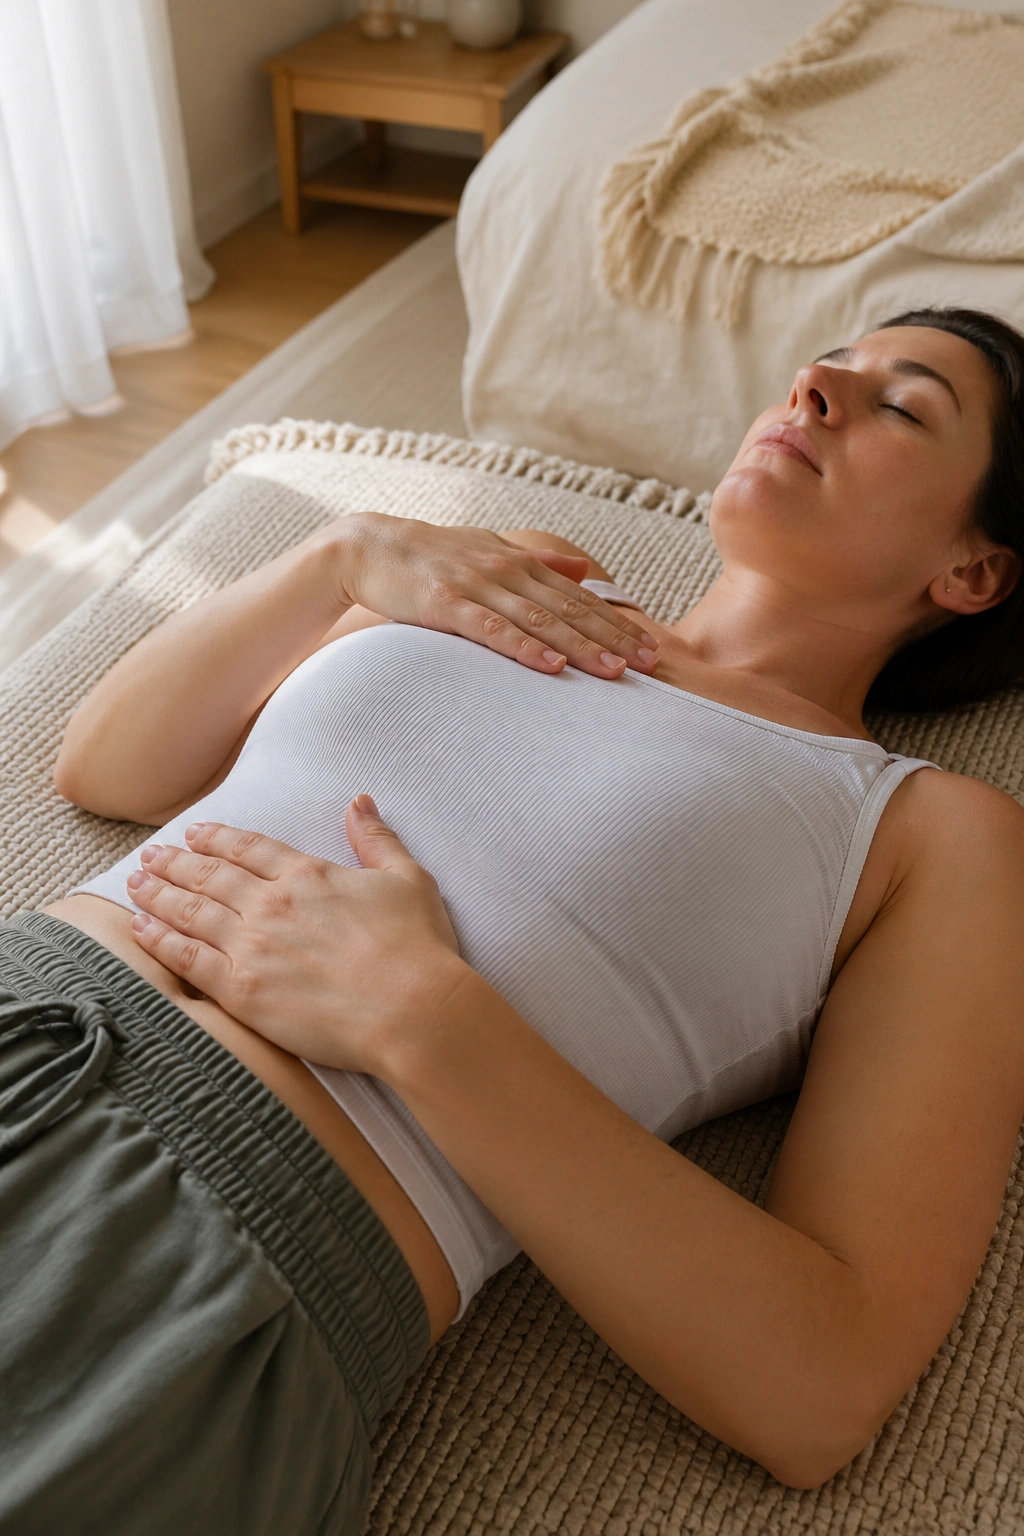
Some days the best postpartum workout is not a workout in the usual sense. It is a short recovery flow that opens the ribs, hips, and upper back so the next real session doesn’t start from a knot of stiffness. That matters more than people like to admit.
Try a simple sequence: 5 slow breaths lying down, 30 seconds of cat-cow, 30 seconds per side of open-book rotation on the floor, and a 20-second supported hip flexor stretch on each side. Keep every piece easy. No hard pushing, no aggressive stretching, no long holds that make you brace. You want the body to settle, not fight back.
This is a good finisher after walking, strength work, or one of those days when sleep was lousy and the only real goal is not feeling stuck in your own skin. A recovery flow like this can also help if your shoulders live near your ears by the end of the day.
Gentle done well is still training. If you only have five minutes, take them. They count.
