



The crunch that makes your belly ridge upward is the wrong kind of core work during pregnancy and early postpartum.
If you’re looking for workouts to prevent diastasis recti, the real goal is less dramatic than most fitness advice makes it sound: keep pressure moving in the right direction, teach the deep core to switch on without bulging, and stop the midline from taking every ounce of strain. Diastasis recti is the widening of the space between the rectus abdominis muscles along the linea alba, and pregnancy itself changes that tissue. No exercise can promise you’ll never see separation, but smart loading can make the whole system work a lot better.
That means we care about breathing, rib position, hip strength, posture, and how you move under load. We care less about chasing a burn in the abs and more about whether the belly stays smooth, the ribs stay stacked, and the back doesn’t steal the job. If you see doming, coning, or a hard push outward in the center line, that’s your body waving a small red flag.
No hard bracing.
1. 360-Degree Breathing for Better Diastasis Recti Control

Breathing sounds basic because it is basic, and that’s exactly why it matters so much. A lot of core work goes sideways because the breath never settles the ribs, so the belly braces in a clumsy way and pressure shoots forward instead of spreading through the sides and back.
Why It Helps
When you inhale into the lower ribs, side ribs, and back body, you give the diaphragm room to move and the deep core a chance to organize underneath it. That helps the transverse abdominis and pelvic floor coordinate instead of fighting each other. The result is less of that sharp forward bulge that shows up during a crunch, a sit-up, or a heavy lift.
How to Practice It
Lie on your side or sit upright. Place one hand on the side of your ribs and one on your lower belly. Inhale through your nose for 3 to 4 counts and try to feel the breath widen your ribs sideways and into your back. Exhale for 5 to 7 counts and let the ribs soften down without sucking your stomach in hard.
What to Watch For
- Keep the shoulders quiet.
- Don’t push the belly out aggressively.
- Aim for wide breathing, not high chest breathing.
- Stop the exhale before you feel strain.
One calm breath done well beats ten rushed ones. Seriously.
2. Pelvic Tilts That Wake Up the Low Belly
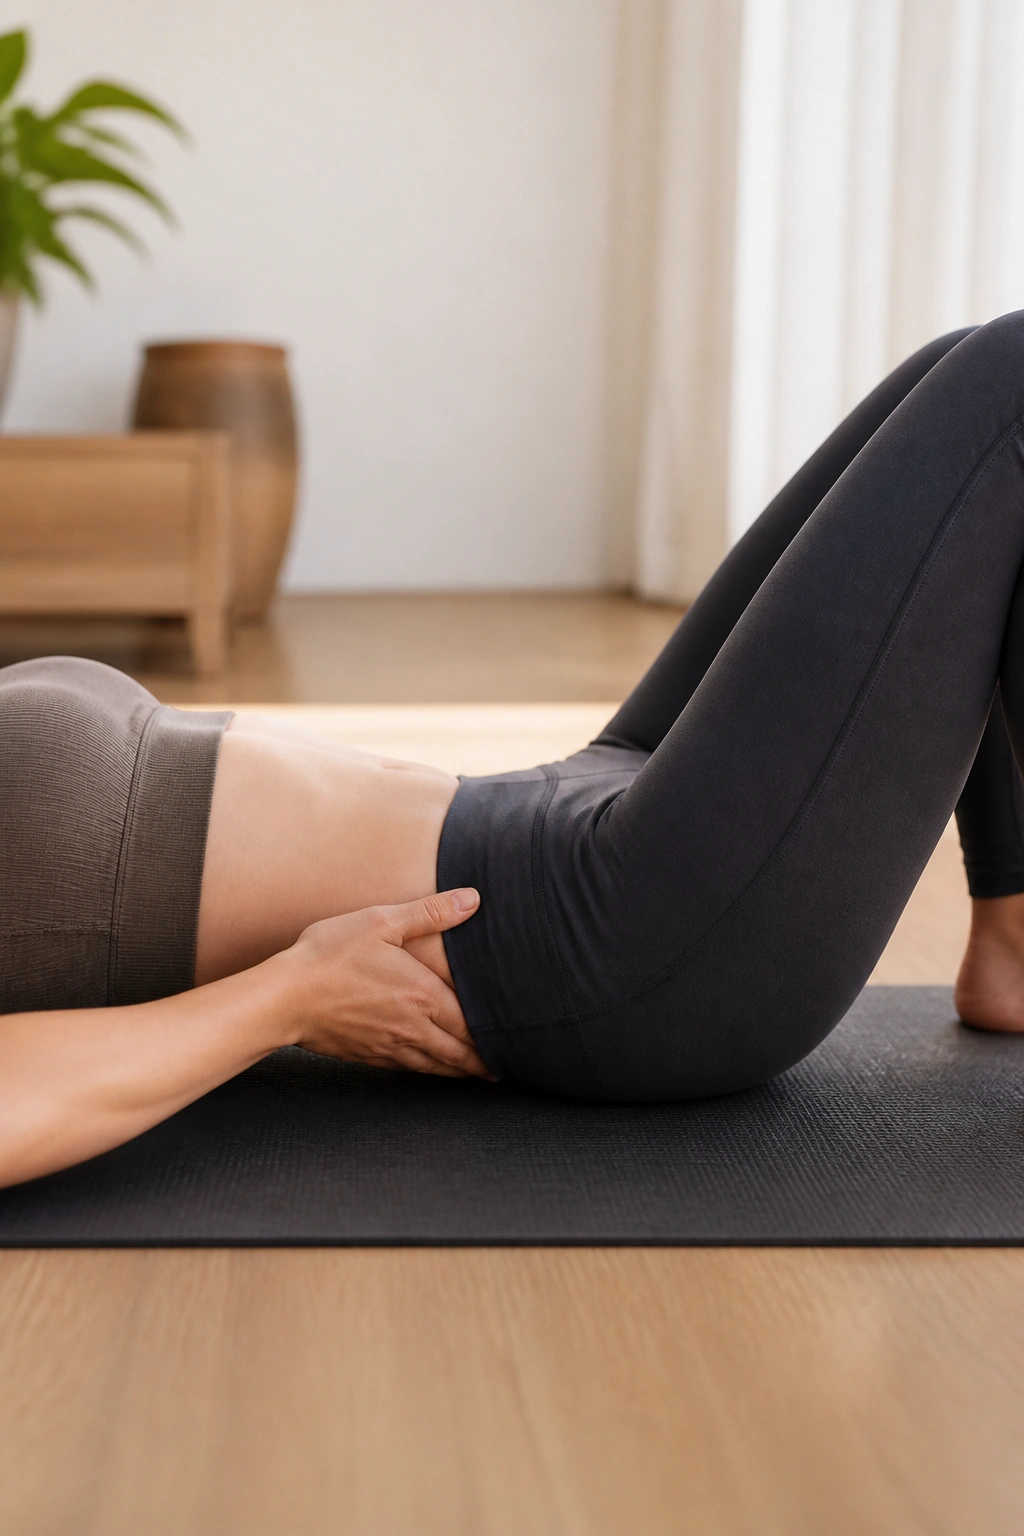
Pelvic tilts look plain, and people skip plain exercises all the time. That’s a mistake, because this move teaches you how to move the pelvis without making the whole front line tense up and spill outward.
Lie on your back with knees bent if that feels fine, or stand with your back against a wall if floor work is uncomfortable. Gently tip the pelvis so the low back flattens a little, then ease it back to neutral. The movement is tiny. You are not trying to crush the spine into the floor.
The useful part is the coordination between the exhale and the tilt. Breathe out as the tailbone drops and the front of the pelvis lifts slightly. Breathe in as you come back to center. That rhythm helps build control around the lower abdomen, which is where many people feel the first signs of doming.
Do 8 to 12 slow reps. If the movement turns into a big tuck or your ribs flare, back off and make it smaller. Tiny is fine here. Tiny is often better.
3. Heel Slides That Keep the Midline Quiet
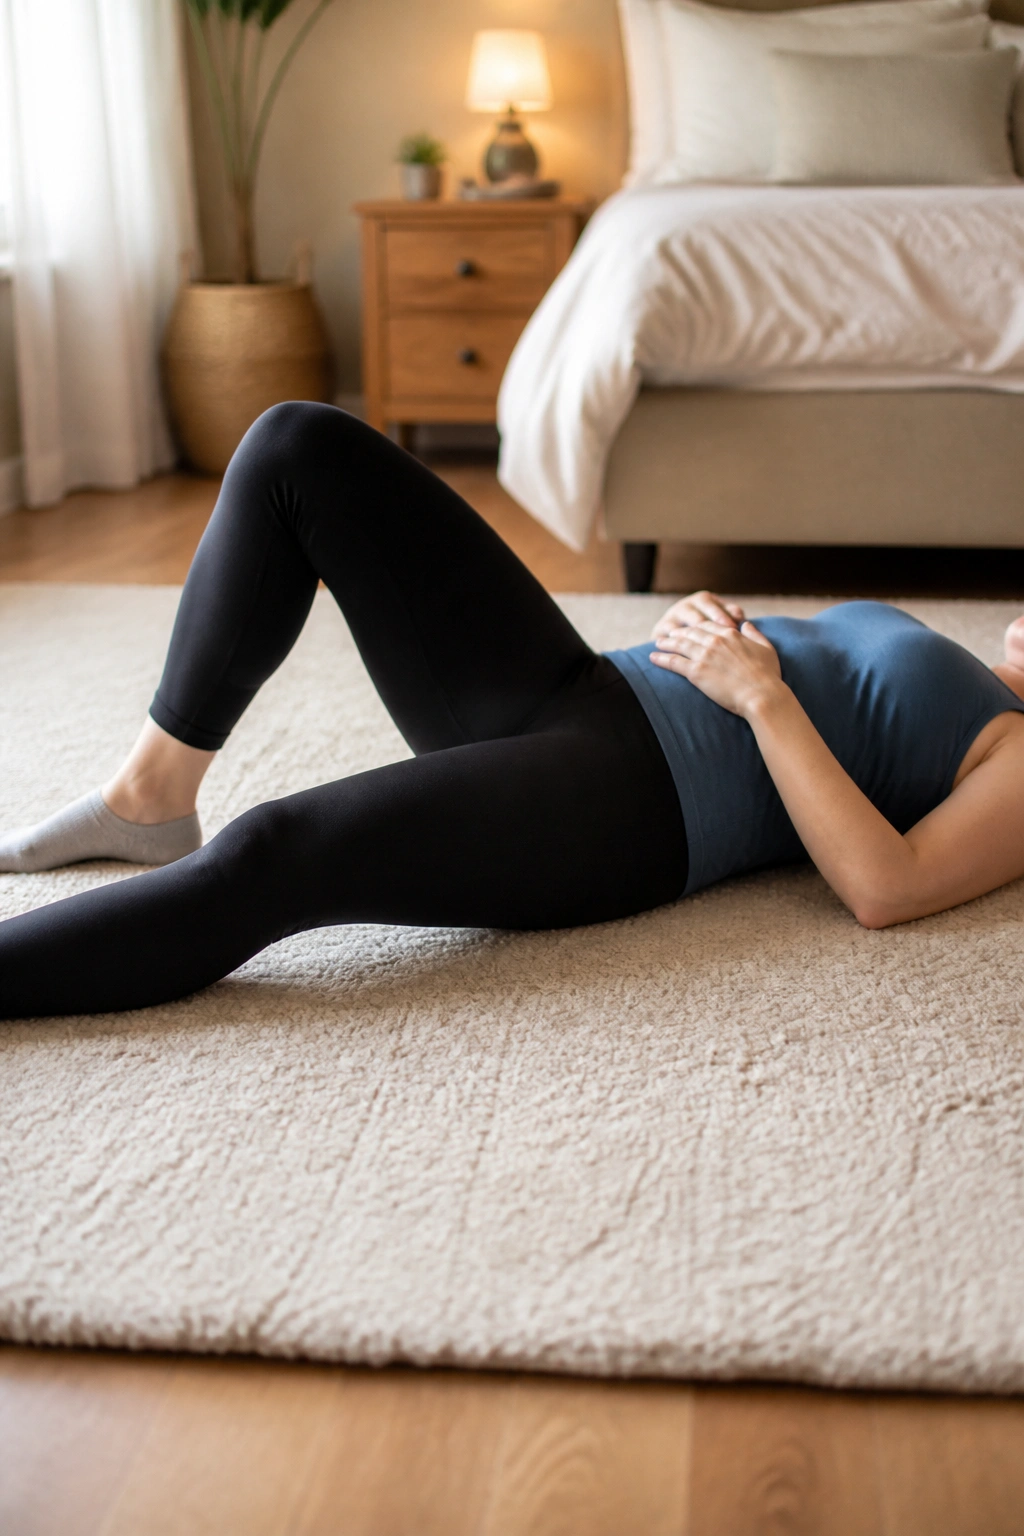
Heel slides are sneaky good because your legs move while your trunk has to stay boring. Boring is the point. If the belly pops up or the back arches every time one leg extends, the core is not ready for more load yet.
Start on your back with knees bent, feet flat, and a neutral pelvis. Exhale gently, then slide one heel away from your body until the leg is partly straight, keeping the foot on the floor the whole time. Inhale as you bring it back in. Ten slow slides per side is plenty for most people.
A few cues make this exercise work better:
- Keep the front ribs heavy.
- Let the movement stay smooth, not fast.
- Stop the slide before the belly domes.
- Use a smaller range if the low back shifts.
If lying flat feels bad, do the same movement with one heel sliding on a towel from a semi-reclined position or on a firm bed. That little change makes the move friendlier during later pregnancy without losing the pressure-control lesson.
4. Bird Dog Reaches from Hands and Knees
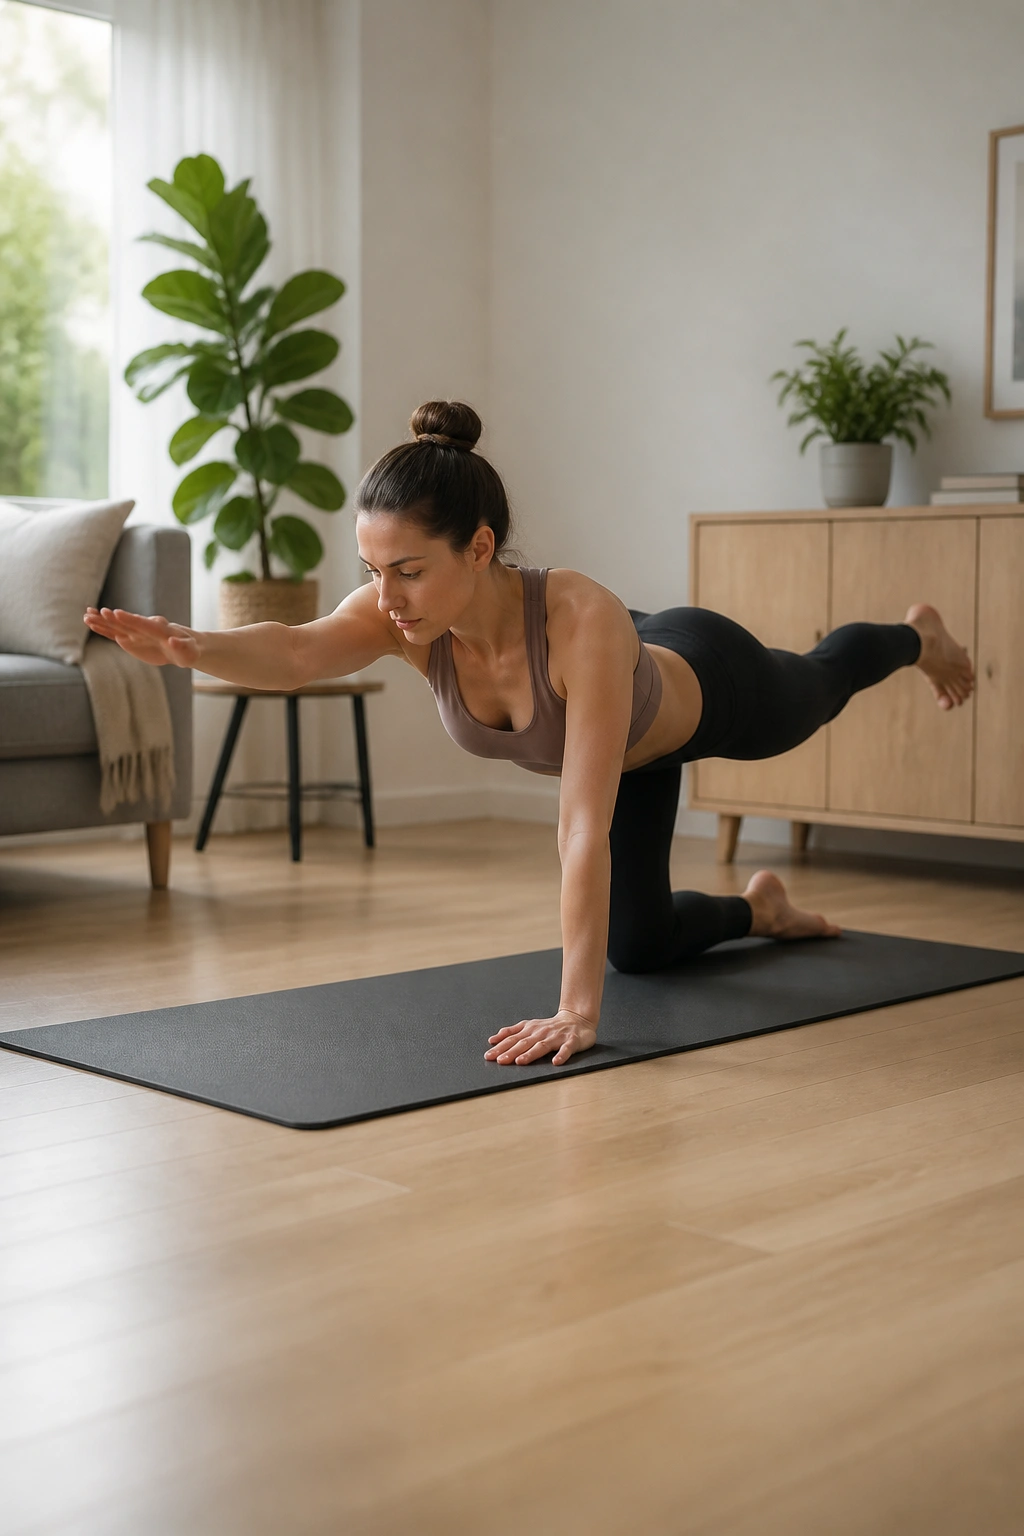
Why does bird dog show up in so many prenatal core programs? Because it teaches the trunk to stay steady while the arms and legs move in opposite directions. That’s real-life core work, not gym theater.
Set up on hands and knees with wrists under shoulders and knees under hips. Before you move, take a slow exhale and feel your ribs settle. Then reach one leg straight back and the opposite arm forward, only as far as you can go without shifting your pelvis. Hold for 1 to 2 seconds, then return with control.
How to Make It Easier
If the full reach feels wobbly, take away one side at a time. Leg only. Arm only. That’s still useful. A smaller reach with a clean midline is better than a bigger reach with your belly dropping toward the floor.
What You Want to Feel
- Gentle work through the glutes.
- A quiet waistline, not a bulge.
- Weight spread evenly through both hands.
- No twisting through the low back.
Bird dog is one of those moves that looks almost too simple to matter. It matters.
5. Dead Bug Heel Taps with a Strong Exhale
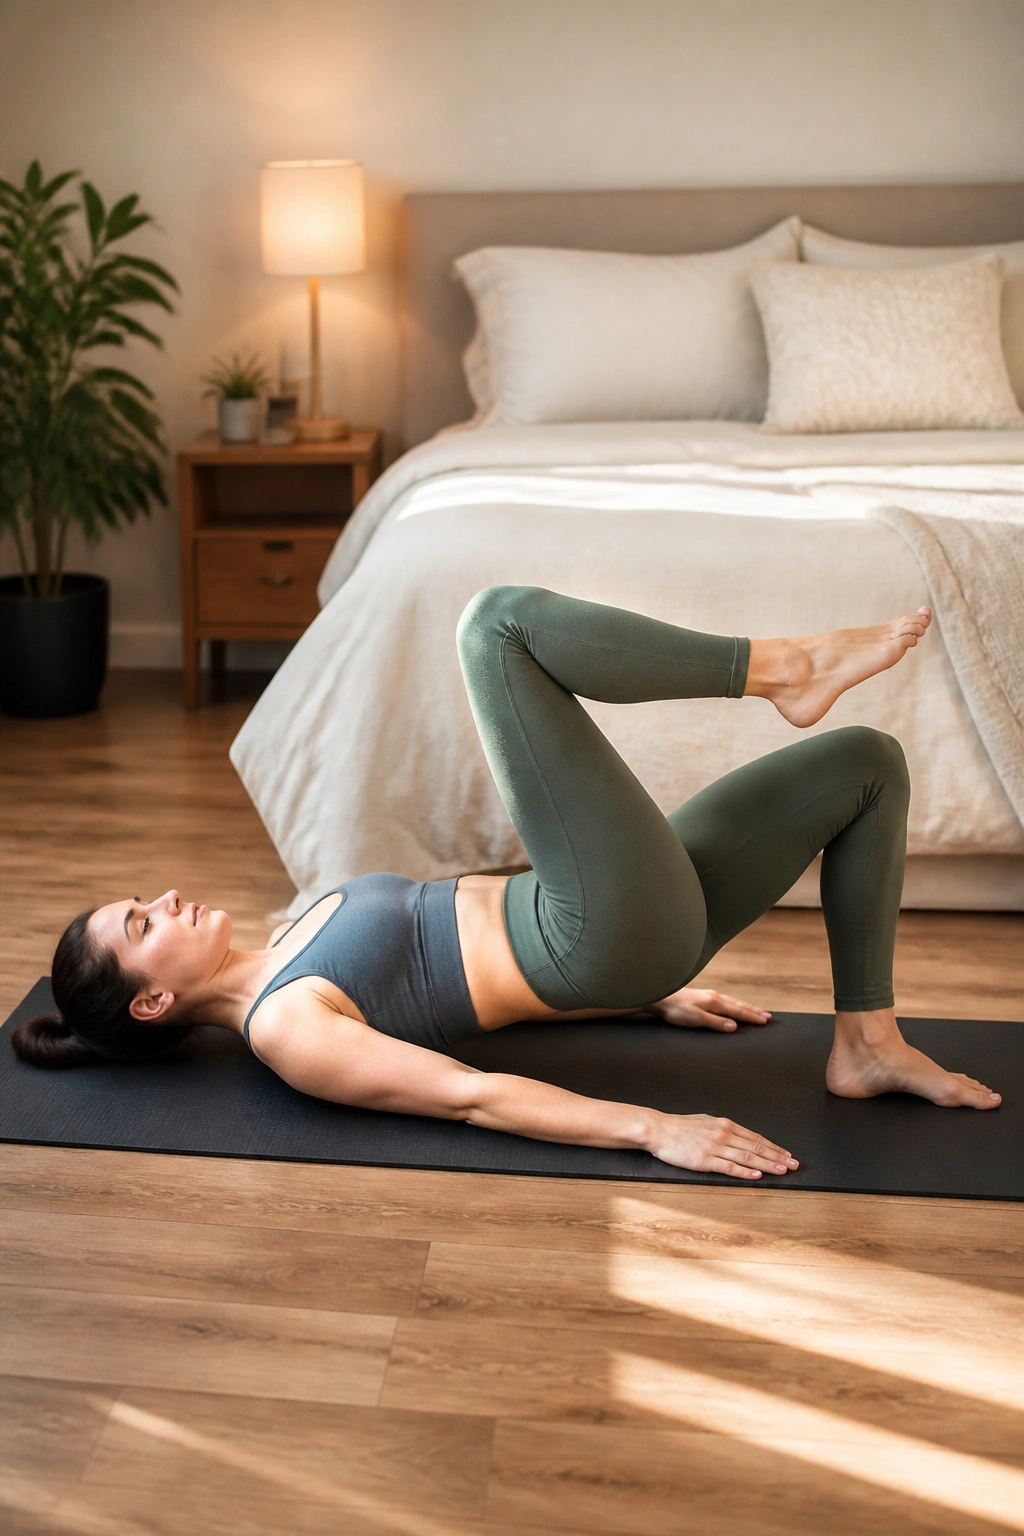
Dead bug is a classic, but the full version can be too much too soon. Heel taps are the friendlier entry point, and they let you build anti-extension strength without asking the belly to hold a dramatic hollow position.
Lie on your back with knees above the hips or with feet hovering in tabletop if that feels easy. Exhale first and feel the ribs drop. Then tap one heel to the floor and bring it back, keeping the low back steady. Alternate sides for 6 to 10 taps each.
If the belly domes, shorten the range and make the legs move slower. If the lower back pops up, the rep is too big. Take the ego out of it. This is a control drill, not a showpiece.
A good heel tap should feel almost quiet. You should see the abdomen stay broad and flat-ish across the center, not bulge into a ridge. When people get this right, they usually look surprised at how much harder it is than it sounds.
6. Side-Lying Clamshells for Hip Support
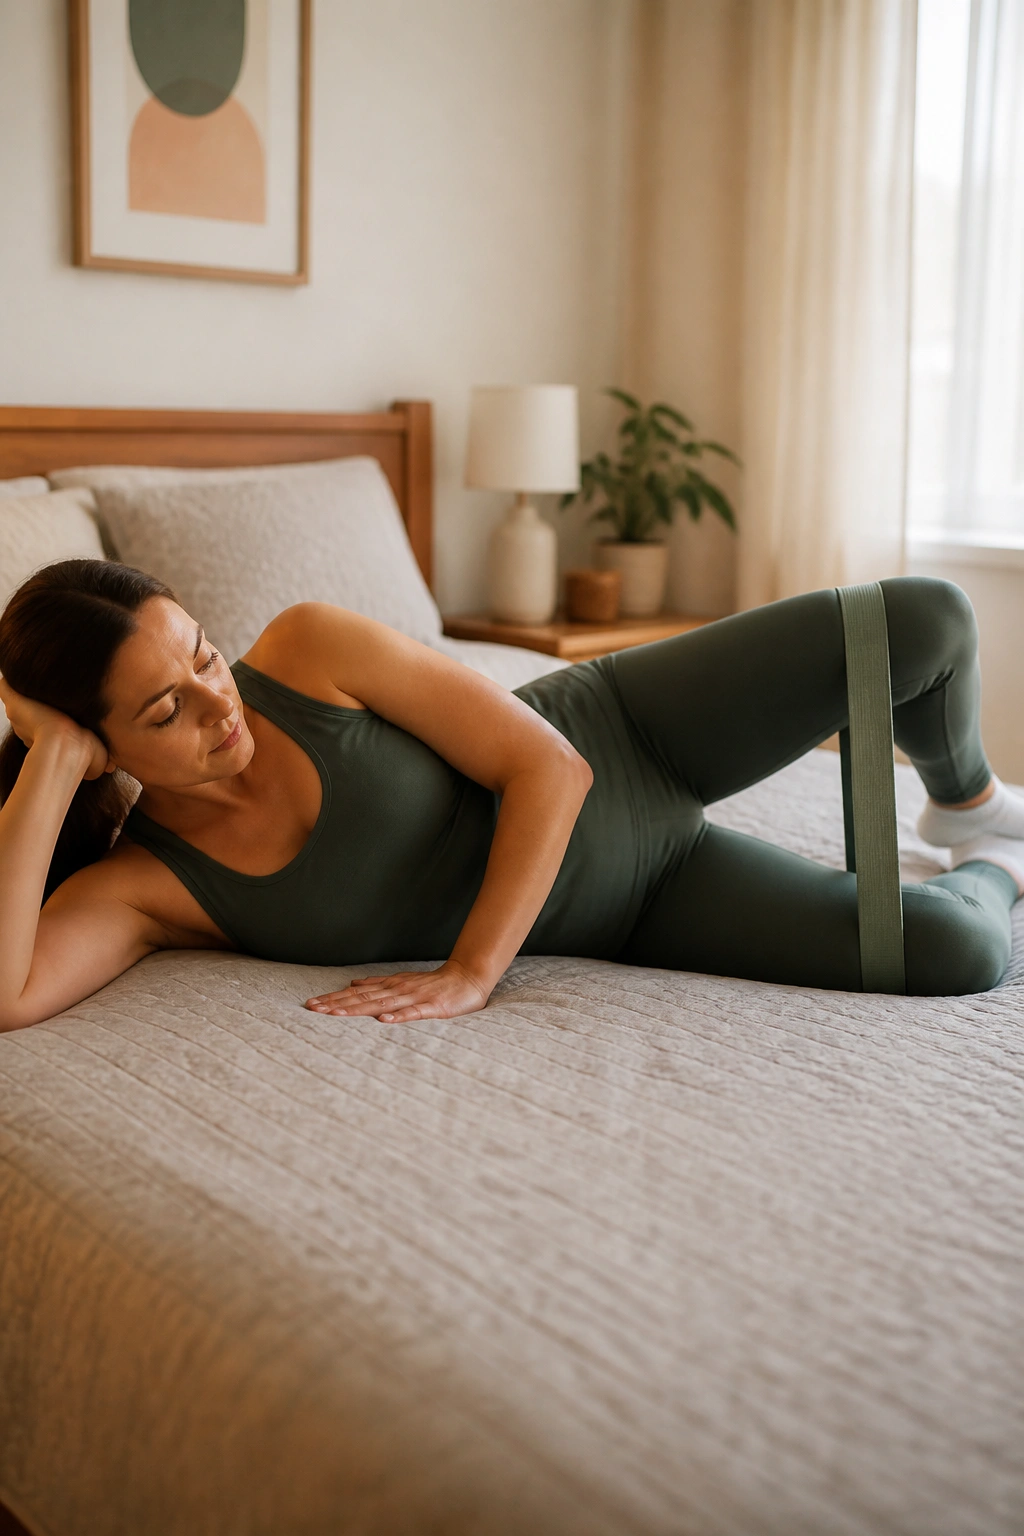
The hips do more for your core than most people realize. Weak or sleepy glutes can make the low back and front belly pick up extra work, and that’s where the pressure gets sloppy. Side-lying clamshells help clean that up.
Lie on your side with knees bent, feet together, and hips stacked. Keep the pelvis still and open the top knee like a clamshell without rolling backward. Pause for a second at the top, then lower slowly. Ten to 15 reps per side is a solid start.
You can add a light mini-band above the knees if the movement feels too easy, but don’t rush to make it harder. The point is not to burn the side of the hip so badly that form goes sloppy. The point is to wake up the muscles that help keep the pelvis steady when you walk, squat, carry a baby, or climb stairs.
Small movement. Big payoff. That’s the whole story here.
7. Glute Bridges That Teach the Belly to Stay Relaxed
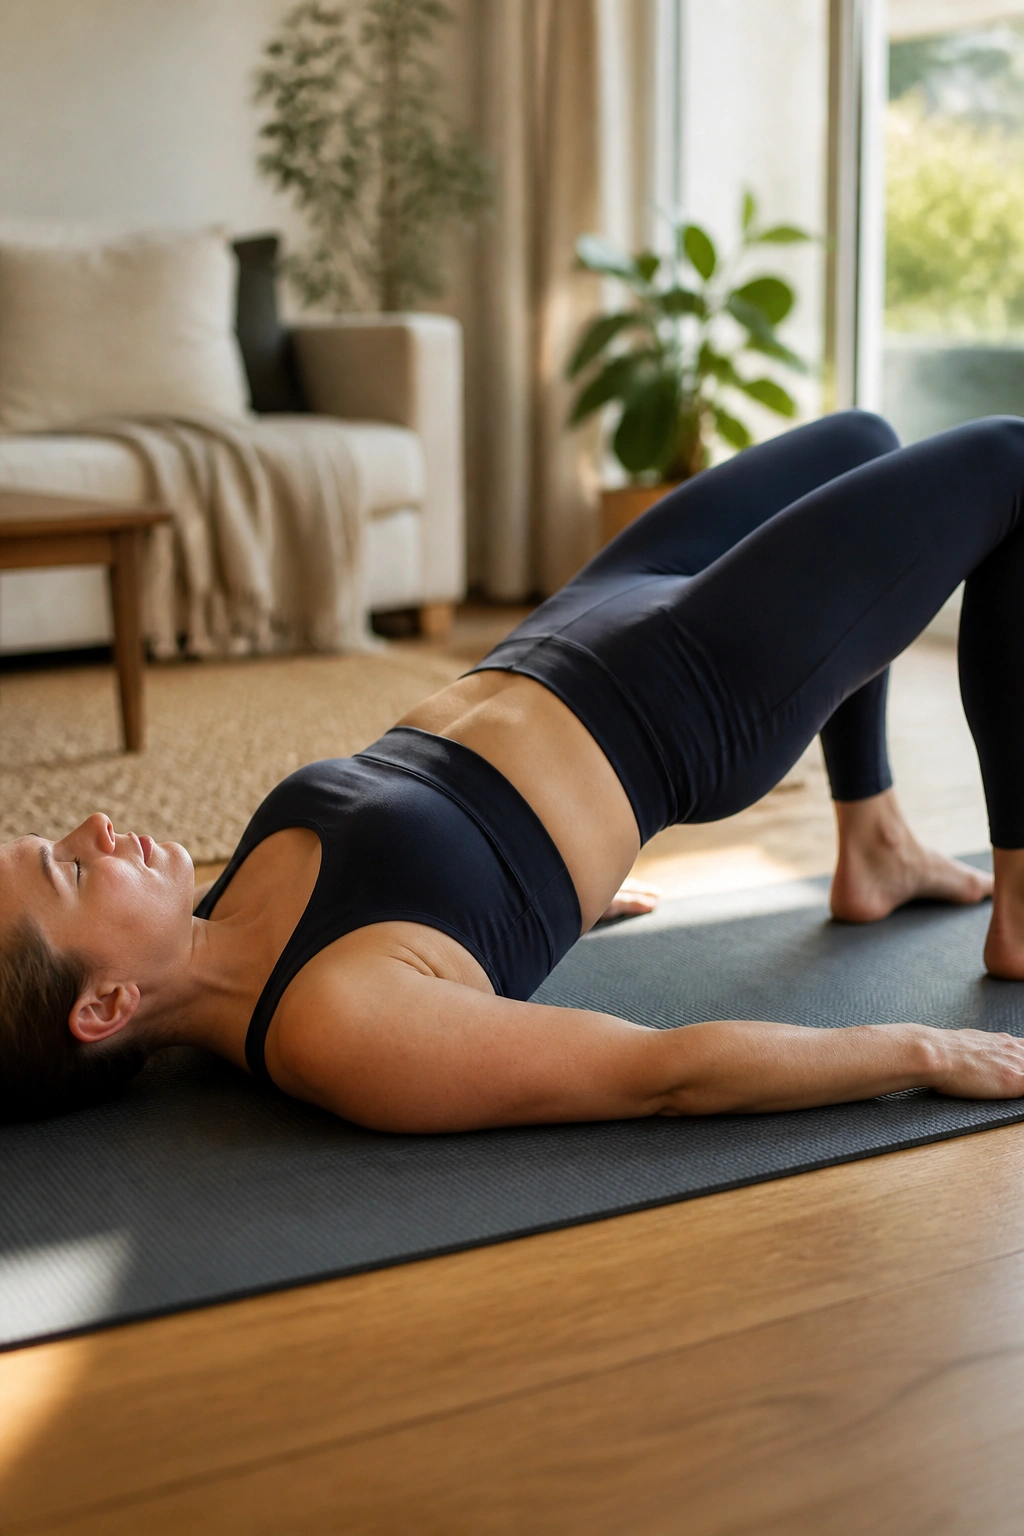
A good glute bridge can be excellent for core support because it trains the back side of the body to share the load. When the glutes do their share, the front wall of the abdomen often has an easier time staying smooth.
Lie on your back with knees bent and feet about hip-width apart. Exhale as you press through the heels and lift the hips until your body makes a long line from shoulders to knees. Pause for 1 to 2 seconds, then lower with control. Six to 12 reps is plenty.
If you’re pregnant and lying flat feels uncomfortable, raise your upper body slightly on a firm wedge or skip this move for a standing hip hinge. Use the version that keeps you calm and comfortable. No prize is handed out for forcing the floor variation.
Common Slip-Up
Do not over-arch at the top. If the ribs flare and the low back takes over, the bridge has gone too far. Stop earlier and think “glutes up, ribs down.”
8. Wall Push-Ups That Build Upper-Body Strength Without Belly Pressure
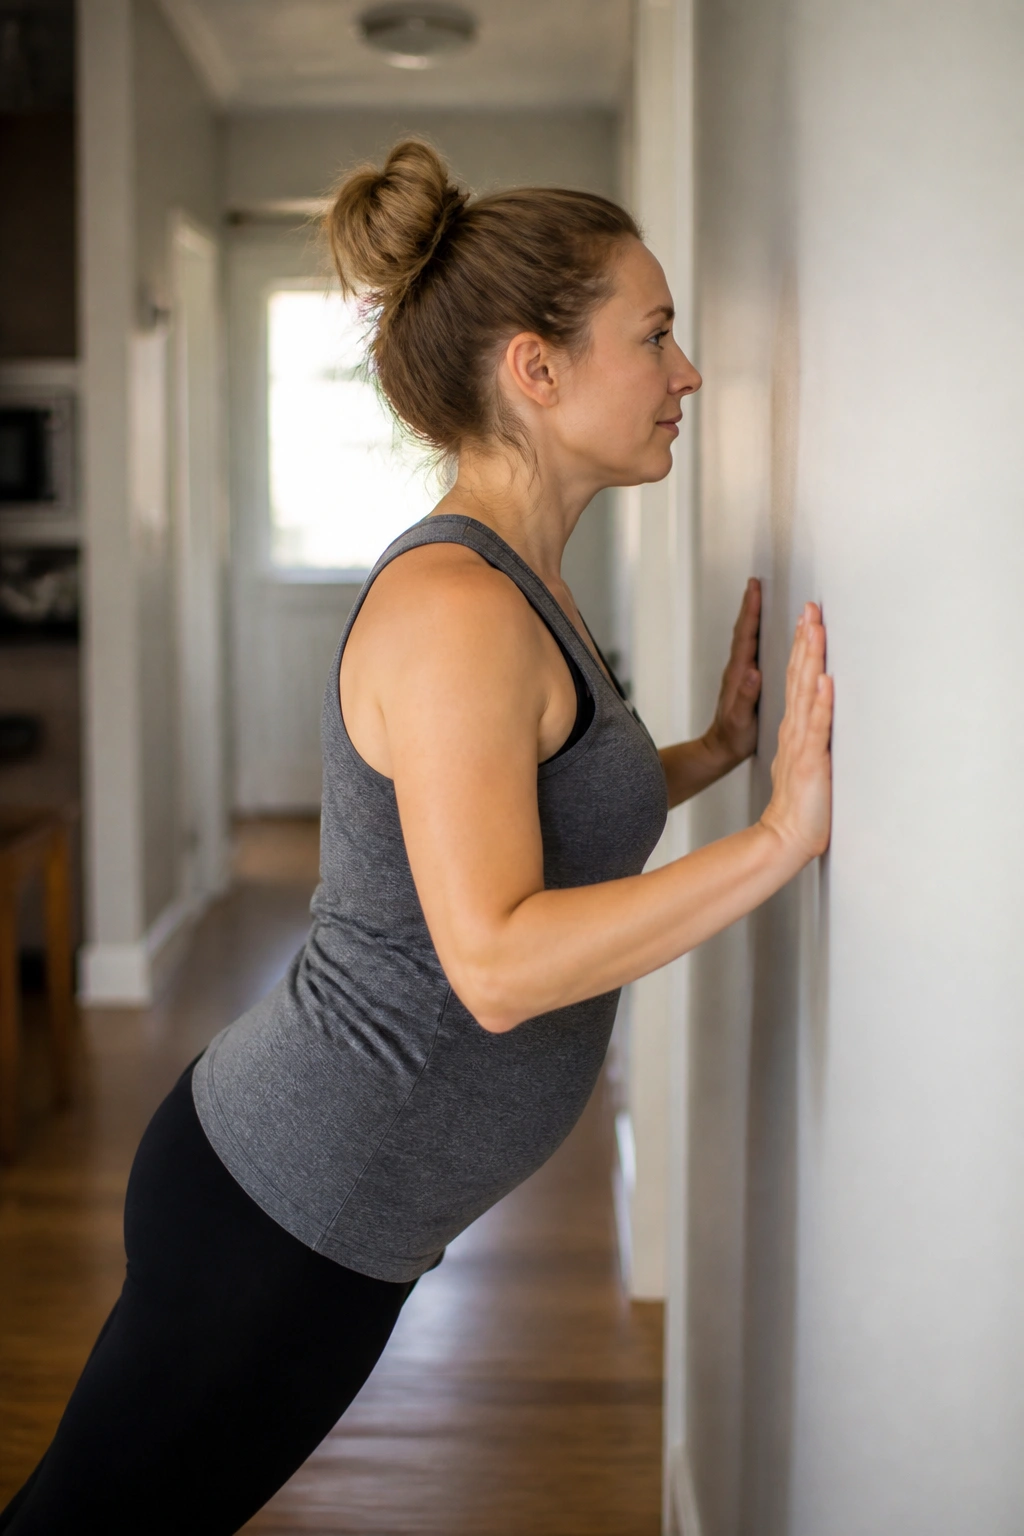
Wall push-ups are underrated because they look easy from across the room. Up close, they teach shoulder control, trunk stability, and how to press without letting the abdomen shove forward.
Stand arm’s length from a wall with hands at chest height. Keep the body in one line and bend the elbows to bring your chest toward the wall. Push back to start while exhaling. Aim for 8 to 15 reps, smooth and controlled.
The farther your feet are from the wall, the harder it gets. That’s your easiest way to scale the exercise. If you want more challenge, step back a few inches. If the low back arches or the belly pushes outward, step in closer.
This one matters because pregnancy and postpartum life involve a lot of pushing: doors, strollers, car seats, high chairs, and tiny humans who never stop wriggling. Strong pressing mechanics help all of it feel less chaotic.
9. Incline Planks That Keep Diastasis Recti from Doming
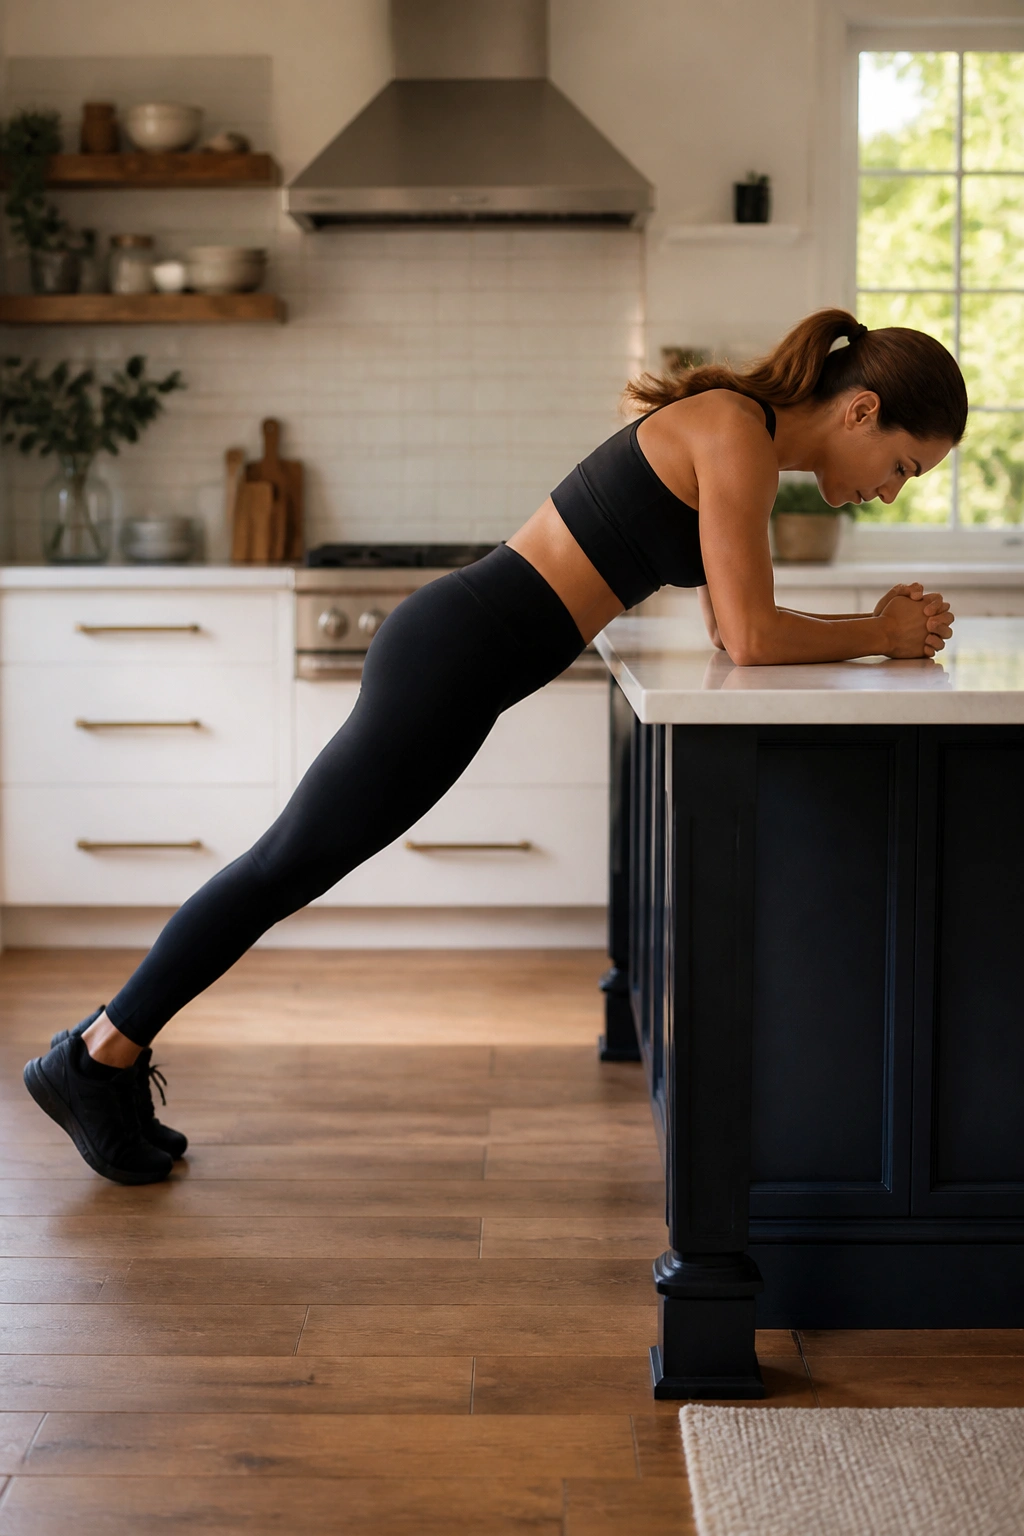
A plank doesn’t have to mean the floor. In fact, for a lot of pregnant and postpartum bodies, the floor is too much too soon. An incline plank lets you practice bracing and breathing without turning your front line into a pressure balloon.
Set your forearms on a wall, sturdy counter, or bench. Walk the feet back until you feel a steady line from head to heels. Hold for 10 to 20 seconds while breathing softly and keeping the ribs from flaring. Rest, then repeat 3 to 5 times.
The trick is not to survive the hold. The trick is to keep the belly quiet. If you see coning, your lever is too long, the hold is too long, or both.
What to Watch For
- Shoulders creeping up into the ears.
- Lower back sagging.
- Breath getting held.
- A ridge down the middle of the abdomen.
When any of those show up, shorten the hold and make the angle easier. That is smart training, not backing off.
10. Side Plank from the Knees
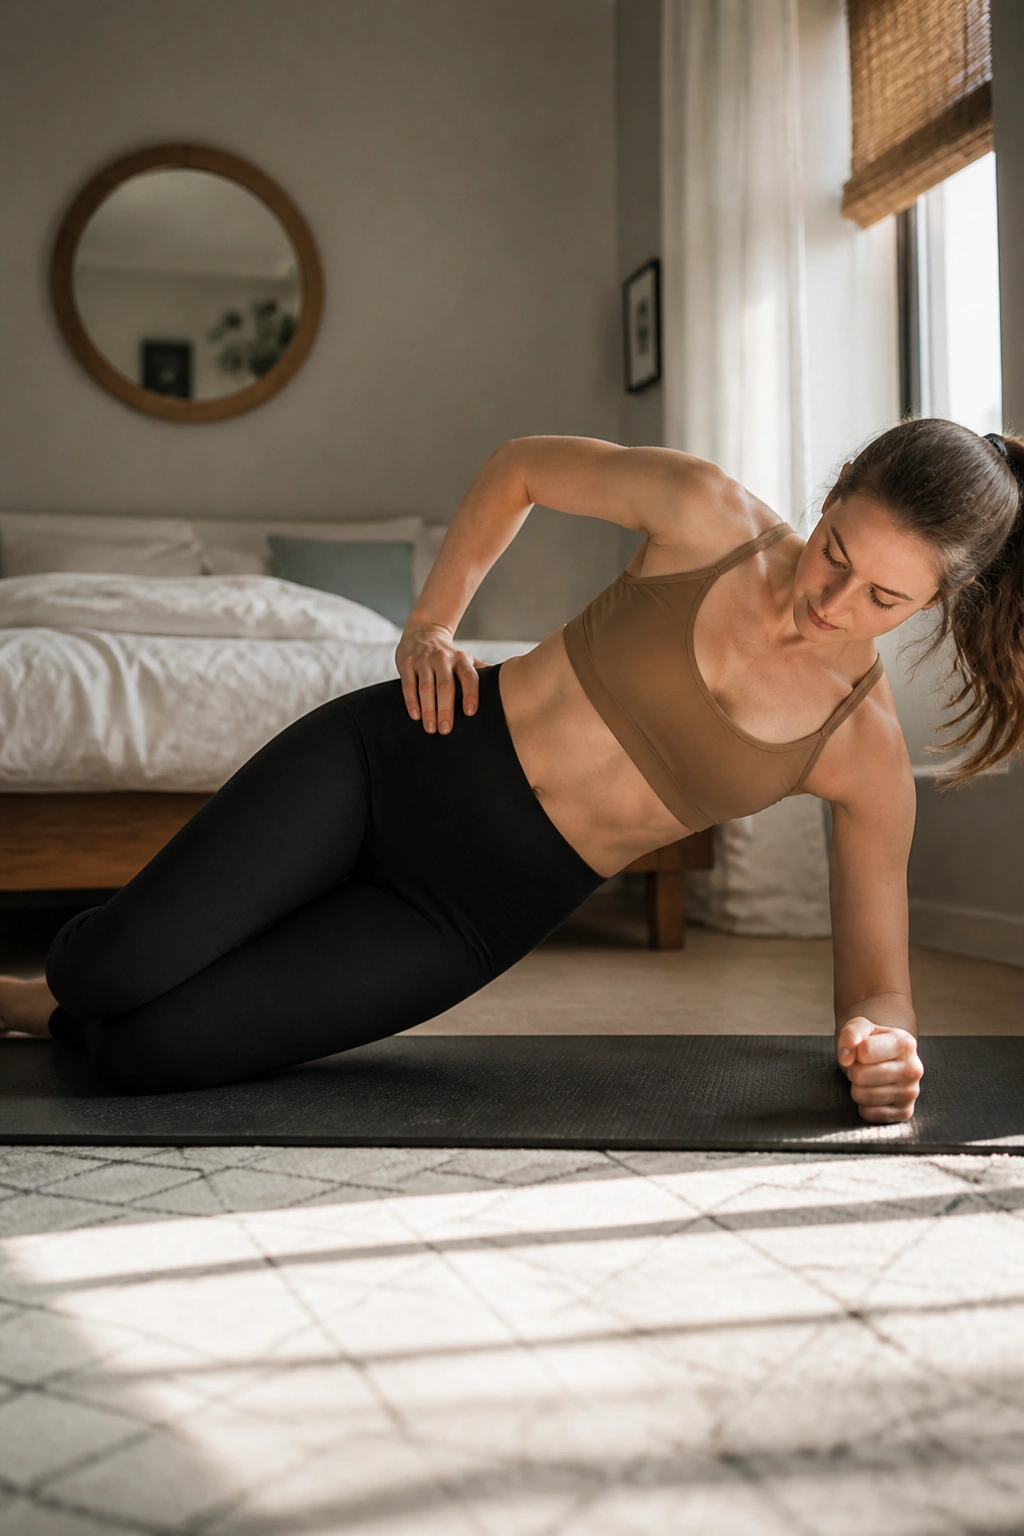
Side planks train the obliques, and the obliques matter more than many people think when it comes to holding the trunk together under load. A knee-supported side plank gives you the same side-body lesson without the strain of a full long-lever hold.
Lie on your side and prop yourself on the forearm so the elbow sits under the shoulder. Bend the knees, lift the hips, and hold the body in a straight line from shoulder to knee. Start with 10-second holds and build from there. Two or three rounds per side is enough.
This move feels different from a front plank. It should. You’ll notice the underside waist working hard while the front belly stays much quieter than it would in a crunch. If the shoulder gets cranky, shift the elbow slightly forward and make sure the forearm is planted firmly.
A Better Cueset
- Press the floor away.
- Keep the neck long.
- Don’t let the top shoulder roll forward.
- Breathe out gently through the hold.
Short holds done well beat shaky long holds every time.
11. Pallof Press for Anti-Rotation Strength
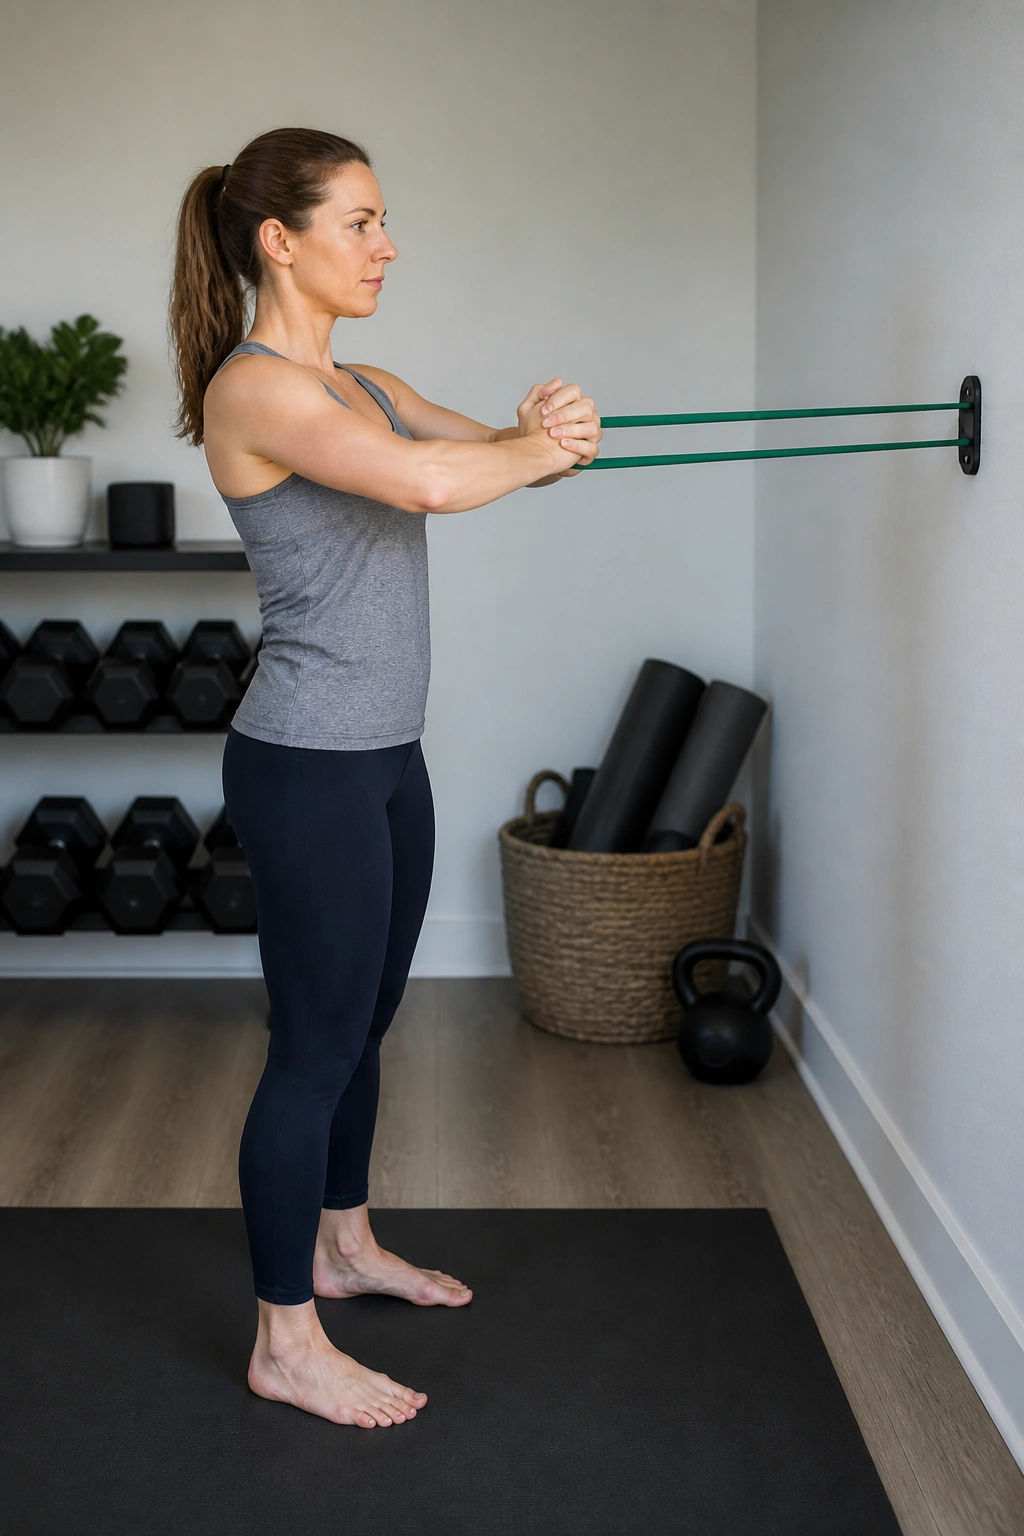
The Pallof press is one of the best anti-rotation moves around, which is a fancy way of saying it teaches your core not to twist when something tries to pull you sideways. That skill matters in pregnancy, and it matters even more when you’re carrying groceries, a toddler, or a car seat.
Anchor a resistance band at chest height. Stand sideways to the anchor and hold the band close to the chest with both hands. Step out until there’s light tension, then press the hands straight forward and bring them back in, keeping the torso square. Six to 10 reps each side works well.
The magic is in the stillness. Your hips don’t sway. Your ribs don’t pop open. The band tries to twist you, and your trunk says no thanks.
If the setup feels awkward, stand a little closer to the anchor so the band pull is gentler. That’s the easy fix. Don’t crank the tension just because the band comes in a heavier color.
12. Suitcase Carries That Train Real-World Core Stability
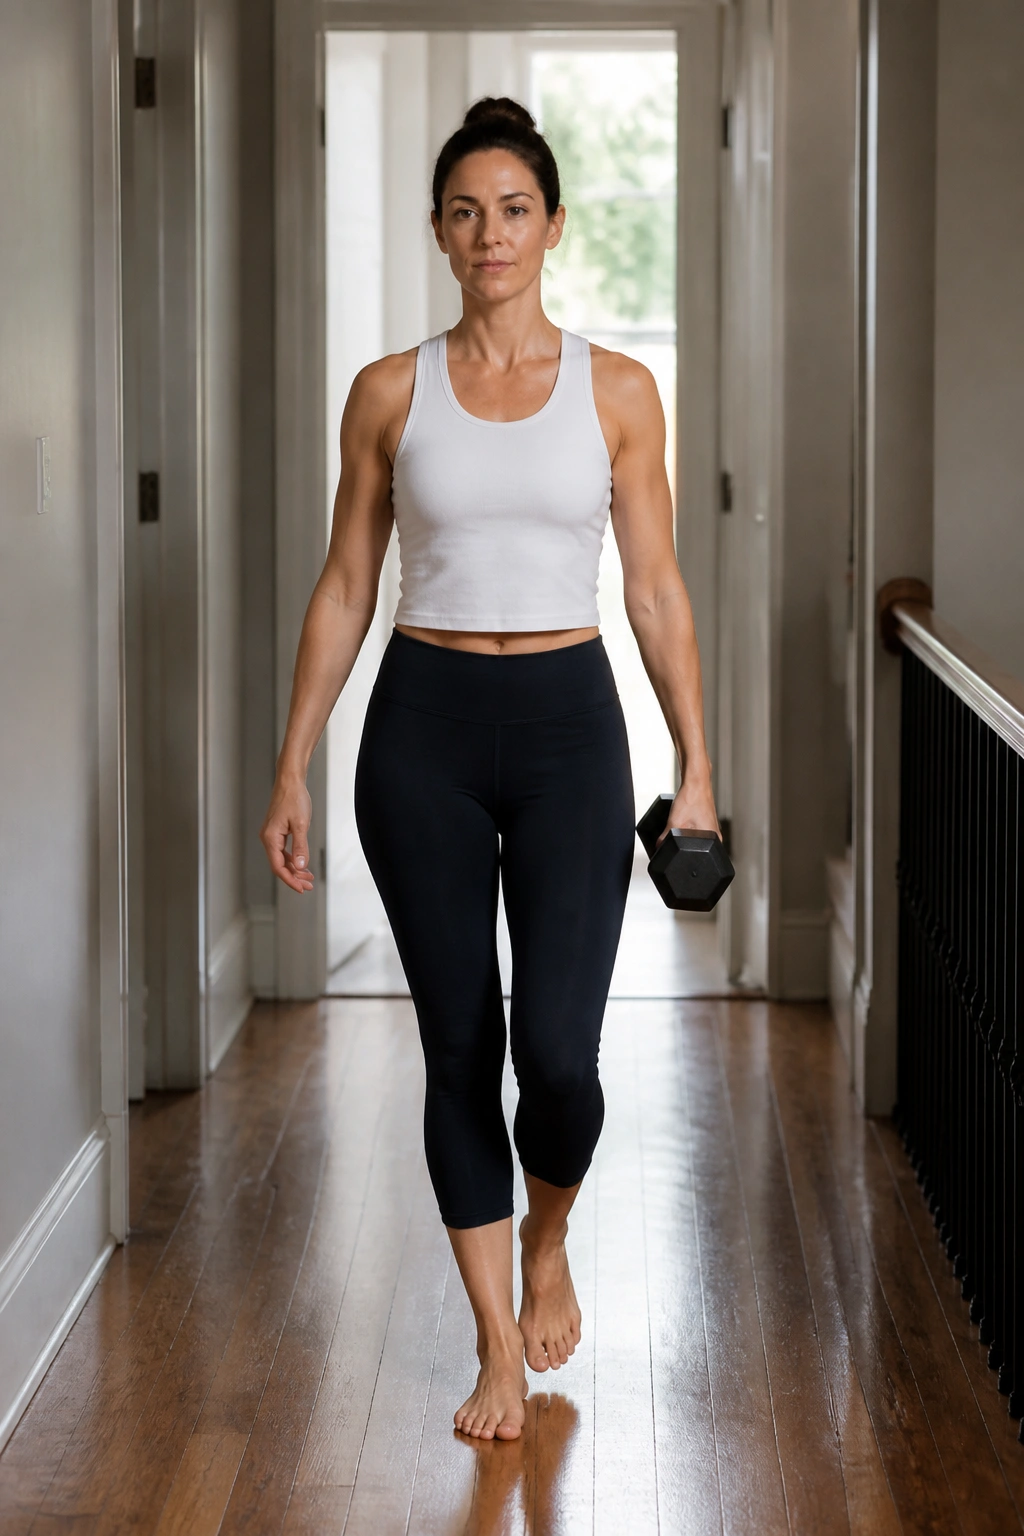
Walking with one weight in one hand sounds too ordinary to count as core work, and that’s exactly why I like it. Real life is rarely symmetrical. Bags, babies, laundry baskets, and groceries usually show up one side at a time.
Hold a dumbbell or kettlebell in one hand and stand tall. Walk 20 to 40 steps without leaning toward or away from the weight. Switch sides and repeat. Use a load that feels challenging but still lets you keep the ribs stacked over the pelvis.
The carry should feel like a conversation between your side body, your glutes, and your grip. If you’re leaning, shrugging, or side-bending, the weight is too heavy or the walk is too long.
This is also a useful check-in after birth, once you’re cleared for loading. If you can carry a moderate weight without doming, you’re usually building the kind of strength that actually shows up in life, not just in the gym.
13. Goblet Squats to a Box or Bench
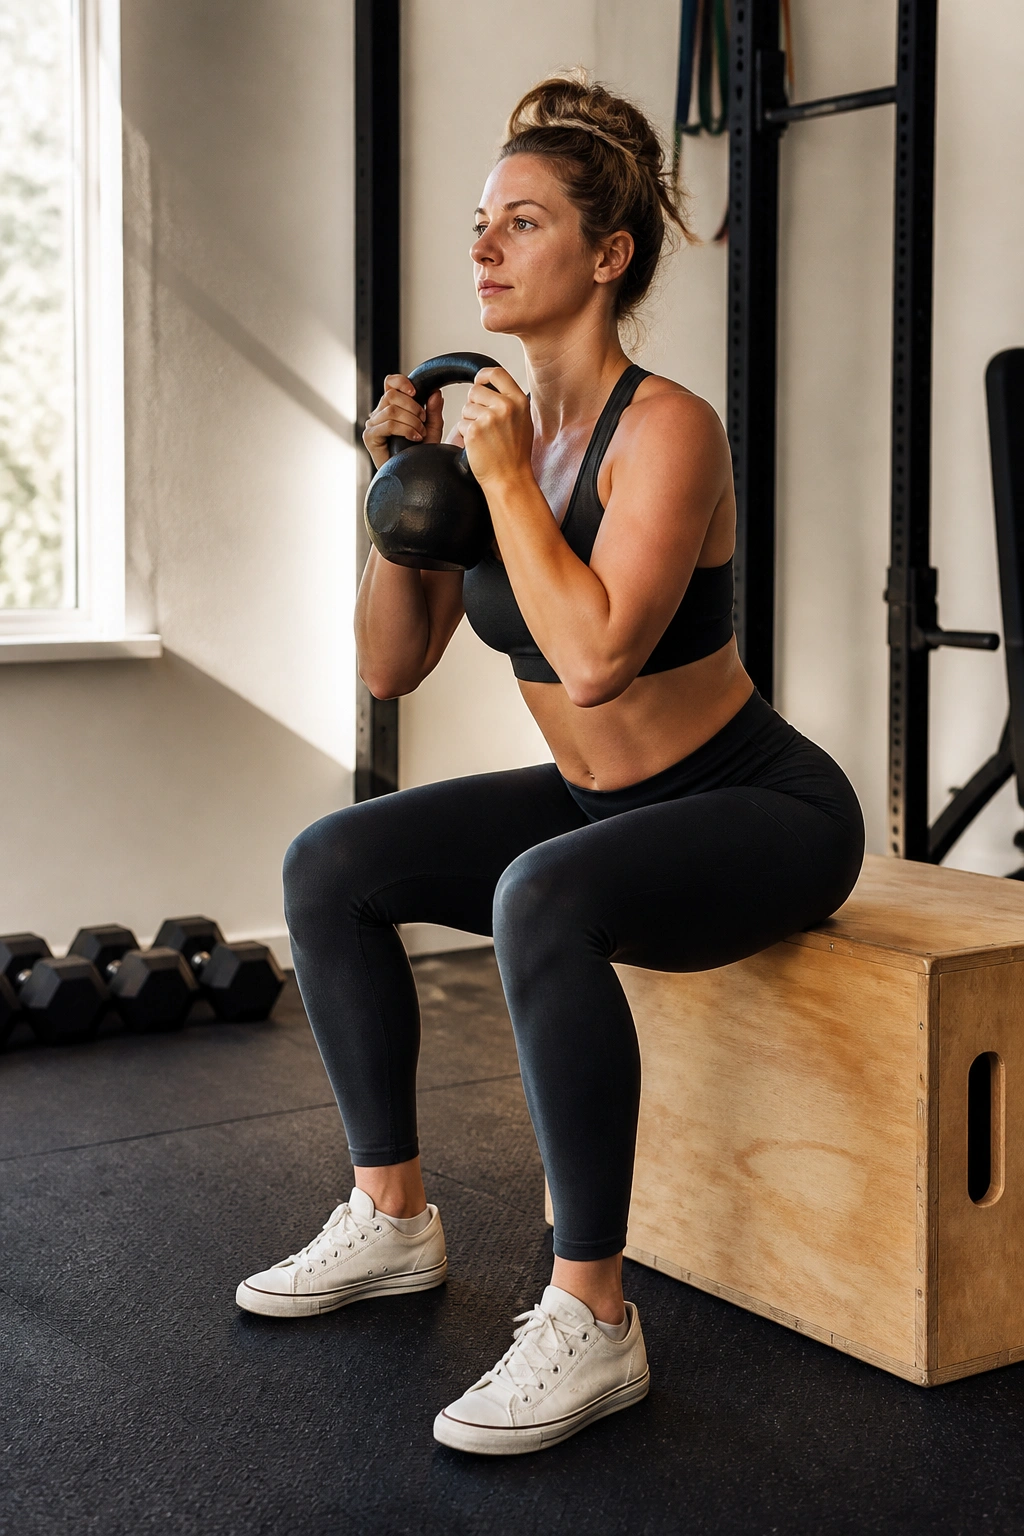
Squats are useful because they teach your body how to brace, breathe, and stand back up under load. A box or bench takes out the guesswork and makes the movement more consistent, which is helpful when your balance is changing.
Hold a dumbbell or kettlebell at chest height. Stand with feet a little wider than hips, sit back to touch the box, then stand by pressing through the whole foot. Keep the chest proud but not flared, and exhale as you rise. Six to 10 reps is a good start.
If the belly gets in the way, widen the stance a bit and turn the toes out slightly. If the knees cave inward, slow down and think about spreading the floor apart with your feet. Those small details matter more than the weight on the bell.
A box squat also gives you a clear bottom position, which helps keep the pelvis and ribs from wandering all over the place. That’s useful now, and useful later.
14. Supported Split Squats That Quiet the Torso
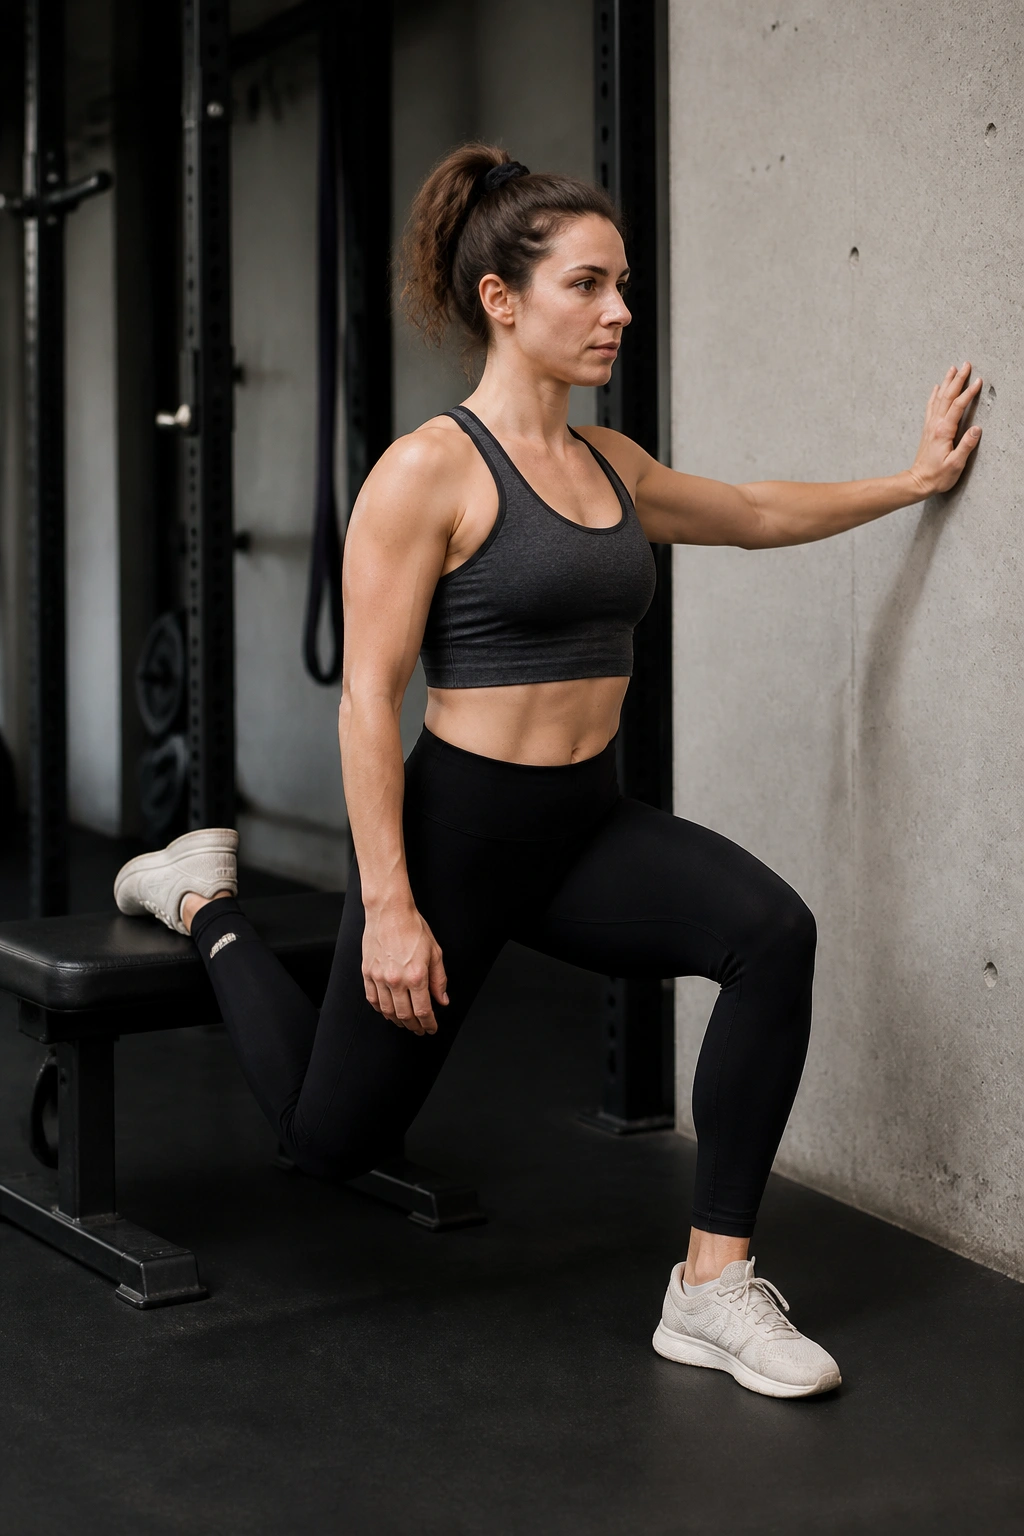
Split squats are excellent for single-leg strength, and single-leg strength matters because everyday life is full of half-steps, staggered stances, and weight shifts that happen fast. When you need one foot to carry more load, this move teaches the trunk to stay organized.
Set one foot forward and the other back, then hold onto a wall, counter, or railing for balance. Lower straight down with the torso upright, then press through the front heel to stand. Start with 5 to 8 reps per side.
Why Support Helps
Holding something stable lets you keep the focus on the legs and trunk instead of spending all your effort on balance. That means cleaner reps and less random twisting through the belly.
A Few Good Cues
- Keep the front knee tracking over the second toe.
- Use a short range if the pelvis tips.
- Exhale on the way up.
- Stop before the back knee gets sloppy.
This one tends to humble people in a good way. It looks simple until the third rep.
15. Step-Ups on a Low Box
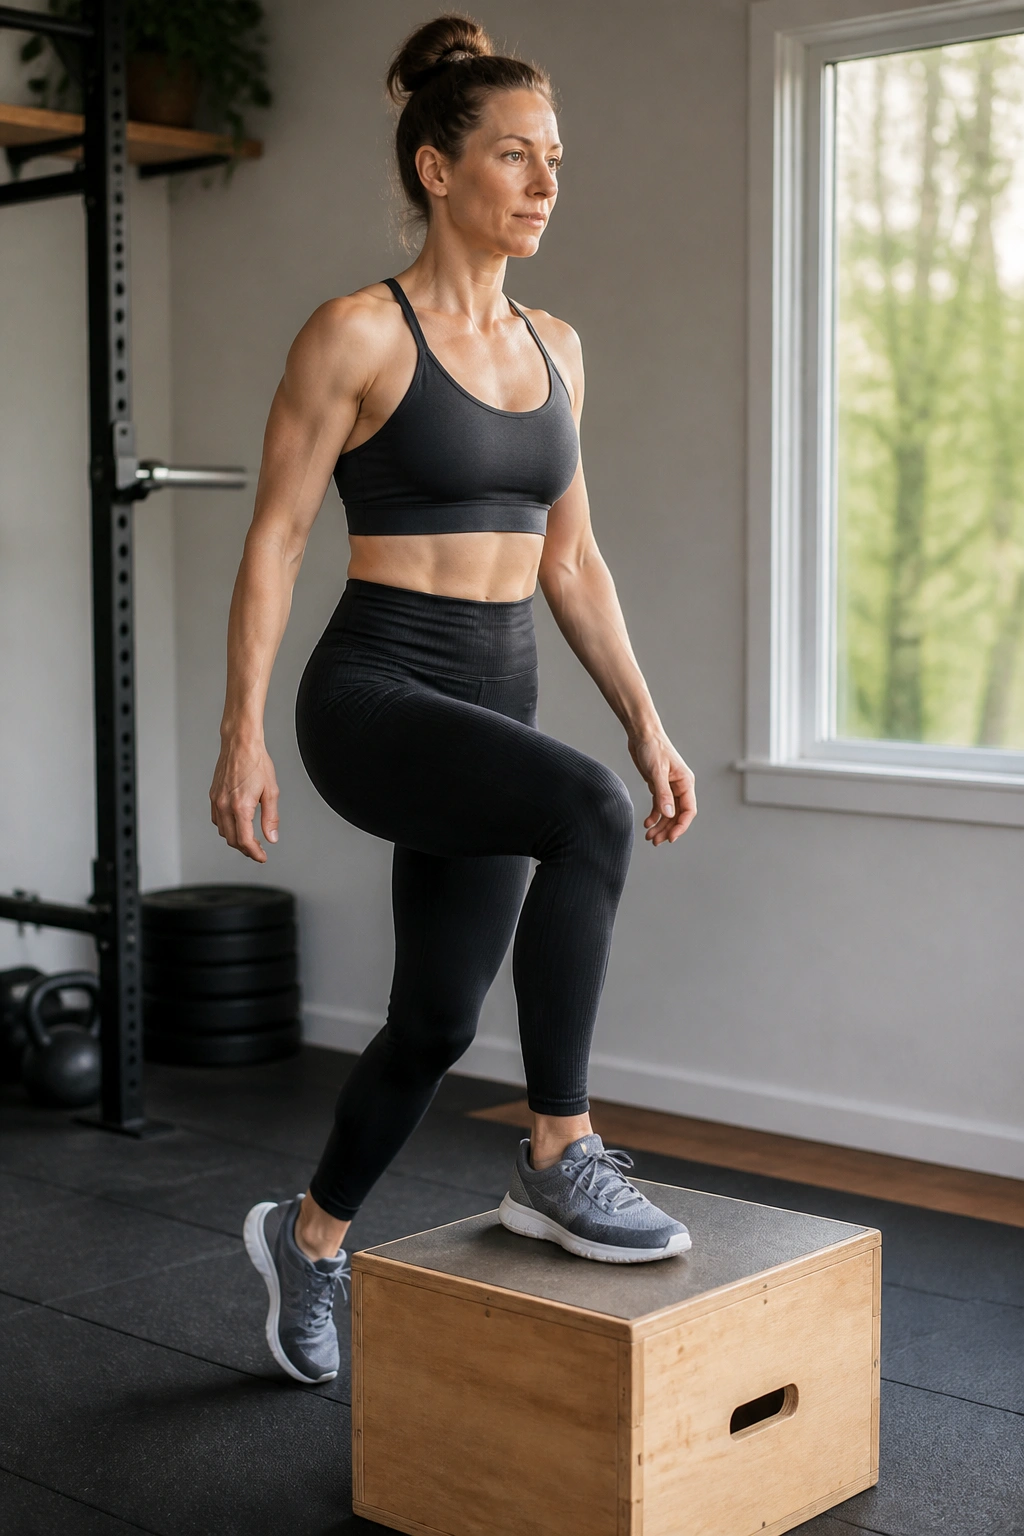
Step-ups are one of the cleanest ways to train the legs and hips without a lot of bouncing or belly pressure. They also mirror real life better than most people admit, because stairs do not care whether you feel ready.
Use a low step, about 4 to 8 inches if you’re starting out. Plant one foot fully on the step, press through the heel and midfoot, and bring the other leg up with control. Lower slowly. Six to 10 reps per side is enough.
If your pelvis hikes up on one side, the step is probably too high. If you have to launch yourself with the back leg, the box is too tall. Keep it modest. The movement should feel smooth, not like a mini obstacle course.
A step-up is one of those exercises that quietly exposes weak spots. Good. That’s useful information. You’d rather find out in the gym than while climbing stairs with a sleepy baby on your shoulder.
16. Resistance Band Rows That Keep the Chest from Collapsing
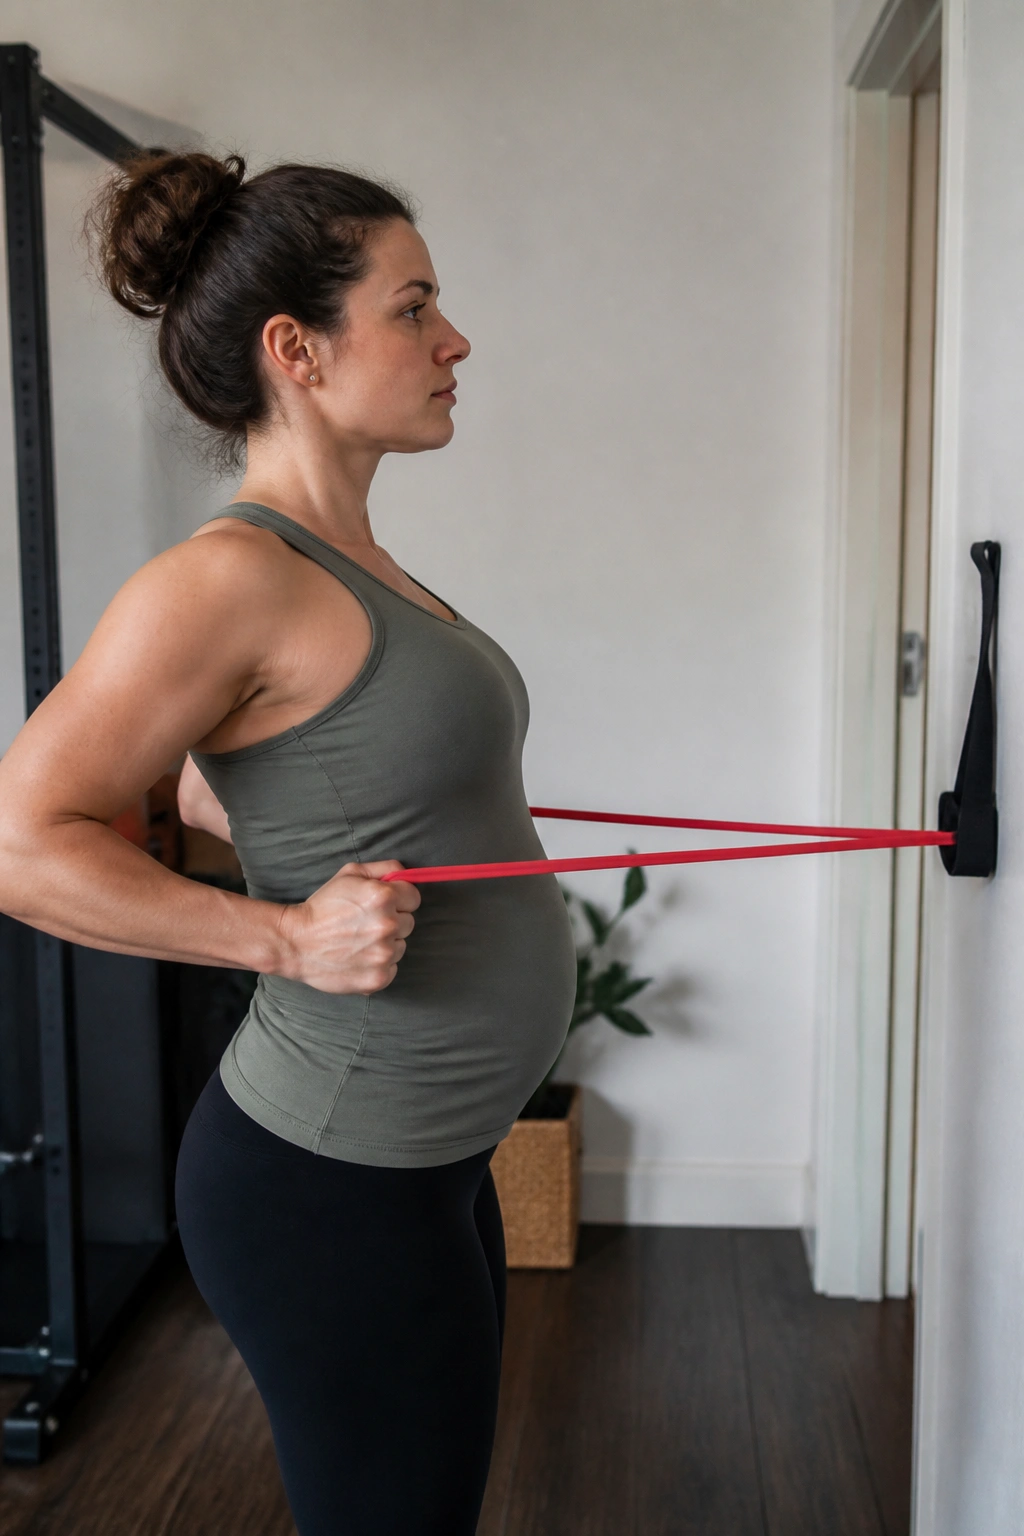
Rounded shoulders and a slumped upper back can change rib position fast, and rib position affects the whole abdominal wall. Rows help pull the chest back into a better stack so the front line has less work to do.
Anchor a band at chest height or use a cable if that’s what you have. Hold the handles, draw the elbows back toward the ribs, and pause for a beat before returning slowly. Ten to 15 reps is a sensible range.
The point is not to pinch the shoulder blades together until your neck feels trapped. The point is to keep the shoulder girdle quiet and strong while the ribs stay down. If you like measurable cues, think of pulling the elbows to the back pockets.
This move is especially helpful once carrying and feeding start to shape your posture. Long days make people fold forward. Rows help push back against that, and you don’t need heavy weight to feel the effect.
17. Quadruped Rock-Backs with Breath
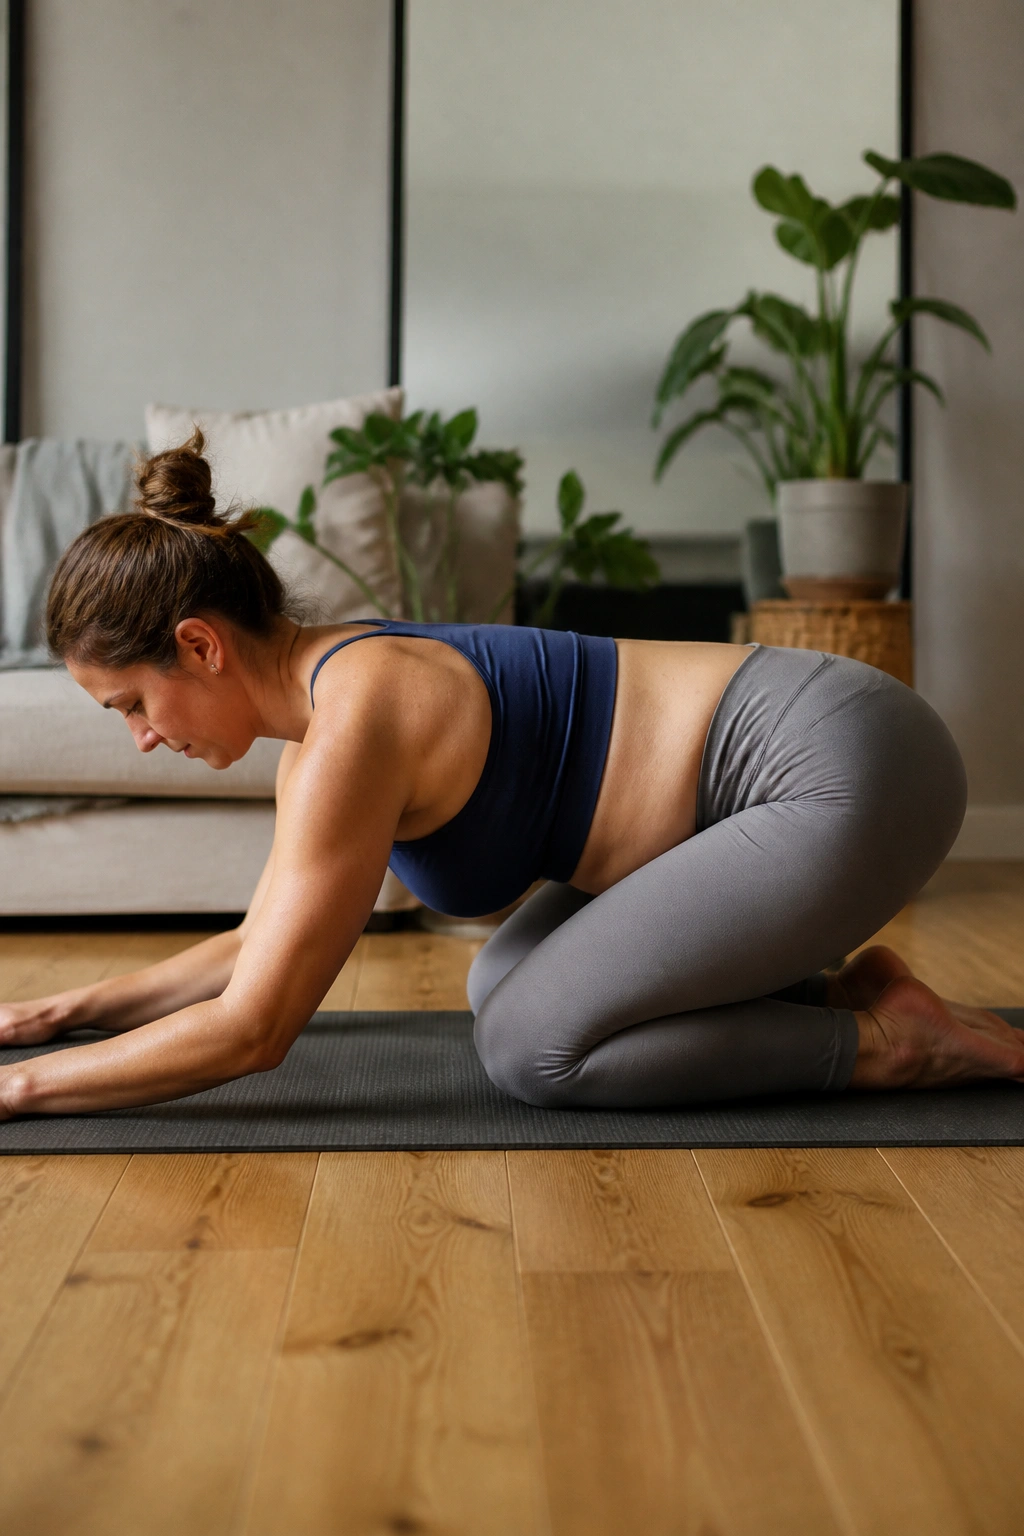
Hands-and-knees rock-backs are one of the best reset moves I know. They teach you to move the hips while keeping the trunk calm, and they give the belly a chance to soften instead of holding itself in a hard brace.
Start on hands and knees. Keep the spine long as you slowly rock your hips back toward your heels, then come forward again. Exhale on the rock-back and inhale as you return. Eight to 10 slow reps usually feels plenty.
What It Should Feel Like
The hips move, the ribs stay broad, and the abdomen stays relaxed. You may feel the low back lengthen a bit, which is a good sign. If the movement turns into a deep slump or the belly starts dropping, shorten the range.
When It Helps Most
- Between harder core drills.
- On days when the back feels tight.
- During pregnancy, when floor work needs to stay gentle.
- After birth, when you need a safe way to reconnect with breath and position.
Rock-backs are not flashy. They are useful, and that’s better.
18. Standing Marches with an Exhale
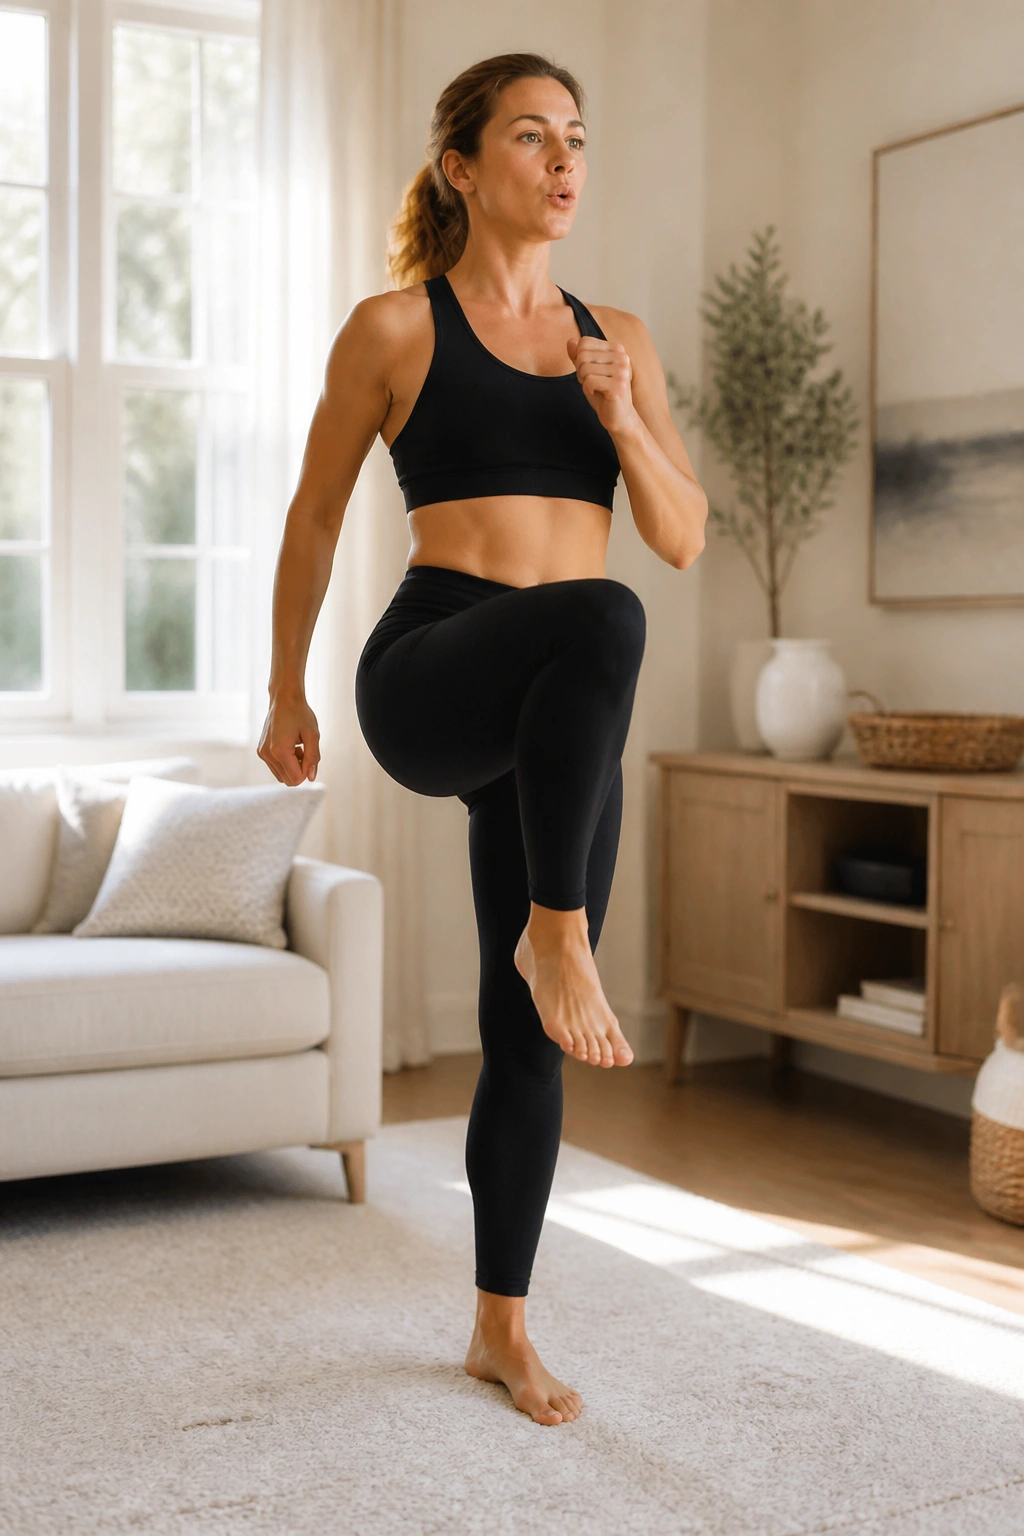
Standing marches are one of the best exercises for pregnancy because they let you train core control in the same posture you spend much of the day using. You’re upright, loaded through the feet, and asked to stay steady while one leg moves.
Stand tall with feet hip-width apart. Exhale as you lift one knee to about hip height or lower if that’s too much, then lower it slowly and switch sides. Ten reps per side is a good start. You can do this near a wall for balance or hold light dumbbells if the movement feels too easy.
Keep the standing hip from hiking up. Keep the chest from leaning back. The core should feel like it’s organizing the movement, not gripping for dear life.
This is one of those drills that looks almost laughably simple until you try to keep the pelvis level while breathing. Then it gets honest fast.
19. Farmer Carries with Two Dumbbells
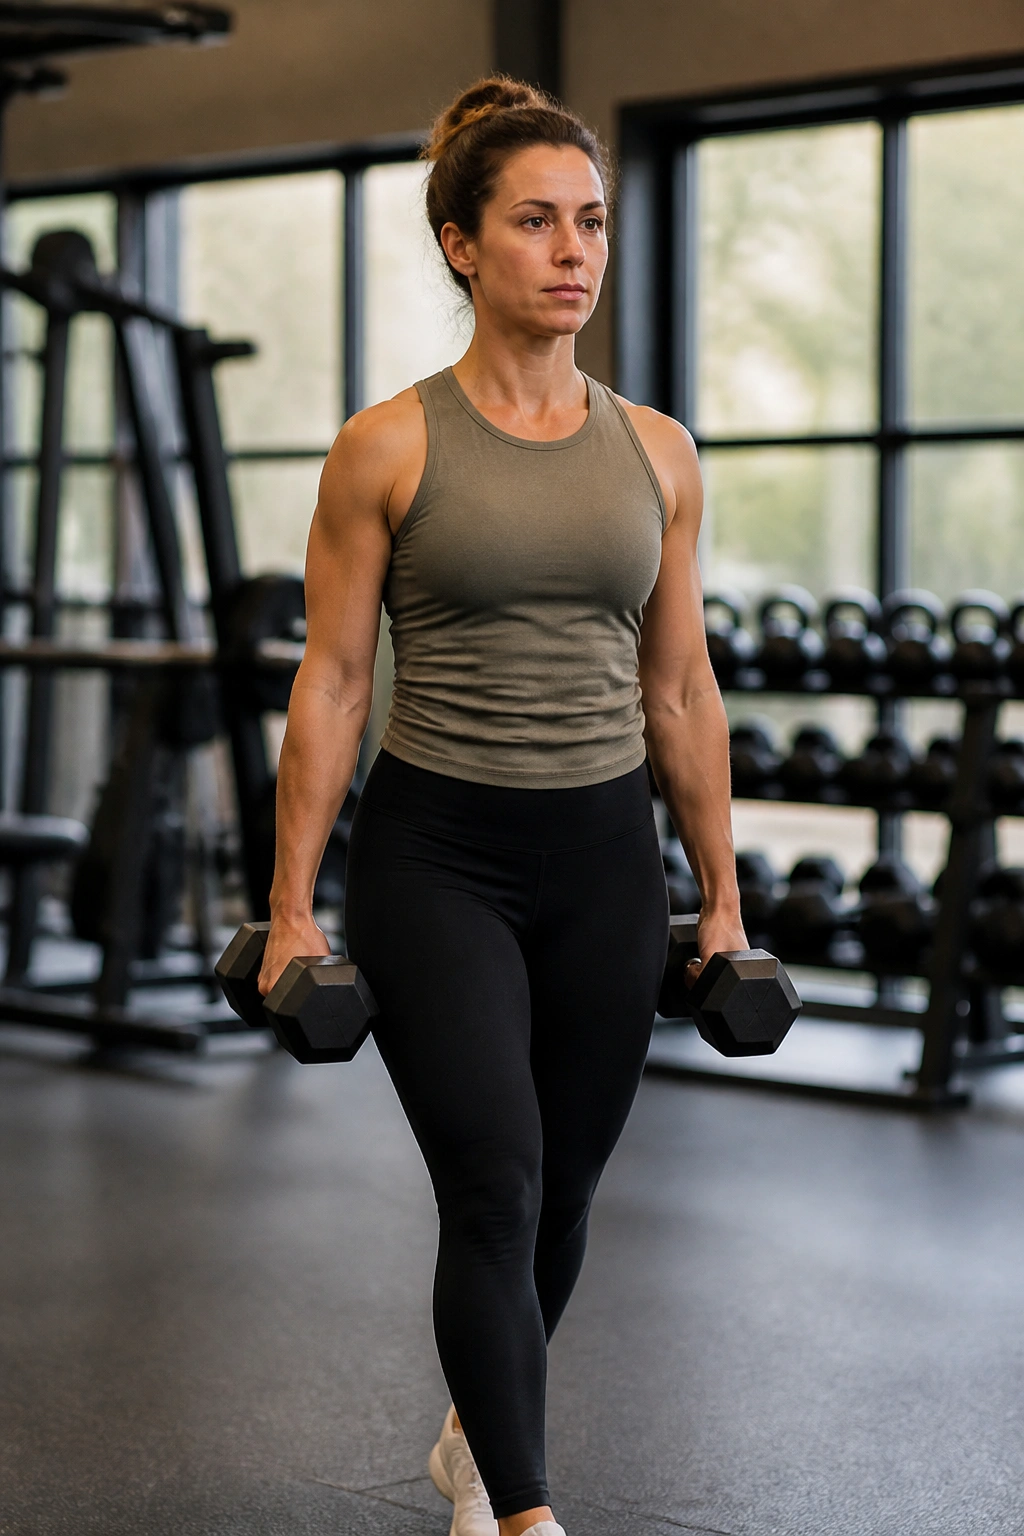
Farmer carries are the sibling of suitcase carries, but they ask for a different kind of control because both sides have to stay even. That makes them a nice choice when you want total-body tension without forcing the abdomen into a crunch pattern.
Hold a dumbbell or kettlebell in each hand and walk for 20 to 40 steps. Stand tall, keep the ribs stacked, and let the shoulders stay down instead of creeping toward the ears. Start light enough that your breathing stays smooth.
If you feel yourself rushing, slow the walk. If the weight starts bouncing, the load is too heavy. The best farmer carry looks almost calm from the outside, which is funny because the whole torso is working underneath.
I like these because they teach posture that actually transfers. Grocery bags. Laundry. A baby in one arm and a diaper bag in the other. Life keeps asking for this pattern.
20. Brisk Walking Intervals for Diastasis Recti-Friendly Conditioning
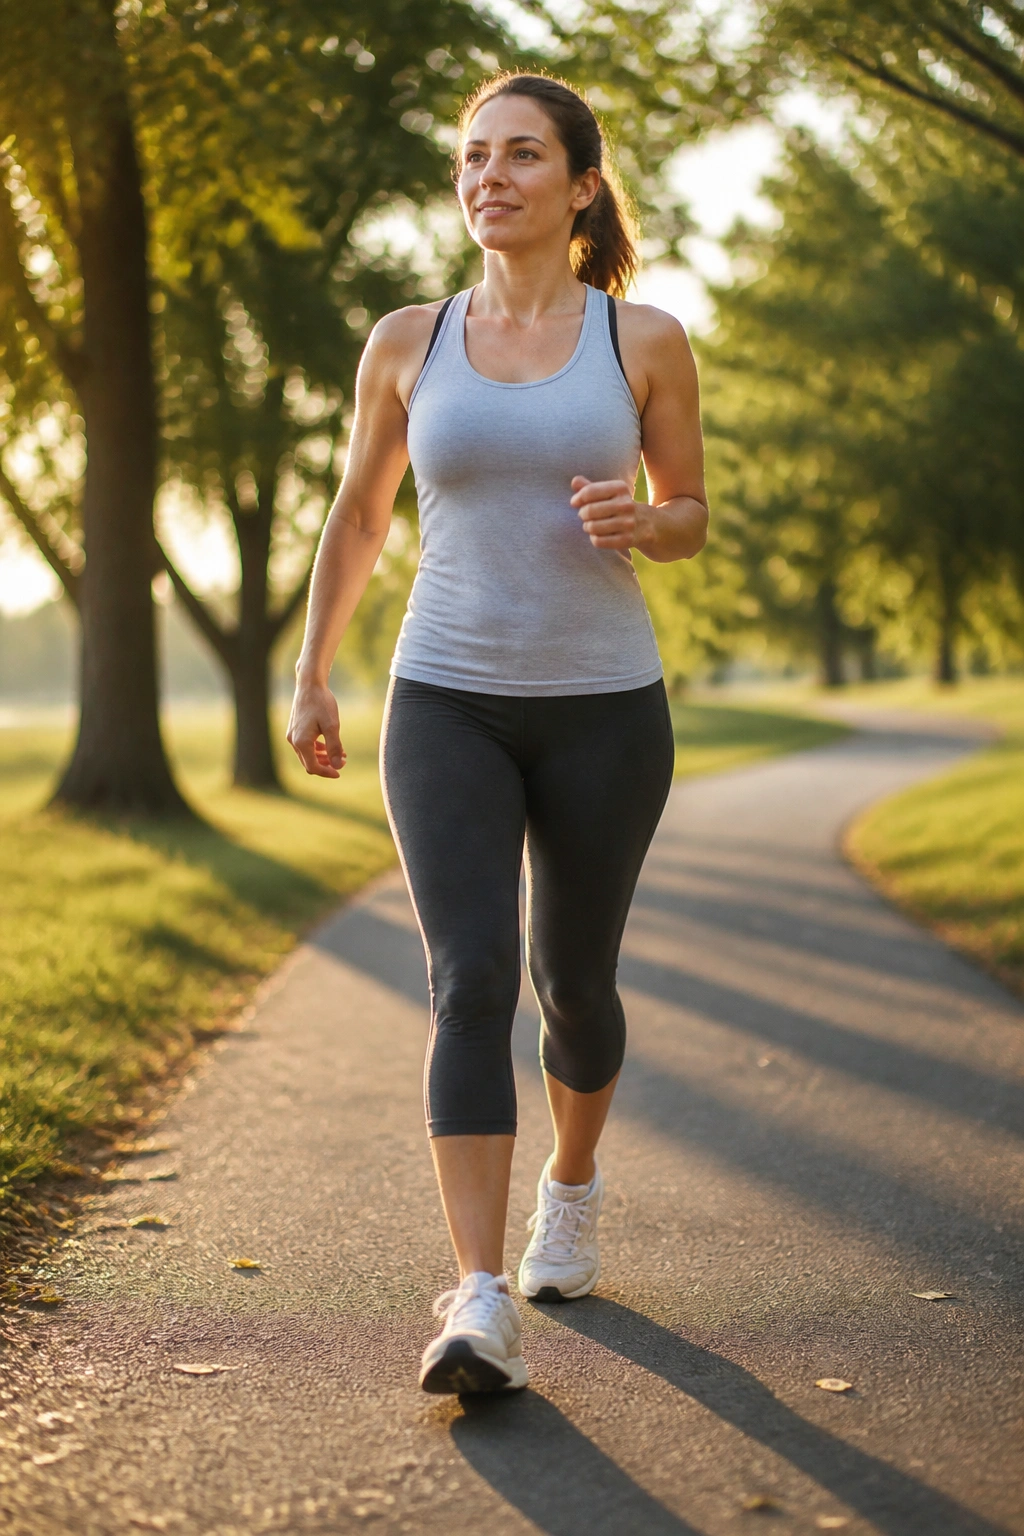
Walking is easy to dismiss because it doesn’t look like a gym exercise, but it is one of the safest ways to build capacity while keeping abdominal pressure manageable. For a lot of pregnant and postpartum bodies, that matters more than chasing a hard workout.
Try 1 minute of brisk walking followed by 2 minutes at an easy pace, repeated 6 to 10 times. Keep the arms swinging naturally, the breath steady, and the ribs from flaring. If you want more challenge, make the brisk minute a little faster or add a gentle hill. If your pelvis feels heavy, shorten the bout and check in with a clinician or pelvic floor therapist.
- Use shoes that feel stable under the heel.
- Keep steps smooth, not stompy.
- Stay tall through the crown of the head.
- Stop if you feel coning, leaking, pain, or a dragging sensation.
Walking won’t replace strength work, but it does a lot of quiet work in the background: circulation, hip rhythm, posture, and pressure control. And quiet work adds up.
A few final things matter more than any single exercise. If your belly domes, the move is too hard or the setup is off. If you feel pain, heaviness, leaking, or a strange pulling at the midline, stop and get checked by a qualified clinician or pelvic floor physical therapist. The best plan is the one your body can repeat without fighting back.
