



You don’t need a reformer, a cadillac, or even a single resistance band to feel the deep, trembling burn of a serious Pilates session. For years, people have been sold the idea that this method requires expensive equipment or a studio membership to be effective. The reality is much simpler. Joseph Pilates developed his original mat repertoire specifically to train the body using nothing but gravity and the floor as resistance. That is the purest form of the discipline—and arguably the hardest.
When you strip away the springs and the pulleys, you are left with nowhere to hide. Every wobble, every misalignment, and every moment of disengagement becomes obvious immediately. That’s not a bad thing. It’s actually the most efficient way to build the kind of core stability that carries over into everything else you do, from carrying groceries to sitting at a desk for hours. If you are looking to get stronger without investing in gear or cluttering your living room, you are in the right place. Let’s look at how to get a full-body workout with absolutely nothing but a few square feet of space.
1. The Hundred
This is the hallmark of a traditional mat class, designed to get your blood pumping and your abdominals firing within the first two minutes. You lie flat, lift your head and shoulders off the floor, and pulse your arms by your sides for 100 beats.
Why It Works
The primary goal here isn’t just working your abs—it’s oxygenating your blood and challenging your stamina. You are forcing your core to stay stable while your limbs are in motion, which is the definition of functional strength.
Technique Cues
- Keep your chin tucked toward your chest, not straining your neck.
- If your lower back starts to peel off the mat, lift your legs higher toward the ceiling.
- Think about pumping your arms from your back muscles, not just your elbows.
Pro tip: Imagine you are pressing down on water with your palms to engage your lats while you pulse.
2. Single Leg Stretch
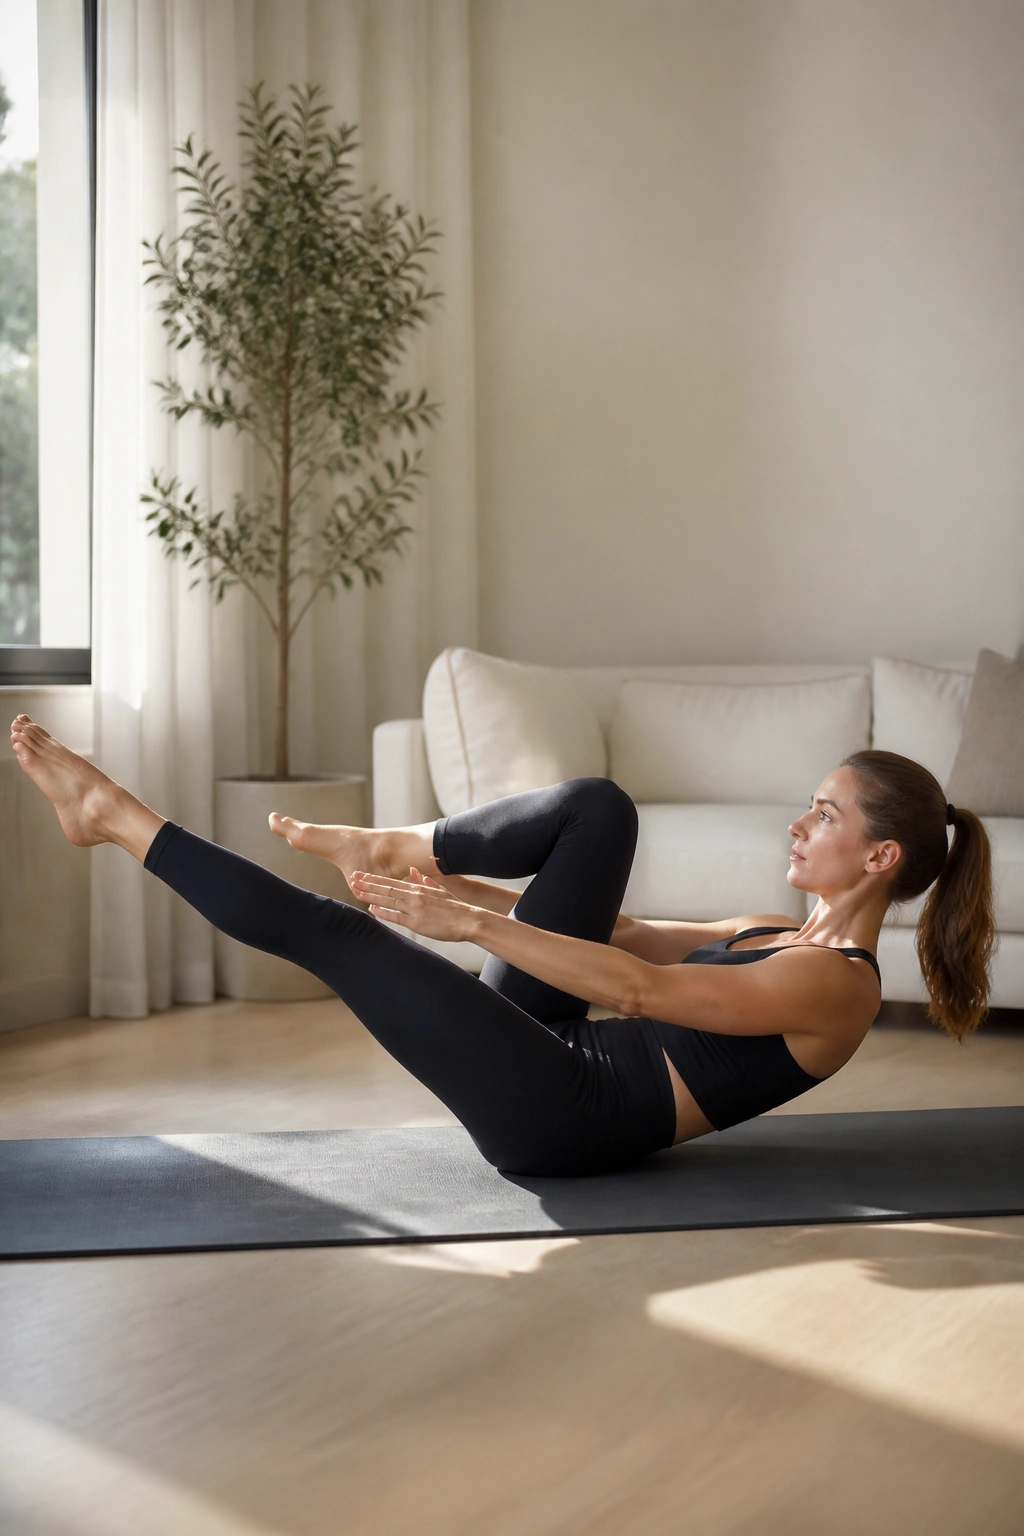
This exercise forces your core to maintain a rigid, scooped position while your legs move independently. You pull one knee toward your chest while extending the other leg straight out at a 45-degree angle.
Breaking Down the Movement
The secret to this move is the coordination between your breath and your movement. You inhale to prepare and switch, and exhale as you reach and pull. If you find your hips rocking side to side, you aren’t engaging your deep abdominals enough. Slow it down.
How to Get More From It
- Keep your head lifted throughout the entire set to maximize abdominal engagement.
- Reach the extended leg out with force, as if you are trying to touch the wall across from you.
- Place your outside hand on the ankle and inside hand on the knee for proper alignment.
3. Double Leg Stretch
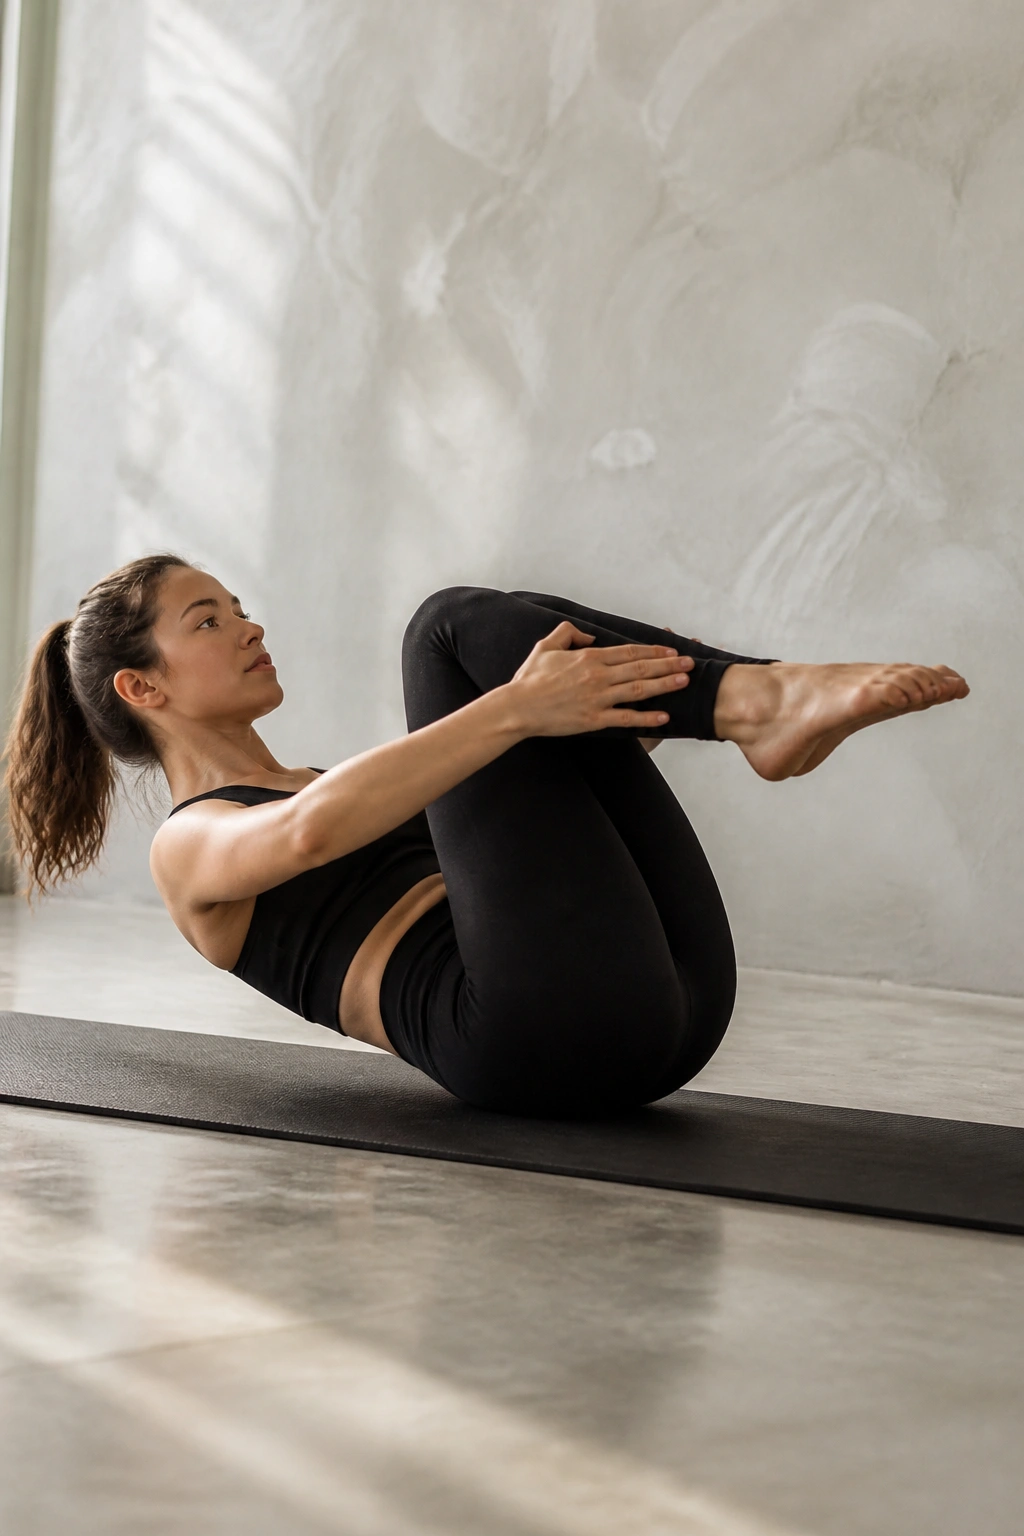
Think of this as the expansion and contraction of your body. You curl into a tight ball, then simultaneously reach your arms and legs away from each other before circling the arms back around to hug the knees.
Common Mistakes
Most people rush the extension. Don’t. The moment of maximum difficulty is when your limbs are at their furthest point from your center. That is where you have to fight to keep your lower back from arching. If it arches, you’ve lost the connection.
Variation for Difficulty
To increase the intensity, lower your legs closer to the floor during the extension. The closer they are to horizontal, the more your core has to work to counteract the weight of your legs. Keep the movement fluid, not jerky.
4. Criss-Cross
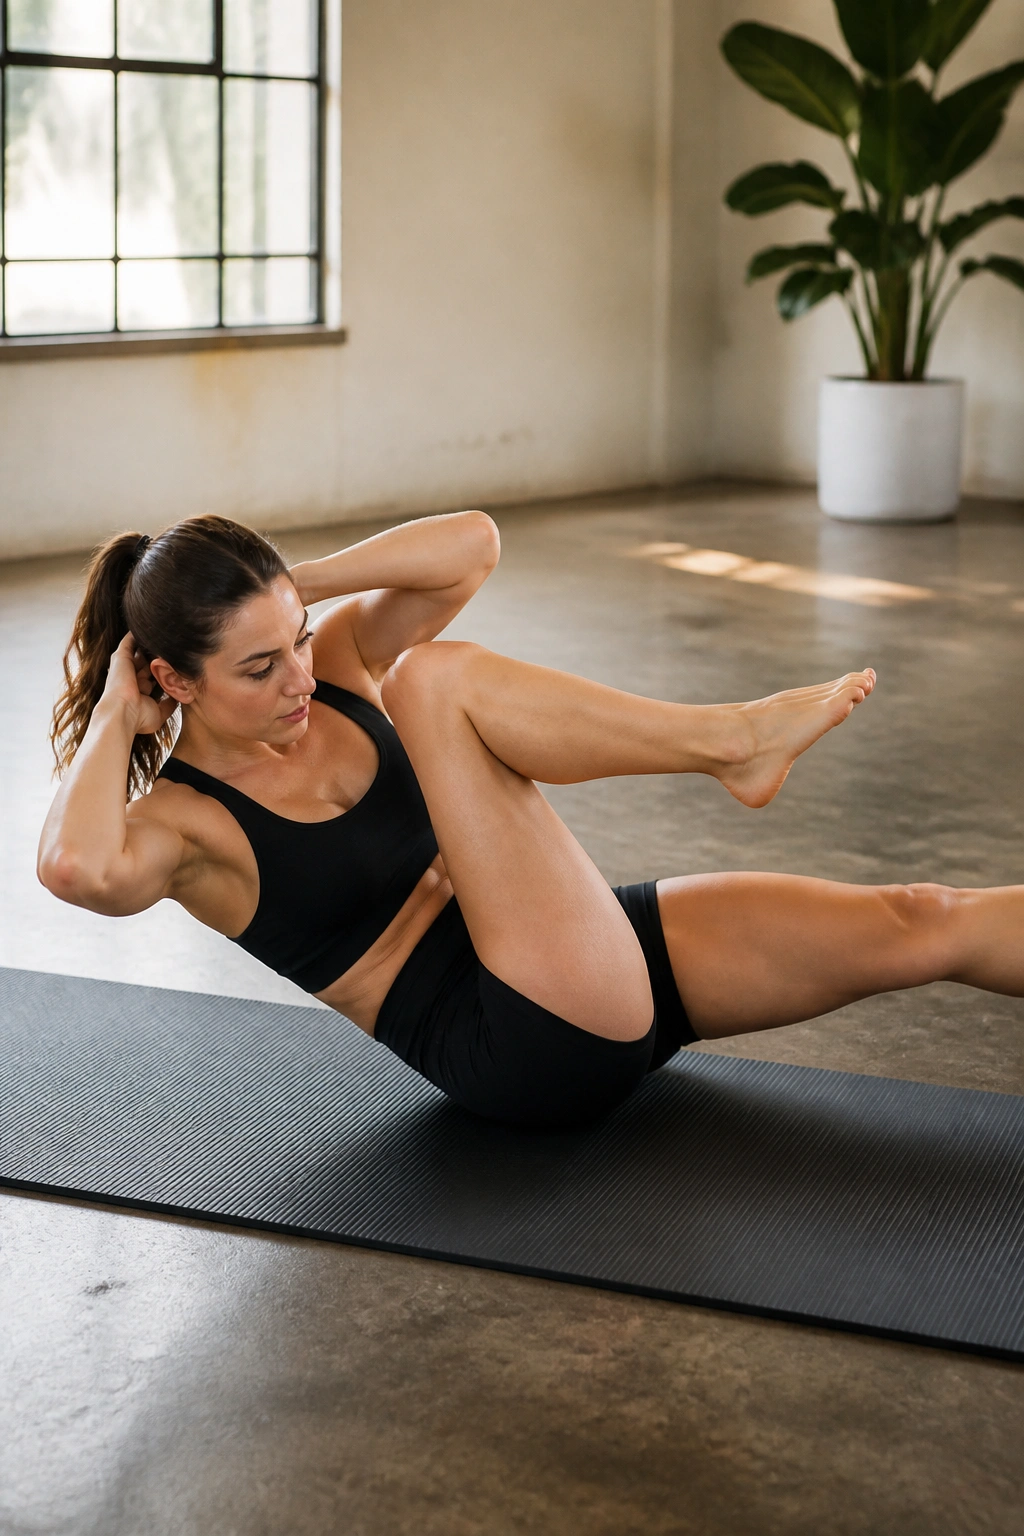
This is the ultimate oblique burner. You keep your lower back glued to the mat, lift your chest, and twist your torso so your opposite armpit reaches toward the opposite knee.
The Mechanics of the Twist
You are looking for rotation from the ribcage, not just moving your elbows. If you just crank on your neck with your hands, you’ll end up with a headache and no ab definition. Imagine you are wringing out a towel; the force comes from the center of your torso.
What to Avoid
- Do not let your pelvis wobble. It should be as stable as a heavy stone.
- Avoid pulling on your neck. Keep your elbows wide, not glued to your ears.
- Ensure the extended leg stays low and straight; dropping it makes the movement too easy.
5. Swimming
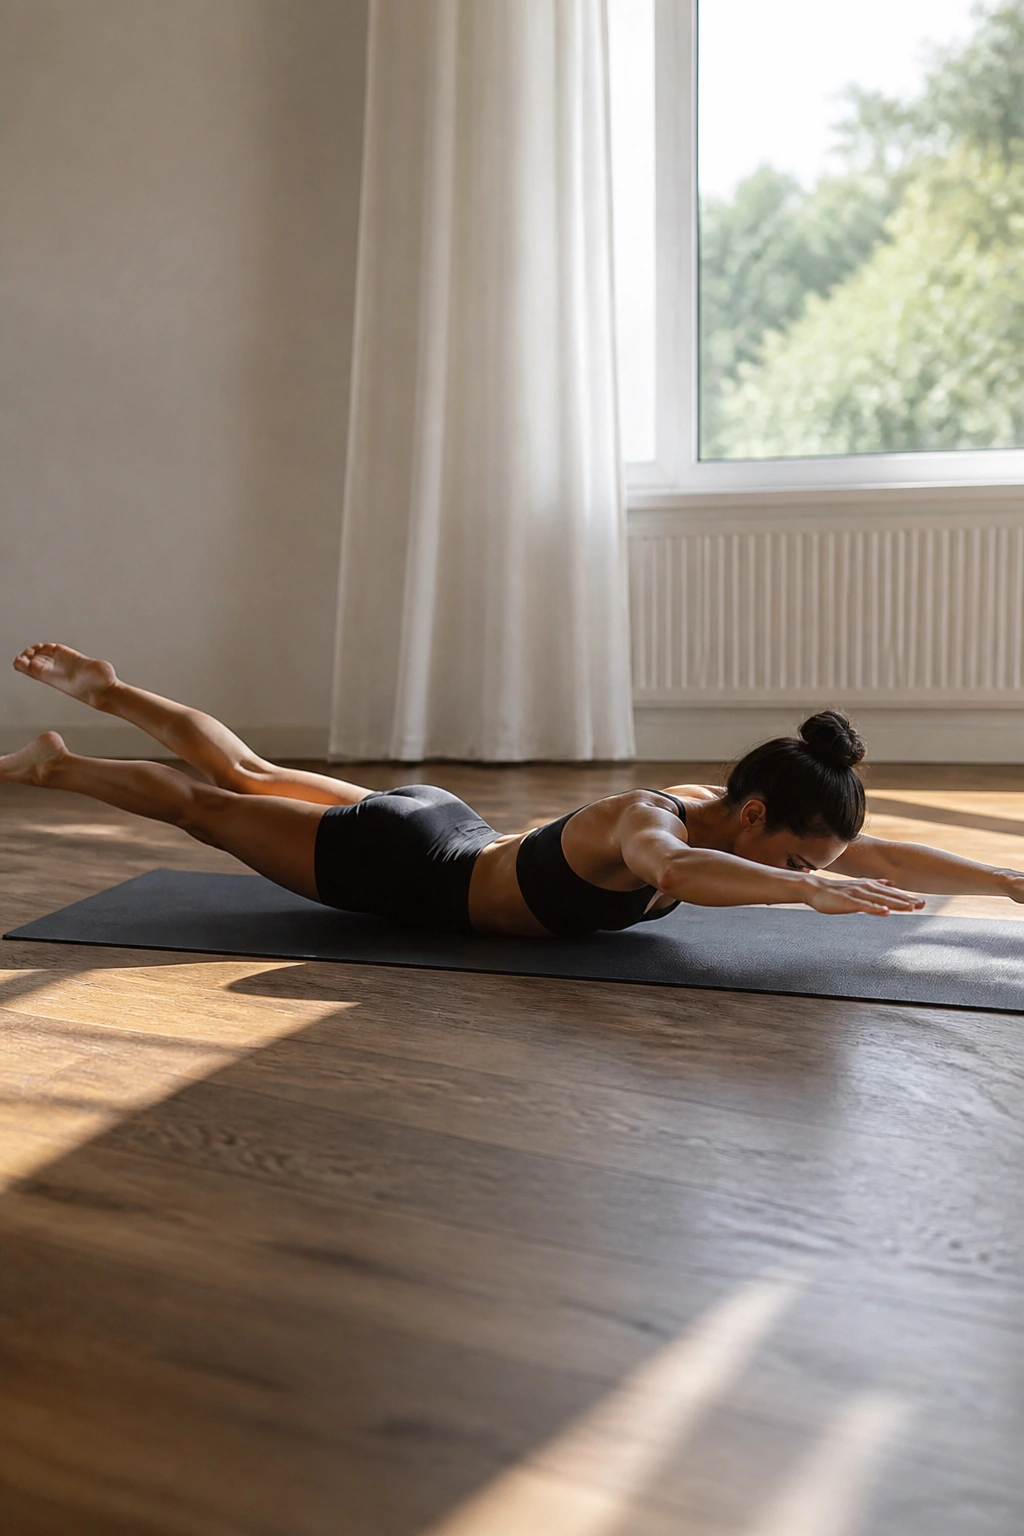
Now we flip over to the stomach to target the posterior chain—your back, glutes, and hamstrings. You lie on your belly, extend your arms and legs, and flutter them rhythmically.
Why Your Back Will Thank You
This move corrects the slumped-over posture we develop from staring at screens. It strengthens the muscles along your spine, which helps you stand taller. It’s hard, and it often feels like you are getting nowhere, but keep at it.
Technique Details
- Lift your head just enough so you are looking at the floor, not cranking your neck up.
- Reach long rather than high. Focus on creating length in your body, stretching from your fingertips to your toes.
- Keep the rhythm steady and fast, like a swimmer in open water.
6. The Roll-Up
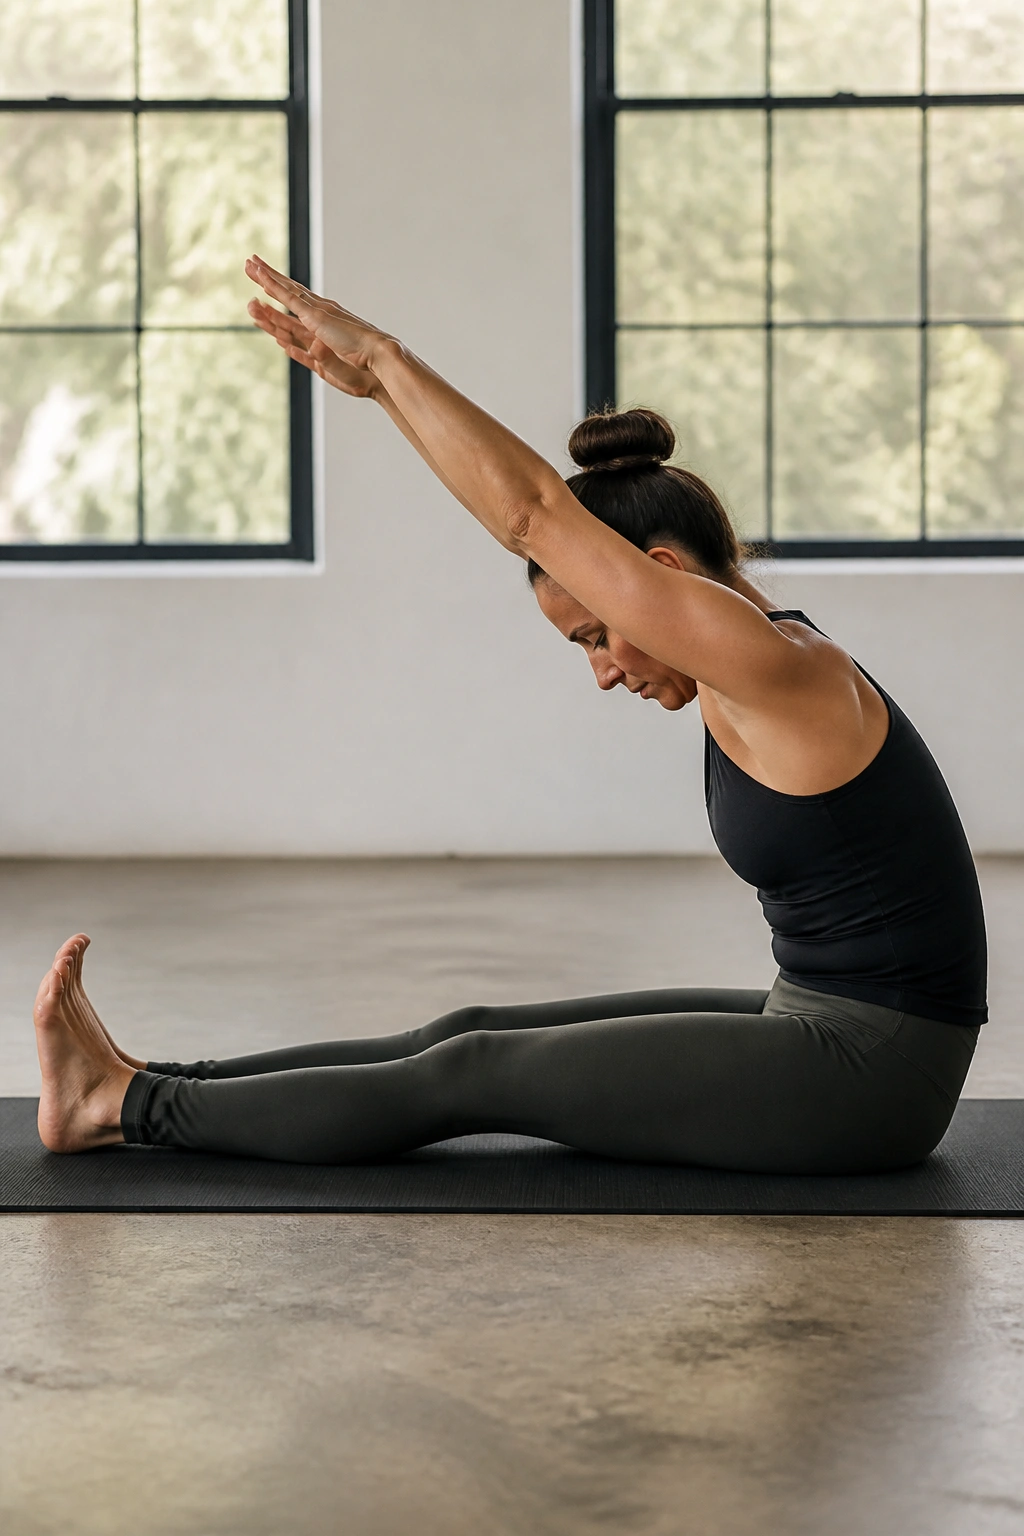
This is the ultimate test of spine mobility. You lie flat, arms overhead, and peel your spine off the mat one vertebra at a time until you are sitting forward, then reverse the motion.
Why It Feels Impossible
Most people use momentum to fling themselves up. That doesn’t work here. You have to move slow. If you get stuck halfway, use your breath to push a little harder into your abdominal wall.
The Art of Articulation
- Imagine each vertebra is a bead on a string. You are placing each one down individually.
- Keep your feet flexed and pressed into the floor; don’t let them lift.
- Reach your fingertips toward your toes at the top, but keep your shoulders down.
7. Leg Circles
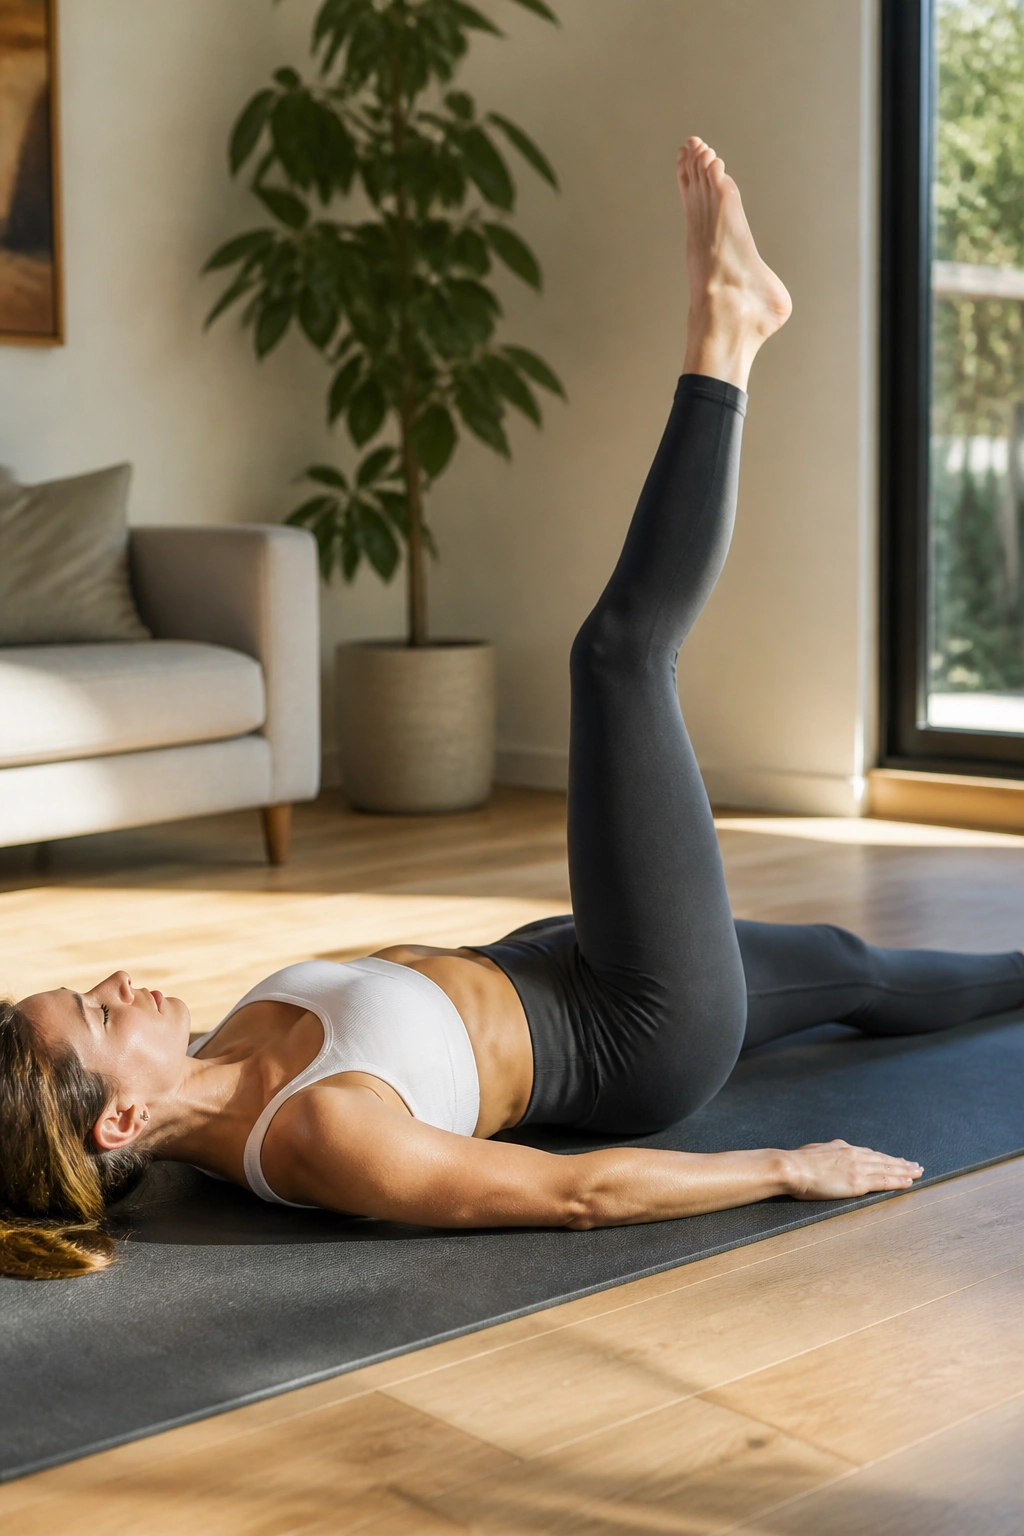
You lie on your back, one leg reaching straight up to the ceiling, the other anchored to the mat. You circle the top leg while keeping your pelvis absolutely still.
Stability Is Key
The goal isn’t to draw a big circle; the goal is to keep your hips from rocking. If your hips are shifting with your leg, shrink the circle. It’s better to do a tiny, perfect circle than a messy, giant one.
Focusing on the Core
- Keep your lower back imprinted on the floor.
- Imagine your leg is a pencil, and you are drawing a circle on the ceiling.
- Switch directions after 5 to 10 repetitions to ensure even muscle development in the hips.
8. Rolling Like a Ball
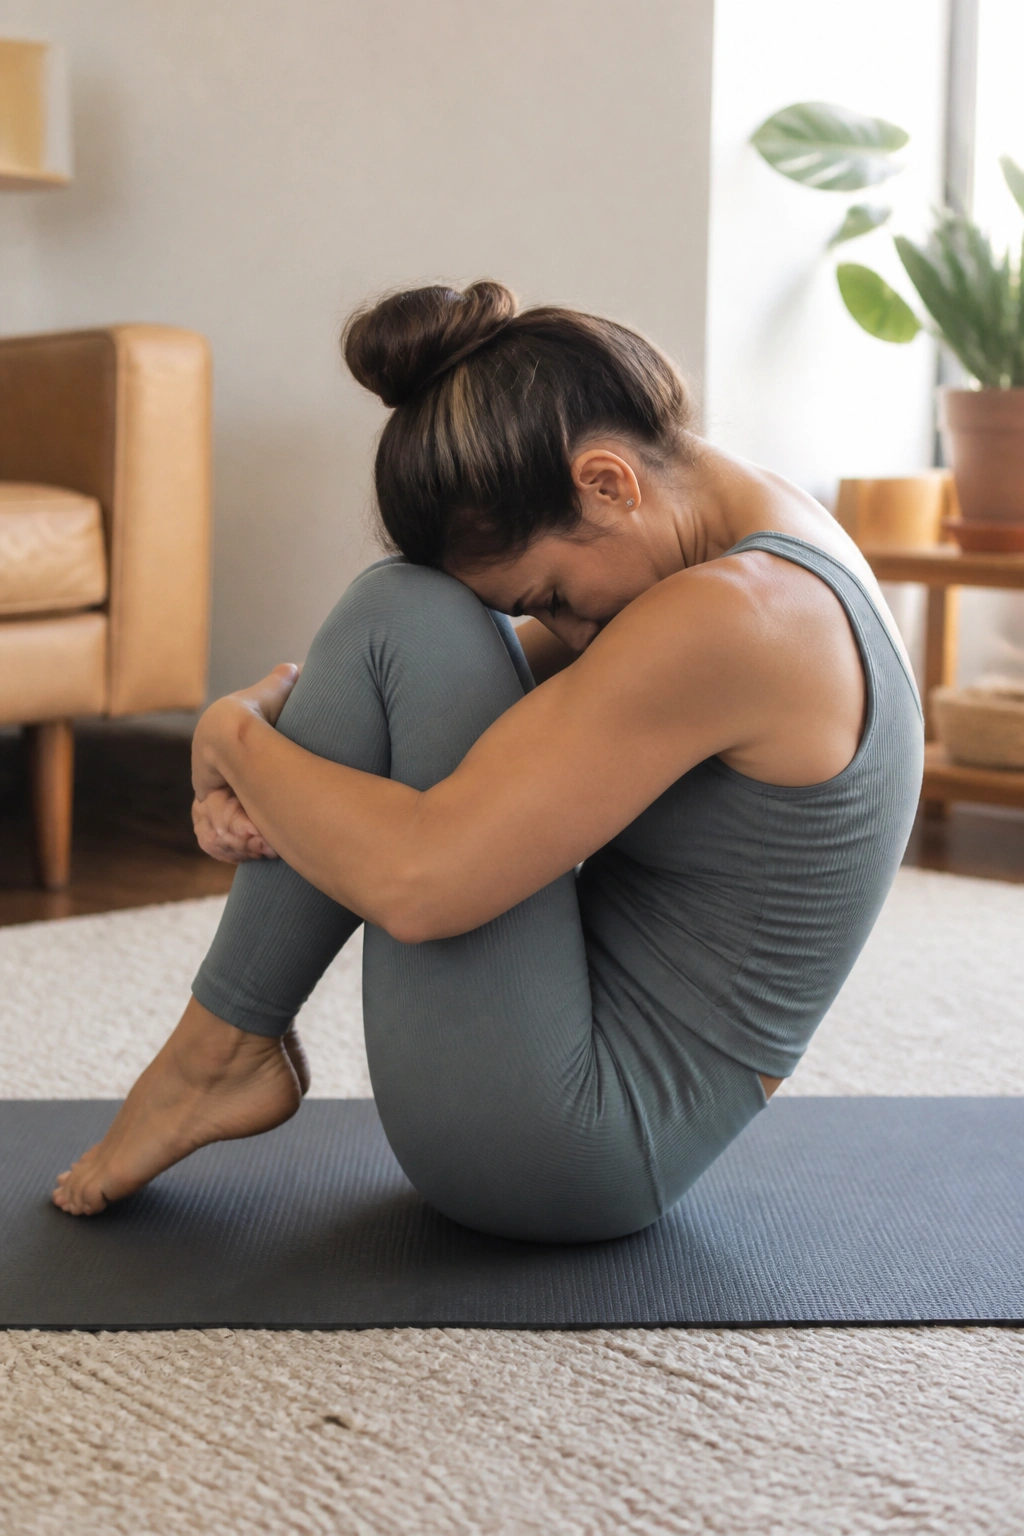
This exercise is all about massage and balance. You hug your knees, round your spine, and rock back onto your shoulder blades—but never your neck—before balancing back on your tailbone.
Finding the Balance
The trick is to maintain your “C-curve” spine the entire time. If you flatten your back as you roll, you won’t be able to come back up. Stay in a tight ball and use your core, not your momentum, to return to the upright position.
Pro Tips for Success
- Keep your heels tucked close to your glutes.
- Do not let your head snap back when you roll.
- Pause at the top for a full second to prove you have total control.
9. Single Leg Kick
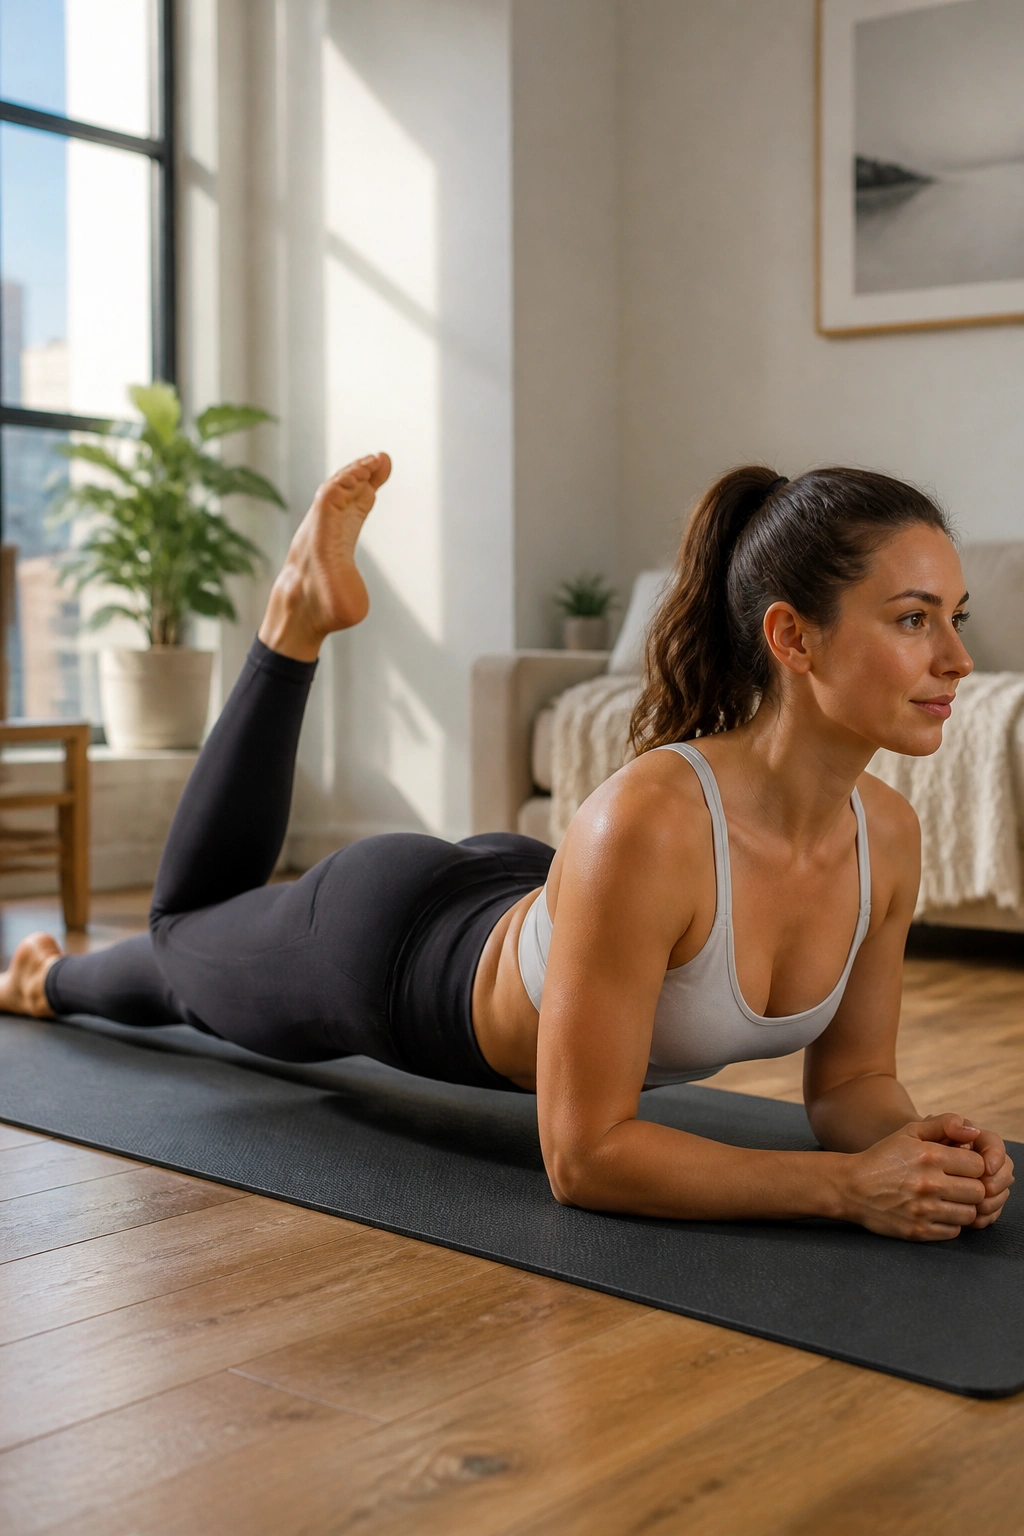
Back on your stomach, you prop yourself up on your forearms. You kick one heel toward your glute twice, then switch legs.
What You Should Feel
This is a great hamstring isolator. By keeping your torso lifted, you also engage your upper back and lats. You need to press your forearms into the floor to stay upright; don’t just sink into your shoulders.
Common Mistakes
- Don’t let your hips lift off the mat when you kick.
- Keep your knees slightly apart for better stability.
- Ensure the movement of the lower leg is sharp and controlled, not floppy.
10. Saw
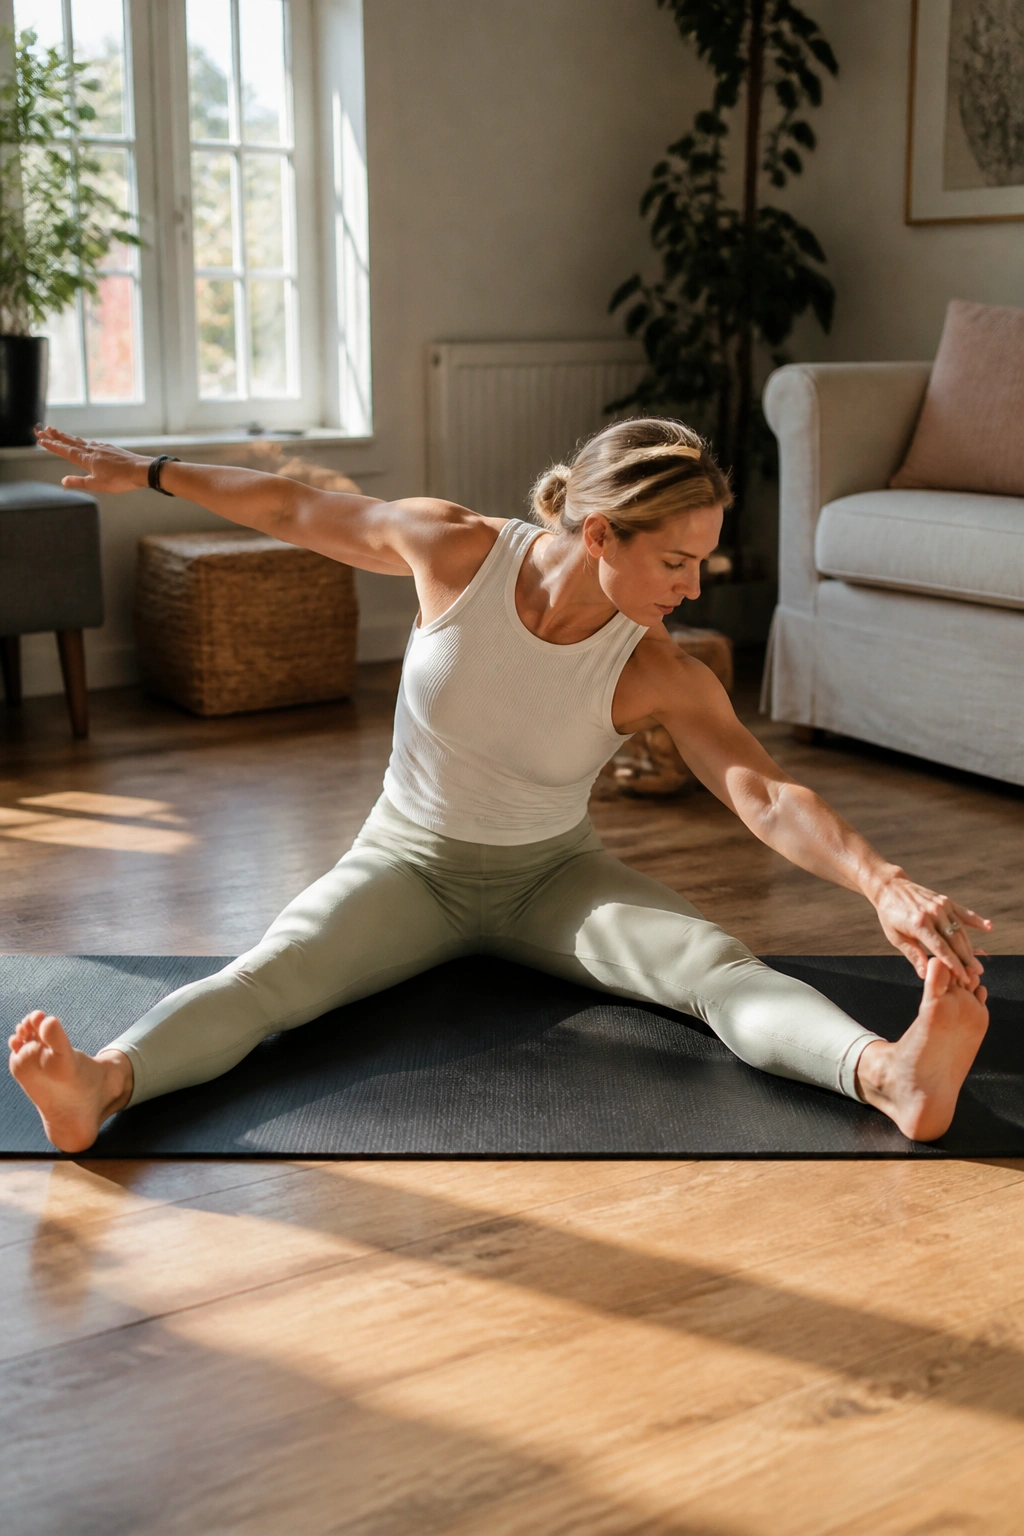
Sit with your legs wide apart, arms in a “T” shape. You rotate your torso to one side, reach your pinky finger toward your pinky toe, and pulse three times.
The Benefit of Rotation
This is a fantastic stretch for the hamstrings and a great drill for thoracic rotation. Most of us are stiff in the upper back, so this helps loosen things up. Reach your back arm behind you as far as it will go to get the best twist.
Avoiding Stagnation
- Keep both sit-bones glued to the floor. Do not let one hip lift as you reach forward.
- Exhale deeply with each pulse to get a little deeper into the stretch.
- Think about reaching past your foot rather than just down to it.
11. Spine Stretch Forward
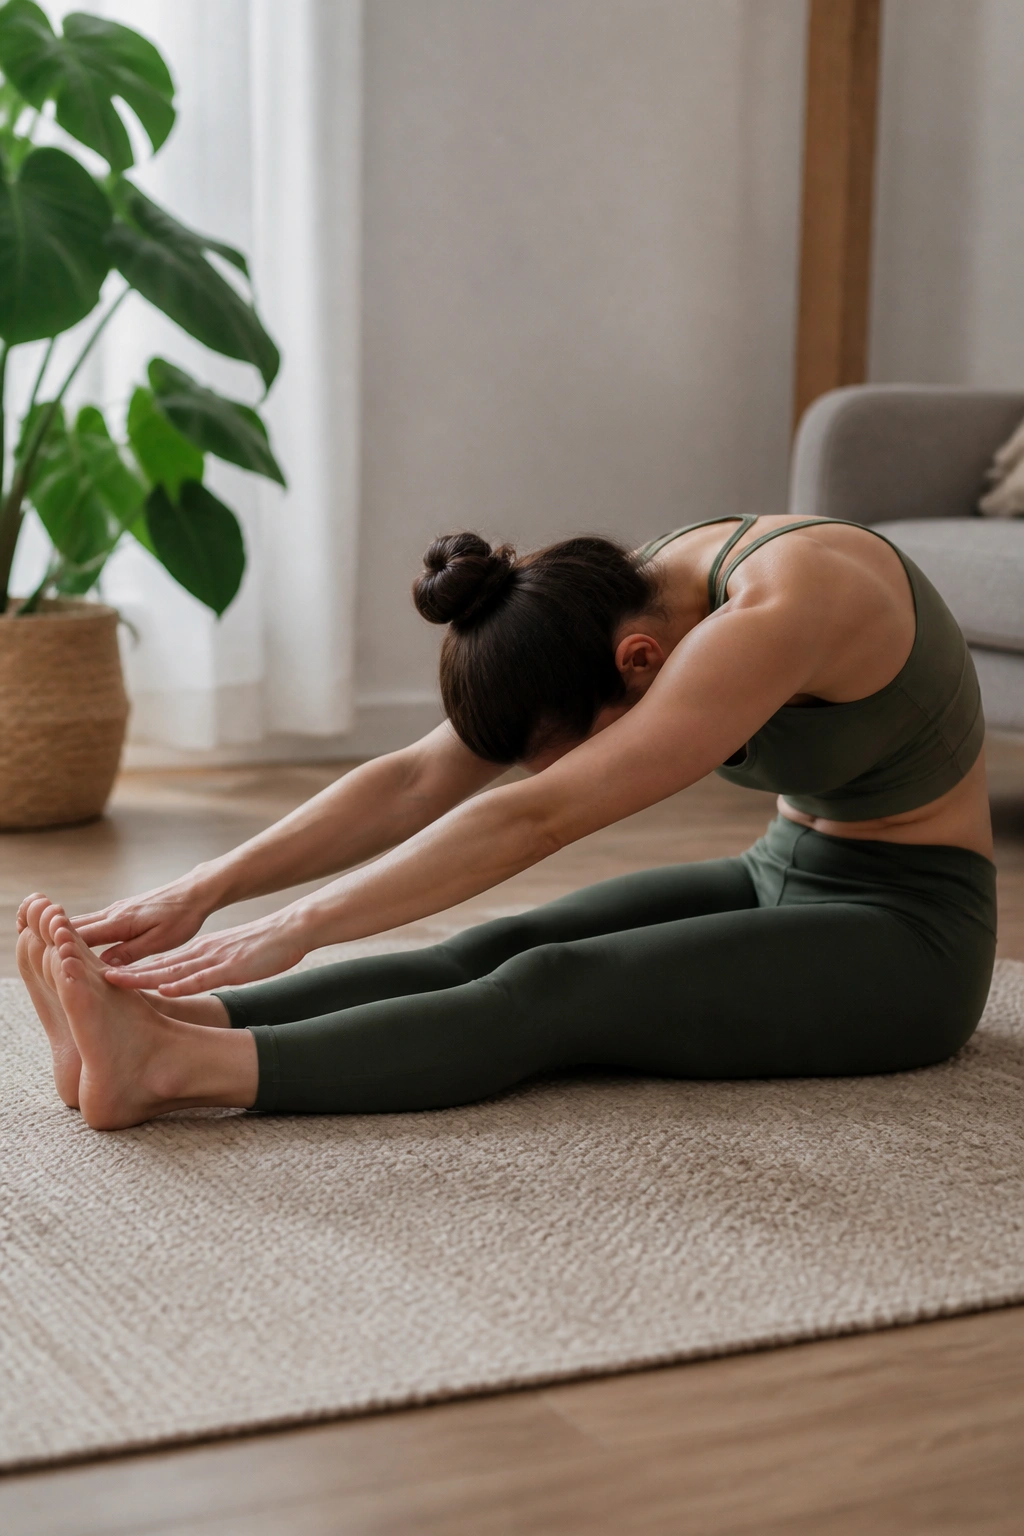
Sit with your legs straight out, feet slightly wider than your hips. Reach your arms forward, drop your chin, and round your spine forward as if you are rolling over a large beach ball.
Why It’s Important
This is about decompression. It teaches you to move your spine segment by segment. It’s not a deep hamstring stretch; it’s a spine stretch. Keep your abs pulled in deeply so they don’t block your movement.
Tips for Execution
- Don’t collapse. You should still feel a lift in your ribcage.
- Imagine someone is pulling you forward by your fingertips while someone else is pulling your hips backward.
- Focus on the stretch between your shoulder blades.
12. Swan Dive
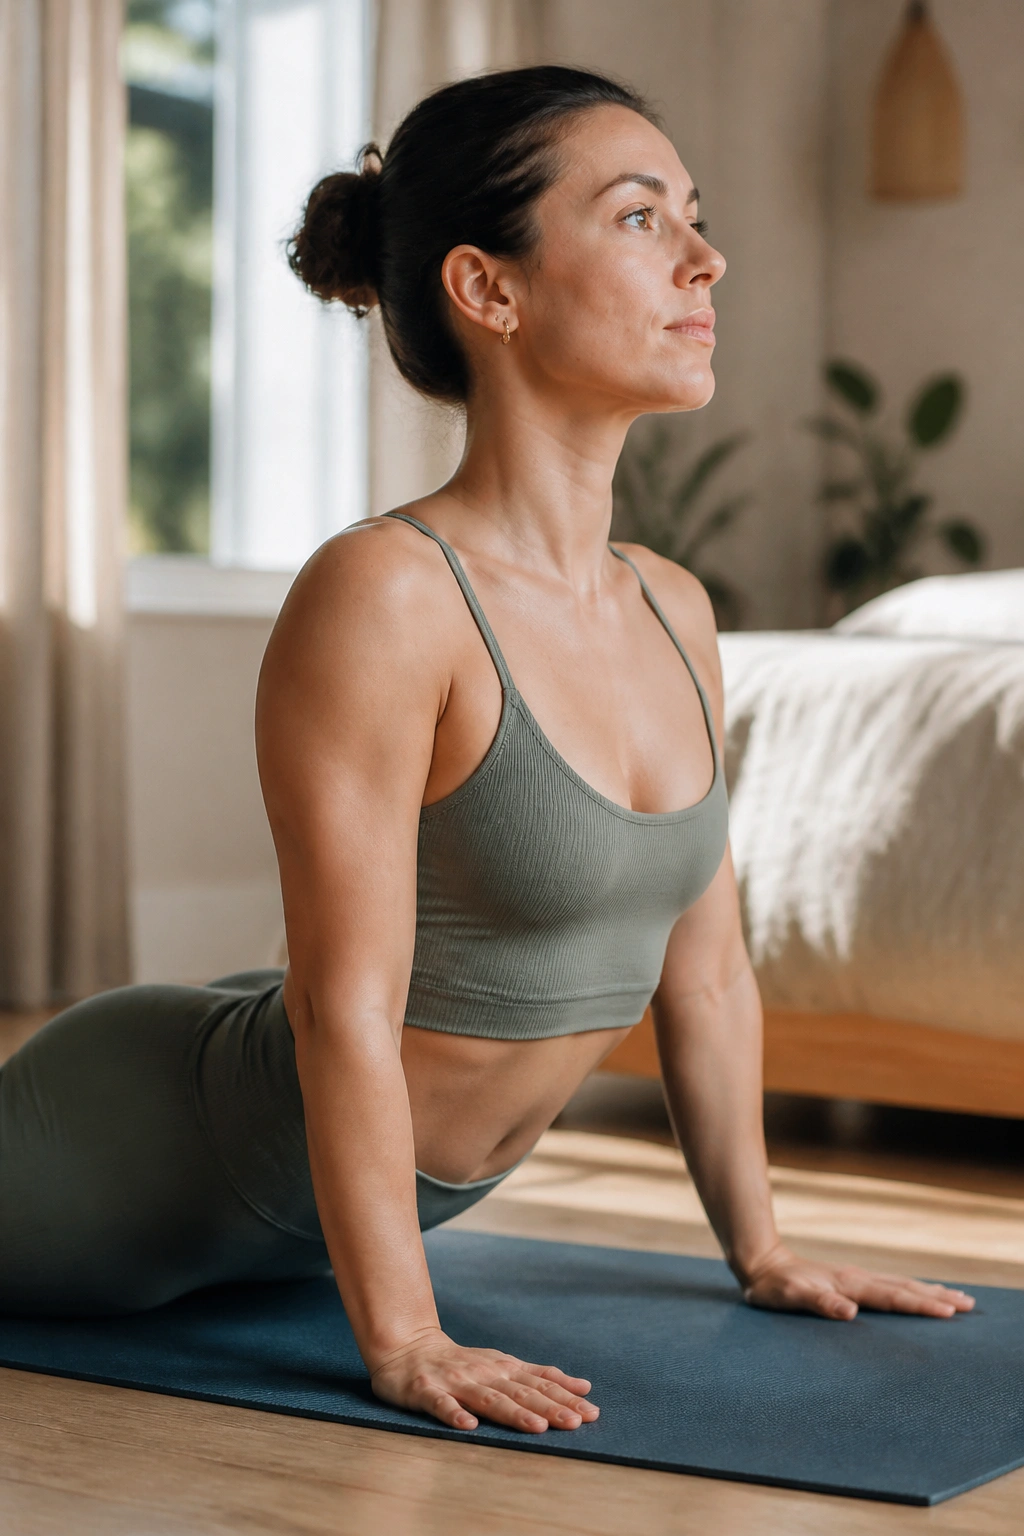
This is extension work at its finest. You lie on your stomach, hands under your shoulders, and press up to lift your chest. Then, release your hands and rock, catching yourself before coming back down.
Mastering the Rock
This is a more advanced move. Start with just the lift—pressing up to extend your spine—before trying the rock. The rock should be gentle, not a violent crash back to the floor.
Safety First
- Keep your glutes engaged to support your lower back.
- If you feel pinching in your lumbar spine, reduce your range of motion.
- Look forward, not up at the ceiling, to keep your neck long.
13. Shoulder Bridge
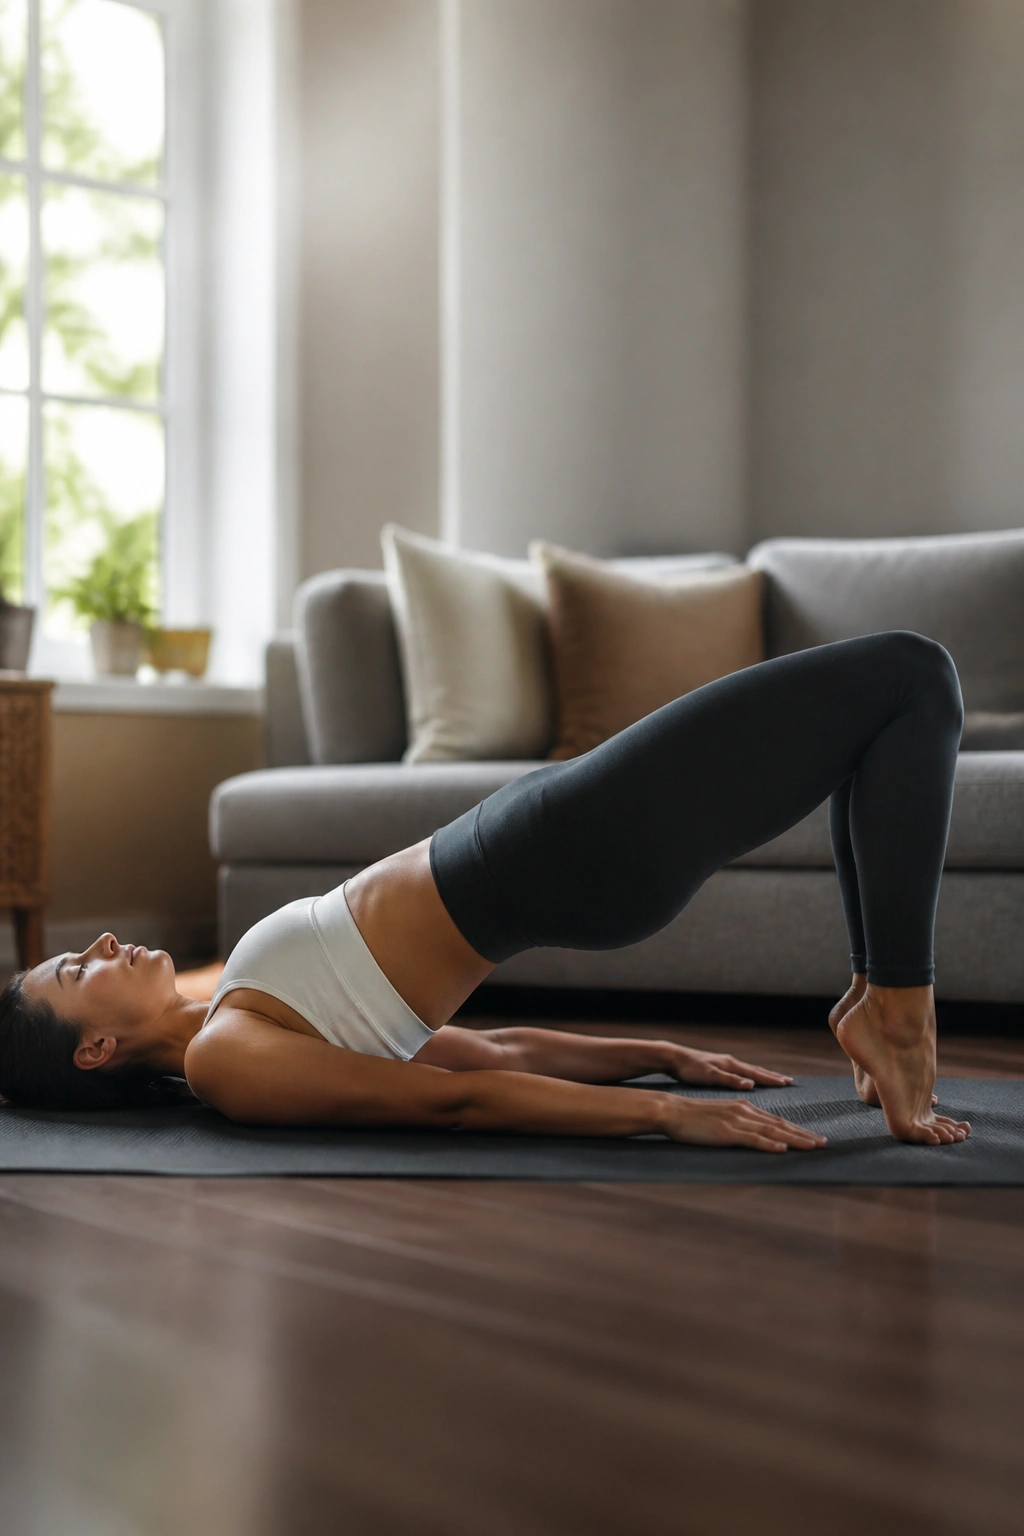
You lie on your back, knees bent, and peel your hips off the floor until you form a straight line from knees to shoulders. Then you articulate back down.
Glute Activation
Many people use their lower back to push their hips up. Don’t do that. Use your glutes. Squeeze them hard at the top. Think about dragging your heels toward your shoulders to fire up the hamstrings.
Leveling Up
- Once you master the basic bridge, try lifting one leg to the ceiling and performing the movement with single-leg support.
- Keep your chest open and shoulders pressed into the mat.
- Avoid rib flare; keep your ribs knit together.
14. Side Kick Series
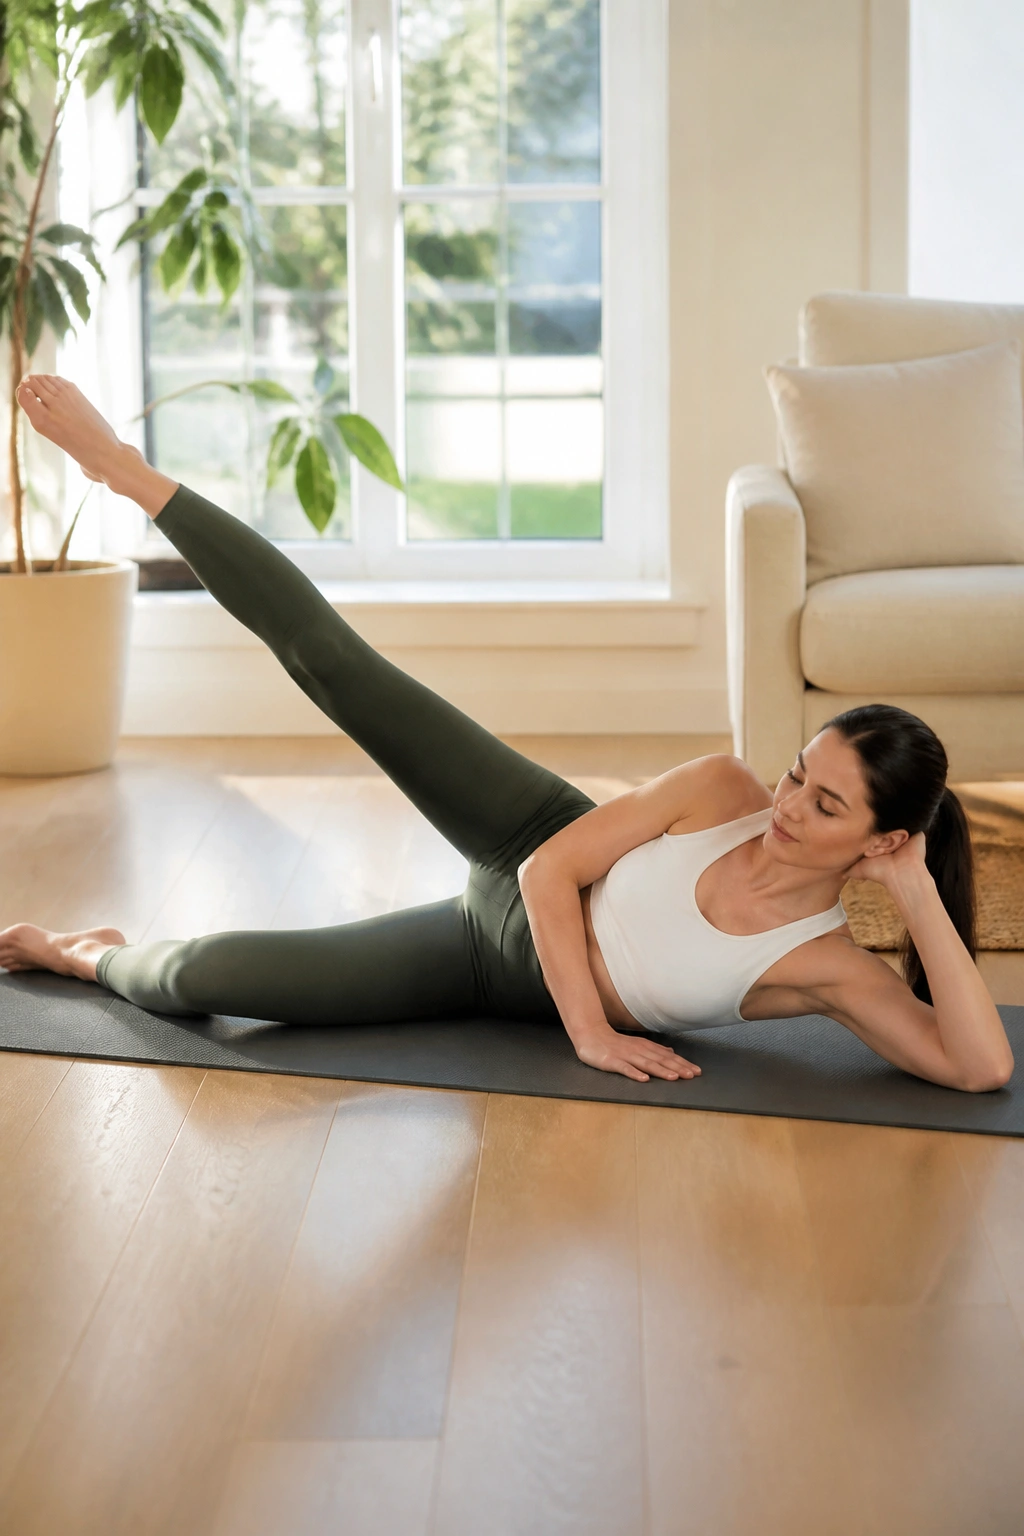
Lie on your side, legs slightly forward, and prop your head on your hand. Lift the top leg and perform a variety of kicks—front, back, up, and down.
Why This Is Deceptively Hard
You will feel this in the outer hip and glute of the bottom leg and the working leg. The challenge is keeping your torso completely still while your leg is in motion.
Technique Variations
- Front/Back: Kick the leg forward twice, then sweep it back.
- Up/Down: Lift the leg up and control it on the way down—that’s where the work happens.
- Small Circles: Draw tiny circles with your toe, ten in each direction.
- Don’t let your top hip sink toward your waist. Keep your waist long on both sides.
15. Teaser
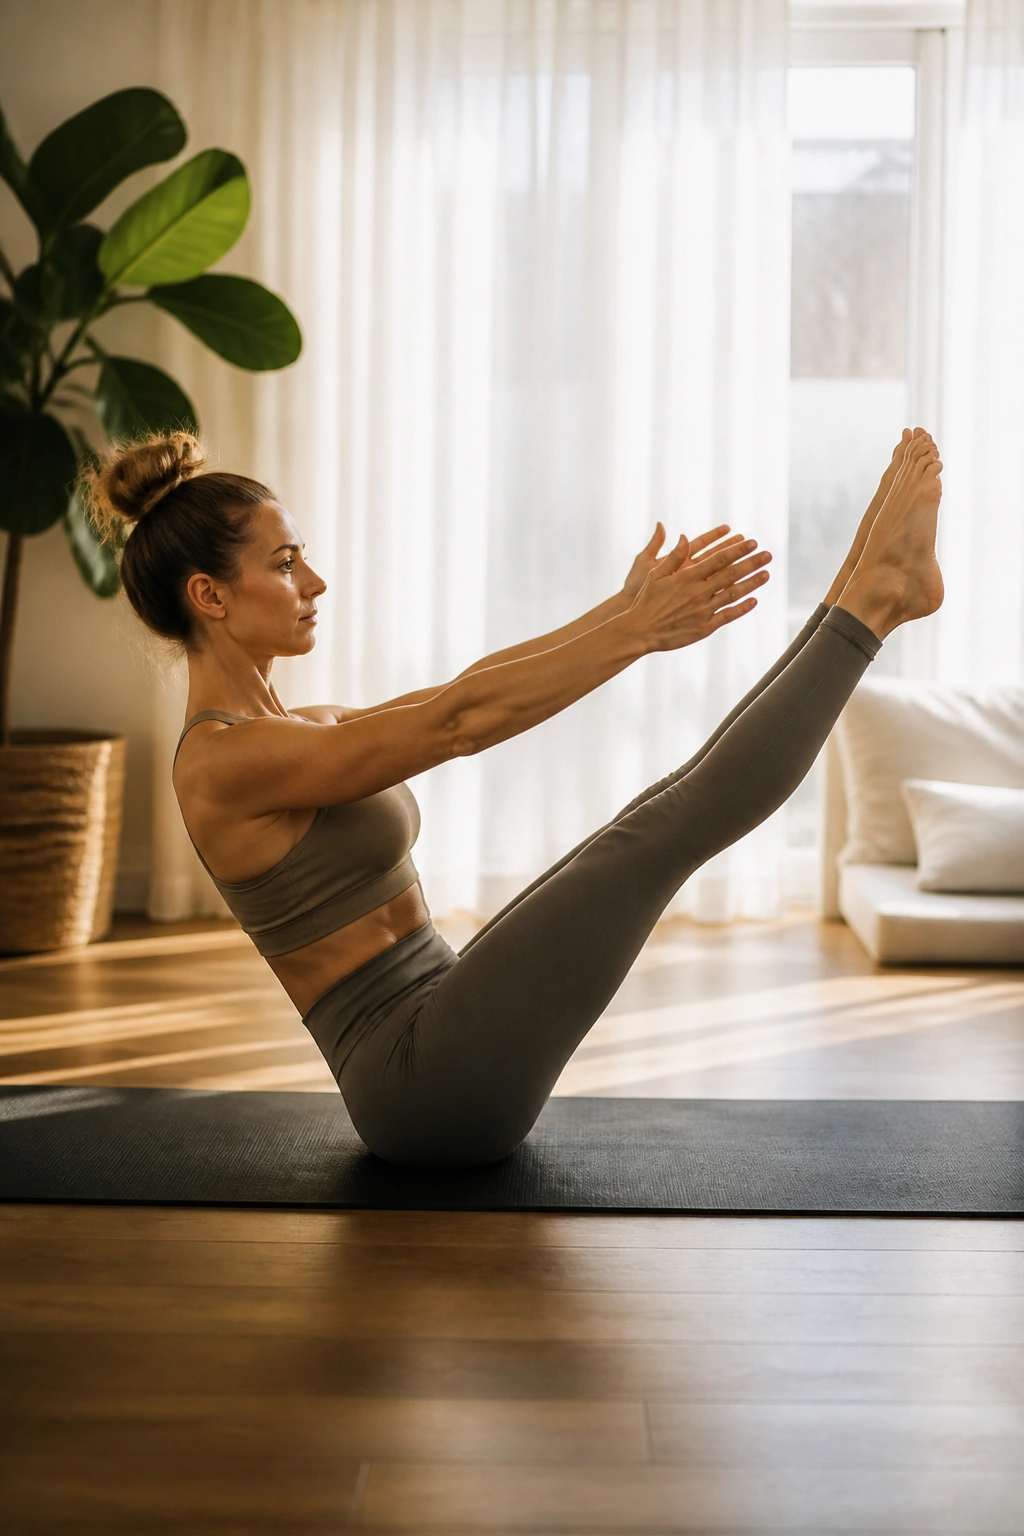
This is the classic Pilates power move. You transition from lying flat to a “V” shape, balancing on your tailbone with legs and arms extended.
The Secret to the V
If you struggle with this, start with your knees bent. Use your abdominal strength to initiate the movement, not your hip flexors. It’s a sequence: head, then arms, then spine, then legs.
Troubleshooting
- If you feel like you are going to fall, reach your arms slightly higher.
- Keep your gaze toward your toes to maintain the shape.
- Exhale as you lift; the air leaving your lungs helps the core contract.
16. Plank Variations
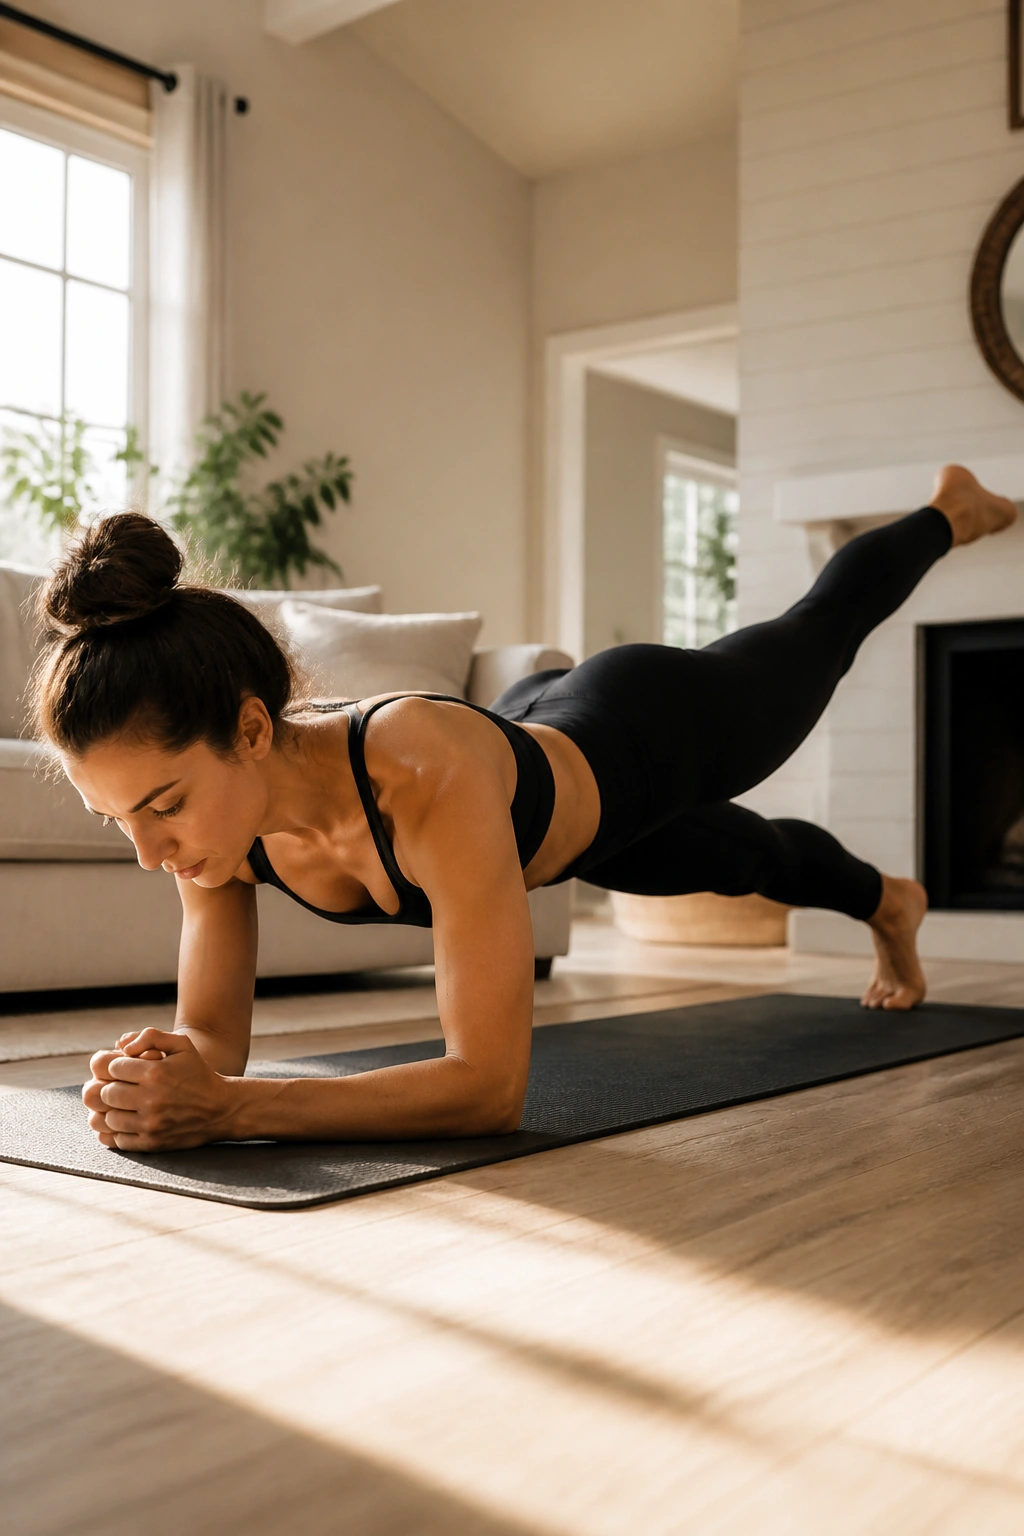
The plank is a staple for a reason. But in Pilates, we don’t just hold it. We move. From a standard plank, try lifting one leg, or shifting your weight forward and backward.
Maintaining the Line
Your body should be a straight, unbending line. If your hips are sagging, you’re putting too much load on your lower back. If they are piked too high, you’re losing the abdominal engagement.
Adding Movement
- Leg Pull Front: While in a plank, lift one leg just an inch. Hold. Switch.
- Side Plank: Rotate onto your side, reaching your top arm to the sky. Focus on keeping the bottom ribs lifted away from the floor.
- Keep your shoulders down away from your ears at all times.
17. Bird Dog
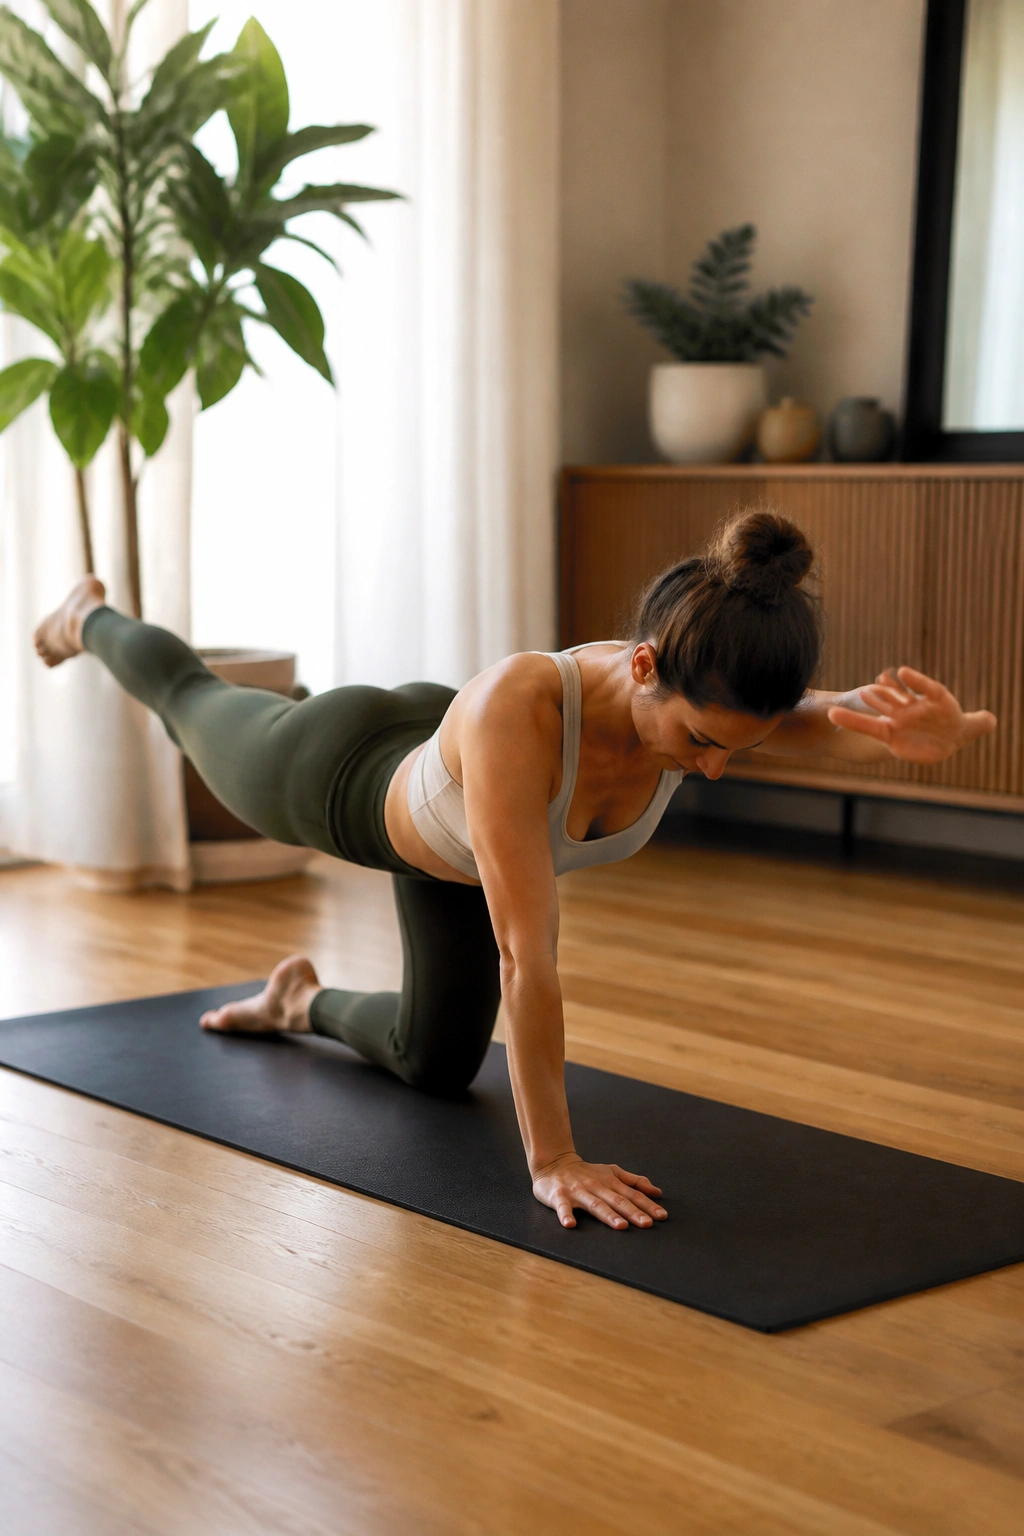
This is a fundamental stability exercise. Start on all fours, then extend your right arm and left leg simultaneously.
The Focus
The goal is to keep your torso perfectly still. Imagine you have a glass of water balanced on your lower back. If it spills, you moved too much. Slow down and focus on the connection between your opposite hand and knee.
Better Results
- Reach out, not just up.
- Keep your neck neutral; look at the floor between your hands.
- Exhale as you extend; inhale as you return.
18. Donkey Kicks
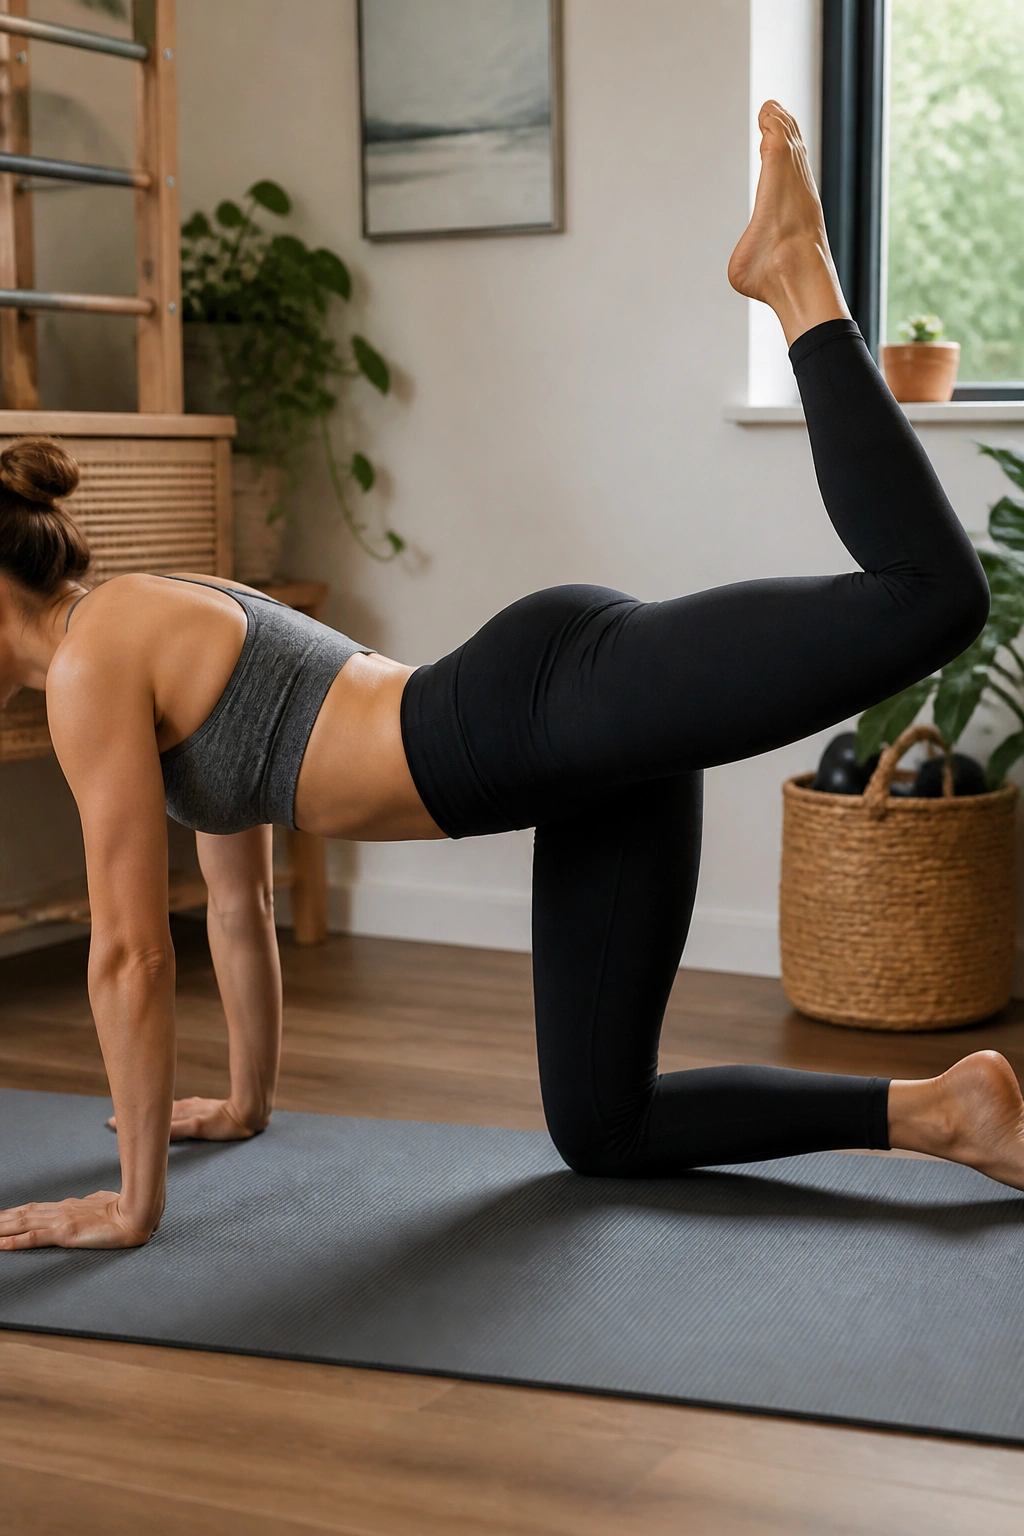
On all fours, keep your knee bent at 90 degrees and push your foot toward the ceiling.
Glute Isolation
This is pure glute work. You aren’t trying to lift your leg high; you are trying to squeeze your glute to drive the movement. If you feel it in your lower back, you are likely arching your spine. Keep your back flat.
Making It Effective
- Flex your foot to engage the hamstring.
- Keep your pelvis level—don’t let the working side tip up.
- Pulse at the top for extra burn.
19. Fire Hydrants
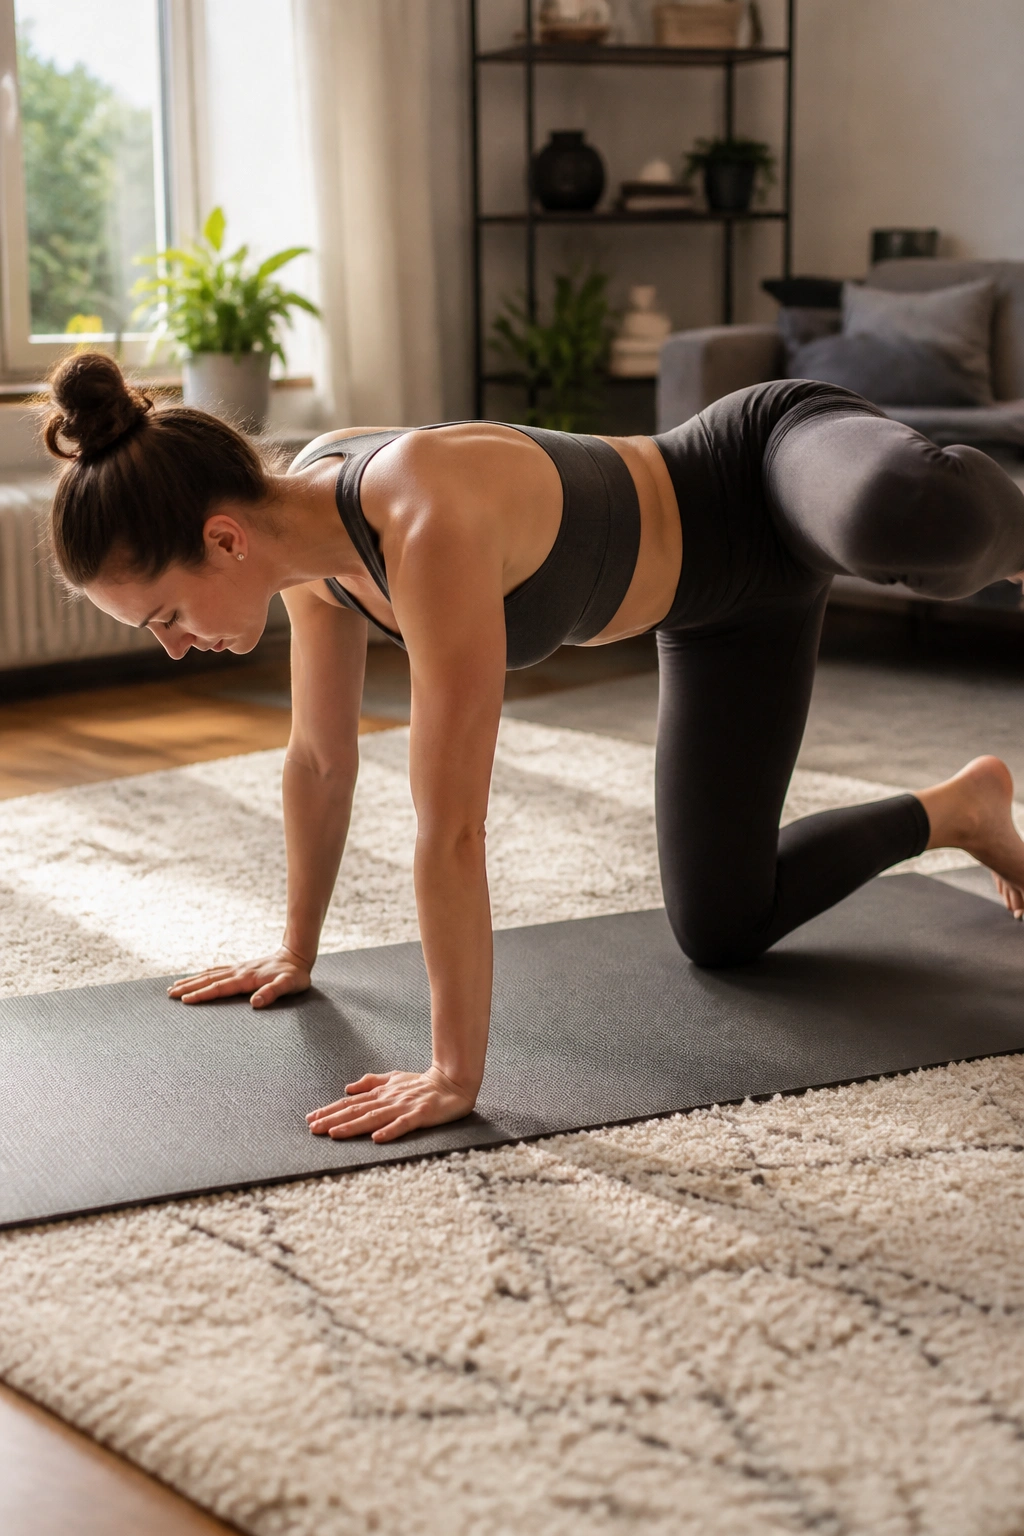
From all fours, lift one bent knee out to the side, like a dog at a fire hydrant.
Why It’s Different
This targets the glute medius—the muscle on the side of your hip that is vital for pelvic stability. It’s a small, precise movement that burns fast.
Technique Details
- Keep your weight even between your two hands.
- Don’t lean into the stationary side.
- Make the movement slow and controlled. You shouldn’t be swinging your leg.
20. Scissors
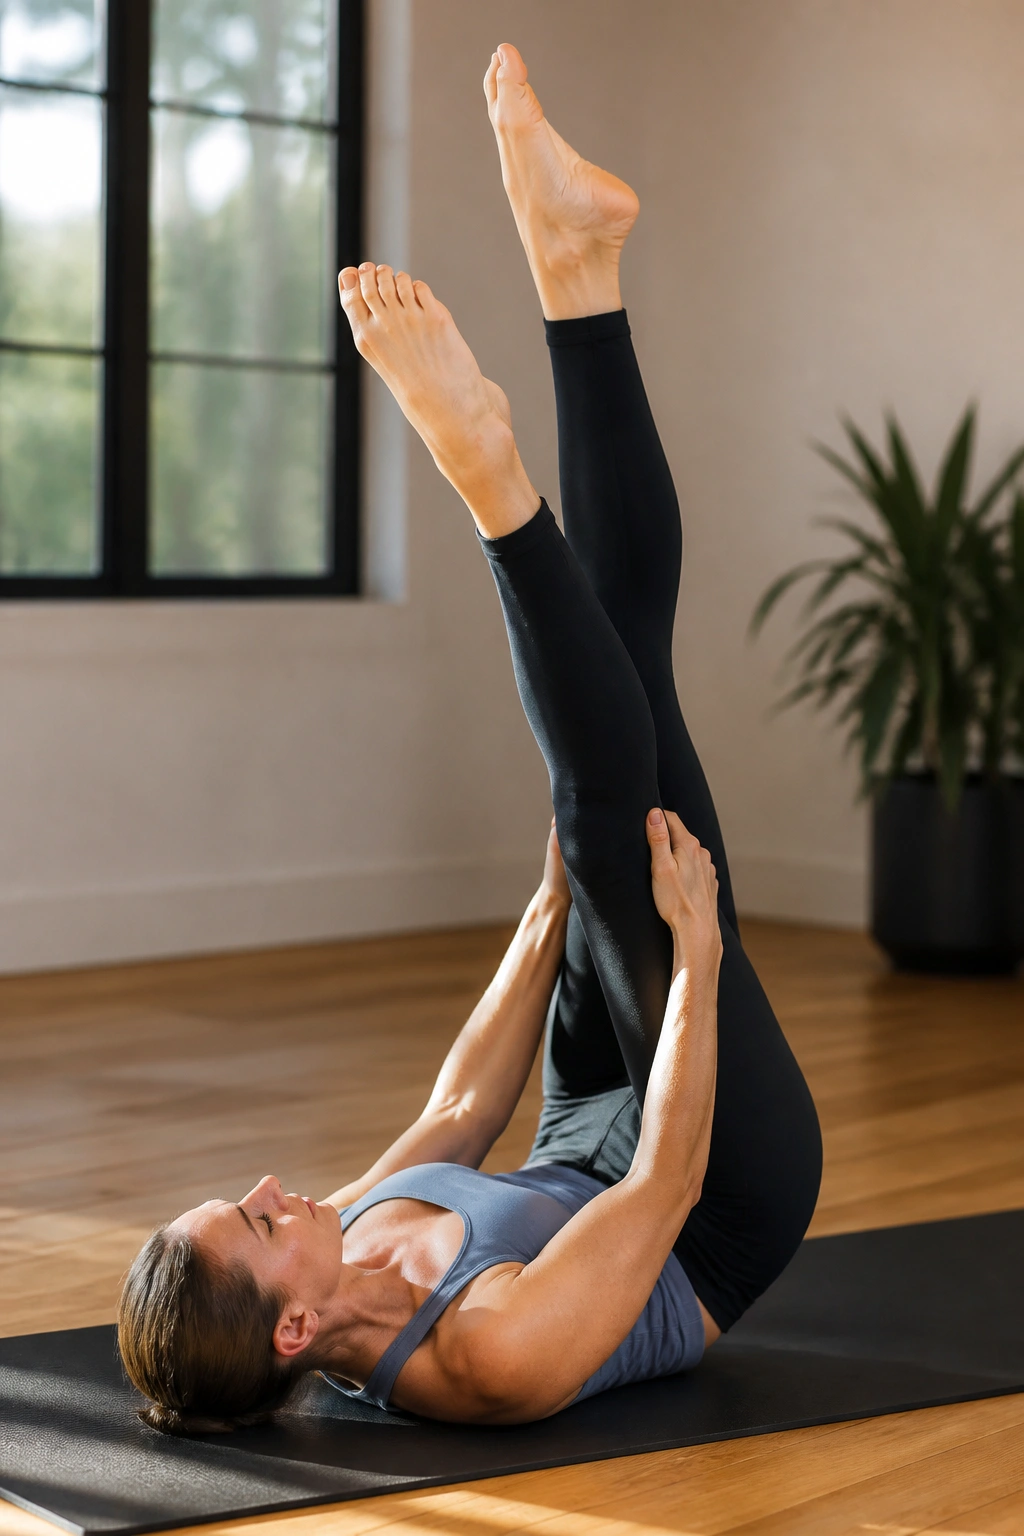
Lie on your back, legs extended to the ceiling. Scissor them back and forth, grabbing the calf to pull the leg toward you for a stretch.
Dynamic Flexibility
This is part stretch, part core work. The goal is to keep the legs as straight as possible. If you are extremely tight, grab behind the knee, but work toward the calf or ankle.
Important Notes
- Keep your shoulders relaxed.
- Avoid holding your breath.
- Use your hands to pulse the leg toward you twice, then switch.
21. Corkscrew
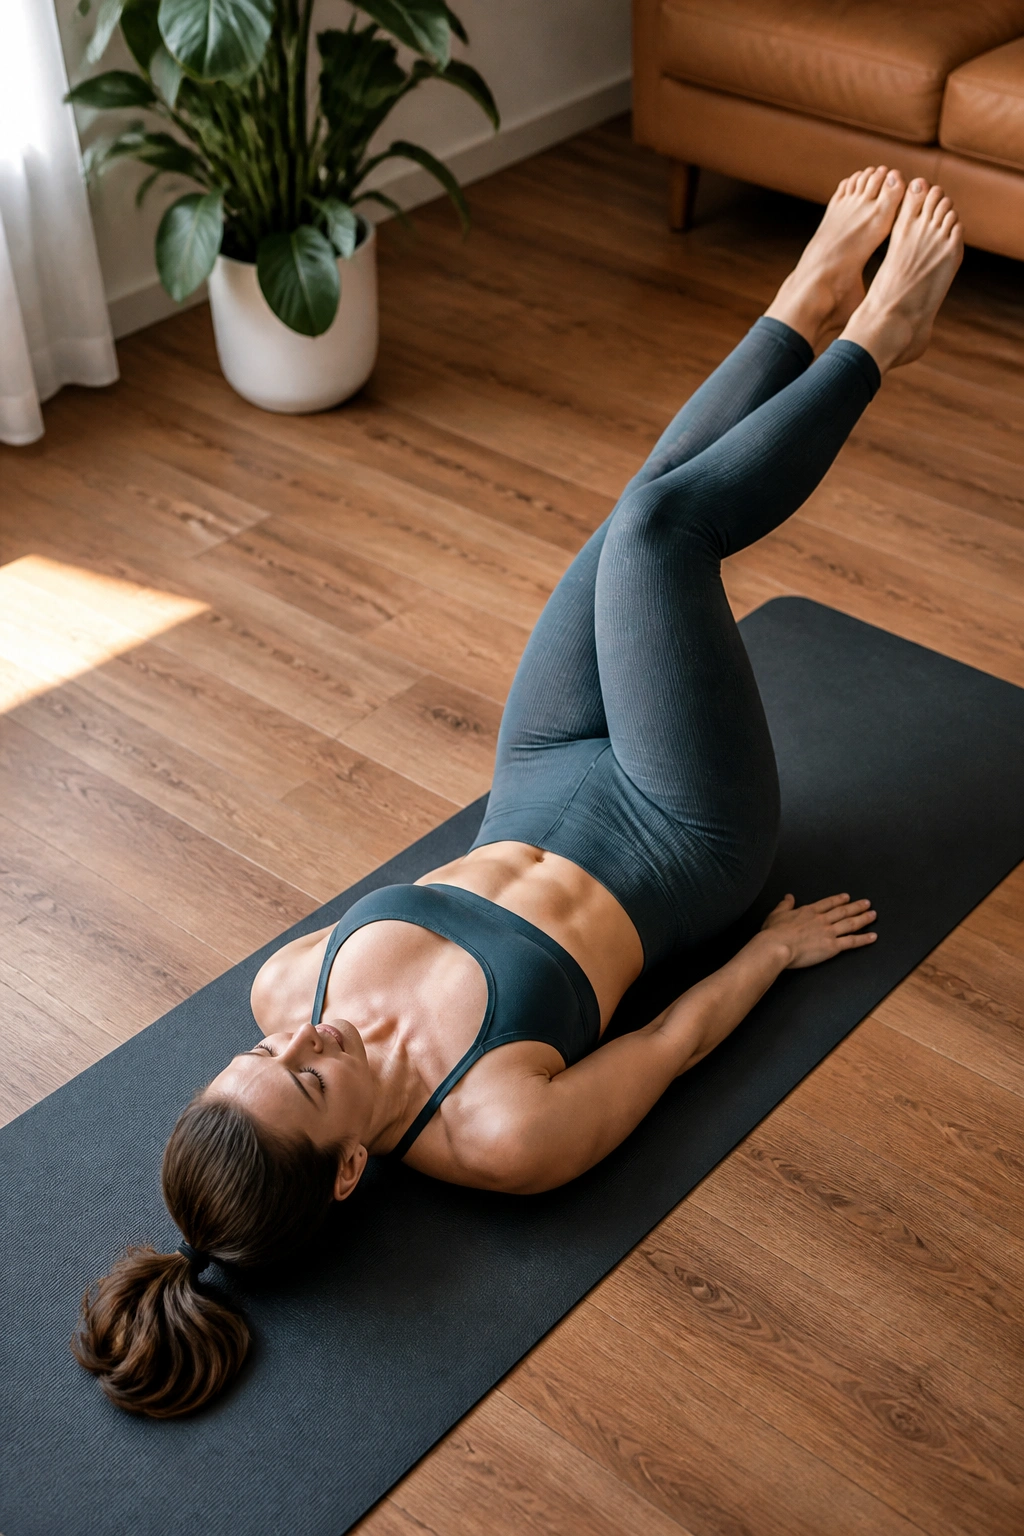
Lie on your back with legs glued together, reaching up to the ceiling. Circle your legs in one direction, keeping your hips stable.
The Challenge
This requires immense abdominal control because your legs are heavy levers. You are trying to move them without your spine moving at all. Start with smaller circles and expand them only as you get stronger.
Pro-Tip
- Inhale for half the circle, exhale for the other half.
- Keep your gaze steady.
- Focus on the sides of your abs as you pull the legs back to center.
22. Push-up Series
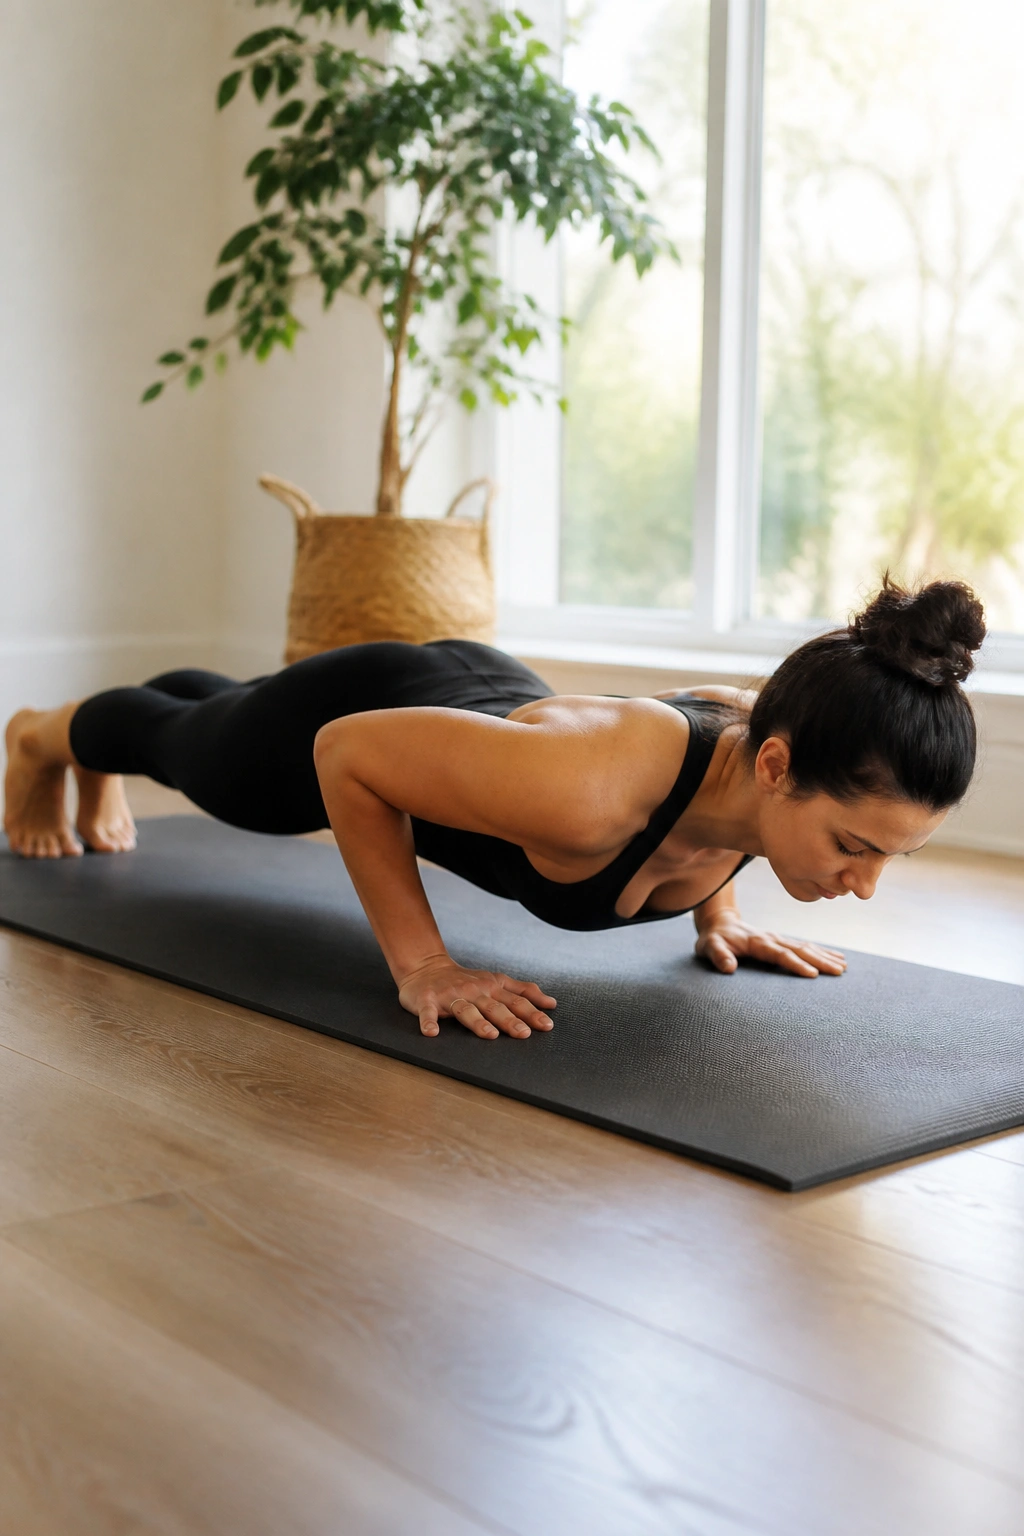
The Pilates push-up is different from a gym push-up. You walk your hands out into a plank, do a few push-ups with elbows tucked in by your ribs, then walk back and roll up.
Precision Over Reps
It’s not about how many you can do; it’s about how many you can do with perfect form. Keep your core tight the entire time—don’t let the hips sag when you descend.
Execution
- Keep your elbows grazing your ribcage as you lower.
- Keep your neck long and eyes looking slightly forward, not down at your chest.
- When you walk your hands back, articulate your spine as you stand up.
Final Thoughts
Consistency is the only thing that actually transforms your body. You don’t need the latest equipment or a complex studio setup to get results. In fact, relying on your own body weight is the fastest way to learn where you are weak and where you are strong.
Take these movements and build your own flow. You can combine them into a quick fifteen-minute routine for the morning or a longer, more deliberate hour-long session in the evening. Listen to your body, focus on the precision of the movement rather than the speed, and you will see the changes you are looking for. The floor is ready when you are.
