



Starting Pilates for the first time often feels like walking into a room where everyone else is speaking a secret language. You hear terms like “powerhouse,” “articulation,” and “ribcage closure” tossed around, and it is easy to assume you need an expensive reformer or a decade of flexibility training just to keep up. The reality is quite the opposite. True Pilates is grounded in the foundational work developed by Joseph Pilates, designed to be accessible to anyone with a floor and a bit of focus. It is not about how high you can kick or how flexible your hamstrings are; it is about learning how to recruit deep abdominal muscles that most other gym workouts completely ignore.
When you begin, the challenge isn’t the physical load—it’s the mind-body connection. You might find your brain fighting to keep your shoulders down while your legs try to follow a specific pattern. That disconnect is normal. The following exercises are the building blocks of the entire practice. They teach you to stabilize your pelvis, lengthen your spine, and breathe with intention. Do not worry about doing these perfectly on your first day. Focus on the sensation of your muscles working in isolation and the specific cues that help you control the movement. If you feel like you are just flailing around, slow down. Cut the speed in half, and you will instantly find more engagement.
1. The Hundred
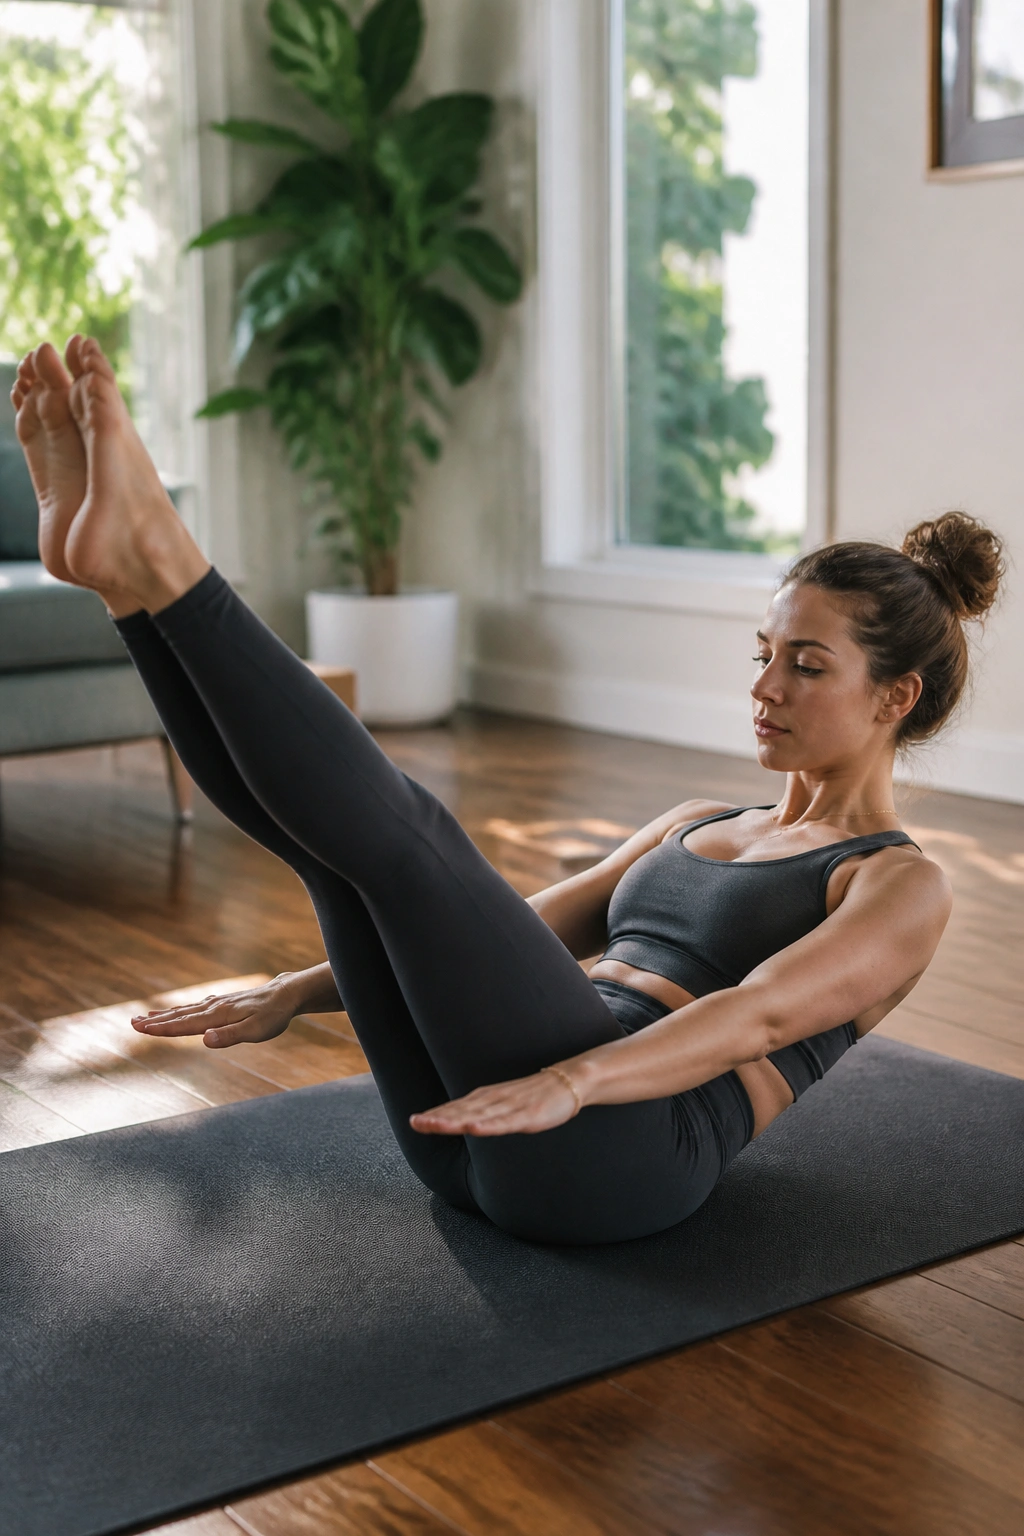
This is the quintessential Pilates exercise, famous for its ability to warm up the entire body and fire up the deep core. Despite the name, you do not need to aim for a hundred breaths right away; start with twenty or thirty and build your endurance over time. Lie on your back with your knees pulled into your chest, hands by your sides. Curl your head and shoulders off the mat, looking toward your belly button. Extend your legs to a 45-degree angle—or higher if your lower back starts to arch. Begin pumping your arms vigorously by your sides.
Why It Matters for Your Core
The pump of the arms creates instability, forcing your deep abdominals to work overtime to keep your torso perfectly still. If you feel your neck straining, lower your head and neck back to the mat while keeping your legs and arms moving. The breath pattern is rhythmic: inhale for five pumps, exhale for five.
Troubleshooting the Burn
- Neck pain: Keep your gaze fixed on your belly. Do not tuck your chin into your chest.
- Lower back arching: This is a sign your core is disengaging. Raise your legs higher toward the ceiling until you can hold the position with a flat back.
- Shoulder tension: Focus on reaching your fingertips toward the wall in front of you, lengthening your arms out of the shoulder socket.
2. Pelvic Curls
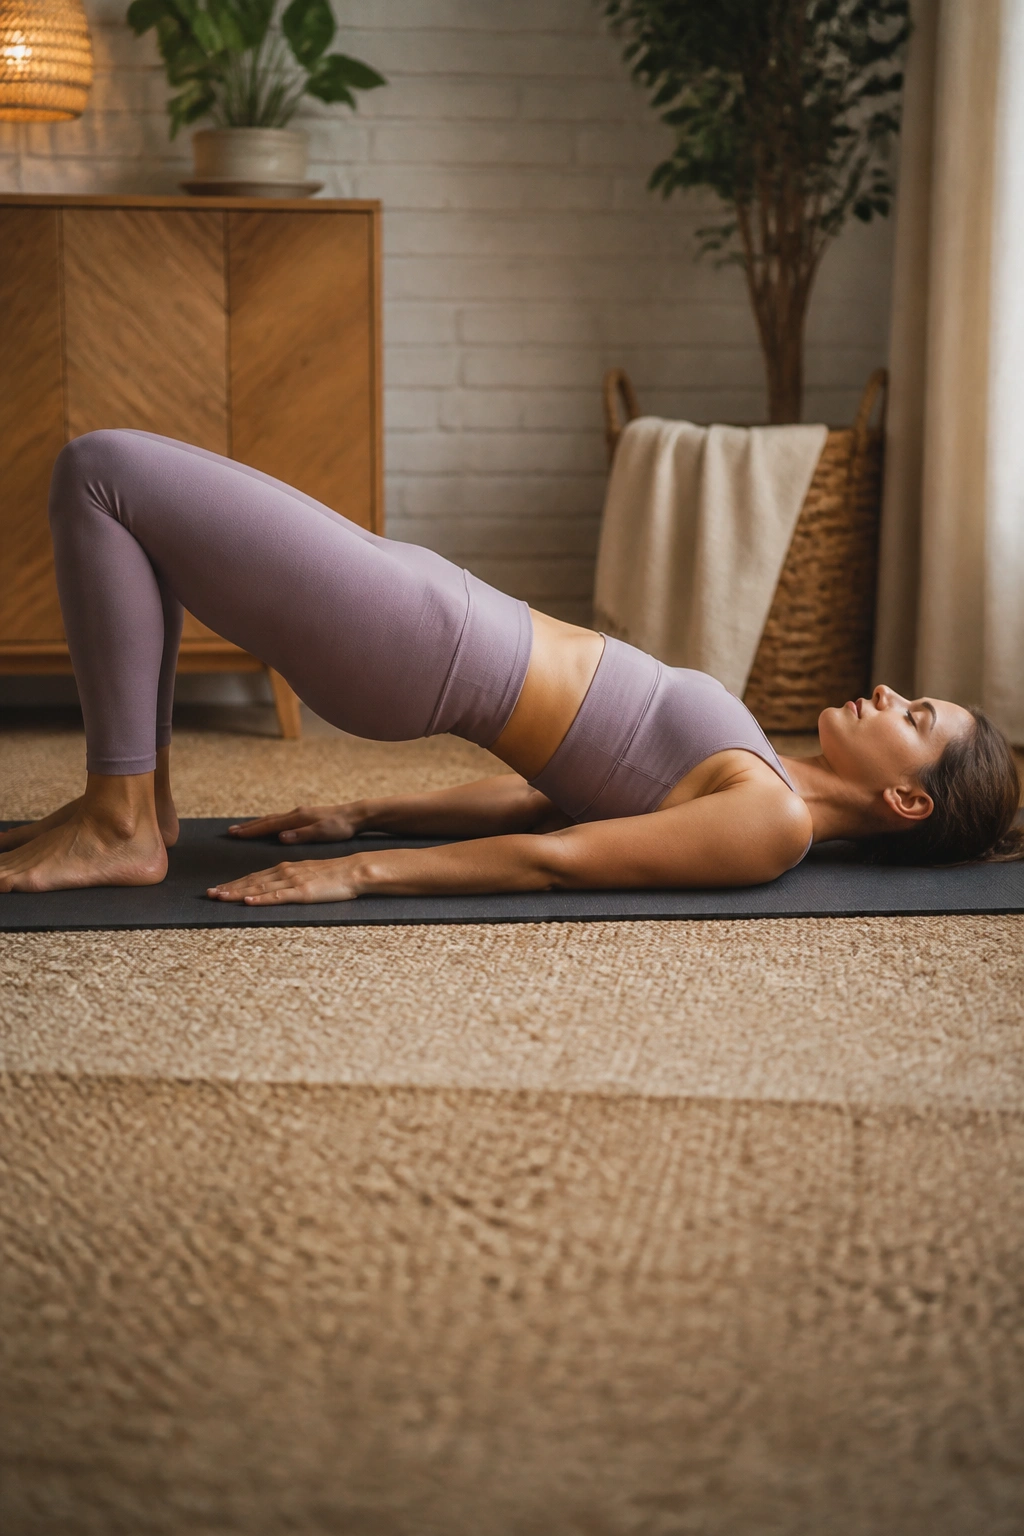
Think of this as a slow, deliberate massage for your spine. It teaches you to articulate each vertebra individually, which is a rare skill in most traditional fitness routines. Lie on your back, knees bent, feet flat on the floor in line with your sit-bones. Your arms should rest comfortably at your sides. Start by tipping your pelvis toward your face, flattening your lower back against the mat.
Continue the movement by peeling your hips off the floor, lifting one vertebra at a time, until you create a straight diagonal line from your knees to your shoulders. Hold for a beat, feeling your glutes and hamstrings fire, then slowly roll back down, melting your spine into the mat piece by piece. The goal here is control, not speed. If you move too fast, you miss the nuance of the spinal articulation.
3. Single Leg Circles
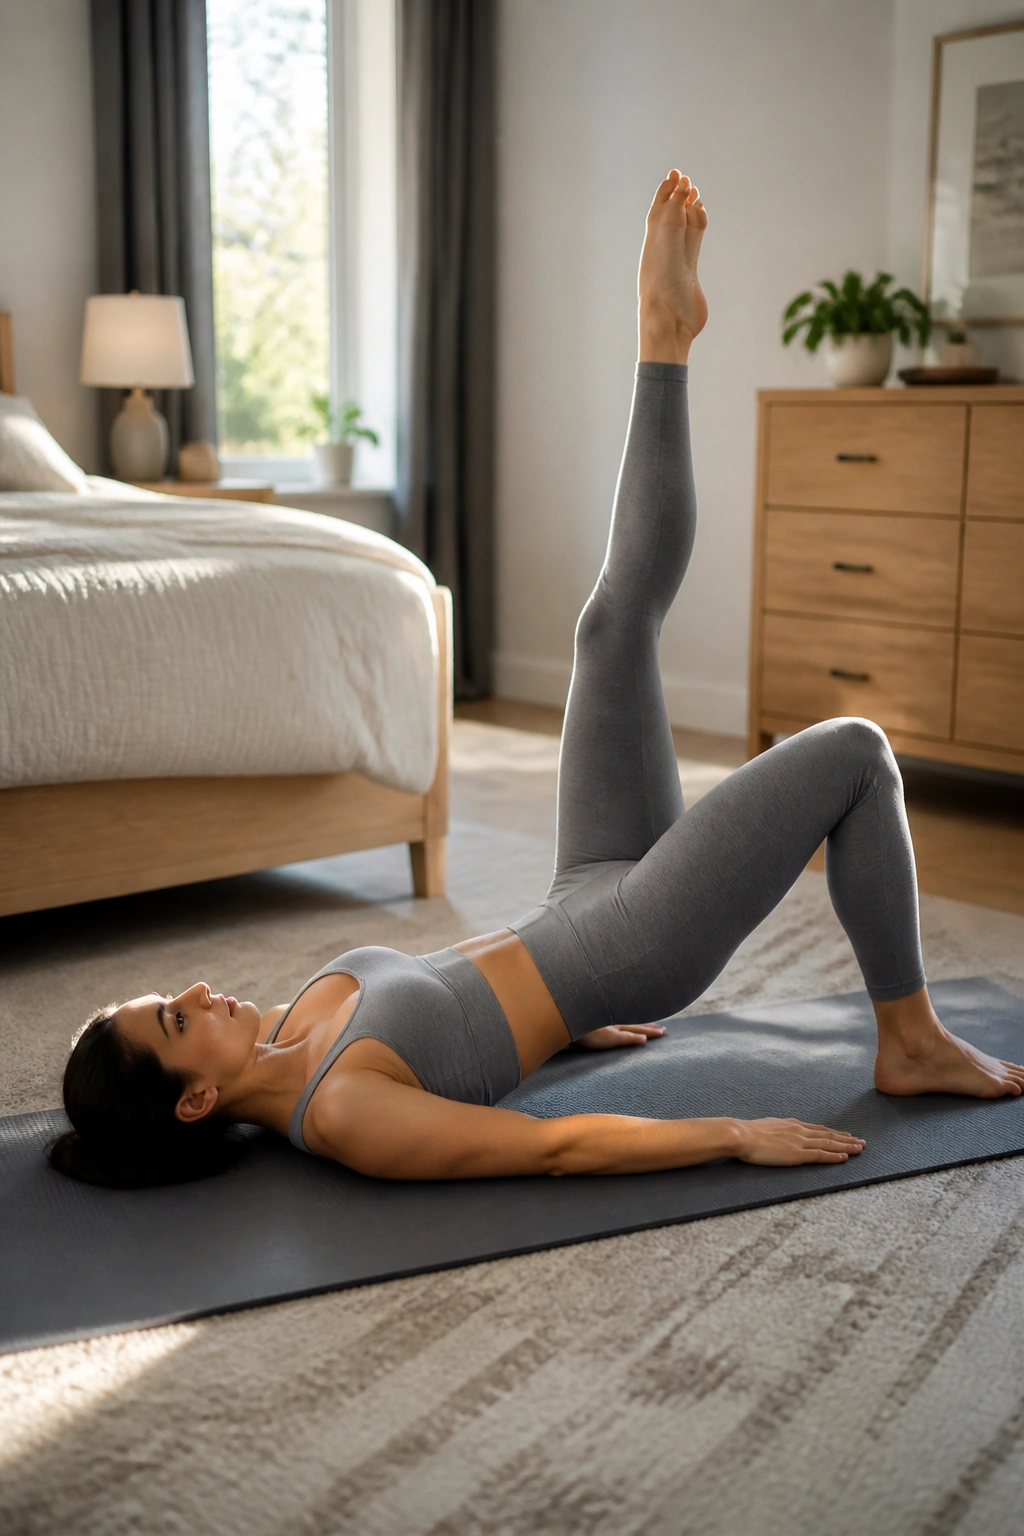
This movement challenges hip stability and abdominal control simultaneously. Lie flat, arms long by your sides, palms pressed into the mat for grounding. Extend one leg straight up toward the ceiling, pointing the toes, while keeping the other leg planted firmly on the floor.
The Technique
The secret here is to keep your torso and hips rock-solid. Imagine you have a teacup balanced on your pelvis. If you wobble or shift your weight, that cup tips over. Draw a small circle with your raised foot, crossing the midline of your body, circling down, and sweeping back up to the top. Keep the circles tight; bigger is not better here. After five circles in one direction, reverse the rotation.
Common Pitfalls
Many beginners allow their hips to rock side to side to make the circle bigger. This defeats the purpose. The leg should move within the hip socket, not from the pelvis. Keep your planted leg active and reaching away from your center.
4. Rolling Like a Ball
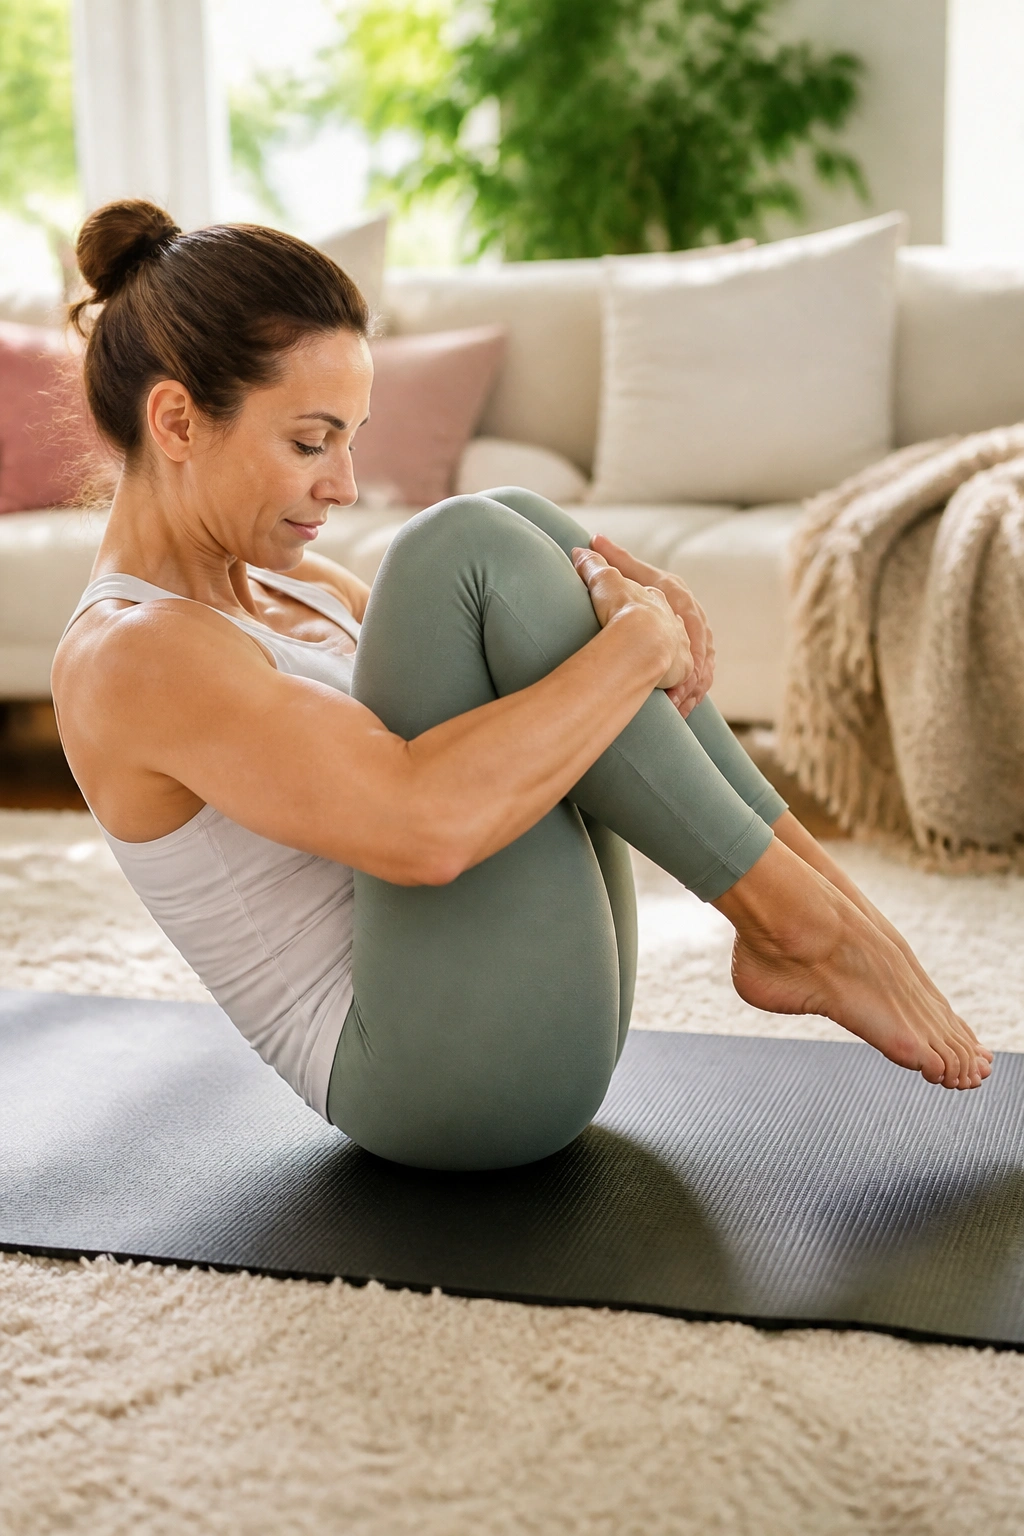
If you want to understand spinal flexibility and control, this is your go-to move. Sit at the edge of your mat, knees tucked into your chest. Hug your shins with your hands and balance on your sit-bones. Try to bring your heels toward your glutes, making your body as compact as a small ball.
Gaze toward your belly button—this keeps your spine rounded in the correct “C-curve” shape. Inhale as you rock backward, landing on your shoulder blades, then exhale as you use your abdominal strength to rock forward, returning to your balanced starting position without letting your feet touch the floor. The momentum should come from your core, not from kicking your legs. If you find yourself slamming into the floor, you aren’t engaging your abdominals enough to catch the movement.
5. Single Leg Stretch
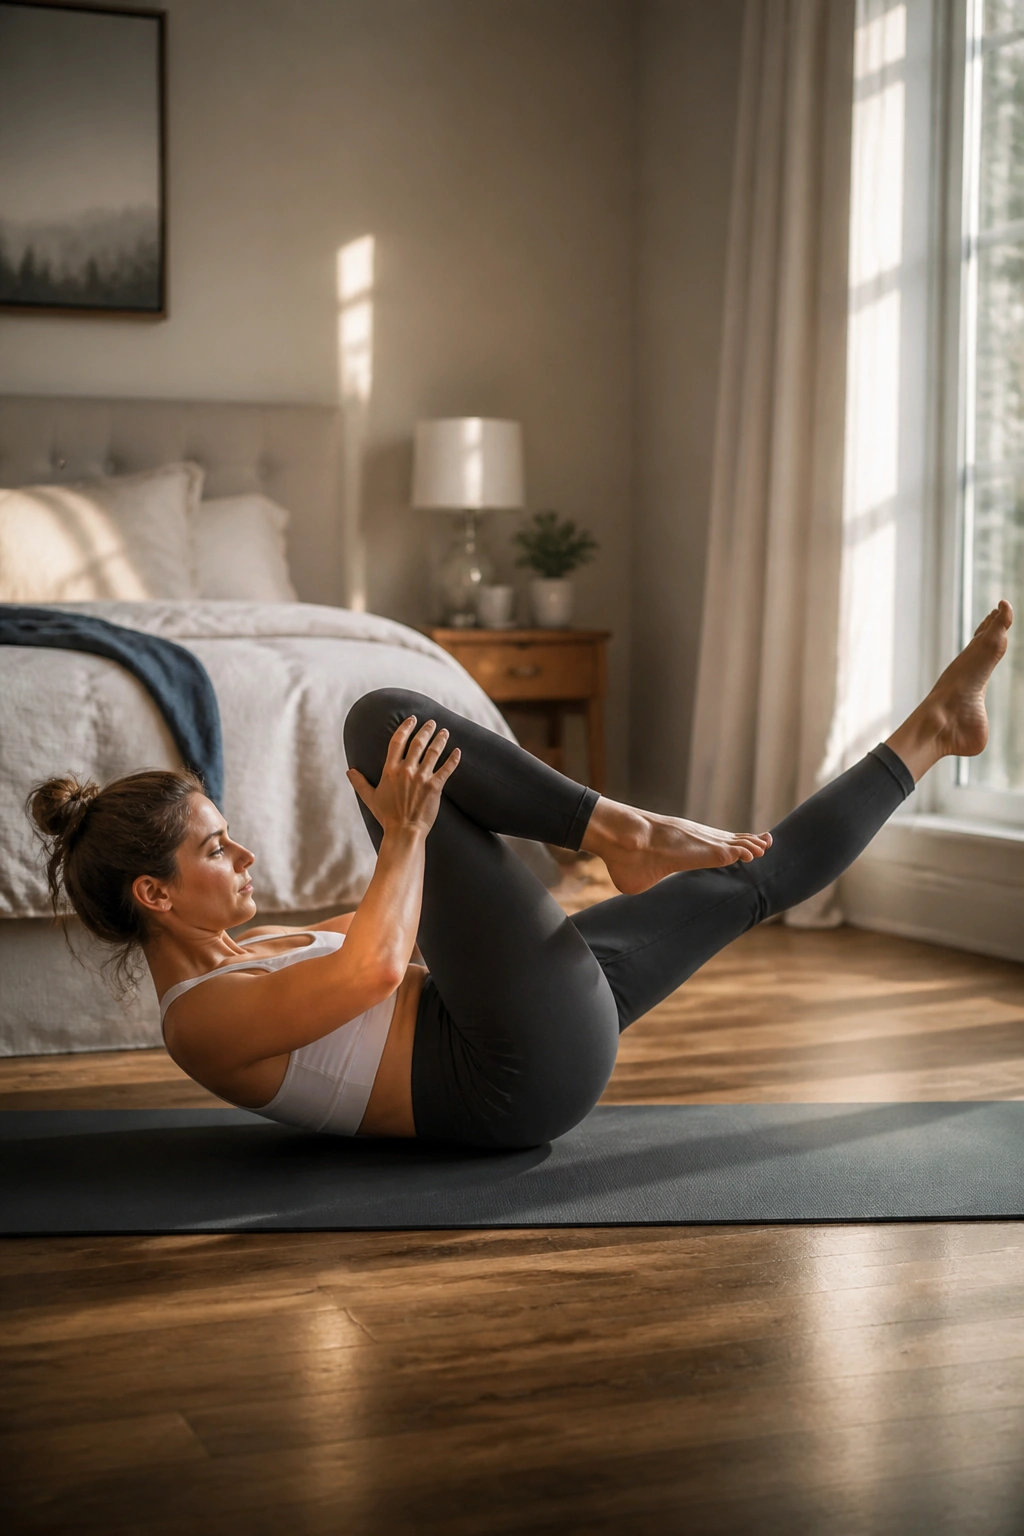
This exercise is essentially a controlled abdominal crunch with a twist. Lie on your back, pull both knees into your chest, and curl your head and shoulders up into that classic Pilates lift. Place your right hand on your right ankle and your left hand on your right knee. Extend your left leg straight out at a 45-degree angle.
Switch legs by pulling the left knee into your chest while extending the right leg, swapping your hand placement as you move. Keep your torso completely still as you switch. You are essentially creating a rhythm of pull, switch, pull, switch. The secret to success is the exhalation; force the air out of your lungs as you switch legs to empty your belly, which helps you draw your navel deeper toward your spine.
6. Double Leg Stretch
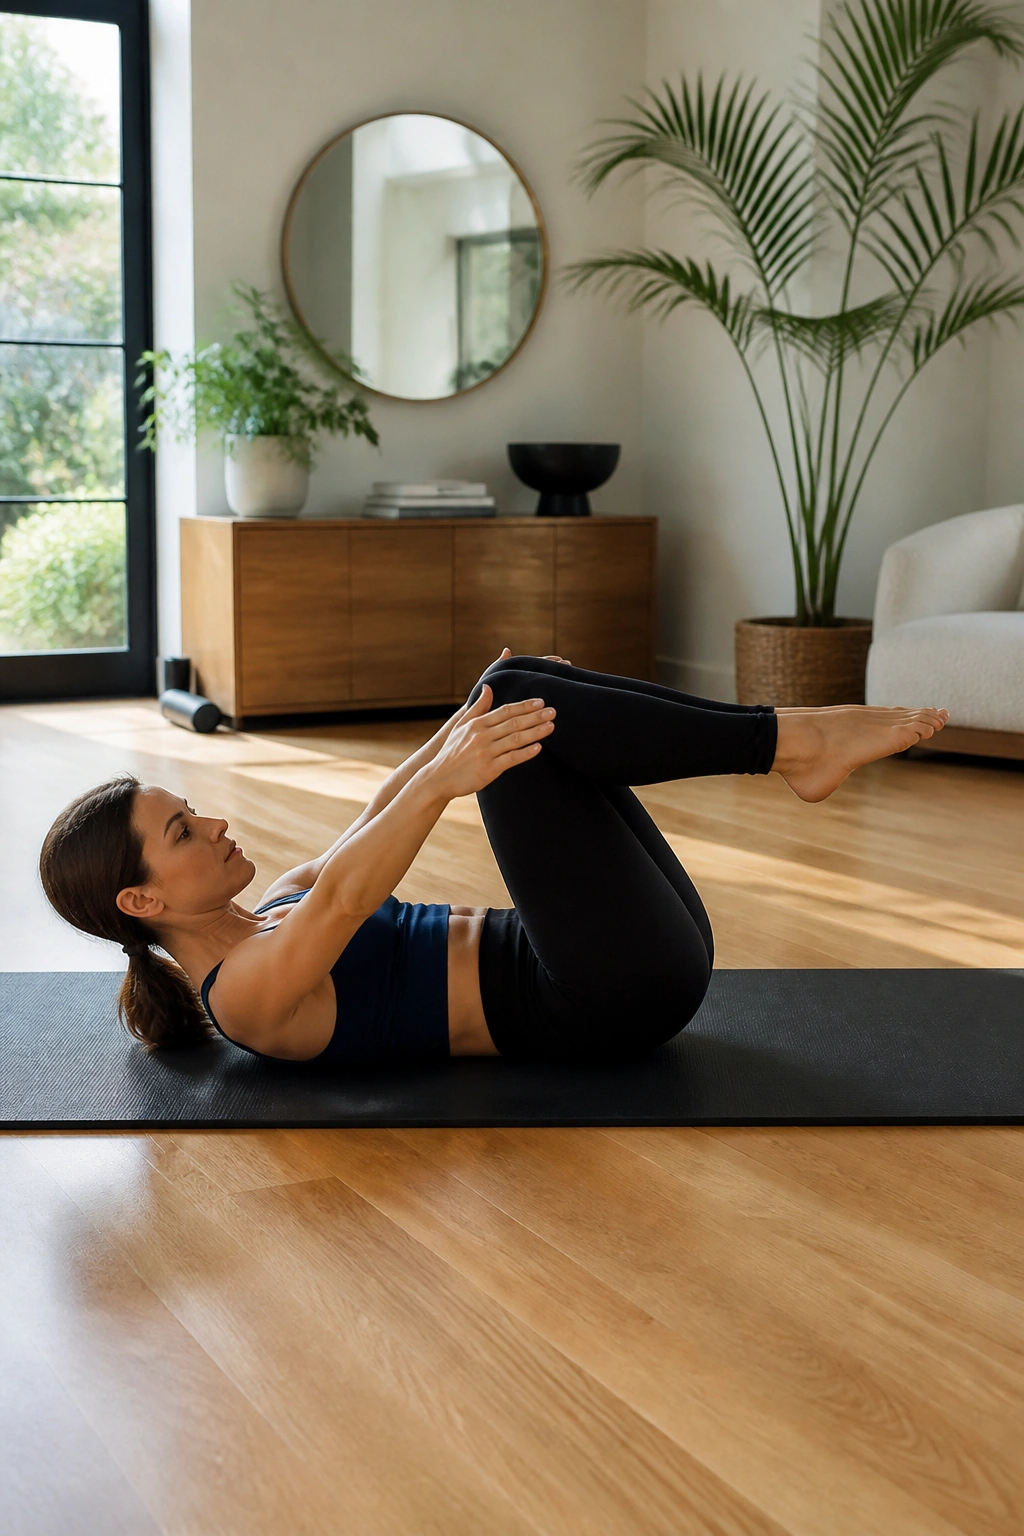
This is the bigger brother to the single leg stretch, requiring significantly more coordination. Start in the same curled-up position, knees into your chest, hands on your shins. Inhale and reach your arms overhead while simultaneously extending your legs straight out, creating a long, extended shape.
Exhale and circle your arms around like you are swimming through water, pulling your knees back into your chest to return to the starting position. Your goal is to keep your head and shoulder blades off the mat the entire time. If your head drops, you lose the abdominal connection. It feels like you are trying to hold a heavy weight with your core; keep that tension, even when your limbs are at full extension.
7. Spine Stretch Forward
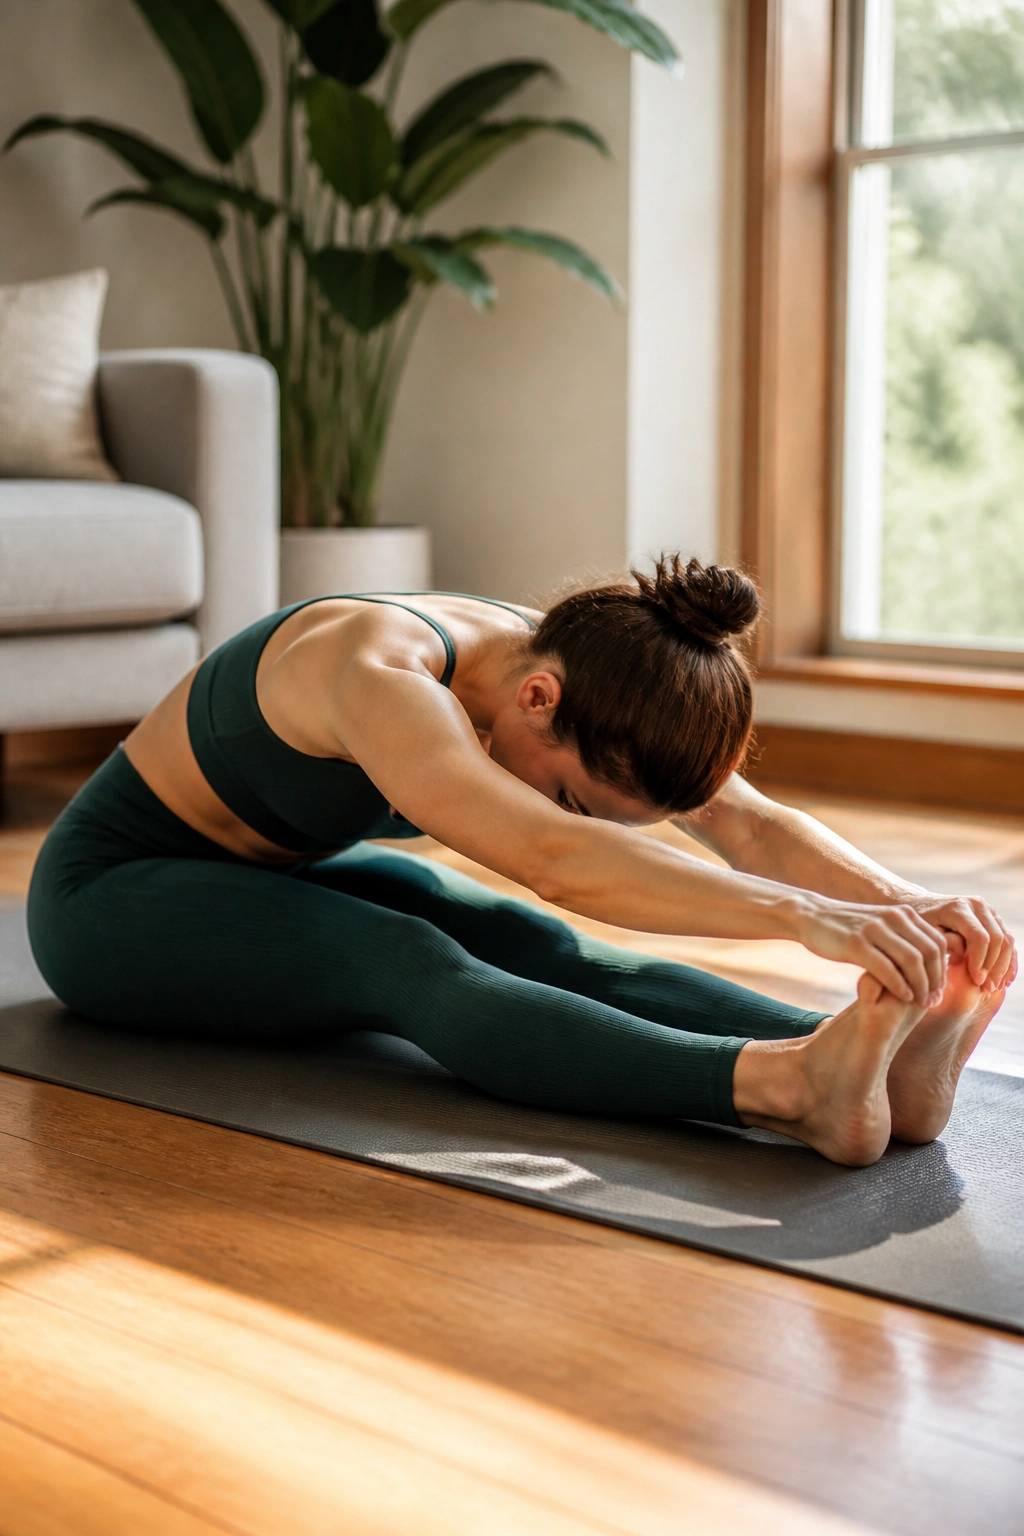
This exercise provides a beautiful, deep stretch for the back of your body while reinforcing the importance of sitting upright. Sit on the mat with your legs extended in front of you, slightly wider than hip-width apart. Flex your feet toward your face. Sit tall, stacking your spine directly over your hips—as if you are leaning against an invisible wall.
Inhale, lengthening your spine toward the ceiling. As you exhale, drop your chin to your chest and reach your hands forward, curving your spine like a bow. Imagine you are rounding your back over a giant beach ball resting on your lap. Keep your abdominals pulling back as you reach forward to create opposition. Return to the upright position by restacking your spine from the bottom up, one vertebra at a time.
8. The Saw
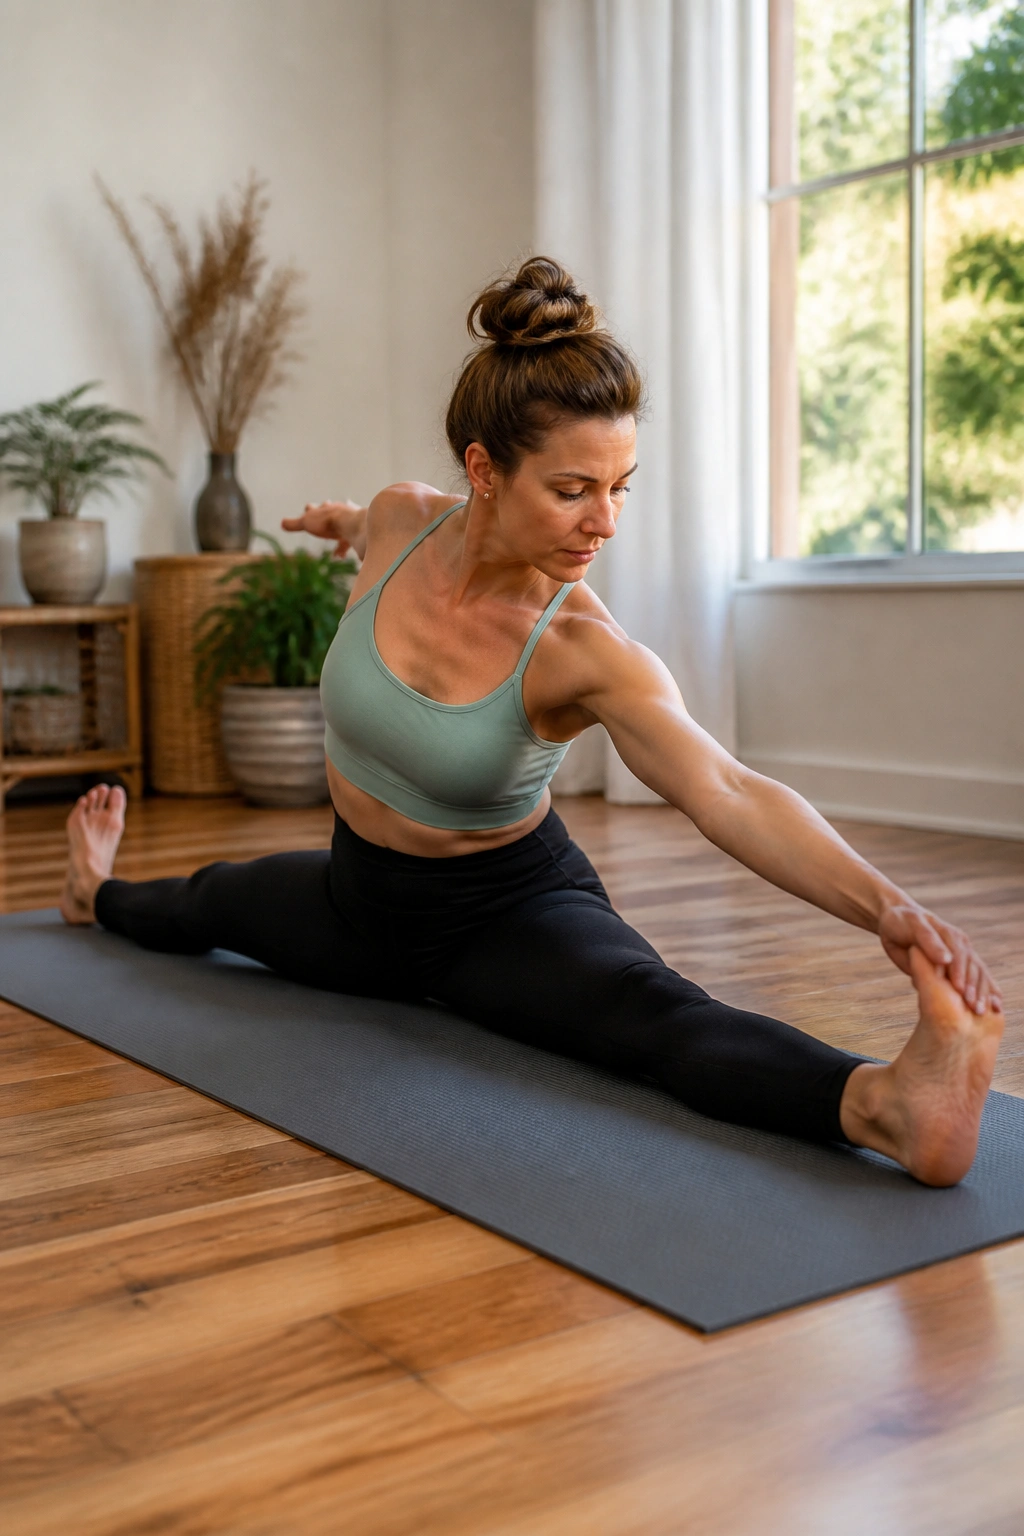
The Saw is excellent for spinal rotation and hamstring flexibility, but it requires serious focus to keep your hips anchored. Sit with your legs wide apart, feet flexed. Extend your arms out to the sides like a ‘T’. Rotate your torso to the right, then hinge forward, reaching your left pinky finger toward your right pinky toe.
Your back arm should reach behind you, palm facing up, while you look at your back hand. Pulse twice, reaching deeper into the stretch, then stack back up to the center. Rotate to the other side. The magic here is keeping both sit-bones glued to the mat. If your left hip lifts when you twist to the right, you have gone too far.
9. Swan Prep
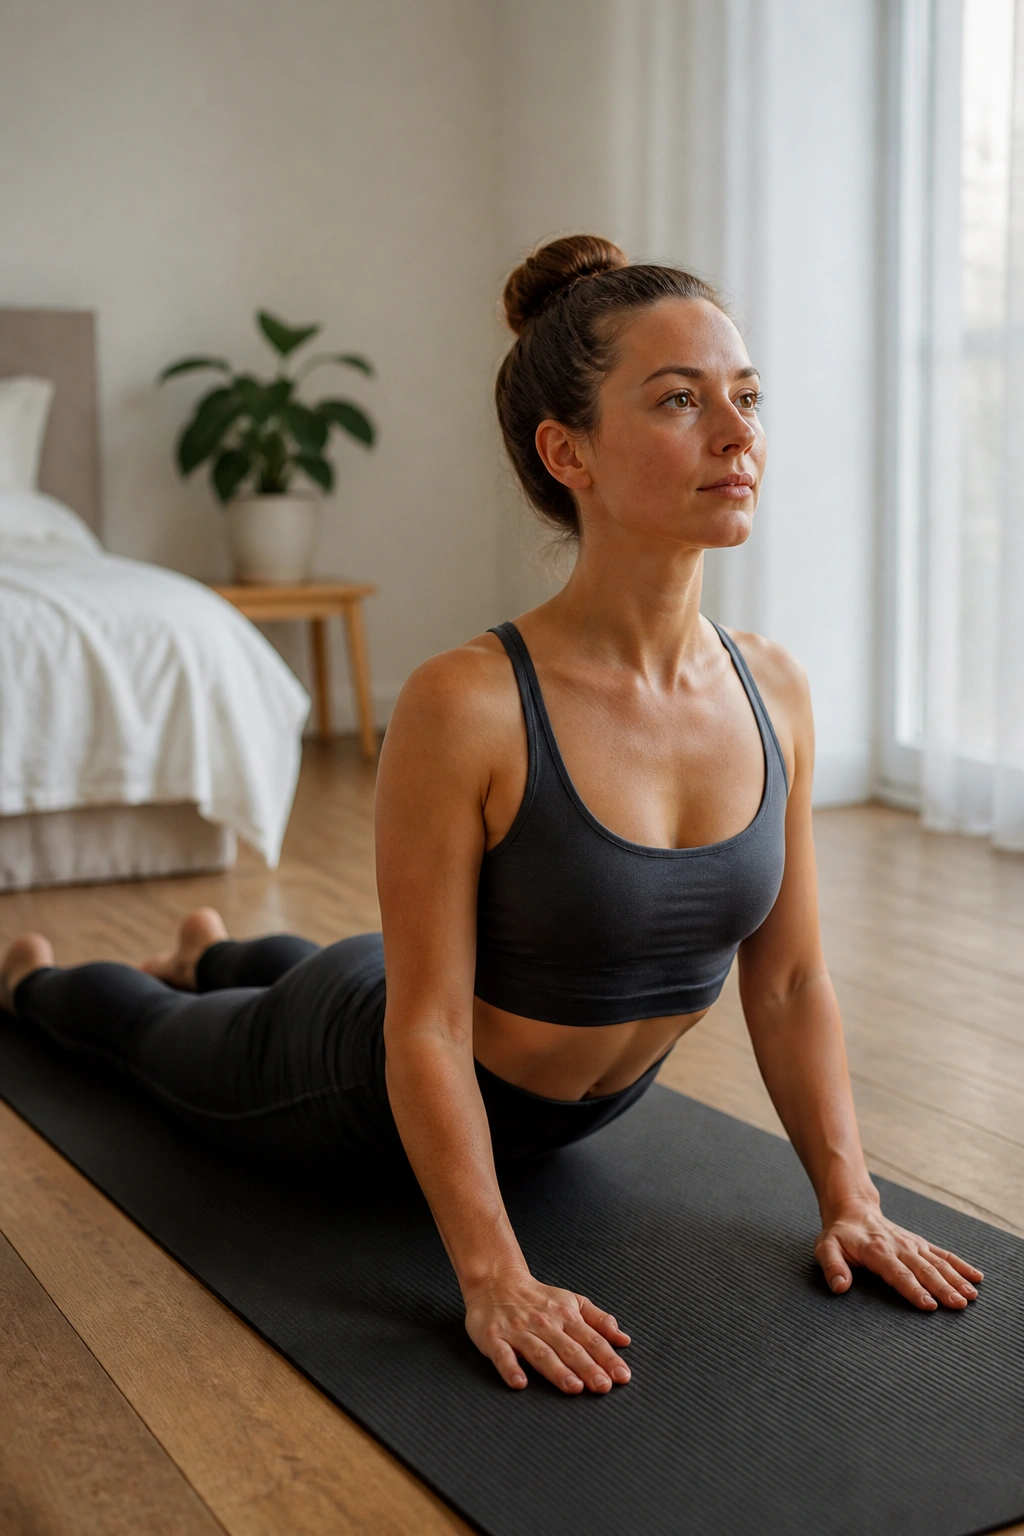
Most of our modern lives are spent hunched forward, so this extension exercise is vital for counteracting that posture. Lie on your stomach, legs hip-width apart, hands placed on the mat directly under your shoulders. Keep your elbows tucked in close to your ribs—do not let them wing out to the sides.
Inhale and lift your head and chest off the mat by pressing into your hands and engaging your upper back muscles. Only lift to the point where your lower ribs are still touching the floor; you aren’t trying to do a pushup. Think of stretching your collarbones wide. Exhale as you lower back down with control. It is less about pushing with your arms and more about lengthening your spine out through the top of your head.
10. Side Kick Series
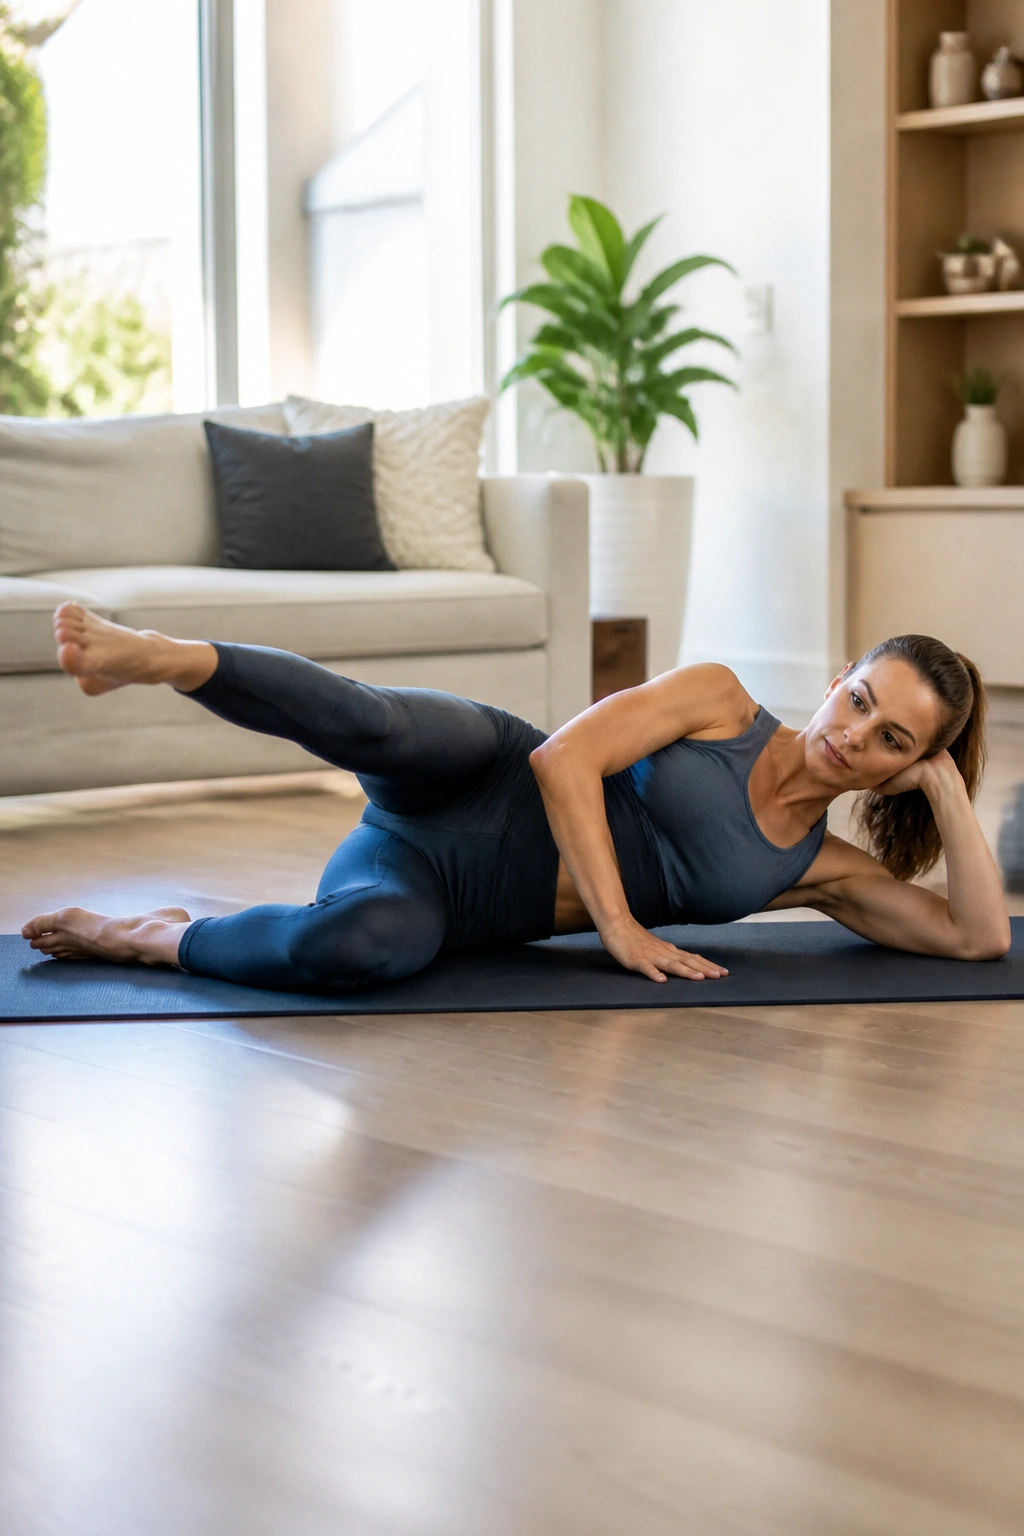
This series is a powerhouse for hip stability and lateral glute strength. Lie on your side, lining up your body with the back edge of the mat. Rest your head on your bottom arm, and place your top hand on the floor in front of you for stability. Flex both feet.
Lift your top leg to hip height, then kick it forward twice—pulse, pulse—while keeping your torso frozen in place. Sweep the leg back behind you, stretching through the hip flexor without arching your lower back. Do this for 8 to 10 repetitions per side. The challenge is fighting the urge to let your torso rock back and forth as the leg moves. If you are wobbling, you need to tighten your core significantly more.
11. Mermaid Stretch
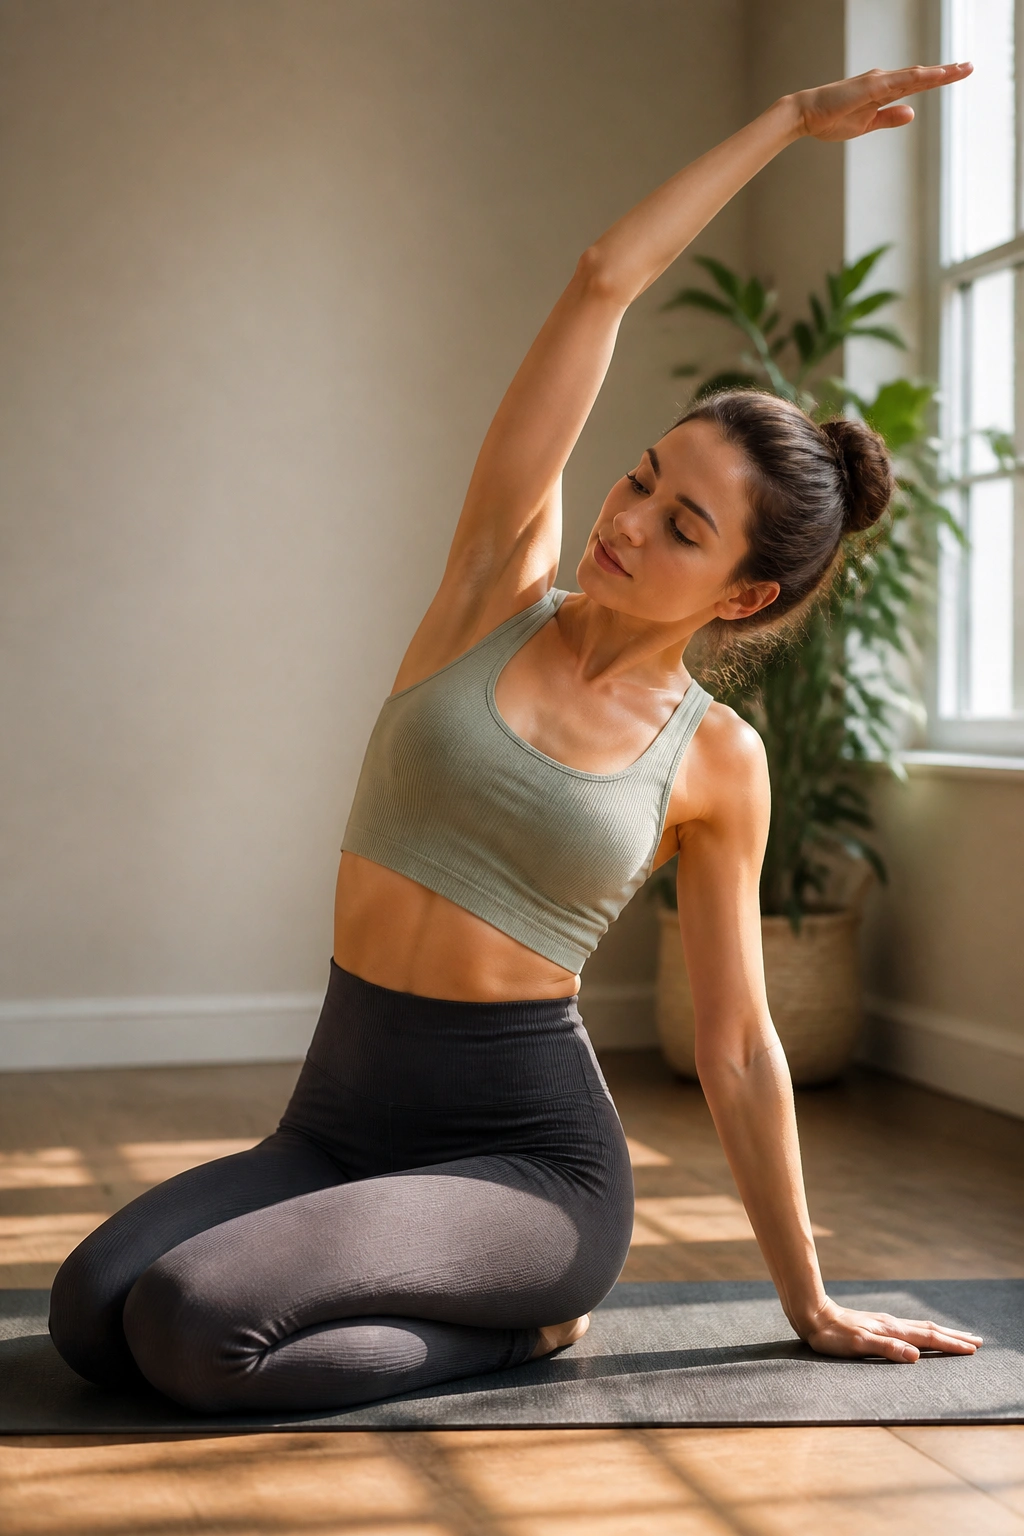
The mermaid stretch feels amazing after a long day of sitting. Sit on your right hip with your legs tucked to the left, knees bent. Place your right hand on the floor beside you and reach your left arm up toward the ceiling.
Inhale as you lengthen, and exhale as you bend to the right, sliding your right hand further away. Try to keep both sit-bones on the floor. You should feel a massive opening in your ribs and waist. Return to center, then reach the left arm across the body for a counter-stretch. Switch sides after 3 to 5 reps. This isn’t just about flexibility; it’s about mobilizing the ribcage and finding length in the waist.
12. Shoulder Bridge
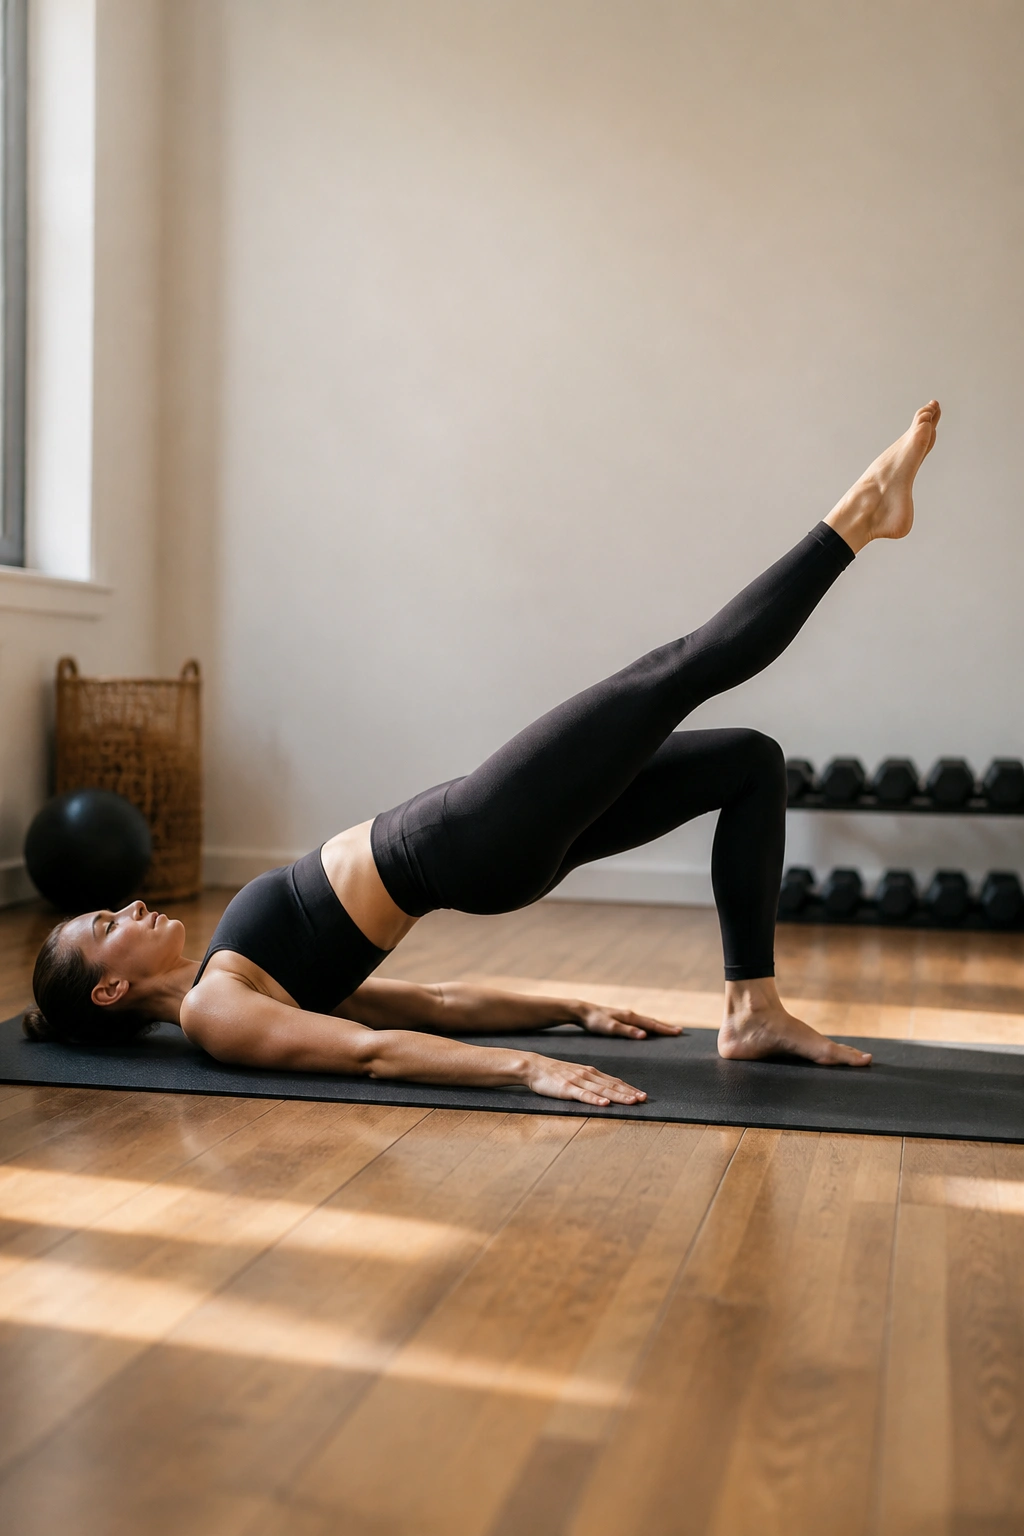
This movement is fantastic for waking up the posterior chain—your glutes, hamstrings, and lower back. Start in the same position as the Pelvic Curl: on your back, knees bent, feet flat. Lift your hips into a bridge, but instead of rolling down, stay at the top.
Extend one leg straight out at a 45-degree angle. Lower that leg until it’s parallel with your standing thigh, then kick it back up to the ceiling. Keep your hips level—do not let the side of the leg that is moving drop toward the floor. It is tempting to dump your weight into your lower back, but keep your ribs closed and your belly pulled in to protect your spine.
13. Swimming Prep
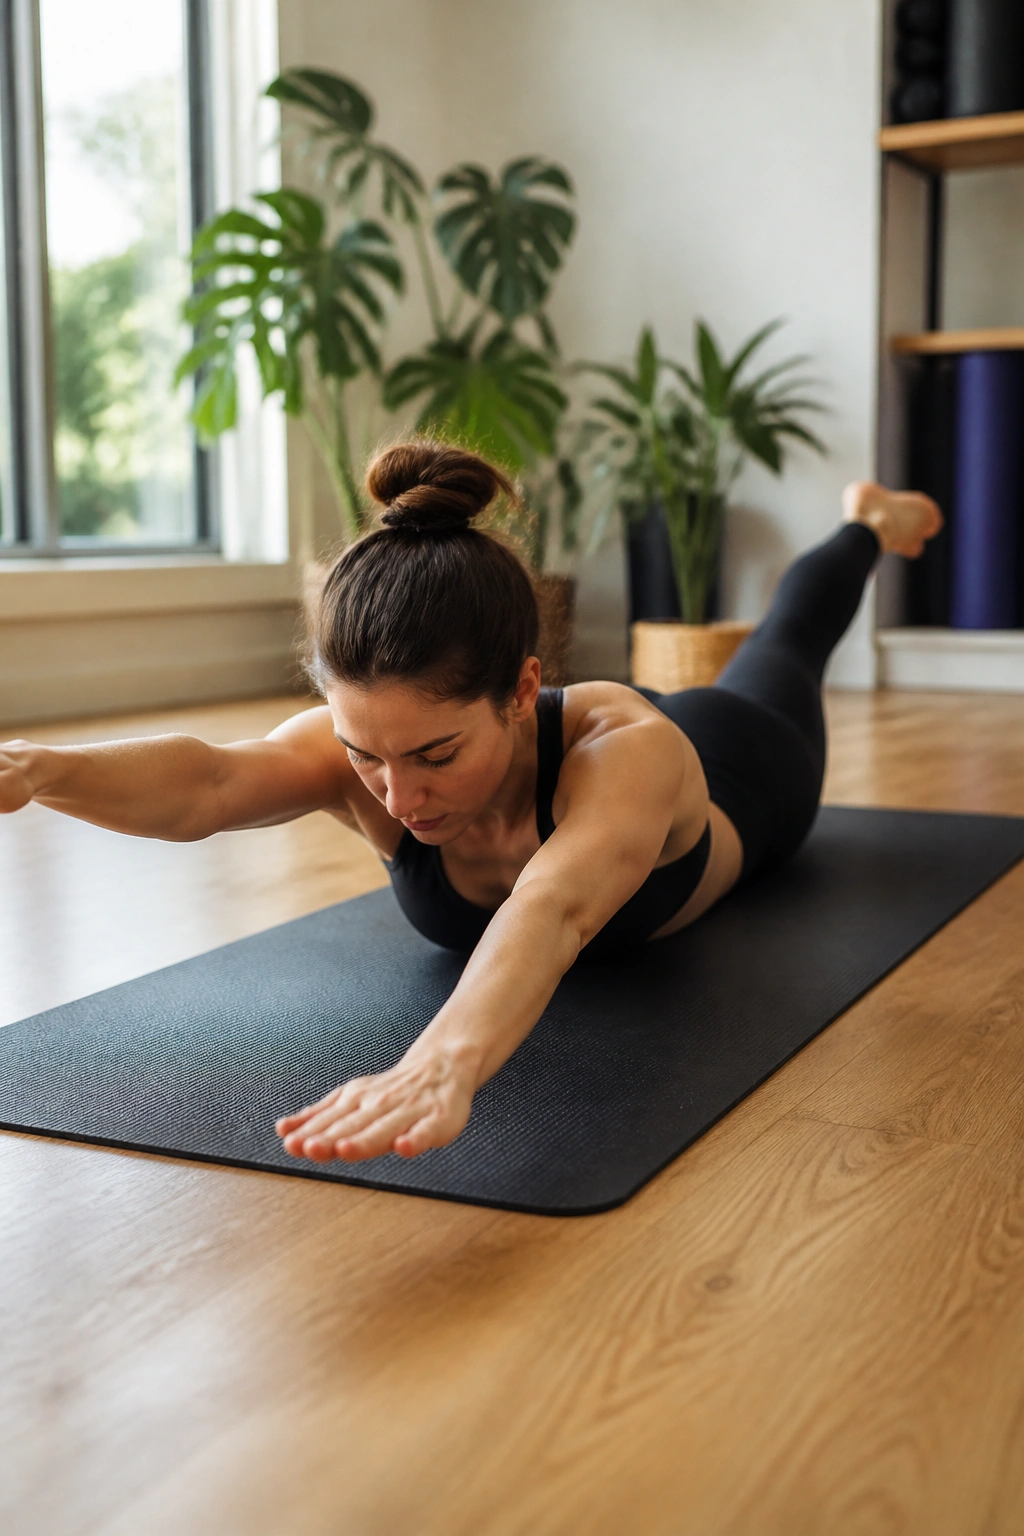
This move is the antidote to the slouch. Lie on your stomach with your legs straight and your arms reaching forward, palms facing down. Engage your abdominals to pull your navel away from the mat—it sounds impossible, but it helps protect your back.
Lift your right arm and left leg simultaneously, hovering them just a few inches off the floor. Keep your gaze down so your neck stays long. Switch sides, lifting the left arm and right leg. The movement should be fluid, like you are swimming through thick water. Keep the movement small and controlled; if you lift too high, you might pinch your lower back.
14. Leg Pull Front Prep
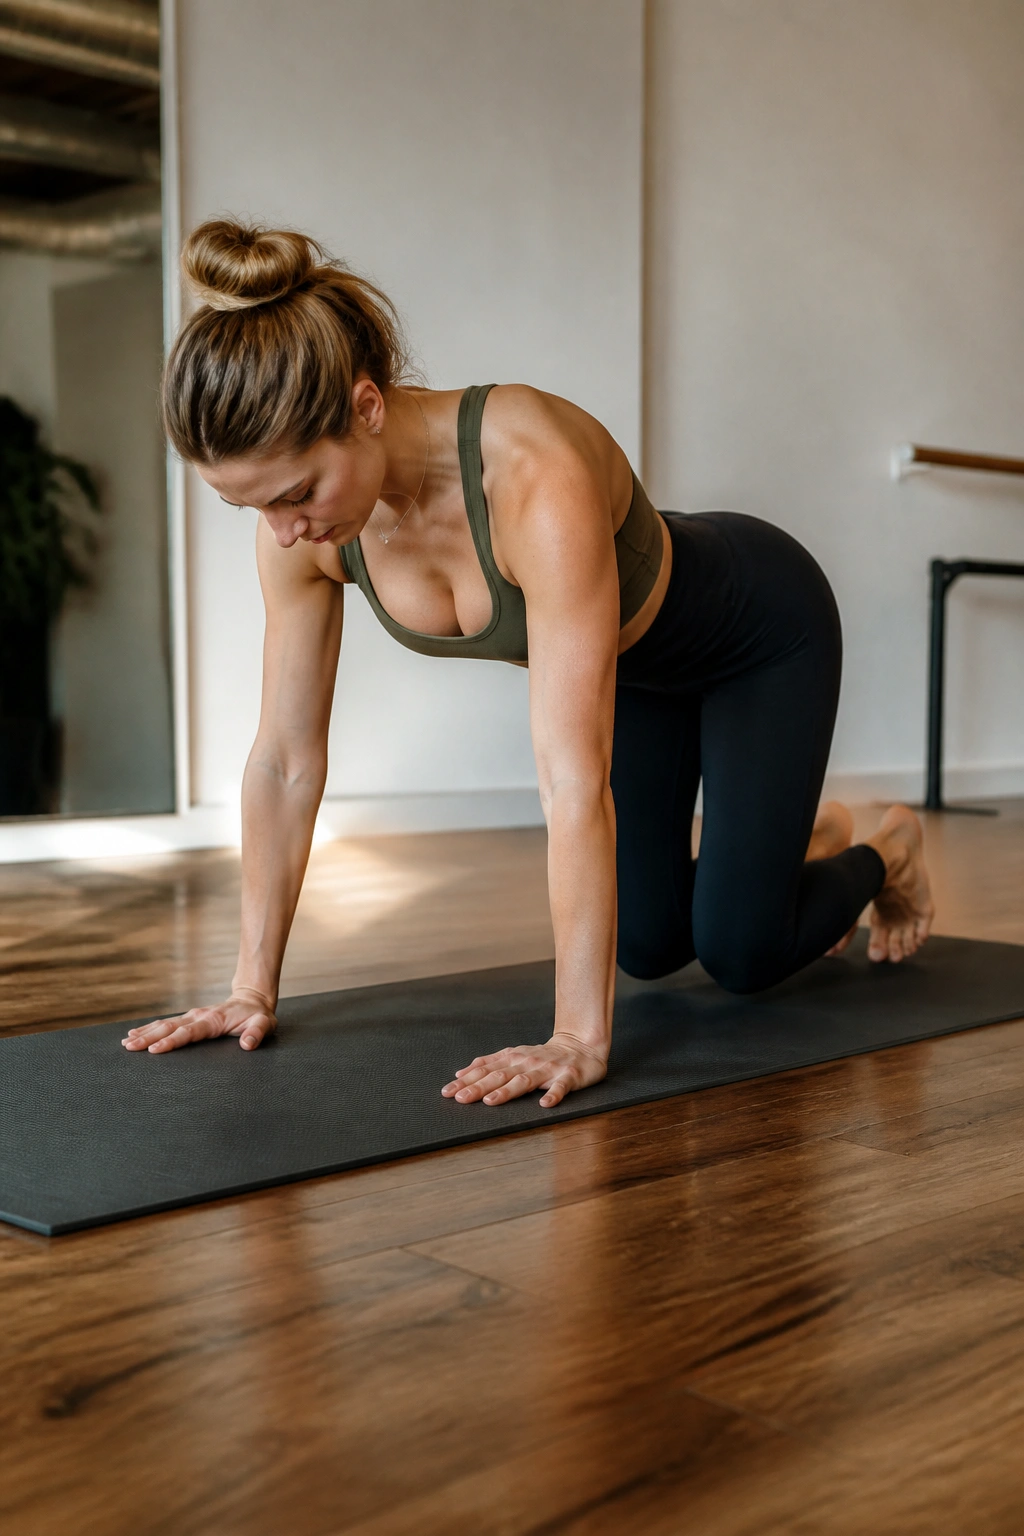
This is your entry point into plank variations. Get into a quadruped position—on all fours, hands under shoulders, knees under hips. Tuck your toes. Exhale and hover your knees about two inches off the mat.
The Focus
Hold this position. You are looking for a flat back, not a rounded or arched one. Your shoulders should be stable, not winging out. This is an isometric hold; you are building endurance in the shoulders and deep abdominals. If your back starts to sag, put your knees down, reset, and try again.
Why This Is Different
Unlike a regular plank, the hover position forces you to use your hip flexors and deep abdominals to keep the legs lifted. It’s an intense, concentrated burn that teaches you to find stability under load.
15. Seal
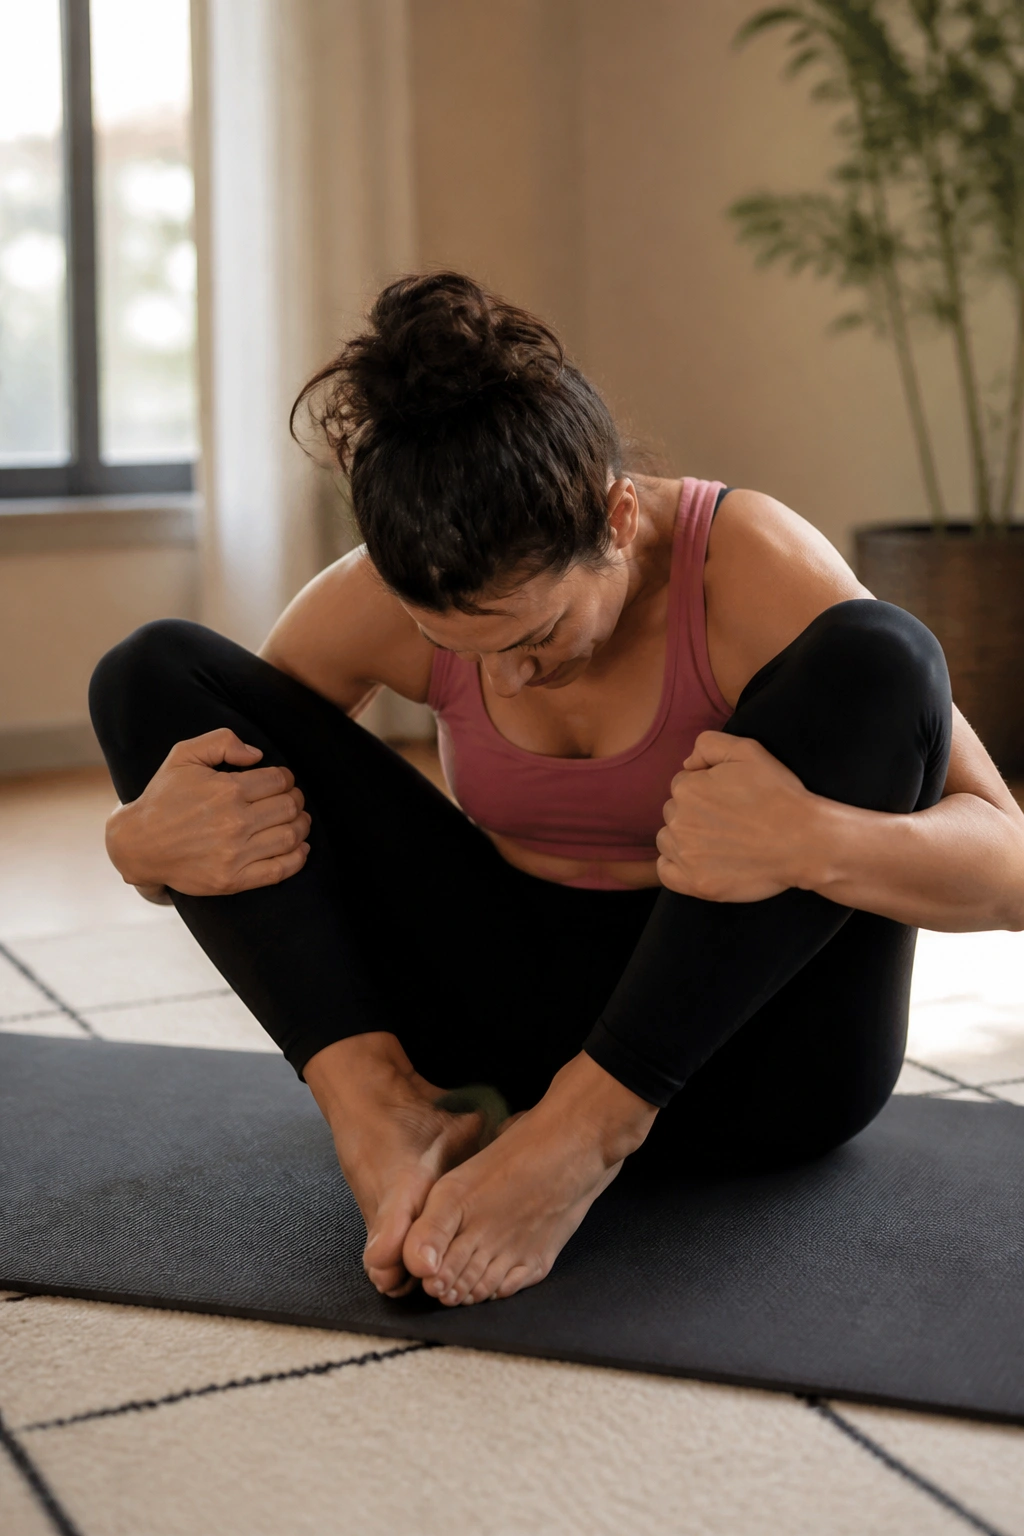
We finish with the Seal, a playful move that is actually quite challenging for your coordination and spinal mobility. Sit on the mat, knees bent and wide, feet touching. Reach your arms through your legs and hold onto the outside of your ankles. Round your spine, tucking your chin.
Balance on your sit-bones. Tap your heels together three times—click, click, click. Roll backward onto your shoulder blades, maintaining the shape of your “ball.” At the top of the roll, tap your heels together three more times. Use your abs to roll back up to the starting position and balance again. The clicking is a great way to force yourself to pause and hold your core tight, preventing you from just mindless rolling.
Final Thoughts
Pilates is not a “quick fix” or a high-impact workout where you leave the room drenched in sweat and gasping for air. It is a system of controlled, precise movements that teach your body how to function better. You are training your brain to recruit muscles that have likely been dormant for years. In the beginning, the most successful sessions are the ones where you feel the most confused—because that confusion means you are finally becoming aware of muscles you didn’t even know you had.
Do not worry about completing a long, intense workout. Focus on these 15 foundations. Even if you only pick three or four of these exercises to do in a day, performing them with absolute focus is far more effective than rushing through all 15 with poor form. Precision is the currency of Pilates. The more you hone in on the small, granular movements, the faster your body will respond. Keep your ribs closed, your breath rhythmic, and your mind engaged. Your strength will build, but more importantly, your control over your own body will become your greatest asset.
