



There is a specific kind of fatigue that hits about midway through a proper leg session. It is not just the breathlessness or the elevated heart rate; it is a deep, localized exhaustion in the quads and glutes that makes the simple act of standing up feel like a negotiation. If you are training at home, you lack the heavy racks and endless plate stacks of a commercial gym, but that is rarely a barrier to building significant strength and definition. Often, it is actually an advantage. Removing the reliance on heavy, external machinery forces you to focus on mechanics, tempo, and total time under tension.
Real leg development is rarely about piling on five-pound plates until you can barely walk. It is about control. It is about understanding that your lower body is a kinetic chain—a system of hinges, levers, and stabilizers that need to be challenged from every angle. When you move away from the “go heavy or go home” mentality and start looking at movement patterns, you realize that your own body weight, combined with basic implements like a pair of dumbbells, a kettlebell, or even a sturdy chair, can create enough stimulus to force adaptation.
Building strong, defined legs is less about the tools you have and more about the precision you bring to the movement. You do not need a fancy setup. You need to understand how to manipulate leverage, how to isolate specific muscle groups, and how to push through that final repetition when your legs are shaking. The following twenty-two movements are designed to target every major muscle group in your lower body—quads, hamstrings, glutes, adductors, and calves—ensuring that you are not just getting stronger, but building balanced, athletic definition.
1. Goblet Squats
The goblet squat is the baseline for functional lower body strength. By holding a weight against your chest, you force your torso to remain upright, which naturally encourages a deeper range of motion and keeps the stress directly on the quads rather than shifting it into the lower back. It is arguably the most efficient way to teach someone how to squat properly without risking their spine.
Why It Works for Definition
This movement creates a massive amount of tension on the quadriceps. Because the weight is anteriorly loaded (in front of you), your core has to work double-time to stabilize your spine. This is not just a leg exercise; it is a full-body engagement. If you are struggling with depth, the weight actually acts as a counterbalance, allowing you to sink lower into your heels than you could with a back squat.
How to Get the Most From It
- Select a kettlebell or dumbbell and hold it vertically against your sternum with both hands.
- Set your feet slightly wider than shoulder-width, toes turned out just a fraction.
- Initiate the movement by sitting back and down simultaneously, focusing on driving your knees out over your toes.
- The cue: Imagine you are trying to push your knees apart as you descend.
- Rise by driving through the mid-foot, not the toes.
Pro tip: Slow the descent down to a three-second count. The time under tension in the eccentric (lowering) phase is where the real definition is built.
2. Reverse Lunges
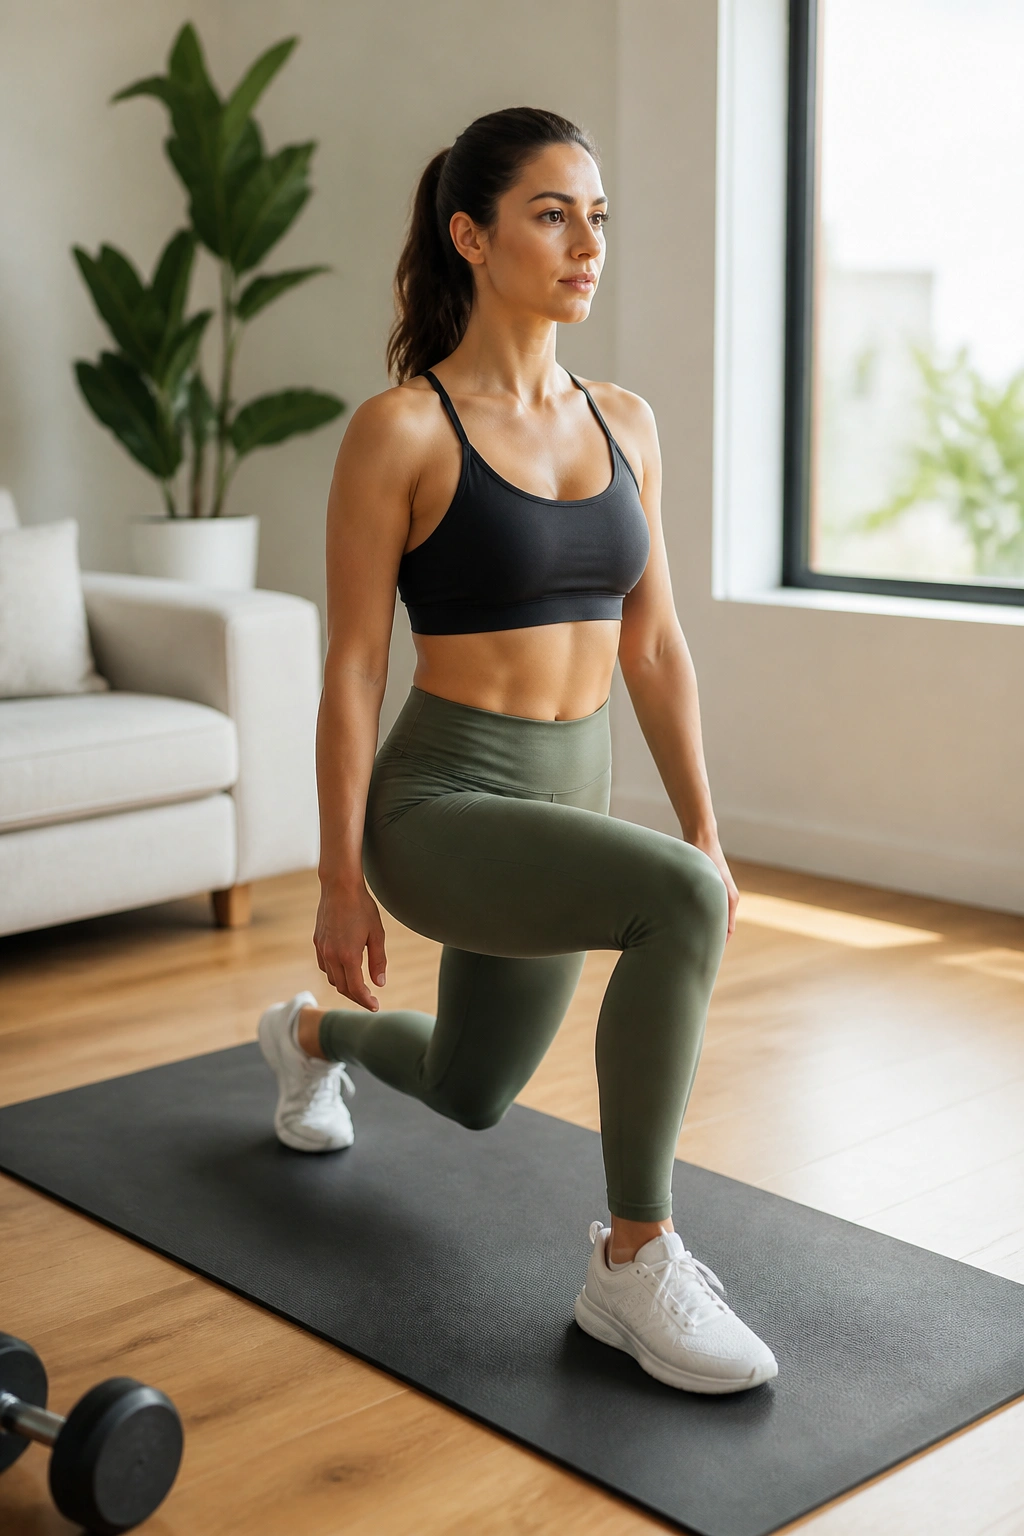
Most people default to forward lunges, but forward lunges place a massive amount of shear force on the knee joint. Reverse lunges, conversely, are much kinder to your knees while providing a superior stretch to the glute and hamstring of the lead leg. This makes them a staple for anyone concerned about long-term joint health.
The Mechanics of the Movement
You start standing tall, then step backward with one foot, dropping your back knee toward the floor. The front shin should stay relatively vertical. The weight is placed almost entirely on the front heel. By stepping backward, you are forced to stabilize your body on the front leg, which lights up the glute medius—that small muscle on the side of your hip that gives your glutes that “shelf” look.
What to Watch For
- Do not let the front knee collapse inward.
- Keep your torso upright; leaning forward is a common mistake that shifts the work into the lower back.
- Ensure your back knee hovers just an inch above the ground; do not slam it into the floor.
If you want to increase the intensity without adding weight, hold a dumbbell in the hand opposite the working leg. This forces your core to fight rotational forces, adding an extra layer of stability training to the exercise.
3. Romanian Deadlifts
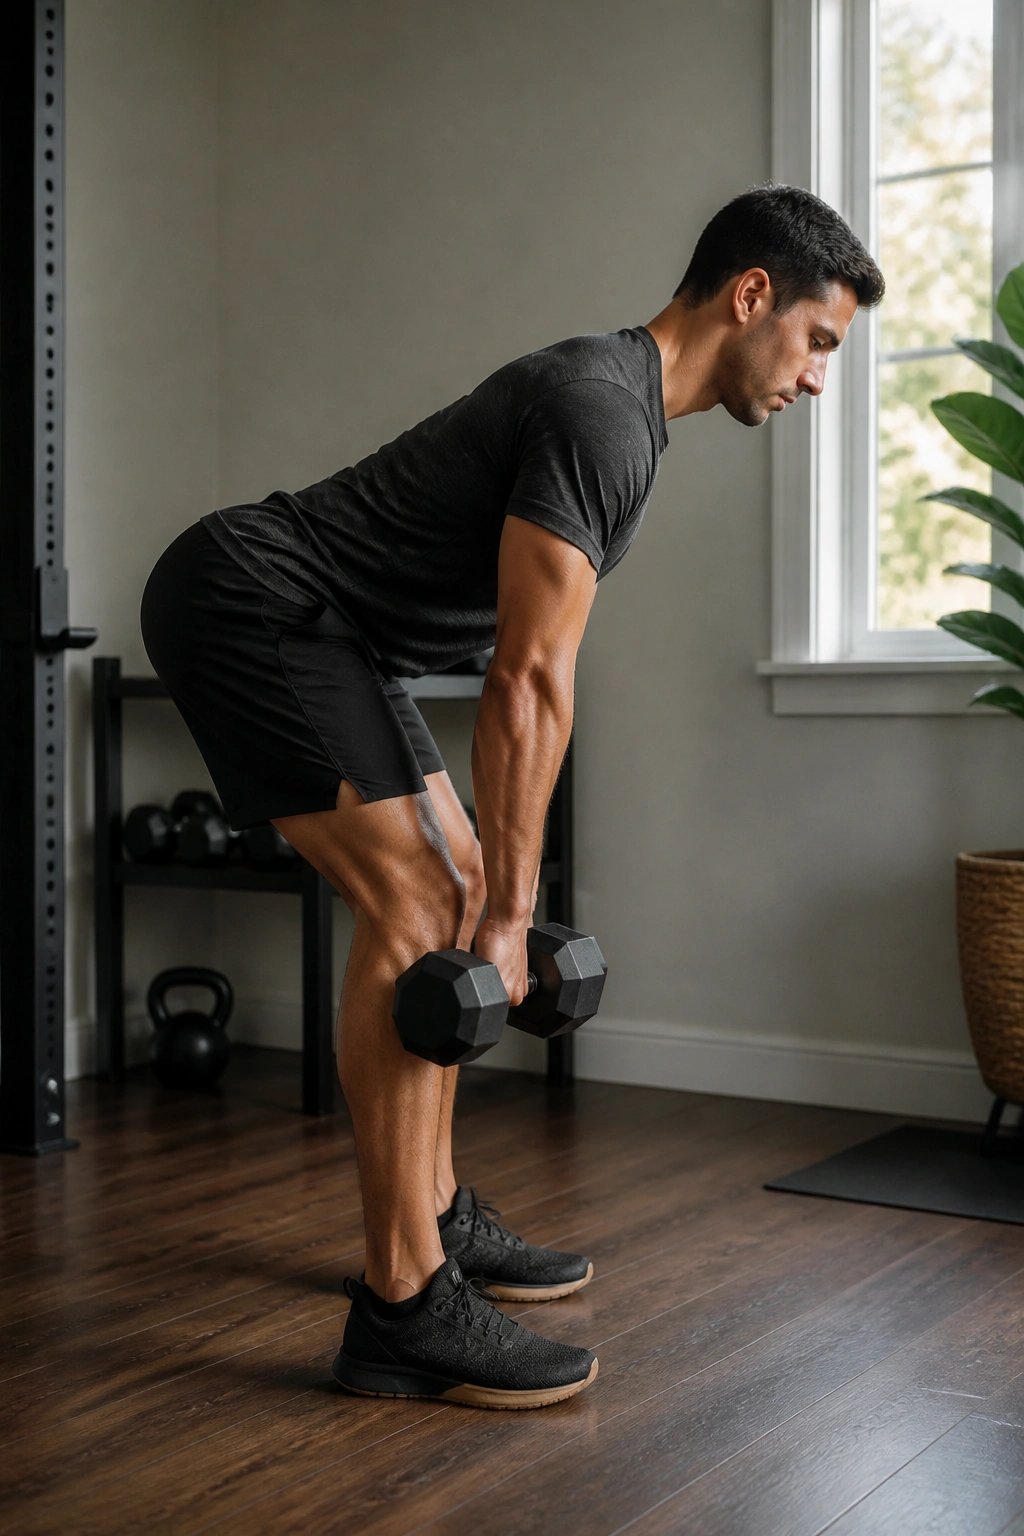
If you want the back of your legs to look sharp and defined, you have to master the hinge. The Romanian Deadlift (RDL) is the gold standard for hamstring development. Unlike a standard deadlift, you are not starting from the floor. You start standing, hinge at the hips, and feel that deep, intense stretch in the hamstrings before driving back up to standing.
The Anatomy of the Hinge
This movement is not a squat. Your knees should have a soft bend, but they should not travel forward. The movement happens entirely at the hip joint. You are effectively “shutting a car door” with your butt. As you lower the weights, keep them close to your shins. If the weights drift away from your body, the lever arm gets too long, and your lower back will take the load instead of your hamstrings.
Common Mistakes
- Rounding the upper back to get the weights lower.
- Bending the knees too much, turning it into a squat.
- Looking up, which strains the neck; keep your gaze a few feet in front of you on the floor.
Pro tip: Focus on pushing your hips backward. If you feel this in your lower back, you are likely reaching for the floor rather than pushing your hips into the wall behind you.
4. Glute Bridges
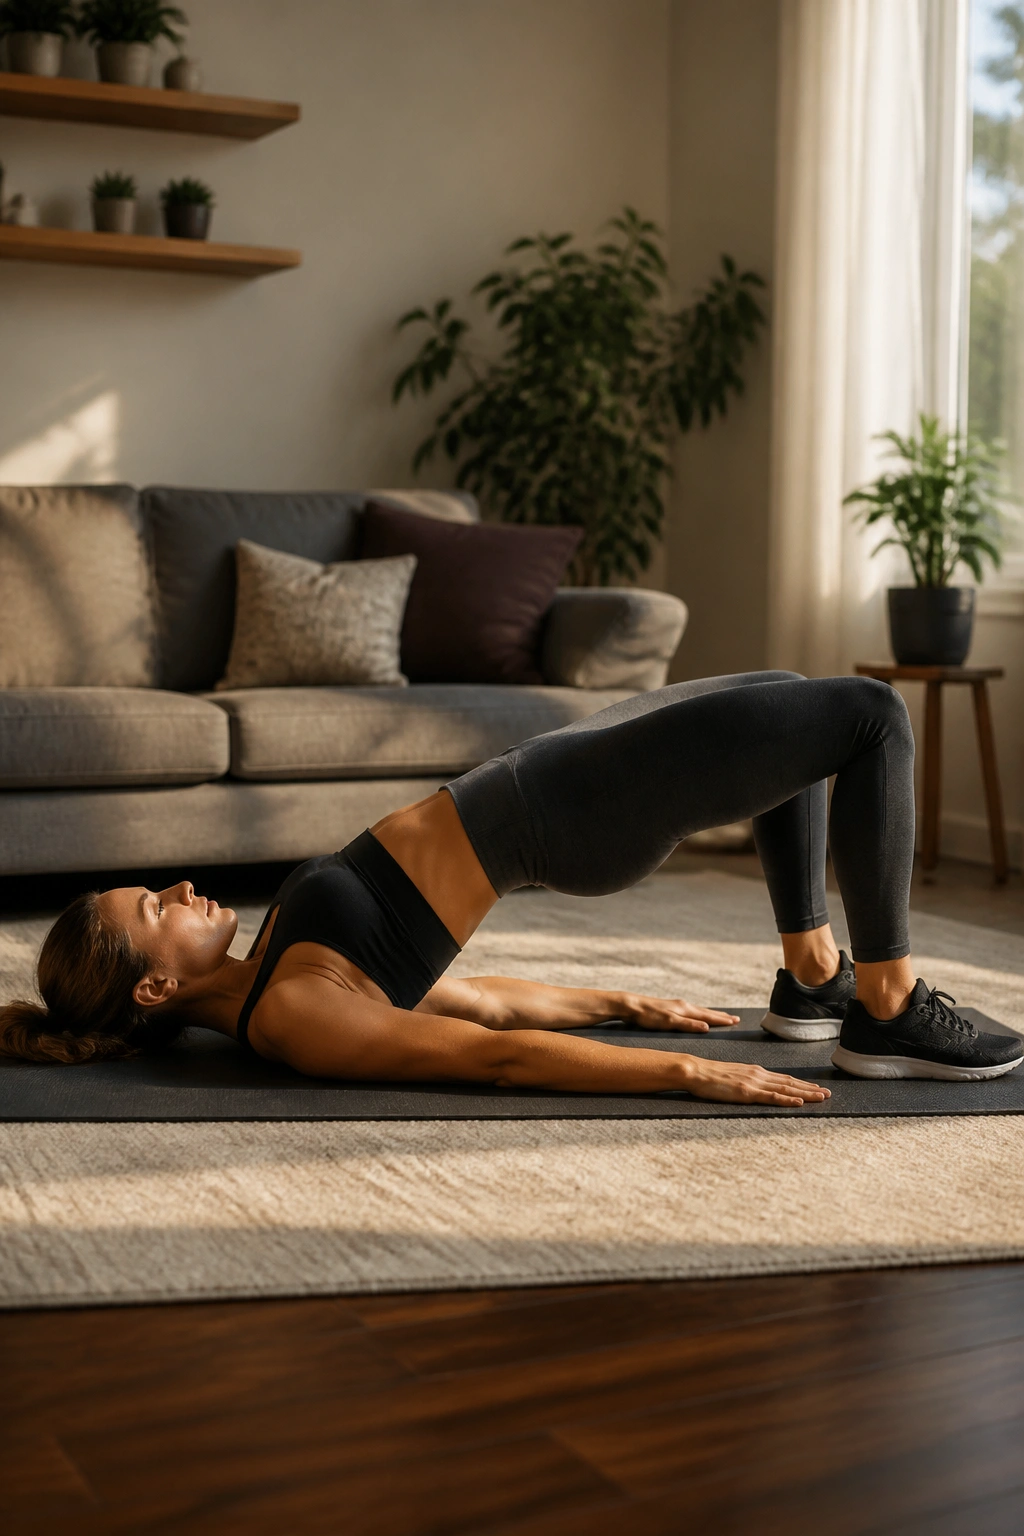
Isolation is the name of the game here. The glute bridge allows you to target the glutes without involving the quads or lower back to the same degree as squats or lunges. It is a fundamental movement for anyone looking to build a stronger posterior chain.
Why This Is Essential
Most of us spend the vast majority of our time sitting, which keeps our glutes in a chronically lengthened and weak state. Glute bridges “wake up” these muscles. When done correctly, you are forcing the glutes to do the primary work of hip extension.
Execution Details
- Lie flat on your back, knees bent, feet flat on the floor, about hip-width apart.
- Drive through your heels to lift your hips toward the ceiling.
- At the top, squeeze your glutes as hard as you can. Do not hyper-extend your lower back. The goal is a straight line from your shoulders to your knees.
- Lower your hips slowly, touching the floor lightly before coming back up.
If this feels too easy, perform the movement with your feet elevated on a sturdy chair or couch. The increased range of motion creates a deeper contraction at the top.
5. Bulgarian Split Squats
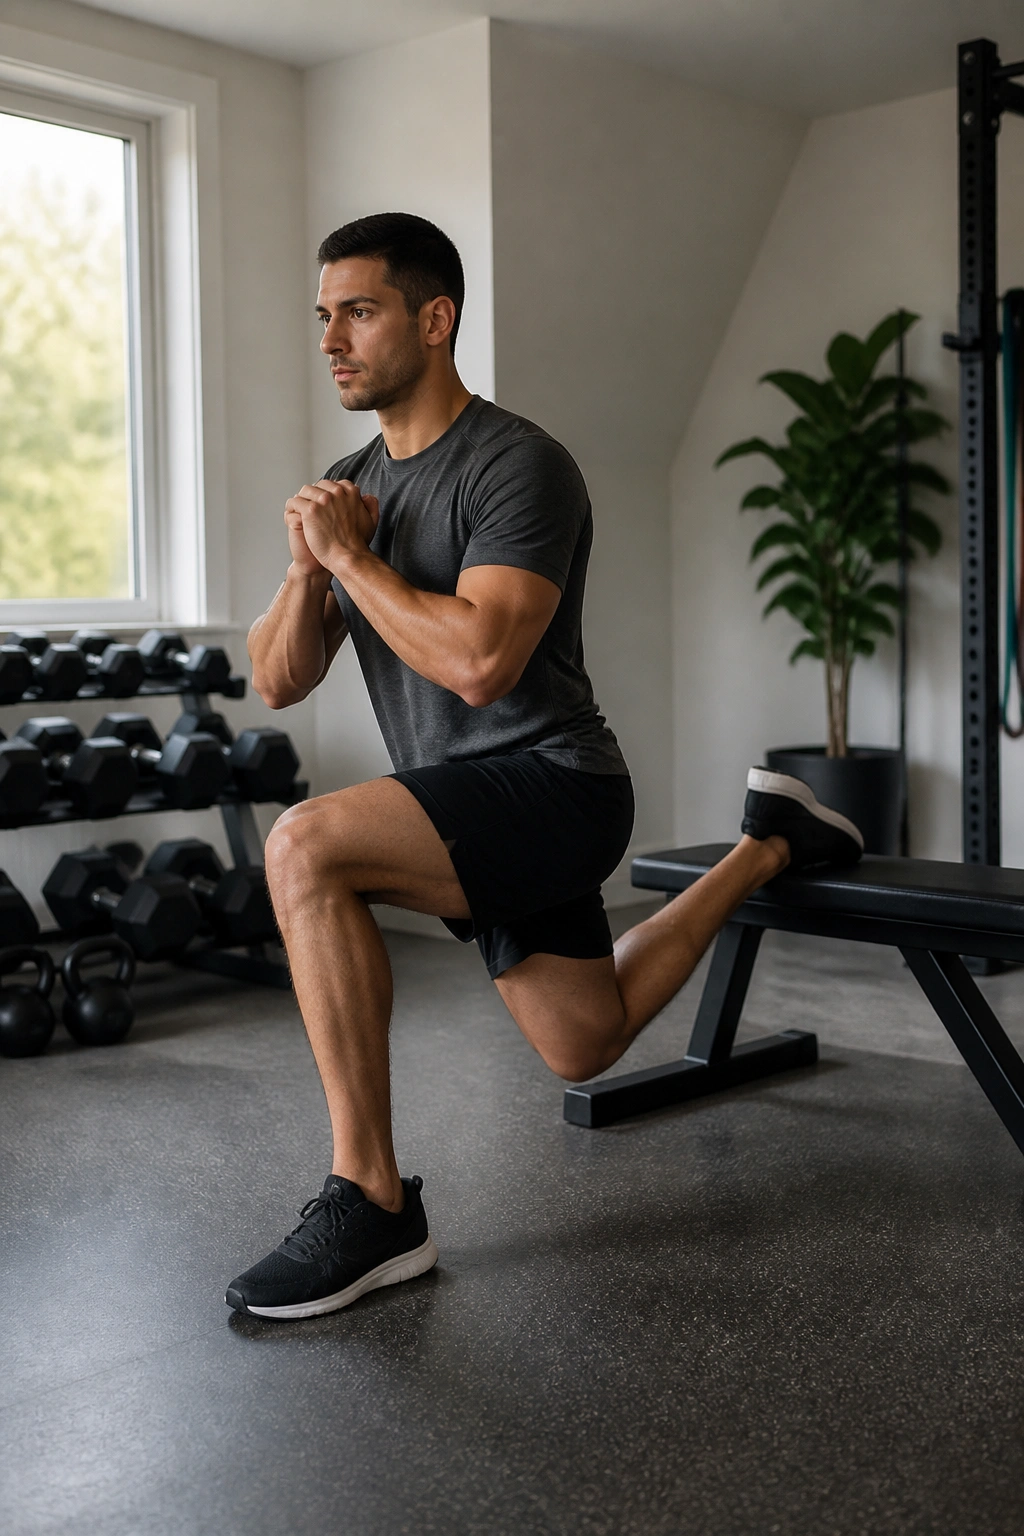
There is a reason why people love to hate this exercise. It is arguably the most effective single-leg movement for building size and strength in the quads and glutes. By elevating the rear foot, you remove the balance-assisting leg, forcing the front leg to handle nearly your entire body weight plus any added resistance.
The Setup
You need a bench, a chair, or a couch. Place one foot behind you on the elevated surface. Hop your other foot forward until you find a position where your front shin is vertical at the bottom of the movement. If your front foot is too close to the bench, your heel will lift. If it is too far, you will feel it mostly in the hip flexor of the back leg.
Tips for Success
- Keep your chest high and your core braced.
- Drive up through the mid-foot of your front leg.
- If you find your balance is the primary bottleneck, do not worry; hold onto a wall for stability for the first few weeks.
- The “burn” is going to be intense. Accept it.
This movement is unmatched for spotting and fixing imbalances between your left and right leg. If one leg is weaker, this exercise will make that incredibly obvious, very quickly.
6. Side Lunges
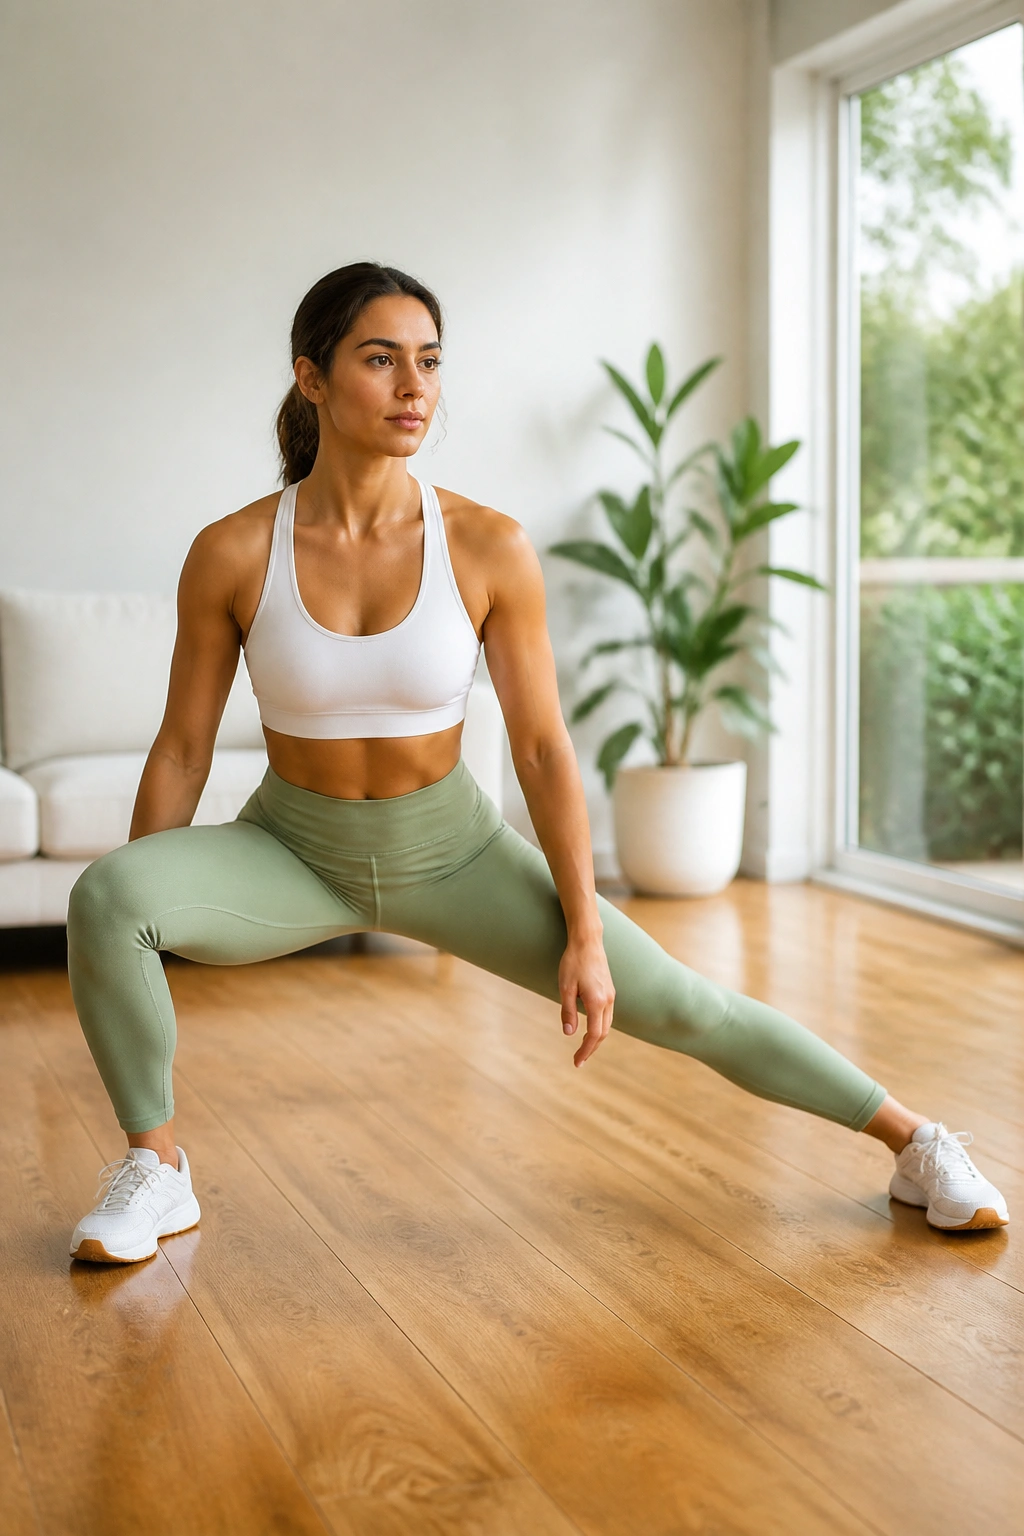
The frontal plane is often neglected in home workouts. Most movements are sagittal—forward and backward. However, your body moves laterally in real life, and training your adductors (inner thighs) and the stabilizing muscles of the hip requires moving side-to-side.
How to Perform
- Stand with your feet wider than shoulder-width.
- Shift your weight to one side, bending that knee while keeping the other leg perfectly straight.
- Push your hips back as if you are trying to sit on a chair placed to your side.
- Keep the straight leg’s foot flat on the floor; do not roll onto the blade of your foot.
- Drive back to the center using the heel of the bent leg.
The adductor stretch on the straight leg is often just as valuable as the strength work on the bent leg. This improves hip mobility and reduces the risk of groin strains in other activities.
7. Step-Ups
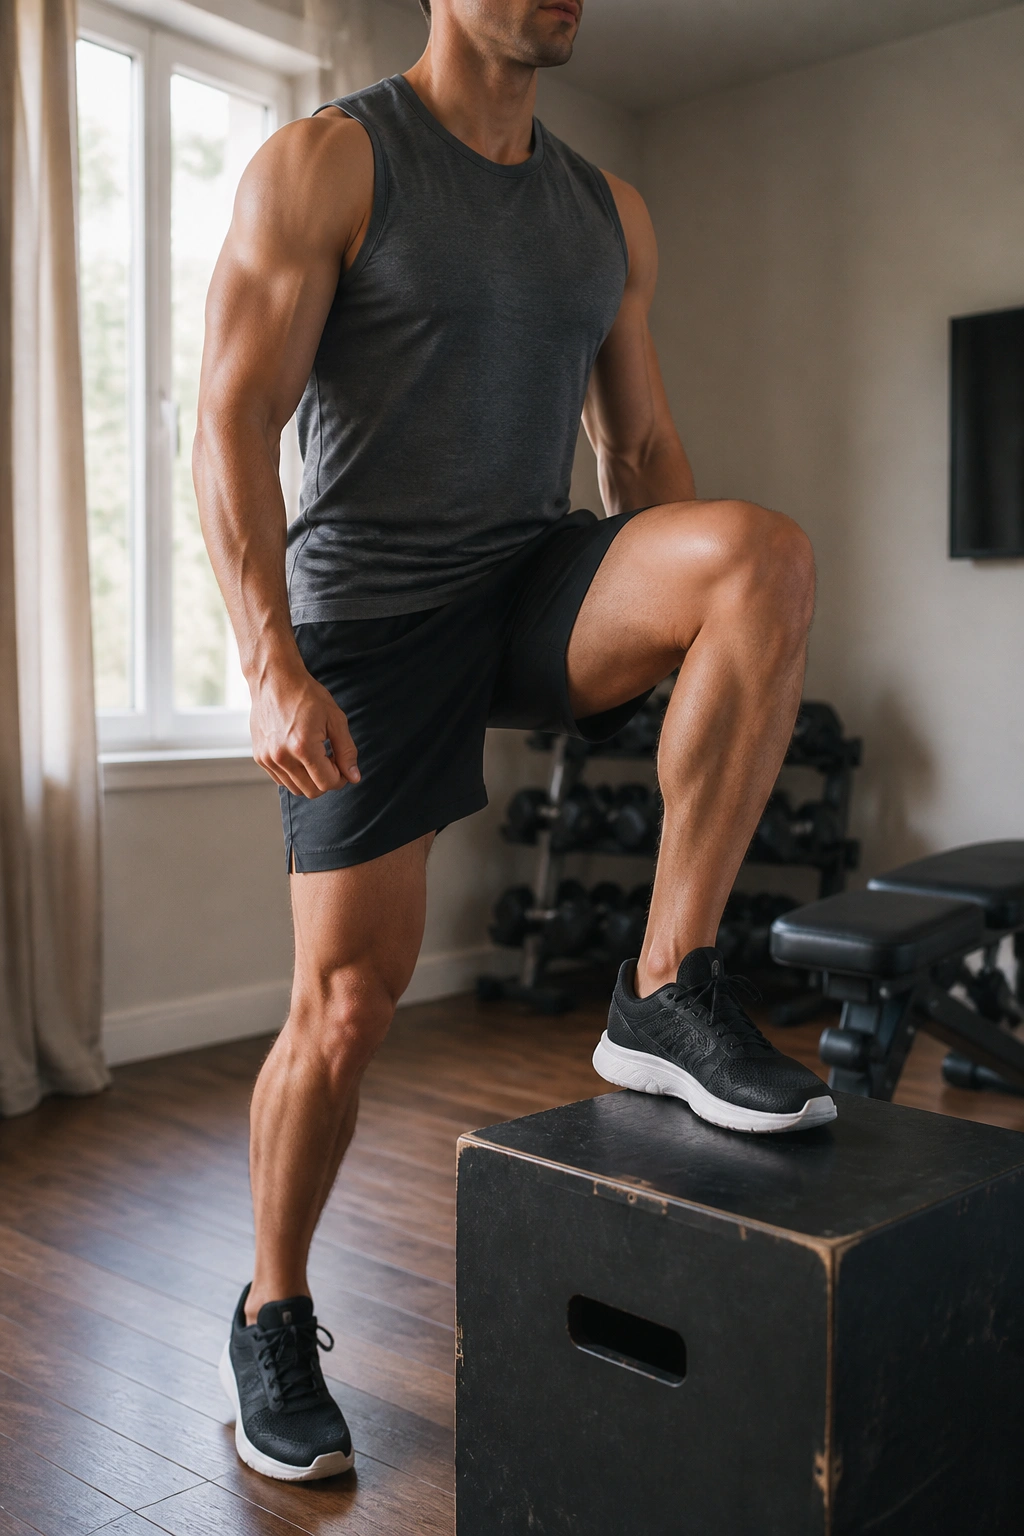
Step-ups are simple, but they are unforgiving. They require a stable surface—a sturdy chair, a bench, or a solid stair. The key here is to avoid the “bounce.” Most people use their back foot to push off the ground, which defeats the purpose of the exercise.
The Right Way to Step Up
- Stand in front of your elevated surface.
- Place one full foot on the box.
- Engage your core and drive through that front heel to lift your entire body weight up.
- The critical part: Do not push off the bottom foot. If you have to bounce, the box is too high.
- Lower yourself back down with extreme control—do not just drop.
The eccentric, or lowering, phase of the step-up is where the muscle building happens. If you let gravity take over on the way down, you are missing out on half the benefits.
8. Sumo Squats
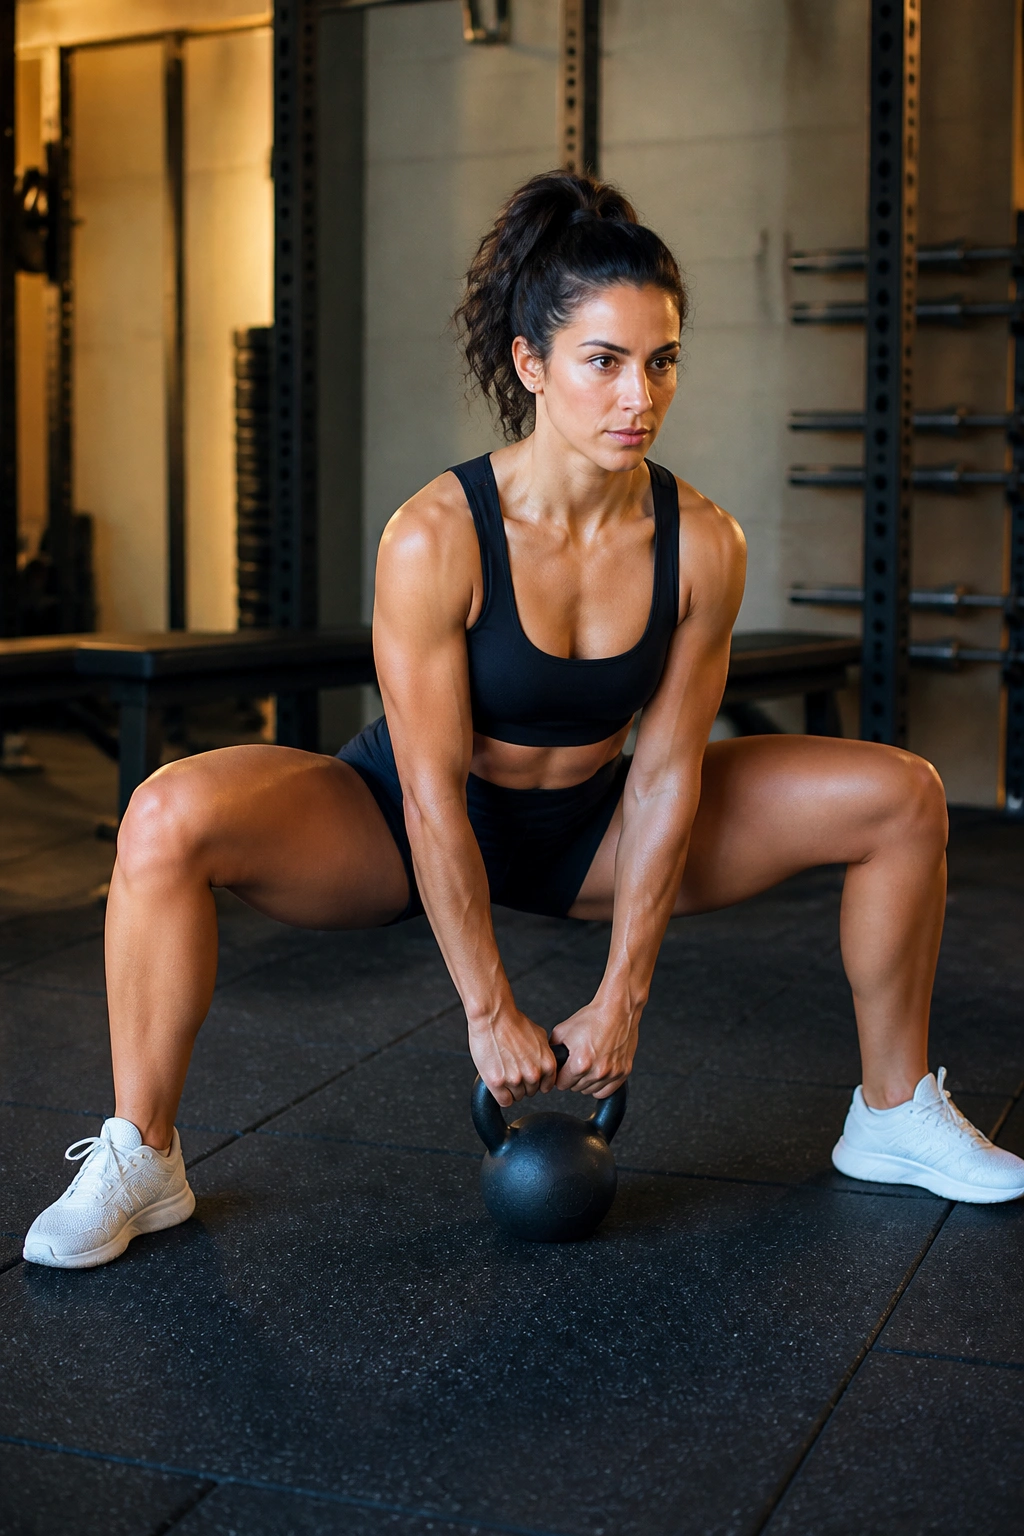
The sumo squat shifts the emphasis from the quads to the inner thighs and glutes. By taking a wide stance and turning your toes out significantly, you change the leverage at the hip joint, forcing the adductors to work much harder to keep your knees from collapsing inward.
Creating Tension
- Take a stance wider than your shoulders, with toes pointed outward at a 45-degree angle.
- Hold a weight between your legs (a kettlebell works best for this).
- As you descend, think about pushing your knees out over your toes.
- Your torso will lean forward slightly more than in a standard squat, but keep your chest up.
- Drive up from your heels, ensuring your glutes are doing the heavy lifting.
This is a great movement for adding width and thickness to the lower body. It complements traditional squatting perfectly because it hits the musculature from a different angle.
9. Curtsy Lunges
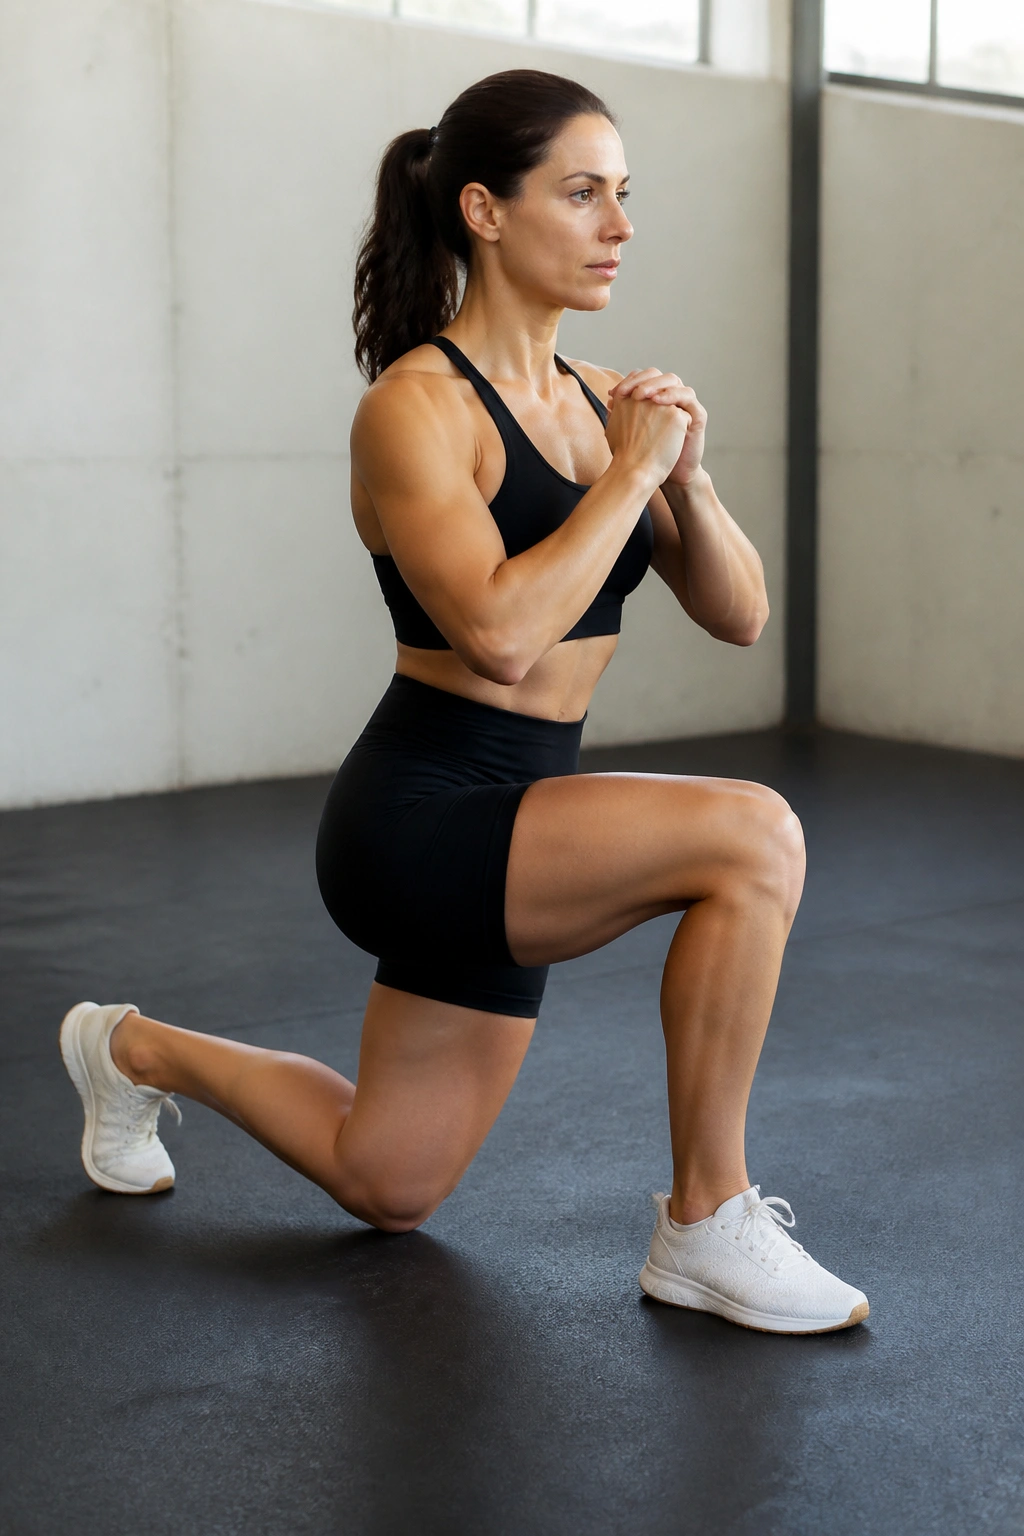
If you want to target the glute medius—the muscle responsible for the curve on the side of your hip—the curtsy lunge is your best friend. It mimics a traditional lunge but with a twist.
The Movement Pattern
- From a standing position, step one foot back and across behind the other, as if you are performing a curtsy.
- Keep your front knee pointing forward.
- You will feel a significant stretch and engagement in the outside of the front glute.
- Push back to the starting position.
This move is slightly more complex than a standard lunge. Take your time. It is not about speed; it is about feeling the glute engage. If you are just moving through the motions, you will miss the benefits.
10. Single-Leg Glute Bridges
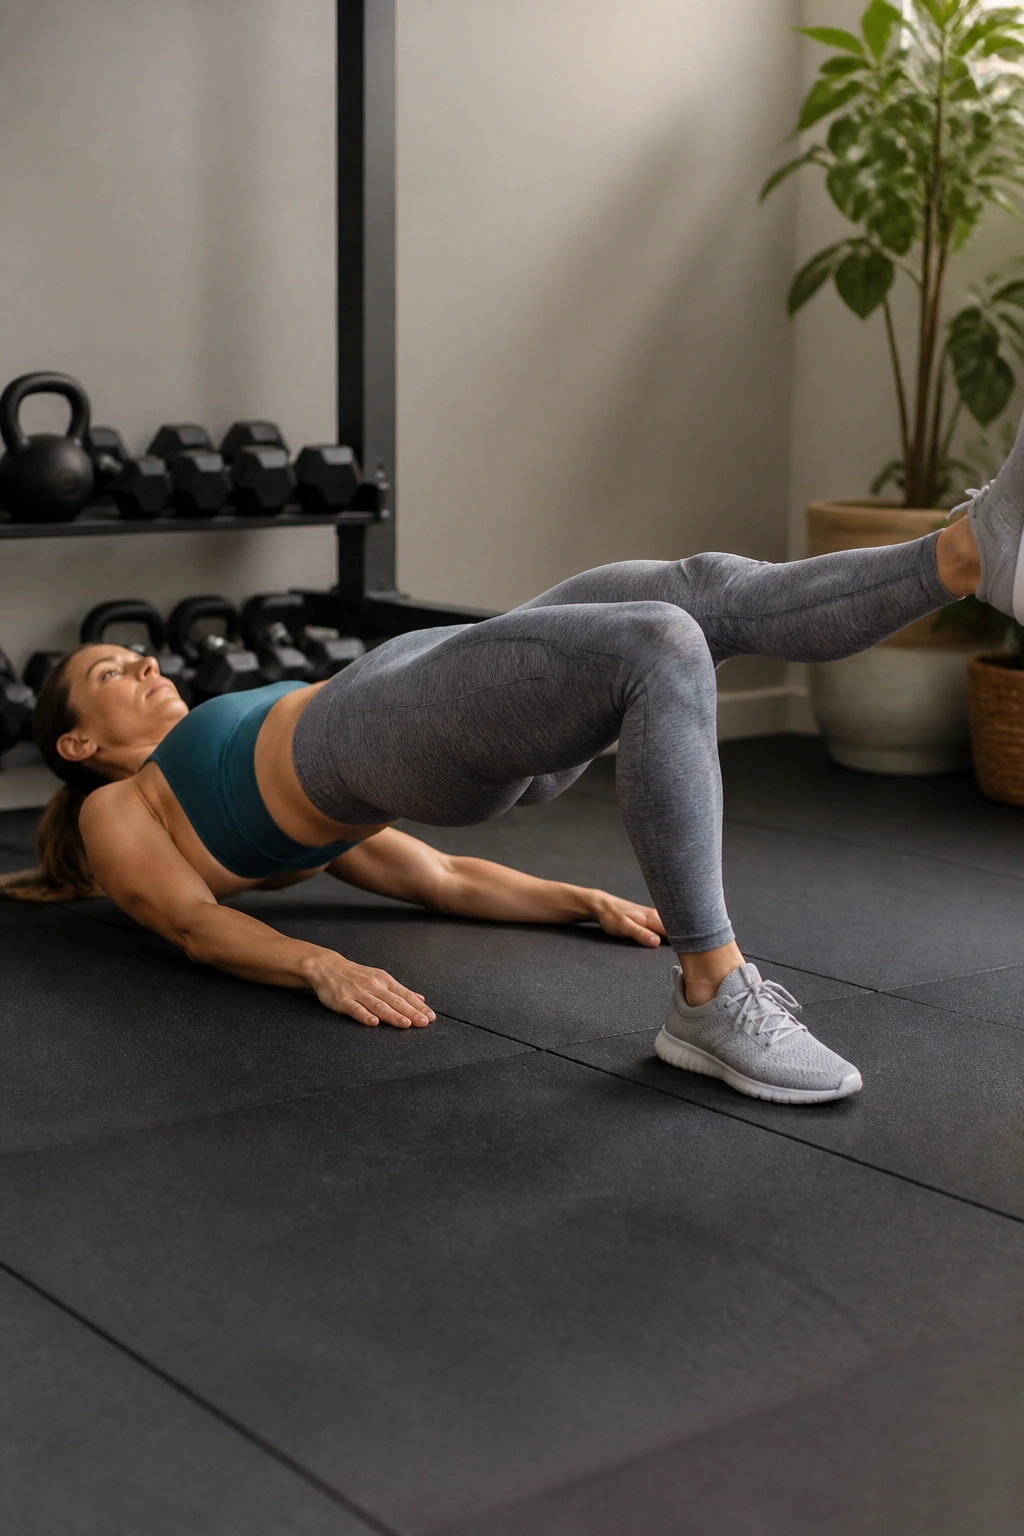
If the standard glute bridge becomes too easy, you must progress to the single-leg version. This removes the stability of the second leg and forces the glute of the working side to stabilize your pelvis. It is a fantastic anti-rotational exercise as well.
Execution Strategy
- Set up as you would for a standard bridge.
- Extend one leg straight out, keeping your thighs parallel.
- Drive through the heel of the foot that is still on the floor to lift your hips.
- Your goal is to keep your hips level. If one side drops, it means your core is not tight enough.
You will find that this exercise is significantly harder than the double-leg version. The intensity spike is immediate. Do not be surprised if your hamstrings cramp initially—that is just a sign that they were underactive.
11. Calf Raises
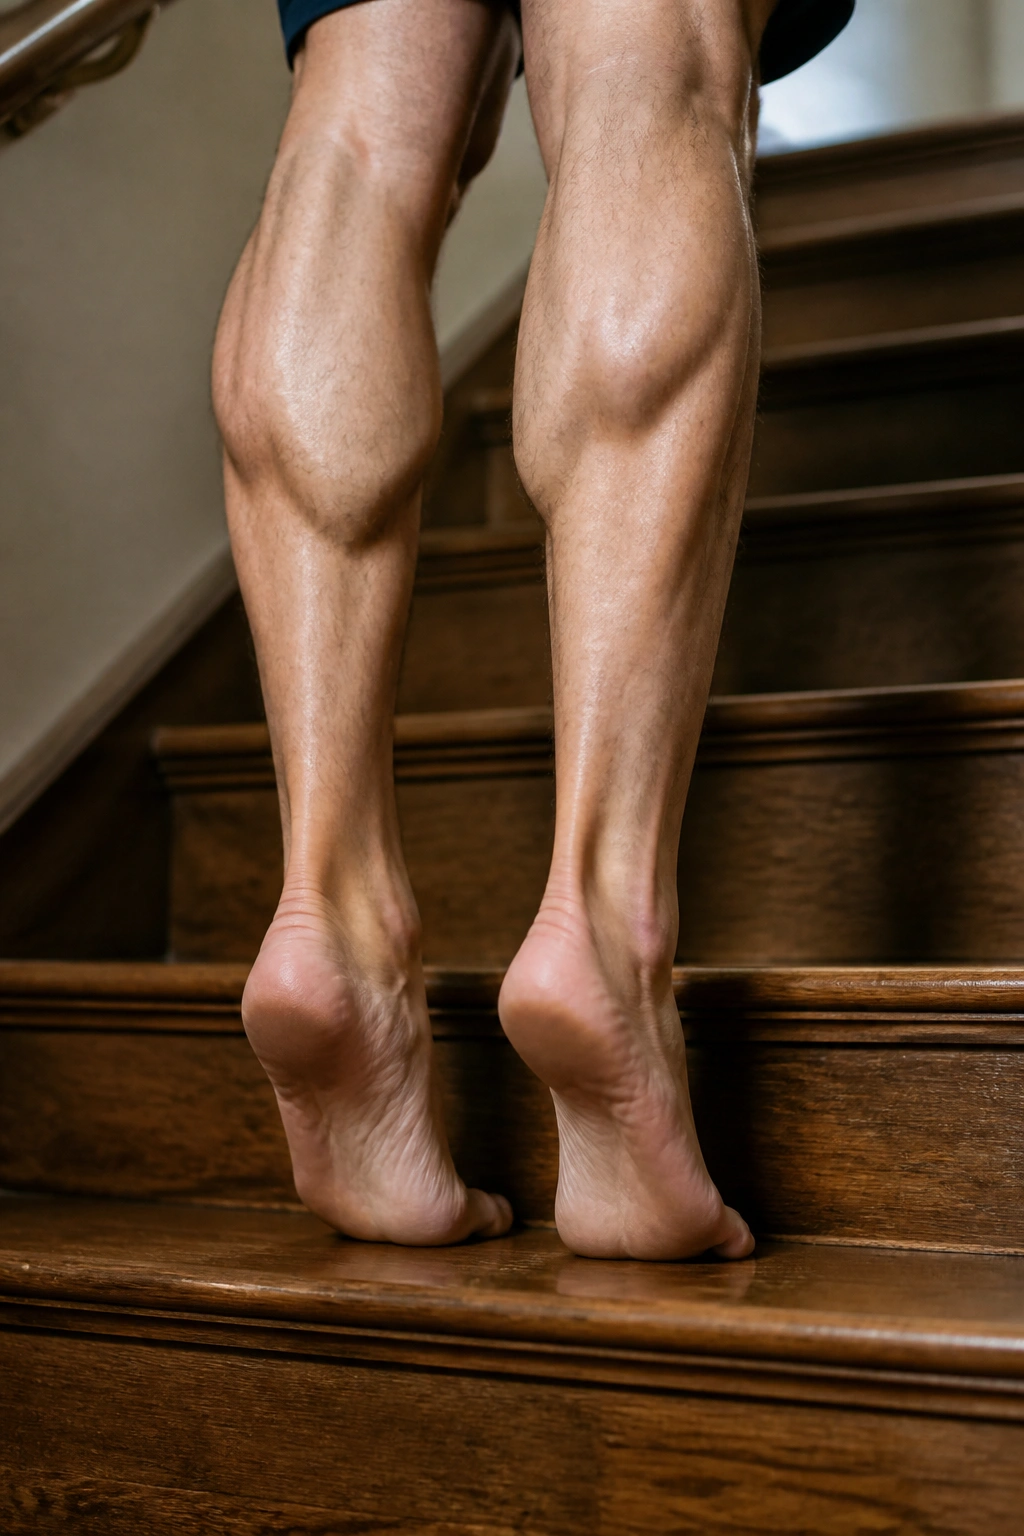
The calves are notoriously stubborn. They are designed for endurance, which means they often require higher volume and more frequency to grow. You do not need a machine for these; a simple stair or a thick book is enough.
Building Size and Definition
- Stand on the edge of a stair, balls of your feet on the step, heels hanging off.
- Lower your heels as far as they will go, feeling the stretch.
- Drive up onto your toes as high as you can, pausing for a full second at the top.
- The secret: Do not bounce. Use a slow, deliberate tempo.
If you want to target the soleus muscle—which sits underneath the gastrocnemius—perform calf raises with your knees slightly bent. The gastrocnemius is more active when the leg is straight.
12. Wall Sits
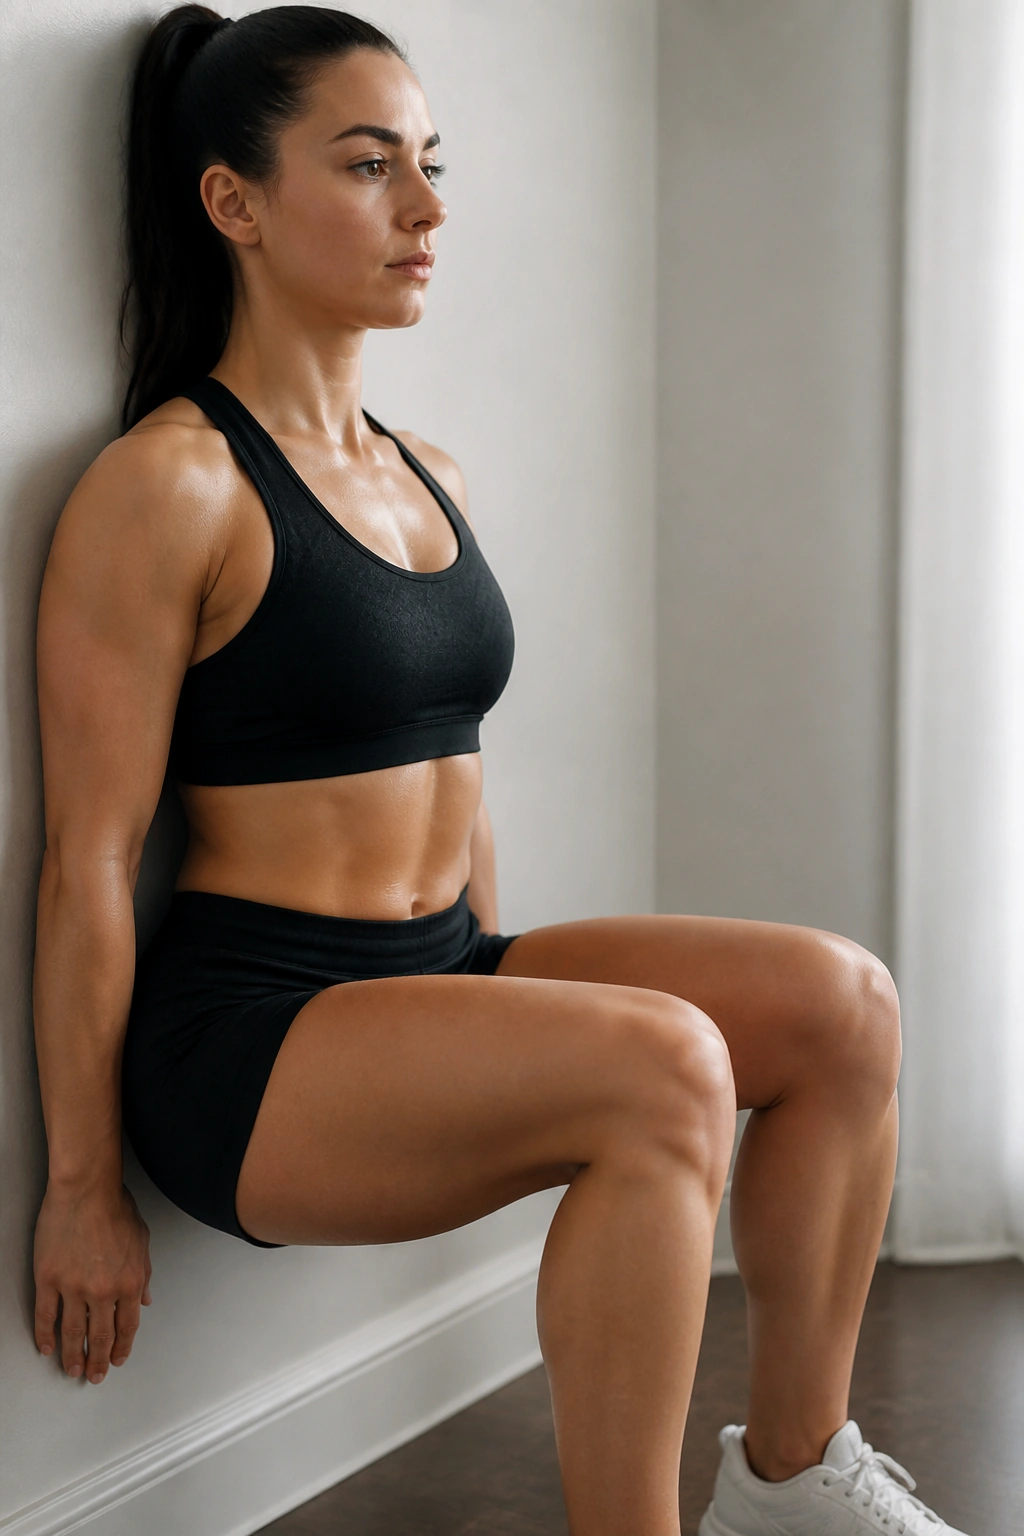
Wall sits are an isometric exercise. They do not involve movement, which means they are great for building endurance in the quads without putting unnecessary stress on the joints. They are also incredibly humbling.
Finding the Intensity
- Lean against a wall and slide down until your thighs are parallel to the floor.
- Keep your feet hip-width apart.
- Ensure your shins are vertical.
- Hold this position. That is it.
The challenge is in the time. Start with 30 seconds and try to add 5 seconds each time you do it. Once you hit 90 seconds, you can add resistance by holding a weight on your lap, but be warned: this increases the difficulty exponentially.
13. Box Jumps
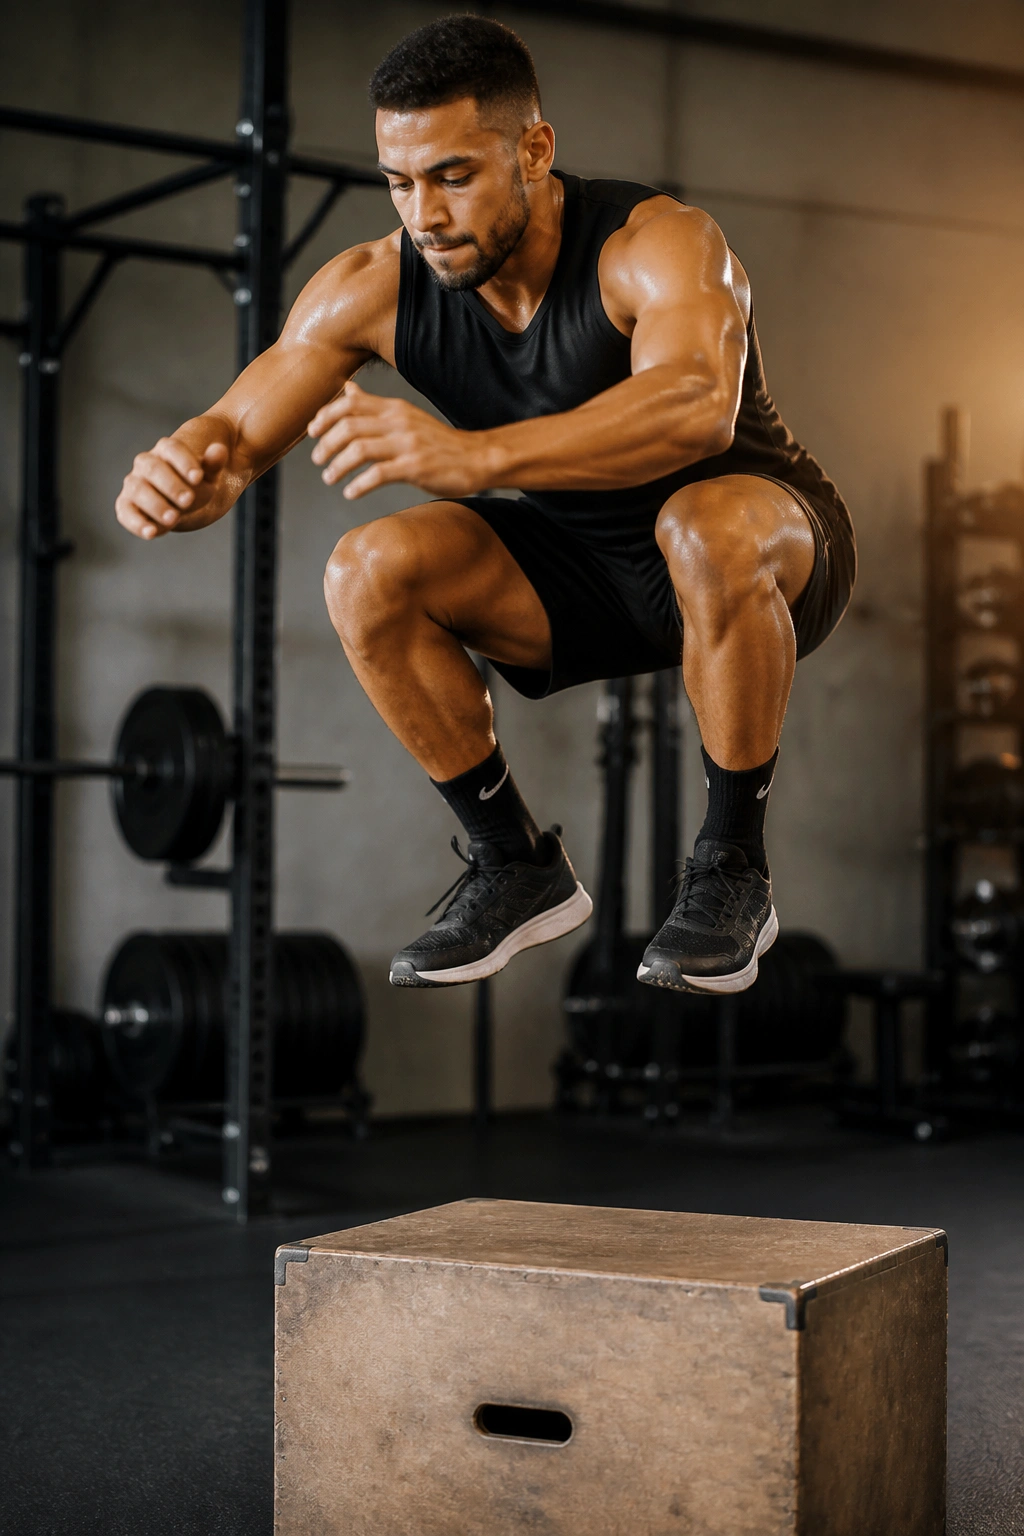
Plyometric training is the missing link for many people. It teaches your muscles to produce force quickly. If you want explosive legs and improved athleticism, you need to jump.
Safety First
- Find a sturdy box or surface. Do not use something that can slide or tip over.
- Start from a standing position.
- Use your arms to generate momentum, bend your knees, and jump onto the box, landing softly on the balls of your feet.
- Stand all the way up on the box before stepping (not jumping) down.
Landing is the most important part. You want to land silently. A loud thud means you are not absorbing the impact with your muscles, which puts unnecessary stress on your joints.
14. Plank-to-Squat
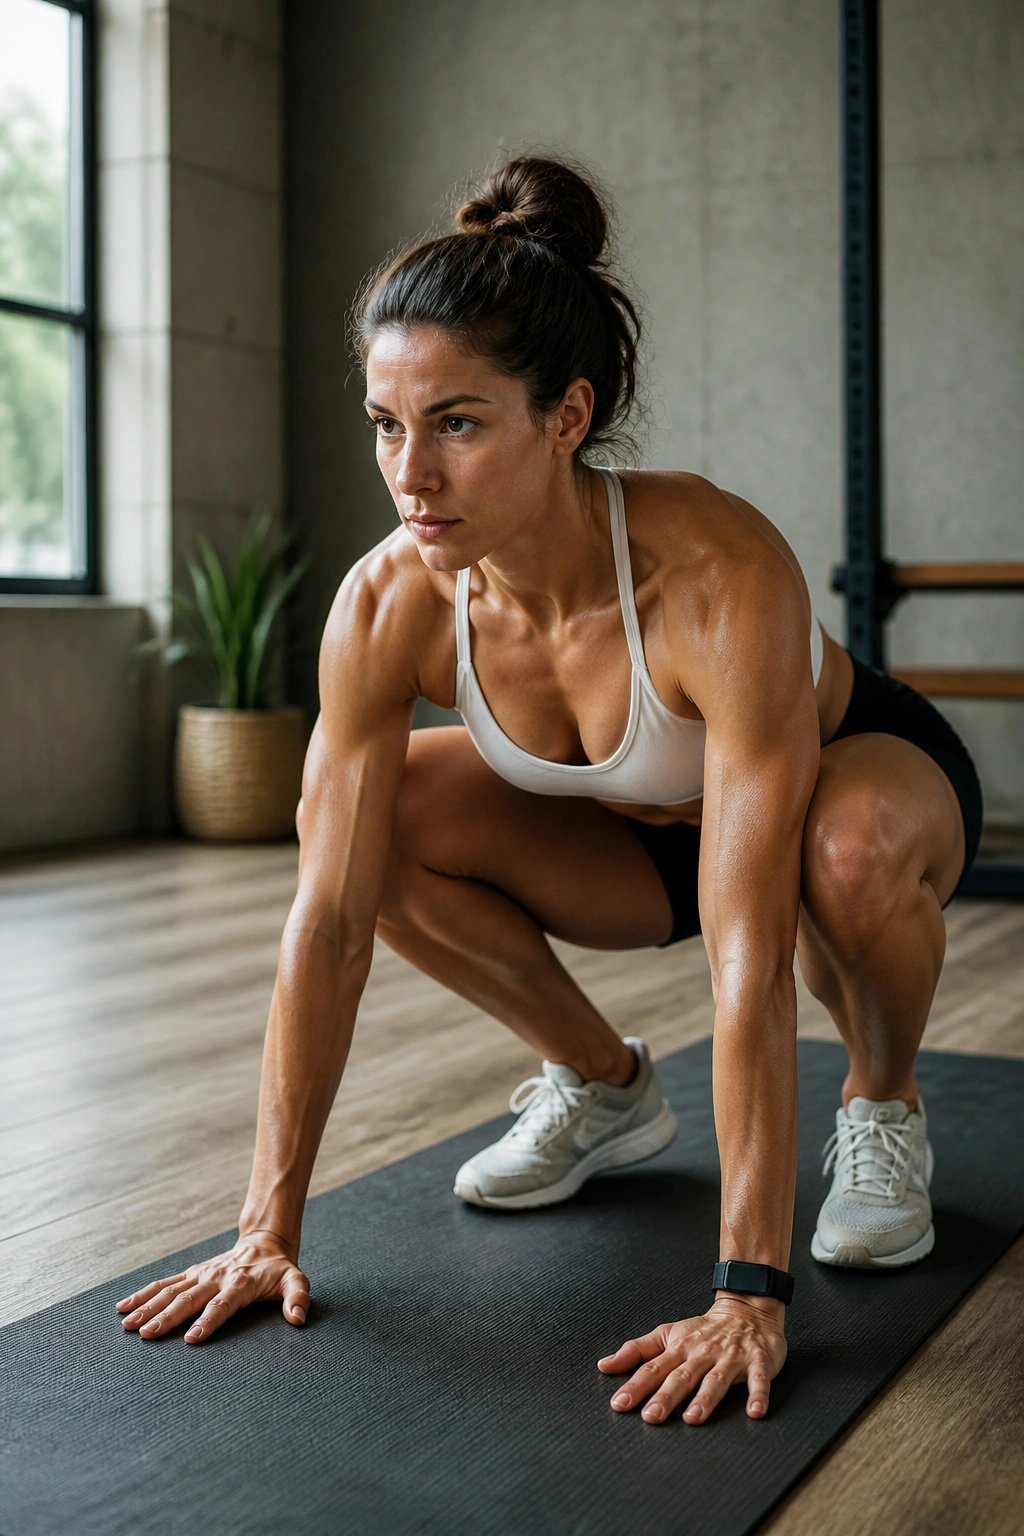
This is a dynamic movement that bridges the gap between core strength and lower body power. It is excellent as a warm-up or as part of a high-intensity circuit.
The Sequence
- Start in a high plank position.
- Jump your feet forward to the outside of your hands, landing in a deep squat position.
- Keep your chest up and your heels on the ground.
- Jump your feet back to the plank position.
This movement demands hip mobility. If you cannot get your feet flat in the squat, work on your ankle and hip flexibility before trying to do these for speed.
15. Glute Kickbacks
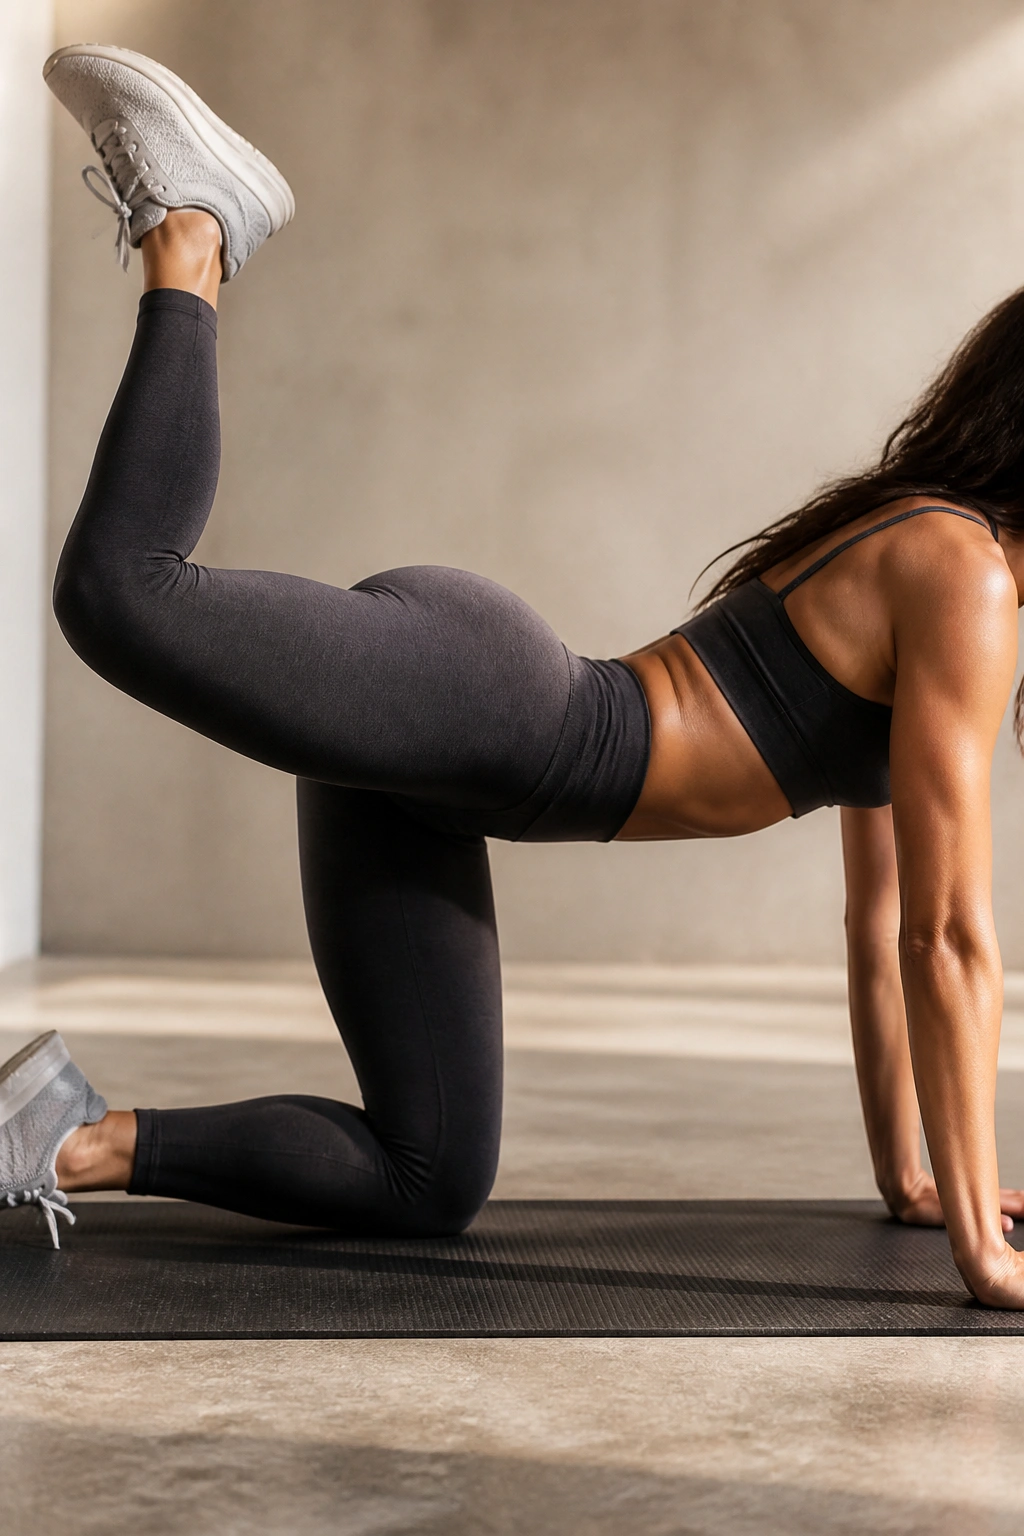
Isolation movements have their place, especially when you are trying to “sculpt” specific areas. The glute kickback is one of the few movements that isolates the gluteus maximus without requiring a heavy load.
How to Do It
- Get on all fours, hands under shoulders, knees under hips.
- Keeping your knee bent at 90 degrees, drive one foot toward the ceiling.
- Squeeze your glute at the peak of the movement.
- Do not let your lower back arch; keep your spine neutral.
If you have resistance bands, wrap them around your knees to make this significantly more difficult. The resistance adds a constant tension that forces the glute to work even harder at the top of the movement.
16. Pistol Squats
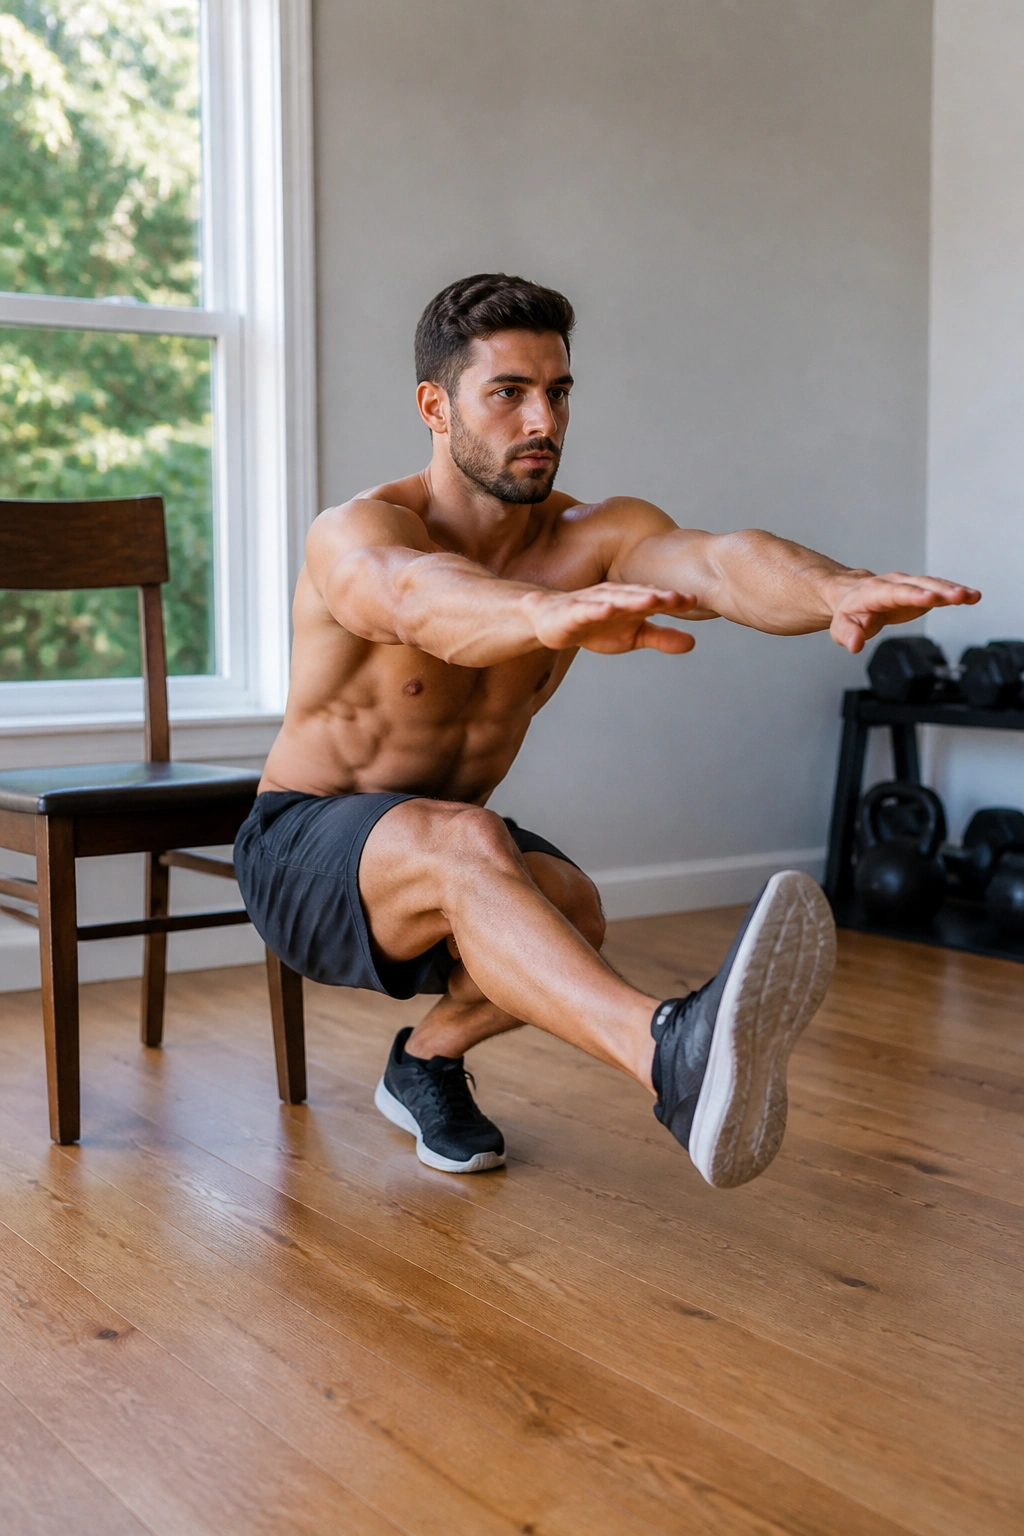
The pistol squat, or single-leg squat, is the pinnacle of bodyweight leg strength. It requires not just strength, but immense balance and mobility. If you can perform a clean pistol squat, you likely have excellent lower body mechanics.
The Progression
- Most people cannot do a full pistol squat immediately.
- Start by sitting down onto a chair on one leg and standing back up.
- As you get stronger, lower the height of the chair.
- Eventually, you will be able to perform the movement in the air with the non-working leg extended in front of you.
Never rush this. It is a technical movement. If your heel lifts off the floor, you are losing the structural integrity of the squat. Keep that heel glued to the ground.
17. Cossack Squats
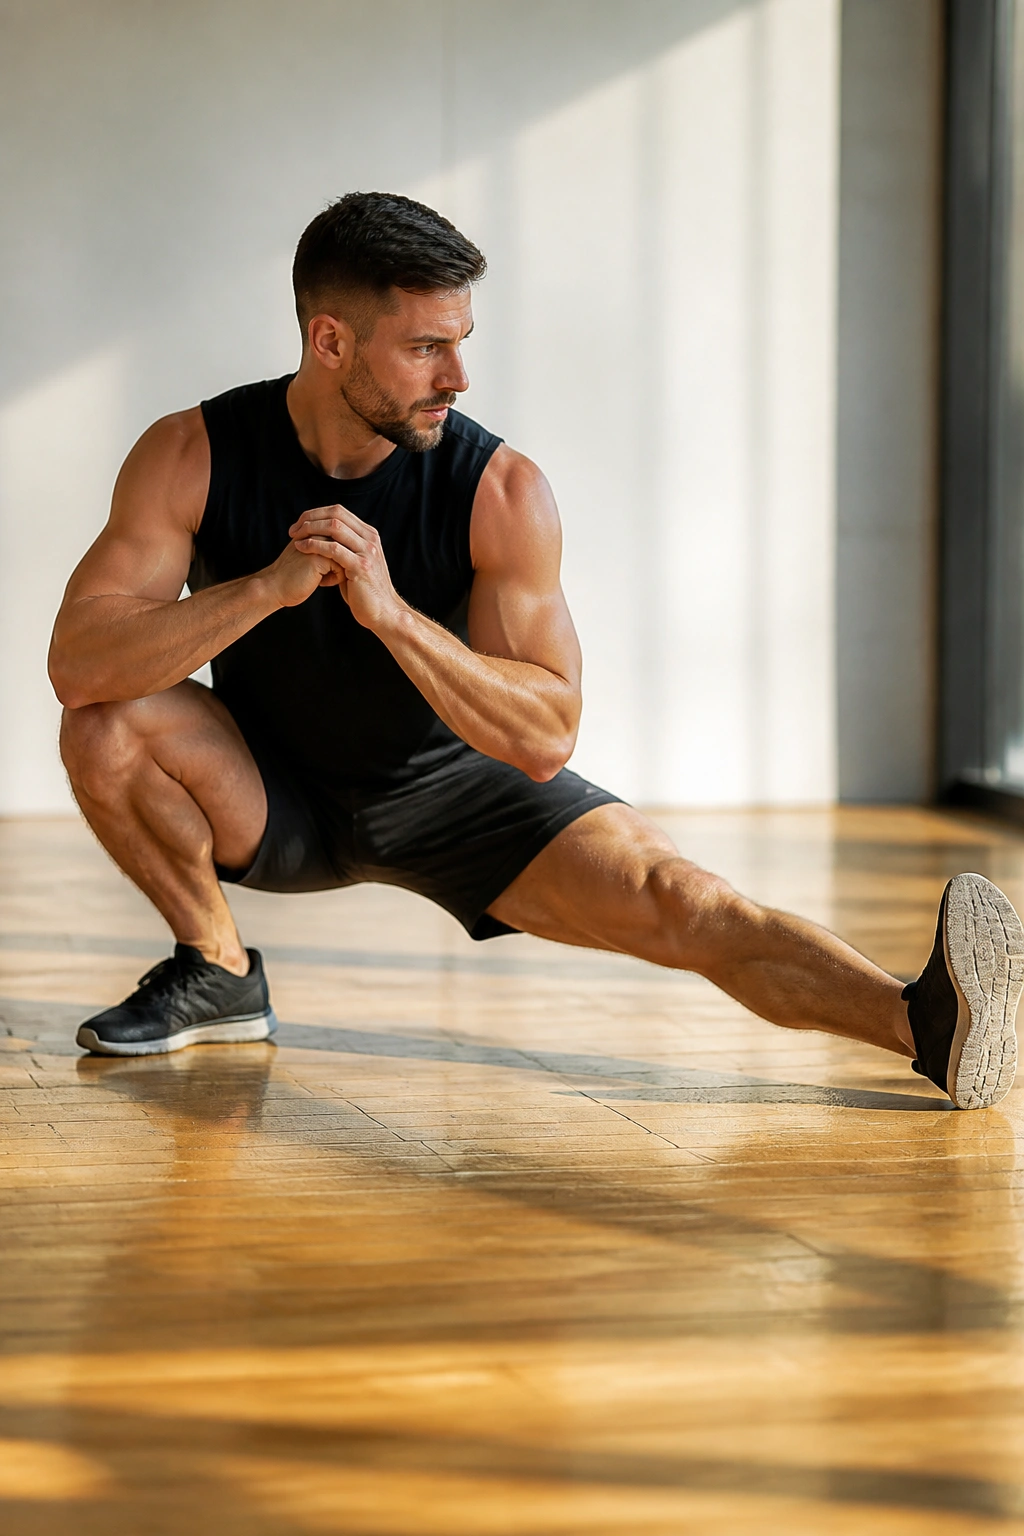
Similar to the side lunge, but much deeper. The Cossack squat is a fantastic drill for increasing hip and ankle mobility while building strength in the adductors.
Deep Mobility
- Take a very wide stance.
- Shift your weight entirely to one side, descending into a deep squat on that leg.
- The other leg stays straight, with the toes pointing toward the ceiling.
- Push through the heel of the bent leg to return to the center.
You will likely find that one side is much tighter than the other. This is common. Spend extra time in the bottom position on your tighter side to improve your range of motion.
18. Jump Lunges
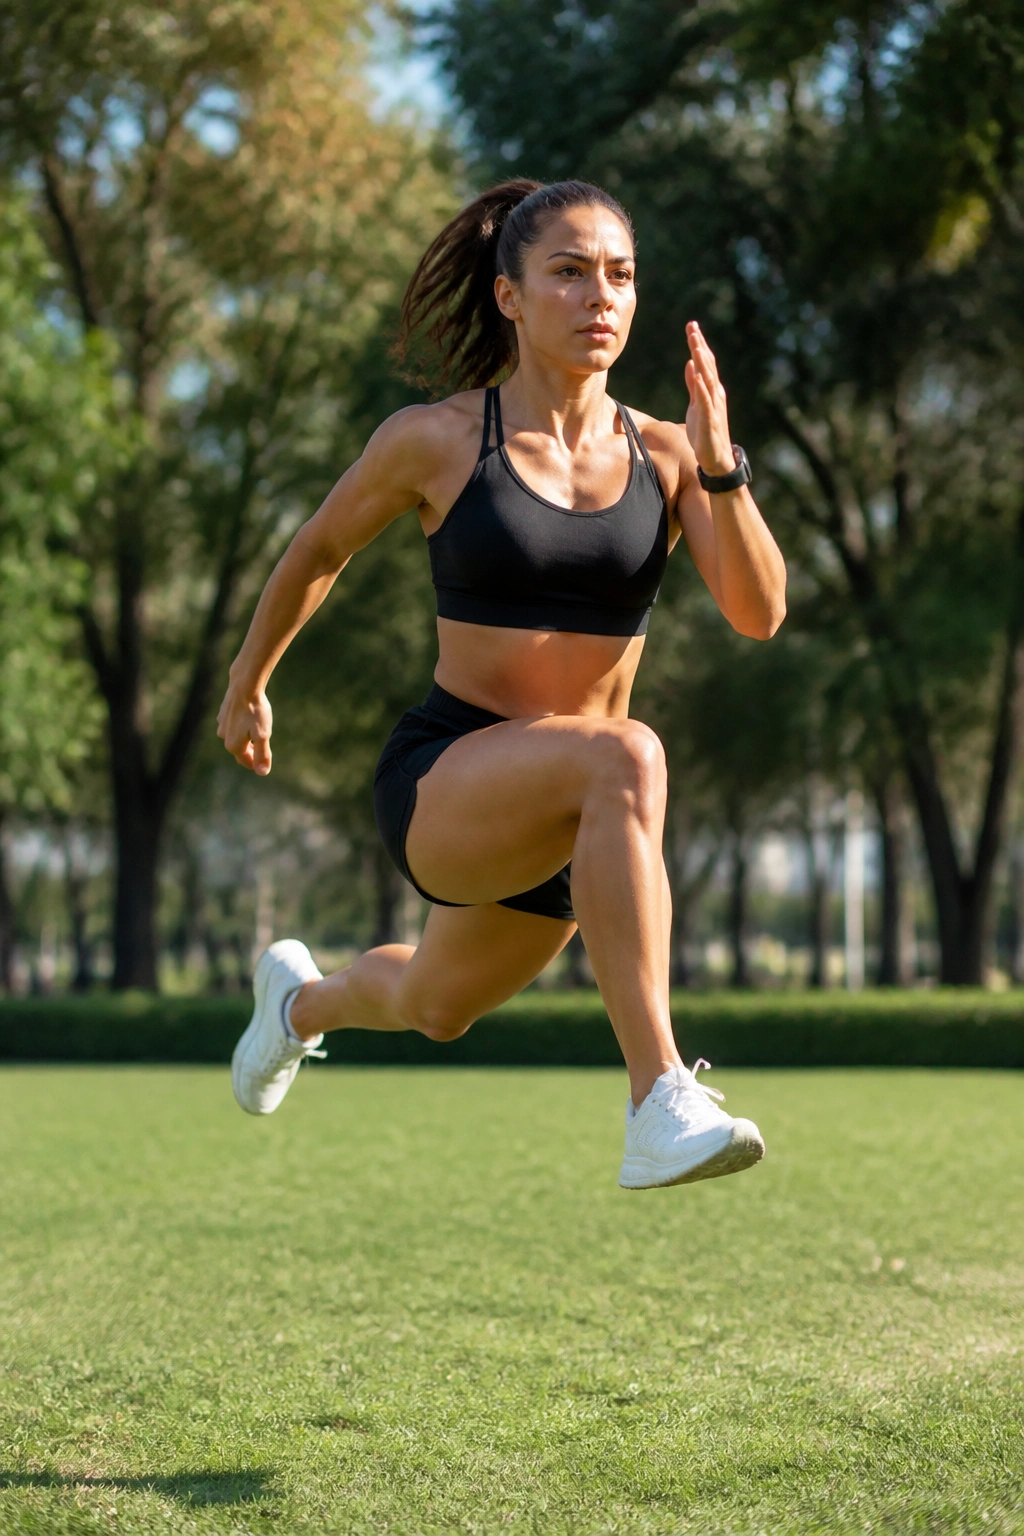
If you want to add an element of cardio to your leg workout, jump lunges are the answer. They are an explosive version of the reverse lunge that will burn out your quads in record time.
The Technique
- Perform a reverse lunge.
- Explosively jump up, switching your legs in the air.
- Land softly back in a lunge position on the other side.
- Keep your torso upright throughout the entire movement.
These are punishing. They will tax your lungs just as much as your legs. If your form starts to break down—if your knees start caving in or you cannot land softly—stop. There is no benefit to training with broken form.
19. Frog Pumps
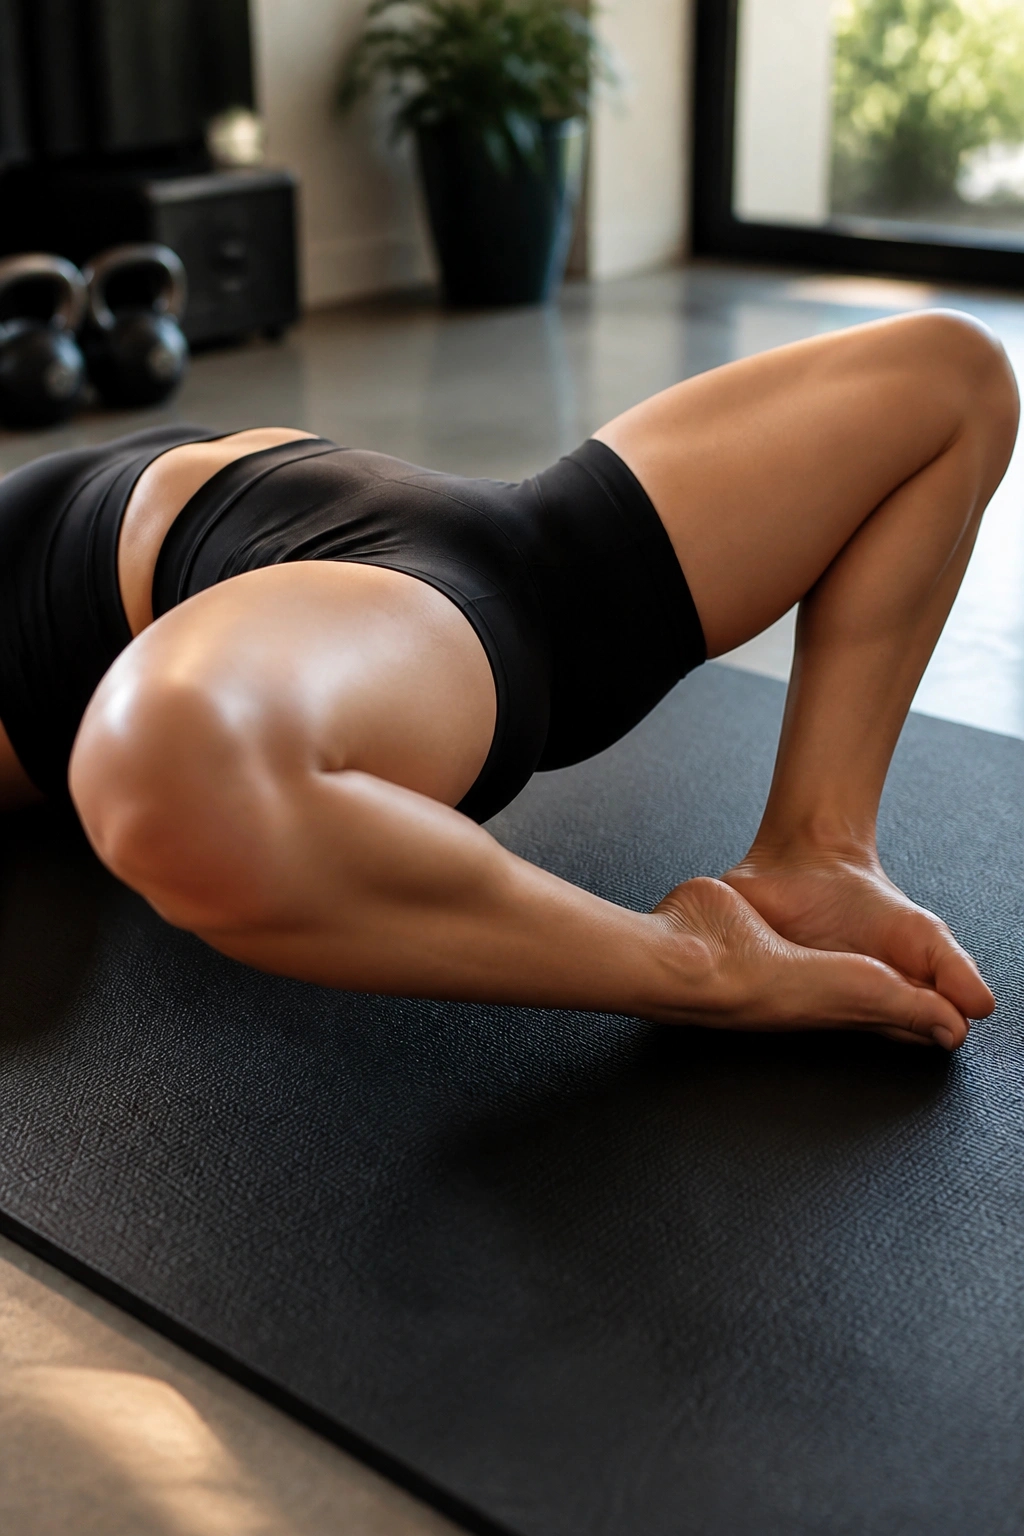
This is a glute-specific movement that removes the hamstrings from the equation. It is essentially a bridge, but your feet are pressed together like a frog.
The Setup
- Lie on your back, bring your heels together and your knees out to the sides.
- Drive through the sides of your feet to lift your hips.
- Because your knees are flared out, you cannot use your hamstrings to help lift.
- You will feel this in the glutes almost immediately.
Perform these for high repetitions. They are not meant for heavy weight; they are meant for metabolic stress and high-volume glute engagement.
20. Fire Hydrants
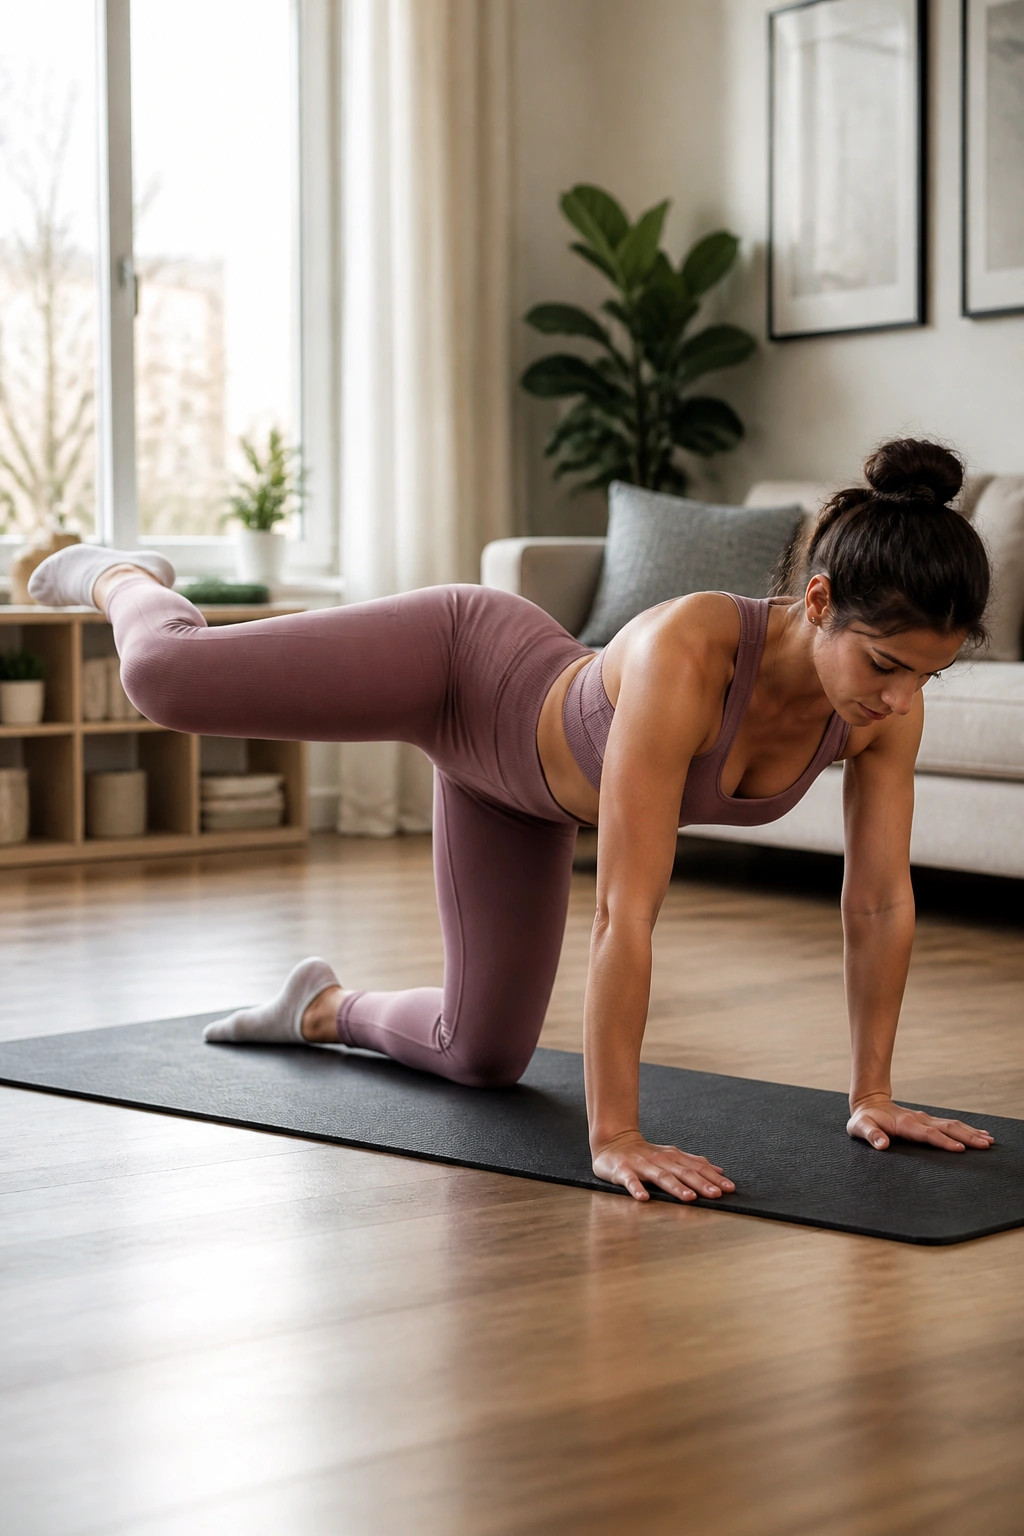
This is another isolation exercise, specifically targeting the glute medius and hip abductors. It is vital for hip stability and the “shelf” look on the side of the glutes.
Focus on Control
- On all fours, keep your knee bent at 90 degrees.
- Lift your leg out to the side like a dog at a fire hydrant.
- Keep your torso perfectly still; do not twist your hips to get the leg higher.
- Lower with control.
The goal is not to get the leg as high as possible; it is to activate the side glute. If you twist your hips, you lose the isolation. Keep your hips square to the floor.
21. Sliding Leg Curls
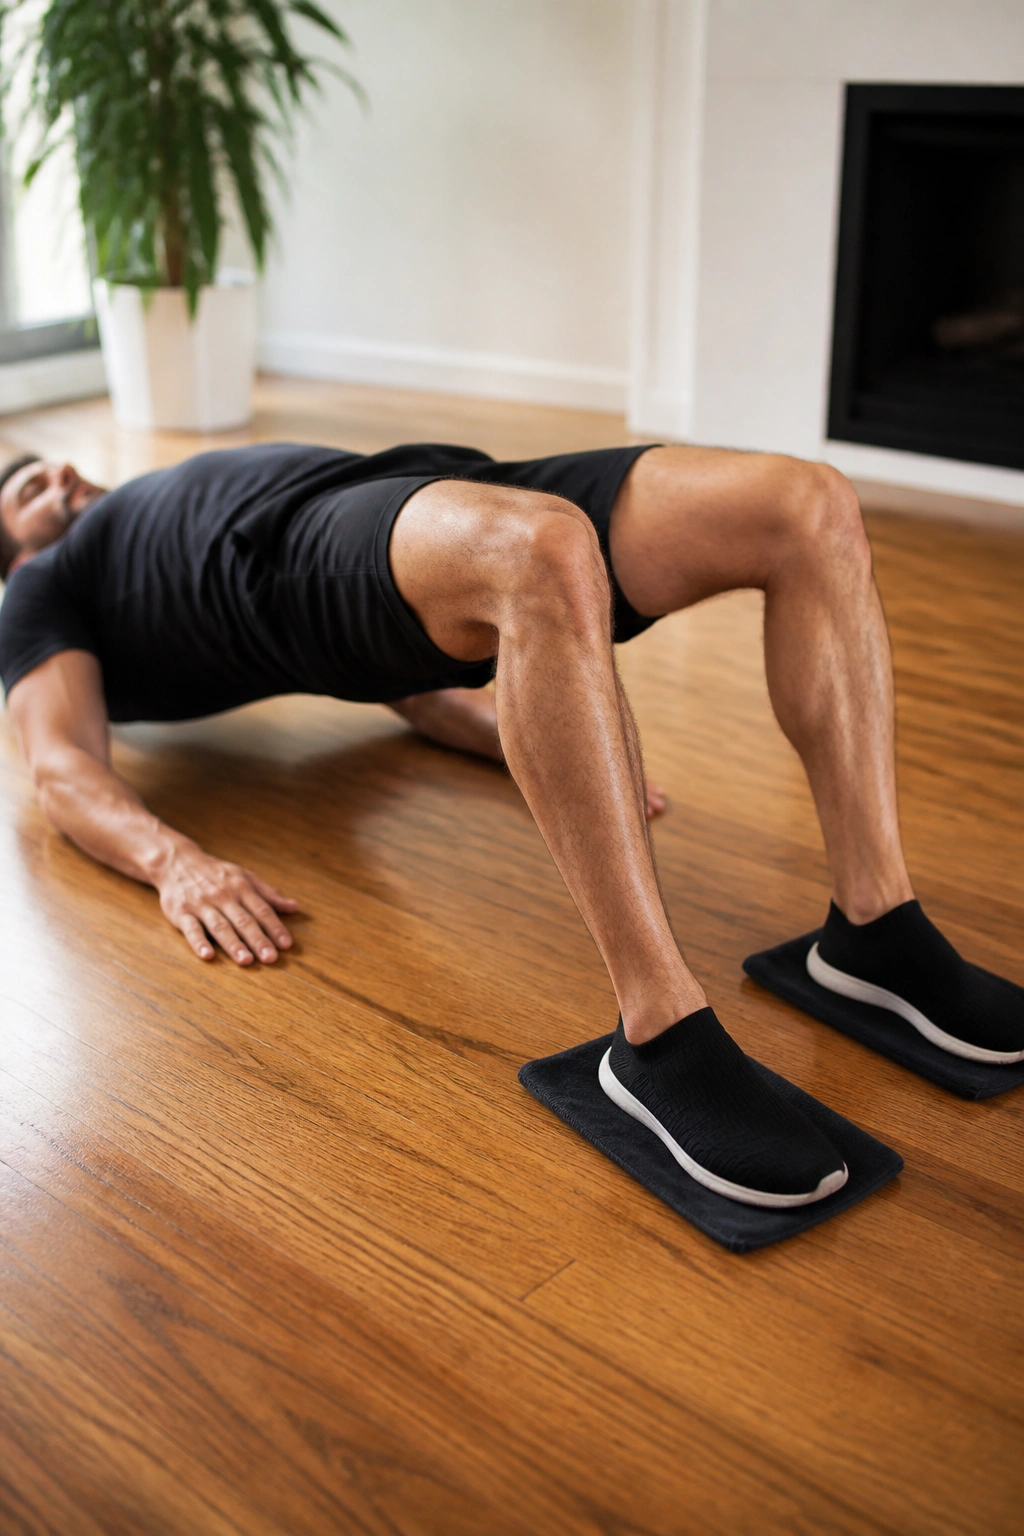
You do not need a leg curl machine to target your hamstrings. If you have a smooth floor, you can use a pair of sliders, or even just two hand towels, to perform leg curls.
The Movement
- Lie on your back, feet on the towels.
- Lift your hips into a bridge position.
- Slide your heels toward your glutes, then slide them back out.
- Keep your hips elevated the entire time.
If this is too difficult, bring your heels in and out one at a time. The eccentric phase—sliding the heels away—is where the hamstring growth happens. Focus on resisting the slide.
22. Standing Abductions
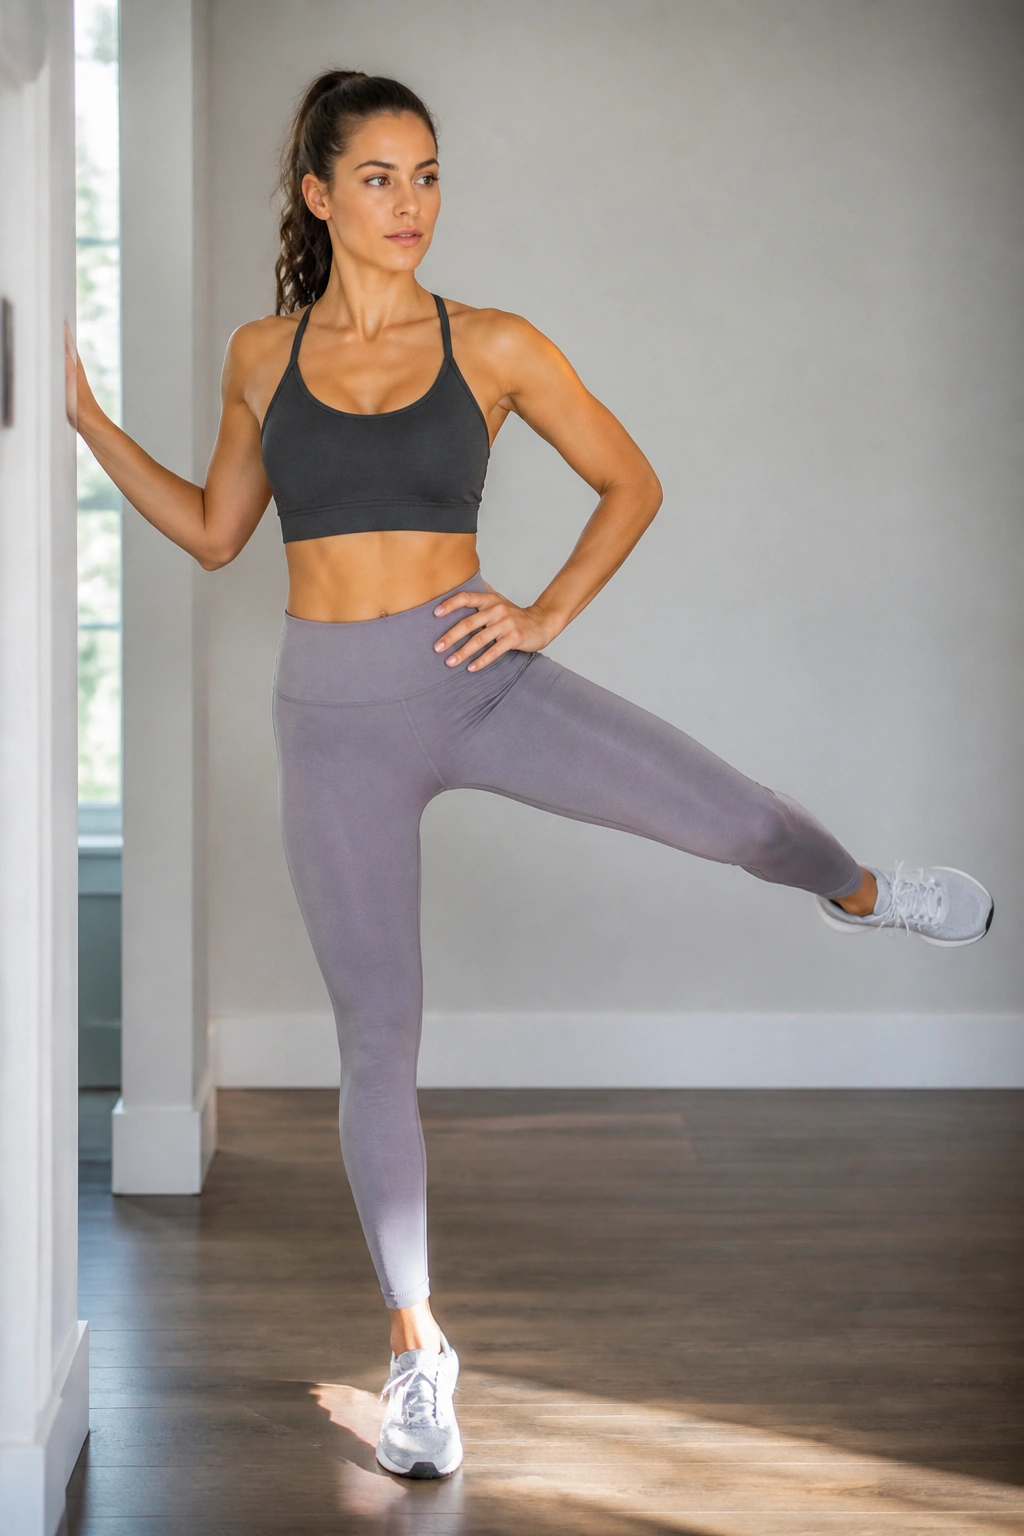
The final piece of the puzzle. Standing abductions target the lateral glutes, which are crucial for pelvic stability and overall definition.
Implementation
- Stand tall, holding onto something for balance if necessary.
- Keep your leg straight and lift it out to the side.
- Lead with your heel, not your toe.
- You should feel this in the side of your hip.
You do not need to move the leg very far. A small range of motion with a strong squeeze at the top is far more effective than swinging your leg around and using momentum.
Final Thoughts
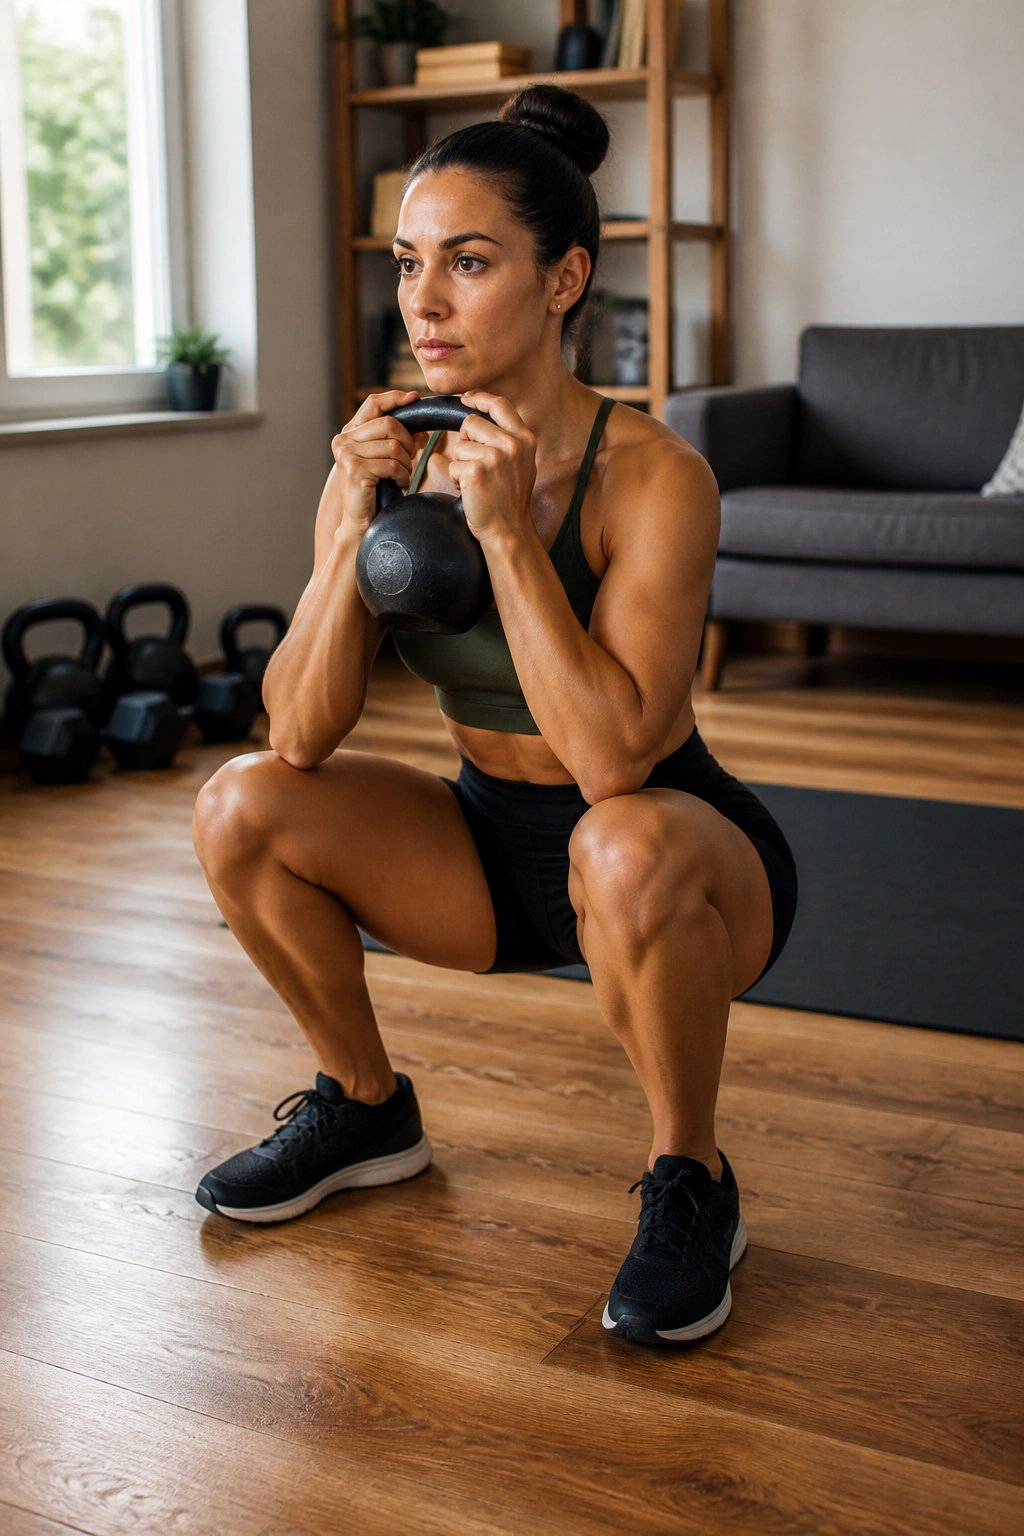
The key to all of these movements is that they are tools. You do not need to do all twenty-two in a single session. In fact, if you try to do that, you will likely be unable to walk for a week. The goal is to select three to five of these movements and build a coherent routine. Focus on the ones that you struggle with, not just the ones that feel easy. Strength is usually found in the areas where we are weakest.
Consistency will always outperform intensity. It is better to have a modest workout that you can perform three times a week for an entire year than a “legendary” workout that leaves you too sore to train again for ten days. Listen to your body. If a movement hurts in the joints, adjust your form or swap it for something else. If it hurts in the muscles, you are likely doing it exactly right. Keep your focus on the quality of the movement, and the definition will follow.
