



A resistance band can make a tiny glute bridge feel rude in the best way. Put a mini band above your knees, keep your ribs down, and suddenly the little muscles on the outside of your hips stop hiding.
That is why Pilates band exercises for strong glutes work so well: they ask the hips to stay steady while the legs move. The glute max handles extension, the side glute — mostly the glute medius — helps keep the pelvis level, and the band keeps tension on both jobs instead of letting the rep go slack at the top.
A light or medium loop band is usually enough. Heavy bands can turn clean work into hip wriggling, and once that happens the lower back starts helping when it should mind its own business.
These 18 moves cover floor work, side-lying control, standing balance, and a few finishers that make the outer hips light up fast. Start with honest range. Small is enough.
1. Pilates Band Glute Bridge
The bridge is still the anchor exercise here. It looks simple, which is exactly why it exposes lazy form so fast.
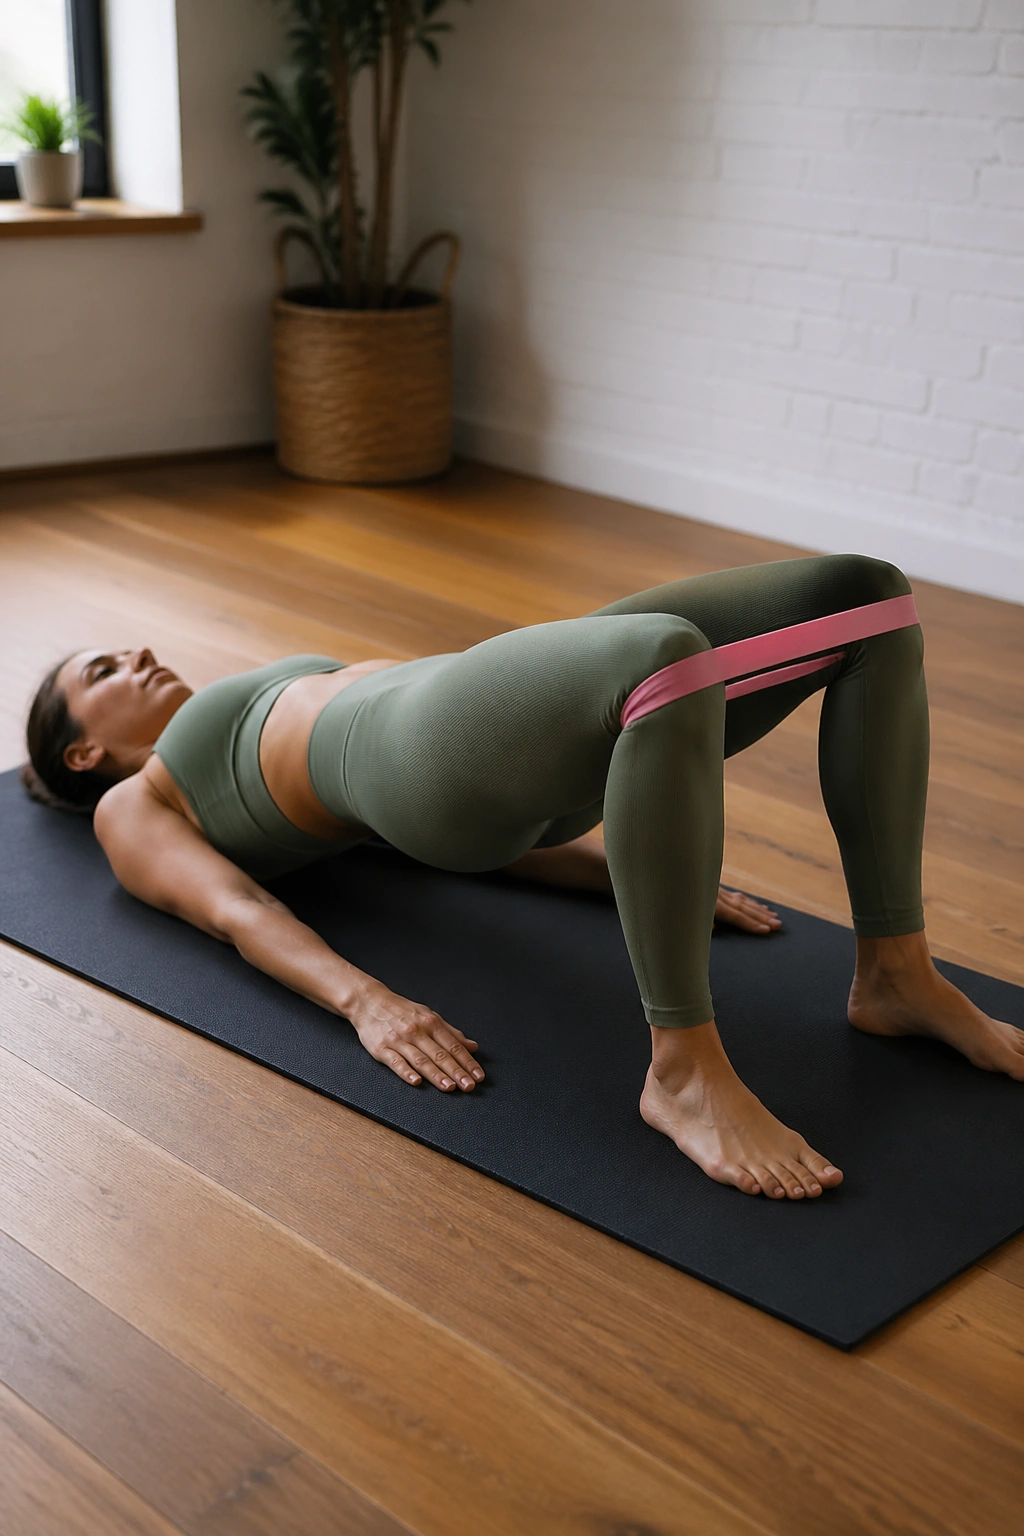
Lie on your back with your feet hip-width apart and the band above your knees. As you exhale, press your knees slightly outward into the band, tuck your pelvis just enough to flatten the low back, then lift your hips until your body forms one long line from shoulders to knees. Hold for two seconds. Lower slowly.
What to feel
- Glutes at the top, not your low back.
- A steady pull on the band the whole time.
- Hamstrings helping, but not cramping.
What to avoid
- Letting the knees cave in.
- Pushing the hips too high and arching.
- Spreading the feet so wide that the band goes slack.
Do 10 to 15 controlled reps. If you want to make it harder without changing the shape, hold the top position for a full breath. That little pause tells you whether the work is really in the glutes or somewhere else.
2. Frog Pumps With a Mini Band
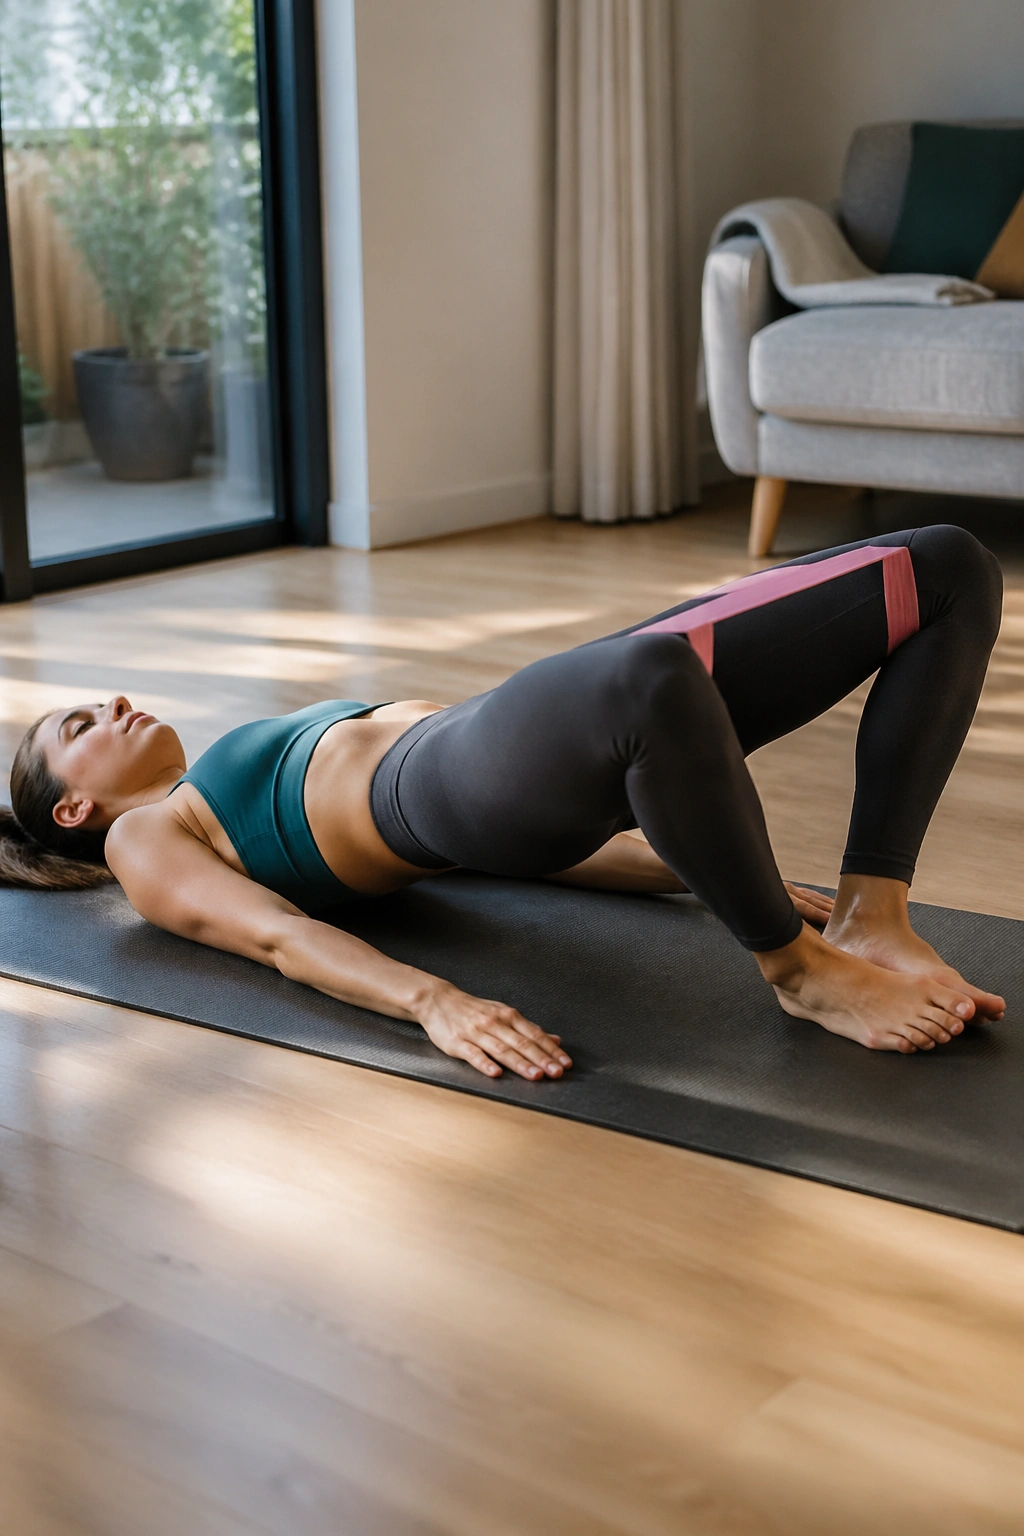
Why do frog pumps feel tiny and brutal at the same time? Because the range is short, the band is constantly awake, and the glutes can’t coast.
Bring the soles of your feet together, let your knees fall open, and place the band above the thighs. Keep your heels close to your seat. From there, make a small bridge lift — only a few inches — then lower with control. The legs stay in the frog shape the whole time.
The trick is not height. It’s tension. If you bounce through the movement, the hip flexors and lower back get noisy. If you keep the movement compact and the pelvis slightly tucked, the glutes have nowhere to hide.
Do 20 to 30 reps, or 30 seconds straight if you like a burner set. And yes, your inner thighs will notice too. That is normal. The big mistake is flaring the ribs and turning it into a back exercise, which happens faster than most people expect.
3. Clamshell Presses
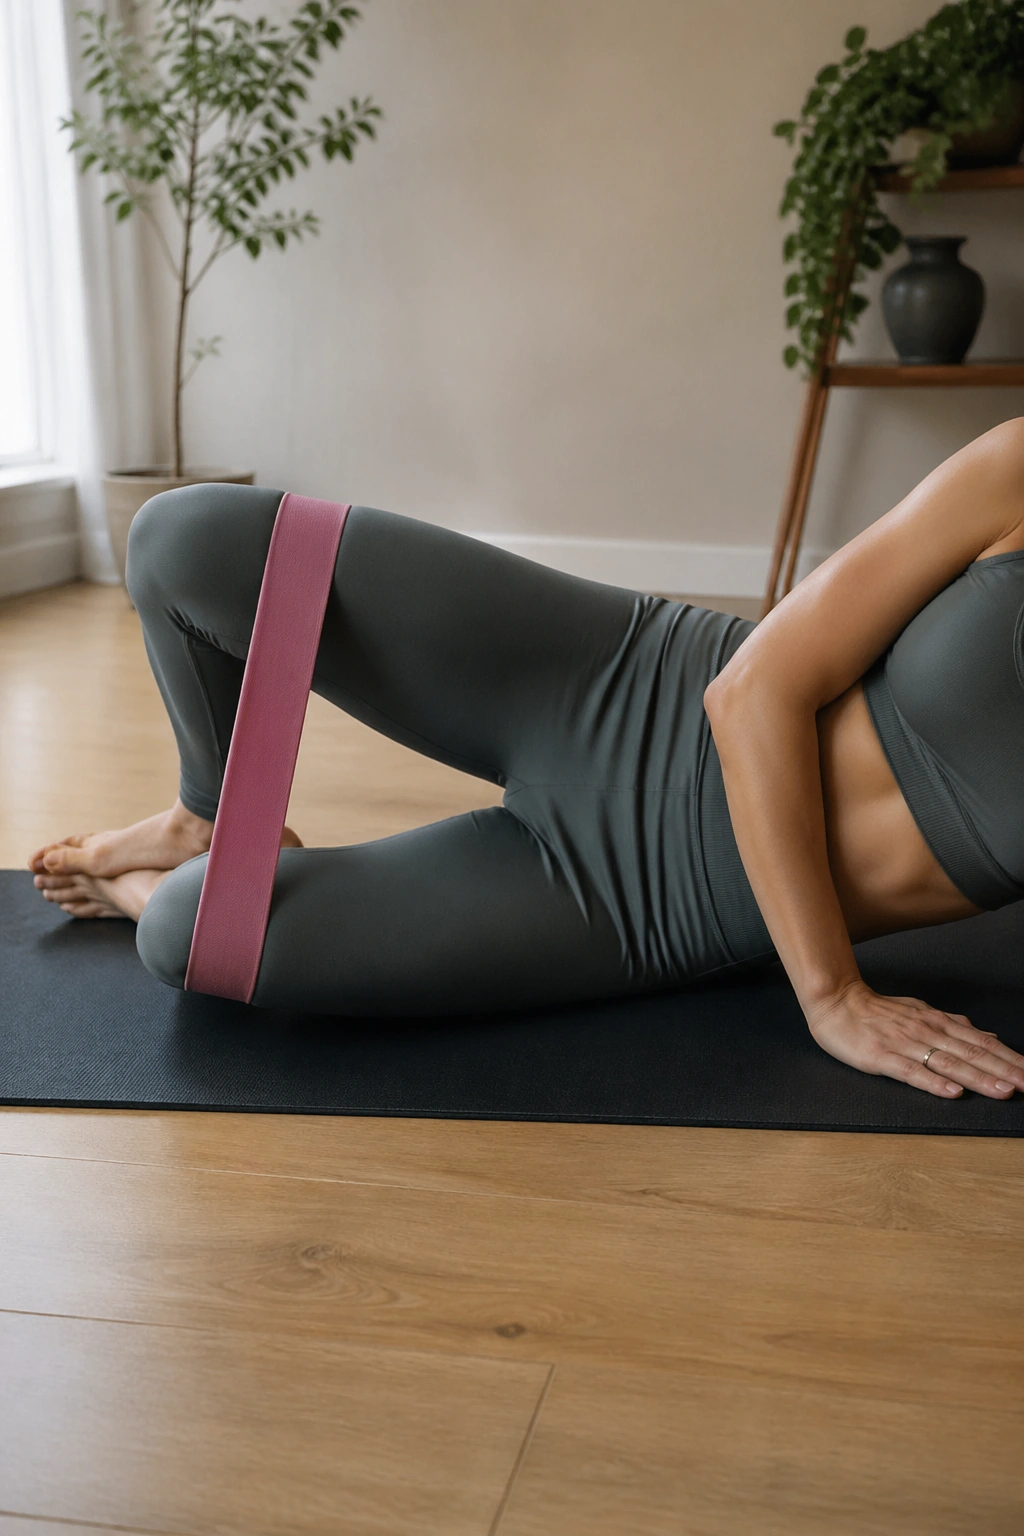
A regular clamshell is fine. A clamshell with a real squeeze against the band is much better.
Lie on your side with knees bent, heels lined up, and the band above the knees. Keep your pelvis stacked — one hip bone on top of the other — then open the top knee like a shell. Pause for a beat. Instead of just dropping it back down, press the knee outward into the band on the return as well. That tiny extra effort matters.
What makes the press different
- The top glute medius works harder at the widest part of the rep.
- The return phase stops being lazy.
- Your pelvis stays quieter, which is the whole point.
Do 12 to 20 reps per side. If the waist rolls backward, shorten the range and slow down. A clamshell should feel like the side of the hip doing the job, not the front of the hip or the low back trying to make up for it.
4. Side-Lying Hip Abductions
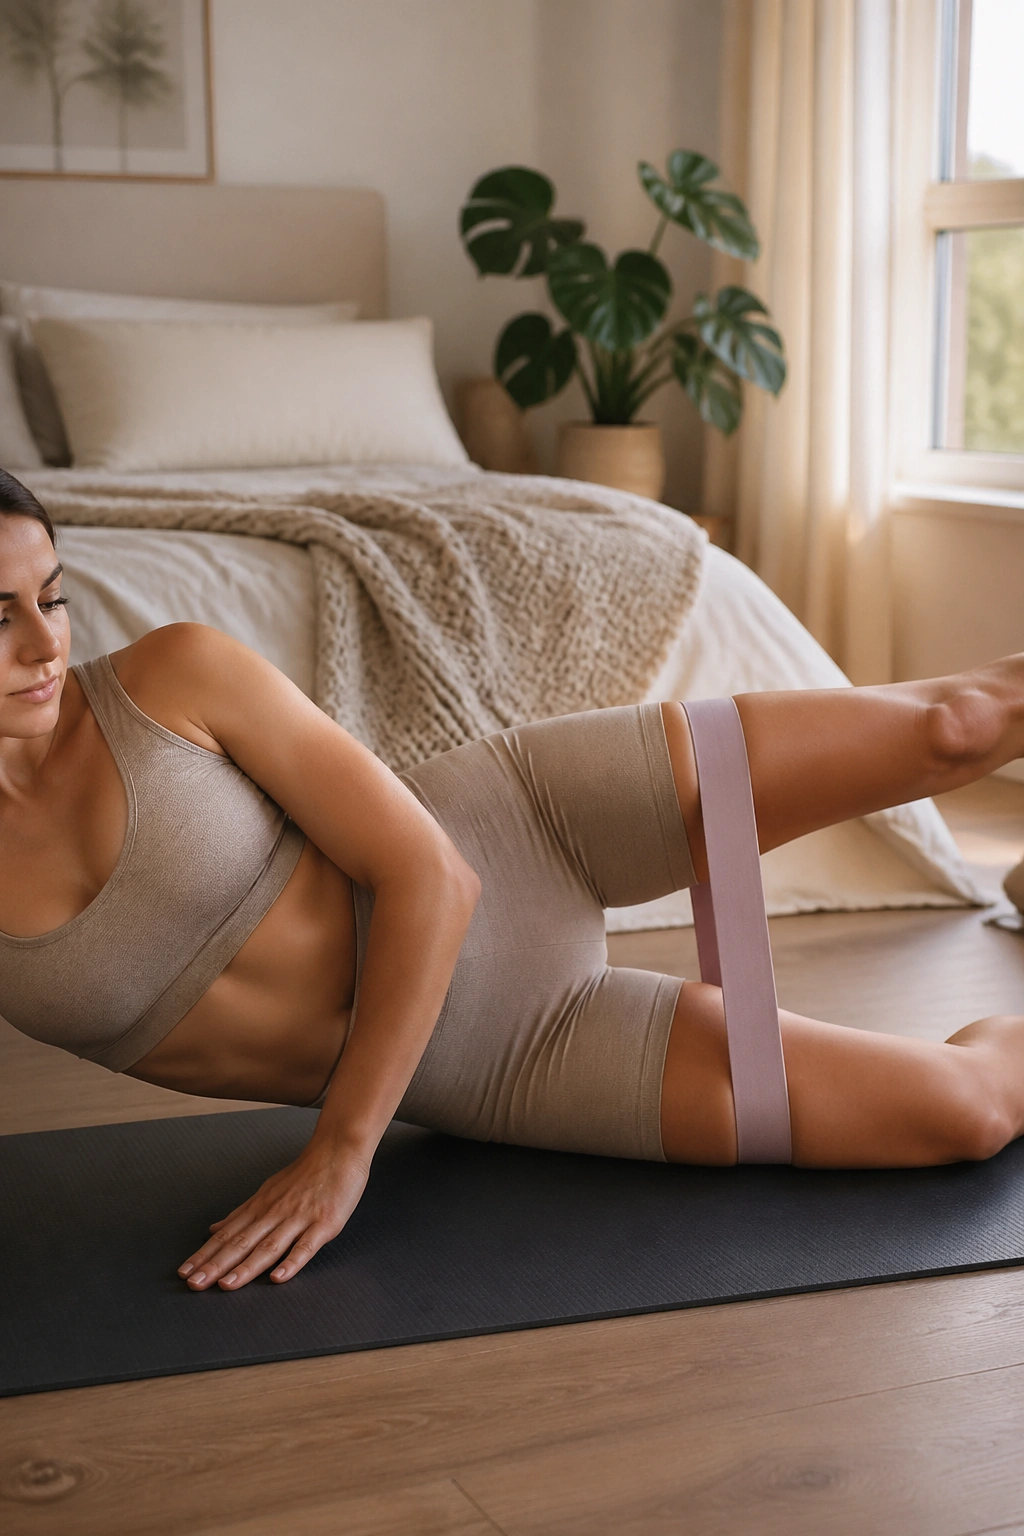
On paper, side-lying leg lifts look easy. On the mat, they have a sneaky way of burning the side of the hip by rep eight.
Lie on your side with the bottom knee bent for support and the top leg straight. A band around the ankles makes this tougher, but above the knees works too if you want a cleaner start. Turn the top toes slightly forward or keep them neutral, then lift the leg to about hip height. Lower it slowly, no swinging.
The most useful cue is also the most boring one: keep the waist long. If your hip hikes up toward your ribs, the lift is too high or too fast. The leg does not need to travel far to work hard.
Do 10 to 15 reps, then switch sides. I like this move because it tells the truth about hip stability without much drama. If the standing side of your body starts to feel sleepy in daily life, side-lying abductions wake it up fast.
5. Side-Lying Leg Circles
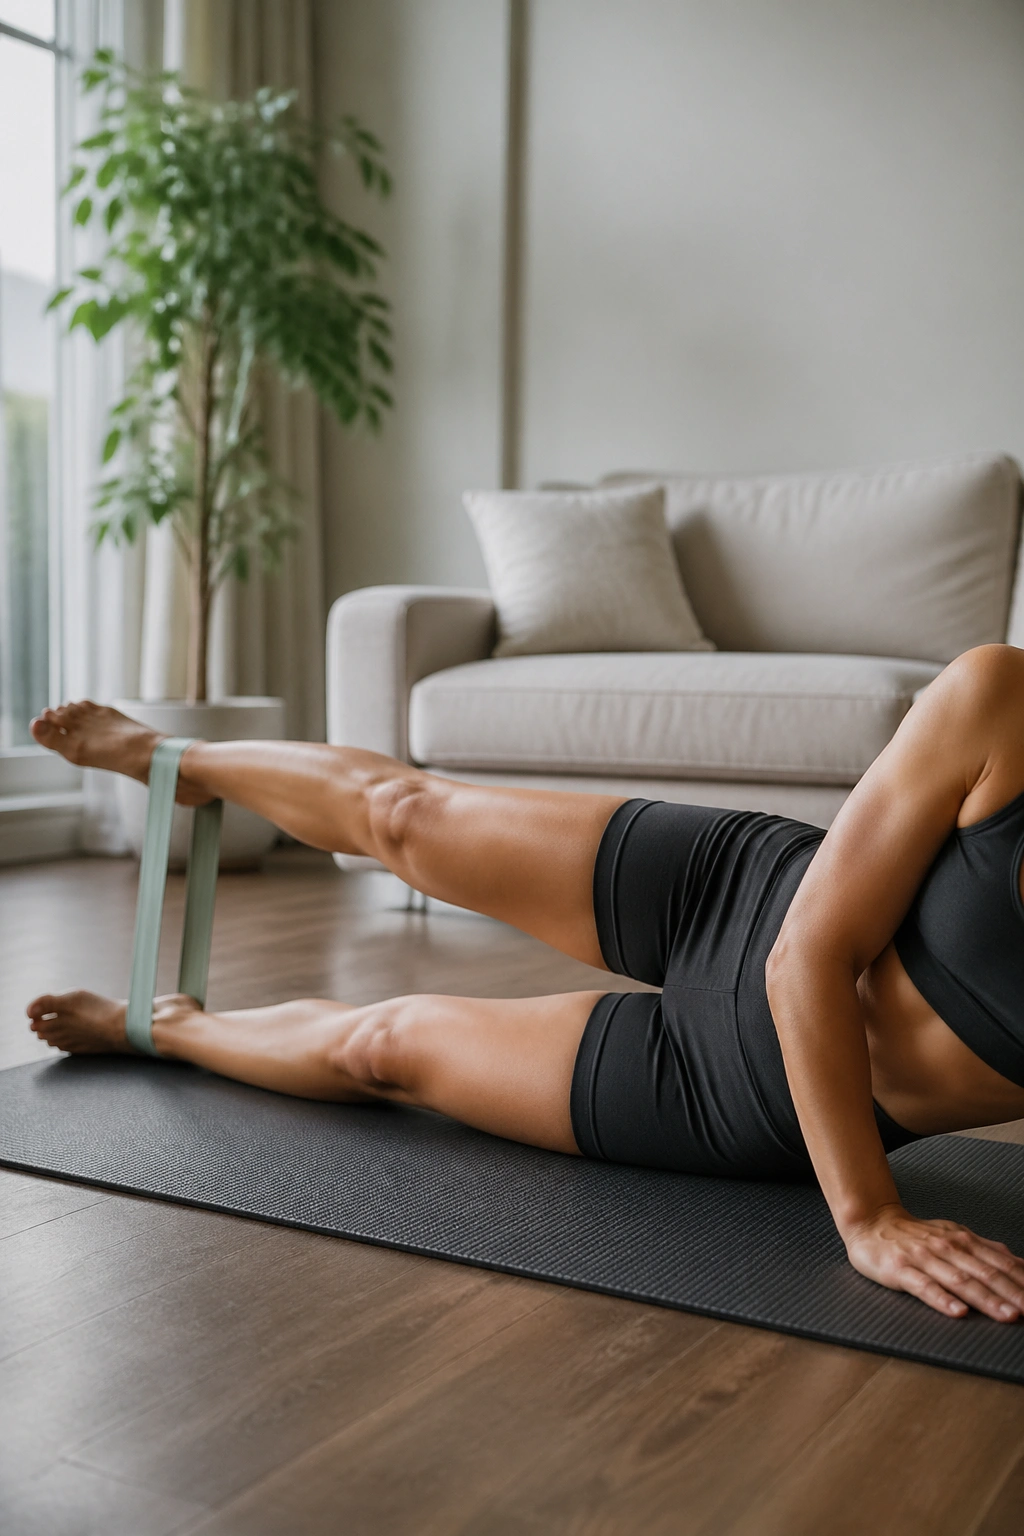
If your leg circles turn into a wobbly car door, the band is telling you to shrink the range.
Stay on your side with the top leg lifted slightly off the floor. A loop band around the ankles gives the circle a clean line, though a band above the knees works if you want a gentler version. Draw small circles with the top leg, first clockwise and then the other way, while the pelvis stays quiet and stacked.
The circles should look almost boring. Good. That means the hip is controlling the motion instead of flinging the leg around. The outer hip, deep rotators, and glute max all get involved when the movement is smooth and the range stays compact.
Try 8 circles in each direction, then switch sides. A useful checkpoint: if your lower waist sinks into the mat or your top hip rolls back, the circle is too big. Cut it down by half and keep going. Small circles done well beat big circles done badly every time.
6. Quadruped Donkey Kicks
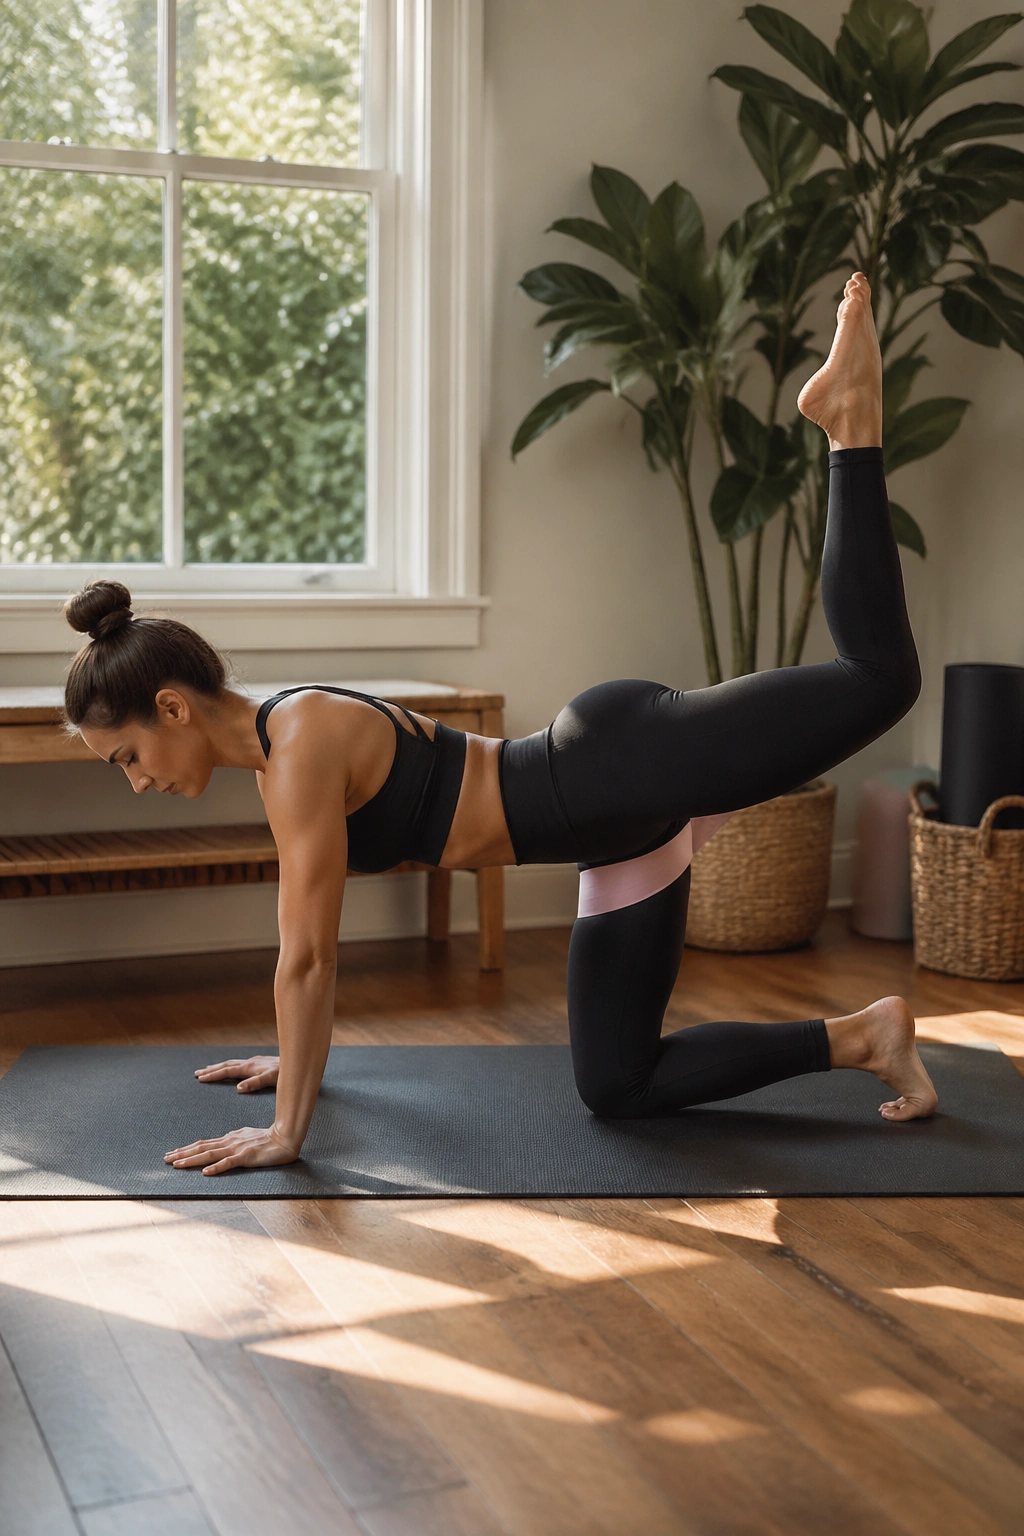
If your lower back feels this first, the band is too much or your ribs have flared. That is the honest version.
Come onto hands and knees with a band above the knees. Keep the spine long and the neck in line with the rest of you. Bend one knee to about 90 degrees, then press the sole of that foot toward the ceiling without opening the hip or arching the back. Lower with control and keep the thigh from dropping all the way to the mat between reps.
How to make it honest
- Exhale before the lift so the ribs stay down.
- Press through the heel, not the lower back.
- Stop the lift the moment the pelvis starts to tip.
Do 10 to 15 reps on each side. This move is great when you want glute max work without loading the spine. It also pairs well with bridge work, because both ask the pelvis to stay organized while the leg moves behind you.
7. Fire Hydrants
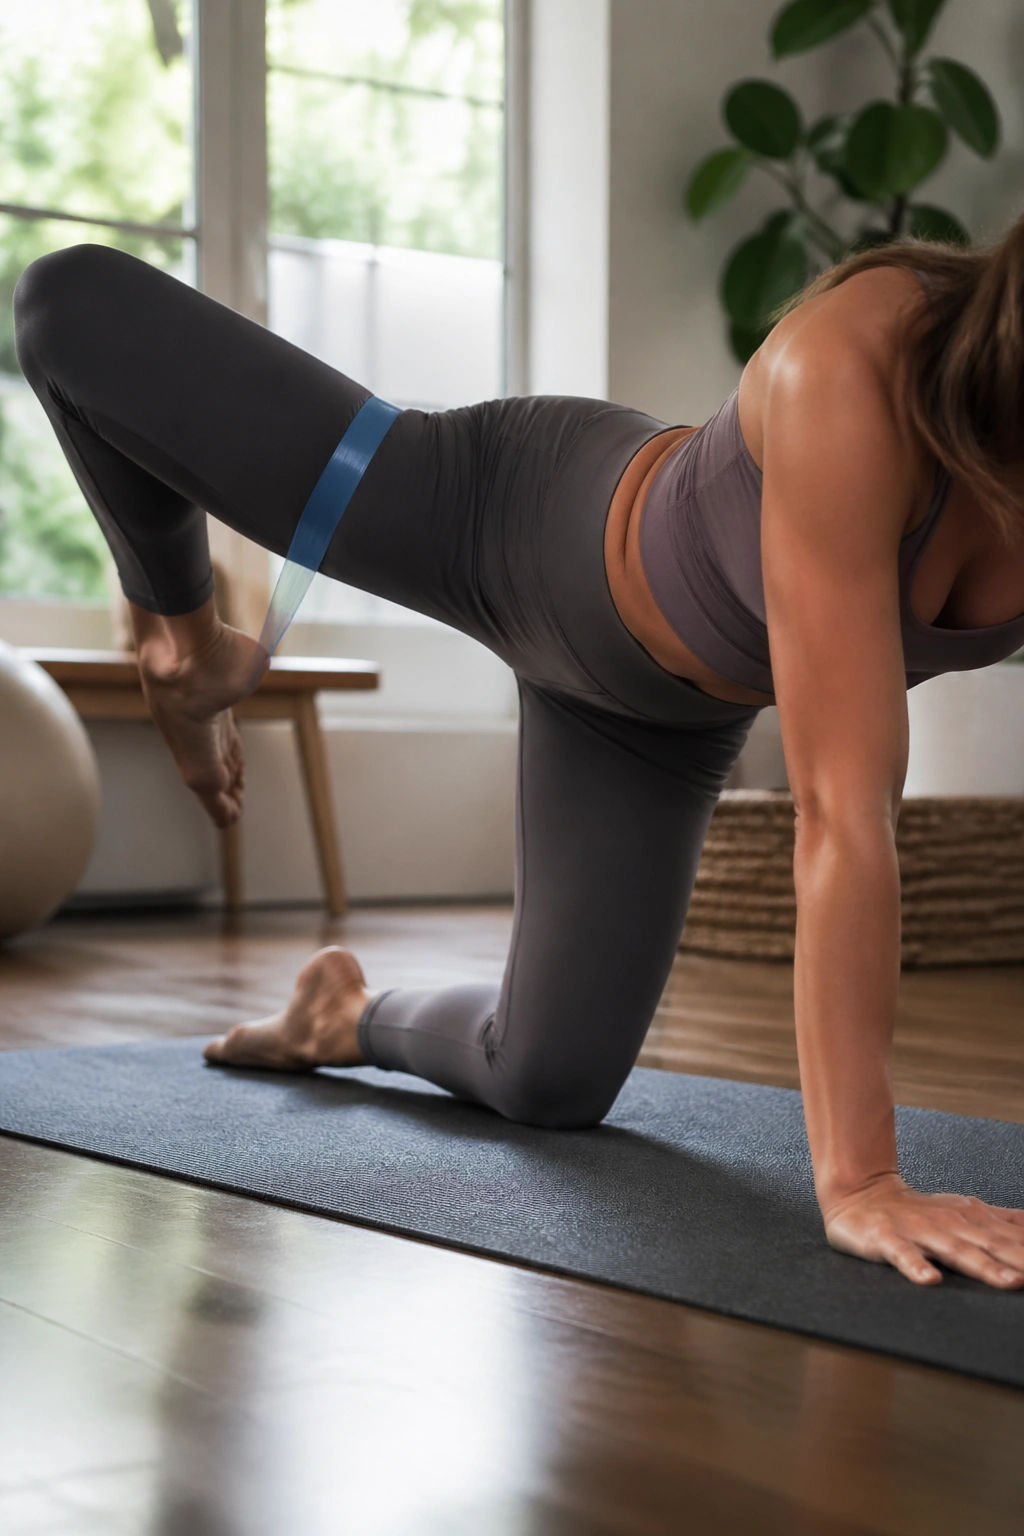
Why do fire hydrants show up in so many glute routines? Because they hit the side hip in a way that feels direct and obvious when the form is clean.
Set up on hands and knees with the band above the knees. Keep your shoulders still, then lift one bent knee out to the side until the thigh is roughly level with the hip, or a little lower if the pelvis starts to twist. Pause for a second. Lower slowly. The working leg should feel like it opens from the hip, not from the lower back.
This one punishes sloppy weight shifts. If you rock onto the opposite hip, you lose the glute medius and hand the job to momentum. Keep your belly lightly braced and your chest broad.
Do 10 to 12 reps each side. A small pulse at the top can add heat, but only after the main lift is stable. The fire hydrant is one of those moves that looks almost playful and then reminds you it is not.
8. Bear Hover Kickback
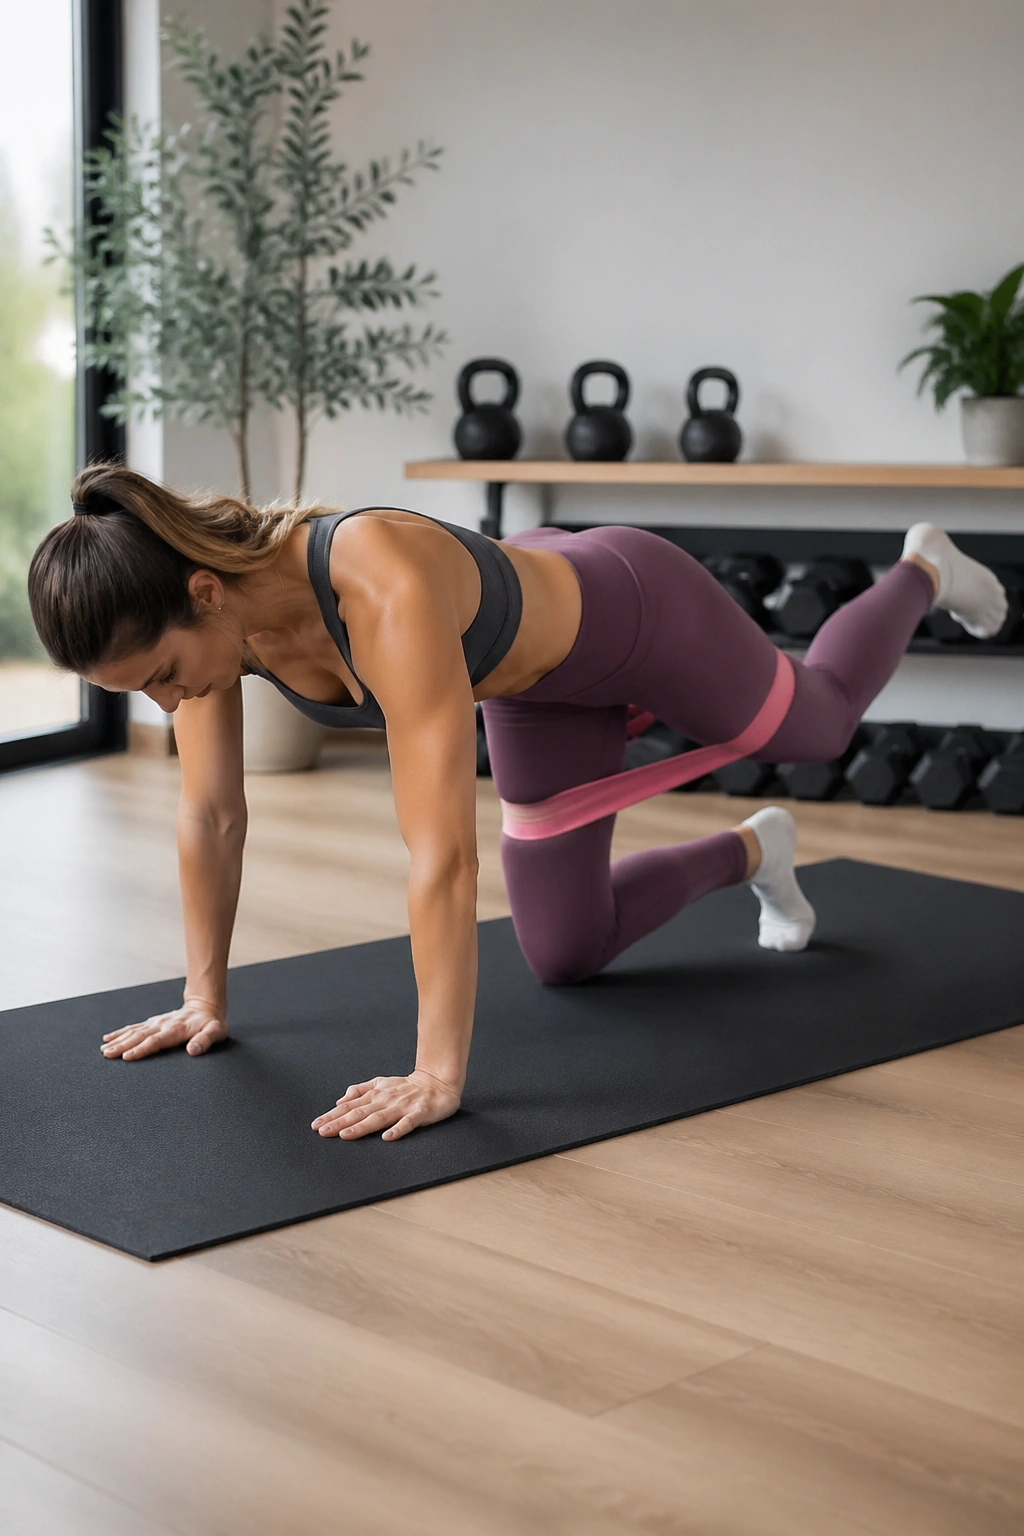
Lift your knees two inches off the floor and everything gets more serious fast.
Start in a bear hover: hands under shoulders, knees under hips, toes tucked, knees floating just off the mat. Place the band above the knees. From there, keep the hover and press one foot back in a short kickback, then return it without letting the spine sway. The supporting side has to stay quiet. That is the whole test.
This move borrows from Pilates core work, but the glutes are doing a lot of the heavy lifting. The hover makes cheating harder, and the band makes the hip extension more demanding. If your wrists complain, put a folded towel under the palms or drop the knees down between sets.
Try 6 to 8 slow reps per side, then rest. It is not a high-rep movement unless you enjoy your form falling apart. Keep the kick small, keep the ribs in, and let the glute do the work instead of letting the low back fling the leg behind you.
9. Lateral Band Walks
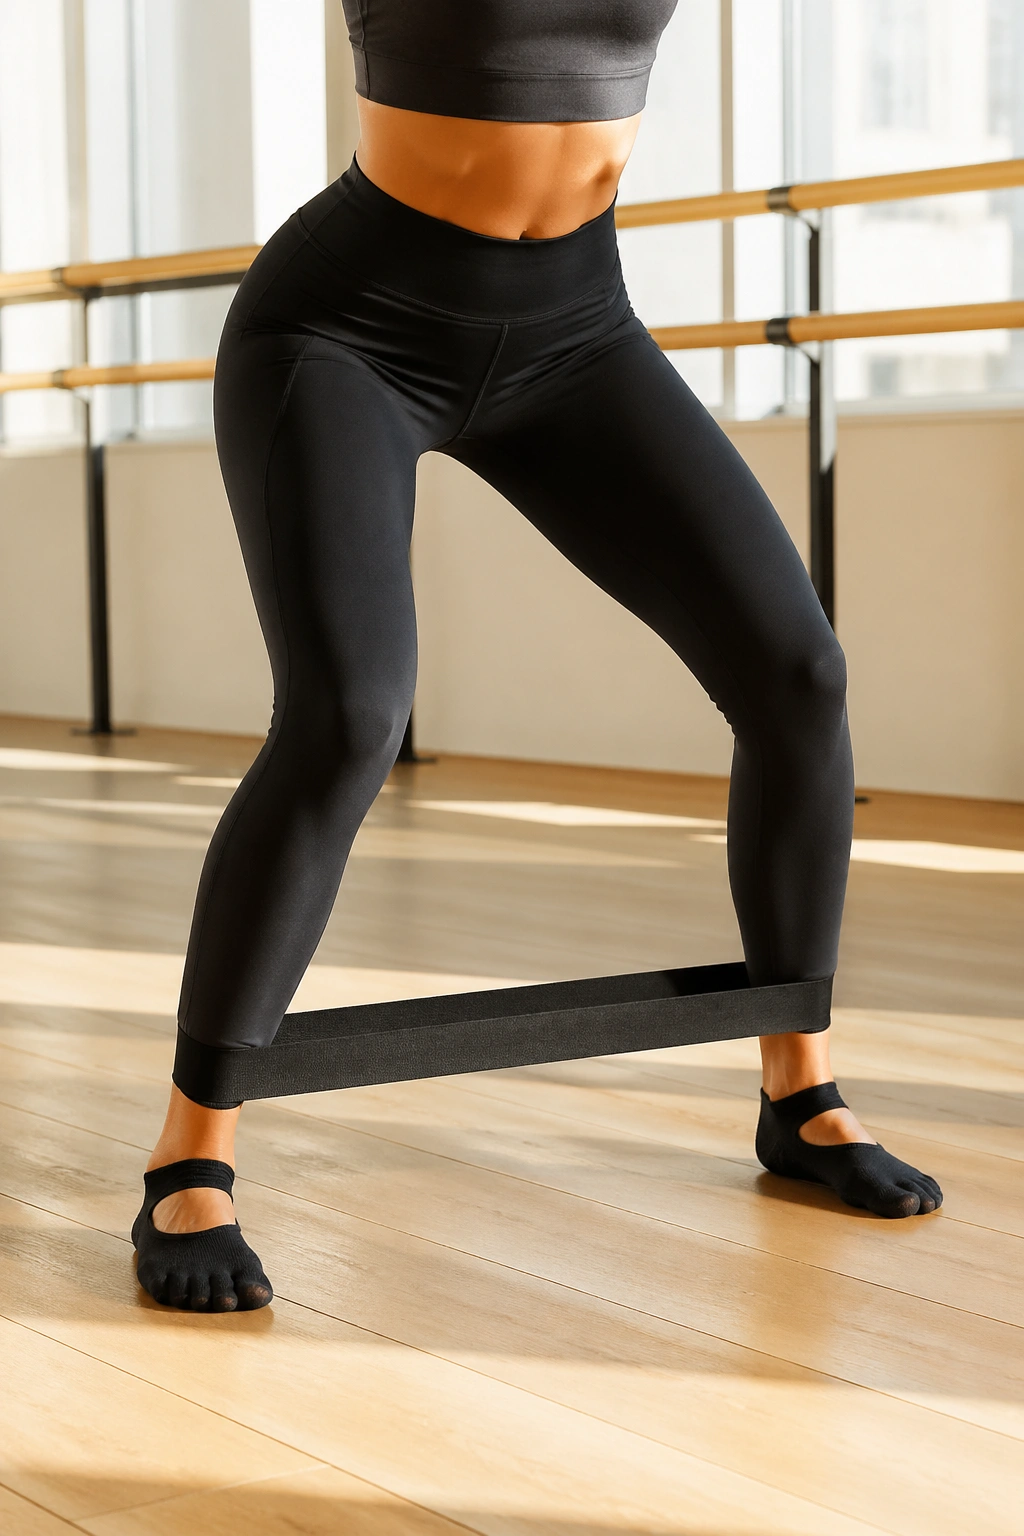
This is one of the cleanest ways to train the side glutes. It also exposes weak knees and sloppy feet in a hurry.
Put the band above the ankles or just above the knees. Sink into a small squat — not a full one, just enough to wake up the hips — and step sideways with control. The trailing foot follows without letting the band go slack. After 8 to 12 steps, walk back the other way.
What makes it different
- The glute medius works to keep the pelvis level.
- The outer hips stay under tension the whole time.
- The feet never cross, which keeps the line of force clean.
Keep the toes mostly forward. If they turn out too much, the quads and calves take over and the band walk turns sloppy. A short, steady step beats a big stompy step every time.
Do two or three trips each way. I like this exercise as a warm-up before bridge work or squats because it reminds the hips where they are in space. That matters more than people think.
10. Monster Walks
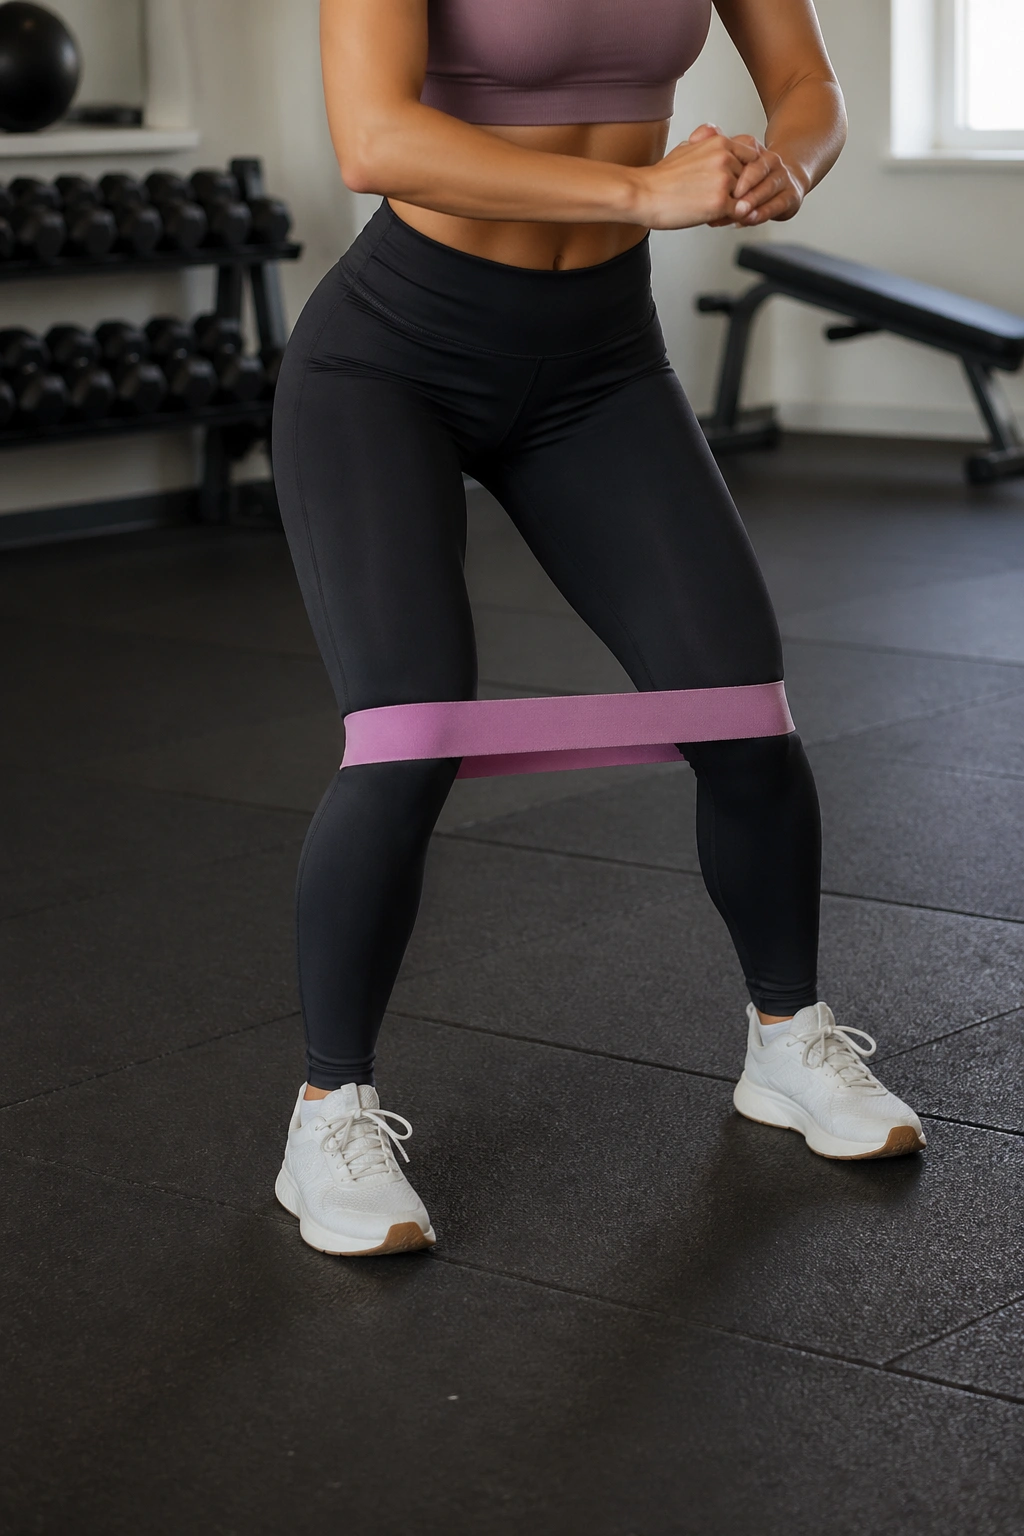
Monster walks are lateral walks with more attitude. Same band, different direction.
Set the band above the knees or around the ankles. Drop into a shallow athletic stance, then step forward on a diagonal, keeping the knees softly bent and the torso tall. After a few steps, reverse it and walk back. The band should stay tight the whole time, which means the feet stay apart enough to keep the glutes honest.
This one tends to wake up the glute max along with the side hip because the leg is dealing with both stability and forward drive. Use small diagonal steps instead of huge lunges. Huge steps look dramatic and usually break the form.
Eight steps forward and eight back is plenty for a set. If the lower back starts to arch, stand up a bit taller and reduce the squat depth. Monster walks are better as a controlled crawl than as a power march. Clean steps. Quiet torso. A little burn.
11. Standing Hip Abduction
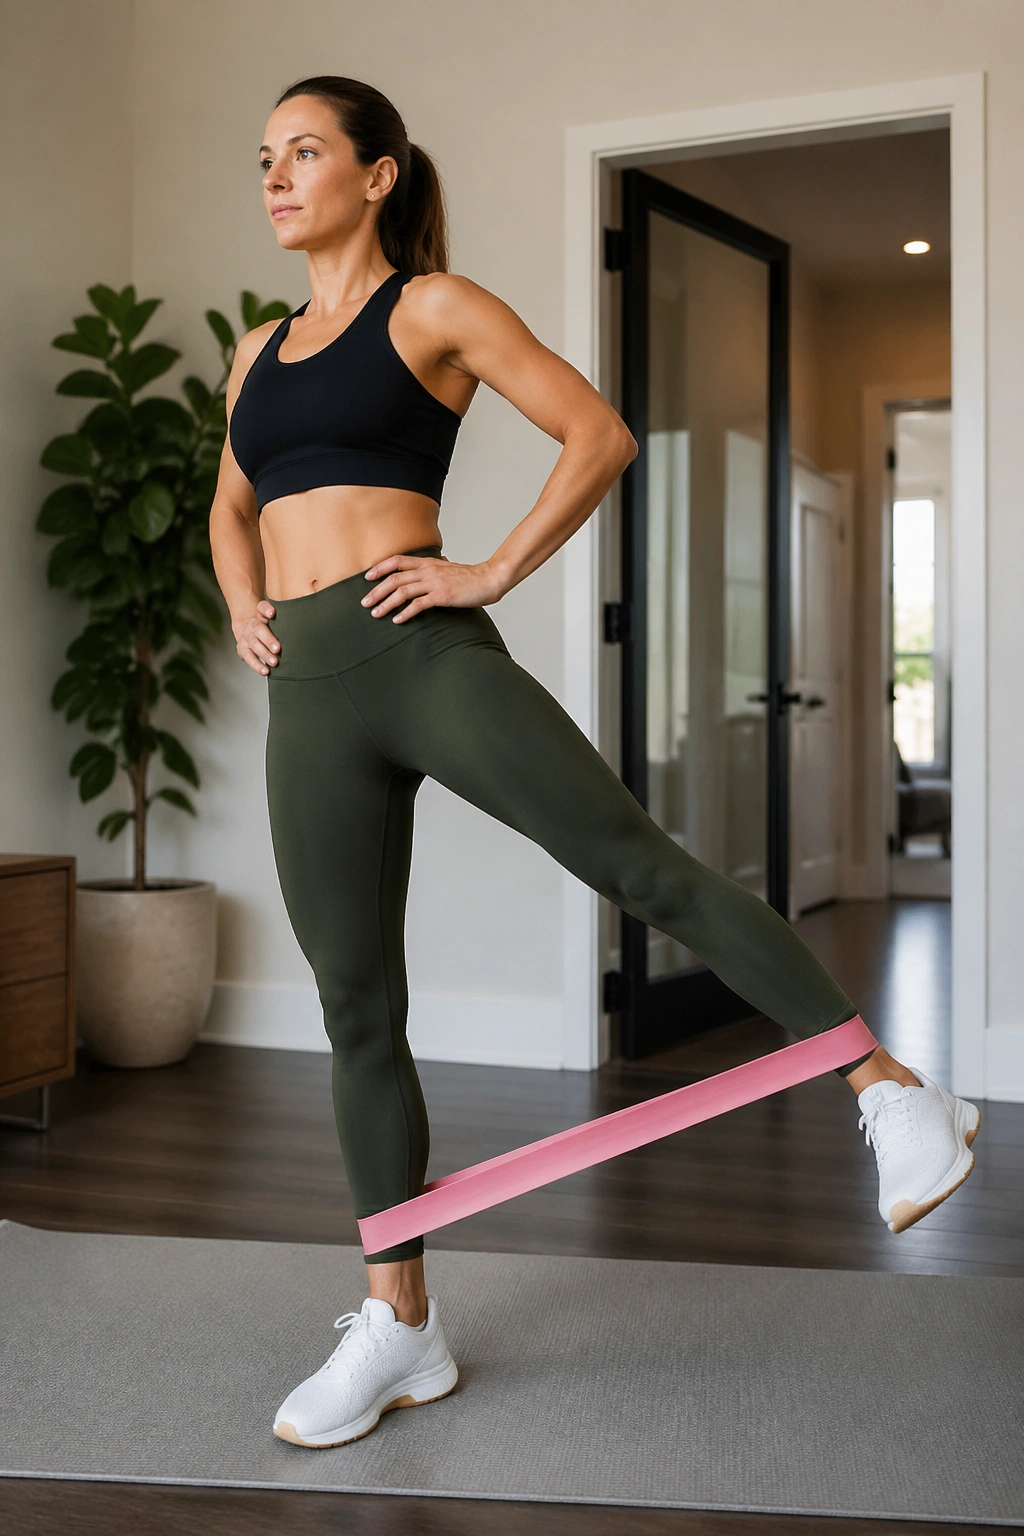
Hold onto a wall and let one leg sweep out to the side like a pendulum. Simple. Not easy.
Stand tall with the band around the ankles. Keep your weight on one leg and hold the wall with the opposite hand if you need balance. Lift the free leg directly out to the side without leaning the torso or hiking the hip. Lower it slowly, then repeat.
The standing version matters because it trains the glute medius in a position that looks a lot like daily life. Walking, stair climbing, carrying groceries — all of it asks one leg to support the body while the other moves. This exercise rehearses that.
The wall keeps the torso honest
- One hand on the wall is enough.
- The standing knee stays soft, not locked.
- The lifted foot points forward, not open to the side.
Do 12 to 15 reps each side. If you feel the waist bending, the leg is too high. Stop lower, keep the pelvis level, and let the side hip do its job without the trunk hijacking the movement.
12. Standing Kickbacks
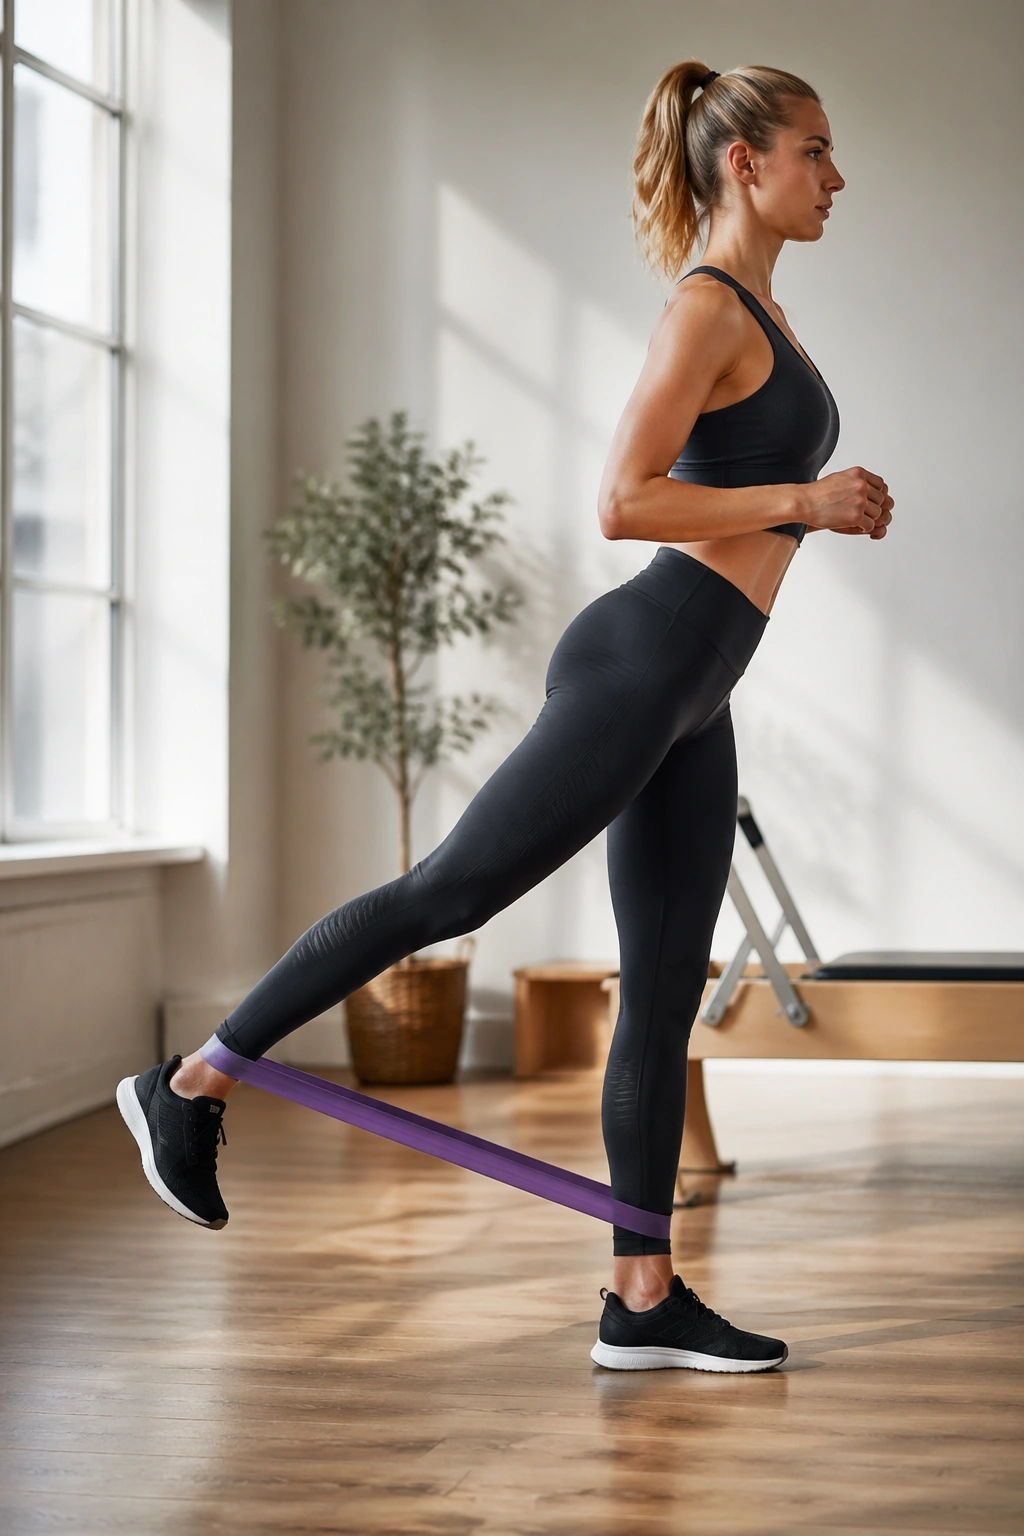
Why do so many kickbacks turn into lower-back tosses? Because people chase height instead of control.
Loop the band around the ankles, or anchor a long band low behind you and attach it to one foot. Stand tall with a small bend in the support knee. Keeping the pelvis square, press the working leg straight back a short distance, then return it with the same control. The knee can stay soft, but the hip should not open out to the side.
What to watch for
- Ribs stay stacked over the pelvis.
- The leg goes back, not up and not out.
- The standing hip does not drift.
Do 12 to 15 reps per side. The important part is the return, because that is where sloppy control shows up. If you snap the leg back and let it swing forward, the band loses the point. Slow enough to feel the glute; fast enough to stay crisp. That balance is the sweet spot here.
13. Curtsy Lunges With a Band
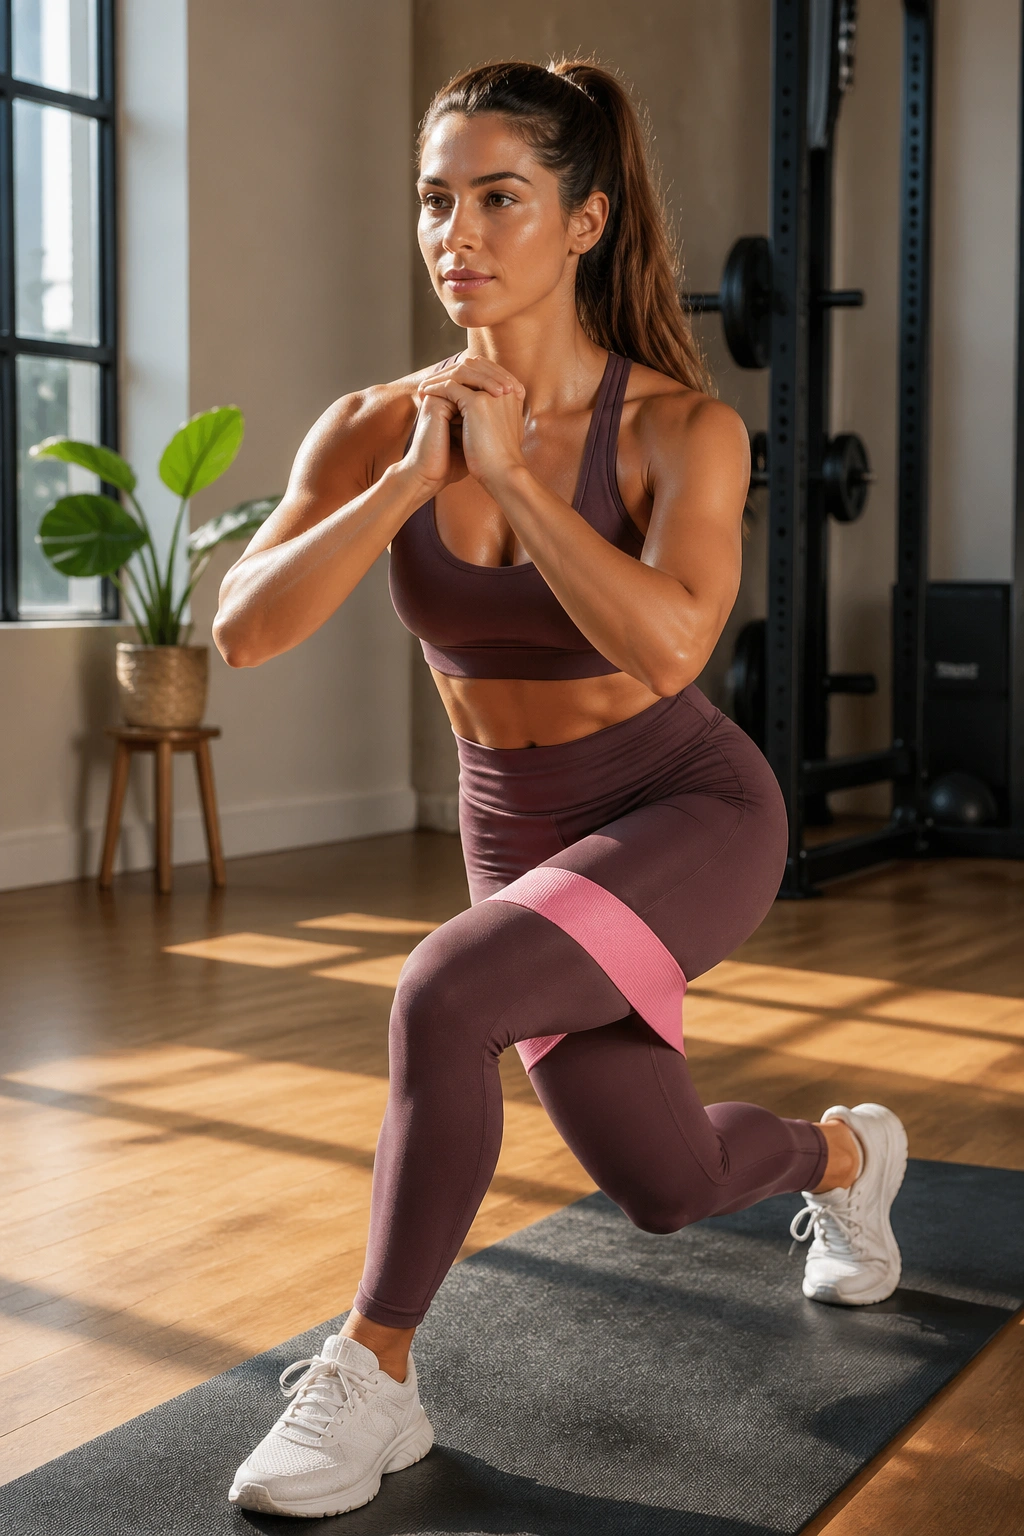
I do not love curtsy lunges for everyone, and that is worth saying plainly.
When they suit your knees and hips, though, they can be a strong glute exercise. Put the band above the knees, stand tall, then step one leg back and across the other in a shallow diagonal. Lower into a small lunge, keeping the front knee tracking over the middle toes. Push back to standing and keep the band slightly stretched the whole way.
This pattern asks the side glute to help stabilize the pelvis while the working leg crosses the body line. That can feel great. It can also feel awkward if your hips are tight or your knees dislike inward rotation, so start shallow. There is no prize for a huge curtsy.
Try 8 to 10 reps per side. If the knee complains, shorten the step or swap this one out for a split squat. I’d rather have a smaller, clean rep than a dramatic lunge that turns into a twinge.
14. Banded Squat Pulses
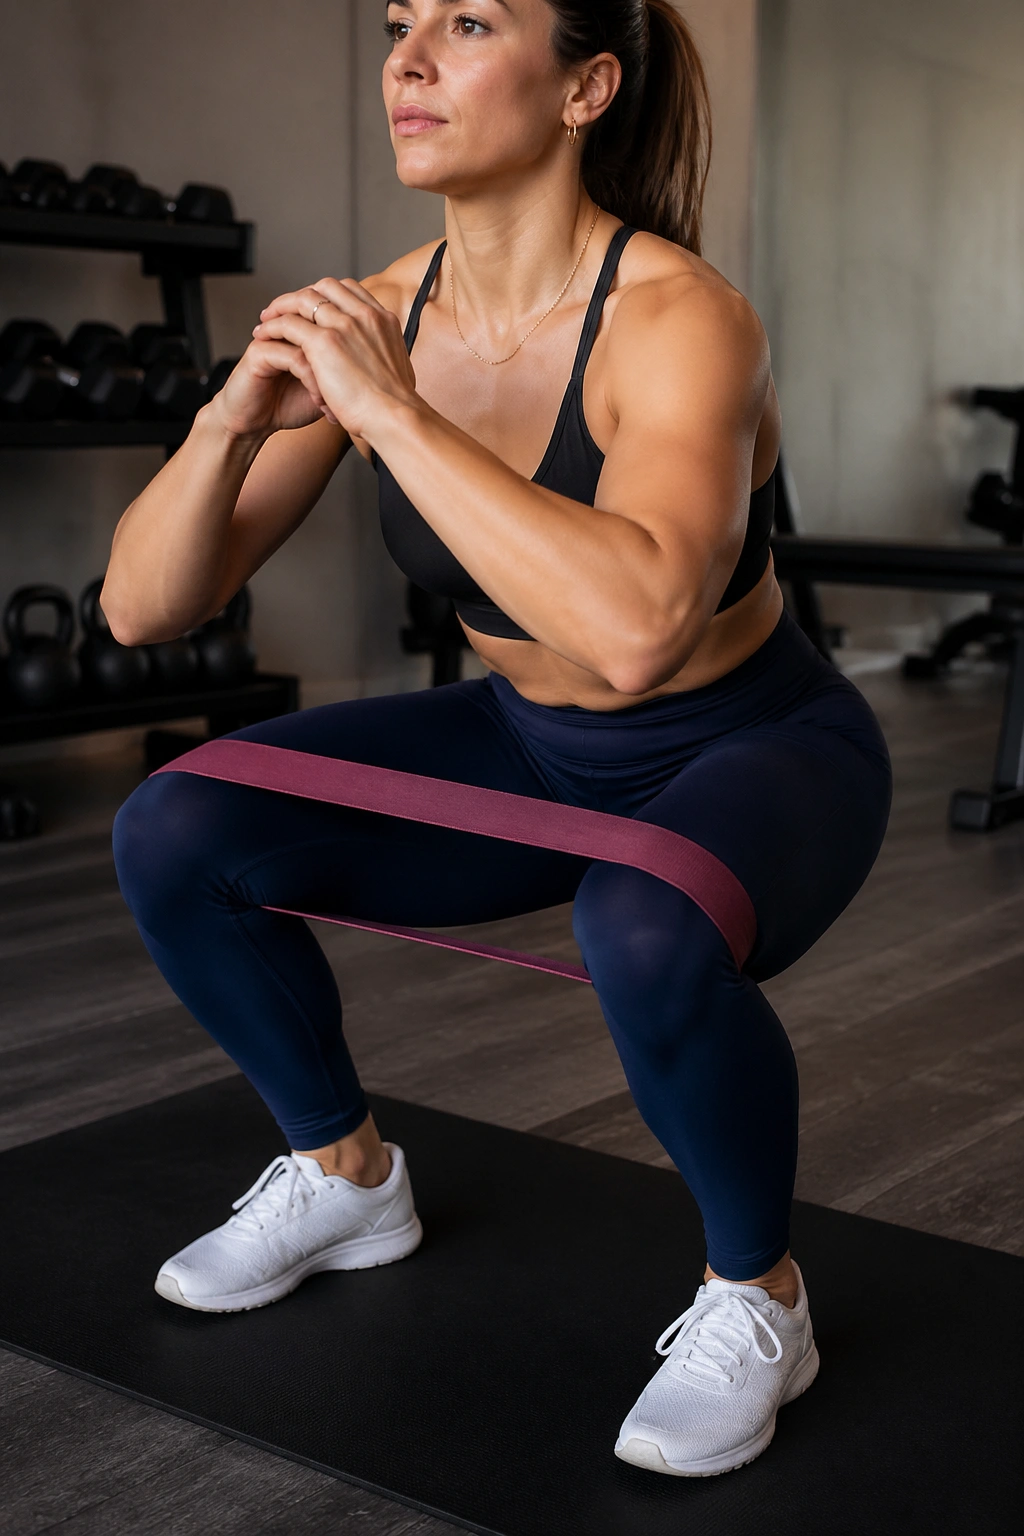
A pulse is not an excuse to bounce.
Set the band above the knees or at the ankles if you already handle stronger work well. Sit into a comfortable squat with your heels grounded and chest lifted. From there, pulse up and down only one to two inches while gently pressing the knees outward into the band. Keep the pressure even. No snapping.
This is a simple-looking fatigue drill, and that is part of why it works. The glutes stay under tension while the thighs and hips have to keep the knees from collapsing inward. If you go too deep, the lower back and ankles may complain. Stay in the depth you can control.
A set of 15 to 20 pulses is enough. Two or three rounds will tell you whether your hips are awake or not. I like this one after bridges or standing abduction work, because the muscles are already warm and the squat pattern feels cleaner.
15. Single-Leg Glute Bridges
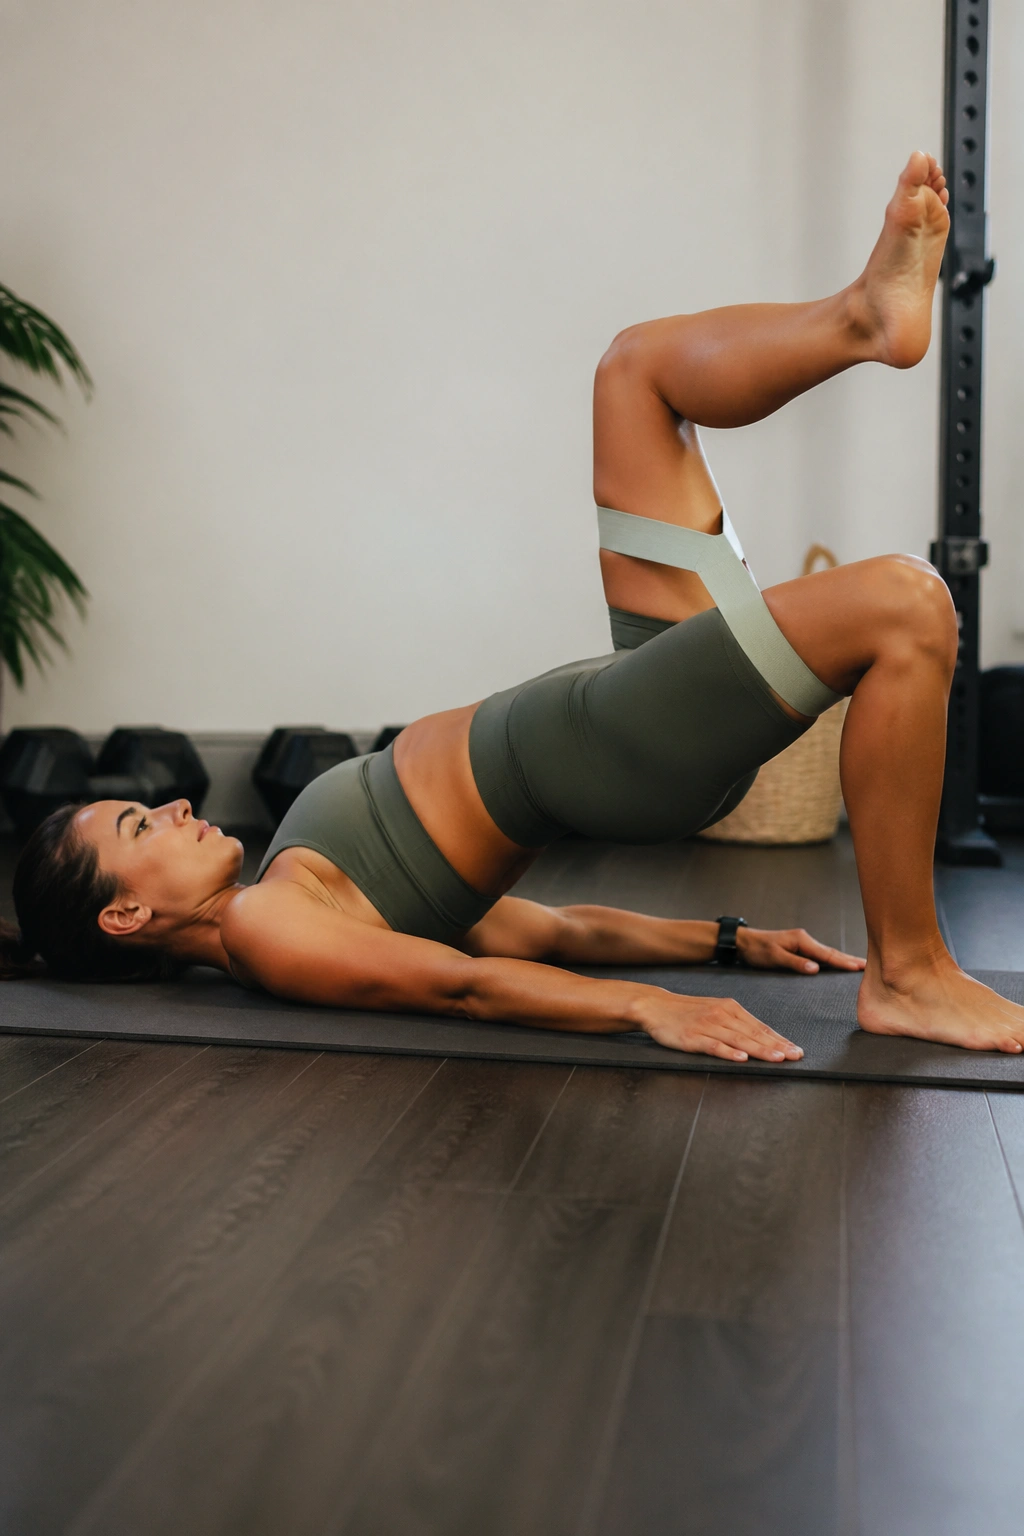
One foot on the floor, the other leg hovering, and suddenly your pelvis becomes much less cooperative.
Set up like a normal bridge and place the band above the knees. Lift one foot so the shin is roughly parallel to the floor, then press through the standing heel and raise the hips without letting one side dip. Keep the band active by pressing the knees slightly outward. Lower with the same control.
The single-leg version shows whether the glute max on one side can carry its share of the load. It also tests pelvic stability in a way that two-leg bridges never quite do. If the hips twist, reduce the range or keep the nonworking toe lightly on the floor as a kickstand for a few reps.
Do 6 to 10 reps per side. That’s enough. More is not always better here, because fatigue turns into pelvis wobble fast. Clean lift, level hips, slow lower. That’s the whole deal.
16. Side Plank Leg Lifts
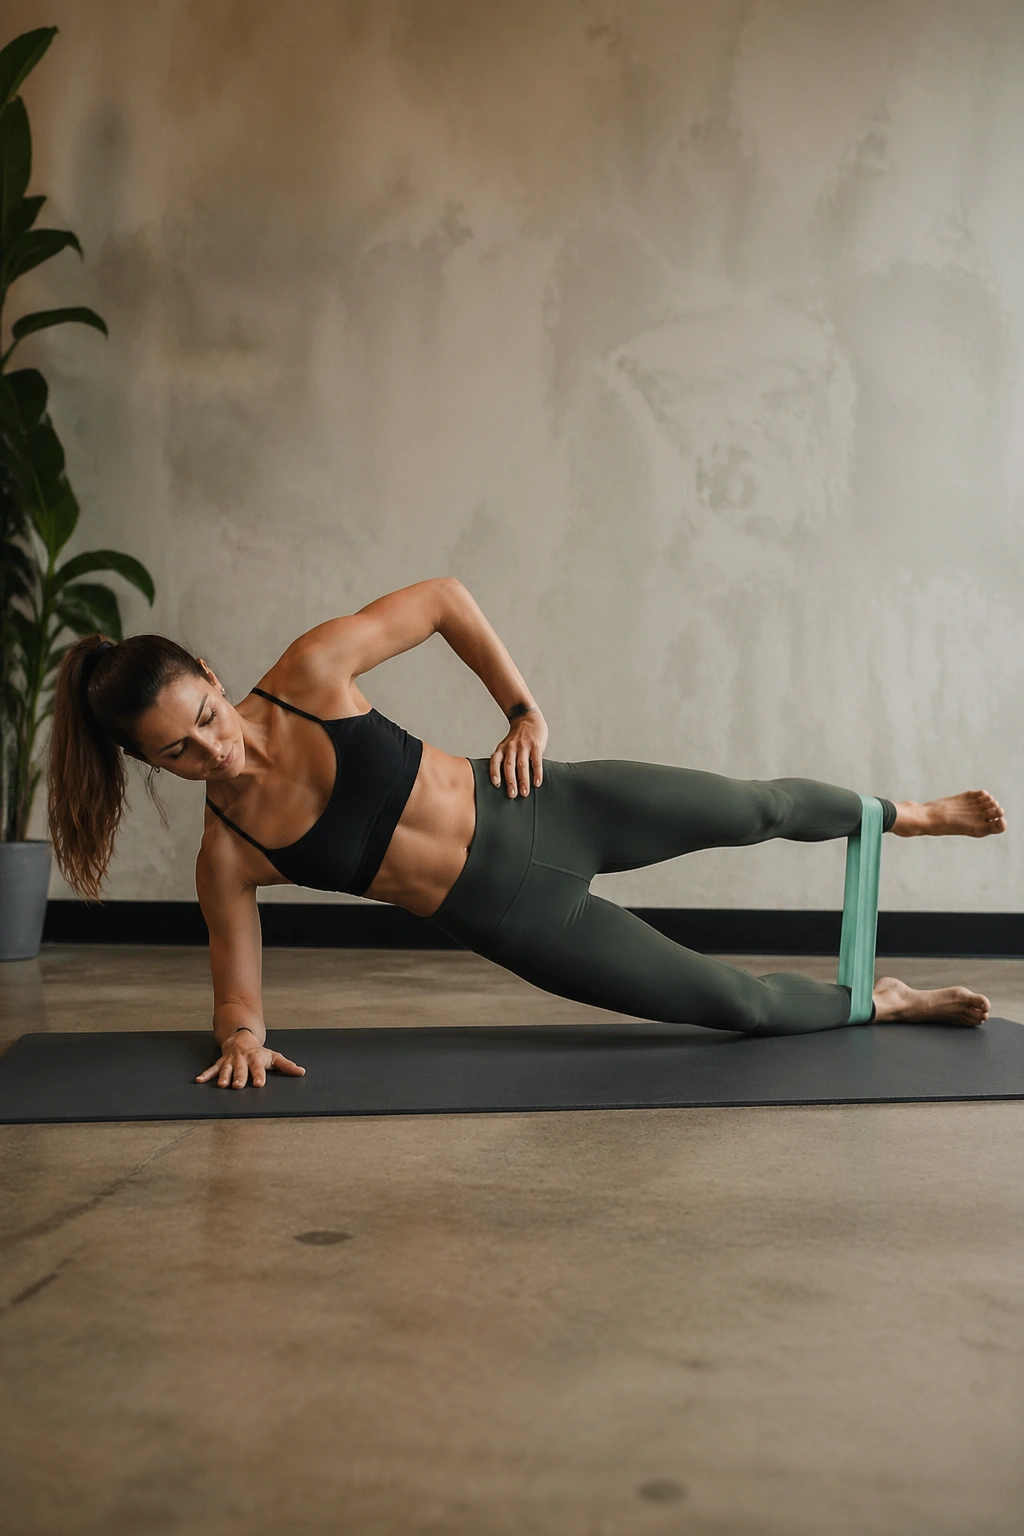
Can a side plank make the glutes work? Absolutely. And the side body has to help too.
Come into a side plank from your hand or forearm. If you need a friendlier version, drop the bottom knee to the mat. Put the band around the ankles or above the knees. From the plank, lift the top leg a few inches and lower it with control, keeping the hips stacked and the waist from collapsing.
This move is sneaky. The glute medius works to lift the leg, but the obliques and shoulder have to keep the whole shape from folding. That is why it feels so different from a standard leg lift on the floor.
A simpler entry point
- Start with the bottom knee down.
- Keep the top foot slightly in front of the bottom one.
- Lift only as high as you can keep the pelvis still.
Aim for 6 to 8 lifts per side. If the shoulder shakes first, shorten the hold or drop the knee. No shame in that. The point is useful tension, not a circus trick.
17. Pilates Side Kicks Front to Back
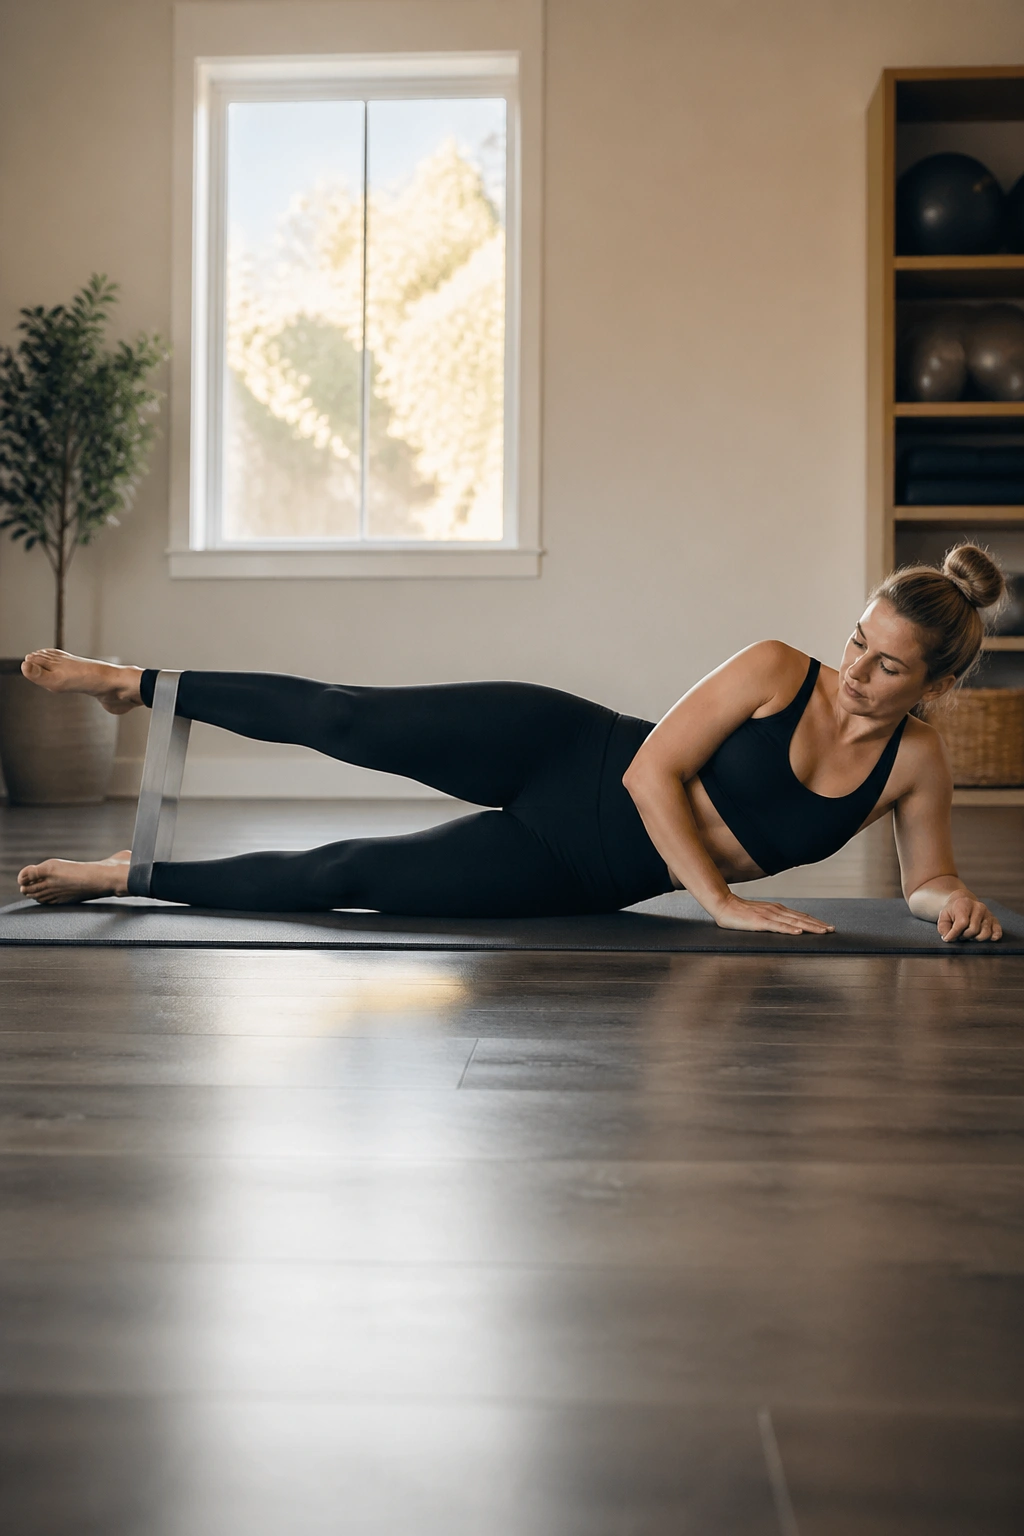
Side-lying leg work looks graceful until the pelvis starts rolling around like loose luggage.
Lie on your side, stack your hips, and place the band around the ankles or above the knees. Lift the top leg so it hovers just off the floor, then swing it a few inches forward and a few inches back. Keep the trunk still. The movement comes from the hip joint, not the waist. Small range, clean line.
This is one of those classic Pilates-style drills that teaches control as much as strength. The front swing asks the hip flexors to lengthen without grabbing. The back swing asks the glute max to catch the leg without arching the lower back. Both directions matter.
The part most people miss
- Keep the top toes relaxed, not clawed.
- Press the bottom waist gently into the mat.
- Stop the back swing before the ribs flare.
Ten front-and-back swings per side is plenty. If the leg starts wandering, the band is too heavy or the range is too large. Clean beats flashy here.
18. Bridge Hold With Outward Press
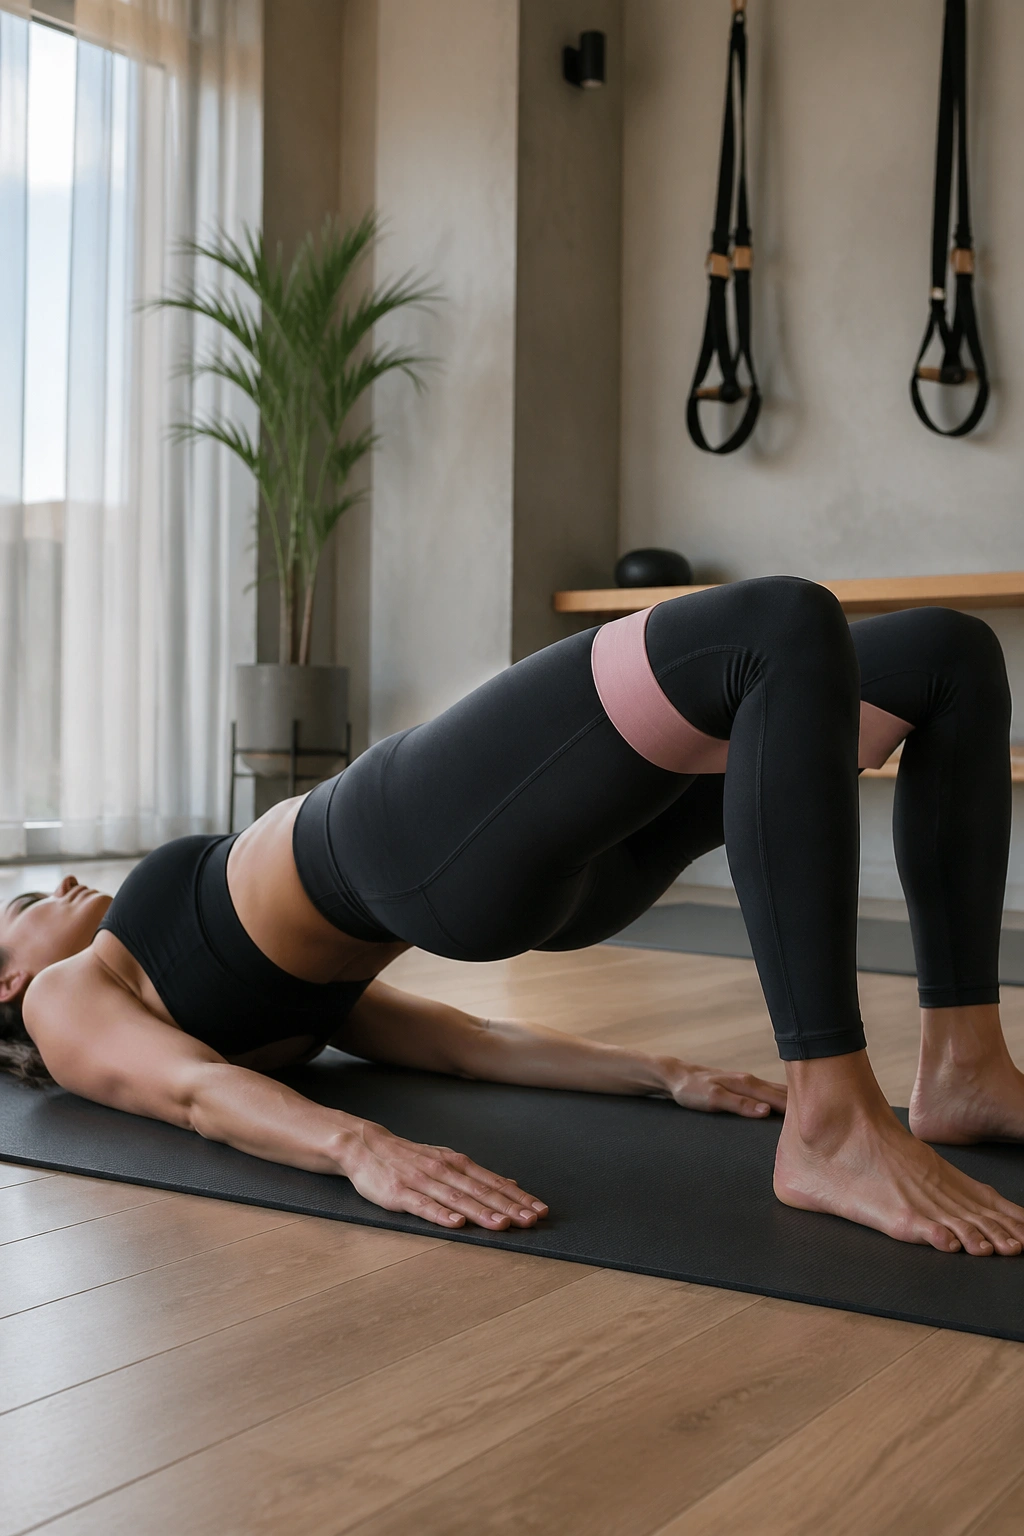
Same setup as the first bridge, less movement, more burn.
Lie on your back, band above the knees, feet planted. Lift into a bridge and stay there. Instead of repeated full reps, press the knees gently outward against the band for tiny pulses while holding the hips high. You can also hold for 20 to 30 seconds and add 10 small pulses before lowering.
This finisher is useful because it keeps the glutes loaded at the top, where many exercises go soft. The band prevents the knees from drifting inward, and the static hold makes the side hip and glute max share the job. It’s a small move. It feels bigger than it looks.
Try one to three rounds at the end of a session. If hamstrings cramp, slide the feet a little farther away and lower the bridge height a touch. If the low back takes over, reset the ribs and shorten the hold. That little reset usually fixes more than people expect.
The Bottom Line
Strong glutes usually come from a mix of positions, not one magic move. Bridges build extension, side-lying work hits the outer hip, and standing drills teach the hips to stay level when the rest of the body wants to sway.
Pick four or five of these exercises and repeat them for a few weeks instead of chasing novelty every session. A good mix is one bridge, one side-lying move, one standing move, and one single-leg drill. That covers a lot of ground without making the workout messy.
One last thing: use less band than your ego wants. Clean reps with a lighter band will beat sloppy reps with a heavy one almost every time. If you can watch yourself in a mirror or on your phone and keep the pelvis quiet, you’re probably doing it right.
