



A flatter-looking stomach usually comes from better core control, better posture, and less rib flare — not from endless crunches done in a hurry. That’s why wall Pilates moves for a flat stomach feel so smart: the wall gives you instant feedback. If your lower back arches, you know it. If your ribs pop forward, you know that too. There’s nowhere to hide, and that’s the point.
The wall also changes the way your abs work. Instead of flailing through fast reps, you’re learning to stack your ribs over your pelvis, breathe without bracing too hard, and keep the deep core switched on while your arms and legs move. That combination matters more than people think. A stomach can look puffier when the body is collapsed or strained, even if the actual muscles are strong.
And no, this is not magic. A calmer waistline takes time, and the look of a “flat stomach” is shaped by posture, digestion, body fat, and muscle tone. But wall Pilates is one of those methods that pays off in a practical way: it’s low-impact, it’s easy to scale, and it teaches the body to hold itself better in daily life.
Start with the first move and keep your focus on the details. The small stuff matters here.
1. Wall Roll-Downs for a Flat Stomach Start
Wall roll-downs are the move I’d put at the top of any wall Pilates list, because they teach the two things most people skip: spinal control and abdominal engagement. Stand with your back against the wall, feet about 6 to 10 inches out in front of you, and let your chin nod slightly. Then peel your spine off the wall one vertebra at a time, as if you’re rolling through a string of beads.
How to feel it in the right place
Keep the movement slow. If you rush, it turns into a clumsy hip hinge and your abs miss the point entirely. On the way down, exhale and let your ribs soften toward your pelvis. On the way back up, press your lower back into the wall first, then stack the rest of your spine until you’re tall again.
- Do 5 to 8 slow rolls
- Stop if your lower back pinches
- Keep the knees soft, not locked
- Think “lengthen, then fold,” not “drop”
A tiny pause at the bottom helps. Seriously. That pause tells your core to stay present instead of dumping all the work into your hips.
2. Wall Plank Holds That Teach Rib Control
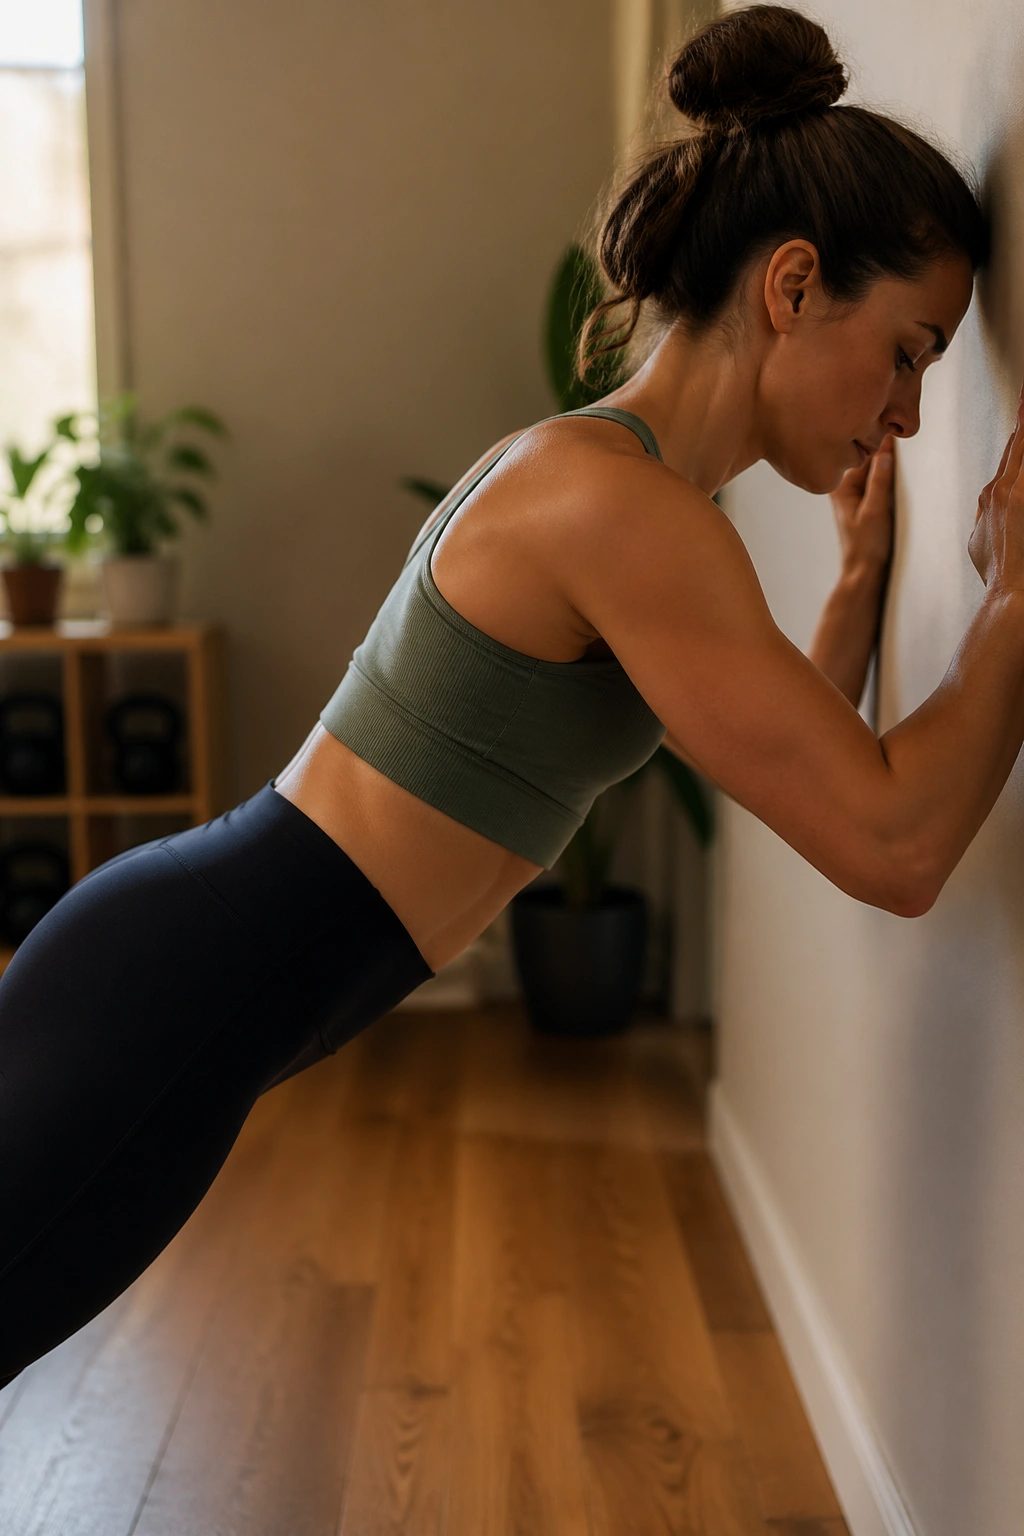
A wall plank looks almost too easy at first glance. Then you hold it for 30 seconds and your midsection starts talking back. Stand facing the wall, place your forearms flat against it at shoulder height, and walk your feet back until your body forms one long line from heels to head. The goal is not to lean like a bored office worker. The goal is to feel your whole trunk wake up.
What makes this useful for a flatter stomach is the anti-extension work. Your abs have to stop your low back from arching, which is where a lot of people leak tension. Keep your ribs heavy, your glutes lightly on, and your neck long. If your shoulders creep toward your ears, step a little closer to the wall.
A good wall plank should feel steady, not dramatic. You should be working, but not shaking so hard that your form falls apart. Hold for 20 to 40 seconds, rest, then repeat for 2 or 3 rounds.
3. Standing Wall Marches That Stop Hip Swing
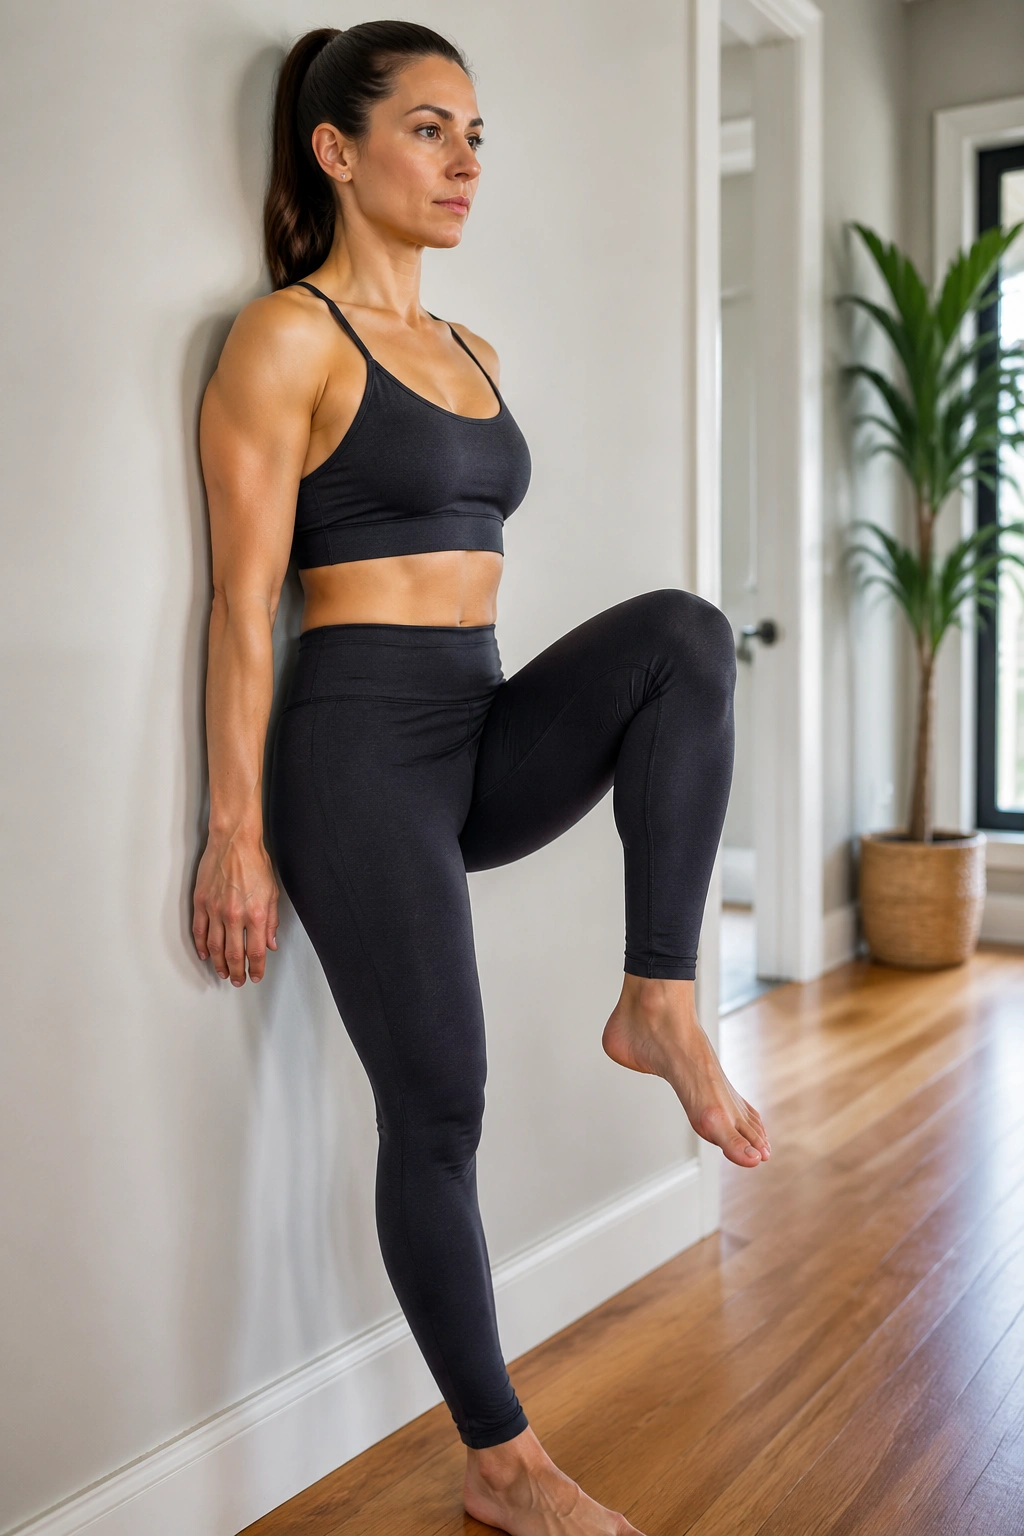
Can you march in place without rocking your torso? That’s the test. Stand with your back against the wall, feet about hip-width apart, and press the back of your head, shoulders, and sacrum lightly into the surface. Lift one knee to a comfortable height, lower it with control, then switch sides.
The trick is to keep the pelvis quiet while the legs do the moving. That sounds small, but it matters. If your hips sway, your obliques and deep lower abs are taking a vacation. If your ribs stay stacked over your pelvis, the core stays honest.
Why this works
Your abs have to resist the pull of the lifted leg. That’s the whole game.
- Start with 8 to 12 marches per side
- Keep the standing foot rooted into the floor
- Lift only as high as you can without tilting
- Exhale on the lift, inhale on the lower
This one is friendly, but don’t treat it like a warm-up throwaway. Done slowly, it burns in exactly the right spot.
4. Wall Toe Taps for Lower-Ab Control
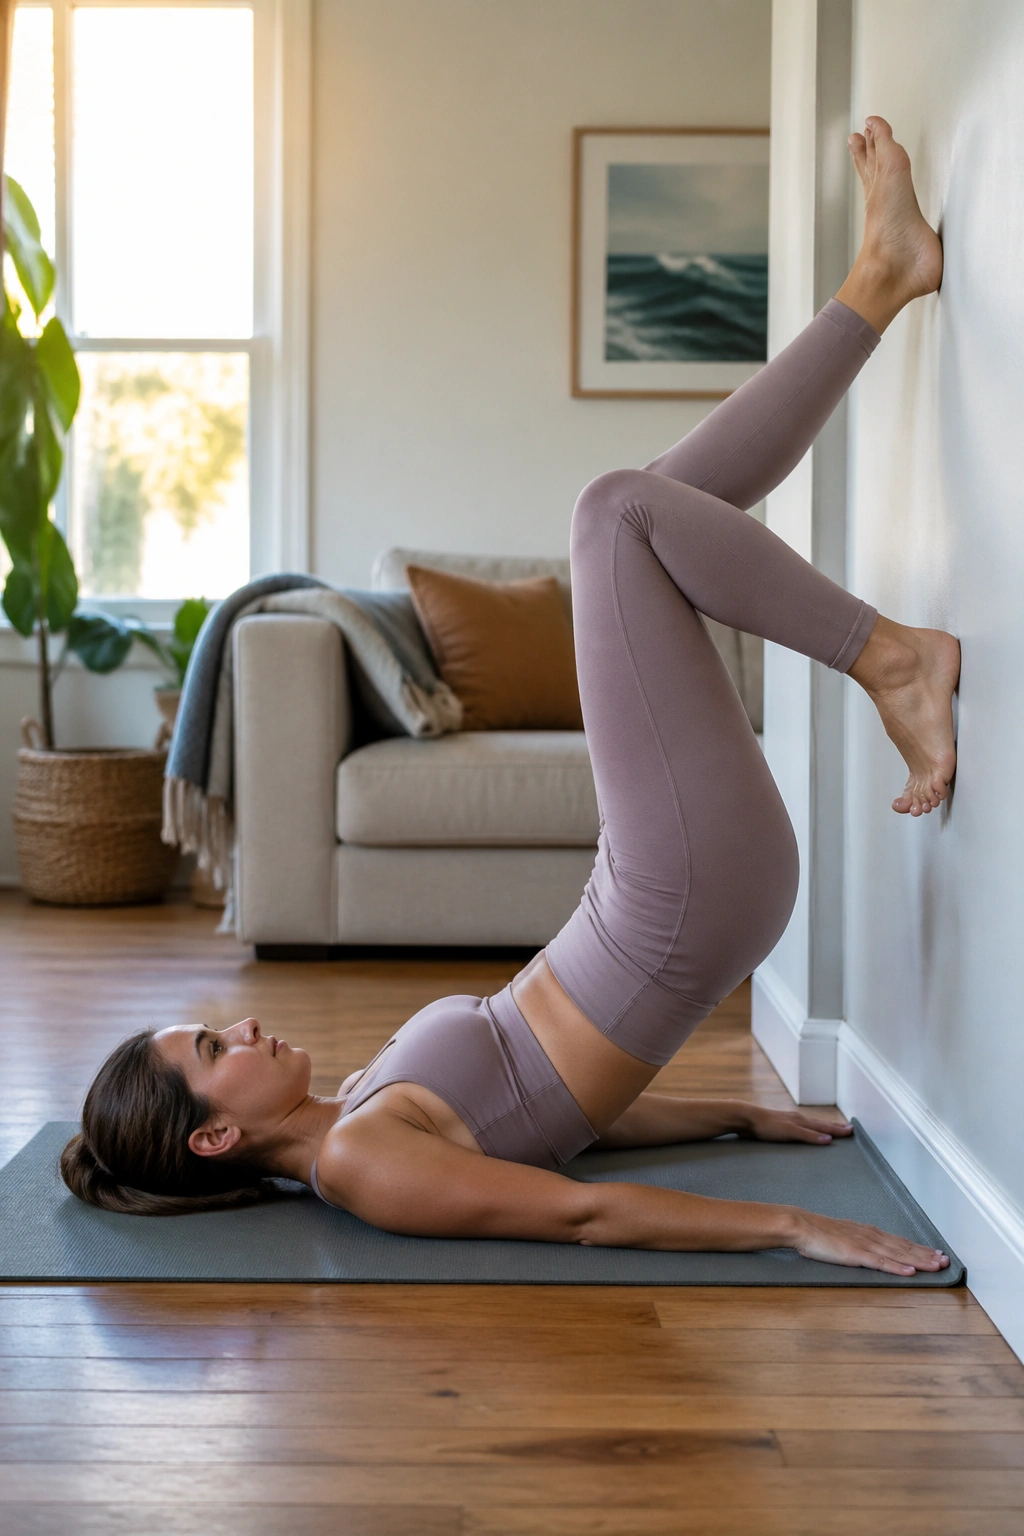
Wall toe taps are one of those exercises that look mild and feel sneaky. Lie on your back with your legs up the wall so your knees and hips are bent around 90 degrees. Press your low back gently toward the floor, then tap one toe down toward the mat and bring it back up. Switch sides.
The whole point is to keep the pelvis from tipping. If your low back arches when the leg lowers, the range is too big. Shrink the movement until you can keep your waist steady. That little adjustment makes the exercise useful instead of just annoying.
Do 6 to 10 taps per side and move slowly enough that you can control the descent. If you want more challenge, reach both arms toward the ceiling and keep the shoulder blades heavy. I like this version better than frantic ab work because it teaches your midsection to hold shape while the legs move away from center.
5. Wall Dead Bugs With a Quiet Core
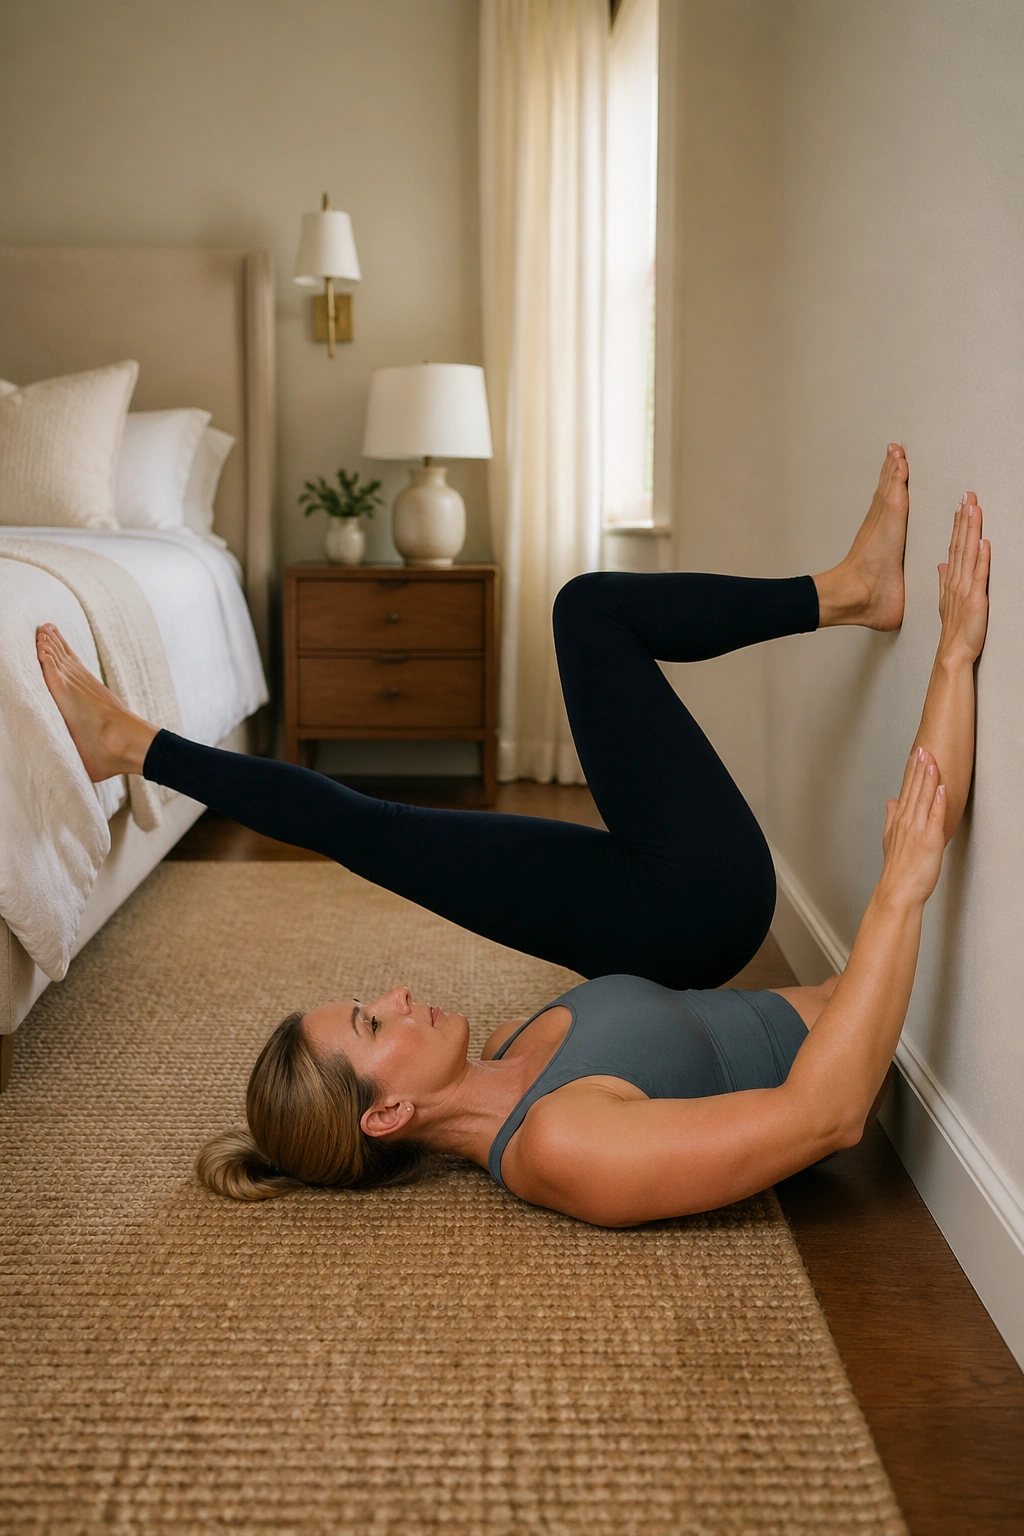
Why does a dead bug feel so much harder when your feet are on a wall? Because the wall gives your legs a pushback to work against, and your abs have to answer. Lie on your back with your shins parallel to the floor and the soles of your feet touching the wall. Press both palms into the wall as well, then lower one arm and the opposite leg only as far as you can without your rib cage flaring.
That cross-body reach is gold. It trains coordination, but it also teaches your core to stay steady while the limbs move out of phase. A lot of people rush this and turn it into a sloppy bicycle. Don’t. Keep the movement deliberate and breathe out on the extension.
How to use it well
- Think small, slow, exact
- Keep the lower back heavy
- Stop the leg before the pelvis tips
- Do 5 to 8 reps per side
If you only have time for one floor-based wall Pilates move, this is one of the best bets.
6. Wall Bridges That Wake Up the Back of the Body
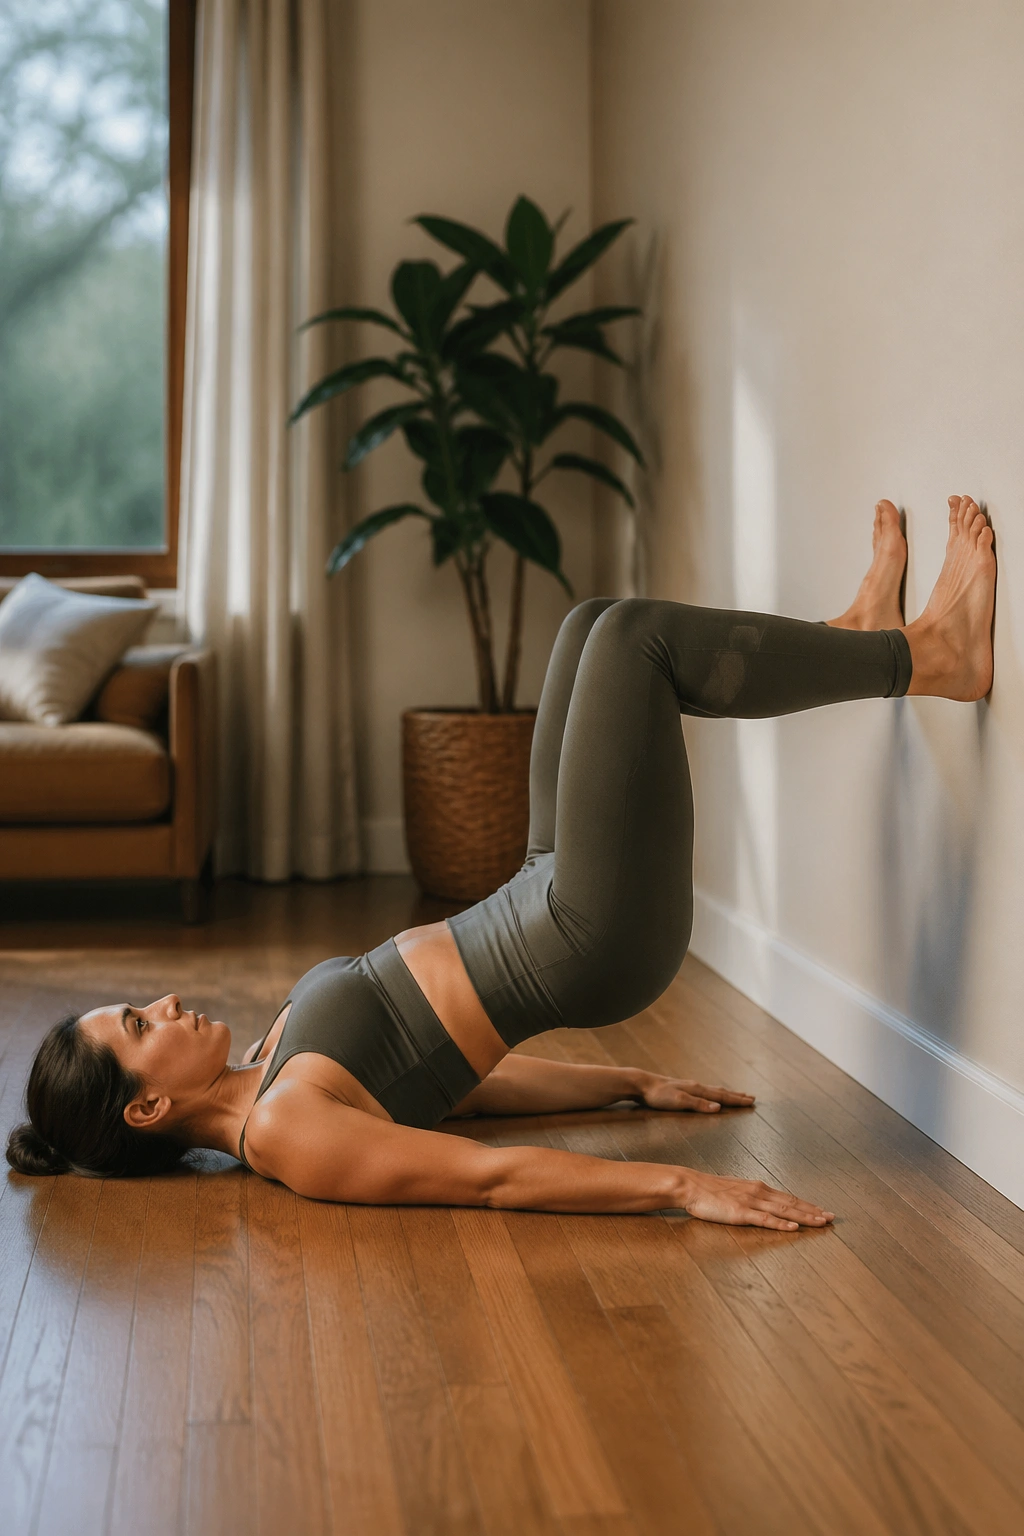
A lot of “flat stomach” work fails because the back side of the body is asleep. Wall bridges fix that. Lie on your back with your heels planted against the wall, knees bent, and feet about hip-width apart. Press your heels in, lift your hips a few inches off the floor, and squeeze your glutes as you rise.
The lower belly has to stay quiet here. If your ribs pop up and your back arches, the bridge turns into a lumbar takeover. Keep the exhale long as you lift, and aim for a straight line from shoulders to knees. You do not need to go sky-high.
Do 8 to 12 slow reps or hold the top for 15 to 20 seconds. That top hold is where the work happens. Your hamstrings should feel active, your glutes should wake up, and your core should keep the whole shape from wobbling. Nice and boring. That’s usually a good sign.
7. Wall Squat Holds With a Pelvic Tuck
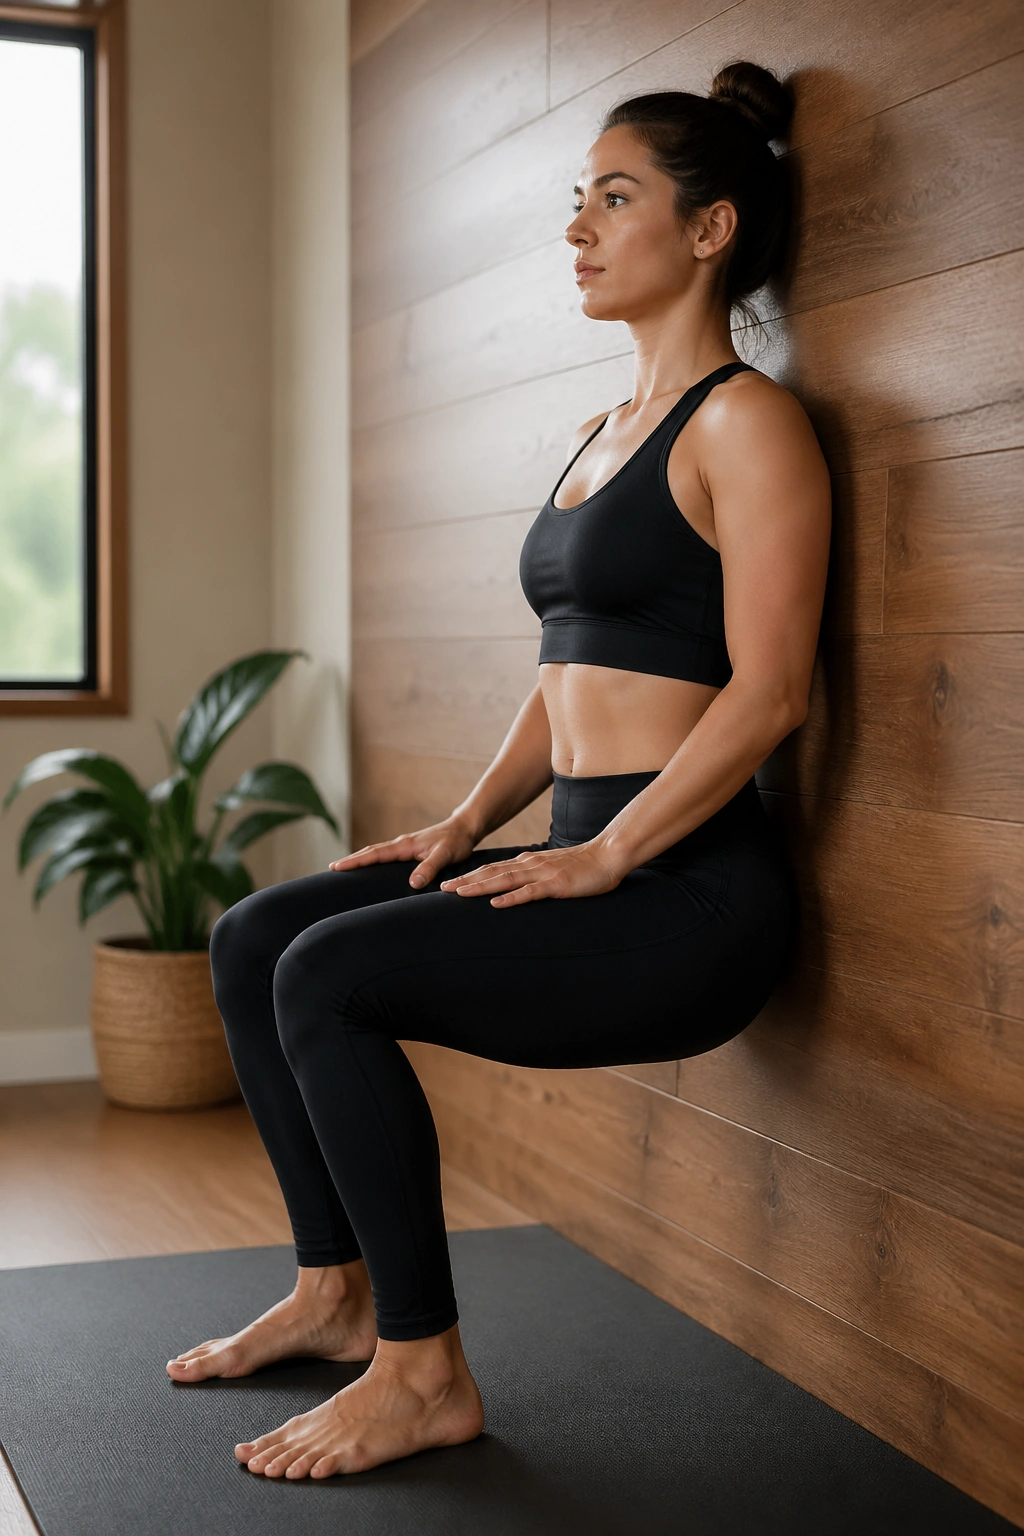
Wall squats are not glamorous. They are effective. Stand with your back on the wall and walk your feet out until your knees can bend comfortably without your heels lifting. Slide down until your thighs are near parallel to the floor, then gently tuck your tailbone so your low back gets closer to the wall.
That tiny pelvic adjustment changes everything. It keeps the ribs from flaring and asks the lower abs to stay involved while the legs are working. If you’ve only ever done squats as a leg exercise, this version will surprise you. The core lights up fast.
Hold for 20 to 45 seconds. If your thighs shake, good. If your lower back aches, come up a few inches. The best version is the one you can hold with clean form, not the deepest one you can force.
8. Standing Side Crunches Against the Wall
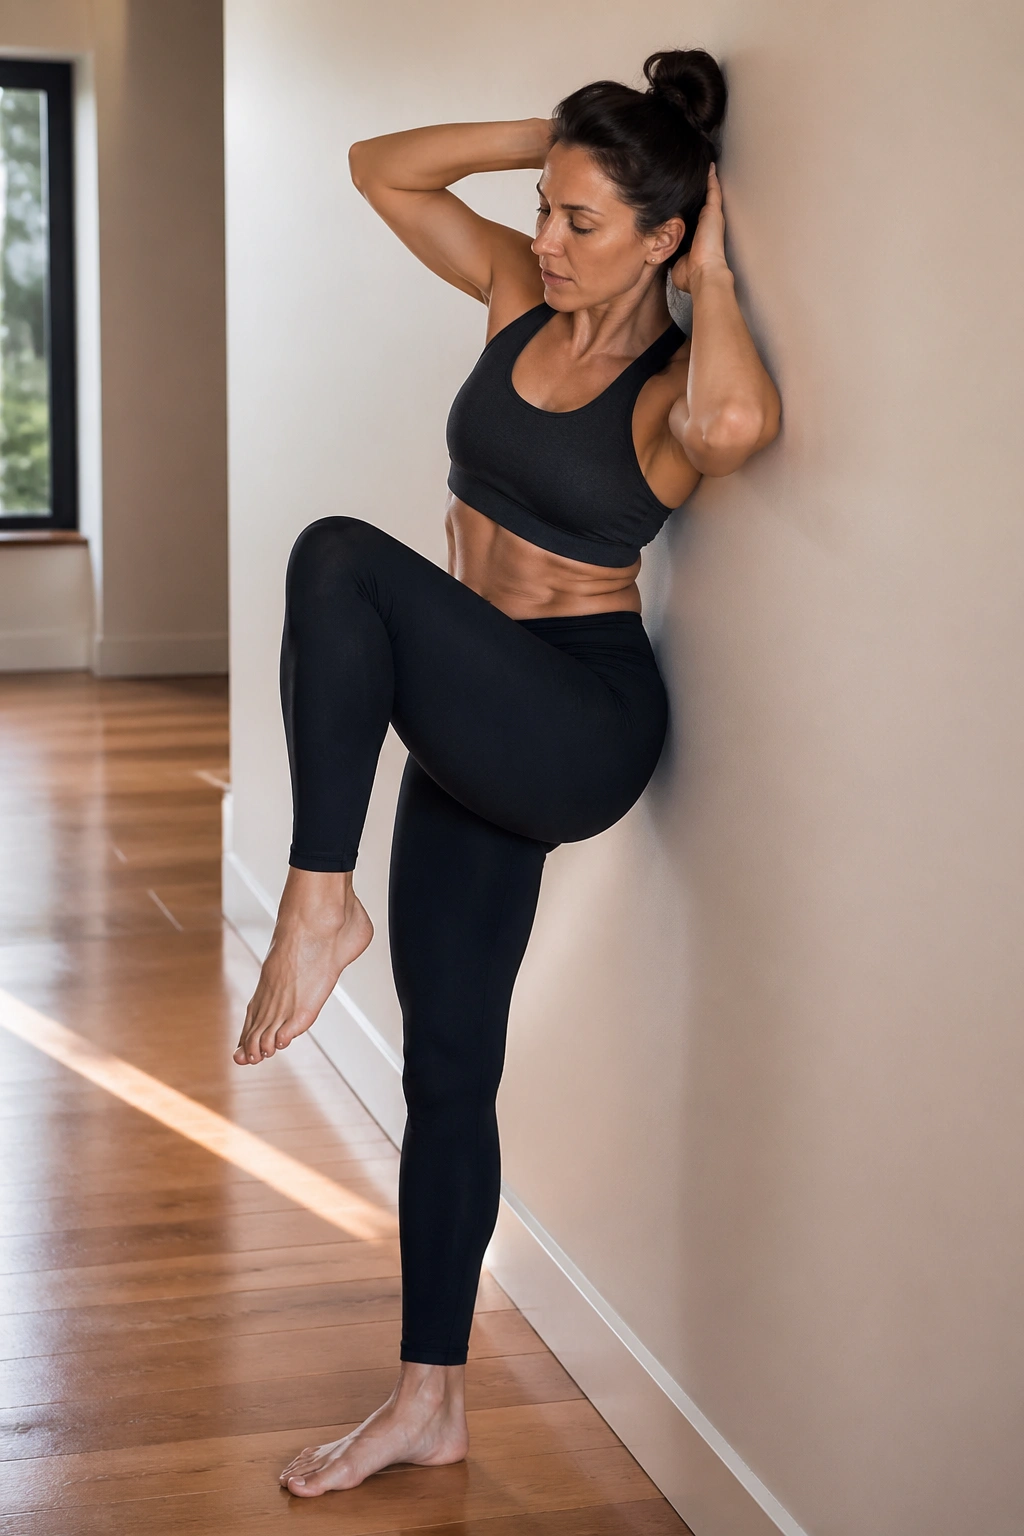
Put one shoulder and hip close to the wall, then lift the leg on the outside and bring the same-side elbow toward that knee. It’s a standing side crunch, and it’s a lot more useful than people give it credit for. The obliques love this pattern because they have to shorten on one side while the other side stays long and steady.
Keep it slow. Fast side crunches turn into hip hikes, and then you’re just swinging around. I prefer a small range with a clean squeeze at the top. You should feel the side of your waist, not your neck.
Do 8 to 12 reps per side. If balance is rough, keep one hand lightly on the wall and move the knee only halfway up. That’s fine. Honestly, a smaller movement done well is better than a huge one done crooked.
9. Wall Mountain Climbers With Less Impact
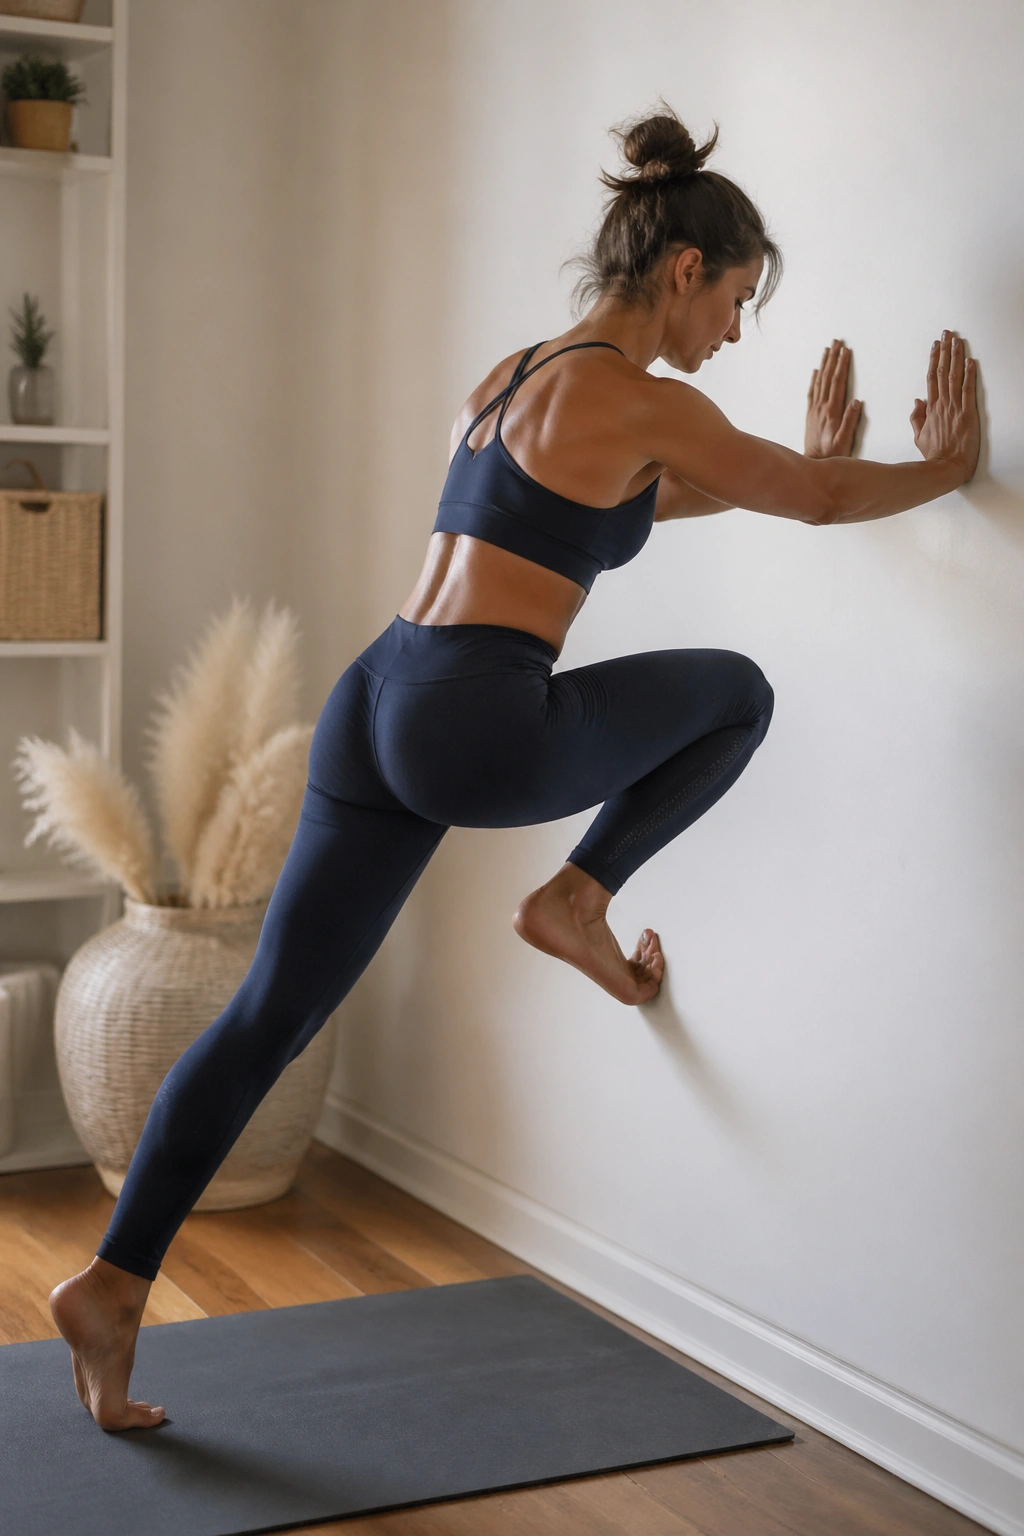
Wall mountain climbers are the low-impact cousin of the floor version, and they still hit the core hard. Put your hands on the wall at chest height, walk your feet back into a strong diagonal line, then drive one knee toward your chest while the other leg stays long. Switch sides in a controlled rhythm.
The key word there is controlled. If your hips bounce and your back caves, the exercise gets messy fast. Keep your shoulders stacked over your wrists, press the wall away, and move the knees as if you’re pulling them through thick water. That slower tempo makes your abs work harder than frantic speed ever will.
Try 20 to 30 seconds of work, rest, then repeat. You’ll feel the shoulders too, which is part of the deal. Core strength and shoulder stability like to share the load.
10. Wall Heel Slides for Flat-Stomach Core Control
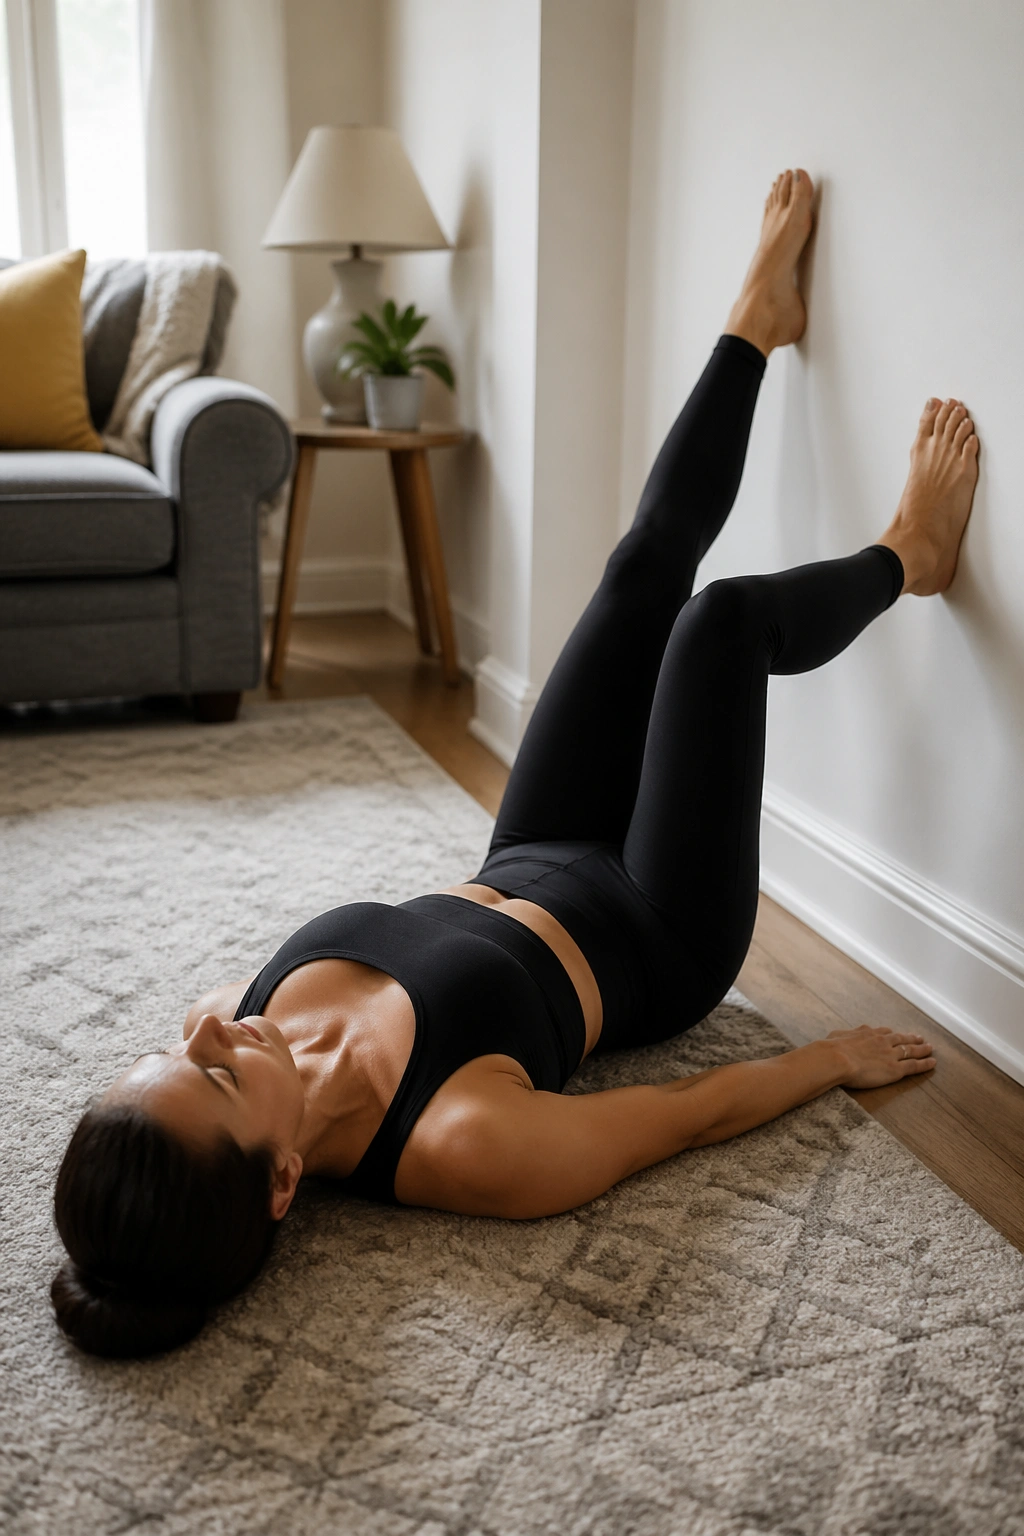
Heel slides are one of the cleanest ways to challenge the lower abs without yanking on the neck or hip flexors. Lie on your back with one foot on the wall and the other leg bent nearby, or keep both feet on the wall in tabletop and slide one heel a few inches down the surface before drawing it back up.
The movement is tiny. That’s not a weakness. It’s the whole point. Your pelvis should stay still while the working leg extends and returns, which forces your deep core to stabilize the trunk. If the low back pops off the floor, reduce the range and slow down.
A few details that matter
- Keep your exhale longer than your inhale
- Slide only until the abdomen starts to fight back
- Do 8 reps per side
- Stop before the hip flexors cramp
This is one of the best moves for people who want flat-stomach core control without a lot of strain.
11. Wall Hundred Prep That Teaches Breath and Bracing
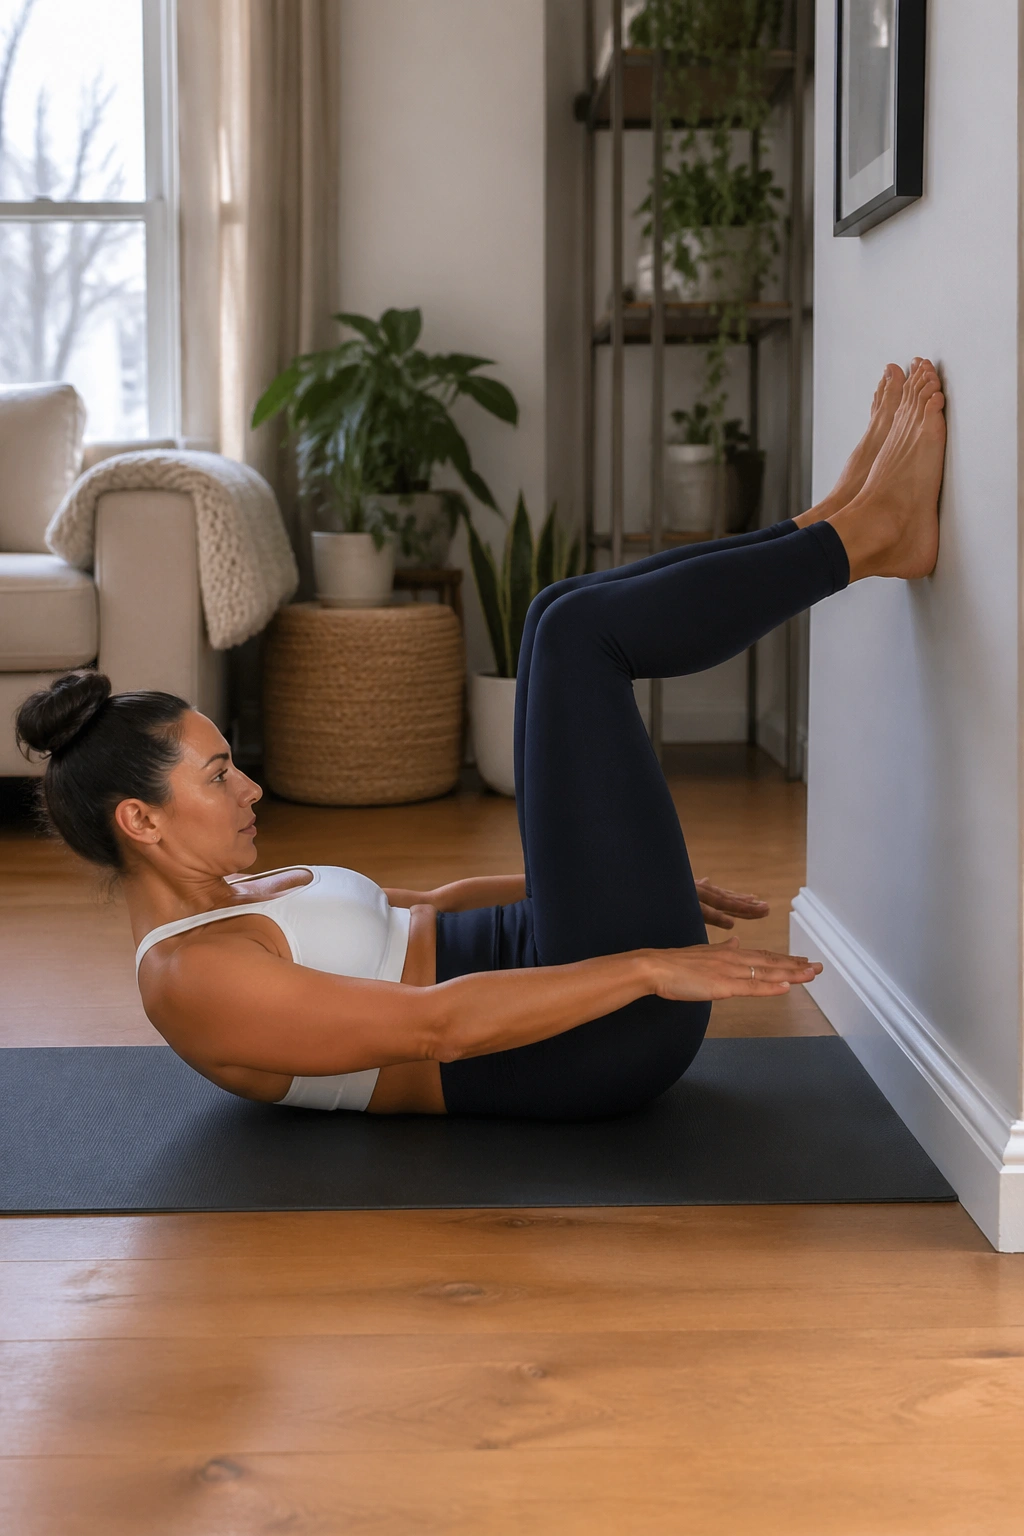
The Hundred is a classic Pilates pattern for a reason. The wall version makes it less messy. Lie on your back with your legs up the wall in tabletop or a bent-knee position, then lift your head and shoulders just enough to feel the abs engage. Reach your arms long by your sides and pump them a few inches up and down while you breathe in for five counts and out for five counts.
What matters most is the breath. You’re not puffing air around randomly. You’re using the exhale to tighten the corset of the torso, which gives the waist a more held-in feeling. If your neck starts barking, put your head down and keep the breathing pattern going.
Aim for 5 to 10 breath cycles to start. It should feel like work, but not like punishment. And yes, the lower abs should be working here too, even though the move doesn’t look dramatic from the outside.
12. Wall Bird Dogs for Cross-Body Stability
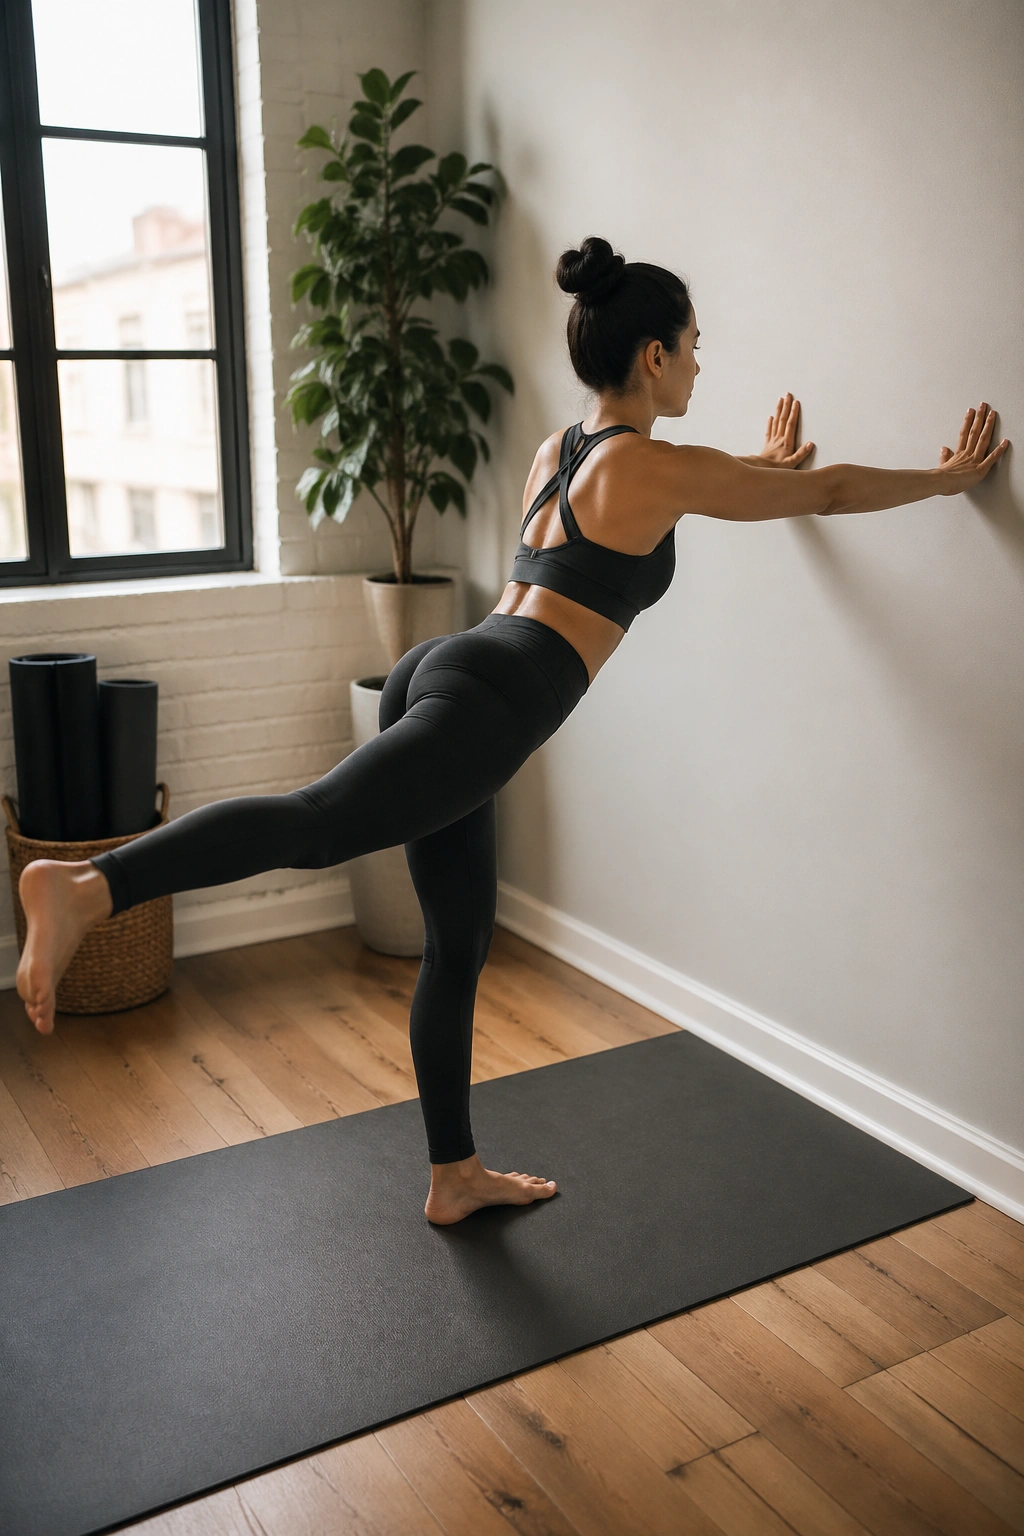
A bird dog against the wall is one of my favorite sneaky core drills. Face the wall and place your hands at shoulder height. Step one leg back and reach the opposite arm forward, then switch sides. You’re basically making a long, stable line while one arm and one leg work in opposite directions.
The challenge is keeping the torso still. That stillness is the whole reason this move belongs in a flat-stomach routine. If your ribs twist or your hips drift, shorten the reach. The body should feel organized, not contorted.
What to watch for
- Keep your standing foot grounded
- Reach through the heel and fingertips
- Hold each rep for 2 to 3 seconds
- Do 6 to 8 reps per side
This one also shows you where your weak side is. Usually, it shows up fast.
13. Side Plank Presses Against the Wall
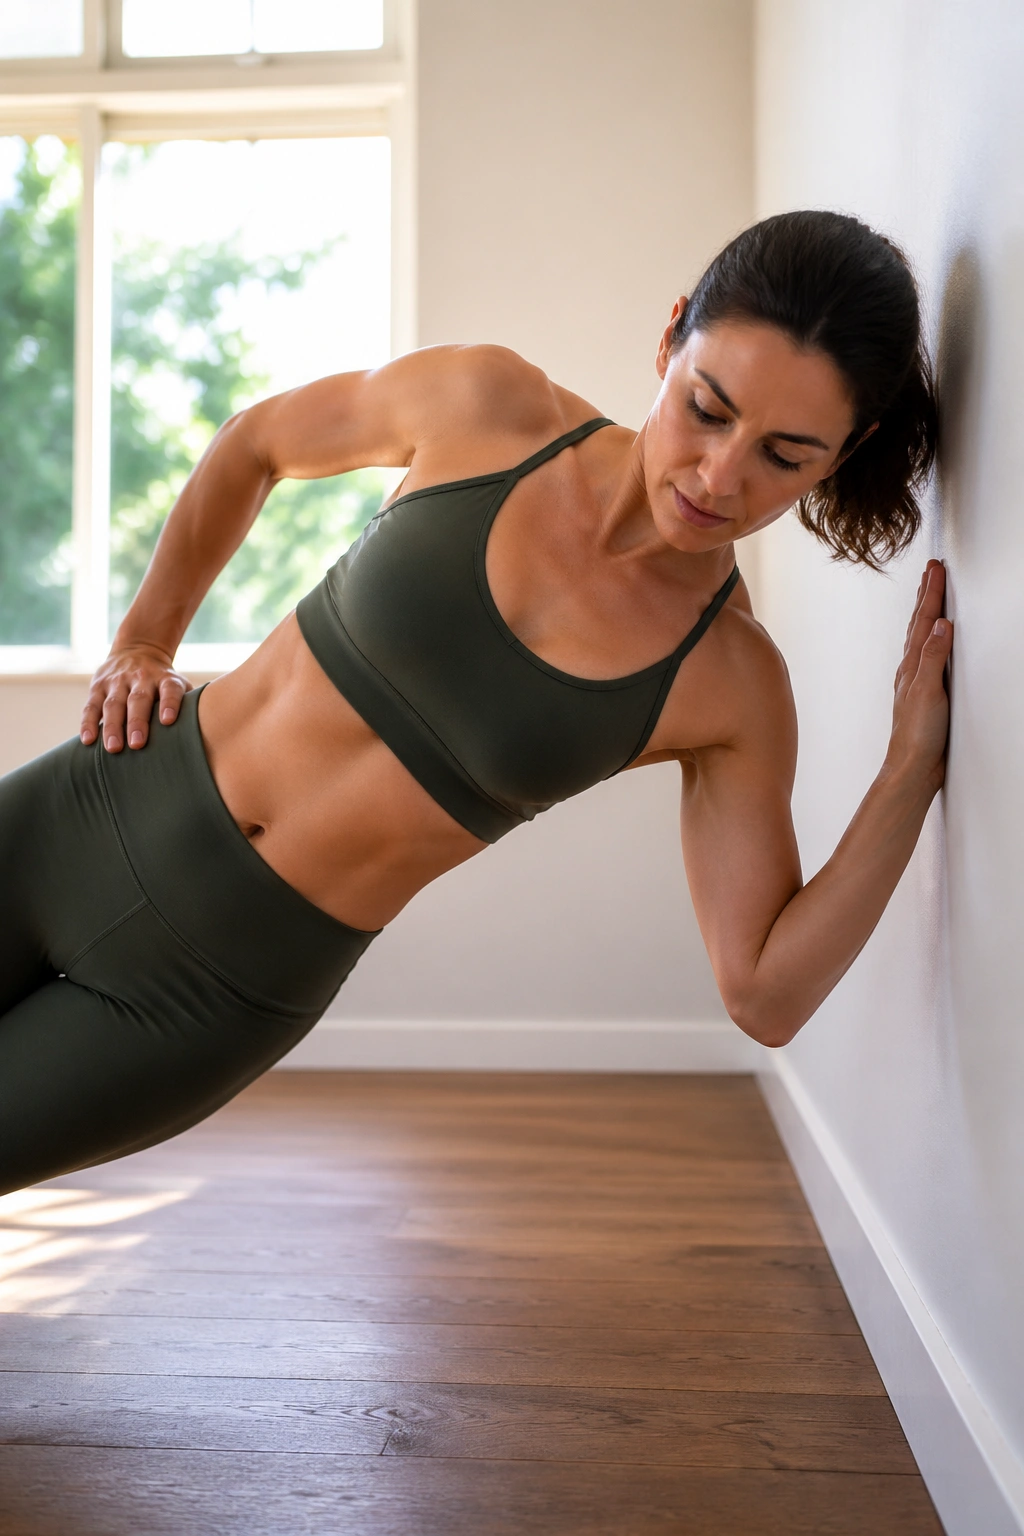
A side plank against the wall gives your obliques, shoulder, and outer hip a clean job to do. Stand sideways to the wall, press the forearm into it, and walk your feet out so your body leans into a straight line. Then press the wall away and hold the side body long.
Unlike a floor side plank, this version is much kinder to wrists and knees. It’s also easier to feel the waist working instead of just hanging on in panic mode. Keep the lower ribs tucked and the top shoulder from collapsing forward.
Try 15 to 30 seconds per side. If you want more challenge, lift the outer foot an inch off the floor for a brief hold. Small change. Big difference. The obliques light up fast when the base of support gets narrower.
14. Wall Curl-Ups That Spare the Neck
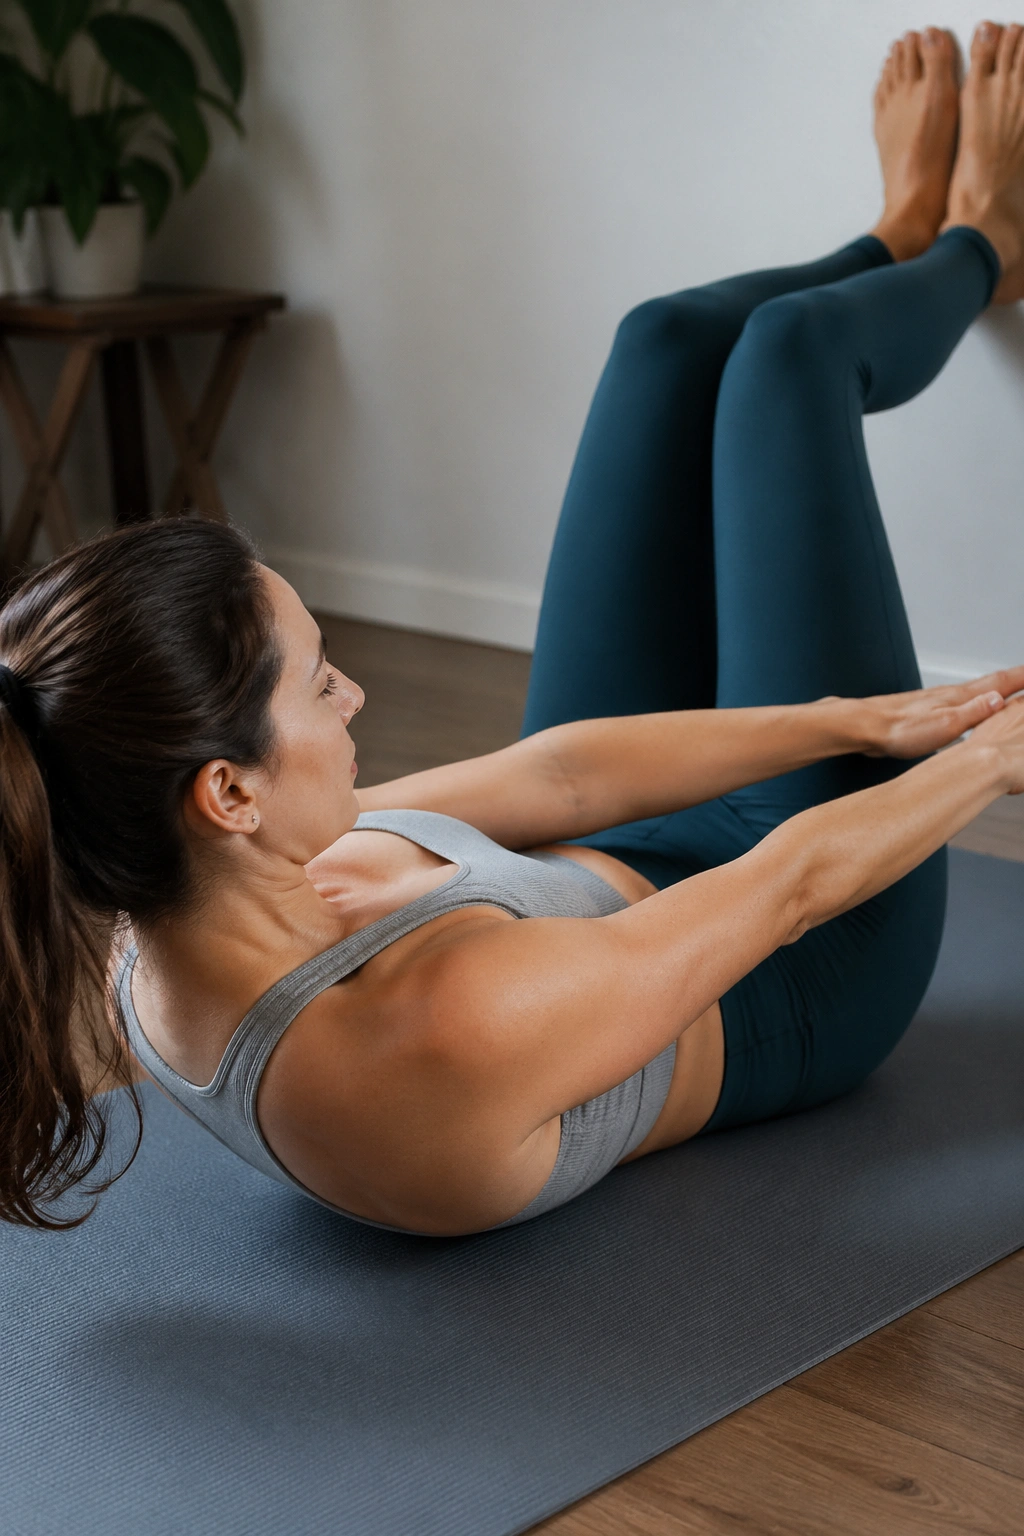
Not everyone loves crunches, and I get it. A lot of them are done badly. Wall curl-ups are cleaner. Lie on your back with your legs supported on the wall, knees bent, and your arms reaching forward. As you exhale, lift your head, neck, and shoulder blades a few inches off the floor. The movement is small, but the abdominal squeeze should be obvious.
The trick is to curl from the ribs, not yank from the neck. Keep the chin slightly nodding, and imagine your rib cage sliding toward your pelvis. If your hip flexors steal the show, put your feet higher on the wall and make the curl smaller.
Do 6 to 10 reps, pausing for a second at the top of each one. This is a nice move for people who want direct abdominal work without the slop of high-speed sit-ups. Boring? Maybe. Useful? Absolutely.
15. Wall Pike Slides for a Stronger Midsection
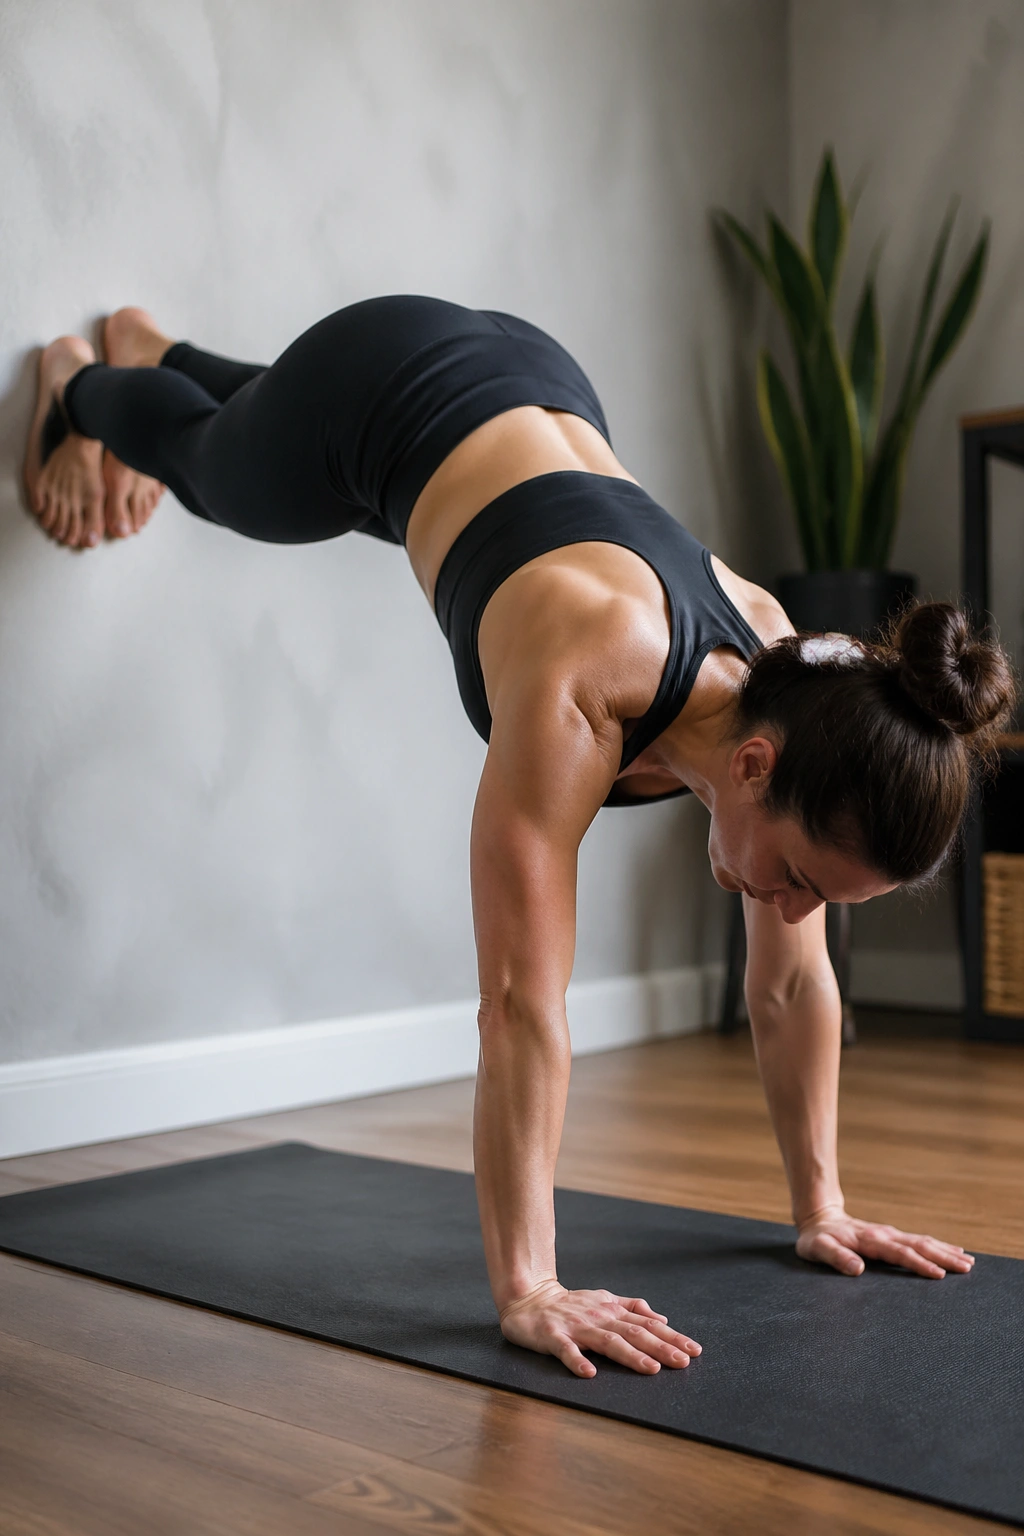
Wall pike slides are one of the harder moves on this list, and they earn their spot. Start in a high plank position with your feet on socks or sliders against the wall, hands on the floor. Bend at the hips and slide the feet upward as the hips lift, then return to plank with control.
If that sounds simple, wait until you try to keep your ribs from flaring. The deep core has to work hard here, especially on the return. Shoulders, too. This move asks for a lot, so don’t rush into a big range on day one.
Build up slowly
- Use a small range at first
- Keep the movement smooth, not jerky
- Stop if the lower back pinches
- Try 5 to 8 reps
A tiny pike done well beats a huge one done with a sagging spine.
16. Wall Frog Pumps for Inner-Thigh and Core Support
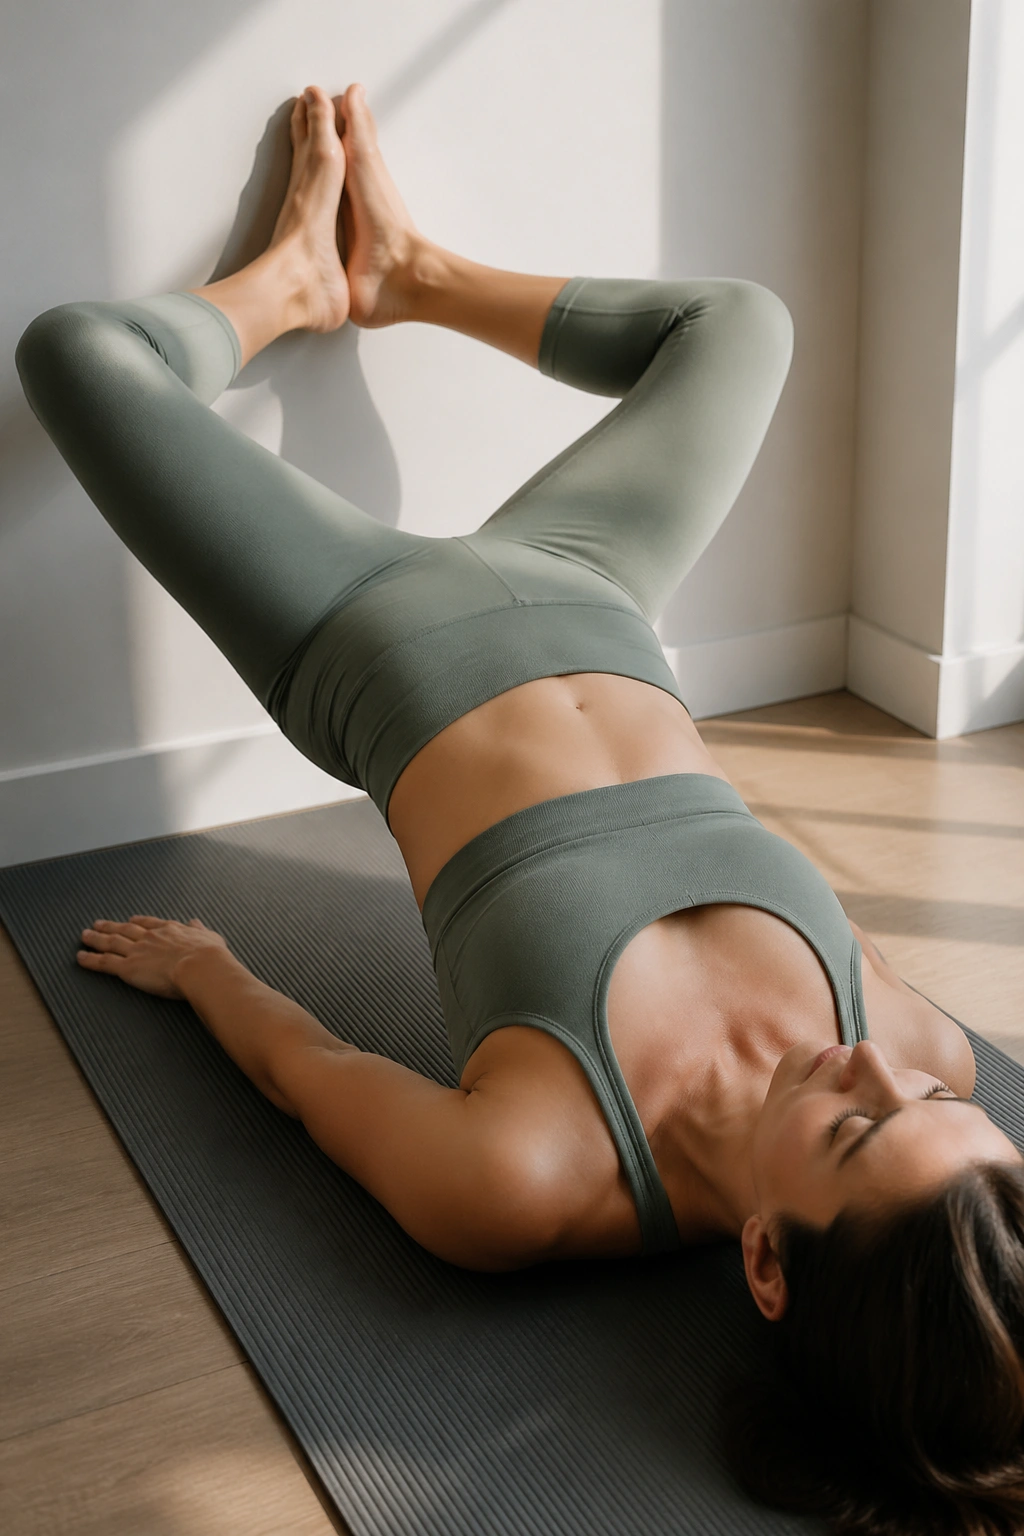
Lie on your back with the soles of your feet together against the wall and your knees open like a butterfly. Press your feet into the wall, then lift and lower your hips in a short bridge pulse. That frog shape brings the inner thighs into the conversation, which helps the pelvis feel steadier.
This isn’t just a glute move. The lower abs have to keep the pelvis from dumping forward as you pulse, and that makes the whole midsection work harder than people expect. Keep the range small and the squeeze at the top firm.
Do 10 to 15 pulses or hold the bridge for 15 seconds on the final rep. If your hamstrings cramp, move your feet a little lower on the wall. That usually fixes it fast.
17. Wall Oblique Reaches That Lengthen and Tighten
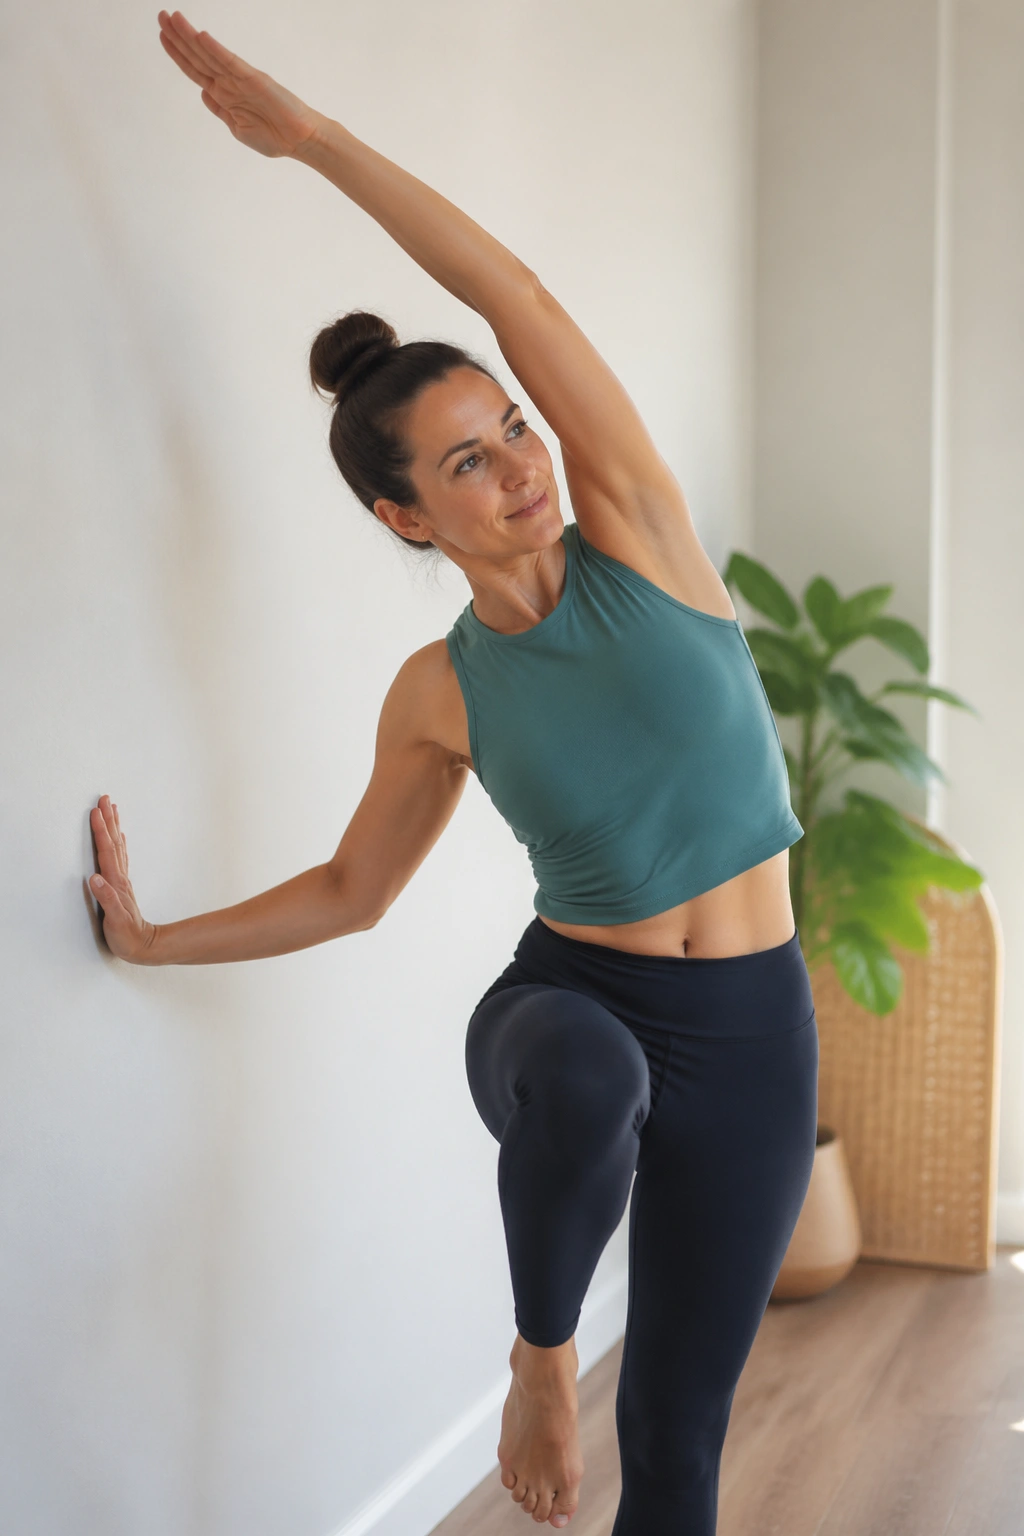
Stand sideways to the wall with one hand lightly touching it for balance. Lift the outside knee while the same-side arm reaches overhead and slightly across the body. Then lower with control and repeat. The movement feels like a side crunch mixed with a reach, which is exactly why it’s useful.
The obliques work in two directions here: they shorten on the crunch and lengthen on the return. That combination is smart. Your waistline muscles don’t just need strength; they need control through a full range. Keep the shoulders relaxed and don’t yank the elbow down.
Use 8 to 10 reps per side. If you want more challenge, pause for a second at the top and feel the side body tighten before you come back down. That pause matters more than speed.
18. Wall Reverse Crunch Holds for Lower-Ab Fire
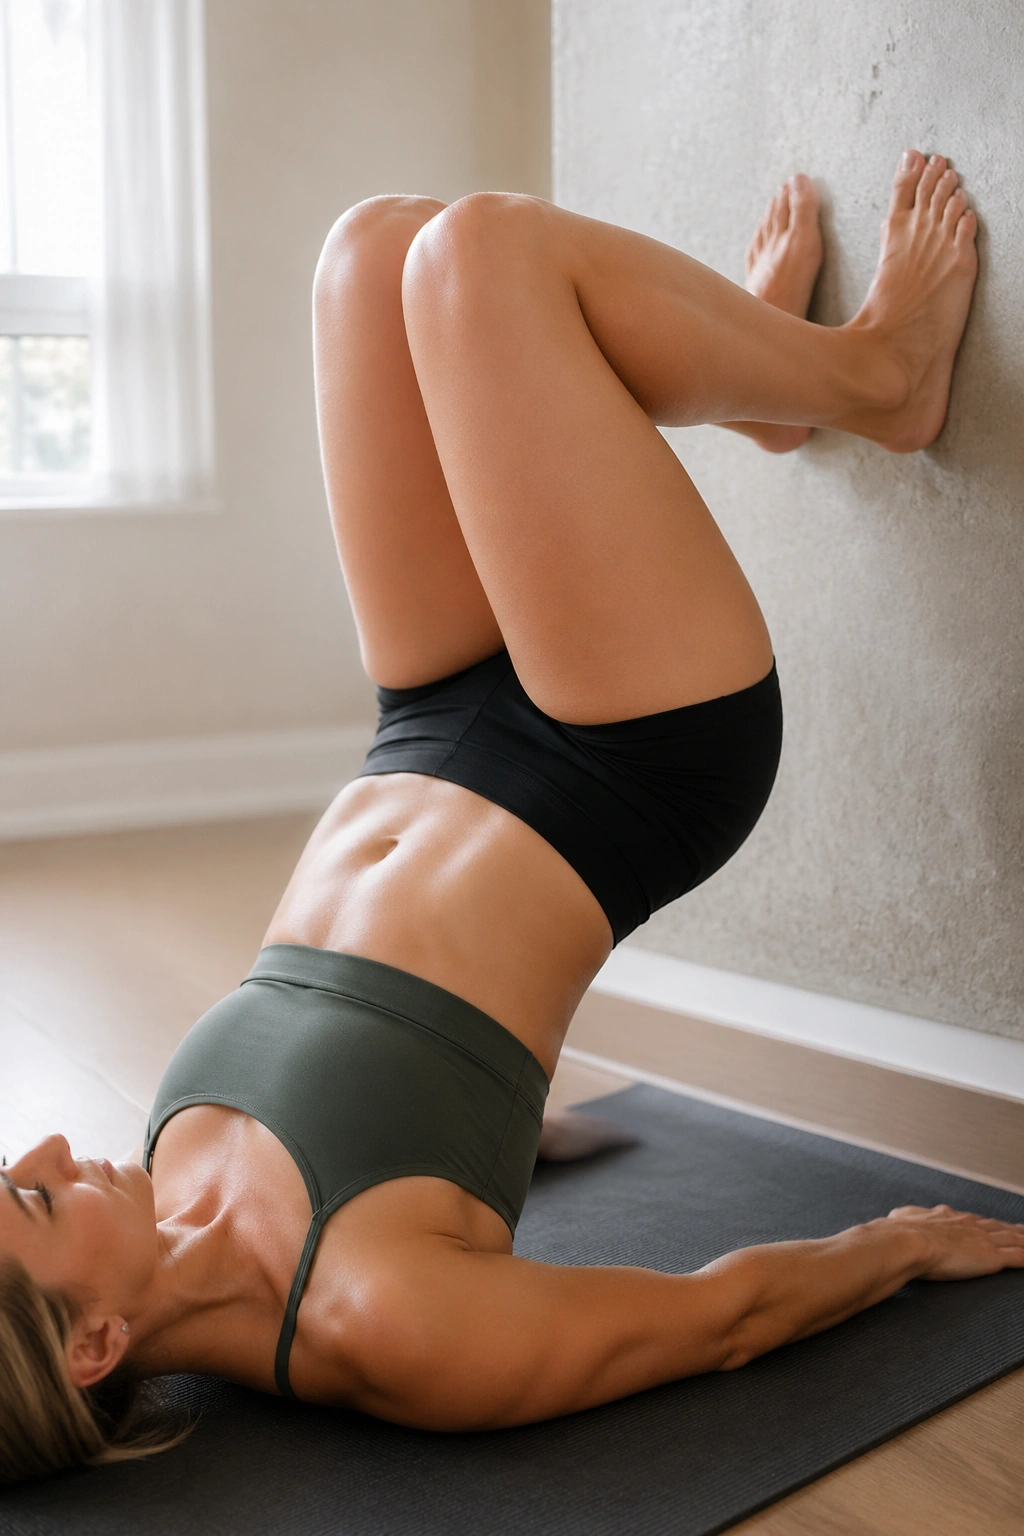
Reverse crunches are the kind of move people either do too fast or not at all. The wall version keeps them cleaner. Lie on your back with your knees bent and feet pressing lightly into the wall. Exhale, curl your pelvis up a few inches, and let the tailbone lift just enough to feel the lower abs do the work.
The goal is not to fling the legs toward the ceiling. Keep the knees bent, keep the motion small, and let the pelvis tip under in a controlled way. That’s the real abdominal work. If your neck tightens, look straight up and keep the chin soft.
Hold the top for 1 to 2 seconds on each rep. Do 6 to 8 reps. You should feel the lower belly switch on without a lot of strain. If you feel it in the hip flexors first, bring the feet a little closer to the wall.
19. Wall Hollow Holds for a Deep Core Challenge
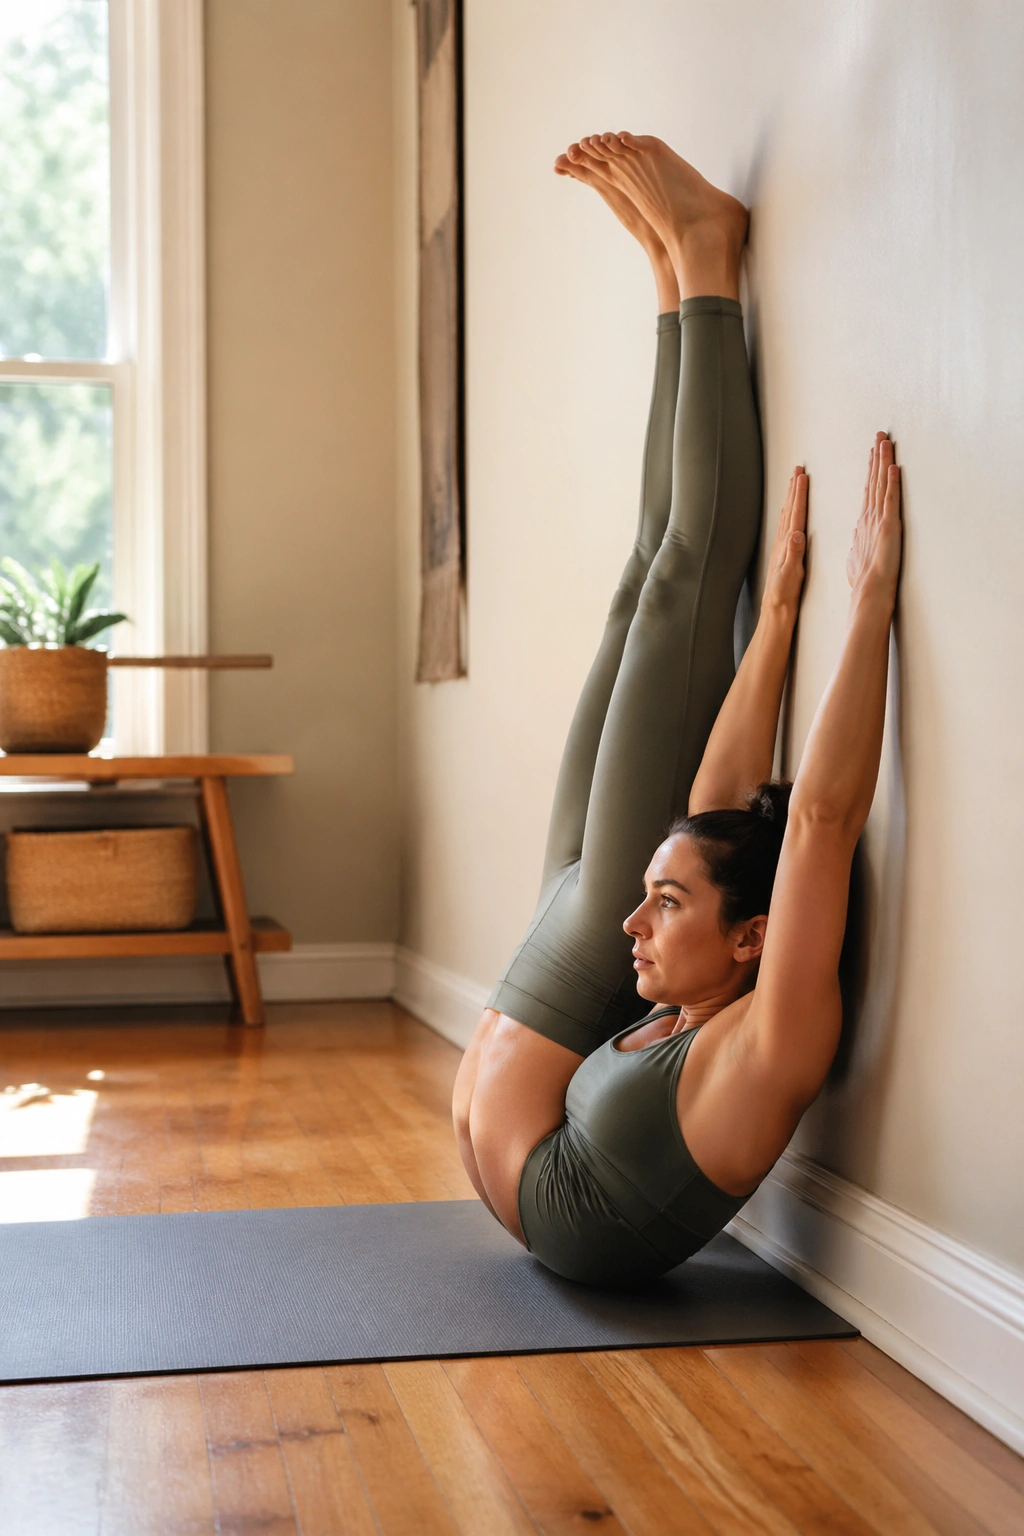
A hollow hold can be brutal on the floor. The wall version gives you a way in. Lie on your back with your legs at the wall and your arms reaching overhead or toward your thighs. Press your lower back down, lift your head and shoulders slightly, and hold the torso in a tight, shallow curve.
The shape is small on purpose. A huge hollow hold often collapses the low back and turns the whole thing into a mess. Keep the ribs down, the belly gently pulled in, and the breath steady. If you can hold for 10 seconds with clean form, that’s better than a sloppy 30.
This move is not flashy. It’s a test. And if you can keep it tidy, your core is doing real work.
20. Wall Posture Reset for a Flatter Midsection Finish
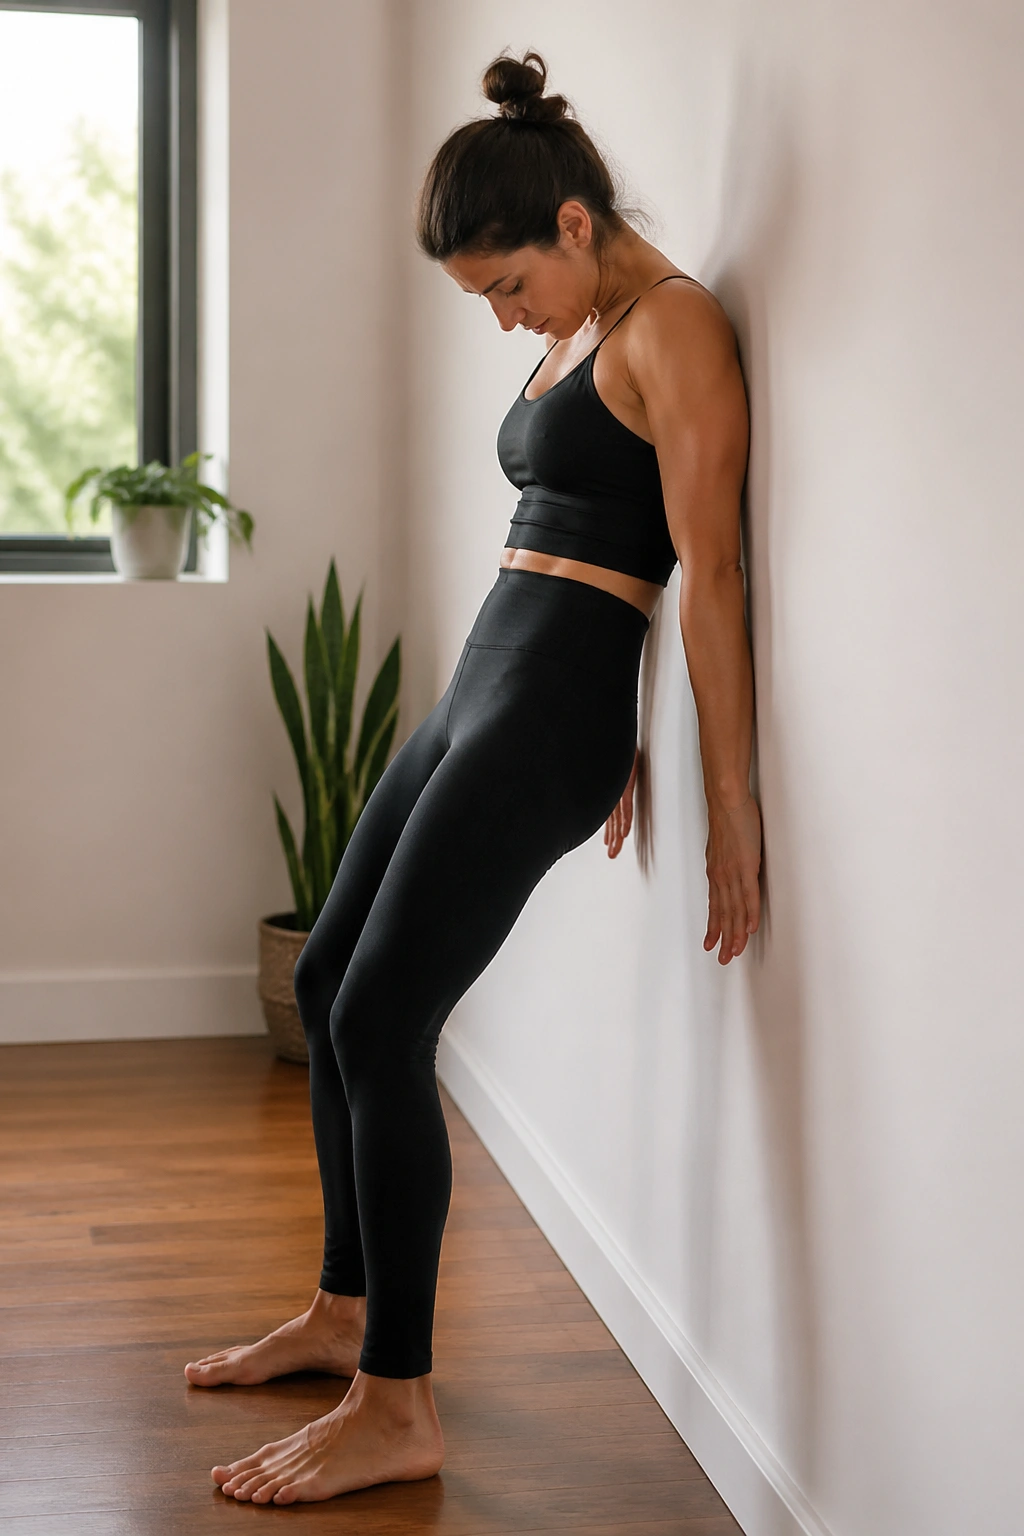
Stand with your back against the wall, heels a few inches out, knees soft, and the back of your head, shoulder blades, and pelvis lightly touching the surface. Take a slow breath in through the nose, then exhale and let the ribs drop without collapsing your chest. Reach the crown of your head upward while keeping the tailbone heavy.
That’s not a throwaway cooldown. It’s a posture drill, and posture changes the way the stomach looks more than people admit. When the ribs sit stacked over the pelvis, the abdominal wall has less reason to push forward. The waist often looks calmer right away.
Hold this for 60 to 90 seconds and breathe evenly. If you want a tiny routine that ties the whole thing together, do moves 1, 3, 8, 10, and 20 in sequence. Slow. Clean. No rushing. That’s the version people usually stick with.
