



A runner’s body can get by on habit for a while, then one day the clues show up: a hip that drops on the left, calves that seize on hills, a torso that twists just a little too much when the pace picks up. Pilates workouts for runners at home are built for those small leaks. They are not flashy, and that is the point.
I keep coming back to Pilates because it asks the body to do the boring things well: hold the pelvis steady on one leg, keep the ribs stacked, wake up the deep abs, and stop the feet from collapsing inward on every landing. Those details sound tiny. They are not.
You do not need a reformer or a big room. A mat, a wall, a towel, and maybe a mini-band are enough to get real work done. And if you are tired of exercises that leave you sweaty but do not change your stride, the first move below will feel almost too simple — until your feet start shaking.
1. Pilates Foot Tripod Wake-Up at the Wall
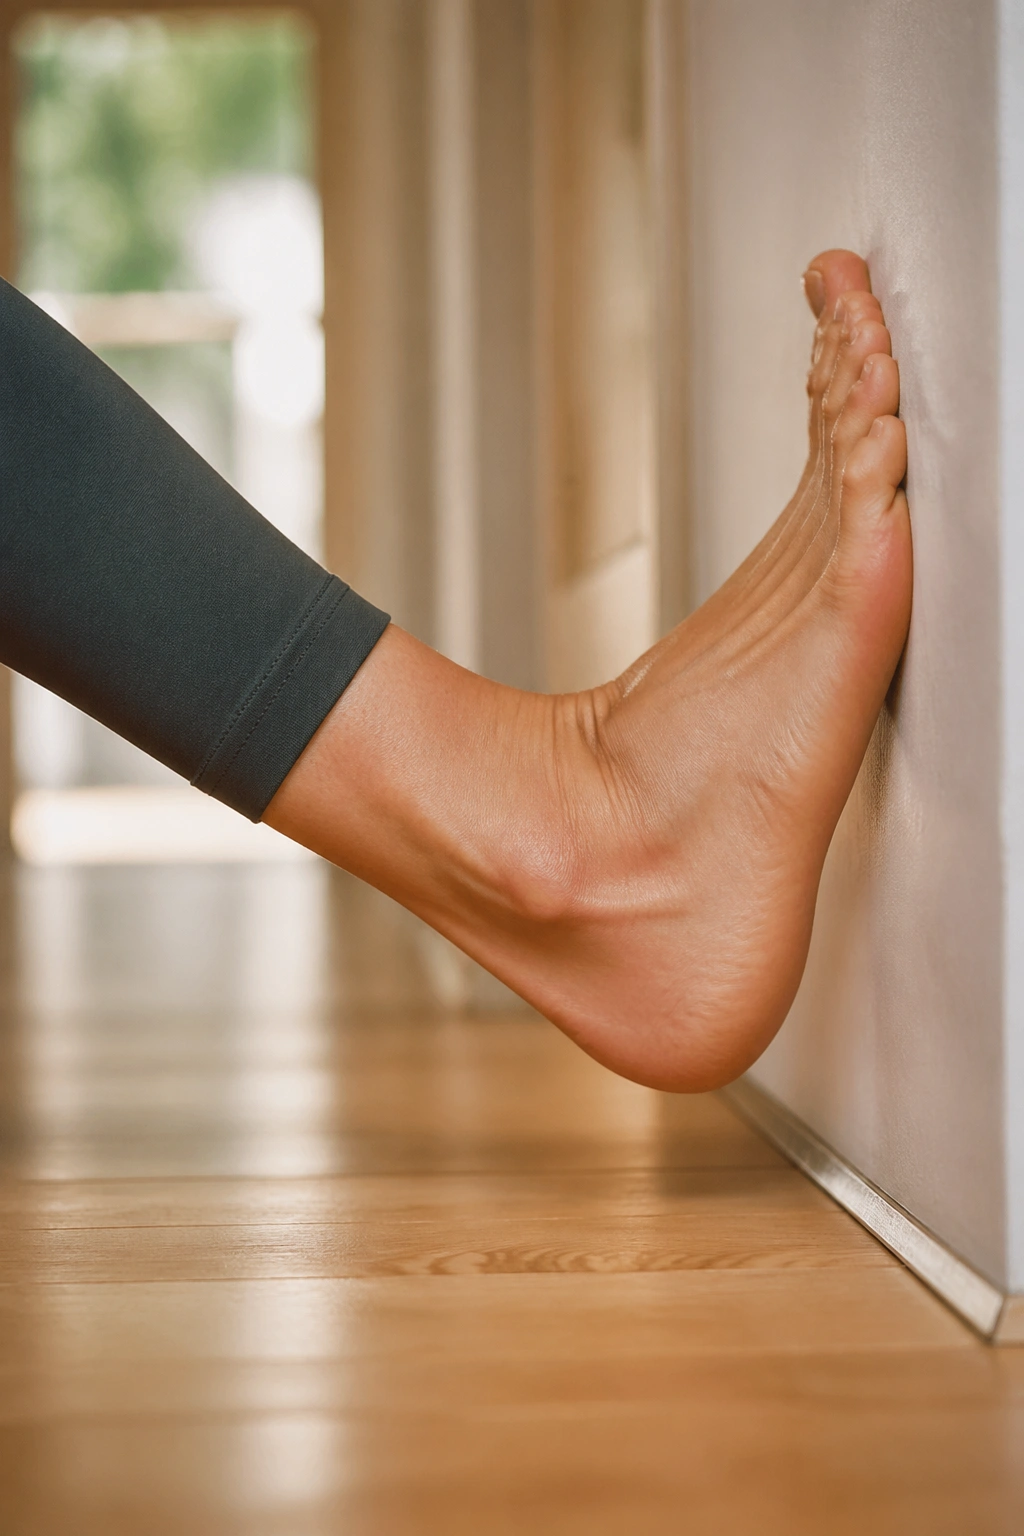
Your feet are not decorations. If the base is sloppy, the rest of the chain pays for it — ankles work harder, calves tighten, and the push-off starts to feel noisy instead of clean.
Stand barefoot with one hand on a wall and notice where your weight actually lives. Most runners dump too much pressure into the big toe or roll to the outer edge of the foot. A proper foot tripod spreads load across the heel, the base of the big toe, and the base of the little toe. That little triangle matters more than people think.
How to do it
- Stand with your feet hip-width apart and your fingertips on a wall.
- Lift all five toes, then set them down one by one.
- Press the heel, big toe mound, and little toe mound into the floor for 5 slow breaths.
- Shift to one leg and hold the same tripod for 20 to 30 seconds.
- Add 10 slow calf raises, keeping the ankle from rolling inward.
Keep the movement tiny. If the arch cramps, that usually means you’re gripping instead of spreading the load.
A wall-supported foot wake-up is a good starting point before a run or after a long day in shoes. It gives you a fast read on whether the foot can stay alive when the rest of the body gets tired. And if the right side feels steadier than the left, that is useful information, not a problem to panic over.
2. The Pilates Bridge-and-March Glute Builder
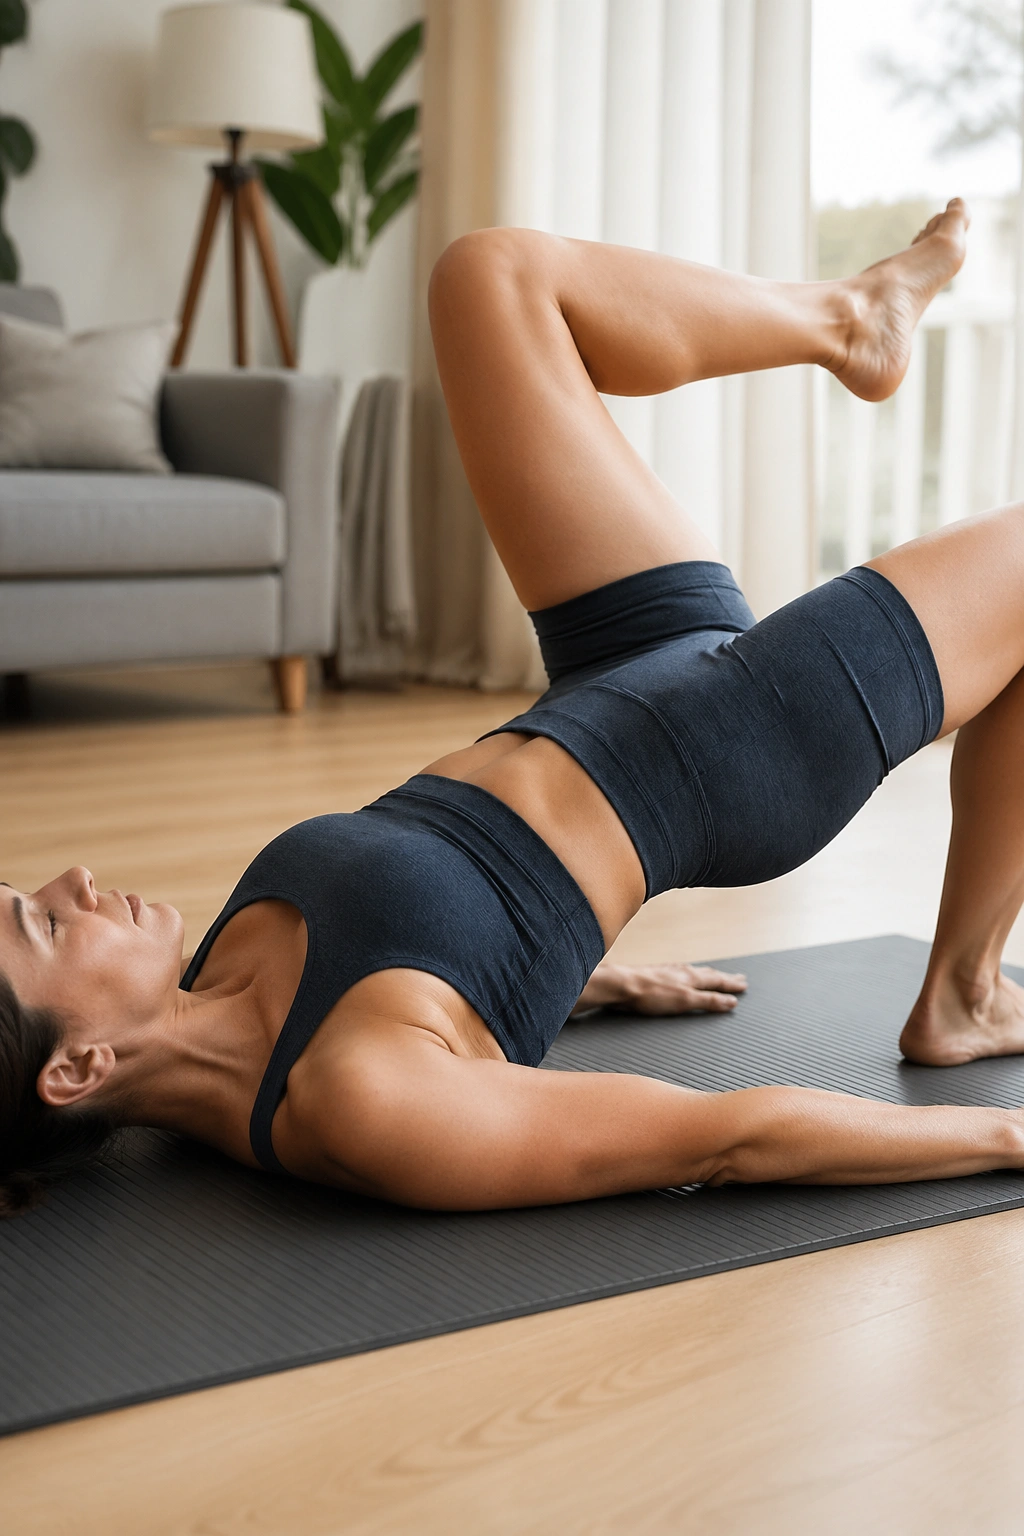
Why does a bridge matter so much to runners? Because it teaches the glutes to own hip extension without the lower back stealing the job.
Lie on your back with your knees bent and feet flat, then peel the spine off the mat one segment at a time until you form a long line from shoulders to knees. Hold there for a beat. Then march one knee toward your chest without letting the pelvis rock, drop the foot back down, and switch sides. It looks easy. It rarely is on the third round.
This move hits the exact spot many runners miss: the glutes that should stabilize the pelvis when one leg is in the air. If the hips wobble here, they usually wobble on the road too. A bridge with a march is better than a fast set of regular bridges because it makes each side do honest work.
What to feel
- Hamstrings working, but not cramping.
- Glutes lifting, not the low back pinching.
- Ribs staying quiet instead of flaring up.
Do 2 sets of 6 to 8 marches on each side. Pause for 2 seconds at the top of every rep. If your pelvis tips when one foot lifts, lower the bridge a little and try again. That small adjustment usually fixes more than forcing a bigger range ever will.
3. Side-Lying Clamshells That Quiet Hip Drop
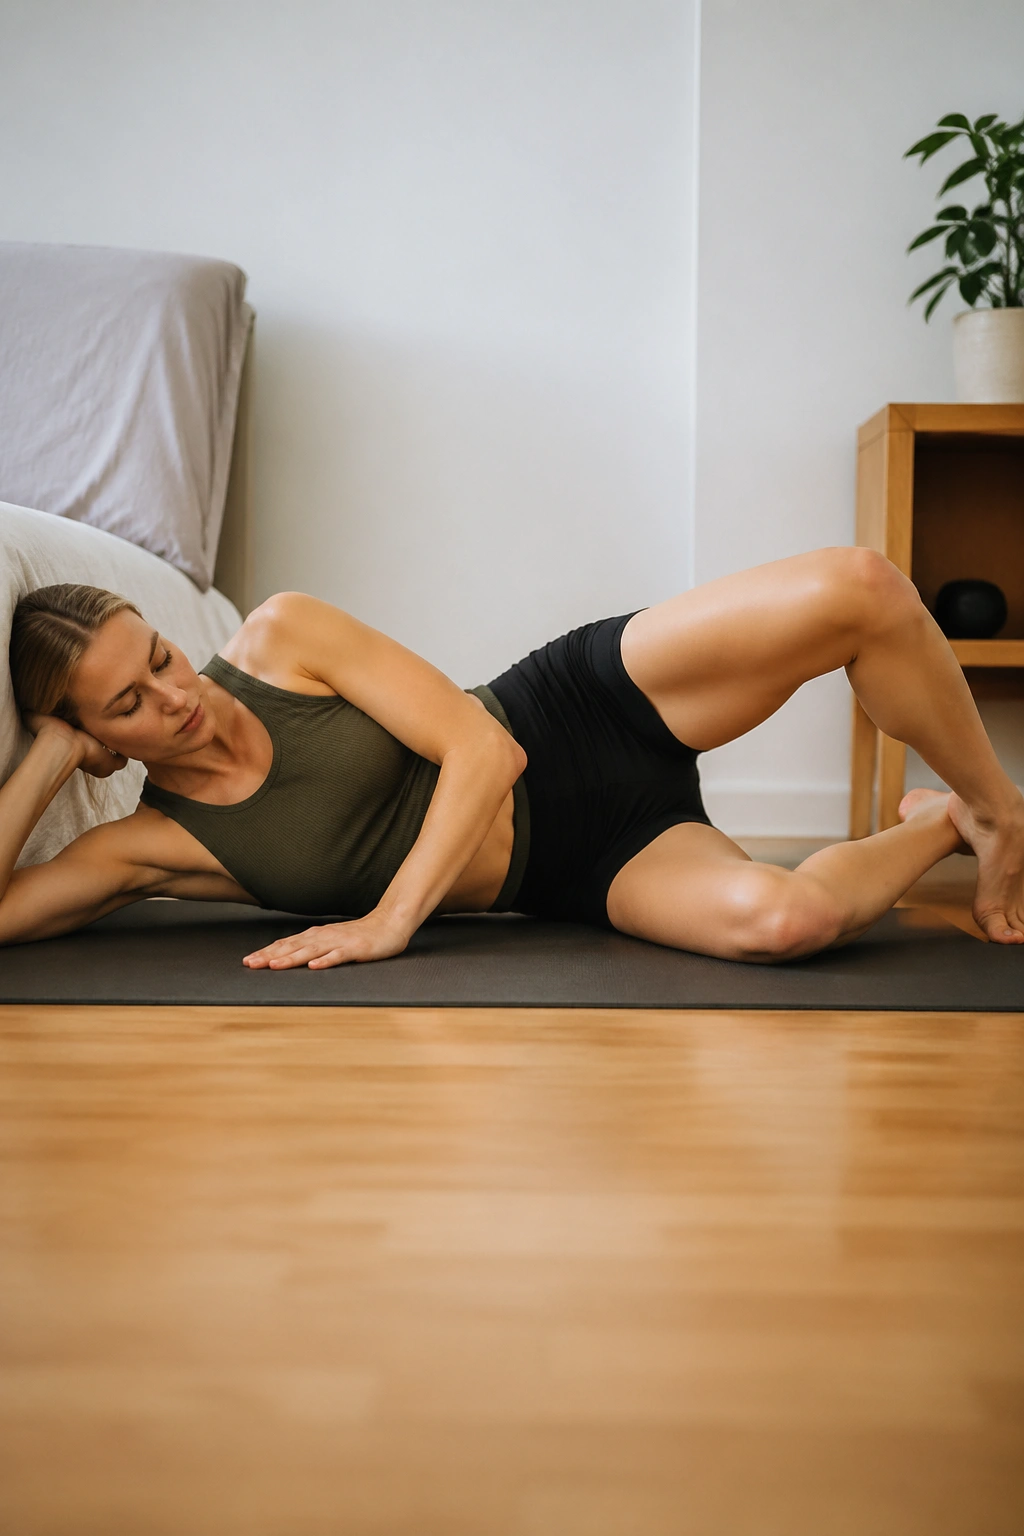
Picture the last mile of a hilly run, when one hip starts to sink and the knees follow the damage. That is clamshell territory.
Lie on one side with knees bent and heels in line with your tailbone. Keep your feet touching, then open the top knee only as far as you can without rolling your pelvis backward. Close with control. The movement is small on purpose; the glute medius does not need a circus act to wake up.
A lot of runners make this harder by going too high or by using a stretchy band they cannot control. Start without the band. If you can open and close 12 clean reps without shifting your waist, then add a light mini-band above the knees. The goal is a burn in the side hip, not a twist through the spine.
Common mistakes to avoid
- Tipping the top hip backward to fake more range.
- Letting the foot separate from the lower foot.
- Rushing the close and slamming the knees together.
Do 2 sets of 10 to 12 on each side. The side you hate is usually the side you need. And yes, that side often feels embarrassingly weak. Good. That is the one worth training.
4. Dead Bug Core Control for Bouncy Strides
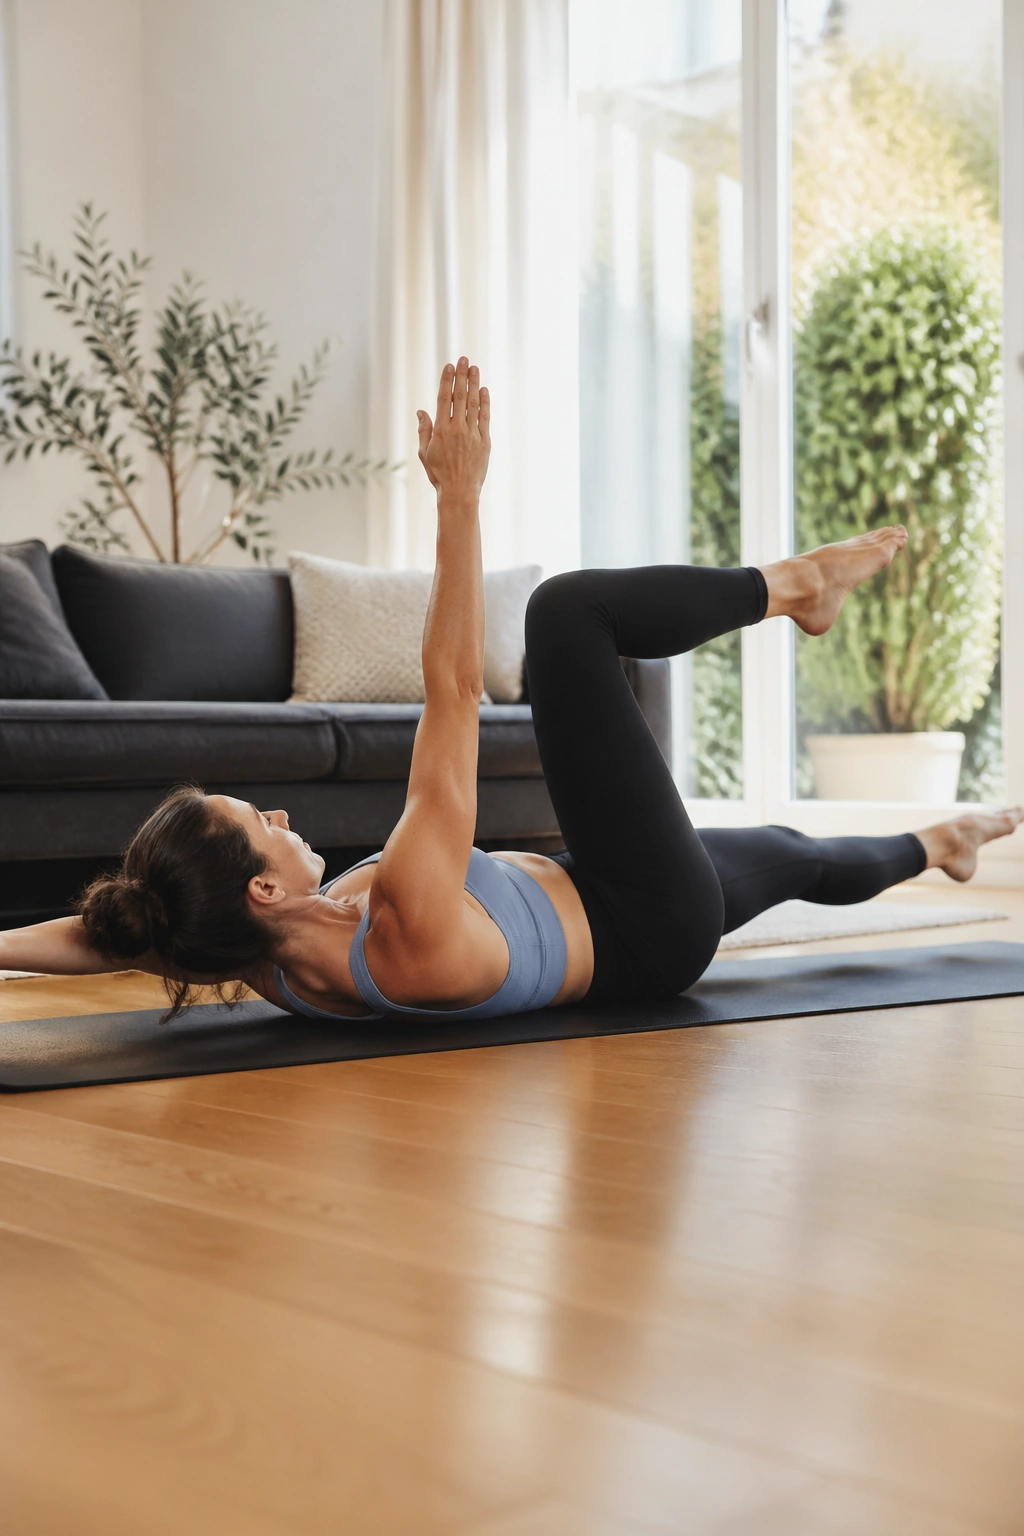
Crunches are not the answer here. Runners need the trunk to resist motion while the legs keep moving, and dead bugs teach exactly that.
Lie on your back with arms up and hips and knees bent at 90 degrees. Exhale, knit the ribs down, and slowly extend one leg toward the floor as the opposite arm reaches back. Return with control, then switch sides. The lower back should stay heavy on the mat the whole time. If it arches, the movement got too big.
This drill is gold for runners because it connects breathing to spinal control. Every exhale should feel like the front ribs softening and the waist narrowing a little. That quiets the body without bracing it stiff. There is a difference, and you can feel it in the first minute.
How to scale it
- Keep the feet higher if the low back lifts.
- Bend the elbows if the shoulders get tense.
- Tap the heel to a block or book instead of reaching all the way to the floor.
Try 6 slow reps per side, then rest for 20 seconds and do one more round. You should finish feeling organized, not crushed. If you are shaking a little, that is normal. If your neck is doing the work, it is time to reset.
5. Single-Leg Reach Series for Balance
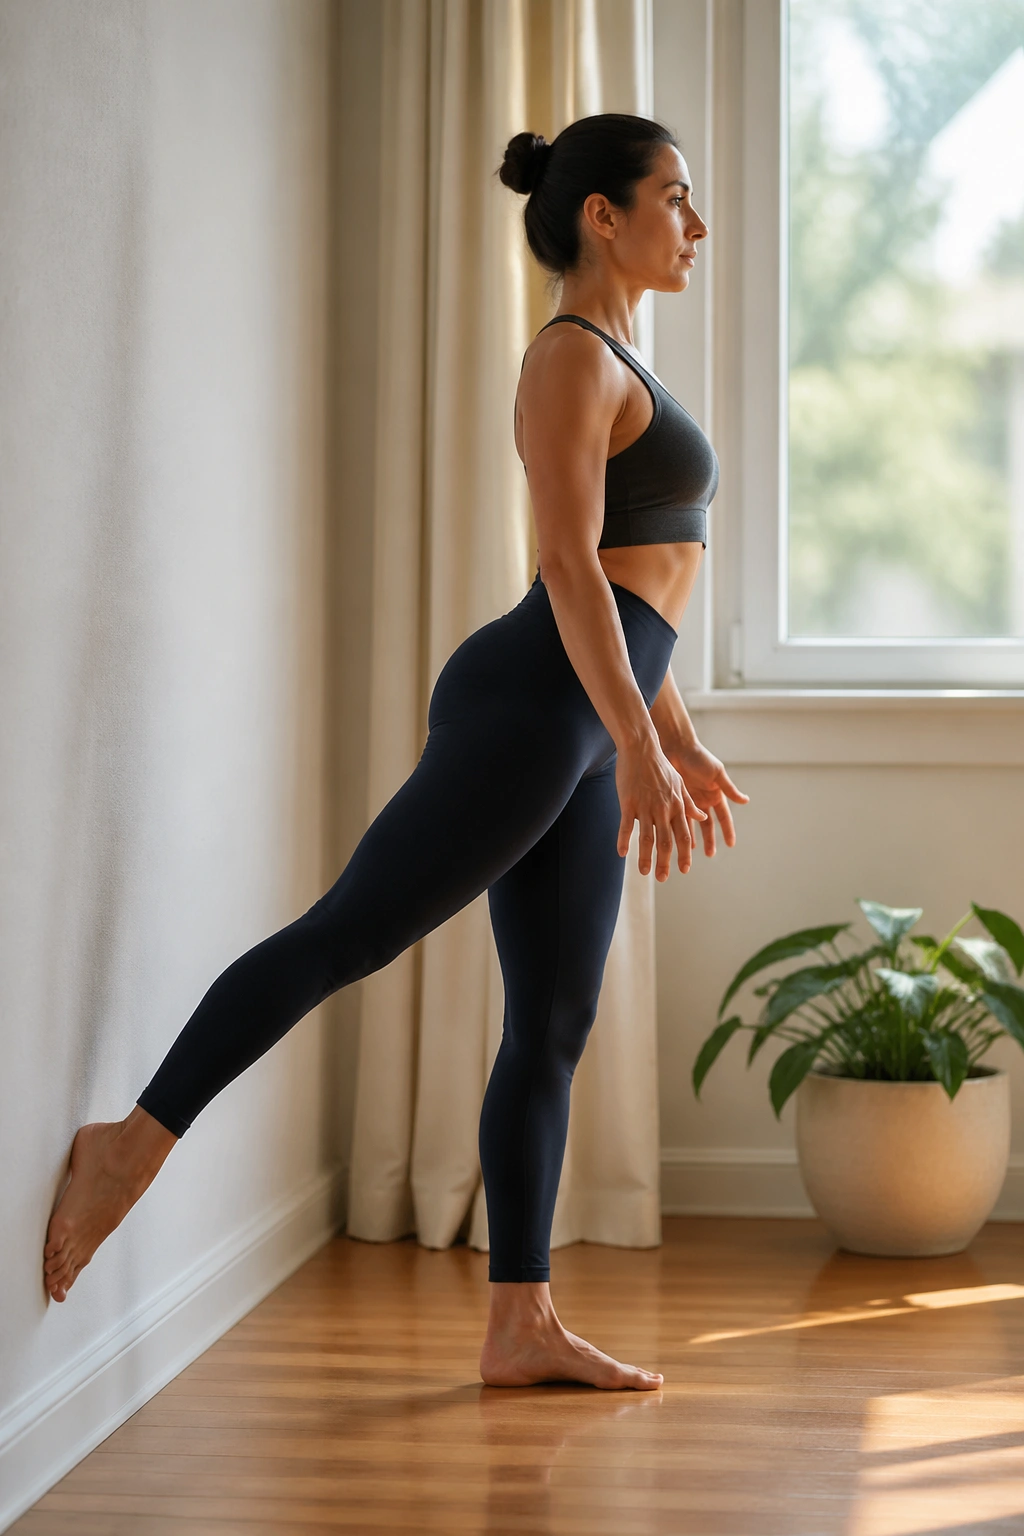
On the first few reps, this one feels a little awkward. That is normal.
Stand near a wall and shift onto one leg. Hinge slightly at the hip as the free leg reaches back, then return to standing without letting the standing knee cave inward. You can keep the other toes barely touching the floor at first if balance is shaky. Think long spine, soft ribs, steady pelvis. The motion is controlled, almost quiet.
The value here is not just balance. It is balance with shape. Running asks you to hold one leg under the body while the other leg moves through space, and if that standing side collapses, you get the side-to-side wobble that shows up late in a run. This drill trains the standing glute, the foot, and the deep core to stay on the same page.
Use 2 sets of 5 to 6 reps per side. Hold the reach for 2 seconds at the bottom. If you want more challenge, reach the arms forward as the torso tips, then sweep them overhead on the way back up. Small changes, big difference.
6. Mermaid and Spine Twist for Rotational Ease
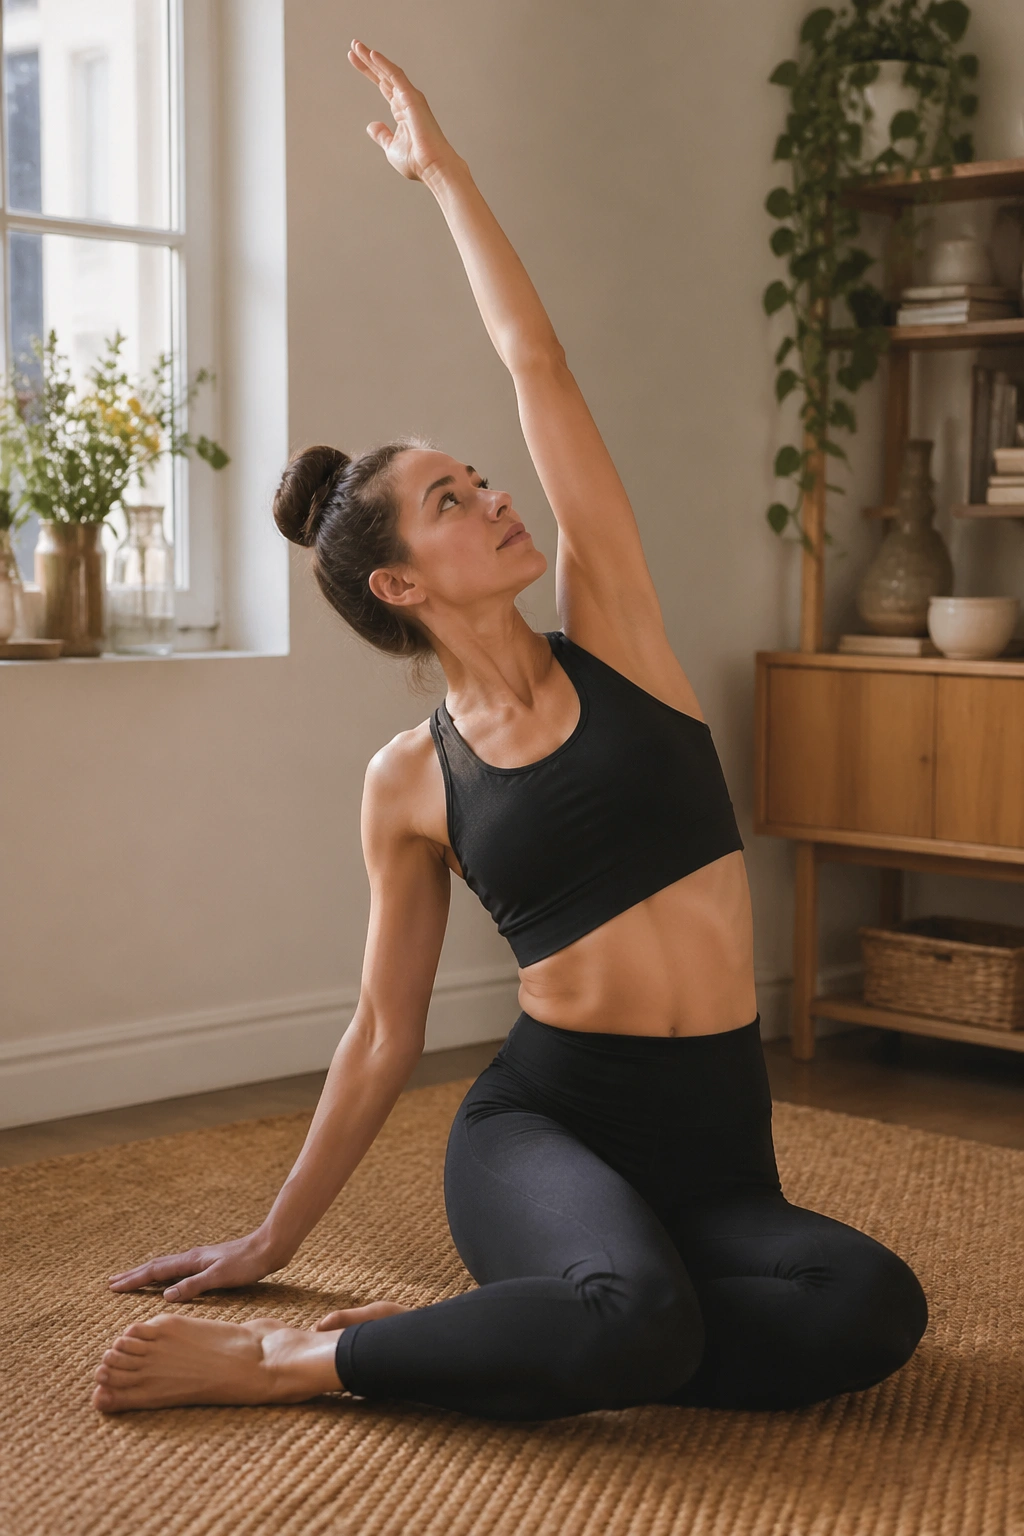
Unlike hard core work, this one gives the torso room to breathe again.
Sit sideways with both knees bent to one side, one hand on the floor, and the other arm reaching overhead. Lean gently into a mermaid stretch, then open the top arm across the body in a slow spinal twist. Keep the pelvis grounded. Keep the breath smooth. The point is not to yank the body into a deep twist; it is to free up the rib cage so the arms and torso can move with less stiffness.
Runners spend a lot of time in one direction, over and over, and the upper back can get stiff without anyone noticing. That stiffness turns into a shorter arm swing and a tighter chest, which makes easy miles feel strangely hard. A mermaid and twist sequence loosens the trunk without making it floppy.
Do 3 slow rounds per side. Spend 4 to 5 breaths in the side bend, then rotate on the exhale. If one side is much tighter, stay with that side for an extra round. No drama. Just time.
7. Hamstring Slider Curls on a Towel
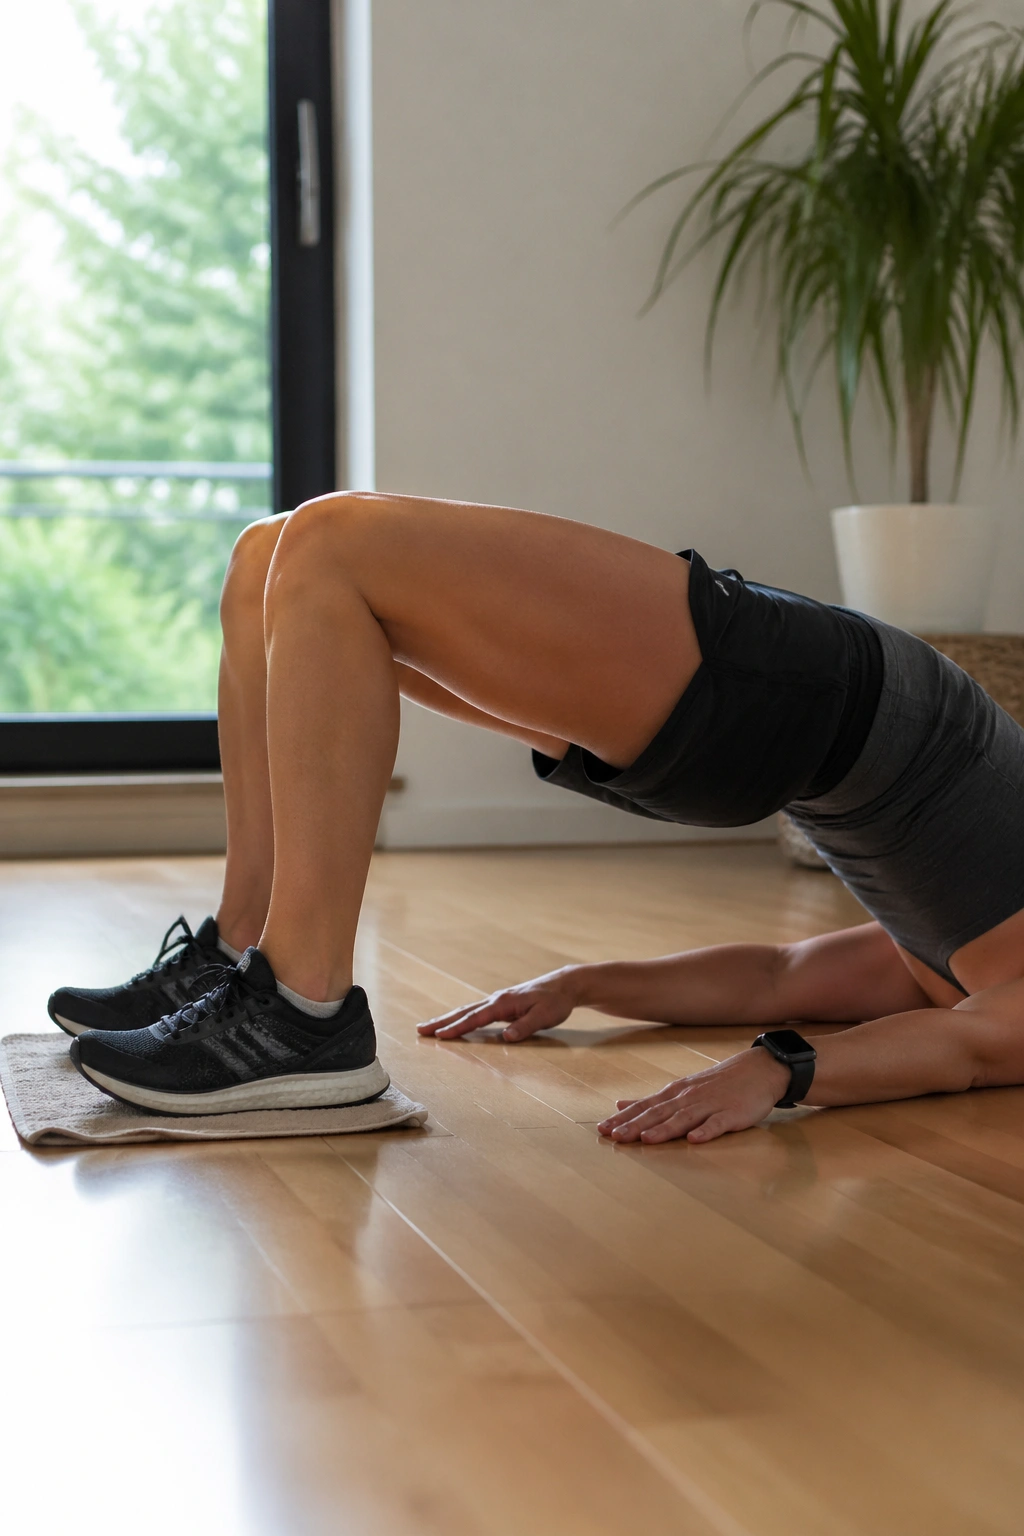
A towel on hardwood can humble you fast.
Lie on your back with heels on a towel or pair of socks on a smooth floor. Lift into a small bridge, then slowly slide the heels away until the legs are almost straight. Pull them back in without dropping the hips. The hamstrings light up almost instantly, and the glutes have to stay involved the whole time so the lower back does not take over.
This is one of the most runner-friendly Pilates-style moves because the hamstrings help with swing phase and hip extension, but they need to work together with the glutes. If the hamstrings are weak or overworked, that can show up as tightness behind the knee or a grabby back of the leg late in a run.
What makes it worth doing
- The sliding surface removes momentum.
- The bridge teaches the hips to stay lifted.
- The slow pull-in builds control, not speed.
Start with 6 reps. If cramping hits, lower the hips a little and shorten the slide. That usually helps. A lot of people try to make this move harder before they can control it. That is backward. Control first, range second.
8. The Pilates Squat Pulse for Climbing Power
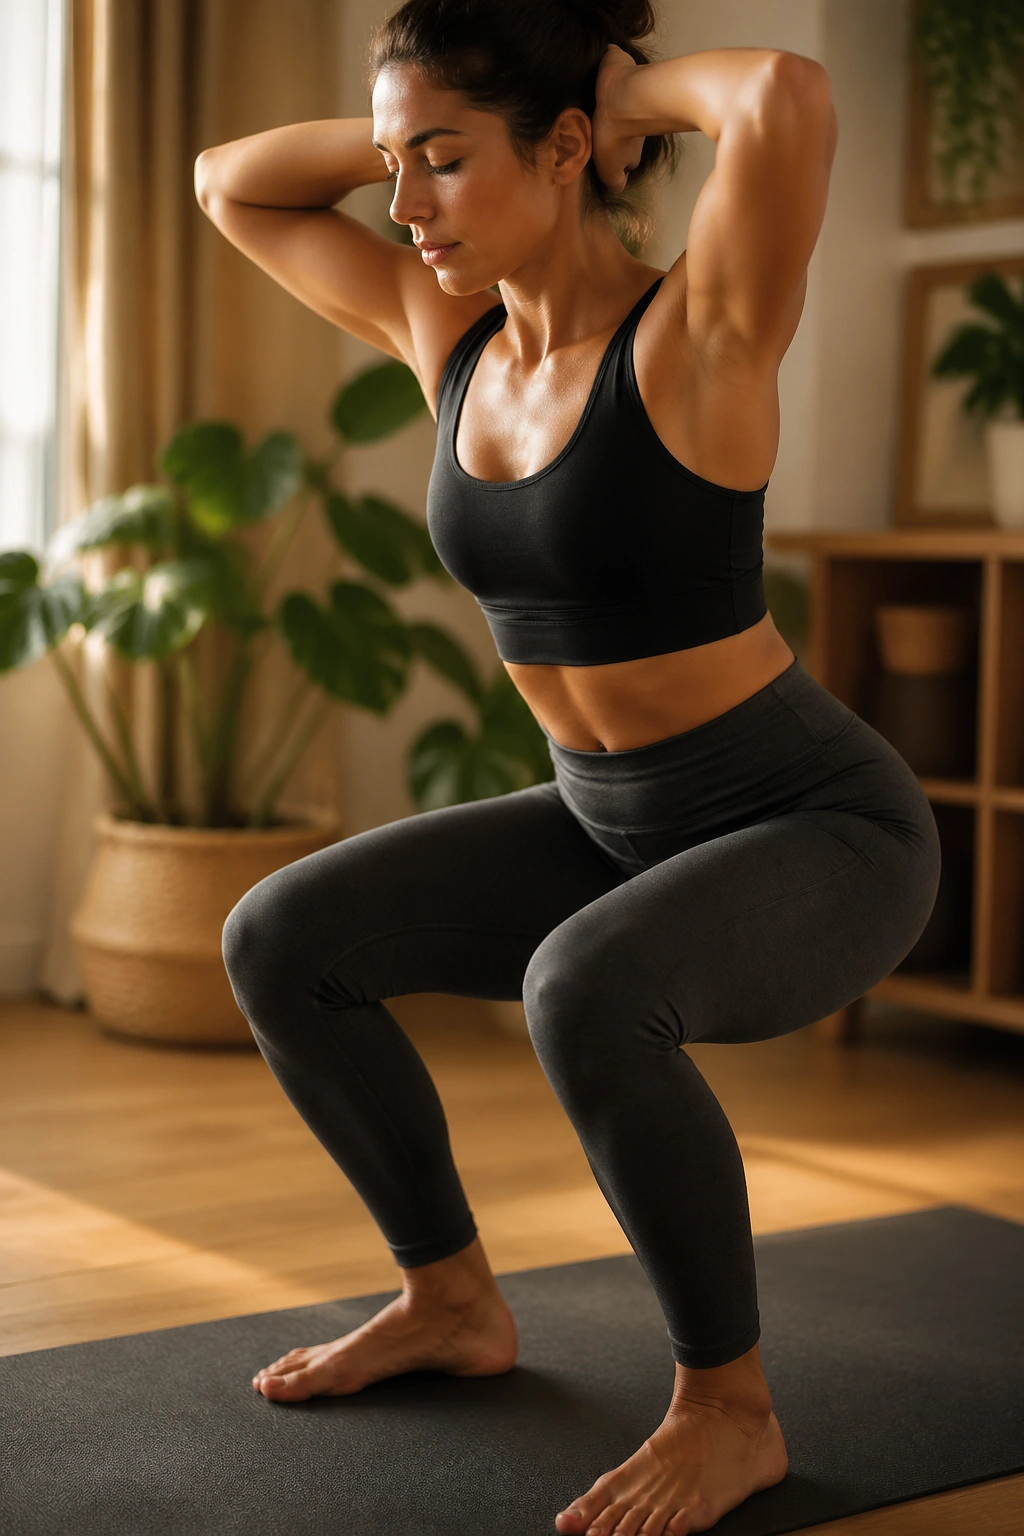
If hills are where your form falls apart, squat pulses deserve a place on the mat.
Stand with feet a little wider than hips, toes turned out just enough to feel natural, and sink into a small squat. Hold the chest open, ribs stacked over the pelvis, then pulse 10 times in a shallow range. From there, press through the heels and stand. You can keep your hands behind the head, arms reaching forward, or one arm overhead if you want to challenge the trunk a bit more.
This is not a heavy strength move. It is a control drill. The short range keeps the thighs and glutes working without letting the knees drift all over the place. For runners, that matters on climbs, descents, and any run where the body wants to fold at the waist.
A good pulse feels like the legs are doing the work while the torso stays calm. A bad one looks like a bounce. That bounce is cheap. The control is the part that pays off.
Try 2 rounds of 10 pulses and 10 seconds of hold at the bottom. If your heels lift, stand a little taller and narrow the depth. A squat that you can own beats a deeper one you cannot.
9. Standing Leg Circles for Hip Stability
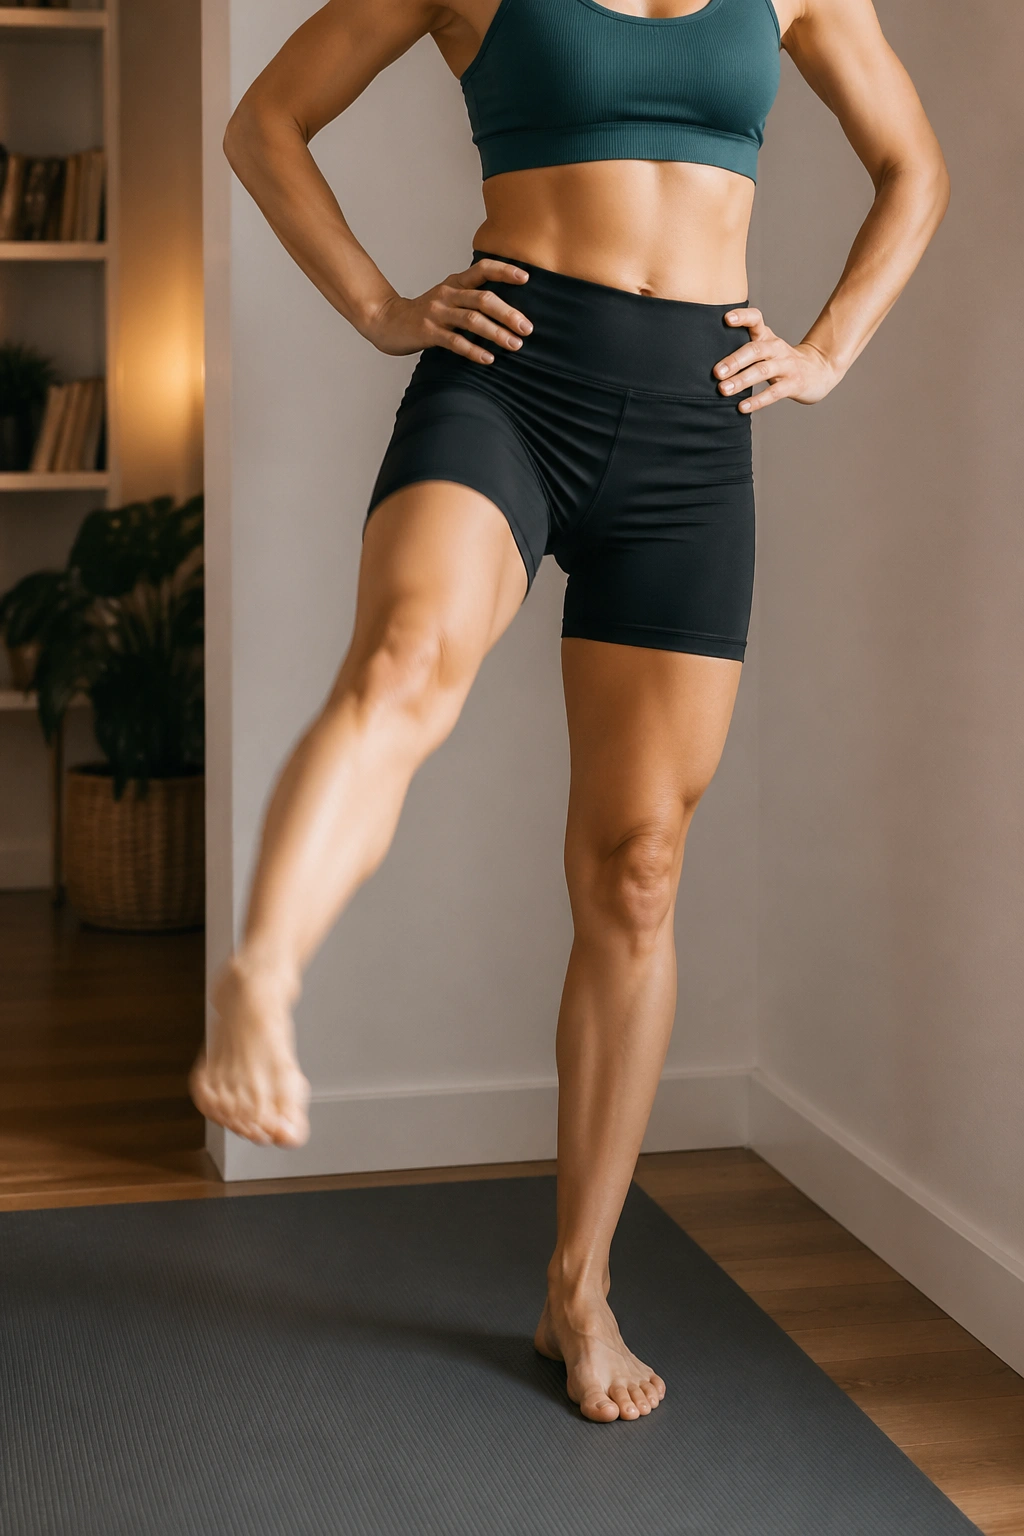
Why draw circles with a lifted leg instead of bigger swings? Because runners usually need precision more than range.
Stand facing a wall, hold lightly with one hand, and lift one leg a few inches off the floor. Draw slow, small circles from the hip joint while keeping the pelvis square. The standing leg should feel steady. The lifted leg should move without yanking the low back around with it.
This looks simple, then becomes surprisingly revealing. If the standing foot collapses or the pelvis tilts, the circle usually gets sloppy right away. That feedback is the point. You see exactly where the control leaks.
Use these cues
- Keep the circle no bigger than a dinner plate.
- Stand tall through the crown of the head.
- Exhale as the lifted leg moves through the hardest part.
Do 5 circles each direction on one side, then switch. One side will probably feel cleaner. That is normal. The rough side often needs the slower tempo, not more force.
This is a nice pre-run option because it wakes up the hip without tiring you out. It is also a good fix for the runner who likes big dynamic swings but never checks whether the pelvis can stay level.
10. Bird Dog with a Long Exhale
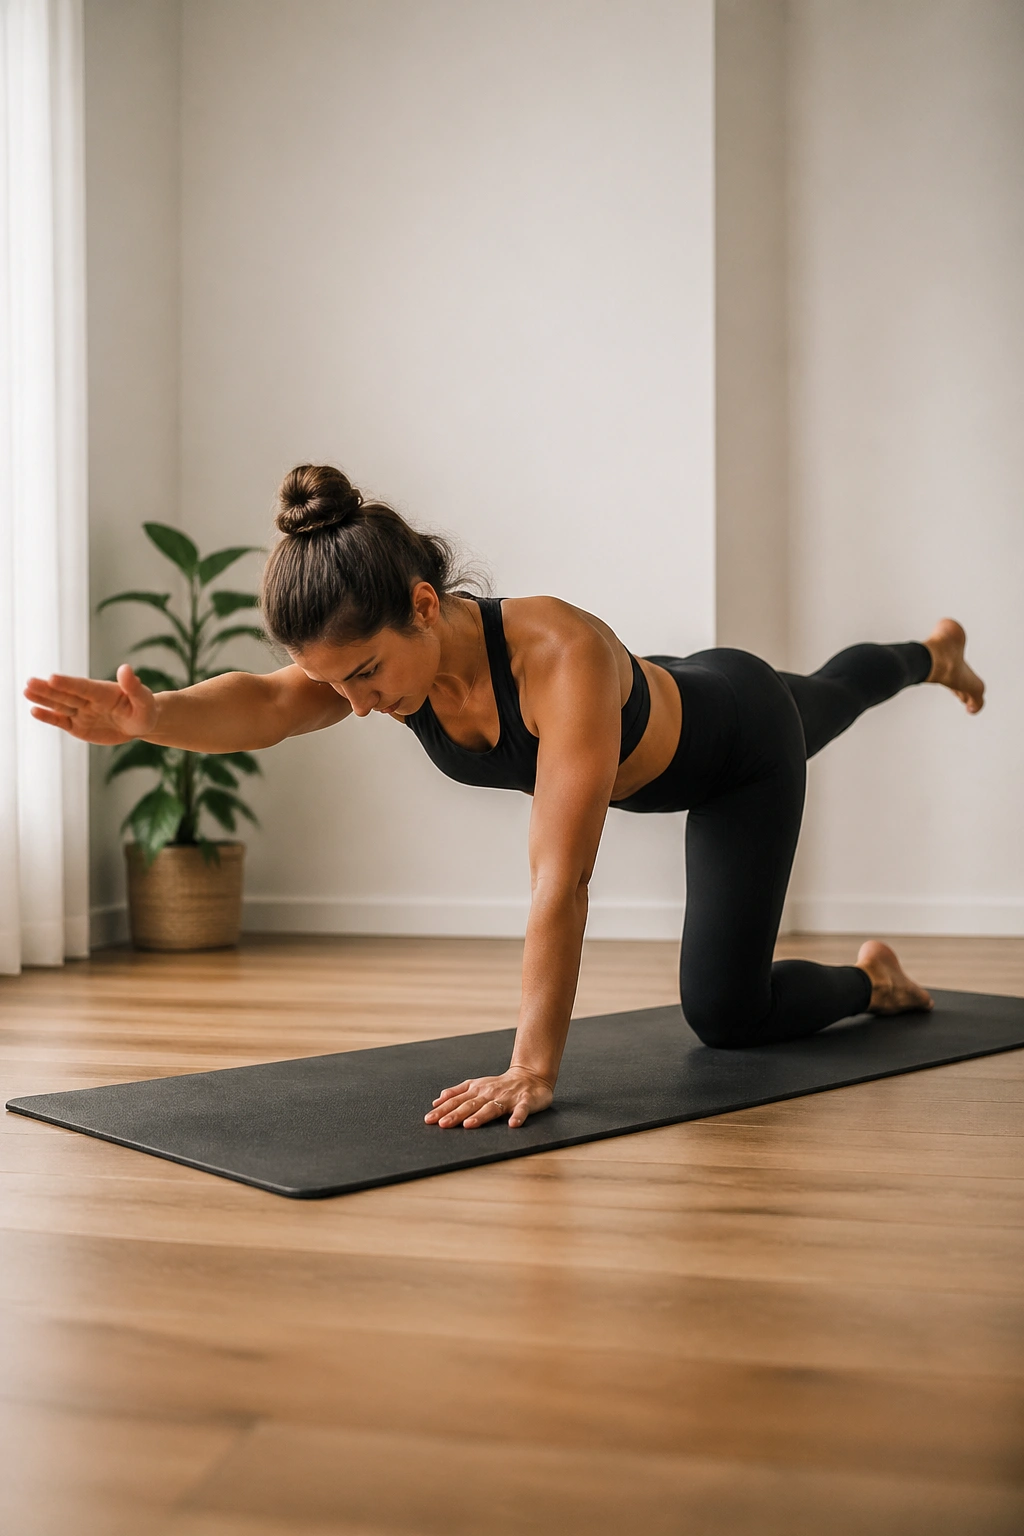
Bird dog looks mild. It is not.
Start on hands and knees, wrists under shoulders and knees under hips. Reach one leg straight back as the opposite arm reaches forward, then hold for 3 to 5 seconds while you exhale slowly. The goal is a long line from fingertips to heel, not a high kick. If the spine sags, lower the leg. If the ribs pop, reset the breath first.
This drill is one of the cleanest ways to train cross-body control. Runners need the trunk to stay quiet while opposite limbs move, and bird dog teaches that pattern without pounding the joints. It also tends to expose the side that likes to cheat. Good. Better to find that on a mat than halfway through a tempo run.
You can make it easier by sliding one hand forward an inch instead of lifting it, or by keeping the toes on the floor and just reaching the heel back. That is not “lesser” work. That is smart work.
Do 6 reps per side. Each hold should feel steady, not frantic. If your neck gets tight, look at the floor between the hands and soften the jaw.
11. Side Plank Lifts for Lateral Strength
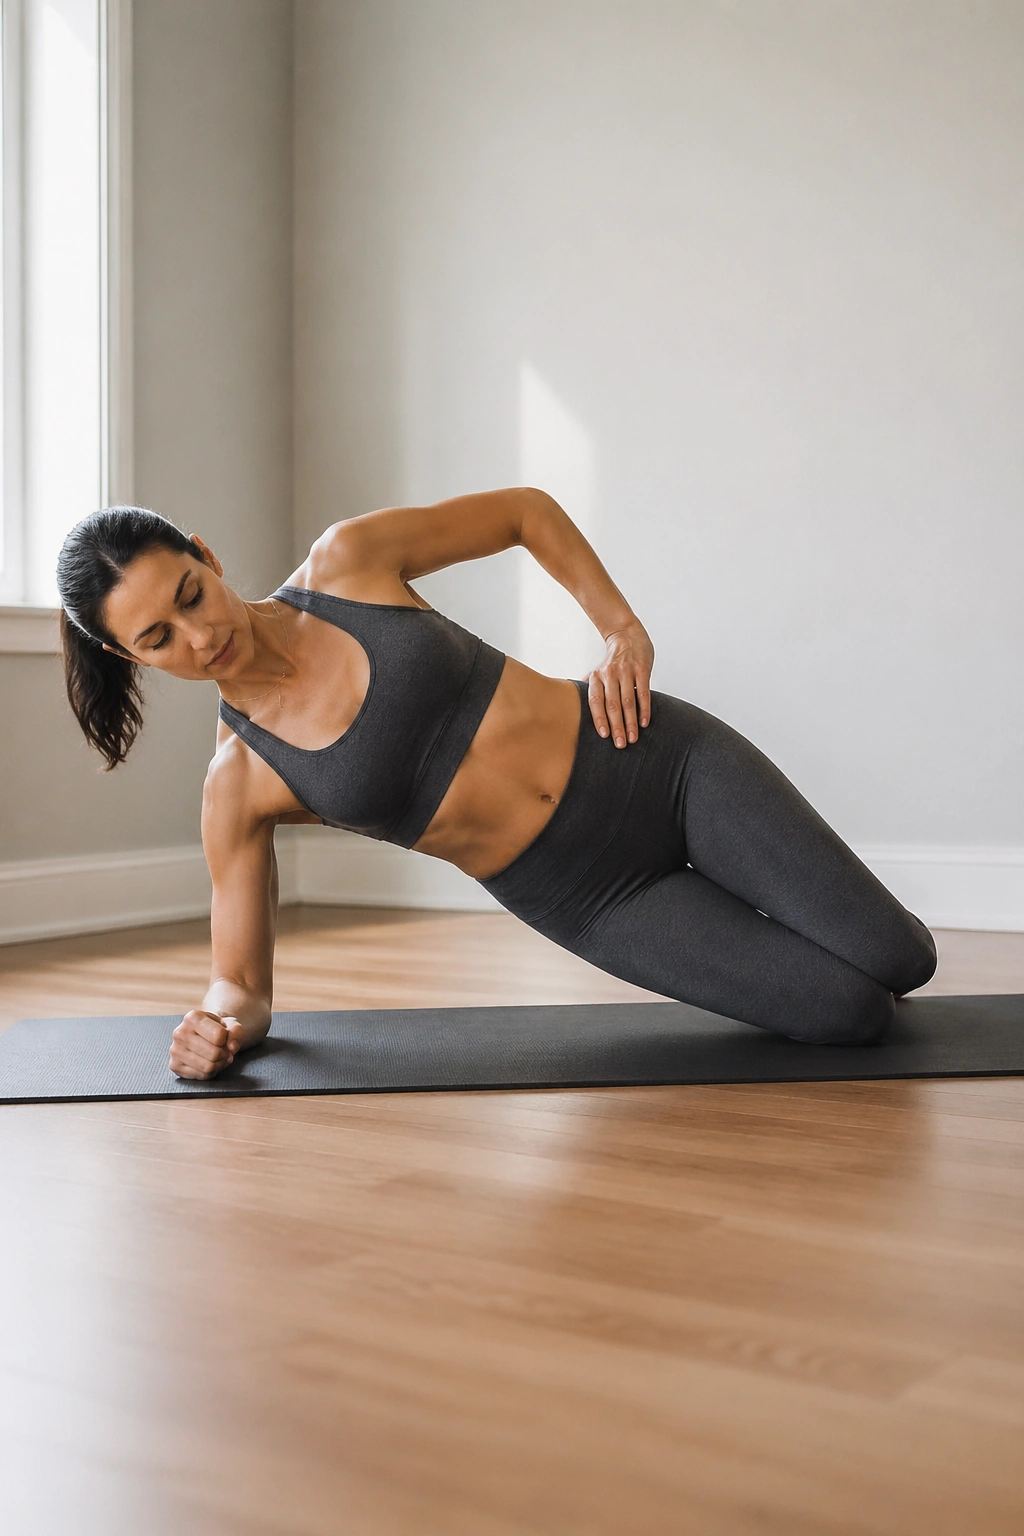
Side planks do more for runners than endless crunches ever will, because the real problem is often side-to-side collapse, not lack of front-body effort.
Set up on one forearm with knees bent for the easier version, or with legs straight if you already have the strength. Lift the hips so the body makes one long line. Then lower an inch or two and lift again for 5 to 8 controlled reps. You can also hold for 15 to 25 seconds if the lift series feels too busy.
The lateral chain matters every time one foot leaves the ground. If the outside of the hip cannot stabilize, the pelvis drops and the knee often follows. Side plank work hits the obliques, glute medius, and shoulder all at once, which is a nice little package for runners who want more control without a giant time commitment.
Keep the top shoulder stacked and the ribs from rolling forward. That is the trap. Most people want to rotate out of the position to make it easier. Don’t. That ruins the point.
Do 2 sets per side. If the bottom hip starts to ache, move the elbow a bit closer to the ribs and shorten the lever. Clean shape beats a longer hold every time.
12. Pilates Roll-Downs and C-Curve Curl for Better Posture
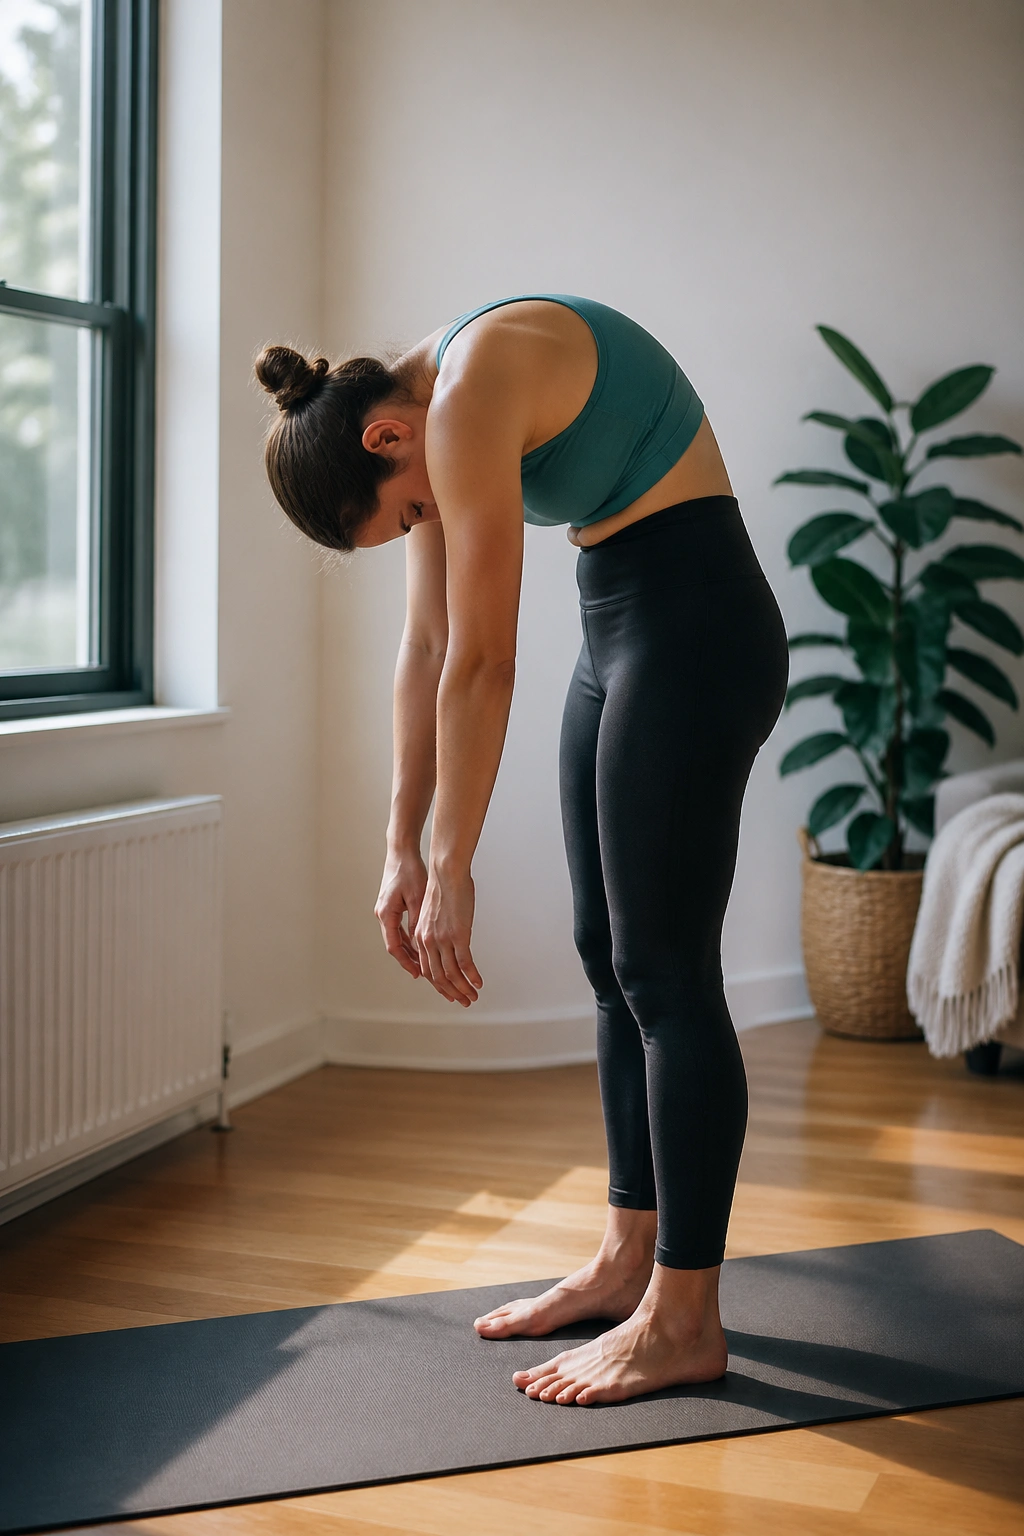
If your chest folds toward your thighs after a long desk day, roll-downs feel like a reset button.
Stand with feet hip-width apart and let the head nod forward first. Then peel the spine down one vertebra at a time until the arms hang and the weight sits near the balls of the feet. Pause. Roll back up slowly, stacking the spine from low back to crown. After that, sit and practice a small C-curve curl, drawing the ribs back while the tailbone tucks under.
That pairing matters for runners because posture is not just about standing tall. It is about controlling where the ribs live over the pelvis, especially when fatigue starts to drag everything forward. Roll-downs open the back body. C-curve work reminds the front body how to stay organized without rigid bracing.
What to watch for
- Do not yank the neck.
- Keep the knees soft if the hamstrings pull.
- Stop before the low back starts to pinch.
Three roll-downs and 6 seated curls are enough. The point is not to touch your toes. The point is to make the spine move segment by segment instead of as one stiff block.
13. Mini-Band Monster Walks, Pilates Style
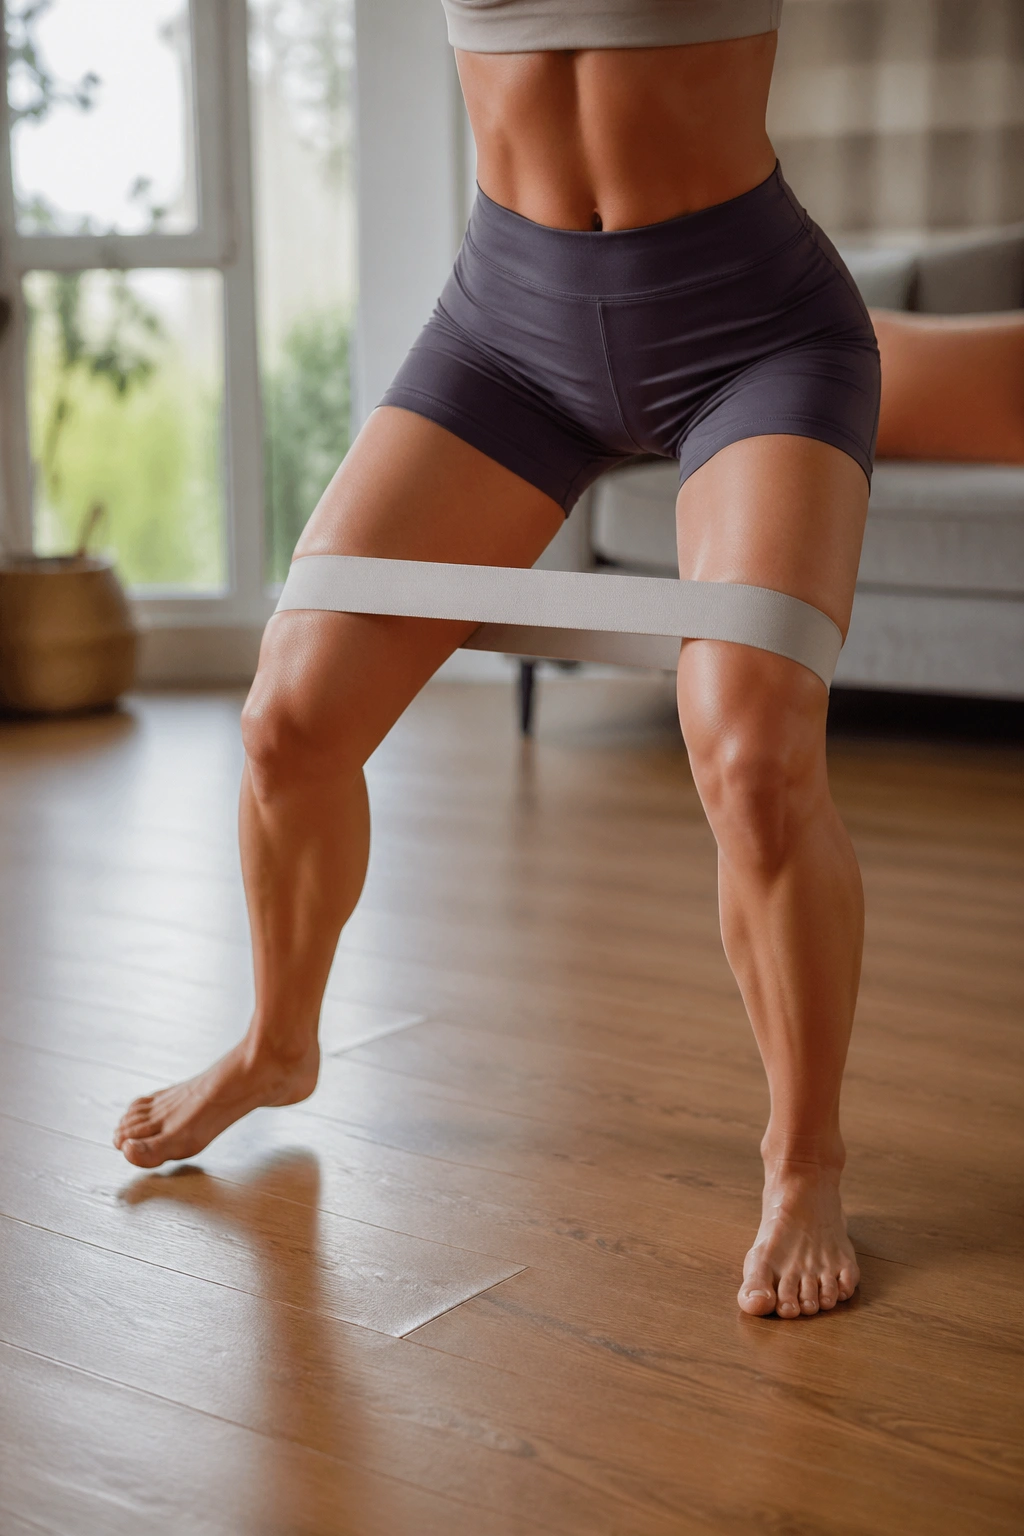
Mini-band walks can get sloppy fast, and sloppy band work is a waste of time.
Put a light band above the knees or around the ankles, sit into a small Pilates squat, and step sideways 6 to 8 steps in one direction. Keep the toes pointing forward and the pelvis level. Step back the same way. Then try 4 diagonal steps forward and back. The range stays small, the pace stays slow, and the knees never cave inward to win the rep.
What makes this Pilates-style instead of gym-bro style is the control. You are not trying to cover distance. You are trying to feel the side hips hold shape while the legs move. That is a bigger job than it sounds, and it shows up on the run when the knees stay aligned instead of diving inward.
A light band is enough. Heavy bands often force the body to cheat with the low back or feet. And if the band bites into the skin so hard that you rush, it is the wrong band.
Try 2 rounds of 8 steps each way. Stay low, but not so low that your pelvis tucks under. There is a sweet spot in the middle.
14. Recovery Flow for Tight Calves and Hips
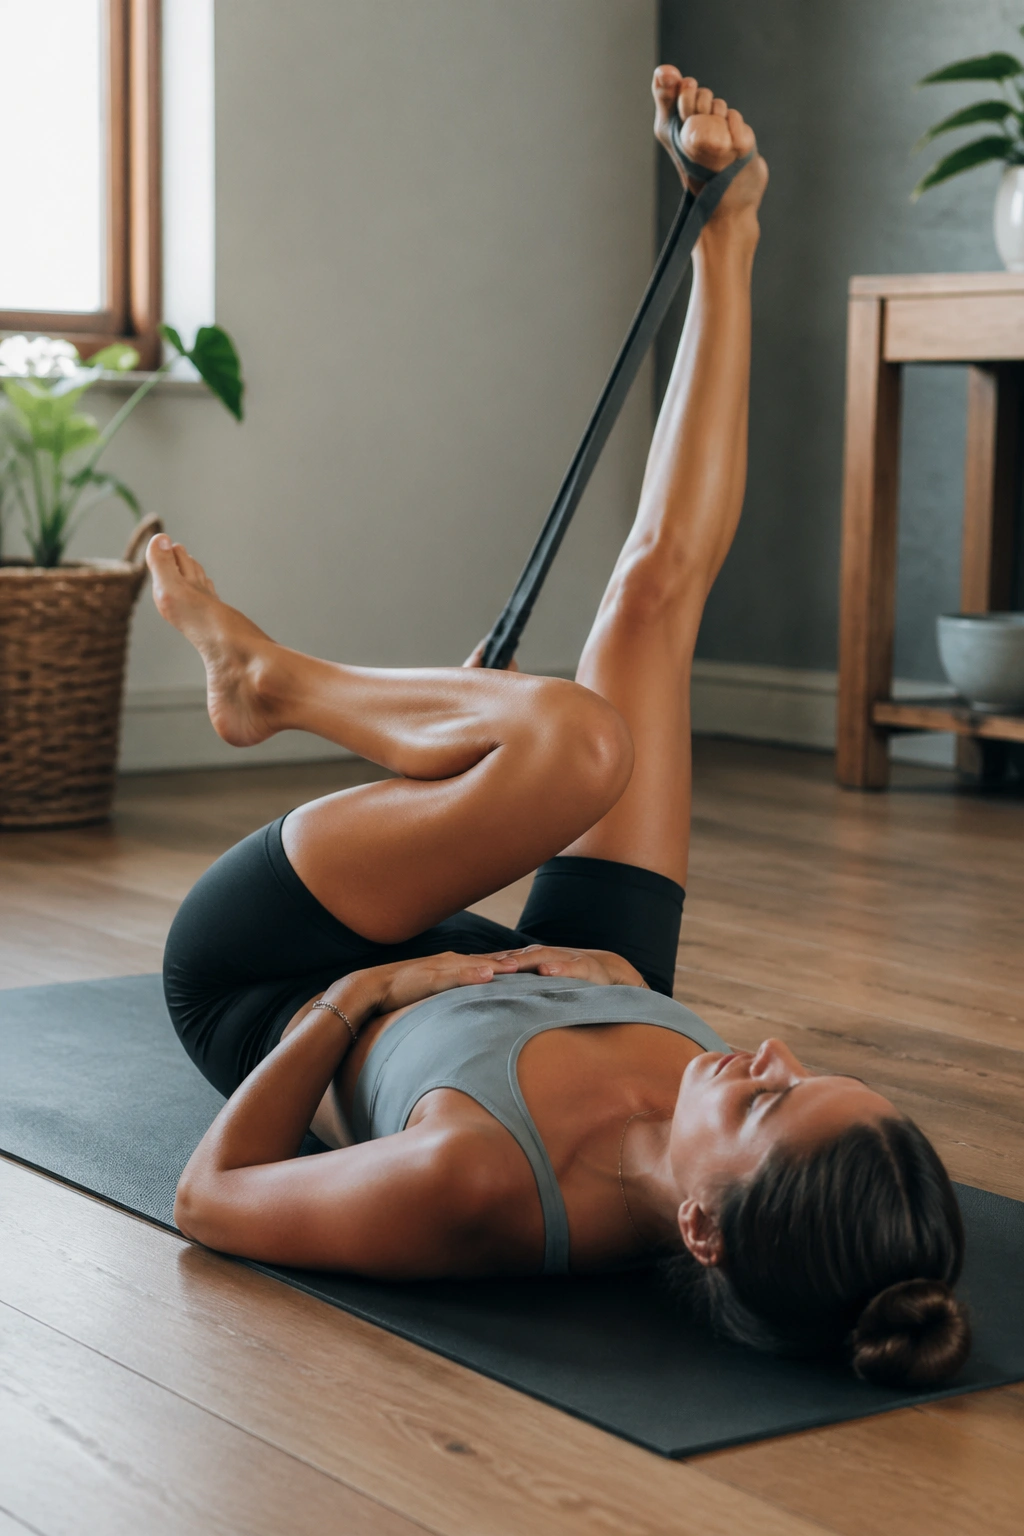
Some sessions should leave you calmer, not more cooked.
Lie on your back and move through a short recovery flow: calf stretch with a strap or towel, figure-four hip stretch, kneeling hip flexor stretch, then 5 slow breaths with one hand on the belly and one on the ribs. You can also add a gentle spinal twist if your back likes it. Keep everything easy enough that you could do it after a long run without dreading the next step.
This kind of work matters because runners often treat recovery as an afterthought. Then the calves stay locked, the hips stay short, and every new run starts from a tight place. A quiet floor sequence will not replace sleep or actual rest, but it does help the body stop gripping so hard.
A clean 8-minute version
- 45 seconds calf stretch each side
- 45 seconds figure-four each side
- 45 seconds hip flexor stretch each side
- 5 deep breaths in a crook-lying position
- 30 seconds of easy spinal twist each side
That is enough. Seriously. You do not need to turn recovery into another workout.
15. The Reset Circuit for Pilates Workouts at Home
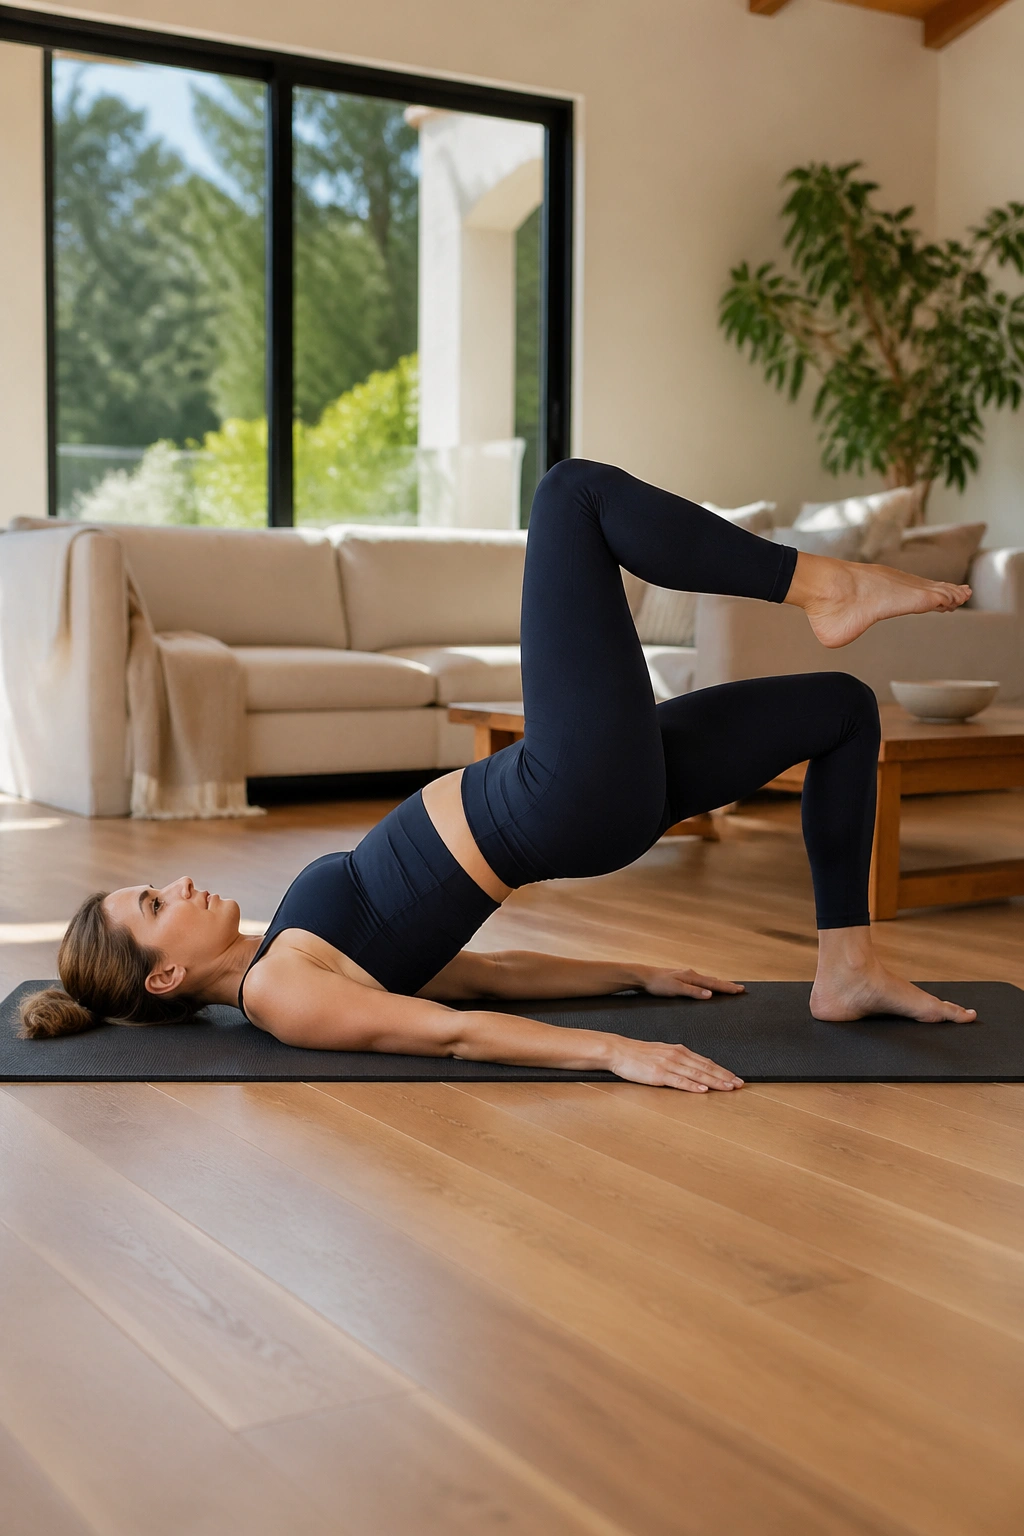
The best home routine is the one you can repeat on tired legs.
Here is a simple circuit that ties the whole thing together: foot tripod wake-up, bridge-and-march, dead bug, side plank lifts, and a short roll-down. Do each move for 30 to 45 seconds, rest for 15 seconds, then move on. Two rounds take about 18 to 20 minutes, depending on how slowly you breathe and how much control you want to keep.
A clean weekly version
- Foot tripod wake-up: 30 seconds each side
- Bridge-and-march: 6 reps each side
- Dead bug: 6 reps each side
- Side plank lifts: 5 lifts each side
- Roll-downs: 3 slow reps
The order matters a little. Start with the feet, then wake up the glutes, then ask the trunk to stay calm while the limbs move. Finish with the spine. That flow feels good before a run, but it is also solid on a rest day when you want work that does not smash your legs.
If you only have time for three moves, make them the foot tripod, dead bug, and bridge. Those three cover the basics runners tend to miss: foot pressure, pelvis control, and core support. Everything else builds on that. And once those pieces feel steadier, the stride usually gets cleaner without you forcing it.
