



A tight chest changes the rules fast. A deep inhale can feel less like a breath and more like work, and the usual advice to “just relax” is about as useful as telling someone with a flat tire to drive carefully.
Yoga breathing poses for asthma and tight lungs can help in a quieter, more practical way. They don’t force a huge inhale. They make room for the exhale, soften the ribs, and stop the shoulders from doing all the work. That matters more than people think. If your breath is already short, chasing a giant lungful of air usually makes the throat clamp down harder.
One important caveat: these are supportive practices, not a replacement for an asthma action plan, prescribed inhalers, or medical care. If you’re wheezing at rest, struggling to speak, getting dizzy, or noticing blue lips or chest pain, stop the practice and get help.
The best breathing work here is gentle, boring, and repeatable. No heroics. No breath-holding contests. Just positions that give the diaphragm, ribs, and upper back a little more space to do their job.
1. Diaphragmatic Breathing in Constructive Rest
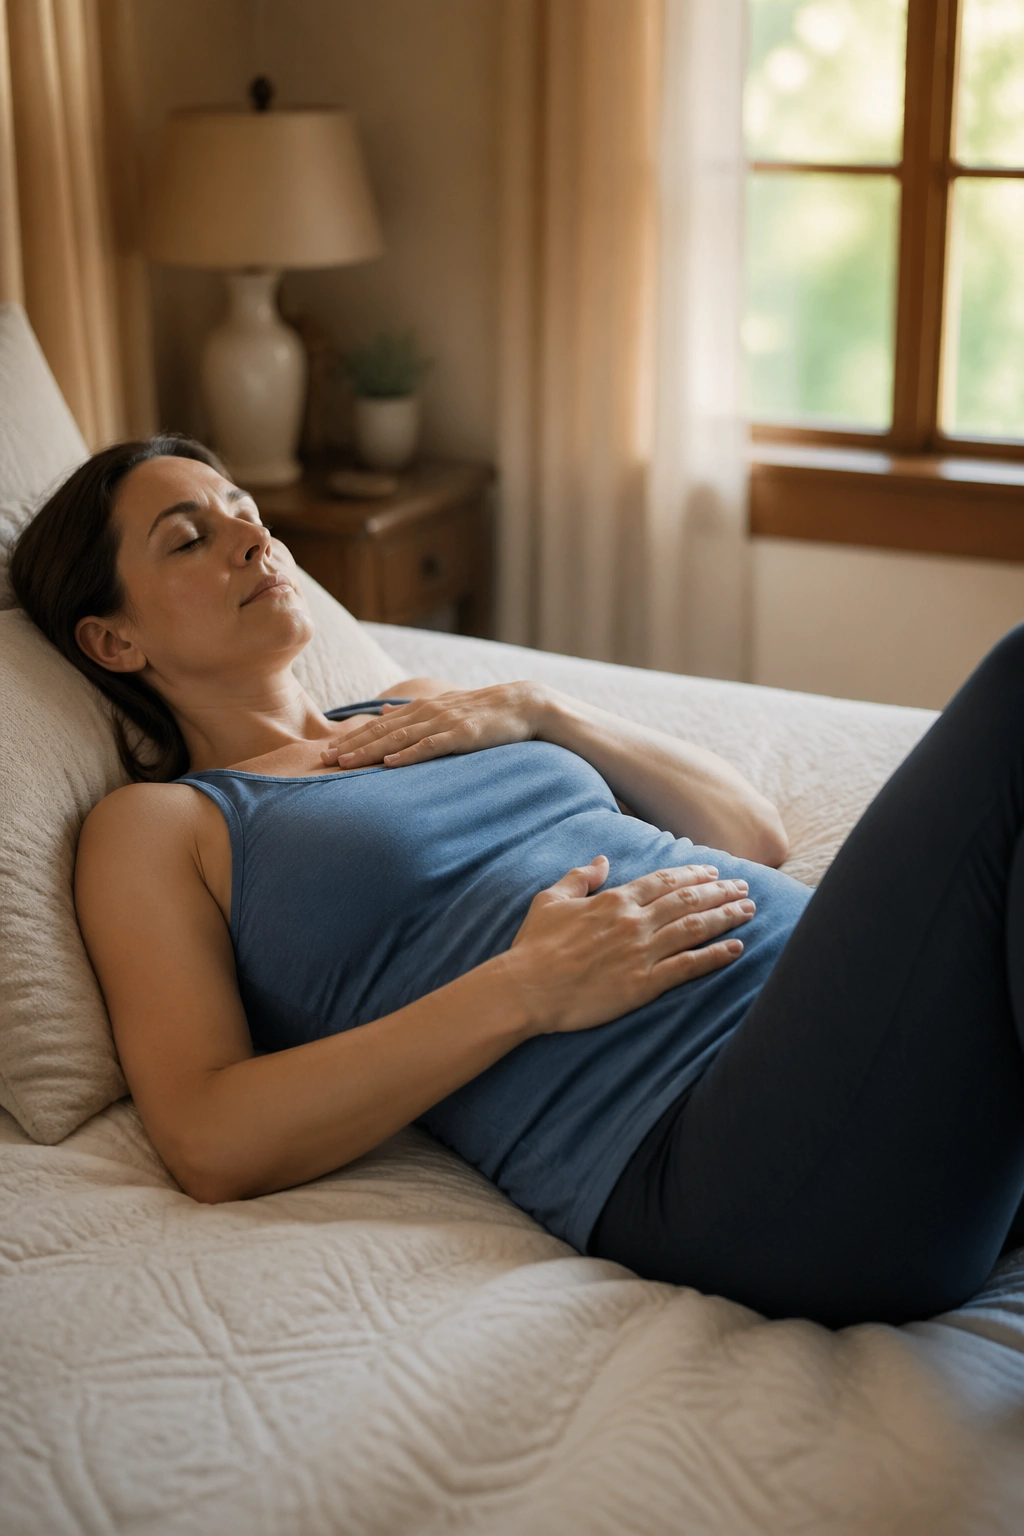
If you only do one pose, make it this one. Constructive rest sounds plain because it is plain, and that’s exactly why it works so well when the chest feels tight. Lie on your back with your knees bent, feet flat on the floor, and your lower back resting in a natural curve. Put one hand on your belly and the other on your lower ribs.
Breathe in through your nose for about 4 counts, then breathe out for 6 counts through the nose or softly through pursed lips. The hand on your belly should rise a little more than the hand on your chest. If your shoulders creep up, shorten the inhale. That’s the tell.
What it should feel like
- The belly rises first, not the collarbones.
- The exhale feels long and unhurried.
- Your jaw stays loose.
- The throat stays quiet.
A folded blanket under your head helps if your neck feels strained. And if lying flat makes you cough or feel pressure, prop your upper body on a bolster or skip this one entirely. The point is ease, not proving anything to the floor.
2. Hand-on-Belly Breathing in Easy Seat
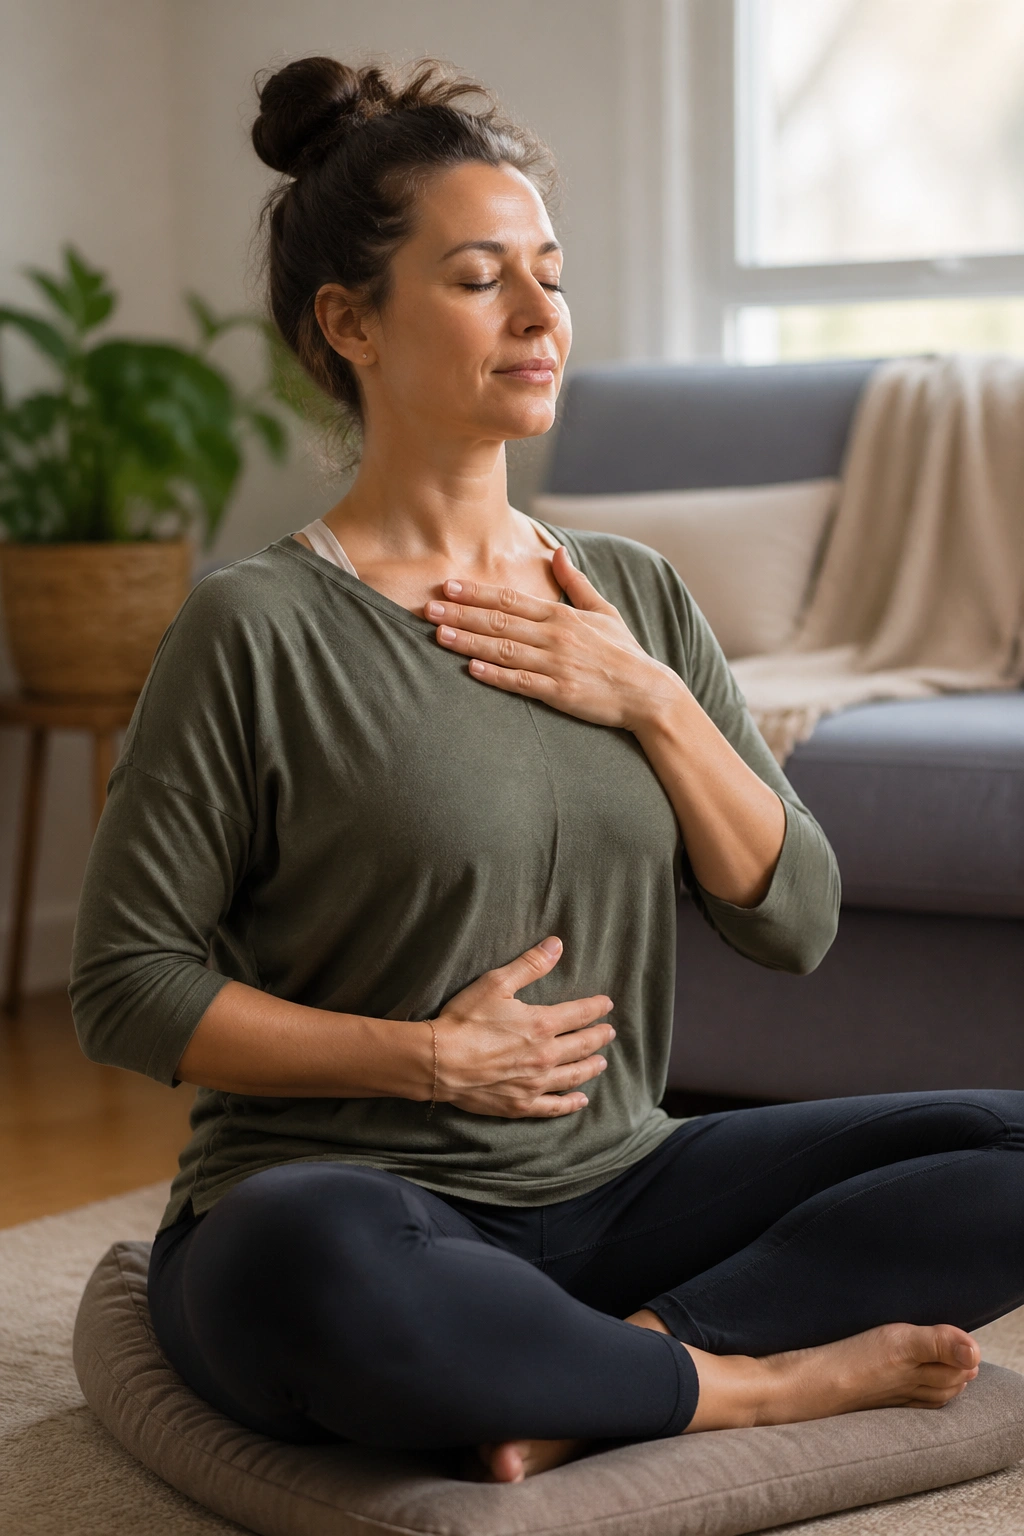
Why do so many people overcomplicate breathing? Because they think they need to “make” the breath bigger. You don’t. Sit cross-legged on a cushion, or on a chair with both feet down, and place one hand on your belly and the other on your upper chest. That simple touch gives you feedback before the breath gets messy.
Breathe in quietly through the nose and let the lower hand move first. The upper hand should stay almost still. On the exhale, feel the belly soften back toward the spine without sucking it in hard. Do this for 2 to 5 minutes, especially if your chest feels tight after a walk or after sitting too long.
The seat matters here. If your pelvis tips backward and your lower back rounds, the diaphragm loses room. Sit on the front edge of the chair or lift your hips on a folded blanket. Small adjustment. Big payoff.
3. Cat-Cow Breath Flow on Hands and Knees
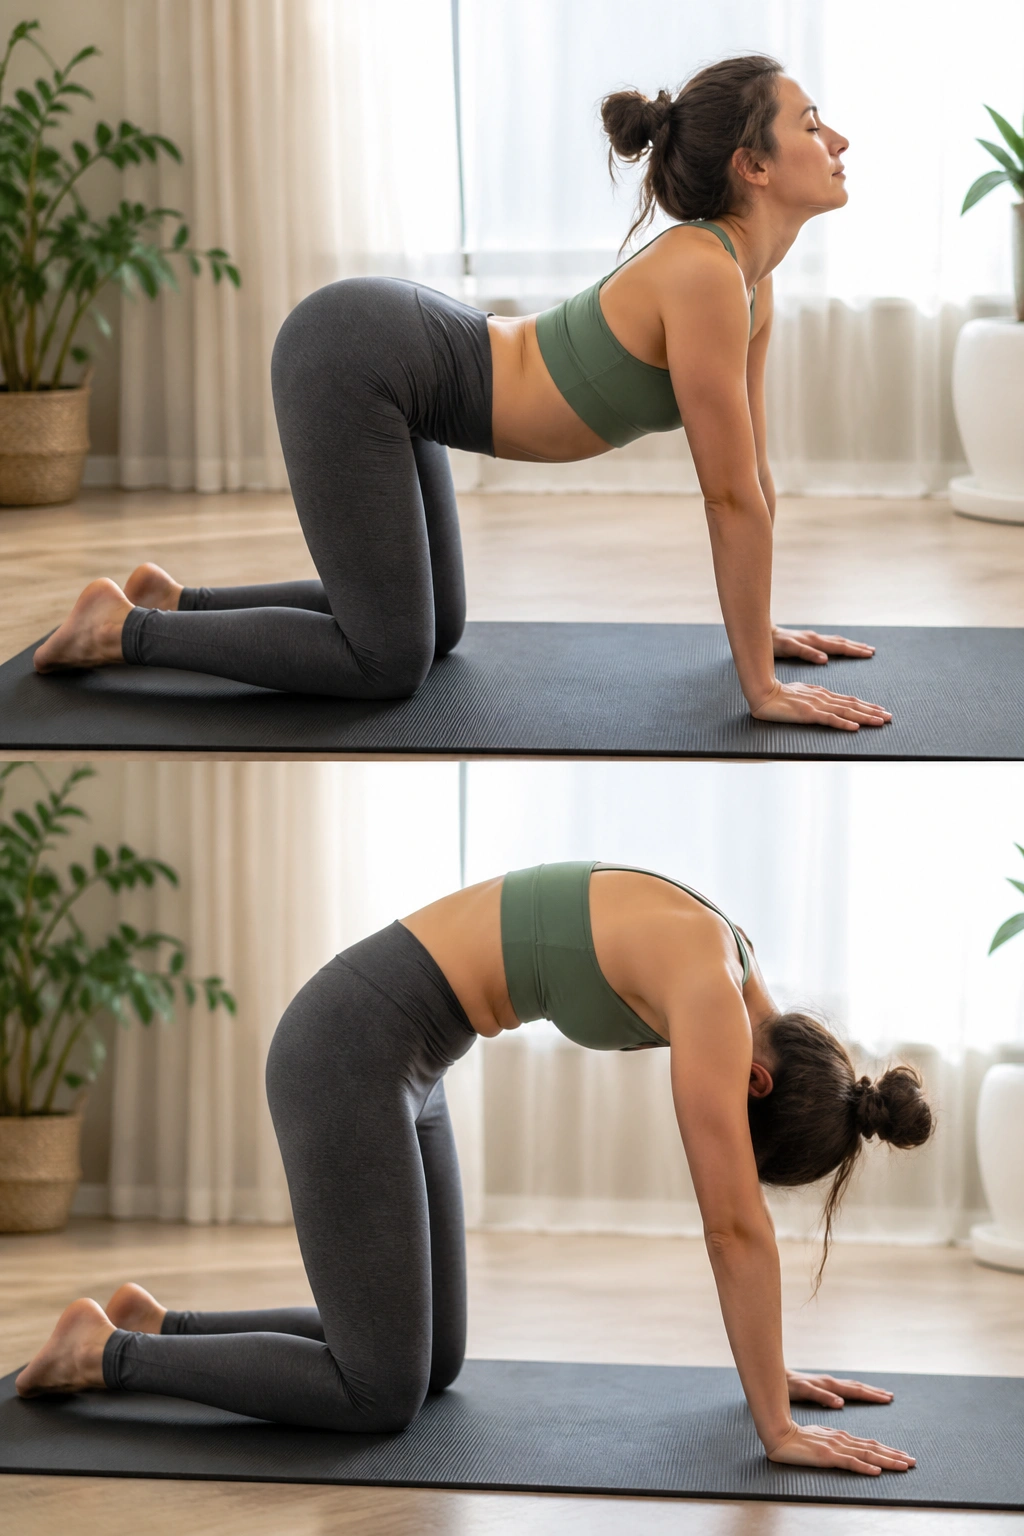
Tight lungs often hate stillness more than movement. Cat-cow gives the ribs a slow, friendly rhythm without asking for much flexibility. Come onto hands and knees, with wrists under shoulders and knees under hips. If wrists complain, come down to forearms or place your hands on the edge of a couch or bed.
Inhale and let the belly drop a little as the chest broadens into cow. Exhale and round the back into cat. Keep the movement small. You’re not trying to force the spine into a dramatic arch. You’re trying to create a smooth wave through the rib cage.
How to pace it
- Inhale for the lift, about 3 to 4 counts.
- Exhale for the round, about 4 to 6 counts.
- Move for 5 to 8 rounds.
- Stop before the breath gets noisy.
A lot of people go too big here. Don’t. A tiny, controlled range is better when the airways are sensitive. If you start panting, pause and sit back on your heels or take a child’s pose.
4. Child’s Pose with Side-Rib Breaths
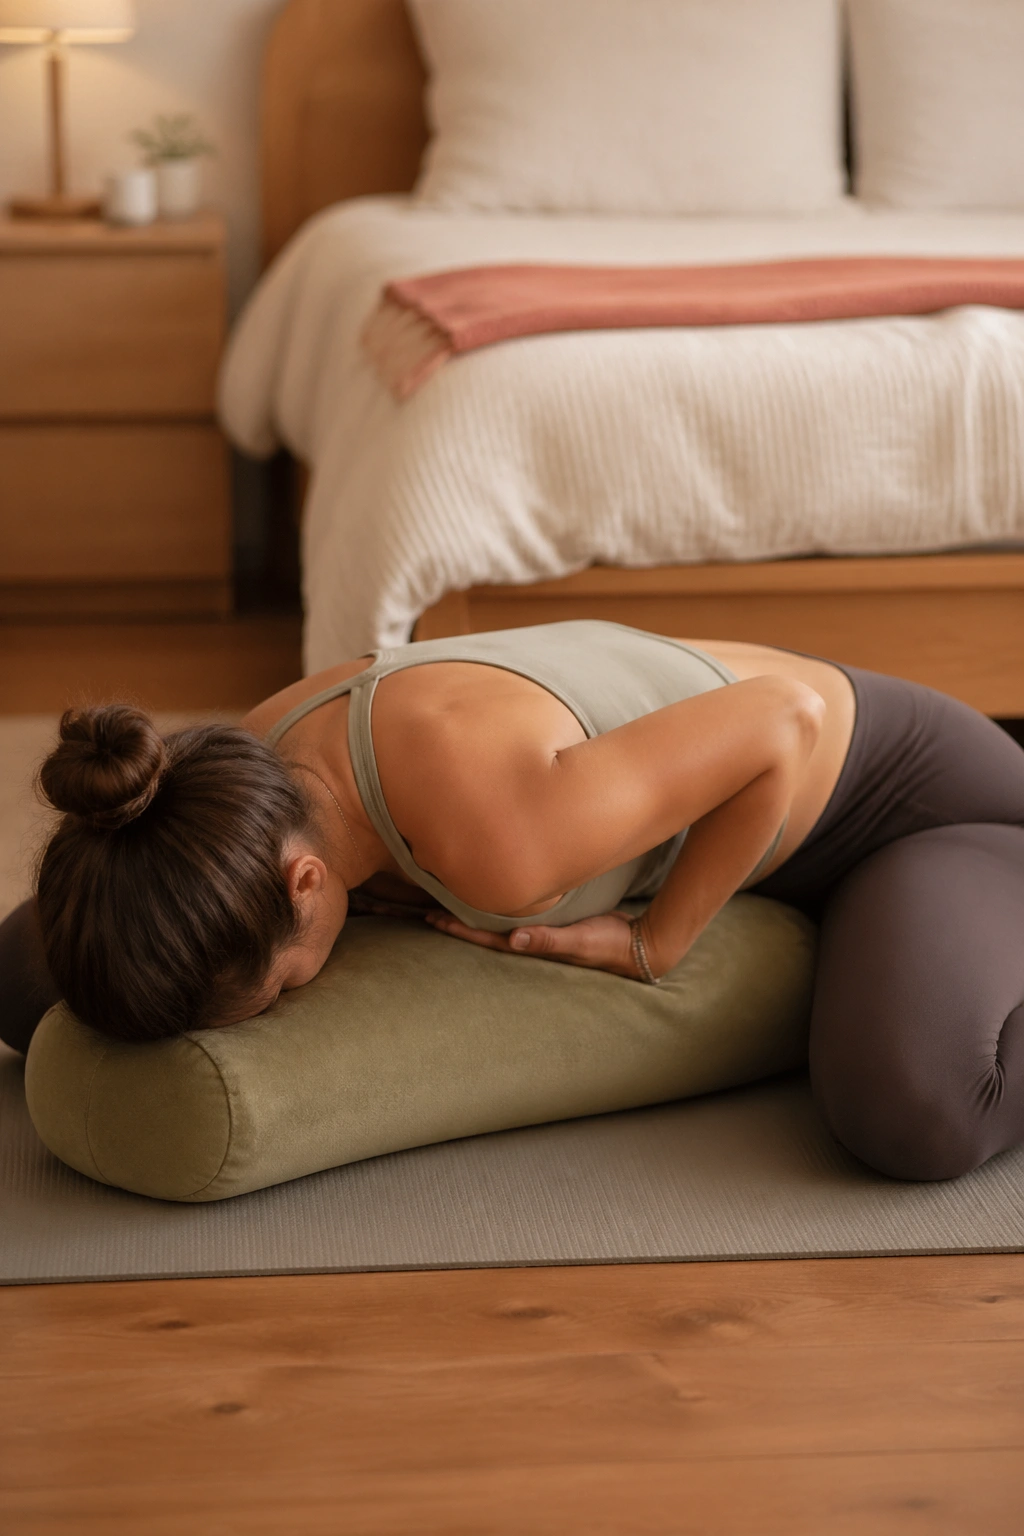
Child’s pose can be a lifesaver, or a miserable squeeze, depending on how you set it up. Knees wide, big toes touching, hips back toward the heels. If the chest needs more room, place a bolster or firm pillow under your torso so your belly and ribs have somewhere soft to rest.
The useful part here is the side body. Put your hands where your side ribs meet the floor or the support and breathe into that space. On the inhale, feel the ribs widen away from each other. On the exhale, let the belly sink and the shoulders melt down.
Make the pose fit your chest
- Use a bolster if your forehead won’t reach the floor.
- Keep the knees as wide as needed.
- Turn the head slightly from side to side if the neck gets cranky.
- Stay for 6 to 10 breaths.
This one works well after a stressful day because it gives the front body a break without locking the breath. If your lower back feels pinched, sit back less and bring a pillow under the hips.
5. Supported Bridge Pose with Slow Exhales
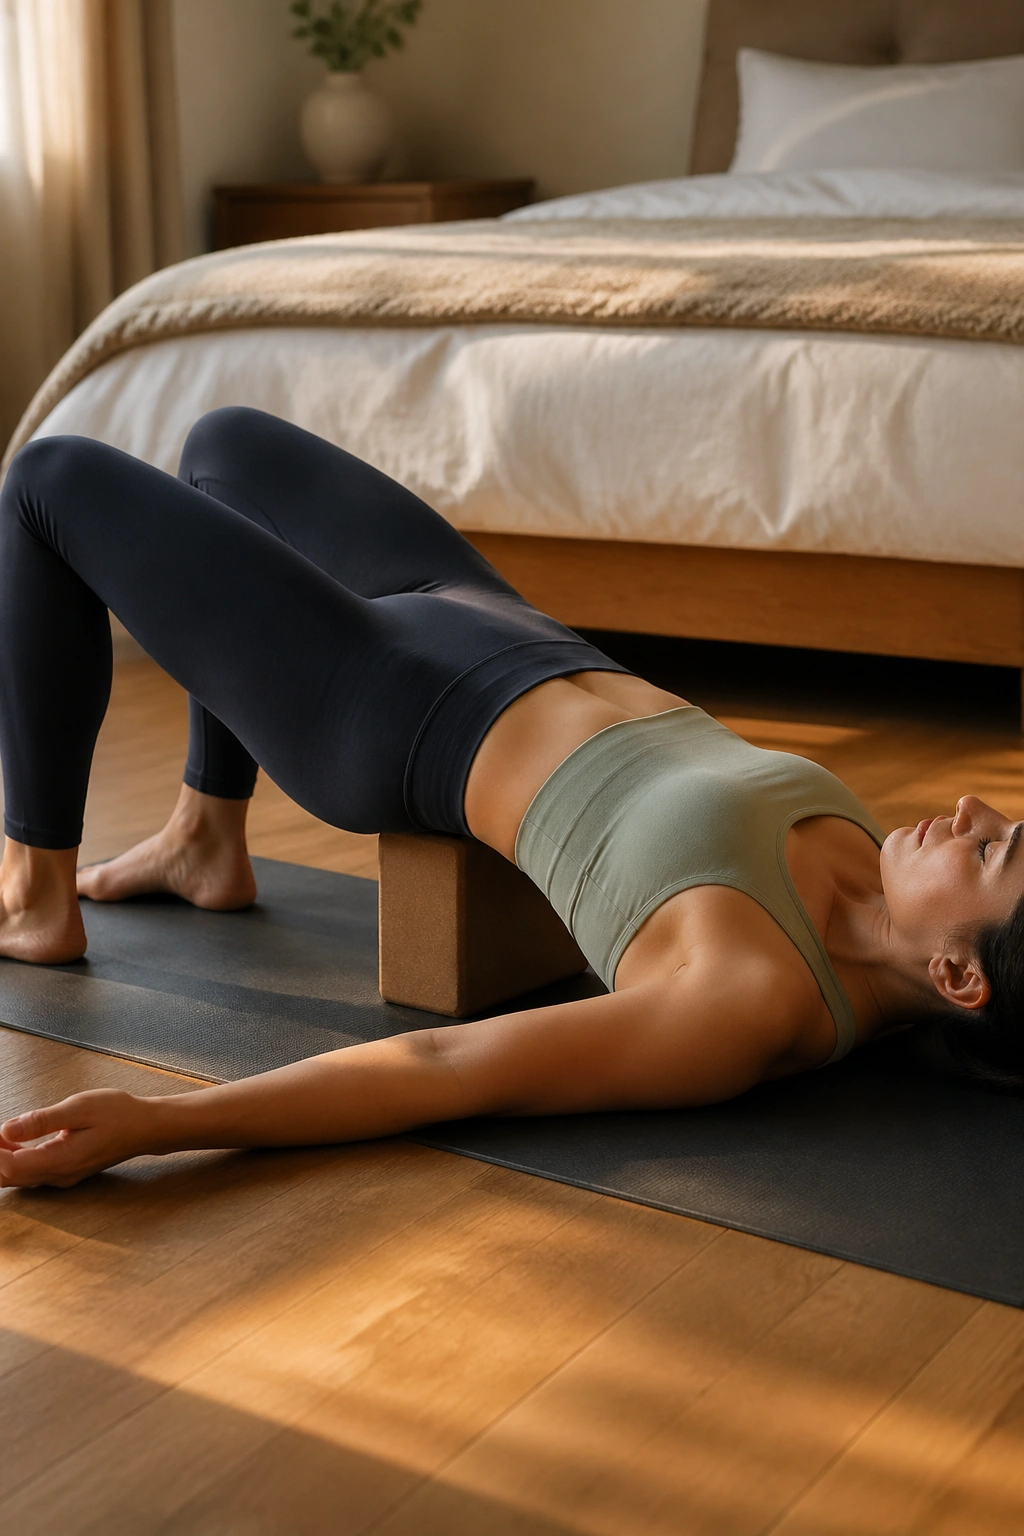
Bridge pose gets ignored in breathing work, which is a shame. A supported bridge can open the front of the body without asking your shoulders to work overtime. Lie on your back with your knees bent and feet hip-width apart, then lift your hips just enough to slide a block or firm bolster under the sacrum.
Once you’re settled, relax the buttocks and breathe into the lower ribs. The chest may feel like it rises a little on the inhale, but don’t chase a huge lift. The useful part is the space across the front body and the quiet steadiness underneath it.
What to watch for
- Keep the support under the sacrum, not the lower back.
- If your neck feels pinched, come out.
- If your low back arches hard, use a lower prop.
- Stay for 1 to 3 minutes.
This pose can feel calming after a coughing spell because it changes the angle of the ribs. Not every backbend helps tight lungs. This one often does because it stays low and supported.
6. Sphinx Pose for Front-Body Breathing
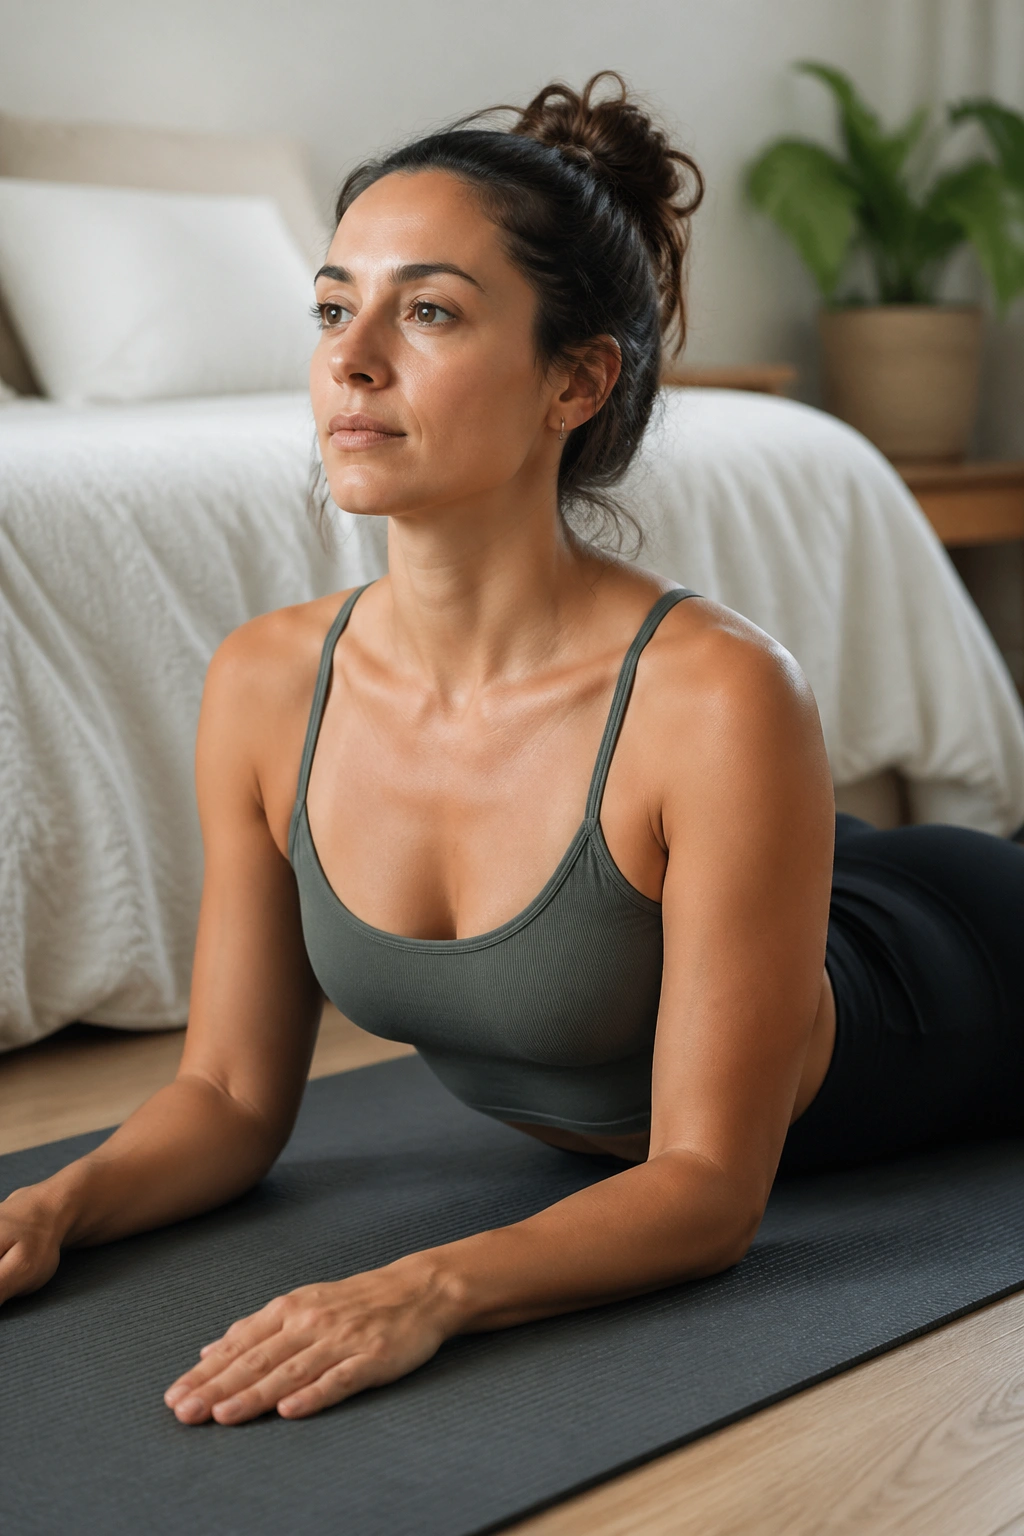
Can a small backbend help a tight chest? Yes, if it stays small. Sphinx pose is one of those shapes that looks simple on a mat and feels surprisingly useful in the body. Lie on your stomach, place your elbows under your shoulders or slightly forward, and let the chest lift just enough to create length through the front side of the ribs.
The trick is not to jam the lower back. Keep the pubic bone heavy, the neck long, and the shoulders away from the ears. Breathe in and feel the collarbones spread. Breathe out and let the belly soften back toward the floor.
A lot of people tense here because they think a backbend should feel impressive. Nope. It should feel spacious, almost dull in a good way. Stay for 5 to 8 breaths, and come out if the low back starts pinching or if prone pressure makes breathing harder.
7. Seated Side Bend to Open the Ribs
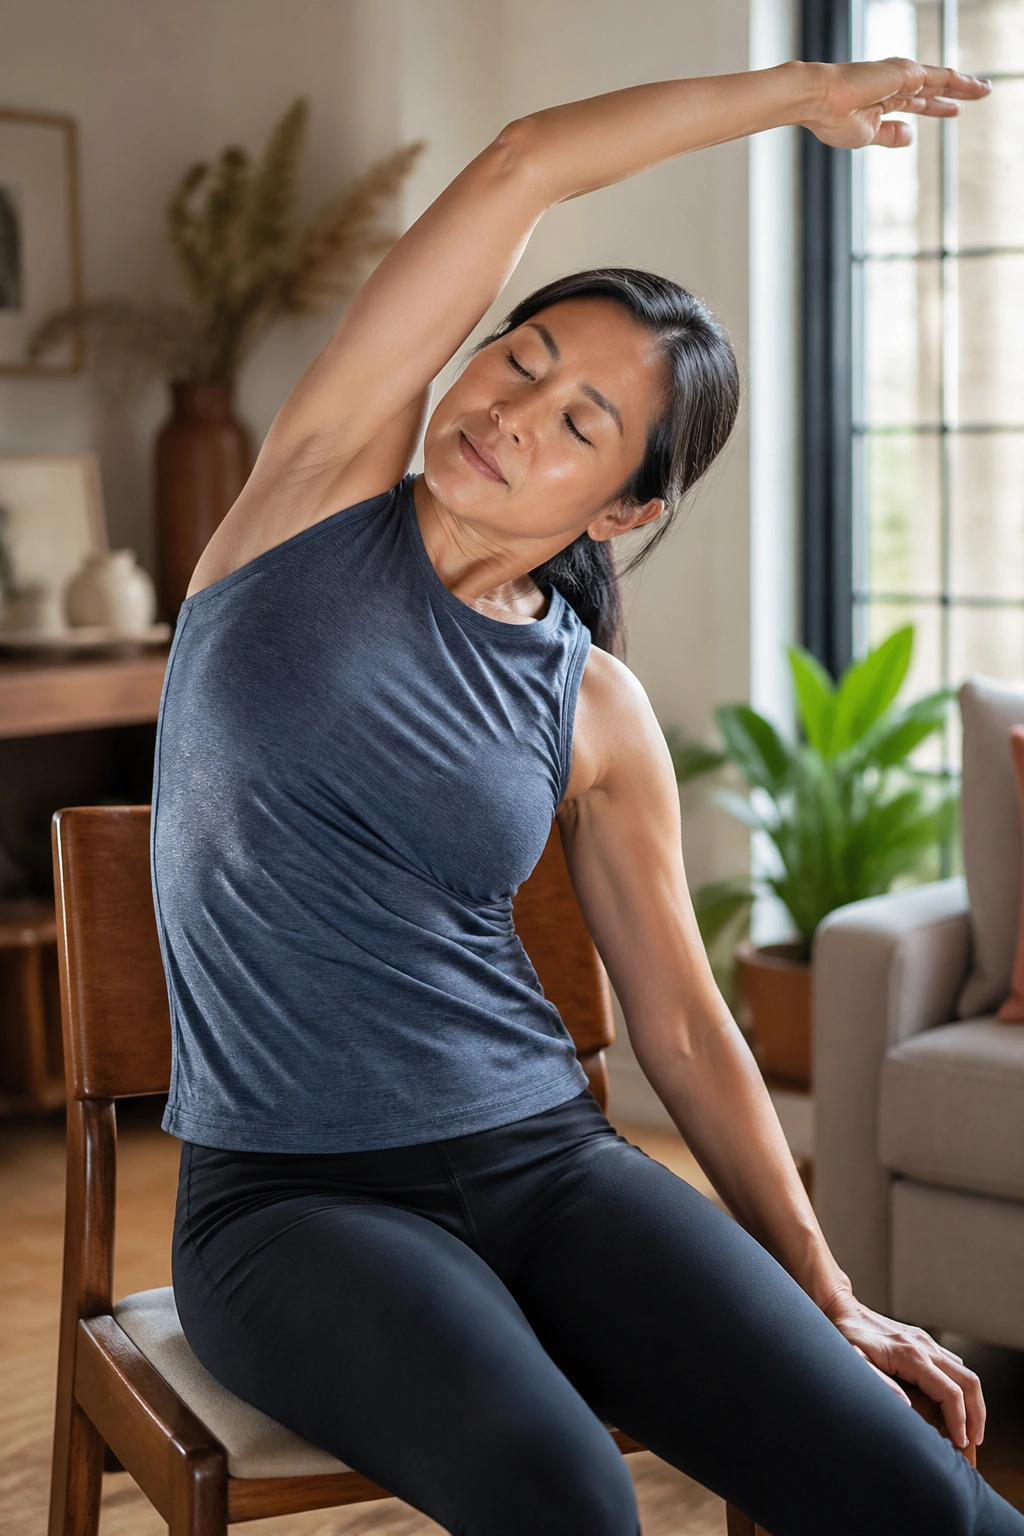
Desk days steal room from the ribs one side at a time. You can feel it when you sit down to breathe and one side seems stuck. A seated side bend gives that side body a chance to stretch without the drama of a deep twist.
Sit on the floor or on a chair. Reach one arm up, then lean gently away from that side while keeping both sit bones heavy. The goal is to open the space between the lower ribs and the armpit, not to collapse backward or shove the shoulder up by the ear.
How to get the most from it
- Keep the top shoulder soft.
- Let the lower hand rest on the thigh or chair.
- Breathe into the open side for 3 to 5 breaths.
- Switch sides and repeat.
You’ll often feel the breath get easier on the stretched side after two or three rounds. That’s not magic. It’s just room. If you want a deeper version, hold the seat or the floor with the lower hand so the torso doesn’t drift.
8. Wall Chest Opener with Forearms Low
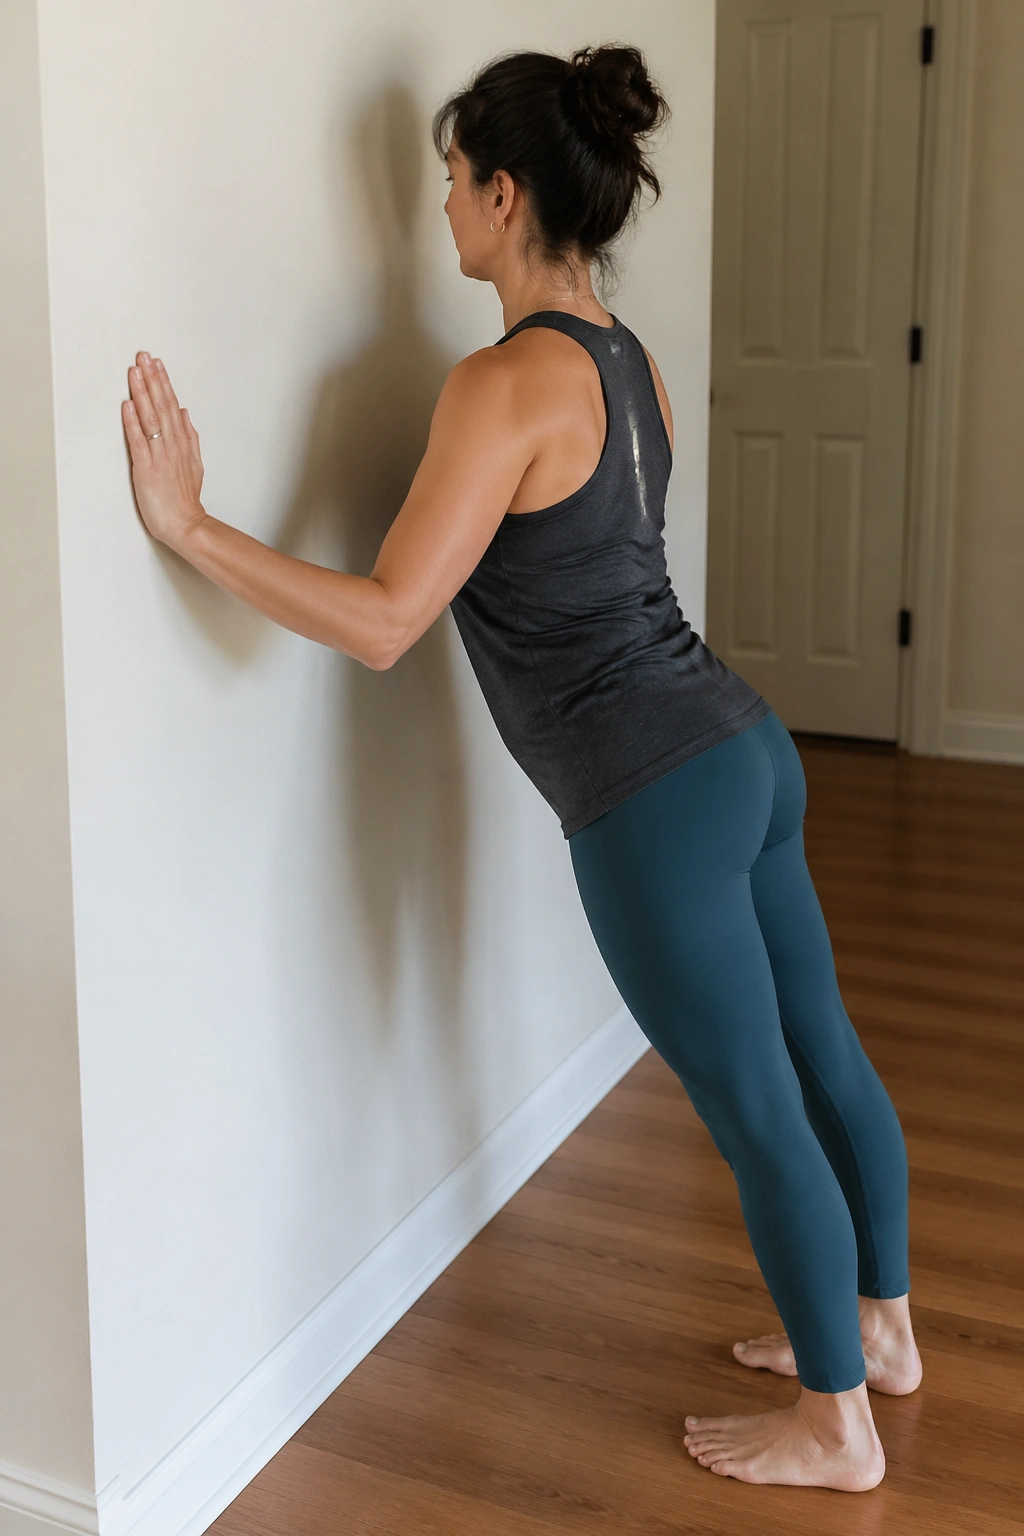
The low-wall version is kinder than the big overhead stretch everyone likes to show off. Stand facing a wall, place your forearms on it a little below shoulder height, and step your feet back until your body makes a clean diagonal line. Soften the knees. Let the ribs expand without dropping the belly forward.
This is a solid choice before walking outside or before a gentle yoga session because it opens the upper chest and shoulders without asking for a backbend. Breathe into the sternum and the sides of the rib cage. Then breathe out slowly and let the throat stay loose.
Low and slow wins here. If the shoulders creep toward the ears, walk the feet in a little. If the chest feels pinched, raise the forearms a touch or try the hands on the wall instead. Stay for 5 breaths, step away, and notice whether the inhale feels less crowded.
9. Legs-Up-the-Wall for Recovery Breaths
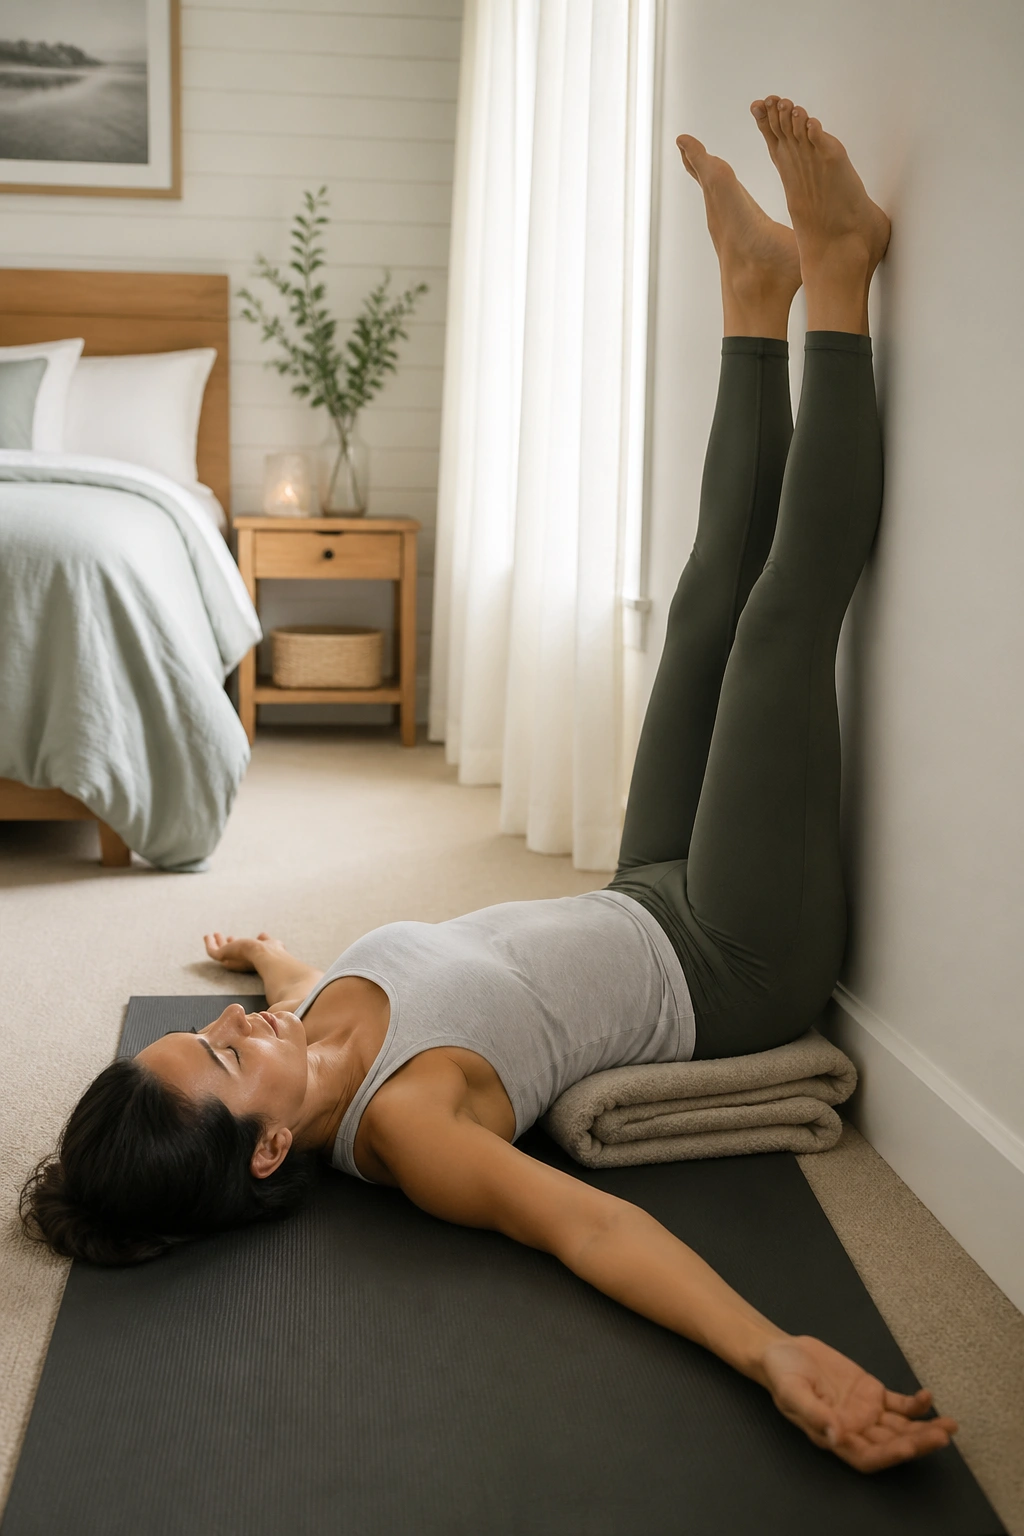
Some breathing practices feel like work. This one feels like lying down and letting your body stop arguing for a minute. Scoot your hips a few inches away from the wall, swing your legs up, and let your heels rest or hover comfortably. A folded blanket under the hips can make the position feel nicer, but don’t crank the pelvis up too high.
Breathe into the belly with a longer exhale and let your shoulders spread wide on the floor. This pose is useful after a busy day, after a workout, or after a stretch session that left the chest feeling open but a little tired. Give it 5 to 10 minutes if it feels good.
A small warning: if your head rushes, your lower back complains, or reflux flares up when you lie flat, skip it. A chair with the calves on a seat can do a similar job. The goal is recovery, not a perfect shape.
10. Reclined Bound Angle for Asthma-Friendly Rib Expansion
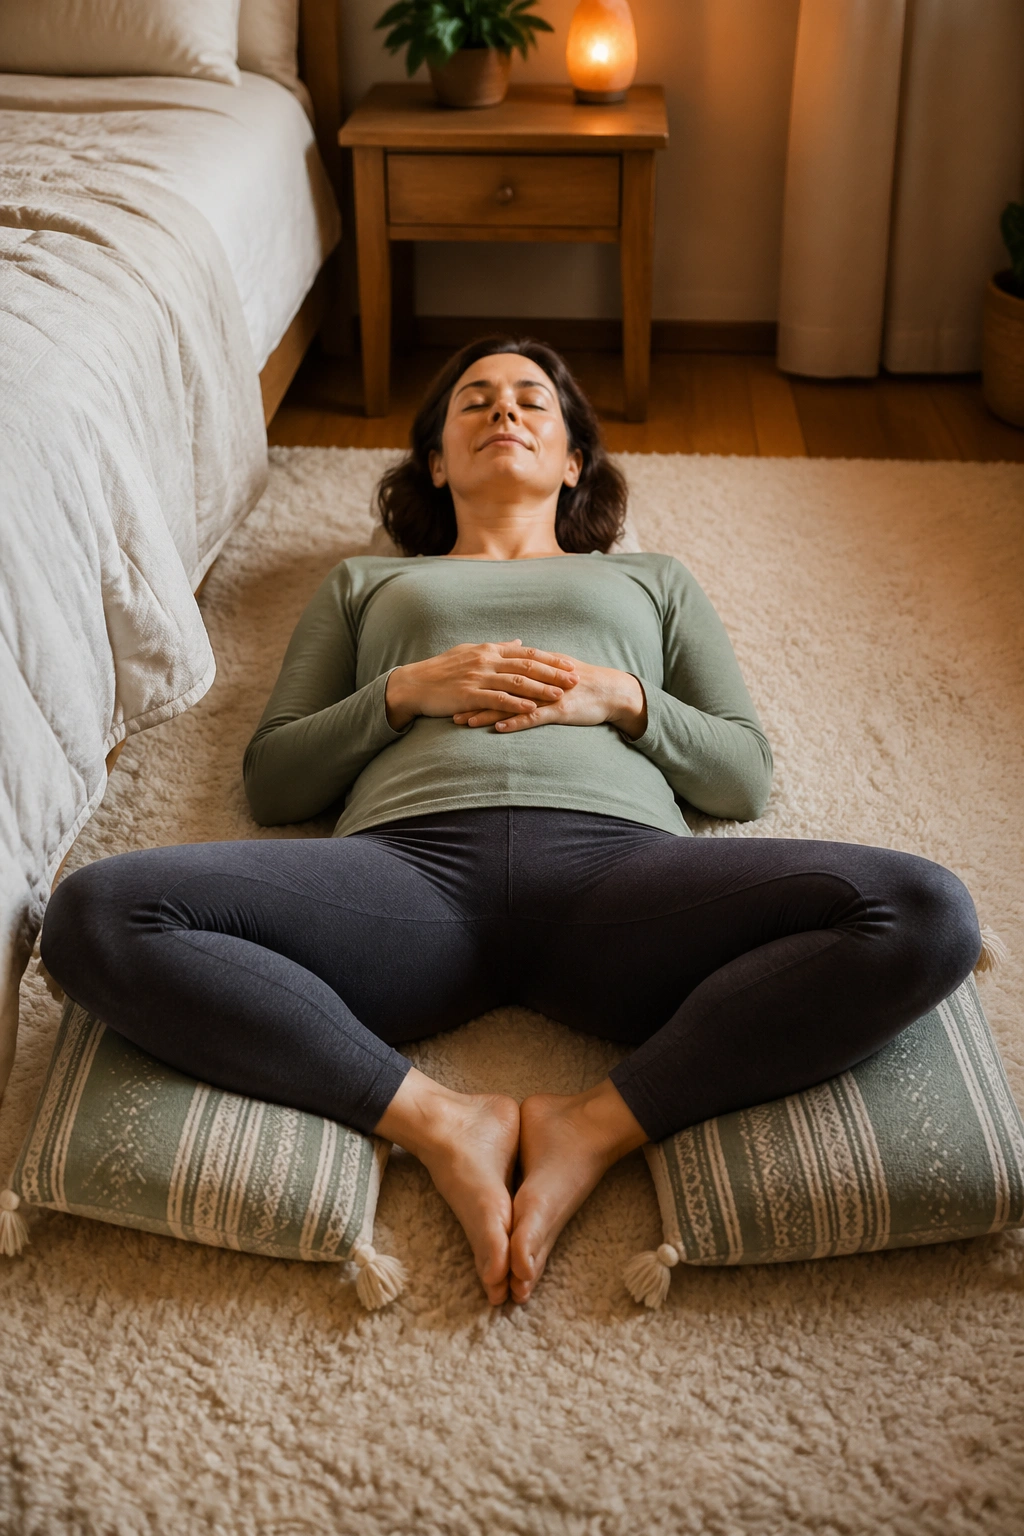
Two blocks under the thighs can make this pose feel a lot safer than the glossy yoga photos suggest. Lie on your back, bring the soles of the feet together, and let the knees fall open. If the inner thighs pull too hard, support the knees with cushions or blocks so the legs don’t hang in space.
Now place one hand on the belly and one on the lower ribs. Inhale and feel the side ribs widen. Exhale and let the thighs relax into the support. That gentle feedback can be calming when the chest feels small and guarded.
Set it up your way
- Put a blanket under the head if the chin tips up.
- Use blocks or pillows under the knees.
- Keep the feet farther from the hips if the groins feel tight.
- Stay for 8 to 12 breaths.
If lying this open feels too exposed, bring the feet farther away from each other or reduce the time. This is a restful pose, not a forced stretch. The breath should feel broad, not forced.
11. Standing Mountain Pose with Three-Part Breathing
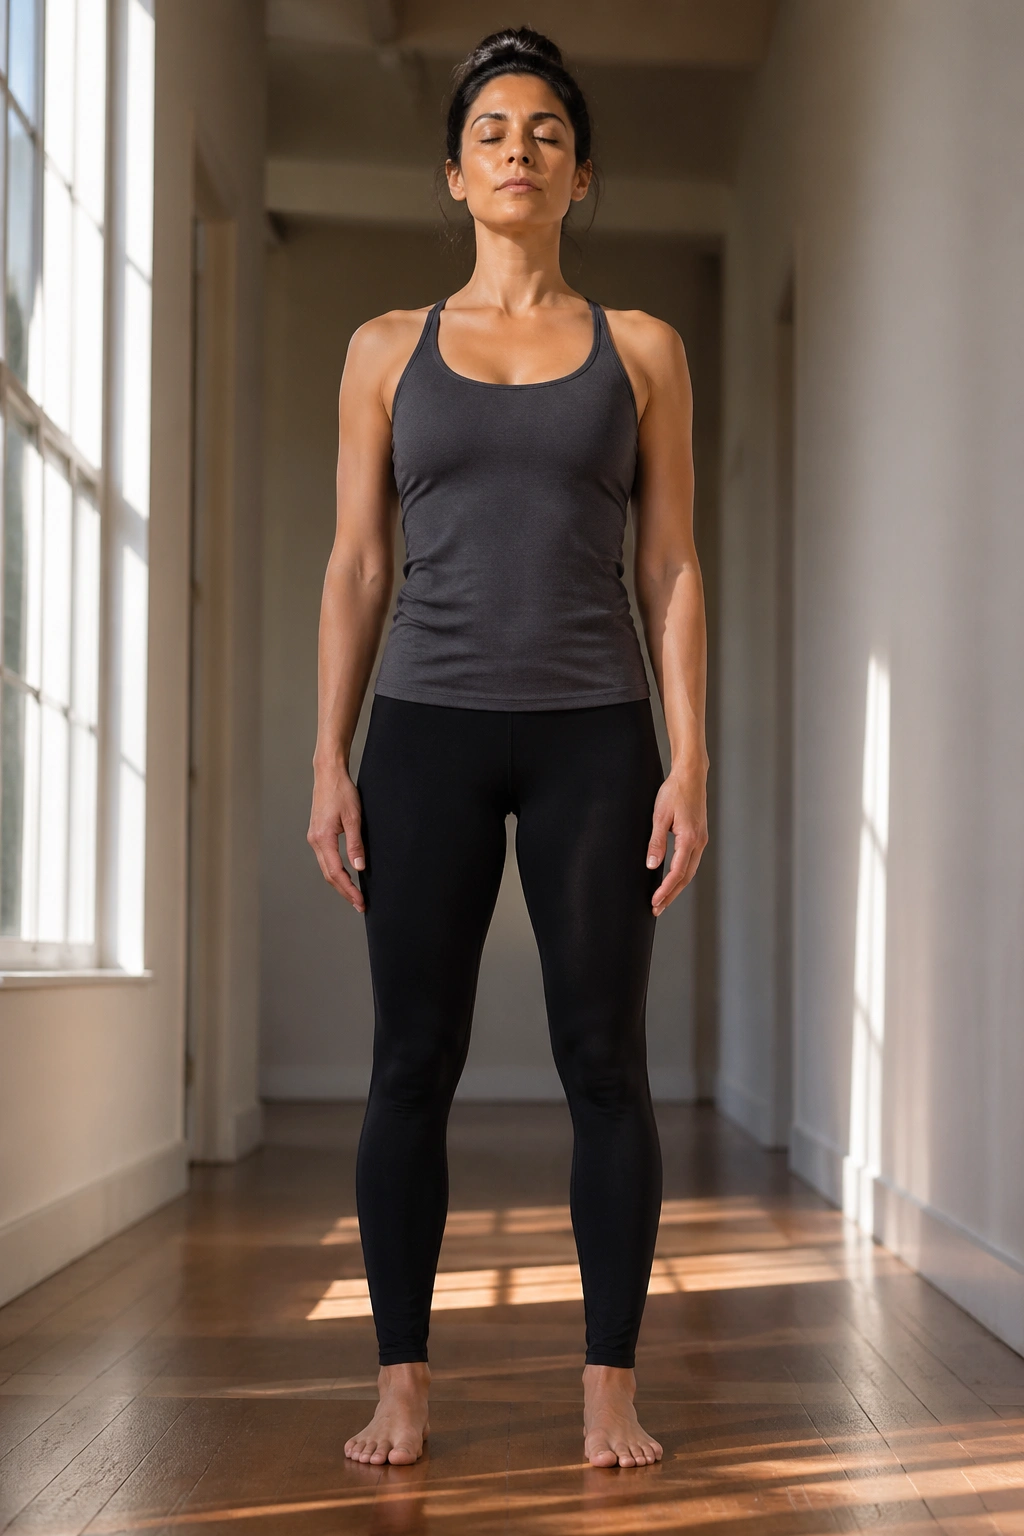
Not everyone wants to lie on the floor when breathing feels off. Standing mountain pose is the upright answer. Stand with feet about hip-width apart, knees soft, arms by your sides, and the crown of the head reaching up without stiffness. Feel your weight spread across the heels and balls of the feet.
Try a gentle three-part breath: breathe into the belly, then the lower ribs, then the upper chest. Exhale in the reverse order. Keep the inhale modest. The goal isn’t to pack the lungs; it’s to help the breath move through the whole torso without getting stuck in one place.
The shoulders should stay boring. Good. If they rise, the breath is too big. Take 3 to 5 rounds and then rest normally for a few breaths. This is a useful standing reset in a hallway, at work, or anywhere you can plant your feet and slow down for half a minute.
12. Chair Side Stretch for Tight Sides
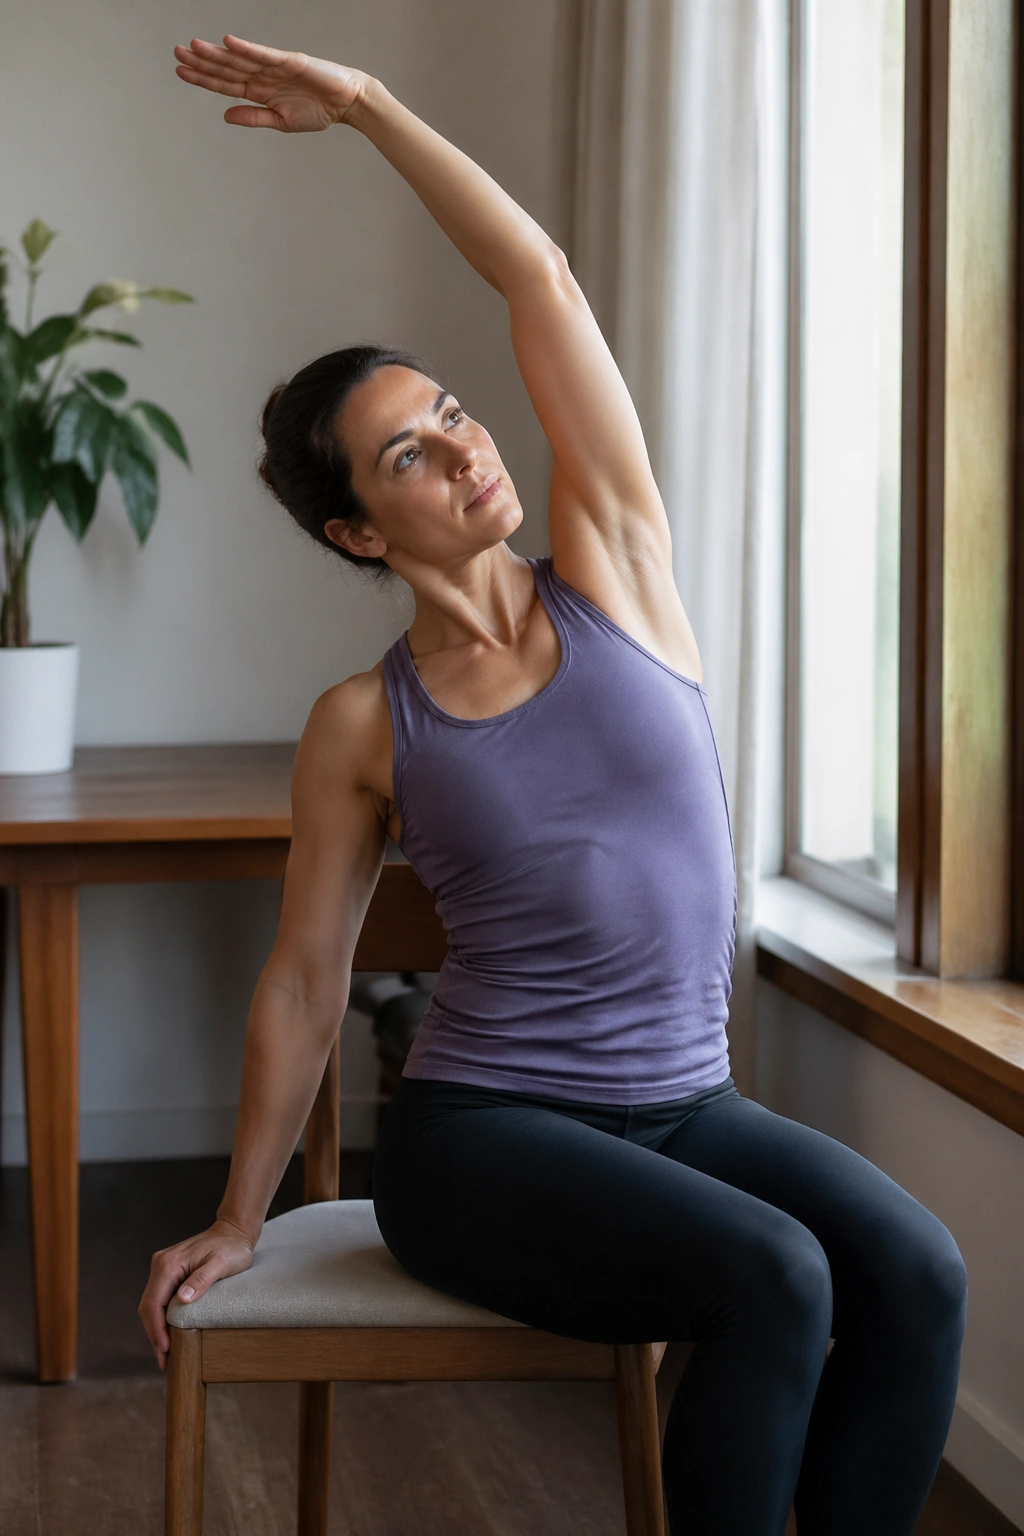
A chair side stretch is one of those plain little things that works far better than it looks. Sit sideways on a chair or sit facing forward with one hand holding the seat. Reach the other arm overhead and lean away until the side waist lengthens. That’s enough. No need to fold in half.
Breathe into the opened side for a count of 4 in and 6 out. You’ll usually feel space under the lower ribs and into the armpit, which is exactly where a lot of tight-breath tension hides. Repeat on the other side, but don’t rush between them.
Best use cases
- Midday desk break.
- After a long car ride.
- Before a walk.
- After coughing or throat tension.
If the neck tightens, bend the top elbow and keep the hand behind the head for a lighter version. The body should feel longer, not twisted sideways into a knot.
13. Thread-the-Needle with Long Exhales
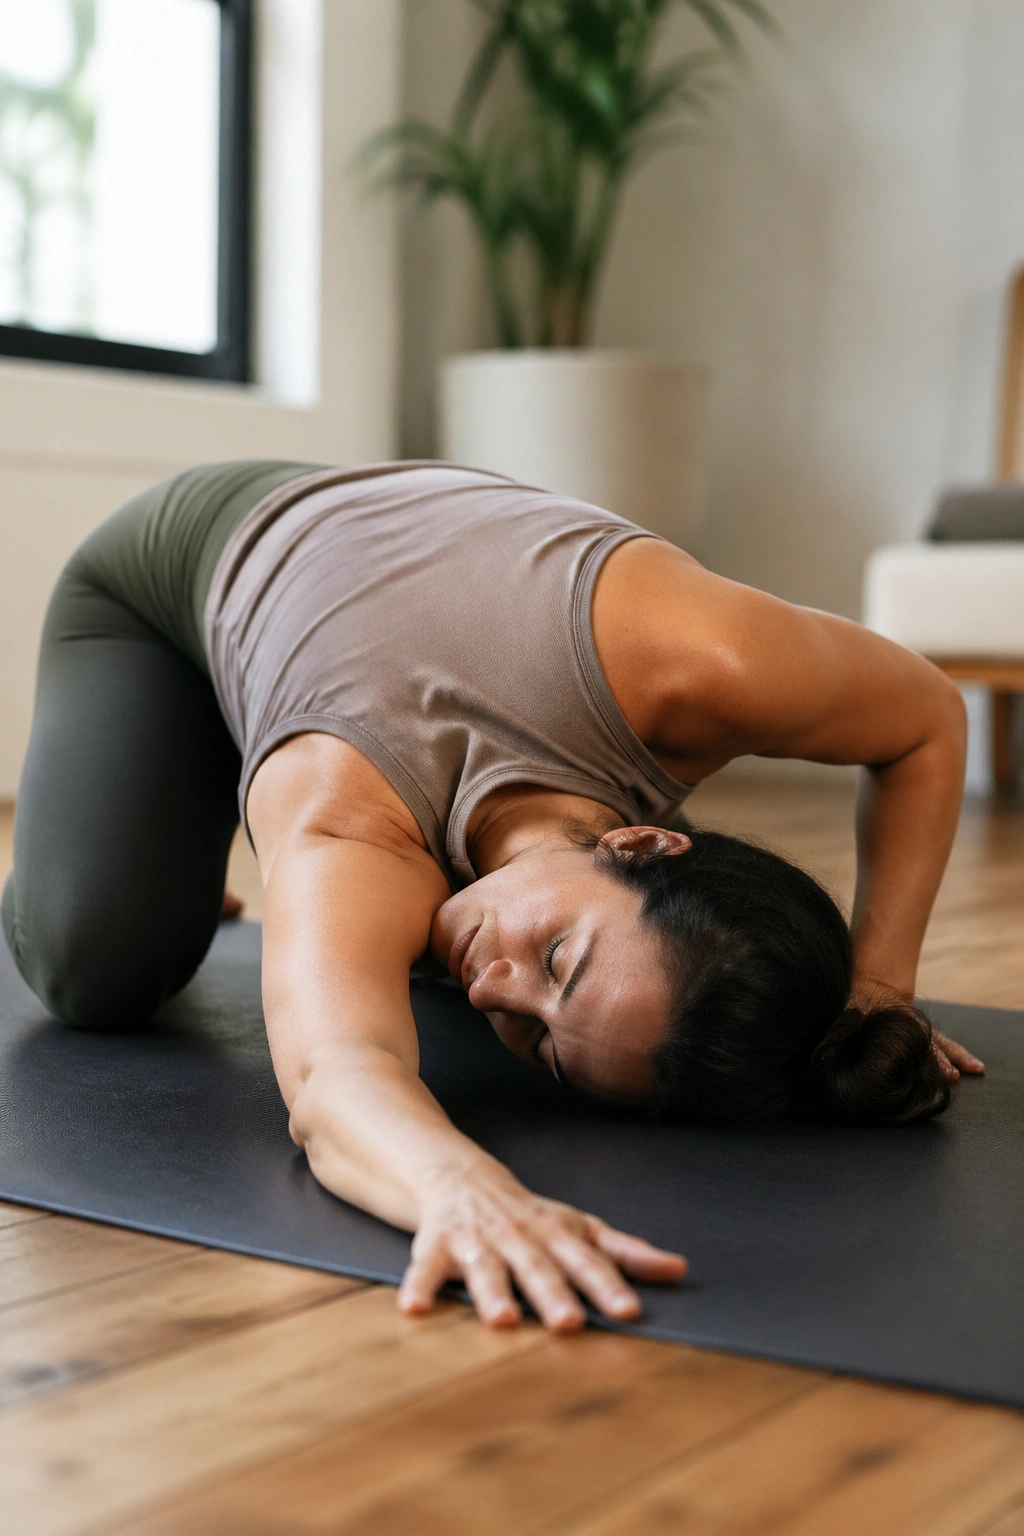
After coughing or hunching, the shoulder blade area can get stubborn. Thread-the-needle fixes that in a way that feels almost sneaky. Start on hands and knees, then slide one arm under the body until the shoulder and side of the head rest on the floor or on a folded blanket.
The exhale is the star. Let it get longer as the torso rotates and the upper back softens. You can keep the top hand planted for support or reach it forward if that feels better. Stay for 4 to 6 breaths on each side.
A small detail matters here: do not force the lower shoulder to sink hard into the floor. The breath will deepen more cleanly if the setup stays gentle. If the neck feels jammed, stack a thicker blanket under the head. A smoother exit is better than a deeper twist.
14. Alternate Nostril Breathing in a Comfortable Seat
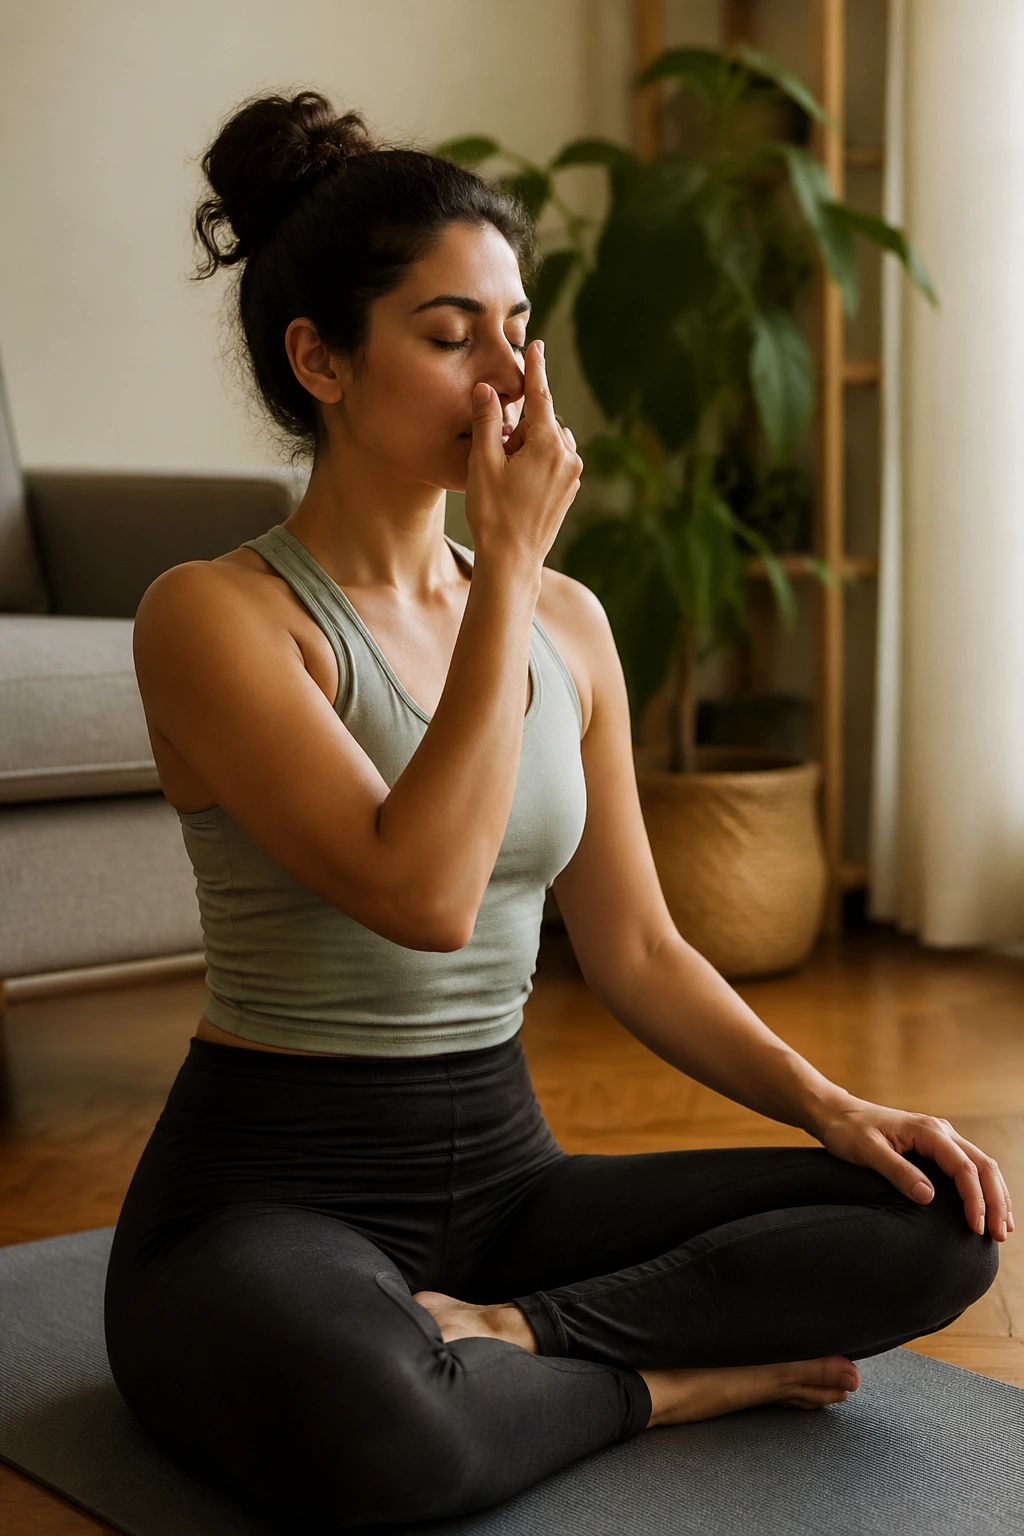
Alternate nostril breathing is not a rescue tool. It’s a settling practice for when you’re stable, seated, and able to breathe through the nose without strain. If your nostrils are blocked, if you’re anxious enough to gasp, or if a flare-up is brewing, skip it and choose something simpler.
Sit comfortably, relax the jaw, and use one hand to close one nostril at a time. Inhale through one side, switch, exhale through the other, then reverse. Keep the rhythm gentle, around 4 counts in and 4 to 6 out, and leave out breath retention. Retention is a poor idea when your airways are touchy.
When to leave it alone
- During an active asthma flare.
- If you feel dizzy or panicked.
- If nasal congestion makes the breath uneven.
- If you start counting instead of breathing.
The appeal here is balance, not control for control’s sake. A soft pattern tends to quiet the chest and jaw together. That’s the whole point.
15. Bee Breath in Easy Pose
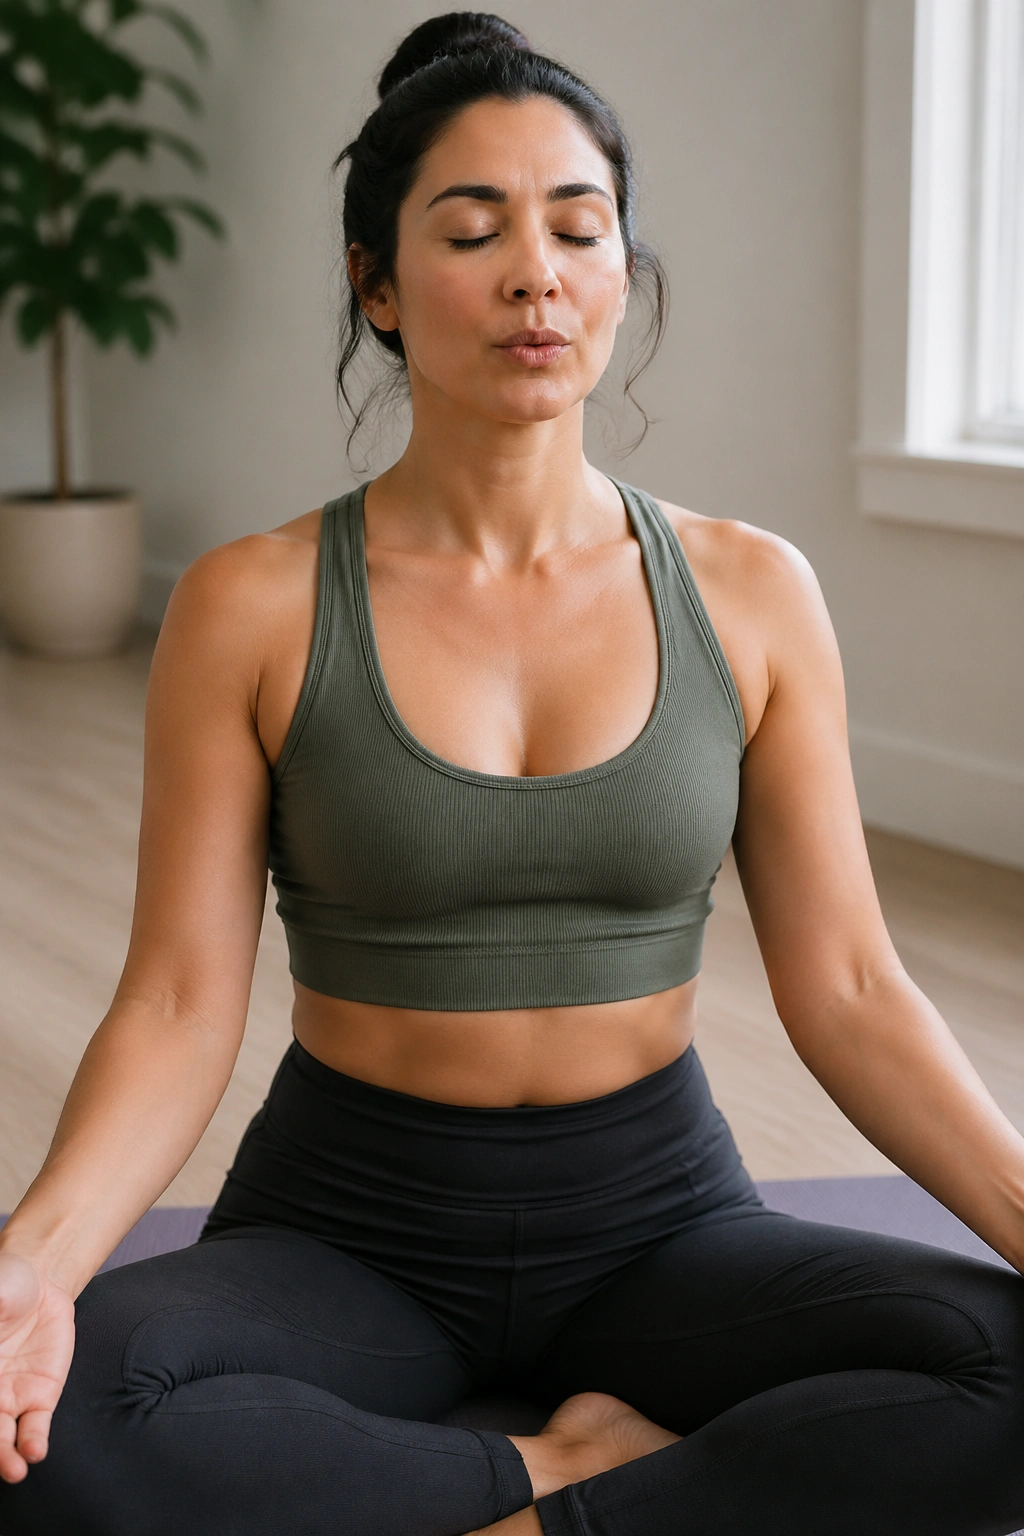
Humming on the exhale can feel almost silly until you try it. Then the whole face, throat, and chest seem to settle at once. Sit in easy pose or on a chair, close the lips, and make a soft humming sound on the exhale. Keep the inhale easy. Keep the hum low and smooth.
The vibration in the face often encourages a longer, slower exhale without you having to count every second. That makes it useful when your breathing feels choppy but not urgent. Try 5 to 8 rounds, then pause and notice whether the throat feels less grabby.
A softer version
- Hum on the exhale only.
- Keep the lips closed lightly.
- Stop if the sound triggers coughing.
- Rest with normal nasal breathing between rounds.
This is one of those practices that can feel almost too gentle to matter. Then you notice the shoulders dropping. Strange, but useful. If you like a quieter version, hum at a whisper level. No need to turn it into a performance.
16. Crocodile Pose for Back-Body Breathing
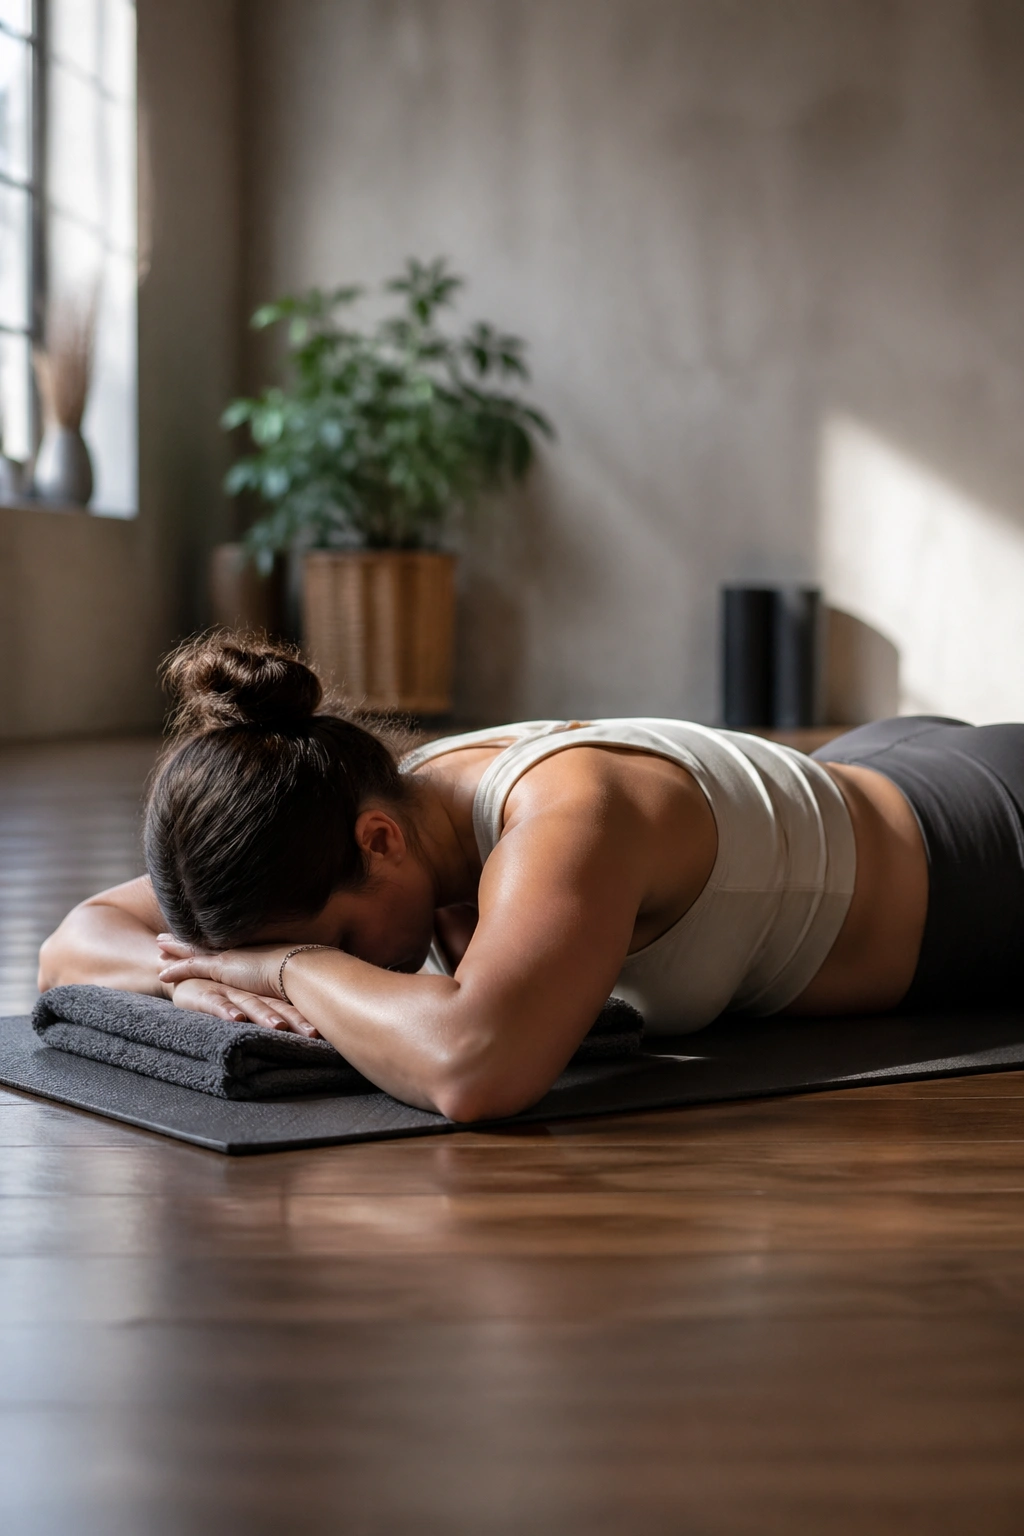
Lie on your stomach with your forehead resting on stacked hands or a folded towel. That’s crocodile pose, and the name sounds odd until you feel the back body settle into the floor. The belly presses gently downward, which can encourage the breath to move into the low back and the sides of the ribs.
This pose helps some people because it takes the chest out of the spotlight. The front body can unclench while the back body does the breathing work. Stay for 1 to 3 minutes and keep the inhales small enough that the chest doesn’t strain against the floor.
A blunt note: if lying on your belly makes breathing feel worse, skip it. Same if you have sinus pressure, recent abdominal issues, or anything else that makes prone pressure a bad idea. Use child’s pose or constructive rest instead. Comfort wins.
17. Supported Fish Pose with a Bolster
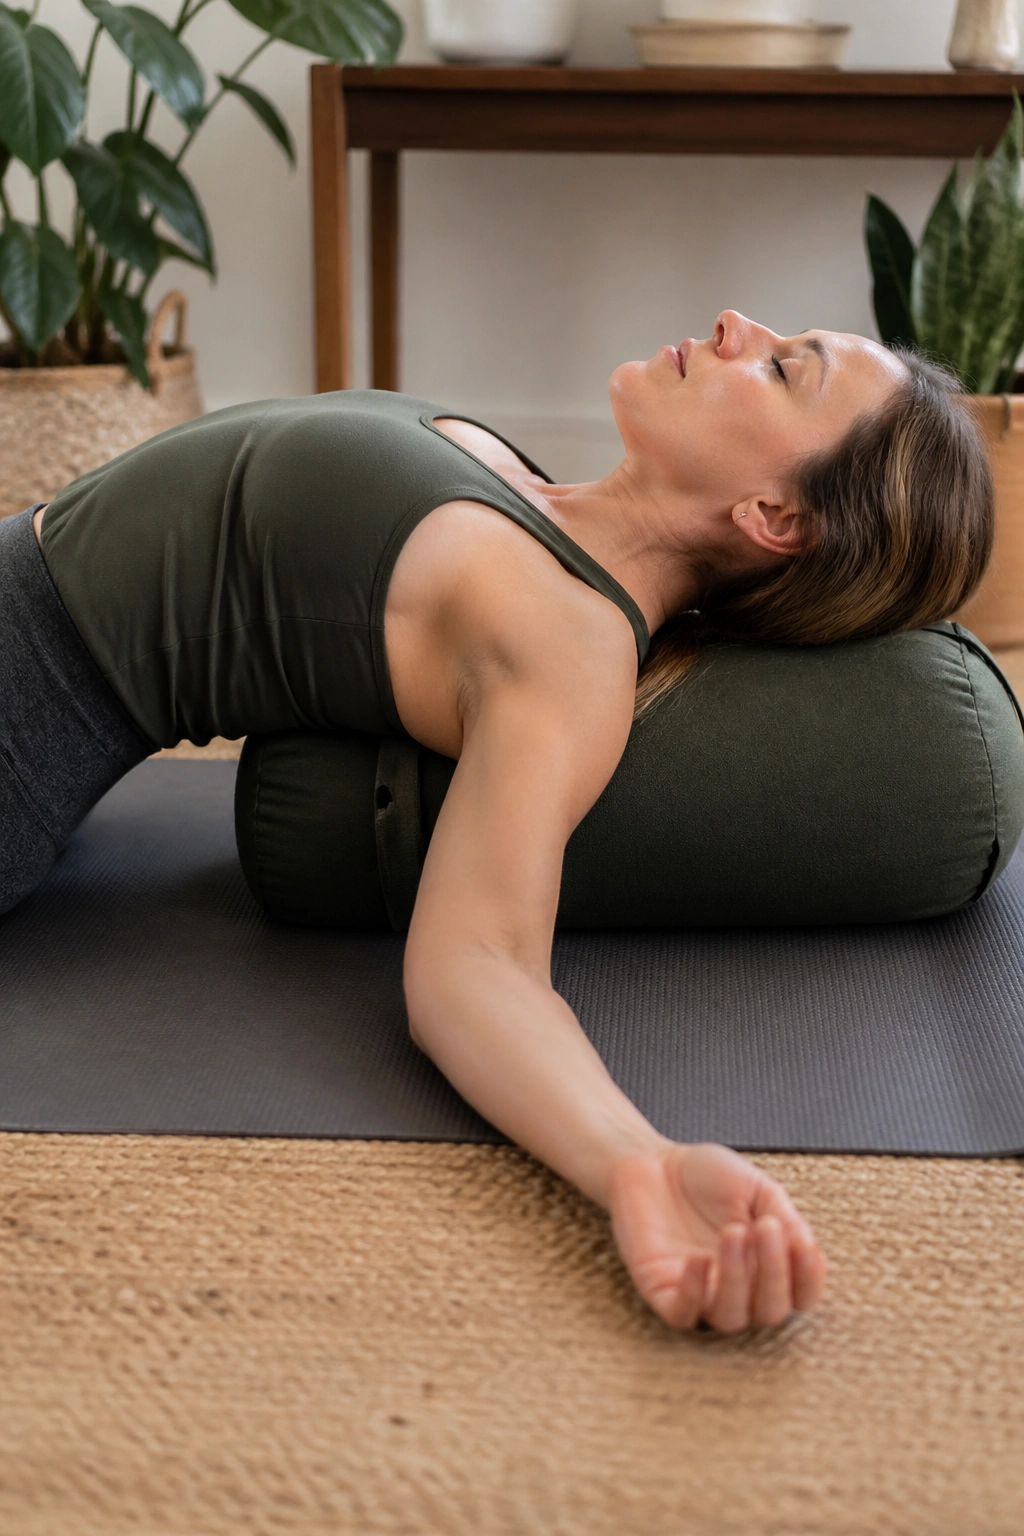
Supported fish is the gentler cousin of a real backbend, and that gentleness matters. Place a bolster or rolled blanket lengthwise under the spine so the chest lifts without collapsing the neck backward. Bend the knees if the lower back needs help, and let the arms rest out to the sides.
Breathe into the upper chest and the side ribs while keeping the belly soft. You should feel an opening through the front body, not a pinchy tug in the throat. If the shoulders are sensitive, add small folded blankets under the arms so they can rest.
This pose is not the one to force if the neck is cranky. But when it fits, it can feel like the sternum finally has room to spread. Stay for 5 to 8 breaths, then roll off slowly to one side before sitting up. That last part matters more than people think.
18. Knees-to-Chest Rest Pose for Full-Body Release
After all the opening work, knees-to-chest gives the body a chance to close back down without clenching. Lie on your back, draw both knees in, and hug them gently toward the belly. Rock side to side if that feels good. The back body gets broad contact with the floor, and the front body gets a break.
Breathe out a little longer than you breathe in. A 3-count inhale and 5-count exhale works well here, but do not force the rhythm if it starts to feel manufactured. Let the belly soften around the thighs. Let the jaw hang loose. Let the shoulders be heavy.
If you want a simple repeatable mini-sequence on a tight-breath day, start with diaphragmatic breathing in constructive rest, move to child’s pose with side-rib breaths, and finish here. Six or seven minutes is enough. Not because you need more discipline, but because calm breathing gets better when it’s easy enough to repeat tomorrow.
