



That little ridge down the middle of your stomach can make even a gentle sit-up feel weirdly loaded. After pregnancy, diastasis recti can show up as doming, coning, a soft gap at the midline, or the sense that your belly is pushing outward the moment you try to “tighten” it. Annoying? Yes. Fixable with random ab workouts? Not usually.
Yoga can help, but only when the poses respect pressure. That means less forcing, less bracing, and a lot more attention to breath, rib position, and how your belly wall behaves when you move. Crunches, hard twists, and deep backbends are not the place to start for most postpartum bodies. Small, steady shapes usually work better.
The goal is not to yank the abdominal wall flat. It is to teach the core, ribs, diaphragm, and pelvic floor to share the load again so the linea alba gets a break. That’s the part people skip, and it matters. A pose that looks easy can still create too much pressure if the breath is stuck or the ribs flare.
These poses are arranged from the quietest work to the more load-bearing shapes, so you can build without chasing soreness or doming. If a movement makes the midline tent, shorten the range. If your lower back takes over, back off. Simple rule. Hard to fake.
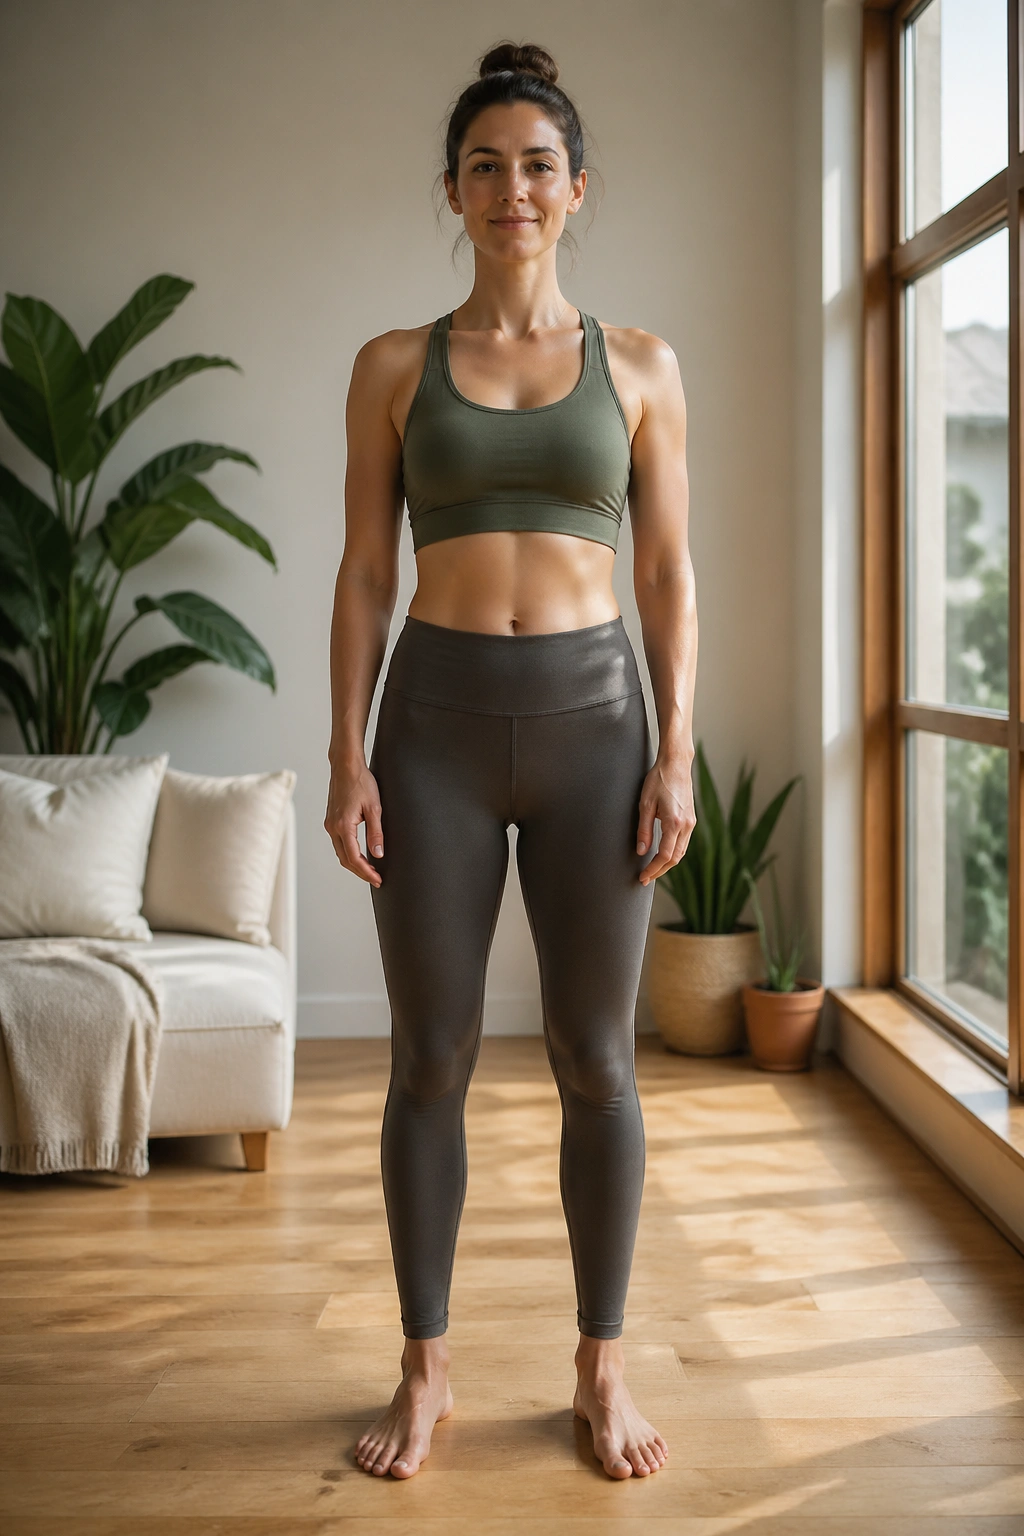
1. Mountain Pose for Diastasis Recti
Mountain pose looks almost too plain to matter, and that is exactly why it belongs first. Standing with your feet grounded and your ribs stacked over your pelvis gives you a clean place to practice pressure control without extra movement getting in the way.
Place your feet hip-width apart, soften your knees a little, and rest one hand on your lower ribs and the other on your belly. Inhale through your nose and feel the breath widen the sides and back of your rib cage. Exhale slowly, like you’re fogging a mirror through pursed lips, and let the lower ribs soften down instead of flaring up.
The magic here is not “sucking in.” Nope. That usually just turns the belly into a hard cylinder and pushes pressure somewhere else. You want the belly to stay broad and quiet, with a gentle lift on the exhale rather than a hard brace.
What to feel
- The weight should spread through all four corners of each foot.
- The ribs should feel stacked, not lifted and poked forward.
- The lower belly should stay soft enough that you can breathe into it.
Do five to eight breaths before moving on. If you only have a minute, do this one. It sets the tone for everything that follows.
2. Standing Side Reach at the Wall
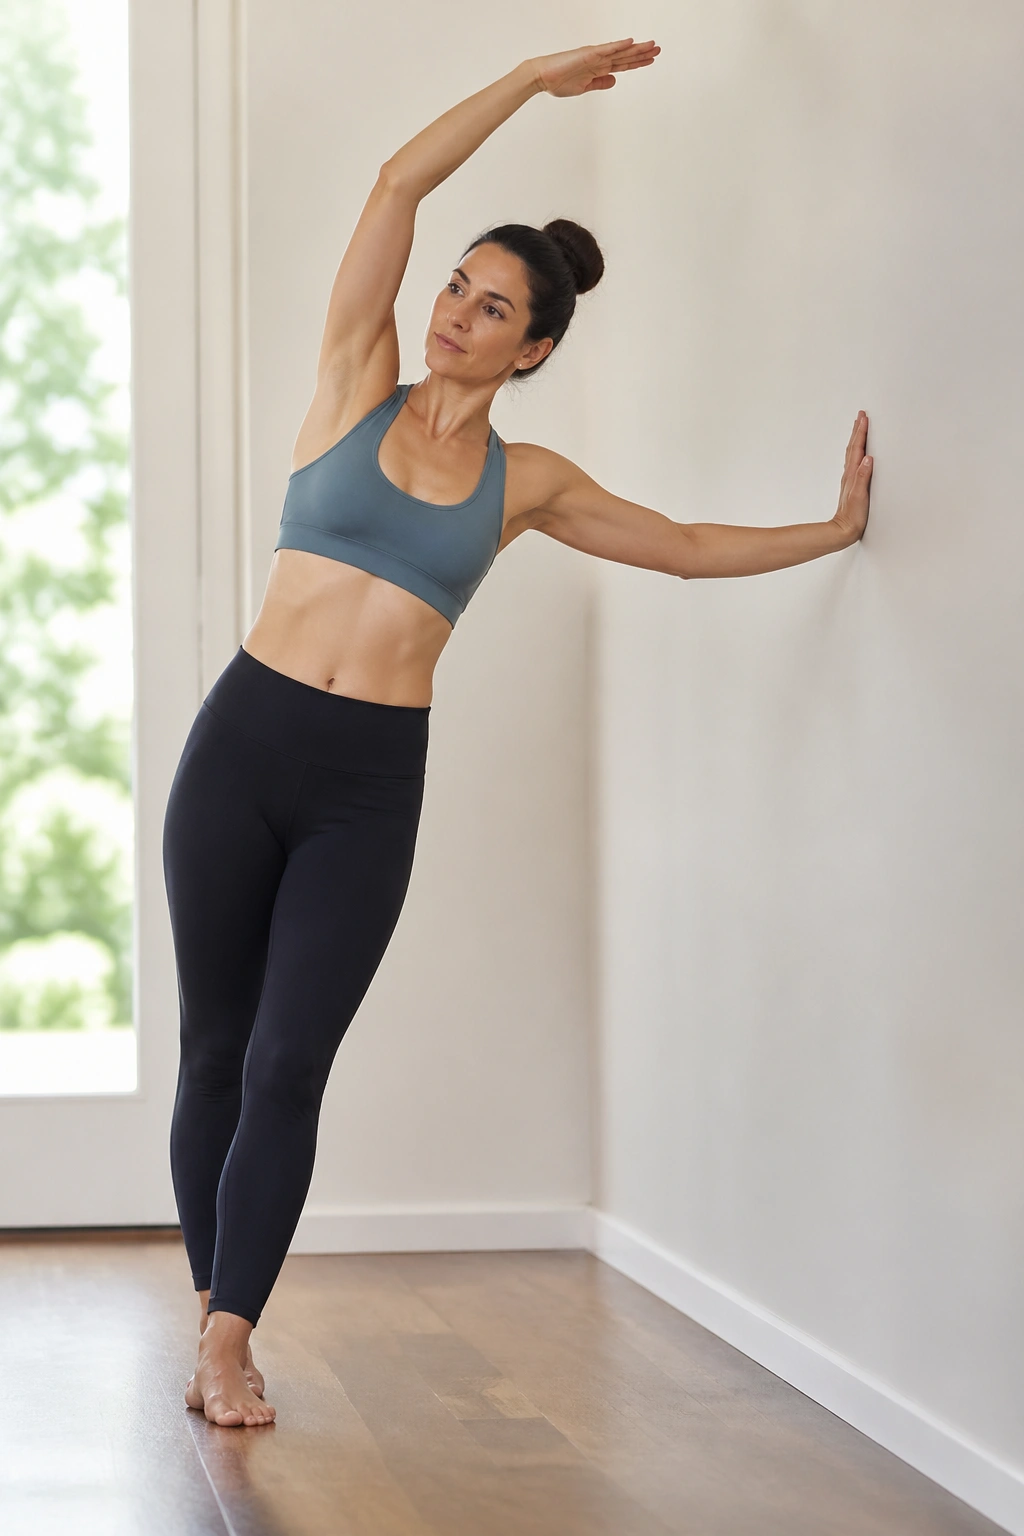
Side-body length is underrated in postpartum recovery. A lot of people focus on the front of the belly and forget that the ribs and obliques need room to expand and contract without strain.
Stand with your left hand on a wall, your feet a comfortable distance away, and your right arm reaching up and over. Keep both hips heavy and your chest facing mostly forward. The stretch should travel along the side of your trunk, from hip to fingertips, without dumping weight into the lower back.
If you feel yourself folding forward or arching backward, shorten the reach. That’s the whole game here. Small range, steady breath, no drama.
This pose can feel especially good if breastfeeding, carrying a baby on one side, or hunching over a car seat has left one side of your torso shorter than the other. Switch sides after four or five slow breaths. The goal is not to crank the body into a perfect shape. It is to let the ribs move without pressure building at the midline.
3. Cat-Cow on Hands and Knees
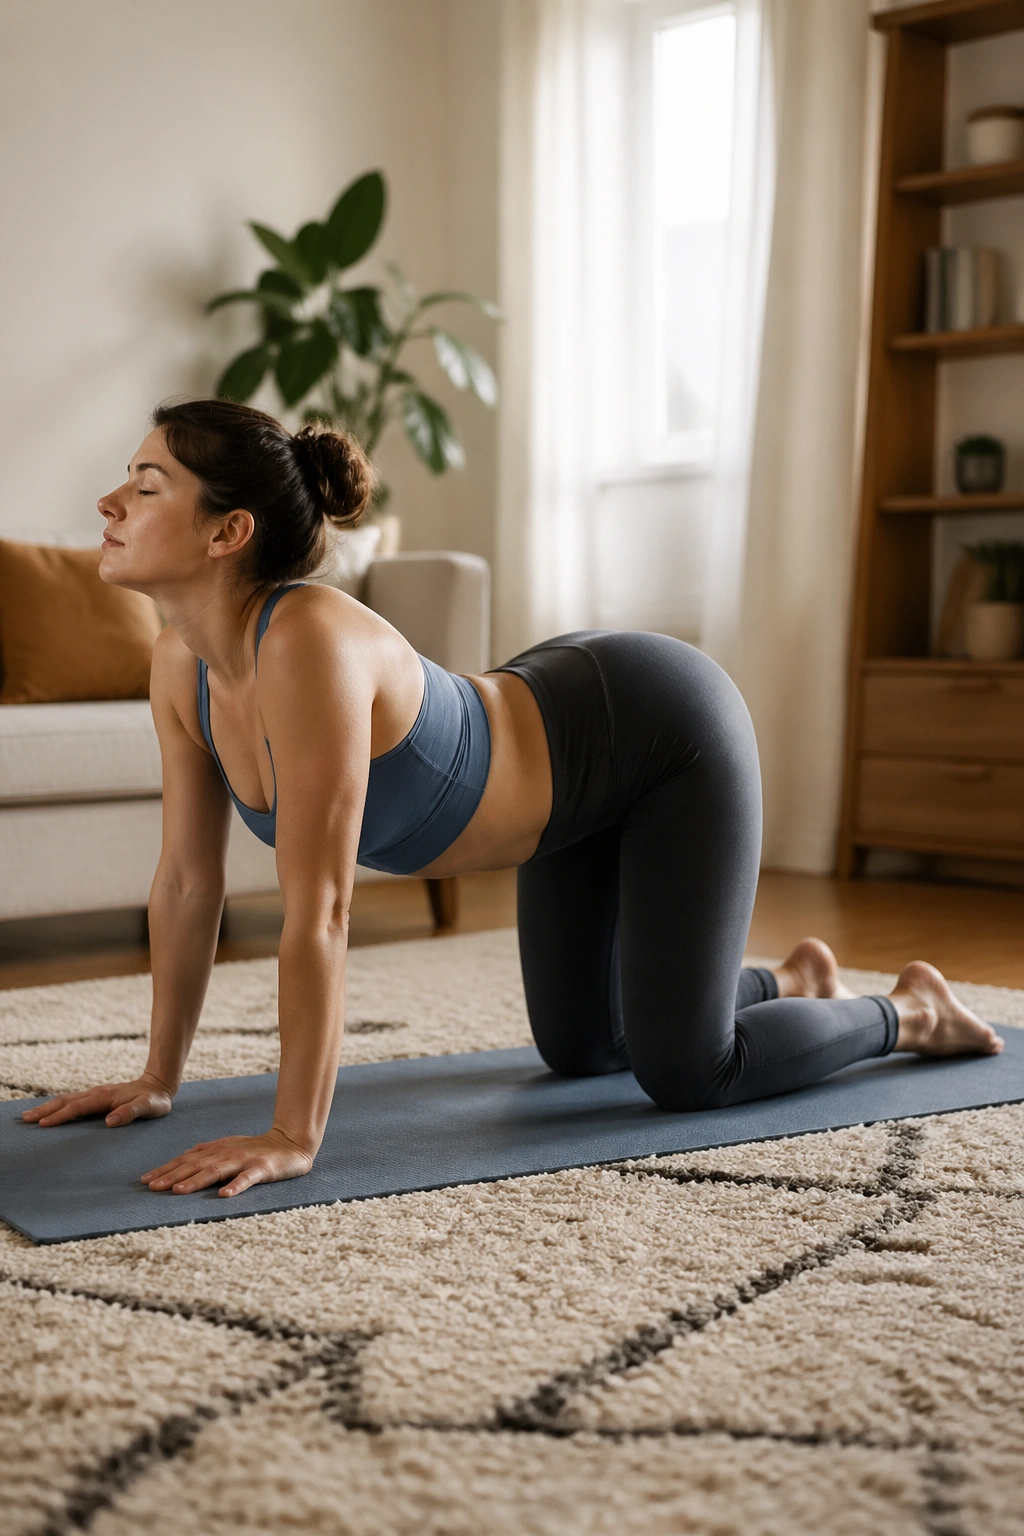
Cat-cow is one of the most useful early yoga shapes for diastasis recti because it teaches the spine to move while the belly stays honest. That is a better skill than it sounds.
Come to hands and knees with wrists under shoulders and knees under hips. As you exhale, round your spine gently into cat pose and let the belly draw inward without hard gripping. As you inhale, tip the tailbone back into a mild cow shape and let the chest soften forward just a little. The movement should be smooth and small, more like a glide than a big stretch.
How to keep it postpartum-friendly
- Keep the range modest; you do not need a deep arch.
- Move slowly enough that you can notice doming.
- If the wrists complain, come down to forearms or place hands on blocks.
A lot of people rush through this like a warm-up drill. Don’t. One slow breath per shape is plenty at first. If the belly pushes out or the low back takes over, make the circle smaller. The best version of cat-cow after pregnancy is the one that feels almost boring.
4. Child’s Pose With Wide Knees
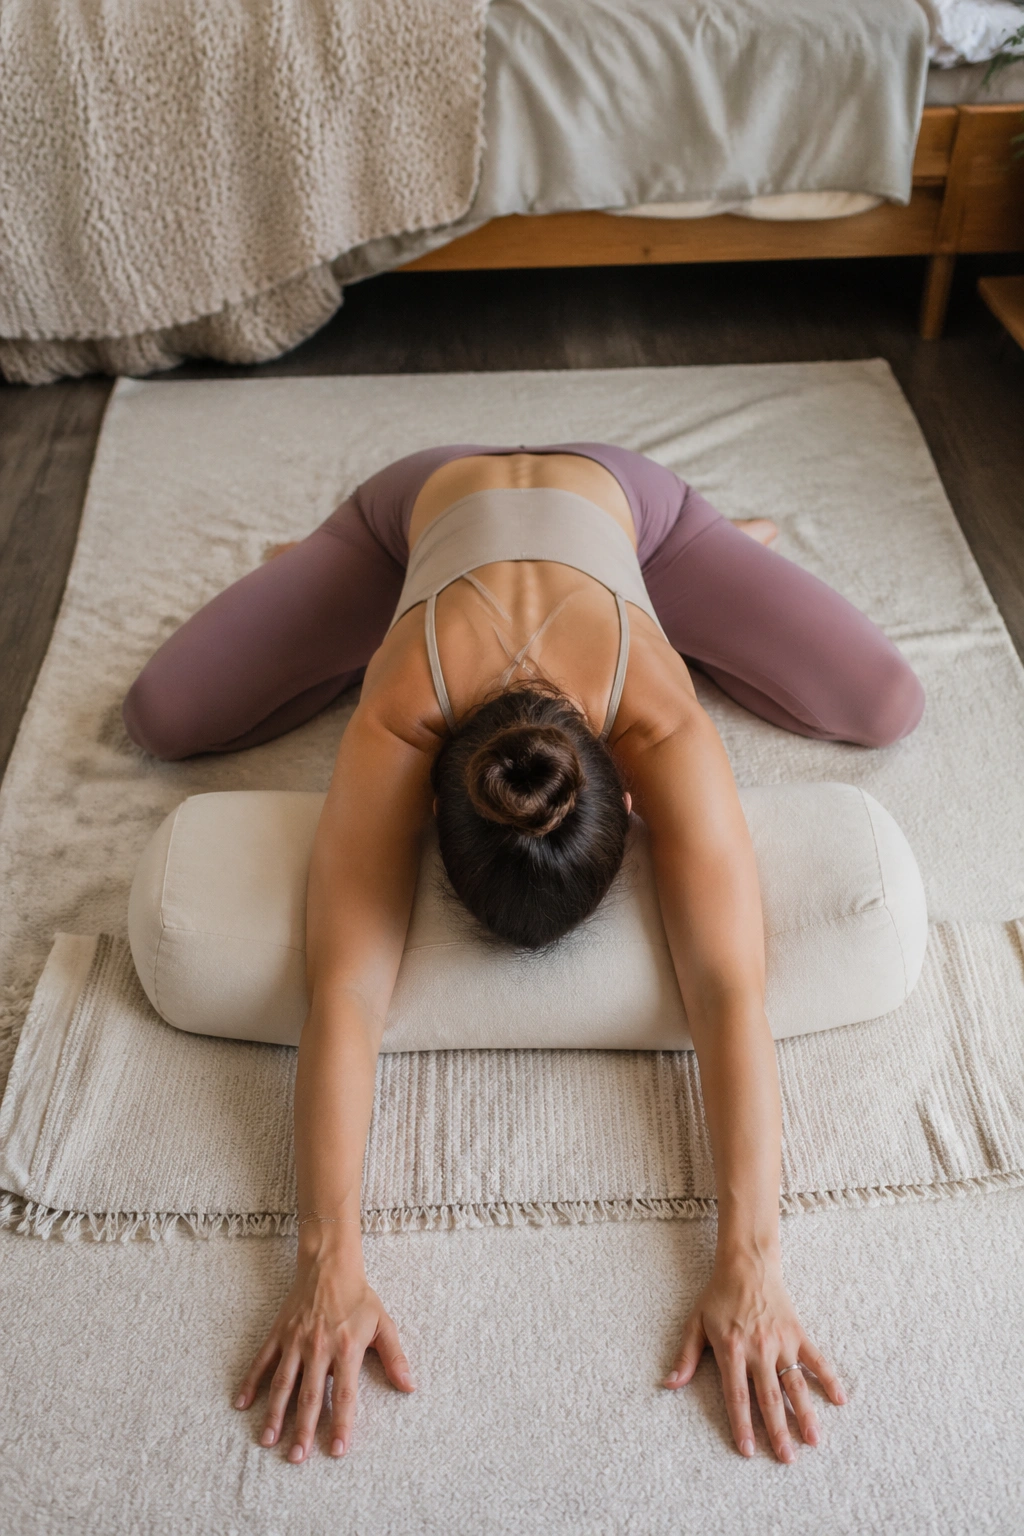
Child’s pose can be a relief or a squeeze, depending on how you set it up. Wide knees matter here. So does support.
Bring your big toes together, open the knees wide, and fold your torso forward. If your belly feels pinched against your thighs, slide a bolster, pillow, or folded blanket under your chest and rib cage. Your arms can stretch forward or rest beside your body. Breathe into the back of your ribs, where the breath has more room to move.
The wide-knee version creates space for the belly instead of compressing it. That makes a difference when your abdominal wall feels tender or unstable. It also gives your lower back a chance to widen, which is often exactly what postpartum bodies want after hours of lifting, feeding, and twisting.
If your hips don’t love this shape, keep the knees only moderately wide and place more support under the torso. No prize is given for getting the head to the floor. The pose should feel like a release, not a test.
5. Bird Dog for Diastasis Recti
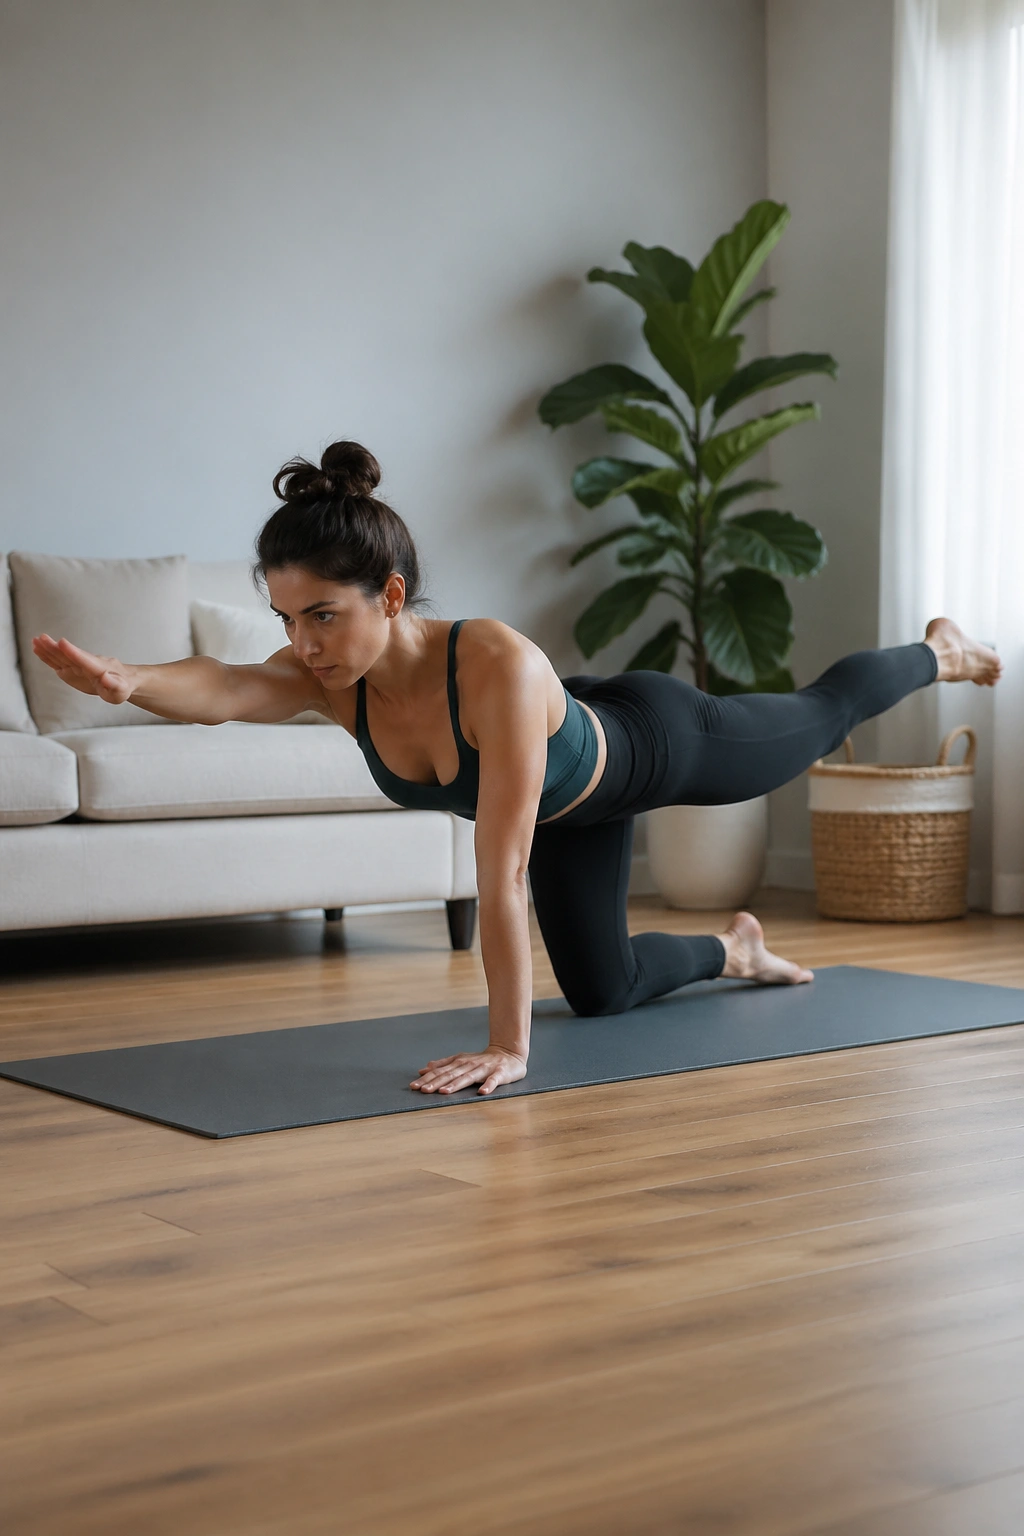
Bird dog earns its reputation the honest way: it asks the deep core to resist rotation without crushing the front of the belly. That makes it one of the best strength-building poses for diastasis recti when it is done slowly.
Start on hands and knees. Reach your right leg straight back and your left arm forward only as far as you can keep the hips level and the ribs from flaring. Exhale before you extend, then hold for one to three breaths. Lower with control, switch sides, and keep the movement clean rather than long.
What to watch for
- The low back should stay long, not sag.
- The hips should stay square to the floor.
- The midline should stay flat, not dome upward.
If the full reach feels wobbly, keep just the leg or just the arm. That still counts. One clean repetition is better than five sloppy ones. A lot better. And if your shoulders or wrists are tired from carrying babies all day, do fewer reps and use a folded mat under the knees for comfort.
6. Legs Up the Wall
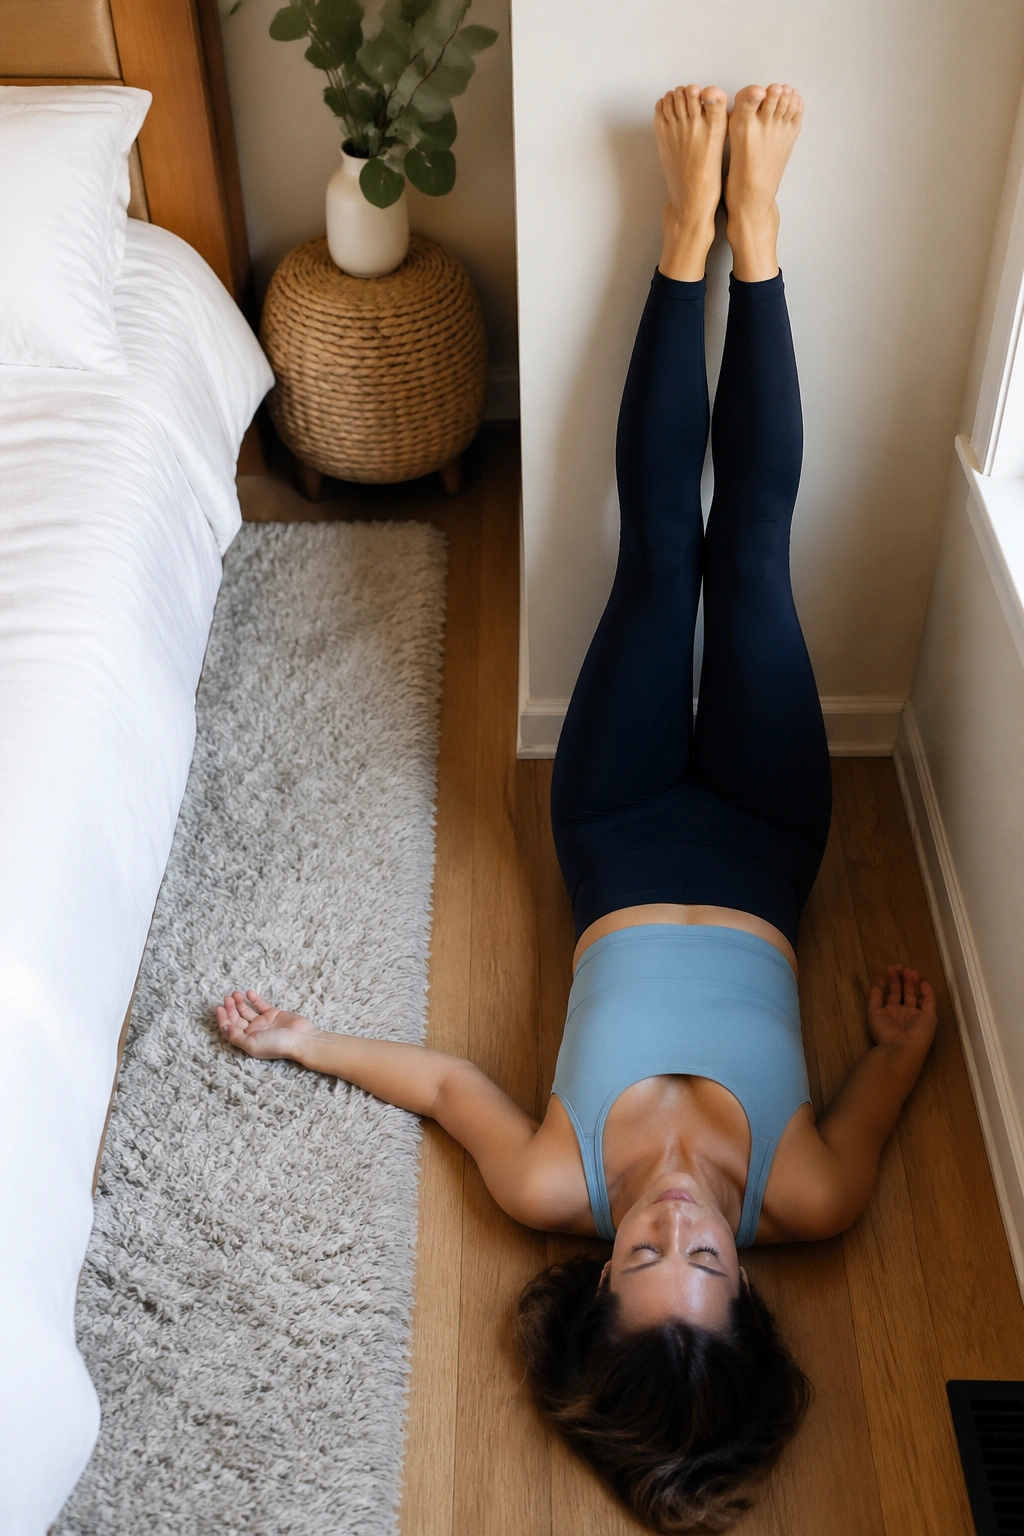
This is the pose I’d hand to anyone who feels wrung out and needs their belly, back, and nervous system to stop arguing for a minute. It is gentle, but it is not pointless.
Sit with one hip close to a wall, then swing your legs up as you lower onto your back. Your hips can stay a few inches away from the wall if the stretch feels too intense. Rest your arms by your sides, bend your knees slightly if needed, and breathe with long, slow exhales. The front of the belly should feel quiet, not pinched.
Some people love a folded blanket under the pelvis. Some hate it. If the lift feels good, use it. If it makes your low back cranky, skip it and keep the pelvis on the floor. Easy choice.
This pose works well after a long day on your feet, and it’s one of the few that asks almost nothing from the abdomen. That matters. When the core has been doing too much all day, “nothing” can be the smartest next move.
7. Wall Downward Dog
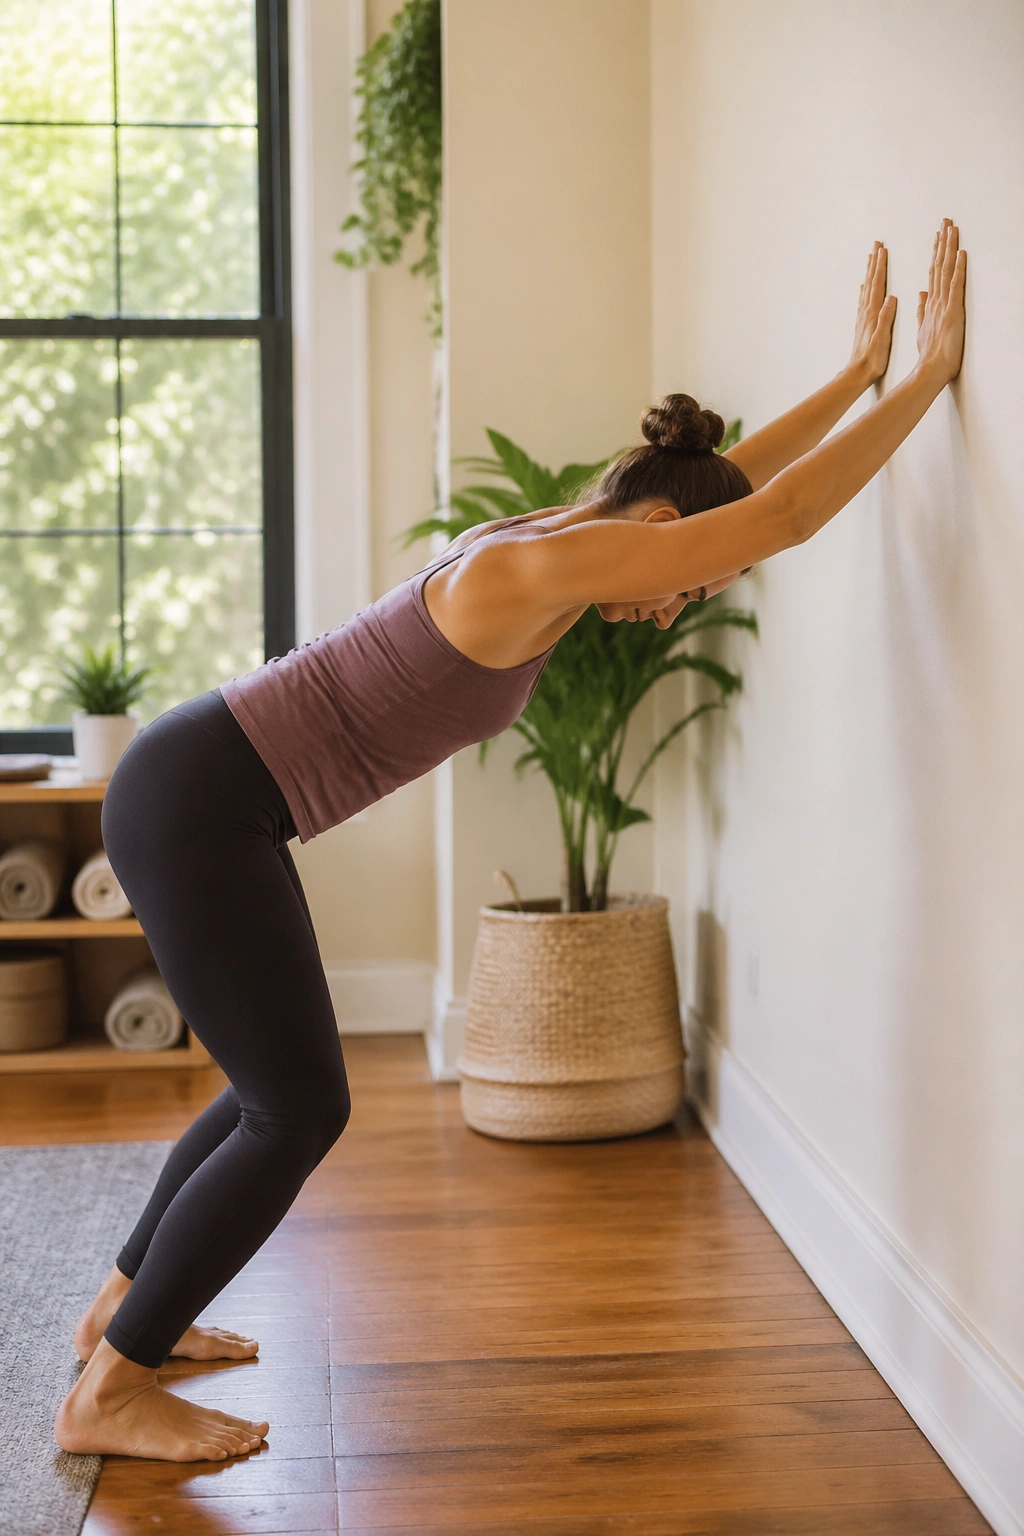
Wall downward dog gives you many of the benefits of the classic pose without the same load through the belly wall. That tradeoff is worth a lot early on.
Place your hands on a wall at shoulder height and walk your feet back until your torso tilts forward. Press your hands into the wall, hinge from the hips, and keep a slight bend in the knees. The spine should feel long and the ribs should stay knitted together, not dumped toward the floor.
If you know the floor version of downward dog, this one feels softer and more controlled. The shoulders get to open. The hamstrings get a say. The abdomen stays under watch instead of being asked to hold your whole body weight against gravity.
One sentence here matters most: shorten the distance if you see coning. Step closer to the wall, bend the knees more, and keep the breath moving. That tiny adjustment can change the whole shape from “too much” to “just right.”
8. Low Lunge With an Upright Torso
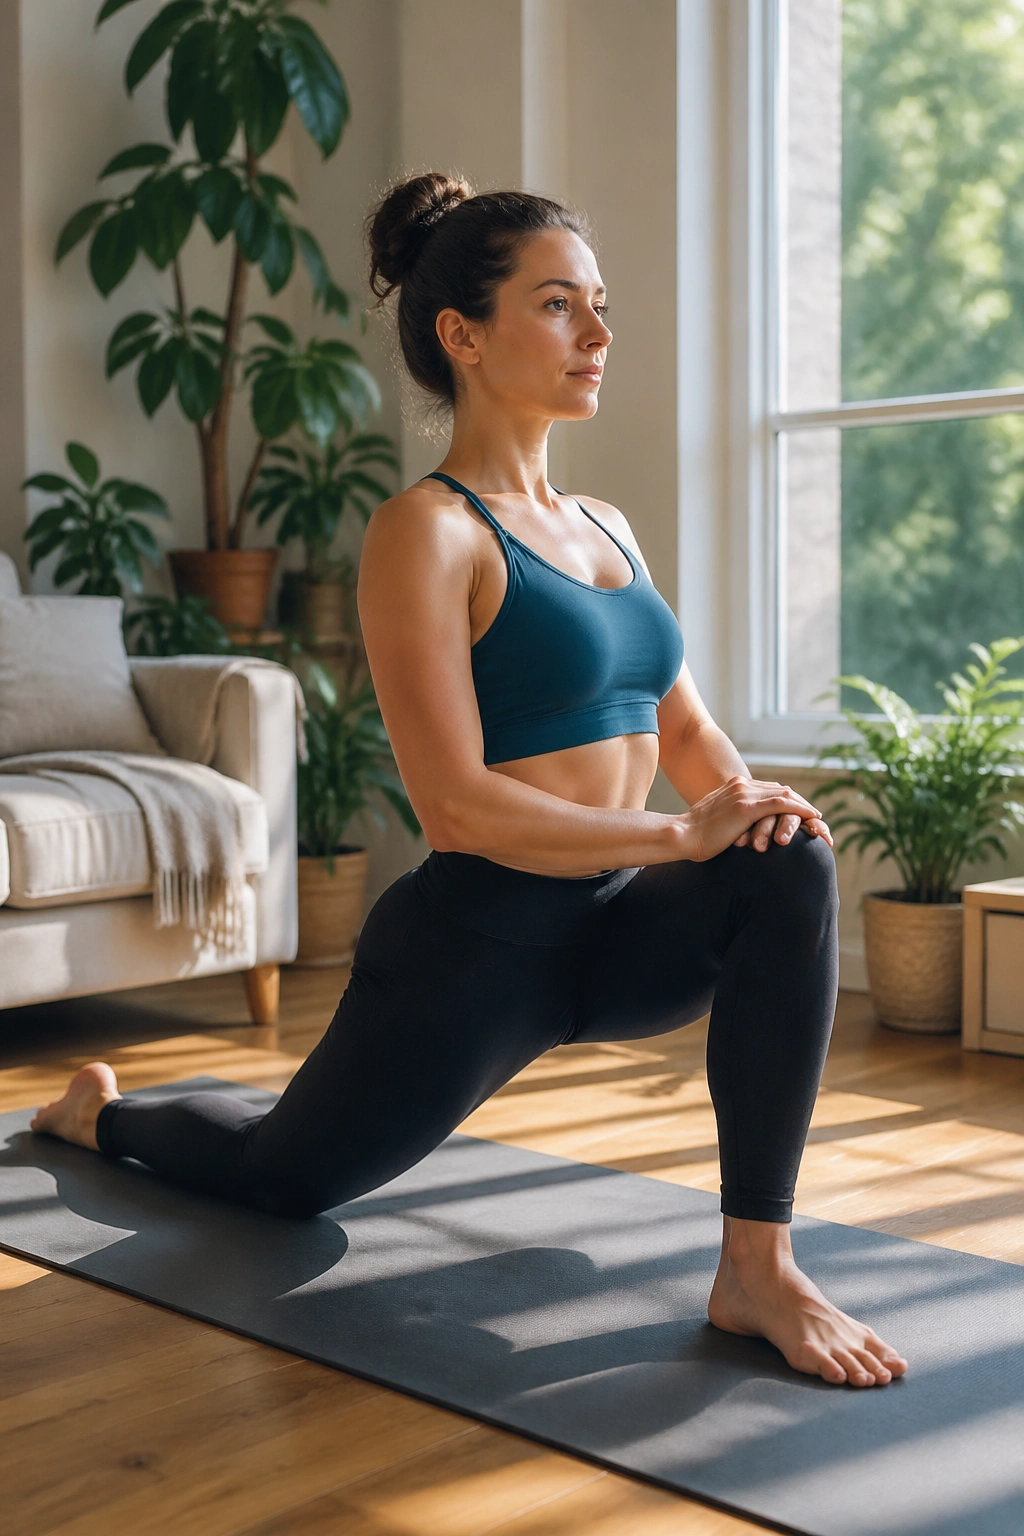
A low lunge can be a strong little reset for the hips, but only if you keep the torso stacked instead of collapsing into the front leg. That’s where the core training sneaks in.
From kneeling, step one foot forward and plant it flat. Keep the back knee down. Bring both hands to the front thigh or place them on blocks, then lift the chest without leaning the ribs ahead of the pelvis. You should feel the front hip open and the deep belly work to keep you from tipping.
If you want a simple cue, use this: exhale before you settle deeper. That keeps the pressure from shooting forward into the abdomen. It also gives the pelvis a chance to find a more neutral angle.
A narrow stance is usually easier than a long one. If your balance feels shaky, keep the hands on blocks or on the front thigh. This is not the pose for a heroic stretch. It is the pose for steady control.
9. Half Split With a Long Spine
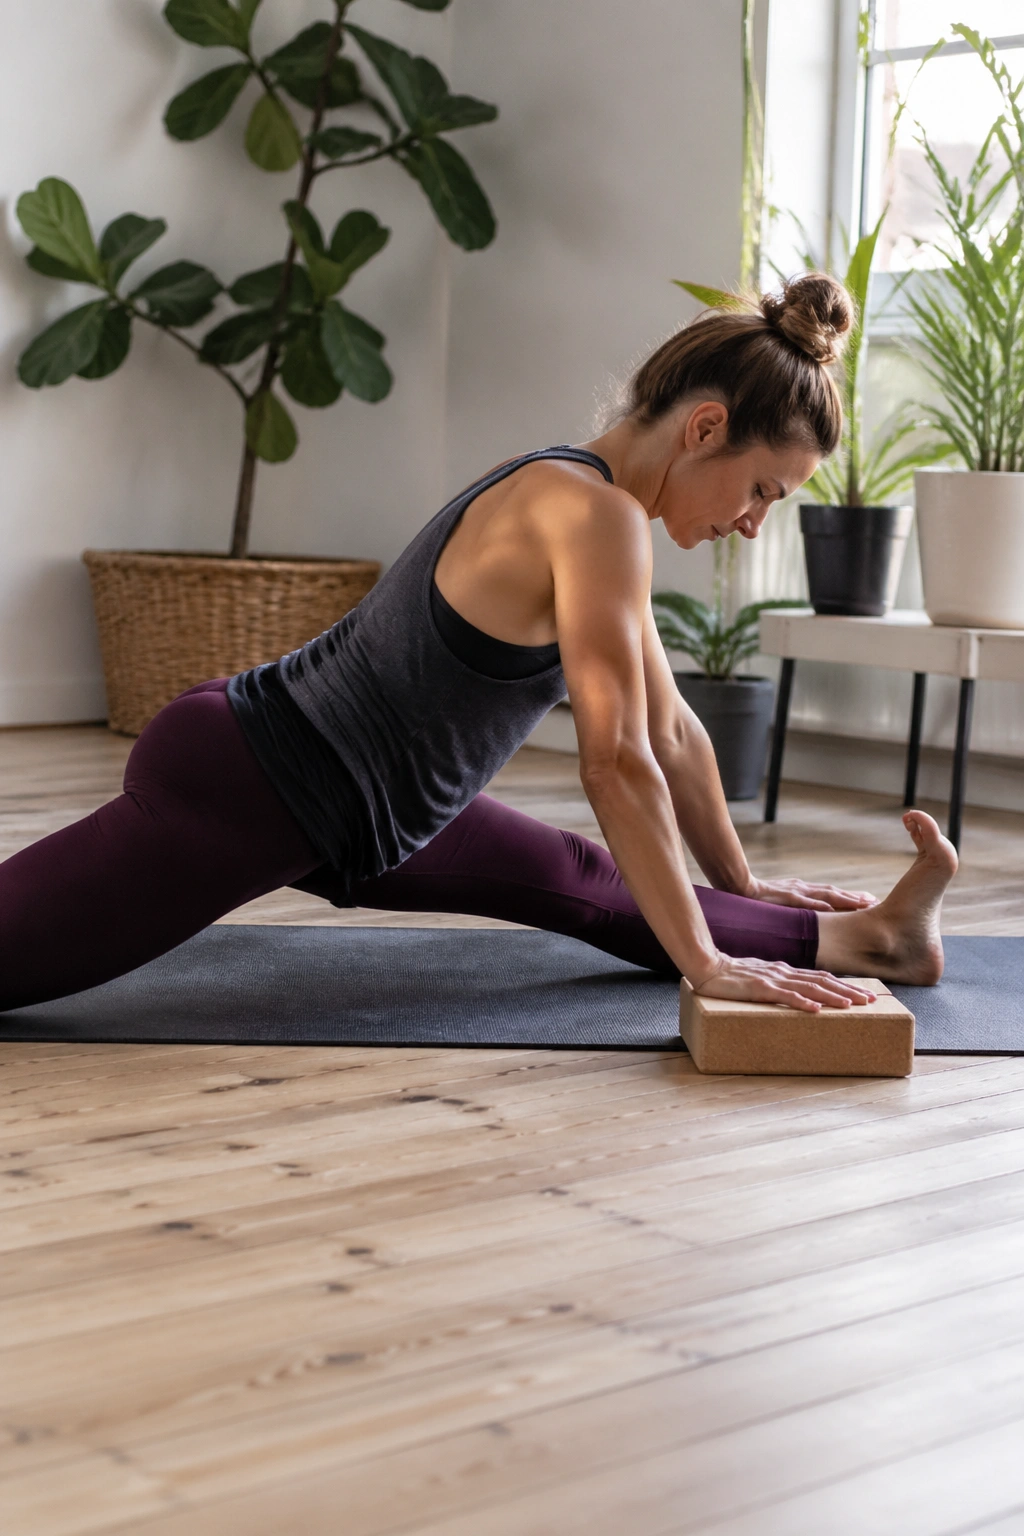
Half split is the antidote to the rounded, grabby hamstring stretch that makes the belly bulge. The point is length, not reach.
From low lunge, shift the hips back and straighten the front leg only as much as feels friendly. Keep a soft bend in the knee if the hamstring pulls hard. Fold forward from the hip crease with a long spine, hands on blocks or on the floor if that does not strain the front body. The chest should feel open enough to breathe into.
People often yank the torso toward the shin and call it a stretch. That usually turns the whole front line into a pressure cooker. Instead, think of the spine lengthening forward while the hips drift back a few inches. The hamstring still works. The core does not get bullied.
If you notice that the belly wall starts to push outward, come up higher and bend the front knee. Tiny changes matter here. They change the sensation from “trying too hard” to “useful and calm.”
10. Warrior I With a Short Stance
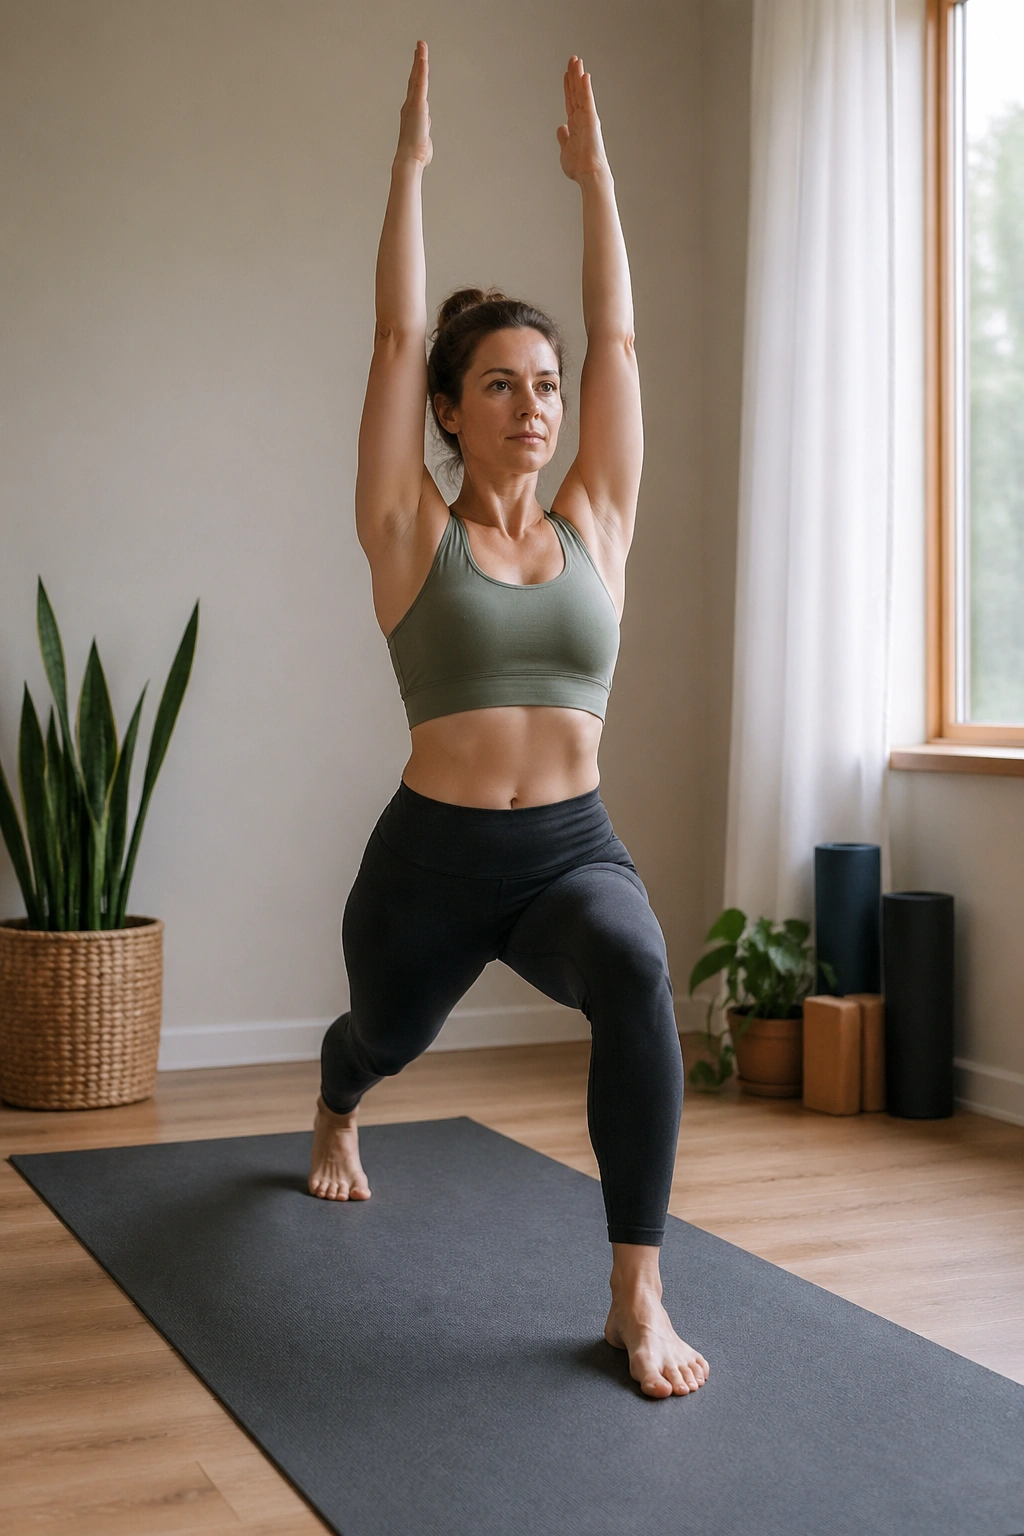
Warrior I can be a sneaky core exercise after pregnancy because it asks you to keep your ribs from flying forward while your legs work underneath you. The key is a shorter stance than most people use.
Step one foot back only a moderate distance, with the back heel angled down and the front knee bent over the ankle. Keep your pelvis mostly facing forward, but do not obsess over perfection. Lift the chest without thrusting the ribs up, and take the arms overhead only if that does not make the belly brace or the lower back arch.
A lot of postpartum bodies want to cheat here. The front ribs flare. The pelvis tilts. The belly pushes outward. That is your cue to shorten the stance and lower the arms. You are training control, not trying to win a shape contest.
If overhead arms feel edgy, keep the hands on the hips or at heart center. The pose still does its job. The legs load. The torso stays honest. That is plenty.
11. Warrior II With a Soft Belly
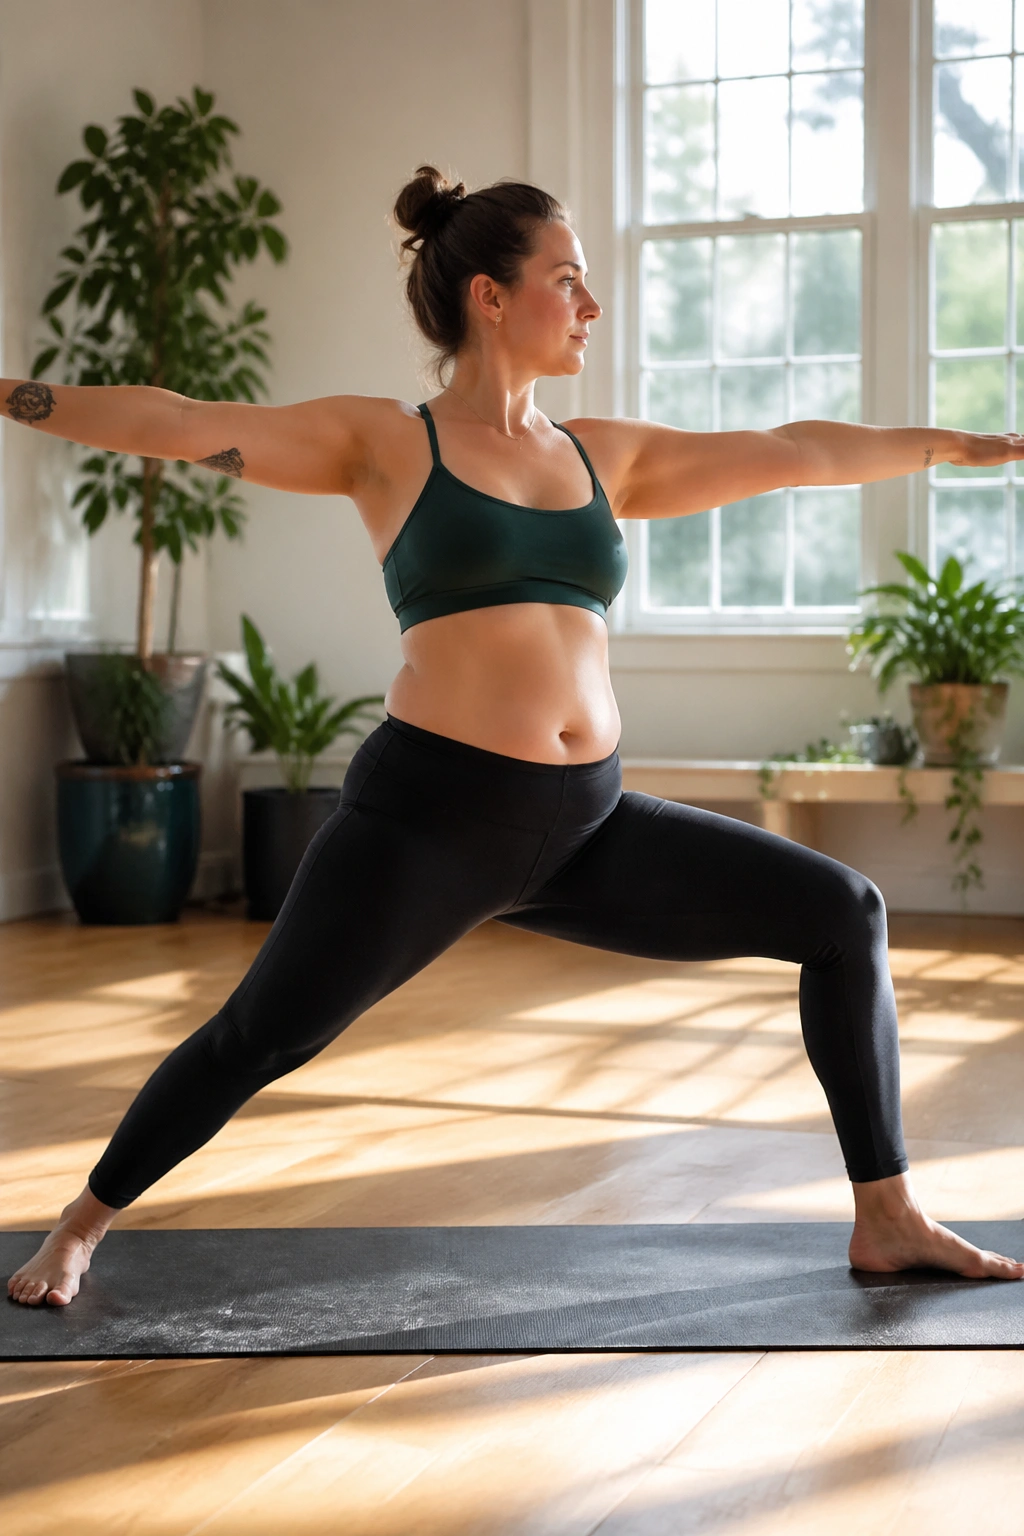
Warrior II is one of the best standing shapes for rebuilding stamina without asking for aggressive abdominal pressure. It looks open, but it should still feel organized.
Take a shorter-than-usual stance, turn the front toes forward, and angle the back foot slightly in. Bend the front knee and stretch the arms wide. Keep the chest lifted but relaxed, with the lower ribs stacked over the pelvis. The belly should stay soft, not sucked in and not pushed out.
How to keep it steady
- Keep the front knee tracking over the second or third toe.
- Shorten the stance if the pelvis feels like it’s tipping.
- Let the shoulders drop away from the ears.
Warrior II can expose compensation fast. If you sink too far, the front side of the waist often collapses and the midline takes the strain. Back off an inch or two and breathe again. That smaller version usually feels cleaner and stronger.
12. Supported Triangle at the Wall
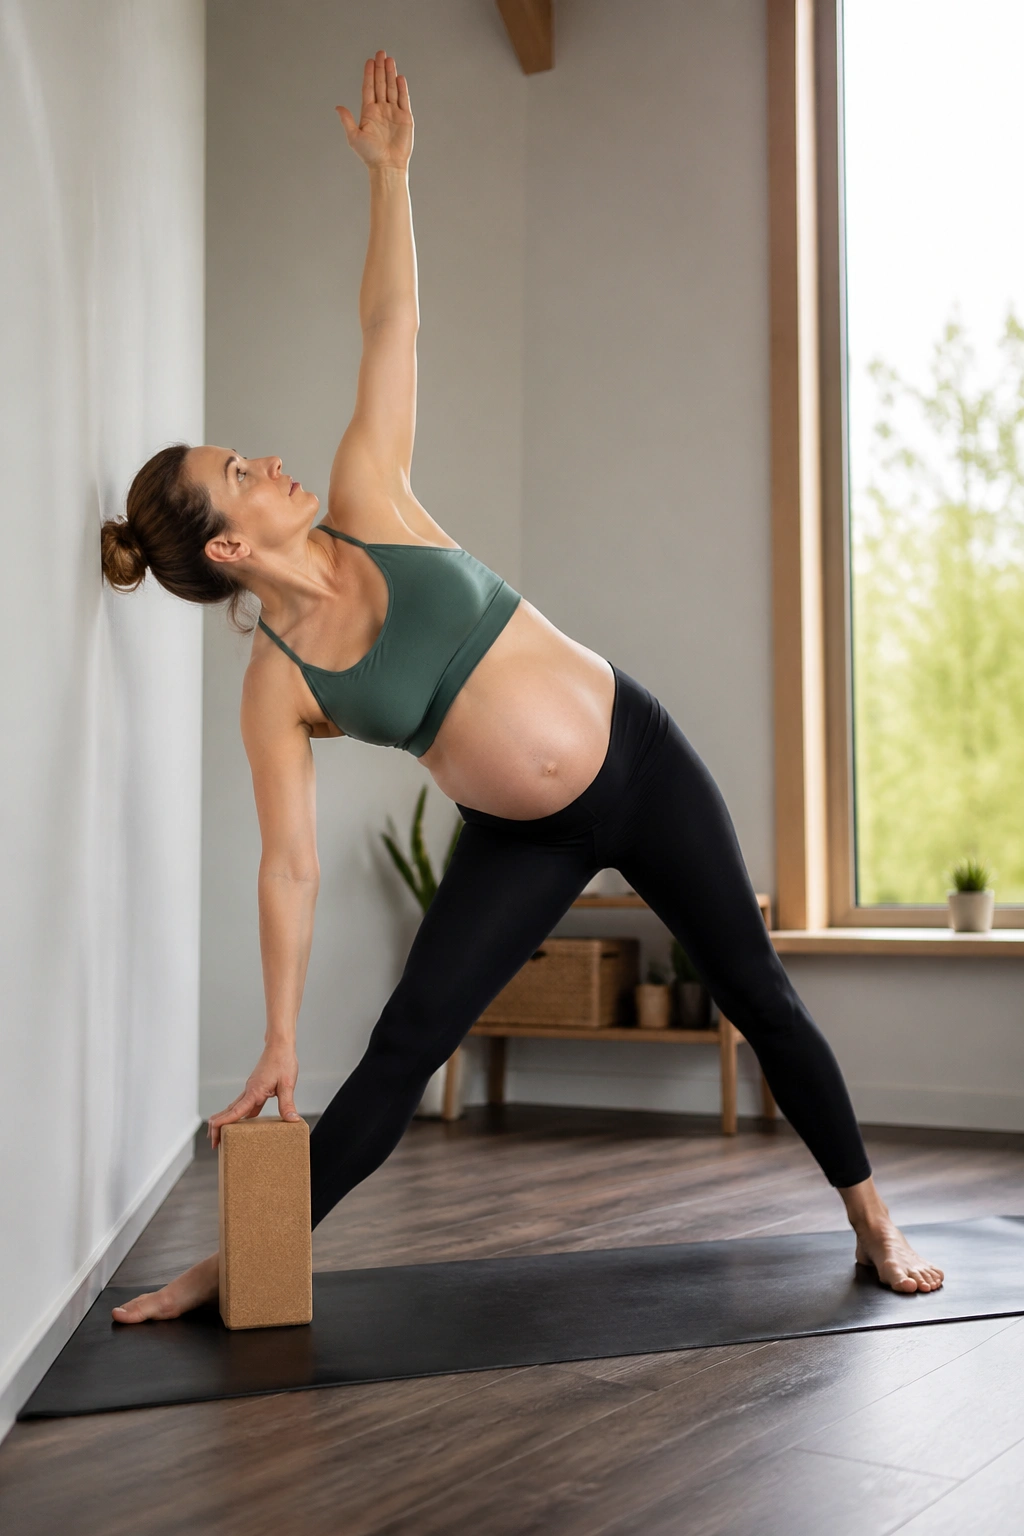
Triangle is useful after pregnancy, but the fully extended floor version can be a lot. The supported version keeps the length without the flop.
Stand with one side near a wall, then hinge at the hip and place the lower hand on a block or the shin. Keep the top shoulder stacked rather than rolling open too fast. The wall is there to remind you where vertical is. Use it. That support keeps the side waist from collapsing and helps the core stay awake.
This pose stretches the hamstrings, outer hip, and side body at once. Nice combination. Still, the temptation is to chase the floor and twist the chest skyward. Don’t. A smaller triangle with a calm belly beats a dramatic one with a bulge at the center.
If your bottom hand keeps sliding too low, raise the block. If the neck feels cranky, keep the gaze down. Triangle should lengthen you out, not unthread you.
13. Supported Bridge for Diastasis Recti
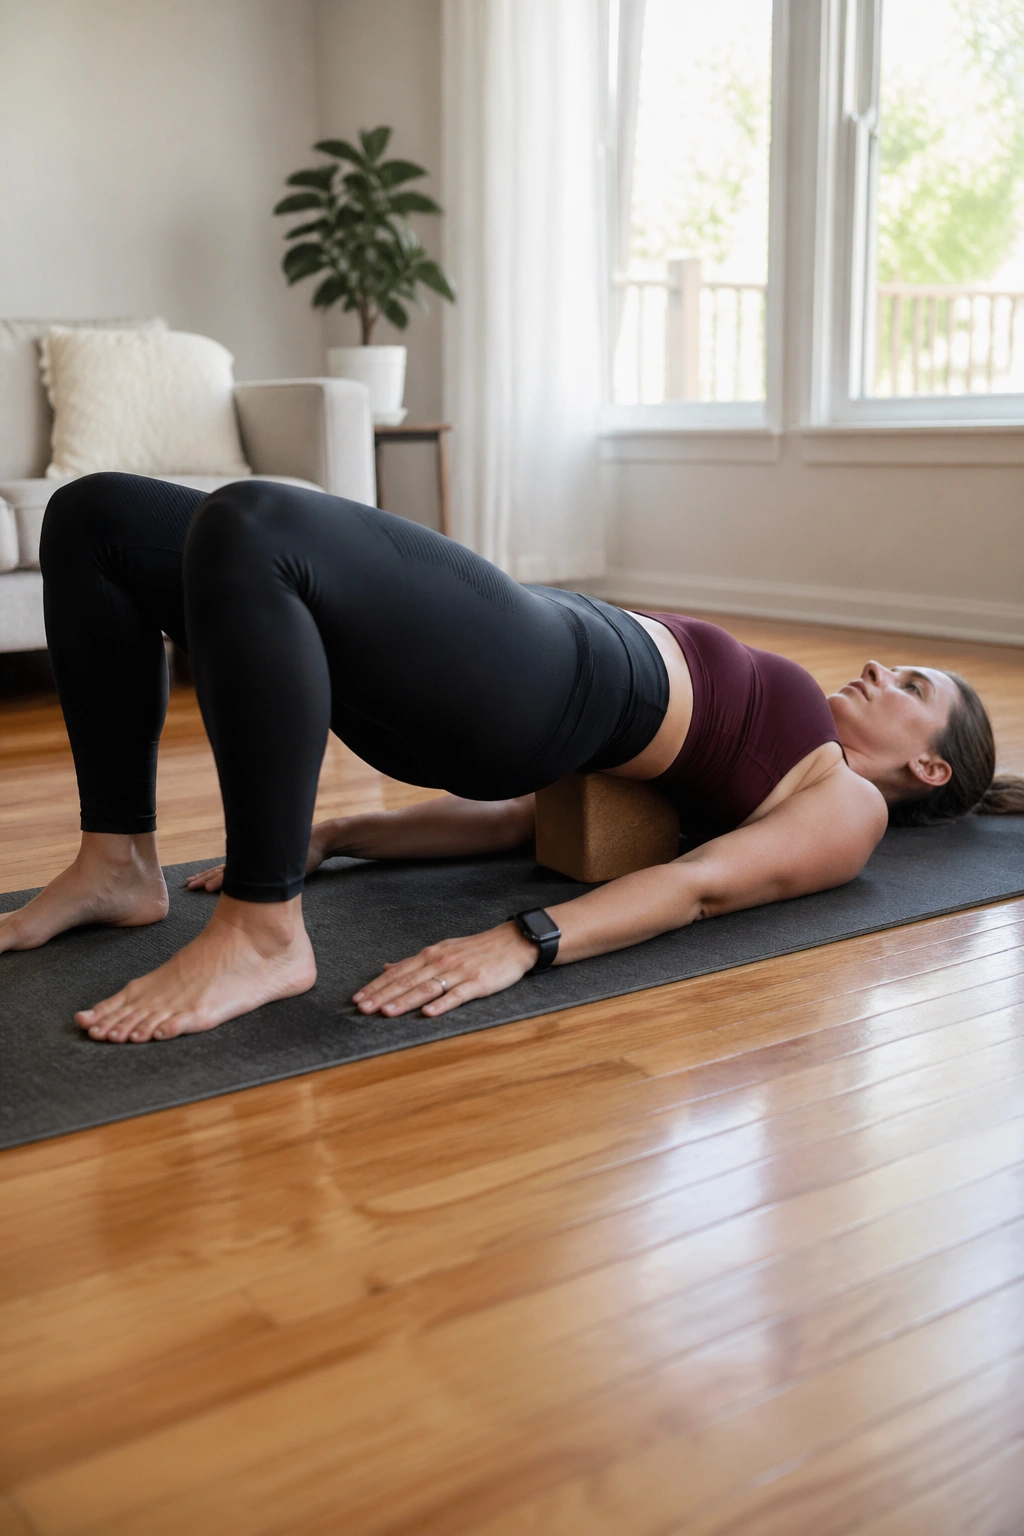
Supported bridge is one of the strongest gentle poses for postpartum core work because it gives the hips a job while the belly stays relatively calm. Done well, it feels stable, not strained.
Lie on your back with knees bent and feet hip-width apart. Exhale, then peel the pelvis up slowly until your thighs and torso make a mild slope. Keep the ribs from popping up toward the ceiling. If you want to make it restorative, slide a block under the sacrum and rest there instead of holding the lift.
The biggest mistake is going too high too soon. That usually turns the low back into the driver and lets the front ribs flare. A smaller bridge, held for two or three breaths, is far more useful.
If your glutes cramp, walk the feet a little closer. If the neck feels jammed, lower the lift. A bridge should feel like the back of the body is waking up and the front of the abdomen is staying organized.
14. Reclined Bound Angle With Bolsters
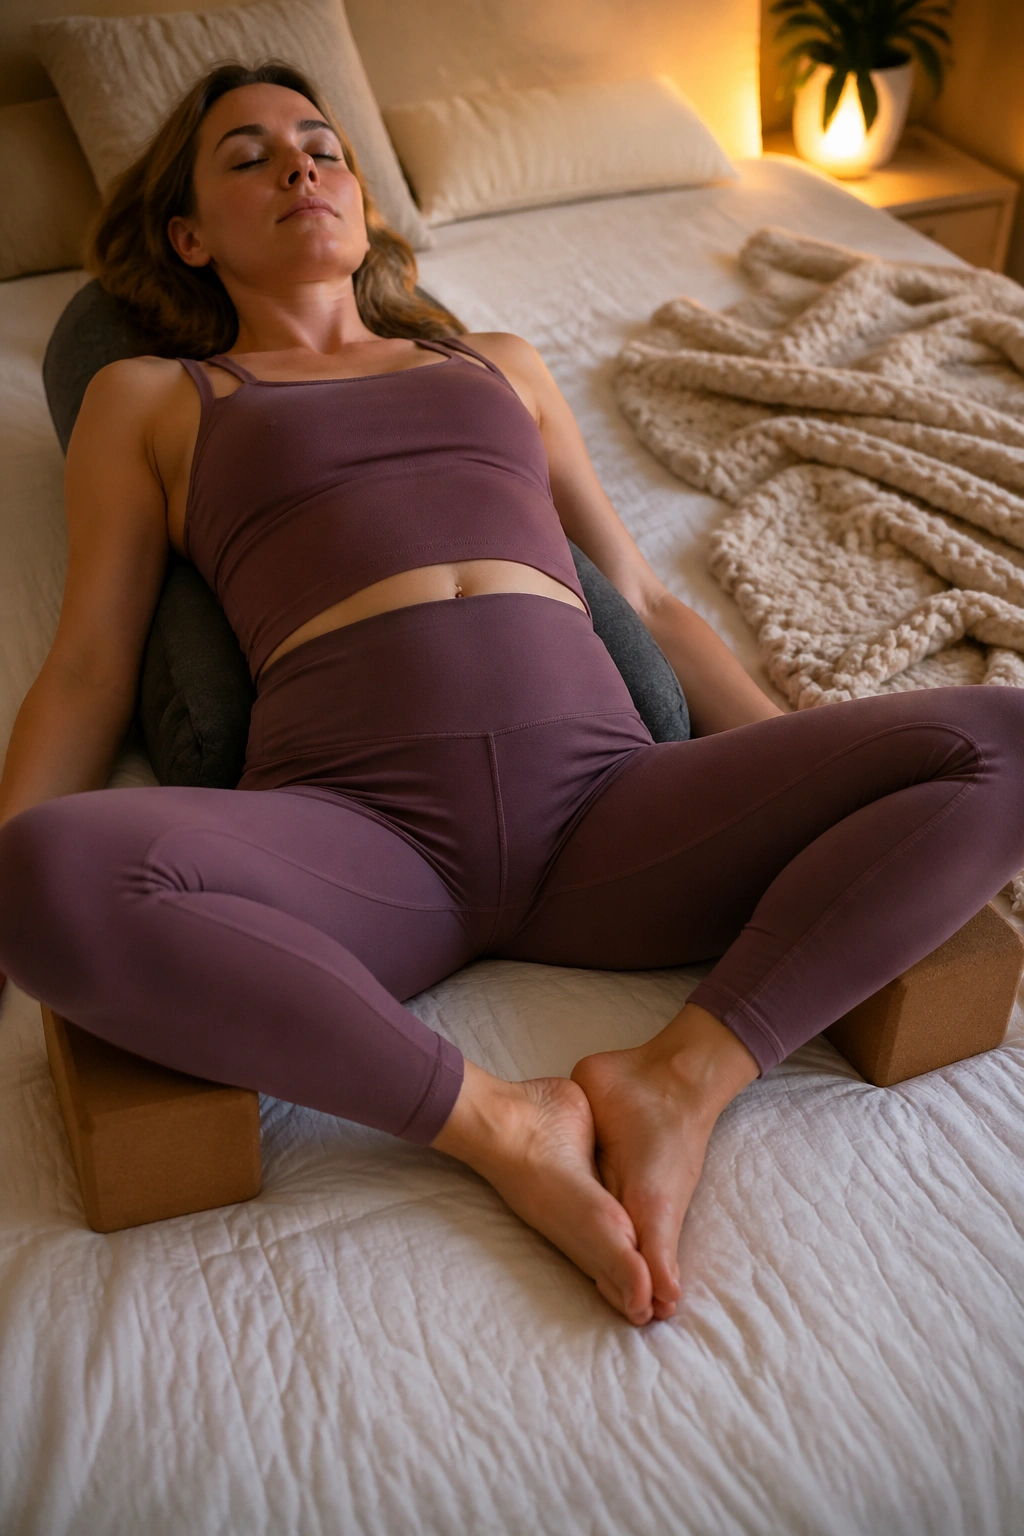
Restorative poses are not a luxury when diastasis recti is part of the picture. They give the tissue and nervous system a chance to stop bracing.
Bring the soles of your feet together and let the knees fall open. Support each thigh with a block, blanket, or cushion so the legs are not hanging in space. If your chest feels tight, place a bolster or folded blanket under the spine from head to sacrum. Breathe low and slow. The belly should rise gently on the inhale and soften on the exhale.
How to set it up
- Use more support than you think you need.
- Keep the lower back comfortable, not flattened hard into the mat.
- Rest one hand on the belly and one on the side ribs.
This shape is especially useful after long feeding sessions or long drives, when the front body feels shortened and the pelvis feels glued in place. It does not build obvious strength. It builds the conditions that let strength come back later.
15. Figure Four on Your Back
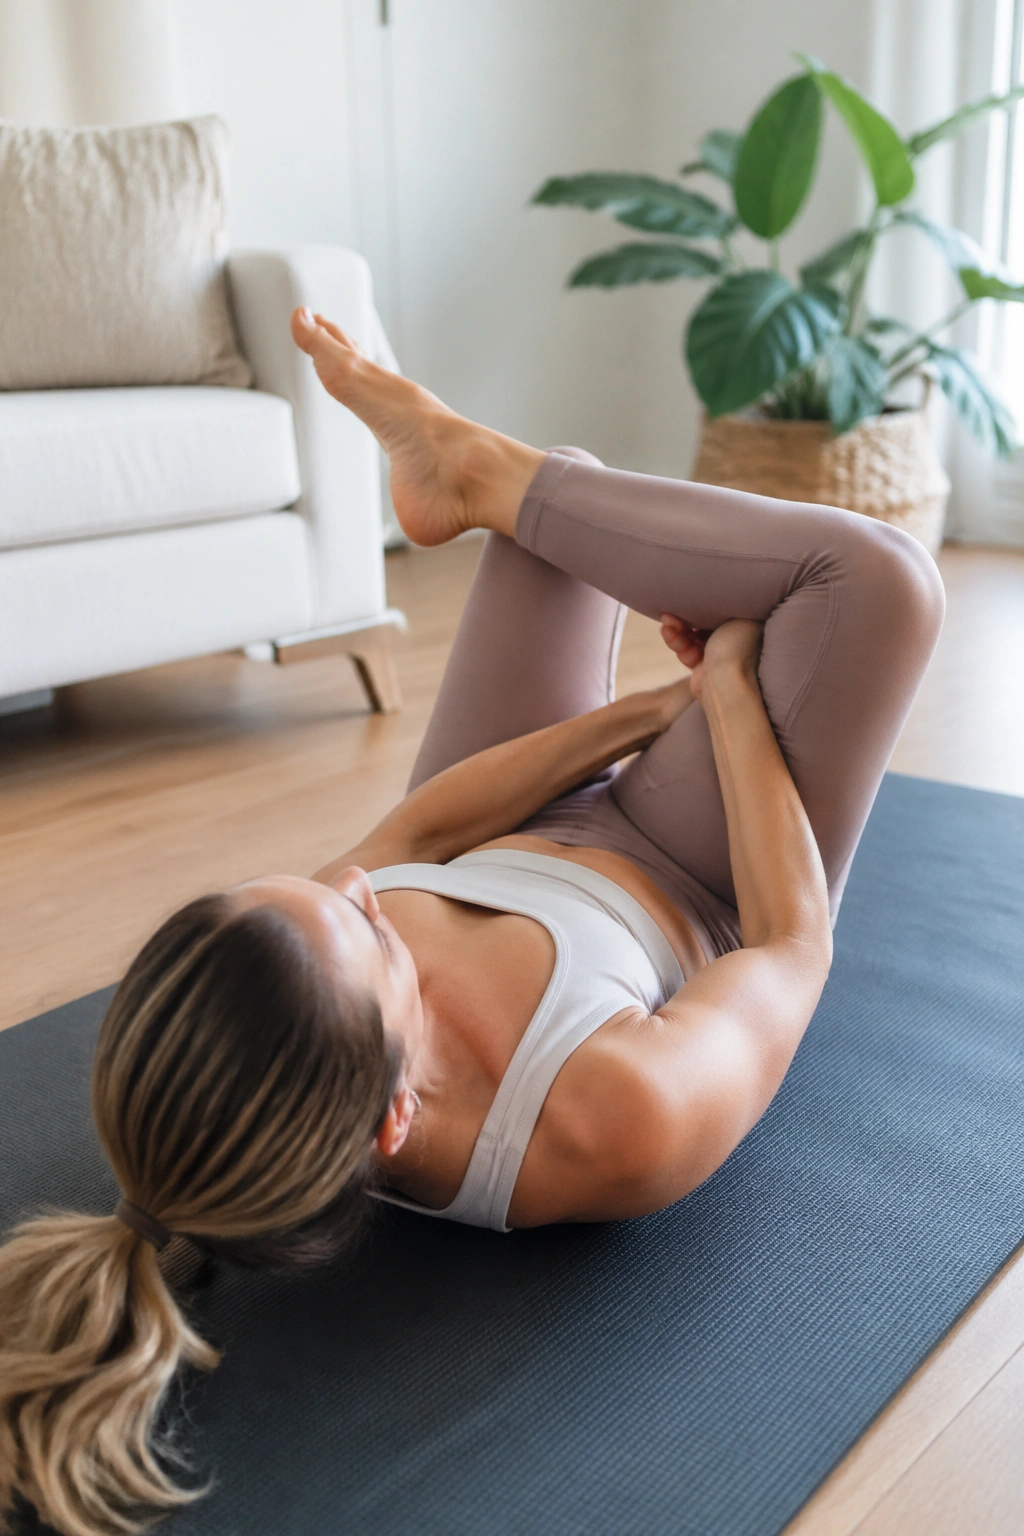
Figure four is a clean way to open the outer hip without loading the abdomen much at all. That matters when the belly wall is still learning how to trust movement again.
Lie on your back and cross your right ankle over your left thigh. Flex the right foot to protect the knee, then stay there or thread both hands behind the left thigh and draw it in a little. Keep the tailbone heavy. The stretch should land in the glute and outer hip, not in the low back.
This pose often feels better than seated hip stretches because you’re not fighting gravity or trying to hold your whole torso upright. The floor does the work for you. That means less pressure, more honesty.
If the belly feels like it’s doming when you pull in, back off. Stay with the crossed-leg version and breathe there. No rush. Hips tend to loosen faster when they stop being bullied.
16. Tree Pose by the Wall
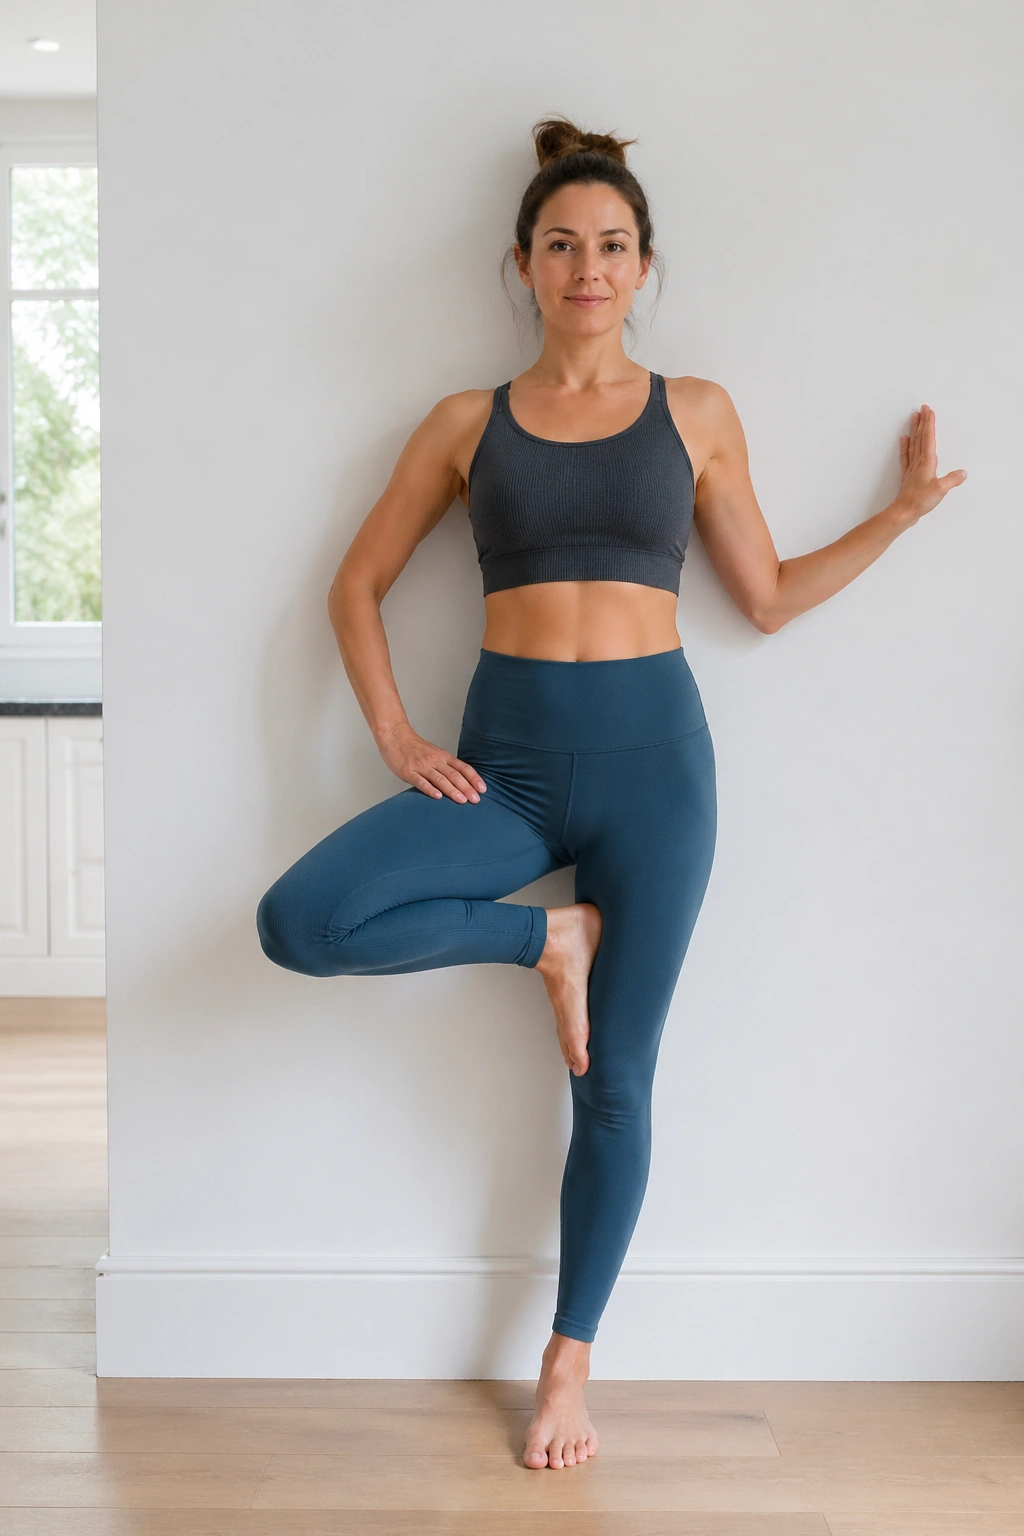
Tree pose teaches balance, but it also quietly trains the foot, ankle, hip, and deep core to work together again. That whole-chain coordination helps more than people expect.
Stand with one side near a wall and place the sole of one foot at the ankle or inner calf of the standing leg. Avoid the knee. Keep one or two fingertips on the wall for support, then bring the hands to heart center if you feel steady. The pelvis should stay level, not hike up on the lifted side.
What makes this version better
- The wall keeps you from gripping the belly.
- A short hold, maybe three breaths per side, is enough.
- The standing foot should feel planted, not wobbly.
Tree gets messy when people try to go high too quickly. The lifted foot ends up pressed into the knee, the hips twist, and the core starts to overwork. Keep it low. Keep it clean. A calm tree is a stronger tree.
17. Seated Forward Fold With Bent Knees
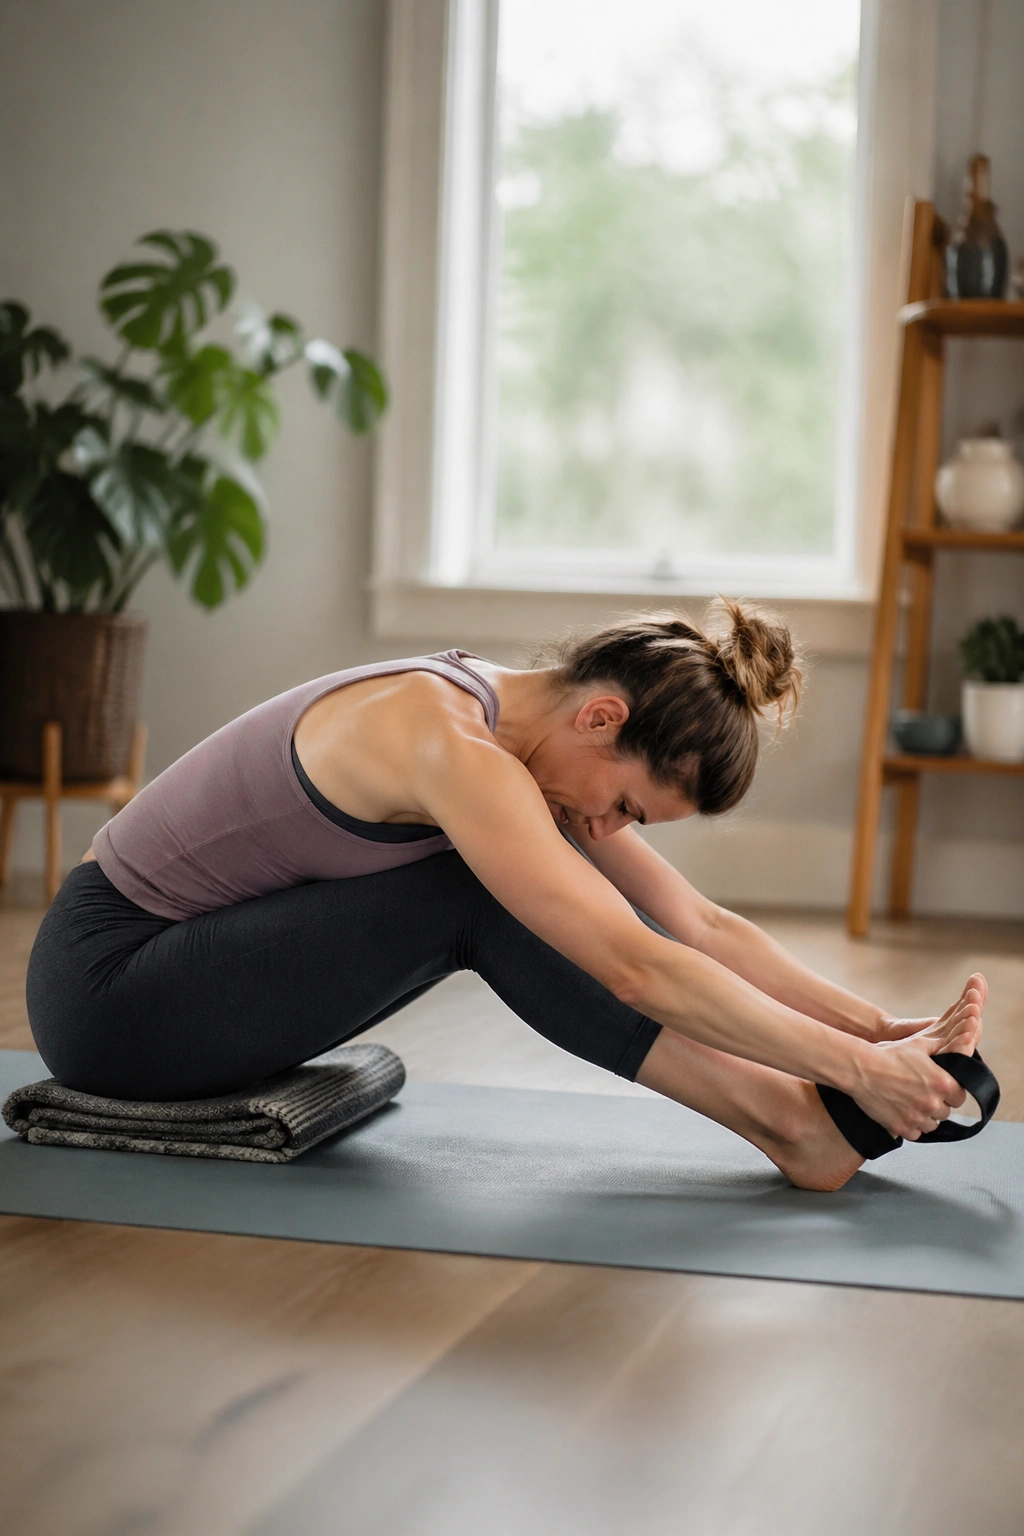
A strict hamstring fold can be rough on a postpartum abdomen, so bend the knees and make the pose about length instead of depth. That tiny shift changes everything.
Sit on a folded blanket so the pelvis tips slightly forward. Bend both knees, hinge from the hips, and fold over the legs with the spine long. If you can’t keep the back from rounding, place a strap around the feet and hold it lightly while staying higher. The knees are allowed to stay soft. They are allowed to stay very soft.
People love to chase toes here. That usually just rounds the back and adds strain where you do not want it. The better version is quieter: sit tall, hinge a little, breathe into the back body, and stop before the front belly feels compressed.
This stretch can be especially pleasant after a day of standing and carrying, when the whole back line feels pulled short. It is not flashy. It does not need to be.
18. Sphinx Pose With a Low Lift
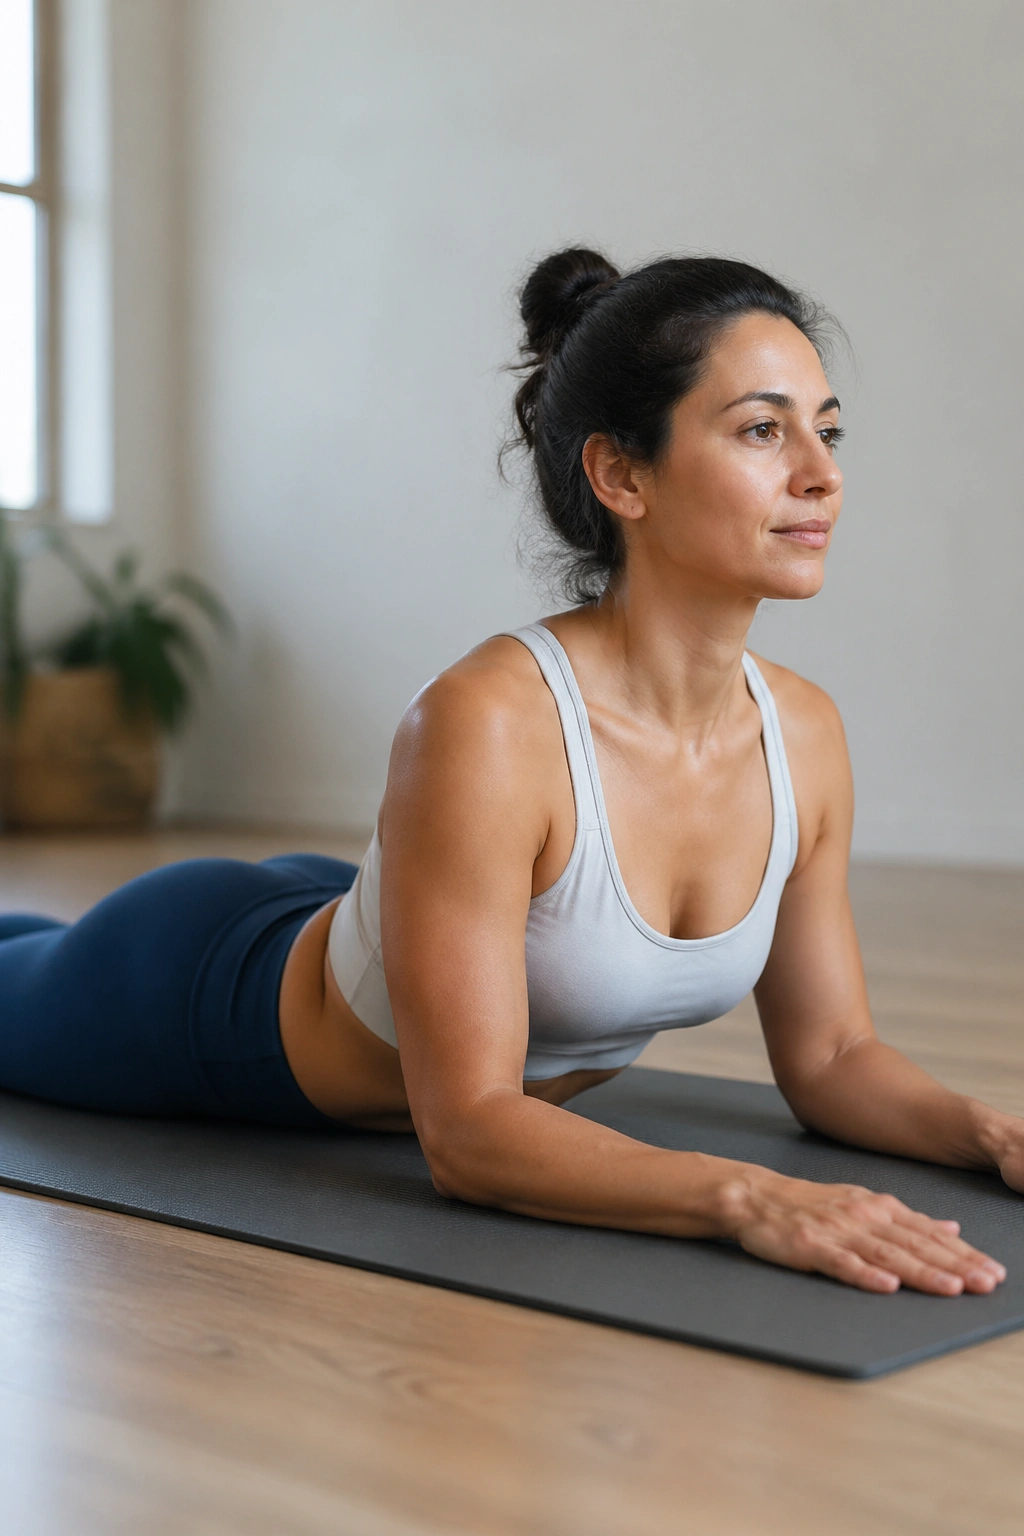
A low sphinx can be a lovely countershape for all the rounding that happens in feeding, rocking, and carrying. The word there is low.
Lie on your belly and place your elbows under your shoulders, forearms on the floor. Press the pubic bone gently down and lengthen the tailbone toward your heels. Lift the chest only a little. You should feel the front of the body opening without the low back getting pinchy or the belly ballooning into the floor.
A lot of people overdo backbends after pregnancy because they finally feel able to move “backward” again. Slow down. If the ribs fling open, the benefit drops fast. The better version is small, quiet, and held for a few easy breaths.
If the abdomen feels uncomfortable against the mat, skip it for now or place a folded blanket under the hips for a softer angle. The pose should leave you more open, not more compressed.
19. Half Happy Baby, One Side at a Time
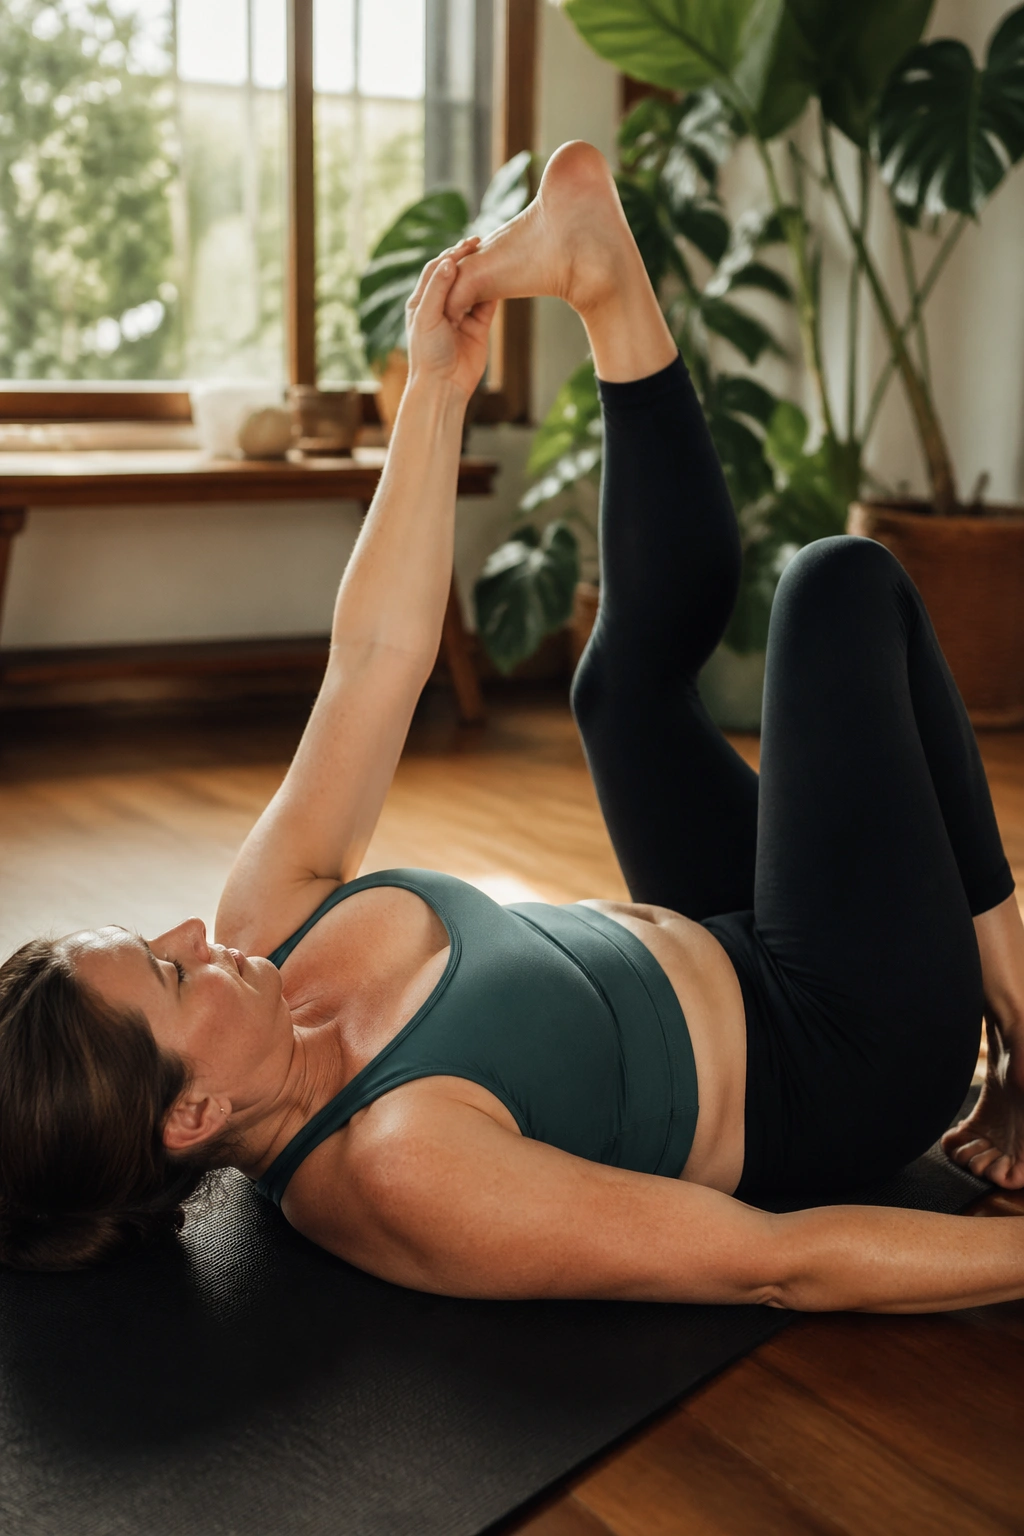
Happy baby can be too much if you take the full shape, but one side at a time is a different story. The smaller version is calmer and easier to control.
Lie on your back and bring one knee toward the chest. Hold the outer edge of the foot or shin, keeping the other leg bent with the foot on the floor if that feels better. Let the knee open a little, but do not yank it deep into the armpit. The stretch should land in the hip and groin while the belly stays soft.
This pose can feel oddly comforting when the hips have been clenched by months of carrying, breastfeeding, and sleeping in strange positions. That doesn’t mean you should push the range. It means the body likes being allowed to open without being forced.
If you feel a pull at the front of the abdomen, back off and keep both feet on the floor with one ankle crossed over the opposite thigh instead. There is no reward for intensity here.
20. Savasana With Diaphragmatic Breathing
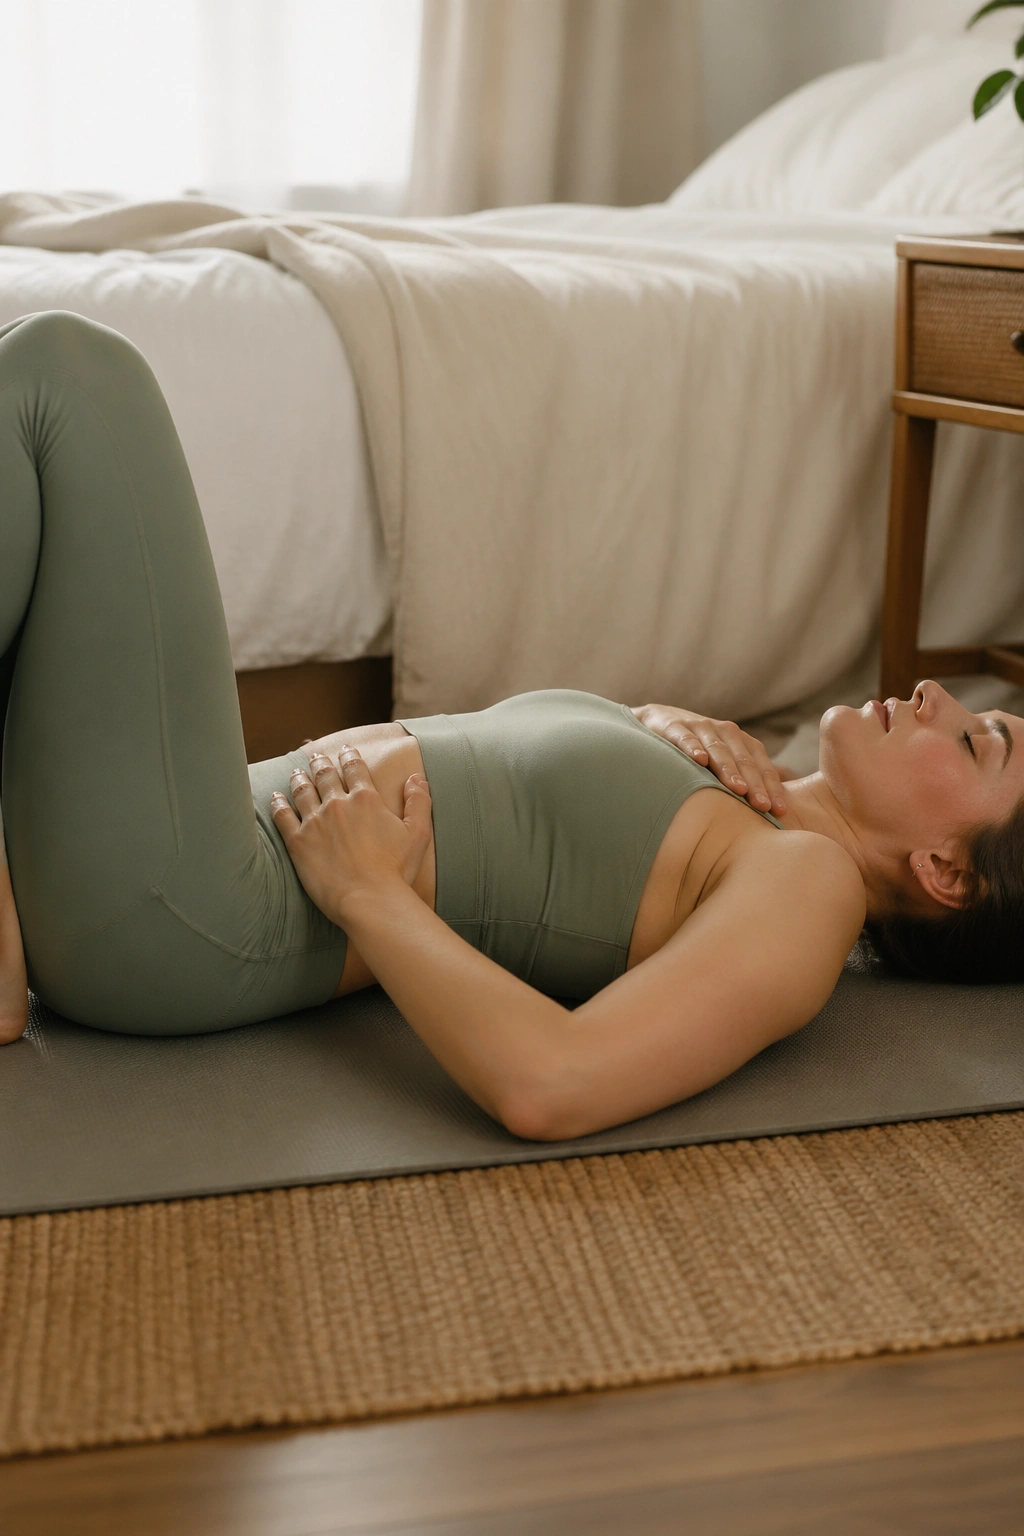
Savasana is not a throwaway ending. For diastasis recti, it is where you teach the body to absorb the practice without clenching again.
Lie on your back with knees bent and feet on the floor, or rest your calves on a chair if that feels better on your low back. Let your arms fall open. Place one hand on the belly and the other on the chest. Inhale quietly through the nose and let the lower ribs widen. Exhale long and slow, and feel the belly soften rather than suck in hard.
This is the shape that helps the whole session settle. You may notice the breath moving more smoothly after even two minutes. Good. That means the ribs, diaphragm, and belly wall are starting to cooperate again.
If lying flat feels too intense, prop your upper body slightly or keep the knees bent higher. The point is rest with awareness, not a perfect corpse pose. A few calm breaths done well beat a long, distracted stretch any day.
Final Thoughts
The smartest yoga for diastasis recti after pregnancy usually looks a little less dramatic than people expect. Breath, stacking, and controlled range do more good than flashy flexibility. That can feel almost disappointingly basic at first. It isn’t. It’s the work.
Watch the belly wall while you move. If it domes, shorten the shape. If the ribs flare, lower the arms or reduce the stretch. The body will tell you what it can handle if you give it a chance to speak.
If pain, heaviness, leaking, or a deep sense of weakness keeps showing up, a pelvic floor physical therapist is worth seeing. A few minutes of the right feedback can save you months of guessing. And once the pieces start lining up, the poses stop feeling like random stretches and start feeling like practice with a purpose.
