



Weak bones and flashy yoga do not mix. But gentle, well-chosen yoga poses can still do real work for posture, balance, hip strength, and the back muscles that help keep you upright when life gets a little wobbly.
That matters more than people think. With osteoporosis, the big goal is not to bend farther or look more flexible. It is to move in ways that load the bones safely, build steadiness in the legs and hips, and keep the spine long instead of rounded under pressure. That means standing poses, supported balances, small backbends, and floor work that wakes up the back extensors without asking the spine to collapse.
The wrong kind of yoga can be rough on fragile bones. Deep forward folds, forceful twists, sit-up style crunches, and anything that dumps your weight into a rounded spine are the poses that make me uneasy here. If you have vertebral fractures, severe bone loss, or a clinician has told you to avoid spinal flexion, take that seriously. Good yoga for weak bones should feel steady, controlled, and a little more boring than the Instagram version. That is a feature, not a flaw.
The poses below are the ones I’d actually put in a bone-friendly practice: upright, clear, and useful. Start with the first few, use a wall or chair whenever you want one, and let the details do the heavy lifting.
1. Mountain Pose
Mountain pose looks almost too plain to matter. It does matter.
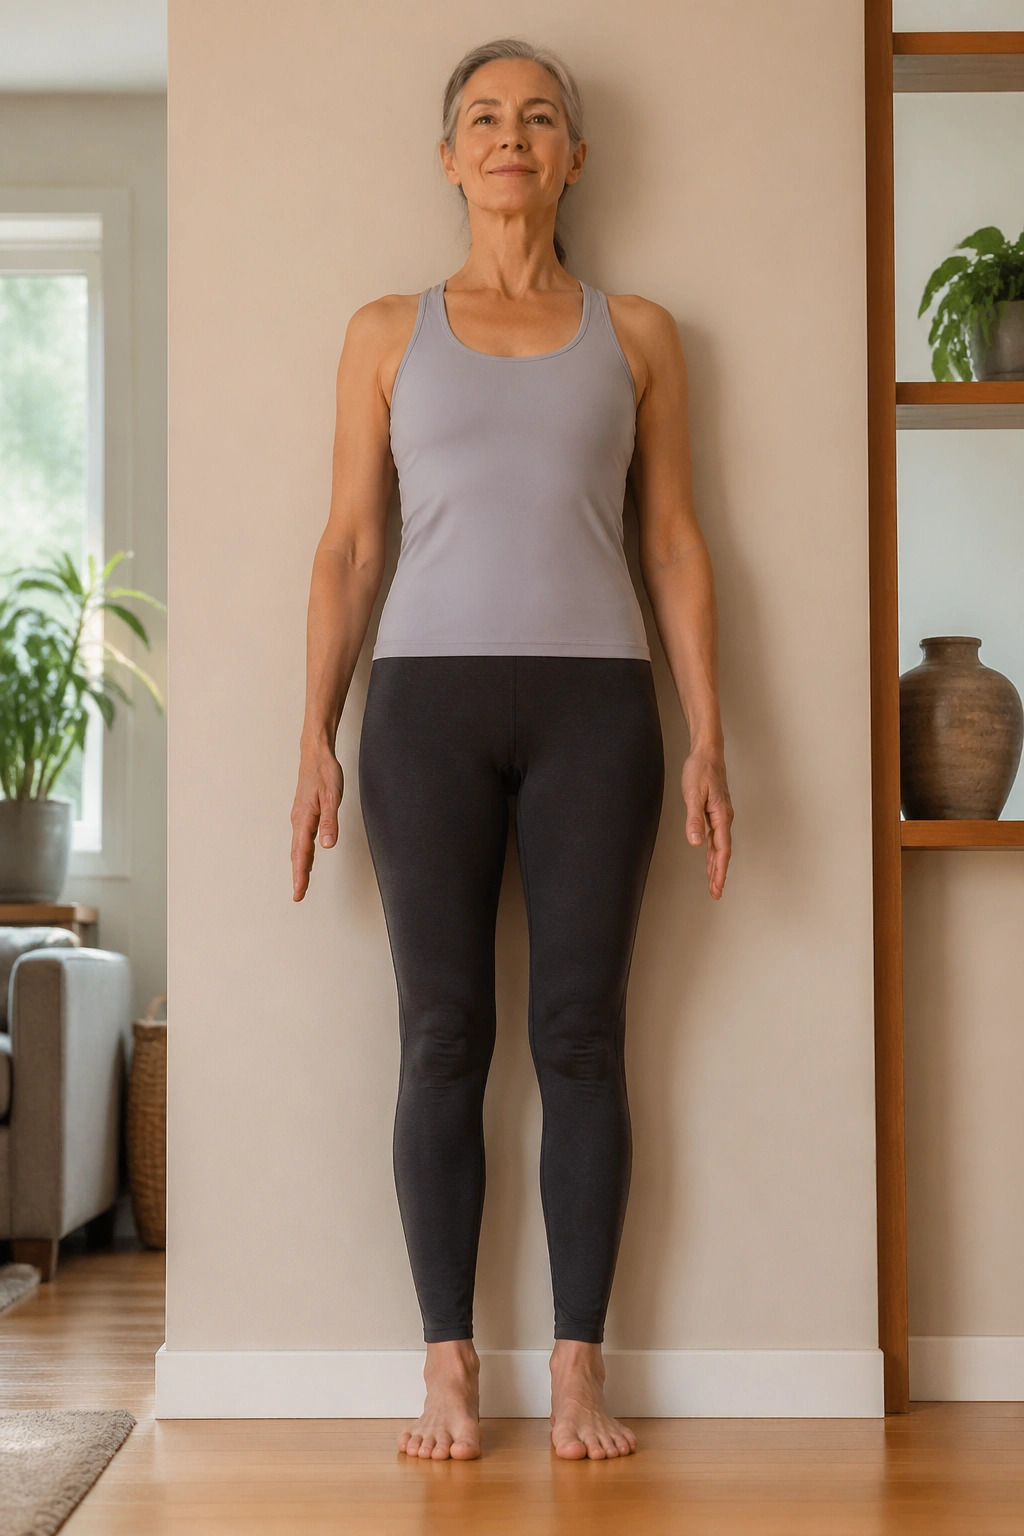
Stand with your feet hip-width apart, spread your toes, and feel all four corners of each foot press into the floor. Lift the crown of your head, soften your knees, and let your ribs settle over your pelvis instead of flaring forward. That simple stack teaches your body what tall alignment feels like, which is not a small thing when posture has started to drift.
Why it belongs in an osteoporosis routine
Mountain pose is where balance work begins, even though nothing dramatic is happening. You are training your feet, ankles, hips, and trunk to share the load without gripping. Over time, that kind of quiet alignment helps you stand and walk with more control.
A wall can help here. If you sway easily, stand with your back near a wall and keep one shoulder blade touching it lightly. That little bit of feedback can make the pose click. The goal is not perfect stillness. The goal is an honest, steady stance that does not strain your low back or clamp your shoulders up by your ears.
2. Chair Pose at the Wall
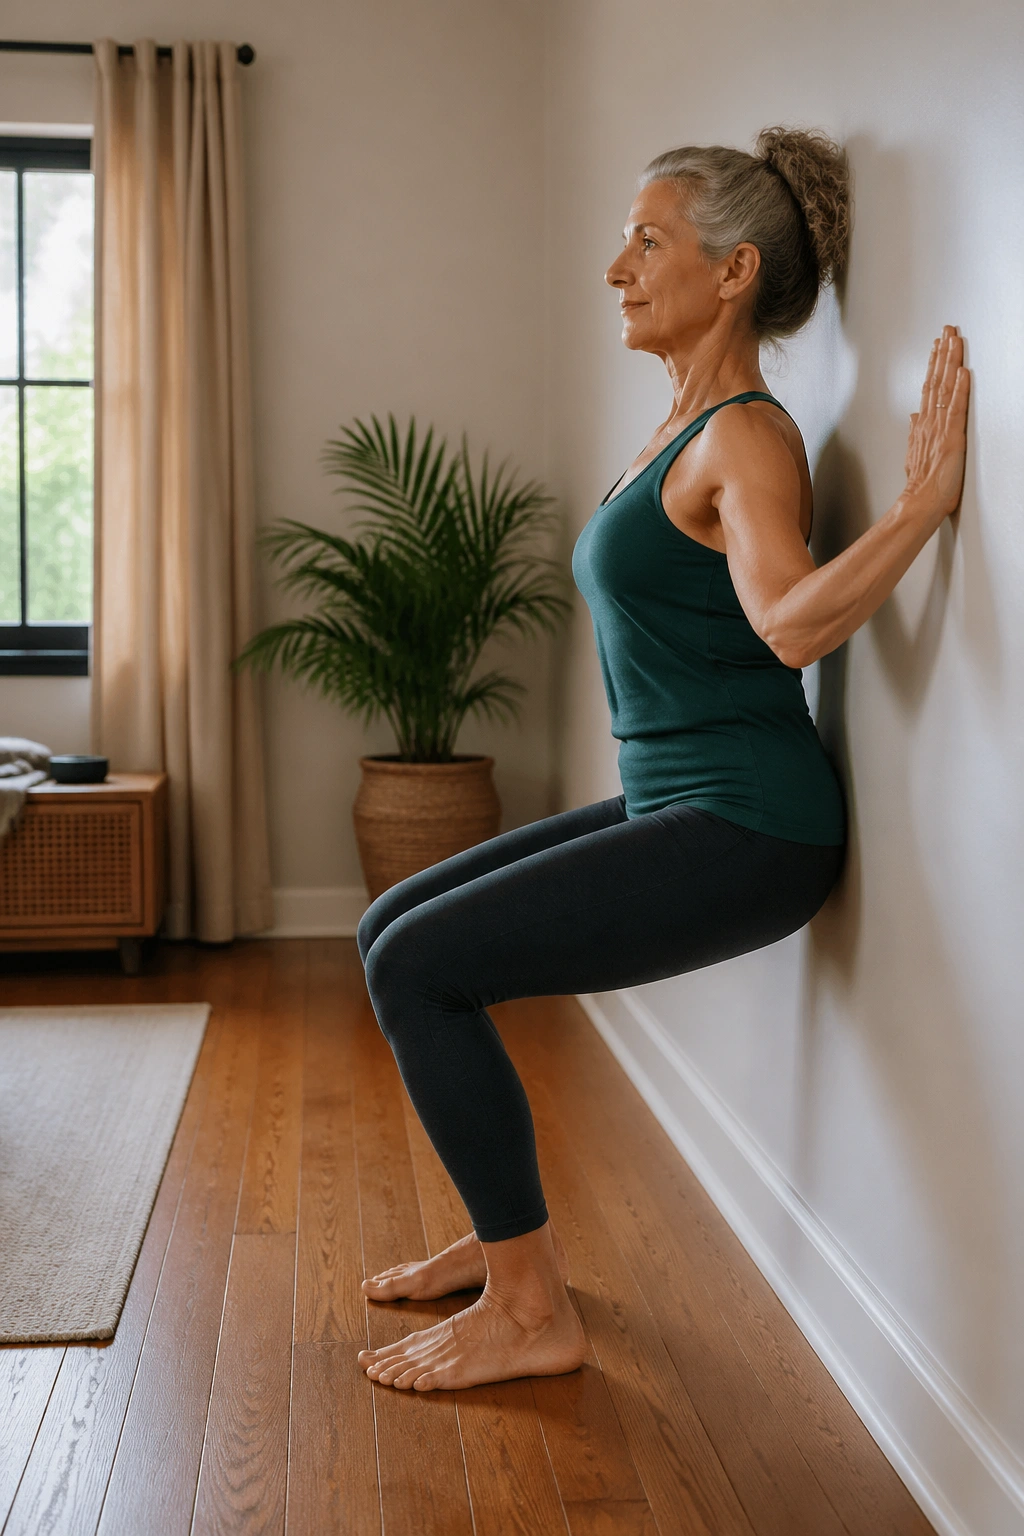
Why use a chair pose when a real chair is right there? Because the wall lets you train the legs without turning the pose into a wobble contest.
Stand a foot or two in front of a wall, feet about hip-width apart. Slide your hips back as if you are about to sit down, keep your chest lifted, and let your hands rest on the wall at shoulder height. Your knees bend, your thighs start to work, and your spine stays long. That long spine is the whole point.
Why the wall helps
The wall keeps you honest. It stops the hips from drifting too far forward and helps you keep pressure in the heels instead of the toes. That matters for bone health because chair pose loads the legs and hips in a way that feels functional, not flashy.
How to make it easier
- Keep the bend small. Even a shallow squat counts.
- Hold for 3 to 5 breaths at first.
- Bring your feet a little farther from the wall if your knees feel crowded.
- If your knees are tender, move only halfway down.
Do not tuck the tail hard. That usually sends the chest forward and the lower back into a mess of compensation. Stay long through the back of the neck and stop before the shape turns ugly.
3. Tree Pose
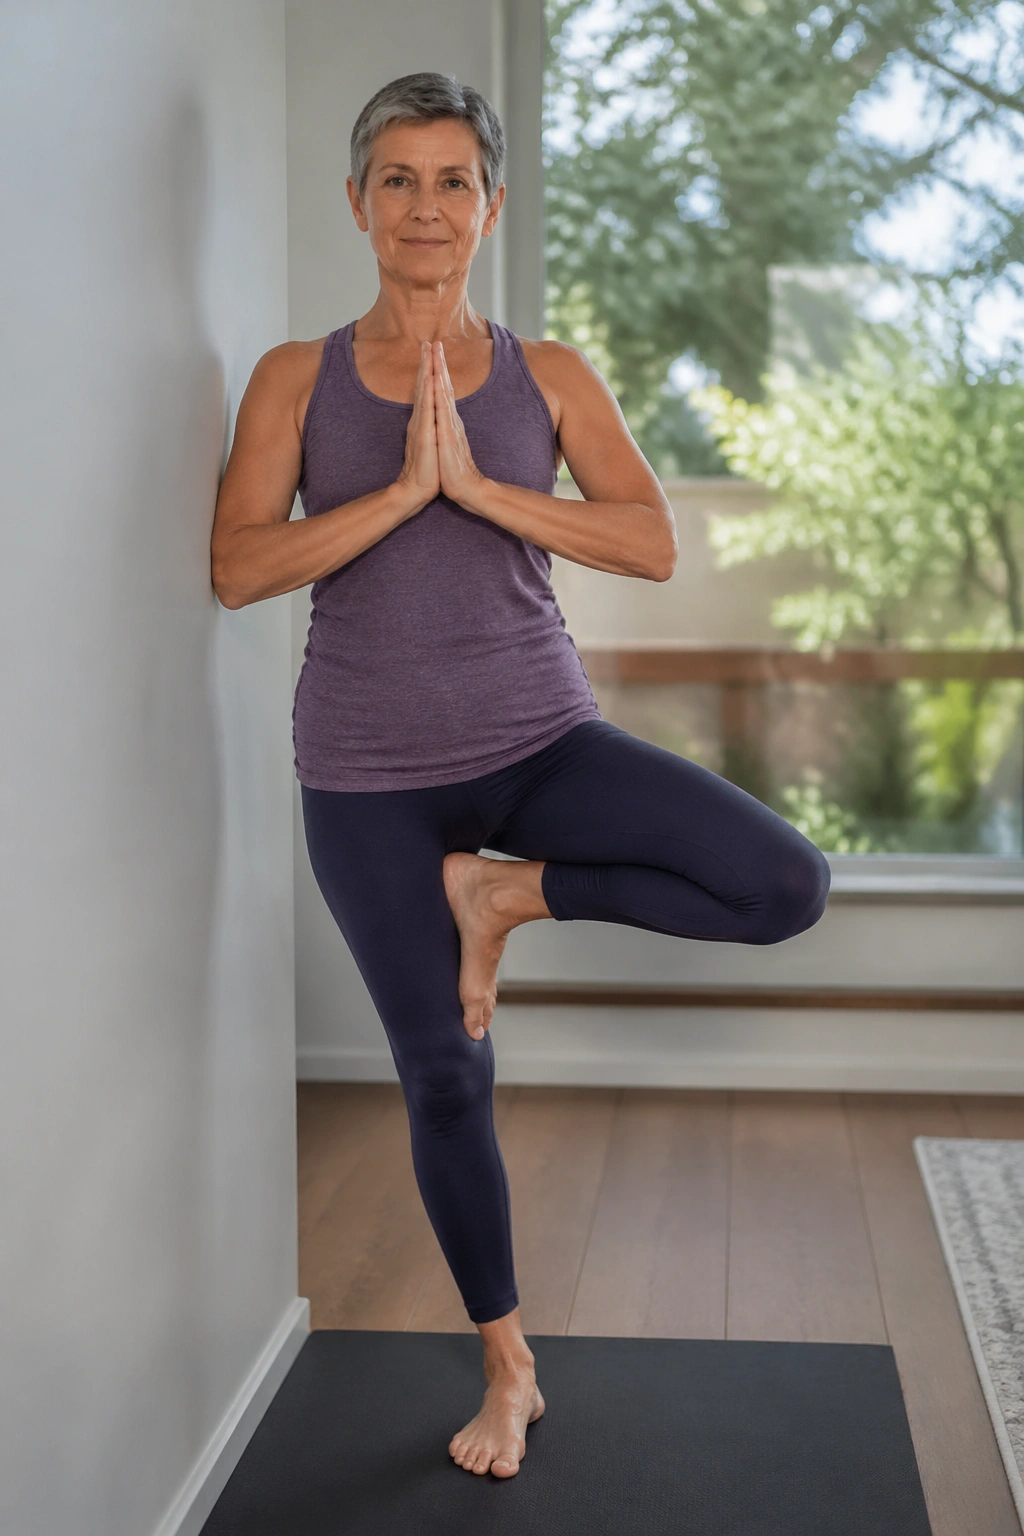
Tree pose is where a lot of people rush. Don’t.
Set one hand near a wall, then place the sole of one foot on the inner ankle, inner calf, or inner thigh of the standing leg. Never press the foot into the knee. That joint does not need the drama. Once the lifted foot is settled, grow upward through the spine and keep the standing hip firm but not clenched.
A good tree pose feels a little alive in the standing foot. You can feel the toes gripping and releasing, the ankle making tiny corrections, the hips staying awake. That is exactly what you want for balance, because falls are the enemy here and balance is trainable.
Some days the pose is tall and calm. Other days it is basically standing on one leg with a wall nearby. Both count. If the lifted knee flares way out or the torso leans hard to one side, shorten the stance and come back to the wall. Control beats height every time.
4. Warrior I
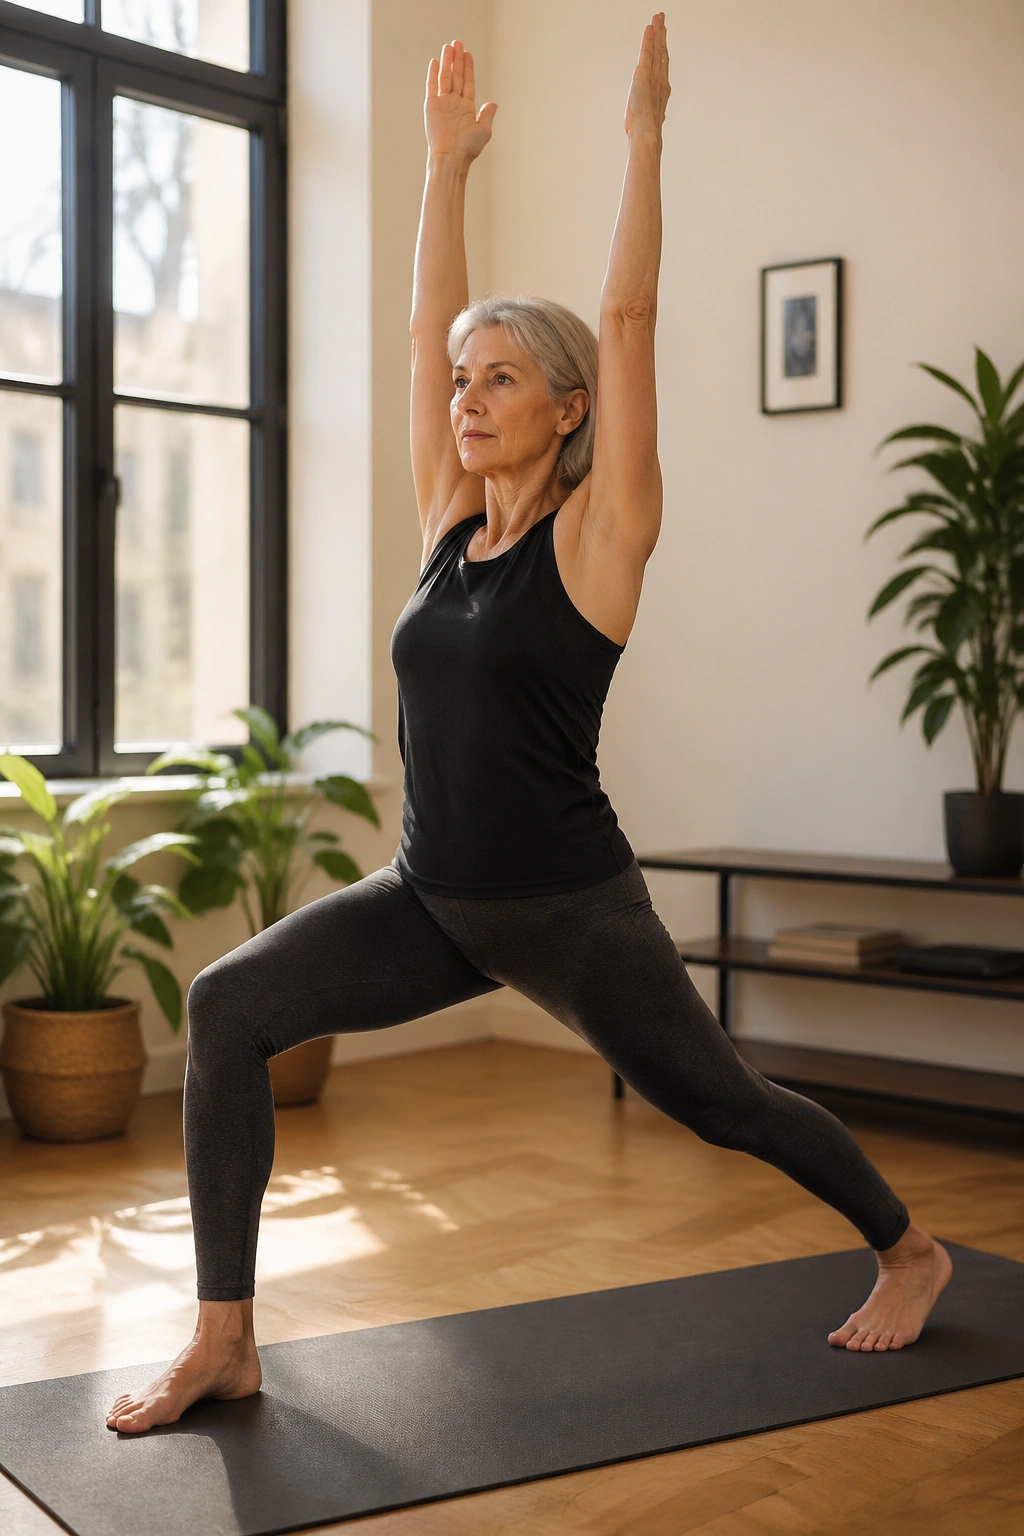
Warrior I is one of the best standing strength poses for weak bones because it asks a lot from the legs without asking the spine to fold. That is a good trade.
Step one foot back, keep the front knee bent, and ground the back heel if it feels stable. Bring your hands to your hips first, check that your pelvis is facing mostly forward, then lift your arms only if your shoulders can stay relaxed. The stance does not need to be huge. A shorter stance is often safer and stronger.
The pose should feel powerful through the front thigh and back leg, but the low back should not be jammed. If you feel a deep arch there, shorten the stance and soften the ribs. Think tall, not dramatic. A modest, well-aligned Warrior I does more for bone loading than a bigger pose with sloppy mechanics.
This is also a good place to practice breathing without losing shape. Inhale to lengthen. Exhale to settle. Simple. Useful. Effective.
5. Warrior II
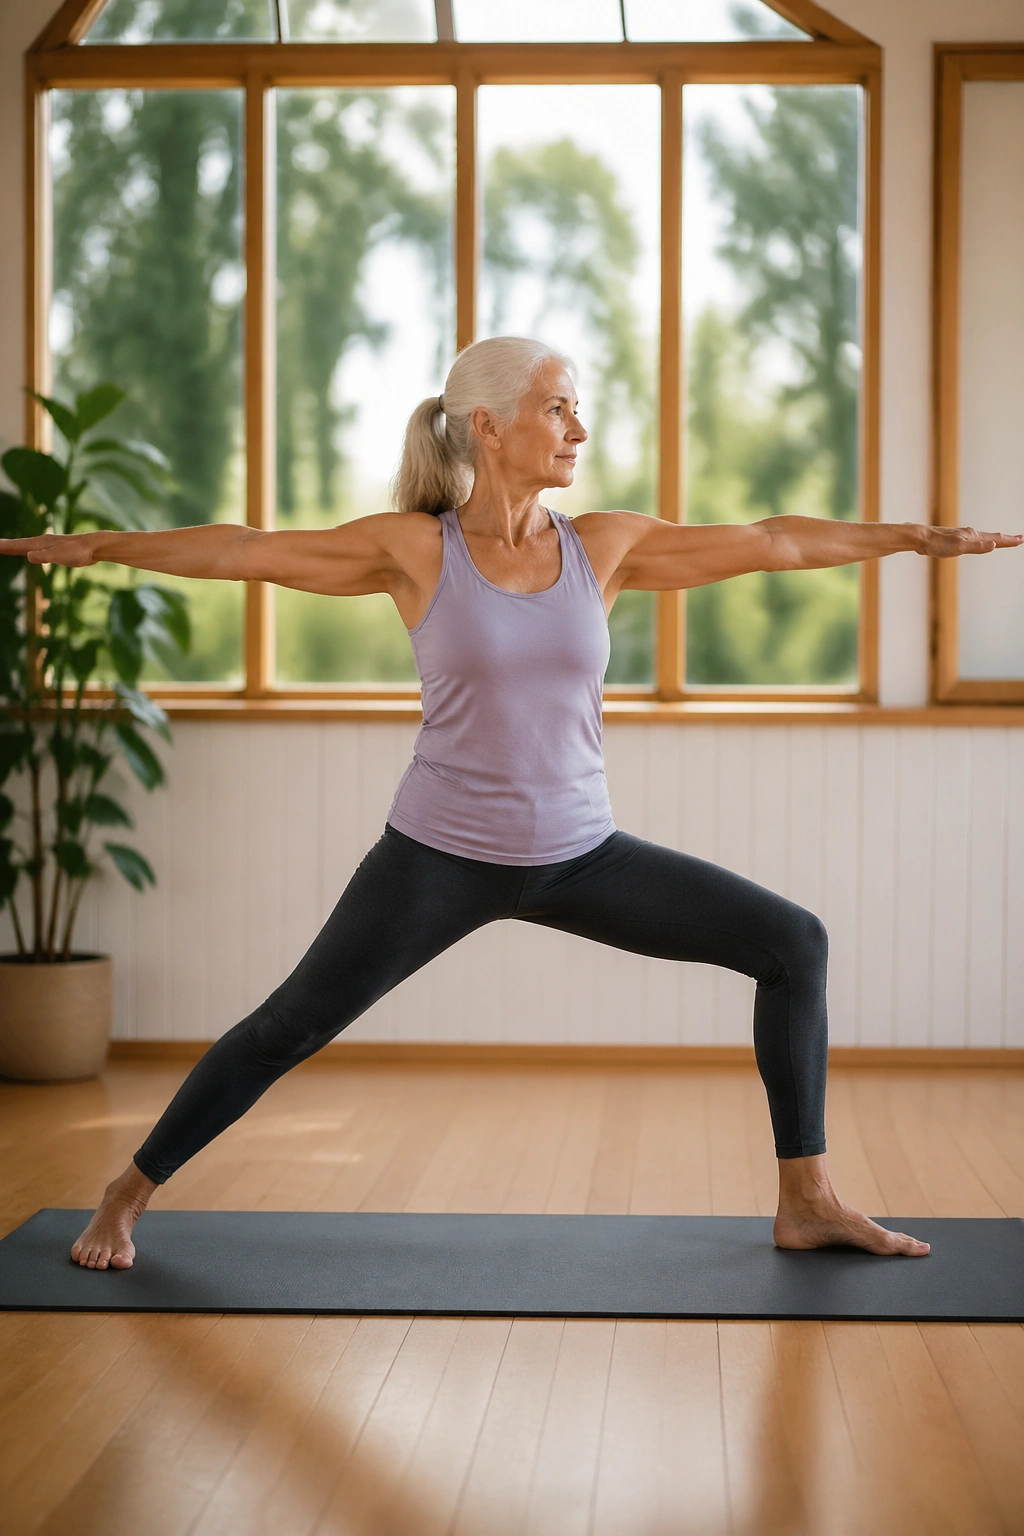
Warrior II is steadier than it looks. The arms stretch wide, the front knee bends, and the eyes look over the front fingers or straight ahead if that feels calmer on your neck.
Open the feet into a wide stance, turn the front toes forward, and keep the back foot slightly angled in. Bend the front knee until it stacks roughly over the ankle, not collapsing inward. Then reach the arms out like you are spanning two walls. That wide shape trains the hips, thighs, and side body while keeping the torso upright.
The thing I like about Warrior II is that it gives you work without making you chase depth. You can keep the stance short, the knee modestly bent, and the chest lifted. If you have weak bones, that is usually the smarter version. A pose that looks a little smaller on the mat often feels a lot better in the spine.
If your shoulder joints dislike long holds, keep the arms lower. No prize for forcing them up.
6. Crescent Lunge
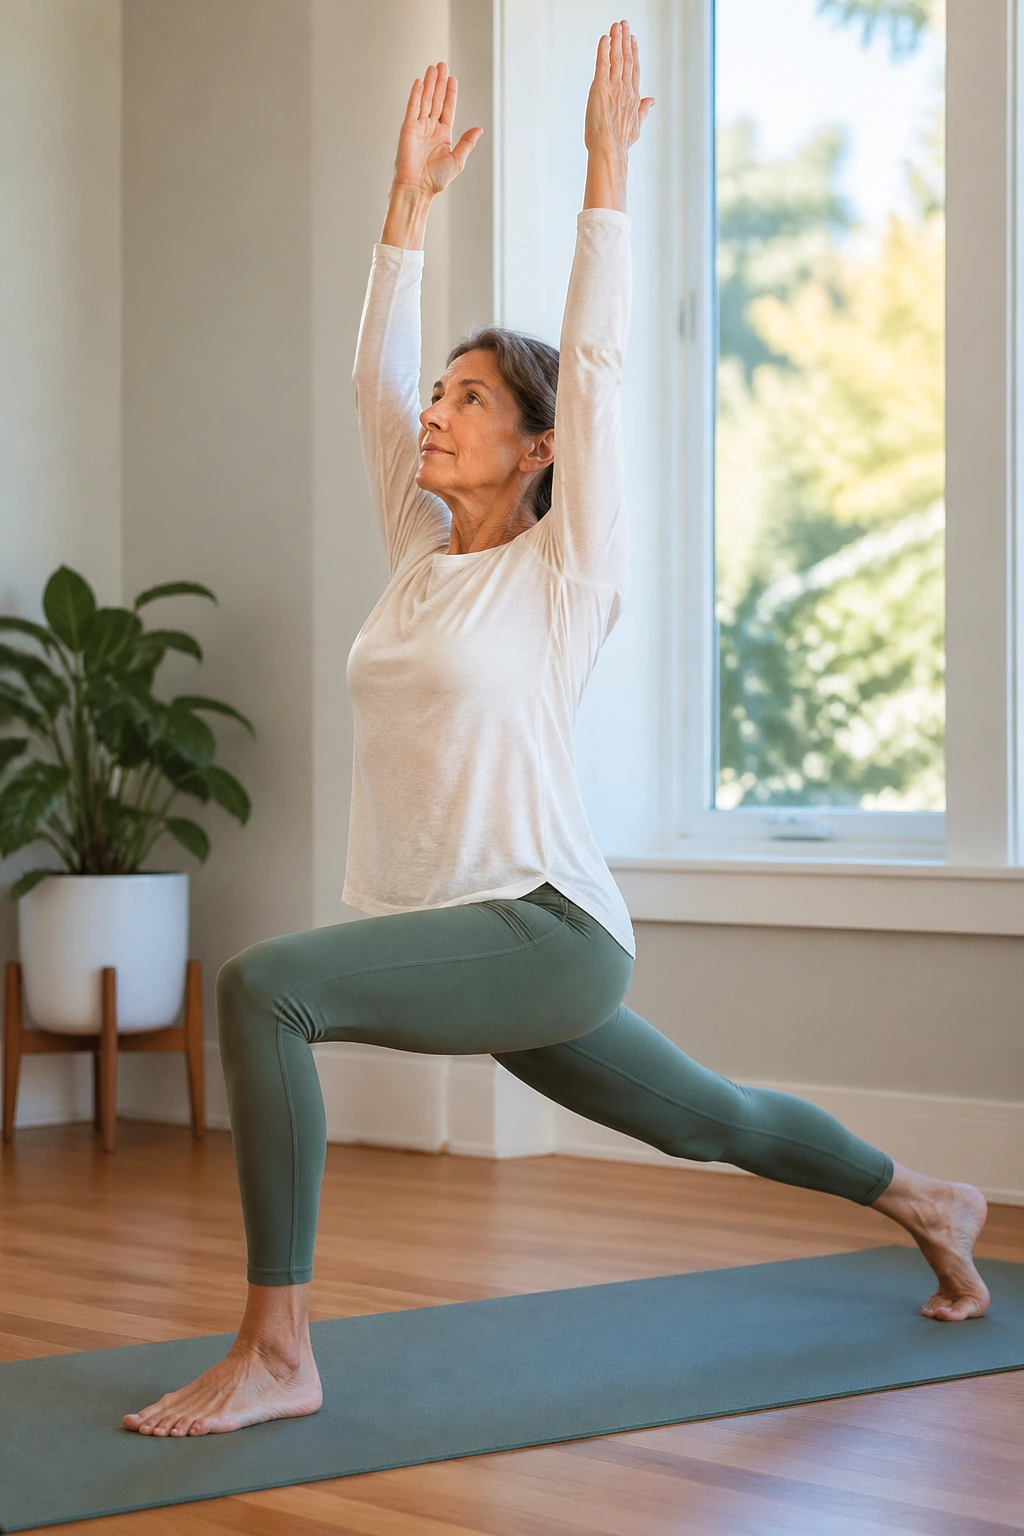
Need a pose that wakes up the hips without asking for acrobatics? Crescent lunge is a strong bet.
Step one foot back into a lunge and keep the back heel lifted. If balance is shaky, lower the back knee to the mat. Hands can stay on blocks, a chair, or your front thigh. The front knee bends, the back leg lengthens, and the torso stays upright instead of folding over the front thigh.
What to watch for
The common mistake is dumping weight into the front knee and letting the pelvis tip forward. That turns the pose into a backbend you did not mean to make. Keep the front shin vertical-ish, pull the ribs in a bit, and feel the back leg lengthen without locking the knee.
How to use it
- Hold for 3 to 5 breaths per side.
- Use a chair under the hands if the floor feels far away.
- Lower the back knee anytime balance slips.
- Keep the stance shorter than you think you need.
This pose builds leg strength and helps you practice standing on uneven footing, which is practical in a very real-life way. Curbs, stairs, and gravel do not care how graceful you look.
7. Supported Triangle
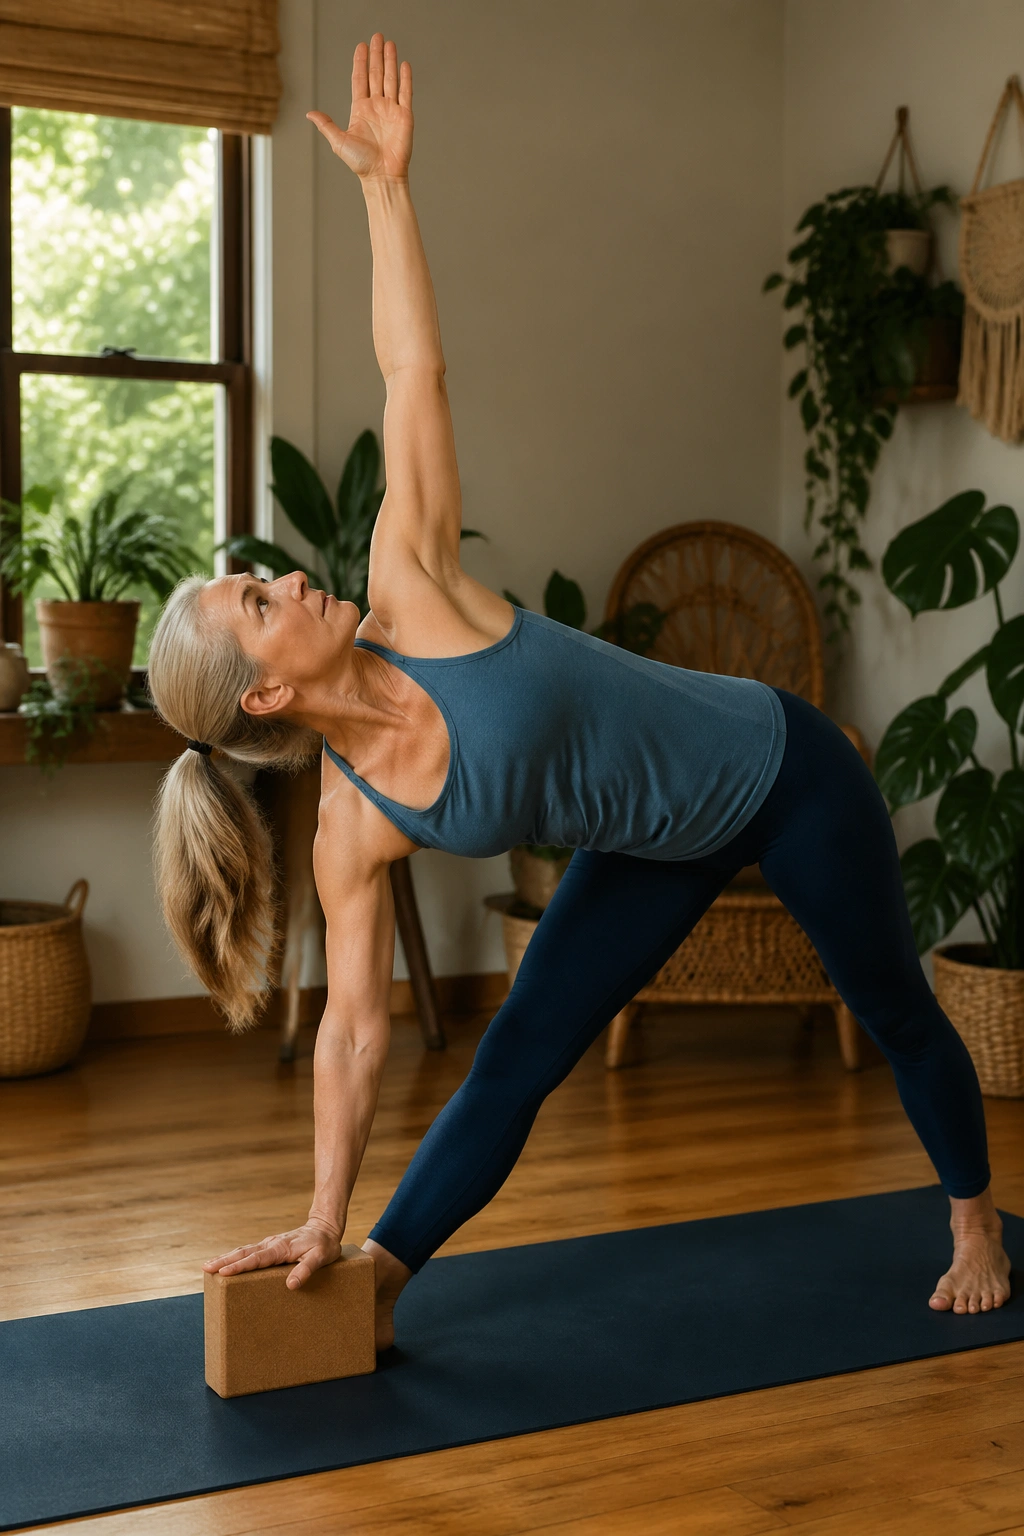
Triangle pose can go wrong fast if the spine rounds and the top shoulder drops forward. The supported version is the one I trust.
Take a shorter stance than the version you see in class, place a block under the front hand, and keep the chest open without reaching for the floor. The front leg stays straight or almost straight, the back leg stays active, and the torso lengthens over the front thigh instead of collapsing into it.
What makes it different
Unlike a deep triangle, the supported version lets you keep more length through the spine. That matters when bones are fragile, because a long spine with controlled movement is a better choice than a folded one. You still get leg work, hip opening, and a bit of side-body stretching.
If you feel the pose turn into a hamstring tug-of-war, raise the block. If your lower back pinches, shorten the stance and bend the front knee a little. The block is not a cheat. It is the thing that makes the pose usable.
8. Reverse Warrior
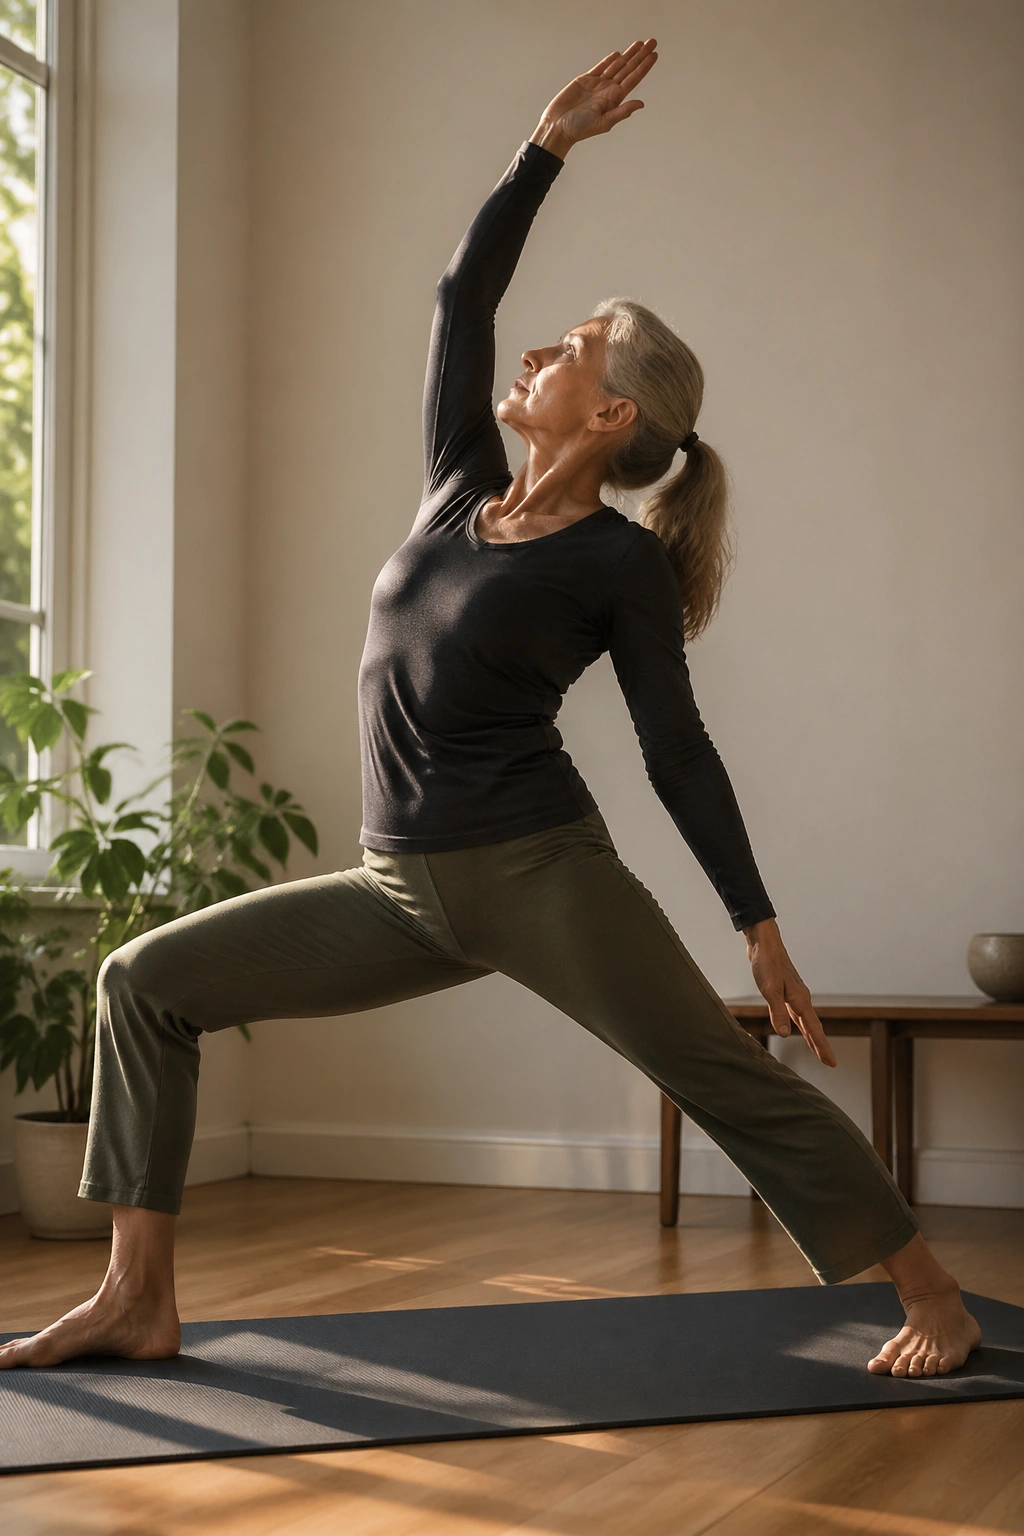
Reverse warrior looks flowy, but the real work is in the front leg and the hips.
From Warrior II, let the back hand slide lightly down the back leg while the front arm reaches up and back. Keep the front knee bent and the torso lifted; do not collapse into a side bend that folds the ribs inward. The pose should feel open across the front of the body and strong in the standing leg.
A lot of people lean too far back here and end up compressing the lower spine. That is the mistake to avoid. Aim for length first, then a mild curve through the upper body. If your low back feels pinched, come out and try a smaller reach.
This one is nice for posture because it reminds the chest to lift without hunching. That sounds small. It isn’t. Better posture starts with easier habits repeated often.
9. Half Moon at the Wall
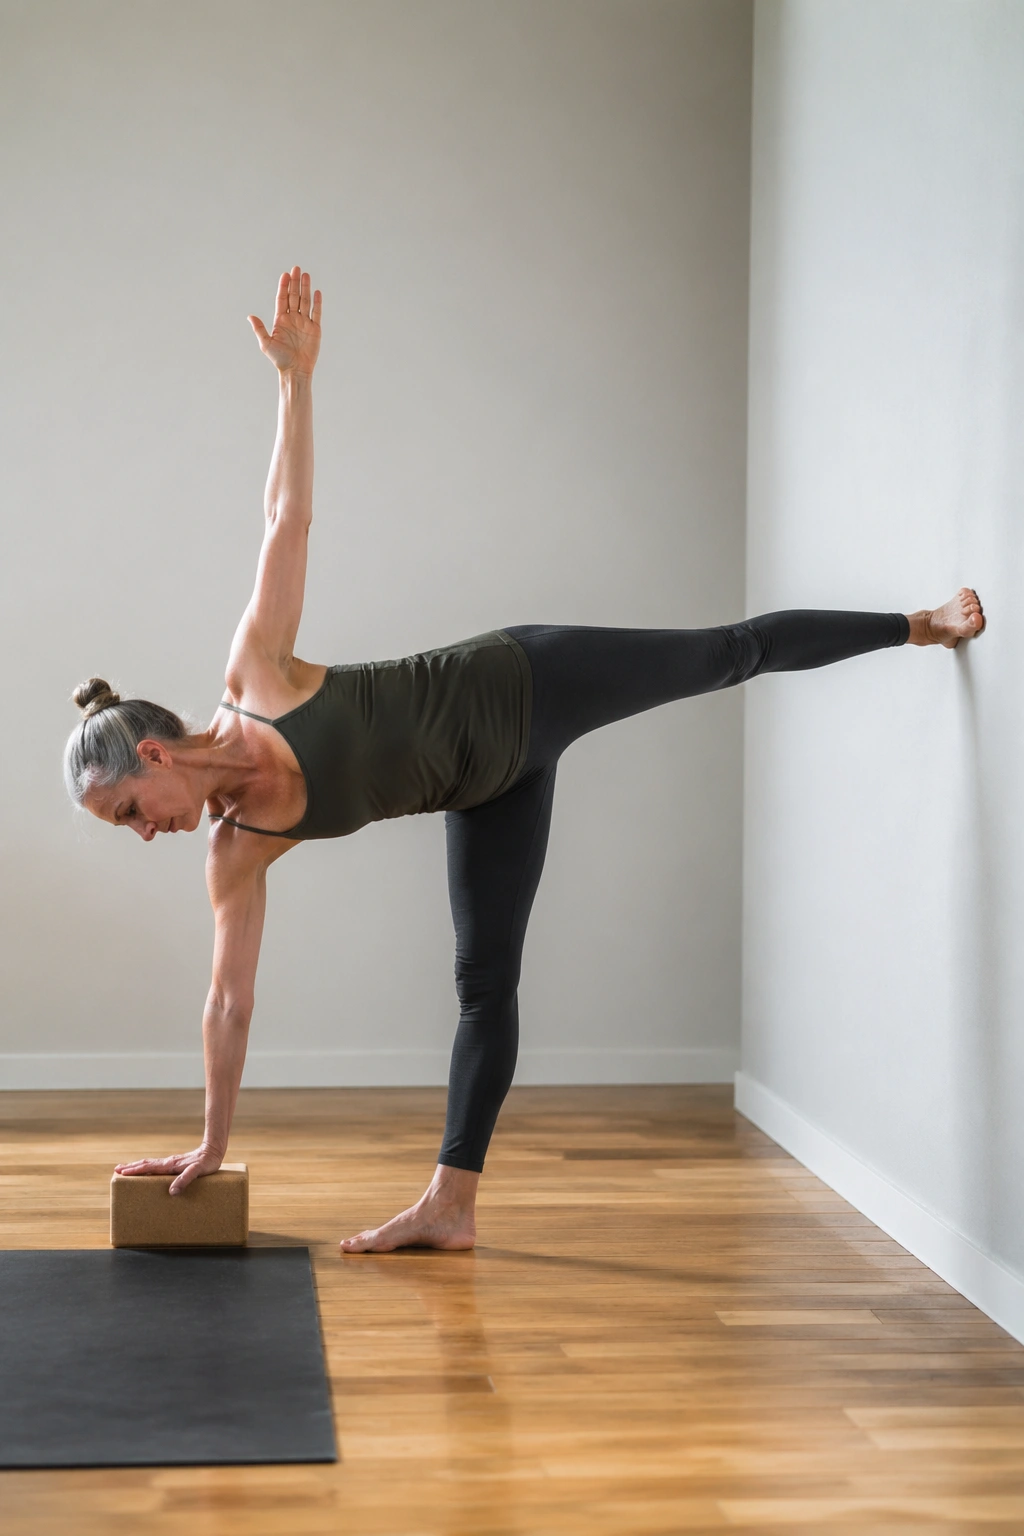
Half moon is a balance pose with a real payoff, but only if you give yourself support. The wall makes it much more reasonable.
Stand near a wall, place one hand on a block or the floor if that is comfortable, and lift the back leg until it feels like a straight line from heel to hip. Keep the standing leg strong and the lifted foot active. If turning the chest open makes you wobble, stay more side-facing and keep the pose simpler.
A small setup that helps a lot
- Use a block under the bottom hand.
- Keep the standing knee soft, not locked.
- Aim your gaze toward the floor a few feet ahead.
- Bring the top hand to the hip if the full shape feels unstable.
Half moon works the hips, ankles, and outer thighs in a way that feels sneaky at first. Your balance has to organize fast, and that is useful practice for bones that need protection from falls. A wall nearby means you can explore the pose without gambling with your balance.
10. Side Plank with the Bottom Knee Down
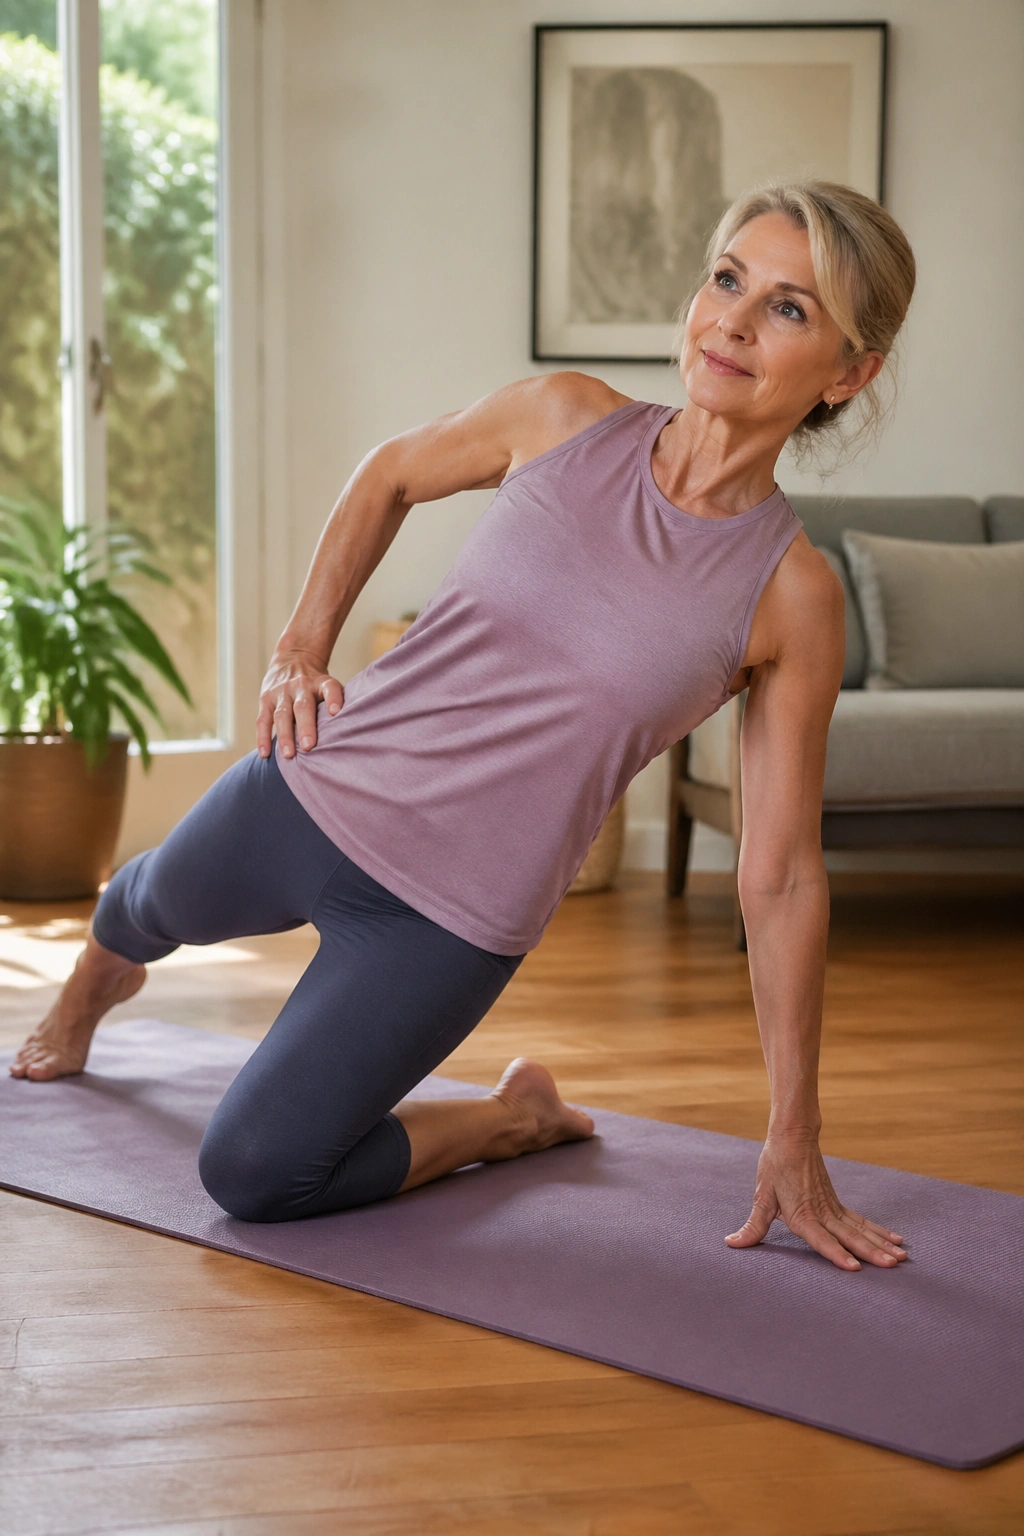
This is one of the few arm-balance style poses I like for weak bones, and only in the gentler version.
Start in side plank with the lower knee on the floor, the lower shin angled behind you, and the top foot stacked or planted in front for extra support. Lift the hips only as high as you can keep without twisting the torso. One hand goes into the floor, the other reaches up, or you can keep the top hand on the hip if that feels steadier.
Why bother with it?
Because it loads the arms, shoulders, ribs, and side waist without requiring a full-body circus act. That kind of upper-body weight bearing matters. Bones respond to load, and this pose gives you some of that load while still being modifiable.
If your wrist complains, come down to the forearm or skip it on that side. If your shoulder feels jammed, shorten the hold. Five clean seconds are better than thirty ugly ones. That rule saves a lot of trouble in yoga.
11. Bridge Pose
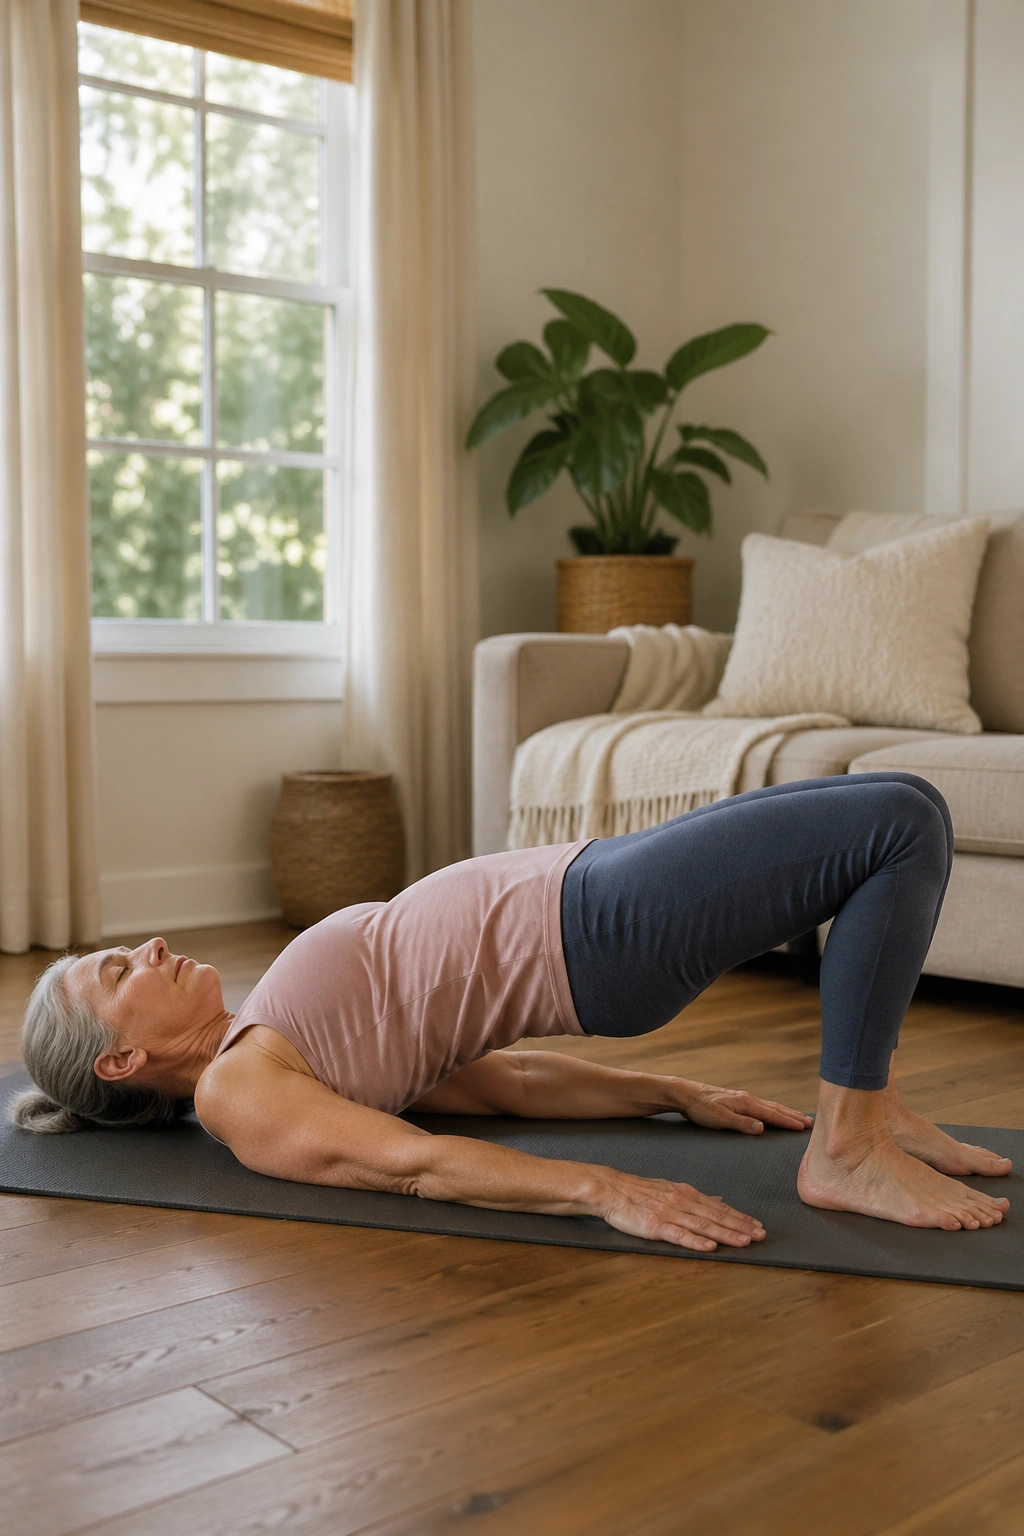
Bridge pose is a backbend, but a friendly one when you keep it small and controlled.
Lie on your back with your knees bent and feet parallel, about hip-width apart. Press through the feet, lift the hips a few inches, and keep the thighs roughly parallel. Your chest should feel open, the glutes should wake up, and the neck should stay long on the mat.
How high is enough?
Higher is not better here. If you lift so much that your ribs flare and your hamstrings cramp, you’ve already gone too far. A modest bridge, held for 3 to 8 breaths, gives you glute work and spinal extension without turning into a strain contest.
This pose is especially useful if you spend a lot of time sitting. It reminds the back of the body how to support you. That matters for osteoporosis because strong back muscles help protect posture and reduce the slumped shape that can make falls and fractures more likely.
12. Supported Bridge on a Block
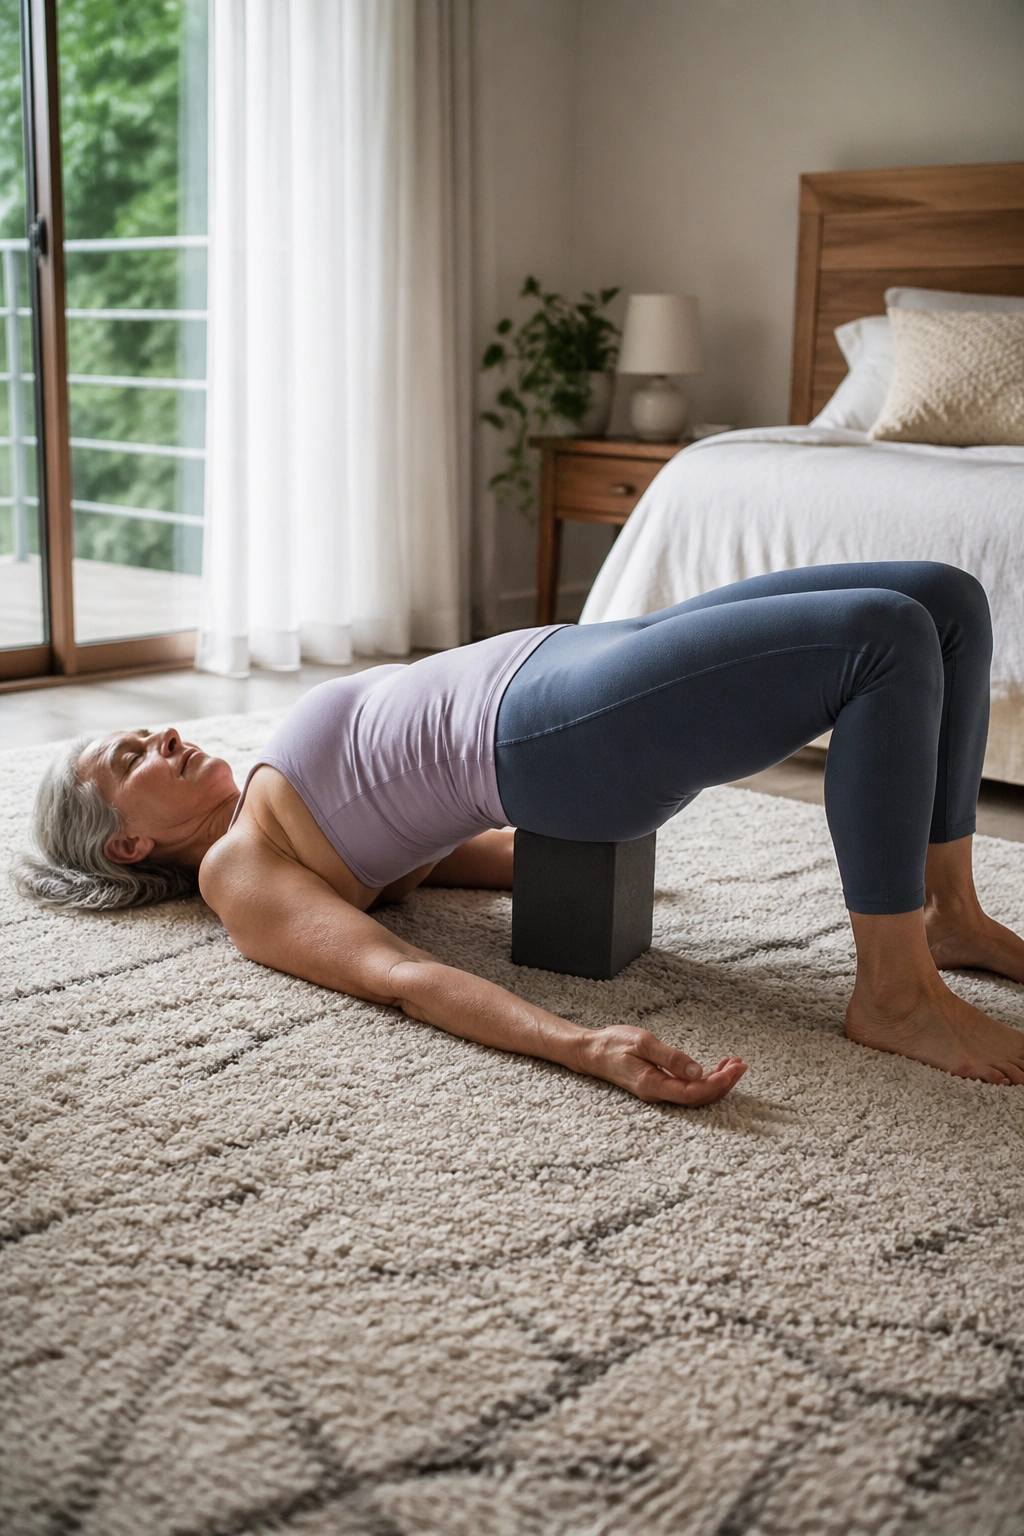
Supported bridge is the more restful cousin of bridge pose, and I like it a lot for people who need less effort.
Lift into bridge, then slide a block under the sacrum — the flat area at the base of the spine — and rest your weight there. The block should support, not jab. Once you settle, the hips can soften while the front of the hips and chest open gently.
The beauty of this variation is that it gives you a backbend without demanding a lot of muscle work. That can be useful on days when your body feels tired, stiff, or unsteady. Hold for 30 seconds to 2 minutes, breathing slowly.
Do not place the block too high on the low back. That turns the support into a wobble. Keep the support under the sacrum and let the knees stay bent. If your neck feels strained, come out immediately.
13. Sphinx Pose
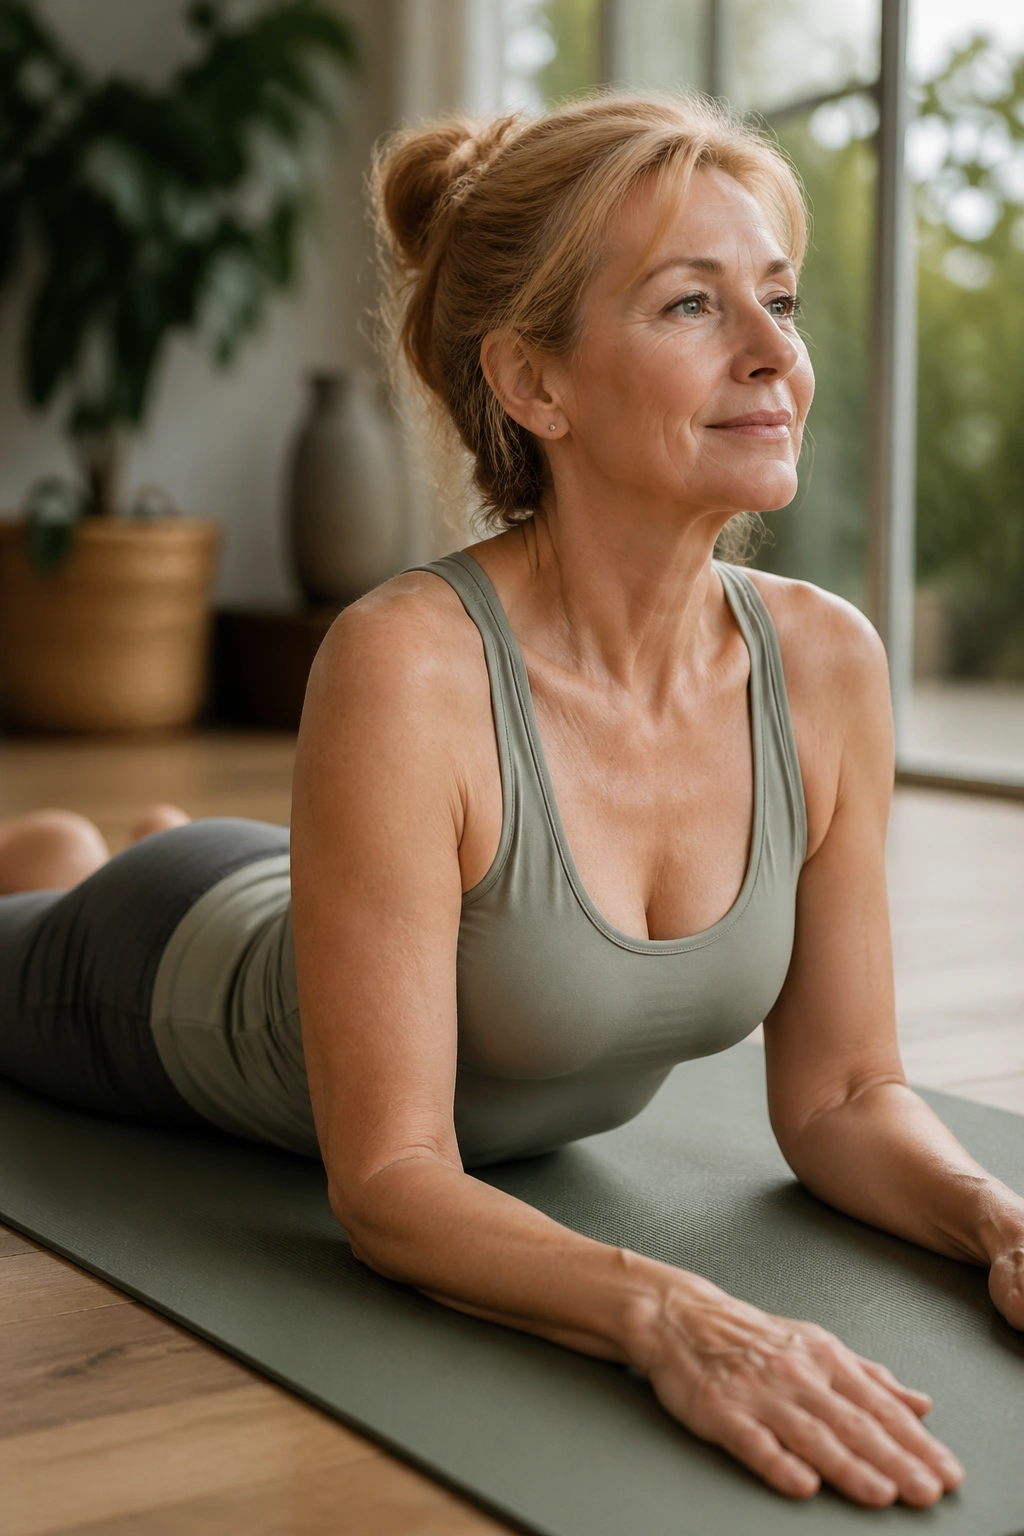
Sphinx pose looks almost too easy to count as a strength pose. That is exactly why people underestimate it.
Lie on your belly, bring your forearms to the floor with elbows under the shoulders, and press the pelvis into the mat. The chest lifts just enough to lengthen the front of the body. Your lower back should feel active, not squashed.
Sphinx is one of the cleaner ways to work gentle spinal extension. It asks the back muscles to engage while keeping the movement small, which is a smart fit for weak bones. The throat stays soft, the shoulders stay away from the ears, and the belly rests lightly on the floor.
If the low back feels pinchy, lower the chest a little or place a folded blanket under the ribs. Tiny adjustments can make the difference between useful and irritating. Small backbends age better than heroic ones.
14. Low Cobra
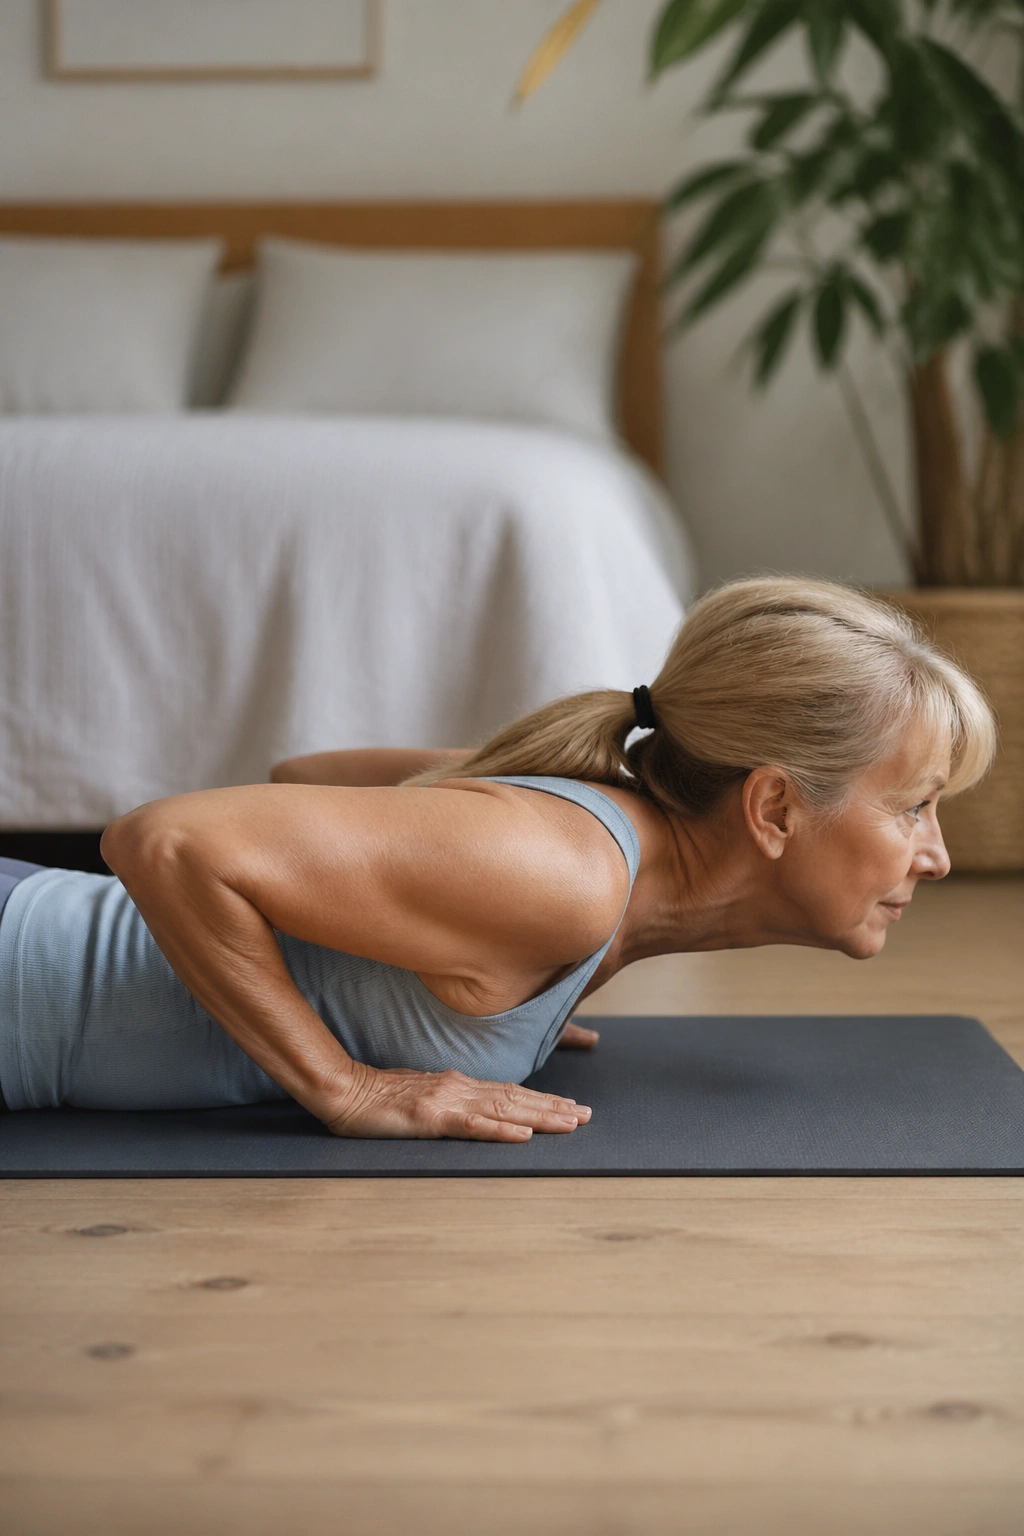
Low cobra is the better choice when you want a little more lift than sphinx, but not the full drama of a big backbend.
Lie on your belly with your forehead on the mat, hands under the shoulders or slightly in front of them, and press the tops of the feet into the floor. On an inhale, lift the chest one or two inches and keep the elbows bent close to the body. The neck stays long, and the gaze goes slightly forward and down.
What to watch for
Do not push hard with the hands. The lift should come mostly from the back muscles, not a shove through the arms. If the shoulders creep up or the low back pinches, lower down and shorten the hold. A few clean reps are better than one strained pose.
Low cobra is useful because it teaches spinal extension in a controlled way. That is one of the patterns that tends to get weak when people sit a lot or avoid back work after a fracture scare. Done carefully, it can help wake the muscles that hold you upright.
15. Locust Pose
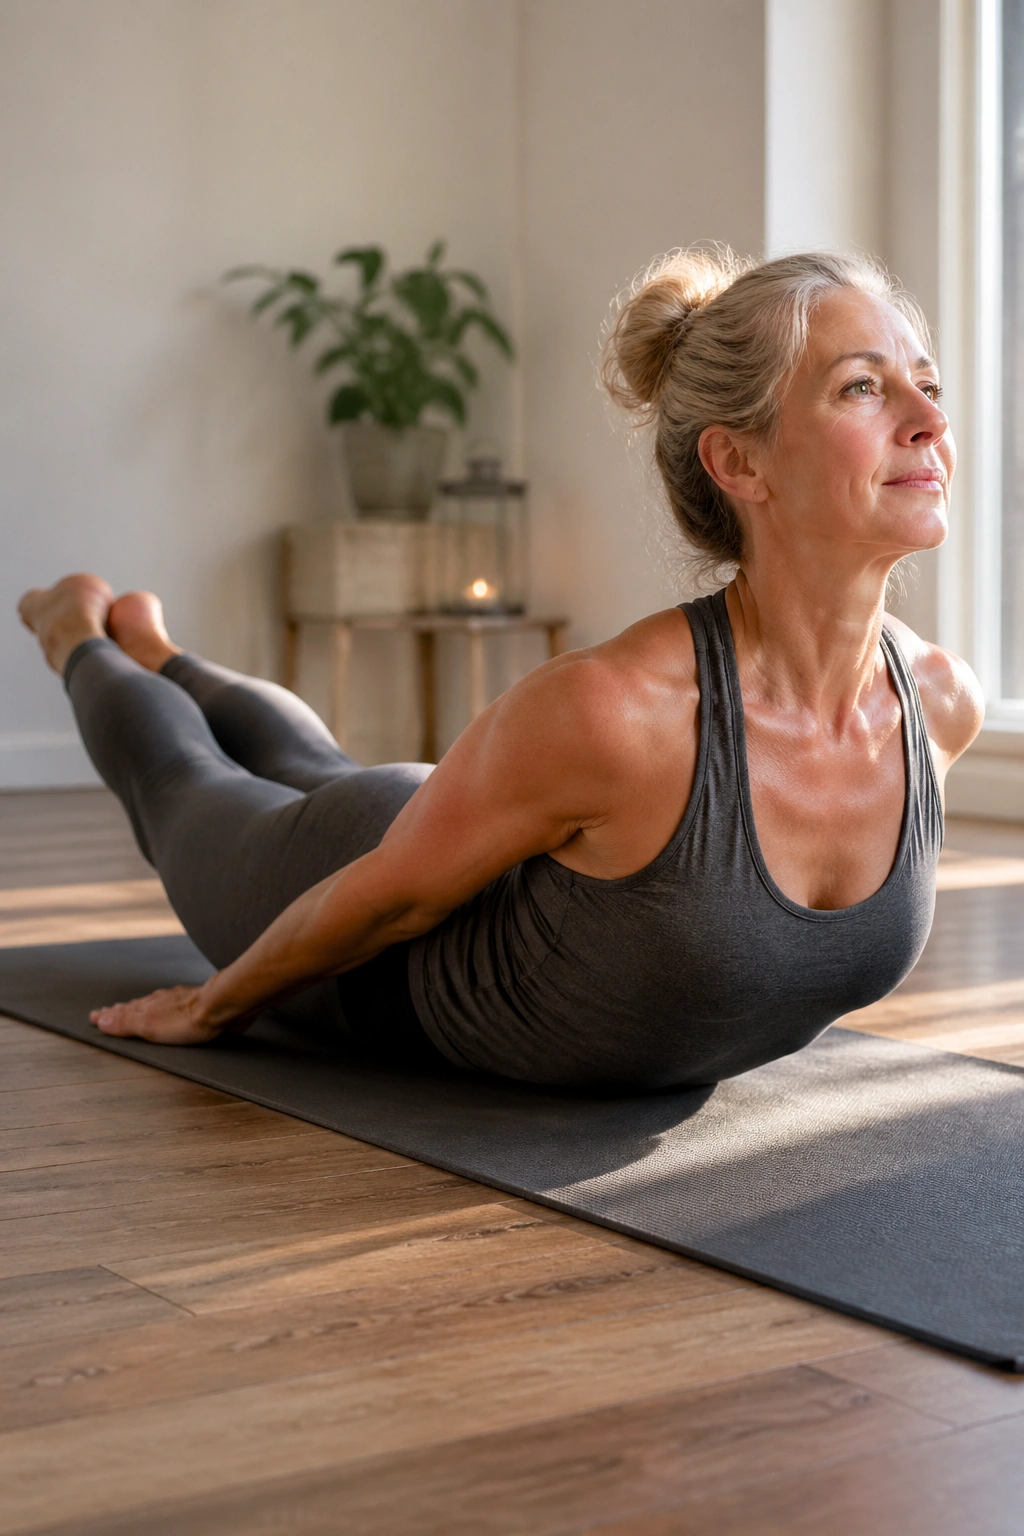
Locust is where the work starts to feel real.
Lie on your belly with arms by your sides, palms down or fists gently clenched, and lift the chest, legs, or both a few inches off the mat. Keep the back of the neck long. The lift is small, but the effort is serious. You’ll feel the glutes, hamstrings, and upper back light up fast.
A lot of people think they need a huge lift here. They don’t. One leg at a time, or just the chest, is enough to begin with. If the lower back cramps, lower the effort and shorten the hold to 2 or 3 breaths.
Locust is one of my favorites for posture because it strengthens the back extensors without asking the spine to round forward. That is a clean fit for fragile bones. If a pose helps you stand taller outside the mat, it has earned its place.
16. Bird Dog
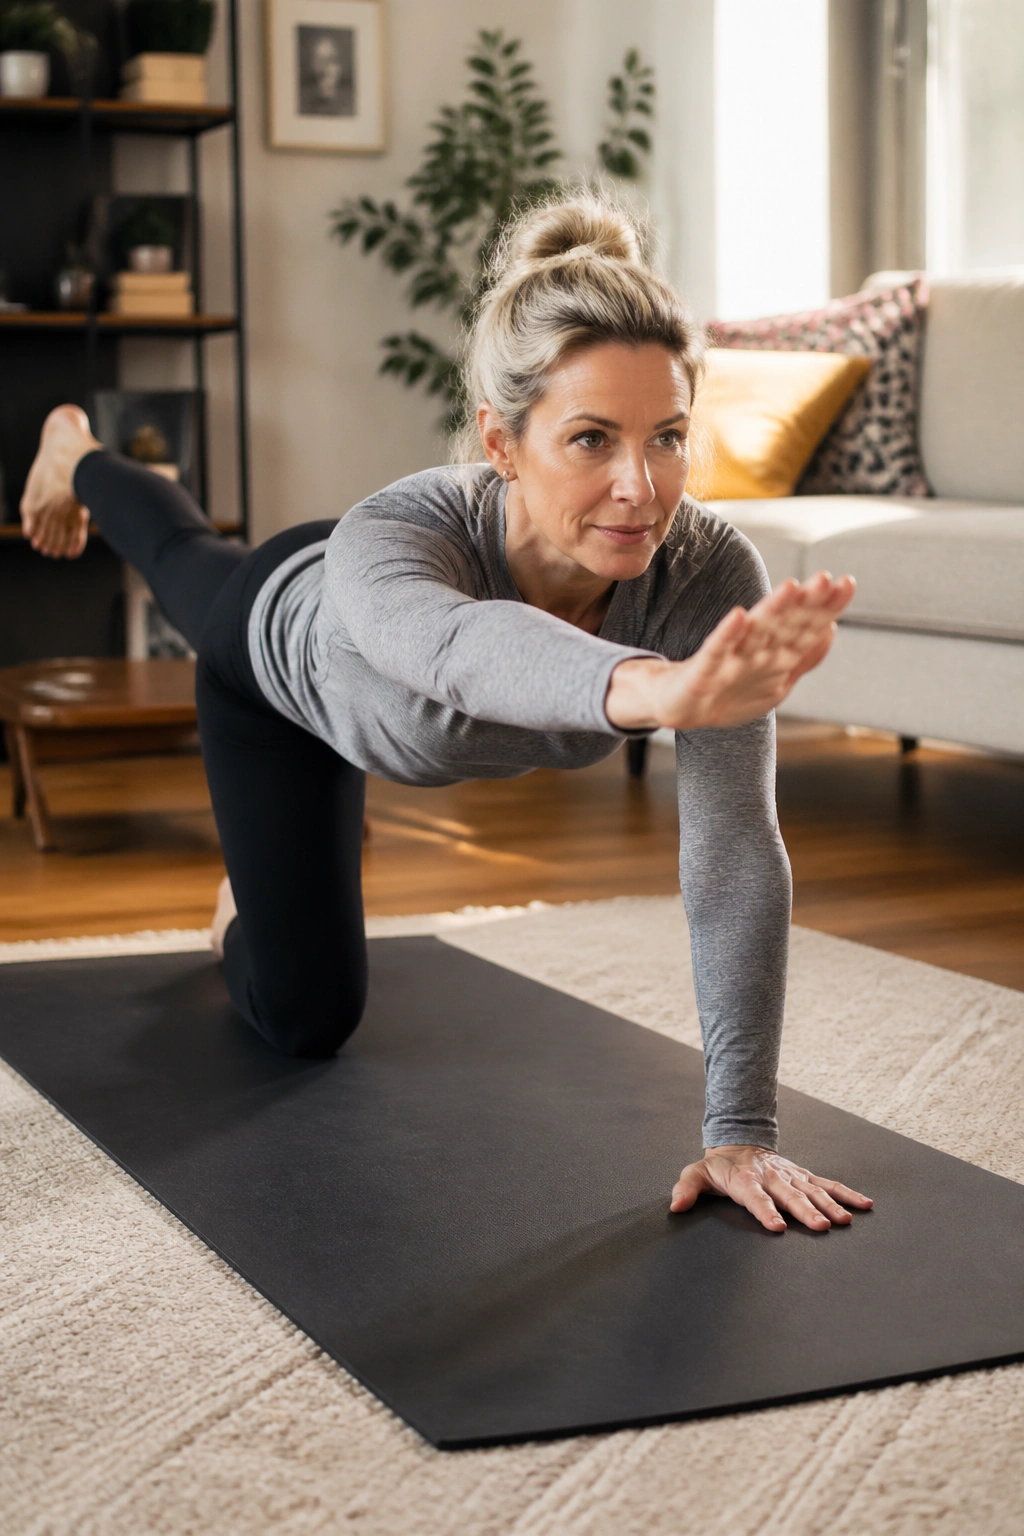
Bird dog looks simple until you actually hold it. Then the wobble shows up.
Start on hands and knees with your wrists under shoulders and knees under hips. Reach one leg back and the opposite arm forward, keeping the pelvis level and the ribs from spilling down. If the full reach is too much, slide the toes along the floor first or lift only the arm.
How to make it useful
- Move slowly.
- Keep the belly gently drawn in.
- Hold for 2 to 5 breaths per side.
- Touch the floor between sides if balance feels off.
Bird dog is a smart choice because it trains spinal stability without compressing the spine under a heavy load. It teaches the trunk to stay quiet while the limbs move. That is exactly the kind of control you want for everyday tasks like carrying groceries, stepping off a curb, or catching yourself before a stumble becomes a fall.
17. Tabletop Reach
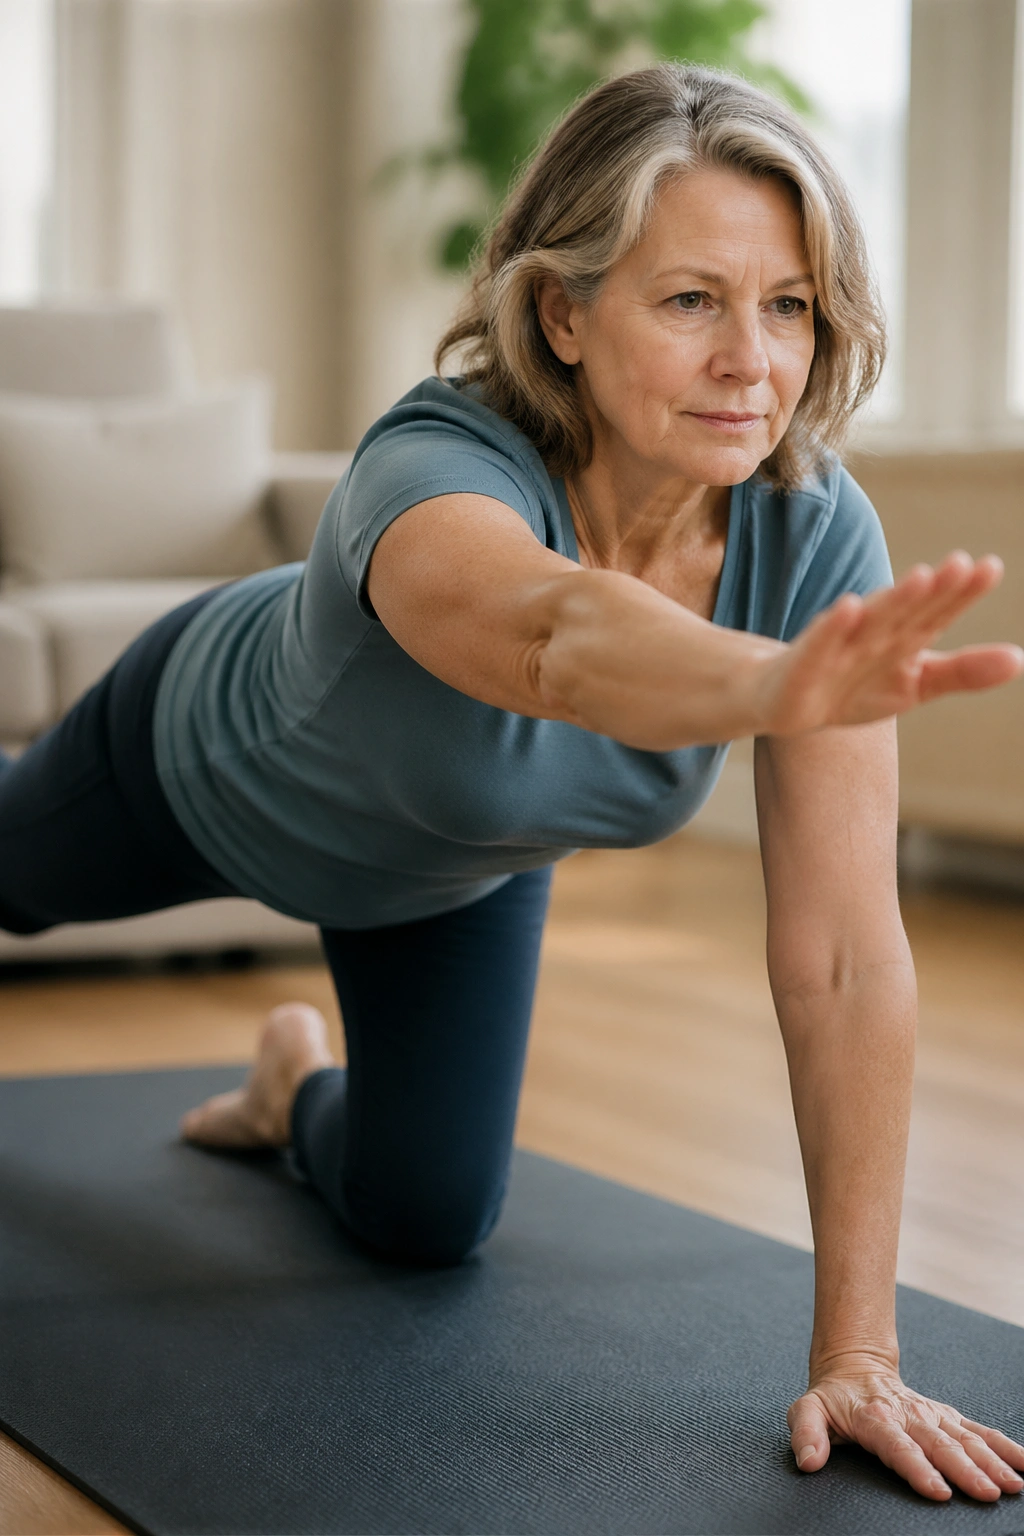
Tabletop reach is bird dog’s quieter cousin, and sometimes quieter is better.
Stay on hands and knees, but keep the movement smaller. Reach one arm forward without straightening it fully, or slide one leg back with the toes barely leaving the mat. The idea is to keep the torso stable while the limbs wake up. If the full bird dog feels too busy, this version lets you practice control without extra strain.
It’s easy to rush here. Don’t. A slow reach, a pause, and a slow return give your body more useful information than a fast flail ever will. Your spine learns from the pause.
This pose is a nice bridge between floor work and more demanding balance poses. It lets you prepare the shoulders, hips, and core before you move on. That preparation matters more than people want to admit.
18. Wall Plank
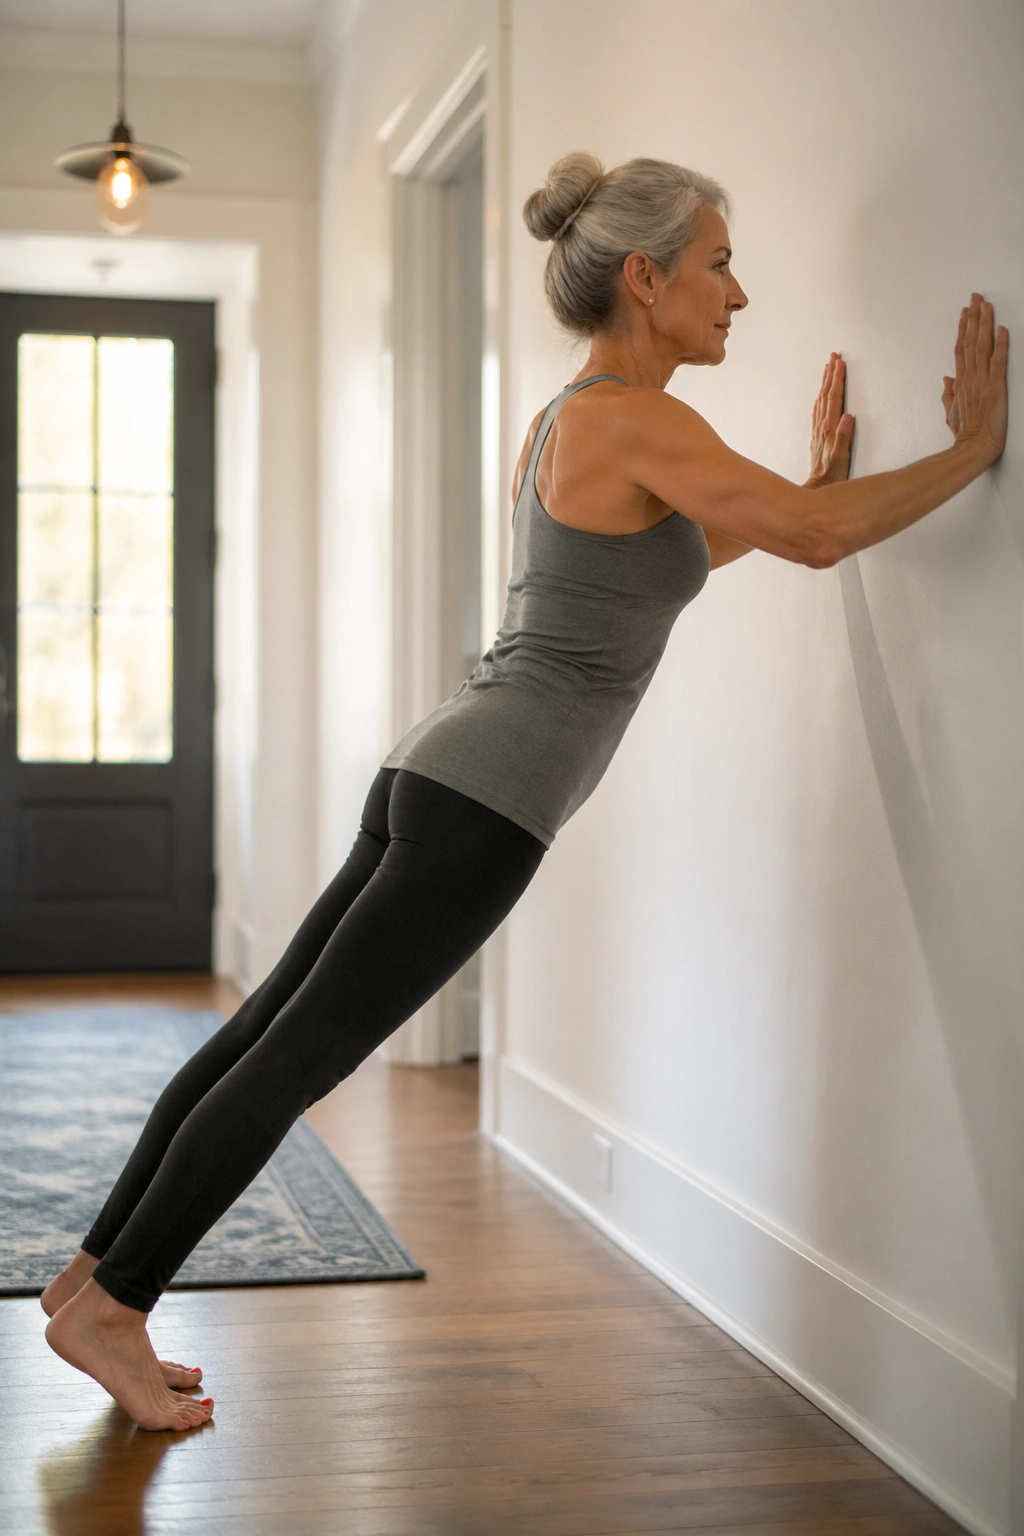
Wall plank is not glamorous. It is useful, which is better.
Place your hands on a wall at shoulder height, walk your feet back until your body forms one long line, and press the floor away through your palms. Keep the ribs from sagging, the neck long, and the heels grounded. If your wrists dislike the angle, turn the hands slightly out or use forearms against the wall.
Why it earns a place here
Wall plank gives the upper body weight-bearing work without asking you to hold a floor plank, which can be too much for some shoulders or backs. It also teaches the core to brace without curling the spine. That distinction matters. Bracing is not the same as crunching.
Hold for 15 to 30 seconds to start. Breathe. If the low back starts to sag or the shoulders hunch, step closer to the wall. A shorter lever is easier on the joints and still does the job.
19. Standing Backbend with Hands on Hips
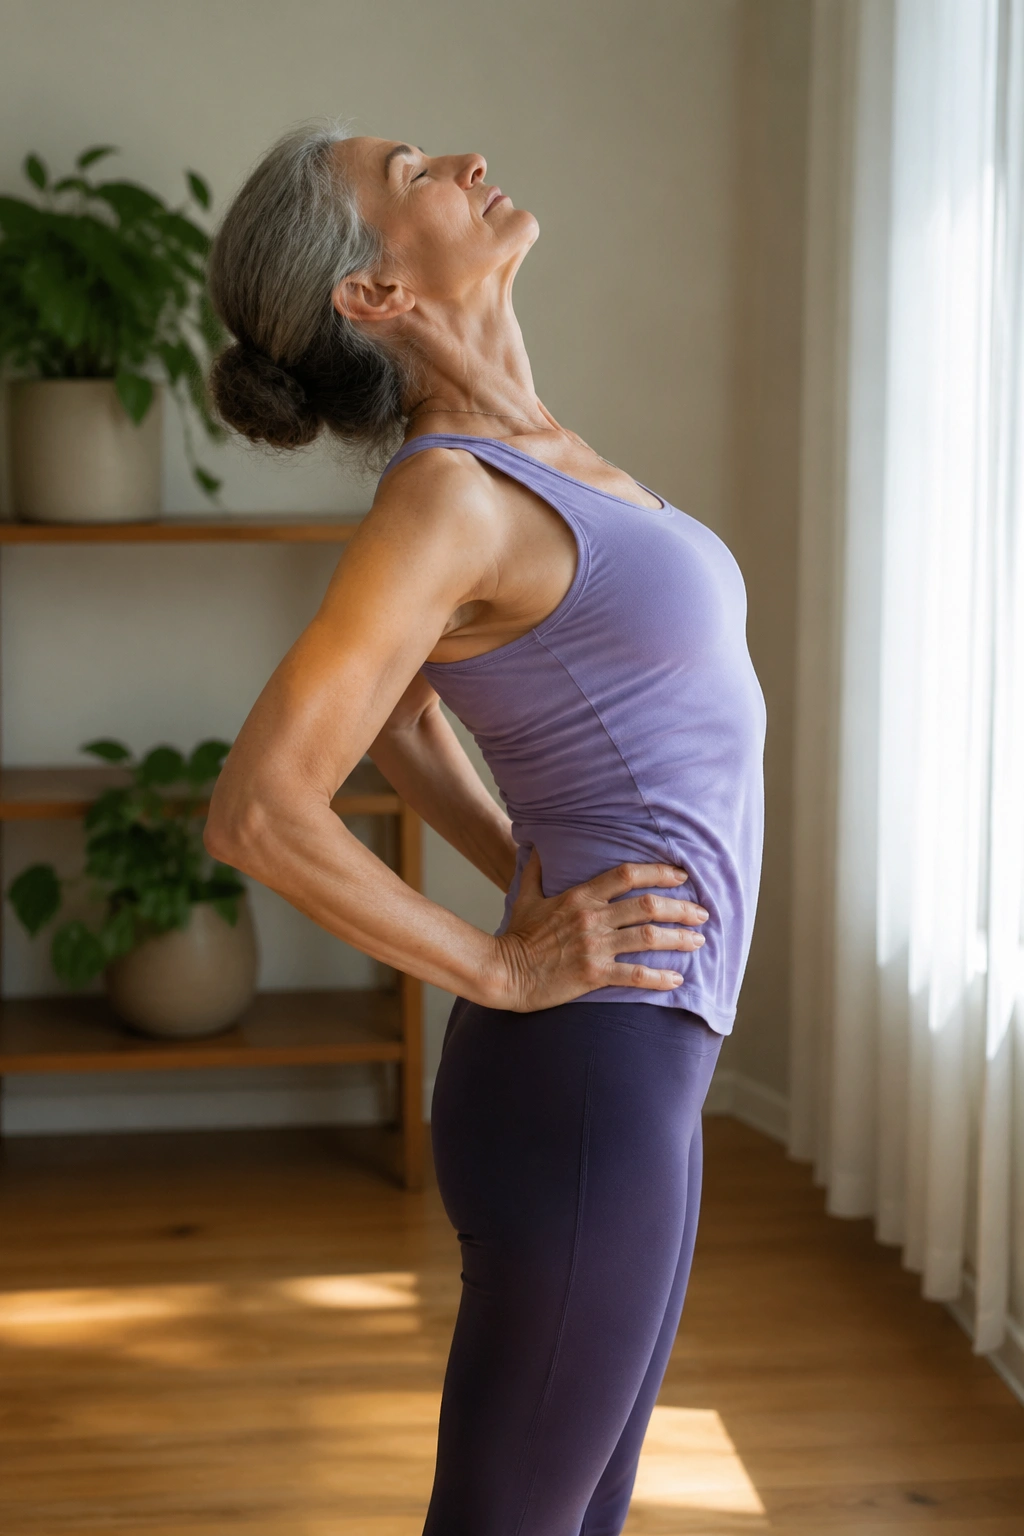
Tiny backbends beat heroic ones.
Stand tall, place your hands on your hips, and lift your chest a few inches while keeping the back of the neck long. You are not trying to throw your head back. You are trying to open the front of the body and remind the spine that extension exists. A mild bend through the upper back is enough.
This pose can be a nice antidote to rounded posture, especially if sitting has left the chest closed and the shoulders forward. Keep the glutes lightly engaged, the knees soft, and the weight even across both feet. If your low back pinches, stop early. If your balance is shaky, keep one hand on a wall or counter.
The beauty here is in restraint. A small, clean backbend can feel refreshing. A big one can feel reckless. For fragile bones, the small version is the one I trust.
20. Constructive Rest Pose
You do not need every pose to be effortful to make the practice useful.
Lie on your back with your knees bent and feet on the floor, hip-width apart. Let your arms rest by your sides or on your belly. If lying flat bothers your spine, place your calves on a chair. Close your eyes, breathe into the sides of the ribs, and let the shoulders melt down. Nothing fancy. Just a calm reset after the standing and strengthening work.
Constructive rest is a good finish because it gives your muscles a chance to let go after they have been asked to support you. People with osteoporosis often brace without realizing it, especially around the ribs and lower back. This pose teaches the opposite. Softness without collapse.
If you want to make this a complete practice, string together five or six of the standing poses, one or two backbends, and this rest position at the end. Keep the movement slow. Keep the spine long. And skip any pose that asks you to round hard through the back, because that trade rarely pays off when bones are fragile.
