



A lot of people think yoga is mostly about hamstrings and hips. Then they hold a real plank for 20 seconds and the triceps start shaking like a loose phone on a table. That little tremor is useful information.
The right upper body yoga poses make the shoulders work in a clean, controlled way, which is hard to fake and even harder to skip over. Your arms carry weight, your shoulder blades learn to move instead of clamp down, and your back gets stronger without the grinding feeling that can show up when form gets sloppy.
I like yoga for upper-body work because it gives you two things at once: load and length. Some poses ask you to press the floor away hard. Others open the front of the chest or stretch the lats so the stronger shapes feel less cramped. If you only do the strengthening part, you end up stiff. If you only stretch, you stay weak. That balance matters.
So the useful approach is a mix of weight-bearing poses, backbends, shoulder openers, and a few slow holds that make the arms and upper back do honest work. Start where your wrists and shoulders can cope, build the holds one breath at a time, and keep the movement clean. The first one is a classic for a reason.
1. Downward-Facing Dog for Upper Body Strength
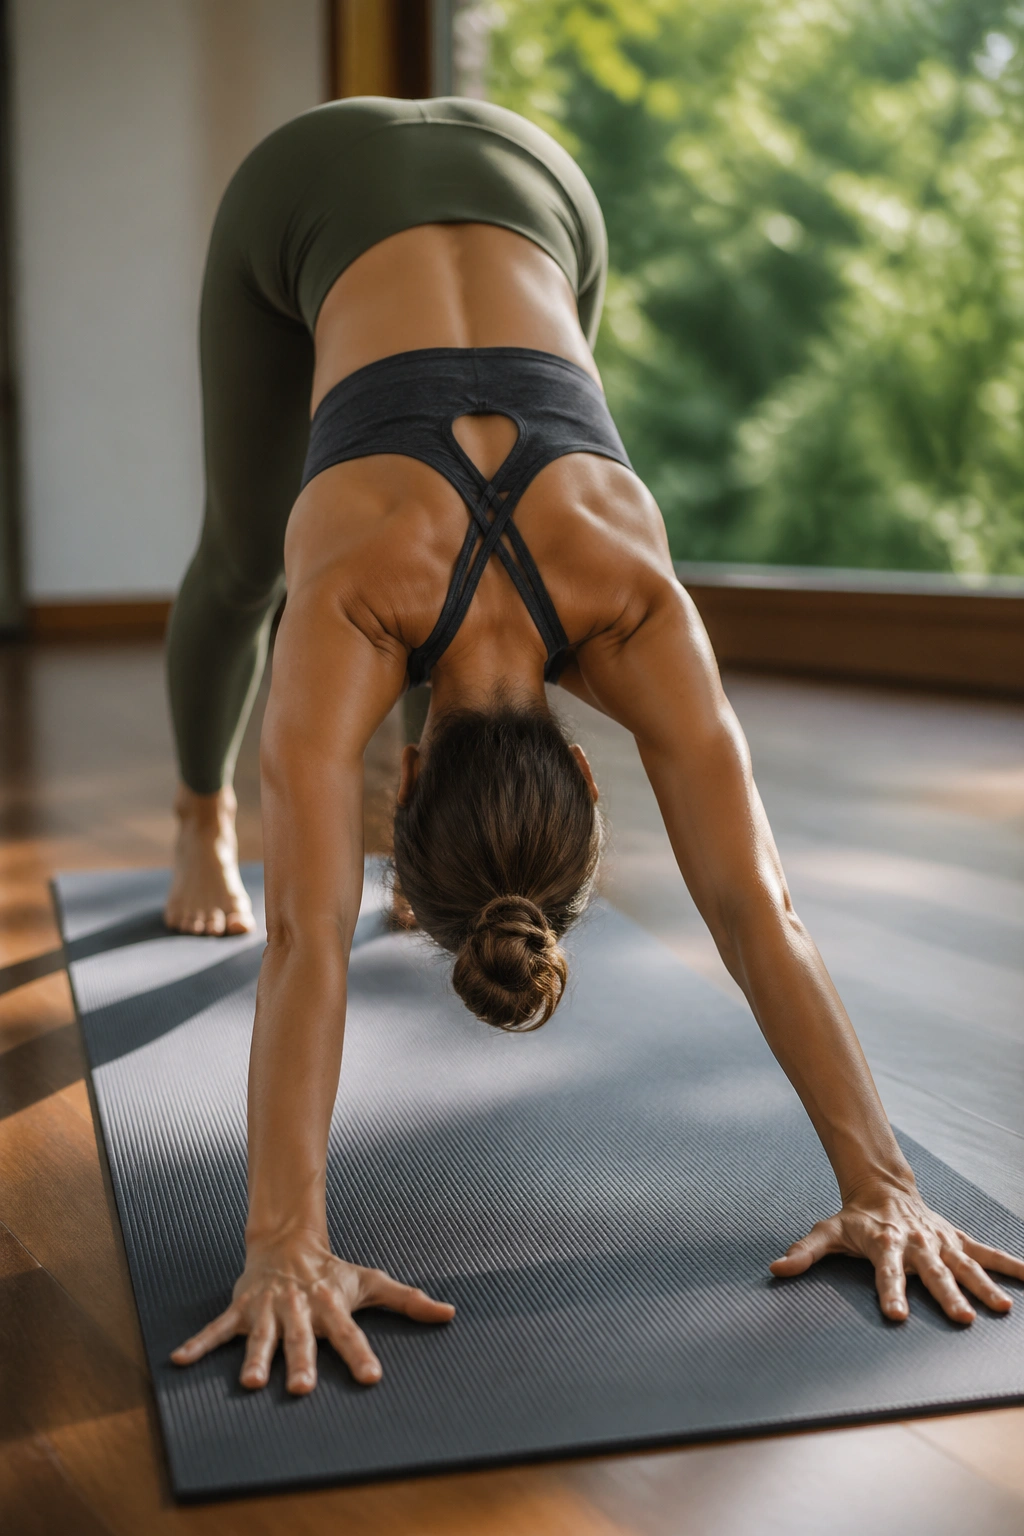
Downward-facing dog does more for the arms and shoulders than it gets credit for. Press the floor away properly, and the work spreads into the triceps, the outer shoulders, and the upper back in a way that feels calm on the outside and busy underneath.
What to Feel
- Spread your weight through the base of the index finger and thumb.
- Let the shoulder heads move away from the ears.
- Keep a soft bend in the knees if that helps lengthen the spine.
Bend your knees as much as you need. Seriously. Straight legs are optional; a long spine is not. If the back rounds and the shoulders jam forward, the pose turns into a wrist dump instead of a useful arm and back builder.
A good hold starts at 3 to 5 breaths. If that feels fine, build toward 8. The pose should feel active through the arms and roomy through the side body, not like you’re hanging from your joints.
Watch for
If your hands are too close, the shoulders crowd forward. If they’re too wide, the chest collapses. Aim for hands about shoulder-width apart and feet far enough back that the heels can hover without pulling you into a shrug.
2. Plank Pose for Stronger Arms and Back
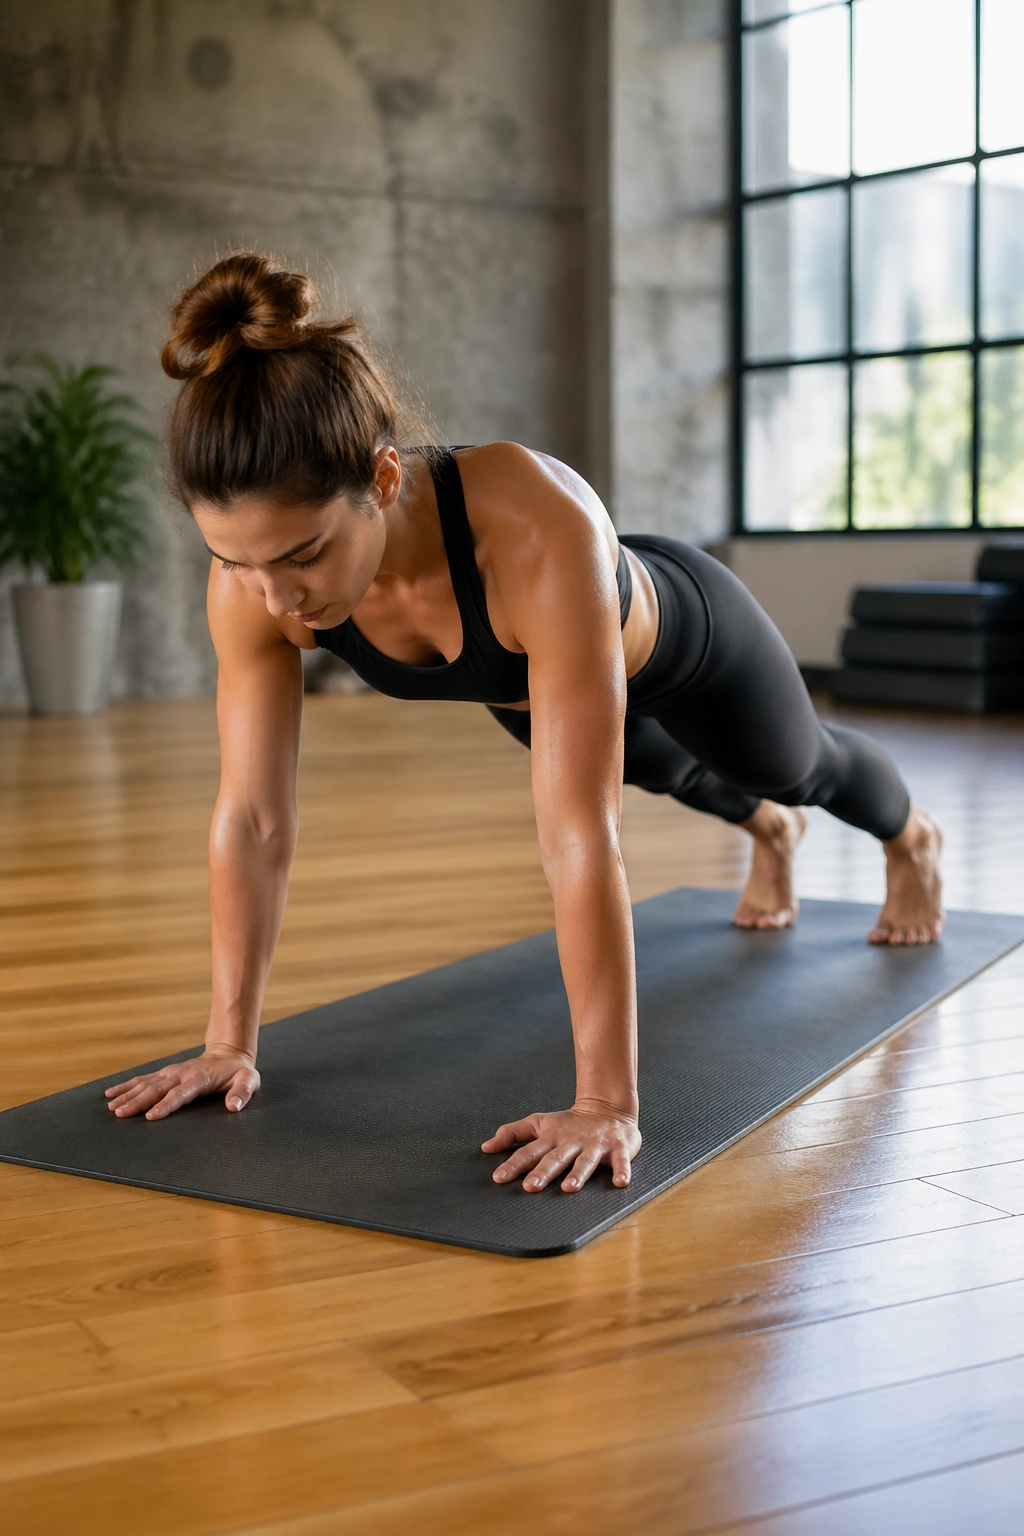
Can a pose this plain build real strength? Yes, if you stop treating it like a quick stop on the way to somewhere else. Plank asks for long lines, steady shoulders, and a back that doesn’t sag the second you look away from your toes.
The main job is simple: press the floor away and keep the body from folding in the middle. That pressure wakes up the triceps, the front of the shoulders, and the muscles around the shoulder blades. It also teaches the core to help, which matters because a weak middle makes the upper body do all the work.
Start with 20 seconds. Then 30. If your hips sink before that, drop the knees and keep the same shape from shoulders to knees. That version still counts. A clean modified plank beats a wobbly full plank every time.
Hands should stack under the shoulders, fingers spread wide, and the neck long. If your breath turns ragged in the first few seconds, the pose is probably too low or too long for where you are right now. Shorter holds, done often, do more good than heroic holds done badly.
3. Forearm Plank
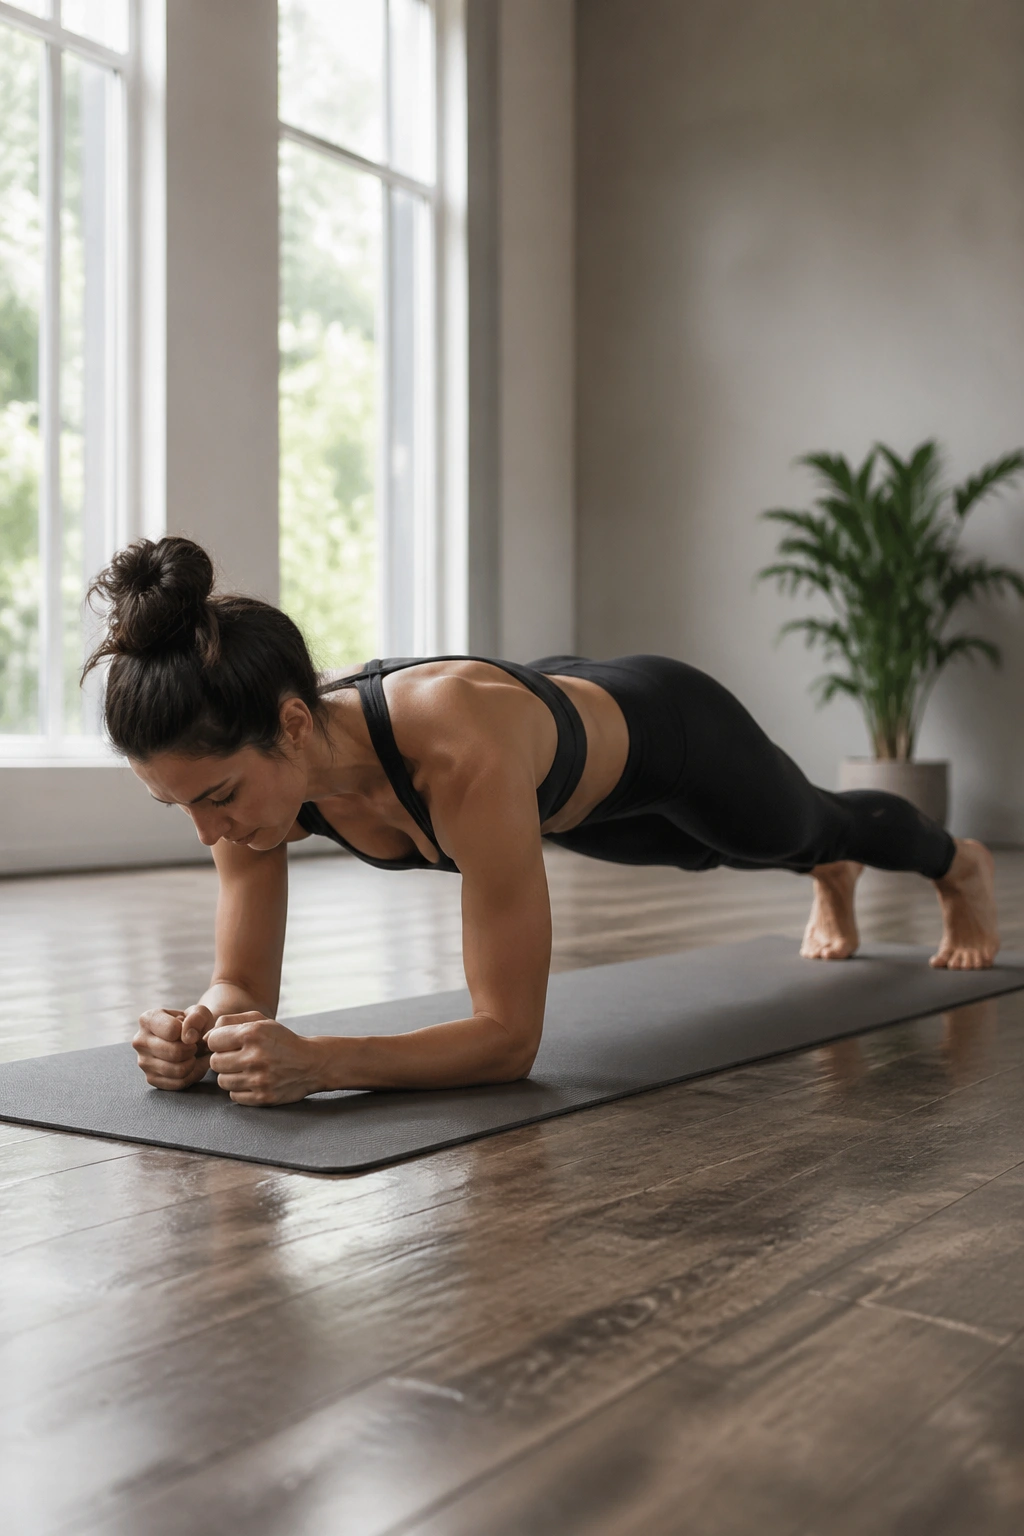
Unlike high plank, forearm plank takes wrist extension out of the equation, which is a relief if your hands complain after a lot of vinyasa work. It shifts the challenge into the shoulders and upper back, where the real work can get sneaky fast.
Why It Helps
Your forearms press down, the shoulder blades stay broad, and the body has to resist sagging without cheating through the lower back. That combination makes the front of the shoulders, the serratus, and the deep stabilizers around the spine step up.
If you want the pose to feel useful, place the elbows directly under the shoulders. Then press the forearms into the mat and imagine dragging the elbows back without actually moving them. That tiny action helps organize the upper back.
A lot of people pike the hips or drop the belly. Both are common, and both steal the work from the place you want it. Keep the body in one line and hold for 15 to 30 seconds, or longer if the shape stays clean.
A Clean Version
- Elbows under shoulders, not in front.
- Forearms parallel, not splayed out.
- Belly lifted enough to keep the lower back from pinching.
- Gaze down, neck long.
4. Side Plank
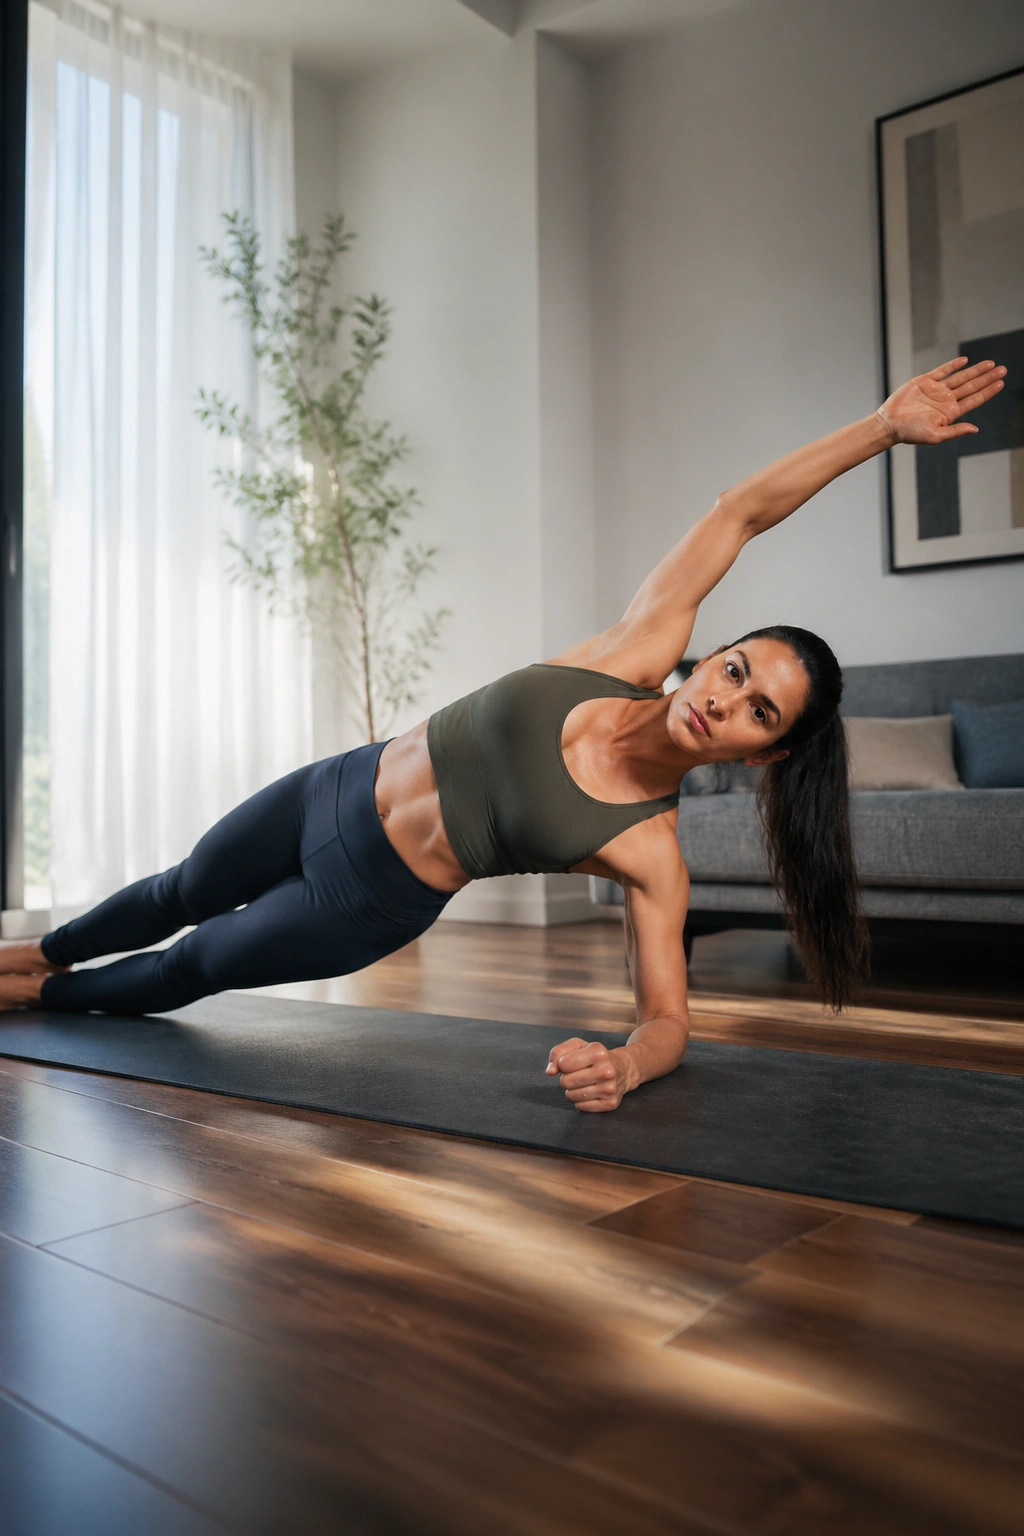
The minute one arm leaves the floor, you find out whether your shoulder is awake. Side plank tells the truth fast. It doesn’t let the weak side hide, which is part of why it’s so useful for building steadier arms and a more capable upper back.
The supporting shoulder works hard to keep you lifted, and the top side has to stay open instead of folding forward. That makes the pose a smart challenge for the serratus, the obliques, and the small stabilizers around the scapula. It’s not just about looking balanced. It’s about staying there.
If full side plank feels like too much, drop the bottom knee and keep the lifted side long. You still get shoulder work, and your wrist or elbow doesn’t have to carry a fight it isn’t ready for. Hold for 3 to 5 breaths per side, then switch.
What Makes It Strong
- Stack the shoulders, one over the other.
- Push the floor away with the bottom hand.
- Reach through the top fingertips to keep the upper body long.
- Keep the side waist lifted so the hips don’t collapse.
5. Dolphin Pose
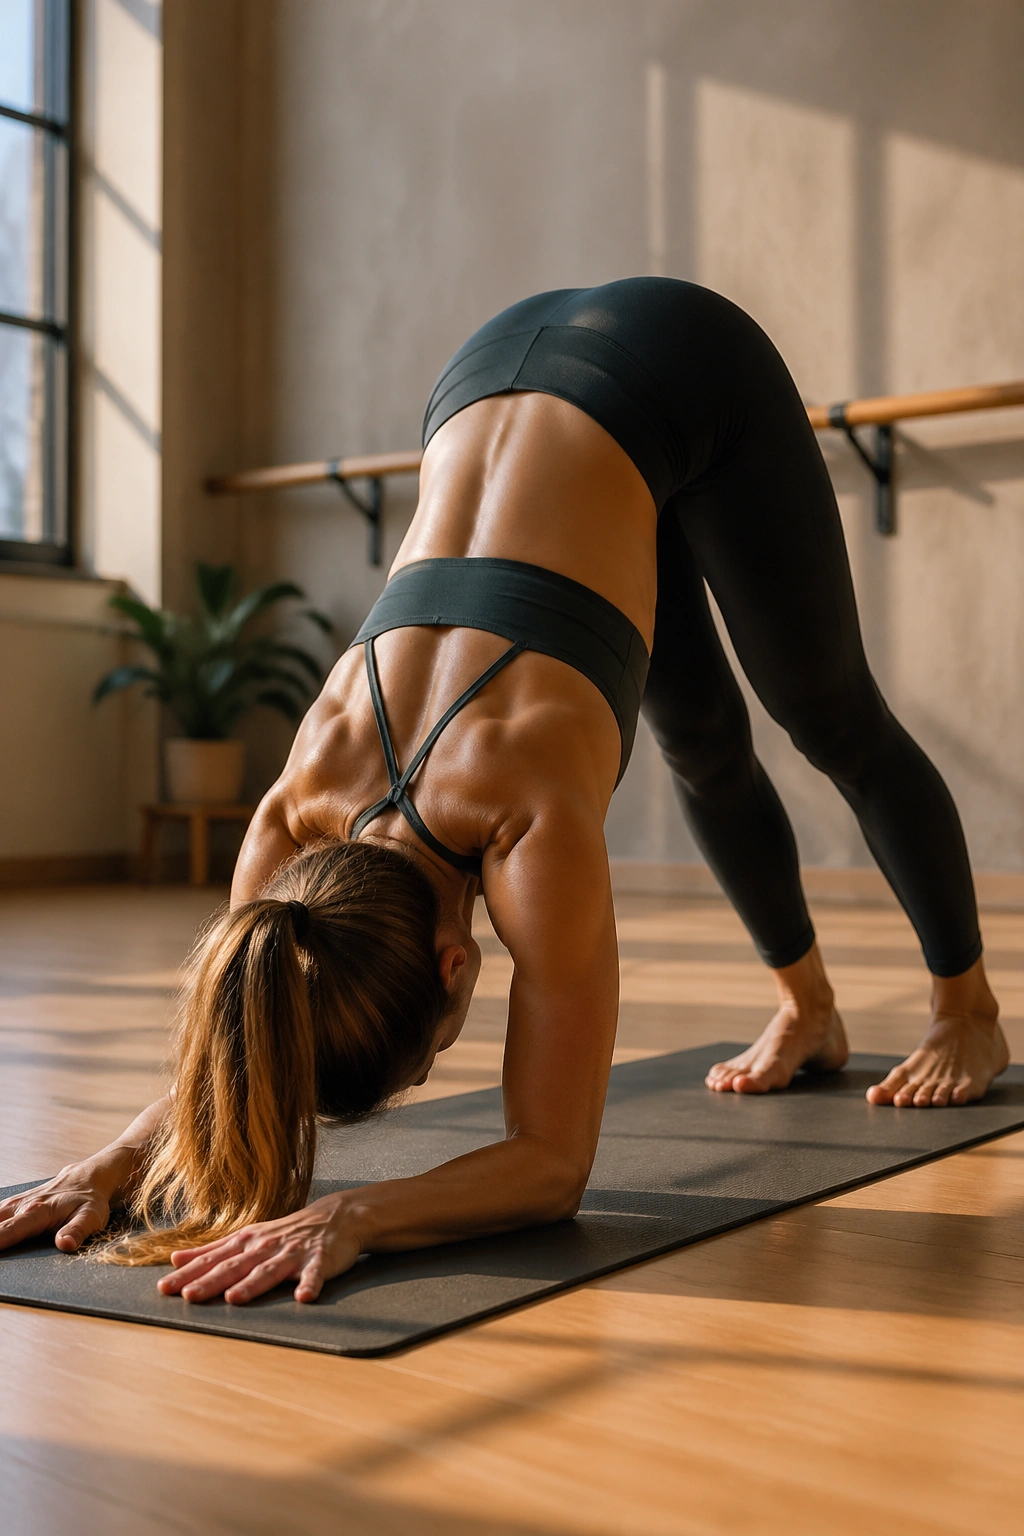
Dolphin is not a softer plank. It can be harsher on the shoulders because the body has to organize itself from a different angle, and that angle asks for honesty. If the upper back is tight, you’ll feel it almost immediately.
This pose loads the shoulders while giving the wrists a break, which makes it a good choice for people who want arm work without spending the whole practice on their hands. Walk the feet in only as far as you can keep the chest from dropping between the shoulders. Too close, and the whole thing turns into a neck clamp.
A small bend in the knees is fine. More than fine, actually. It helps you keep the spine long and the shoulders open enough to do their work. Hold for 3 to 5 breaths, then come down and breathe.
How to Make It Safer
- Keep the forearms parallel.
- Press down through the inner forearms.
- Lift the hips more than the heels.
- Stop before the shoulders start pinching.
6. Chaturanga Dandasana
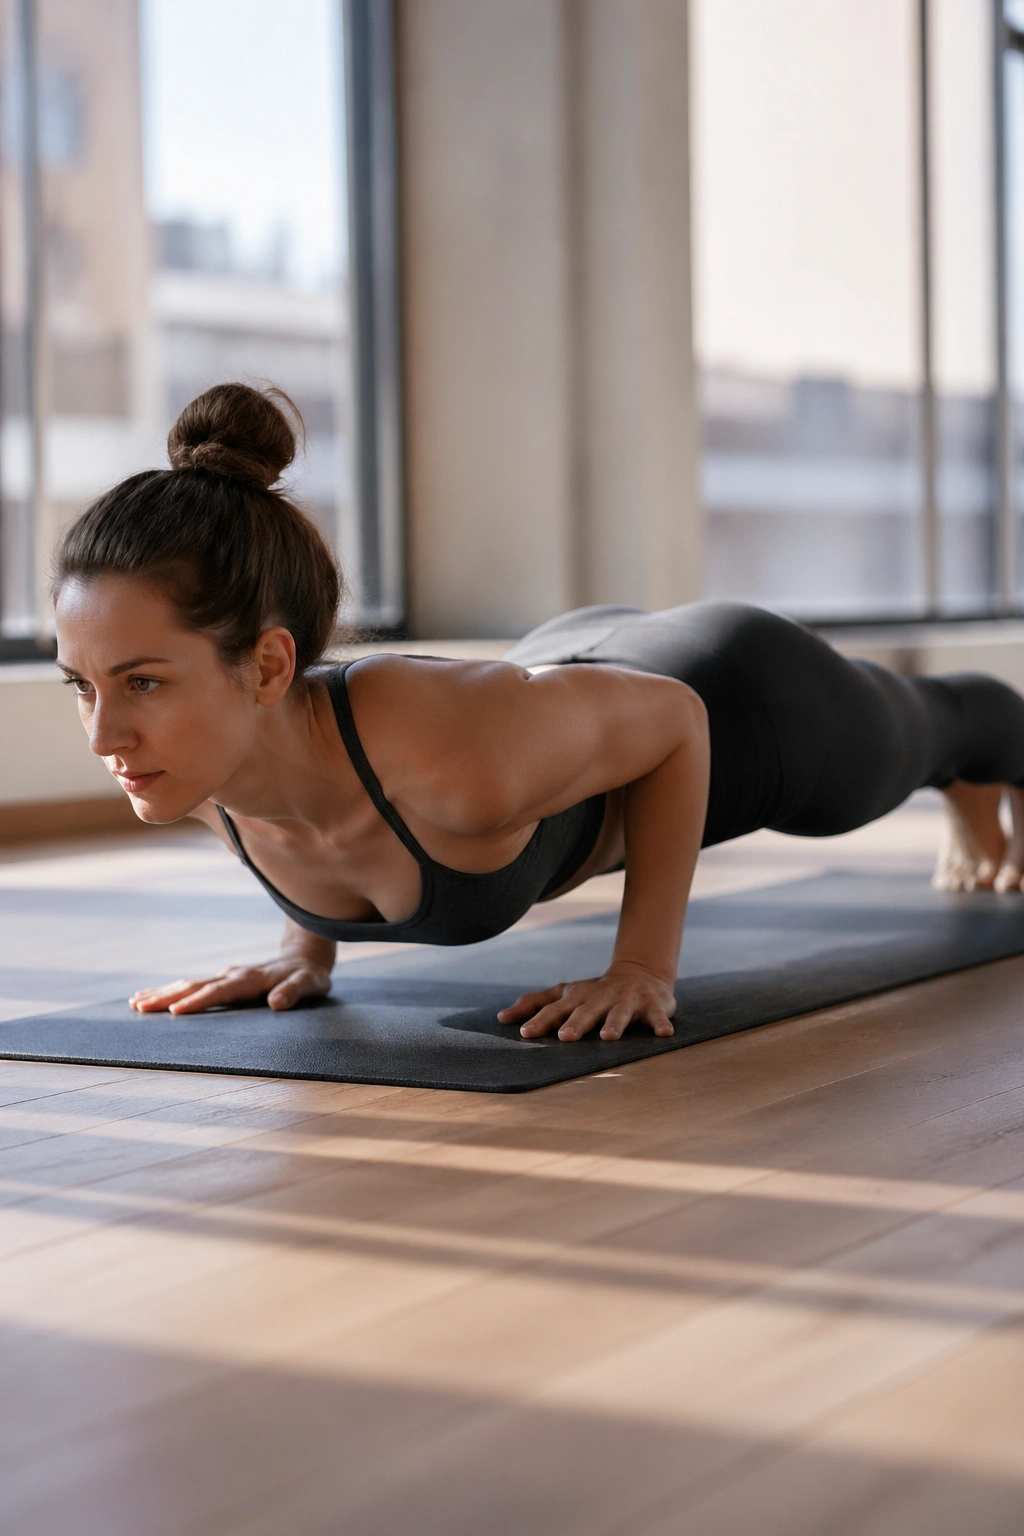
Chaturanga is where a lot of upper-body yoga work gets messy. It looks neat from the outside, then exposes every habit you’ve been ignoring in the shoulders, triceps, and chest.
The key is not to dive. Lower as one long line, with the elbows hugging the ribs and the shoulders staying no lower than the elbows. If the shoulders drop first, the front of the shoulder takes a beating, and the whole pose starts to feel like a push-up gone sideways.
A knees-down version is not a lesser version. It is a smarter one if you’re still learning the path. You can also lower only halfway and come back up, which is a cleaner way to build strength without dumping into the bottom.
The Part People Miss
- Keep the elbows tucked close.
- Keep the neck in line with the spine.
- Stop before the shoulders sink below elbow level.
- Lower slowly, not with a crash.
Do not chase depth here. Chase shape. Depth without control is just a fast mistake.
7. Cobra Pose
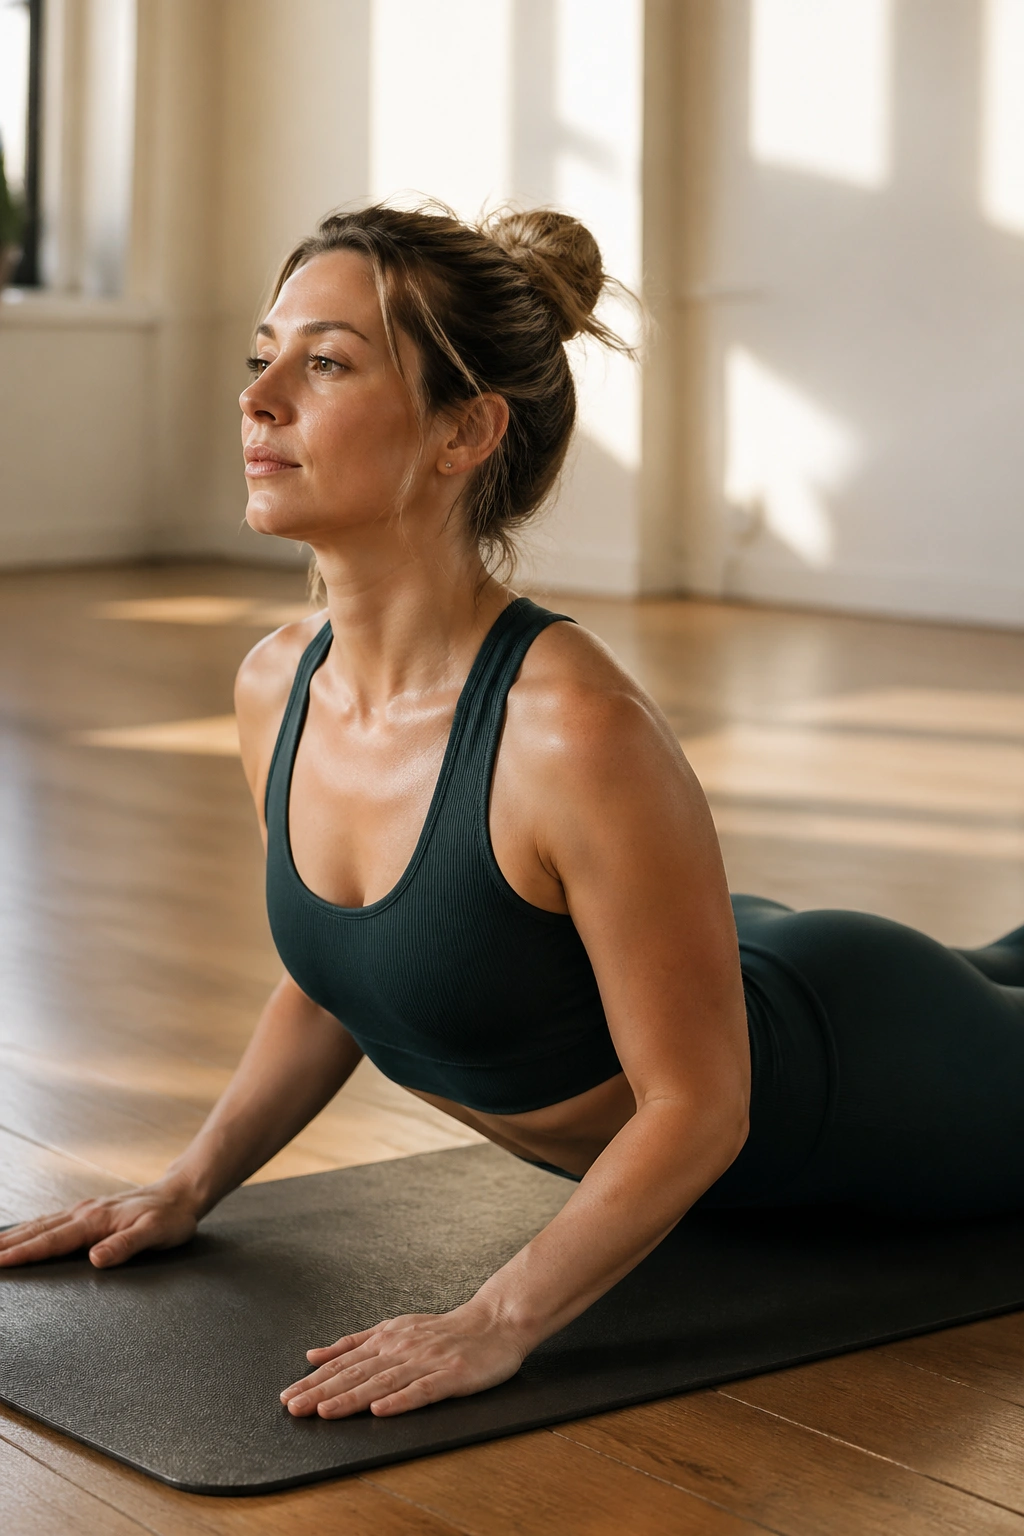
Your chest lifts a little, the ribs spread, and the muscles along the spine switch on in a low, steady way. That’s cobra when it’s done well. It’s not a dramatic backbend contest. It’s a controlled lift that teaches the back to support itself.
Press the tops of the feet into the floor, lengthen the legs, and keep the pelvis grounded. Then peel the chest up just enough to feel the back muscles, not the hands, taking the load. If your arms are doing all the work, the lift is too high or the chest is too rushed.
A low cobra can be enough. In fact, for many people it’s better. Hold for 2 to 4 breaths, lower with control, then repeat once or twice. The repeated small lift builds more useful strength than one wild heave.
The neck should stay long, and the shoulders should slide down away from the ears. If the low back feels pinchy, come down sooner and shorten the lift. That isn’t failure. It’s information.
8. Upward-Facing Dog
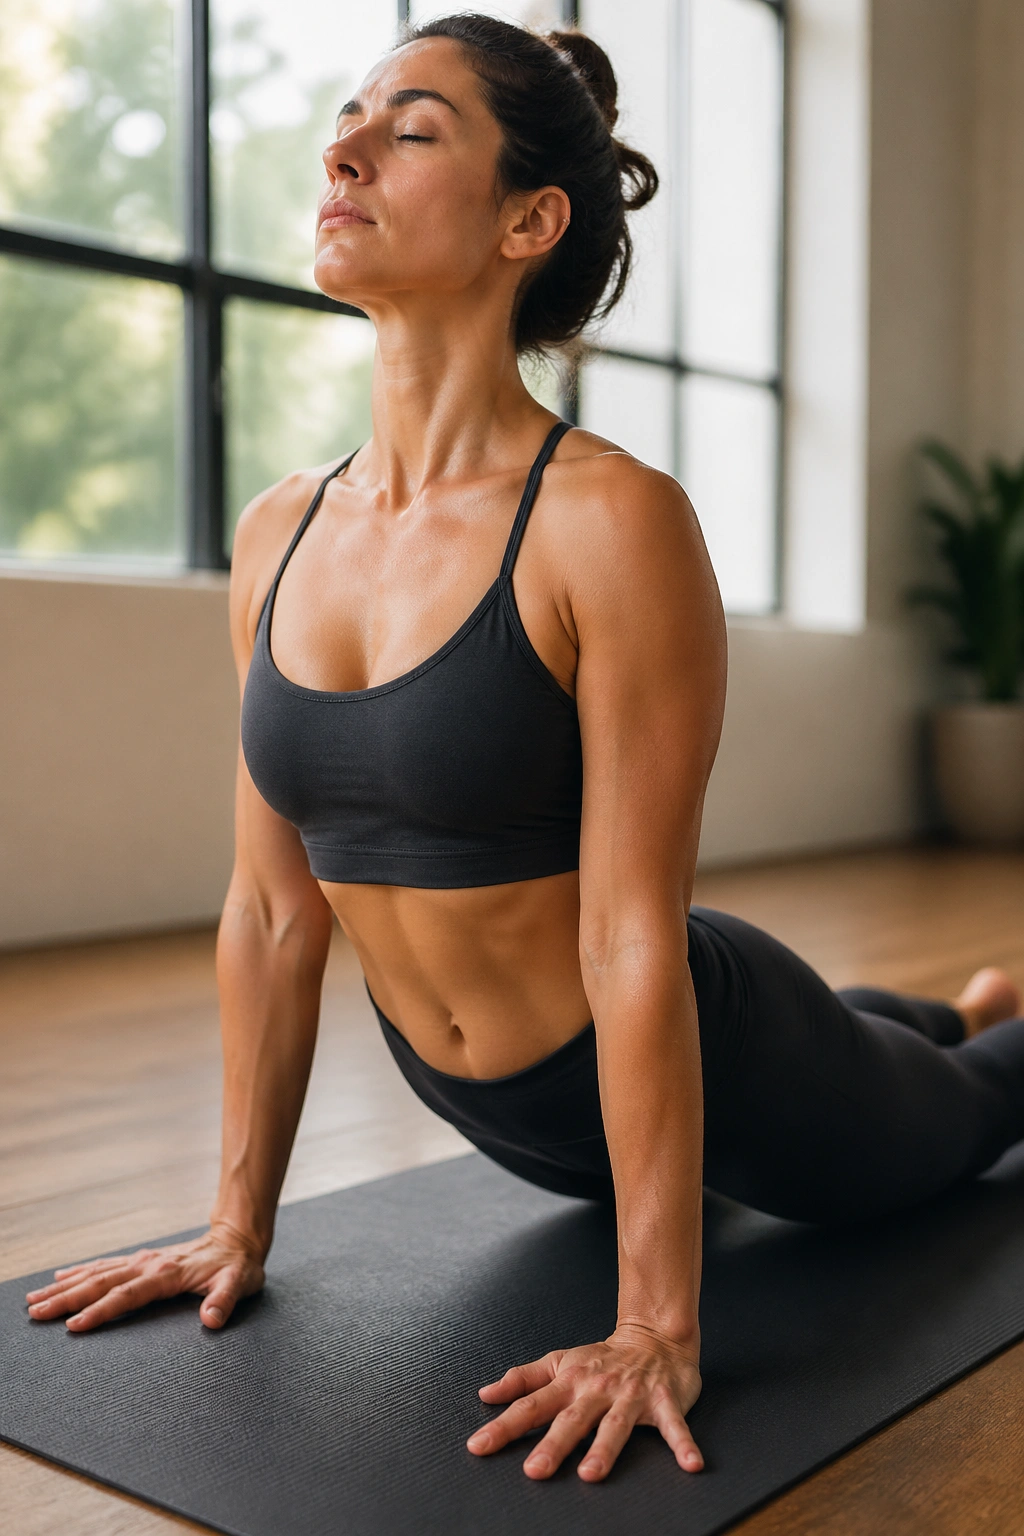
If cobra is a low lift, upward-facing dog is the sharper version. The thighs come off the floor, the arms straighten, and the chest moves forward in a way that demands more from the shoulders and triceps.
The pose works best when the hands are under the lower ribs or lower chest, not way out in front. Straight arms matter here, but only if the shoulders stay organized. If you’re hanging into the joints, the pose loses its point and starts chewing up the wrists.
A lot of people try to force this shape too early. That’s the mistake. A better path is a low cobra, then a stronger cobra, then upward dog only when the spine and shoulders can manage it without strain. If your lower back pinches, skip it for the day and use sphinx or cobra instead.
No drama needed. Just enough lift to feel the back wake up.
9. Locust Pose
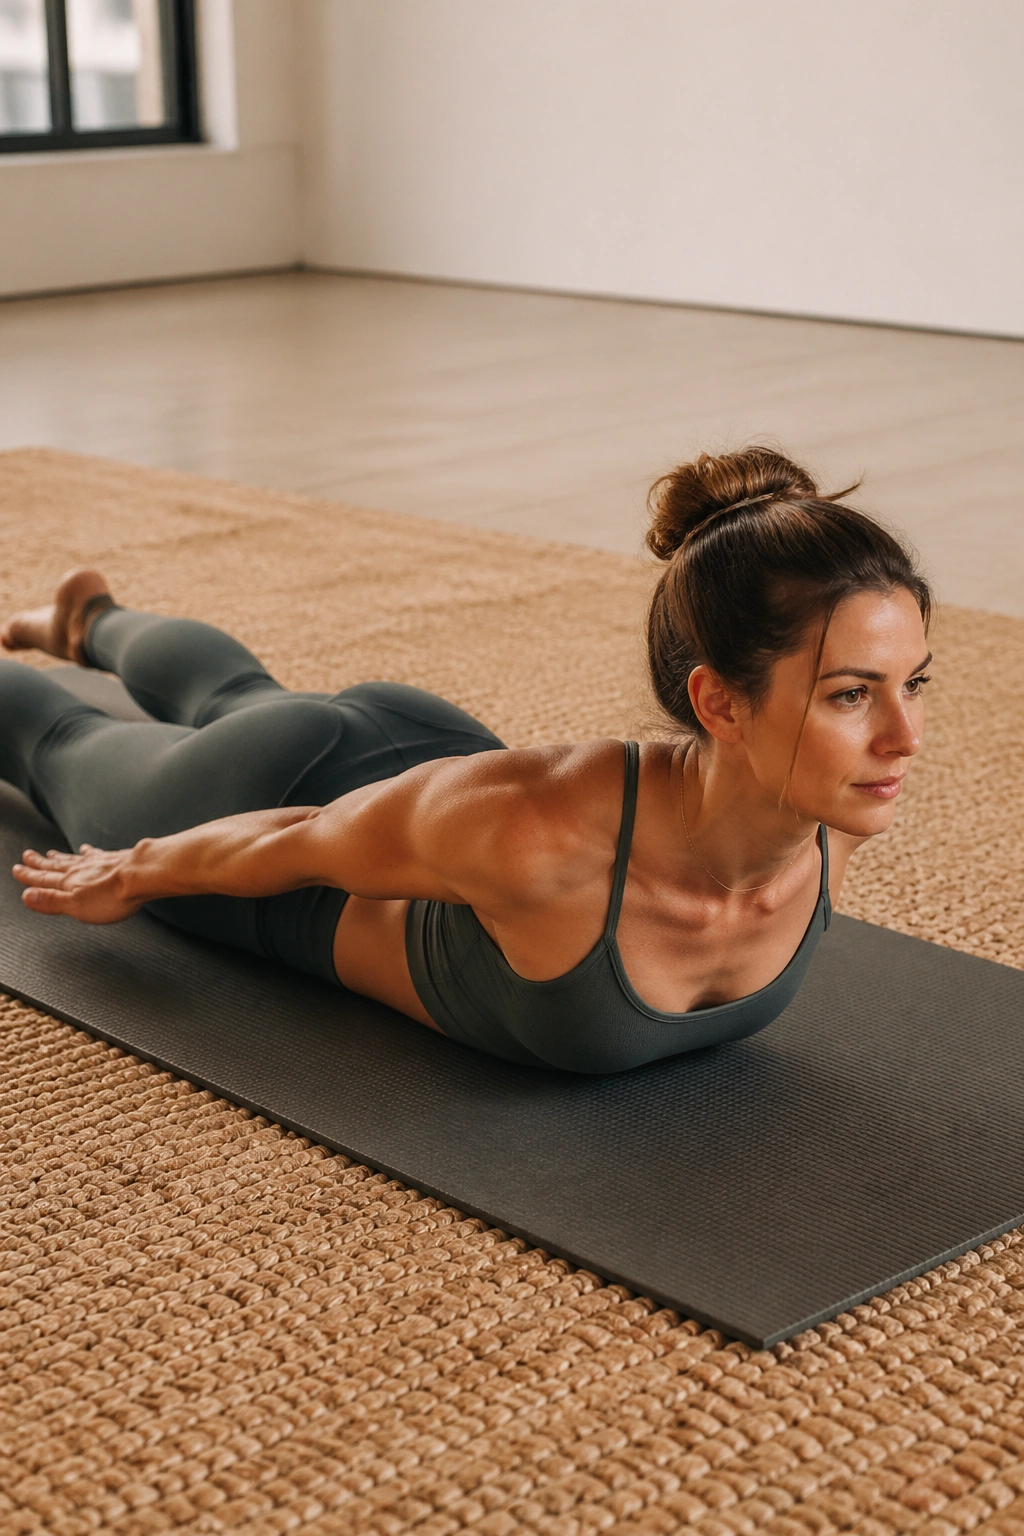
Locust pose has a funny habit of feeling tiny before it feels hard. Then the lower traps, spinal muscles, and the back of the shoulders all start talking at once. It’s one of the best poses for upper-back strength because it doesn’t let the arms coast.
Lie on your belly, lengthen the legs back, and lift the chest and arms just a few inches. That small lift is enough. You do not need to fling yourself upward. A modest, steady hover is the real work.
Arm Options
- Arms by the sides, palms facing down for a straightforward lift.
- Arms reaching back, thumbs up, for a tighter upper-back challenge.
- Arms in a cactus shape, elbows bent, to wake up the shoulder blades.
Hold for 10 to 20 seconds, rest, then repeat. If the lower back feels crunchy, keep the lift lower and the ribs heavy. Tiny lift, clean effort. That’s the sweet spot.
10. Bow Pose
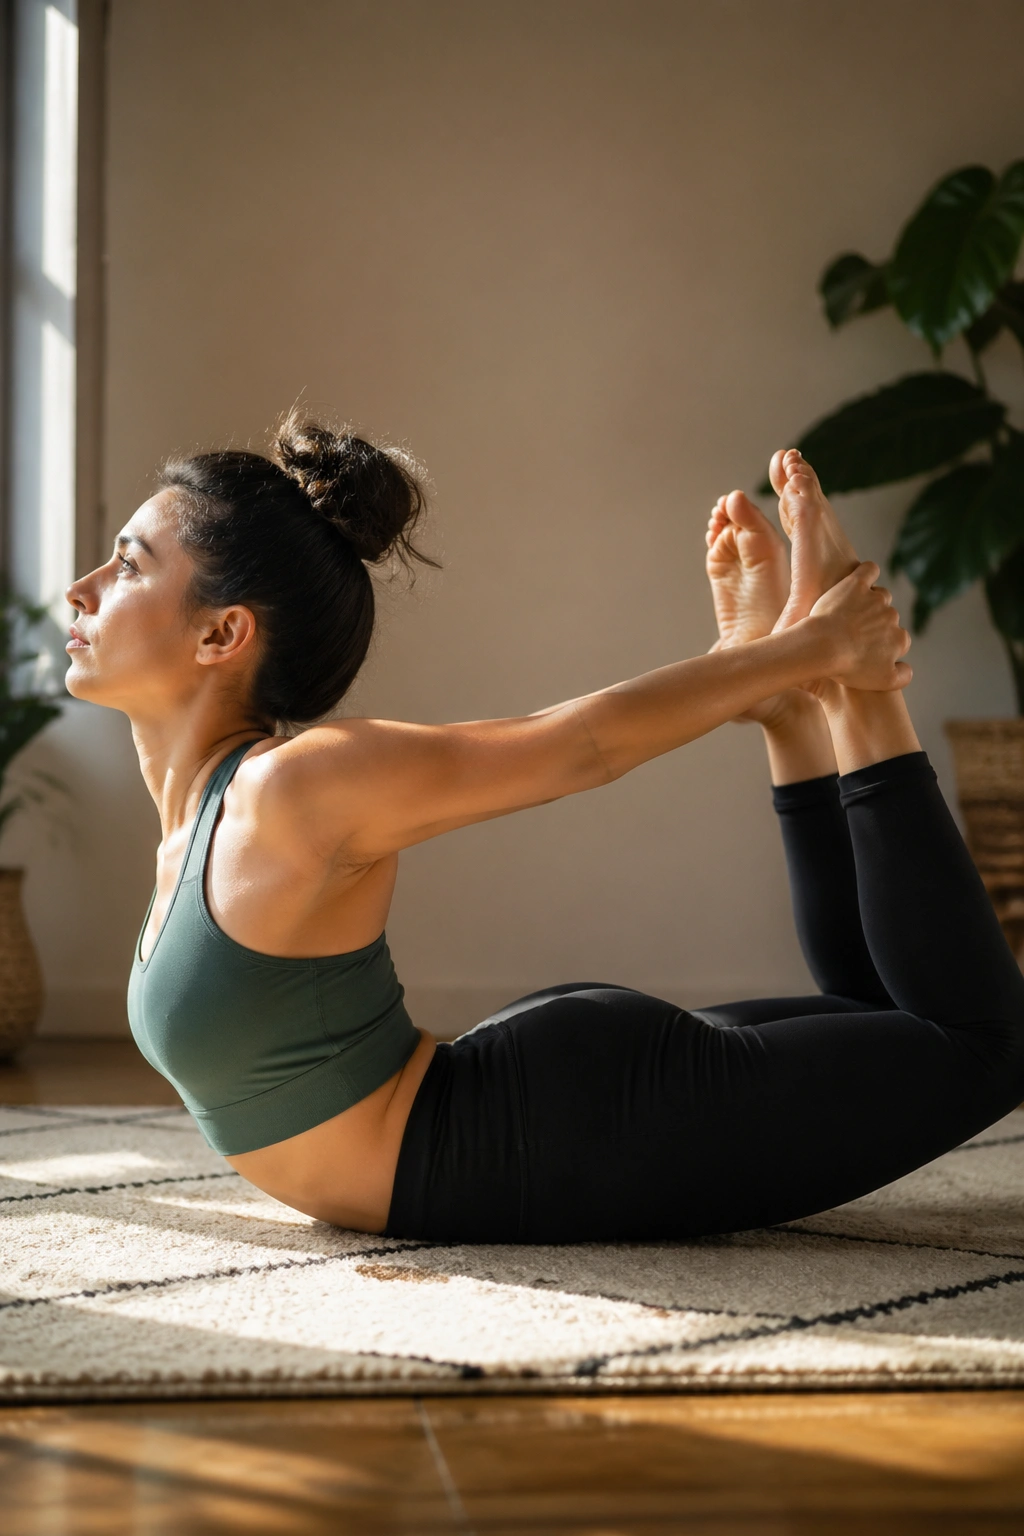
Why hold the ankles and lift everything at once? Because bow pose asks the back to contract while the chest opens, and that combination is awkward for a second and useful after. You feel the thighs, shoulders, upper back, and chest all working in one shape.
The pose starts face-down. Bend the knees, reach back, catch the ankles, and press the feet gently into the hands as the chest lifts. That backward pressure matters. It creates the lift, rather than yanking on the arms and cranking the lower back.
If your knees spread wide or your lower back pinches hard, back off. Use a strap around the ankles or stay with locust and cobra for a while longer. Bow asks for some shoulder opening too, so tight quads or stiff fronts of the shoulders can make the entry feel clumsy.
A Cleaner Entry
- Bend both knees evenly.
- Reach for the ankles without twisting the pelvis.
- Lift the chest first, then the thighs.
- Keep the breath slow enough that you can still count it.
11. Sphinx Pose
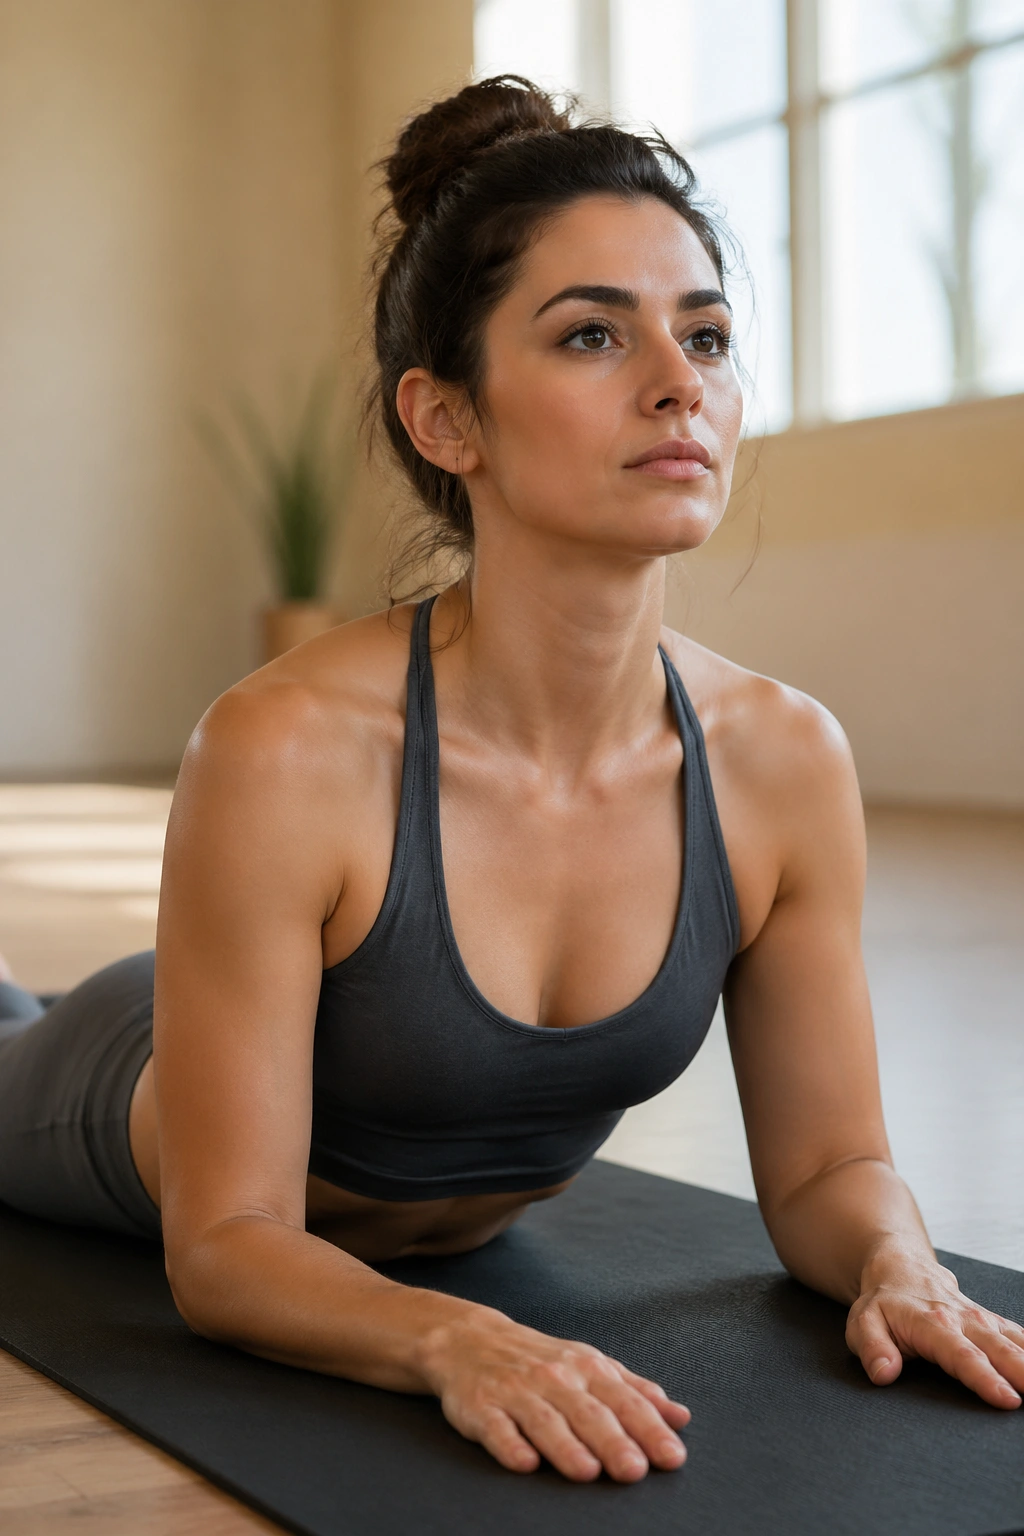
Gentle does not mean useless. Sphinx pose builds back stamina in a way that feels almost too easy for the first few breaths, and then the low back and shoulder girdle start doing real work.
Forearms rest on the mat, elbows under shoulders, and the chest moves forward and slightly up. The key is not to jam the shoulders toward the ears. Let the neck stay long, and keep the front ribs from spilling forward. That small amount of control is what makes the pose useful rather than floppy.
Sphinx is a smart place to learn spinal extension if cobra feels harsh. You can stay here for 30 to 60 seconds and let the back settle into the effort. It’s also one of the better choices when your wrists need a break but you still want something that counts as upper-body work.
Not flashy. Still valuable.
12. Puppy Pose
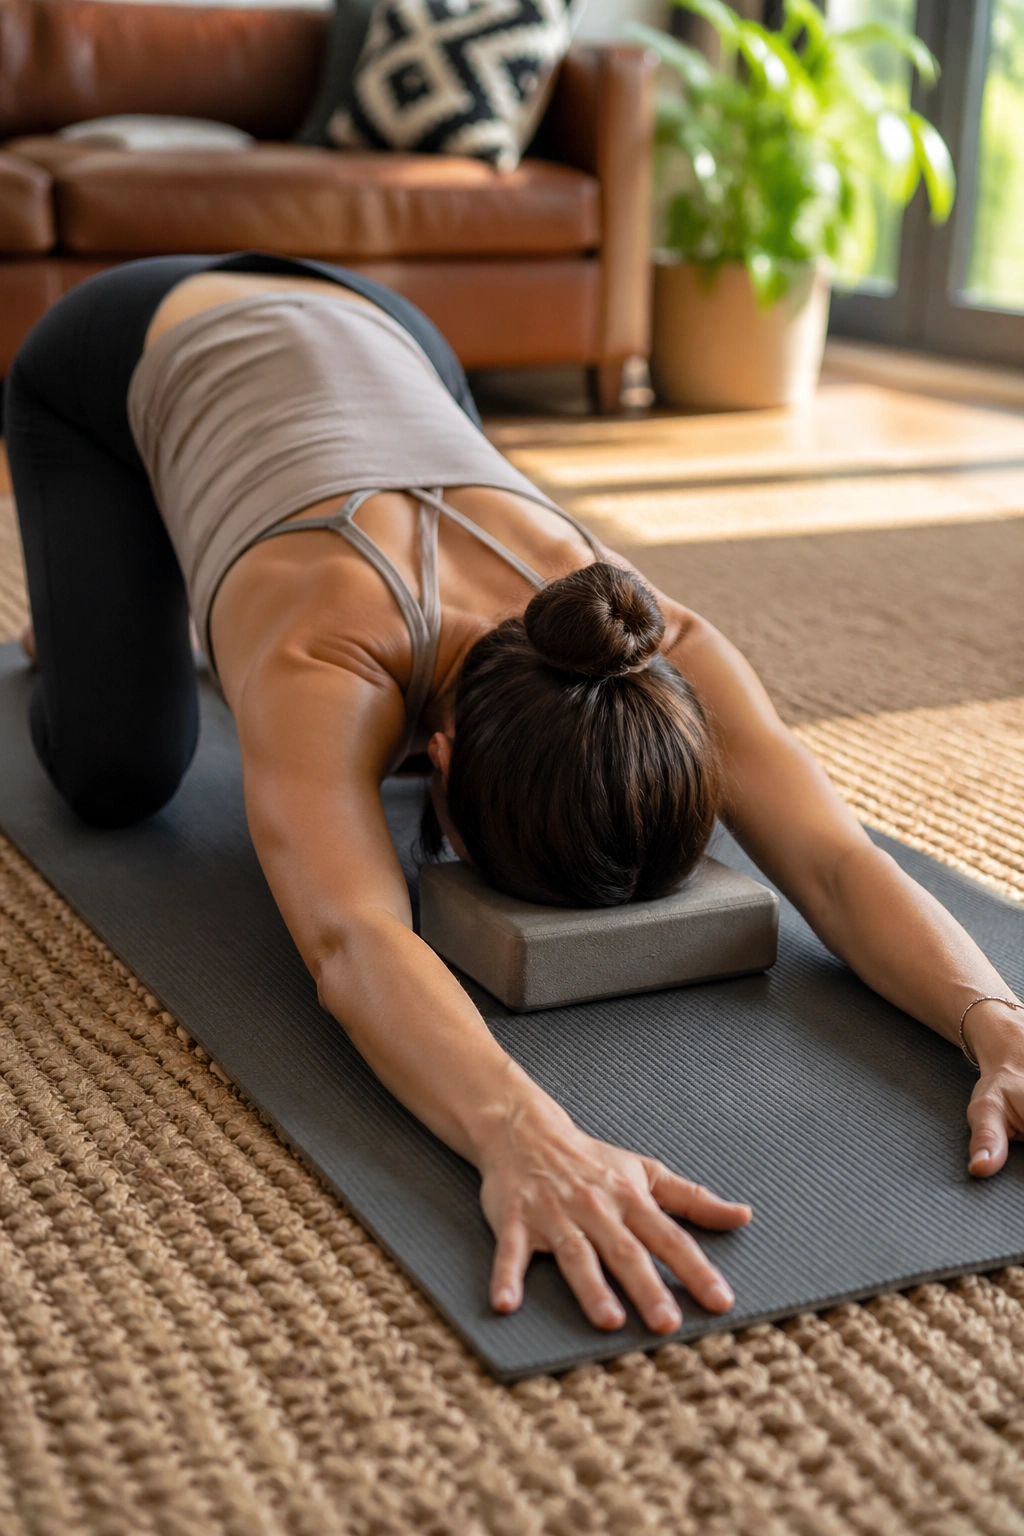
If downward dog feels too aggressive, puppy pose gives the shoulders a different job. The hips stay above the knees, the arms reach forward, and the chest melts toward the floor while the upper back and lats lengthen.
That long reach matters for stronger arms and back because tight lats can make overhead work feel grim. Open them a little here, and the stronger poses later often feel less cramped. Keep the elbows lifted if that helps the shoulder joints stay comfortable, or rest the forehead on a block.
The pose is more opening than loading, but I wouldn’t skip it. A body that moves overhead without fighting itself tends to handle planks, down dog, and chaturanga better. Hold for 5 to 8 breaths, breathing into the sides of the ribs.
Simple Cues
- Hips over knees.
- Hands far enough forward to feel a chest stretch.
- Forehead down only if the neck stays easy.
- Stop before the shoulders feel pinched.
13. Eagle Arms
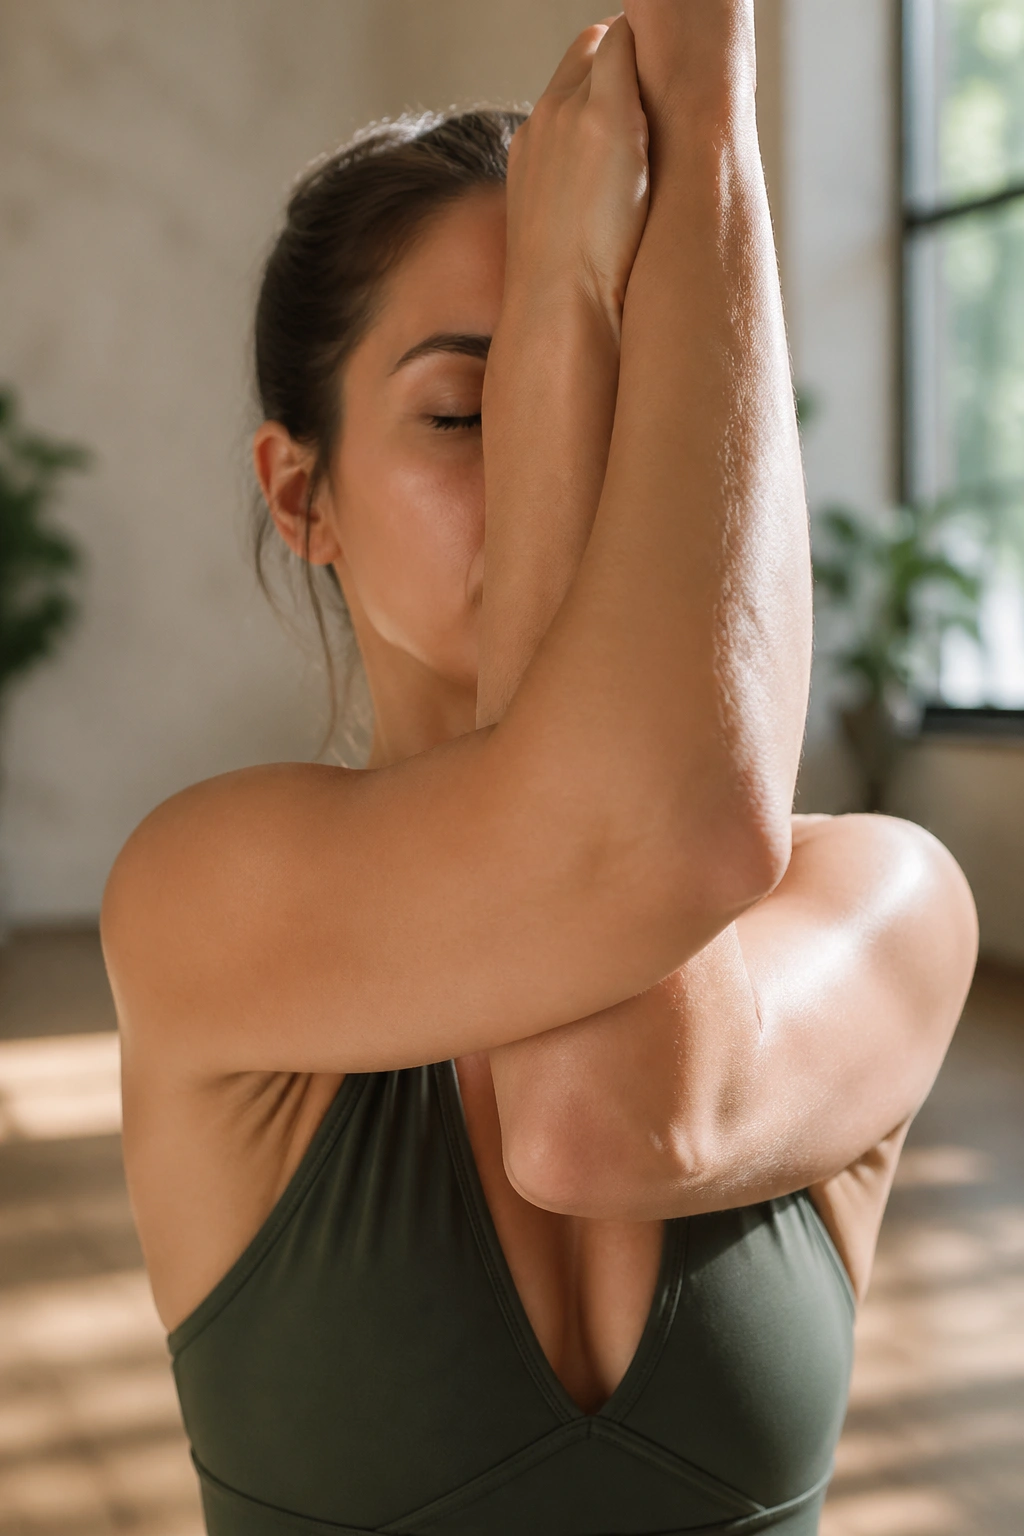
No weight. Plenty of work.
Eagle arms look like a simple wrap, but they wake up the upper back in a way that surprises people. The shoulders protract a bit, the spaces between the shoulder blades get more awareness, and the neck often feels less cluttered after a few slow breaths.
You can do them seated or standing. Wrap one arm under the other, bend the elbows, and lift them away from the chest while keeping the ribs stacked over the pelvis. The goal is not to force the hands together. The goal is to feel the upper back broaden and the shoulders soften without collapsing.
Five breaths per side is enough to feel a shift. If the elbows drift down, the pose loses its bite. If the neck tightens, lower the arms a touch and keep the breath moving.
It’s a good reset between stronger poses. Not a strength move in the obvious sense, but absolutely part of the upper-body story.
14. Cow Face Arms
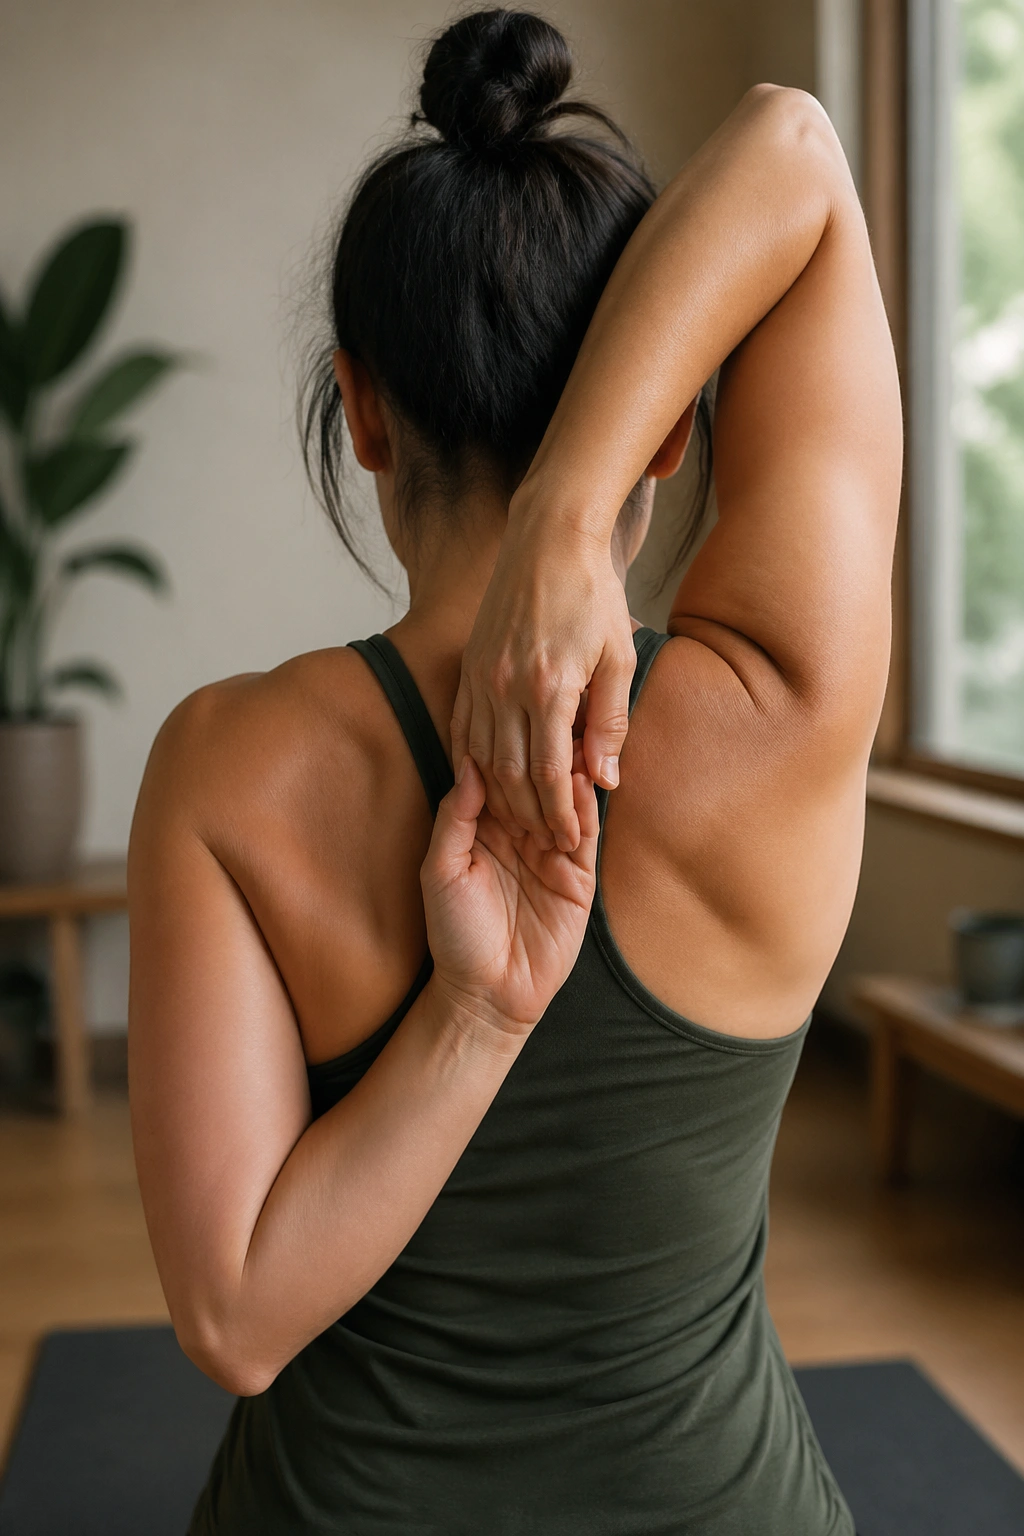
Unlike eagle arms, cow face arms reaches deeper into the shoulder line and makes side-to-side differences hard to hide. One side might feel smooth. The other may stop halfway and complain. That’s normal, and useful.
Take one arm up and the other down the back, then try to link the hands or hold a strap between them. Keep the ribs from flaring forward. That’s the part people skip, and it matters because the pose works best when the shoulders do the opening instead of the lower back cheating.
If the hands never meet, that’s still a good practice. A strap between the hands can give you a clean line without forcing the joints. Hold for 20 to 30 seconds, then switch sides and notice which shoulder feels tighter. Usually one does.
What to Watch
- Don’t yank the bottom arm.
- Keep the neck relaxed.
- Use a strap before you force the bind.
- Breathe into the upper ribs, not just the belly.
15. Reverse Tabletop Pose
If you want one pose that feels like a clean finish, reverse tabletop earns its place. The hands press down, the shoulders open, the back of the arms wake up, and the chest lifts in a way that feels honest rather than dramatic.
Sit with the knees bent, feet flat, and fingers pointing toward the feet or slightly out to the sides if the wrists prefer that angle. Press through the hands and feet, then lift the hips until the body makes a long line from shoulders to knees. The glutes help, yes, but the upper back and arms are doing their share too.
A Good Way to Use It
- Hold for 3 to 5 breaths.
- Lower with control.
- Repeat 2 times if the shoulders still feel steady.
- Stop if the wrists pinch sharply.
I like this pose near the end of a short upper-body sequence because it feels like a tidy closing note without being soft. Pair it with planks, locust, and dolphin, and you’ve got a practice that gives the arms and back real work without turning the whole thing into a fight.
Pick five or six of these on a given day. That’s enough. You do not need to do all fifteen every time, and honestly, most bodies won’t like that anyway. A smart mix of a few weight-bearing poses, one back-strengthener, and one shoulder opener tends to beat a long random list.
