



A strong core shows up long before your abs look defined. You feel it when you can hold a side plank without wobbling, twist without tugging at your lower back, and lift one leg without your ribs popping open.
That is why yoga works so well for this goal. The best core poses do not chase burn for its own sake; they teach your trunk to stay quiet while your arms and legs move around it. That means the deep stabilizers—the transverse abdominis, obliques, and the smaller muscles around your spine and pelvis—have to do real work.
Visible definition is a separate piece of the puzzle. Yoga can build shape, control, and endurance, but it won’t magically change body composition on its own. What it does give you is the kind of strength that holds a line, cleans up balance, and makes every other workout feel more solid.
Start with the poses that expose your weak spots. Clean holds beat heroic-looking slop every time.
1. Plank Pose
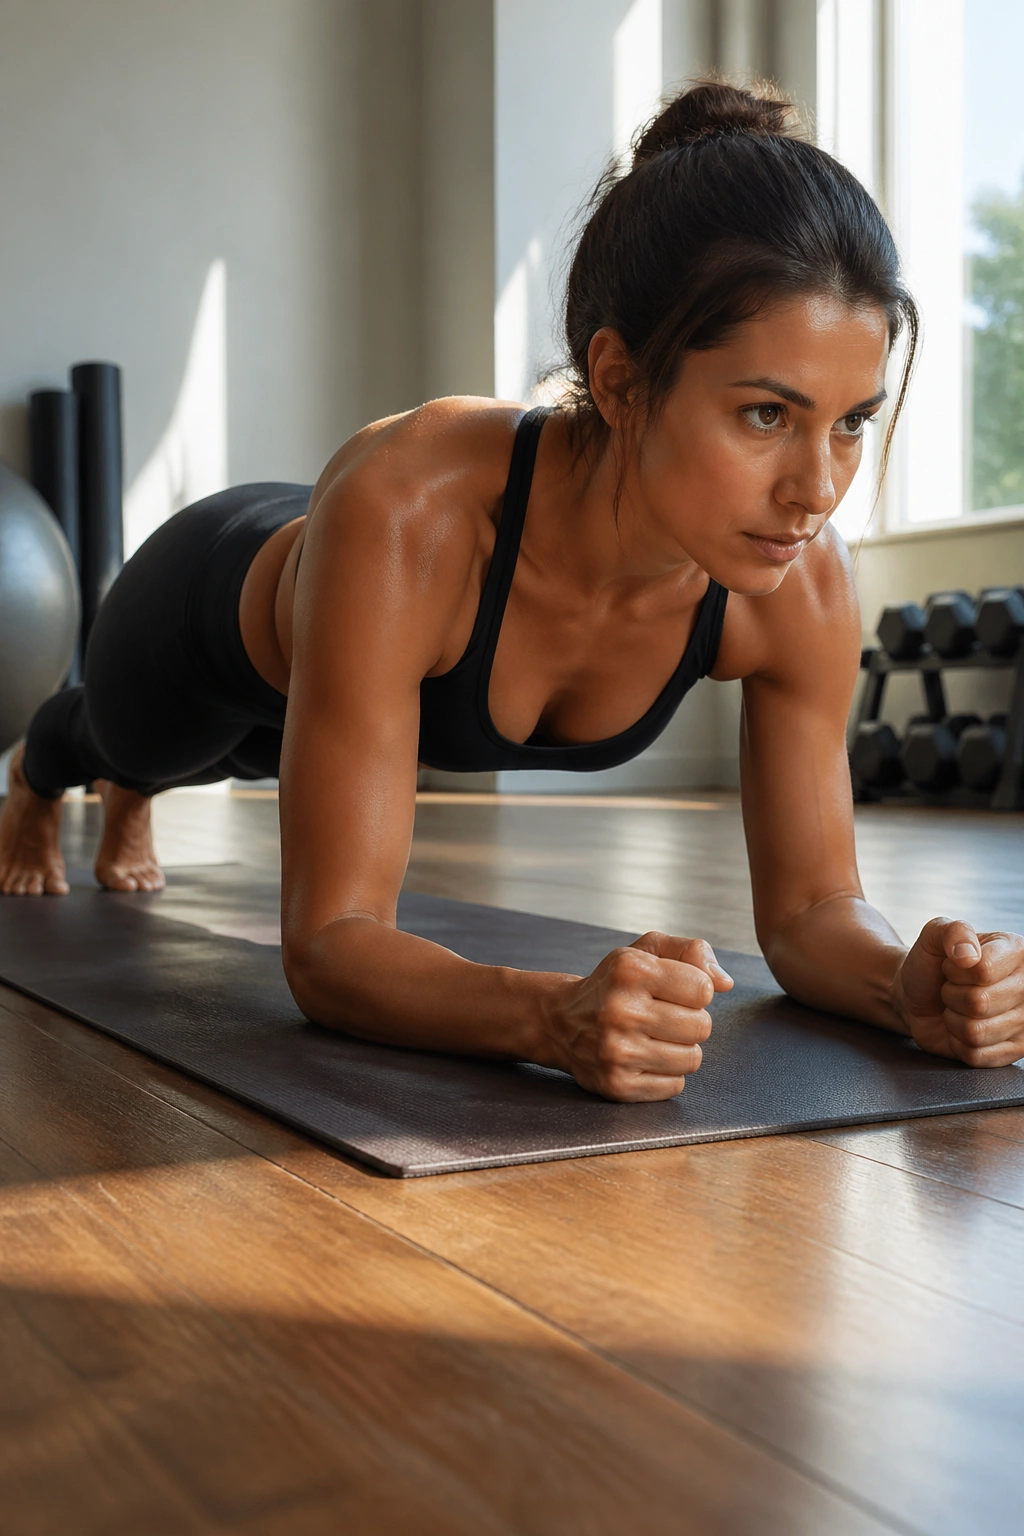
Plank looks basic because it is basic. That’s the point.
If you can hold a plank with your ribs tucked, glutes awake, and neck long, you already have a decent snapshot of your core strength. It asks the front of your body to brace without turning rigid, which is harder than it sounds once the timer passes 20 seconds.
Why It Works
Plank trains anti-extension strength. That means your abs resist the lower back’s urge to arch. Your shoulders help too, especially if you press the floor away and keep the shoulder blades broad instead of sinking between them.
A useful target is 20 to 40 seconds for 3 rounds. Stop the second your hips start sagging or your breath turns choppy. Longer is not better if your form falls apart.
- Hands under shoulders, fingers spread wide.
- Heels reach back, crown of the head forward.
- Squeeze the glutes lightly so the low back doesn’t steal the job.
- Exhale and draw the ribs in just enough to feel the front body engage.
Tip: If your wrists complain, place your hands on yoga blocks or do plank on forearms until the line of the body feels steady.
2. Side Plank Pose
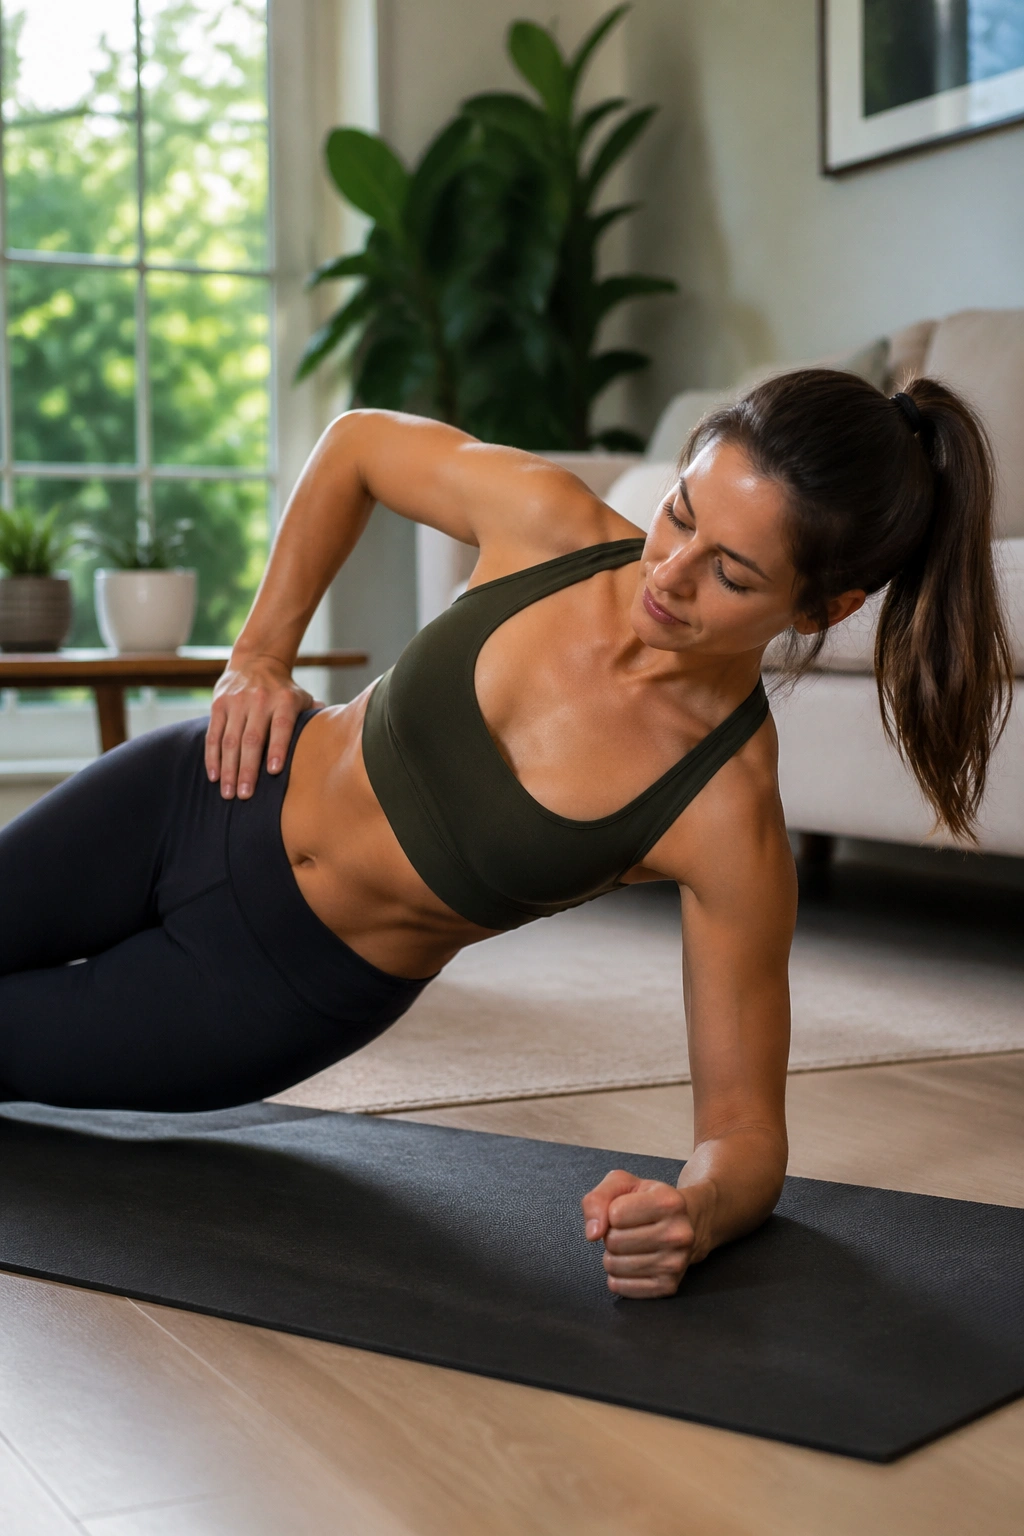
This is the one that wakes up the sides of your waist.
A lot of people train the front of the core and wonder why they still feel flimsy in twists, side bends, or single-leg balance. Side plank fixes that blind spot fast. It asks the obliques, glute med, and shoulder to hold your body up in one long line instead of letting you collapse toward the floor.
The hardest part is usually not the hold itself. It’s the quiet work of stacking the hips and keeping the lower ribs from flaring open.
A bent-knee version counts. Seriously. Drop the bottom knee to the mat, keep the top hip lifted, and keep the bottom waist active. That version still builds the right strength without turning the pose into a survival test.
When you feel ready, straighten the legs and press the floor away with the lower hand. The line from wrist to top heel should feel sharp, almost stubborn. That is the good stuff.
3. Boat Pose
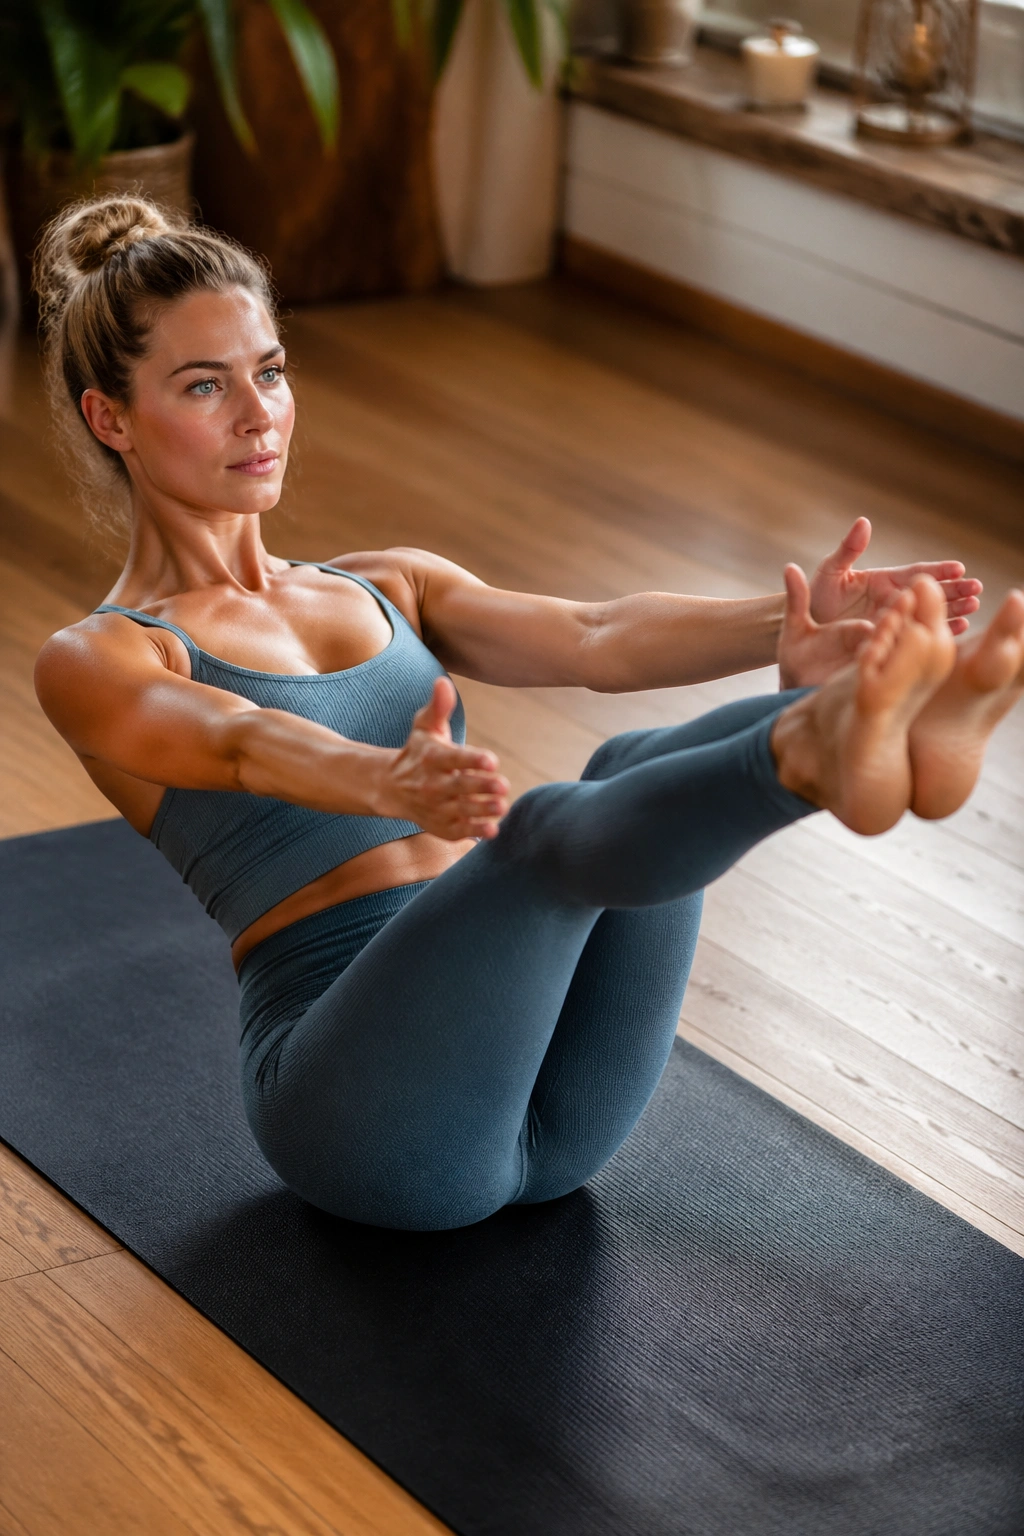
Why does boat feel so dramatic? Because it asks the hip flexors and abs to talk to each other without letting the lower back take over.
People often rush into a full V-shape and then blame their core when their neck tenses up. The smarter move is to start with bent knees, shins parallel to the floor, and a chest that stays wide. The abs still work hard there. Hard enough.
How to Keep Your Low Back Quiet
First, sit tall on your sitting bones and lean back only a little. Then lift one foot, then the other. If your spine rounds like a startled cat, back out a notch.
- Keep the chest open.
- Lift from the lower belly, not the neck.
- Hold for 15 to 30 seconds, then rest.
- Try 3 rounds, with short rests between.
Half boat is not a downgrade. It’s a smarter on-ramp. If you can maintain a clean half boat for longer than a sloppy full boat, that usually says more about your strength than the pose aesthetic does.
4. Forearm Plank
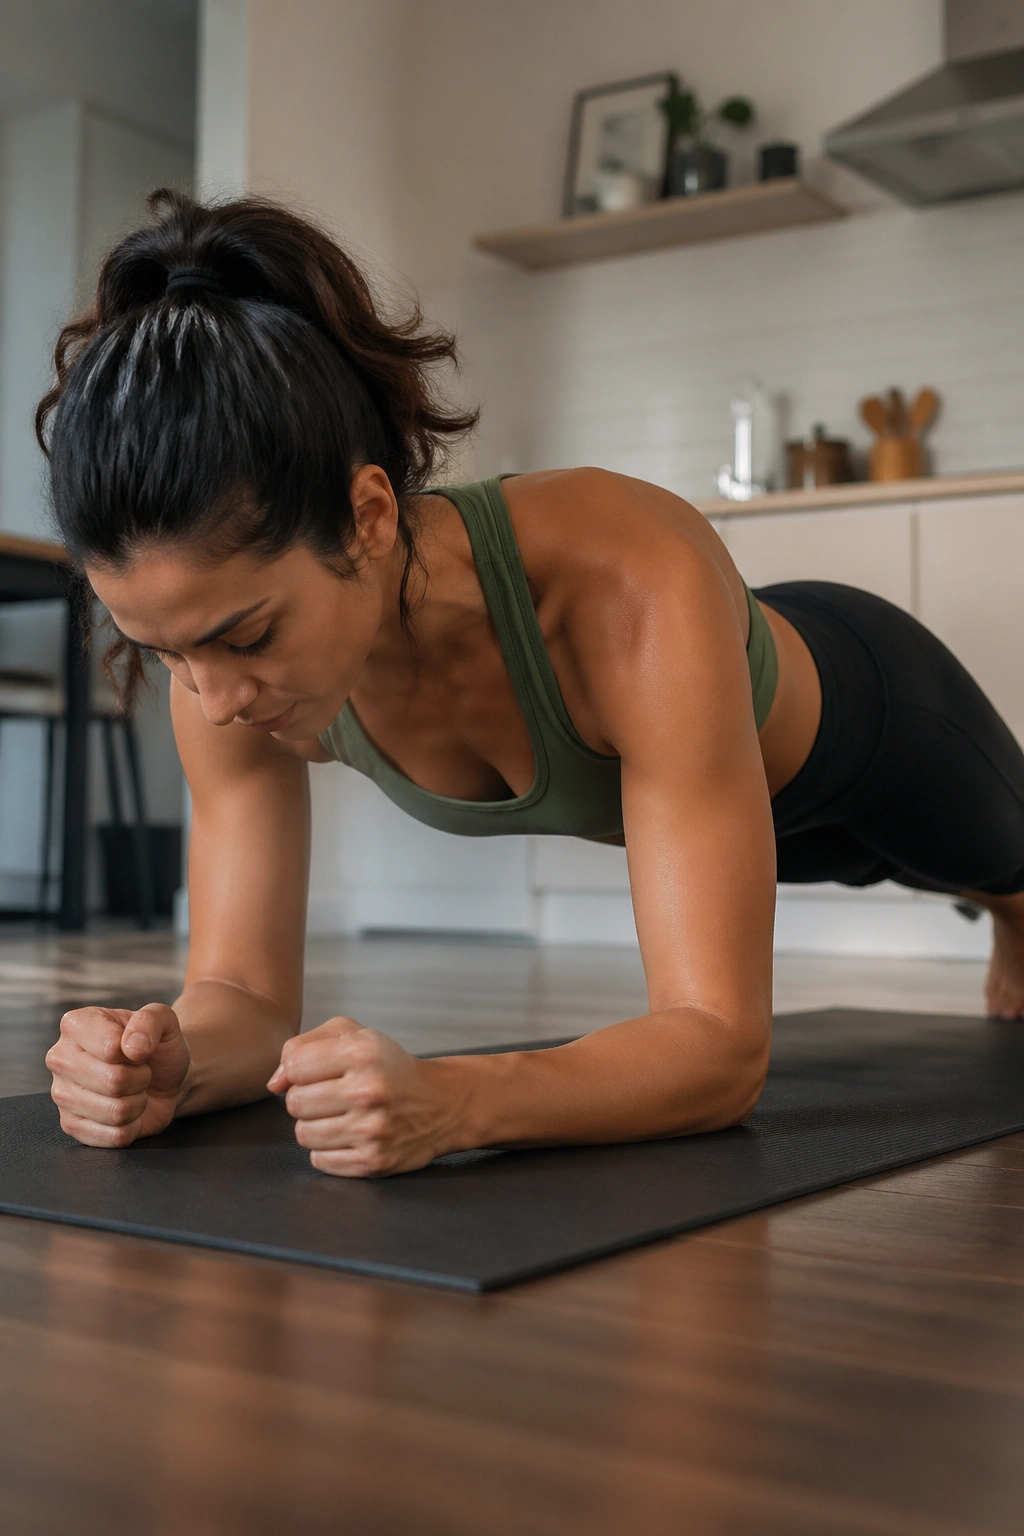
If regular plank makes your wrists bark, forearm plank is the friendlier version.
It shifts the load down the forearms and still makes the trunk work like it should. The elbows sit under the shoulders, the forearms press into the mat, and the body has to stay long without dumping into the lower back. You will feel the abs, but you’ll also feel the serratus and the upper back holding the frame together.
The mistake I see most is people sinking between the shoulder blades. That turns the pose into a shrug with a timer. Press the forearms down and slightly pull them toward each other without actually moving them. The torso will light up fast.
A good setup is 20 seconds on, 20 seconds off, repeated 3 to 4 times. Keep the neck easy. Keep the gaze down. The minute you start staring forward like a stressed meerkat, the spine usually follows.
Do not chase a longer hold if your hips sway or your breathing stops. The shape matters more than the ego.
5. Bird Dog
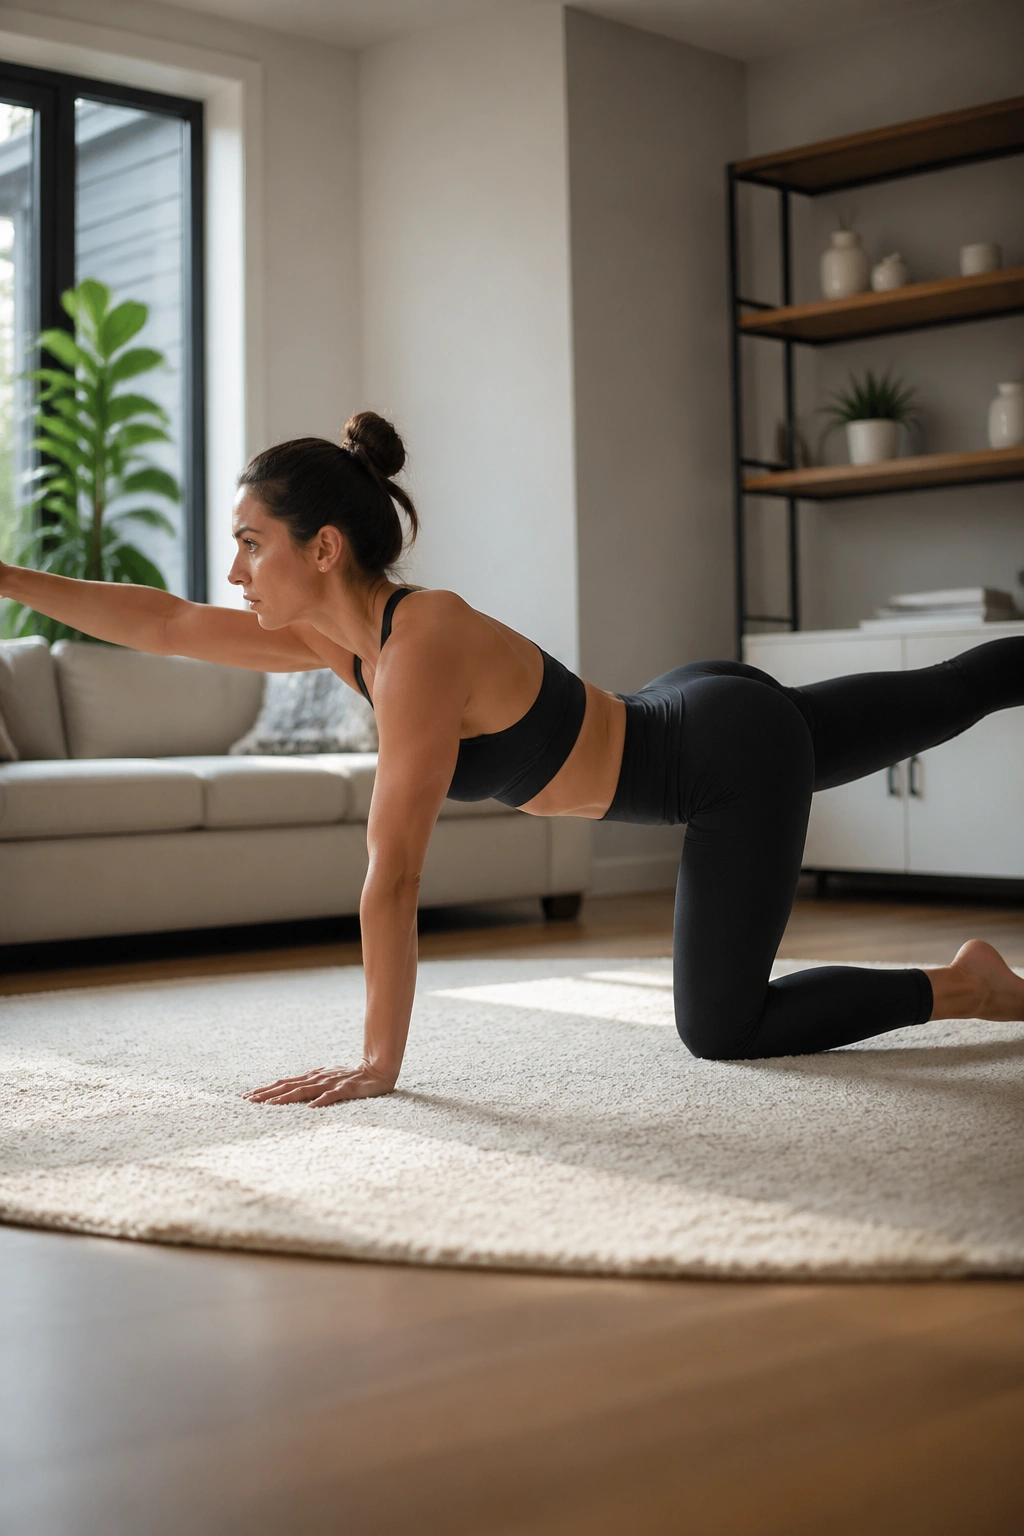
Bird dog looks gentle. It isn’t.
From tabletop, reach one arm forward and the opposite leg back, then pause long enough for the whole torso to stop wobbling. That pause is where the work happens. The pelvis wants to rotate, the ribs want to flare, and the low back wants to do the heavy lifting. Your job is to keep everything square and calm.
Slow is the whole trick.
What to Feel
You should feel a deep tug through the belly and along the back side of the body, almost like your center is being zipped up. If the standing hand or knee shifts around, shorten the reach a little and keep the movement quieter.
A smart version is to hold each side for 3 slow breaths. Reach, pause, return, switch. That’s enough when you’re doing it with honesty.
A lot of yoga core work is about compression. Bird dog is about control. That matters just as much, maybe more, because it teaches your spine to stay stable while your limbs travel away from it.
6. Revolved Chair Pose
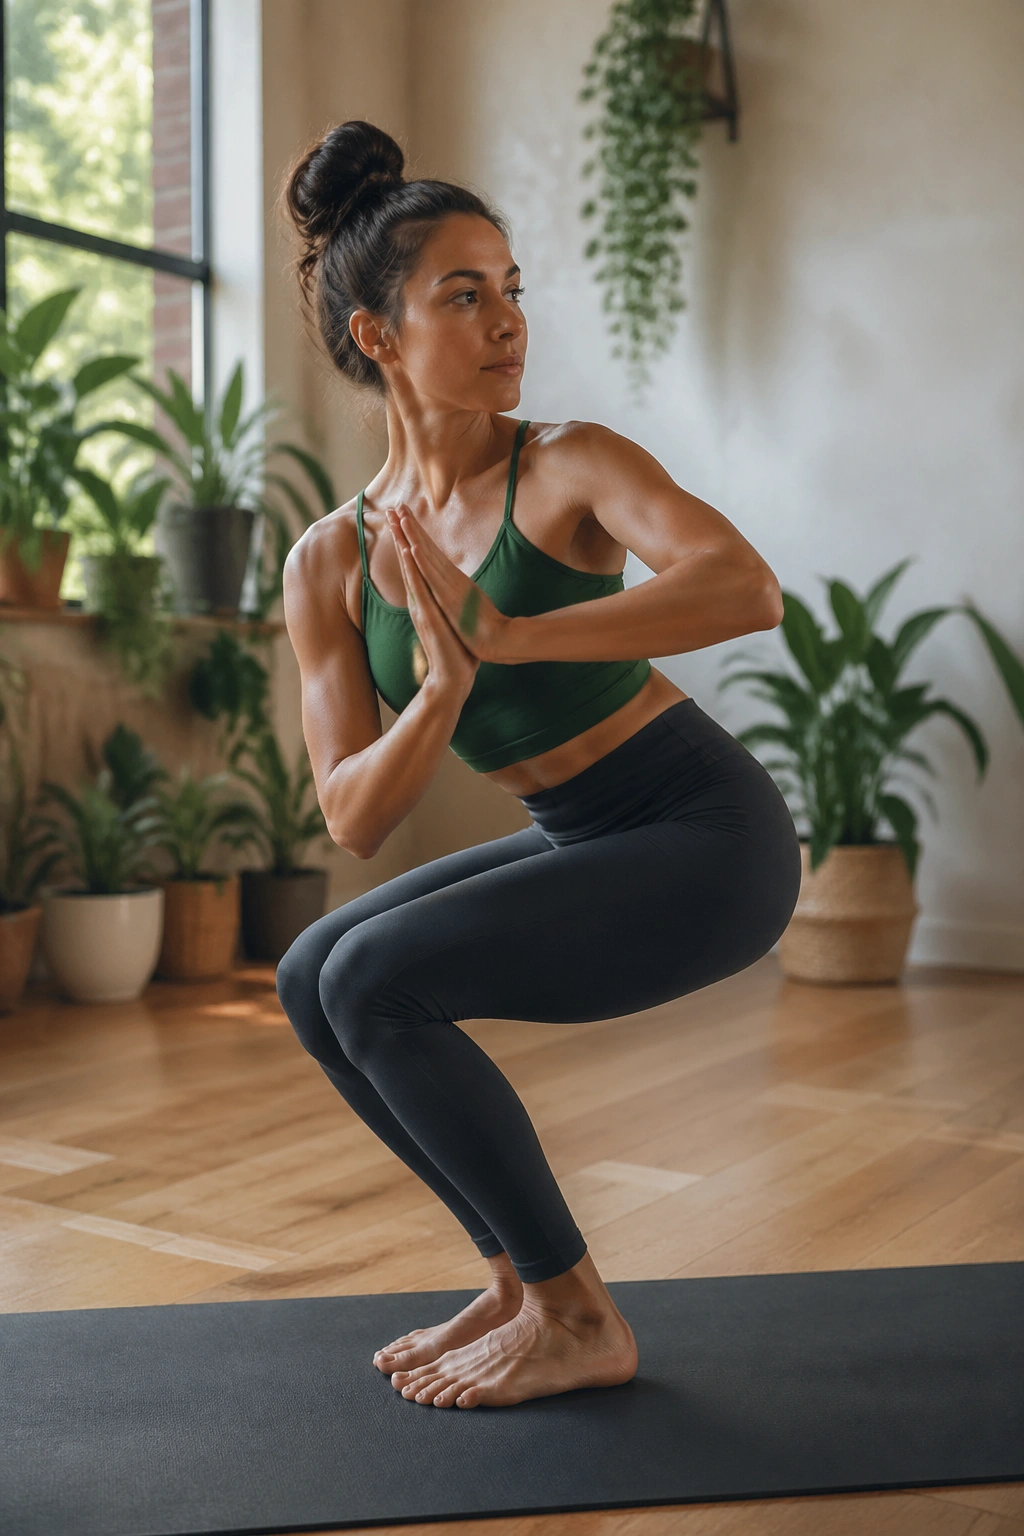
Revolved chair is sneaky. It looks like a squat with a twist, and then your obliques start filing complaints.
The real challenge is keeping the hips low while the ribs rotate without dumping the weight into one side. If you just yank the arms across and hope for the best, the twist comes from the shoulders and the knees get messy. That’s not the point.
Keep the feet rooted about hip-width apart, sit the hips back as if you’re reaching for a chair, then lengthen the spine before the twist. That little pause before you rotate changes everything. It gives the torso room to turn instead of folding over itself.
Best version? Prayer hands at the chest, elbows pressing into each other, knees lined up, breath steady. If balance wobbles, shorten the twist and keep the torso a bit more upright. You’ll still get the core work.
This one is great when you want a standing pose that feels athletic but still unmistakably yogic.
7. Low Lunge Twist
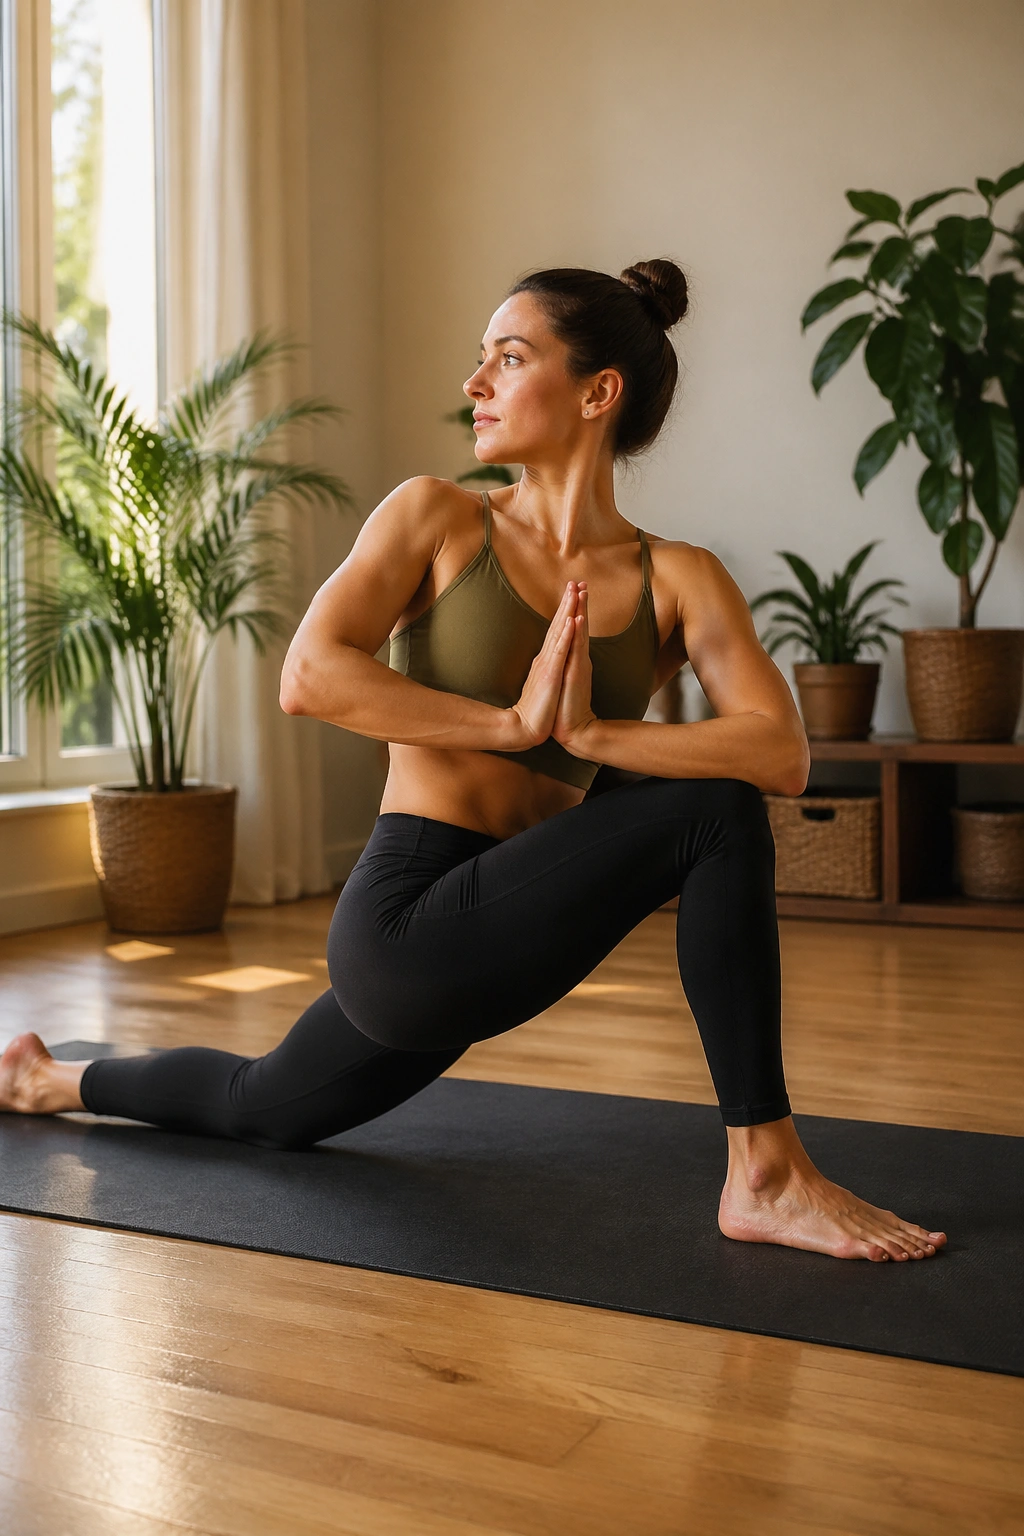
A low lunge twist is one of those poses that feels simple until you try to stay there for more than a few breaths.
The back knee can stay down, which makes the pose accessible, but don’t let the setup fool you. The front thigh, hip flexor, side waist, and deep belly all have to keep the pelvis from tipping around while the torso rotates. That’s core work with a bit of spice.
Where the Work Should Land
You want the rotation to rise through the middle of the body, not collapse into the lower back. Start by lifting the chest, then twist. If you twist first, the spine usually shortens and the breath gets shallow.
- Front knee stacked over the ankle.
- Back leg active, even with the knee down.
- Both sides of the waist long before the twist.
- Hold for 3 to 5 breaths, then switch.
A small prop under the opposite hand can make a huge difference. A block keeps the chest open and stops the pose from becoming a slump with a prayer hand.
8. Dolphin Pose
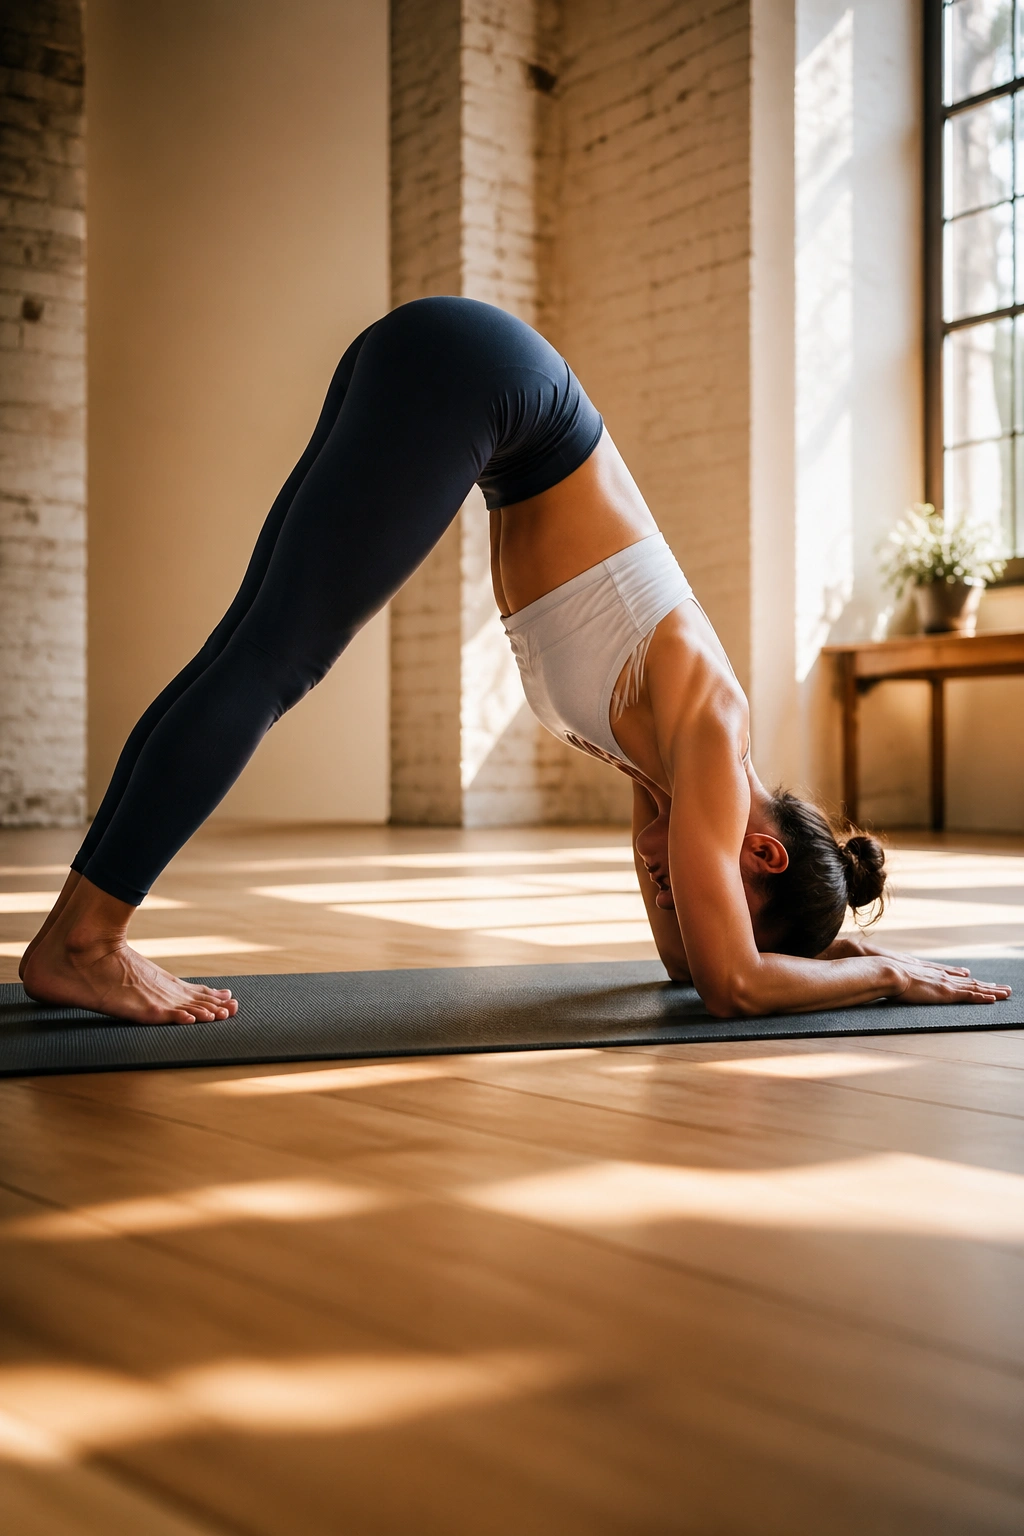
Dolphin is the pose people skip because it looks a little awkward. That’s a mistake.
Forearms down, hips high, heels reaching toward the floor, head hanging in a neutral line—there’s a lot going on. The shoulders have to work, the upper back has to stay alive, and the abdomen has to keep the ribs from spilling forward. It’s part strength pose, part prep for arm balances and inversions.
Your hamstrings may complain. Fine. Let them. But the real job is keeping the trunk tight enough that the shape doesn’t collapse into the lower back. That means a light draw of the front ribs inward and a steady press through the forearms.
Try 5 to 8 slow breaths first. Then walk the feet in a little and see what changes. Usually the closer stance makes the core work harder, not easier, because the body has to resist folding over itself. Small shifts matter here.
If you want one pose that quietly builds a stronger midsection and better shoulders at the same time, this is a strong pick.
9. Warrior III
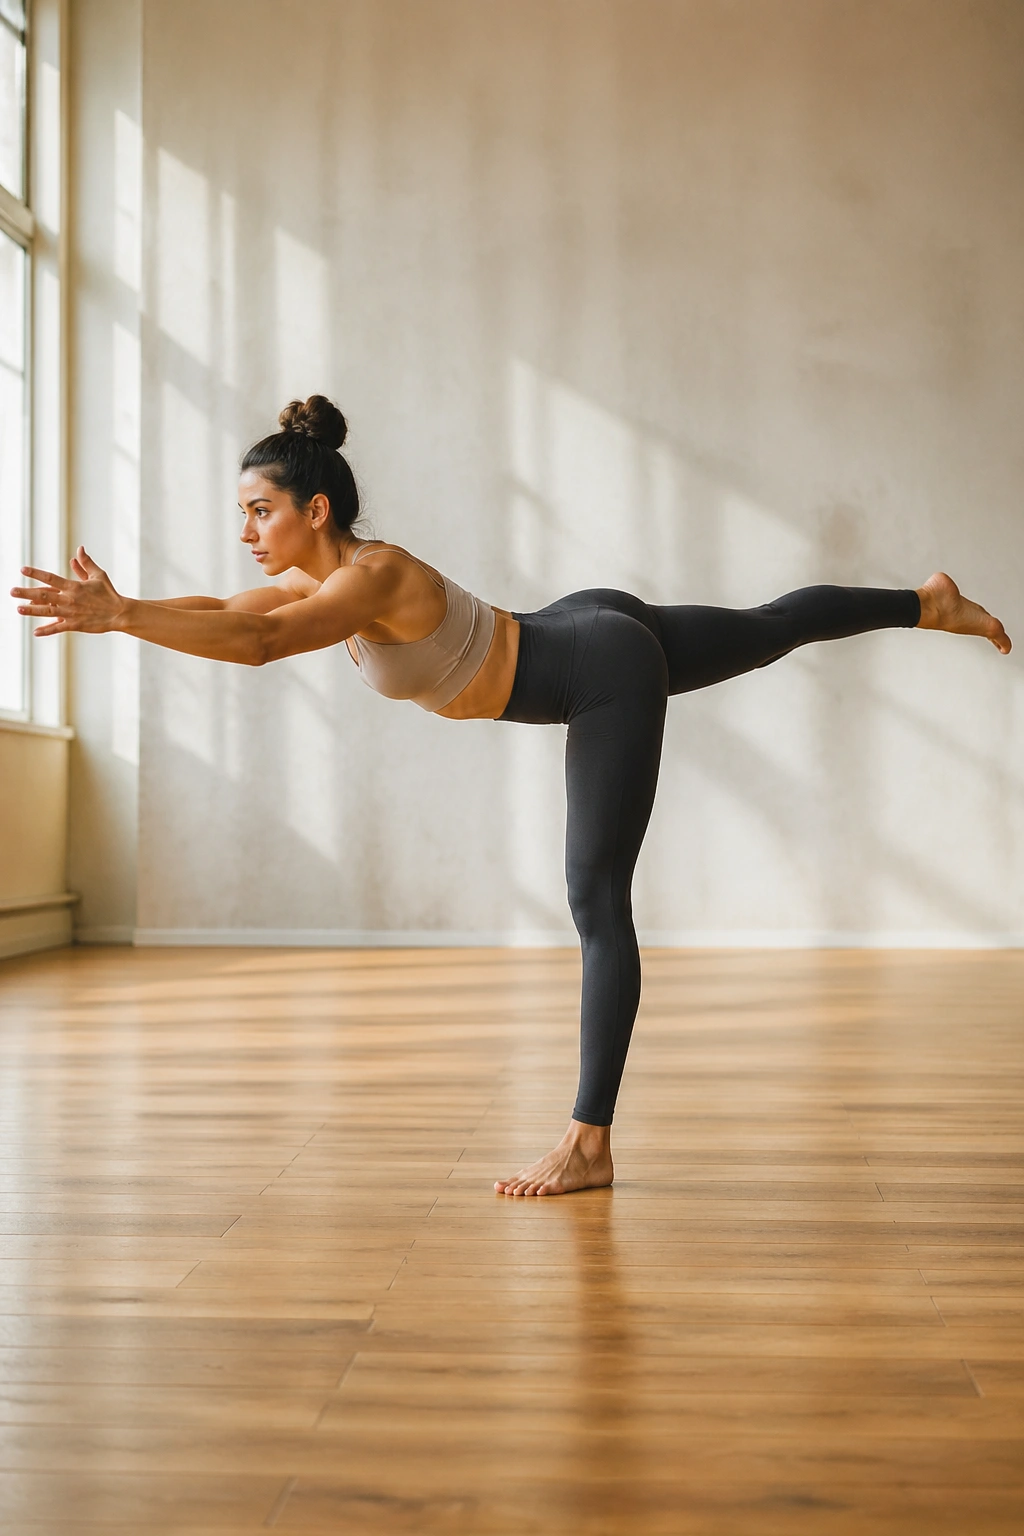
Warrior III is a balance pose, but the core is the part that saves you from face-planting.
Once you tip forward into the long line from fingertips to lifted heel, your belly has to keep the ribs and pelvis from drifting apart. That’s the real work. The standing leg helps, the glute helps, but the center holds the whole thing together.
Most people go too high with the lifted leg and lose the line. Lower the back leg a little, bend the standing knee slightly, and find a shape you can actually control. A strong Warrior III looks quiet. The torso doesn’t wag around. The hips stay nearly level. The breath stays usable.
Key Details
- Square the hips as much as your body allows.
- Reach through the back heel like someone is pulling it away.
- Keep both sides of the waist long.
- Use a wall with one hand if balance gets shaky.
That wall option is not cheating. It’s precision.
10. Forearm Side Plank
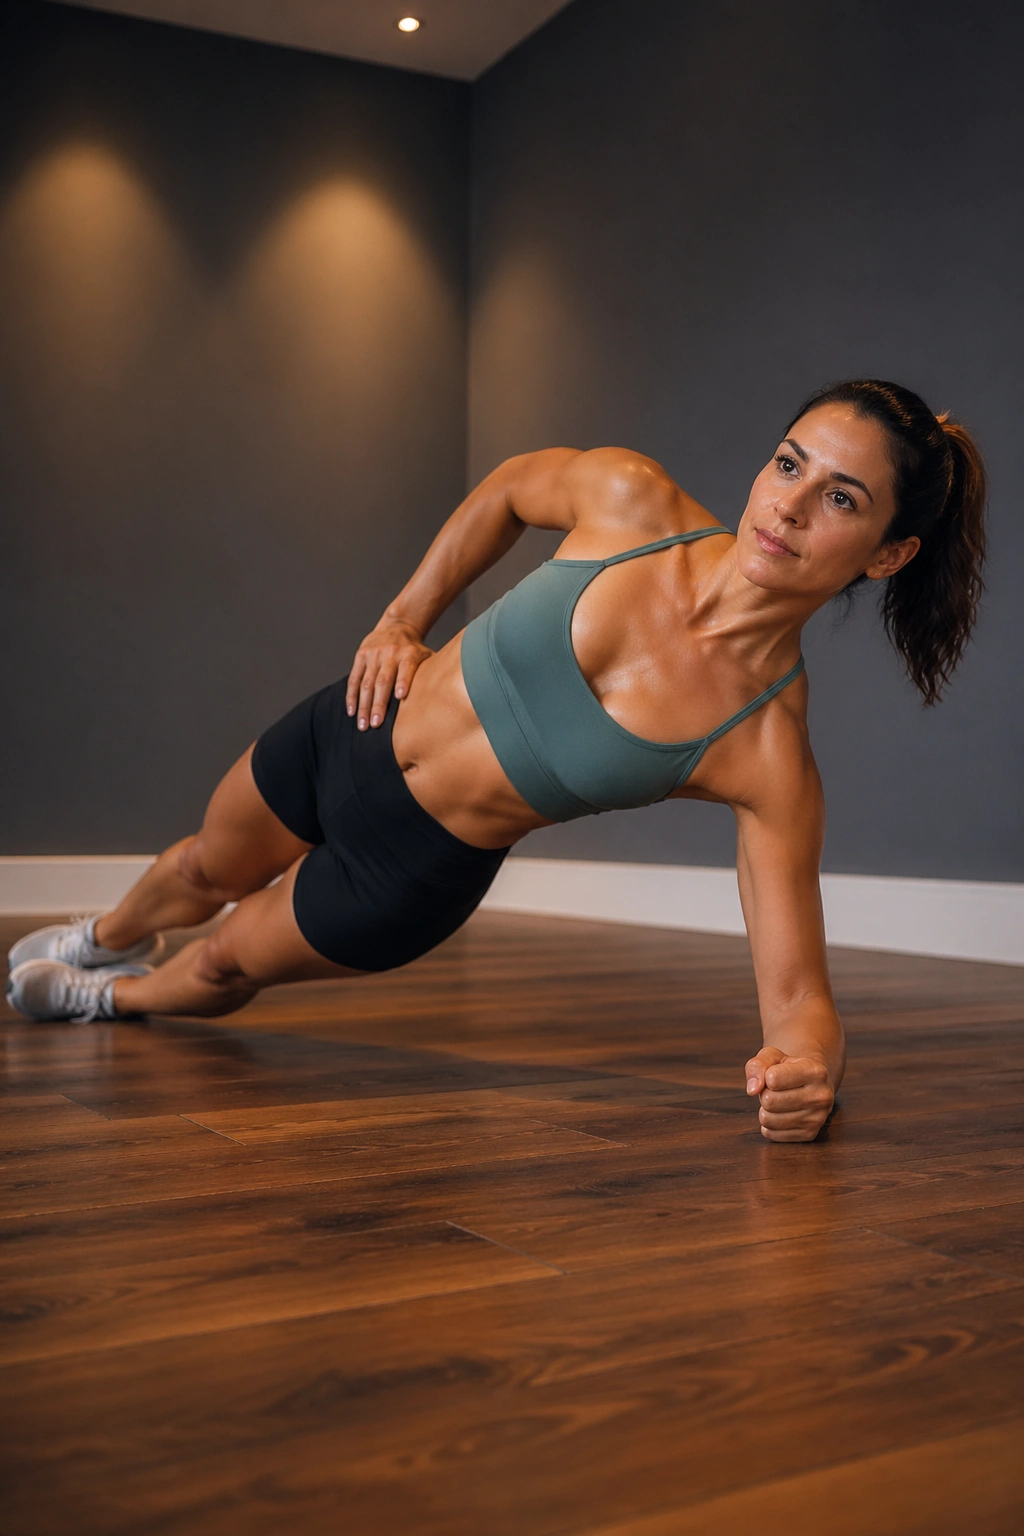
Forearm side plank is the version I reach for when the shoulder wants more support and the waist needs to work just as hard.
Compared with a straight-arm side plank, this one usually feels a little more grounded. The lower elbow sits under the shoulder, the side body lifts, and the obliques have to resist the whole torso dropping toward the floor. The body wants to curl. You don’t let it.
The setup matters. Elbow directly under shoulder. Forearm pressing into the mat. Bottom waist lifted away from the floor, not sagging into it. If the full version feels too spicy, drop the bottom knee and keep the top leg long. You still train the same side-body line.
This is a good choice if you want a clean core challenge without as much wrist load. It also teaches a lot about shoulder stability, which people often miss when they think “abs.” The body never works in one neat compartment. Annoying, maybe. Useful, absolutely.
11. Crescent Lunge
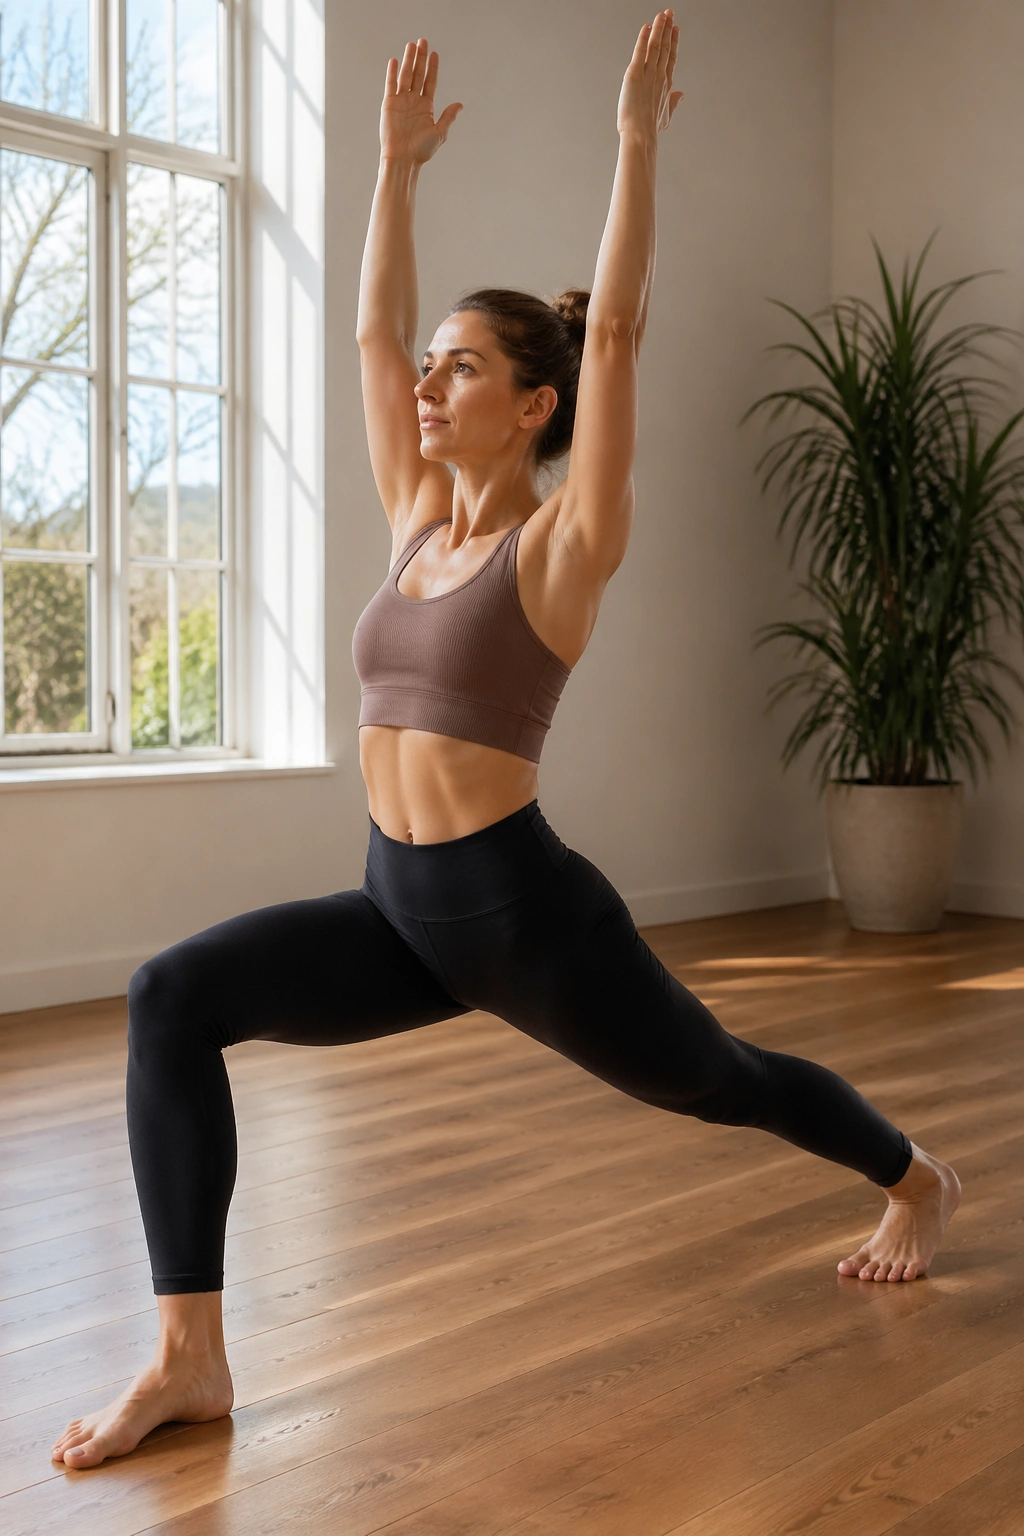
Need a standing core drill that still feels like yoga? Crescent lunge does that job nicely.
One leg stays forward, the back heel lifts, and the pelvis has to stay stable while your torso rises tall. If the ribs flare and the low back arches, the pose gets sloppy fast. If the spine stacks over the pelvis, the whole front body starts working in a deeper, more useful way.
A high crescent with arms overhead is the classic version. You can also bring the hands to prayer at the chest, which often makes the core work more obvious because the body can’t rely on the arms for balance. The front thigh burns, yes. But the midsection is what keeps the pose honest.
How to Scale It
Shorten your stance if the back leg shakes. That helps more than people think. You can also keep the back knee slightly bent while you build strength.
Two or three breaths on each side is enough to start. Then repeat. Clean repetitions beat one long wobble-fest.
12. Chair Pose
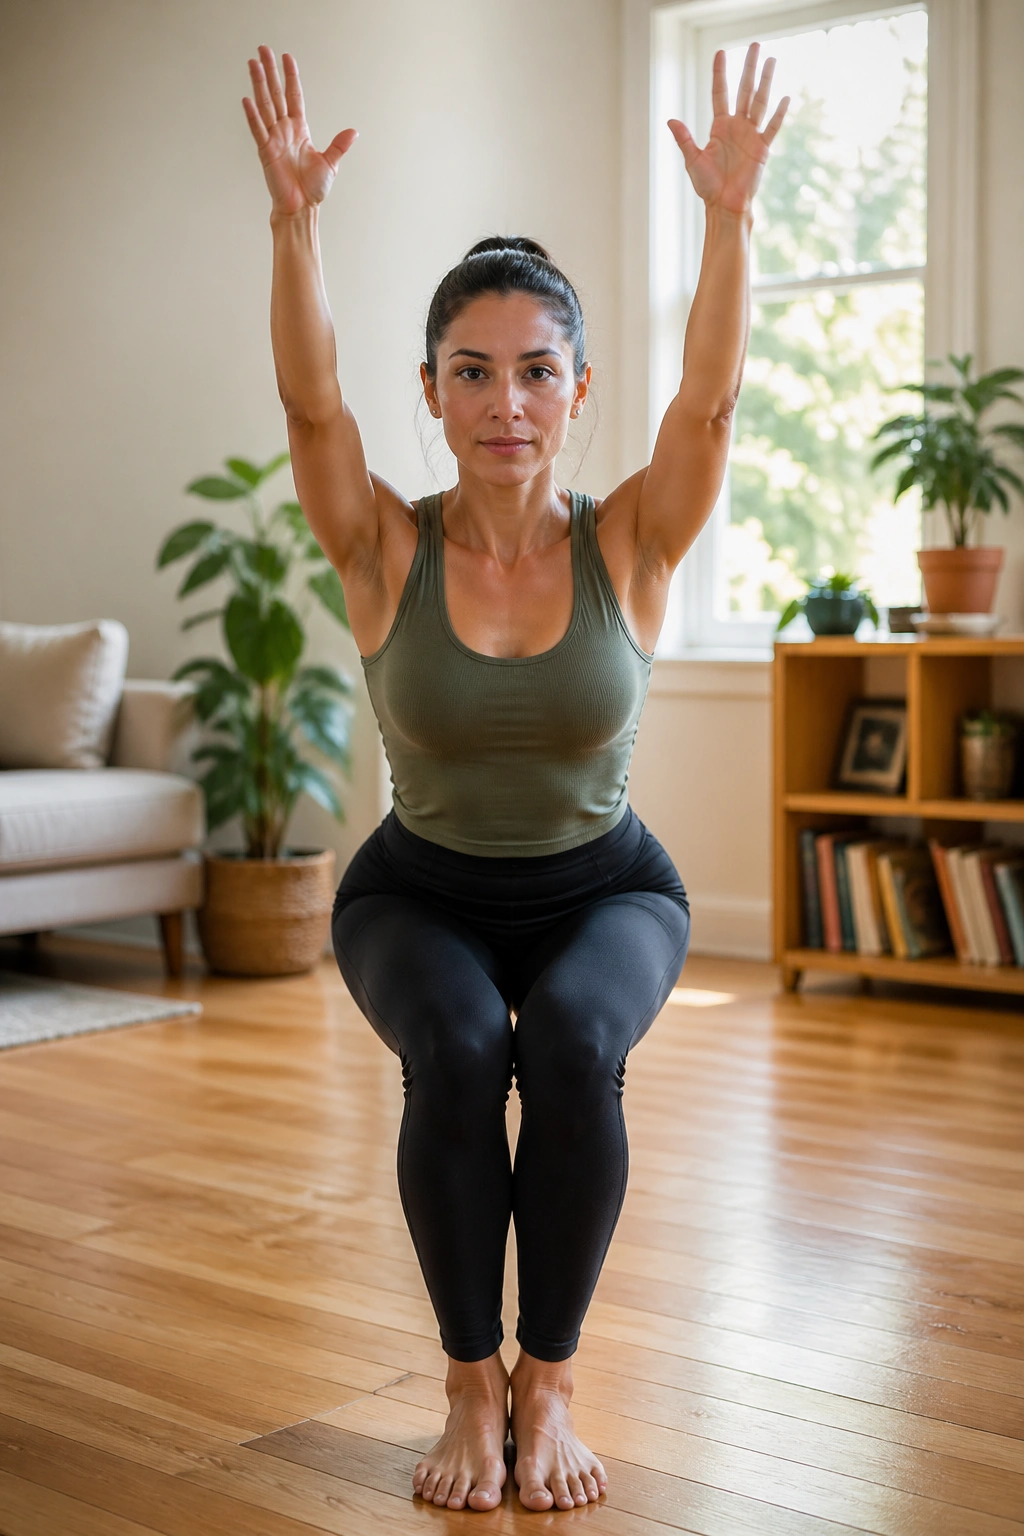
Chair pose is pure honest work.
The first few seconds feel like legs. After that, the midsection joins the conversation, especially if you keep the ribs stacked over the hips and the tailbone long. Sit back as if you’re closing a car door with your hips, then keep the chest lifted without puffing the ribs forward.
A lot of people lean too far into the toes. That’s not what you want. Keep the weight spread through the whole foot, with the heels heavy enough that you could wiggle the toes a little if needed. The core has to keep the torso from folding while the thighs do their part.
- Hold for 3 to 6 breaths.
- Keep knees tracking over the middle toes.
- Reach the arms forward or overhead, but don’t let the ribs pop.
- If the low back arches, lower the arms.
Your thighs will complain first. Fine. The abs are working quietly underneath that noise.
13. Half Moon Pose
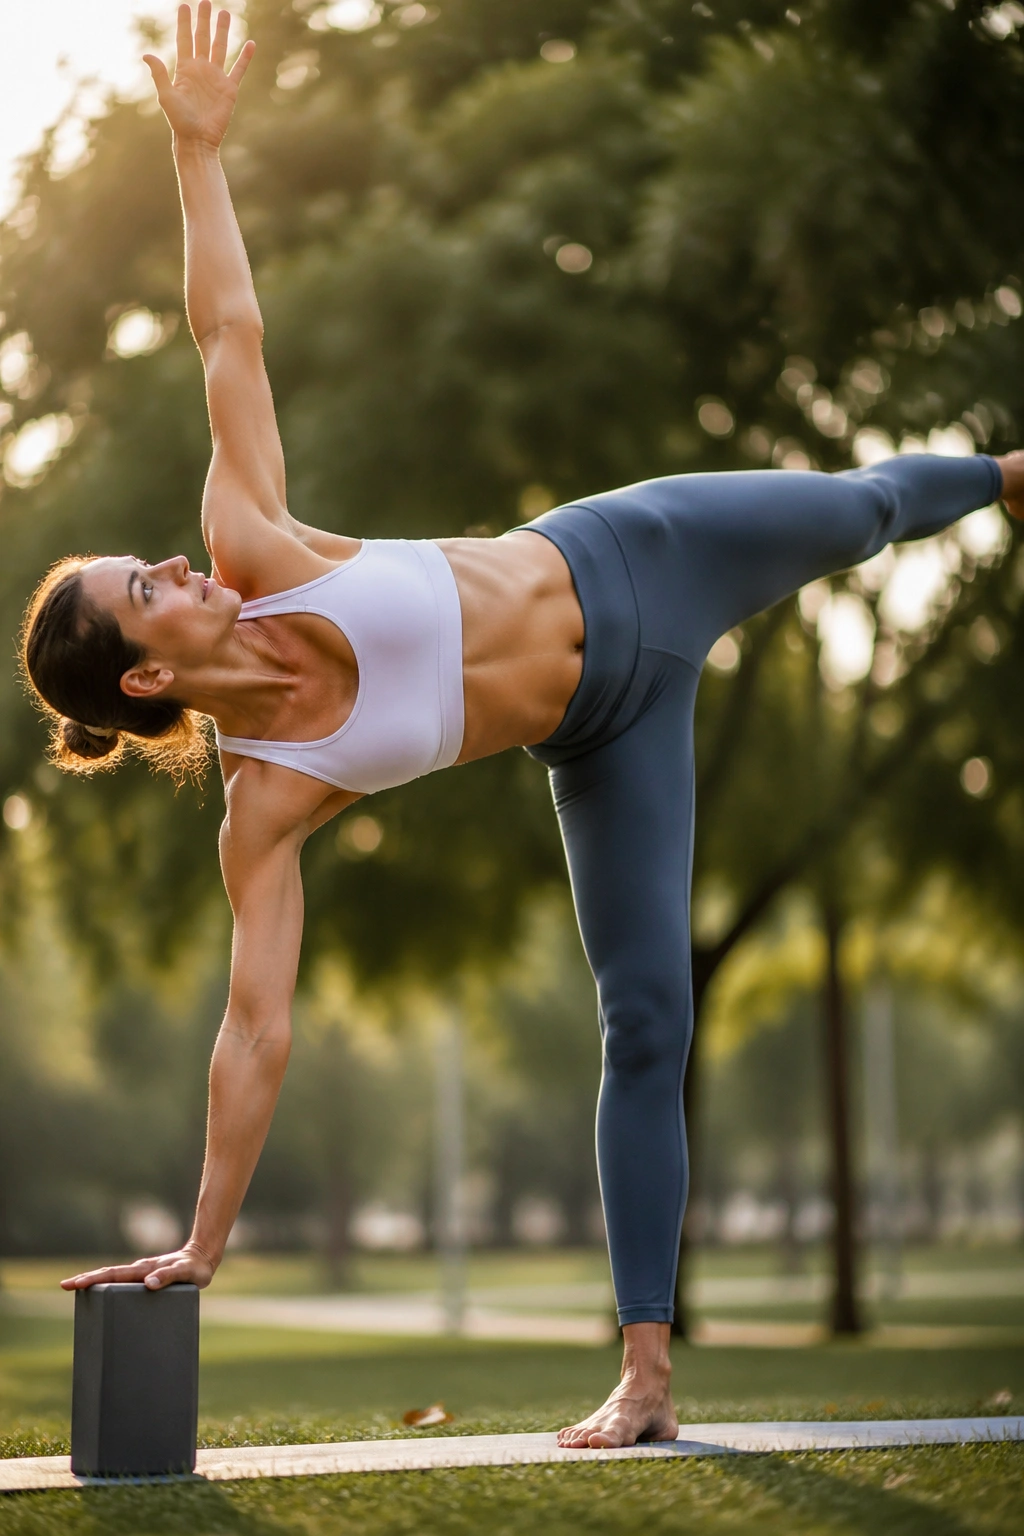
Half moon is one of the cleanest examples of core control in a standing balance.
You’re on one leg, the torso is open, the lifted leg reaches away, and the side body has to keep the whole shape from tipping over. That means the obliques, hip stabilizers, and deep belly muscles are doing constant correction work. Tiny corrections. The kind that add up.
A block under the lower hand makes a huge difference. It gives the chest room to open and keeps the standing leg from doing everything at once. If the balance still feels shaky, keep the lifted leg lower and think more about length than height. High is not the goal. Steady is.
What to Watch For
Don’t let the top hip roll open too early. And don’t lock the standing knee if the balance feels thin. A soft knee often makes the pose more usable, which is better than forcing a rigid shape that lasts two breaths.
Half moon is a reminder that definition is not only about crunching. It’s about control in weird positions.
14. Revolved Triangle Pose
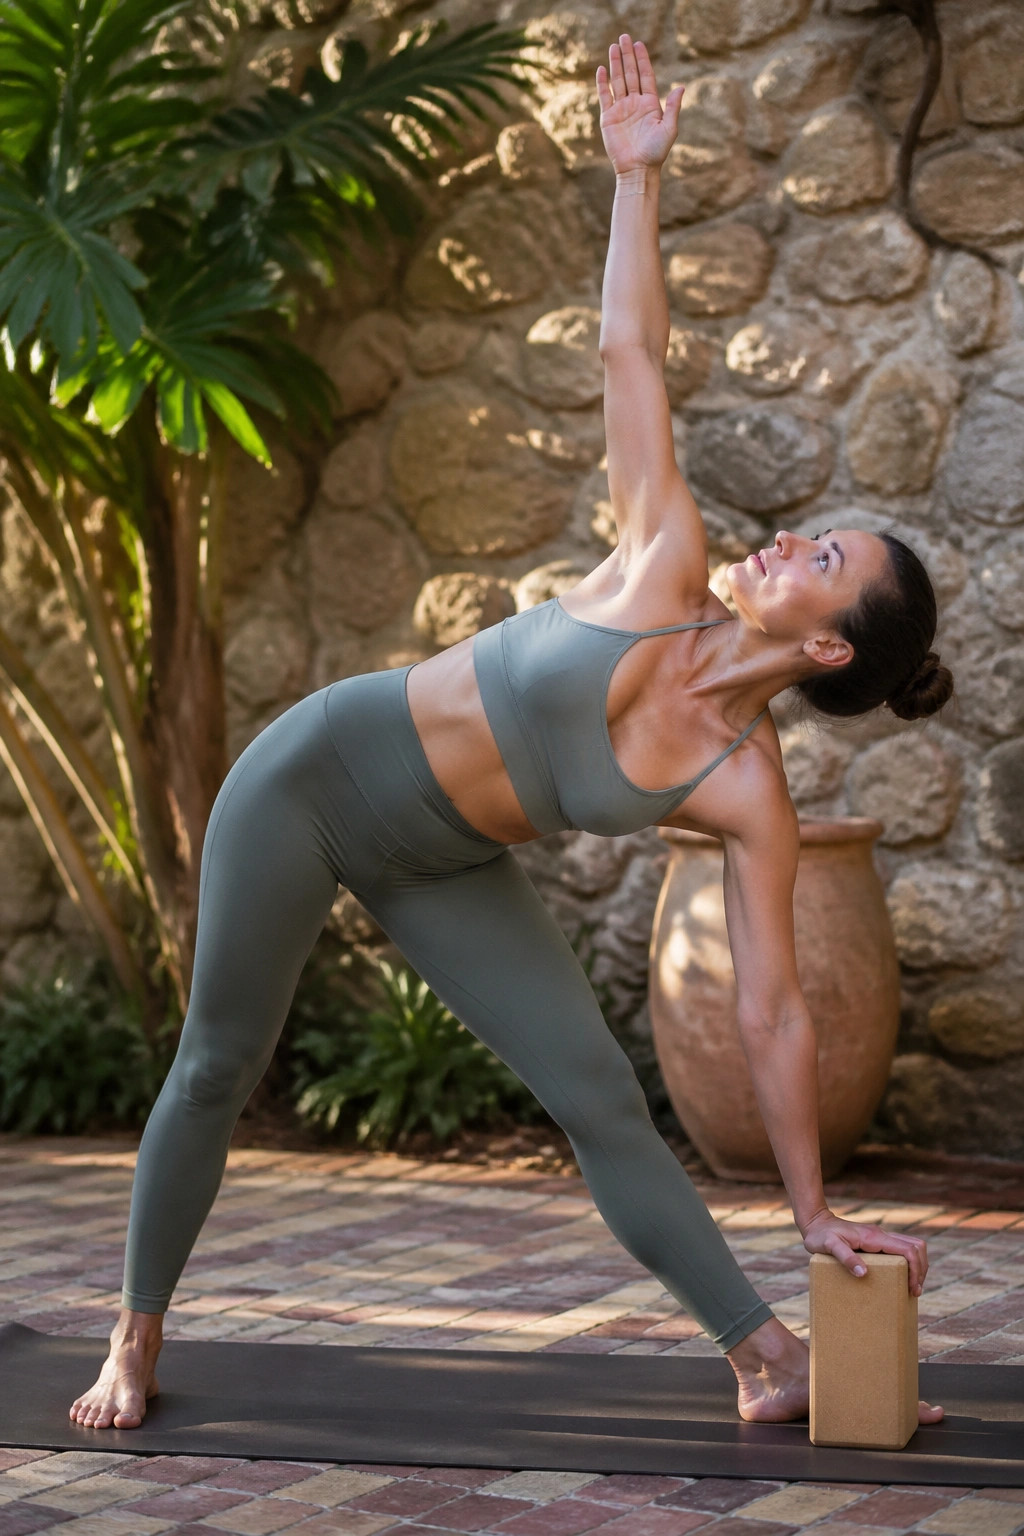
Revolved triangle is not a pose you fake.
The back leg lengthens, the front leg grounds, and the torso twists over a stable base. That twist has to happen with a long spine, not a collapsed one. If you round hard at the waist, the pose turns into a hinge with stress on the lower back. If you stay patient and use a block, the obliques and hamstrings do the work they’re supposed to do.
This is one of the best poses for teaching the core to stay organized under rotation. The body has to resist falling apart while it turns. That is a useful skill outside the mat, too—carrying groceries, reaching into a back seat, even just walking fast while turning your head.
Use a shorter stance if the hamstrings are tight. It’s not a failure. It gives you room to breathe and keeps the twist cleaner. A lot of people make revolved triangle harder than it needs to be by forcing the feet too far apart.
15. Standing Hand-to-Big-Toe Pose
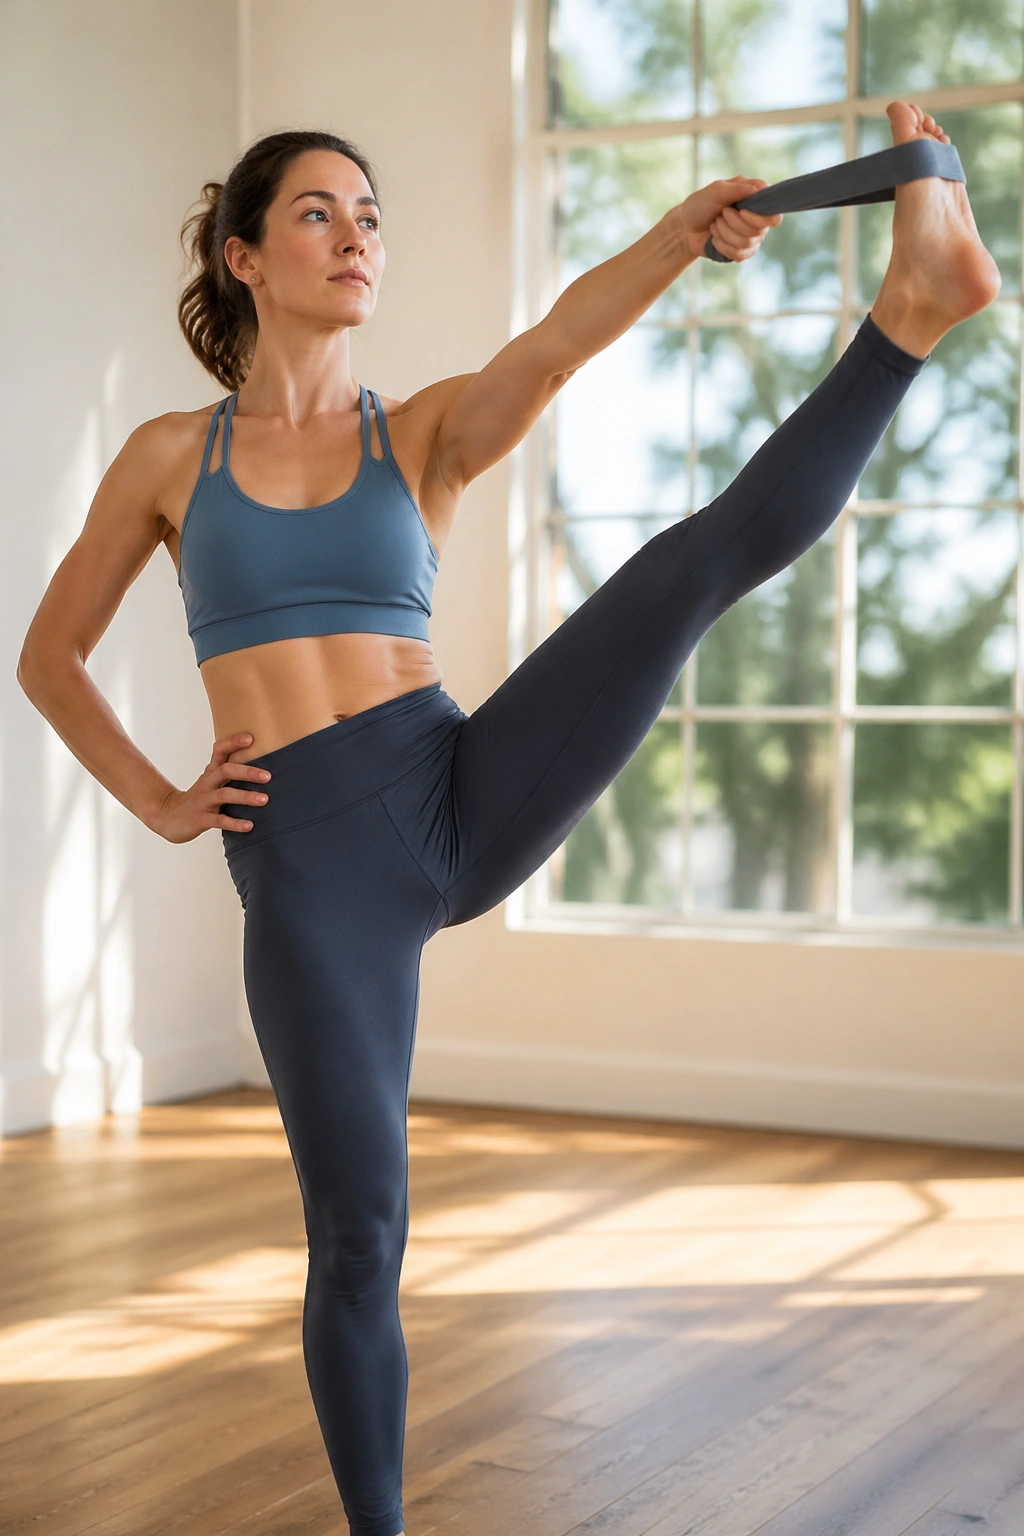
This pose has a funny name and a serious job.
Standing hand-to-big-toe pose asks your core to hold one leg out in space while the rest of you tries not to fold. That creates a strong line through the front body, especially when the lifted leg is working against your hand or a strap. It looks simple from across the room. It is not simple.
The standing side has to stay steady. The lifted hip wants to hike. The ribs want to flare. Your job is to keep the torso long and the pelvis square enough that the pose doesn’t turn into a wrestling match with gravity.
A strap around the lifted foot helps a lot if hamstrings are tight. So does bending the lifted knee. Both versions still train the core well because the challenge is holding the shape, not touching the toe for bragging rights.
This is one of my favorites for people who want more front-body control without going to the floor.
16. Dancer Pose
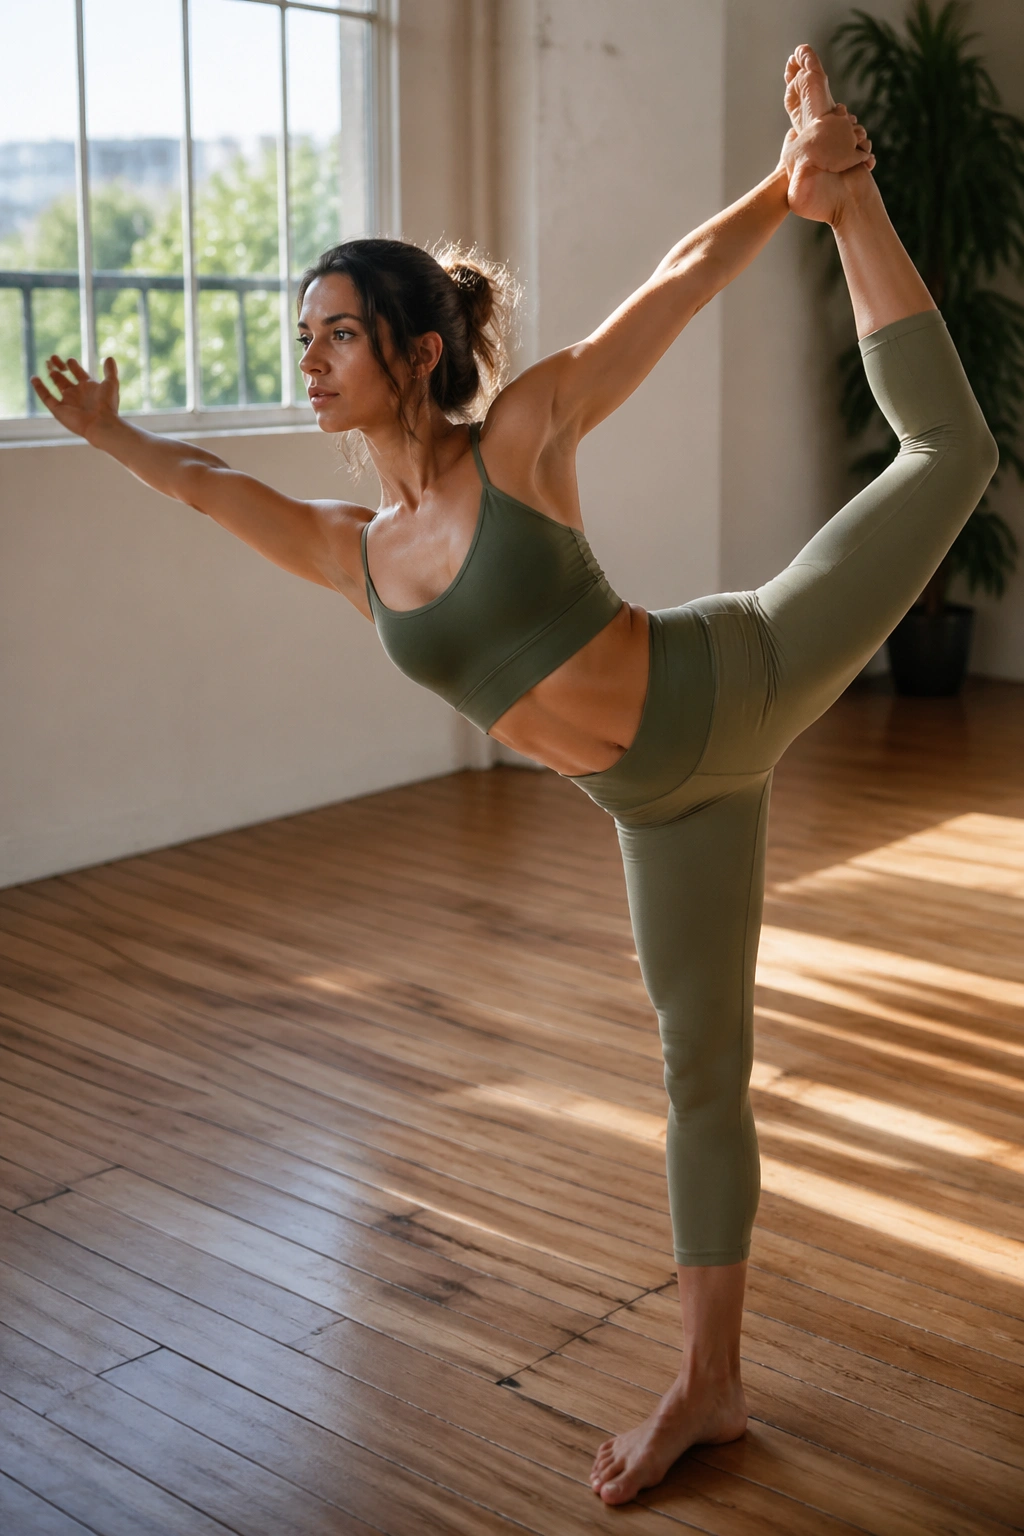
Dancer pose looks elegant. It is also a core drill with a balance problem.
The standing leg has to stabilize the whole body while the lifted leg reaches back, and the torso has to stay long instead of dumping into a low back bend. That’s where the core comes in. It keeps the ribs from flaring and the pelvis from pitching forward. Without that control, the pose turns into a pretty wobble.
Use a wall or strap if you need it. That is not a watered-down version; it’s how you keep the shape clean while your balance improves.
Quick Setup
- Ground through the standing foot.
- Reach back with the lifted hand and keep the chest open.
- Keep the front ribs from poking out.
- Hold 3 to 5 breaths before switching sides.
If you feel the pose mostly in your lower back, reduce the backbend and bring your focus back to the standing side. The core should feel engaged, not pinched.
17. Crow Pose
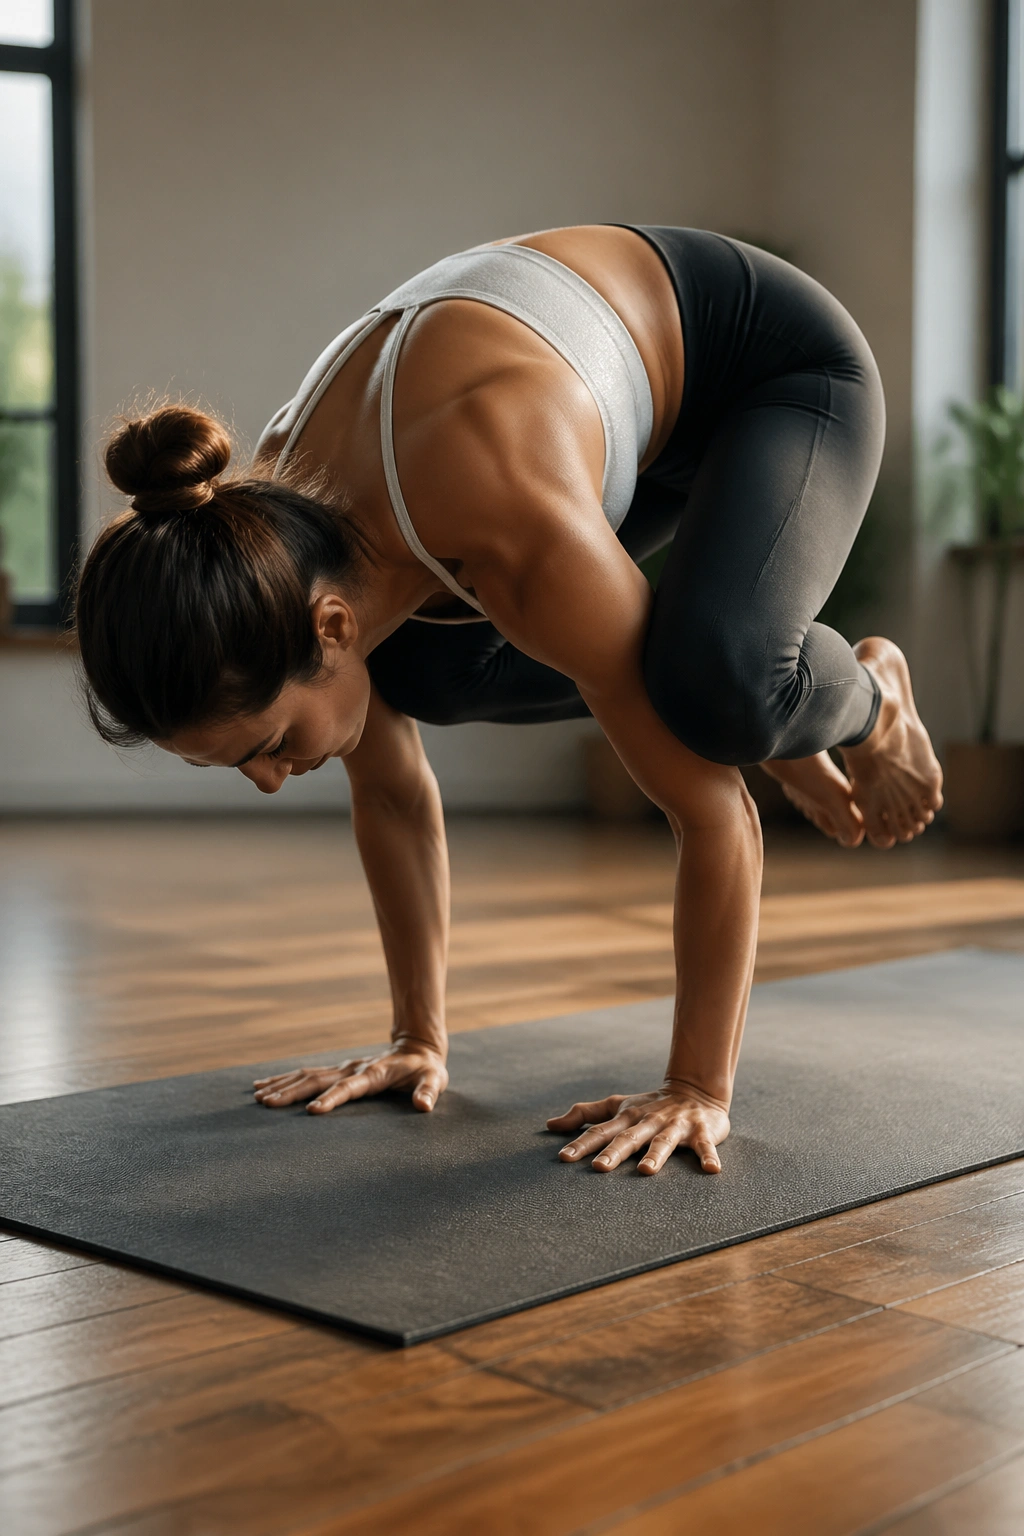
Crow is where many people first realize core strength and arm balance are the same conversation.
The knees rest high on the upper arms, the weight tips forward, and the belly has to help keep the body compact. If the center is loose, the feet stay glued to the mat. If the center is engaged, even a tiny shift of weight starts to feel possible.
Start with a block in front of you if that helps. Lean forward slowly, lift one foot, then the other. You do not need to fly right away. Crow rewards small, steady attempts better than dramatic lunges at the shape.
The biggest mistake is looking too far forward and forgetting the hands. Spread the fingers. Press the floor away. Keep the elbows from splaying. That little structure gives the core something stable to work against.
Crow can be frustrating. Good. That means it is teaching something real.
18. Side Crow Pose
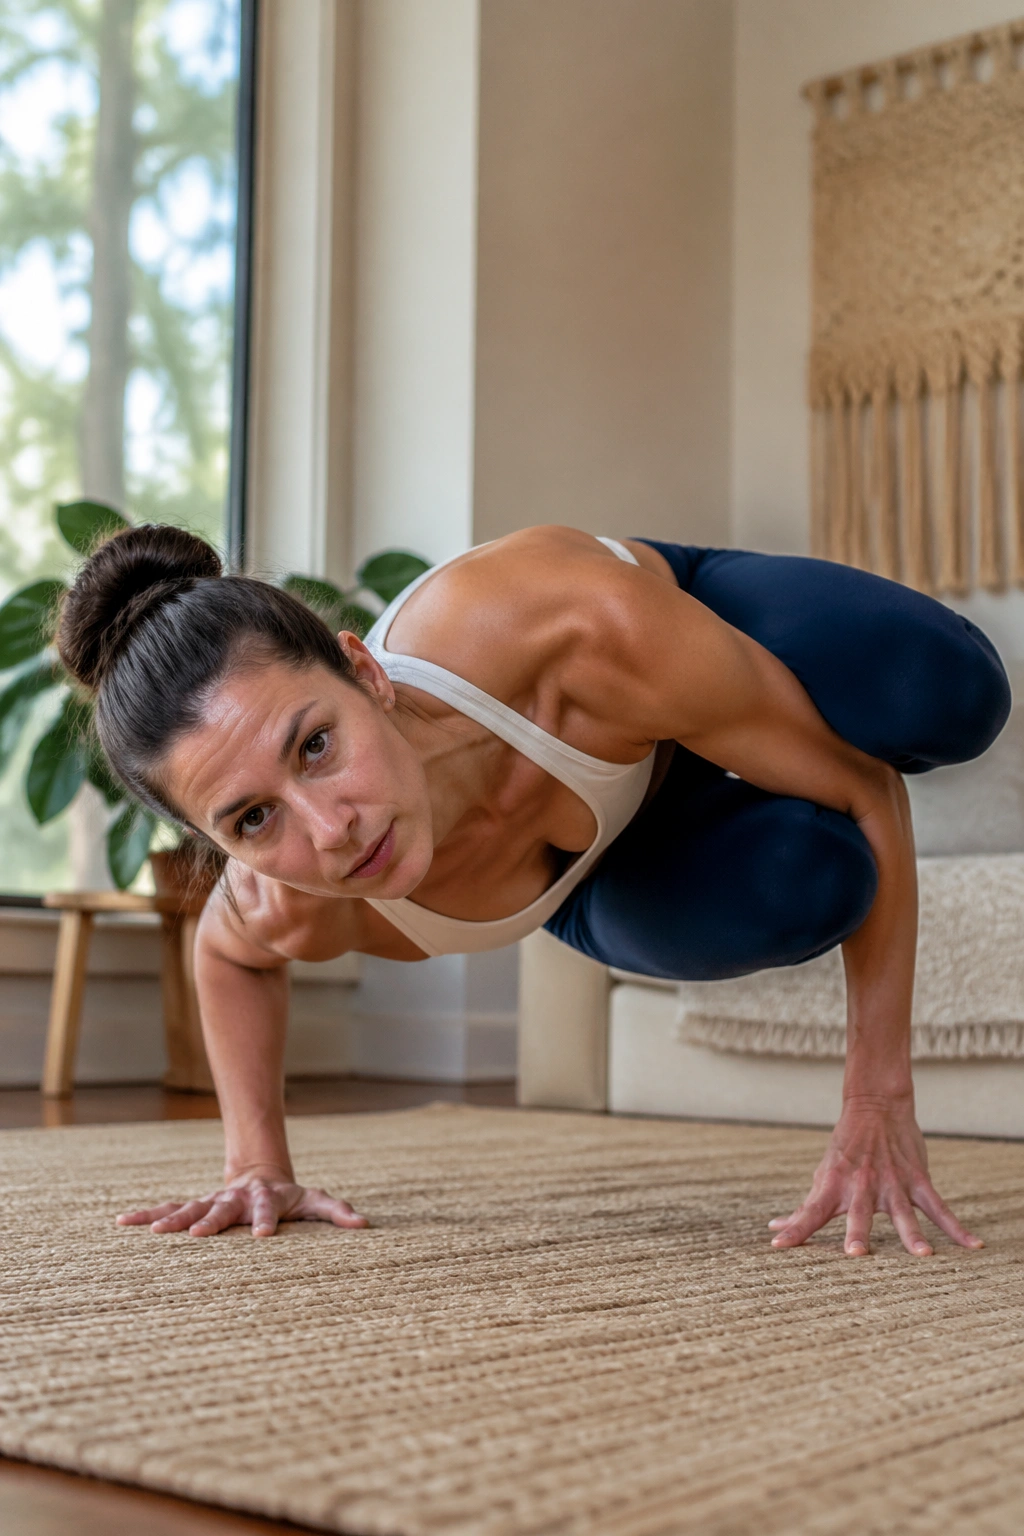
Side crow is crow with a twist, and the twist is the whole challenge.
One side of the waist compresses, the arms act like shelves, and the legs have to stay compact enough to keep the body from sliding off to the side. It’s a very specific kind of core work—part rotation, part compression, part trust in your hands.
How to Ease Into It
Start from a low squat or a twisted chair. Plant the hands firmly, then place the knees on one upper arm as the torso rotates. Keep the gaze a little forward, not down into the floor. That helps with balance.
- Keep the legs tucked close.
- Press the floor away through both hands.
- Hold for a breath or two at first.
- Use a folded blanket under the head if fear of face-planting makes you tense up.
That last part matters. Fear makes the body stiff, and stiffness makes arm balances harder. Side crow rewards a calmer setup than most people expect.
19. Eight-Angle Pose
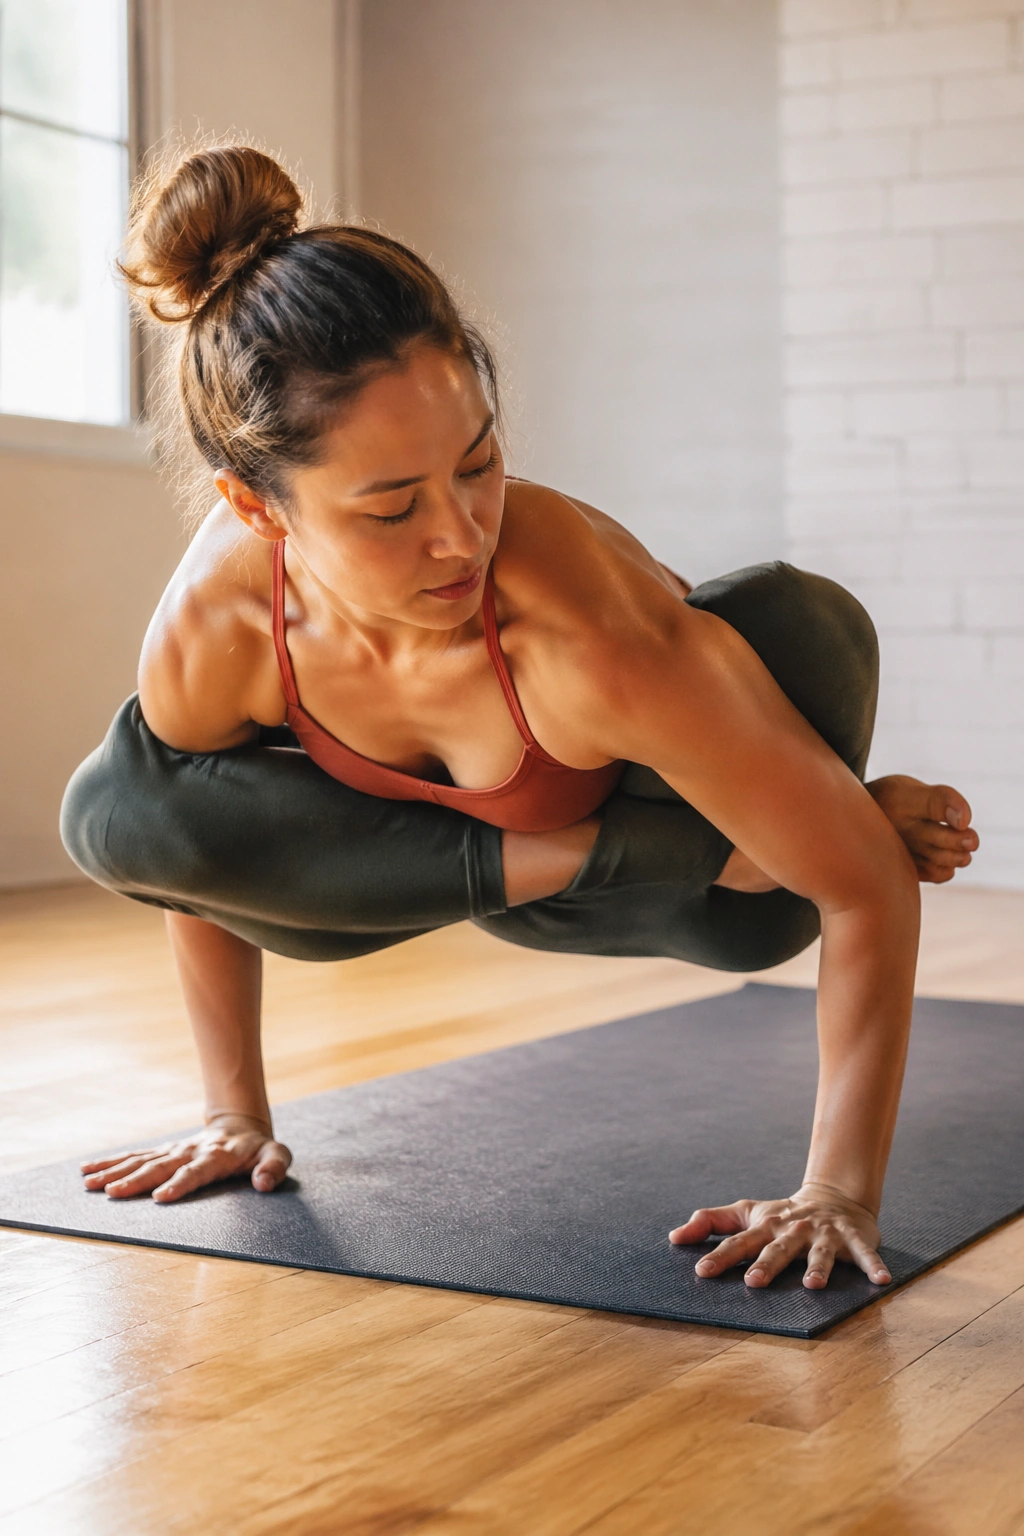
Eight-angle pose is not a beginner pose, and it does not pretend to be.
The body has to twist, compress, and lift all at once while the legs lock around the upper arm and the arms stay strong. The core is in the middle of all of that, controlling rotation and keeping the torso from collapsing forward. It’s a lot. That’s why people either love it or avoid it for years.
If crow feels steady and side crow is starting to make sense, eight-angle is the next hard conversation. The pose asks for strong obliques, flexible hips, and a willingness to be very patient with the setup. Rushing it usually ends in a heap on the mat.
Use the floor to your advantage. Sit low, get the twist first, and only then think about lifting. The lift comes from the body being organized, not from trying to muscle it up at the last second.
This is one of those shapes that teaches restraint. That alone is worth the time.
20. Locust Pose
Locust doesn’t get enough credit in core conversations.
People hear “core” and think only about the front of the body. Locust reminds you that the back side matters too. Lying face down, you lift the chest, legs, or both, and the belly has to stay lightly engaged so the lower back doesn’t pinch. That makes the whole torso work as a unit instead of a loose hinge.
Start small. Lift the chest a few inches, keep the gaze down, and reach the legs long behind you. If the neck cranes or the shoulders jam up toward the ears, reduce the height. More lift is not more work if the shape gets ugly.
Hold for 3 to 5 breaths, lower with control, and repeat. You’ll feel the back body wake up fast, which is useful if your practice has leaned too hard on flexion and crunch-like shapes. Strong abs are nice. A balanced trunk is better.
A few poses can do more for your core than a hundred quick reps if you practice them with care. Pick the ones that challenge your weak link, not only the ones that make you sweat the fastest.
The useful mix usually looks like this: one plank, one side-body pose, one balance pose, and one twist or arm balance. Keep the form clean. Keep the breath steady. The definition comes later, but the strength shows up first.
