



Two person yoga poses for beginners work best when they look almost too simple. A lot of people picture acrobatics when they hear partner yoga, then back away when the shape starts to feel like a circus warm-up. The smarter move is to begin with poses that use the other person as a steadying point, a breathing cue, or a gentle wall for your balance. That usually feels calmer, safer, and far more useful than chasing a big shape too early.
A good partner pose gives you feedback you cannot get alone. Your ribs can feel the other person’s breath. Your hands have something real to press into. Your standing foot gets instant honesty when it starts drifting toward the outer edge. That kind of feedback makes beginner partner yoga less about performance and more about finding a shape you can repeat without wobbling.
That is the whole point.
The best beginner poses are often the ones that barely look like yoga on a screen, which is exactly why they work. Seated holds, mirrored stretches, and supported balances let you learn how much pressure feels helpful and how much turns into a tug. If a pose asks for a neck twist, a deep backbend, and perfect timing all at once, skip it for now. Your body will thank you for the boring option.
Start slow, talk while you move, and keep the breath steady. A three-breath hold done cleanly beats a thirty-second wobble every time. The first pose below is the easiest place to begin, and it sets the tone for everything that follows.
1. Seated Back-to-Back Breathing
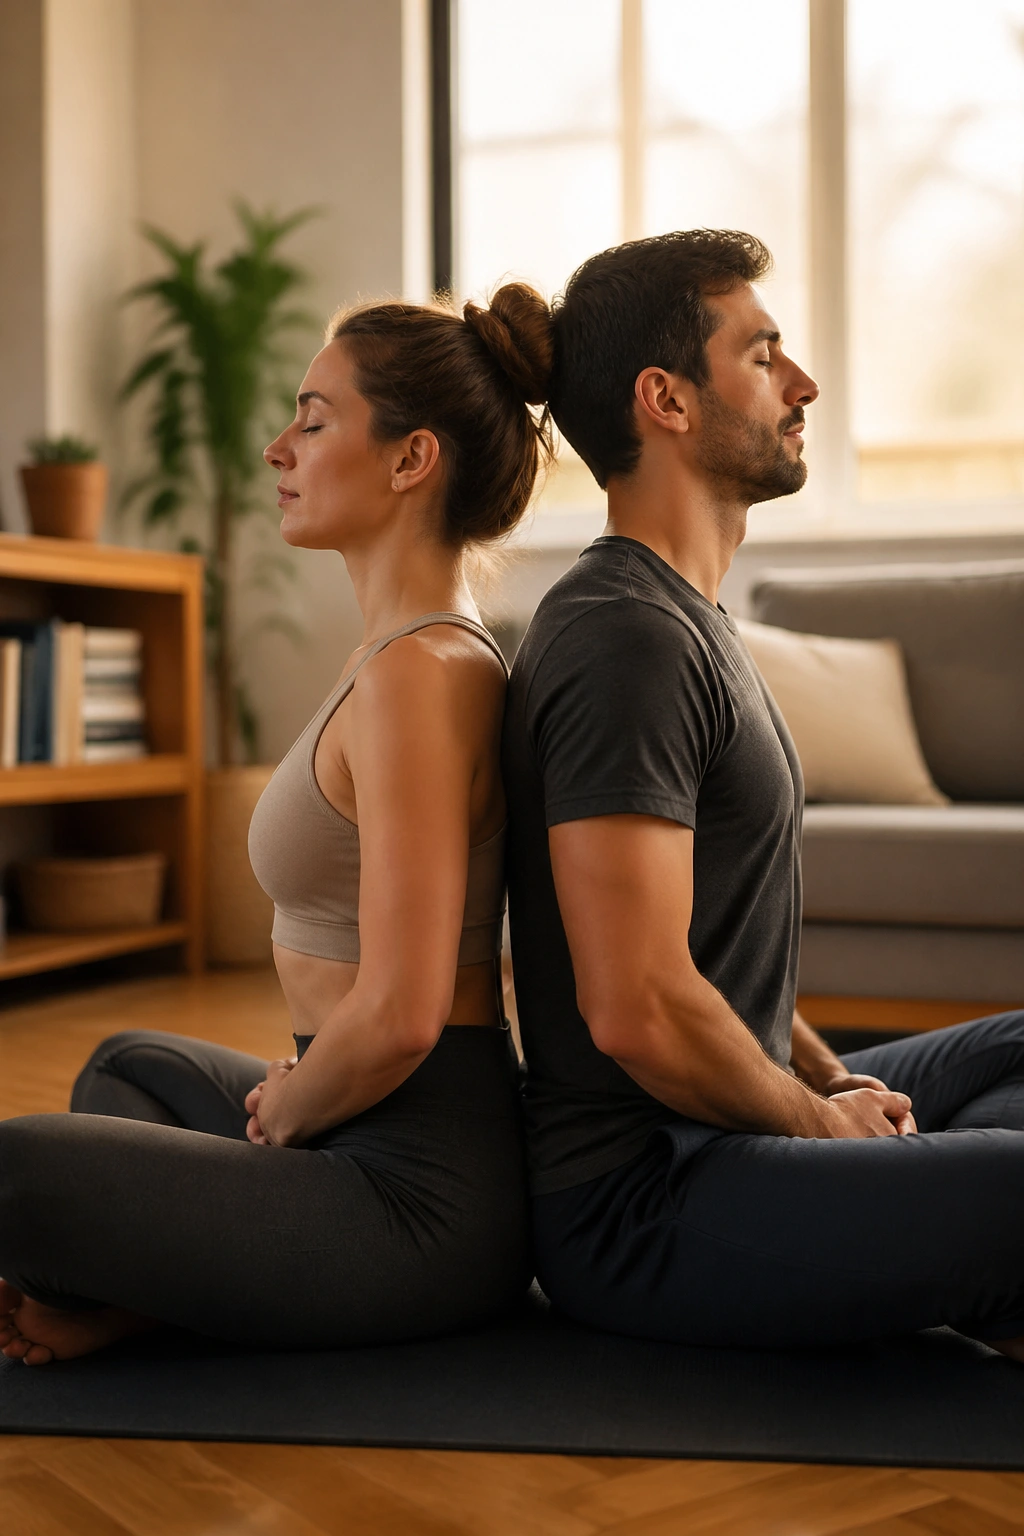
This is the easiest partner yoga shape to get right, and I mean that in the best way. Sit on the floor with your backs touching, either cross-legged or with your legs stretched long if your hips hate sitting cross-legged. The whole job is to match the rise and fall of your breath while your spines rest against each other for support.
You do not need to press hard. In fact, too much pressure makes the pose feel stiff. Let your back contact be light enough that you can still inhale into your ribs. If one of you has a tighter lower back, sit on a folded blanket so the pelvis tips forward a little and the spine grows tall without strain.
Tiny adjustments that matter
- Sit on a folded towel or blanket if your knees lift higher than your hips.
- Keep your chin level so the neck stays long.
- Try 4 counts in and 6 counts out for 5 to 8 rounds.
- If your breath speeds up, slow the exhale first.
- Let the shoulder blades soften down, not pinch together.
A one-sentence cue helps here: breathe like you are fogging a mirror, but with your mouth closed. That slower exhale does more than calm the nervous system; it also keeps the back contact smooth instead of jerky. Once you feel the rhythm settle, this becomes the pose that makes everything else easier to trust.
2. Palm-to-Palm Mountain Pose
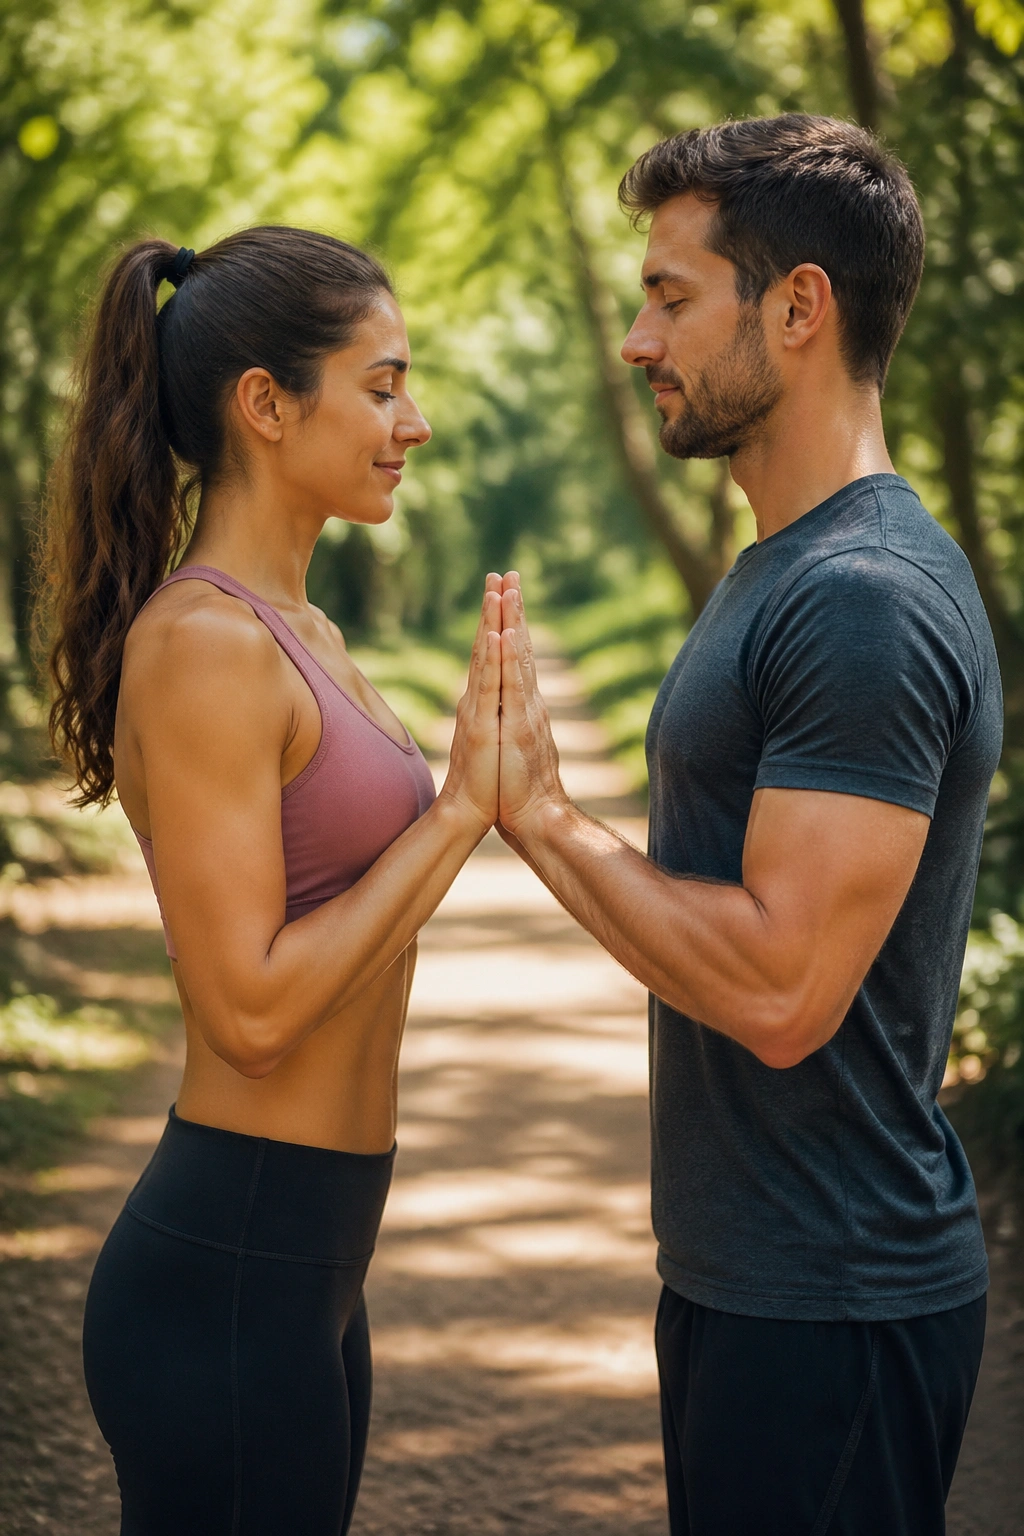
What does a standing partner pose look like when you strip away the fancy stuff? This is it. Stand facing each other with your feet hip-width apart, then press your palms together at chest height like a very calm high-five. You can stay there, or raise the hands overhead if both of you feel steady.
The useful part is the shared pressure. A light palm press gives your shoulders something to organize around without forcing them up toward your ears. Keep a tiny bend in the elbows, soften the knees, and let the weight spread evenly across the balls and heels of both feet. If one person tends to lock the knees, this pose makes that habit obvious fast.
What to watch
- Wrists should stay straight, not bent back.
- Ribs should stack over the pelvis.
- Eyes can stay soft or look at a fixed point between you.
- If overhead pressing feels shaky, keep the hands at the chest.
- Step the feet slightly wider if either of you sways.
There is a reason this looks plain. It teaches the body to stay upright without bracing. And that matters more than it sounds. A beginner who can stand tall, breathe, and keep a small hand connection is already learning the bones of partner yoga.
3. Partner Forward Fold With a Gentle Counterpull
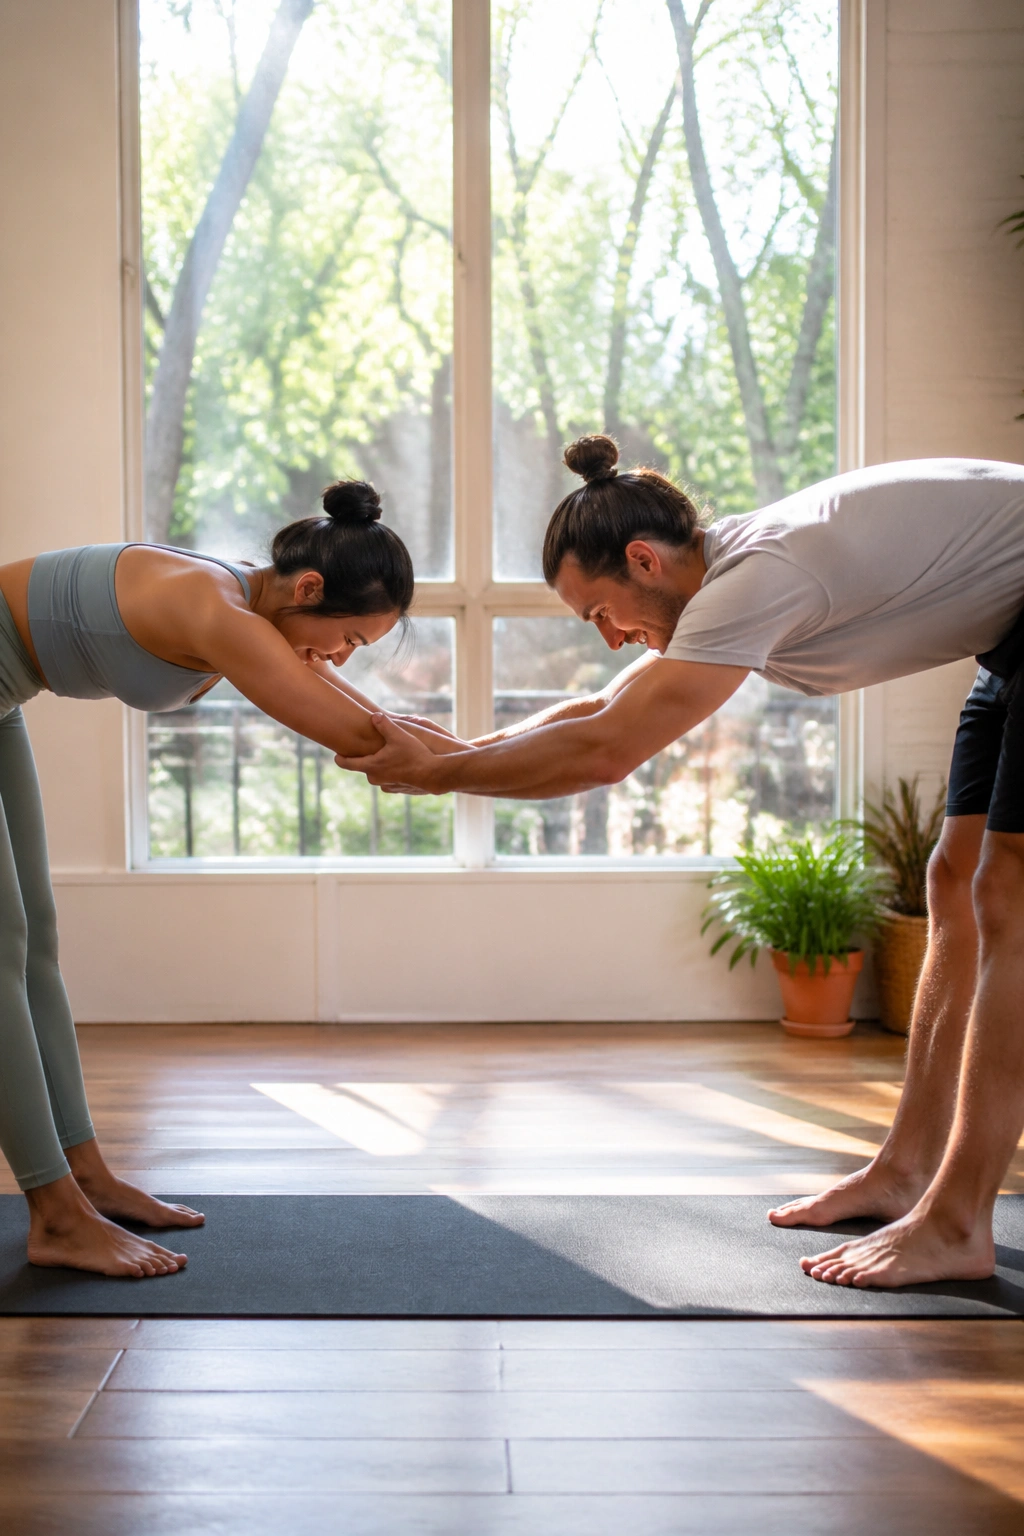
A good forward fold should feel like a release, not a tug-of-war. Stand facing each other, hold forearms or hands, and step back just enough to make a small, steady line of tension between you. From there, hinge at the hips and let the torso fold forward while the knees stay soft.
The important part is the word gentle. This is not arm wrestling with a stretch attached. One person leans back a little to create traction, and the other lets the hips tip forward while the spine lengthens. If the hamstrings feel like piano wires, bend the knees more. A deep bend with a calm back is better than a straight-leg fold that turns into a grimace.
Do this for 3 to 5 breaths, then come up slowly with bent knees and a rounded spine last. That slow return is not fussy; it keeps the head from spinning and gives the lower back a break. If you’ve ever stood up too fast from a fold and felt a little woozy, you already know why this matters.
No yanking. Just space.
4. Standing Side Stretch Facing Each Other
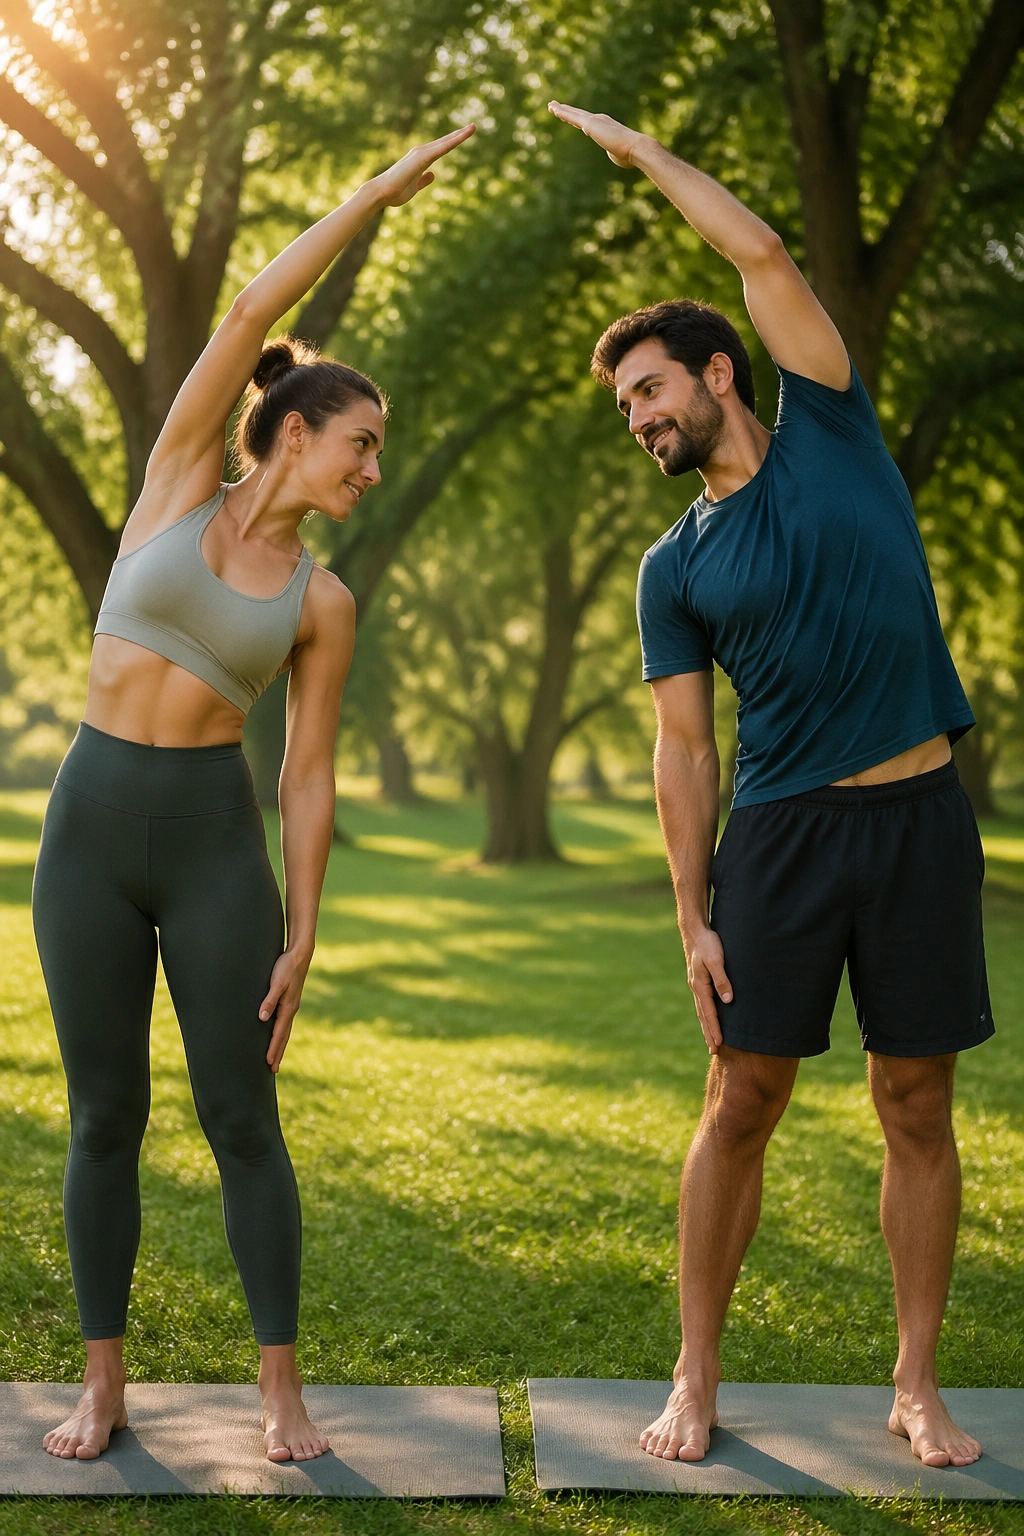
Why does a side bend feel better when someone else mirrors it? Because your body gets a clearer line to follow. Stand facing each other, feet about hip-width apart, and reach one arm overhead while the other hand rests lightly at the hip or thigh. Mirror the same shape at the same time, almost like a quiet dance pose.
The stretch should run along the side of the body, not dump into the lower back. Keep the hips level and think about lifting out of the waist before tipping over. A lot of beginners bend from the wrong place and feel the pinch down near the lumbar spine. If you feel the stretch low in the back, come up a little and lengthen first.
How to set it up
- Choose the same side for both people so the shape stays mirrored.
- Keep the front of the ribs from rolling forward.
- Let the bottom hand slide down the leg only as far as the breath stays smooth.
- Hold for 3 slow breaths on each side.
- If balance feels off, stagger the feet slightly.
The nice part about this pose is how fast it teaches control. You can feel when one side gets longer than the other, and that little correction changes the whole line. It is simple, but not sloppy. That is a good combination.
5. Partner Tree Pose With Hand Support
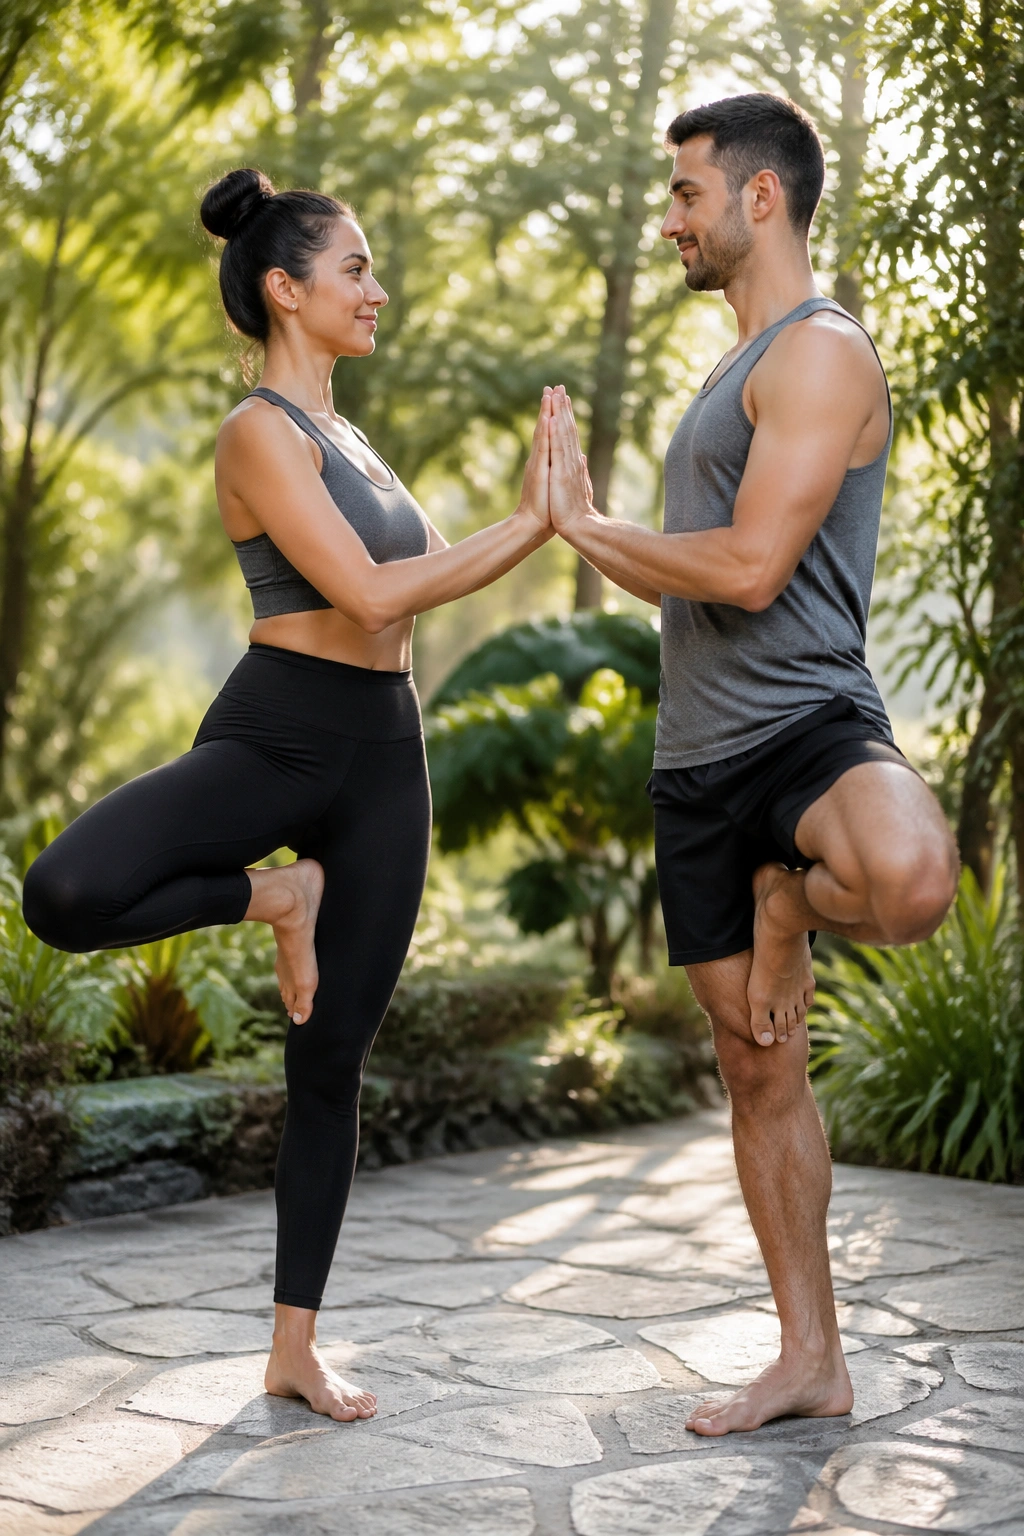
One person starts to wobble, the other gives a steady point, and suddenly tree pose stops feeling like a test. Stand side by side or face each other, shift weight onto one foot, and place the other foot against the inner calf or ankle, never on the knee. Then take one hand connection — palm to palm or forearm to forearm — and use that contact to stay calm while the lifted leg finds its home.
A lot of people overdo tree pose because they think balance means stillness. It does not. Tiny ankle adjustments are part of the pose, and the partner connection gives those adjustments a little room to happen. Keep the standing foot spread wide through the floor, and let the lifted foot press lightly rather than cram itself into the leg.
Where the support should be
- Use a hand connection at chest height first.
- Move to fingertips only if the balance feels easy.
- Keep the lifted foot below the knee.
- Gaze at one fixed point instead of looking around the room.
- Lower the foot if the hip hikes up.
This is a good place to discover that balance is partly about permission. If you hold your breath, the pose gets shaky. If you breathe and keep the grip light, it settles. That lesson carries into every other standing partner shape.
6. Back-to-Back Chair Pose
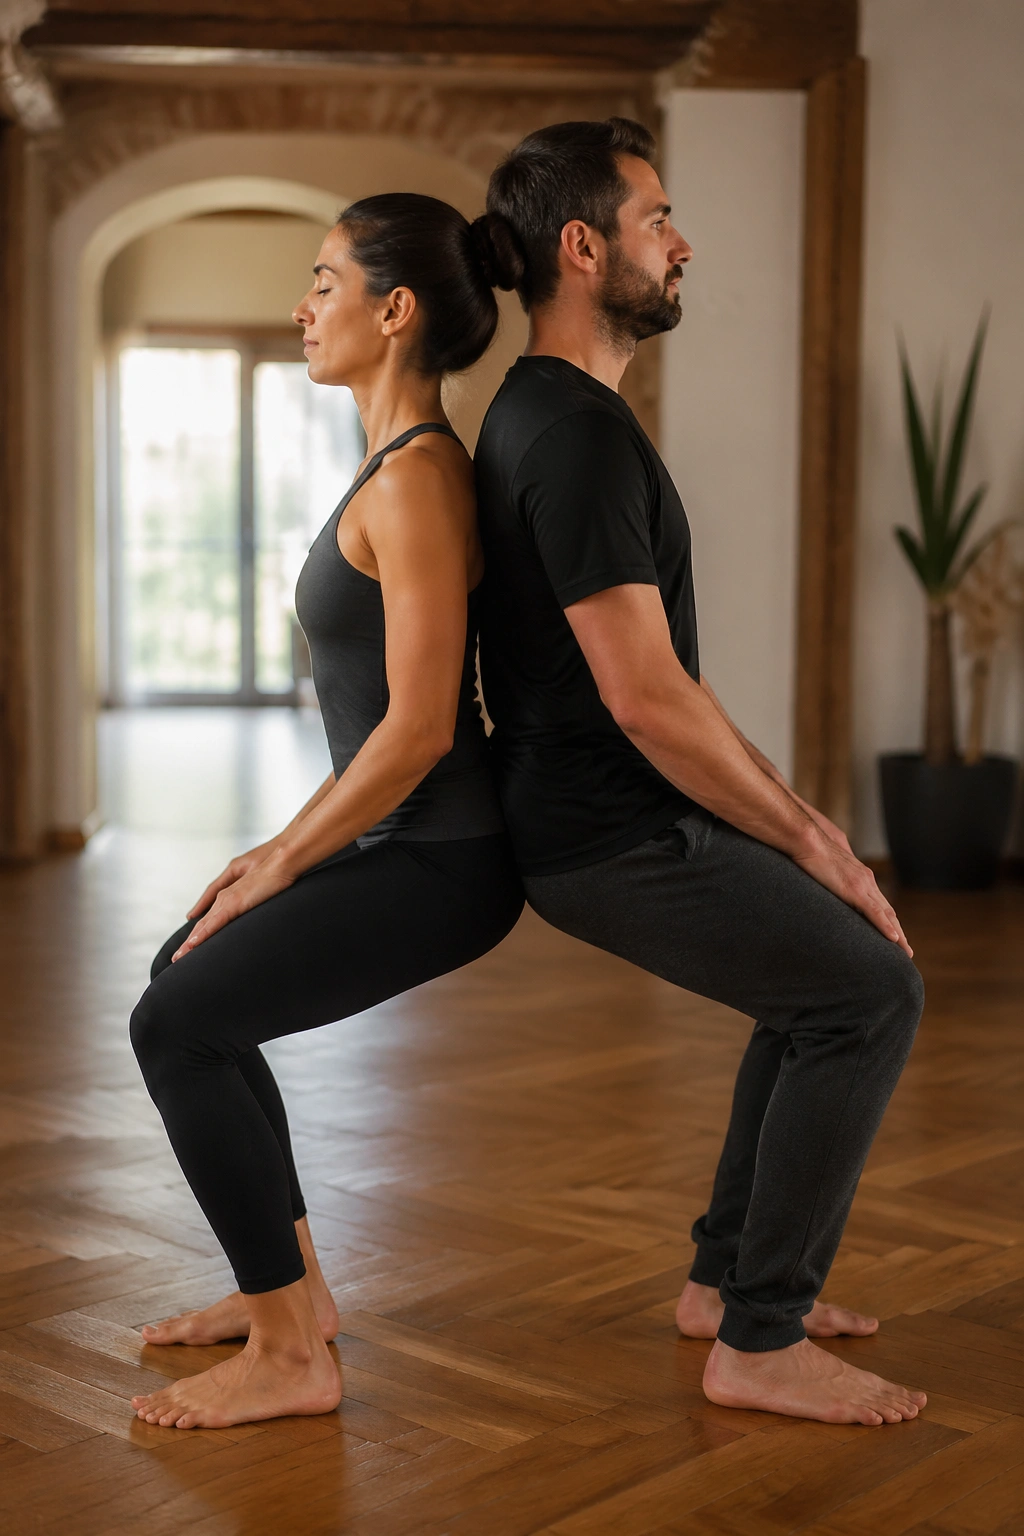
Compared with solo chair pose, this version gives you a built-in brake. Stand back-to-back, walk your feet forward a little, and slide down together until both sets of knees bend and the backs stay connected. You are aiming for a shallow squat at first, not a dramatic sit-back that burns the quads for sport.
The back contact keeps the chest from collapsing and gives both people a reference point for how low to go. If the backs separate, you are probably sitting too far down. Bring the hips up a bit, rebuild the connection, then lower only as far as you can keep breathing through the nose. Fifteen to 20 seconds is plenty when you’re starting out.
This is the best beginner leg burn because it feels honest. You know exactly where the effort is coming from. And if the knees drift inward, you feel it right away through the back line, which makes the correction easier than it is in a solo chair against a wall.
Who is this for? Anyone who wants a strengthening pose without the drama of balance. Put a wall behind one person if you want extra security the first time. No shame in that.
7. Seated Spinal Twist Back-to-Back
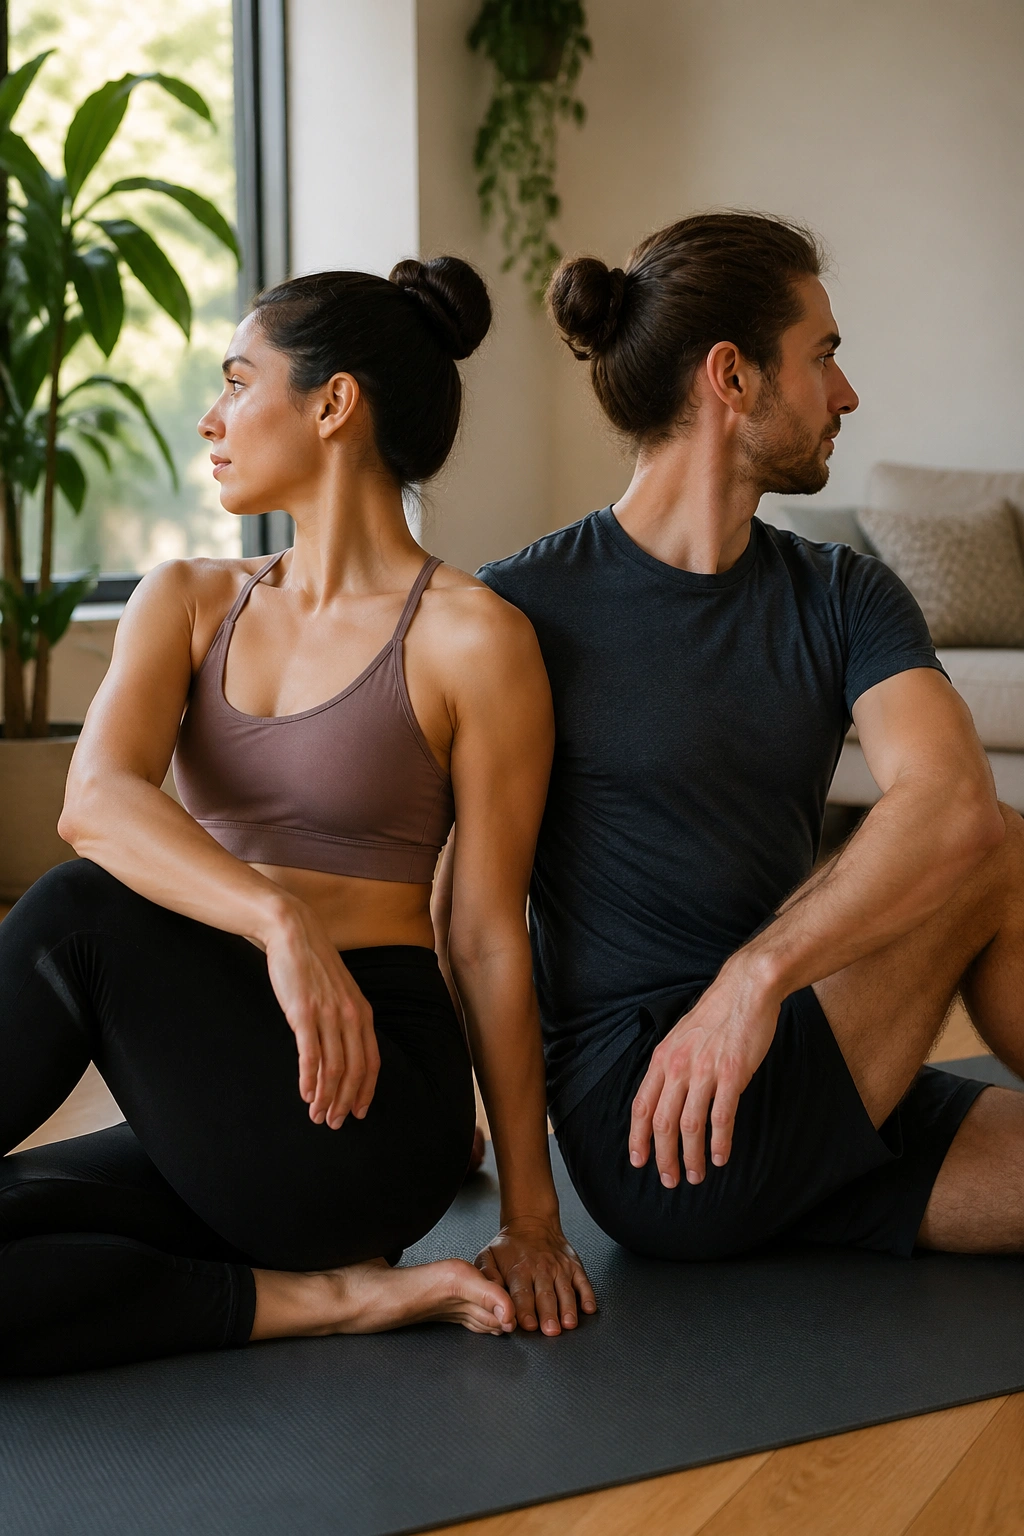
Sit back-to-back again, but this time let each person rotate in the opposite direction. One hand can rest on the opposite knee or thigh, and the other hand can settle behind you for support. The point is to create a twist without wrestling the spine into a shape it does not want.
The sensation should be clean and warm, not sharp. A good seated twist feels like the ribs are spiraling over the pelvis while the spine stays long. Exhale and let the twist deepen by a degree or two, then inhale and grow a little taller before the next turn. If the breath gets choppy, the twist is too deep.
Keep the neck easy. People get greedy here and crank the head around to chase a bigger range, which is a bad trade. The neck should follow the torso, not lead it.
On the second side, pay attention to the asymmetry between left and right. One side will almost always feel looser. That is normal. Don’t chase equal sensation; chase steady breathing and a shape you can actually repeat next week.
8. Double Child’s Pose
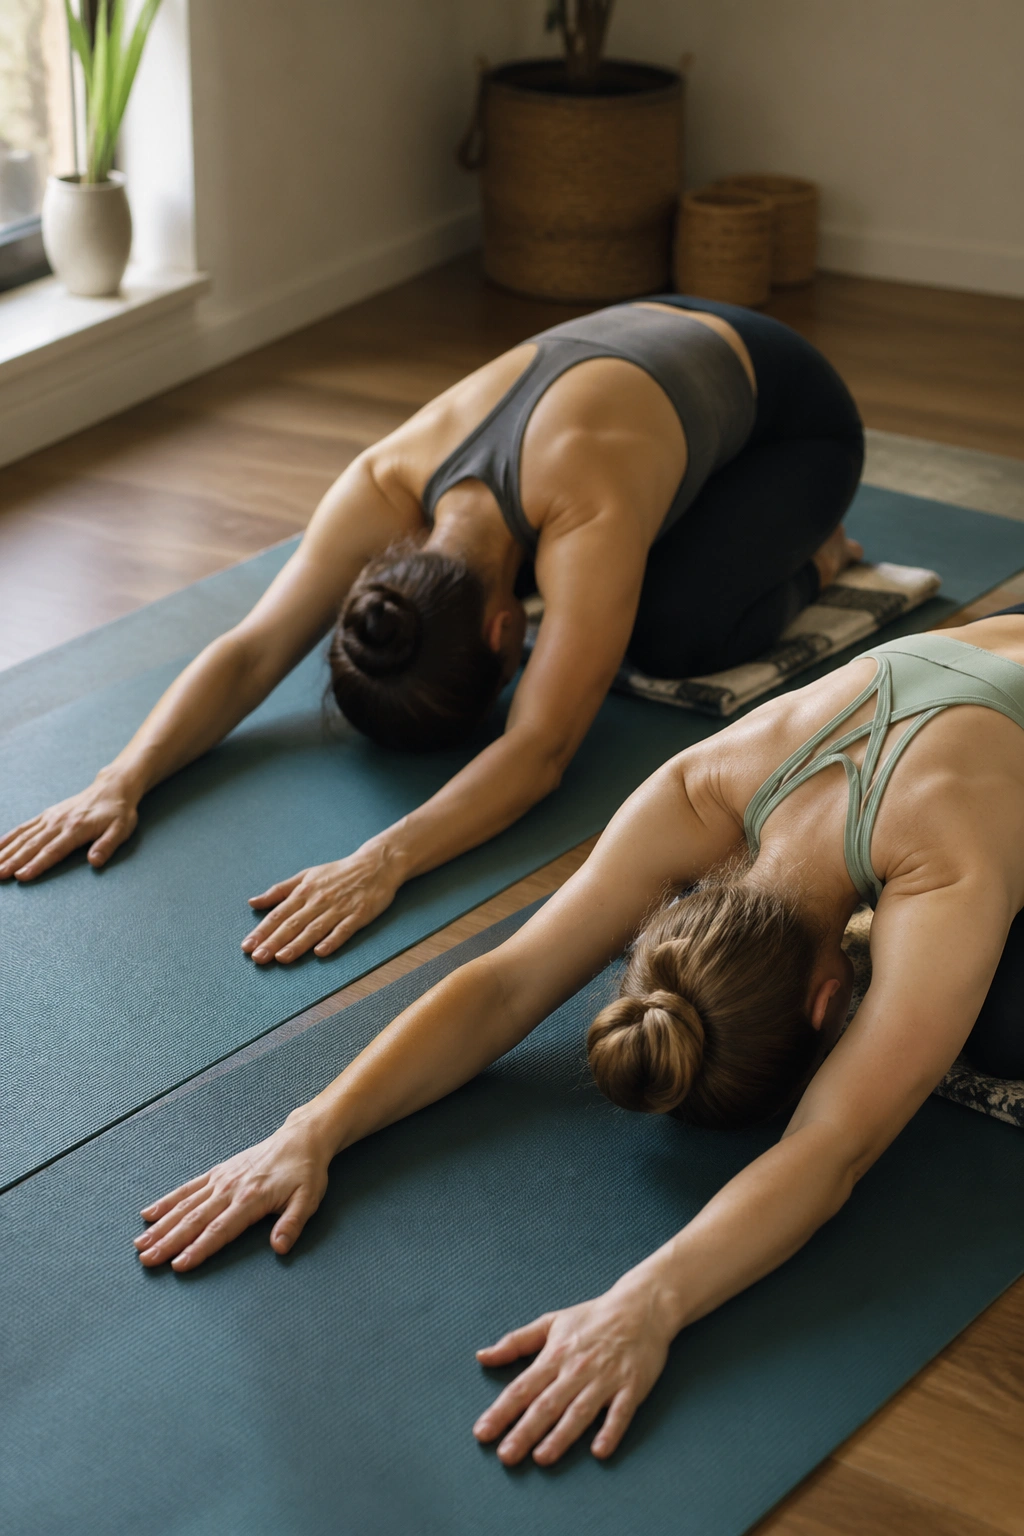
Both people folding down at once changes the feeling of Child’s Pose in a way that surprises most beginners. You get the comfort of a low, resting shape without having to think about performance, and the shared position tends to slow the whole room down. If your day has felt noisy, this is the pose that turns the volume down.
Kneel close enough that your hips can sink back toward your heels, then widen the knees a bit and walk the hands forward. You can mirror each other side by side, or offset slightly so your foreheads do not bump. A folded blanket under the shins or between the hips and heels can make the pose much kinder on the knees.
Make the floor work for you
- Keep the knees wider if the belly feels crowded.
- Rest the forehead on a block, fist, or stacked hands.
- Let the elbows soften out to the sides.
- Stay for 5 to 8 breaths.
- If one ankle hurts, tuck a towel under it.
The best part is that nothing needs to happen. That sounds obvious, but it matters. You are not trying to stretch harder here; you are trying to let the back lengthen and the breath get quiet. That alone can reset the whole session.
9. Cat-Cow With Shoulder Guidance
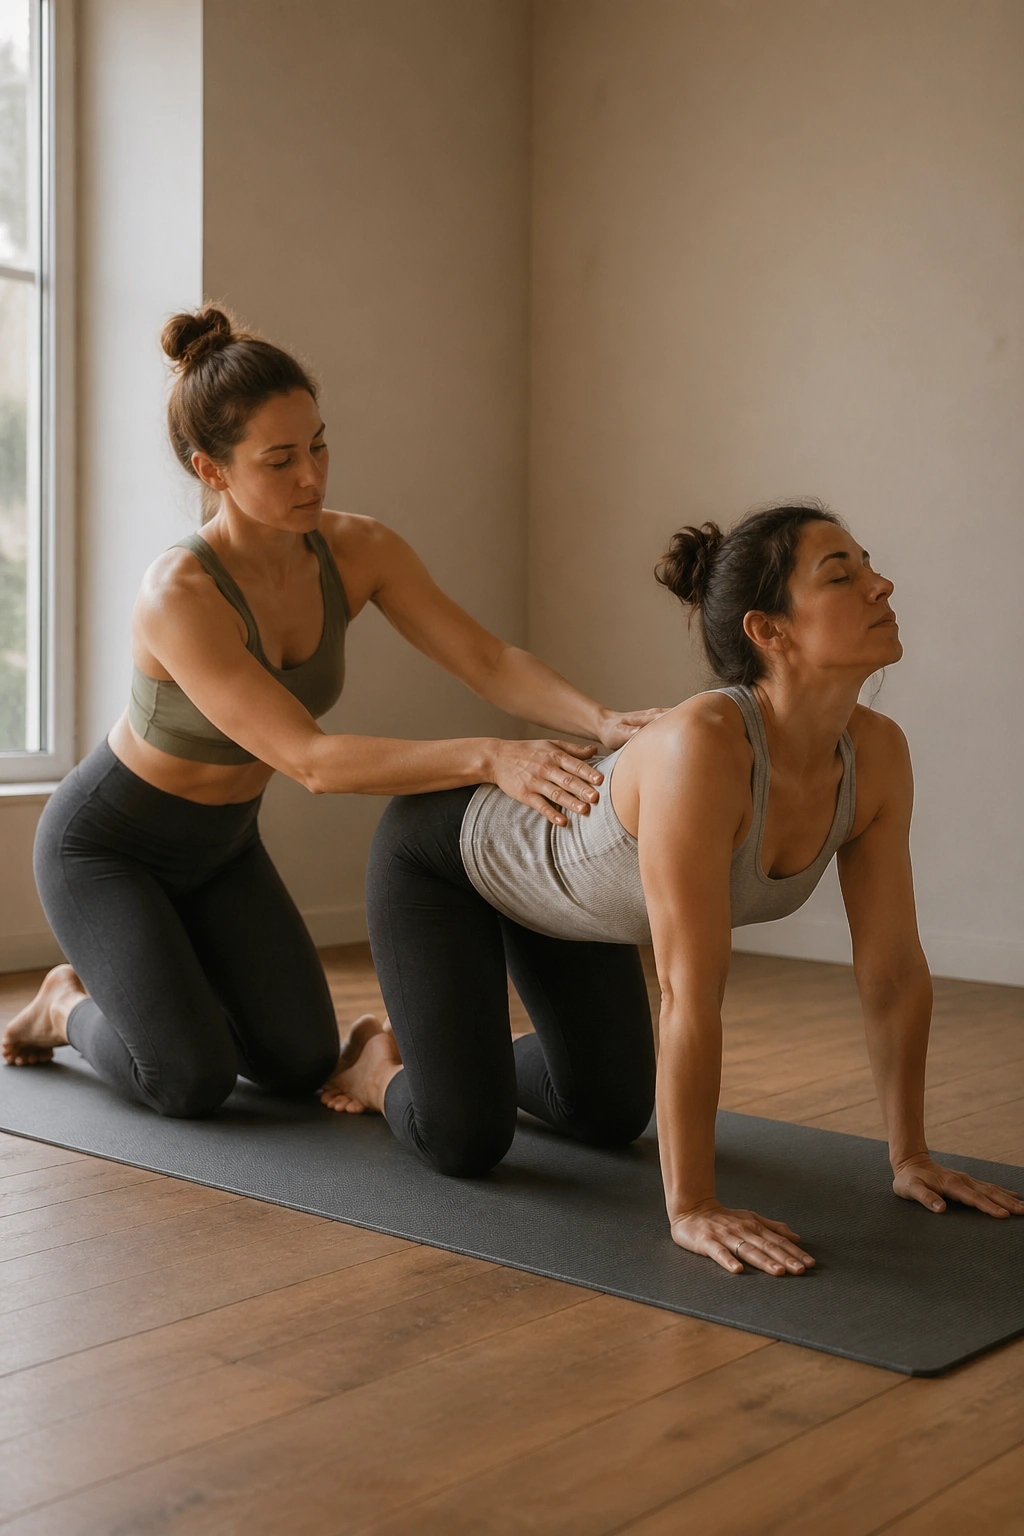
Picture two mats side by side, one person guiding the tempo, and both spines moving like they belong to the same conversation. Come onto hands and knees, wrists under shoulders and knees under hips, then move through cat and cow together. One partner can place a very light hand on the upper back or ribs of the other to help feel the shape change.
The touch should be a cue, not a push. Light pressure across the shoulder blades can help someone notice the difference between rounding and lifting without forcing the lower back to do all the work. On cow, the chest broadens and the sit bones tilt up; on cat, the navel draws in and the back domes. If the neck feels pinched, keep the gaze on the floor.
Hand placement that helps
- Use the palm flat, not fingertips digging in.
- Stay on the upper back or side ribs, never on the spine.
- Match the pace to the slowest breath.
- Keep the elbows soft, not locked.
- Skip the pressure entirely if the person being guided prefers touch-free cues.
A lot of people think partner yoga means bigger poses. Sometimes it means better feedback. This is one of those times. The pose itself is plain, but the tactile cue can make the spine move more clearly than it does alone.
10. Partner Lunge and Reach
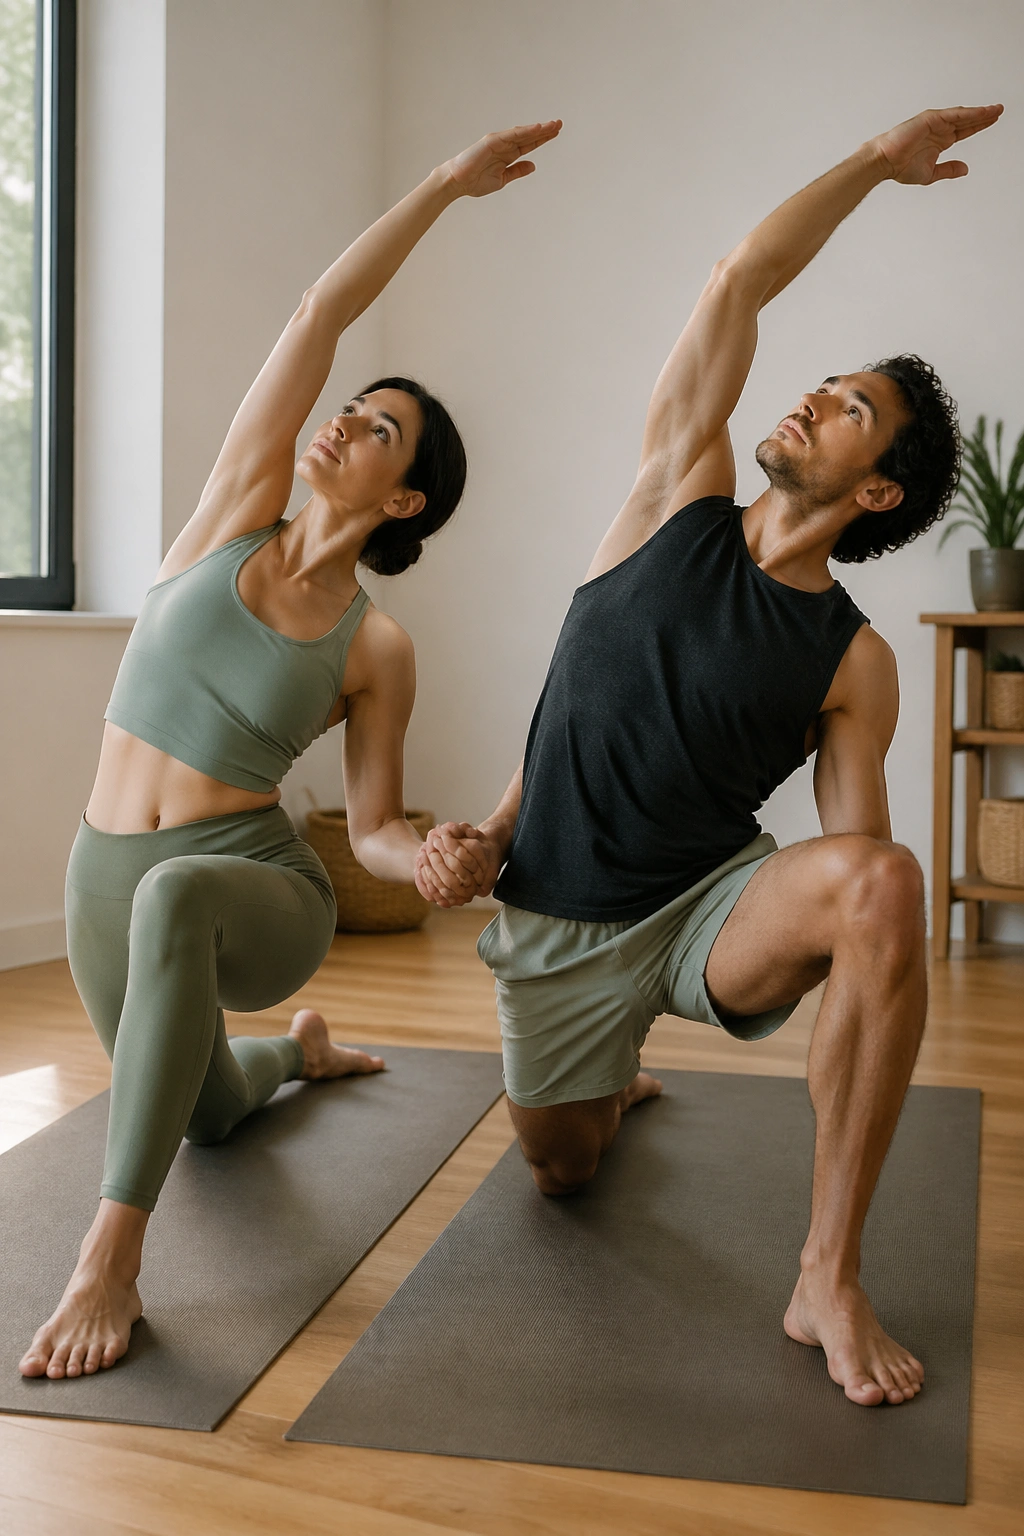
This is one of the best easy partner yoga stretches because it opens the hips without requiring either person to be especially flexible. Step one foot forward into a low lunge, drop the back knee to the floor if needed, and hold hands with your partner for balance. Then reach the free arm overhead and gently arc the torso away from the back leg.
The front hip should feel long, not pinched. If the lunge gets too deep, the stretch jumps out of the hip flexor and into the knee or lower back, which is not the point. Keep the front foot planted firmly, tuck the back toes if that feels better, and pad the back knee with a folded blanket if the floor is hard.
This pose works well because the partner connection stops the torso from collapsing forward. You get a cleaner line through the front of the body, and the reach overhead becomes more honest. Hold for 20 to 30 seconds on each side, or for 3 smooth breaths if that feels easier to count.
A small aside: if one of you has tighter hips than the other, mirror the same shape but keep the depth different. Equal shape is not the goal. Clean shape is.
11. Counterbalance Lean
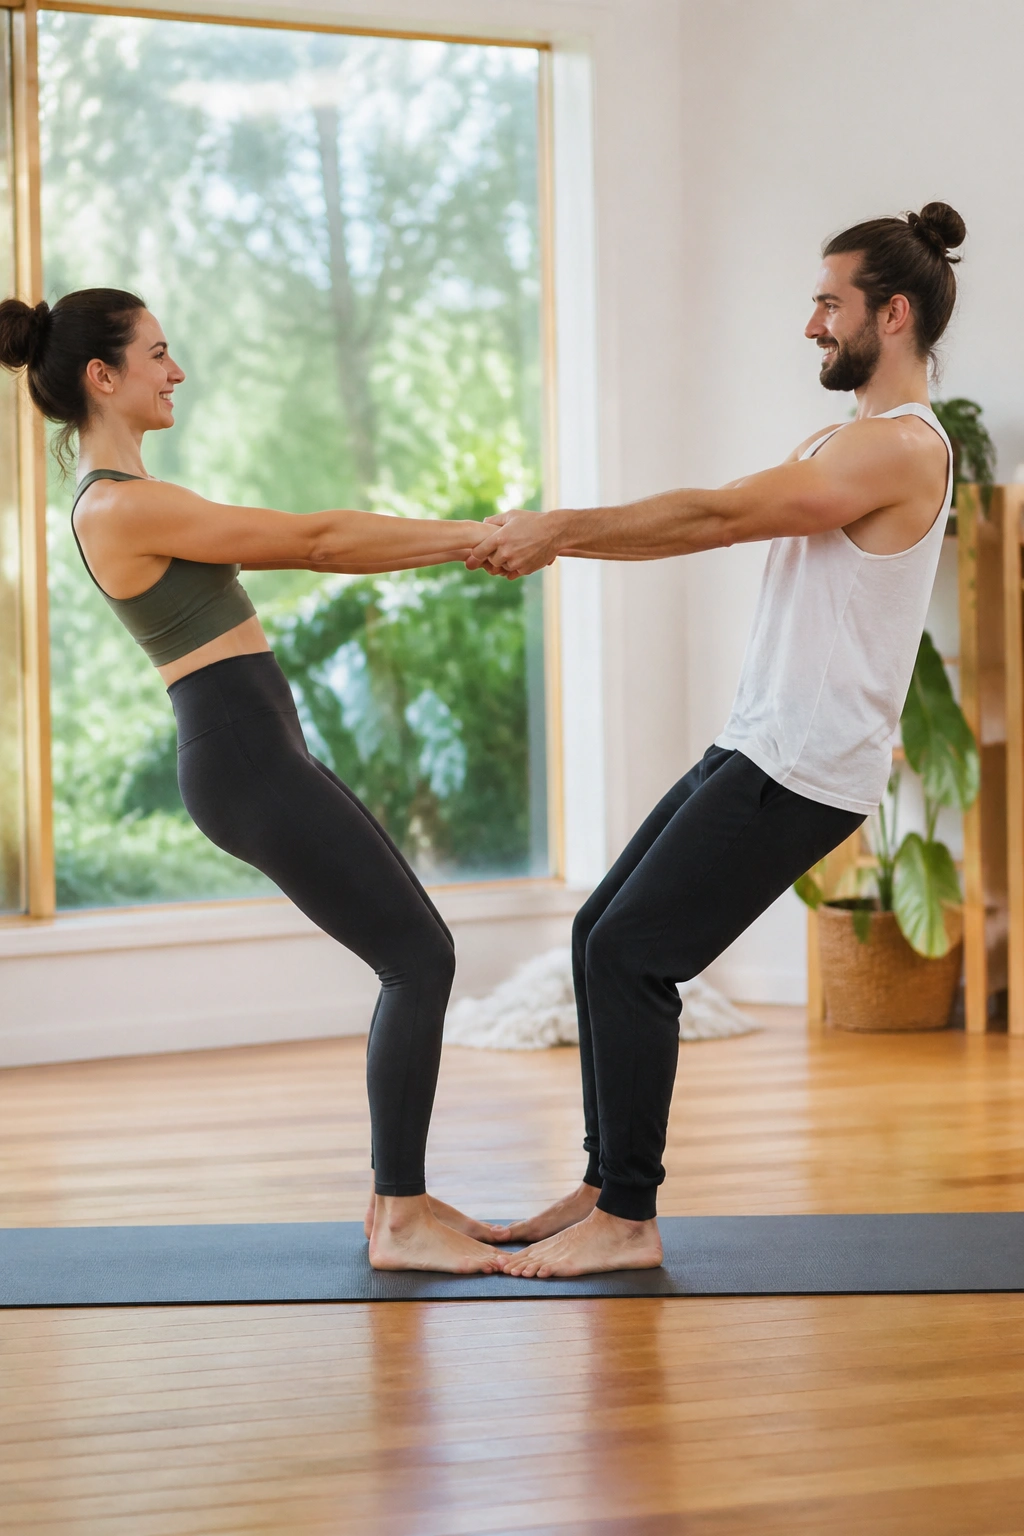
Unlike a trick pose, this one should look almost casual. Stand facing each other, hold both hands, step back until the arms are long, and sit the hips back a few inches while leaning away from one another. Your bodies form a shallow V, and the shared pull helps both of you find a balanced lean without folding too far.
The beauty here is the small scale. You only need a tiny lean to feel the hamstrings, upper back, and shoulders wake up. Bend the knees if the hamstrings complain, and keep the spine long rather than rounded. If the shoulders start creeping toward the ears, come out and reset. That is not failure; that is the pose telling you it has had enough.
Start with almost no lean at all. Seriously. A 10 percent shift is enough the first time. If both people can breathe normally and keep their feet grounded, then you can back up another inch on the next round.
Who likes this pose most? Nervous beginners, honestly. It builds trust without asking for fancy coordination, and it gives you a low-risk taste of partner work before anything more demanding.
12. Supported Bridge Pose
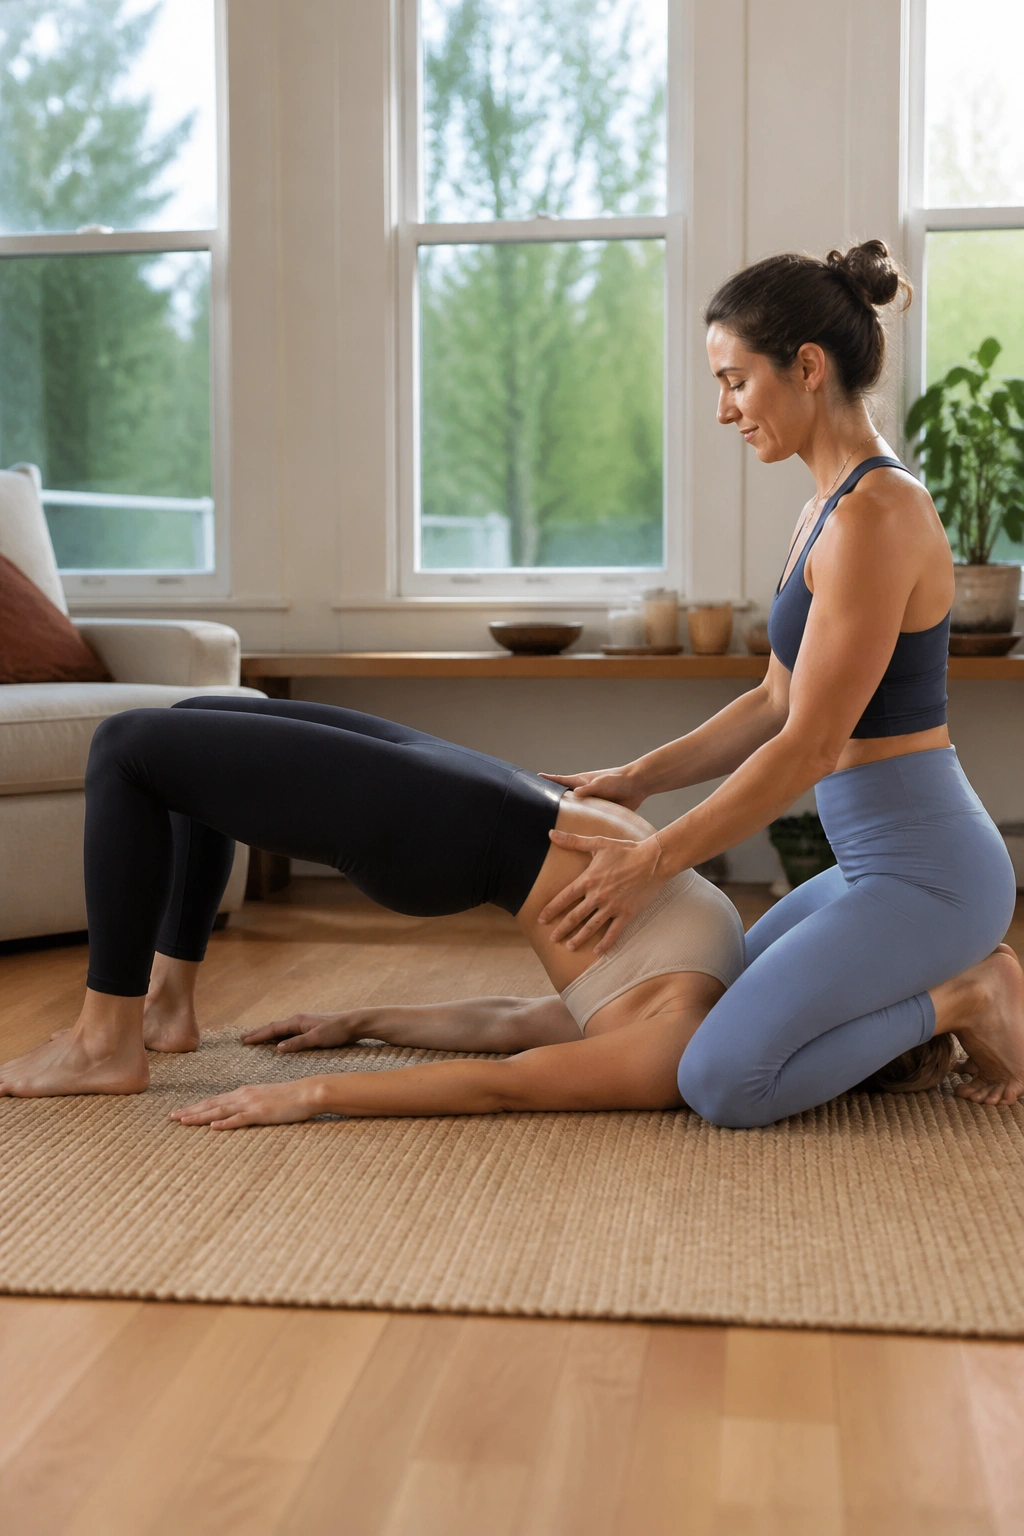
Bridge is easier when someone else watches the landing. Lie on your back, bend your knees, and plant your feet hip-width apart with heels close enough that your fingertips can touch them. Lift the hips into a basic bridge, then let your partner kneel at your feet or beside your hips and offer steady hands where they can help without pressing on the lower back.
The support should be subtle. A hand at the outer hips or lower ribs can remind the body to lift evenly. Hands in the wrong place can turn a good stretch into a weird squeeze, so avoid pushing directly into the lumbar spine. The goal is not to force a higher backbend. It is to keep the lift smooth and the knees from splaying out.
Where the partner should touch
- Outer thighs, to keep the knees tracking forward.
- Lower ribs, to help the chest stay open.
- Ankles or heels, if the person lifting needs a stable anchor.
- Never on the spine itself.
- Never hard enough to create pain or numbness.
Hold the bridge for 3 to 5 breaths, then lower one vertebra at a time. If the neck feels crowded, tuck the chin a little or skip the pose that day. A beginner bridge should feel energizing, not like a dental appointment for your back.
13. Partner Boat Pose With Bent Knees
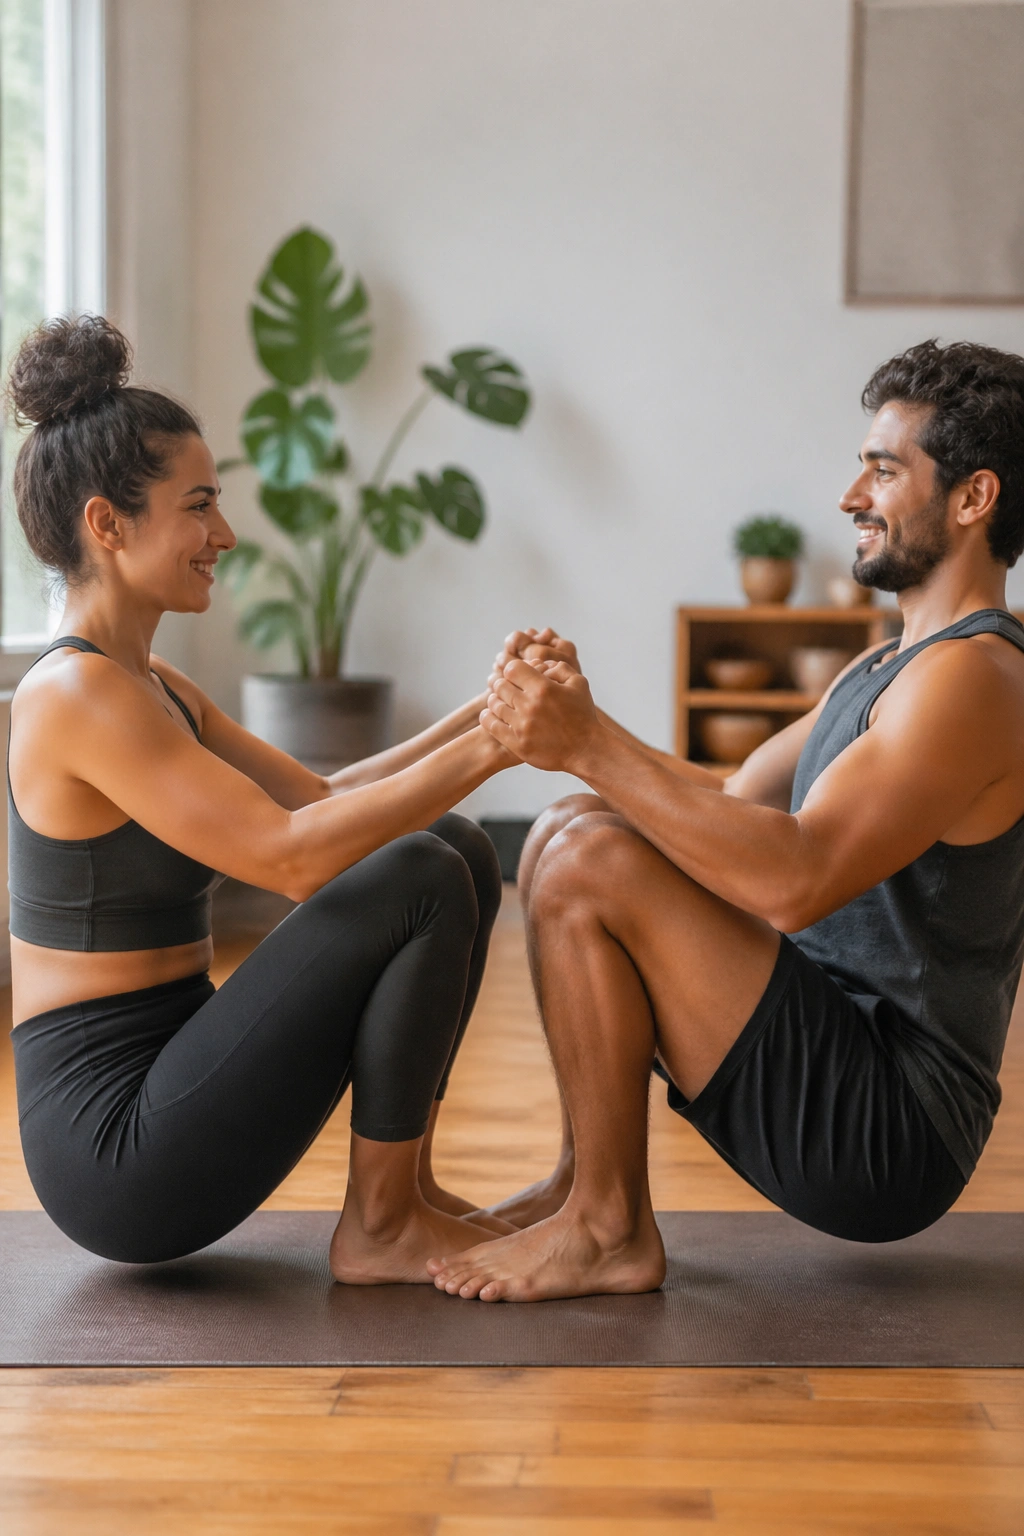
This is the one that makes people laugh first. Sit facing each other, bend your knees, and hold hands with arms straight but not locked. Lift the feet so the shins hover or keep the toes lightly on the floor if that feels more manageable. From there, lean back a few inches and find a shared V shape through the chest and belly.
The bent-knee version is the reason this belongs on a beginner list. Straight legs are not required. In fact, keeping the knees bent often makes the core work cleaner because the lower back does not have to fight the hamstrings. The pose should feel like a steady shake, not a panic. If your shoulders start rounding hard, lower the feet and reset.
A few details matter here:
- Keep the chest broad.
- Draw the ribs in a little so the low back does not arch.
- Press the inner thighs lightly toward each other.
- Breathe out while holding, which helps the abdomen stay engaged.
- Lower halfway before the shake turns into collapsing.
The useful part of this pose is not how high the legs go. It is how clearly it shows where your core actually is. Once you know that feeling, the rest of boat pose gets a lot less mysterious.
14. Partner Figure Four Stretch
This stretch is sneaky. It looks calm, but it gets deep fast if you push it. One person lies on their back and crosses the right ankle over the left thigh to make the classic figure four shape. The partner kneels beside them and helps by supporting the lifted leg or gently stabilizing the opposite hip so the stretch stays in the glute instead of the knee.
The knee on the crossed leg should open comfortably, not strain wide. The stretch belongs in the outside hip and glute, never in the knee joint. If the hip pinches, move the foot lower on the thigh or reduce the angle. If the lower back feels tight, keep the grounded foot on the floor instead of pulling it toward the chest.
This pose is especially nice after sitting at a desk or driving for a long time. The hips often feel short and stubborn by then, and the partner support helps you stay relaxed enough to actually let the muscles go. Hold 20 to 30 seconds, then switch sides and compare the two hips without judging them too much.
A small warning: do not yank the thigh toward the chest. That turns a stretch into a tug on the sacrum. Slow and mild wins here.
15. Reclined Hamstring Stretch With Partner Support
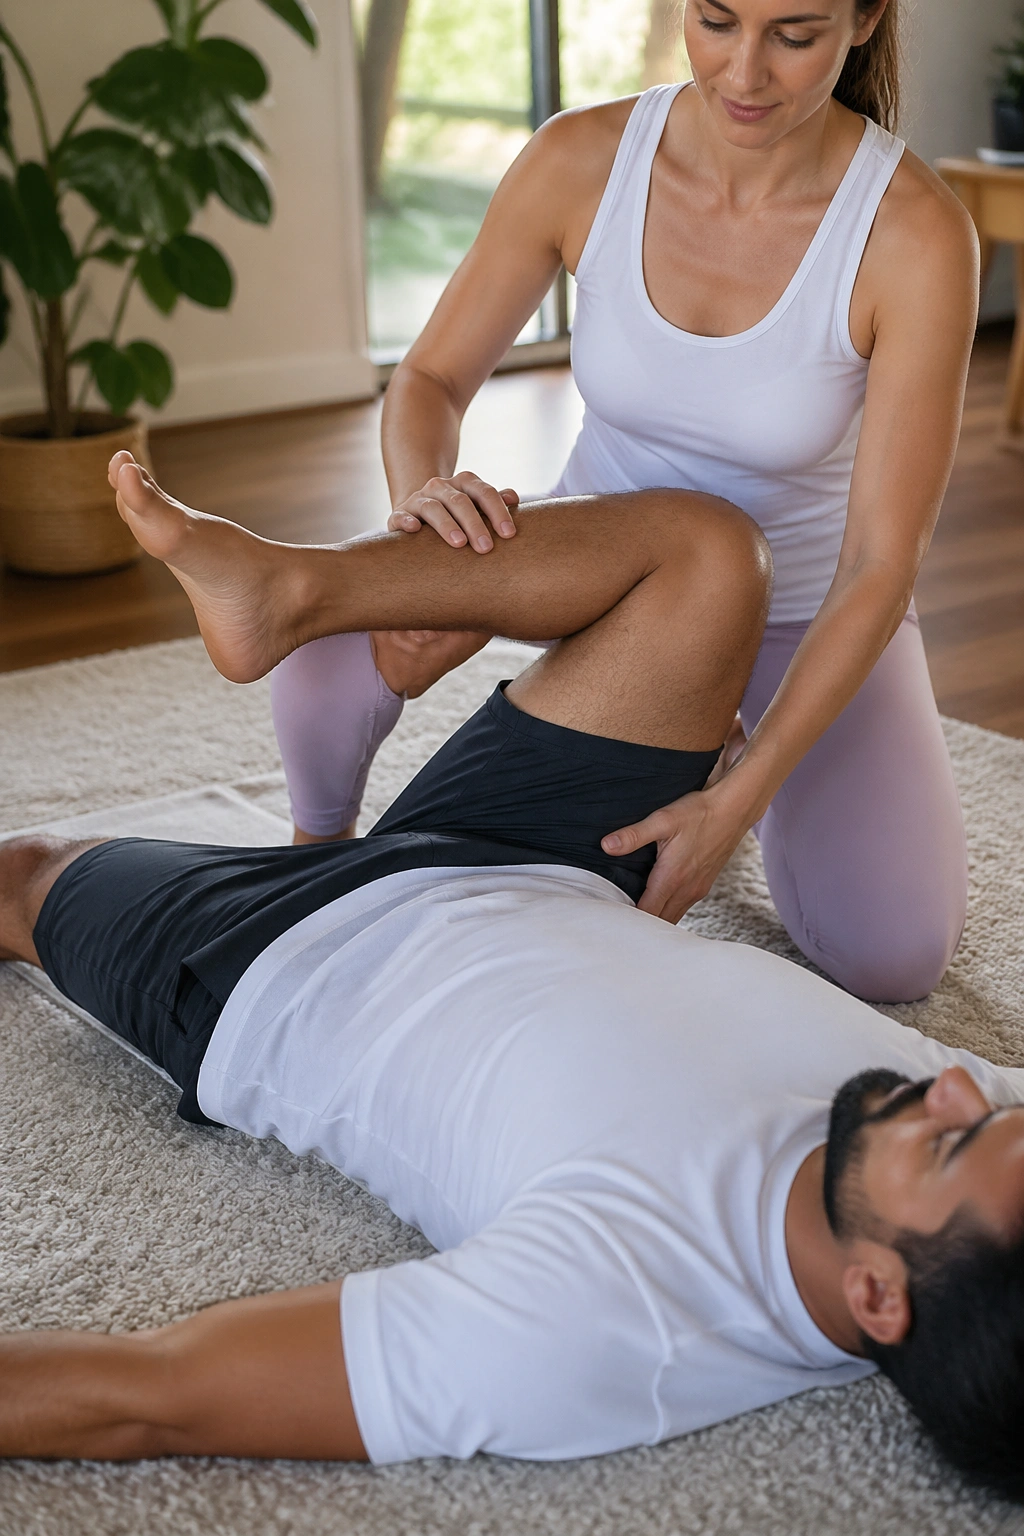
If you only repeat one partner stretch after a long day, make it this one. Lie on your back, bend one knee, then lift the other leg toward the ceiling while your partner supports the calf or heel with both hands. The lifted leg should stay active, with the foot flexed and the toes pulling back slightly to keep the back of the leg awake.
This works better than people expect because the partner can help keep the hip square and the knee softly extended without forcing it. You should feel the stretch along the hamstring, not a sharp pull behind the knee. If the lower back arches, bend the grounded leg or slide the lifted leg a little closer to the body. A strap can do the job too, but the partner version gives you real-time feedback on how much tension is enough.
Best way to use it
- Hold for 3 to 5 breaths on each leg.
- Keep the standing leg bent if the pelvis tips.
- Flex the foot to avoid a nerve-y feeling behind the knee.
- Support the leg, don’t drag it.
- Come out slowly and let the leg rest before switching sides.
It is a simple shape, but that is part of why it belongs at the end of a beginner sequence. You finish with length, not strain. And if the session started with breathing and careful standing, ending here feels tidy in the best way — calm, loose, and easy to repeat next time.
