



Pregnancy can make a pelvic floor feel sleepy, tight, or overworked — sometimes all three in the same week. The fix is not endless squeezing. Pelvic floor strength in pregnancy comes from learning how to breathe, lift, relax, and respond under gentle pressure without holding your breath or bracing like you’re lifting a refrigerator.
That matters because the pelvic floor is not a lone muscle hiding at the bottom of the body. It works with the diaphragm, deep abs, glutes, hips, and the way you stand, sit, cough, and get off the couch. When one part starts guessing, the rest usually compensate. That is where leaks, heaviness, tension, and the odd “something feels off” moment often show up.
A lot of prenatal exercise advice gets stuck on Kegels and stops there. I don’t love that. Sometimes the muscles need strength, yes, but sometimes they need room to lengthen and learn how to fire without gripping. The smartest workouts to strengthen the pelvic floor in pregnancy do both.
If you already have pelvic pain, leaking, a sense of pressure, or a history of prolapse, it’s worth getting individualized guidance from a clinician or pelvic floor physical therapist. And if any move gives you pain, dizziness, bleeding, or a heavy downward feeling, stop. Simple as that.
1. Diaphragmatic Breathing With Pelvic Floor Drop
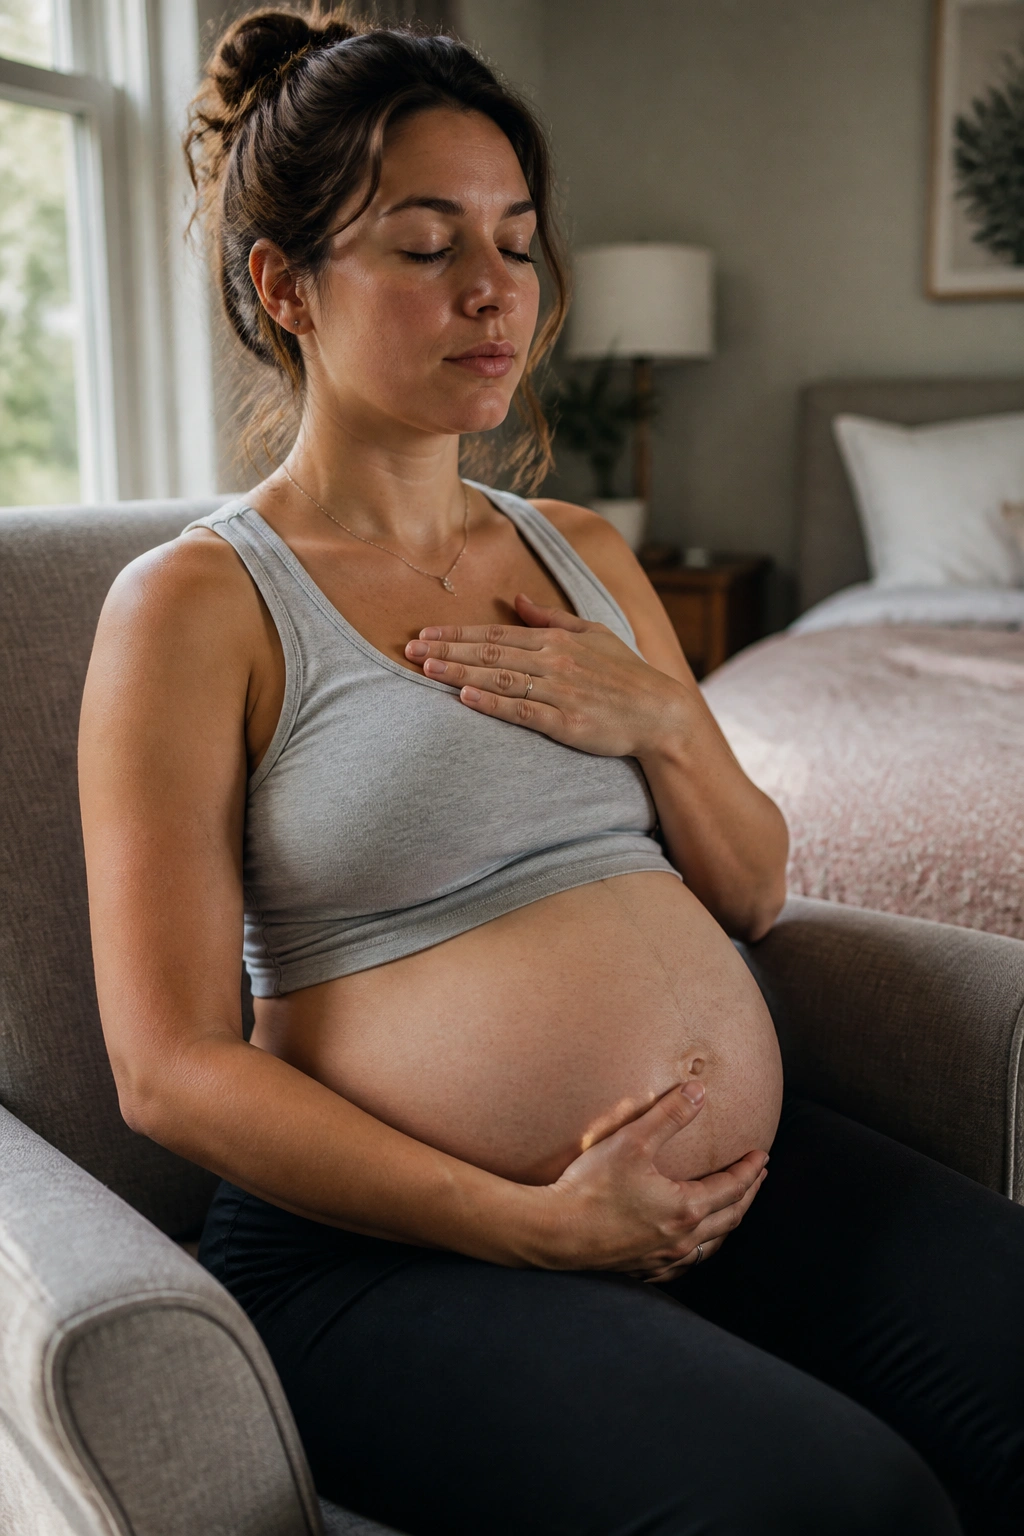
Breathing sounds too basic to count as a workout, but this is where a lot of prenatal pelvic floor work starts. If your ribs stay frozen and your belly never fully moves, your pelvic floor often gets stuck doing the same thing all day: holding. That gets tiring fast.
How It Feels When It’s Working
Lie on your side or sit tall in a chair. Inhale through your nose for 4 counts and let the ribs widen sideways, not just forward. Exhale for 5 to 6 counts and imagine the pelvic floor gently lifting back up, like an elevator returning to the ground floor.
- Do 5 to 8 slow breaths
- Keep the shoulders quiet
- Let the jaw unclench
- The belly should feel soft on the inhale, not pushed out hard
Do not force the belly to flatten on the exhale. That usually turns into bracing, and bracing is not the same thing as support.
2. Slow Kegel Holds

Harder is not better here. A clean 3- to 5-second pelvic floor squeeze beats a sloppy 10-second clench every time, especially if you are already tense or feeling pressure. The goal is a lift, not a grimace.
Sit, stand, or lie on your side. Exhale first, then gently contract as if stopping gas and a little urine at the same time. Hold for 3 seconds at first, then relax for 6 to 8 seconds so the muscle actually gets a chance to rest.
A good rep feels like an inside lift, not a butt squeeze. If your glutes, thighs, or lower abs take over, the pelvic floor is getting a bodyguard it did not ask for.
Start with 5 reps, once or twice a day. If that feels easy and calm, work up to 8 or 10. If you feel any downward pressure, go lighter.
3. Quick-Flick Kegels
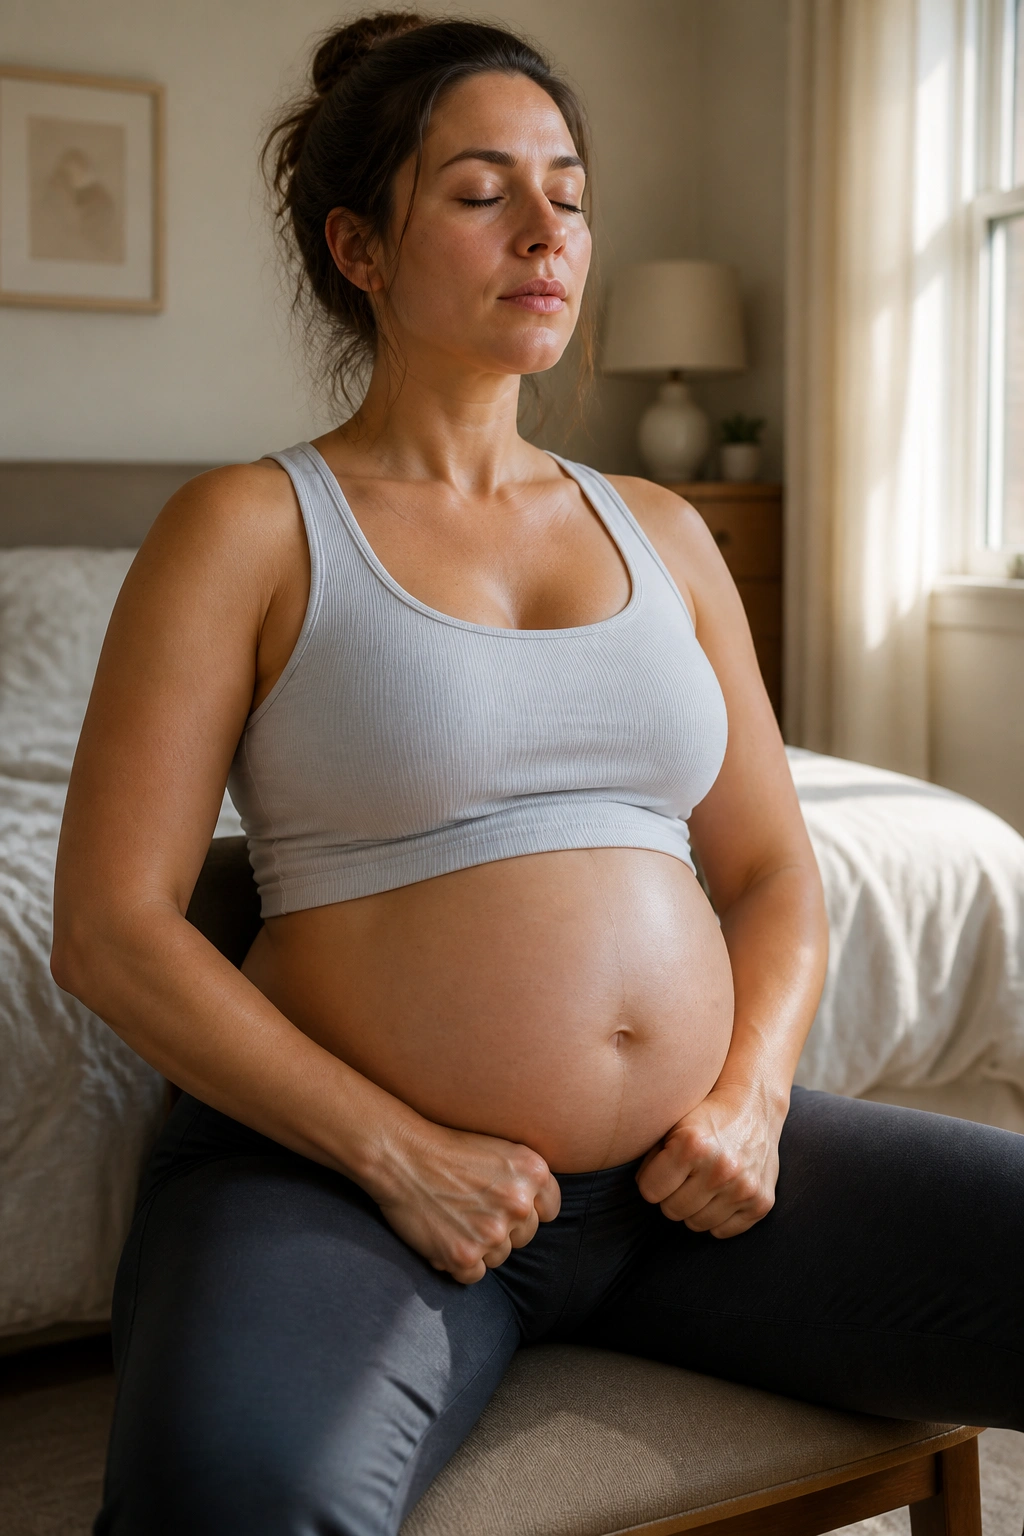
Can the pelvic floor react fast? That matters more than people think. Sneezing, laughing, and sudden movement all ask for a quick response, not a long heroic hold.
Quick-flick Kegels train that snap. Exhale, contract lightly for 1 second, then fully release for 2 to 3 seconds. The release is part of the rep. Skipping it is like doing bicep curls and never lowering the weight.
When to Use Them
These are useful before a cough, a laugh, or a lift from the floor. They also work well after you’ve already practiced slow holds and can feel the muscle without guessing.
Keep the total volume modest: 6 to 10 quick reps is enough for most people. More is not automatically better, and too many fast squeezes can make a tight pelvic floor crankier.
4. Reverse Kegels With Long Exhales

A lot of pregnant bodies need this more than another squeeze. Reverse Kegels teach the pelvic floor to soften and lengthen, which can help when the muscles feel guarded, sore, or locked up.
Sit on a firm chair or kneel on a pillow. Inhale and let the sit bones feel heavy. On the exhale, picture the pelvic floor melting downward a little, like you are fogging a mirror without pushing.
That image sounds odd. It works.
Do 4 to 6 slow breaths and pay attention to the difference between letting go and bearing down. They are not the same thing. If your face tightens or your belly pushes hard, back off and shorten the exhale.
5. Cat-Cow on Hands and Knees
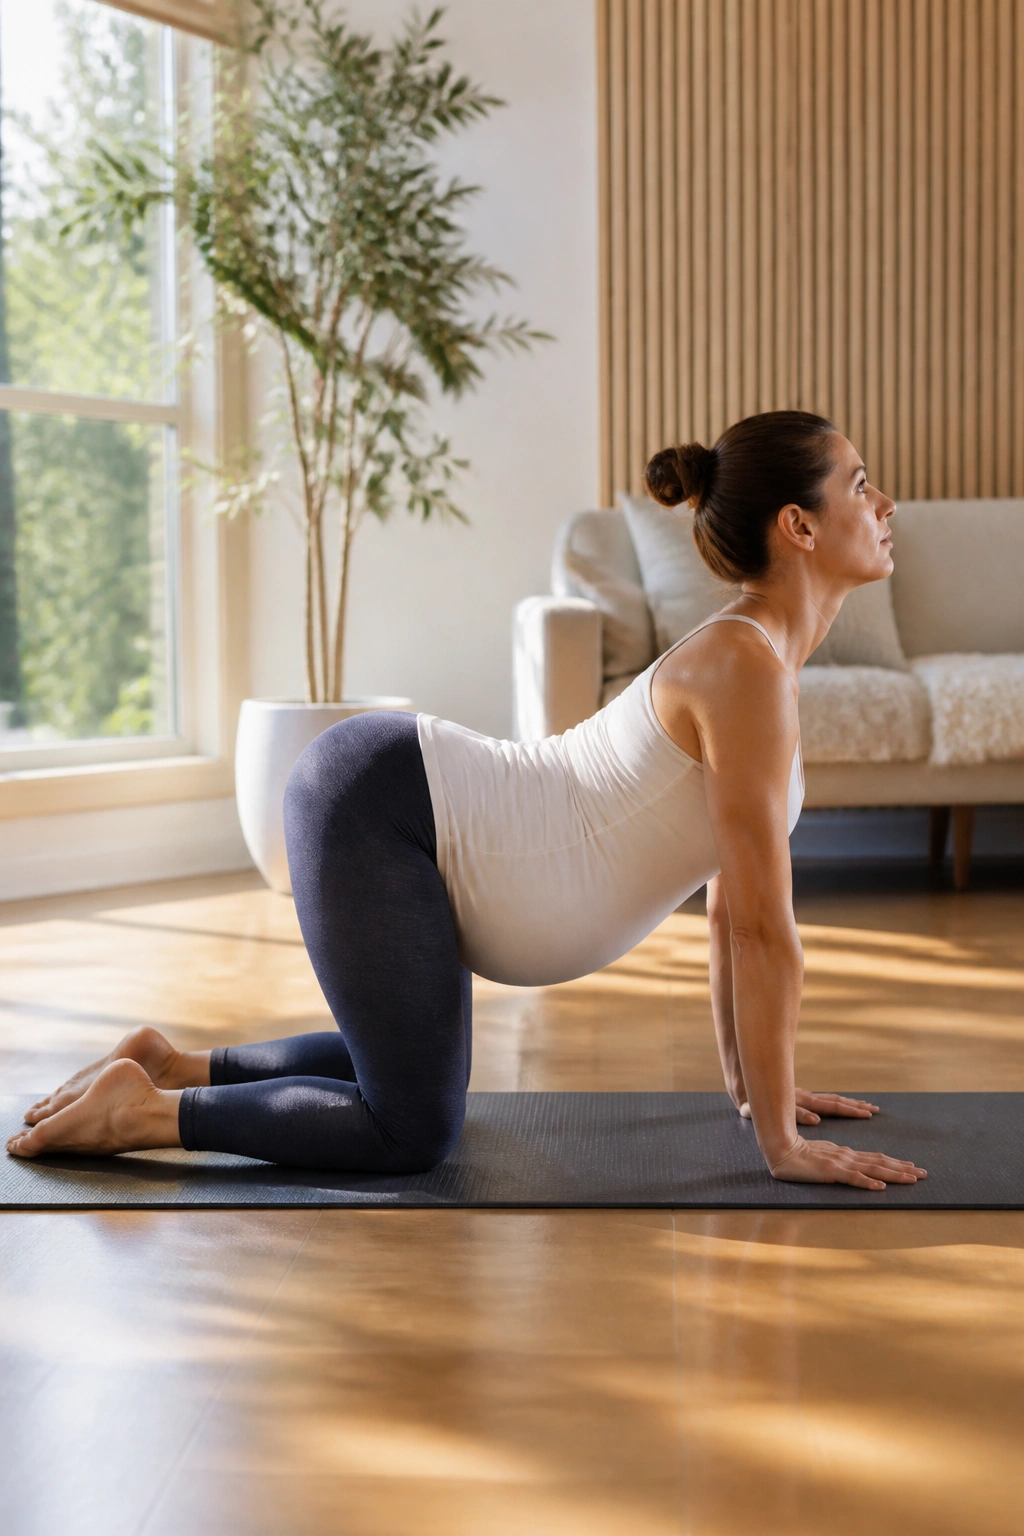
The spine and pelvis talk to each other all day. Cat-cow gives them a better conversation.
Start on hands and knees with wrists under shoulders and knees under hips. Inhale, tip the tailbone back, and open the chest. Exhale, round the back gently and let the pelvic floor follow the curve without a hard squeeze.
What to Feel in Your Ribs
- Ribs open on the inhale
- Belly softens
- Exhale feels longer than the inhale
- The neck stays loose
Move slowly for 6 to 8 rounds. If kneeling bothers your knees, put a folded towel under them. If your wrists complain, come onto fists or forearms. The point is a smooth wave, not a perfect pose.
6. Pelvic Tilts on the Floor or Wall
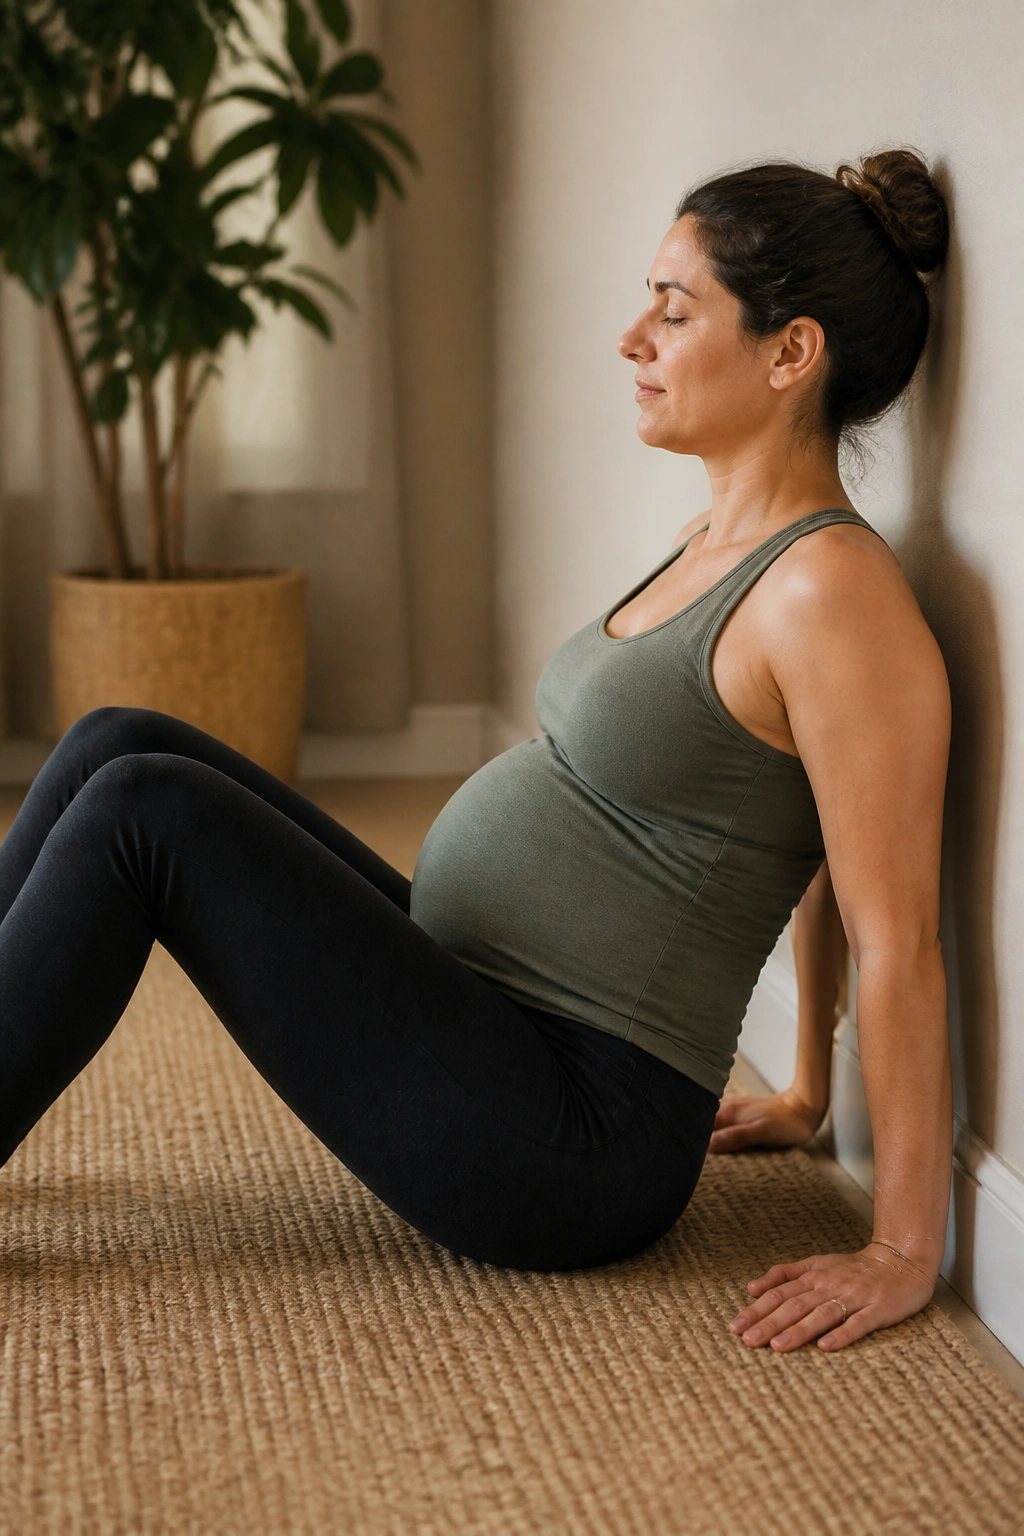
Pelvic tilts are small, which is exactly why they’re useful. Big, dramatic motions are not the goal. You want control.
Lie on your side or stand with your back against a wall. Gently tip the pelvis so the low back flattens a little, then return to neutral. On the exhale, imagine the front of the pelvis lifting toward the ribs by a few millimeters.
- 8 to 12 reps
- Move without clenching the glutes
- Keep the breath even
- Stop if the abdomen domes hard or the back pinches
This move is boring in the best way. It teaches awareness of the pelvis without asking for a load you do not need.
7. Glute Bridges With a Long Exhale
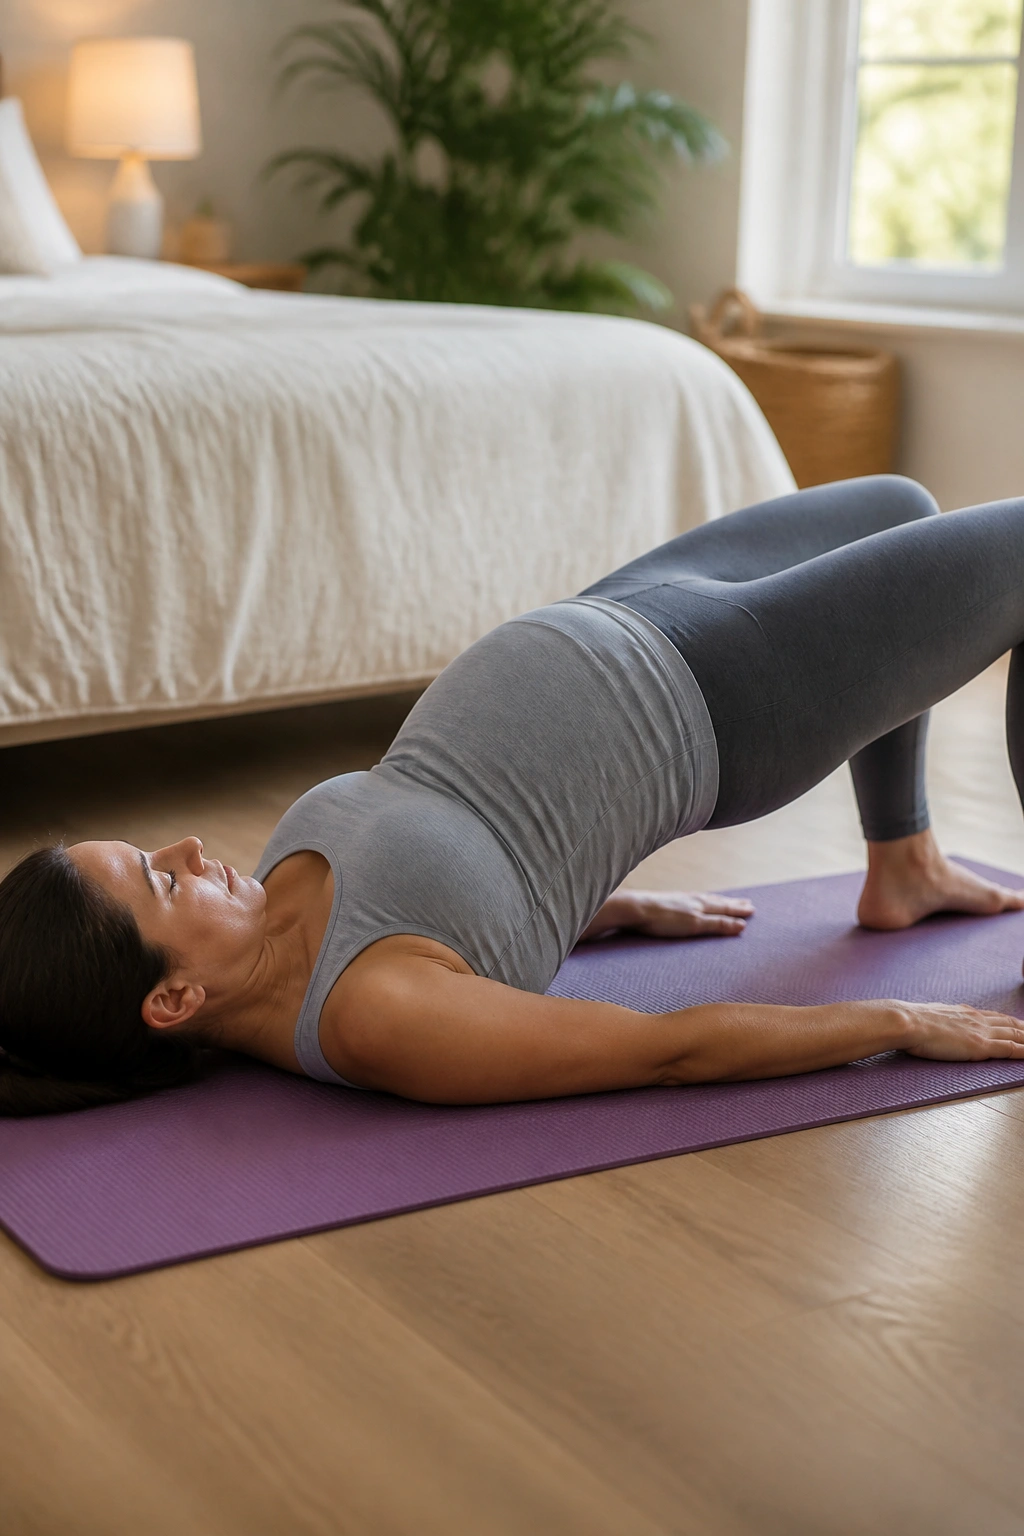
A bridge is not just a butt exercise. Done well, it teaches the hips to help support the pelvic floor so the middle of the body does not have to do every job alone.
Lie on your back only if it feels good and your clinician has not told you to avoid it; otherwise, use a wedge or do this on an incline. Feet stay flat, knees bent, and feet hip-width apart. Exhale, tighten the lower ribs gently, then lift the hips until the body forms a long line from shoulders to knees.
Hold for 2 seconds. Lower with control.
If the hamstrings cramp, bring the feet a little closer. If the lower back takes over, reduce the height. 6 to 10 reps is enough, and each rep should feel smooth rather than punchy.
8. Side-Lying Clamshells
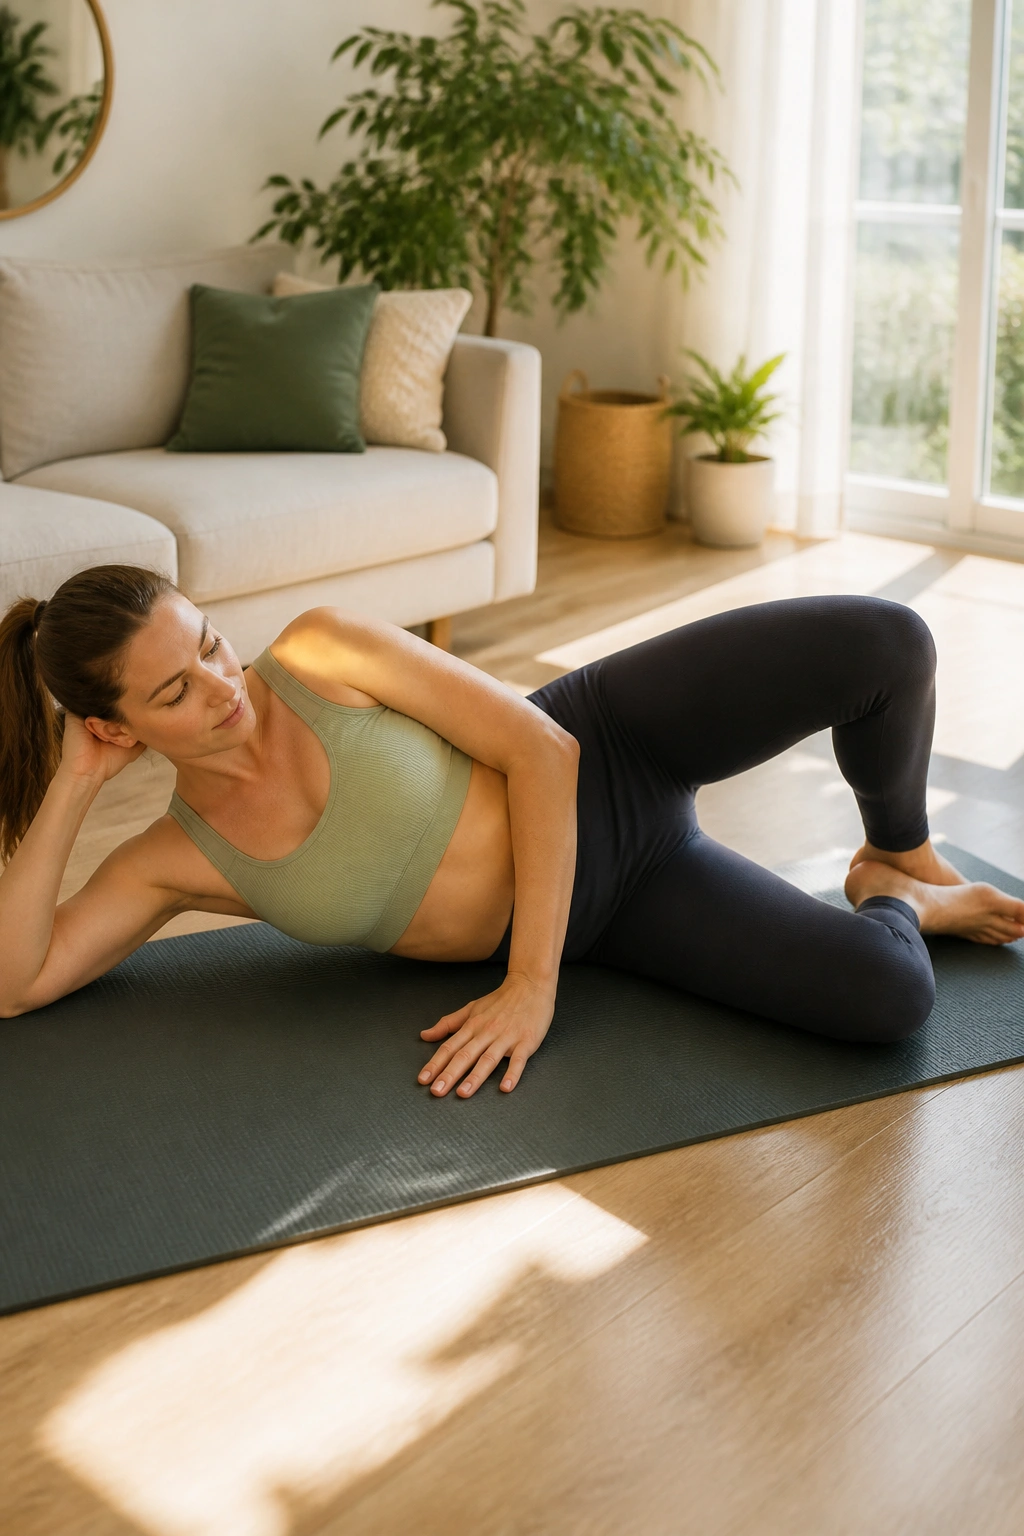
Side-lying clamshells look simple, and they are simple — but they hit the glute medius, which helps keep the pelvis steady when you walk, climb stairs, or stand on one leg. That steadiness takes strain off the pelvic floor.
Lie on your side with knees bent and heels lined up. Keep the feet together as you open the top knee like a clamshell. Exhale on the lift, inhale on the way down.
No rolling backward. That cheats the rep.
Do 8 to 12 reps per side. If you want more challenge, add a mini band above the knees, but keep the motion small. This is not a giant open-and-close drill. A quiet, controlled rep is the one that matters.
9. Bird Dog Reaches
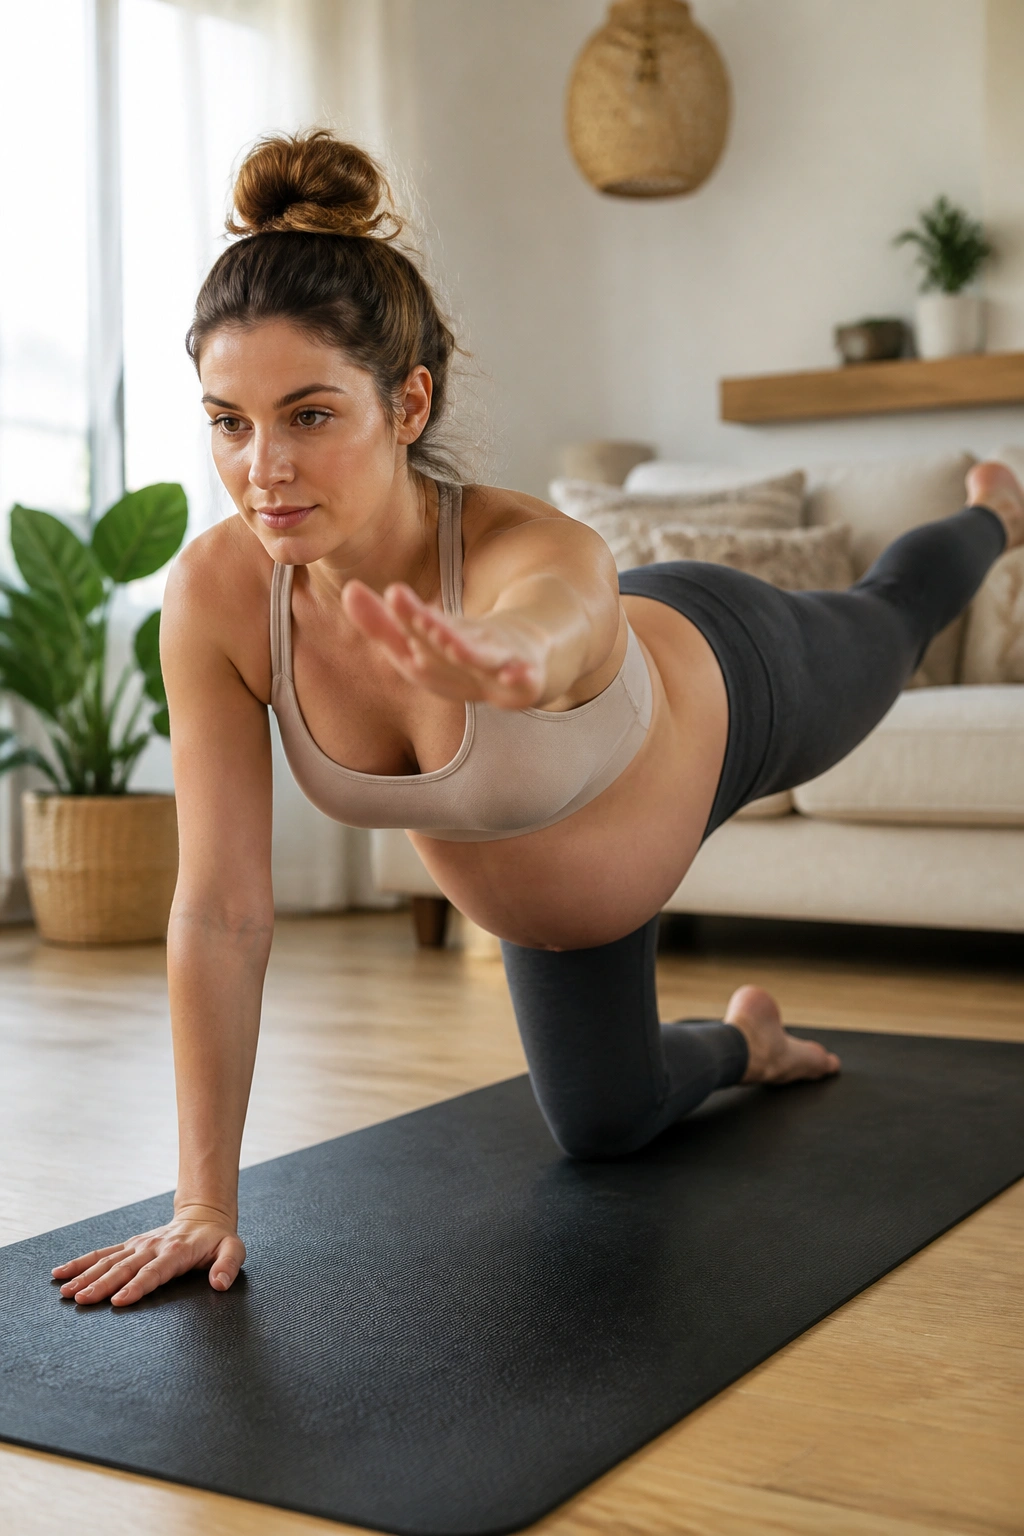
Can you train the pelvic floor without doing an actual Kegel every second? Yes, and bird dog is one of the cleanest ways to do it.
From hands and knees, extend one leg behind you and the opposite arm forward. Reach long, not high. The torso should stay level, like a tray of water you don’t want to spill.
Why It Helps During Pregnancy
Bird dog asks the core to organize around movement, which is what pregnancy keeps demanding anyway. The pelvic floor works better when it learns to respond to shifting weight instead of waiting for a perfect, still moment.
Try 5 to 6 slow reps per side. If the balance feels shaky, keep the hand on the floor and only slide the leg back. That version still counts.
10. Sit-to-Stand Squats From a Chair
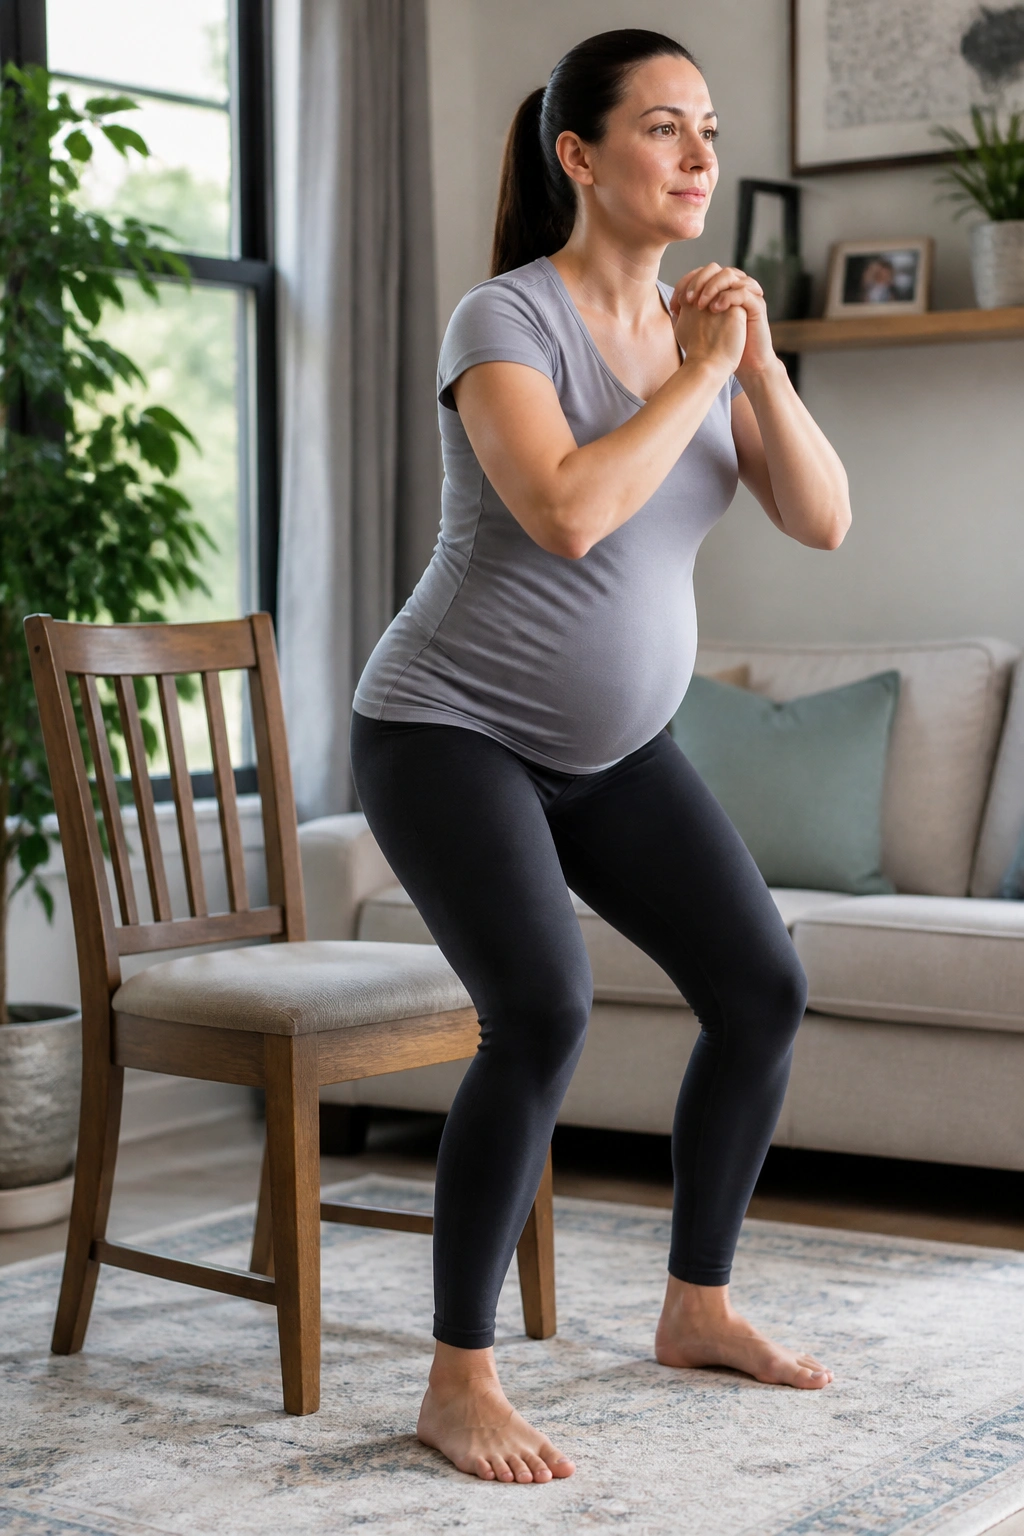
This is one of the most useful prenatal strength moves, period. Getting up from a chair is a real-life skill, and when you practice it with breath and control, the pelvic floor gets a much cleaner message.
Sit toward the front of a sturdy chair with feet flat and a little wider than hips. Lean forward slightly, exhale, and stand by pressing through the whole foot. Sit back down with control, not a flop.
A few cues help:
- Knees track over toes
- Chest stays lifted
- Exhale on the stand
- Inhale as you lower
Use 6 to 10 reps. If you need help, touch a counter with one hand. That is not cheating. That is smart.
11. Wall Squats With a Pillow
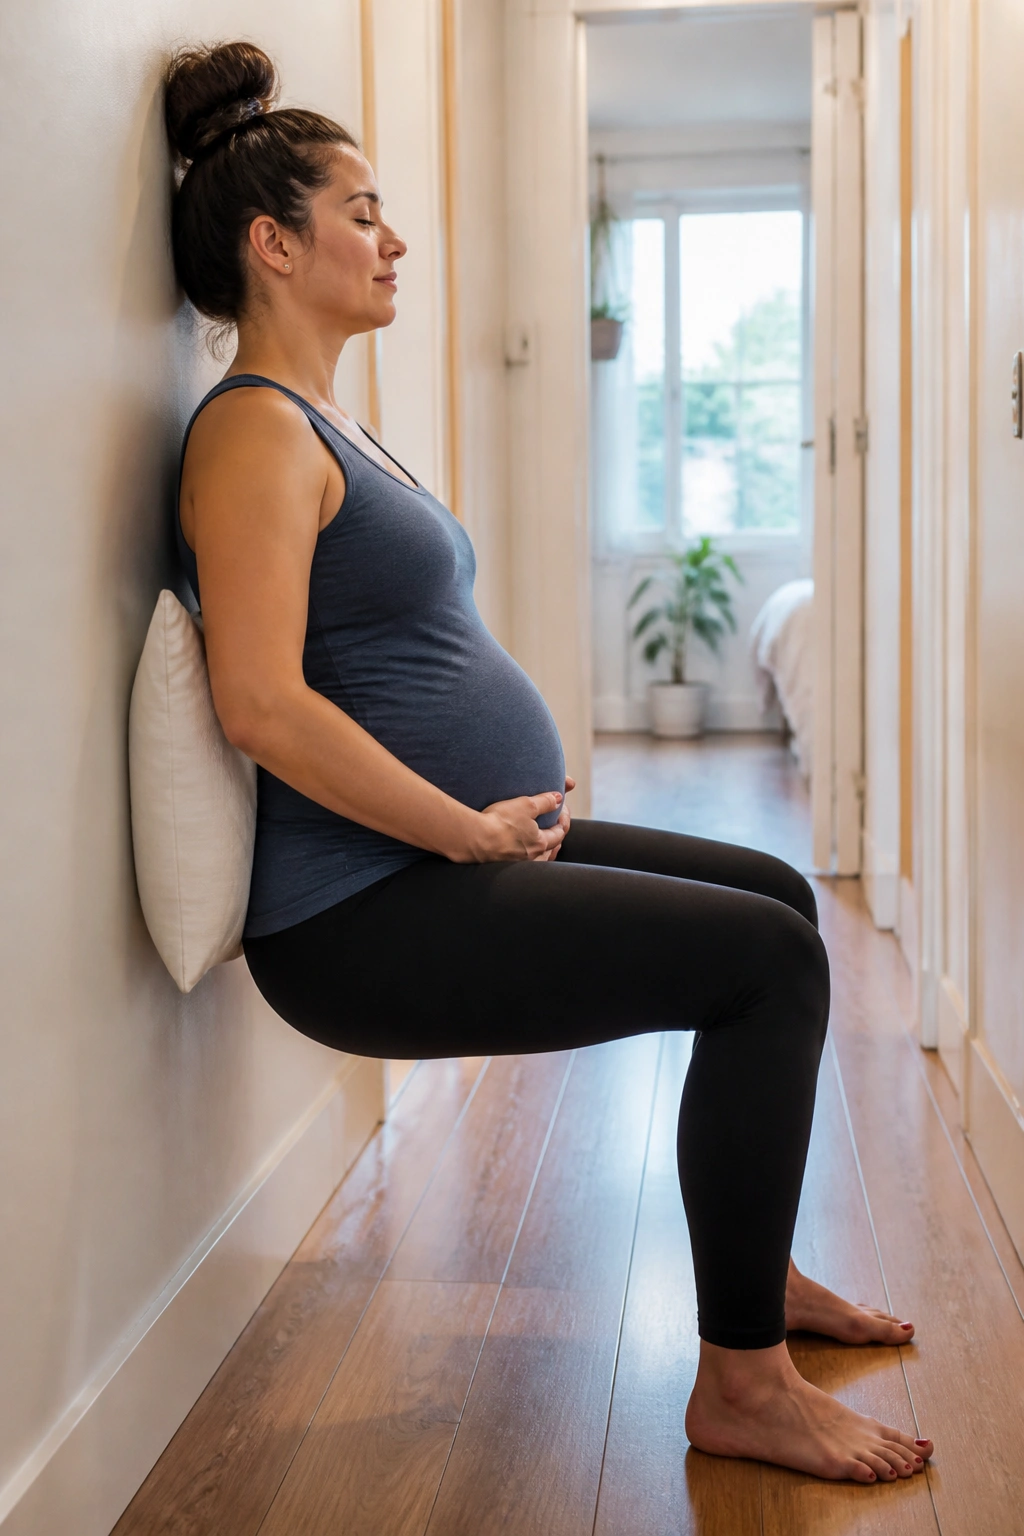
Wall squats can feel like a reset for the whole lower body. The wall gives you feedback, and the pillow makes the position friendlier on the hips and back.
Place a pillow or yoga block behind your lower back and slide down into a shallow squat. Don’t chase depth. A quarter squat is enough if it lets you breathe and keep the pelvis calm. Hold for 10 to 20 seconds, then stand back up.
This is about pressure control, not ego. If your breath turns short or your lower belly bulges hard, the squat is too deep.
Do 3 to 5 holds. I prefer these to endless reps on days when the body feels heavy and you want something steady rather than flashy.
12. Standing Hip Abductions
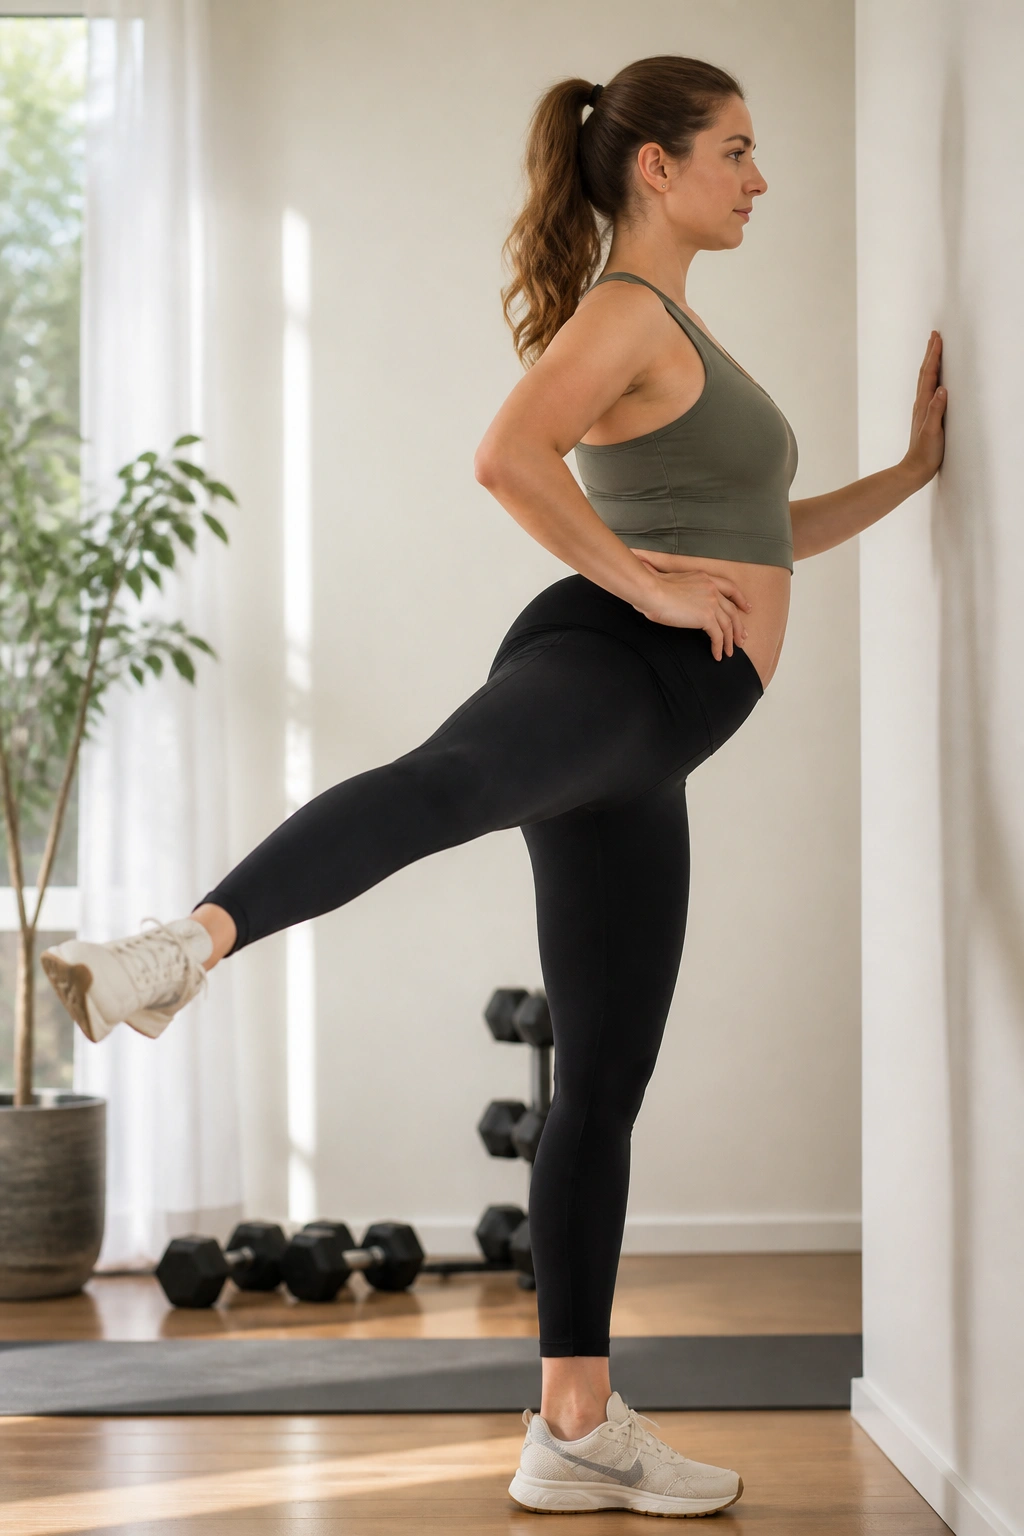
One leg moves out to the side. The pelvis stays quiet. That is the whole game.
Stand tall with one hand on a wall or counter. Shift weight into one leg and slide the other leg out to the side without leaning your torso. The outer hip should do the work, not the low back. Exhale as the leg moves away, inhale as it returns.
This exercise helps because the hip stabilizers and pelvic floor often cooperate. When the hip starts doing its share, the pelvic floor does not have to grip so hard every time you take a step.
Try 8 to 12 reps per side. A small range is better than a sloppy big one. If the standing leg locks hard, soften the knee a little.
13. Side-Step Marches With a Mini Band
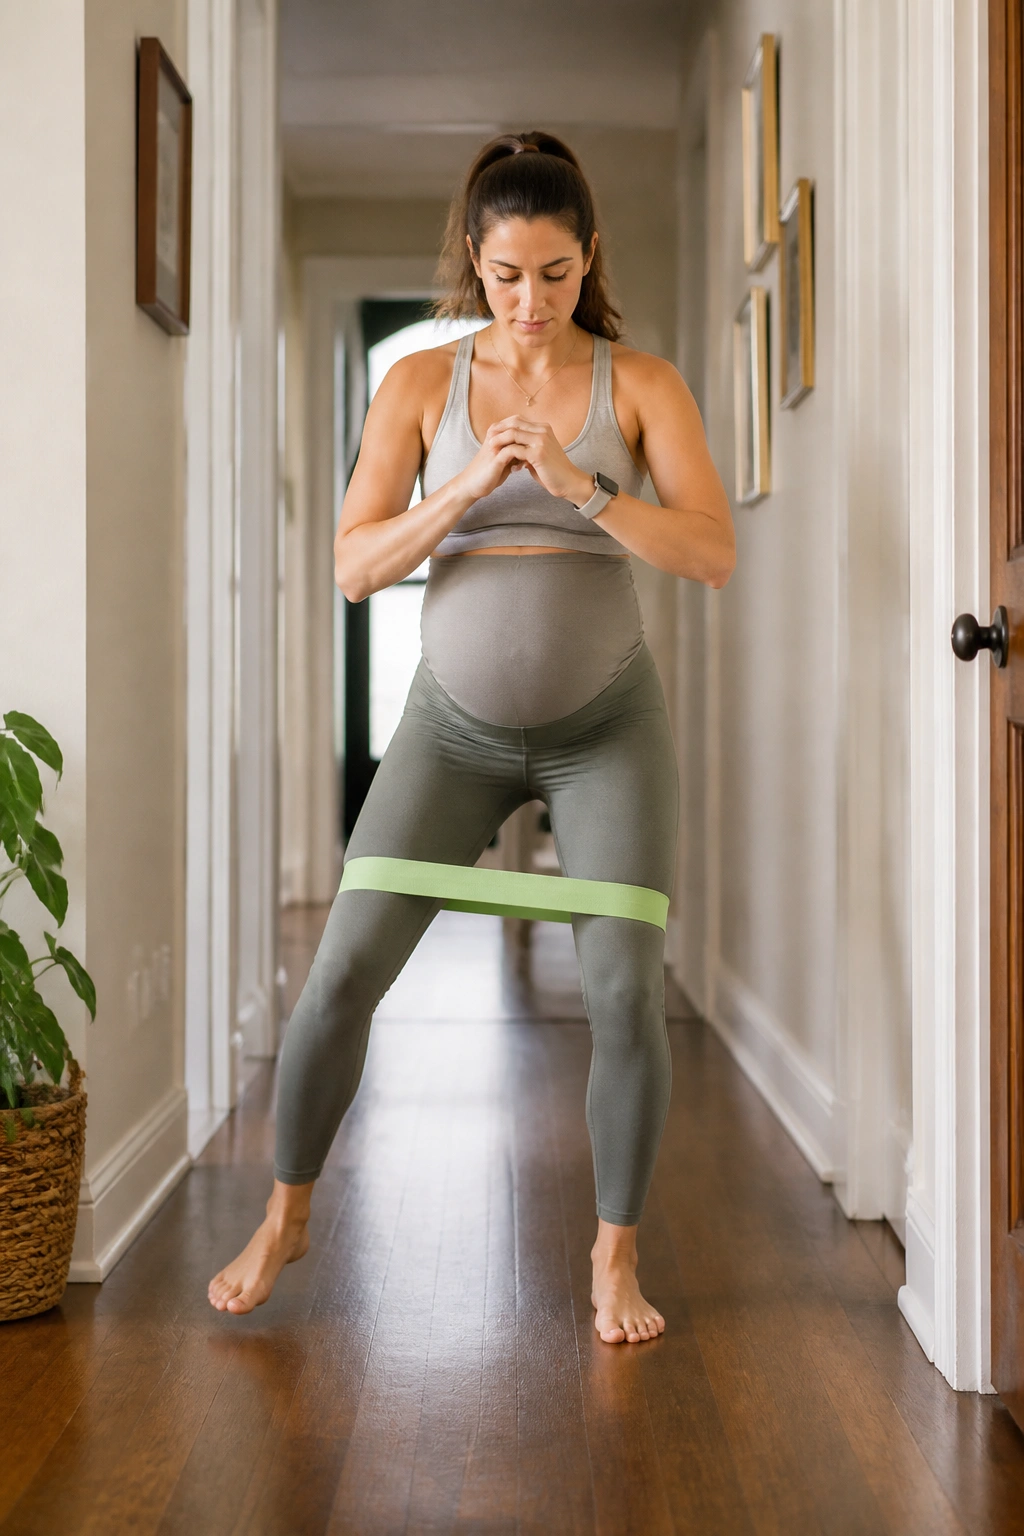
Why use a tiny band for pelvic floor support? Because the challenge is small, targeted, and easy to control. You are not trying to burn out the legs. You are trying to teach the pelvis how to stay steady while both hips work.
Place a mini band above the knees or around the ankles. Step sideways for 5 to 8 steps, then return the other way. Keep the knees slightly soft and the feet pointed forward. The exhale comes as you step.
How to Get the Most From It
- Keep the steps short
- Don’t sway the torso
- Use a light band, not a brutal one
- Stop before the hips start wobbling
Two rounds is plenty for most people. If you feel the pelvic floor bearing down, lighten the band and shorten the steps. Cranking up resistance does not fix poor control.
14. Heel Slides for Deep Core Control
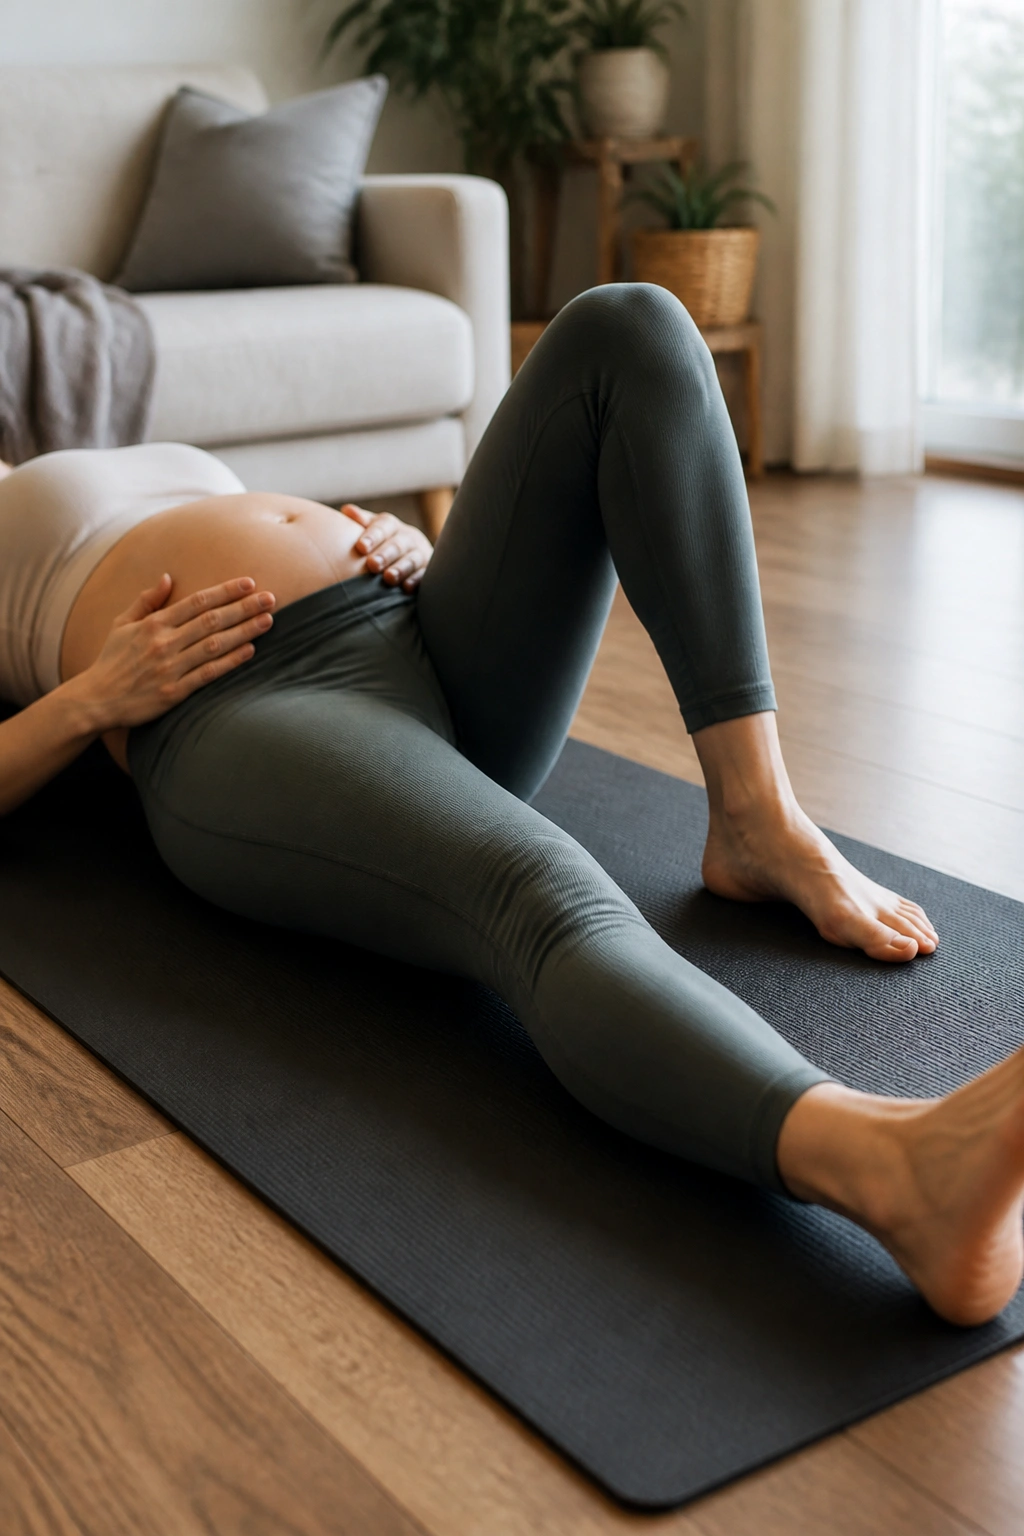
Heel slides are quiet work. They look too easy to matter until you feel how much the middle of the body wants to flare and brace when a leg moves away from it.
Lie on your back if comfortable, or use a slight incline. With one knee bent, slowly slide the heel away until the leg is almost straight, then bring it back. Exhale as the heel slides out, and keep the ribs from popping up.
This is a good checkpoint for doming or coning along the belly. If the abdominal wall bulges into a little ridge, reduce the range or slow it down. The goal is control, not distance.
Do 6 to 8 reps per side. The movement should feel almost too calm. That calm is the point.
15. Supported Split-Stance Lunges
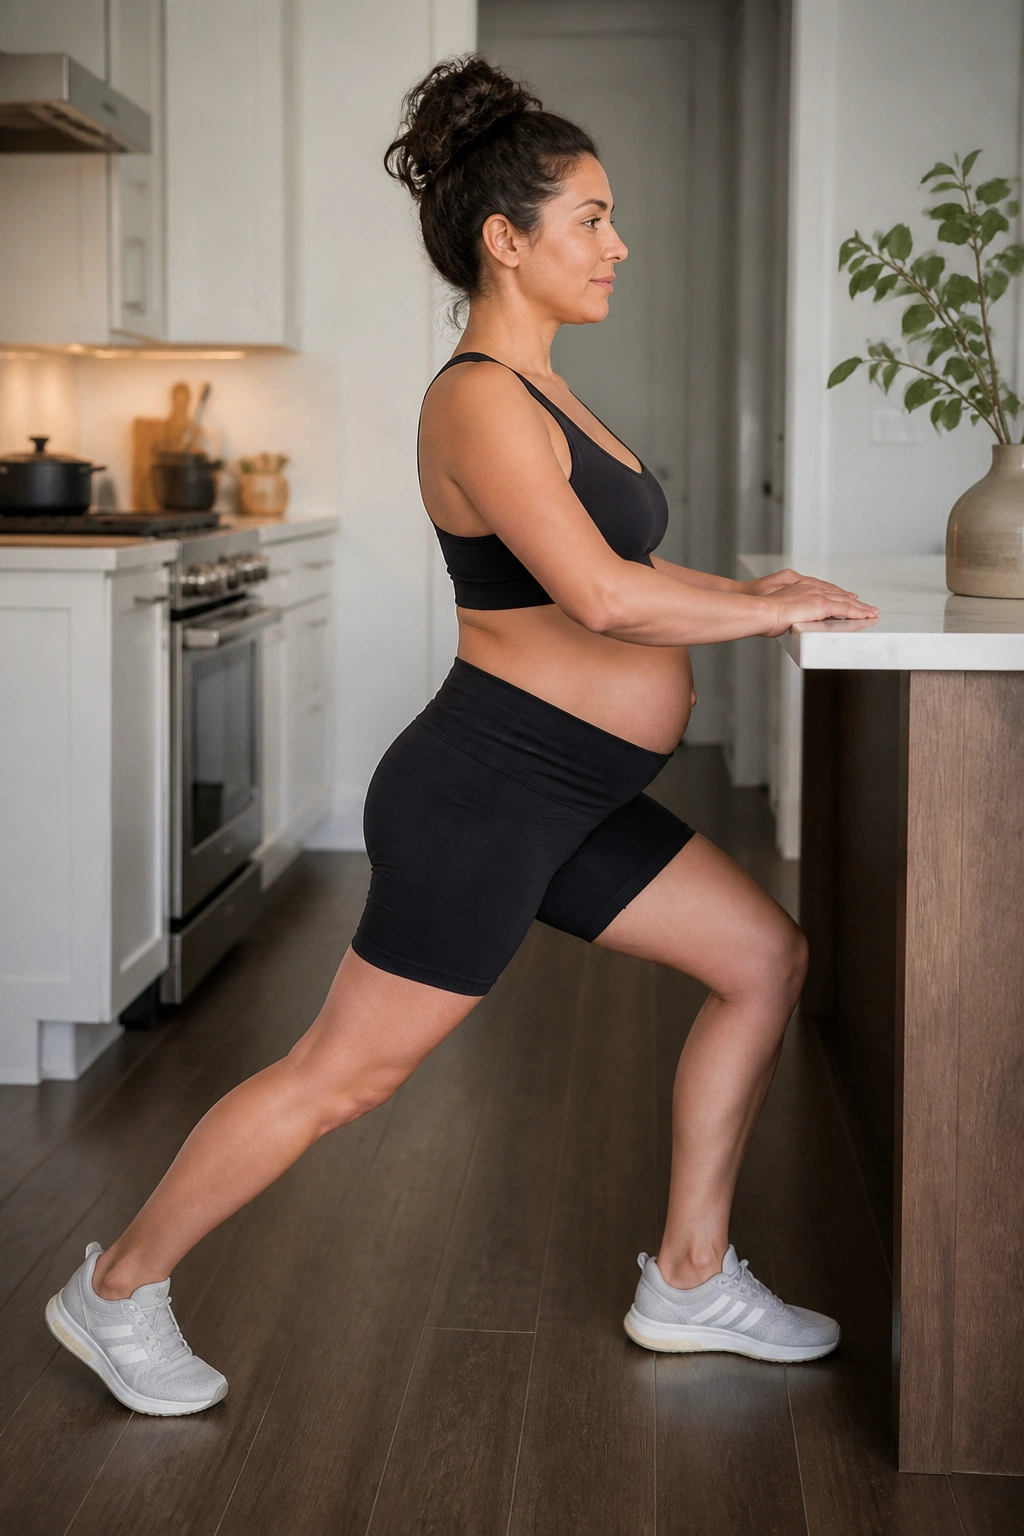
A split stance lunge gives the pelvic floor a real-world job: stay organized while weight shifts from one leg to the other. That is a more honest test than a machine or a mat exercise.
Hold a counter or chair for balance. Step one foot back a short distance, bend both knees a little, and lower straight down. Exhale as you rise. The front foot stays planted, and the back heel can stay lifted.
Compared with a deep lunge, this version is kinder on balance and easier to keep clean. Short range beats deep range when the pelvis starts tilting or the low back arches.
Use 5 to 8 reps per side. If the front knee feels cranky, shorten the stance. If you lose balance, keep one hand on support the whole time.
16. Step-Ups to a Low Platform
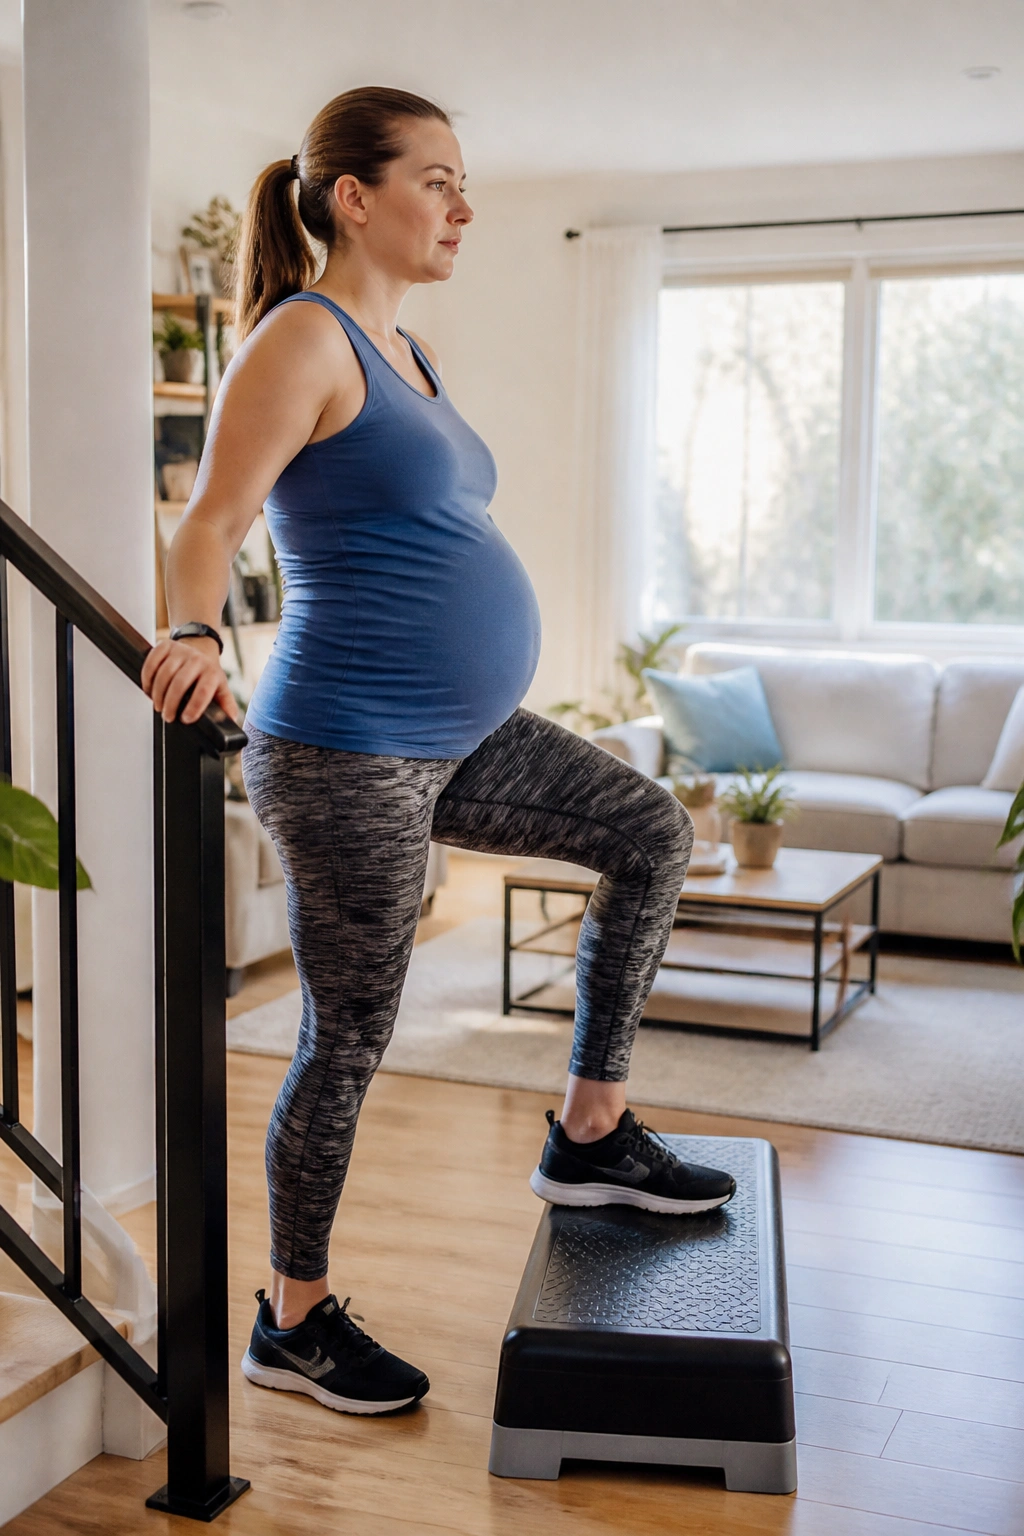
A low step-up is plain old useful. It trains the hips, glutes, and pelvic floor to manage one-sided load without that slow, sloppy wobble you sometimes get when climbing stairs near the end of pregnancy.
Use a step no higher than a sturdy stair to start. Place one foot fully on the step, exhale, and drive through that foot to stand tall. Lower slowly and control the down phase.
The descent matters. A lot.
If you drop down too fast, the pelvic floor gets hit with more pressure than it needs. Try 5 to 8 reps per side. Hold a rail or wall if that lets you move better. Strong does not have to mean unstable.
17. Modified Side Plank at the Wall
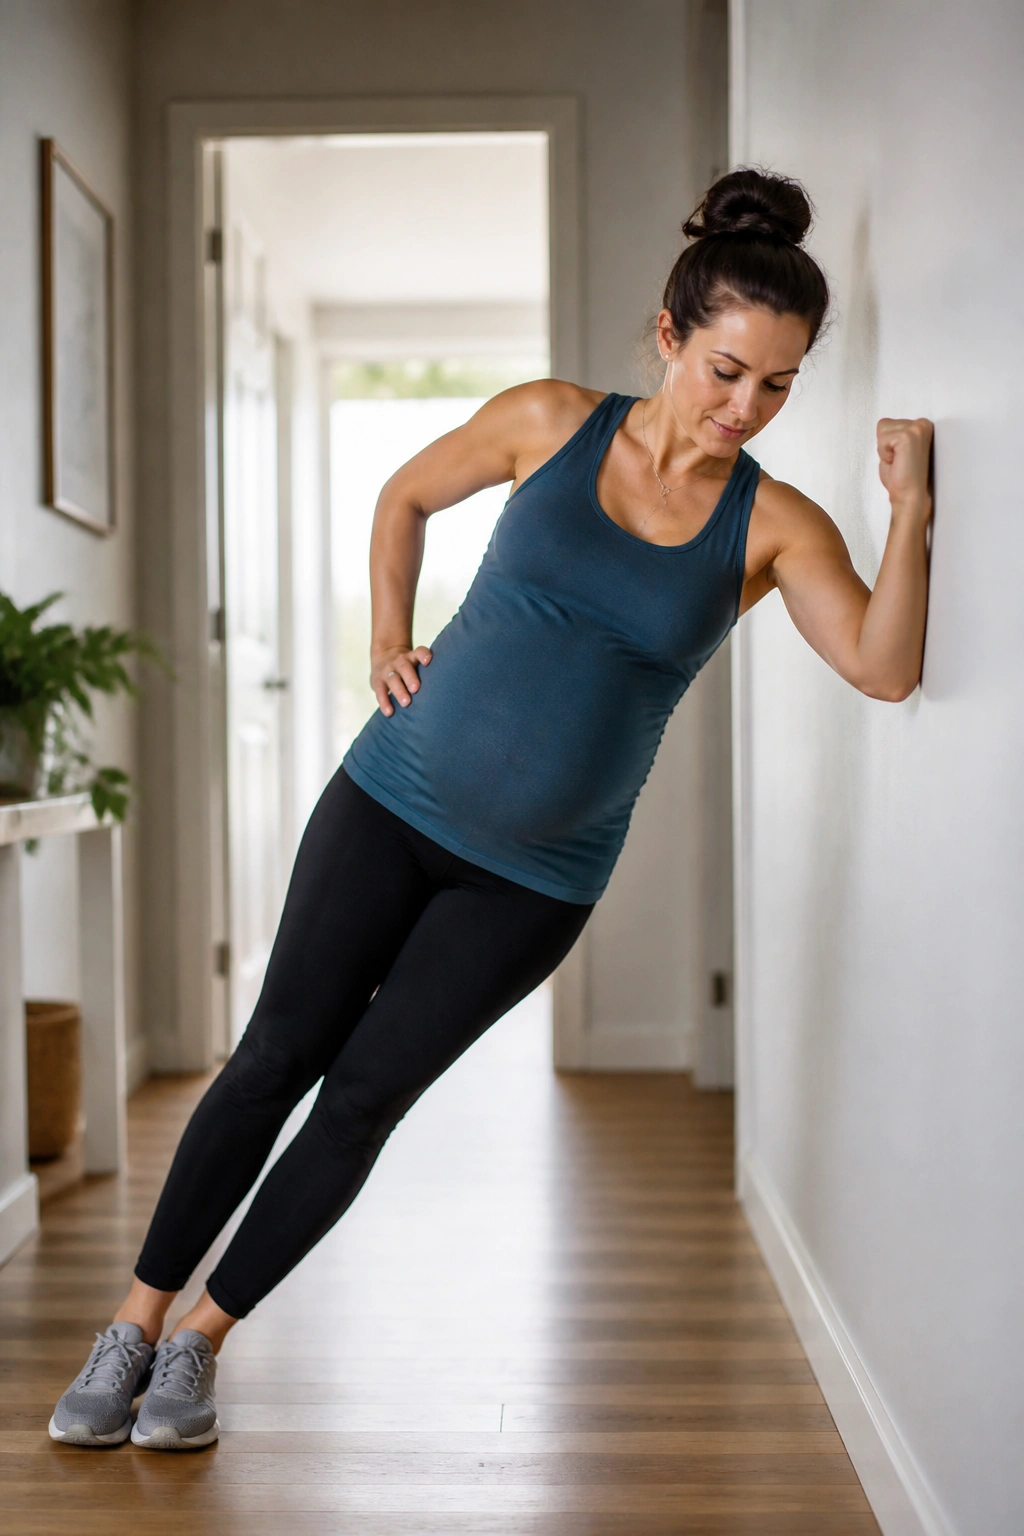
A floor side plank can be a little much in pregnancy, and I would rather see a clean wall version than a shaky full version any day. The wall keeps the load honest and the pressure manageable.
Stand sideways to a wall and press the forearm into it at shoulder height. Step the feet out a little and lean the body away from the wall so the side body turns on. Hold 10 to 20 seconds while you breathe steadily.
What Makes It Different
Unlike a floor plank, this version is easier to scale. You can adjust the angle by moving your feet closer or farther from the wall. That makes it a smart option if you want oblique and pelvic stability work without feeling like you are wrestling the floor.
Do 3 to 4 holds per side. If the shoulder takes over, move the feet closer and try again.
18. Quadruped Rock-Backs
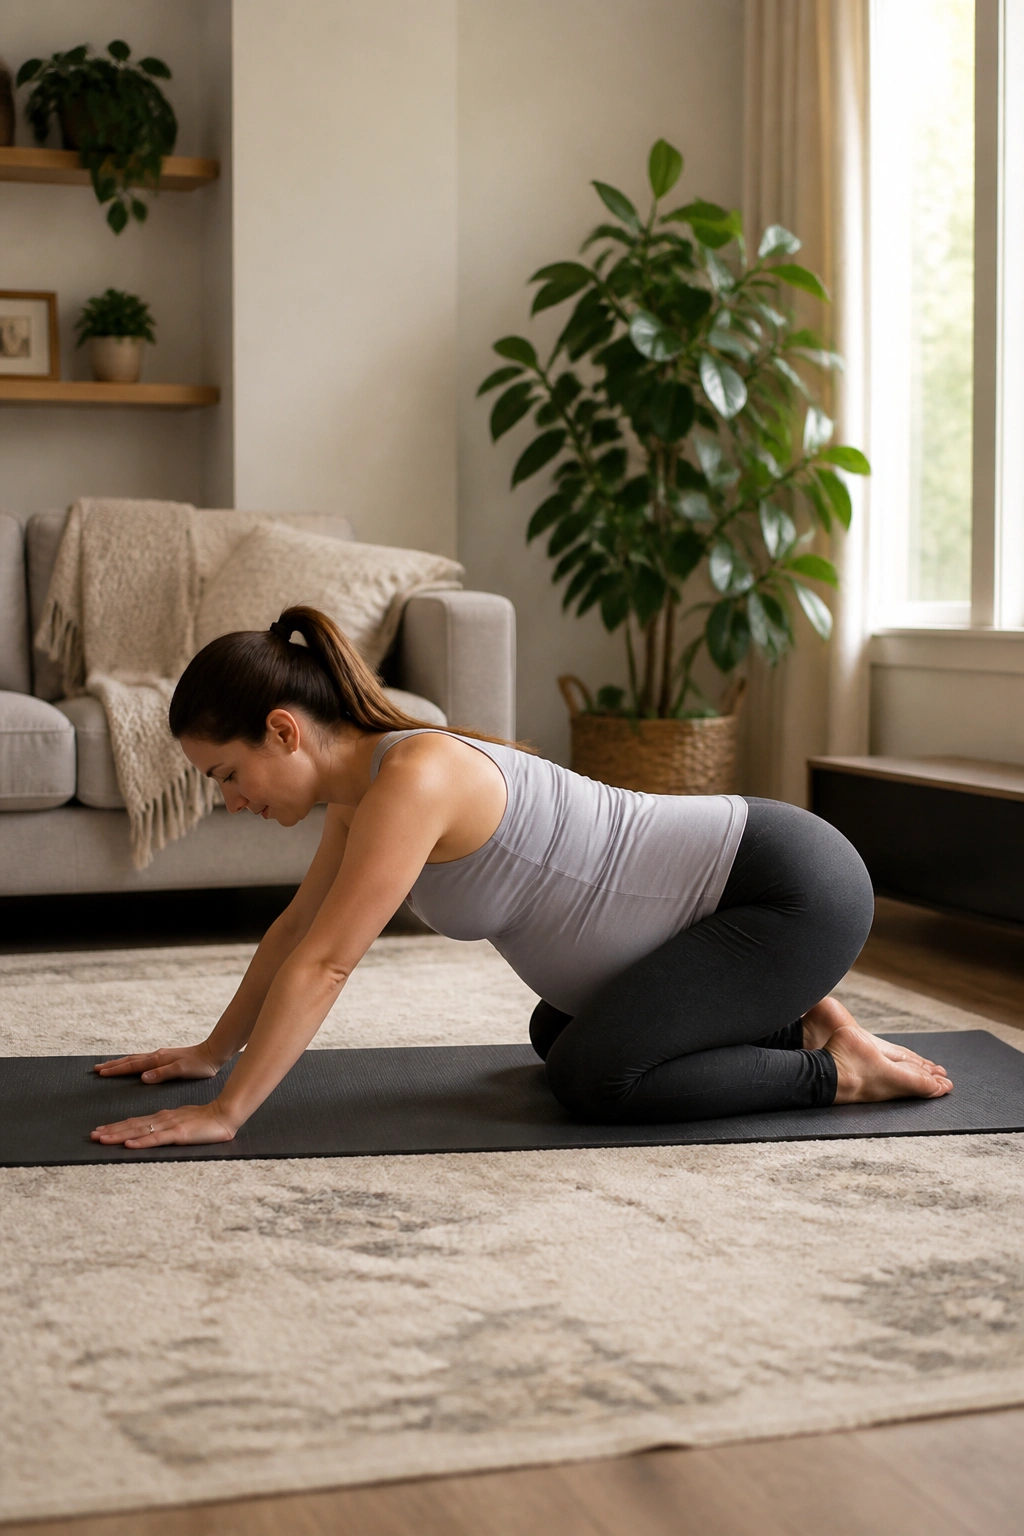
Rock-backs are one of my favorite “my body feels weird today” moves. They calm the back, open the hips, and let the pelvic floor lengthen without forcing anything.
Start on hands and knees. Keep the spine long and slowly shift the hips back toward the heels, then glide forward again. Breathe in on the way back, breathe out on the way forward, or flip it if that feels better.
The magic is in the hips. They move, the pelvis follows, and the floor of the pelvis gets a small stretch instead of a big command.
Try 8 slow rocks. If you are carrying a lot of tension, widen the knees a little. If your knees complain, tuck a folded towel underneath them. Tiny comforts make a bigger difference than people admit.
19. Supported Deep Squat Holds
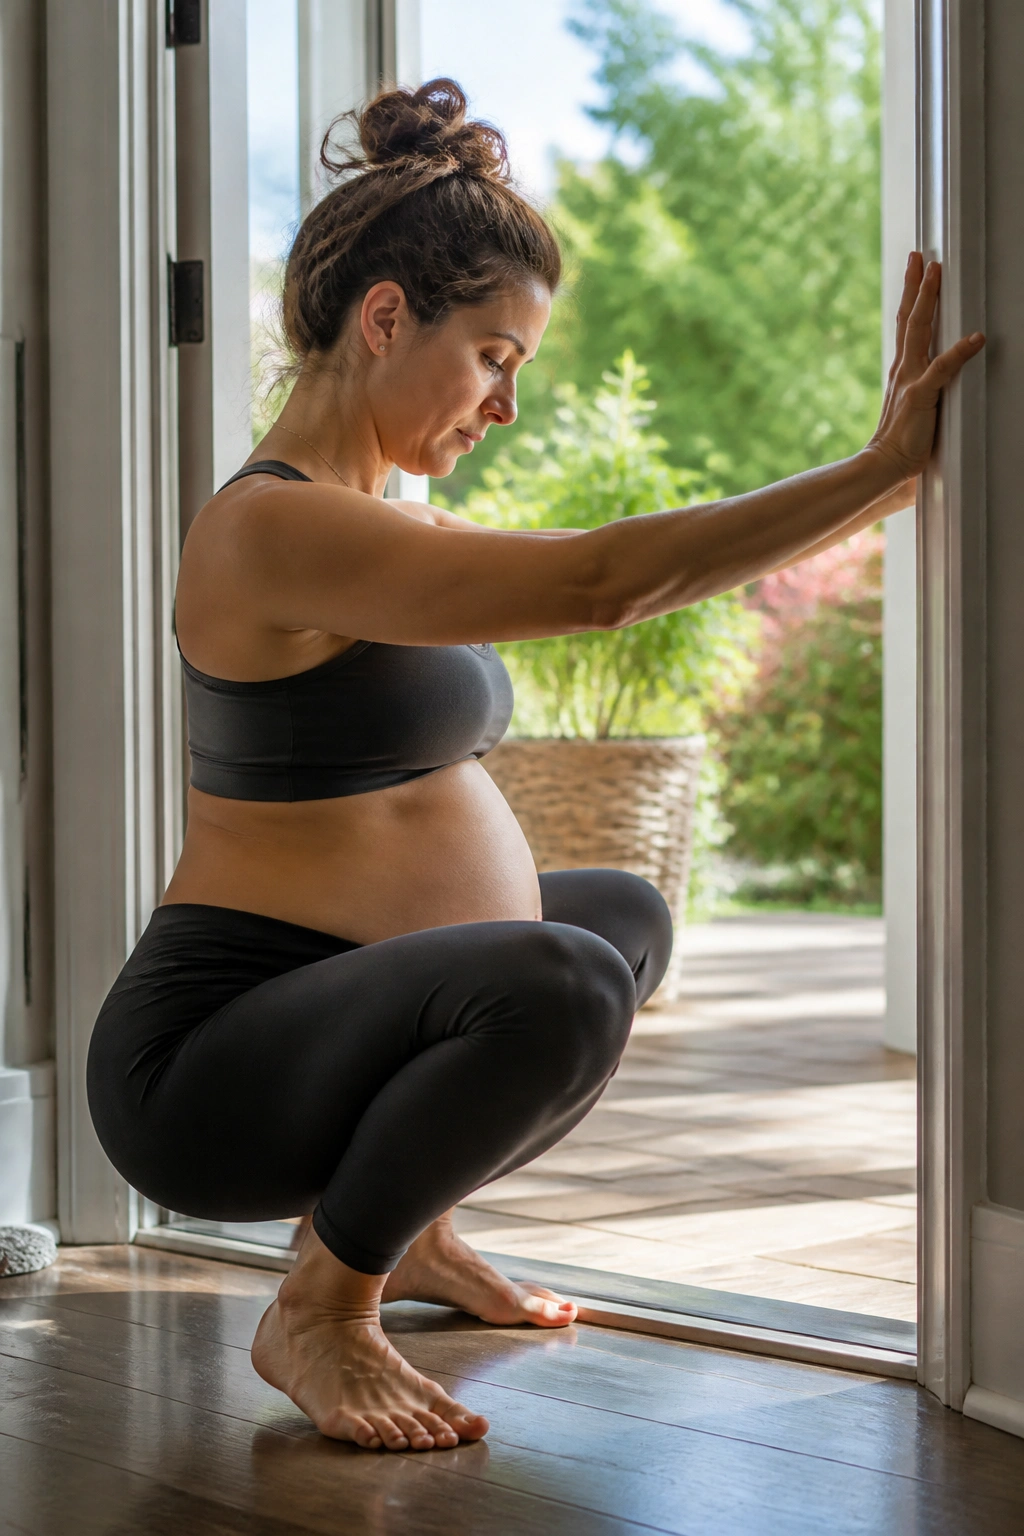
A supported squat is one of the best ways to practice opening through the hips while keeping the pelvic floor responsive instead of clenched. The support keeps the position safe and useful.
Hold onto a doorframe, sink, or sturdy counter and settle into a deep squat that still lets you breathe. Heels can stay on the floor or lift slightly if that is more natural. Once you are in position, inhale to widen, exhale to gently lift the pelvic floor, and then relax it again.
What to Watch For
- No straining
- No breath-holding
- No sharp pressure downward
- No forcing depth just to “get lower”
Hold for 10 to 30 seconds, repeat 2 or 3 times. If the squat feels like a stretch in the hips and a calm opening in the pelvis, you’re in the right zone. If it feels like a push, you’ve gone too far.
20. Standing Wall Press With Breath Control
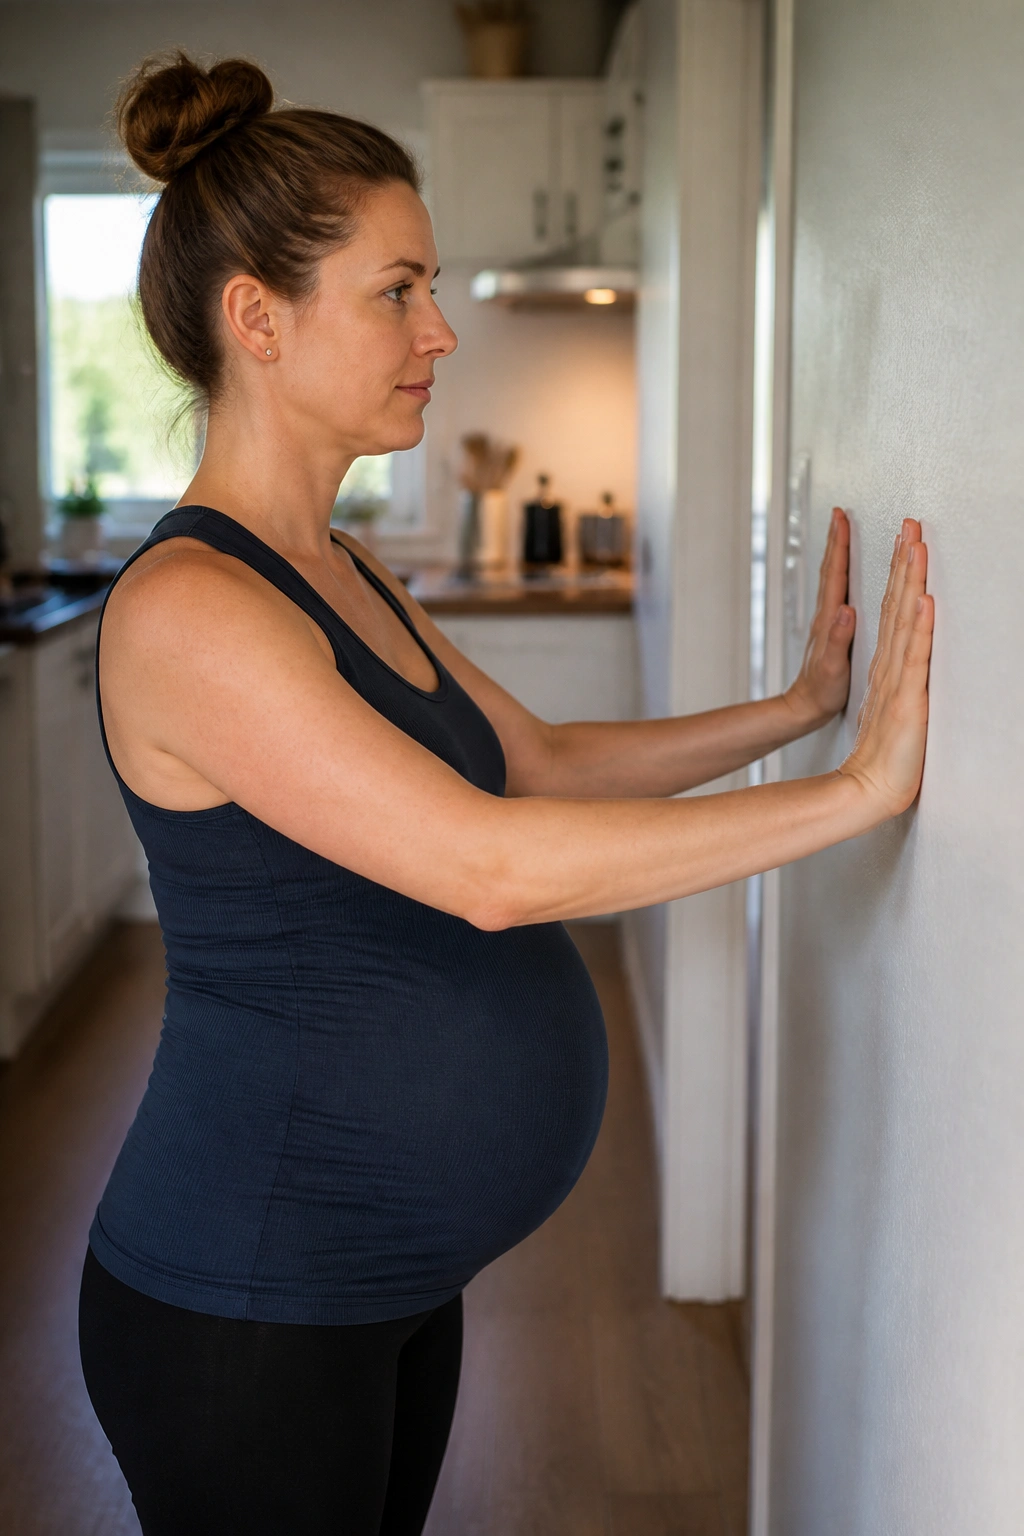
This one looks plain, which is part of why I like it. You stand near a wall, press both hands into it at chest height, and use the effort to organize the ribs, belly, and pelvic floor together without overthinking it.
Stand with feet hip-width apart, knees soft, and hands on the wall. As you press for 5 seconds, exhale and keep the ribs from flaring. Then ease off and inhale while staying tall. The pressure should feel even through the palms, shoulders, and midsection.
Use 5 rounds on its own or pair it with a squat, a march, or a sit-to-stand. On low-energy days, this is the move I’d keep. It asks for focus, not drama, and the pelvic floor gets a clear signal that the body can create support without clenching.
A simple way to stitch the whole thing together is this: pick 1 breathing drill, 2 strength moves, and 1 mobility move on most days. That’s enough. You do not need all 20 in one session, and honestly, you probably would not enjoy that anyway. Consistency beats spectacle here, and the best routine is the one your body can repeat without groaning.
