



A prolapsed uterus changes the rules. The old advice to “just do more Kegels” can miss the real issue, because downward pressure is often the thing that makes symptoms flare in the first place. Prolapsed uterus pelvic floor exercises work best when they calm pressure first and build strength second.
That means low strain. Small ranges. Better breathing. If a movement makes you feel heavier, more bulgy, more dragged down, or even a little shaky in the pelvis afterward, that move is not earning its keep. No number of pretty reps changes that.
Pelvic floor work is not only about squeezing. The hips, glutes, ribs, diaphragm, and deep belly muscles all share the load, and when one part is overworking, the others usually start complaining. A lot of people brace all day without realizing it. That constant clench is exhausting.
So the goal here is a routine that feels controlled, calm, and usable in real life — getting up from a chair, walking to the mailbox, carrying a grocery bag, climbing a few steps without the “something is dropping” feeling. Start with the gentlest moves and let your body tell you what stays and what goes.
1. Diaphragmatic Breathing to Unload the Pelvic Floor
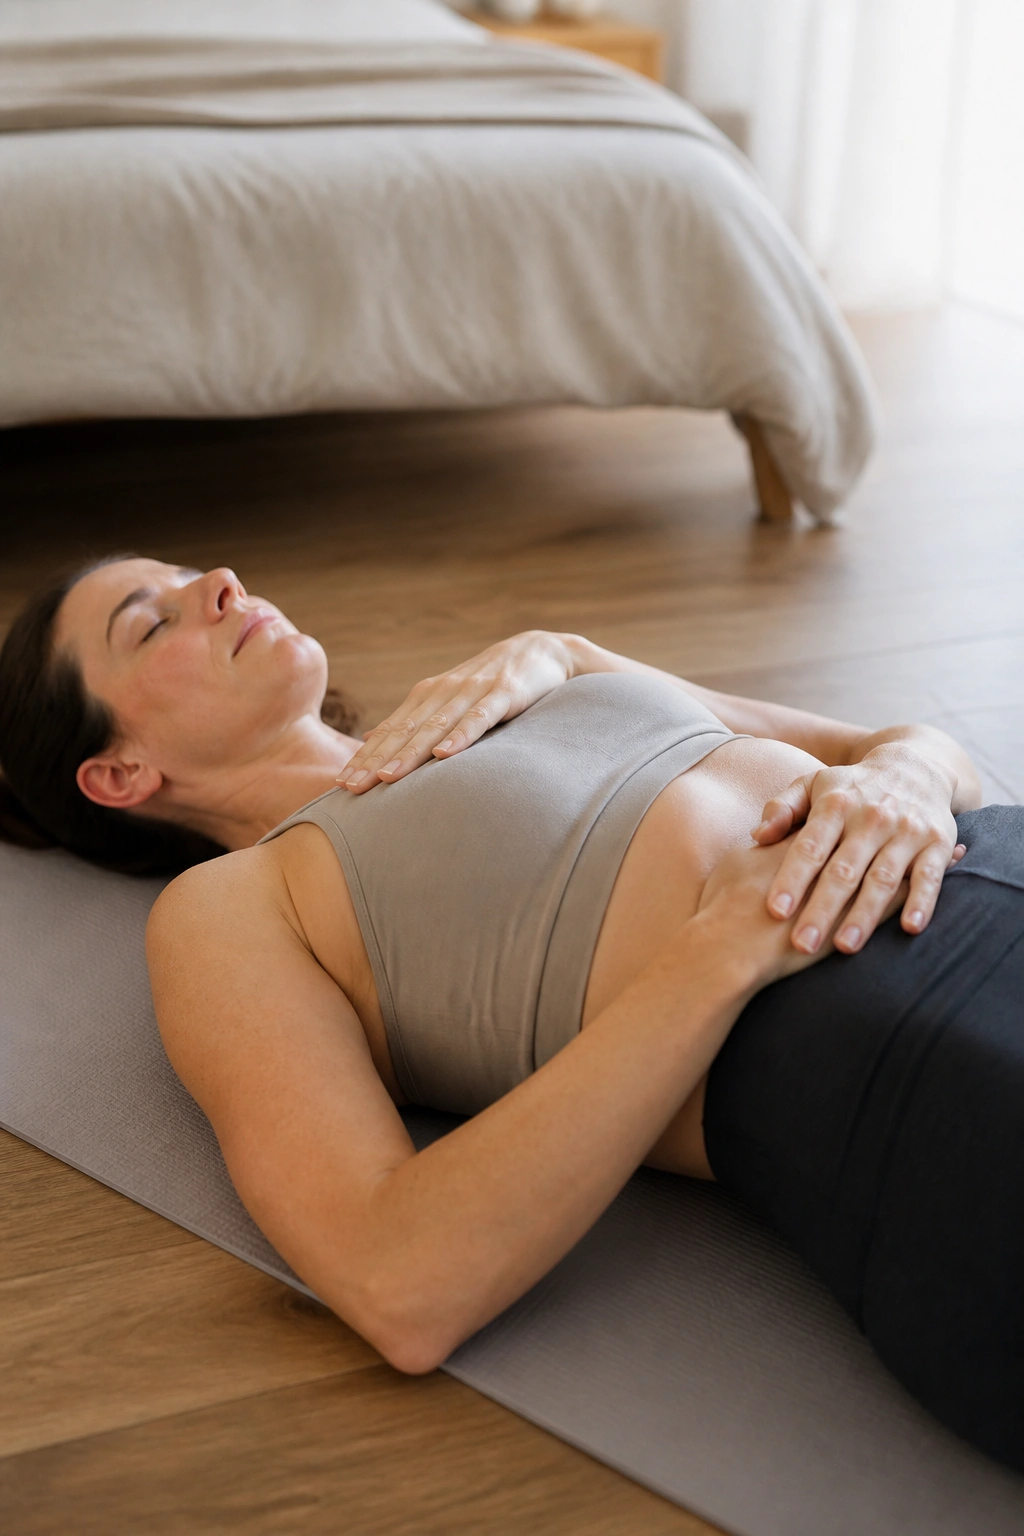
Lie on your back with your knees bent, or sit in a firm chair if the floor feels awkward. Put one hand on your lower ribs and one on your belly. Inhale through your nose and let the ribs widen sideways, then exhale slowly as if you were fogging a mirror. The exhale should feel long and quiet, not forced.
What to feel
- The lower ribs expand before the belly pushes out.
- The pelvic floor softens on the inhale instead of gripping.
- The belly flattens a little on the exhale, but it does not clamp hard.
- Your jaw, shoulders, and butt stay loose.
Five breaths is enough to start. Two rounds is plenty if you’re new to this.
If the exhale feels like a hard stomach crunch, back off. That is not the point here. You want pressure to move down and out on the inhale, then settle gently on the exhale.
2. Gentle Pelvic Floor Lifts and Full Releases
Can pelvic floor contractions still help with prolapse? Usually, yes — if they are tiny, clean, and followed by a real release. A small lift can improve awareness and support, but a hard squeeze with no release tends to make the area feel tight and cranky.
Think of lifting a blueberry, not a marble. The effort should land around 20 to 30 percent, not max effort. Hold for 2 to 3 seconds, then fully relax for 4 to 6 seconds. That release matters as much as the lift.
How to use it
Start with 5 gentle reps after breathing work. If the pelvis feels more crowded, skip the holds and stick with breathing for a few days. A lot of people do better when they stop trying to “win” the Kegel and start trying to make each contraction crisp.
3. Exhale on Effort Before You Add Load
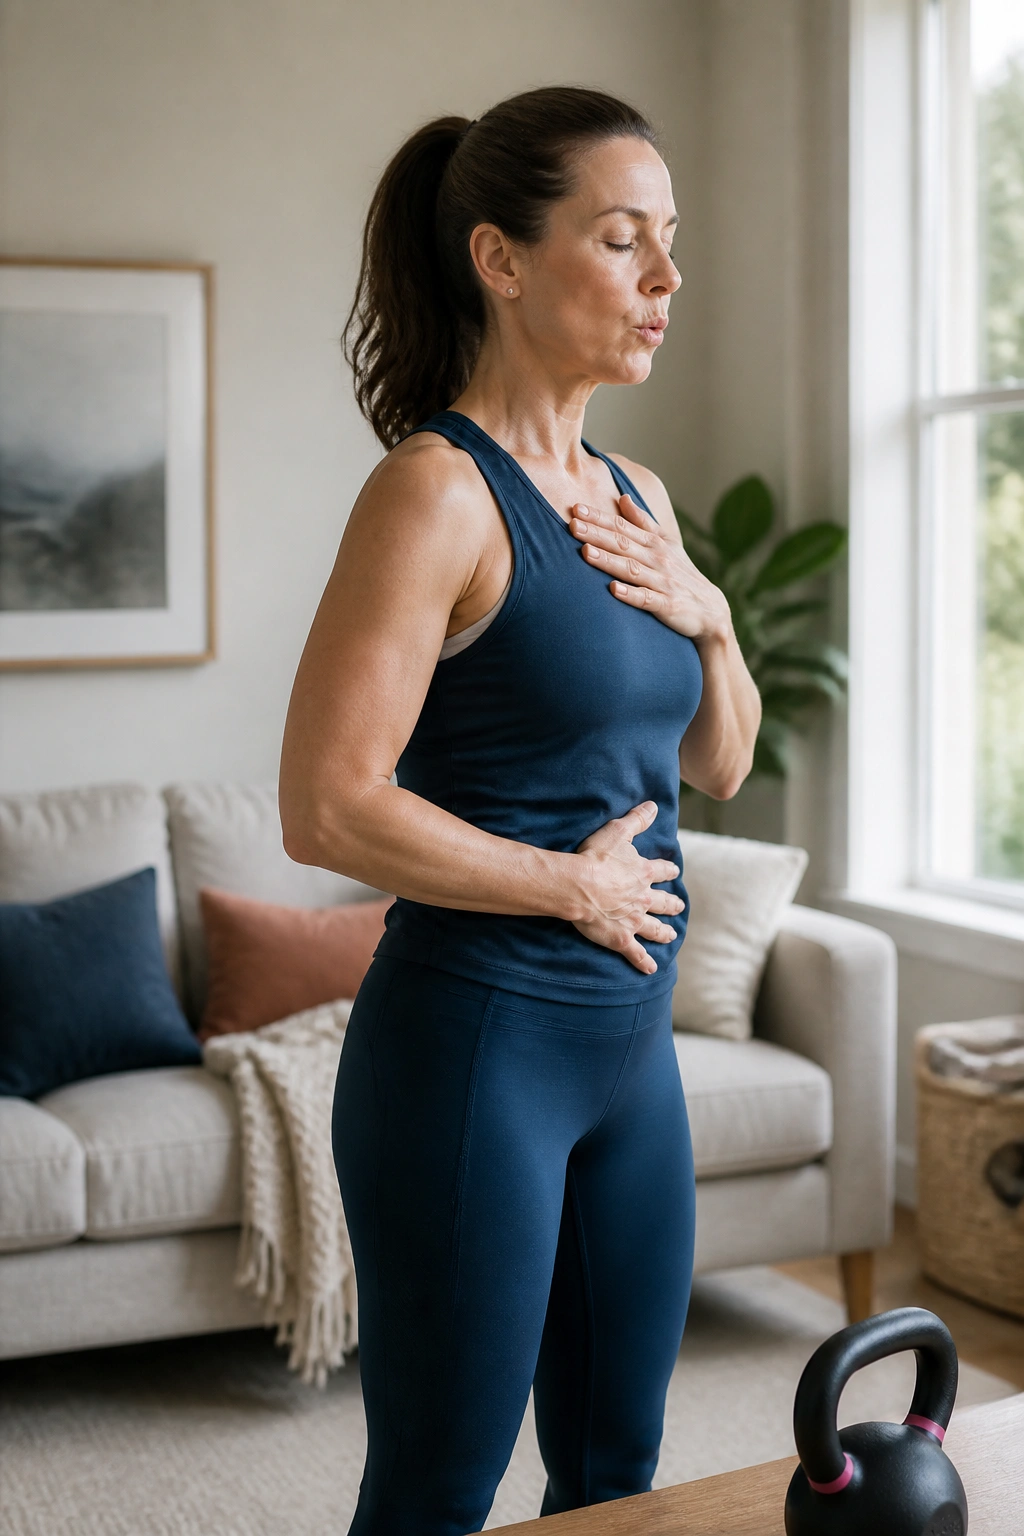
Breath-holding is the fastest way to turn a safe exercise into a pressure spike. It happens fast. Stand up from a chair, lift a laundry basket, push through a bridge, and the instinct is to hold your breath and brace. That brace may feel strong, but it sends pressure downward.
Exhale first, then move. Not after. First.
Use the same rule for nearly every exercise in this list. As the effort starts, let air leave through the mouth in a slow, quiet stream. The exhale does two jobs at once: it keeps the ribs from flaring and it stops the belly from bulging hard against the pelvic floor.
Try it with a sit-to-stand, a bridge, or even a step-up. You should feel a smoother start and less of that “punching down” sensation. Tiny detail, big payoff.
4. Pelvic Tilts on the Floor
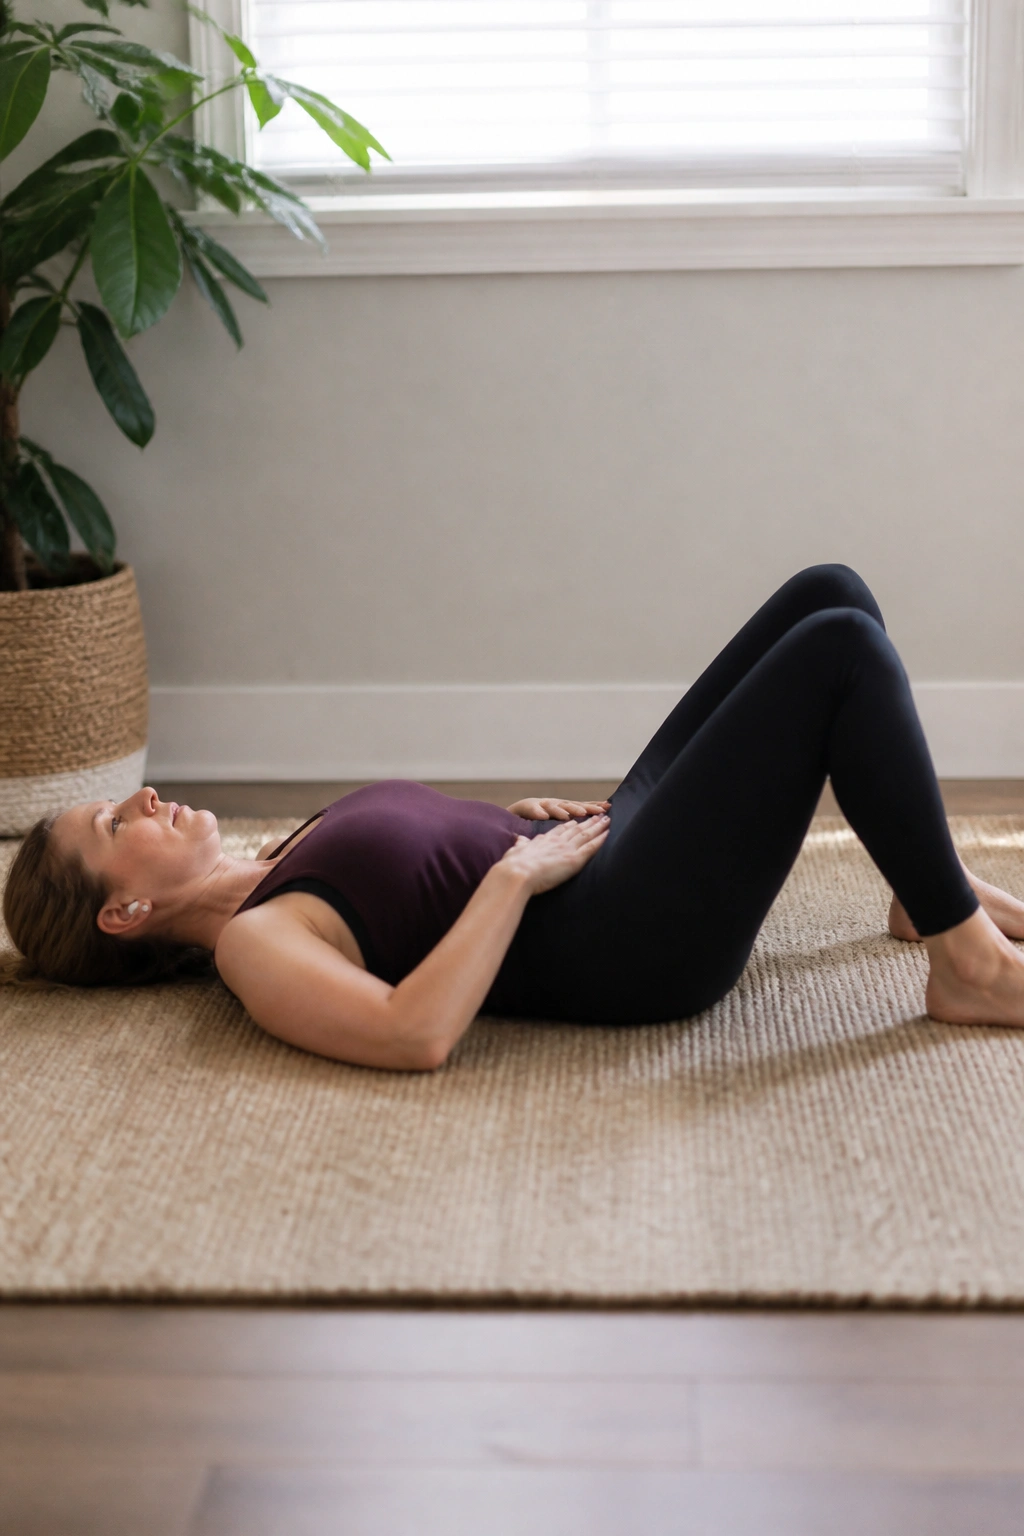
If your low back feels glued to the mat, don’t panic. That little rock of the pelvis is one of the cleanest starter moves for prolapse-friendly training because it teaches you where neutral is without asking the pelvis to support much load.
Lie on your back with your knees bent and feet flat. Gently exhale and tip your pelvis so the low back softens toward the floor. Then inhale and return to a middle position. The movement is tiny. That’s fine.
- Keep the rib cage quiet.
- Don’t push hard through your feet.
- Let the movement come from the pelvis, not the shoulders.
- Aim for 8 to 10 slow reps.
A small pelvic tilt before bridges or marches can make the rest of the routine feel cleaner. It is a warm-up that earns respect because it stops the whole body from getting stiff and braced.
5. Heel Slides With a Quiet Abdomen
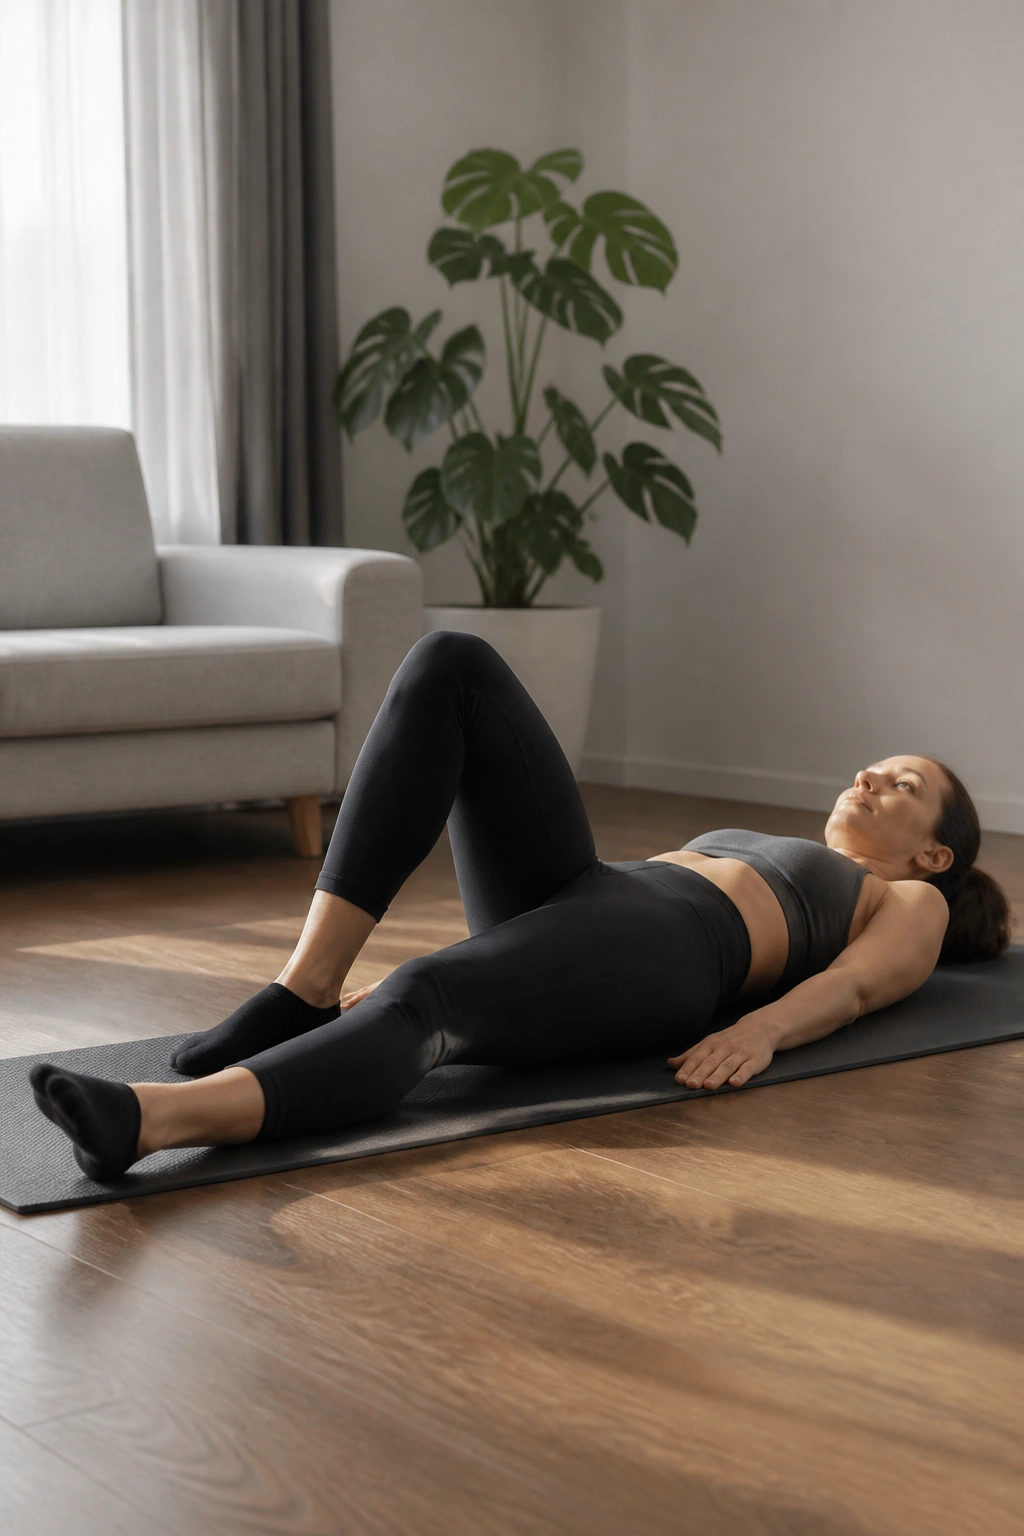
Heel slides look almost too easy, and that is exactly why they work so well early on. One heel glides away along the floor while the pelvis stays quiet. No leg lifting. No big abdominal effort. No dramatic pressure change.
Lie on your back with knees bent. As you exhale, slowly slide one heel forward until the leg is almost straight, or as far as you can go without the belly doming. Inhale and slide it back. Then switch sides.
The trick is to watch the pelvis, not the foot. If the low back arches, the rib cage pops up, or the opposite hip starts wandering, the range is too big. Cut it down by half and keep going. Boring is good here.
Do 6 to 8 reps per side. Heel slides often feel easier than marching, and that makes them a smart bridge between breathing and true strength work.
6. Marching in Hook-Lying Position
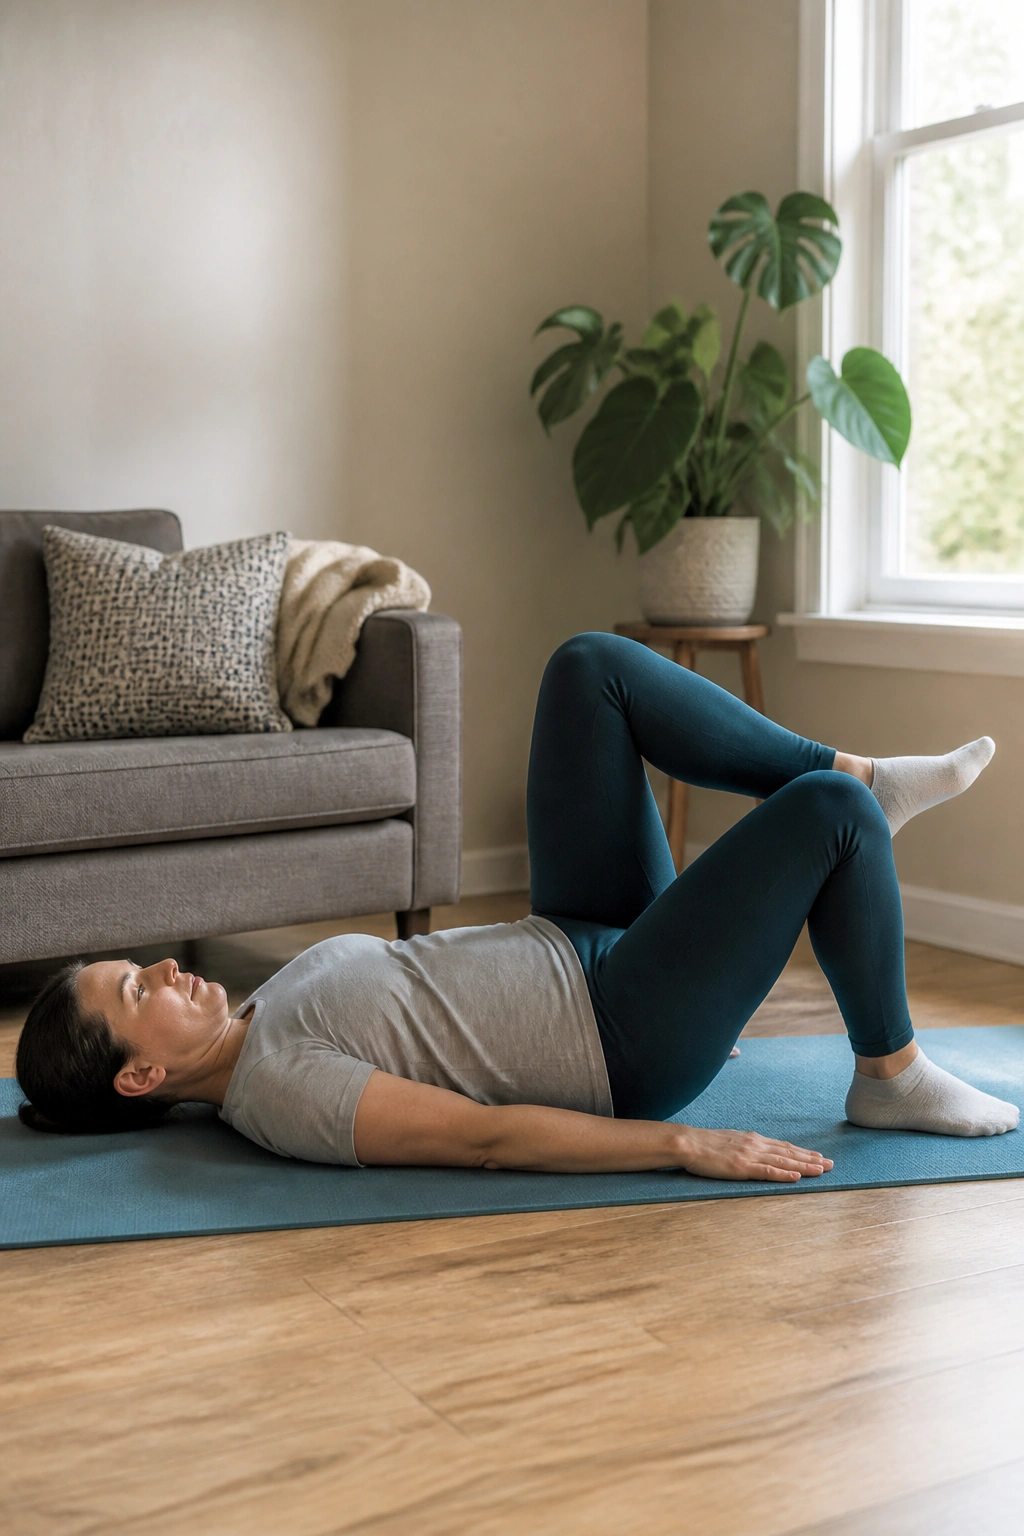
Marching asks a little more of the deep core than heel slides, but it still stays friendly if you keep the range small. Unlike a full leg lift, a hook-lying march only lifts one foot an inch or two off the floor, so the pelvis has a chance to stay level.
This is a good step up if heel slides feel easy and symptom-free. It’s also better than rushing into more dramatic core work. People often think they need harder exercises right away. They don’t.
Who it suits best
- You can breathe without bracing.
- Heel slides feel calm.
- You want a bit more challenge without standing up.
Lift one foot only as high as you need to clear the floor. Exhale as the knee rises, inhale as it lowers. Keep the movement slow. 6 marches per side is enough to start, and your pelvis should feel steady, not wobbly.
7. Glute Bridges With a Soft Exhale
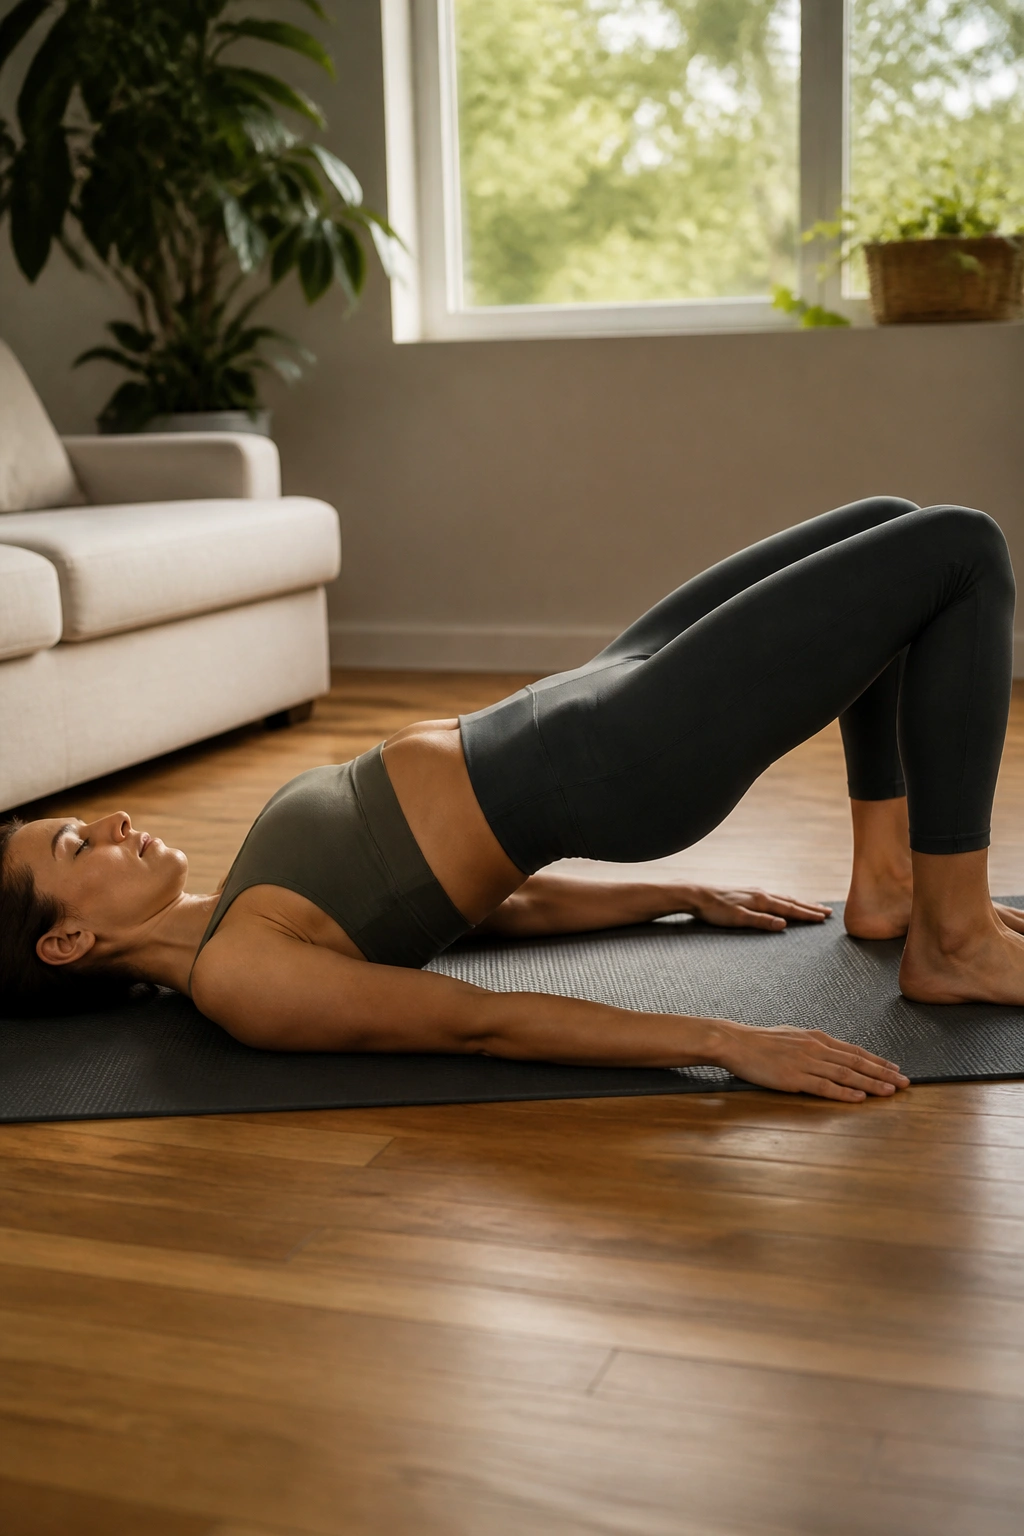
A bridge can be helpful for prolapse because it trains the backside — glutes, hamstrings, and a little deep core — without the same downward load as a squat. The catch is that people love to go too high. That is where the low back starts taking over and the pelvic floor gets annoyed.
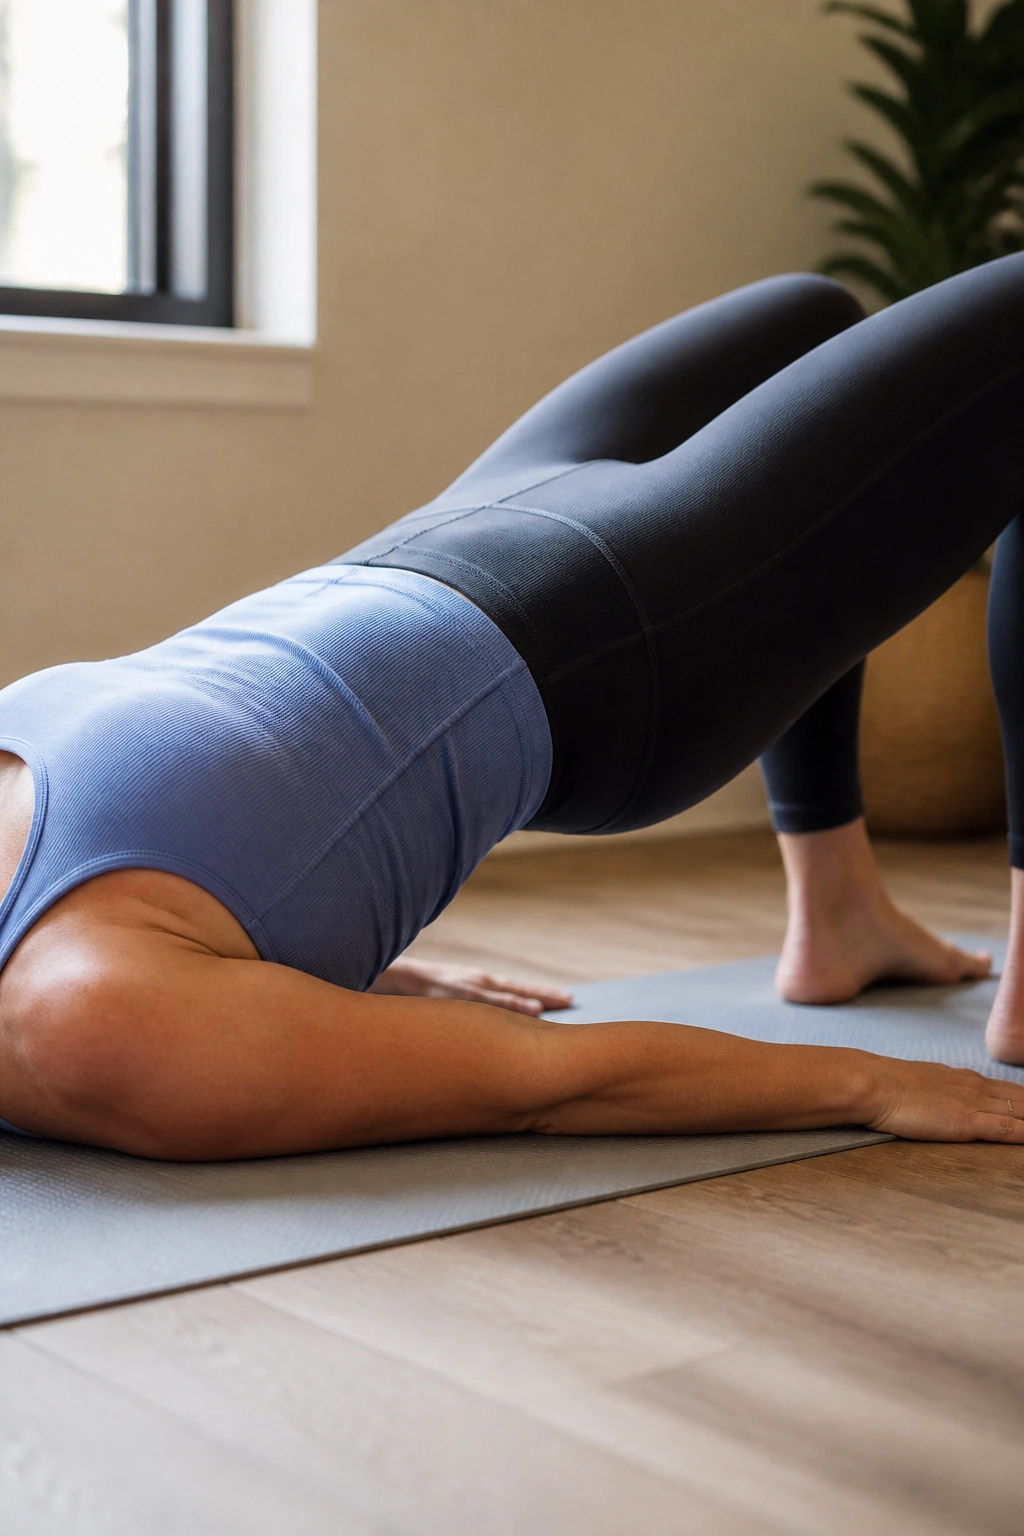
Feet stay hip-width apart. Exhale before the lift, then peel the hips up only until your body forms a straight line from shoulders to knees. Hold for 1 or 2 seconds. Lower slowly. You are not trying to make a mountain out of it.
What not to chase
- A huge hip lift.
- A hard abdominal brace.
- Weight rolling into the toes.
- Breath-holding at the top.
A low bridge is still a bridge. 5 to 8 clean reps are better than 15 ugly ones. If the pelvis feels heavy at the top, cut the range in half or go back to pelvic tilts for a bit.
8. Clamshells for Hip Support
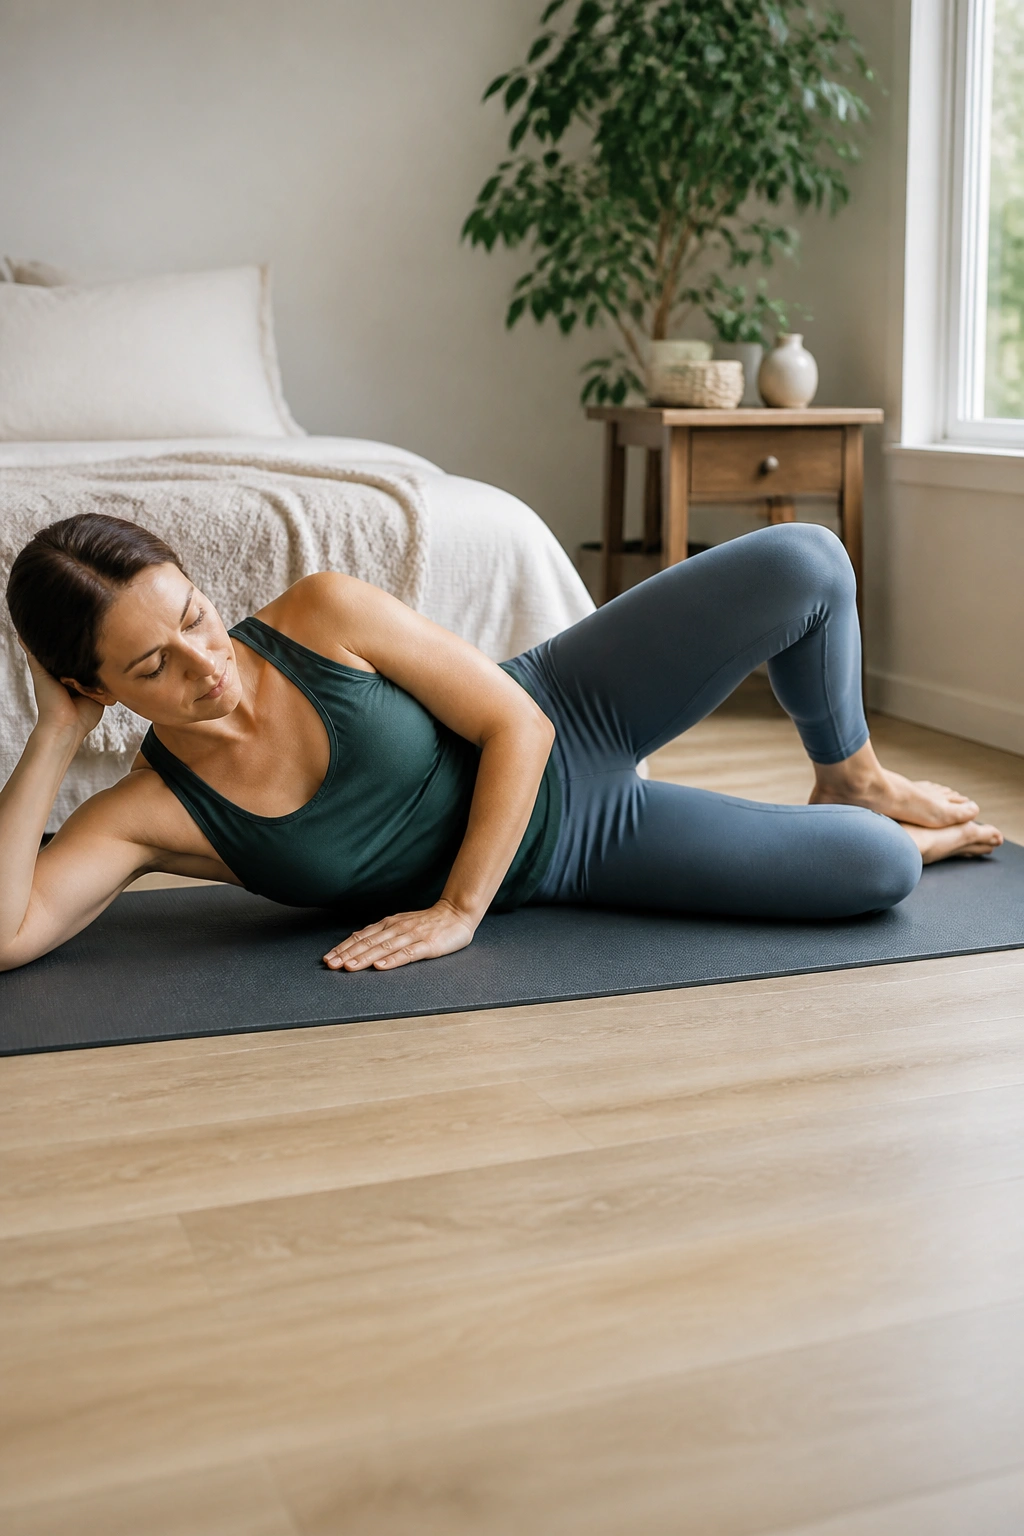
Clamshells are one of those exercises people dismiss because they look too simple. I like them anyway. They train the side of the hip, especially the glute med, which helps keep the pelvis from wobbling all over the place when you walk or stand on one leg.
Lie on your side with knees bent and feet stacked. Keep the hips stacked too — that part matters. Open the top knee a few inches, then close it slowly. The feet stay together. The pelvis stays quiet.
Do 10 to 12 reps per side with a slow lower. A light band above the knees can come later, but don’t start there unless bodyweight feels boring and the pelvis stays calm. If you feel the lower back helping, the motion is too big.
Clamshells work best when they are tidy. No rolling back. No yanking the knee open. Tiny, clean reps beat fancy effort every time.
9. Side-Lying Leg Raises Without Pelvic Roll
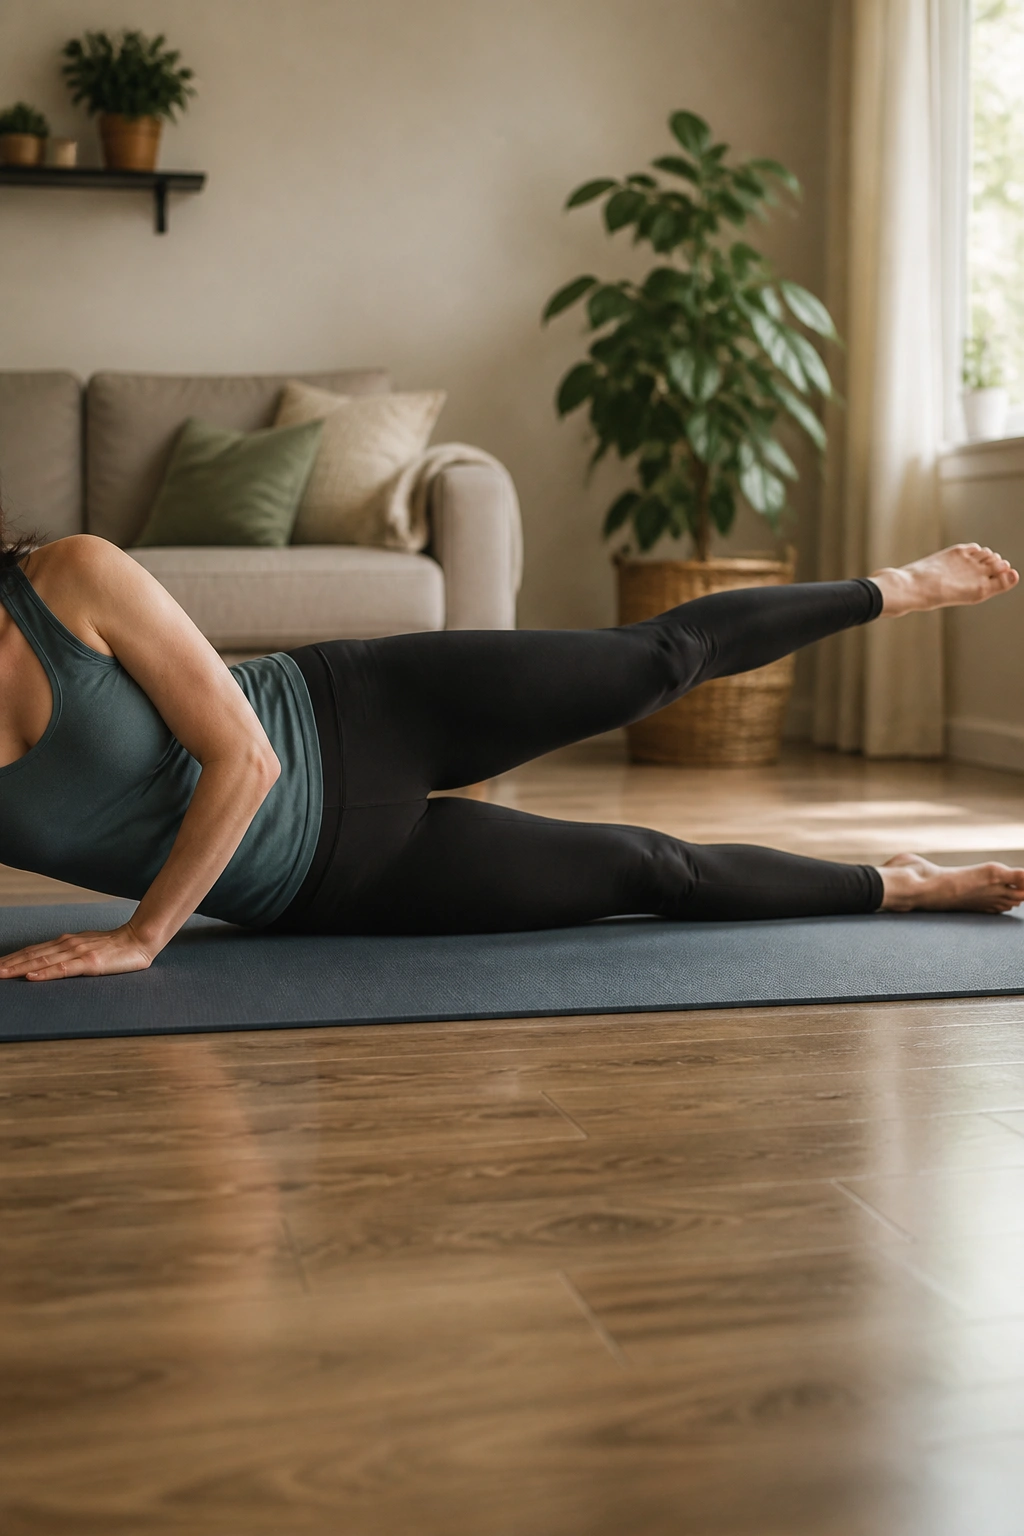
Can you do a side-lying leg raise with prolapse? Often yes, if the range stays small and the waist doesn’t lift away from the floor. Compared with clamshells, this move asks more of the outer hip because the leg is straighter. That makes it a little tougher.
Lie on your side, bottom knee bent if that helps you stay stable. Keep the top leg straight and the toes slightly pointed down. Lift the leg 6 to 10 inches, then lower with control. If the body starts rocking back, stop right there.
How to use it
- Start with 8 reps per side.
- Keep the lift smooth, not fast.
- Stop the set if the waist tightens hard.
- Reduce the lift range before you add bands or ankle weight.
This is a useful move for walking strength and hip control. It is not the place to prove anything. If you can keep the pelvis stacked and the breath calm, it belongs in the routine.
10. Modified Bird Dog Reach
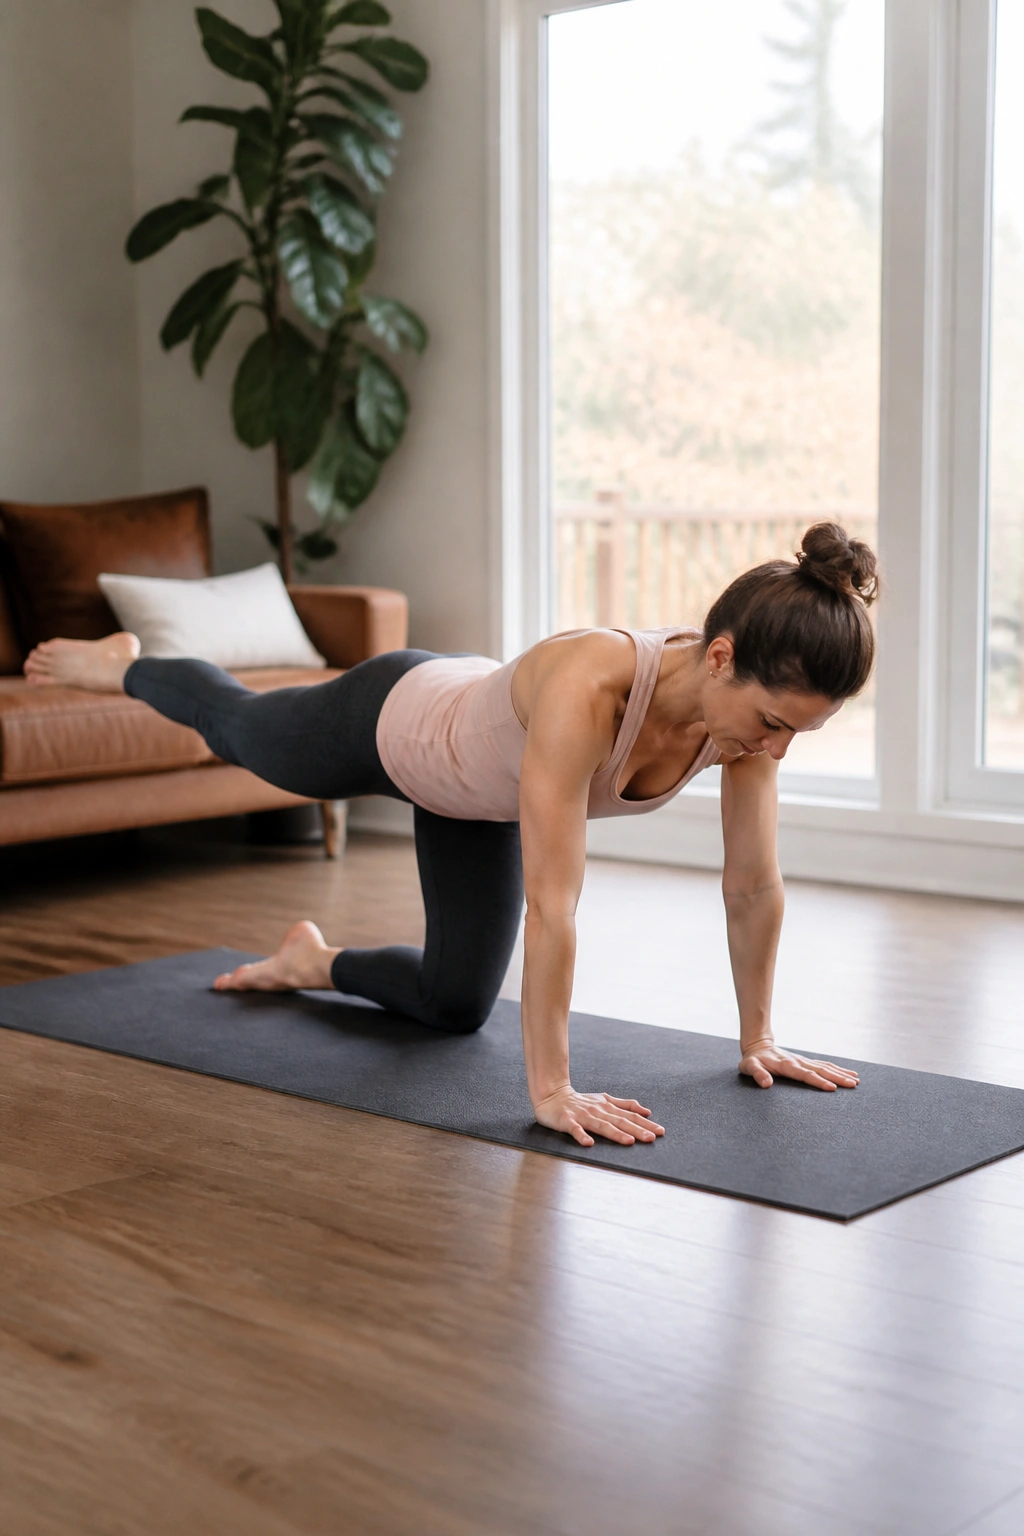
Bird dog can be excellent, but full versions are too much too soon for a lot of people with prolapse. The safer version starts small: one leg slides back, or one arm reaches forward while the knees stay on the floor. No heroics. Just control.
Come onto hands and knees. Keep the hands under the shoulders and the knees under the hips. Reach one leg back on the floor first, almost like you’re sliding it rather than lifting it. If that feels calm, add a tiny hover. Later, you can add the opposite arm.
Key details
- Keep the spine long, not sagging.
- Exhale during the reach.
- Stop if the belly domes down.
- Use 5 reps per side at first.
Bird dog works because it teaches the trunk to stay steady while the limbs move. That skill matters in real life. It’s the difference between carrying a bag with control and carrying it like you’re wrestling it.
11. Cat-Cow for Spine and Pressure Relief
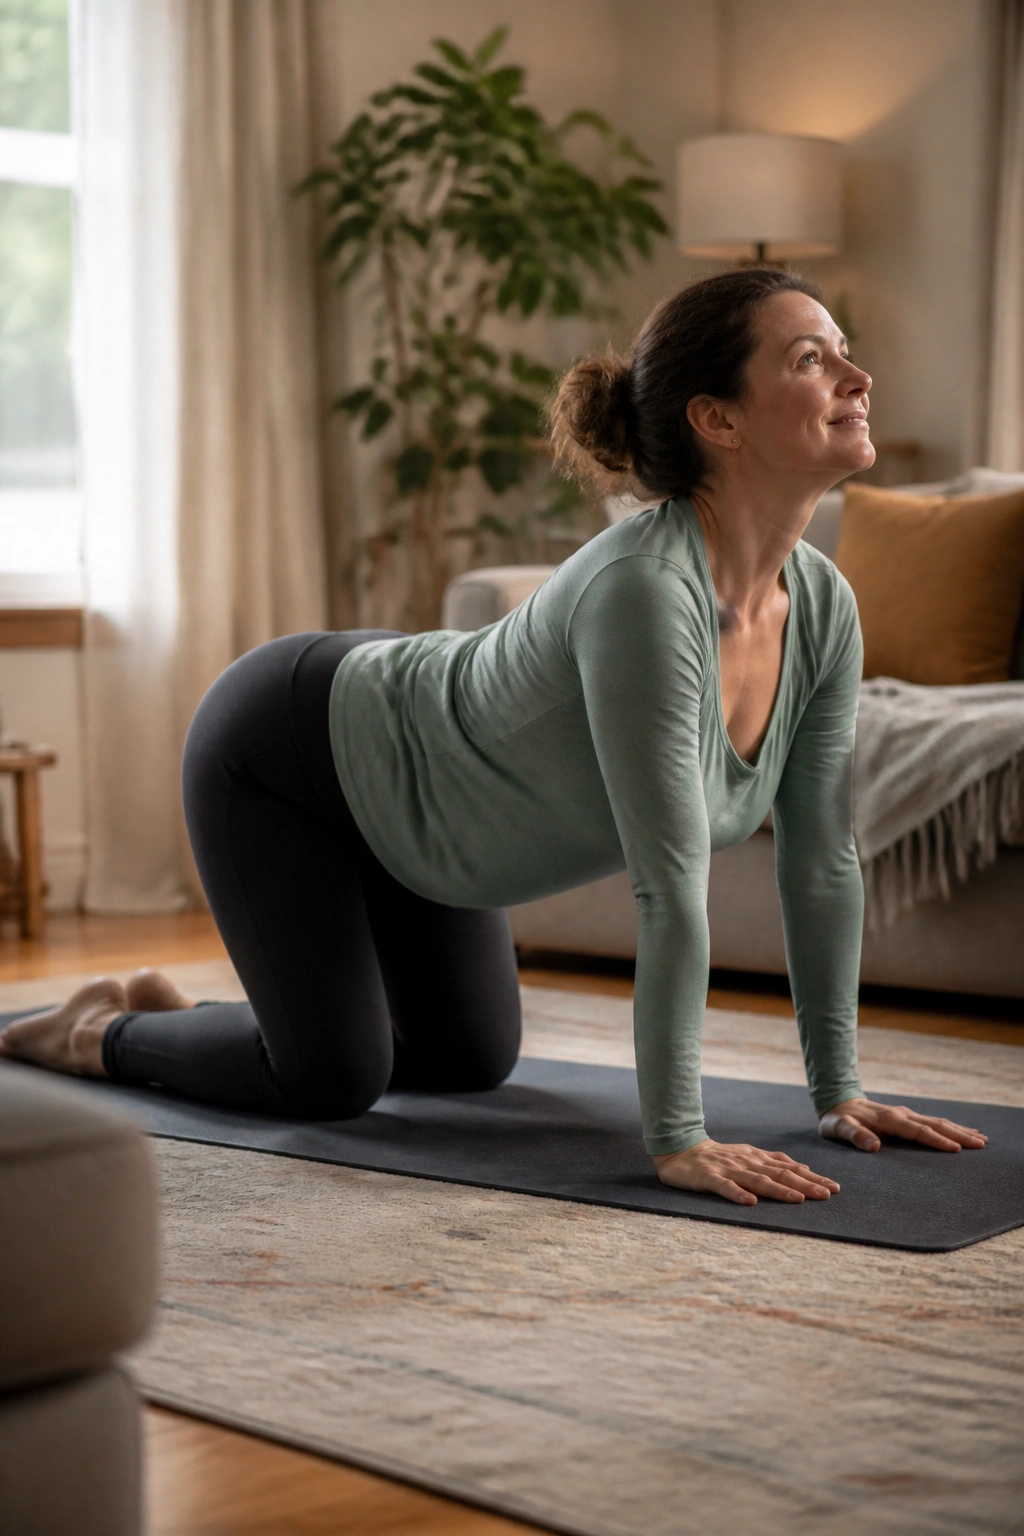
Cat-cow is not strength work, and I’m fine with that. It’s a reset. When a prolapse makes you feel heavy or guarded, a few slow spinal waves can take the edge off the stiffness that builds up from bracing all day.
Get onto hands and knees or sit tall in a chair. Inhale as the chest opens and the tailbone tips back a little. Exhale as the spine rounds gently and the ribs soften in. Keep the range small. A lot smaller than the yoga photos suggest.
I like this move between strength sets because it gives the abdomen a chance to stop gripping. It also helps people feel the difference between a helpful brace and an ugly one. Those are not the same thing.
Do 6 to 8 cycles. If hands and knees bother your wrists or knees, do the same shape in a seated position. The body does not care where the motion happens as long as it stays smooth.
12. Sit-to-Stand From a Chair
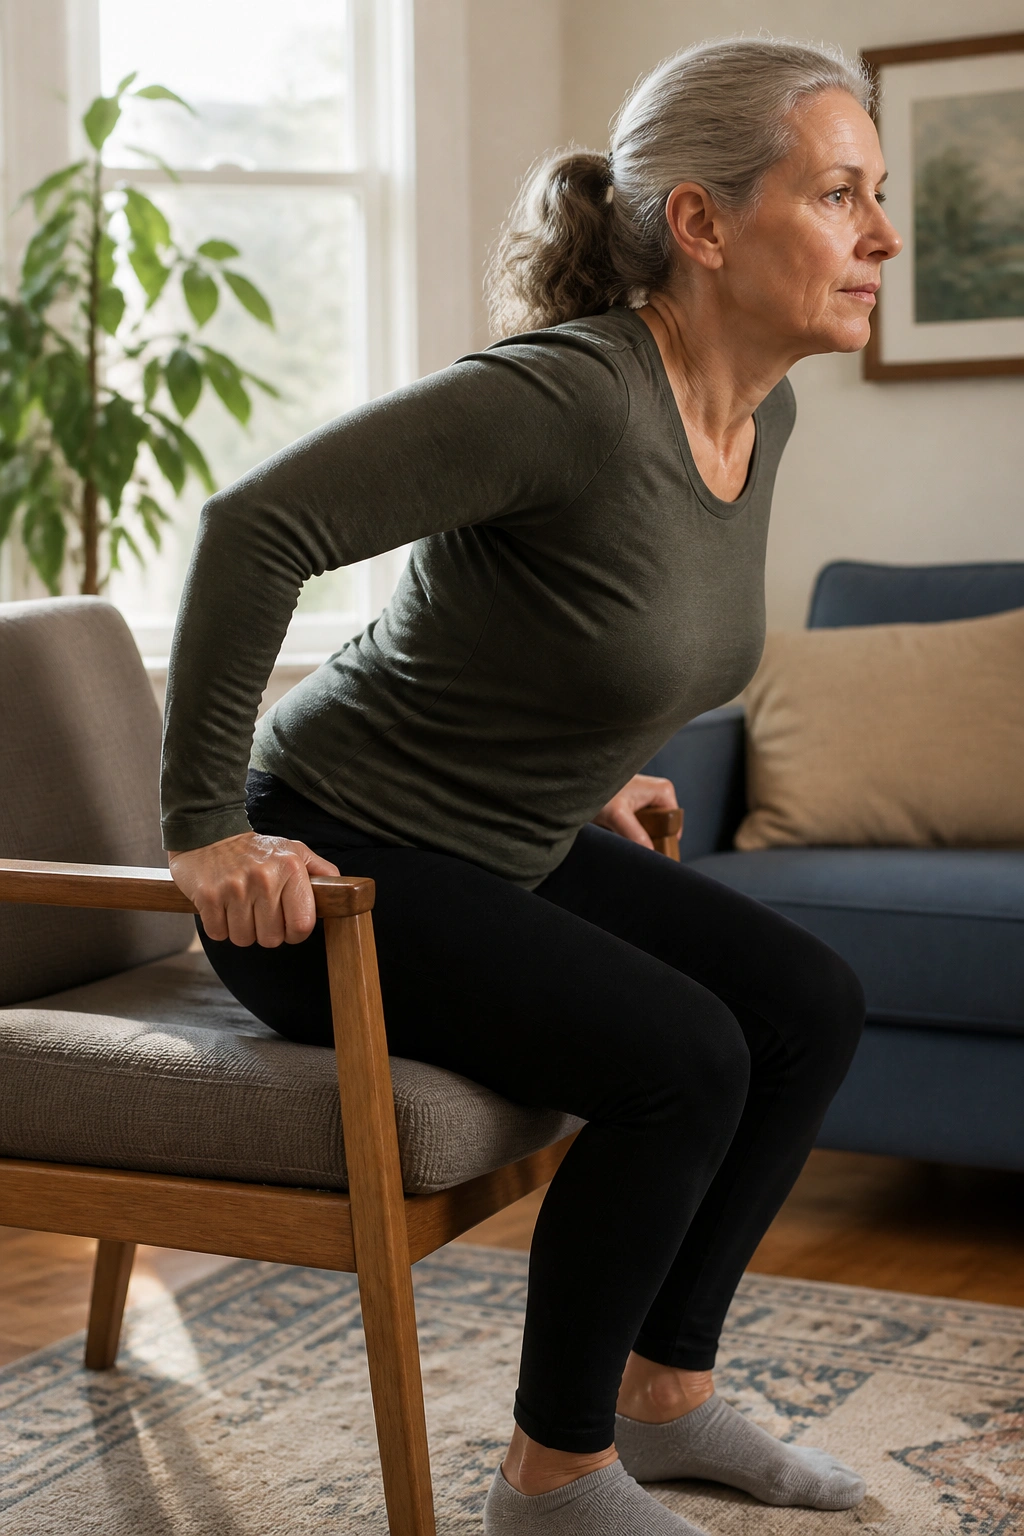
A chair rise is a better test of real-world strength than a deep squat, and with prolapse that matters. You can control the depth, the speed, and the breath. You can also stop the moment pressure starts to build. That makes it a clean training tool.
Sit toward the front of a sturdy chair, feet planted under your knees. Lean the chest slightly forward, exhale, and stand. Sit back down slowly without dropping. Use your hands on the chair arms if you need to. That is not cheating. It is smart scaling.
What to change first
- Raise the chair with a cushion if the drop feels too deep.
- Use your hands on the first set.
- Shorten the range before you shorten the breath.
- Keep the knees tracking over the middle toes.
5 to 10 reps is a solid start. If a chair rise feels more stable after a pelvic tilt or a few breathing cycles, that’s a clue your routine is working in the right order.
13. Shallow Wall Sits
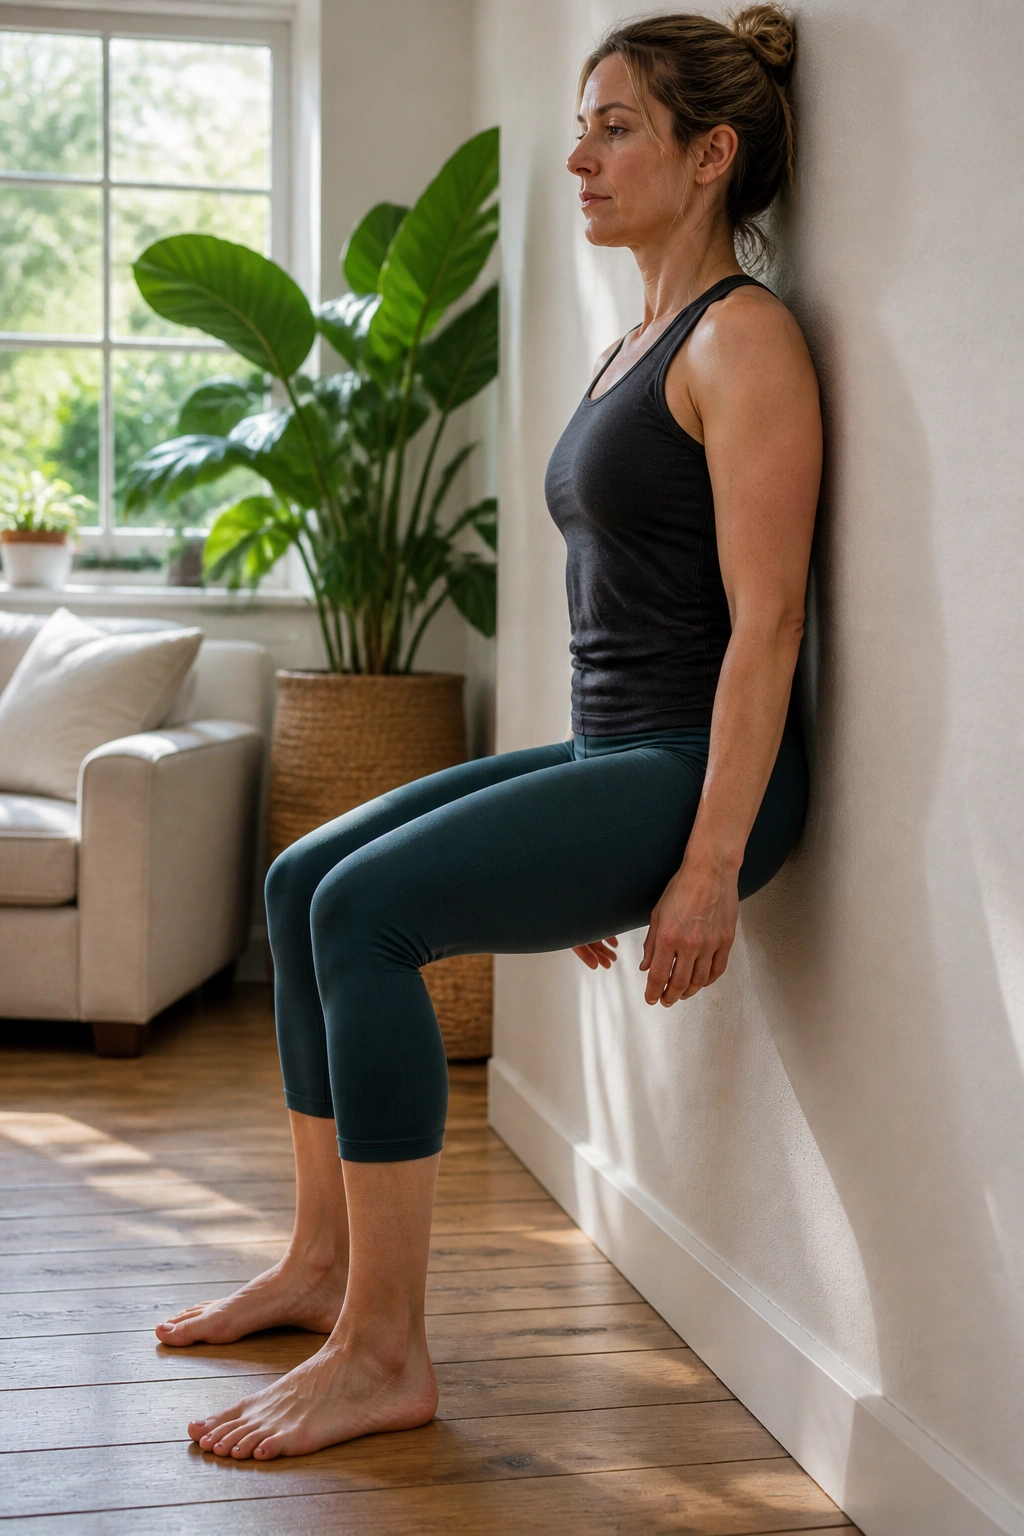
A wall sit can be useful because the wall does some of the work for you. It takes balance out of the equation, and that lets you focus on keeping the pelvis quiet. The mistake is sinking too low. That turns a gentle isometric hold into a strain test.
Slide your back down the wall only until your knees are in a shallow bend, maybe a quarter squat at most. Feet stay about a foot away from the wall. Hold for 10 to 20 seconds, then stand back up and breathe.
- Keep the knees soft, not jammed.
- Press the whole foot into the floor.
- Breathe through the hold.
- Stop before the face starts grimacing.
Three short holds are enough. If you have to clamp your belly to stay there, the wall is too low. This move should feel like steady work, not a grind.
14. Supported Mini Squats
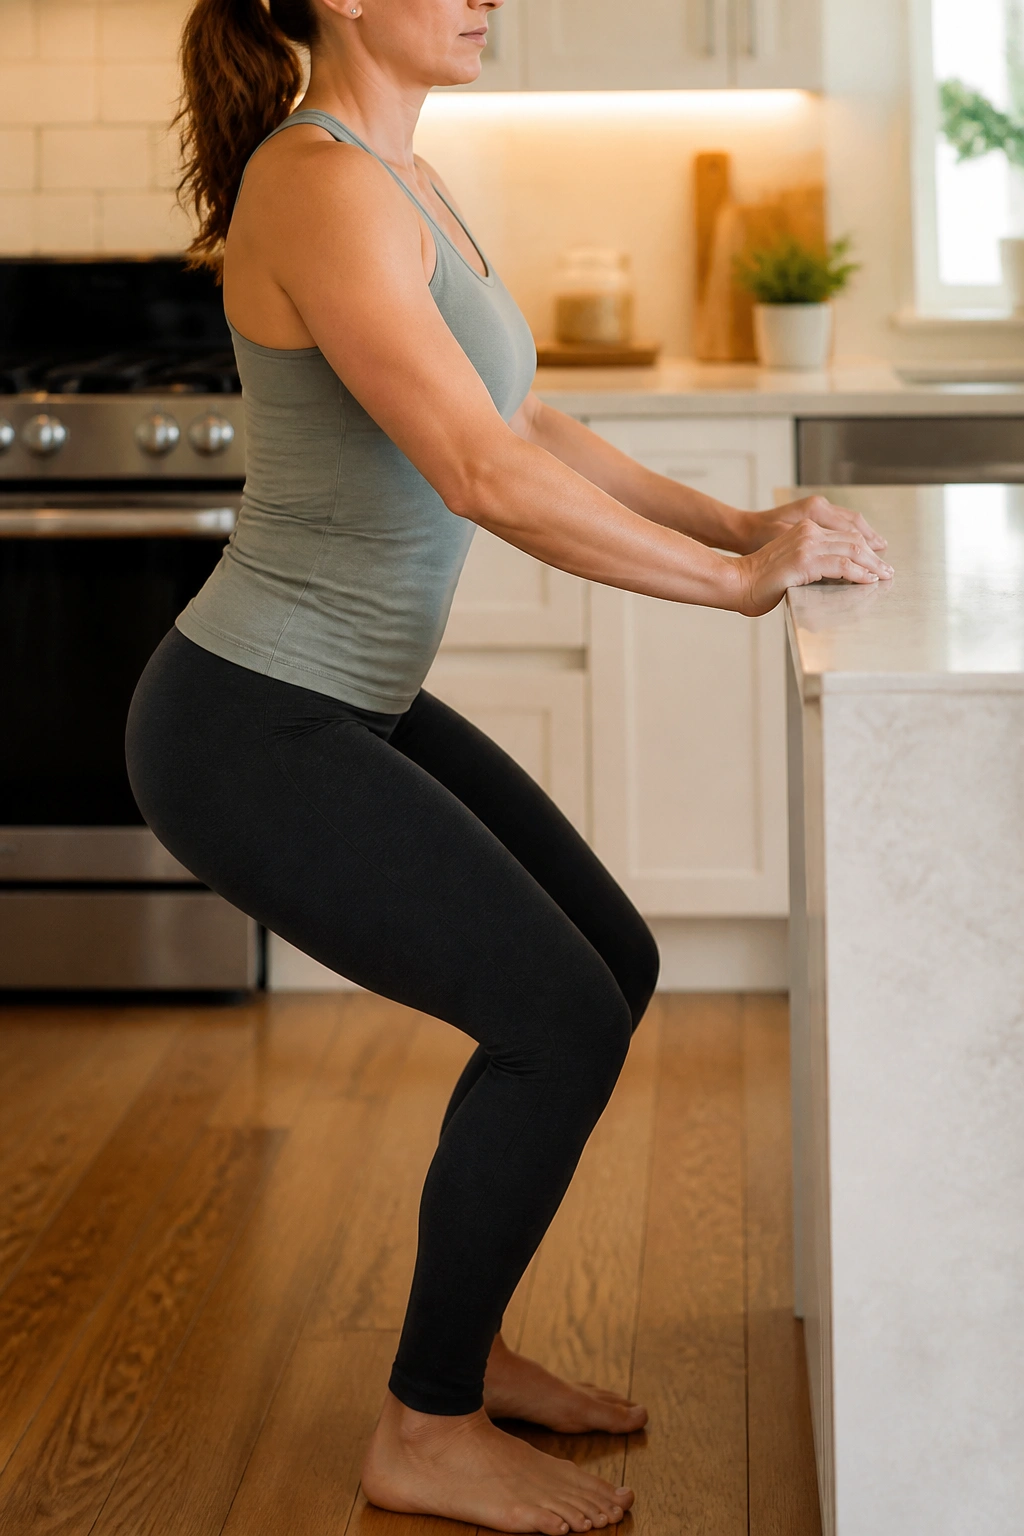
Mini squats beat deep squats when pressure is the issue. There, I said it plainly. A smaller squat gives you leg work, hip work, and day-to-day function without forcing the pelvis into the kind of load that often causes symptoms to jump.
Stand in front of a counter or sturdy table and hold it lightly. Send the hips back a few inches, bend the knees a little, then stand on the exhale. The motion should look almost modest. That is the whole point.
A counter makes the movement cleaner because you can stay tall through the chest without wobbling. Use it. People act like support is a weakness. It isn’t. It’s feedback.
Try 6 to 8 reps and watch the belly. If it domes hard, reduce the depth. If the pelvis feels heavier after two or three reps, stop and go back to chair rises for now.
15. Low Step-Ups
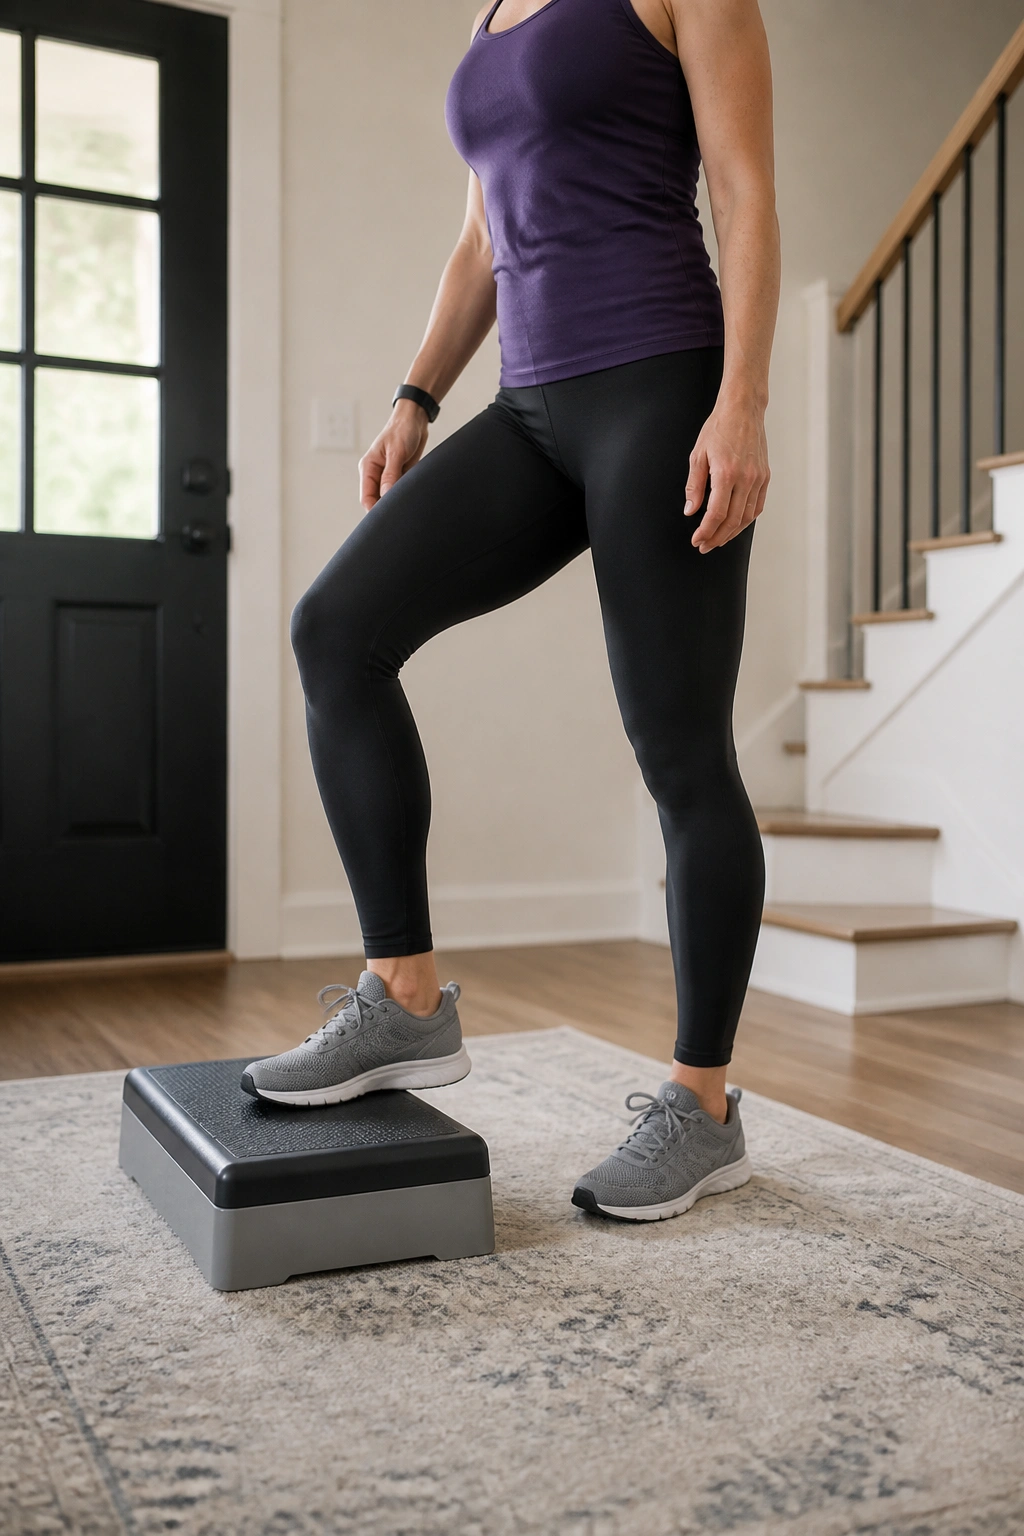
Can stairs help or hurt prolapse symptoms? Both, depending on the step height and how hard you push. A low step-up is one of the best ways to train single-leg strength without a big pressure spike, because you control the height and the pace.
Use a 4- to 6-inch step to start. Place one whole foot on the step, exhale, and stand up through that leg. Lower yourself slowly. Switch sides after each rep or do a set on one side first.
How to keep pressure low
- Keep the step close to the body.
- Push through the whole foot, not just the toes.
- Don’t lean way forward.
- Keep the breath moving.
Six reps per side is plenty for a first round. If you feel heaviness as you lower, the descent is probably too fast. Slow it down. A neat step-up tells you more than a sloppy one ever will.
16. Standing Calf Raises
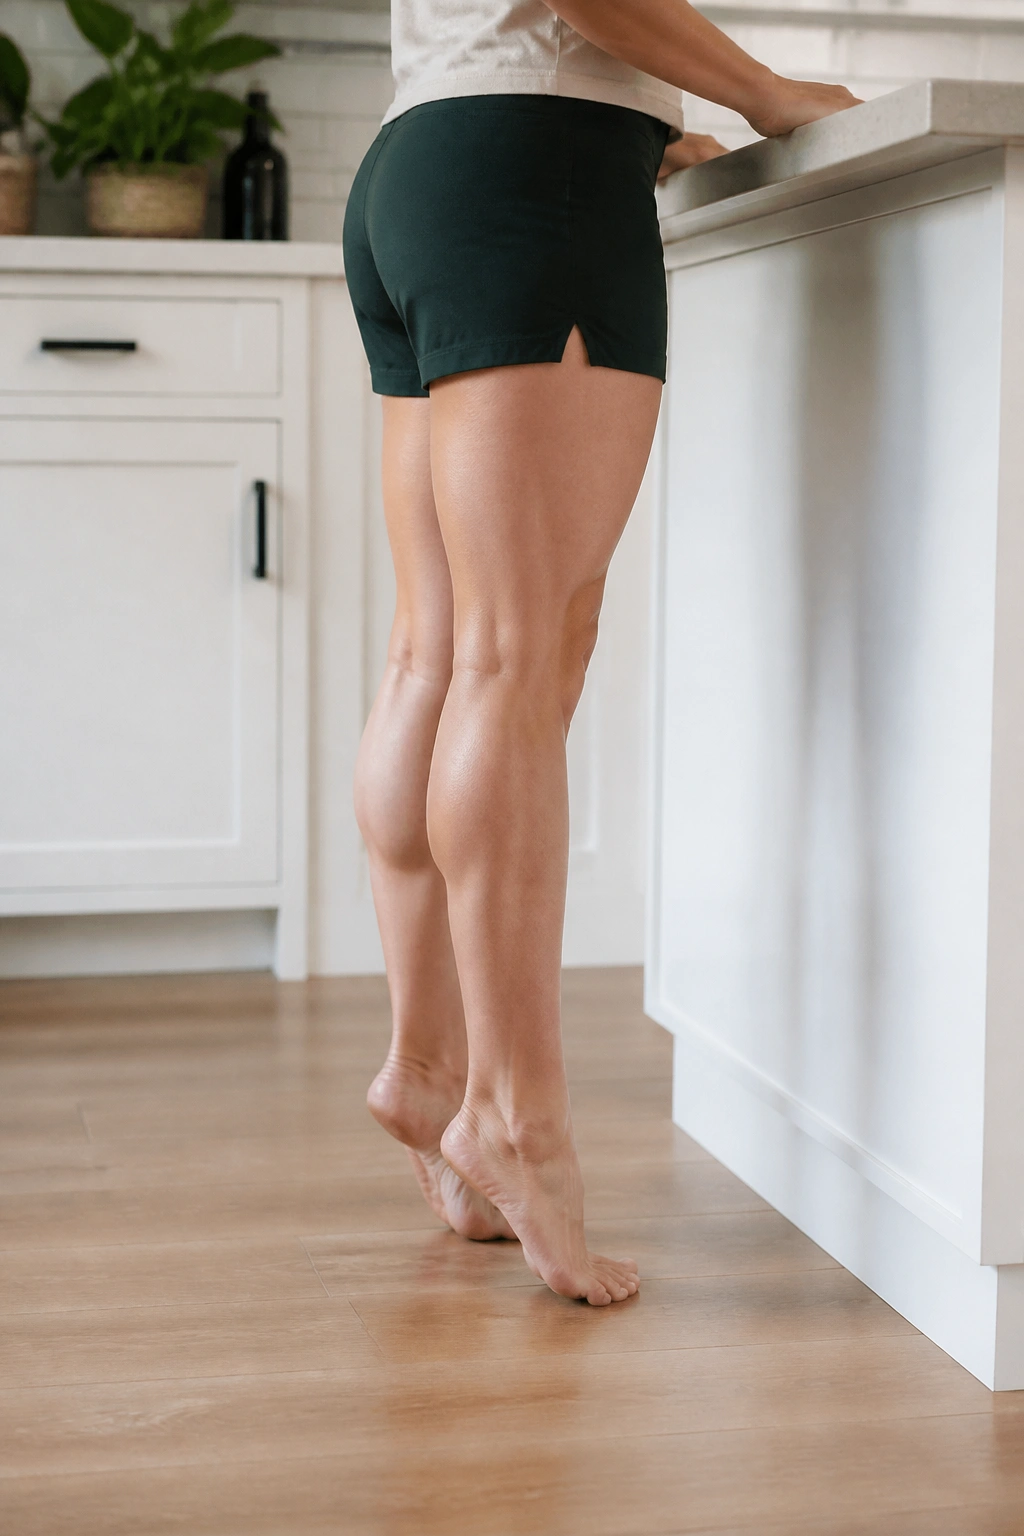
Calf raises are underrated. They don’t look sexy, and they won’t leave your glutes on fire, but they help build standing endurance with very little pelvic pressure. That matters if you spend time in the kitchen, at a counter, or on your feet at work.
Stand near a wall or countertop. Rise onto the balls of your feet for a count of 2, then lower for a count of 3. Keep the ribs stacked over the pelvis and the shoulders loose. The motion should stay vertical. No rocking back.
Do 12 to 15 reps. If that’s easy and symptom-free, try one leg at a time later. Not first. Later.
The nice thing about calf raises is how easy they are to fit into the day. Waiting for tea? A few reps. Brushing your teeth? A few reps. Those small doses add up without making the pelvis feel like it got into a fight.
17. Side Steps With a Light Band
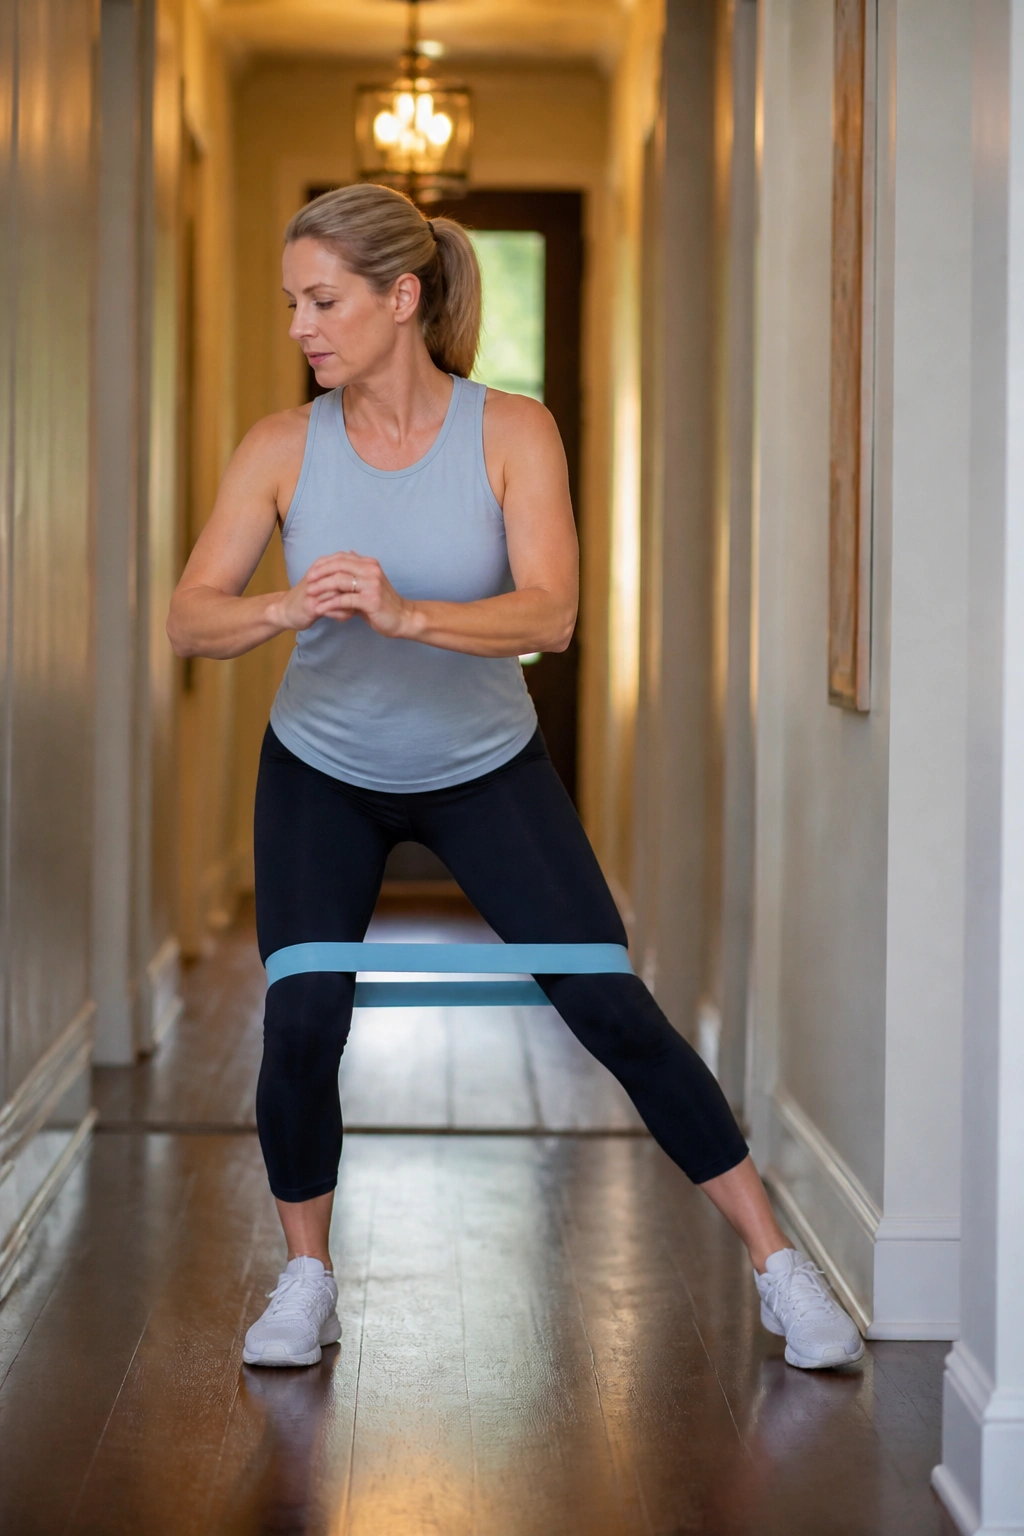
I’d take a tiny band done well over a monster band done badly. Every time. Side steps train the hips to stabilize side to side, which matters because a pelvis that sways all over the place tends to make prolapse symptoms feel less predictable.
Place a light loop band above the knees or around the ankles if you already handle above-knee work well. Bend the knees a little, then step sideways 6 to 8 inches at a time. Keep the feet parallel and the chest quiet. The knees should not cave inward when you step.
If you start leaning the torso or clenching the belly hard, the band is too strong. Back off. A light band gives feedback; a heavy one can turn into a wrestling match you do not need.
Do 8 to 12 steps each way. Side steps pair well with bridges or clamshells because they keep the hip work balanced instead of one-note.
18. Pillow Squeezes for Inner-Thigh Support
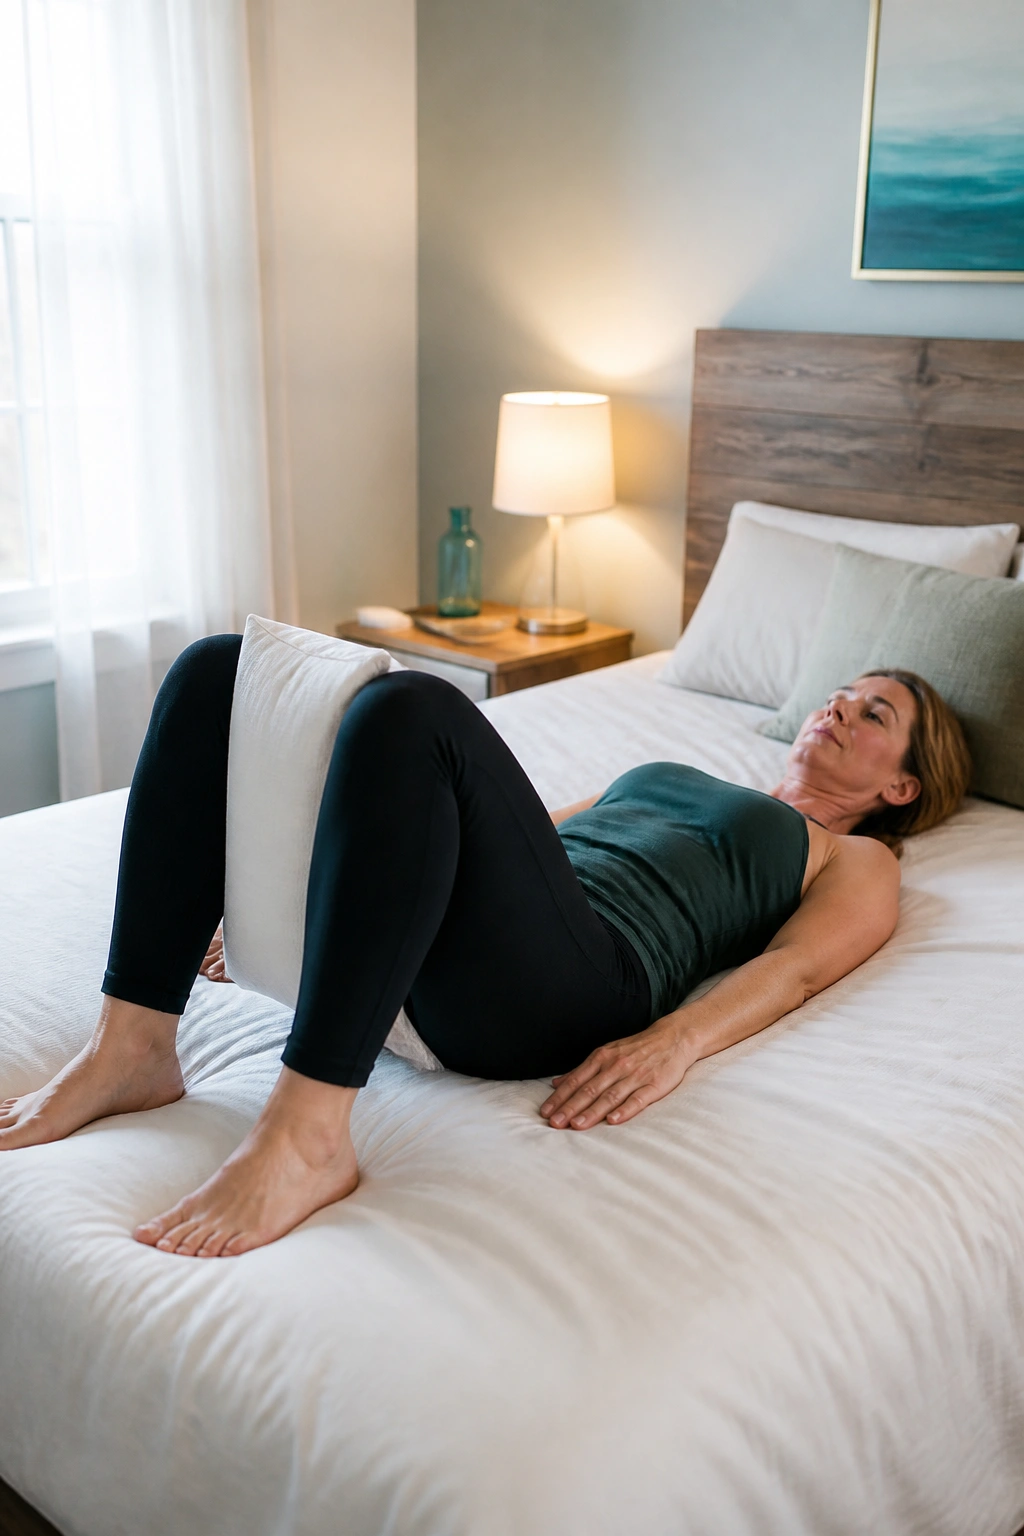
Pillow squeezes sit somewhere between a pelvic floor drill and a leg exercise, which is why they’re useful. The inner thighs and pelvic floor often work together, and a gentle squeeze can help you feel that connection without the strain of a hard full-body brace.
Lie on your back with knees bent, or sit tall in a chair with a small pillow between the knees. Squeeze at about 20 to 30 percent effort as you exhale. Hold for 3 to 5 seconds, then fully release. The release should feel obvious, not rushed.
What to watch for
- The squeeze stays small and controlled.
- The belly does not push downward.
- The breath keeps moving.
- The pelvis feels supported, not crowded.
Five to eight reps is enough. If the squeeze makes you feel more pressure or dragging, make it lighter or skip it. This is a support drill, not a test of strength.
19. Standing Weight Shifts and Posture Reset
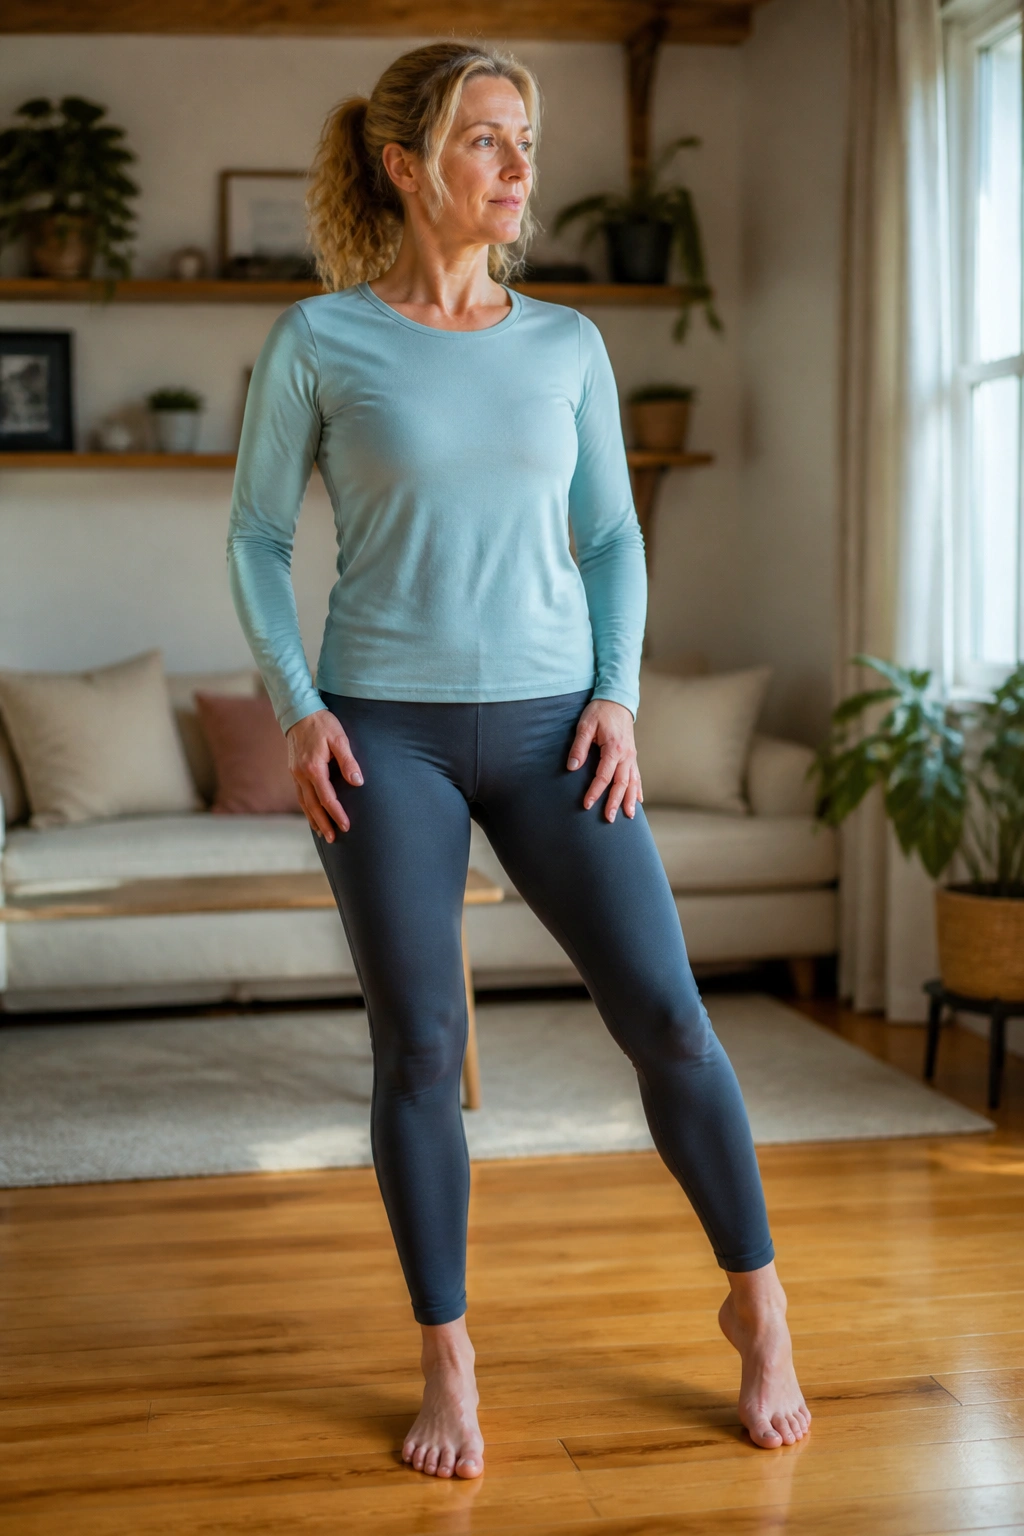
Standing posture sounds boring until you realize how much time you spend standing around. In line. At the sink. Talking to someone. Carrying something. If your default stance jams the ribs forward and tucks the pelvis under, the pressure in the system gets messy fast.
Stand with your feet hip-width apart and your knees soft. Shift your weight slowly from one foot to the other, then forward and back a little. Keep the ribs stacked over the pelvis. That’s the target. Not rigid. Just organized.
What you’re looking for
- No hard rib flare.
- No clenched butt.
- No breath-holding.
- No pushing the pelvis forward to “look straight.”
A minute of weight shifts can reset the whole body before you do another exercise — or before you lift a bag, bend to feed the dog, or reach into a low cupboard. Good posture should feel easier, not tighter. If it feels like a military pose, start over.
20. Short Walking Intervals That Stay Symptom-Safe
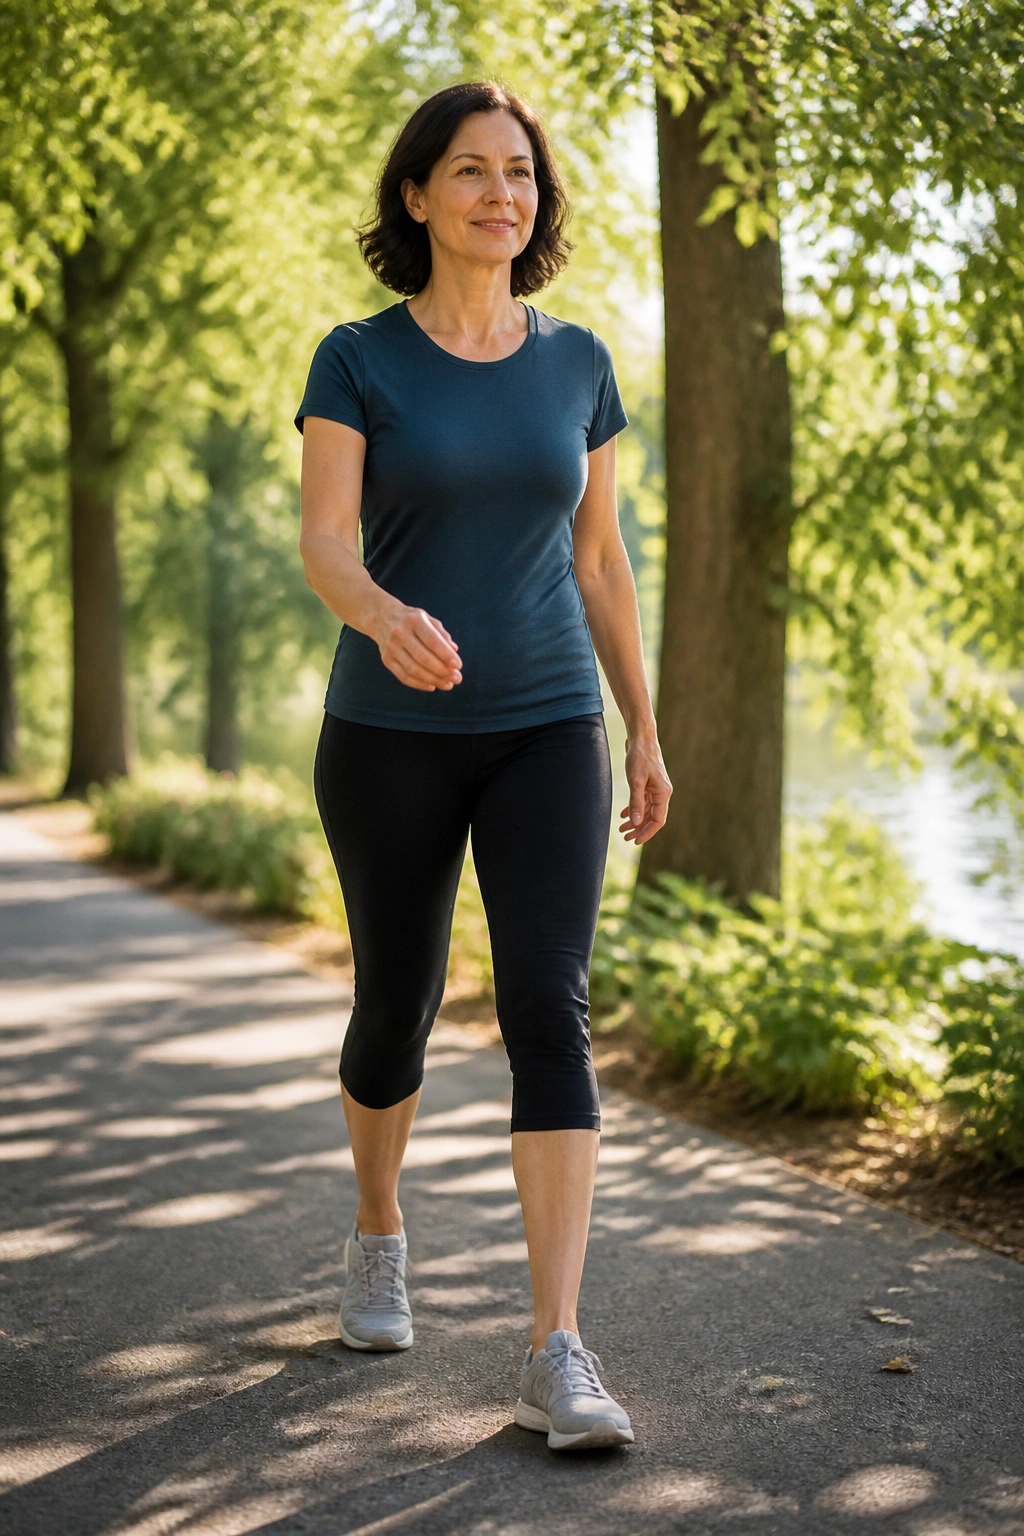
Walking is often the safest cardio piece in a prolapse plan. Not because it is magical. Because it is adjustable. You control the pace, the stride length, the hills, the stops, and the amount of time on your feet. That makes it a lot easier to keep the pelvic floor calm than with jumps, running, or hard lifting.
Start with 5 to 10 minute walks and pay attention to what happens after you stop. A little fatigue is normal. A heavier, lower, more “pulled down” feeling is your cue to shorten the walk next time or split it into two chunks. Short steps and a steady exhale help more than long strides and a tight belly.
A simple week can look plain on purpose: breathing and pelvic floor work on one day, a few strength moves on another, and walking in short pieces most days. That is not flashy. It is useful. And for a prolapsed uterus, useful beats impressive every single time.
If you want one rule to keep, keep this one: movement should leave the pelvis quieter, not louder. That’s the real test.
