



The sensation of having a “pooch” or a soft lower belly long after having a baby can be incredibly frustrating. It is a common experience, and for many, it has very little to do with traditional “fat” and everything to do with how your core muscles are functioning after a period of intense physiological stretching. When we talk about this area, we are often talking about the transverse abdominis—the deep, corset-like muscle that wraps around your waist—and the pelvic floor. These muscles often forget how to do their jobs properly during pregnancy, leaving the lower abdomen unsupported.
Forget the advice to do hundreds of crunches. In fact, if you have any degree of separation in your abdominal muscles, known as diastasis recti, traditional sit-ups and crunches might actually make the pooch worse by pushing the abdominal contents forward. You need a different strategy. You need to reconnect with the deep, stabilizing muscles that have gone dormant. This is not about punishing your body to make it look a certain way; it is about rebuilding the strength that supports your spine, your organs, and your daily movements, like picking up a toddler or carrying heavy groceries.
Consistency matters more than intensity here. You do not need a gym membership, fancy equipment, or an hour of free time. You need ten or fifteen minutes, a flat space on the floor, and a commitment to moving with intention rather than just “getting it done.” If you can breathe, you can do these movements. In fact, your breath is the secret weapon that makes all of these exercises effective.
1. Pelvic Tilts
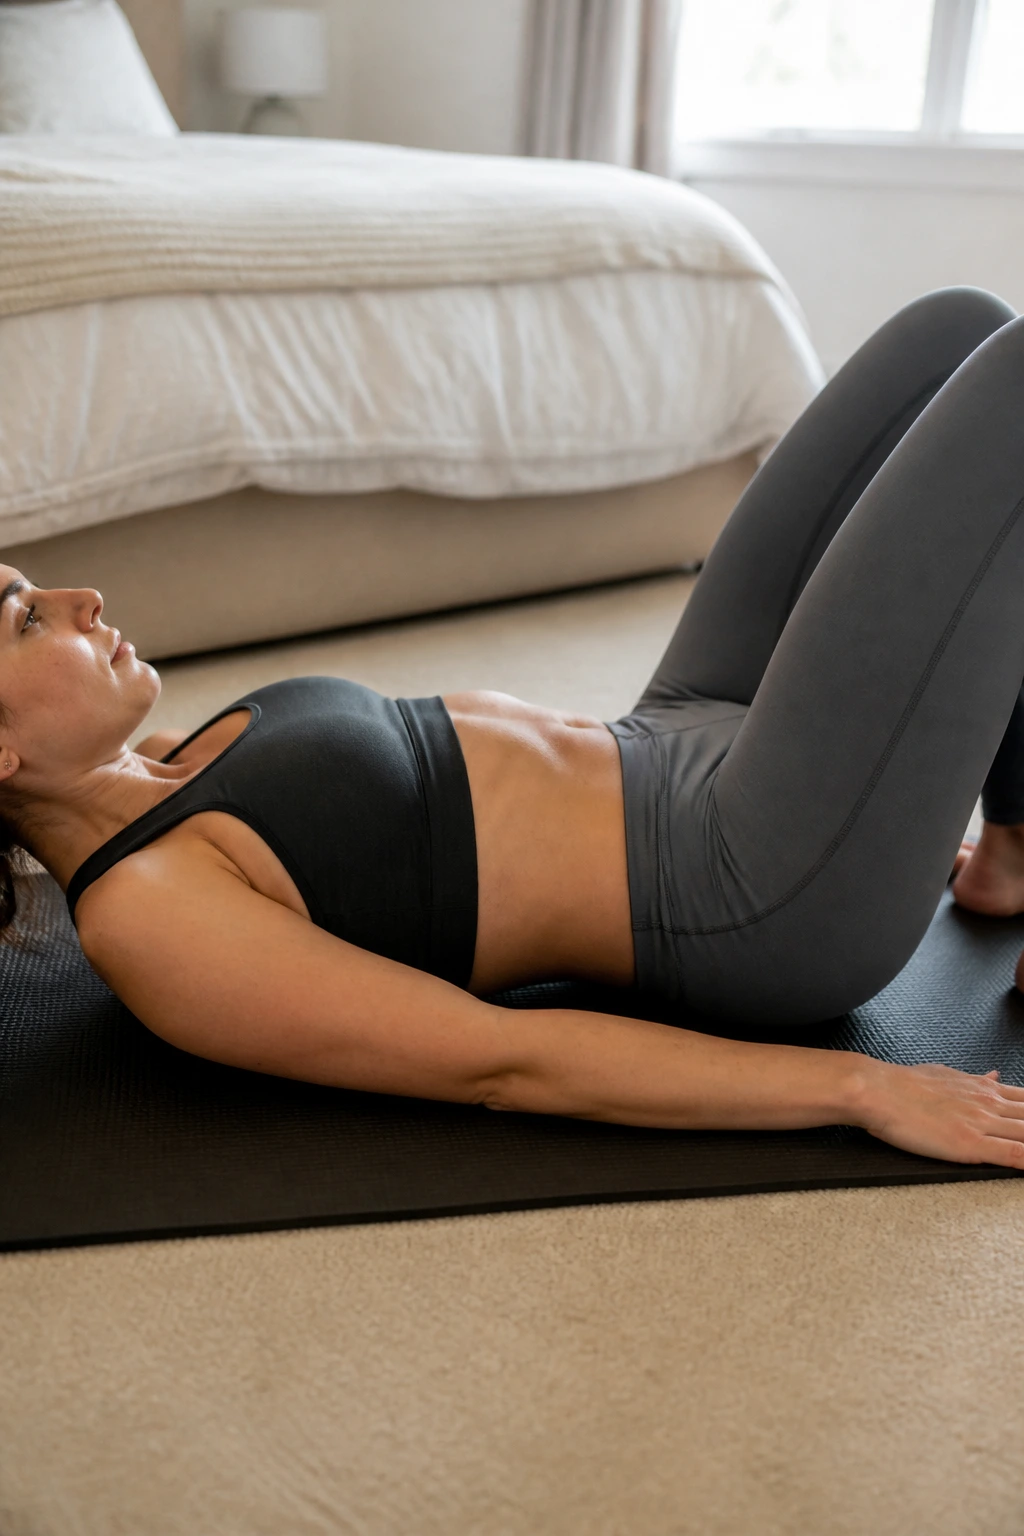
This is the foundational movement. If you learn nothing else, learn this. It teaches you how to recruit the deep abdominal muscles without using your back. Lie on your back with your knees bent, feet flat on the floor. Inhale, and as you exhale, gently pull your belly button toward your spine and tuck your tailbone slightly.
Why This Works
You are training the brain to find the transverse abdominis. Most of us default to gripping our glutes or pushing into our feet, but the pelvic tilt isolates the lower abs. You should not be straining your neck or shoulders. If you feel your lower back arching excessively, that is a sign to back off and shorten the movement.
How to Practice
- Lie in the neutral position.
- Focus on the exhale.
- Imagine drawing your hip bones toward each other.
- Hold for three seconds, then release.
- Repeat 10 to 15 times, focusing on quality, not speed.
Pro tip: Place your hands on your lower belly. You should feel the muscles firming up underneath your fingertips. If you feel nothing, keep trying—it can take time to “wake up” that mind-muscle connection.
2. Heel Slides
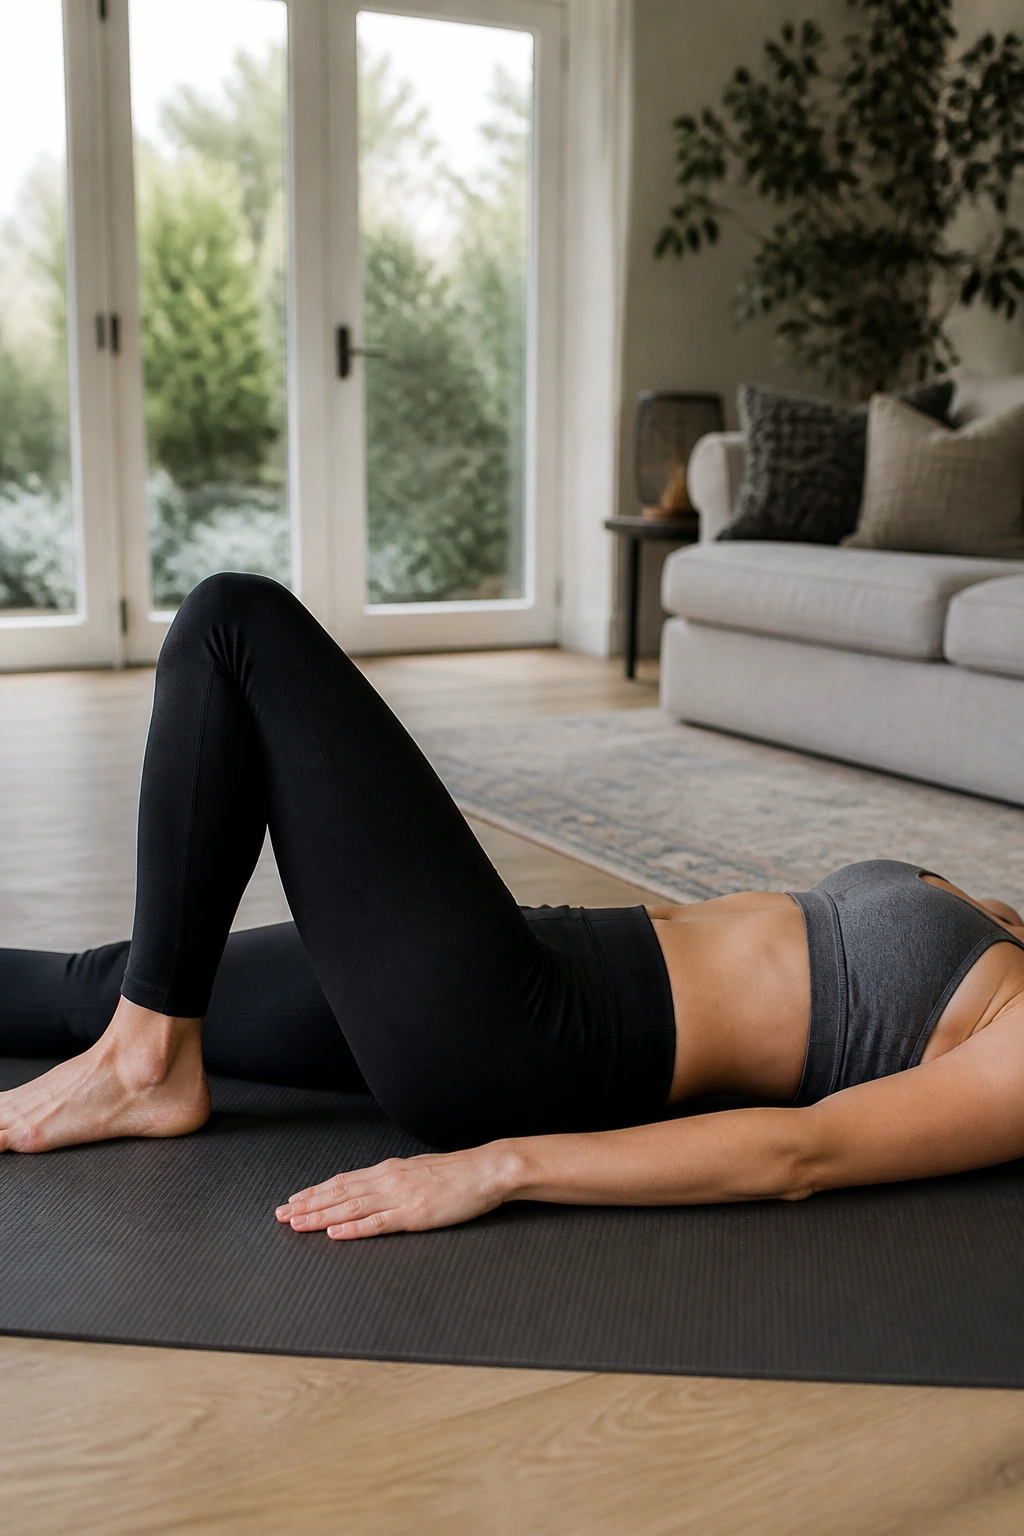
Once you have mastered the pelvic tilt, heel slides introduce movement while maintaining core tension. Lie on your back, knees bent, feet flat. Maintain that neutral spine you found in the pelvic tilt. Exhale, engage your core, and slowly slide one heel out along the floor until your leg is nearly straight.
The Challenge
The goal is to keep your pelvis rock-steady. Most people will feel their back arch as the leg goes out. If that happens, do not extend the leg as far. Stop at the point where you can maintain control. You are working the deep core to prevent the pelvis from tilting as the weight of your leg moves away from your center.
Key Details
- Keep the foot in contact with the floor.
- Do not hold your breath.
- Move slowly—think of moving through thick water.
- If your back lifts off the floor, your range of motion is too large. Shorten the slide.
Warning: Do not rush these. The benefit comes from the slow, controlled recruitment of the lower abs as the leg creates a “lever” that tries to pull your spine out of alignment.
3. Bird-Dog
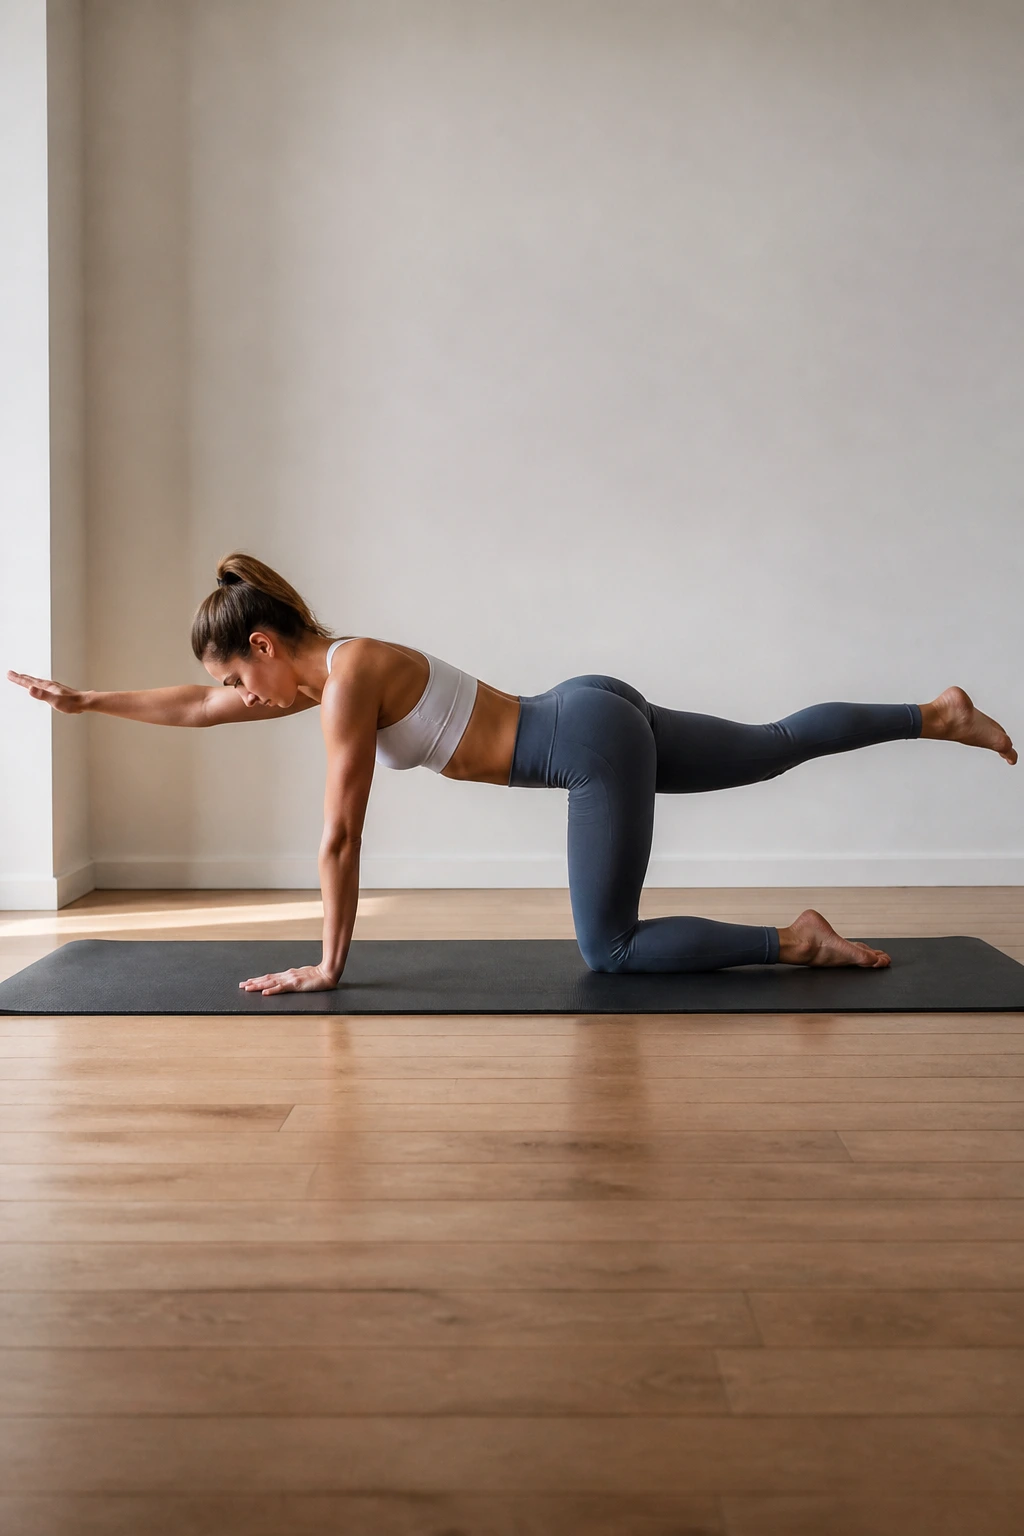
This is a classic stability exercise, but it is often performed incorrectly. Start on your hands and knees in a tabletop position. Your wrists should be directly under your shoulders, and your knees under your hips. Keep your spine neutral—do not let your belly sag toward the floor.
Finding Balance
Extend your right arm forward and your left leg back simultaneously. The goal is not height; it is length. You want to reach your fingertips and toes toward opposite walls. Your core must work overtime to keep you from tipping over. If you feel like you are wobbling like a jelly, focus on pressing the floor away with the grounded hand.
Common Pitfalls
- Lifting the leg too high, which arches the back.
- Looking up (keep your gaze at the floor to protect your neck).
- Moving too quickly.
Why it matters: This teaches you to manage rotational forces. Life with kids involves being off-balance constantly—carrying a baby on one hip, reaching for a toy. This movement strengthens that exact stability.
4. Glute Bridges
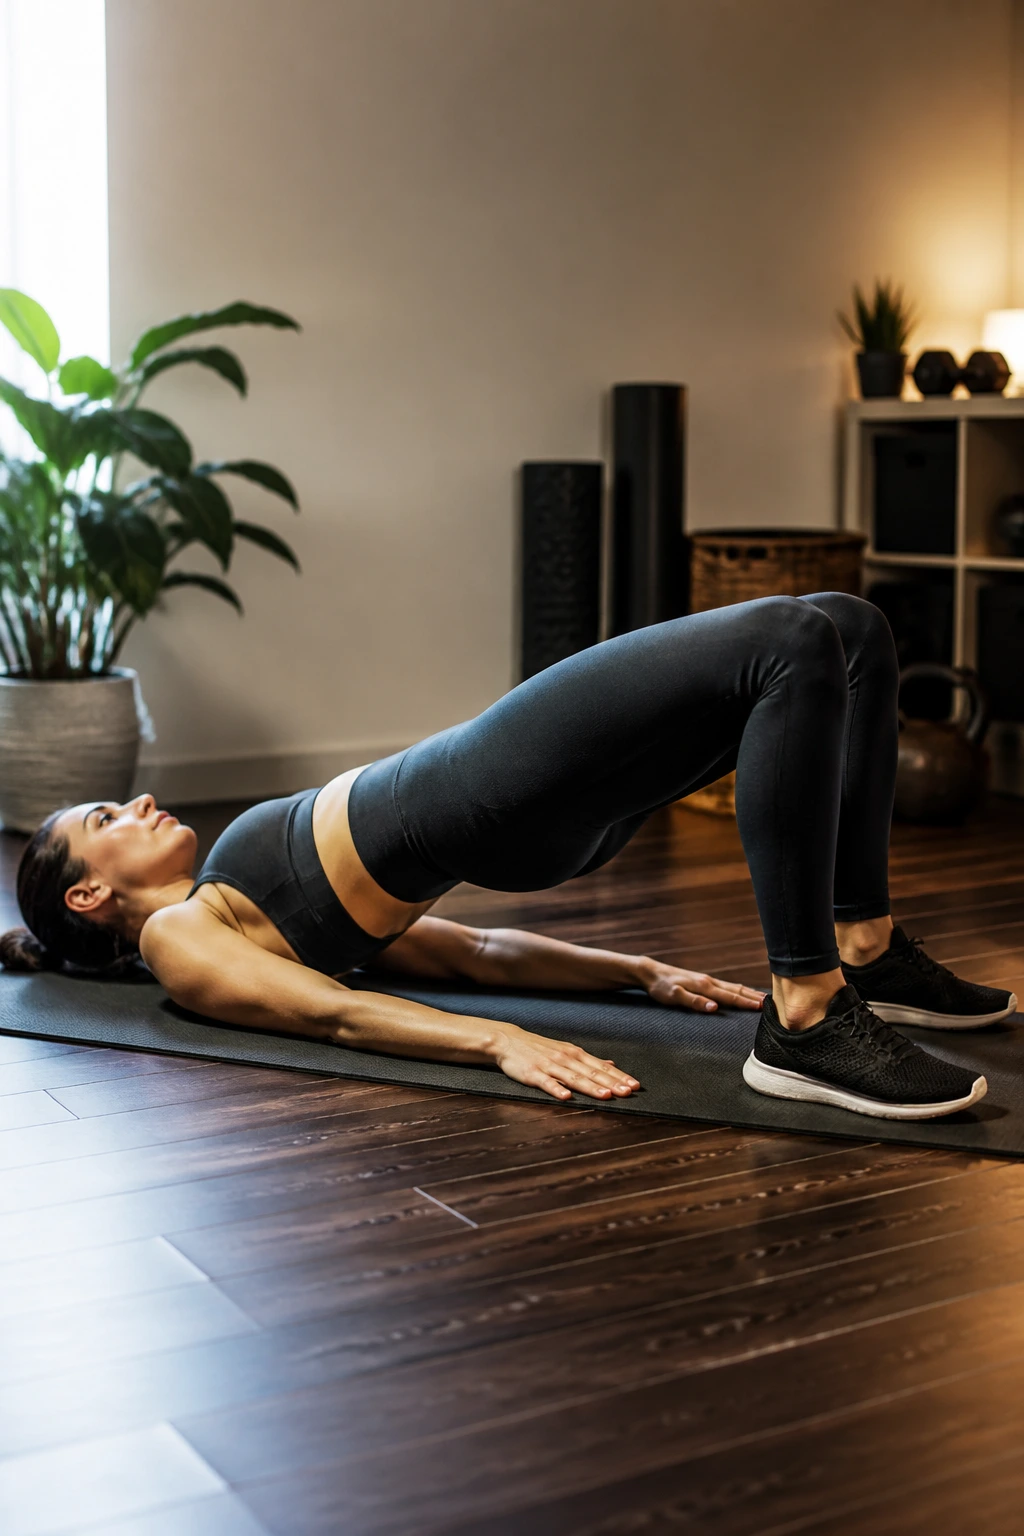
Your glutes and your abs are a team. When your glutes are weak, your pelvis tilts forward, which pushes the belly out. Lie on your back, knees bent, feet hip-width apart. Press through your heels to lift your hips toward the ceiling.
The Squeeze
At the top of the movement, squeeze your glutes. Do not over-extend your spine; you want a straight line from your knees to your shoulders. Many people turn this into a back exercise by arching too hard. Keep your ribcage knitted down—don’t let it flare up toward the ceiling.
Variations for Success
- Hold the bridge for 30 seconds for isometric work.
- Add a small pillow between your knees to engage the inner thighs.
- Focus on the descent—lower your hips one vertebra at a time, slowly.
Pro tip: If you feel this mostly in your hamstrings, shift your feet closer to your glutes. If you feel it in your quads, move your feet a few inches further away.
5. Modified Dead Bug
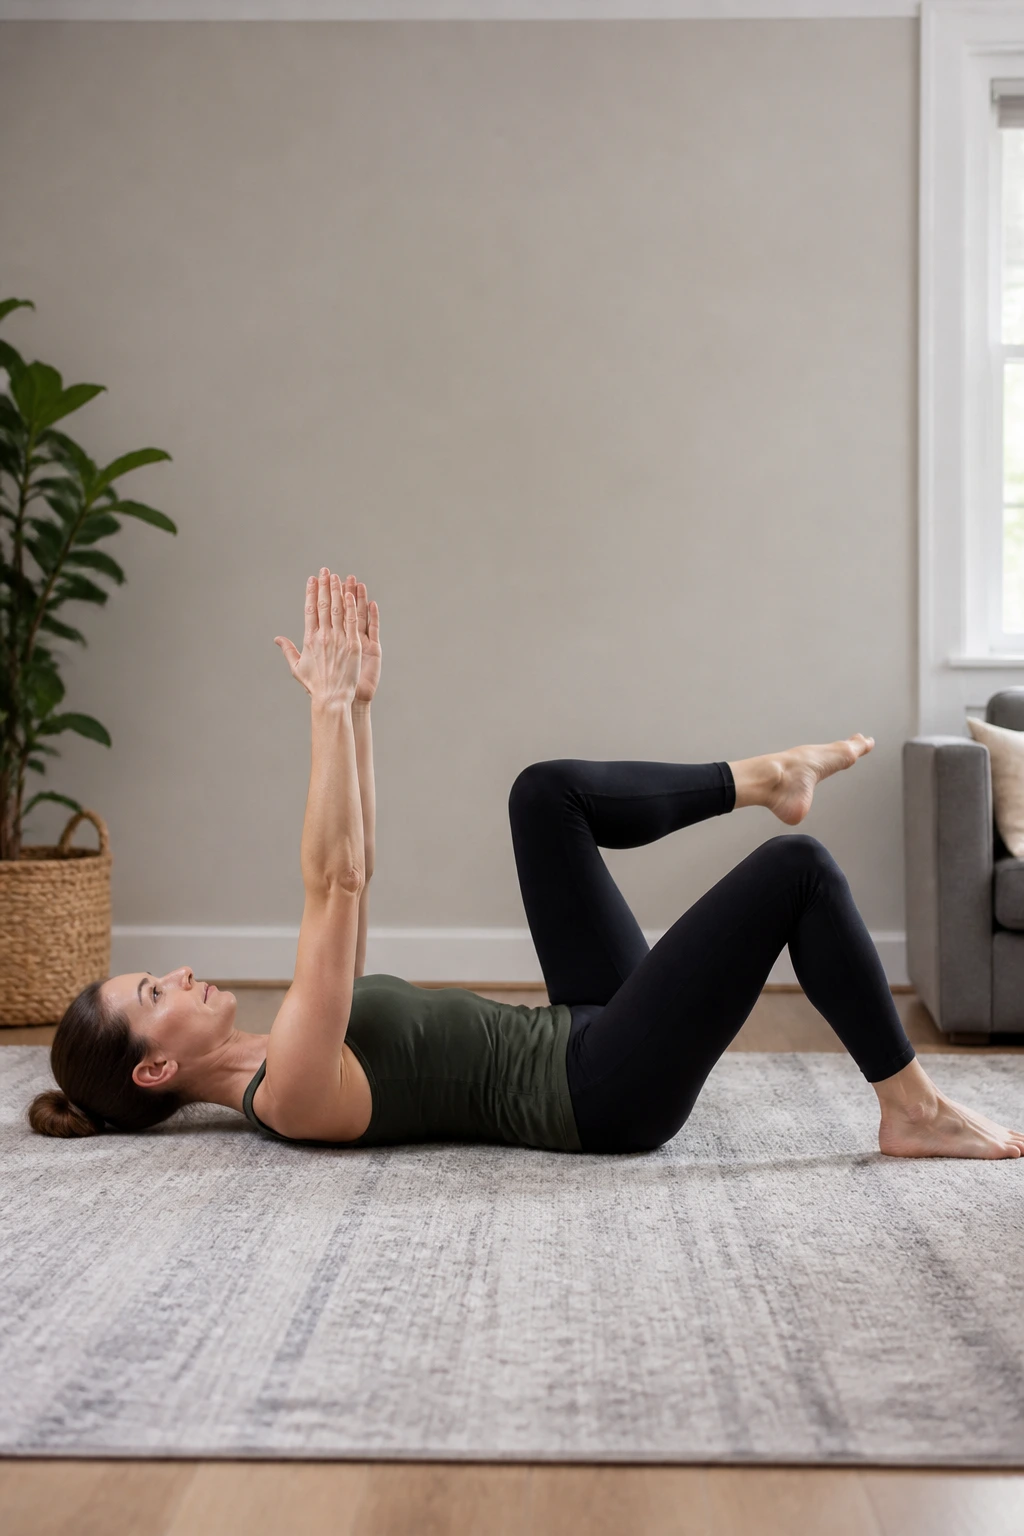
The dead bug is the “gold standard” for safe core work, but the full version is difficult. Let’s stick to the modified version. Lie on your back, arms extended toward the ceiling, knees bent at 90 degrees in the air (tabletop position).
The Movement
Exhale and slowly lower one toe to tap the floor while keeping the other leg still. Return it to the starting position and switch legs. Keep your lower back glued to the floor. If you cannot keep your back down, stop moving your legs and just hold the tabletop position with your core engaged.
Why It’s Effective
It puts the core under load without the strain of a crunch. It forces the lower abs to work to stabilize the pelvis while the legs move. It is humble, quiet, and extremely effective.
Critical note: Never let your lower back pop up. If it does, you have lost the engagement of your deep abdominals, and your back is taking the load.
6. Standing Core Marches
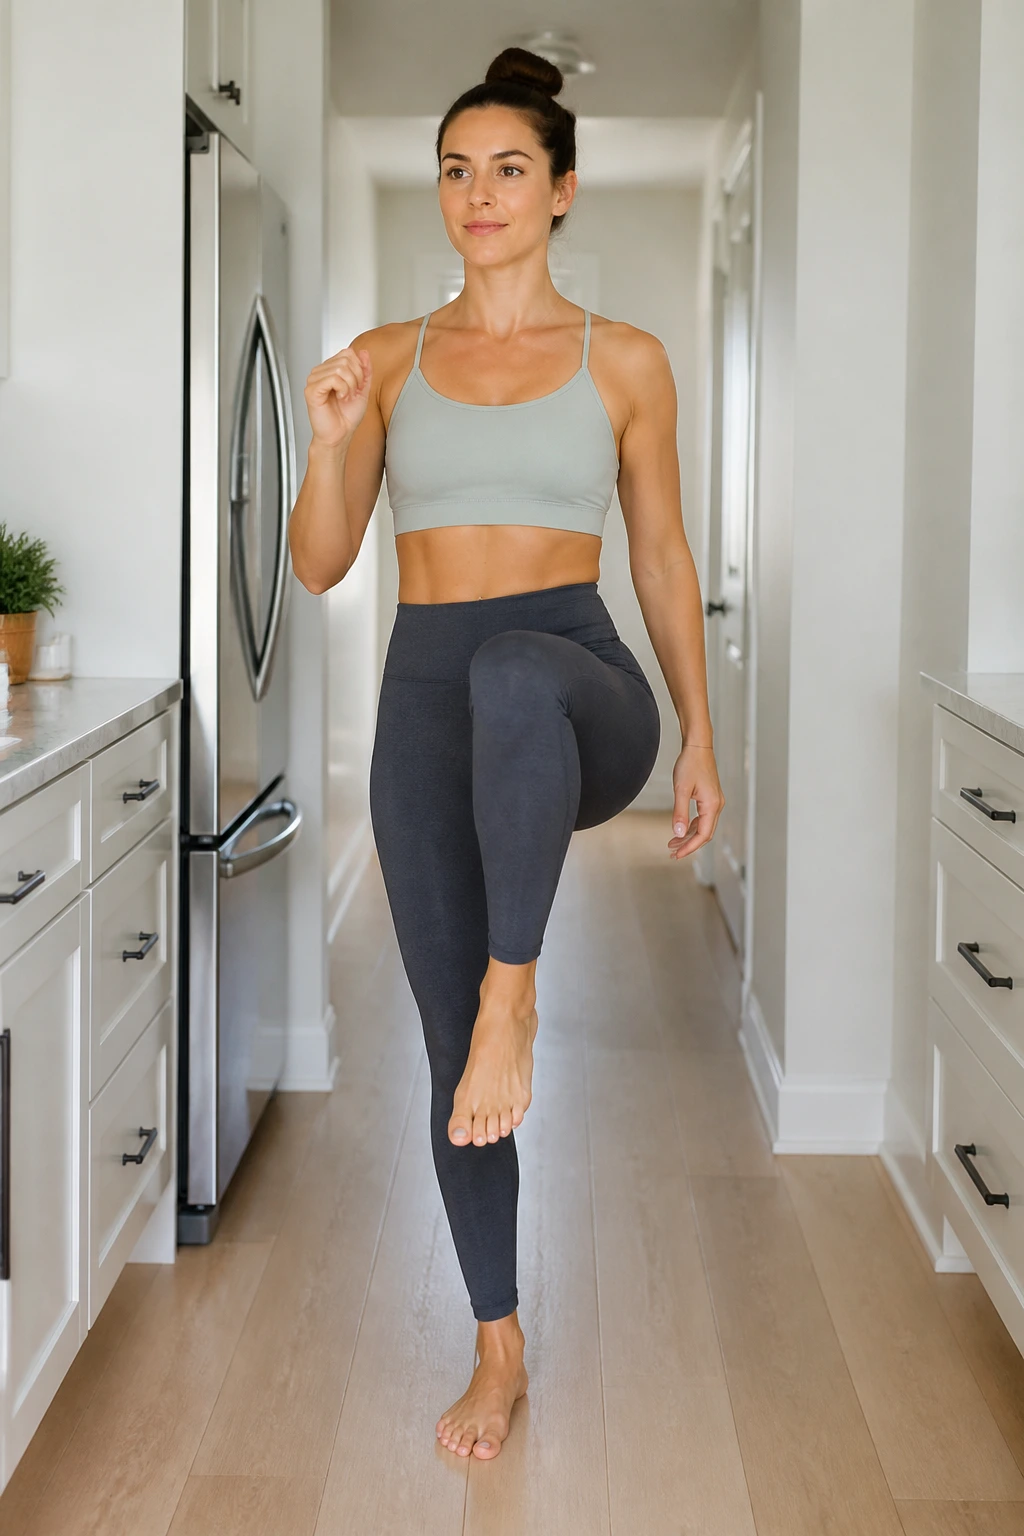
You do not always need to be on the floor. This move is great because you can do it while waiting for the coffee to brew or folding laundry. Stand tall, feet hip-width apart. Engage your core as if you are bracing for a gentle punch to the stomach.
The Mechanics
Lift one knee toward your chest. The challenge is to keep your torso perfectly still. Do not lean side-to-side or forward. Balance is key here. Every time you lift a leg, your standing leg’s hip and your core muscles have to stabilize you.
Integrating into Life
- Try doing 20 marches while brushing your teeth.
- Focus on the “hollow” feeling in your lower belly.
- Keep your chest lifted.
This is a functional movement. It trains you to stand with your core engaged rather than resting on your joints, which is a common posture mistake that leads to a protruding belly.
7. Cat-Cow Stretch
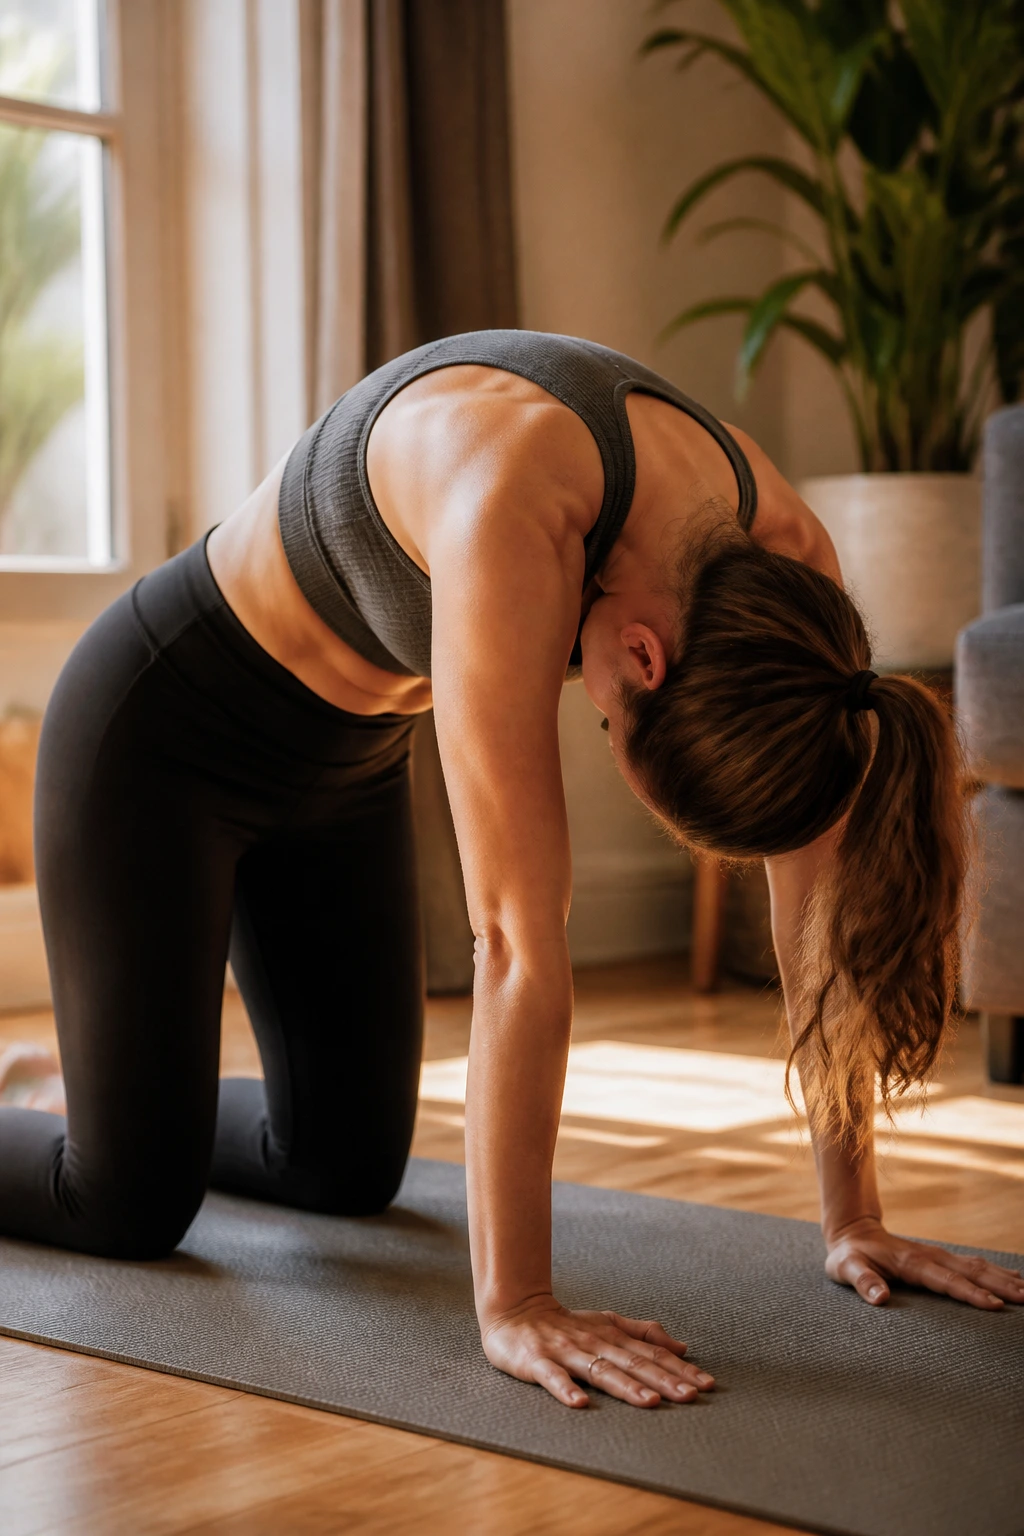
This is technically mobility, but it is vital for core connection. Get on your hands and knees. Inhale and drop your belly toward the floor, looking up gently (Cow). Exhale and arch your back toward the ceiling, tucking your chin and pelvis (Cat).
The Core Connection
Focus on the exhale portion of the Cat pose. This is the moment to deeply engage your transverse abdominis. Pull your belly button to your spine as hard as you can. This provides a deep internal massage for your organs and helps re-pattern the abdominal muscles to shorten and pull in.
Why You Need This
Many moms have a tight lower back and a “stuck” thoracic spine. When your spine is stiff, your core cannot function efficiently. This loosens everything up so the strengthening exercises actually work.
Tip: Move slowly. This is not a race. Feel each vertebra moving one by one.
8. Wall Sits
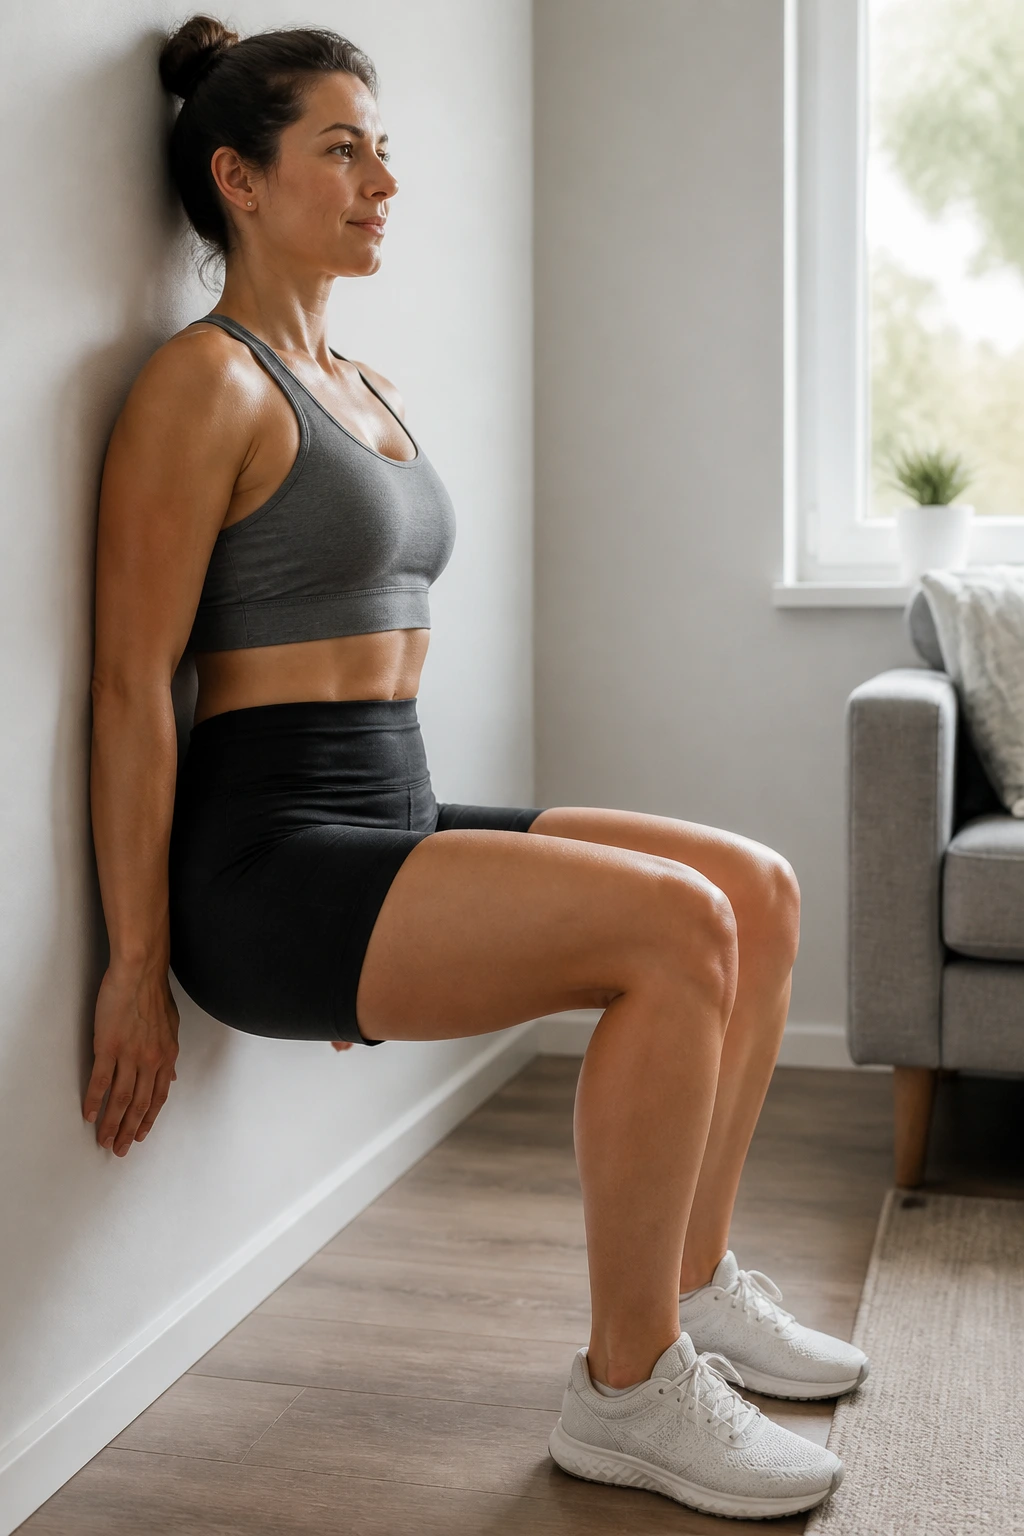
Wall sits are an isometric powerhouse. Find a wall and slide your back down until your knees are at a 90-degree angle. Press your entire back into the wall. This forces your core to stay flat and engaged.
The Hidden Work
It looks like a leg exercise, but the demand on your abdominal wall to keep your back pressed against the wall is significant. If you arch your back away from the wall, you are cheating the core engagement.
Duration
- Aim for 30 seconds initially.
- Increase by 5 seconds each time you practice.
- Keep your hands off your knees; keep them at your sides or on your belly to monitor engagement.
This is a fantastic way to build endurance. You are essentially teaching your core to hold tension for longer periods.
9. Kneeling Side Planks
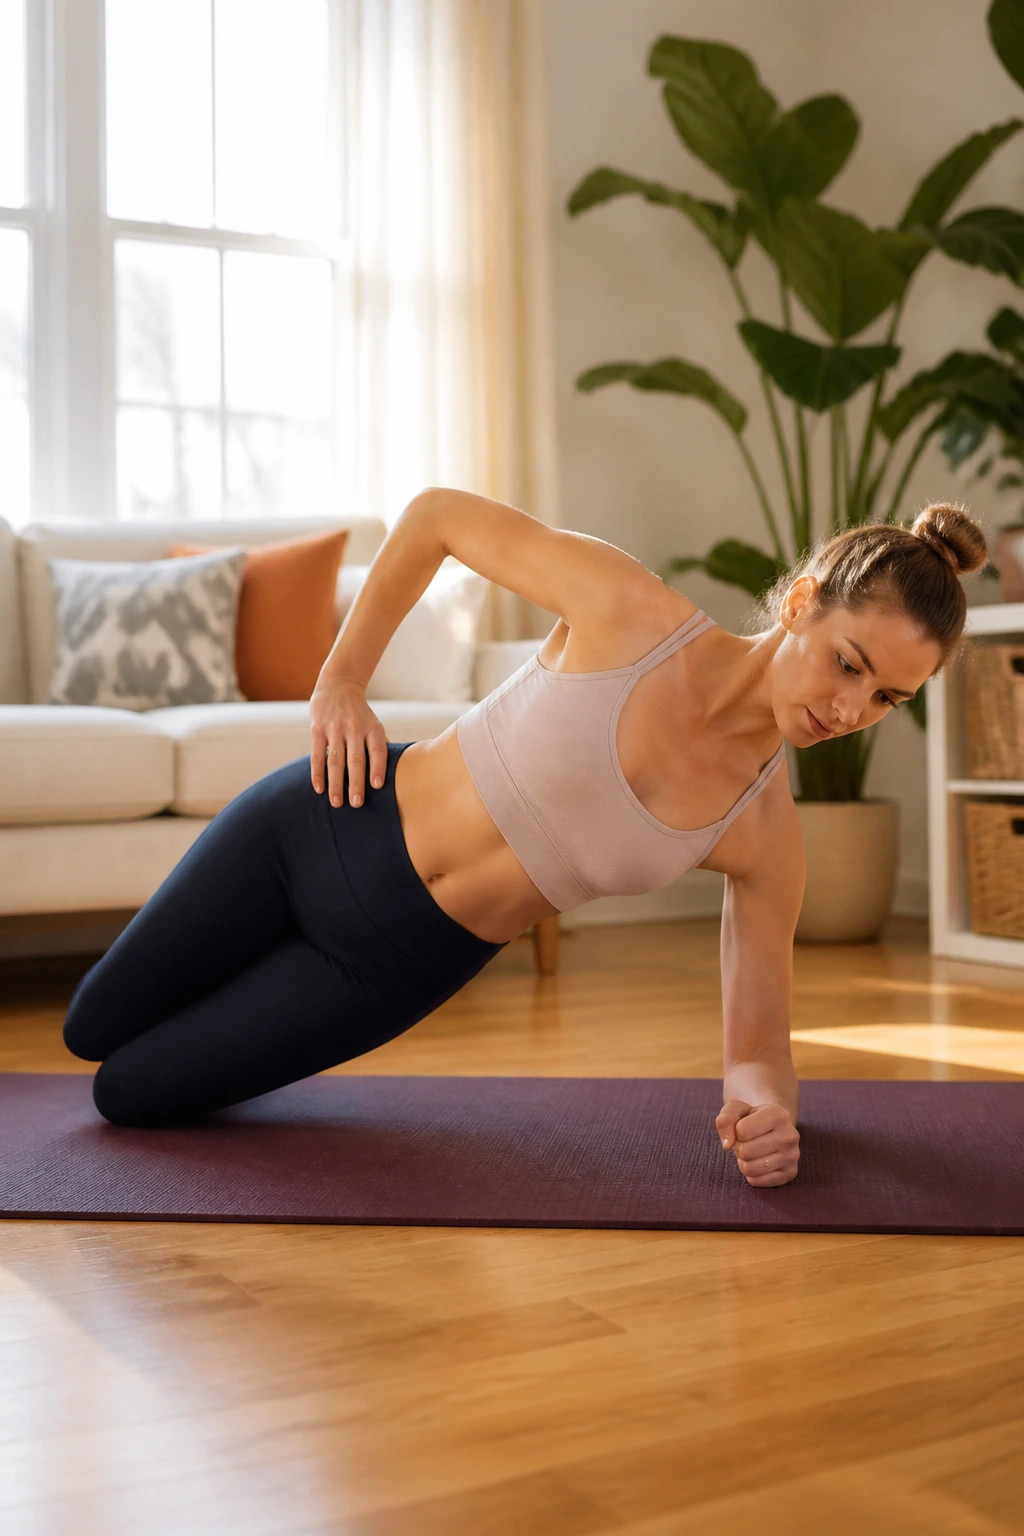
Full side planks can be aggressive on the lower back if you aren’t ready. Kneeling side planks are the perfect regression. Lie on your side, knees bent, supporting your upper body with your forearm.
Lifting Up
Push through your forearm and your knees to lift your hips off the floor. Your body should form a straight line from your head to your knees. Your obliques—the muscles on the side of your waist—should be working hard to keep your hips lifted.
Execution
- Keep your shoulder stacked over your elbow.
- Don’t let your top hip rotate forward.
- Keep your neck long—don’t collapse into your shoulder.
This builds that lateral stability, which helps “cinch” the waist and support the lower back, which is essential for alleviating that “muffin top” look caused by postural weakness.
10. Clamshells
While we often focus on the front of the core, the pelvic stability muscles are located in the hips and glutes. Lie on your side, knees bent, feet together. Keep your feet touching as you open your top knee like a clamshell.
Why It Matters
A strong pelvic floor supports the abdominal wall. If your hips are weak, your pelvic floor has to overcompensate. Clamshells are safe, effective, and target the deep gluteus medius.
Details
- Keep your hips stacked (don’t roll back).
- Use your top hand to press your top hip away from your ribs to keep your spine straight.
- Aim for 15 reps on each side.
Pro tip: You can add a resistance band around your knees once you get stronger, but start without one to master the form.
11. Single-Leg Glute Bridge
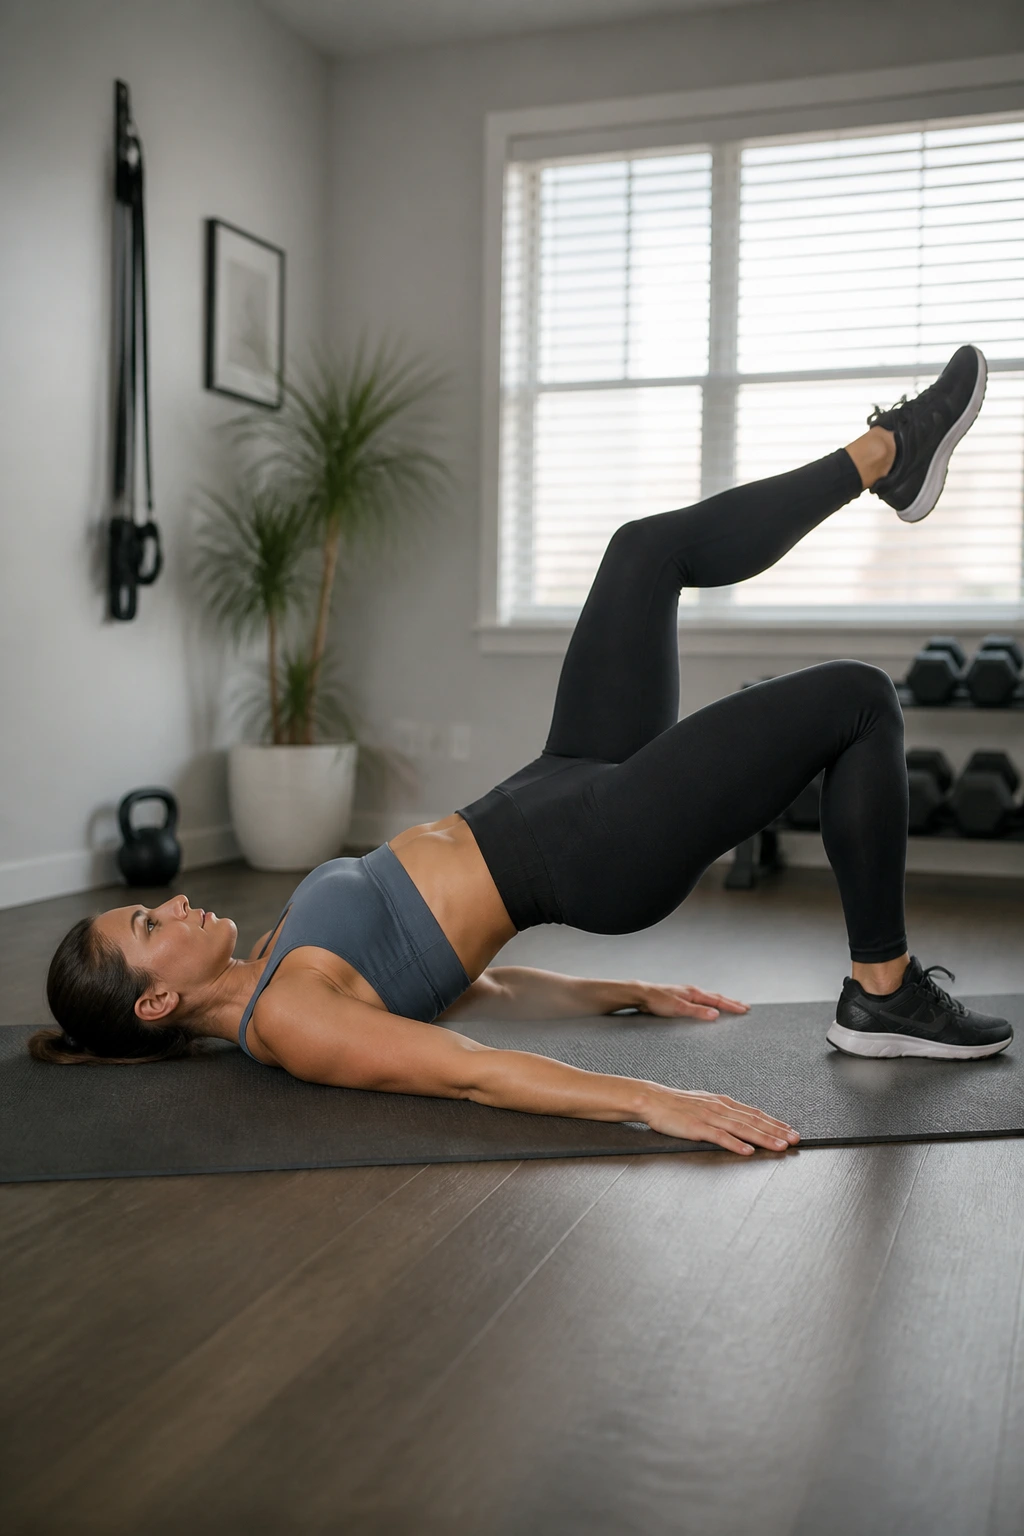
Progressing from the standard bridge, this adds an element of instability that forces the core to work harder to prevent rotation. Perform a standard bridge, then lift one foot slightly off the floor while keeping your hips level.
The Struggle
Your hips will want to dip toward the side of the lifted leg. Do not let them. Press your grounded heel into the floor to keep the pelvis square. This is a massive workout for the deep stabilizers that prevent the belly from pooching out.
Execution
- Hold for 5 seconds per rep.
- Ensure your hips stay high.
- If your back starts to hurt, drop back to the standard two-legged bridge.
12. Toe Taps
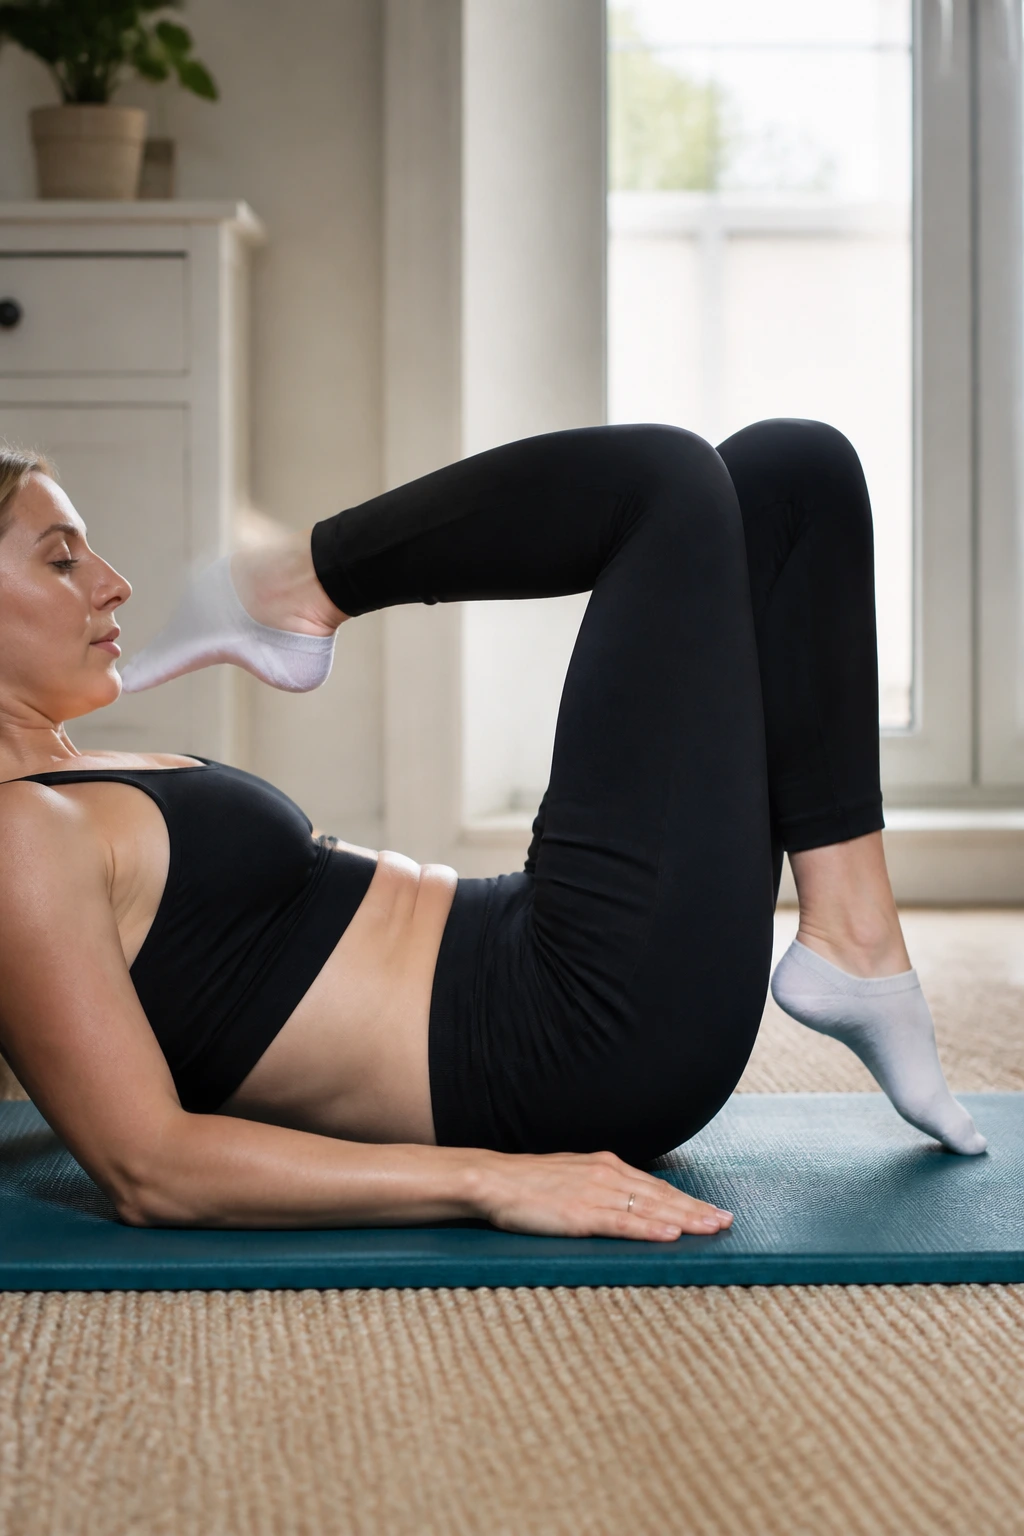
This is the next level of the dead bug movement. Lie on your back, knees in tabletop. Instead of just sliding, you are tapping your toes down toward the floor while maintaining a 90-degree bend at the knee.
Controlled Descent
The goal is to move the weight of your leg away from your center. Your abs have to contract to keep your ribs down and your spine neutral. If your ribs start to pop up, you are done for that set. Quality is the only metric that matters.
Why It Works
It is a dynamic movement that requires constant core bracing. It is significantly harder than it looks, and you will feel it deep in the lower abdomen, right where the “pooch” sits.
13. Standing Pelvic Tucks
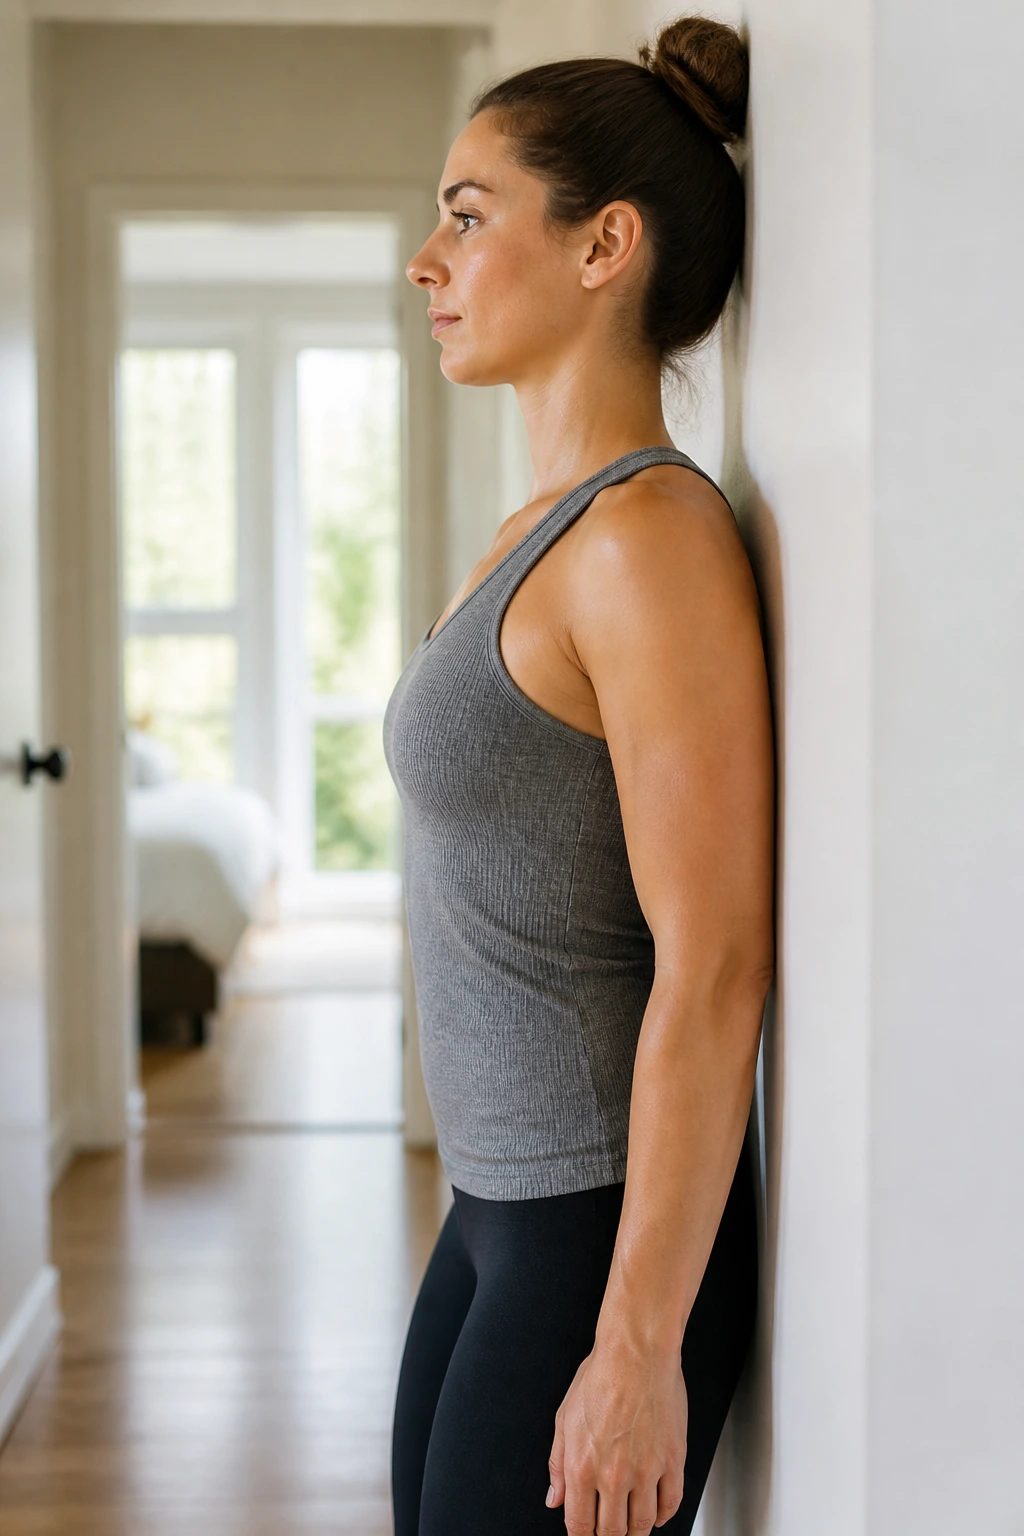
Posture is a huge part of the mommy pooch. Many of us stand with an anterior pelvic tilt—essentially, the pelvis tips forward, pushing the belly out. This exercise helps correct that stance. Stand against a wall, feet a few inches out.
The Correction
Flatten your lower back against the wall by engaging your core and tucking your pelvis slightly. Hold this “tuck” for a moment, then release. It is a subtle shift, but it resets the alignment of your hips and spine.
Daily Application
Practice this while washing dishes or standing in line. It’s an invisible workout. Over time, your body will start to prefer this neutral position, which naturally makes the belly appear flatter.
14. Modified Plank (Knees/Elbows)
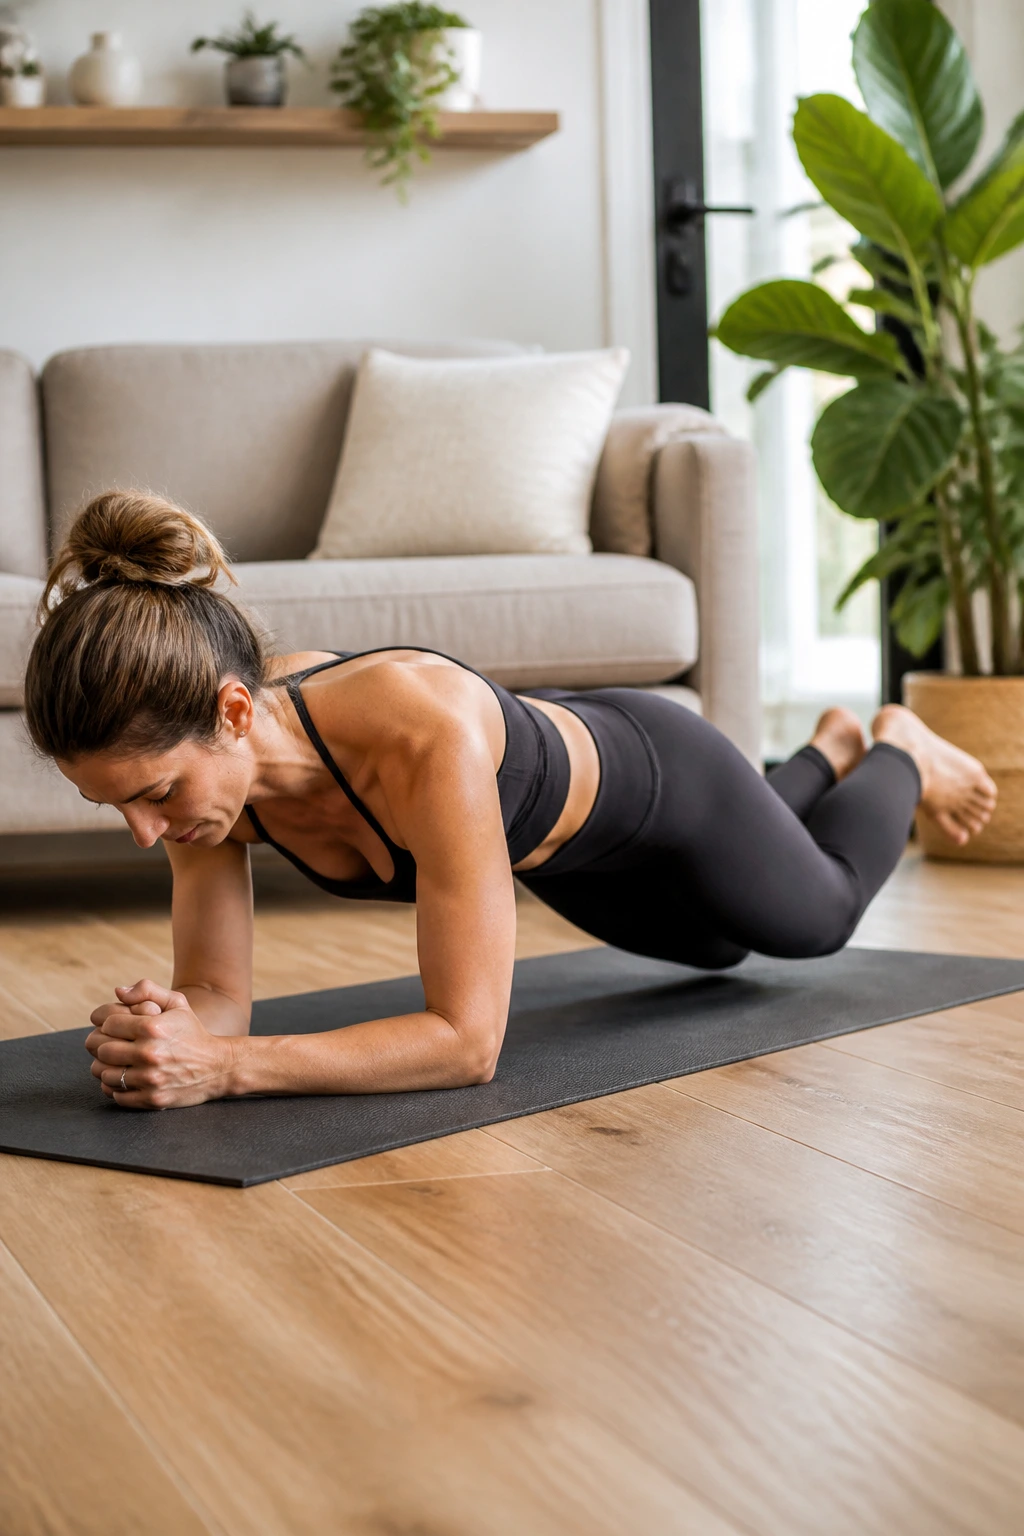
Planks are great, but the full version often leads to sagging hips if you are fatigued. Start with your knees and elbows. Tuck your toes, engage your core, and lift your knees just an inch off the floor.
The “Hover”
This is often called a “hover” plank. It is intense. By keeping the knees close to the floor, you reduce the lever length and keep the pressure on the abdominals rather than the lower back.
Tips
- Breathe deeply.
- Imagine pulling your elbows toward your knees to engage the lats.
- Hold for 10-20 seconds.
- Rest and repeat.
15. Quadruped Core Bracing
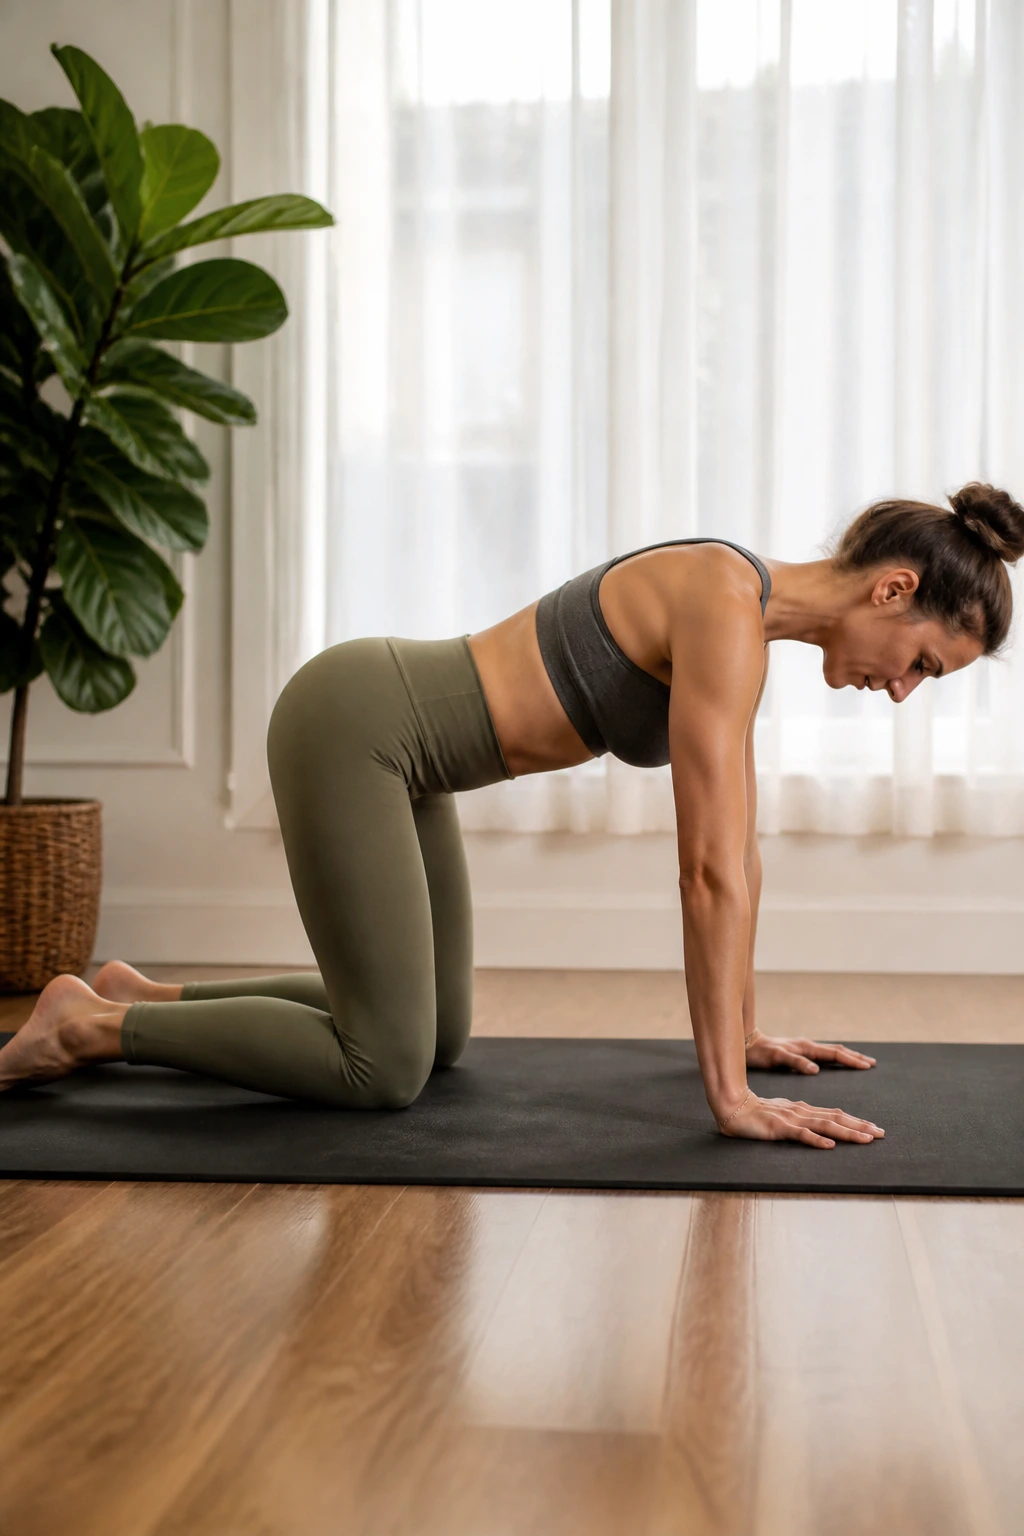
This is the most subtle exercise on the list, but it is arguably the most important for deep abdominal strength. Get into a tabletop position. Exhale and “draw” your belly button to your spine, but also try to engage the pelvic floor muscles as if you are trying to stop yourself from using the bathroom.
The Feeling
You should feel a slight shortening of the distance between your ribcage and your hips. You aren’t sucking in; you are activating. Hold this for 10 seconds while breathing normally.
Why You Need It
This teaches you to maintain tension while breathing—a skill required for every single movement you do in real life. If you can only engage your core while holding your breath, you won’t be able to use it when lifting a child.
16. Side-Lying Leg Lifts
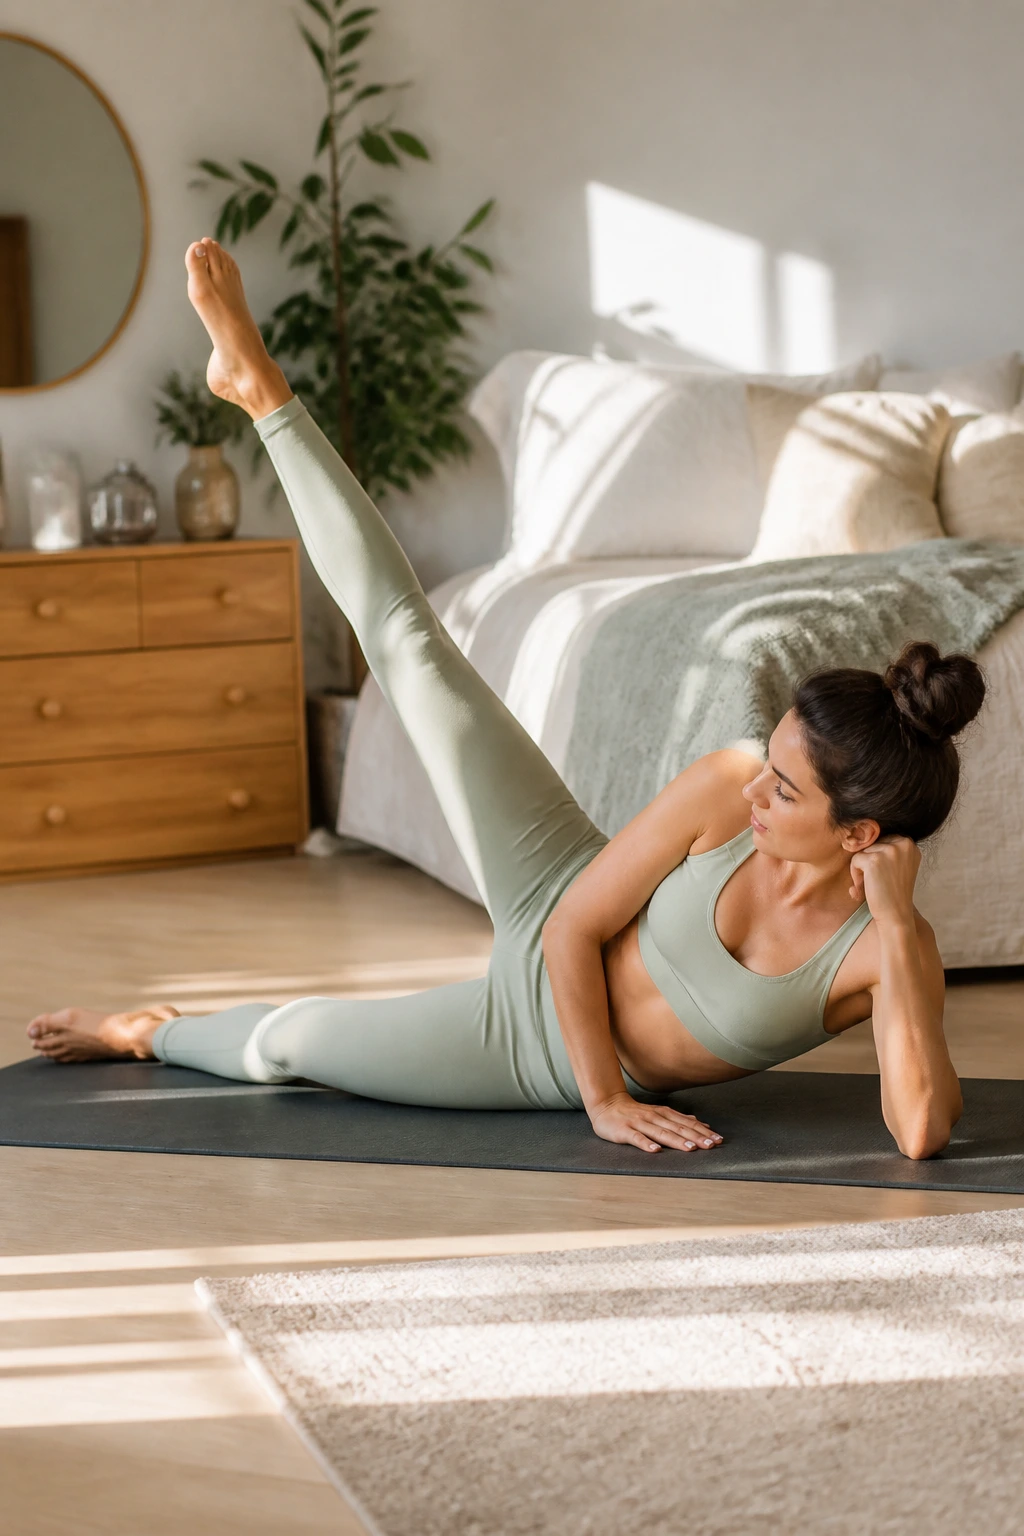
This targets the oblique chain and helps stabilize the pelvis from the side. Lie on your side, legs straight. Lift your top leg toward the ceiling and lower it slowly.
Stability
The key is to keep your torso rock-solid. Don’t let your upper body rock back and forth. You are using your core to anchor your spine while your leg moves.
Why This Works
The obliques are essential for pulling the waistline in. By working them with leg lifts, you are targeting the entire lateral core chain without putting stress on the spine.
17. Wall Push-Ups
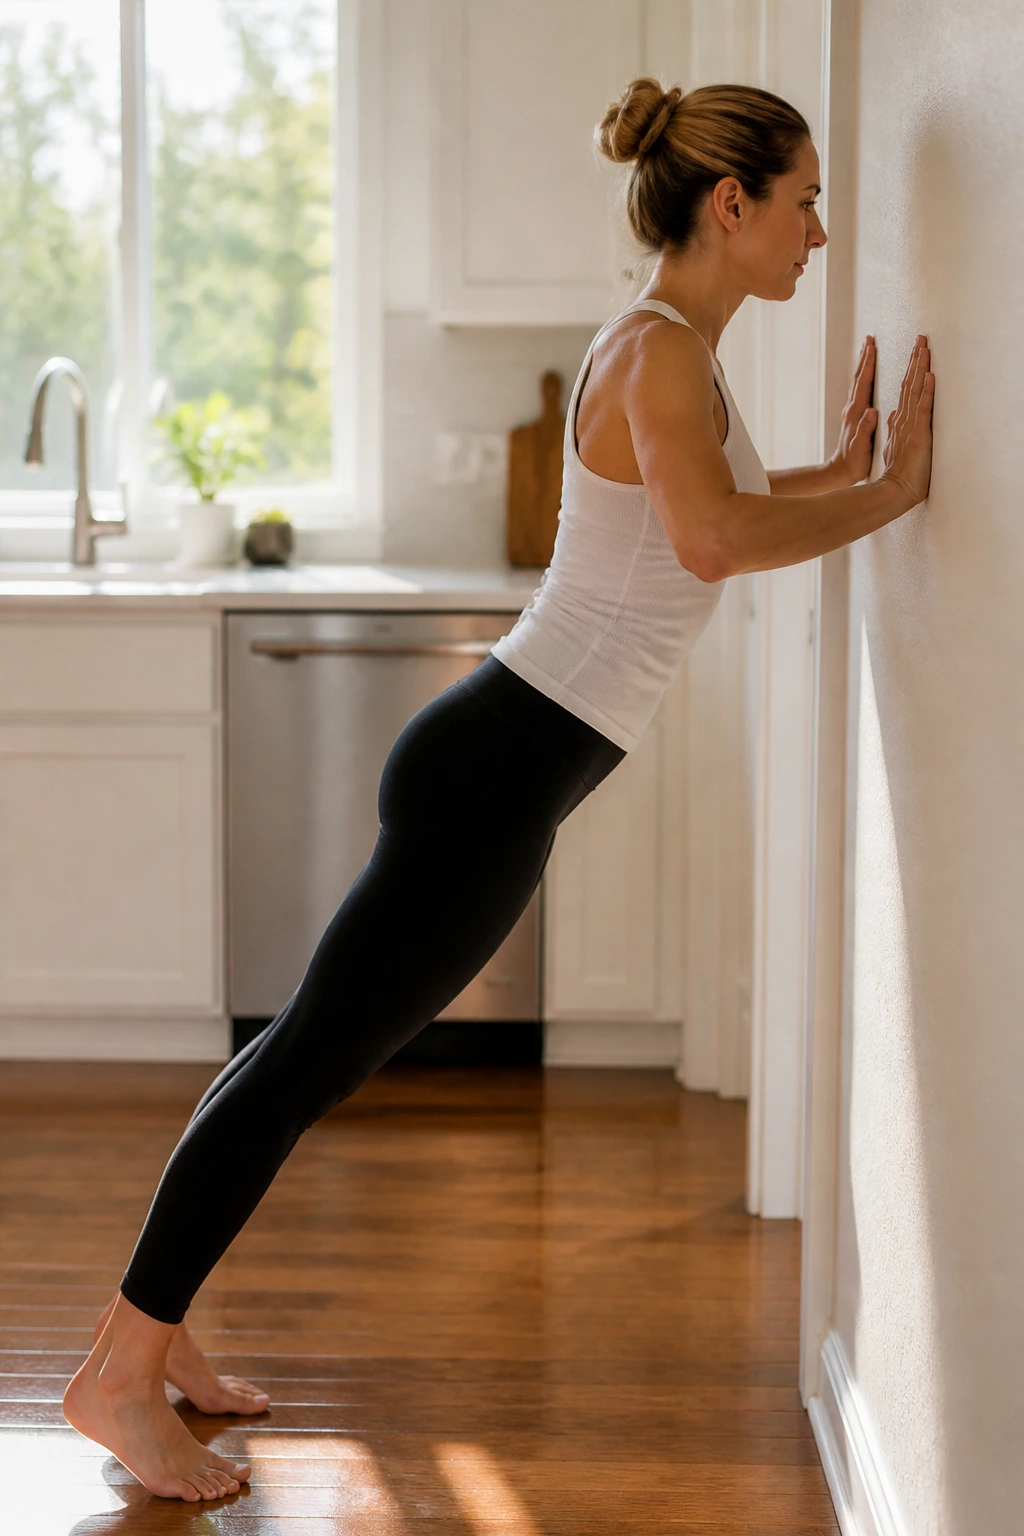
Push-ups are a fantastic core exercise, but most people struggle with the form, which causes their back to sag. Start at a wall. Keep your body in a straight line from heels to head.
Core Engagement
As you lower your chest to the wall, squeeze your glutes and brace your abs. You are essentially doing a moving plank. If you don’t engage the core, your hips will sag forward, and you’ll get zero ab work.
Progression
- Move your feet further from the wall to increase the angle.
- Focus on the push-back—that’s where the core does the most work to stabilize the body.
18. Seated Core Engagement
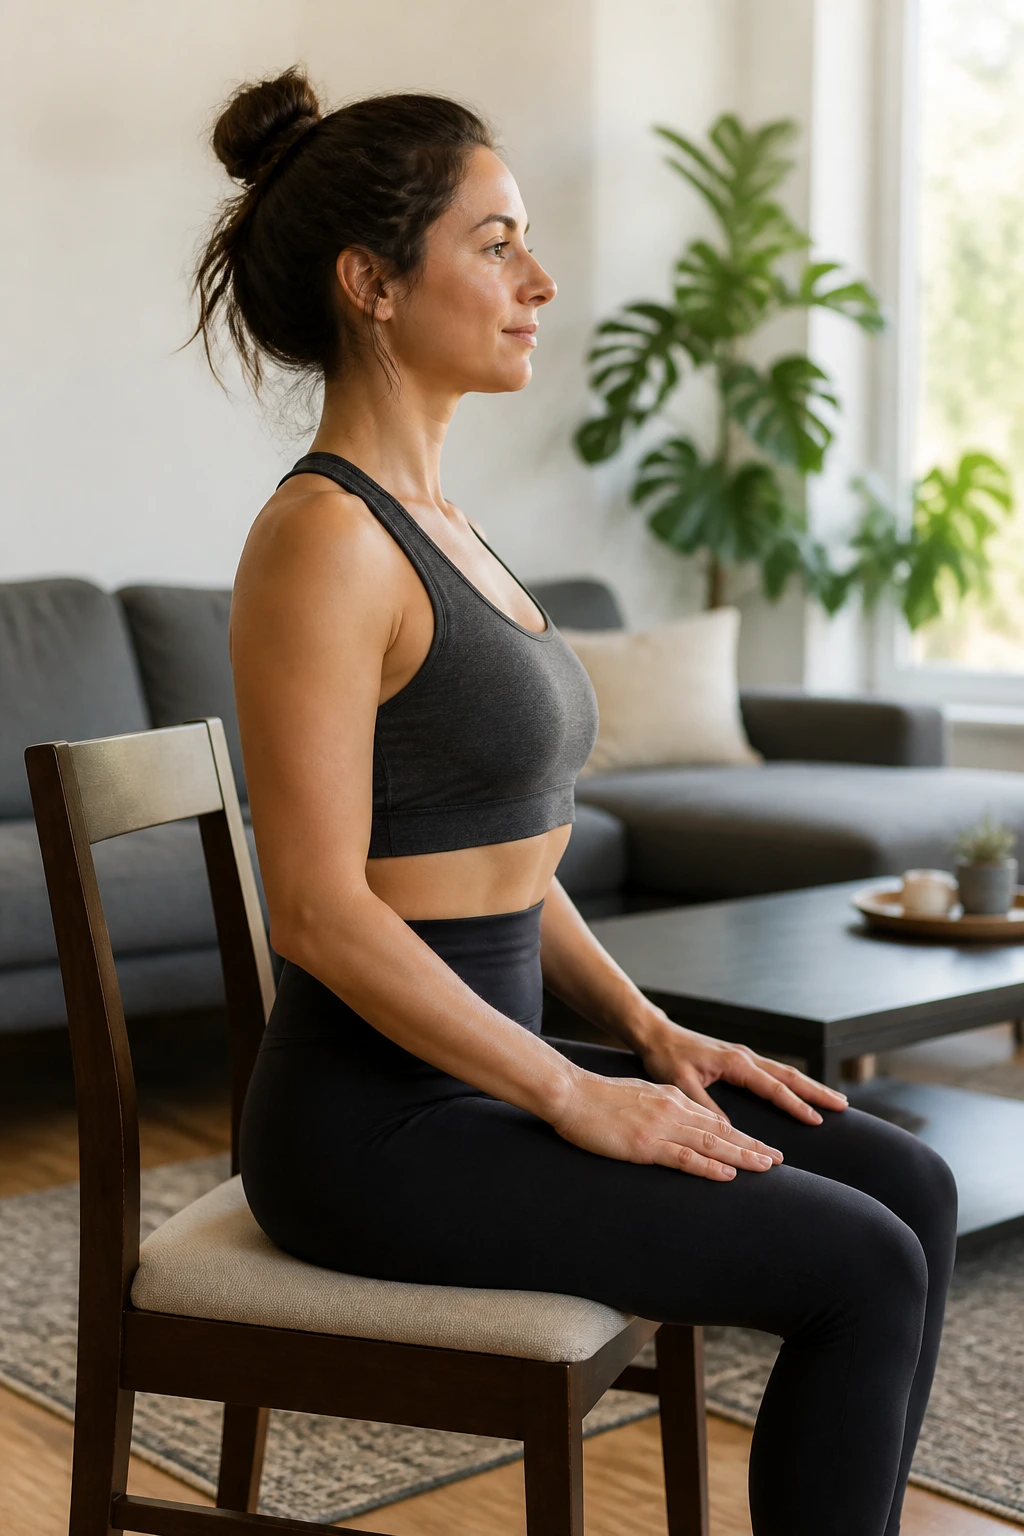
You can do this while sitting at a desk or on the couch. Sit tall, feet flat on the floor. Inhale, and on the exhale, sit as “tall” as possible, pulling the belly button in toward the spine and lifting the pelvic floor.
Subtle Strength
It’s like trying to zip up a pair of pants that are just a little too tight. You aren’t holding your breath; you are just maintaining that “zippered” feeling for 30 seconds.
Why It’s Useful
It trains your core to stay active during sedentary time. We often slump while sitting, which stretches the abs and weakens them. This is the antidote to “tech neck” and “slumped spine” syndrome.
19. Modified Bicycle Crunches
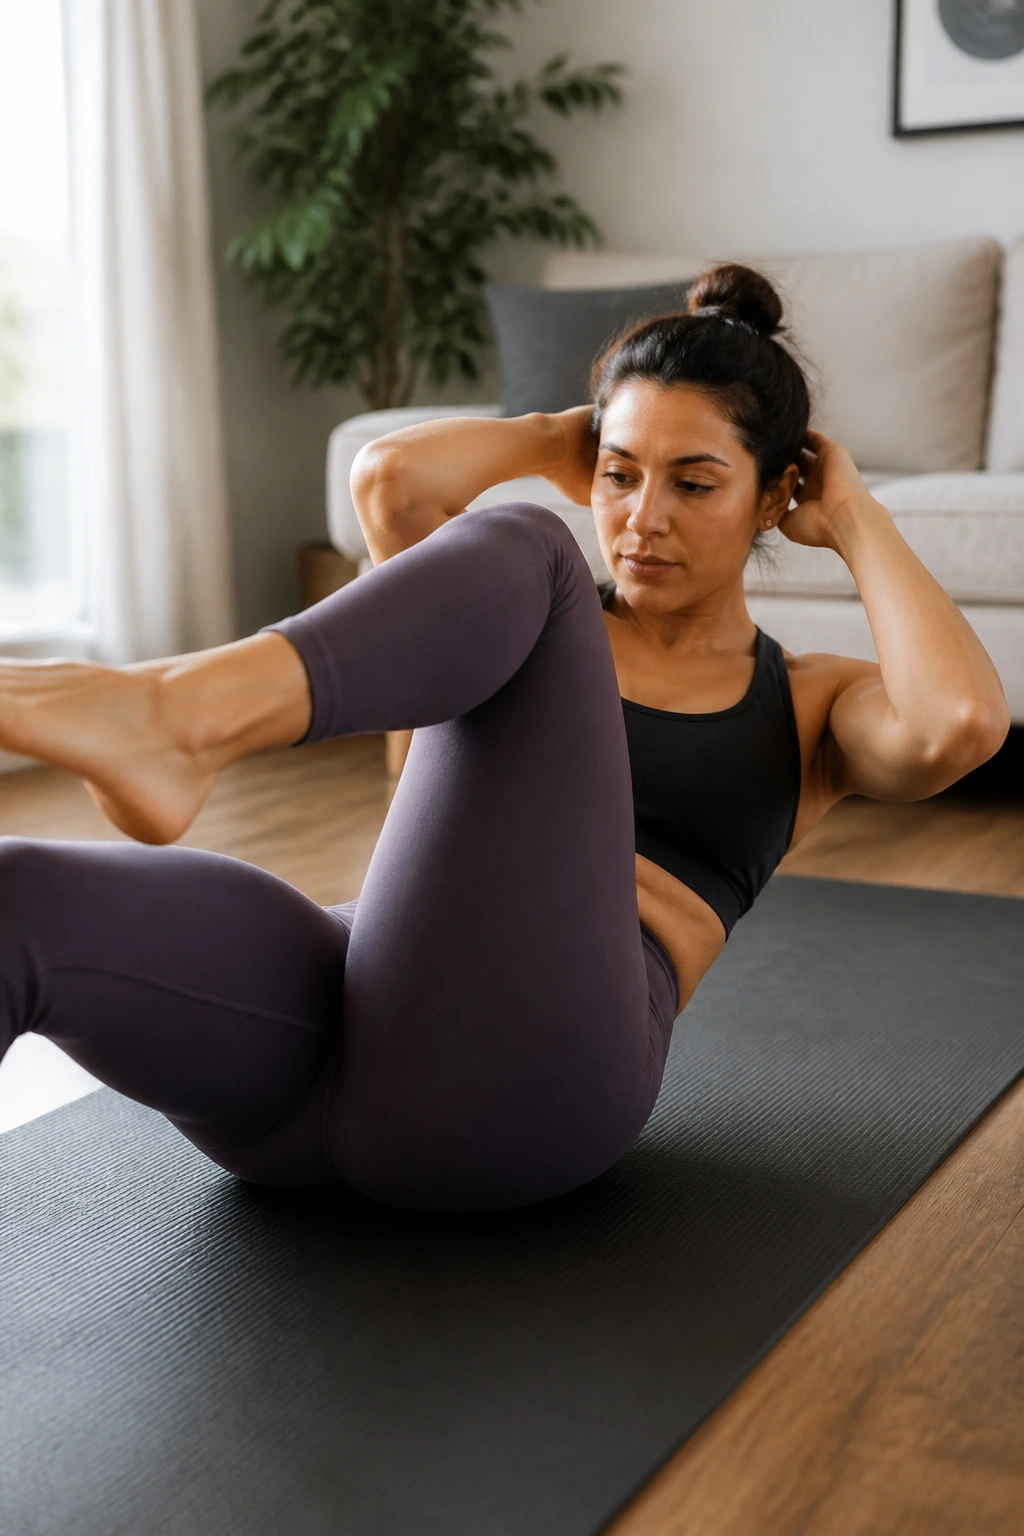
Traditional bicycles can be too fast and aggressive. Do these in slow motion. Lie on your back, knees in tabletop. Hands behind your head for support, but don’t pull on your neck.
The Motion
Extend one leg slowly, and as you do, rotate your torso slightly toward the bent knee. Pause. Return to center. Switch. The rotation should be minimal.
Focus
It is about the rotation of the ribcage, not the elbow-to-knee contact. If you can’t keep your lower back down, reduce the range of motion. Slowing it down makes it exponentially harder and safer.
20. The “Tummy Vacuum”

This is a classic technique that has stood the test of time for a reason. It directly targets the transverse abdominis, which acts like a natural corset. Stand tall or kneel on all fours. Exhale all the air out of your lungs.
The Technique
With no air in your lungs, pull your belly button in and up under your ribcage. Hold this “hollow” position for 5 to 10 seconds. Release and inhale.
Why It’s Powerful
It is the most direct way to isolate the deep core muscles. It can feel strange at first, but it is a highly effective way to retrain the brain to keep the lower belly flat.
Warning: Only do this on an empty stomach. It is a deep internal movement, and you do not want to be full when attempting it.
The Reality of Results
Getting rid of a “mommy pooch” is not about a quick fix or a specific number of reps. It is about reconnecting with a part of your body that has undergone a massive transformation. You are re-teaching your muscles how to fire, how to stabilize, and how to hold you up throughout the day. It takes time. Some days you will feel connected and strong, and other days, especially if you are exhausted, your form might slip. That is normal.
If you are just starting, do not try to do all 20 of these. Pick three or four that feel the most accessible to you. Spend a week practicing those. Focus on the breath, the pelvic alignment, and the slow, controlled movement. Your goal is to feel the muscles working. If you feel pain—sharp, pinching pain, especially—stop. Discomfort from muscle fatigue is different, but pain in the joints or the lower back is a clear signal to modify or rest.
Remember that nutrition and hydration also play a role in how your body recovers, but movement is the only way to rebuild the muscular wall that was stretched for months. Be patient with yourself. You are not “getting your body back.” You are building a new, stronger, and more functional version of yourself. Your core will respond when you treat it with respect and consistent, gentle challenge.
