



You look in the mirror, press your fingers into your abdomen, and feel a gap where firm muscle should be. You have heard the term “diastasis recti” tossed around in parenting forums, medical blogs, and casual conversations with friends who have been through the same thing. Hearing about it and feeling the physical separation of your abdominal muscles are two very different experiences. That sinking feeling—literally—when you realize your core isn’t functioning the way it once did can be frustrating, confusing, and sometimes even physically uncomfortable.
Most of the time, the focus is placed entirely on how the stomach looks. But diastasis recti (DR) is far more than a cosmetic issue. It is a functional problem. Your core is meant to be a cylinder of stability. When the linea alba—the connective tissue running down the center of your abdomen—stretches and thins, that cylinder loses its integrity. You might notice back pain, poor posture, pelvic floor issues, or that persistent “pooch” that refuses to budge, no matter how many standard crunches you do.
Here is the good news: the body is resilient. You can often heal or at least significantly improve the functional integrity of your core with the right approach. It is not about doing hundreds of sit-ups or aggressive planks. In fact, those traditional moves can often make DR worse by putting too much pressure on the already weakened tissue. Instead, the focus has to be on retraining the deep core, managing intra-abdominal pressure, and reconnecting with muscles you might not have intentionally engaged in years.
This process takes patience. There are no shortcuts here, and expecting an overnight fix is the surest way to get discouraged. You are not just training muscles; you are retraining your nervous system to stabilize your spine and pelvis. If you approach these movements with intention, focusing on quality of contraction over quantity of repetitions, you can create the tension necessary to draw those muscles back together and regain your stability.
1. Diaphragmatic Breathing
This is the foundational movement for everything else that follows. If you cannot breathe into your diaphragm, you cannot properly engage your deep core. Most people breathe shallowly into their chest, which actually increases pressure on the pelvic floor and the abdominal wall. You need to reverse this pattern.
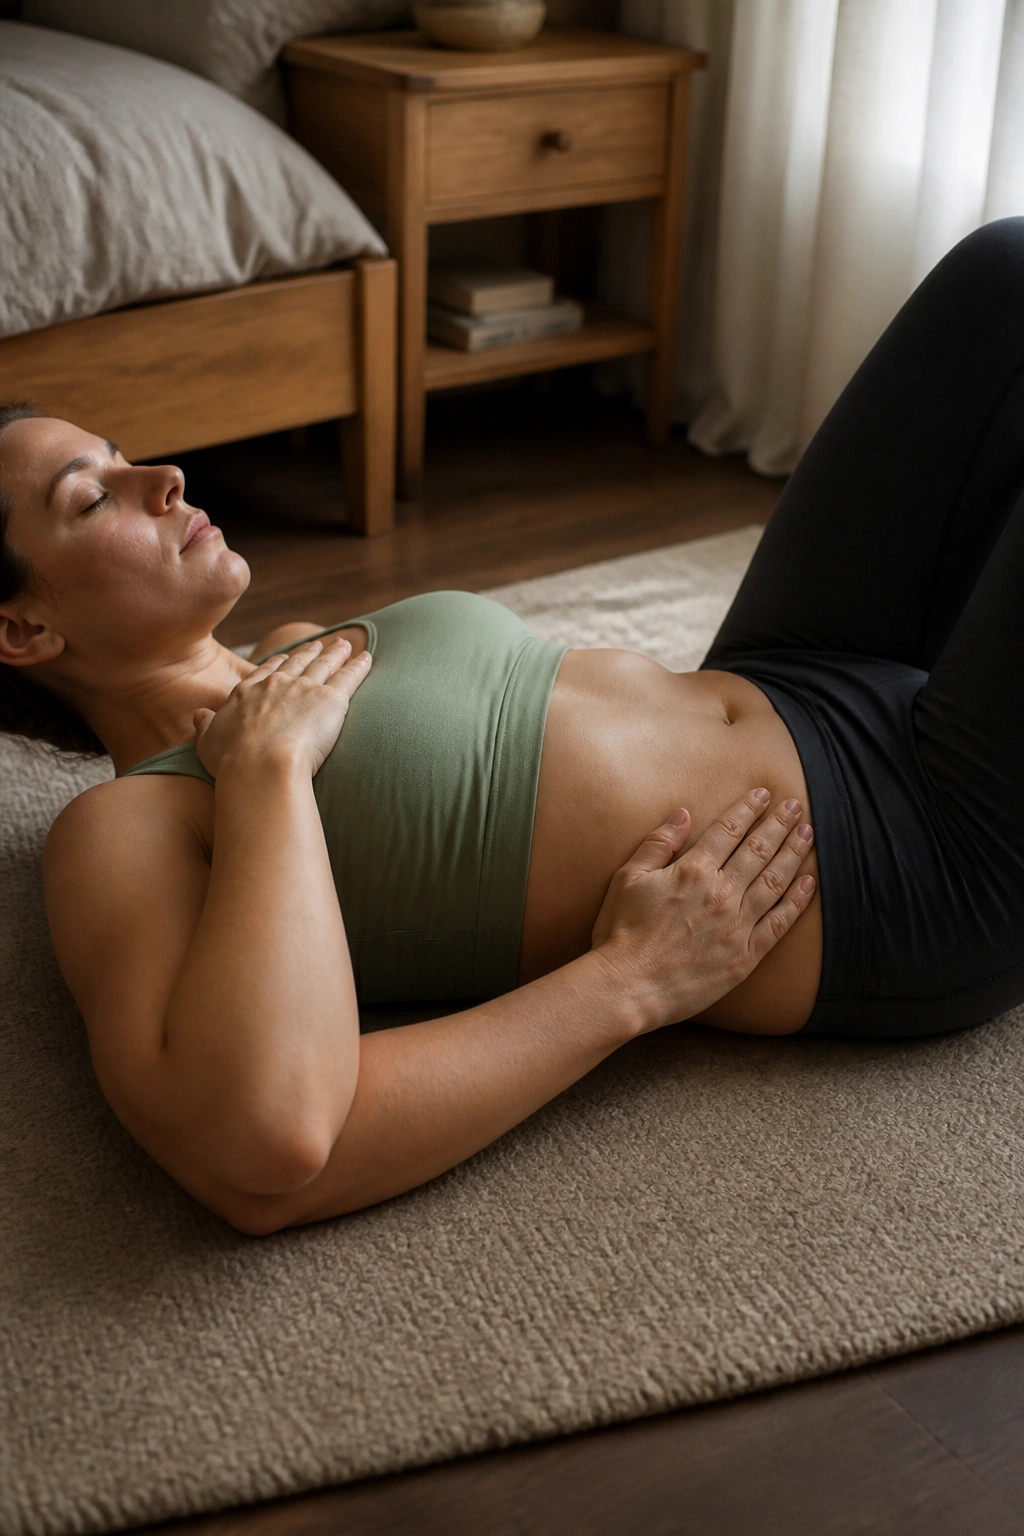
Lie on your back with your knees bent and feet flat on the floor. Place one hand on your chest and the other on your belly. As you inhale slowly through your nose, focus on moving your belly hand outward while keeping your chest hand relatively still. Your ribs should expand laterally, like an umbrella opening, rather than rising toward your chin.
When you exhale, purse your lips and blow out slowly, as if you are blowing through a straw. Feel your belly button gently pulling back toward your spine and your ribs knitting together. This exhale is where the magic happens. By coordinating the breath with deep core activation, you are teaching your body how to manage pressure from the inside out, which is the exact opposite of the outward pressure that causes coning.
2. Pelvic Tilts
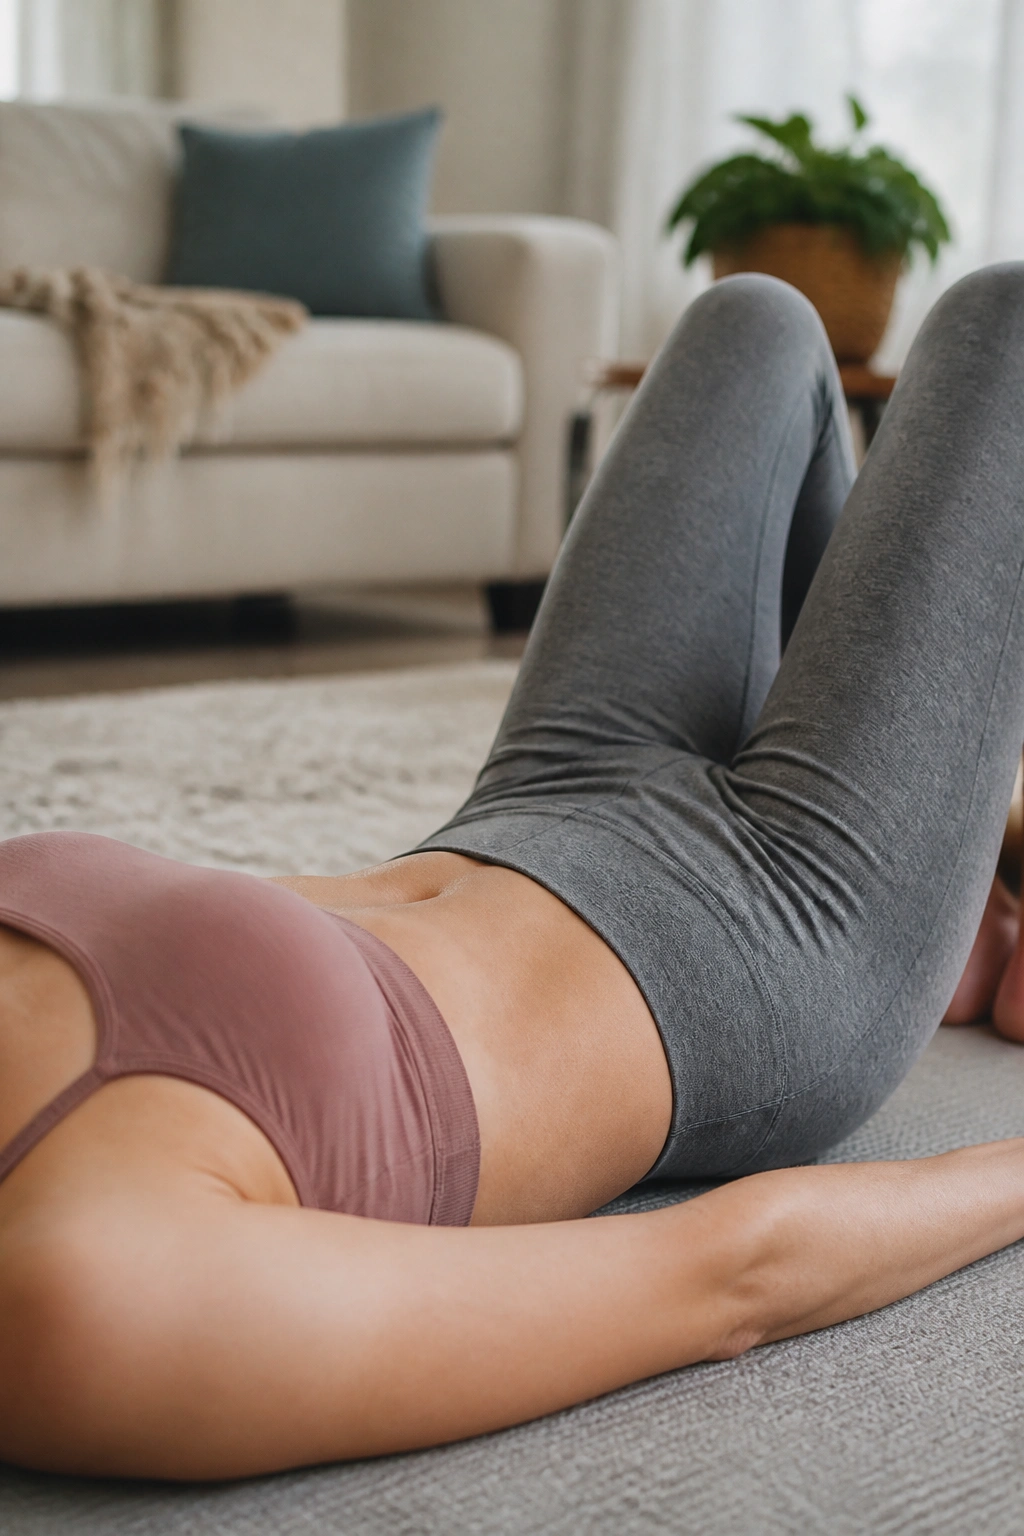
Pelvic tilts are a subtle movement, but they are essential for finding the neutral position of your spine. Many people with DR live in an anterior pelvic tilt, where the lower back is arched and the ribs are flared. This position puts constant, unnecessary strain on the linea alba.
To perform this, lie on your back with knees bent. Your lower back will naturally have a slight gap between it and the floor. On your exhale, gently rock your pelvis backward, pressing your lower back into the floor. This is not about squeezing your glutes as hard as you can; it is about using your lower abdominals to rotate the pelvis.
Hold this position for a few seconds while continuing to breathe shallowly. If you feel your upper abs bulging or “coning” upward, you have gone too far or are over-engaging the rectus abdominis—the “six-pack” muscle. The goal is to feel the tension deep in the lower belly. Release slowly, returning to a neutral spine. Focus on the internal rotation, not the external force.
3. Heel Slides
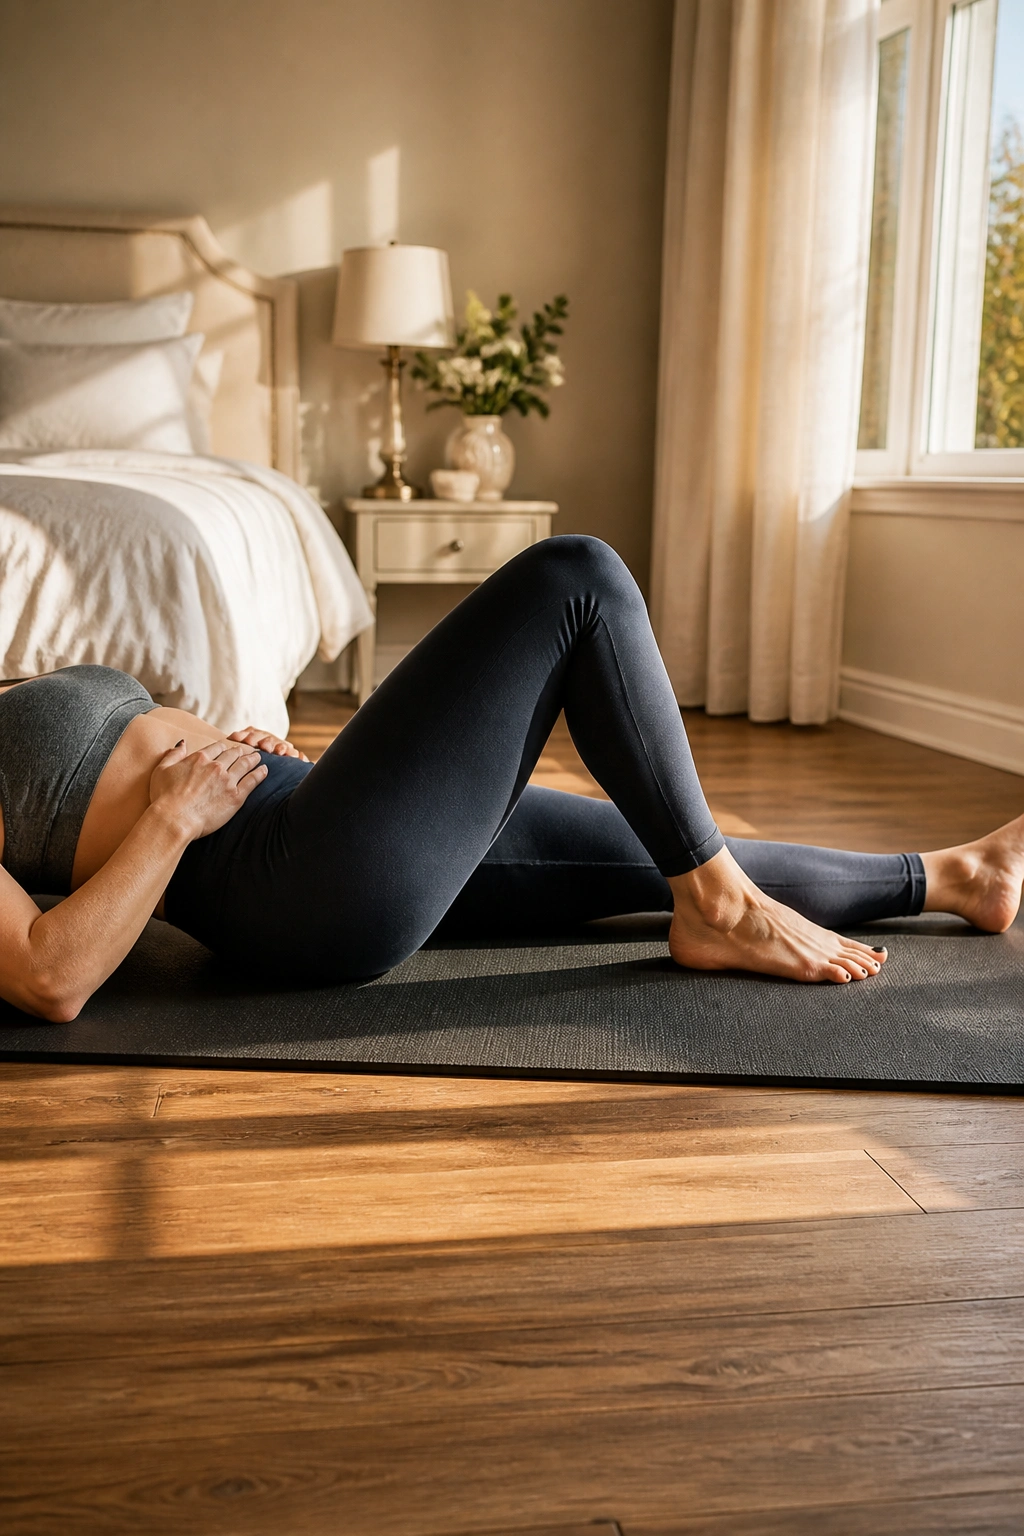
Once you have mastered the pelvic tilt, heel slides introduce movement while maintaining that core stability. You are essentially testing your ability to keep the core “on” while your legs move. This mimics the stability required for walking or climbing stairs.
Start in the same position: back flat, knees bent. Engage your deep core by exhaling and gently pulling your belly button toward your spine. Keep one foot planted and slowly slide the other heel along the floor, extending your leg until it is almost straight. The challenge is to keep your pelvis completely still.
If you feel your lower back arch off the floor as your leg extends, you have lost your core tension. Stop the leg movement before that happens. It is better to extend your leg only halfway and maintain perfect form than to reach full extension and lose the connection. Slowly slide the heel back to the starting position and switch legs. This is a slow, methodical exercise. Rushing through it defeats the purpose.
4. Transverse Abdominis Engagement

The transverse abdominis (TVA) is your body’s natural corset. It wraps around your torso, providing stability for your spine and holding your organs in place. Strengthening this muscle is the primary goal of any DR rehabilitation program.
Sit or lie in a comfortable position. Place your fingers on your hip bones, then move them about an inch inward toward your belly button. This is the area where the TVA sits. Now, imagine you are wearing a pair of jeans that are slightly too tight, and you are trying to zip them up.
Draw your belly button gently toward your spine. You should feel a slight tightening or hardening sensation under your fingertips. Do not hold your breath. You should be able to talk or count while holding this contraction. If you find yourself holding your breath, your contraction is too intense. Aim for a 20% to 30% contraction—enough to feel it, but not enough to cause tension in your neck or shoulders.
5. Modified Dead Bug
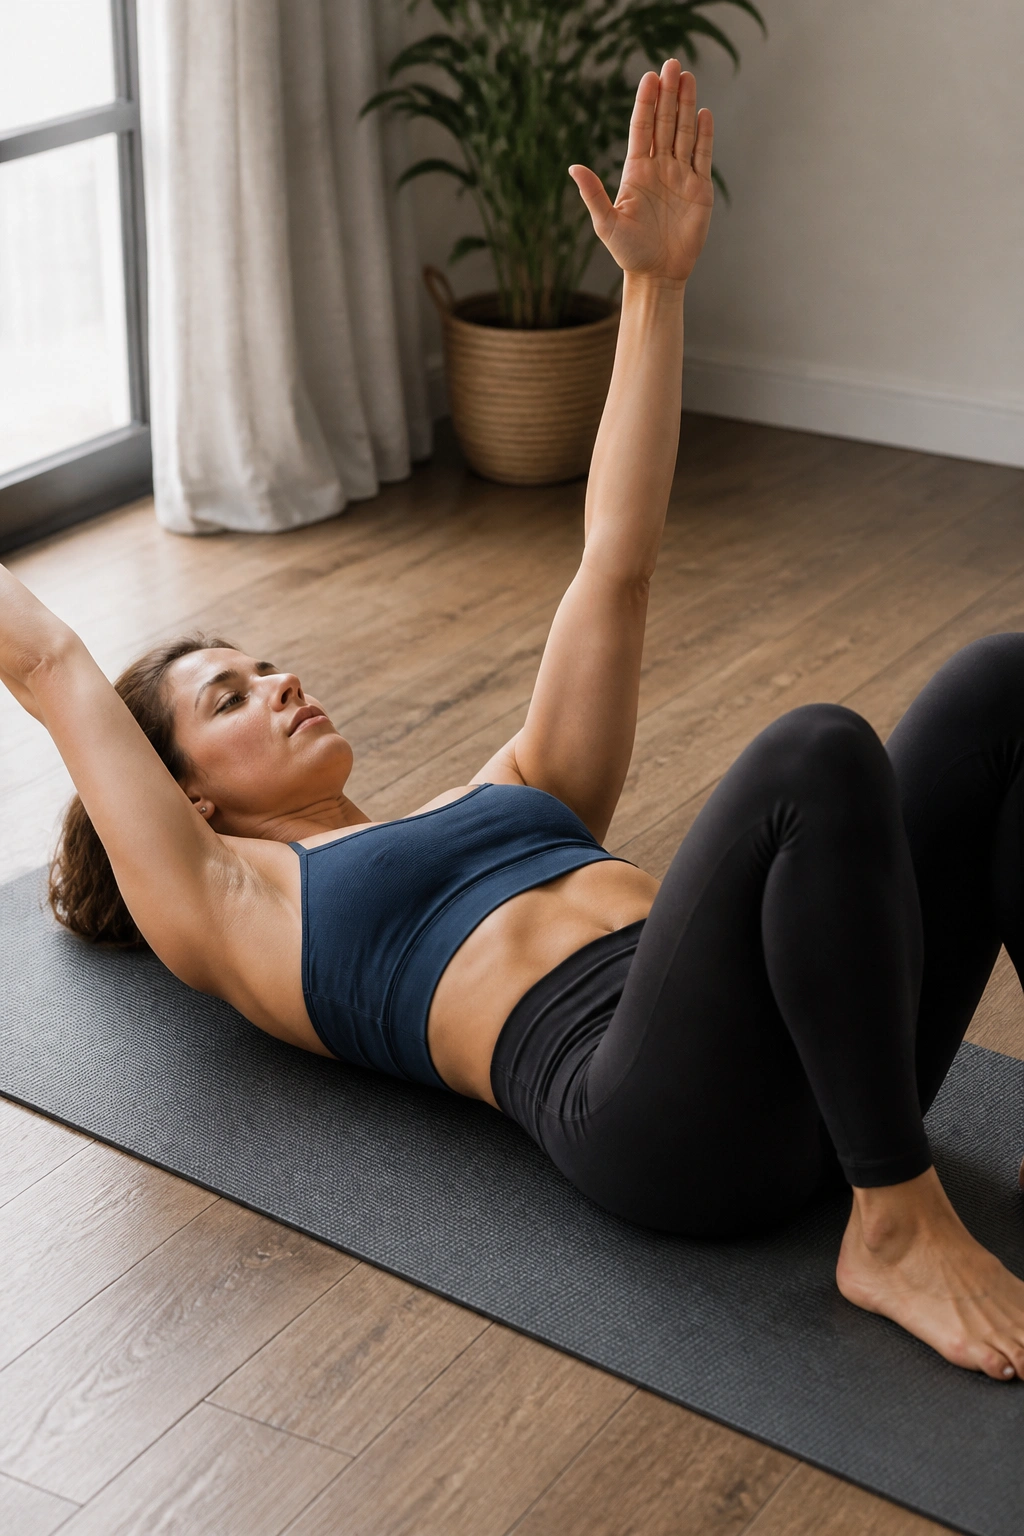
The classic “Dead Bug” is a great core exercise, but it can be too aggressive if your DR is significant. The modified version keeps both feet on the floor, focusing on arm movement while maintaining a rock-solid torso.
Lie on your back, knees bent, feet flat. Extend your arms toward the ceiling, palms facing each other. Engage your core, ensuring your lower back stays imprinted on the floor. Now, slowly lower one arm backward toward the floor behind your head. Keep the other arm pointing straight up.
The goal is to prevent your ribcage from flaring open as the arm moves. You will feel a strong pull in your mid-section as your arm goes back. If your back lifts or your ribs pop up, do not lower your arm as far. Return to the starting position and repeat with the other arm. This teaches your core to resist rotation and extension, both of which are critical for healing the abdominal wall.
6. Glute Bridges
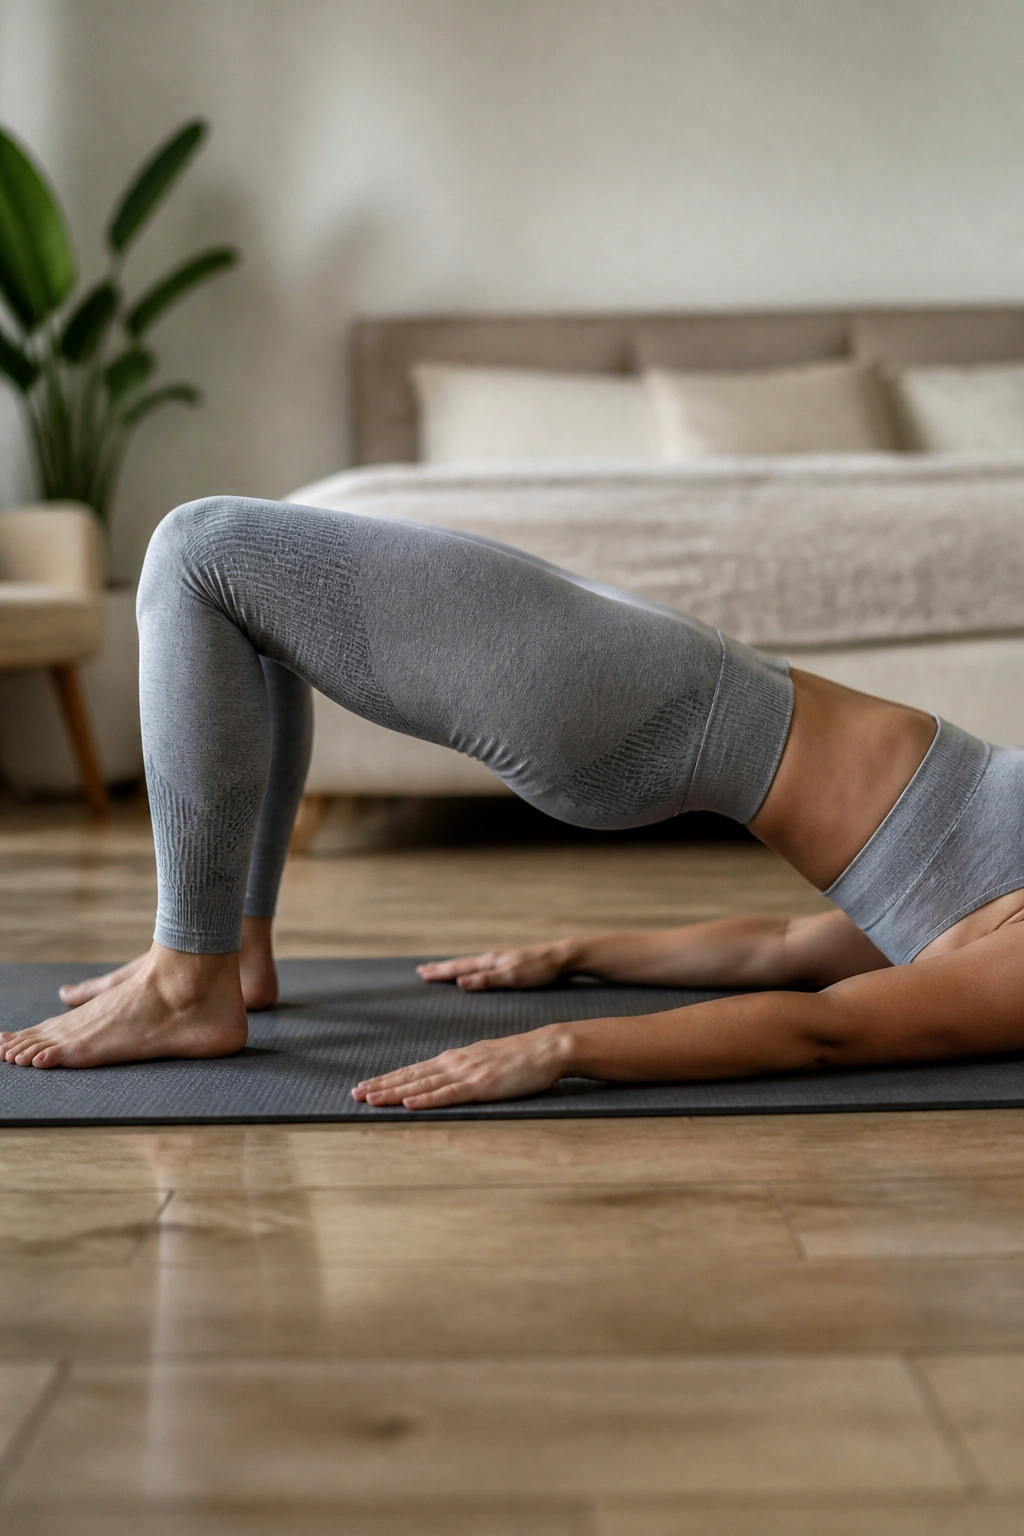
Your glutes are part of your core system. If they are weak, your pelvis will likely tilt forward, putting more strain on your lower back and abdominals. Glute bridges help restore the balance between the front and back of your core.
Lie on your back, knees bent, feet hip-width apart. Before you lift, find that slight pelvic tuck you practiced earlier. Engage your core. Drive through your heels to lift your hips toward the ceiling. Avoid pushing your hips too high, which leads to arching the back. You want a straight line from your knees to your shoulders.
Squeeze your glutes at the top, but keep your ribs knitted down. If you feel this in your lower back, you are likely pushing up with your spine rather than your legs. Lower back down slowly, keeping the engagement in your belly the whole time. The descent is just as important as the lift.
7. Bird-Dog
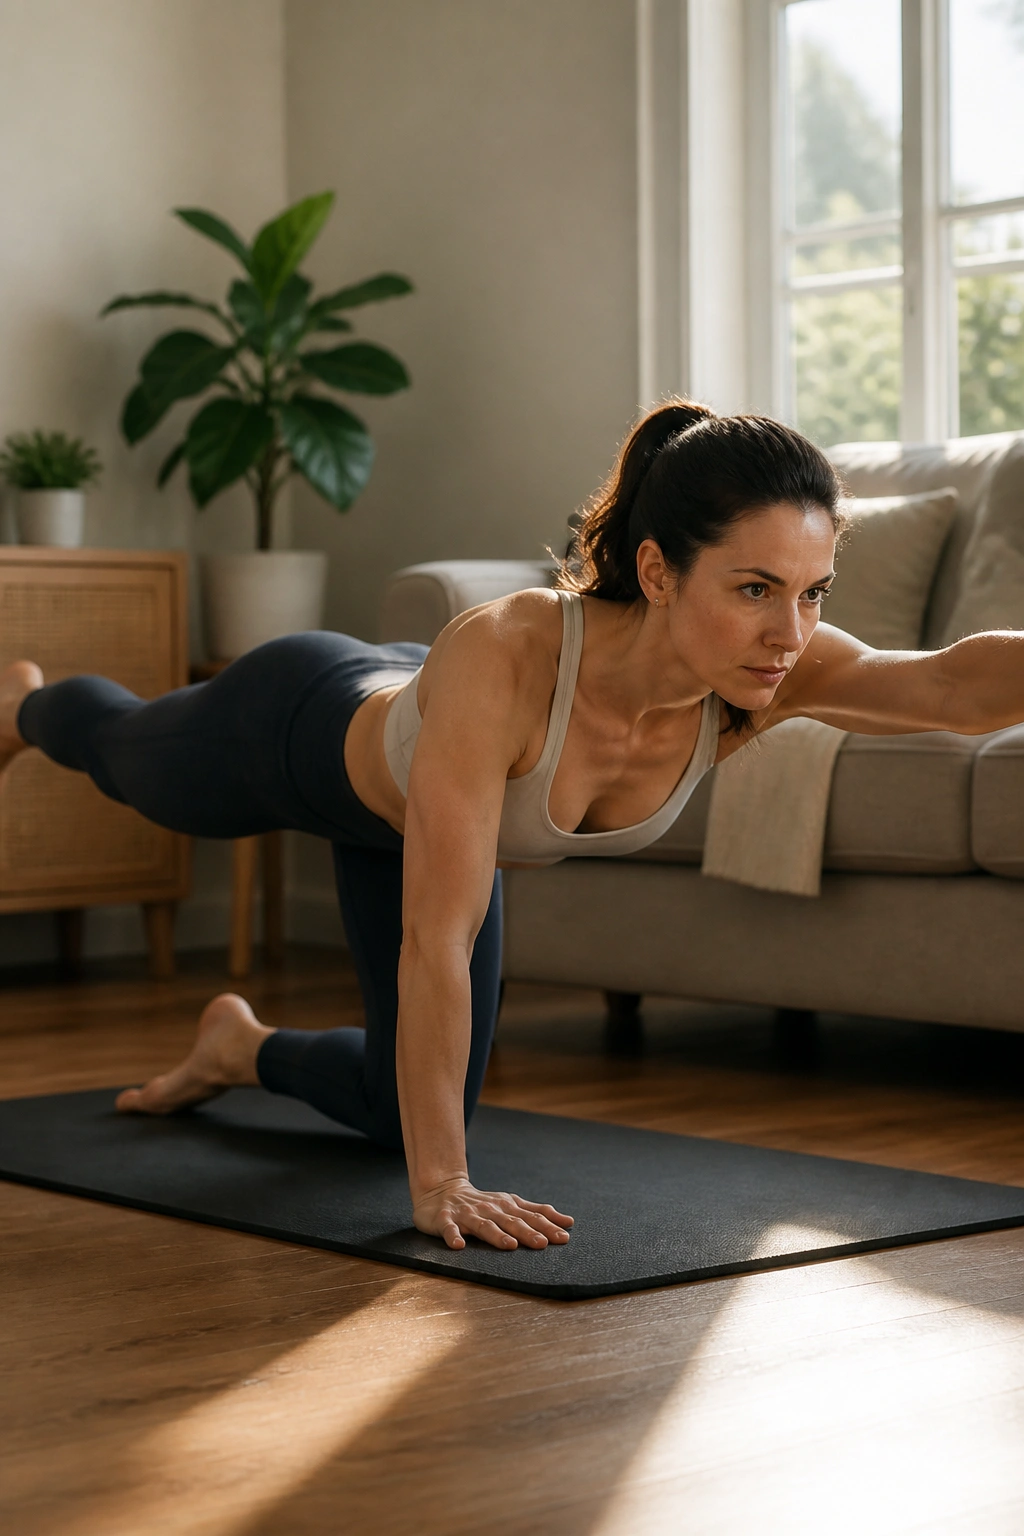
This is a fantastic exercise for stability and coordination, forcing the right and left sides of your brain—and body—to communicate. It also requires you to resist gravity while on all fours.
Start on your hands and knees, hands under shoulders, knees under hips. Keep your back flat like a tabletop. Exhale, engage your core, and simultaneously reach your right arm forward and your left leg backward. Do not let your back sag or rotate toward the floor. Imagine a glass of water balanced on your lower back; it shouldn’t spill.
If that feels steady, hold it for three to five seconds, then return to the start. If your back wobbles, start by just lifting one arm or one leg at a time. The goal is complete stillness in the torso. You are building the deep, stabilizing muscles that support the spine, which directly impacts how well your abdominal wall can close.
8. Wall Sits with Core Activation
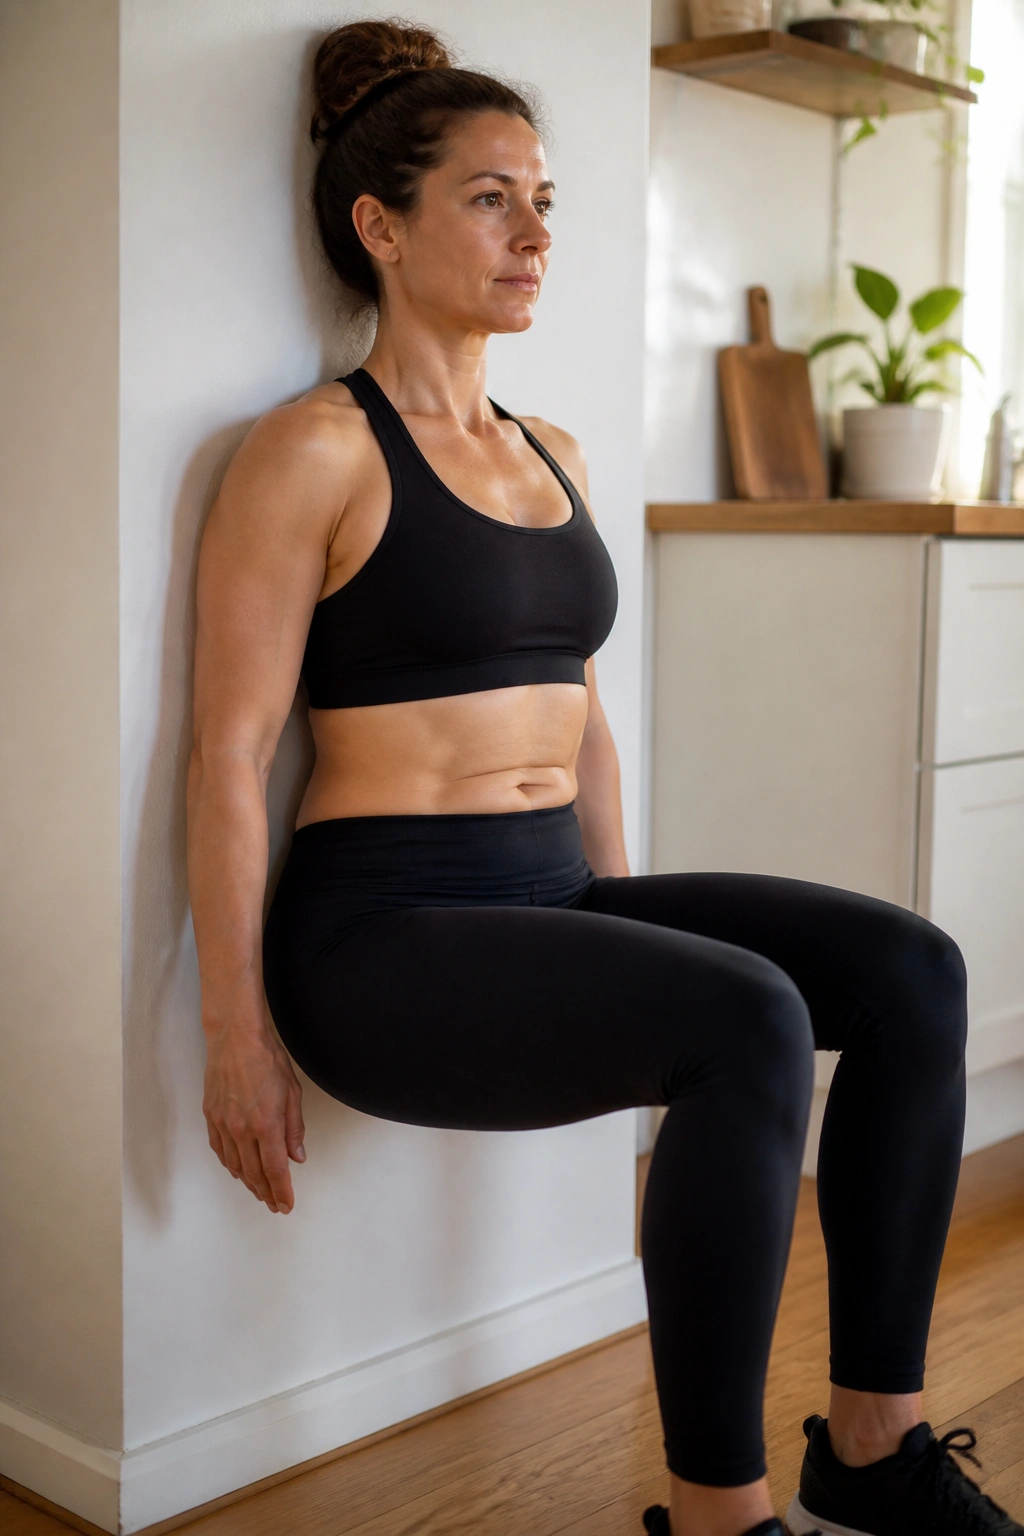
Wall sits are often used for leg strength, but they are an excellent, safe way to practice core activation in a vertical position. You need to be able to hold your core together while standing, and this provides a stable environment to do just that.
Lean your back against a wall and slide down until your knees are bent at a comfortable angle. Push your lower back into the wall. This is a different feeling than lying on the floor, but the principle is the same: eliminate the arch in your lower back.
Once you are in position, engage your core. Maintain that engagement for 20 to 30 seconds. You will feel your quads working, but keep your attention on your belly. Are your ribs sticking out? Pull them down. Are you holding your breath? Breathe. This is a functional exercise because it requires you to stabilize your core while your legs are under load—a skill you use every time you pick up a toddler or a laundry basket.
9. Cat-Cow
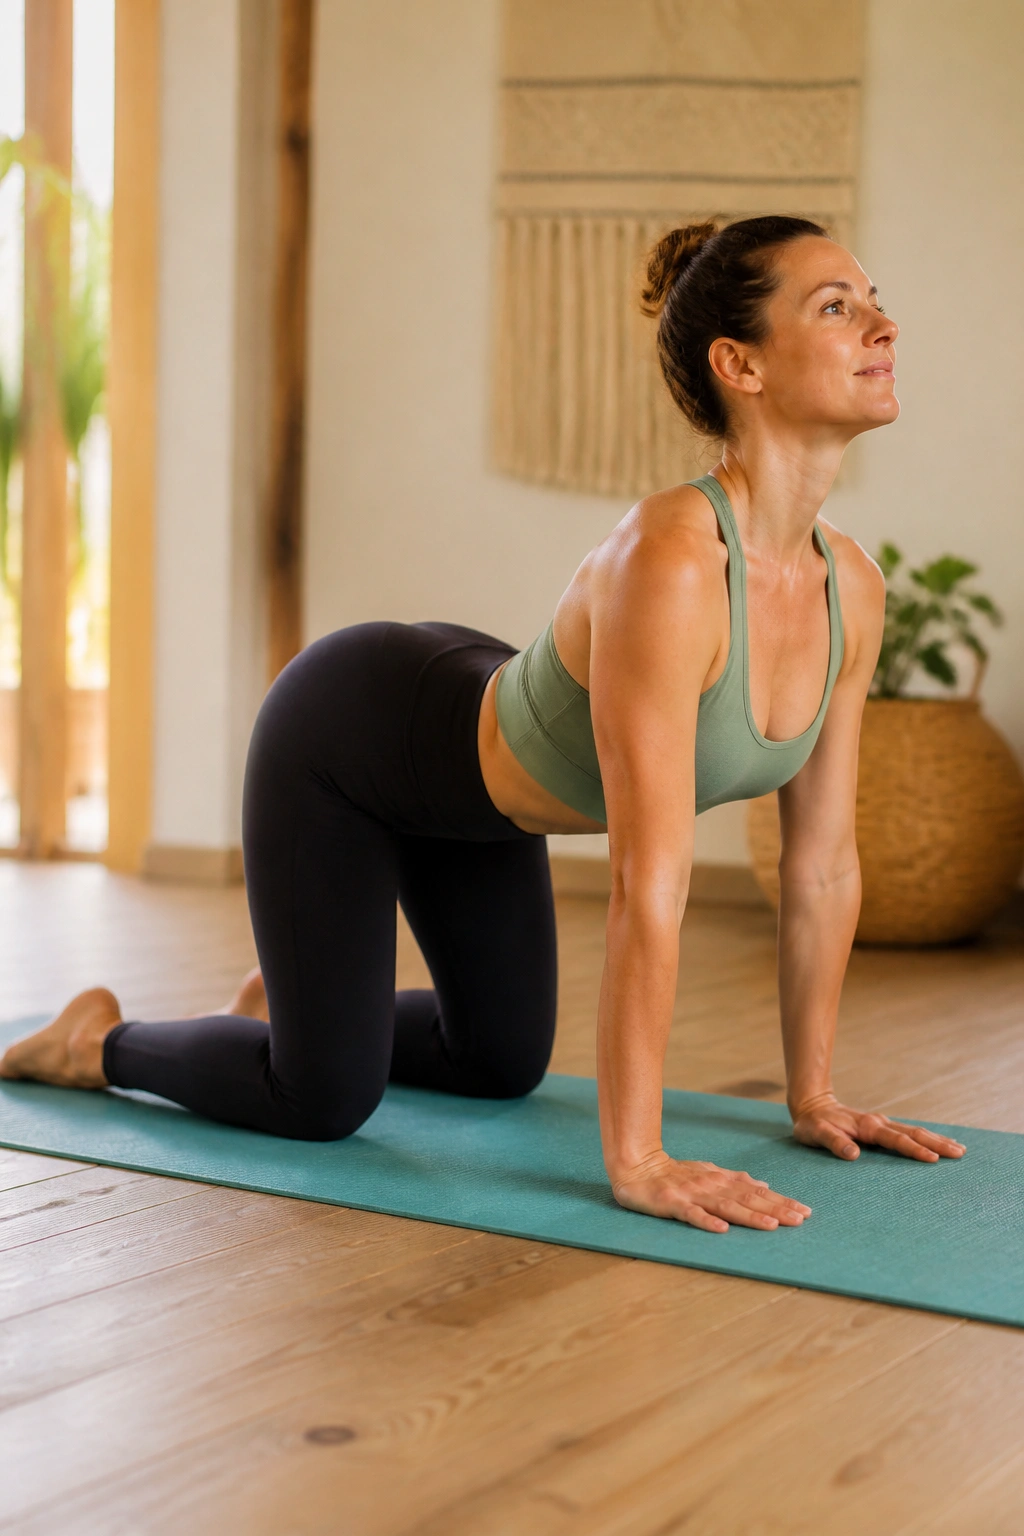
This is not just for flexibility. It is an exercise in body awareness and segmenting your spine. Being able to move your spine independently is essential for restoring proper function to the abdominal muscles attached to it.
Start on your hands and knees. For the “cow” pose, drop your belly toward the floor, lift your chest, and look forward, but keep your core gently engaged so you don’t over-arch. For the “cat” pose, exhale, tuck your chin, and round your spine toward the ceiling, pushing the floor away with your hands.
Focus on pulling your belly button into your spine during the “cat” portion. Really feel the separation between your ribs and your hips. This movement helps reset the tension in the abdominal wall and can relieve the tightness that often accompanies the compensation patterns we develop when our core is weak.
10. Standing Pelvic Tucks
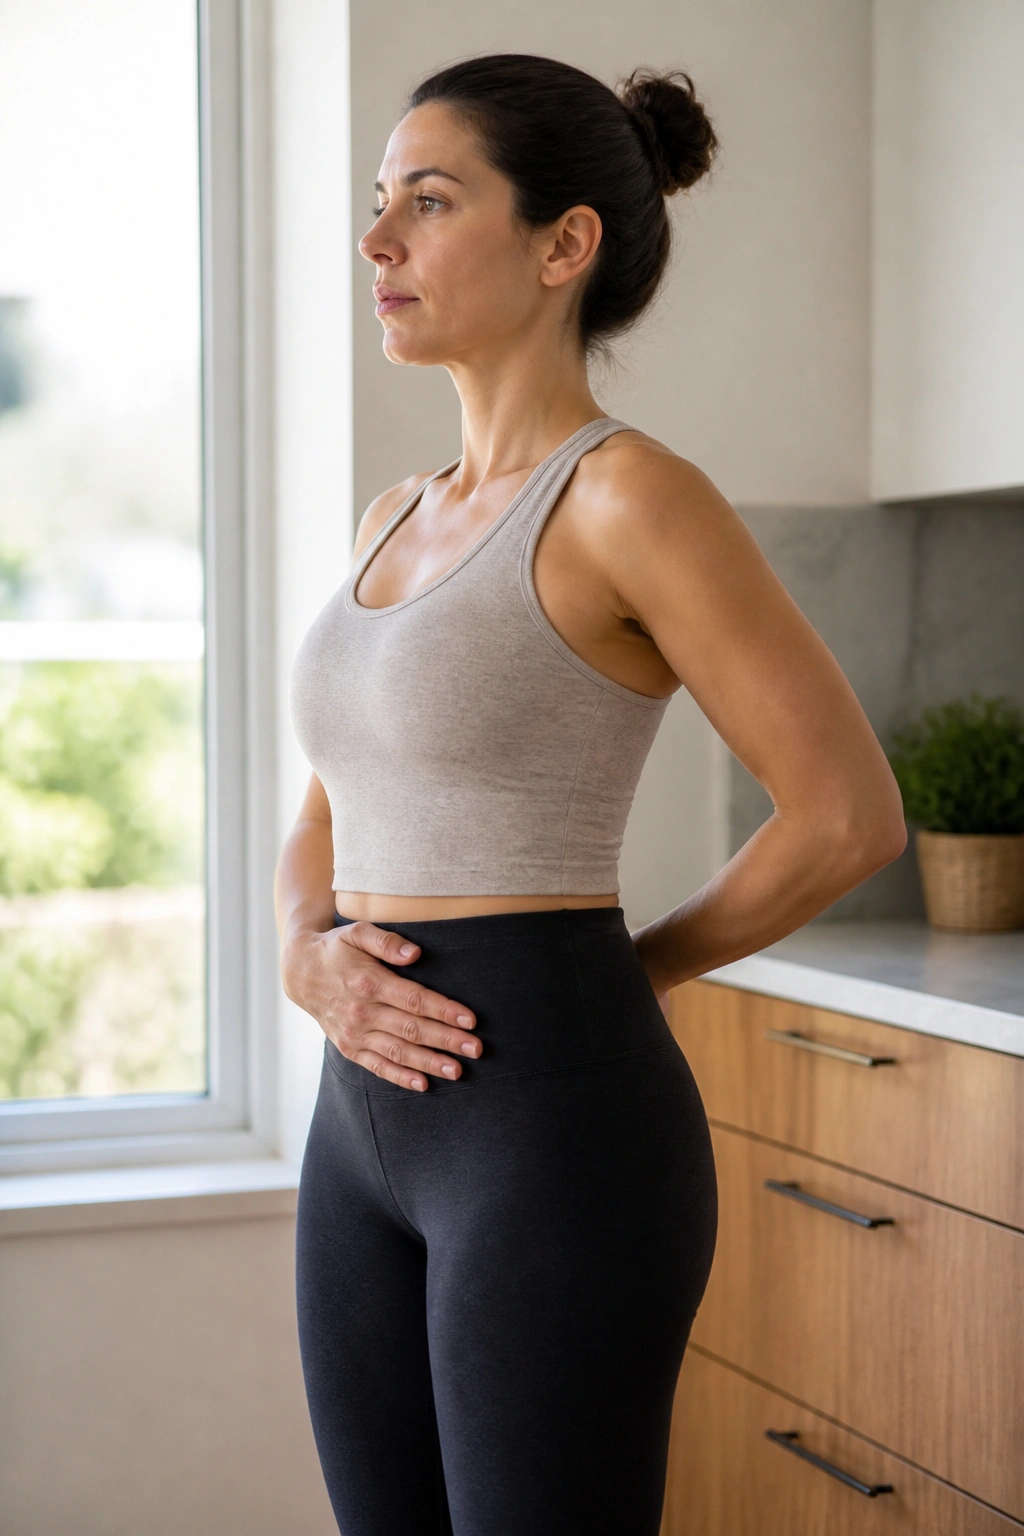
You don’t need a gym or even a mat to heal your core. This is a movement you can do while standing in line at the grocery store or waiting for the kettle to boil. It keeps the muscles firing throughout the day.
Stand with feet hip-width apart. Imagine there is a string attached to the top of your head, pulling you tall. Place your hand on your lower belly. As you exhale, gently tuck your tailbone under. You are not bending your knees; you are just changing the angle of your pelvis.
You should feel your lower abs tighten. Release the tuck and return to a neutral spine. Repeat this 10 to 15 times. It is a subtle motion, practically invisible to anyone watching, but it keeps the connection between your brain and your lower abdominal wall alive. It is about consistency, not intensity.
11. Side-Lying Leg Lifts
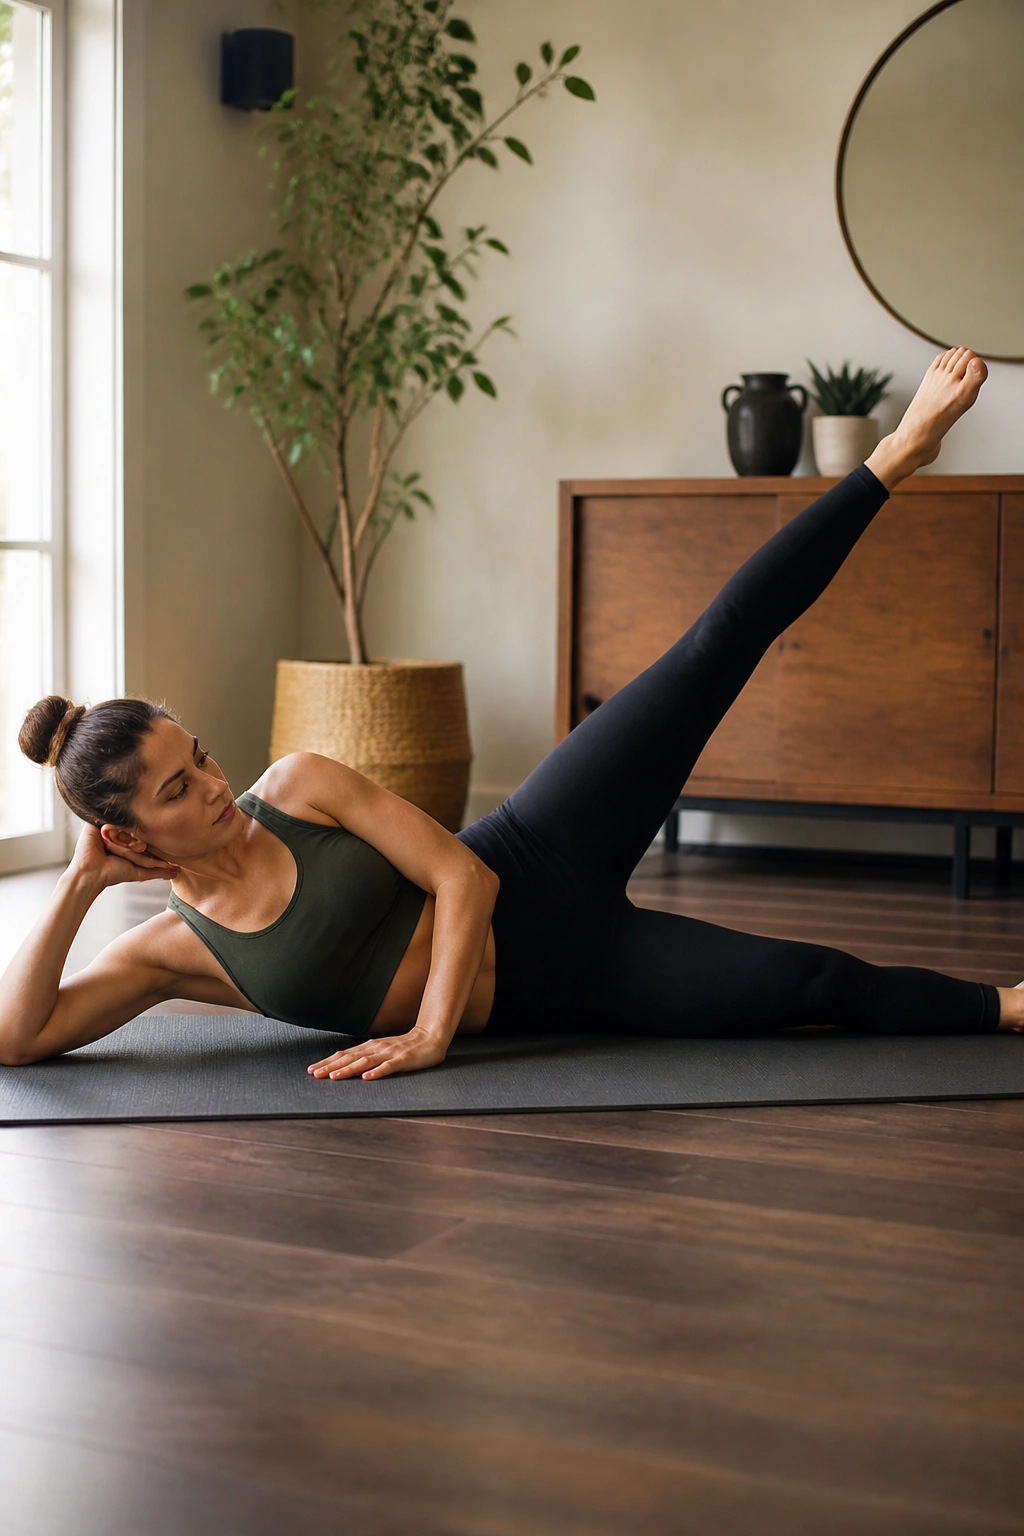
The obliques are crucial for closing the gap in your abdomen. They are the muscles on the sides of your torso, and they pull the abdominal muscles together toward the center. This exercise targets them without putting the strain on your spine that a side crunch would.
Lie on your side, legs stacked and straight. You can support your head with your hand. Ensure your hips are stacked directly on top of each other—don’t let your top hip roll backward. Engage your core, pulling the lower side of your ribcage slightly off the floor.
Lift your top leg toward the ceiling. Only lift as high as you can without your pelvis shifting or your torso collapsing. Slowly lower it back down. You will feel this in the side of your hip and your obliques. If you feel yourself wobbling, shorten the range of motion. Precision is more effective than range.
12. Clamshells
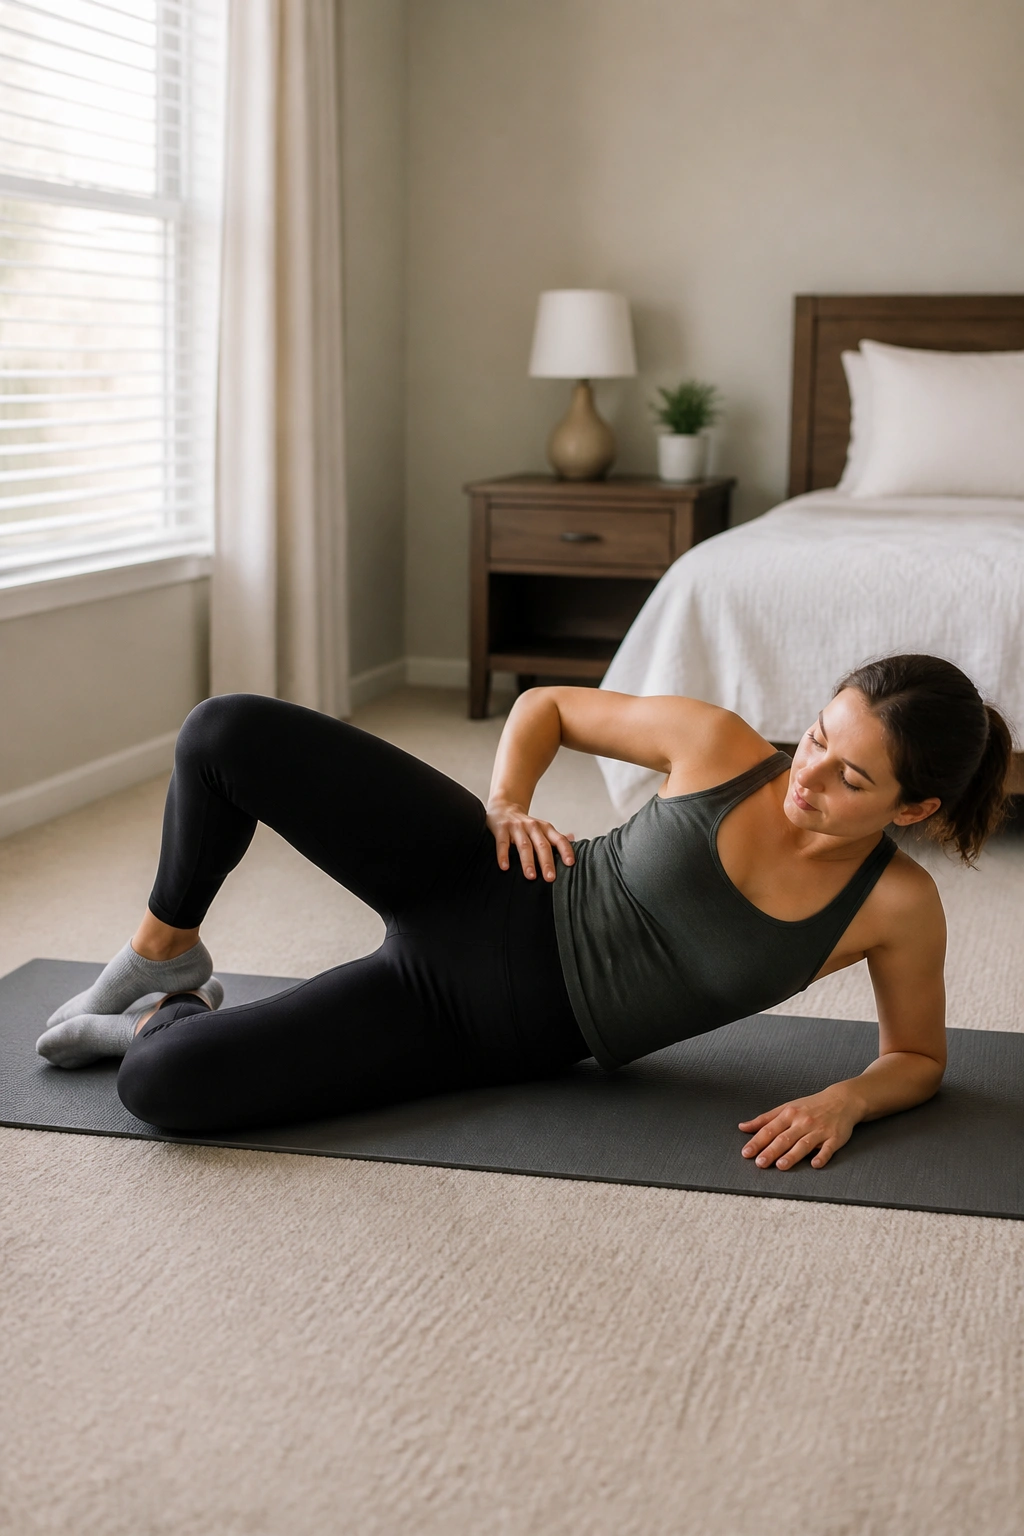
While often prescribed for glute strength, clamshells are surprisingly good for the deep core and pelvic floor. Strong hips and a stable pelvis are prerequisites for a closed abdominal gap.
Lie on your side with your knees bent at a 45-degree angle. Keep your feet touching. Keeping your hips stacked (don’t rock back!), lift your top knee toward the ceiling, like a clam opening its shell. Hold for a second at the top, then lower it back down.
The work is happening in the hip, but the stability is coming from your core. Keep your hand on your lower belly to ensure you are maintaining that gentle engagement. If you are compensating by twisting your lower back, you are missing the target. Keep the torso frozen while the hip does the rotation.
13. Supported Squats
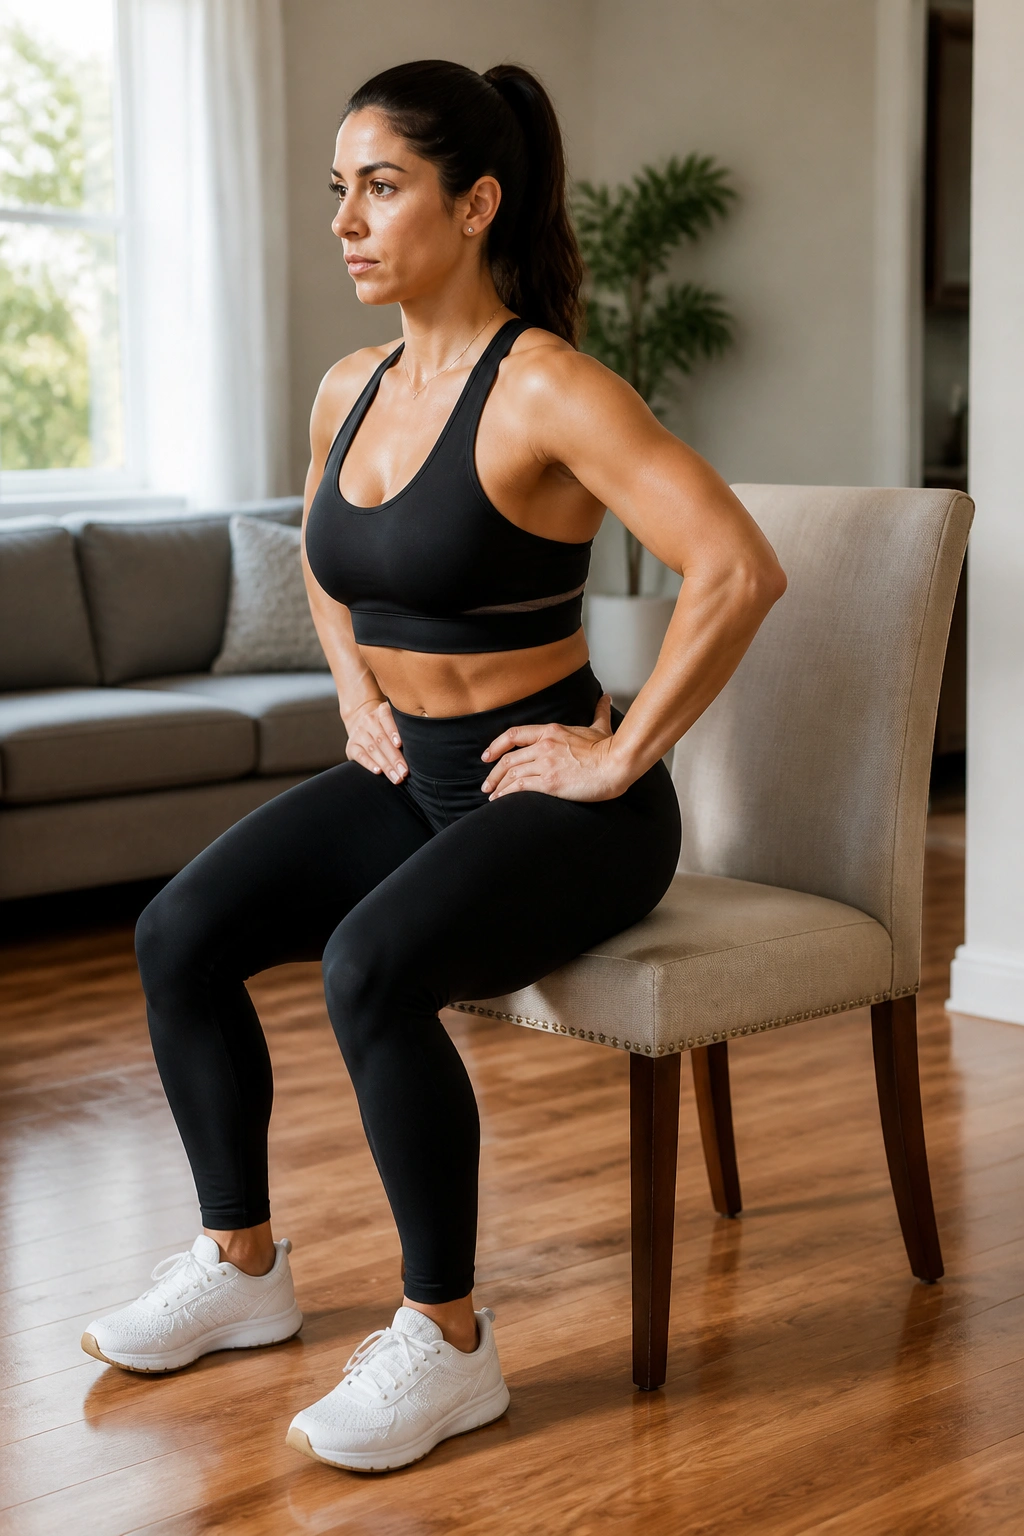
Squats are a functional movement we do all day. Healing your core means learning how to squat without coning. Using a chair or a couch for support gives you the stability to focus on your form rather than your balance.
Stand with your back toward a chair. Keep your feet hip-width apart. Engage your core, then hinge at the hips as if you are going to sit down. Tap your glutes to the chair—don’t sit fully—and then stand back up, driving through your heels.
Pay close attention to your belly during the movement. If you notice your abs pushing forward at the bottom of the squat, you are not engaging your TVA. Reset, breathe, and focus on maintaining that “corset” tension throughout the entire descent and ascent. This is essential for preventing the abdominal wall from popping out under pressure.
14. Modified Forearm Plank
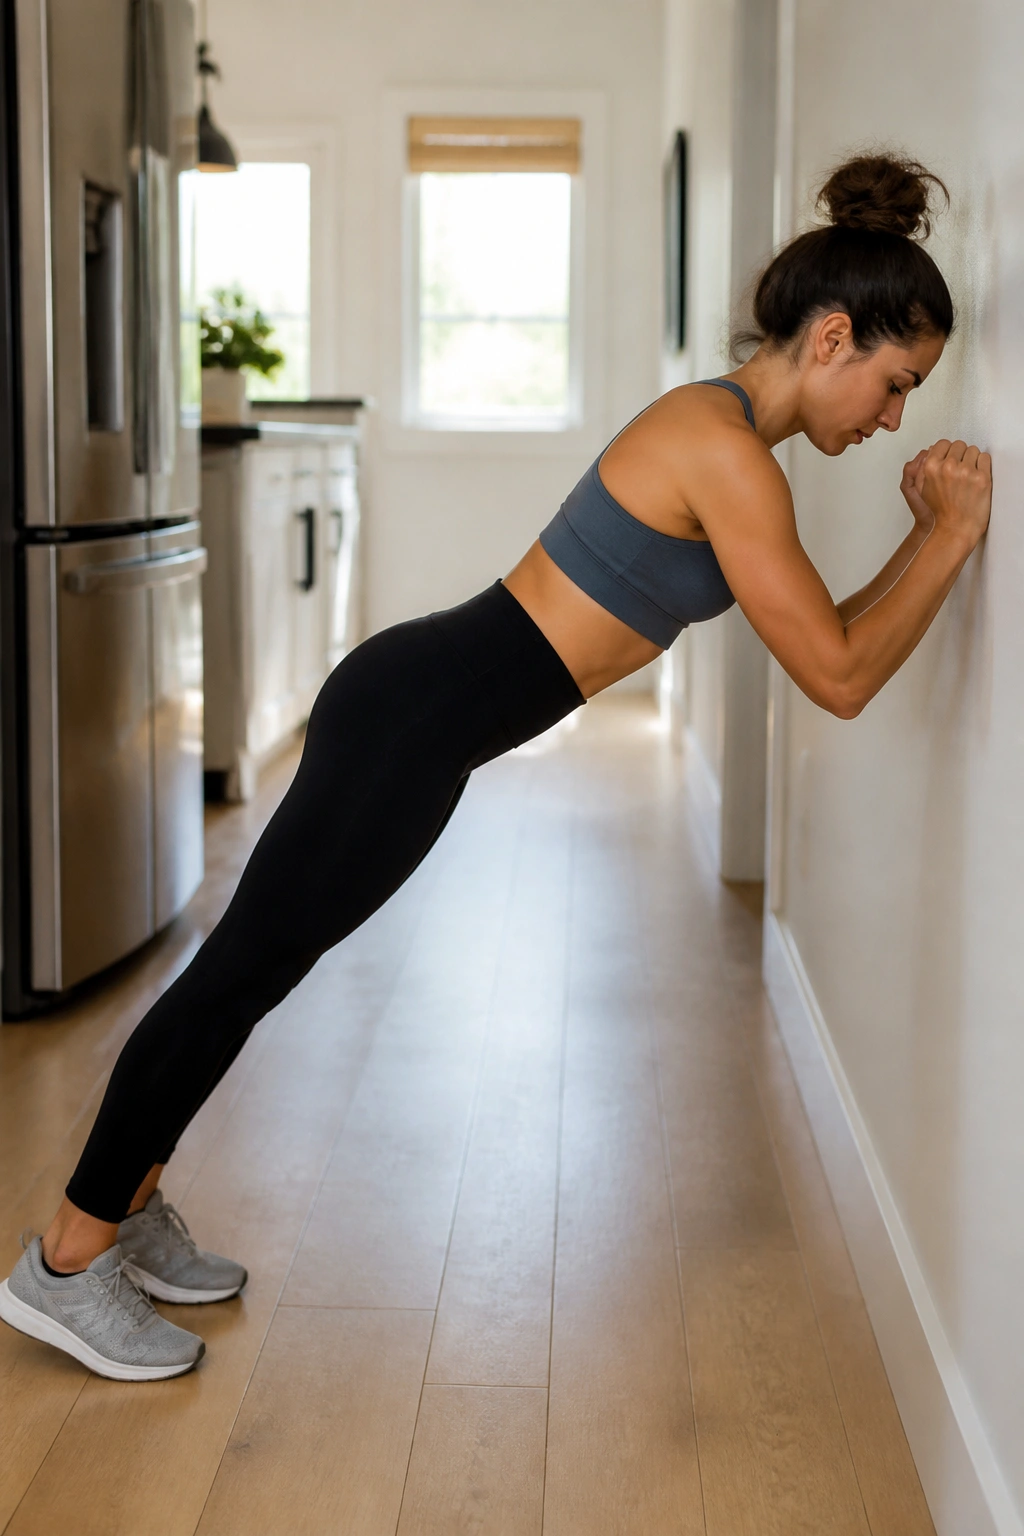
Planks are notoriously difficult for people with DR because they often lead to sagging or coning. However, a modified plank done against a wall or an elevated surface (like a countertop) is a safe and effective way to build endurance.
Face a wall and place your forearms against it, elbows at shoulder height. Step your feet back until your body is at an incline. Engage your core, tuck your tailbone slightly, and pull your ribs down. You should feel your abs working immediately.
Hold for 20 to 30 seconds. If you feel your lower back arching, move your feet closer to the wall to reduce the angle. If you feel your belly pushing out, that is a sign to stop. The goal is to keep the “corset” tight. Never push through pain or coning in a plank; it is counterproductive.
15. Toe Taps
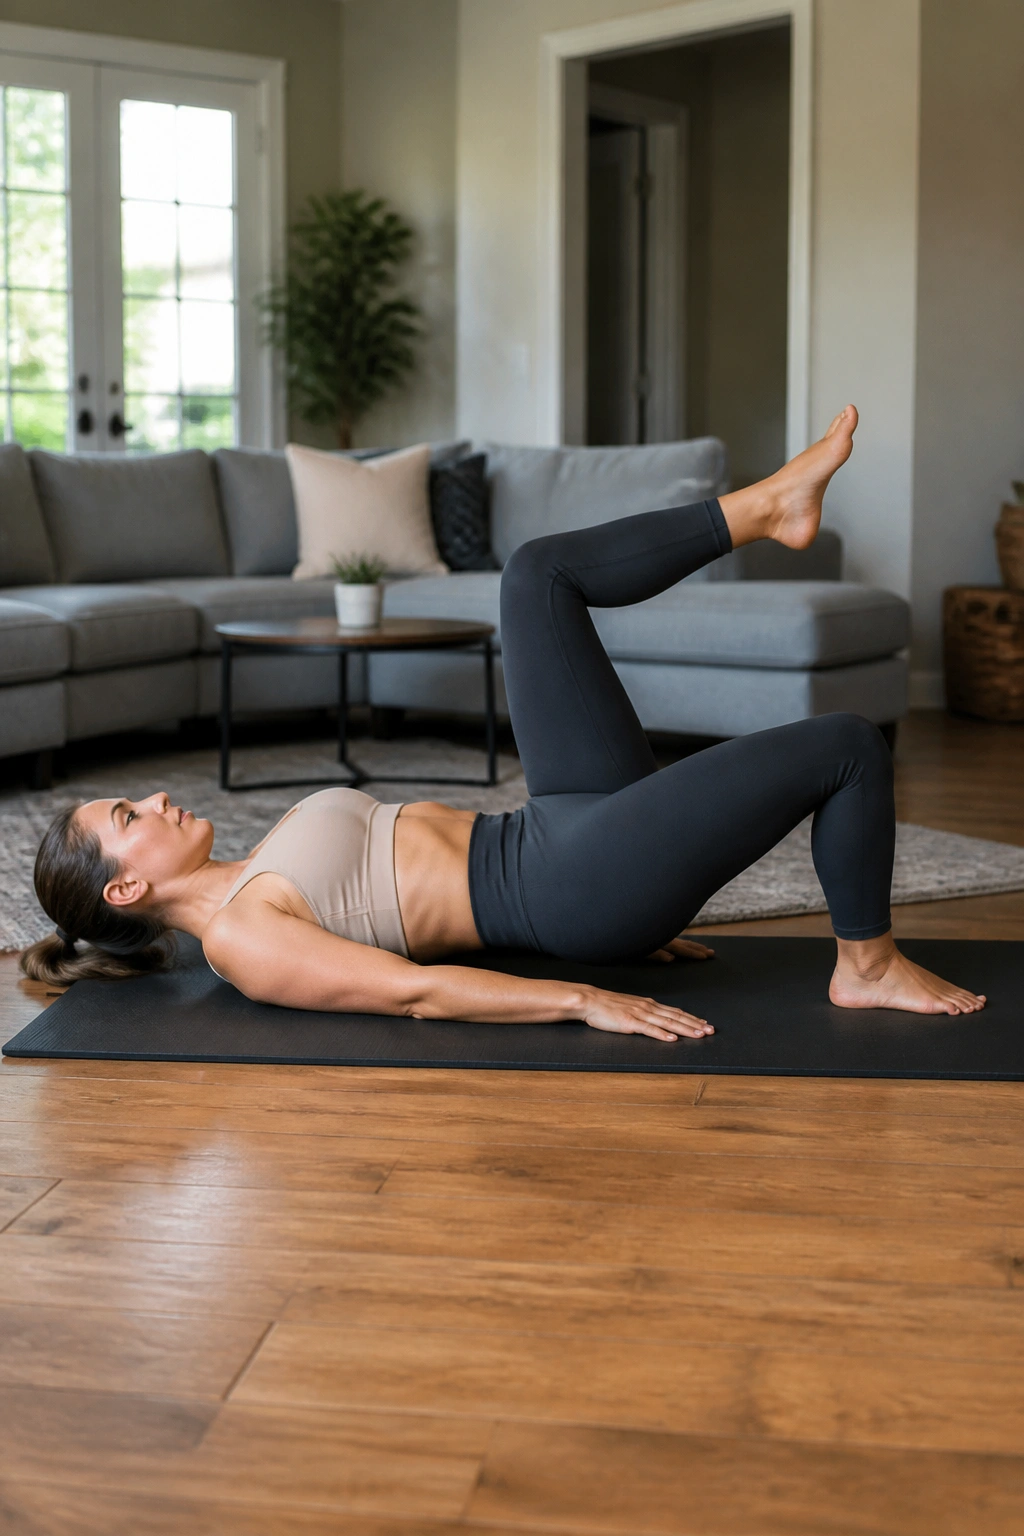
This is a progression of the heel slides. It involves lifting the legs off the ground, which increases the load on your lower abs. Only attempt this once you have mastered the foundational movements and can keep your back flat without effort.
Lie on your back, knees bent, feet flat. Find your core engagement. Now, lift your legs to a tabletop position (knees directly over hips). This is your starting point. Slowly lower one foot toward the floor, tapping it gently without letting it touch the ground completely.
Keep your lower back pressed into the floor throughout the movement. If your back lifts even a millimeter, bring the leg back up immediately. The moment your back arches, the exercise is no longer targeting your core; it is putting stress on your spine. Move slowly.
16. Hip Hinge
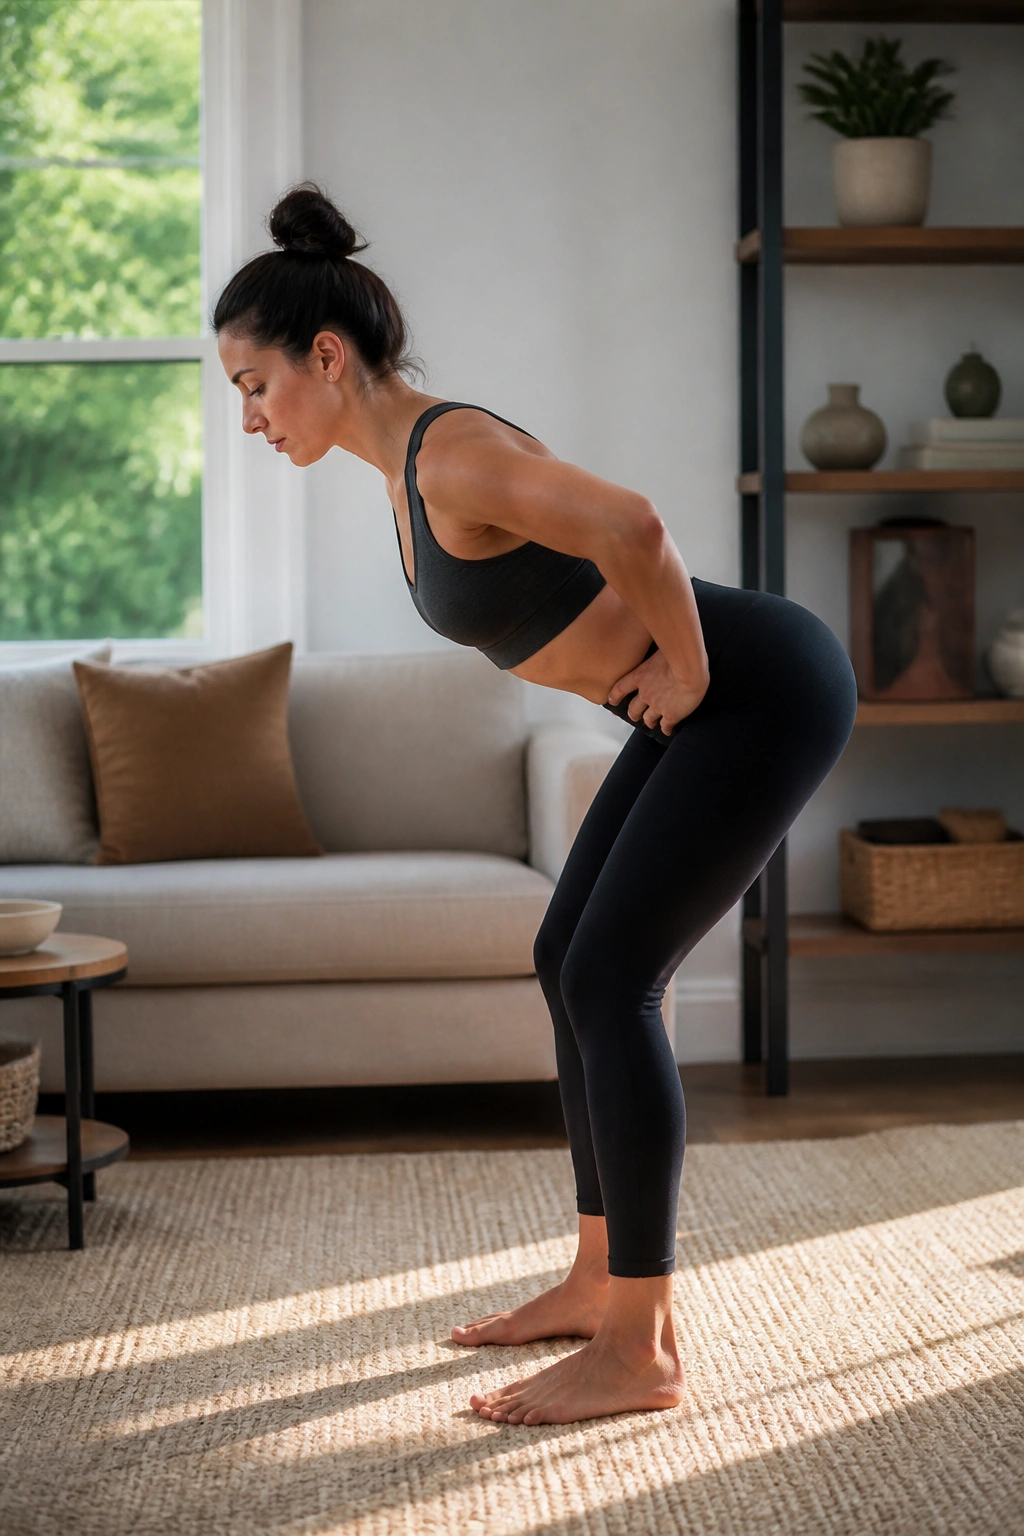
The hip hinge is the mechanical basis for bending over to pick up objects. If you bend by rounding your back, you create pressure that forces the abdominal wall outward. Learning to hinge keeps the core protected.
Stand with feet hip-width apart, knees slightly soft. Place your hands on your hips. Imagine there is a wall behind you, and you are trying to close a door with your glutes. Push your hips backward while keeping your back straight and your core engaged.
Your chest will lower toward the floor, but your spine stays neutral. Your shins should remain almost vertical. This is not a squat; it is a fold at the hips. When you stand back up, squeeze your glutes. This movement relies on the deep core to maintain spinal alignment, making it a critical skill for daily living.
17. Standing Row with Resistance Band
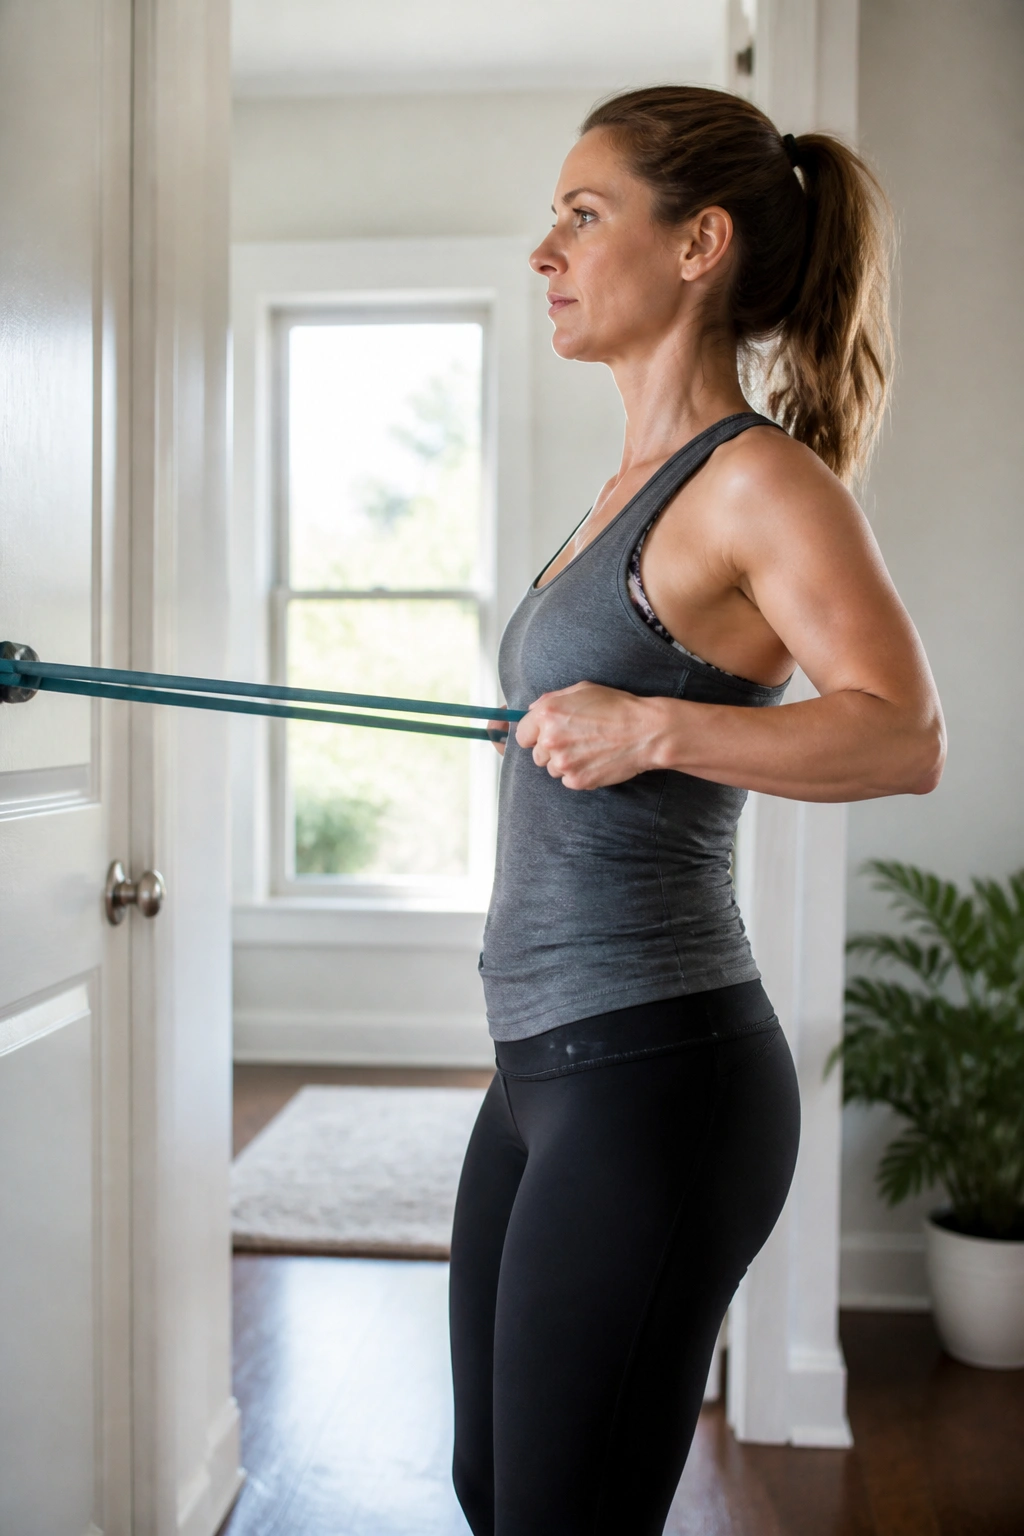
Postural strength is often overlooked in DR recovery, but your mid-back supports your core. If you are hunched forward, your abs are slack. Strengthening the muscles between your shoulder blades helps pull your shoulders back and ribcage down, which naturally engages your core.
Tie a resistance band to a doorknob or sturdy post at chest height. Stand facing the anchor point, knees soft, core engaged. Hold the ends of the band with your arms extended. Squeeze your shoulder blades together and pull your elbows back, rowing the band toward your ribcage.
Keep your elbows close to your body and do not let your ribs flare as you pull. Return to the starting position slowly. This teaches you how to maintain core tension while moving your arms, a skill needed for carrying groceries, holding a baby, or putting items on high shelves.
18. Kneeling Balance
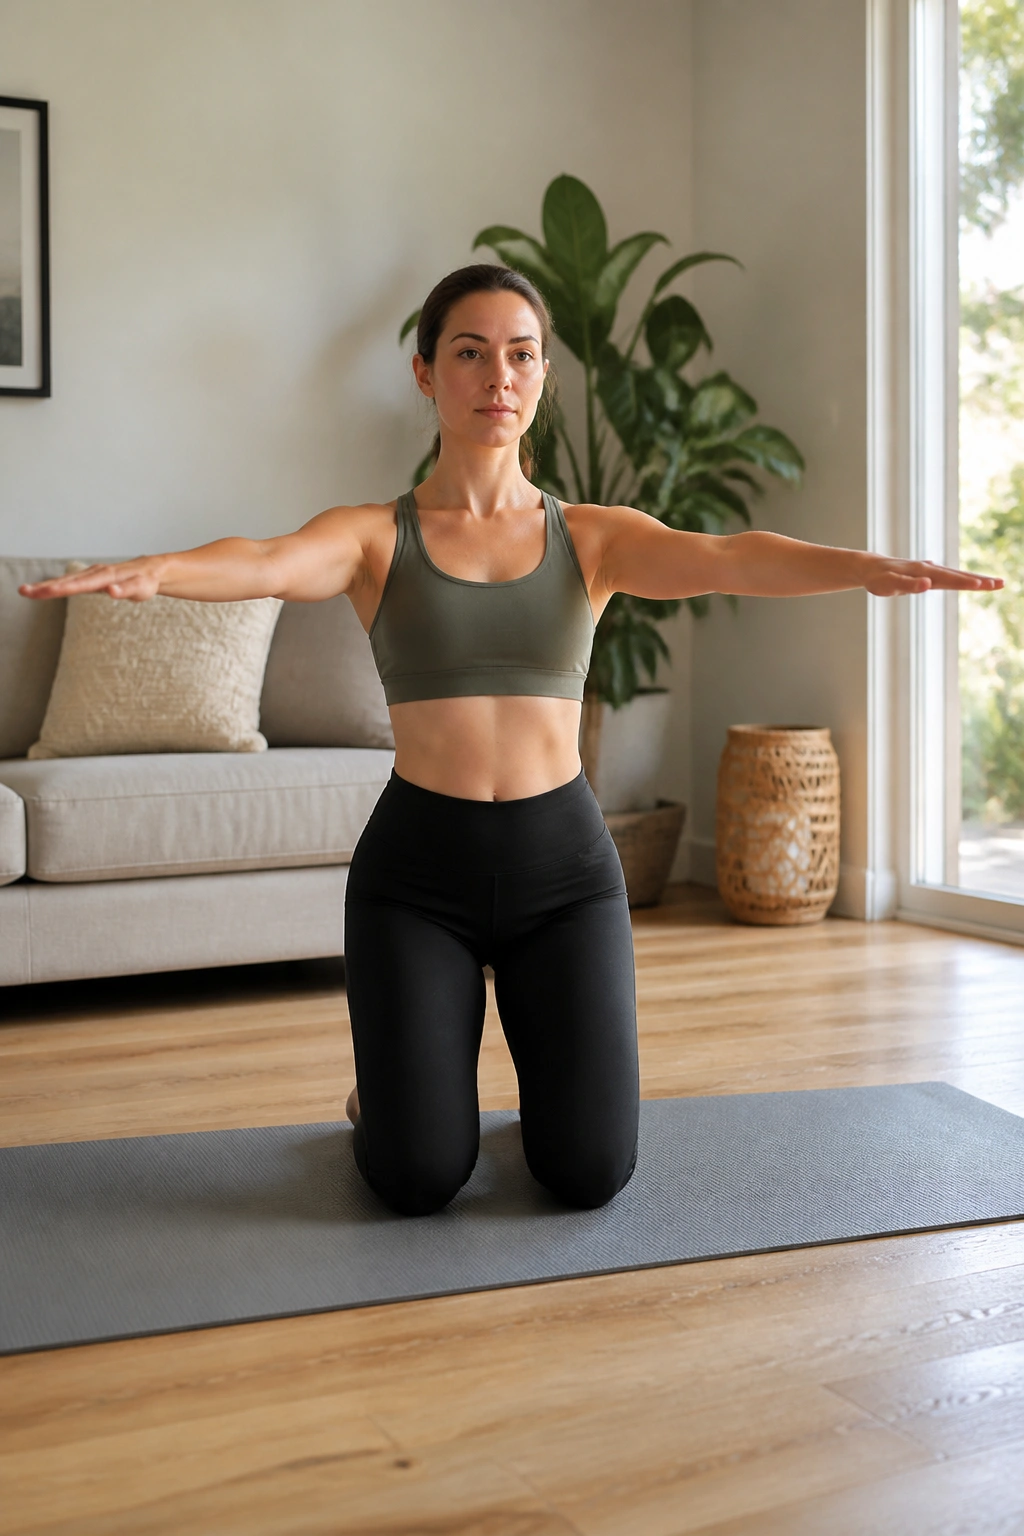
This exercise forces your core to work on an uneven, challenging base. It improves proprioception—the awareness of your body in space—and requires the deep stabilizers of the spine to fire rapidly.
Kneel on a soft mat with your knees about hip-width apart. Ensure your toes are tucked under or flat (whichever is more comfortable). Stand up tall on your knees, engaging your glutes and core to keep your pelvis neutral.
Extend your arms out to the sides for balance. If you feel steady, close your eyes. This removes the visual cues, forcing your core to work harder to stabilize you. If you start to tip, open your eyes. Hold this for 20 to 30 seconds. It seems like you are doing nothing, but your internal stabilizer muscles are working overtime to keep you upright.
19. Supine Leg Extensions
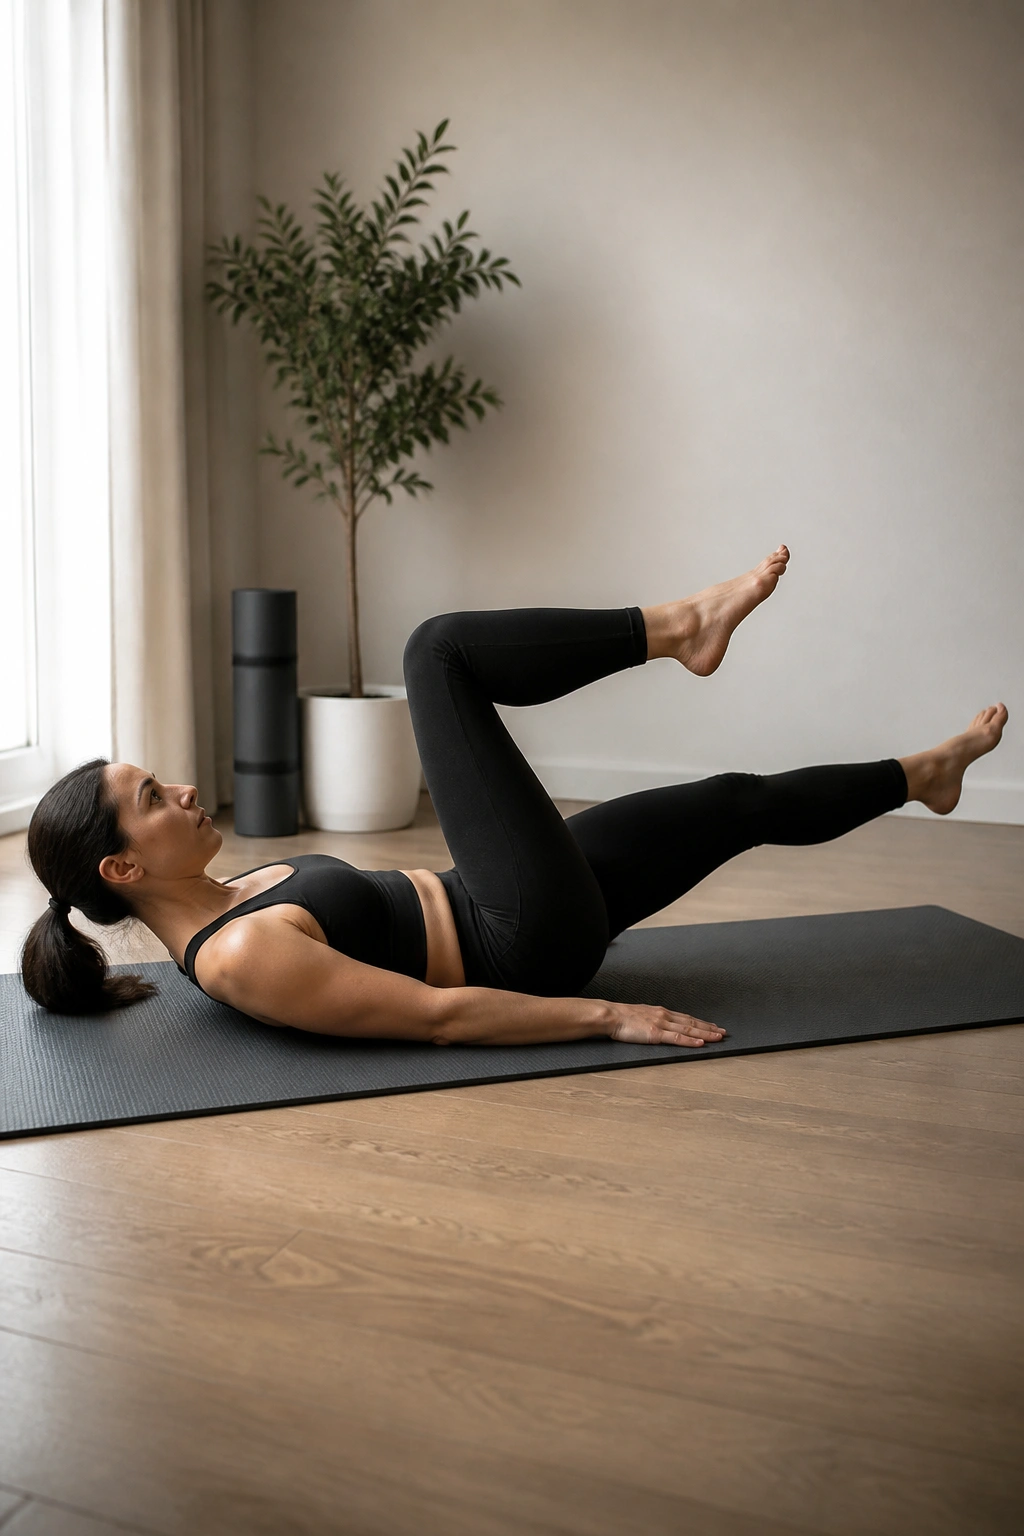
This is a more advanced version of the heel slides. By extending the leg fully while it is hovering above the floor, you create a longer lever, which dramatically increases the demand on your abdominal wall.
Lie on your back, knees in tabletop position. Engage your deep core. Slowly extend one leg out until it is straight, hovering it about six inches off the floor. Do not let your back lift. The weight of your leg is now pulling on your core, testing whether your internal “corset” can hold.
Hold the extension for a second, then return to tabletop and switch legs. If you notice any bulging along the center of your stomach, do not lower the leg as far toward the floor. Keep it higher. The closer the leg is to the floor, the harder the exercise. Listen to your body and honor its limits.
20. Modified Push-up Against Wall
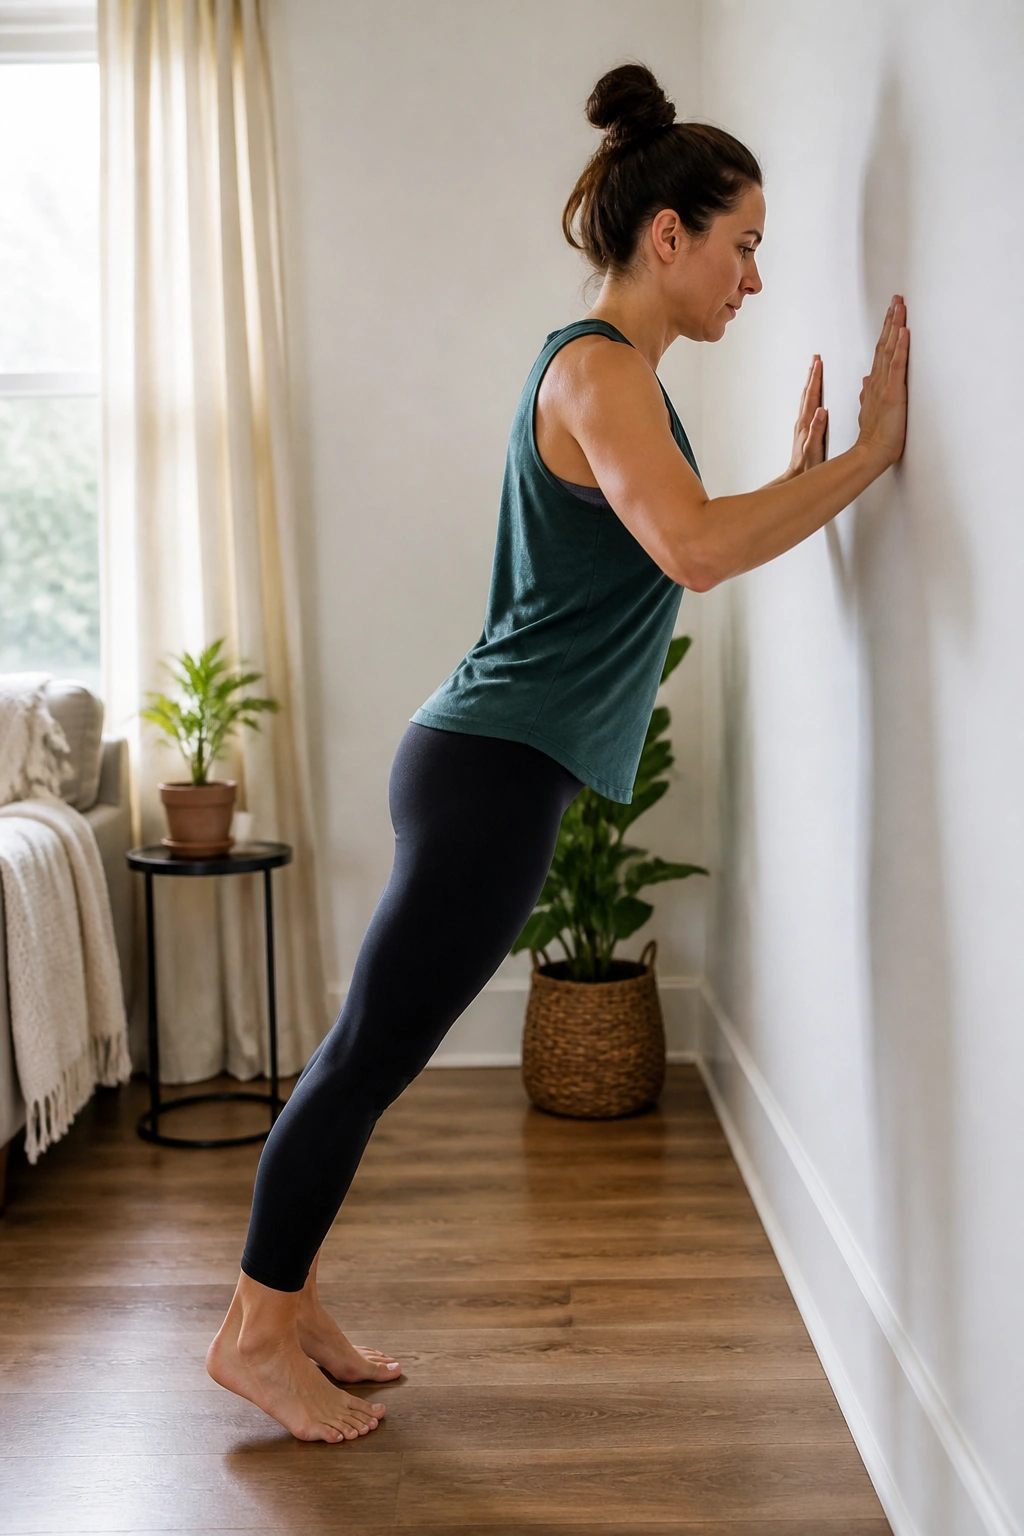
Most people do push-ups incorrectly, allowing their lower back to sag and their belly to drop toward the floor. This is a recipe for disaster with diastasis recti. A wall push-up, done correctly, is a core exercise.
Stand facing a wall, arms distance away. Place your hands on the wall at shoulder height. Engage your core, pulling your belly button to your spine. Lower your chest toward the wall by bending your elbows.
As you push back, keep your elbows close to your sides. Focus on the core engagement—do not let your ribs pop forward as you push. Your body should move as a single, rigid plank. If you can do this without your belly pushing outward, you are developing the ability to stabilize your spine under a load, which is exactly what your body needs to heal the separation.
Final Thoughts
Healing diastasis recti is not a race. You might find that some days your core feels strong and responsive, and other days it feels like you are starting from scratch. That is entirely normal. Your body is navigating a complex recovery, and it responds to how you treat it. Prioritize consistency over intensity, and listen to the feedback your body provides through sensations like coning or pressure.
If you find that your gap remains wide, or if you experience persistent pain, do not hesitate to seek out a pelvic floor physical therapist. They can provide a personalized assessment that you simply cannot get from an article. You have the tools to make progress, but having an expert guide you through the nuances can make the difference between a frustrated plateau and a steady, successful recovery. Keep breathing, keep connecting, and stay patient with yourself.
