



Barre Pilates moves can look tiny and still leave your thighs shaking by the third minute. That’s the trick, and honestly, it’s why people keep coming back to them.
A lean body in this context isn’t about doing more chaos or chasing sweat for its own sake. It’s about building strong legs, a steady core, cleaner posture, and the kind of muscle endurance that makes you stand taller even when you’re just walking to the kitchen.
The work happens in holds, pulses, and slow changes of direction. There’s no need to fling your arms around or jump until your socks slide. Clean form matters more than speed, and a two-inch range of motion can be a lot meaner than a big one if you keep the tension where it belongs.
1. First-Position Plié with Heel Lift
Tiny range. Huge burn.
The first-position plié is one of those moves that looks polite until your quads start talking back. Turn the heels together, open the toes only as far as your hips allow, and lower just a few inches so the knees track over the second toes. Then press up through the balls of the feet and lift the heels for a beat at the top.
Why It Feels Hard So Fast
The heel lift adds ankle work, calf work, and balance to a move that already asks a lot from the thighs. You’re not just bending and straightening; you’re also controlling how much the feet press into the floor, which is where a lot of the fatigue lives.
- Keep the ribs stacked over the pelvis.
- Lower only 2 to 3 inches if your form starts to wobble.
- Rise onto the balls of the feet for 1 count, then lower with control.
- Aim for 12 to 15 reps, or hold the bottom position for 20 seconds and pulse 10 times.
If your arches collapse, stop the descent earlier. A shallower plié with good alignment is worth more than a deep one that twists the knees or dumps into the low back.
2. Second-Position Plié Pulse
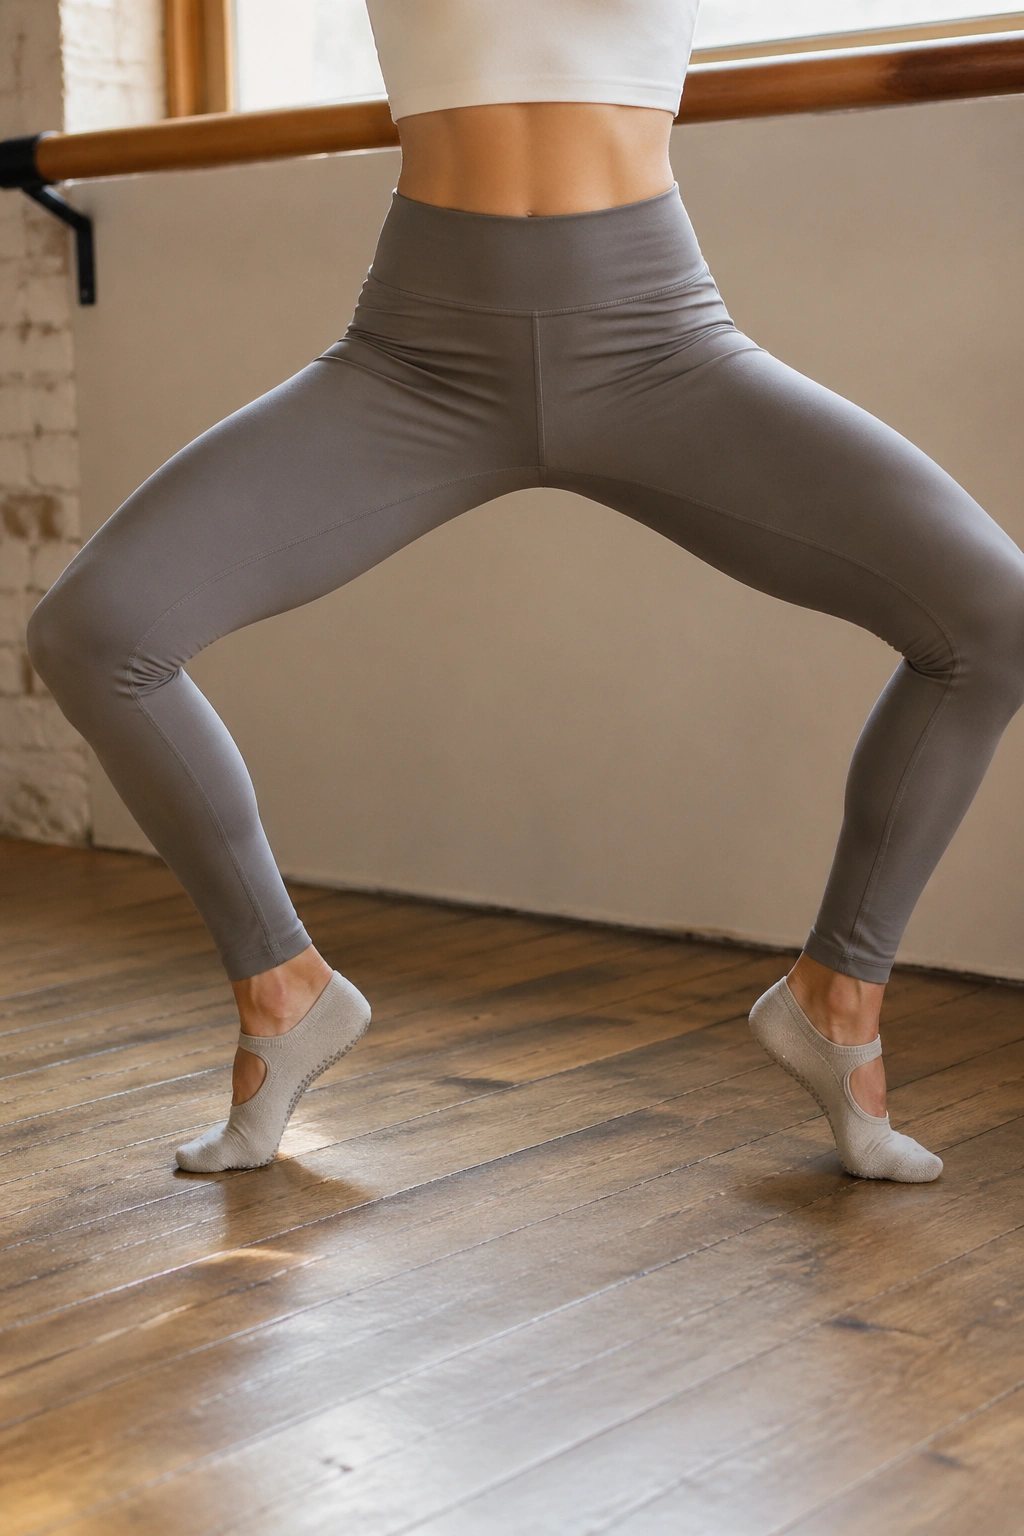
A second-position plié gives you more room, but it does not make the move easier.
Widen the stance, turn the toes out a little, and sink into a plié until the inner thighs start to feel awake. Then hold that height and pulse up and down a inch or two. That tiny pulse is where the sting lives, especially if you keep the knees soft and resist the urge to bounce.
What I like about this one is how fast it exposes weak hip control. If the knees roll inward, you feel it right away. If the torso tips forward, you feel that too. The move asks for an upright spine and steady hips, which is why it shows up in so many barre Pilates classes.
Try 20 pulses, then 10 slower pulses with a two-count on the way down. If your knees are fussy, stay high and work the isometric hold instead of chasing depth. The body still has to fight for the position, and that’s enough.
3. Standing Arabesque Lift
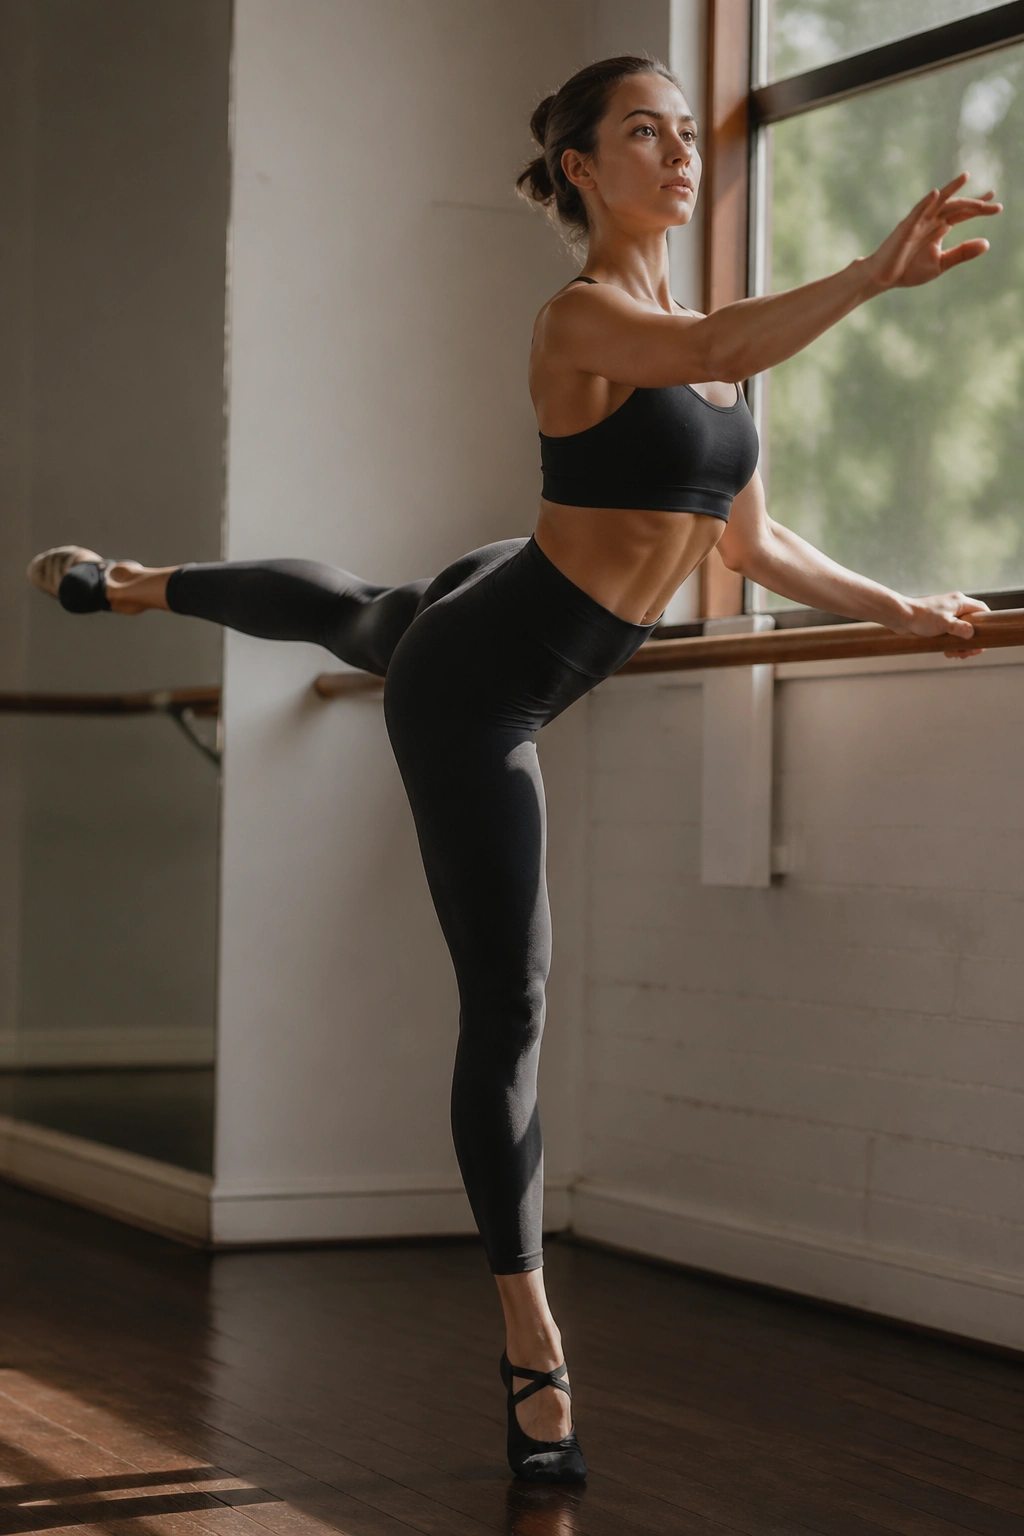
Can one standing leg lift really do that much? Yes, when the pelvis stays level and the standing leg stops cheating.
Hold the barre lightly, shift your weight into one foot, and send the other leg straight back with the toes pointed or flexed. The torso stays tall. No leaning. No arching the lower back to pretend the leg went higher than it did.
How to Keep the Hips Square
The support leg should feel like a tree trunk, not a jellyfish. That means a soft knee, active foot, and a quiet pelvis that does not tip sideways when the working leg lifts.
- Keep the lifted leg low at first, about 4 to 6 inches.
- Draw the lower belly in before every lift.
- Pause for 1 count at the top of each rep.
- Do 12 lifts on each side, then 10 tiny pulses.
Think long, not high. A smaller arabesque with a still torso will do more for your glutes than a big swing with a cranky lower back.
4. Curtsy Lunge Pulse
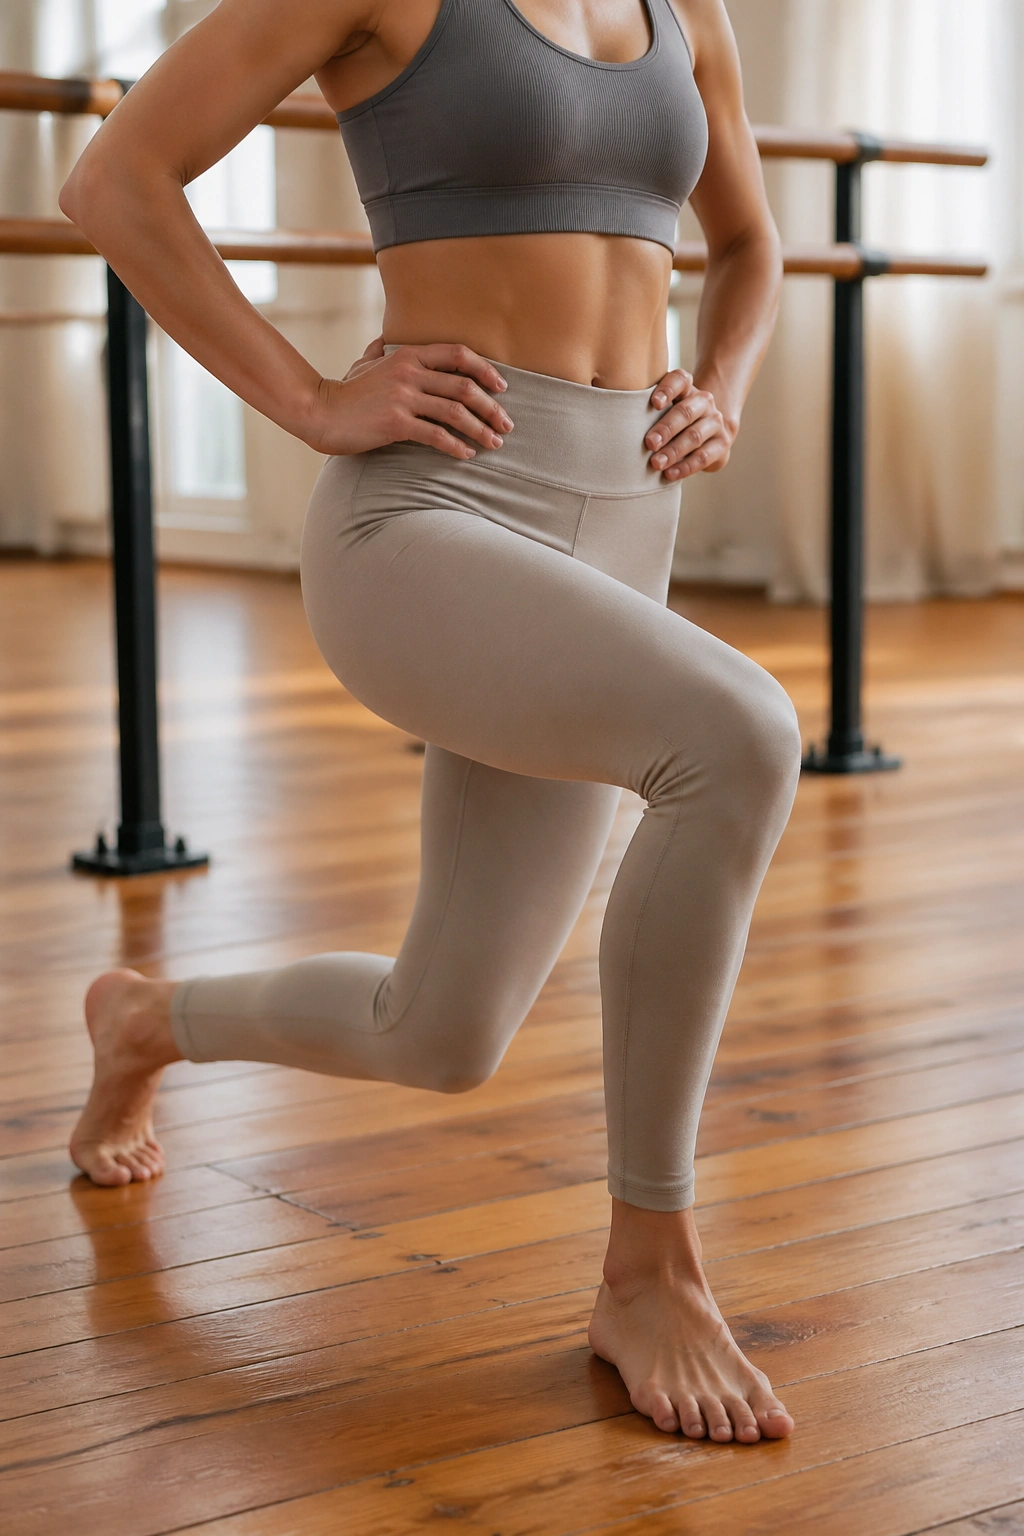
Picture the last ten seconds of a barre class when nobody wants to admit they’re shaking. That’s a curtsy pulse.
Step one leg back and across behind the standing leg, then lower into a small curtsy lunge. Keep the front knee tracking over the toes and the chest lifted. From there, pulse a few inches up and down without collapsing into the front hip.
The cross-body angle lights up the outer glute and the inner thigh in a way a straight lunge does not. It’s also a sneaky balance drill. Your standing leg has to stabilize while the pelvis stays mostly square, and that combination gives the move its bite.
I prefer this as a mid-workout burner, not a warm-up. Ten to 12 pulses per side is plenty, and if your knees hate deep crossing, shorten the step and stay higher. You’ll still feel it. Probably sooner than you want.
5. Relevé Calf Raise Hold
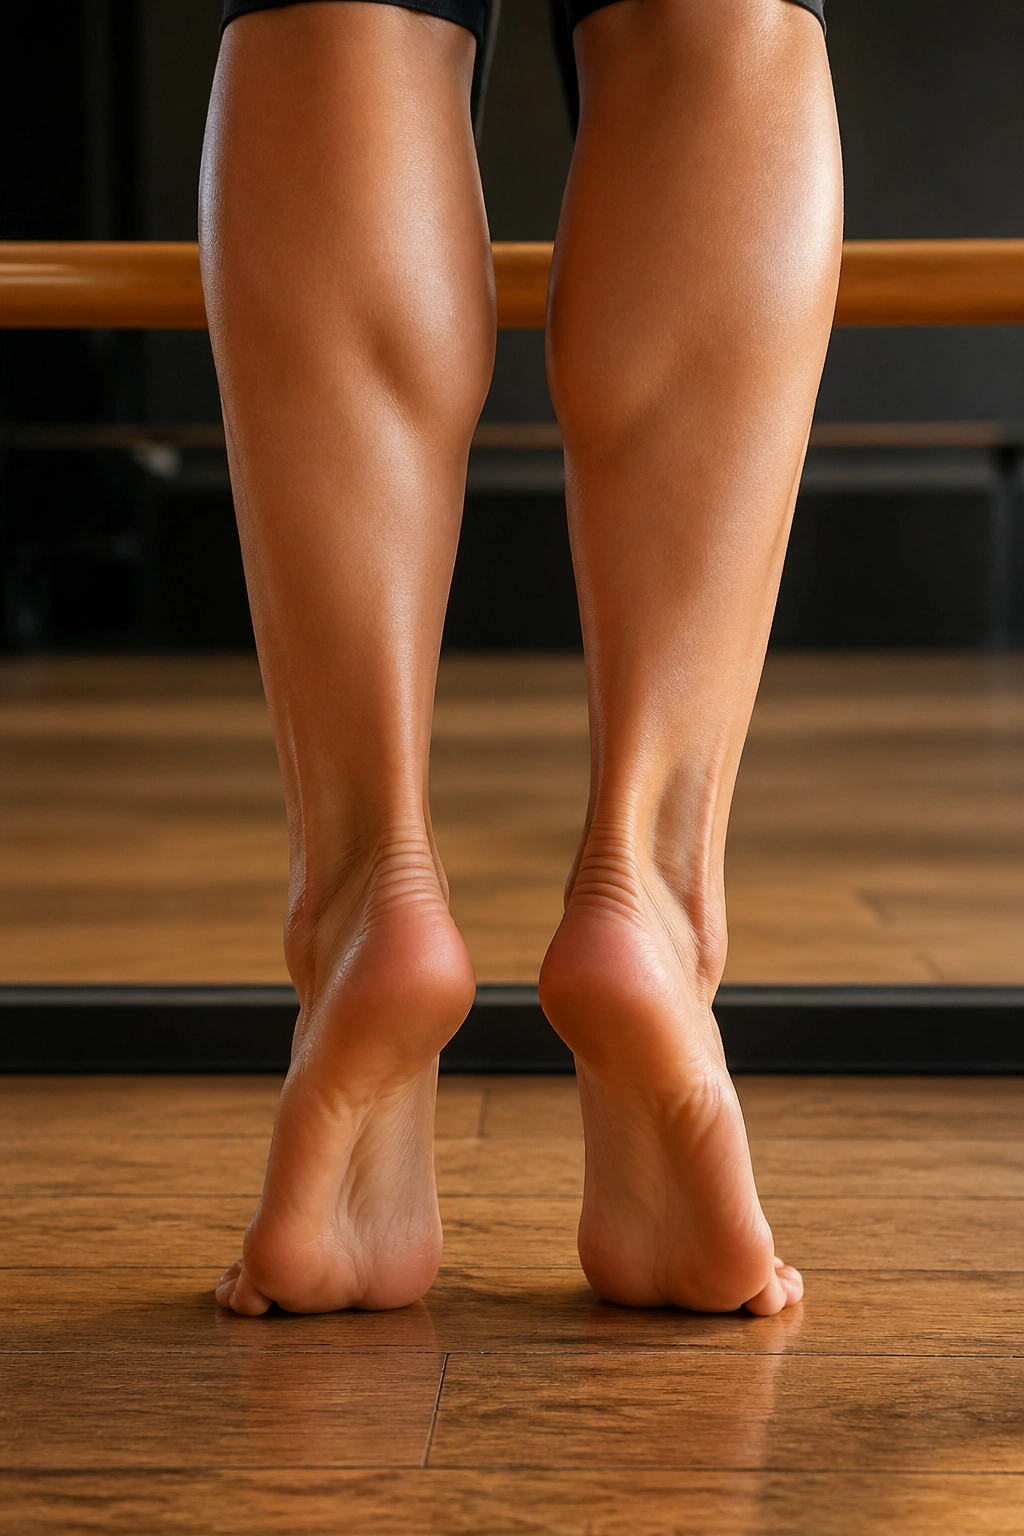
Calf work looks simple until you hold the top of the rep.
Rise onto the balls of the feet and stay there for 20 to 30 seconds, or pulse the heels up and down at a slow tempo. The calves have to carry your body weight, but the ankles and small foot muscles are working too. That matters more than people think. A stable ankle gives every standing move a better base.
The temptation is to rock forward onto the big toe and lose the outer edge of the foot. Don’t. Keep pressure spread across the first and second toes and the little toe side so the foot feels like a tripod. That detail makes the calf raise feel smoother and safer.
I like adding a tiny bend and straighten at the knees while staying high on the toes. Ten slow reps are enough to make the lower legs burn in a very honest way.
6. Attitude Lift
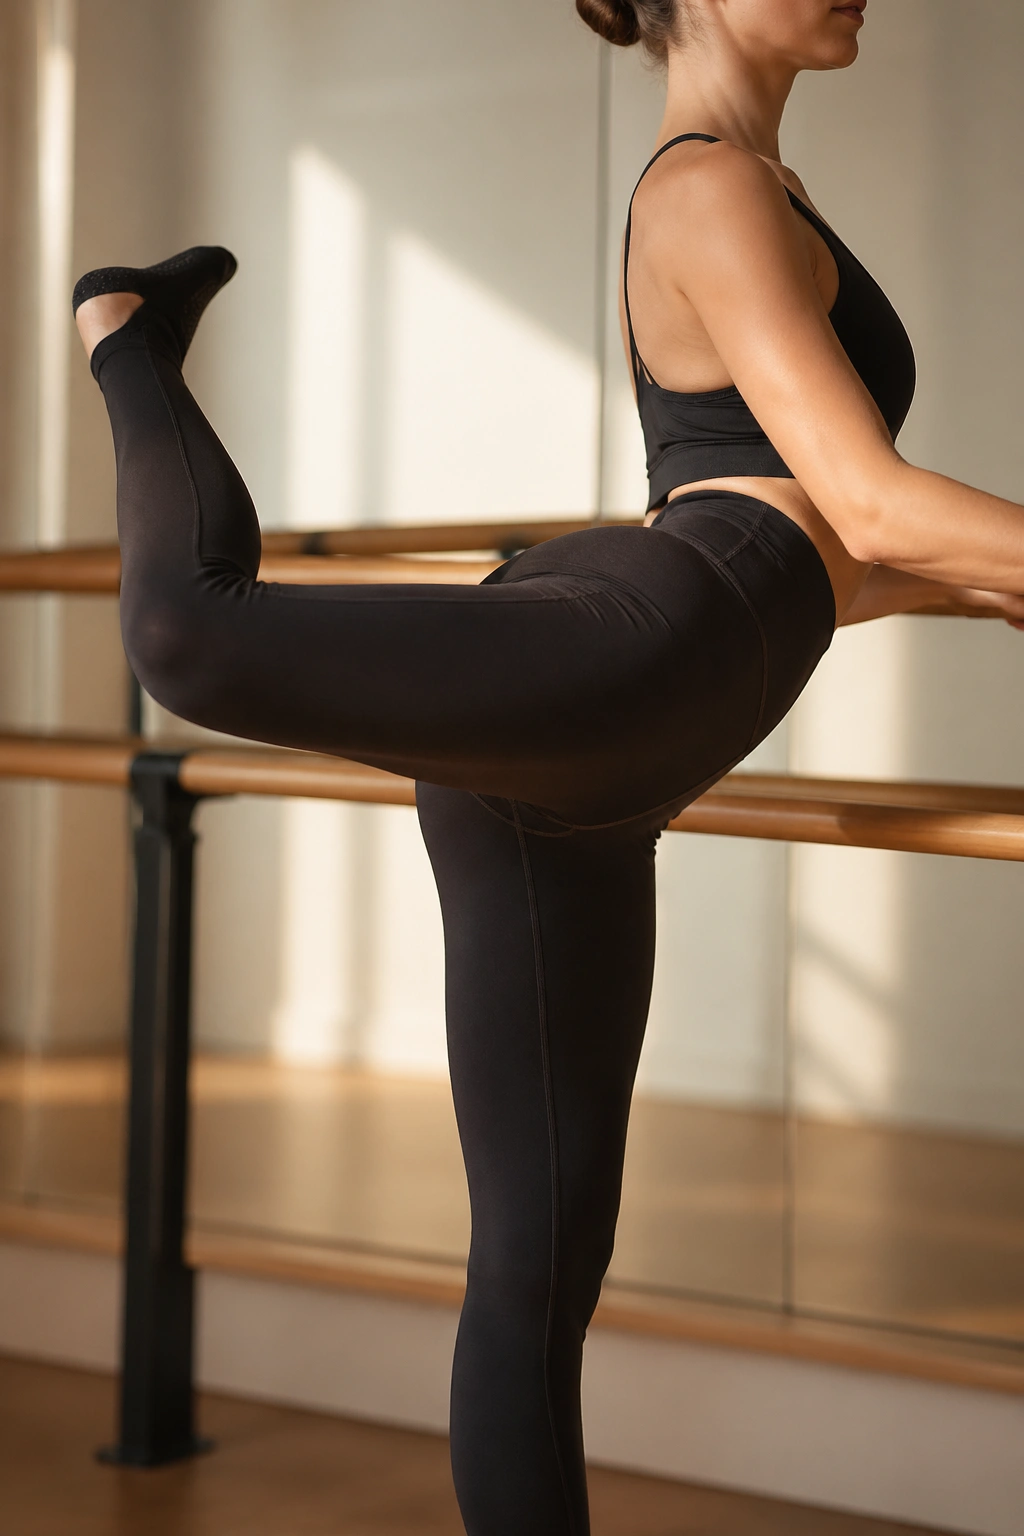
Unlike a straight-back arabesque, the attitude lift keeps the knee bent and puts more of the load into the side of the hip.
Stand tall, bend one knee behind you, and lift that thigh slightly back and out while the standing leg stays grounded. The bent leg changes the lever, which is why the outer glute has to work harder to keep the shape from wobbling. It looks dancey. It feels serious.
Best For
This one is a good pick if your standing balance is decent but your outer hips fall asleep fast. The bent knee version also tends to be kinder than a long straight-leg kick for people whose hamstrings feel tight.
- Keep the chest quiet.
- Lift from the glute, not the low back.
- Hold for 1 to 2 seconds at the top.
- Do 10 to 12 reps per side, then switch.
If the pelvis twists open, lower the leg. That’s the fix. Not a bigger lift.
7. Side-Lying Inner Thigh Lift
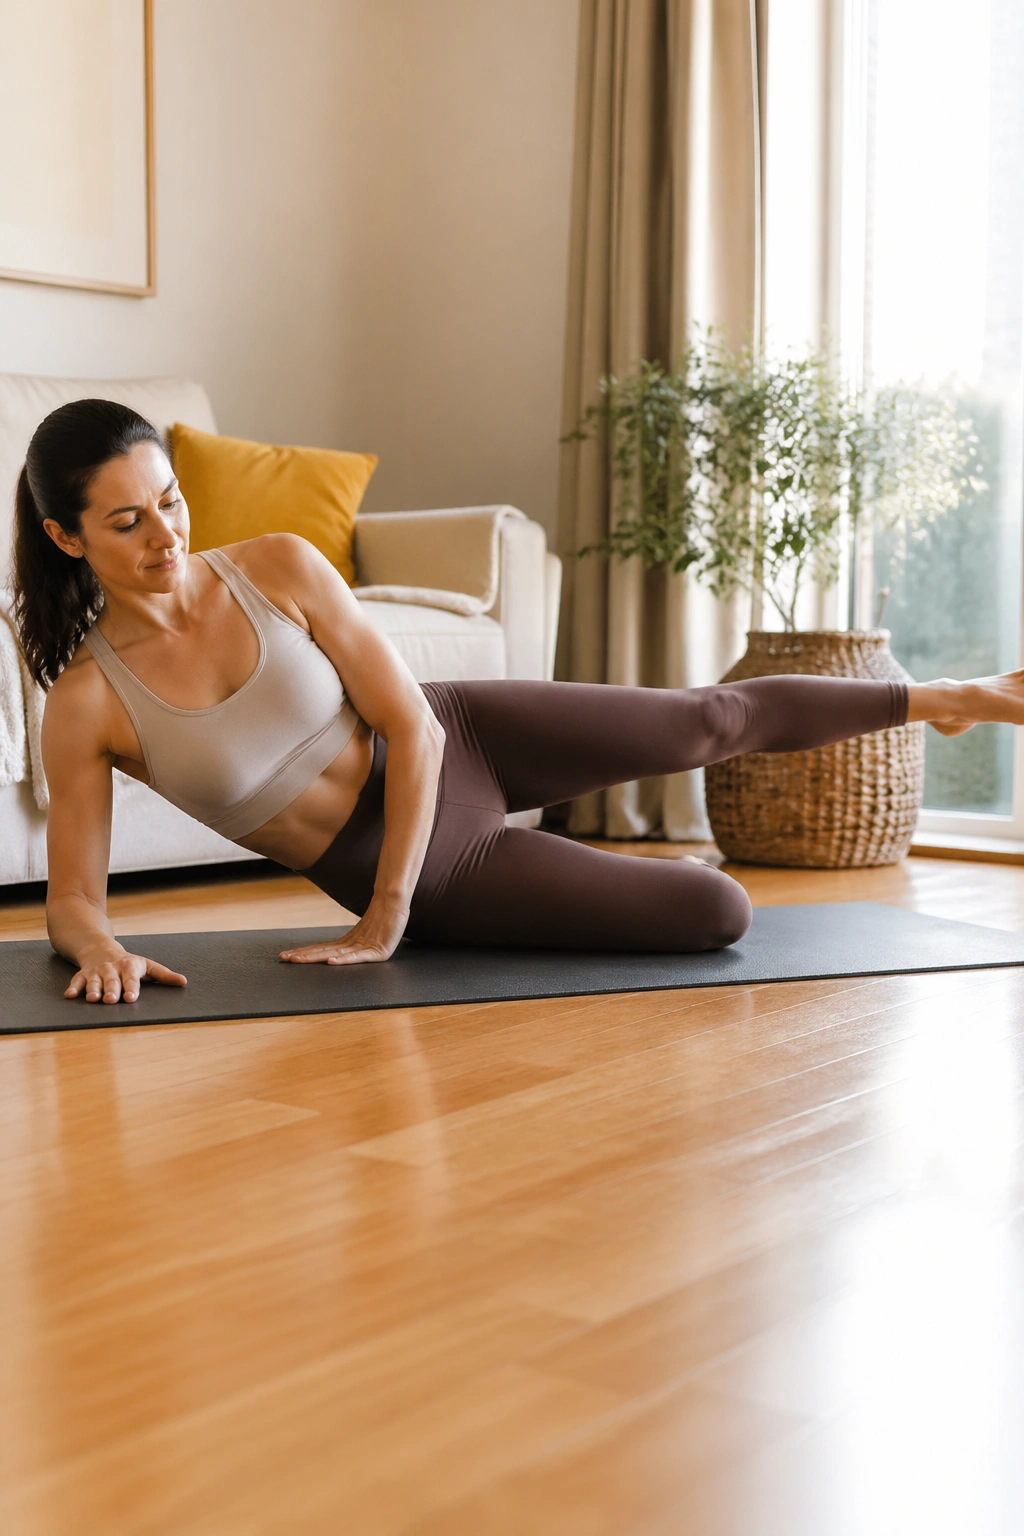
Why does a side-lying inner thigh lift feel so strange at first? Because the muscles it targets often do very little in daily life until you ask them to work on purpose.
Lie on one side, bottom leg long, top leg bent with the foot planted in front for support. Lift the bottom leg a few inches off the floor, then lower it slowly without letting the waist bunch up. It’s a small action, but the inner thigh has to stay controlled the whole time.
Setup Cue
The lower hip should feel heavy and steady. If you roll backward to cheat the lift, the exercise turns into something else entirely. Keep the torso stacked, press the top hand into the floor if needed, and move with a boring, controlled rhythm.
- Point or flex the foot, but keep the knee straight.
- Lift 6 to 8 inches, not 18.
- Try 15 to 20 reps per side.
- Add 10 tiny pulses at the top if you want more burn.
If the hip flexor takes over, bend the top leg a little more. That small change often clears the space you need.
8. Side-Lying Clamshell
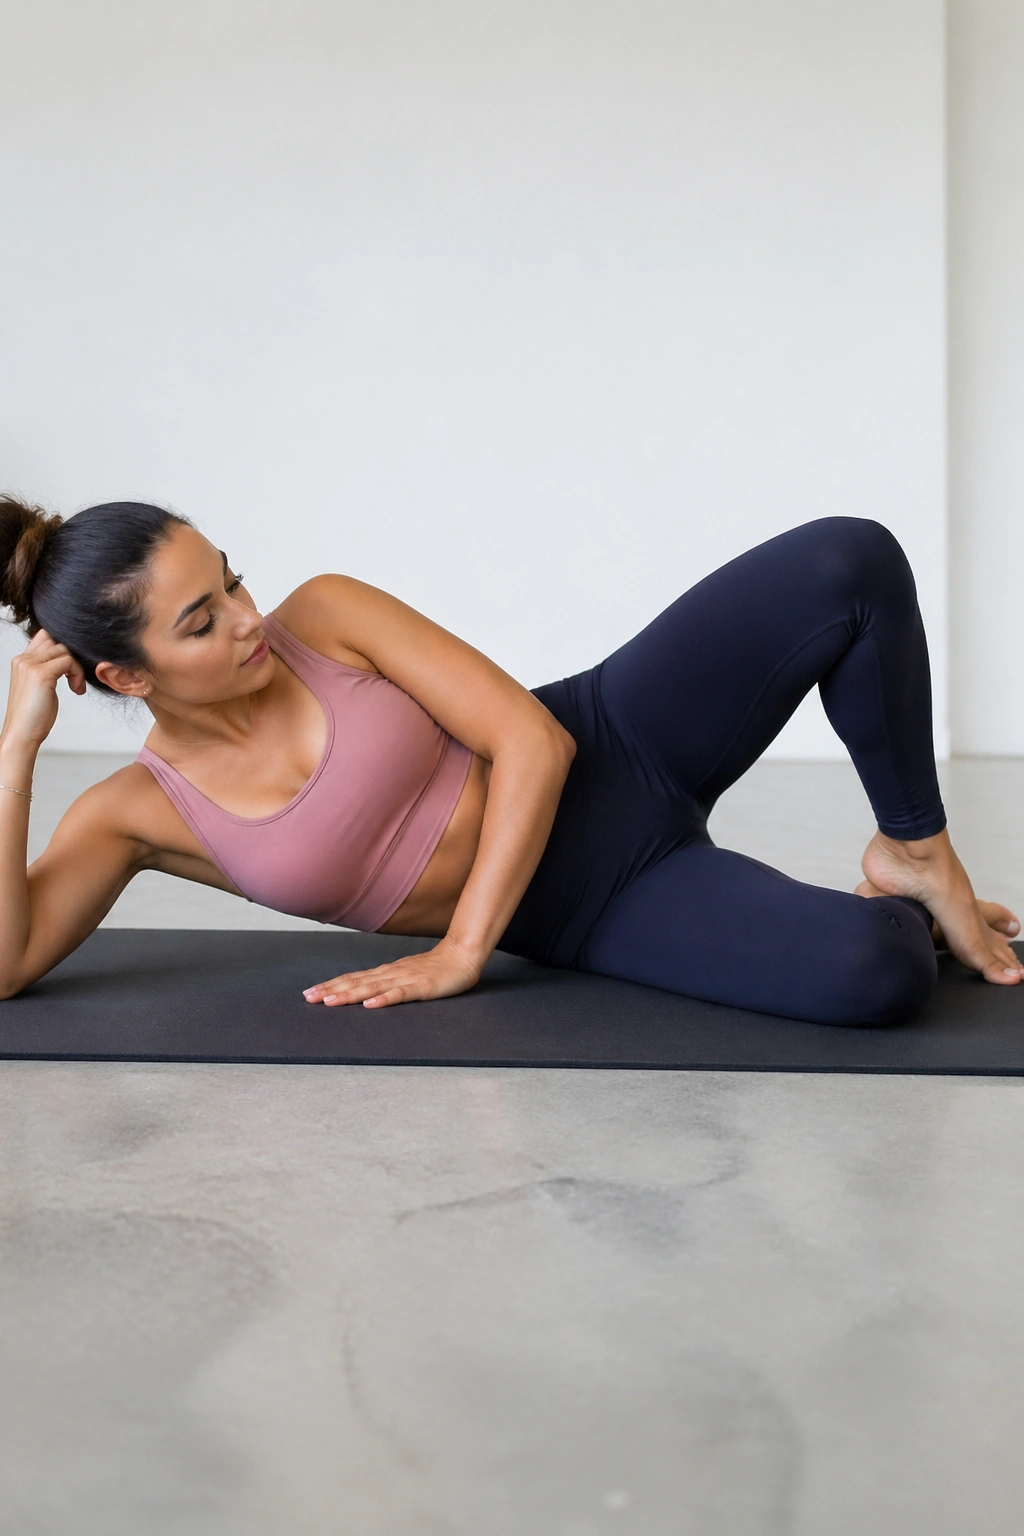
The clamshell is small, and that is exactly why it works.
Lie on your side with the knees bent and feet together, then open the top knee like a shell while the pelvis stays still. The feet stay in contact. The hips do not roll backward. And yes, the outer hip usually lights up much faster than you expect.
A lot of people rush clamshells and turn them into a lazy knee fling. That misses the point. The move is about hip external rotation and glute medius strength, which matter a lot for balance, knee tracking, and the way standing moves feel later in the session.
If the standard version feels easy, add a mini-band above the knees or hold the top position for 3 seconds on each rep. Twelve to 15 controlled reps is enough to make the side hip come alive. Sometimes less is more annoying, and that’s useful.
9. Fire Hydrant Pulse
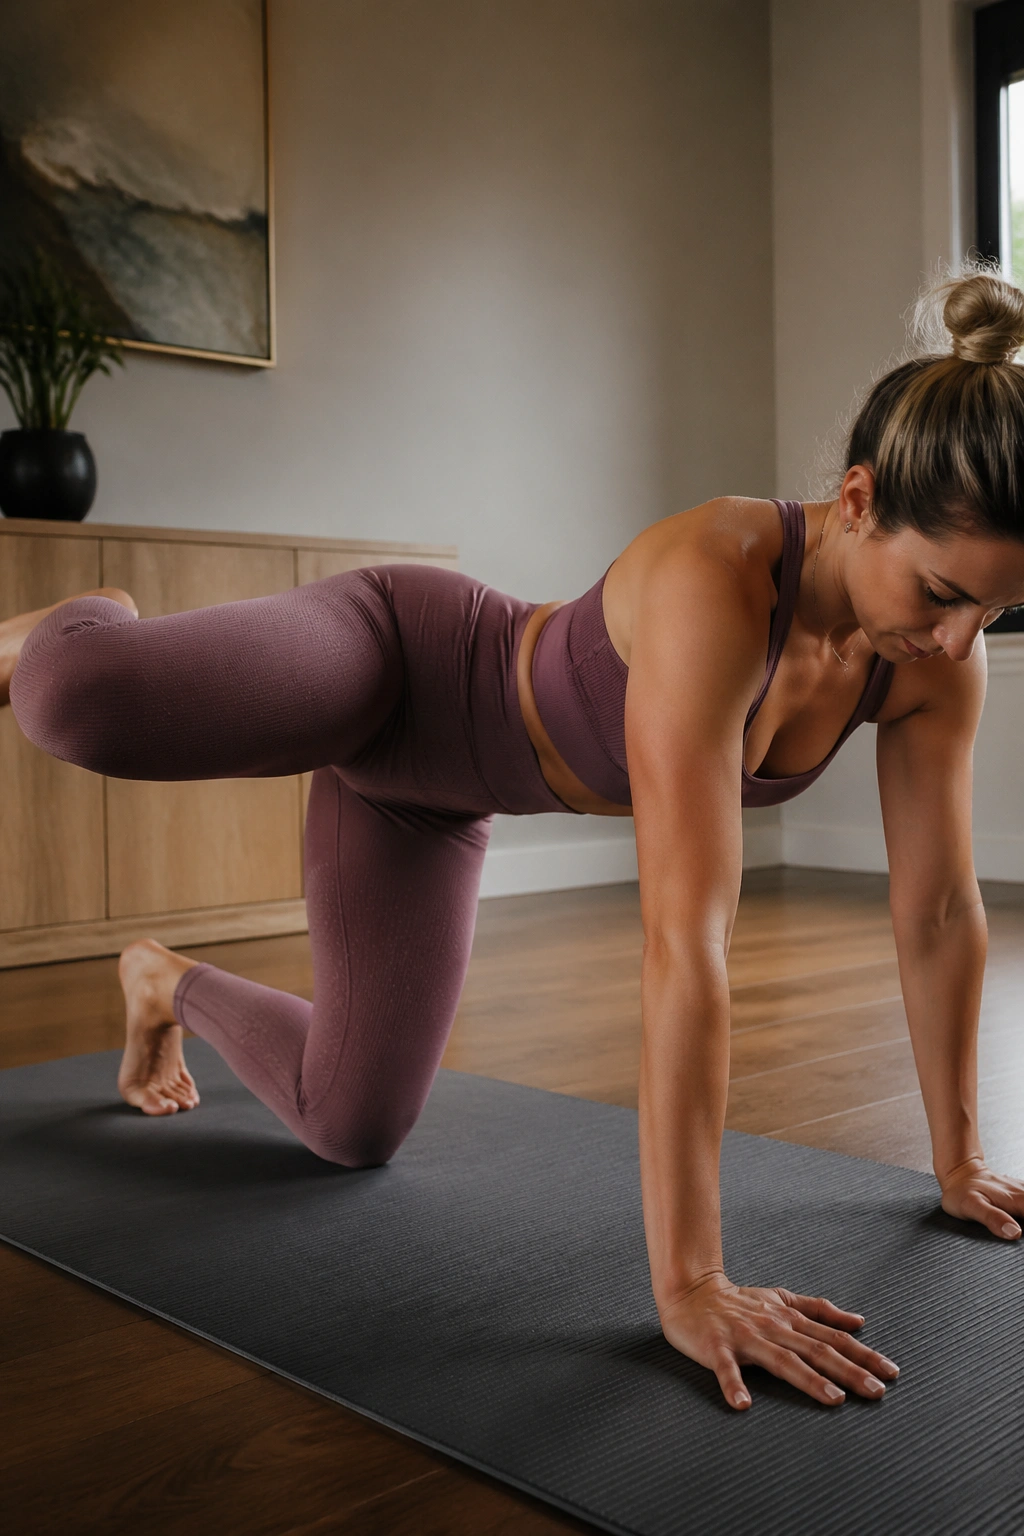
If you’ve ever been on all fours and felt one glute wake up before the other, you know the fire hydrant.
Set up in a tabletop position with the hands under the shoulders and the knees under the hips. Keeping the knee bent, lift one thigh out to the side like a dog at a fire hydrant, then pulse just a little higher and lower without twisting the spine. The movement is short, but the control requirements are not.
The goal is to keep the trunk quiet while the hip joint does the work. If the low back arches or the body leans to the opposite side, the leg has probably gone higher than it should. Lower it. The best version is usually the least dramatic one.
Try 12 reps per side, then 12 tiny pulses at the top. A soft exhale on the lift helps more than people expect. It keeps the rib cage from flaring and makes the whole thing cleaner.
10. Donkey Kick with Bent Knee
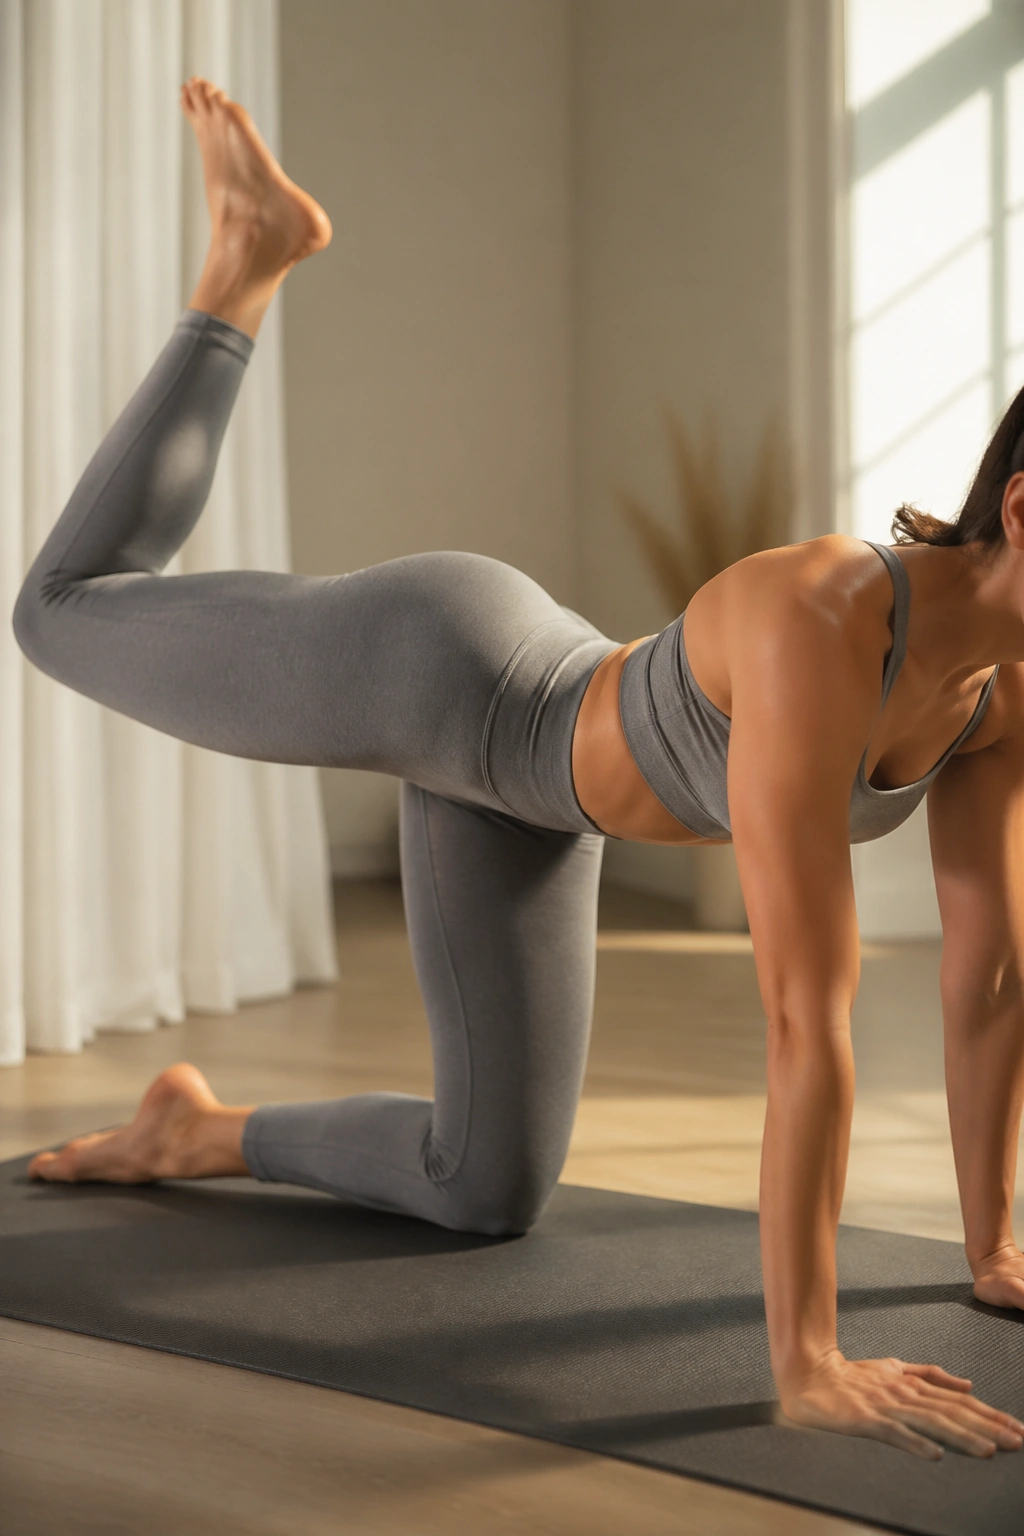
Donkey kicks get sloppy fast if the lower back starts doing the work.
Stay on hands and knees, flex one foot, and drive the heel up toward the ceiling with the knee bent. The thigh should lift only as far as the pelvis stays square. If you feel the low back pinching, the leg has gone too high. That’s the line.
The bent-knee position shifts the emphasis into the glute instead of turning the move into a hamstring tug-of-war. It’s one of the better bodyweight choices for people who want a simple glute drill without standing balance or equipment.
Form Cue
Imagine the heel is pushing the ceiling away by an inch. Not a mile. An inch.
- Keep both hip bones facing the floor.
- Hold the top for 1 count.
- Do 12 reps on each side.
- Finish with 10 pulses, then switch sides.
If your wrists get tired, drop to forearms for a few reps and keep going. The glutes do not care about the style points.
11. Bridge March
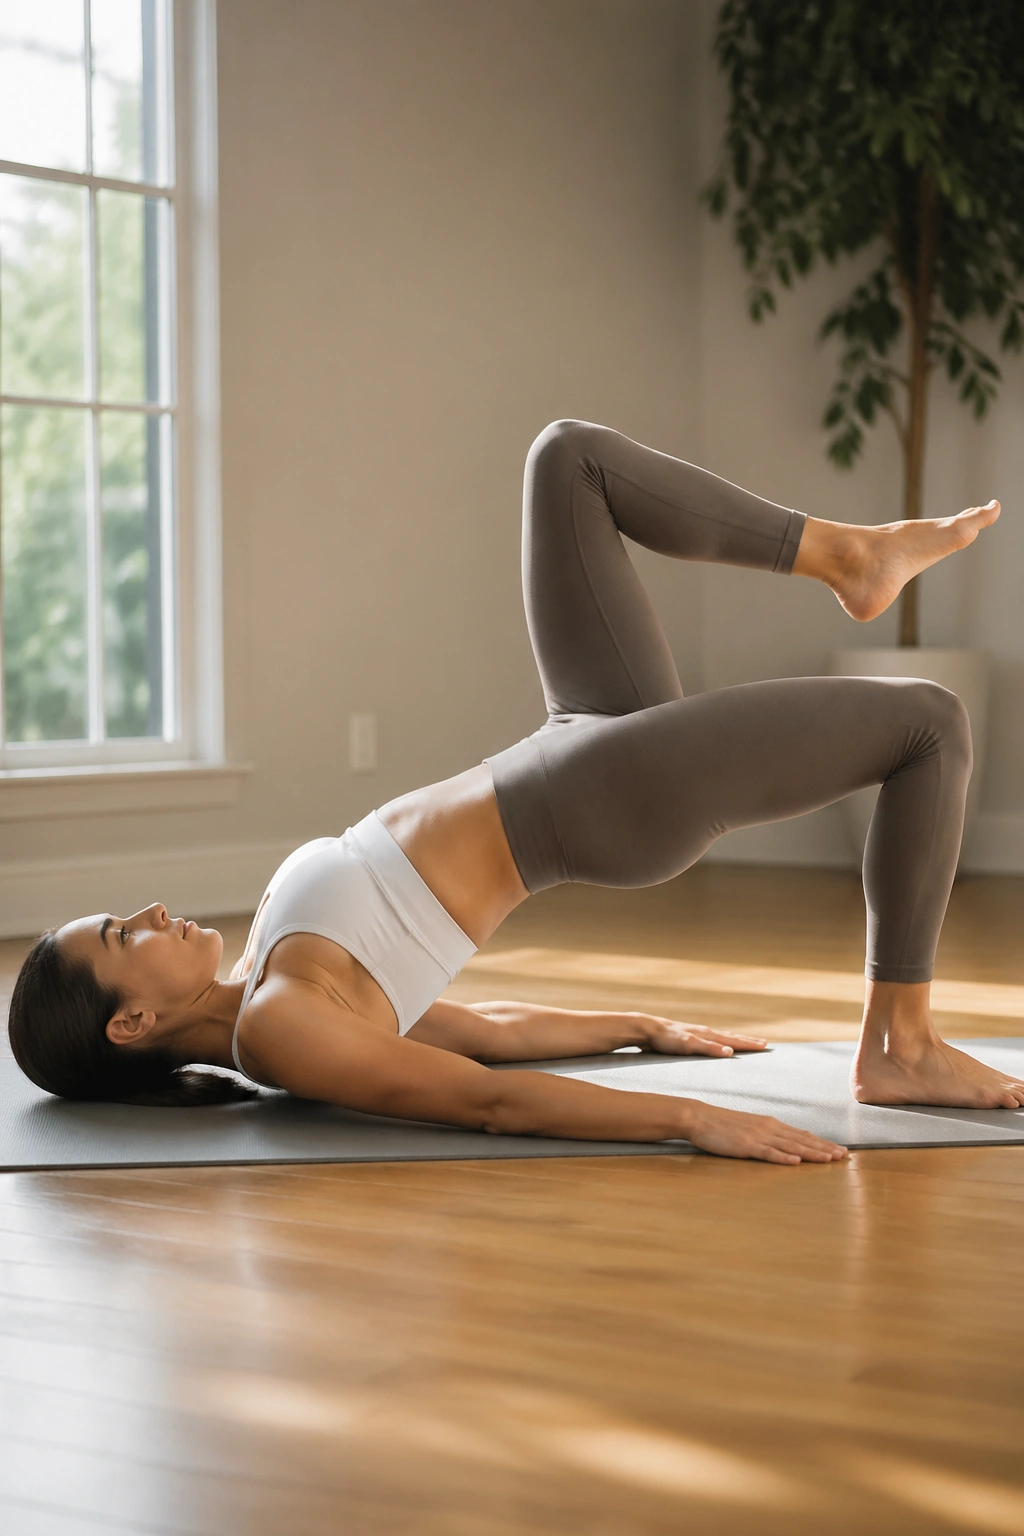
A bridge march is less glamorous than a fancy ab finisher, but it teaches the pelvis to stay steady under movement.
Lie on your back, knees bent, feet flat, and lift the hips into a bridge. From there, march one foot up to tabletop without letting the hips drop or sway. Set it down, switch sides, and keep the whole pelvis as level as you can manage.
The magic here is anti-rotation. Your body wants to shift to the side that’s lifting, and your core has to stop it. That makes the move useful for the low abs, the glutes, and the deep stabilizers that don’t always get enough attention in faster workouts.
Eight to 10 marches is plenty. If the bridge turns into a back bend, lower the hips a little and try again. I’d rather see a smaller bridge with rock-solid control than a high one that looks good for four seconds.
12. Single-Leg Bridge Hold
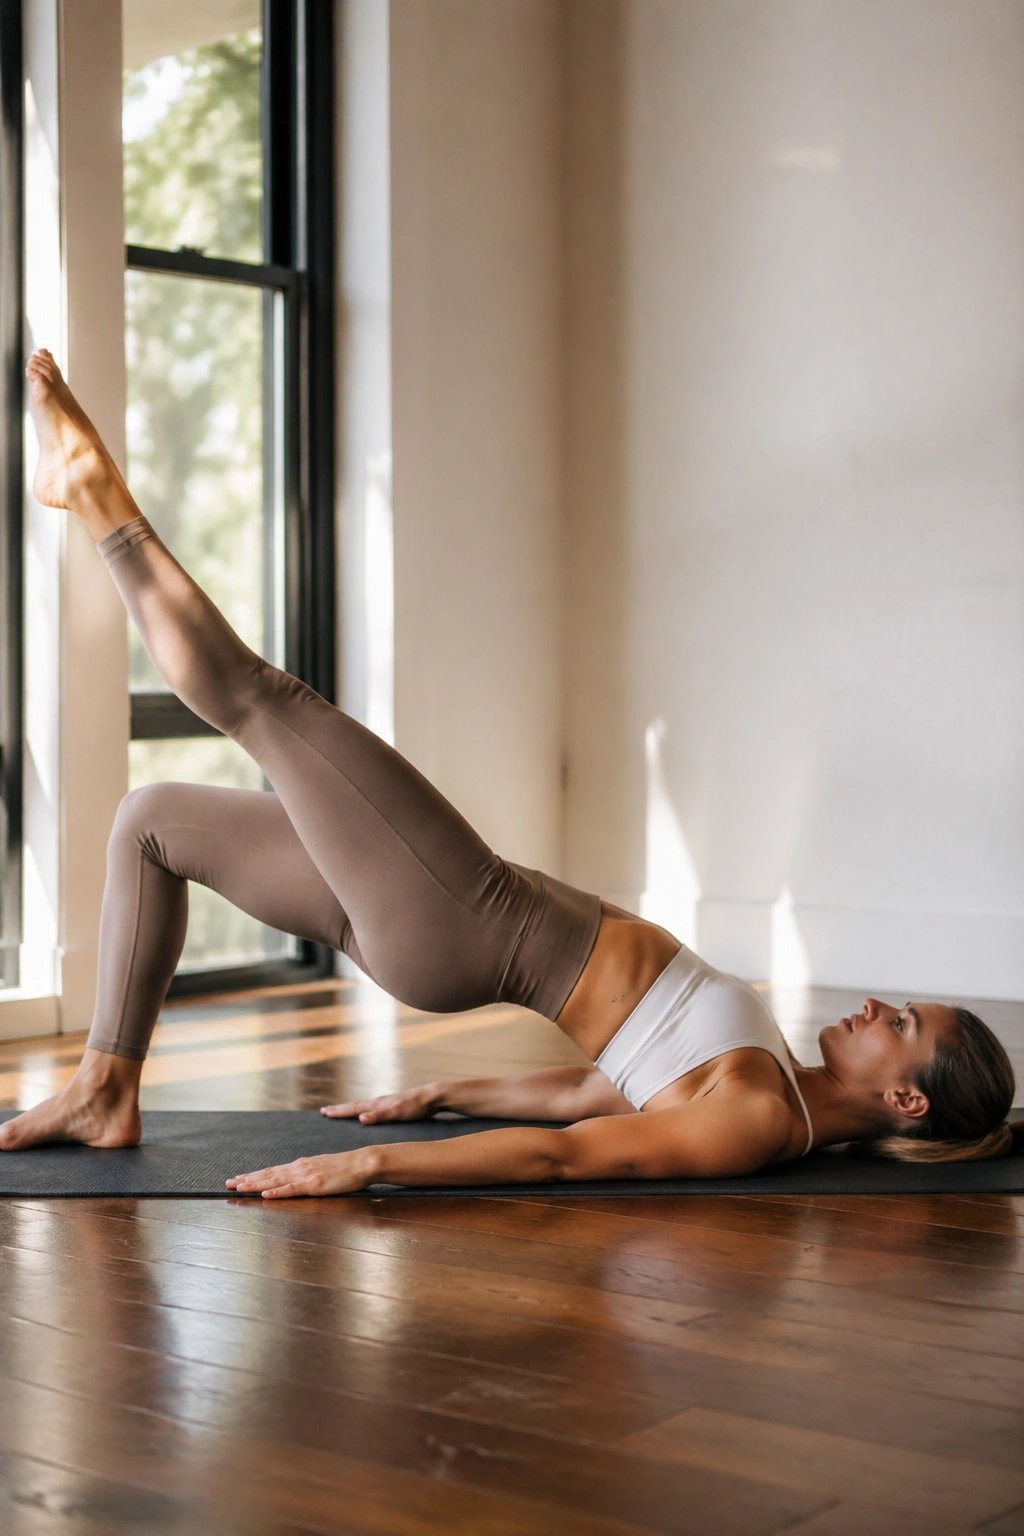
A single-leg bridge hold tells the truth fast.
Lift into a bridge, extend one leg long, and hold the hips as level as possible while the standing side carries the load. The hamstring on the floor leg should work, yes, but the glute has to stay online or the whole shape starts to sag.
- Keep the ribs down and the chin slightly tucked.
- Press through the heel of the grounded foot.
- Hold for 20 to 30 seconds per side.
- If the hamstring cramps, lower the hips, reset, and try again with a smaller lift.
This is one of those moves that looks calm from a distance and feels like a wrestling match from the inside. Good. That means it’s doing something useful. The hold trains strength and patience at the same time, which is a nice combination if you ask me.
13. Plank Knee Drive
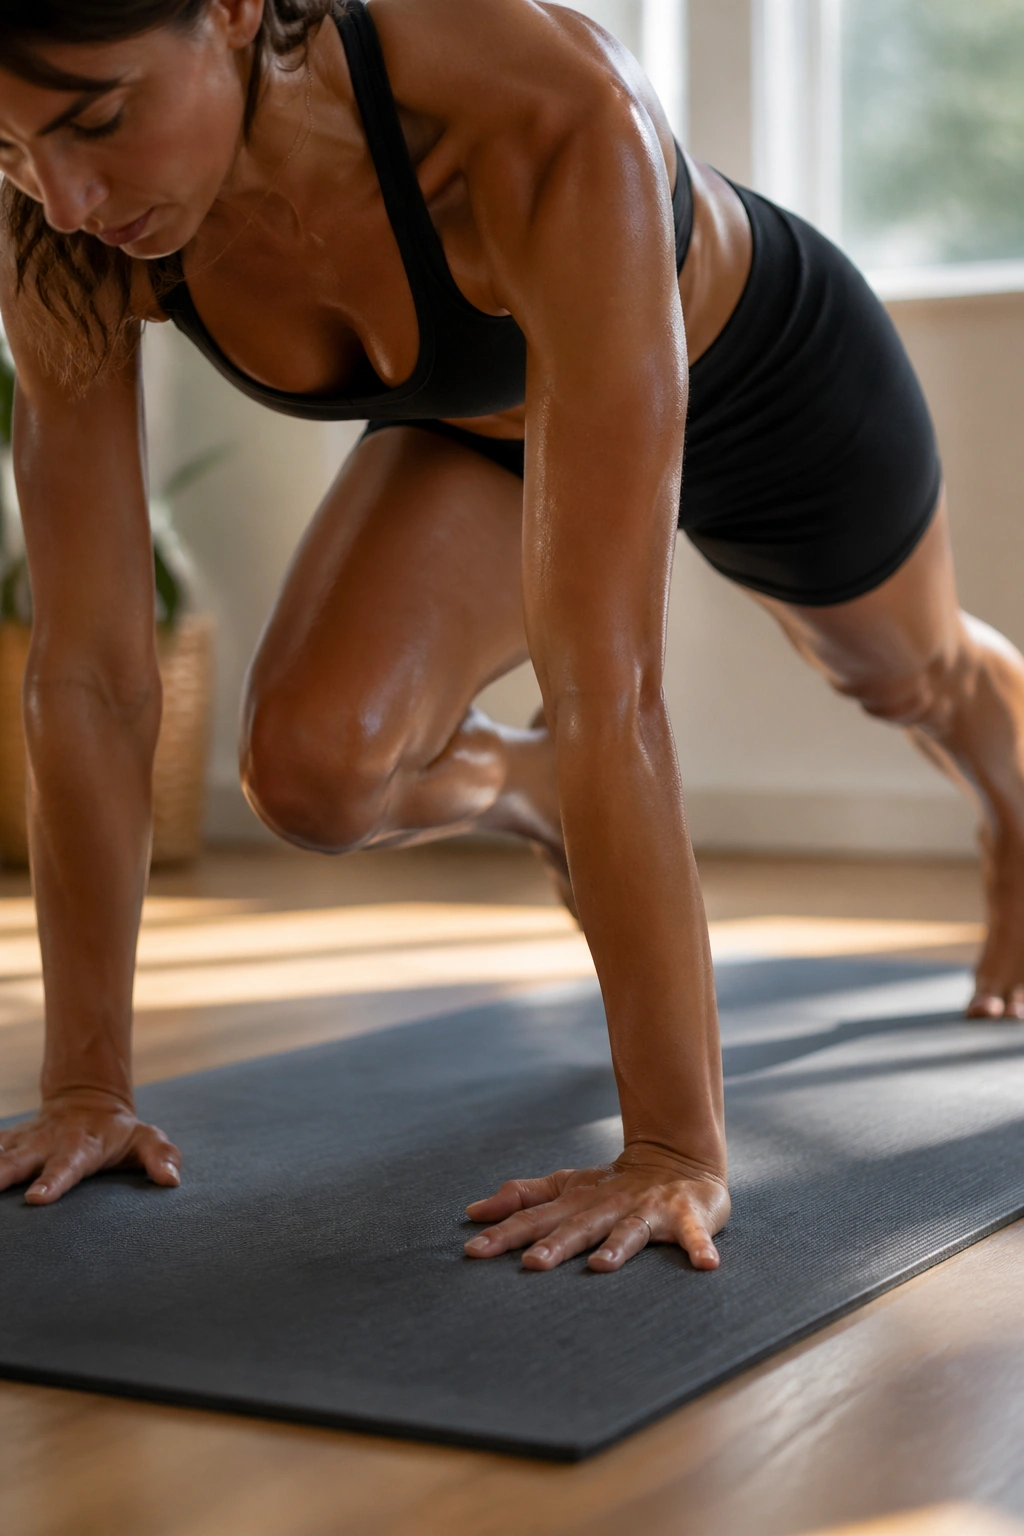
Can you keep a plank clean while driving one knee toward your chest? That’s the whole game.
Start in a high plank with the shoulders stacked over the wrists and the feet about hip-width apart. Pull one knee toward the same-side elbow or chest, then send it back without letting the hips swing. Alternate sides and keep the motion smooth.
Wrist-Friendly Tweak
If your wrists complain, drop to forearms and do the same knee drive from a forearm plank. The angle changes, but the challenge stays. You still have to hold the torso steady while one leg moves, which is where the core work lives.
- Move at a slow, deliberate pace.
- Keep the shoulders broad.
- Do 10 to 12 total knee drives.
- Stop before the low back starts sagging.
The faster you go, the easier it is to cheat. Slow beats impressive here.
14. Forearm Plank Leg Lift
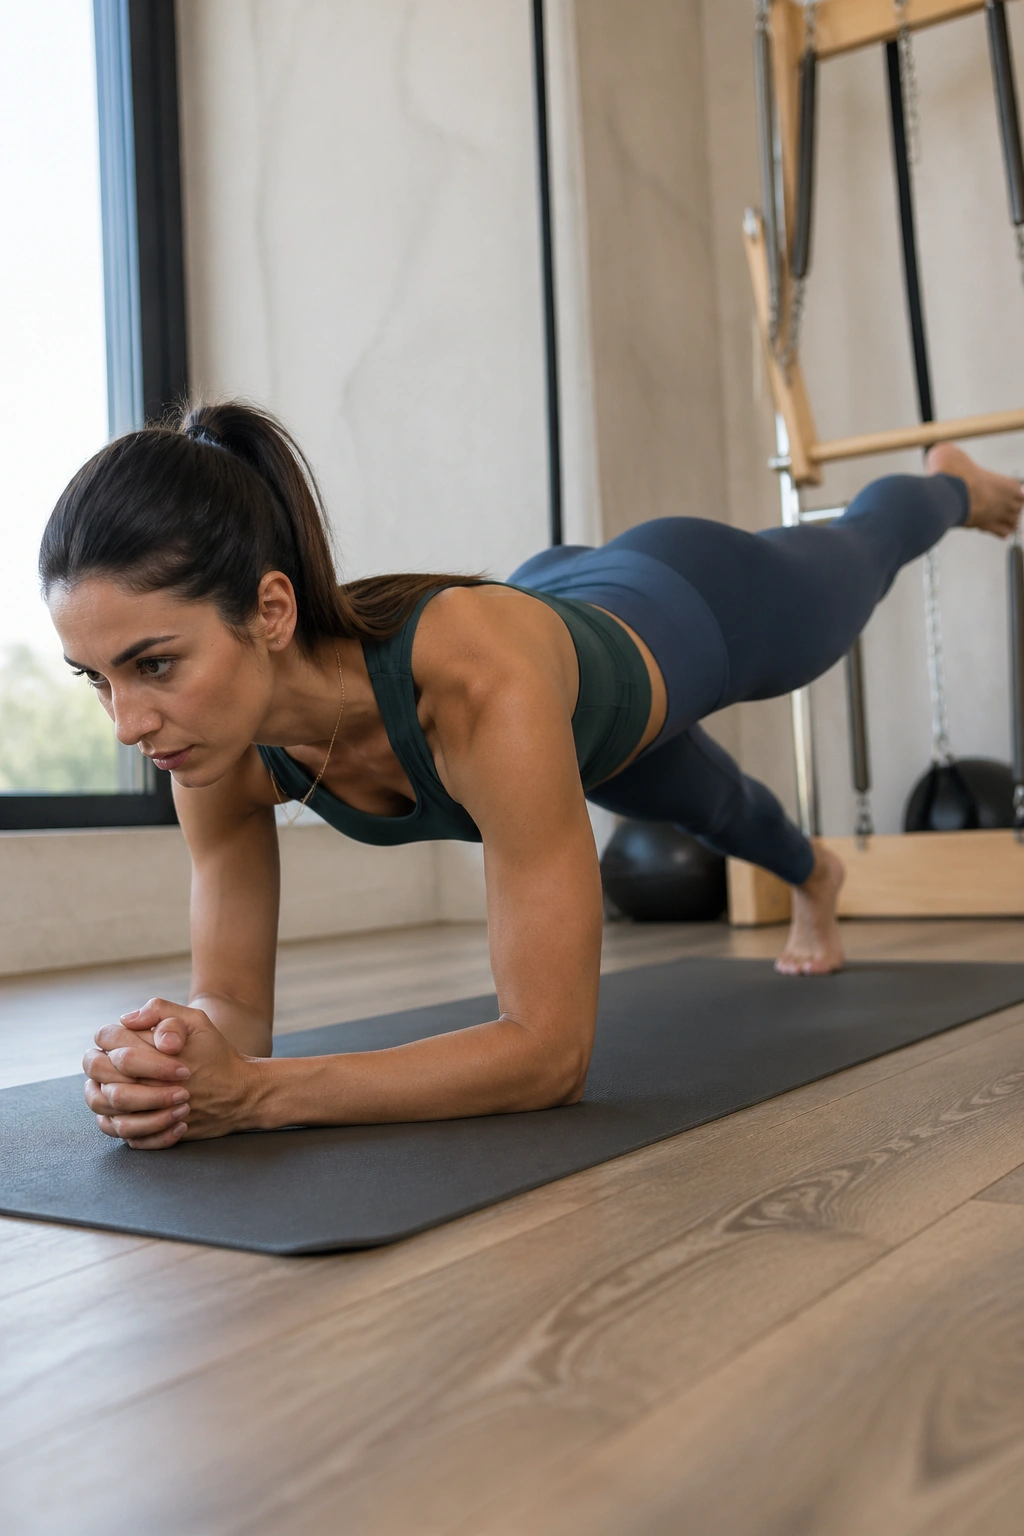
You know that shaky moment when your shoulders start to creep up in a plank? This move finds it immediately.
From a forearm plank, lift one straight leg a few inches off the floor and lower it with control. The pelvis wants to tip, the ribs want to flare, and the standing shoulder wants to collapse. None of that helps. Keep the body long and the lift small.
The payoff is a stubborn kind of full-body work. The glute on the lifted side has to fire, the standing side has to resist rotation, and the shoulders keep the plank honest. It’s a better test of alignment than speed, which is why I like it more than endless mountain climbers for this style of workout.
Try 8 lifts per side, then hold the last lift for 5 seconds. If the neck gets tight, widen the elbows a touch and press the floor away. Small adjustments can save the whole set.
15. Swan Lift
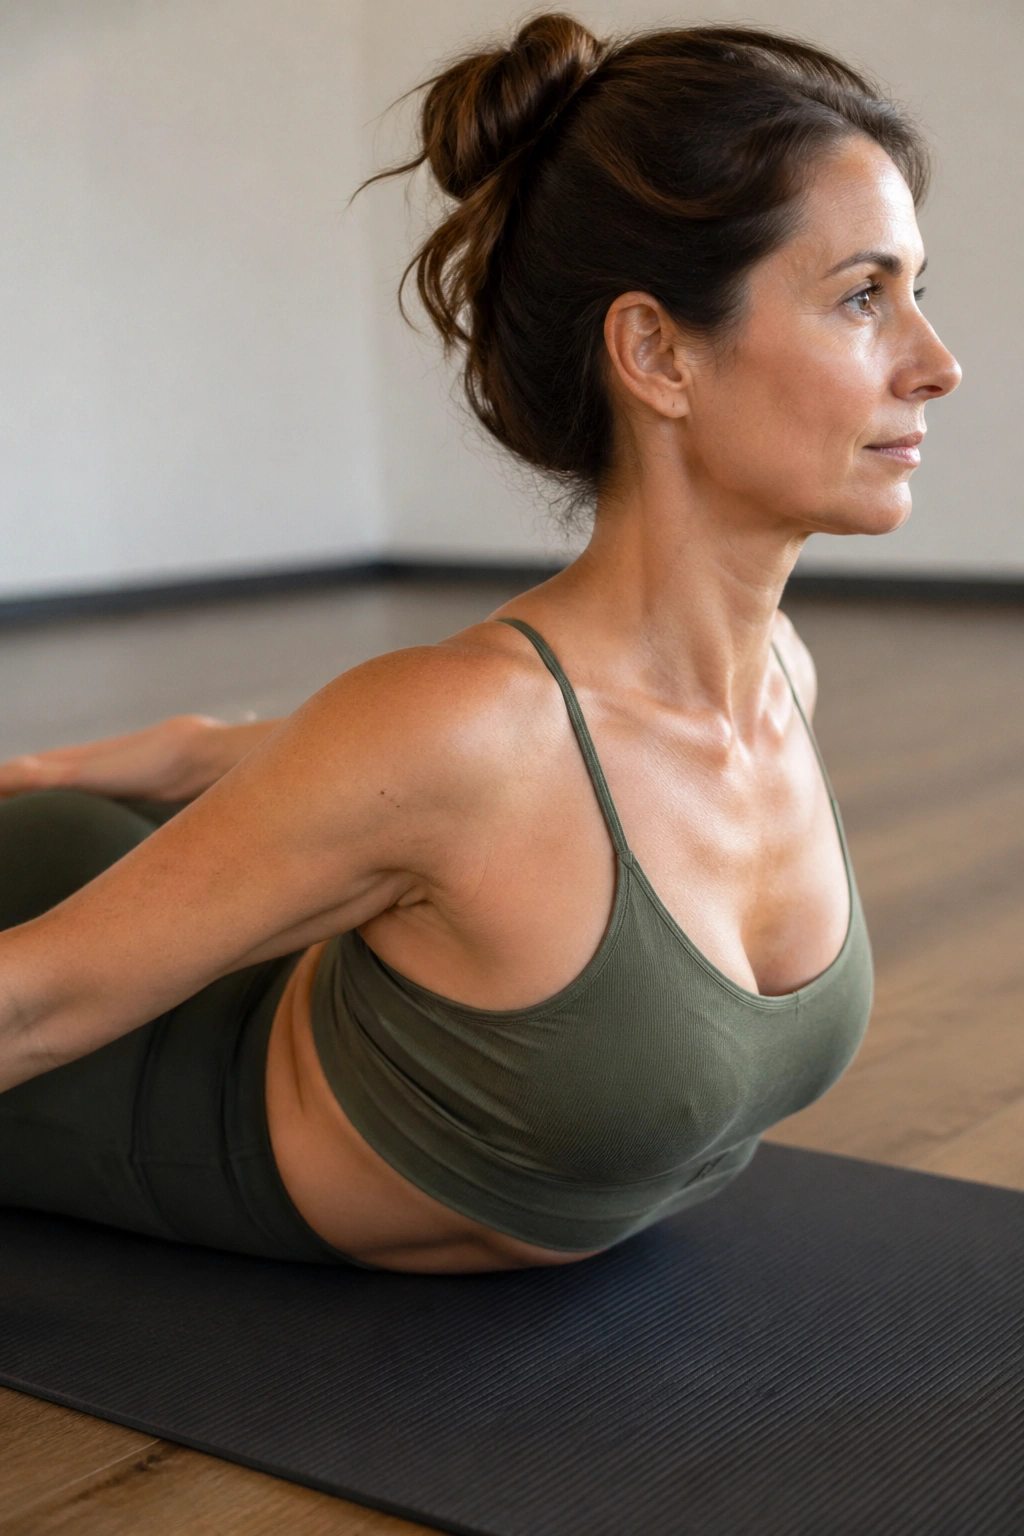
The swan lift opens the front of the body, and most people need that more than they think.
Lie on the stomach with the hands near the ribs or slightly wider, then lengthen the spine and lift the chest just enough to feel the back muscles work. This is not a big cobra-style heave. The move should feel long, not jammed. The sternum glides forward and up while the shoulders stay down.
There’s a specific sensation I look for here: the front of the hips stay heavy, the neck stays long, and the low back feels supported rather than pinched. If the shoulders crunch toward the ears, come down a little. If the lower back complains, lift less and widen the elbows.
Eight to 10 smooth reps are enough. Some people prefer a 10-second hover instead, and that works too. The swan lift is partly about posture, partly about back strength, and partly about reminding the body that the spine can move in more than one direction.
16. Standing Oblique Crunch
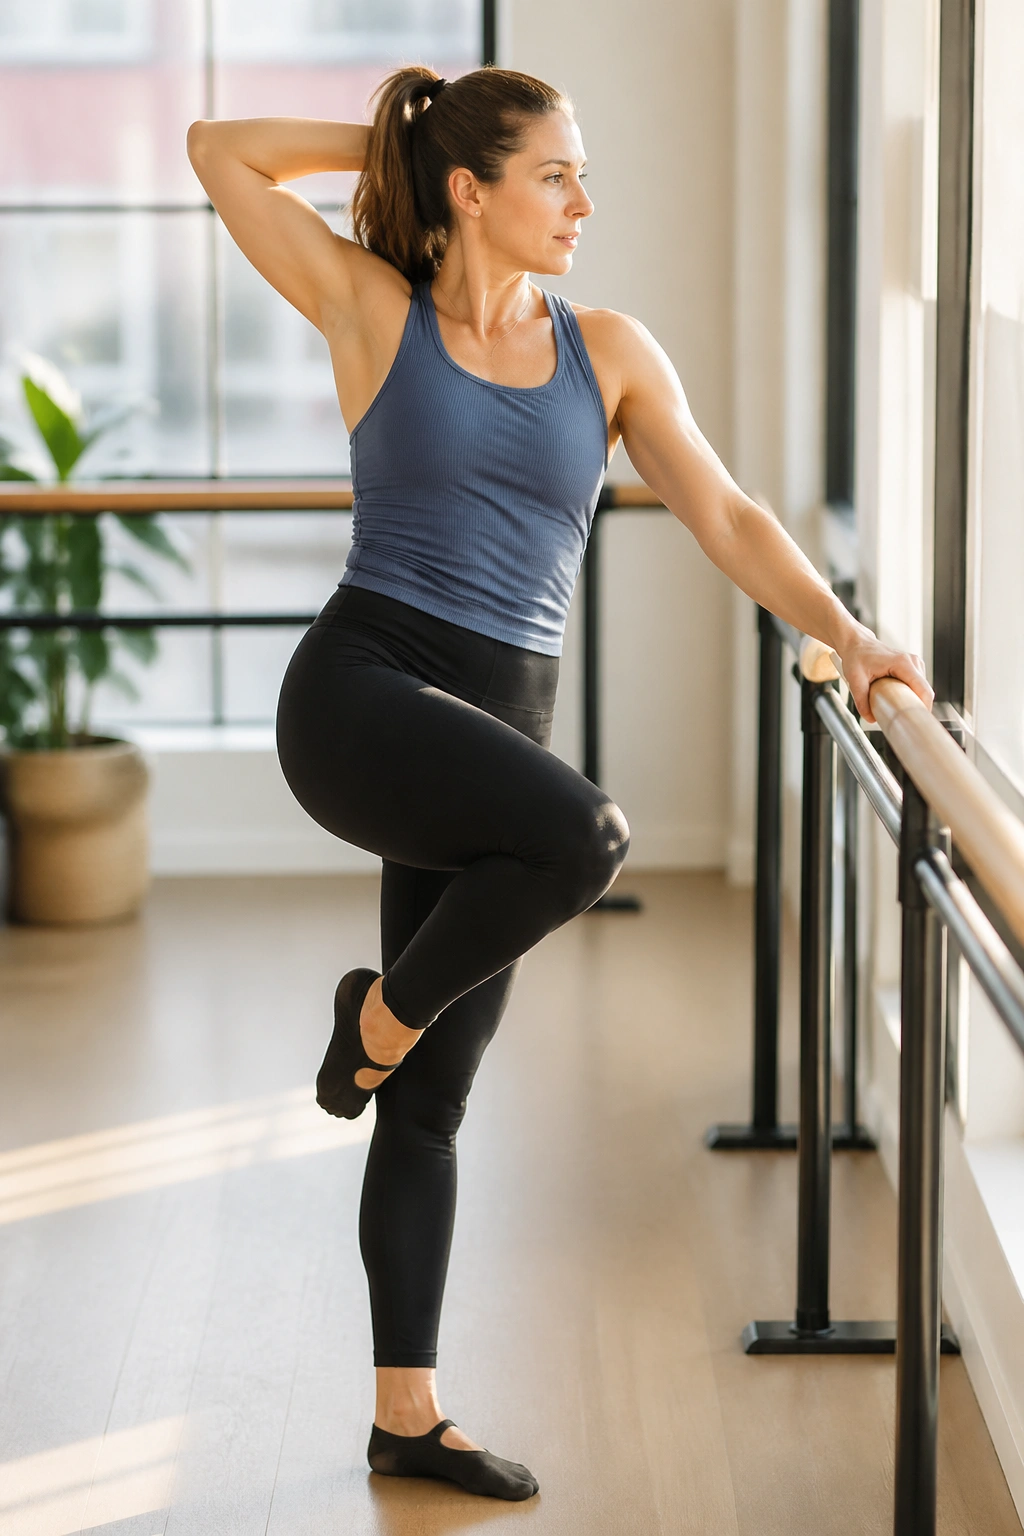
An oblique crunch at the barre is not about elbow-to-knee speed.
Stand sideways to the barre, one hand lightly resting on it, and lift the outside knee toward the elbow while the side body shortens. Or keep the knee down and crunch the rib cage toward the hip if you want a lower-impact version. The key is the same: the torso moves, but it does so in a controlled, narrow lane.
How to Keep It Clean
The standing leg should stay rooted. If the hips drift all over the place, the side waist never really gets the job done.
- Exhale as you crunch.
- Keep the shoulder away from the ear.
- Do 12 reps per side.
- Pause for 1 second at the top of each rep.
I like this move because it feels practical. It helps you see and feel the waistline work without needing floor space or complicated setup.
17. Triceps Dip at the Barre
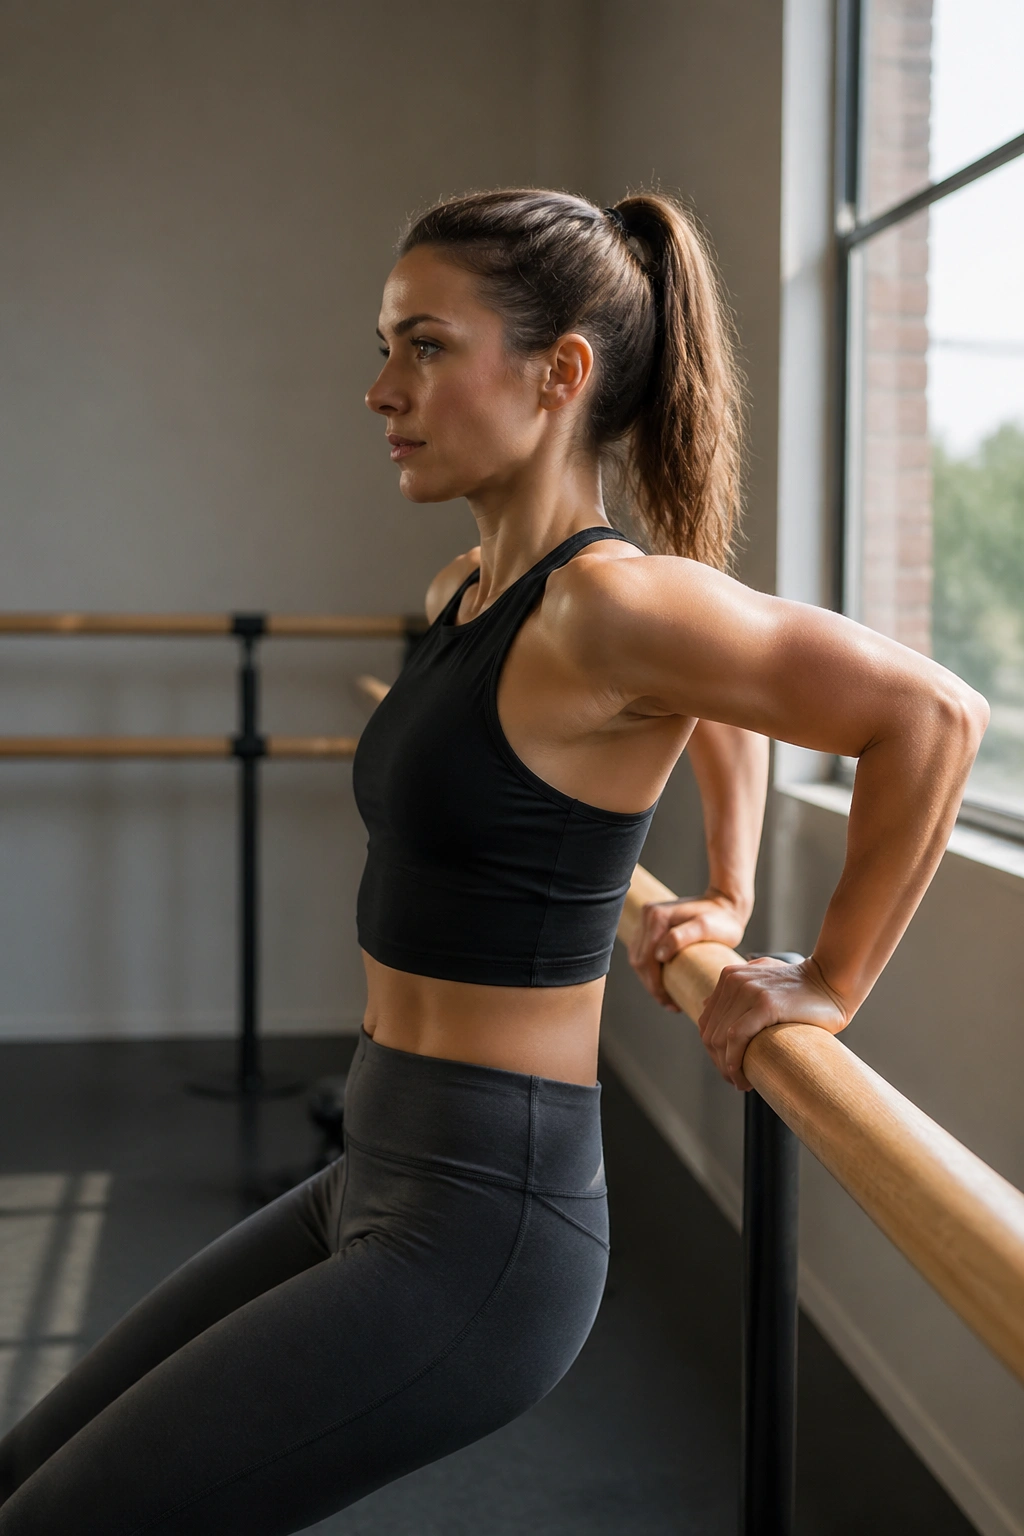
Compared with doing triceps dips on a bench, the barre version gives you a little more control and a little less drama in the shoulders.
Place your hands on the barre behind you or on a stable surface at about hip height, fingers facing forward or slightly out. Walk the feet out, bend the elbows straight back, and lower only a few inches before pressing up again. The chest stays lifted, the shoulders stay away from the ears, and the elbows do not flare like wings.
This is a small-range triceps burner, not a dive-bomb. The upper arms should feel the work fast, but the shoulders should stay happy if you keep the range tight. If the front of the shoulder pinches, bend the knees more and bring the feet closer.
Do 10 to 12 dips, then hold the bottom for 5 seconds on the final rep if you want extra work. Clean form matters here more than depth. A shorter dip with steady elbows beats a deep one that feels shaky.
18. Wall Sit with Heel Lift
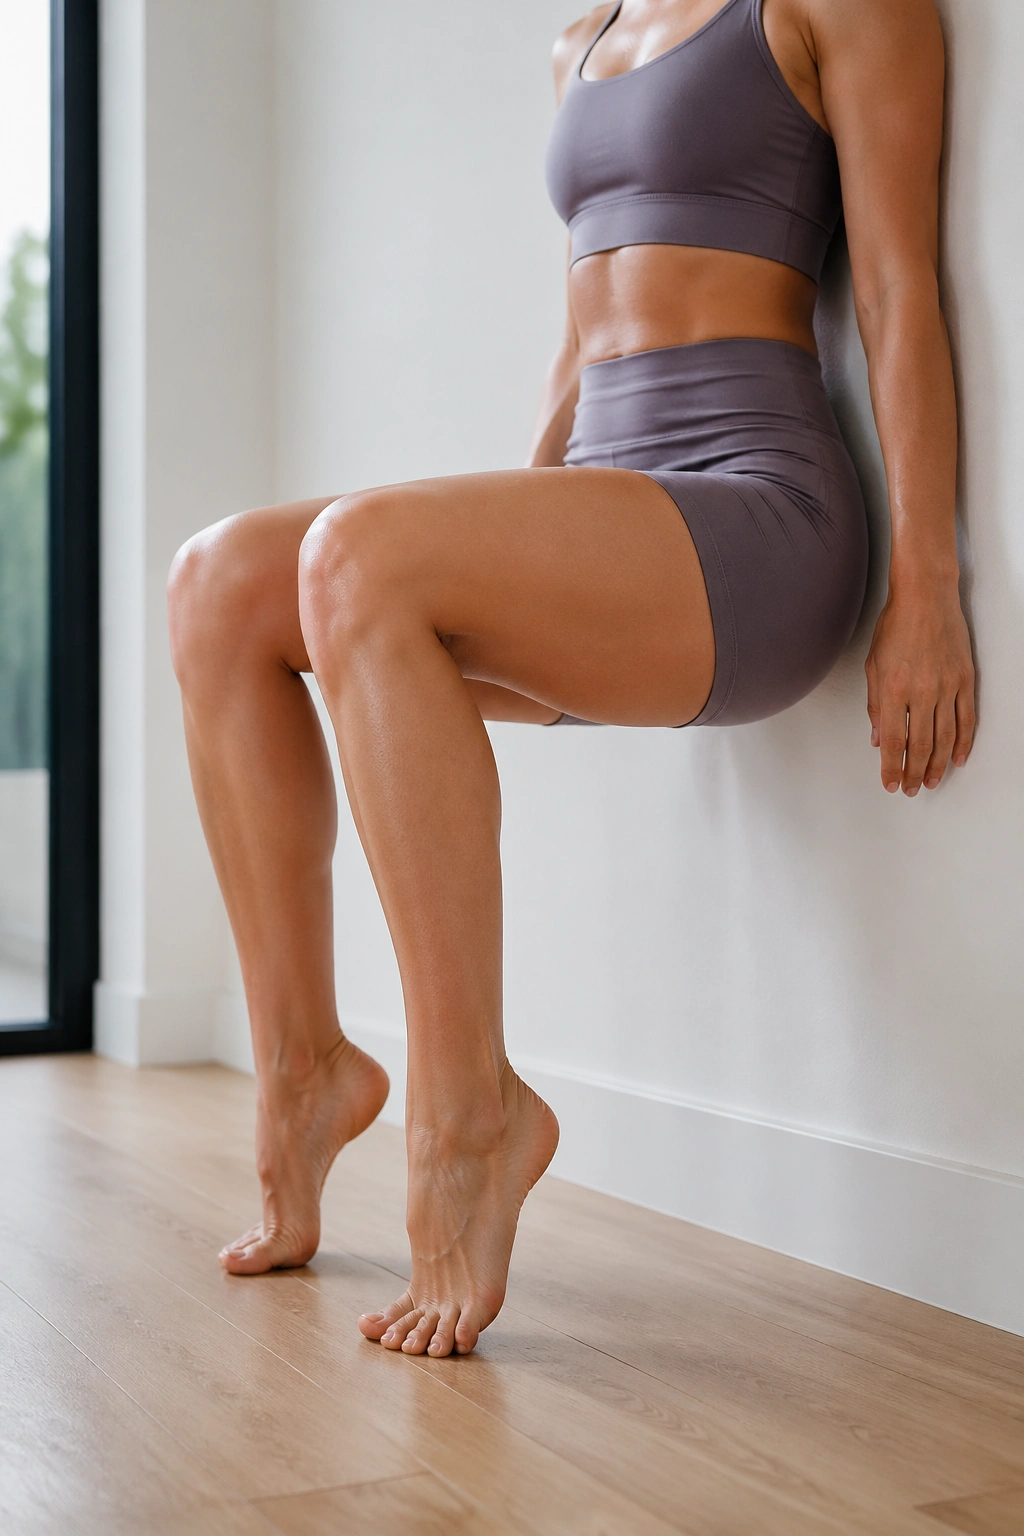
Why does a wall sit feel harder after the first heel lift? Because the balance shifts, the calves wake up, and the quads lose their little moment of rest.
Slide down the wall until the knees are bent about 90 degrees, or higher if your knees prefer a more open angle. Then lift one heel for 2 to 3 seconds, lower it, and switch sides. The thighs keep working the whole time. The calf on the lifted side joins the party too.
- Keep the back flat against the wall.
- Press the knees gently over the ankles, not collapsing inward.
- Hold for 30 to 60 seconds total.
- Add 10 alternating heel lifts before standing up.
If you need a friendlier version, sit higher and skip the heel lift until the plain wall sit feels steady. That still counts. There’s no medal for suffering at a bad angle.
19. Standing Hamstring Curl with Reach
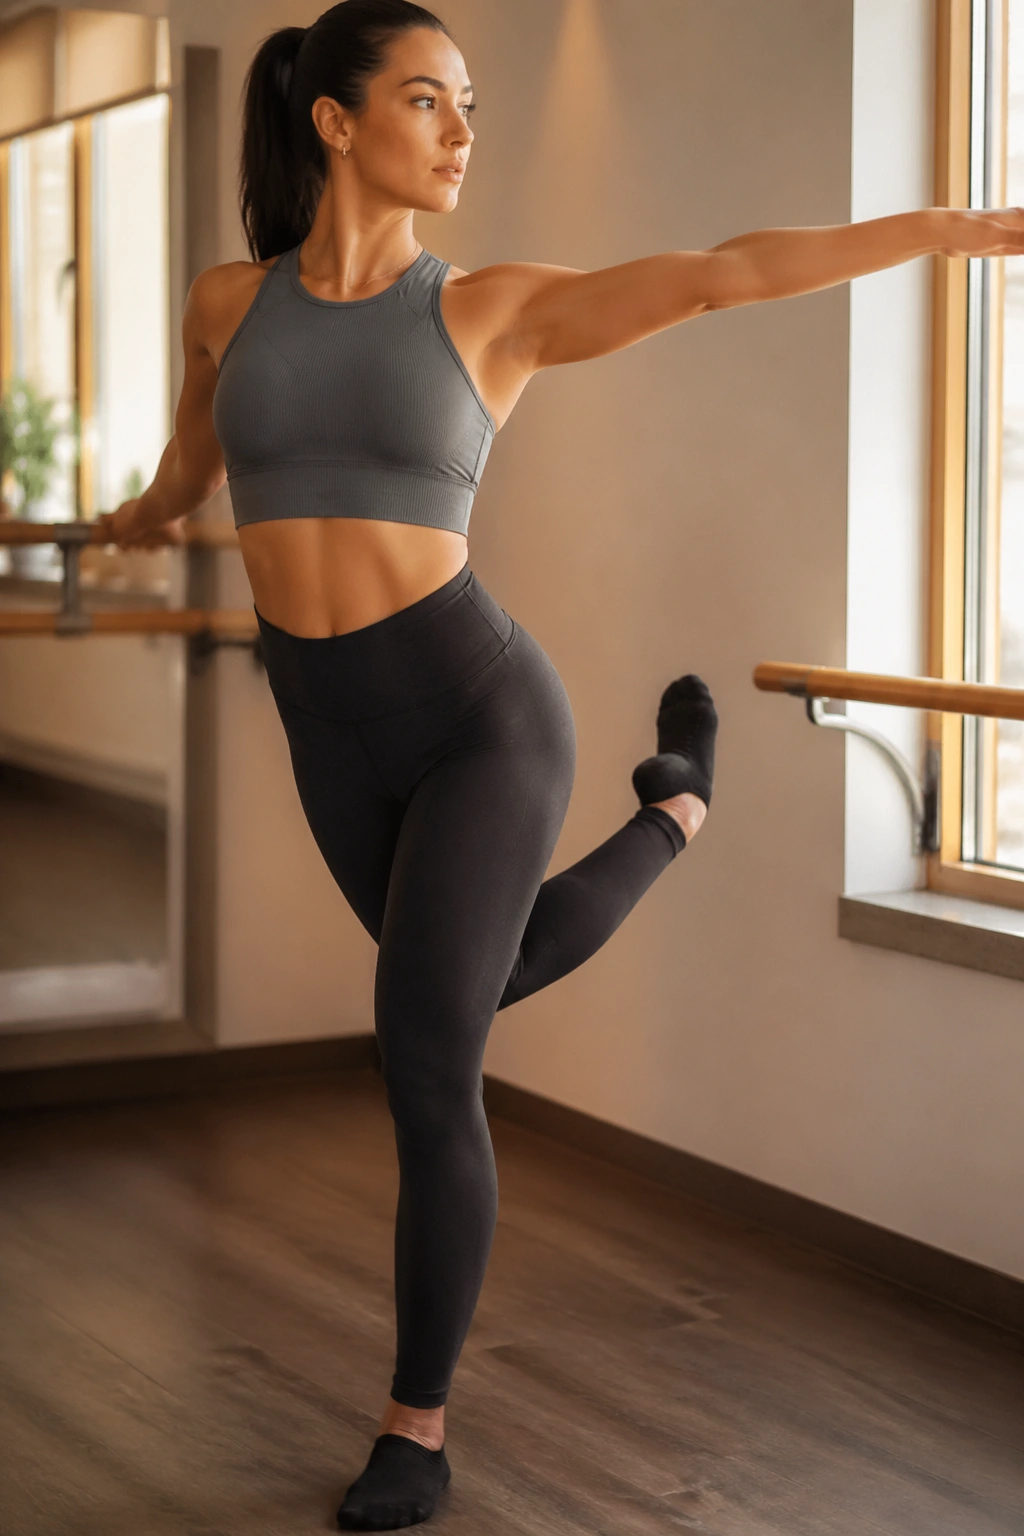
Some moves look like simple standing balance drills until your standing leg starts to tremble.
Stand tall, hold the barre lightly, and curl one heel toward the seat while reaching the opposite arm forward or overhead. The curl wakes up the hamstring. The reach adds length through the torso and makes the standing side work harder to stay steady.
What to Feel
You should feel the standing glute stay firm and the abdomen quietly brace to keep you from tipping forward. If the chest dumps down or the knee shoots out in front, reset. The move is cleaner when the thigh stays vertical and the torso stays long.
- Keep the knee pointing straight down.
- Hold the top of the curl for 1 to 2 seconds.
- Do 12 reps per side.
- Use a slower tempo if balance is the issue.
This one is nice when you want something that feels athletic without getting jumpy. It’s also a good reminder that the backside of the body deserves more attention than it usually gets.
20. Teaser Hold with Arm Reach
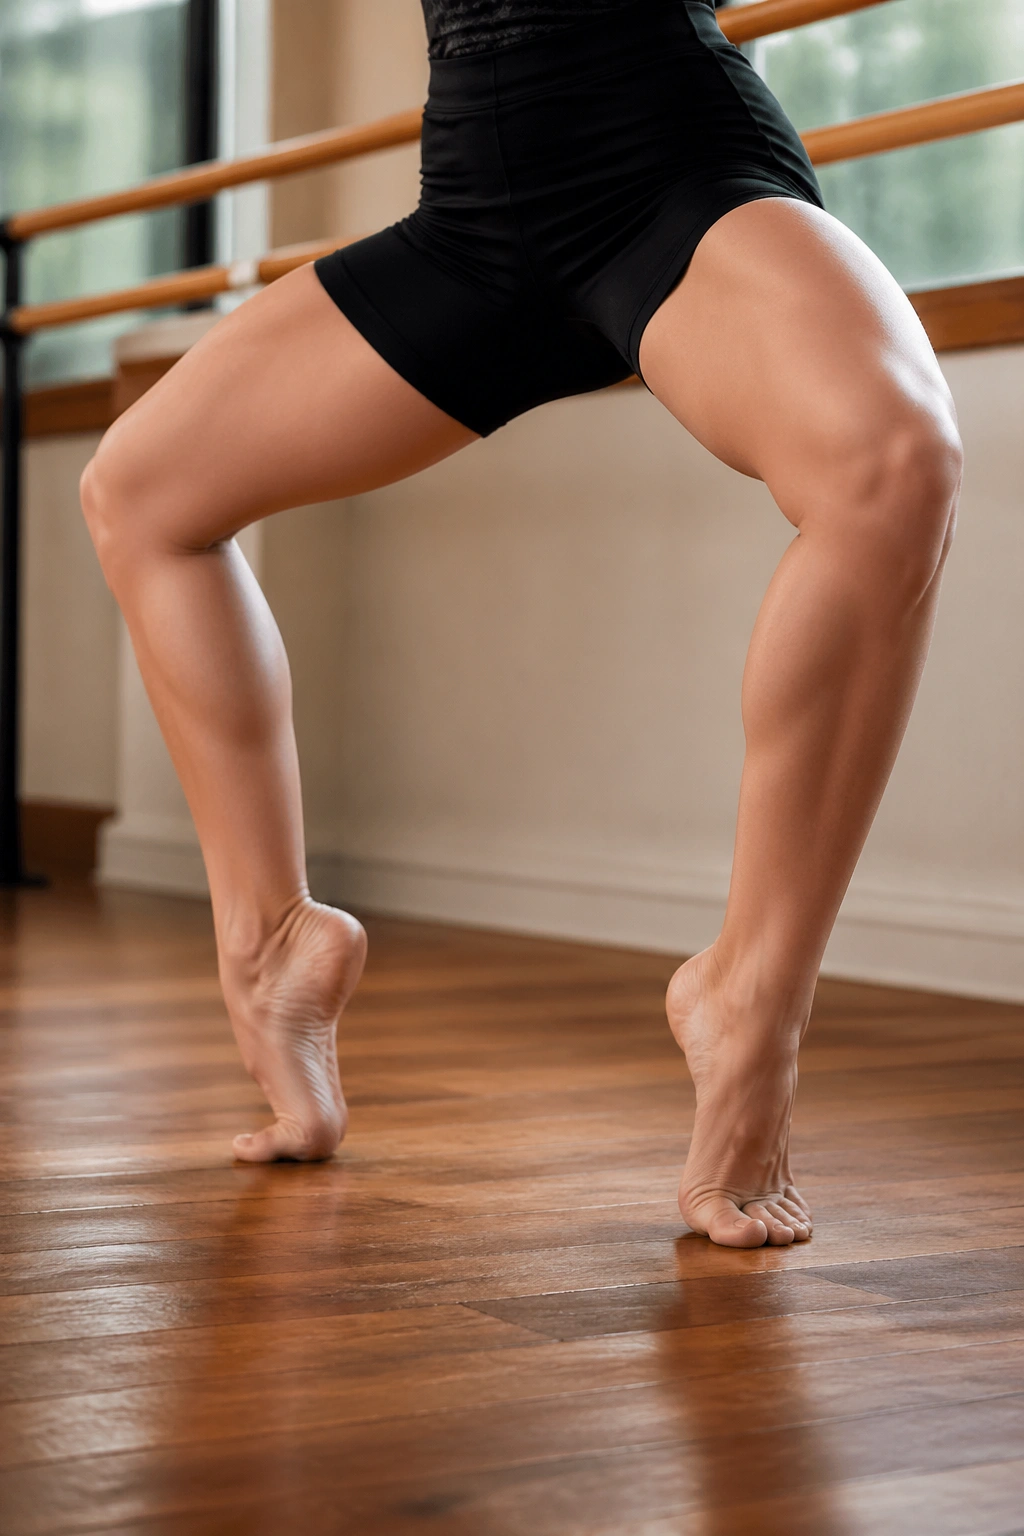
If one move belongs at the end of a barre Pilates circuit, it’s the teaser hold.
Sit tall, roll back until the abs have to catch you, and either keep the knees bent or extend the legs partway if your core can keep the shape steady. Reach the arms forward, then lift the chest and legs into a controlled V shape. No jerking. No flopping. The body should feel long and tense at the same time, which is a weird but useful combination.
If Teaser Feels Too Big
Start with one foot on the floor and the other leg lifted, or keep both knees bent and focus on the balance point behind the sit bones. The point is not to win a flexibility contest. The point is to keep the spine organized while the abs, hip flexors, and back line all work together.
- Exhale as you lift.
- Hold for 5 to 10 seconds.
- Try 5 to 8 reps, or 3 longer holds.
- Keep the shoulders low and the neck soft.
When the teaser is done well, it feels less like a crunch and more like a long line from fingertips to toes. That’s the version worth chasing.
