



A wall looks harmless until you lean into it.
Wall Pilates exercises for women over 40 work best when they feel controlled, a little slow, and more honest than flashy. The wall gives you feedback you can feel right away: ribs that flare, shoulders that creep up, hips that drift, and a lower back that tries to do the job of the abs.
That feedback matters more as the body changes. Joints tend to get less forgiving of sloppy reps, while balance, posture, and hip strength start to matter in ways you notice during ordinary life — getting out of a car, carrying groceries, reaching overhead, standing on one leg while you pull on a sock. The wall helps you clean all of that up without asking for a jump, a lunge across the room, or a piece of gym equipment you do not own.
And no, this does not mean easy. A good wall session can light up the glutes, wake up deep core muscles, and make your legs shake in ten minutes flat. The trick is to use the wall as a cue, not a crutch, and to keep the movements small enough that your form stays sharp.
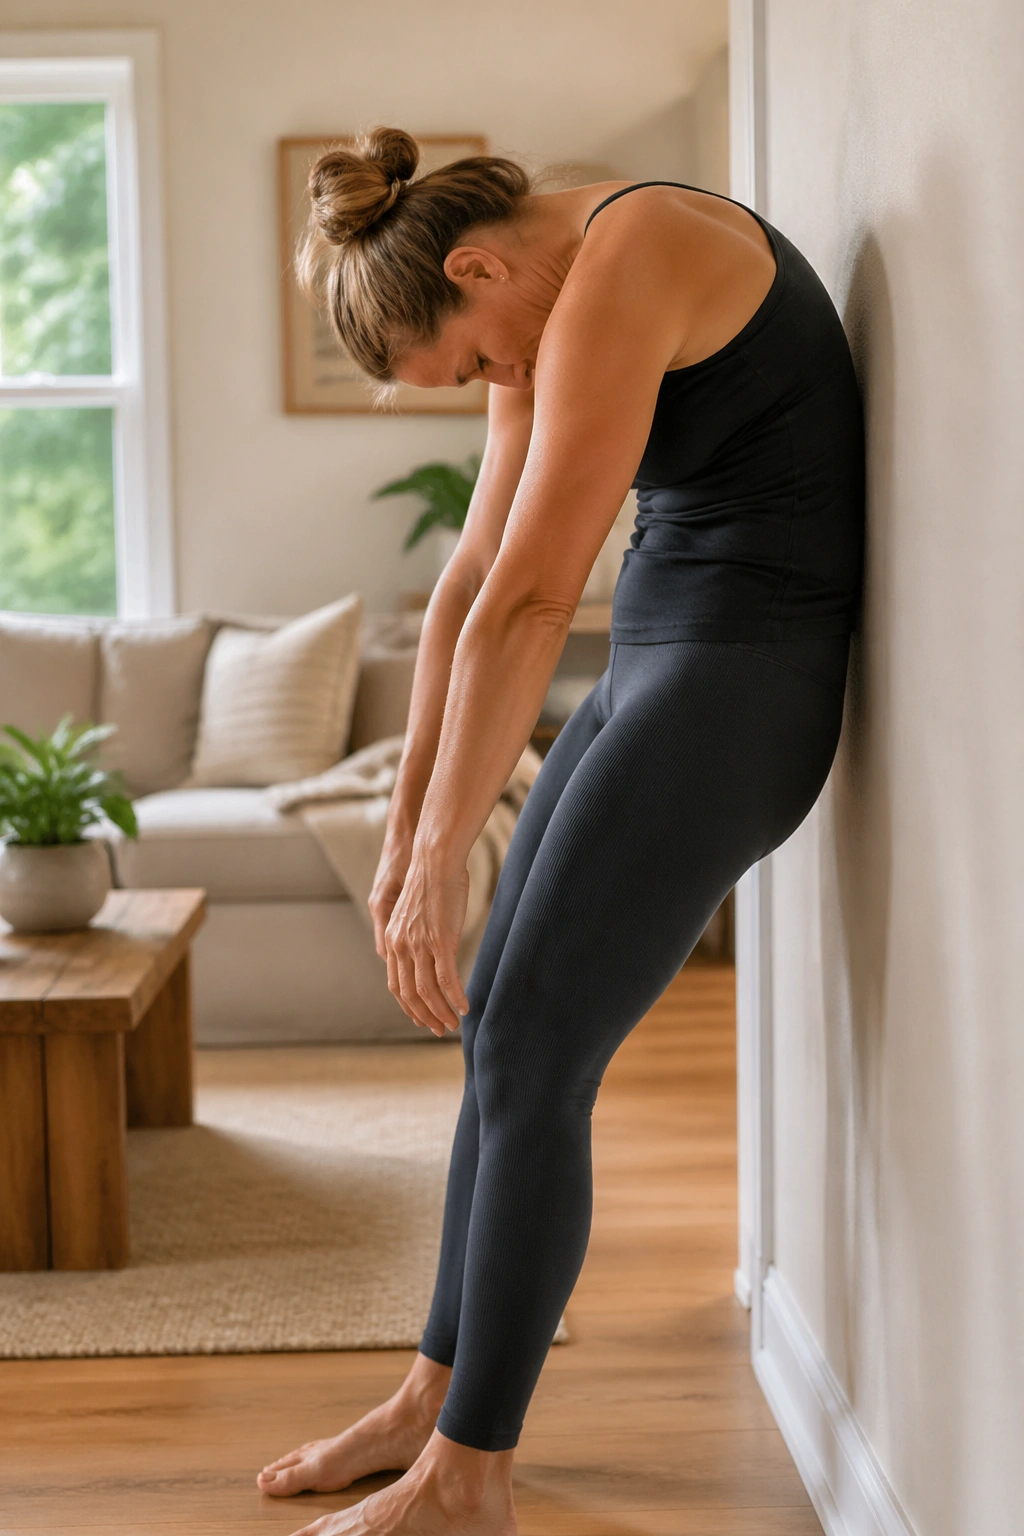
1. Wall Pilates Roll-Downs
The wall roll-down is where I like to start because it teaches the body to stack itself again. That sounds simple, and it is — but simple does not mean useless. A slow roll-down opens the back of the body, wakes up the hamstrings, and reminds the ribs not to flare forward like they’re late for a meeting.
Stand with your back to the wall, feet about 6 to 8 inches out from the baseboard, and let your knees stay soft. Exhale as you tuck your chin, then peel your spine away from the wall one section at a time until your hands hang toward the floor or you reach your comfortable limit. Come back up slowly, stacking the spine from the low back to the neck.
How to keep it gentle on tight backs
- Keep the bend in your knees small if your hamstrings feel tight.
- Stop the descent the moment your lower back starts to pinch.
- Think “curl down, stack up” instead of folding all at once.
- Take 4 to 6 slow reps, not a rushed set of 15.
One good rep tells you more than five sloppy ones.
2. Wall Squat with Arm Reach
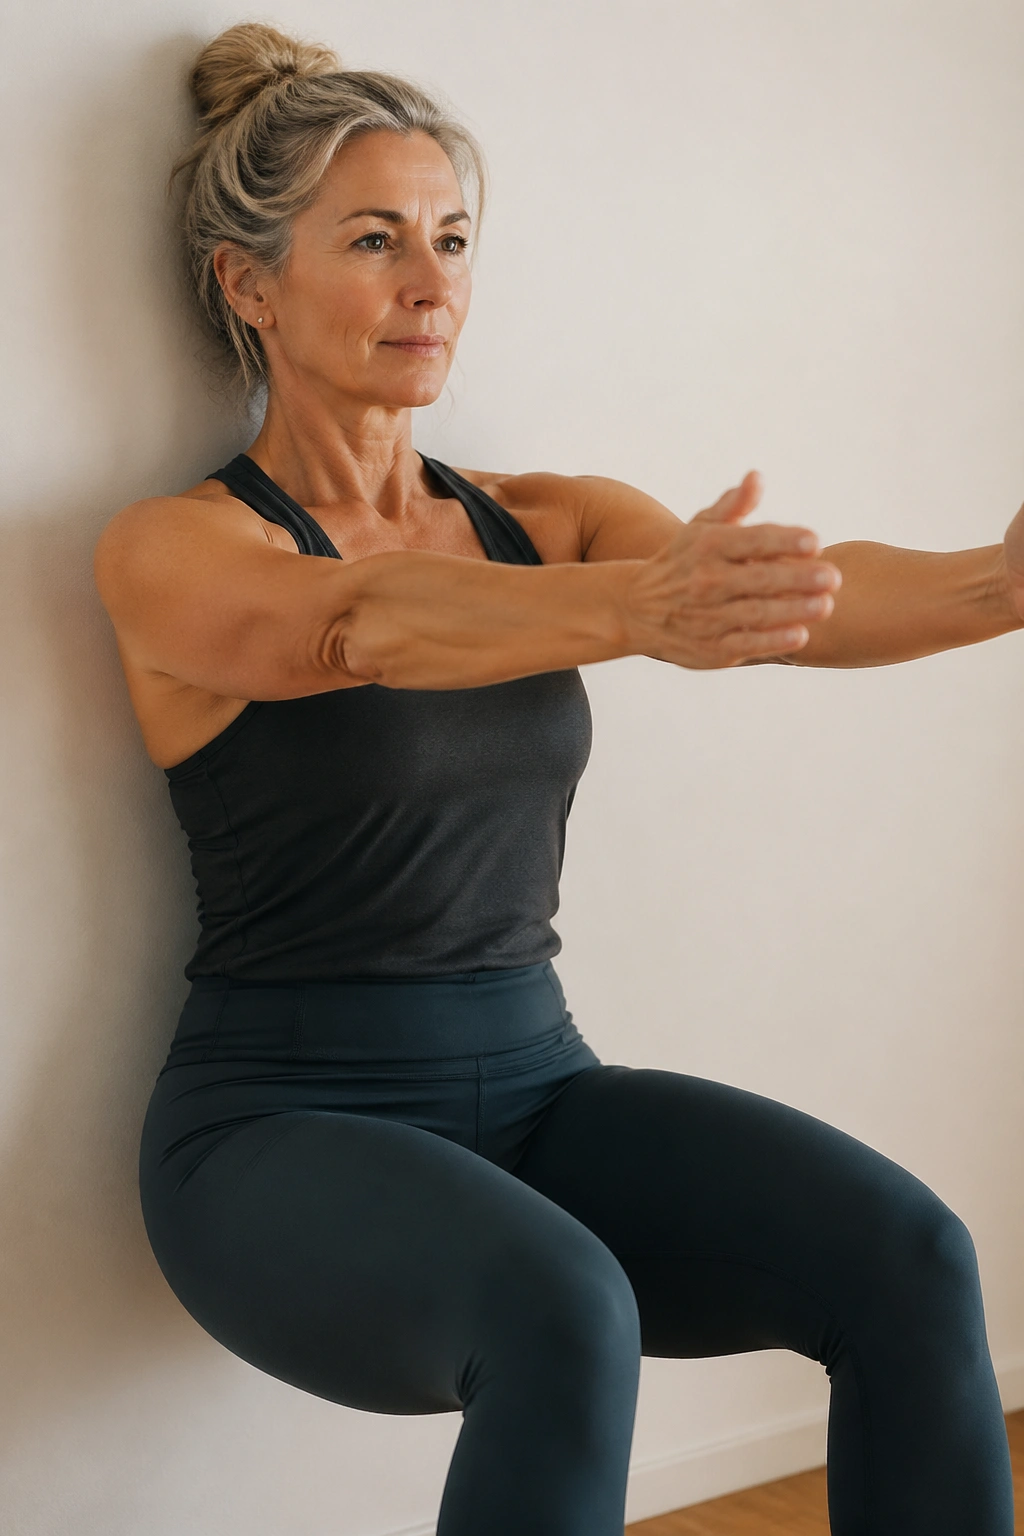
Why does a squat feel different when the wall is there? Because the wall removes the wobble and makes your trunk work harder. You cannot lean forward and cheat as easily, which means your glutes, thighs, and core all have to show up on purpose.
Stand with your back against the wall and walk your feet forward until your knees can bend without pinching. Slide down into a shallow squat, usually somewhere around a 45-degree bend at the knees if that feels comfortable, then reach your arms forward or overhead as you hold the position. If you want more work, pulse up and down 3 to 5 inches for 8 to 10 reps.
What to watch for
- Keep your knees tracking over the middle toes.
- Press the whole foot into the floor, especially the heels.
- Do not let the low back arch away from the wall.
- Hold for 15 to 30 seconds, then stand and rest.
A wall squat can look mild from across the room. Up close, it burns.
3. Wall Bridge
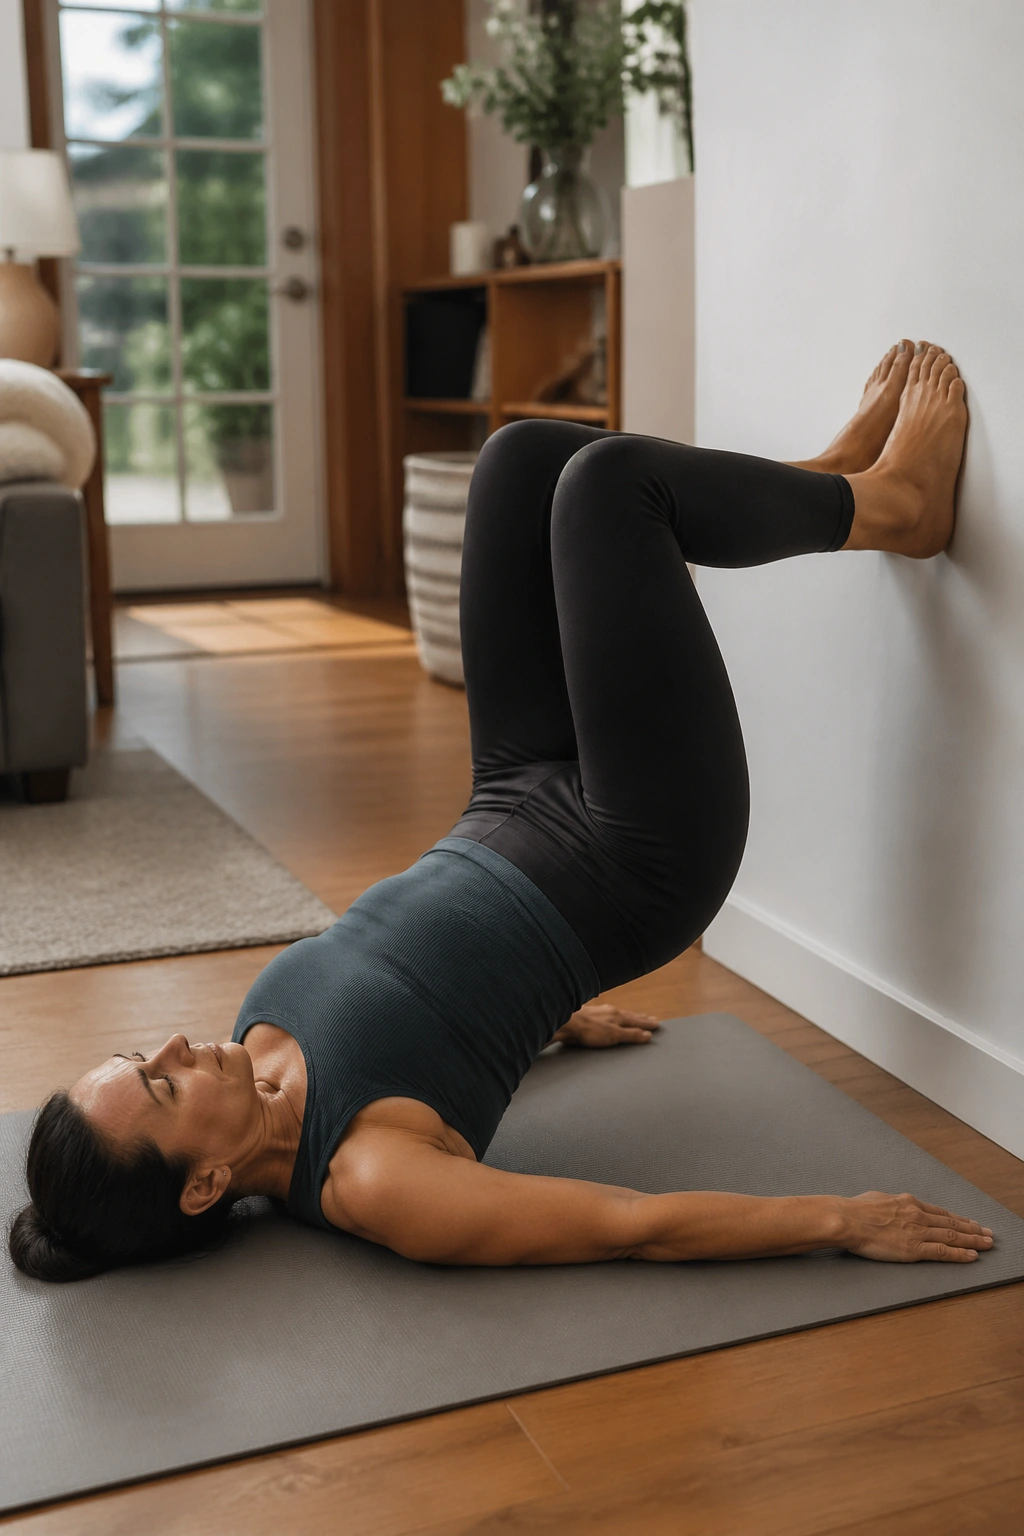
If your glutes have gone a little sleepy, this is the move to wake them up. A wall bridge gives you the same back-side strength work as a floor bridge, but the wall adds a clear target and often helps people feel their hamstrings and glutes working together instead of letting the low back take over.
Lie on your back with your calves up on the wall and your knees bent about 90 degrees. Press your heels into the wall, draw your lower ribs down, then lift your hips until your body makes a straight line from shoulders to knees. Pause for one to two seconds at the top, then lower with control.
Why the wall helps the glutes wake up
- The wall keeps your feet from sliding.
- The angle makes it easier to feel even pressure through both heels.
- The lifted position reduces the urge to fling the hips up.
- You can keep the movement small and still get a real muscle response.
If your hamstrings cramp, move your feet a little lower on the wall. If your lower back feels it more than your glutes, shorten the range and squeeze the glutes before you lift. 8 to 12 slow reps is usually enough to make the point.
4. Wall Dead Bug
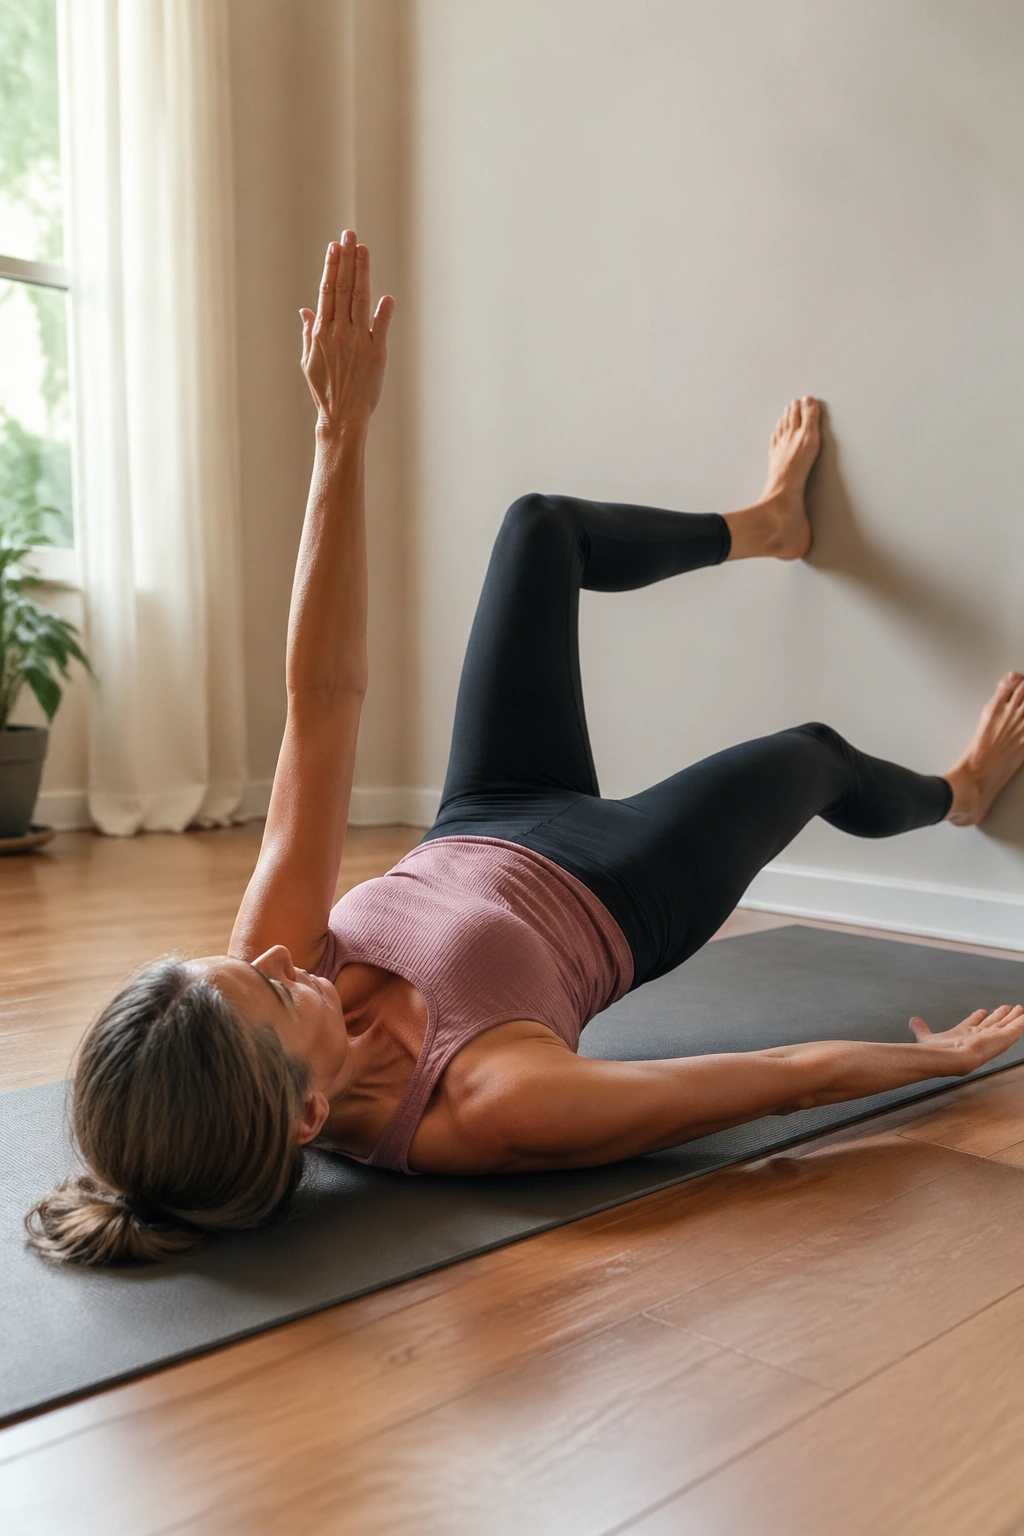
Can a core drill feel calm and hard at the same time? Yes. That is the strange, useful beauty of the wall dead bug. Your arms and legs get a target, your pelvis gets feedback, and your deep core has to stabilize instead of letting the lower back arch.
Lie on your back with your feet pressed into the wall and your knees bent. Reach both arms toward the ceiling. As you exhale, lower one heel toward the floor or slide one leg away from the wall a few inches while the opposite arm reaches overhead. Return with control, then switch sides.
Make the exhale do the work
- Exhale before the limb moves.
- Keep the ribs heavy, not puffed up.
- Move slowly enough that the low back stays quiet.
- Aim for 6 to 8 reps per side.
If you feel your back arching, make the movement smaller. Much smaller. The point is not to see how far the leg can go; the point is to keep the pelvis still while the limbs move around it. That is the whole game here.
5. Wall Push-Up
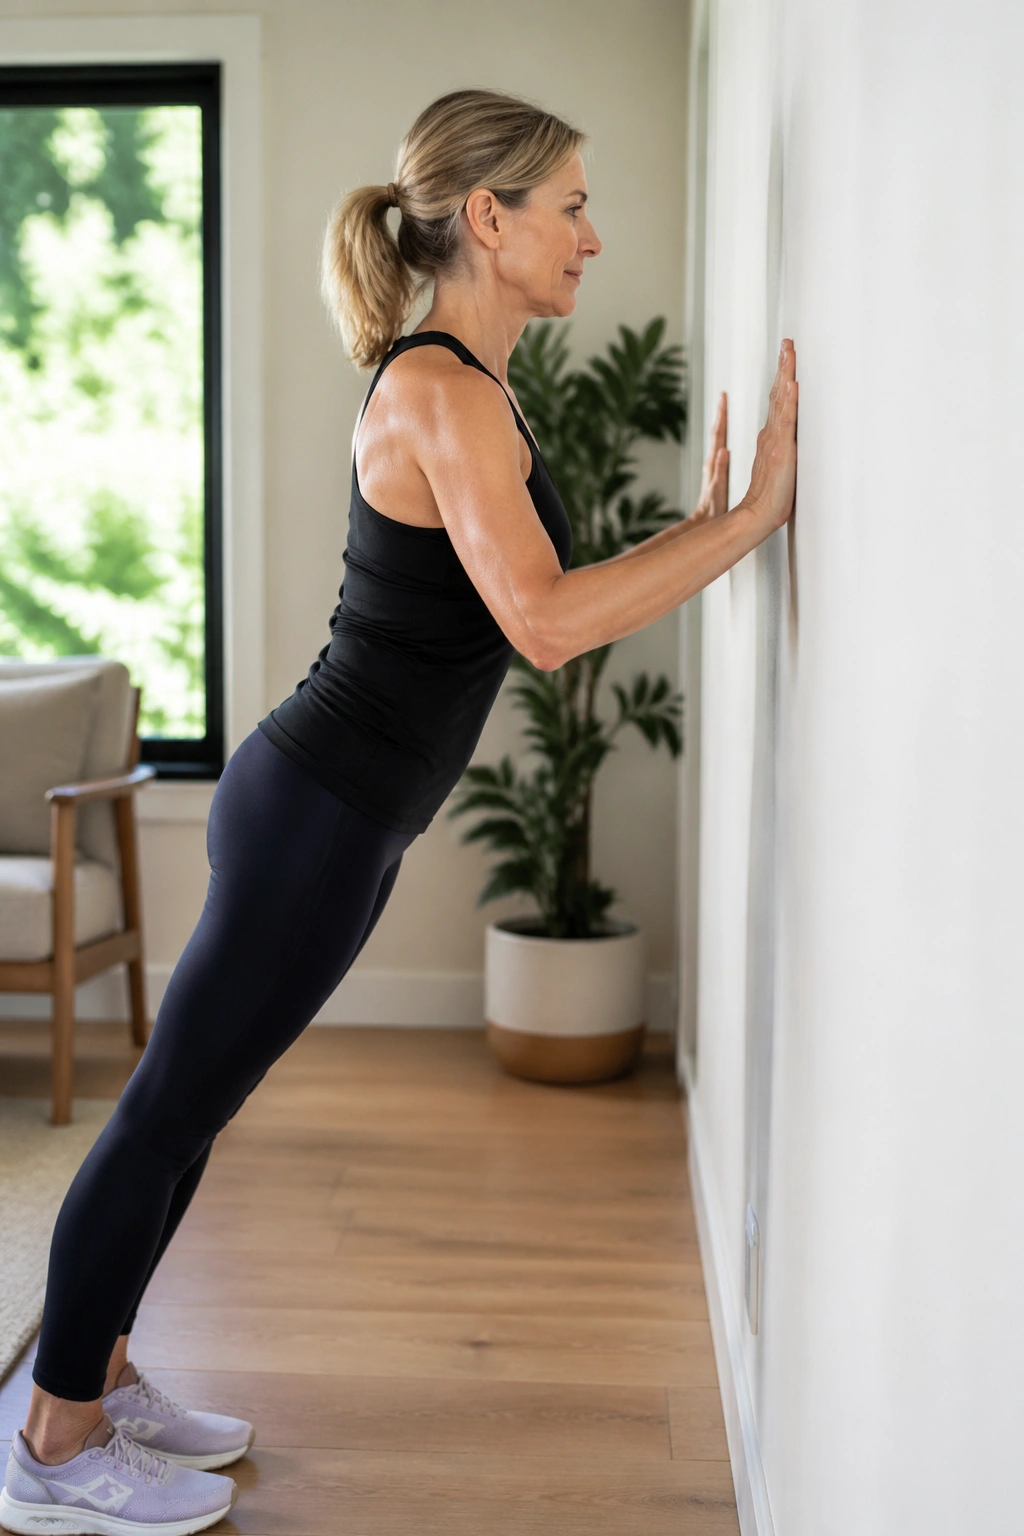
Wall push-ups are not the lazy version. They are the version that lets you focus on shoulder position, chest strength, and controlled tempo without fighting the floor. For women who have spent years sitting, typing, driving, or carrying bags on one side, this one pays off faster than it looks like it should.
Place your hands on the wall at chest height, a little wider than shoulder-width. Walk your feet back until your body forms a straight line from head to heels, then bend your elbows and lower your chest toward the wall for about three seconds. Press back to the start without shrugging your shoulders up around your ears.
A slow wall push-up builds more than arm strength. It teaches the shoulder blades to move smoothly, which is useful if reaching overhead sometimes feels stiff or pinchy.
If wrists get cranky, turn your hands slightly out or drop to forearms on the wall. 2 to 3 sets of 8 to 15 reps is a solid place to live for a while.
6. Wall Plank
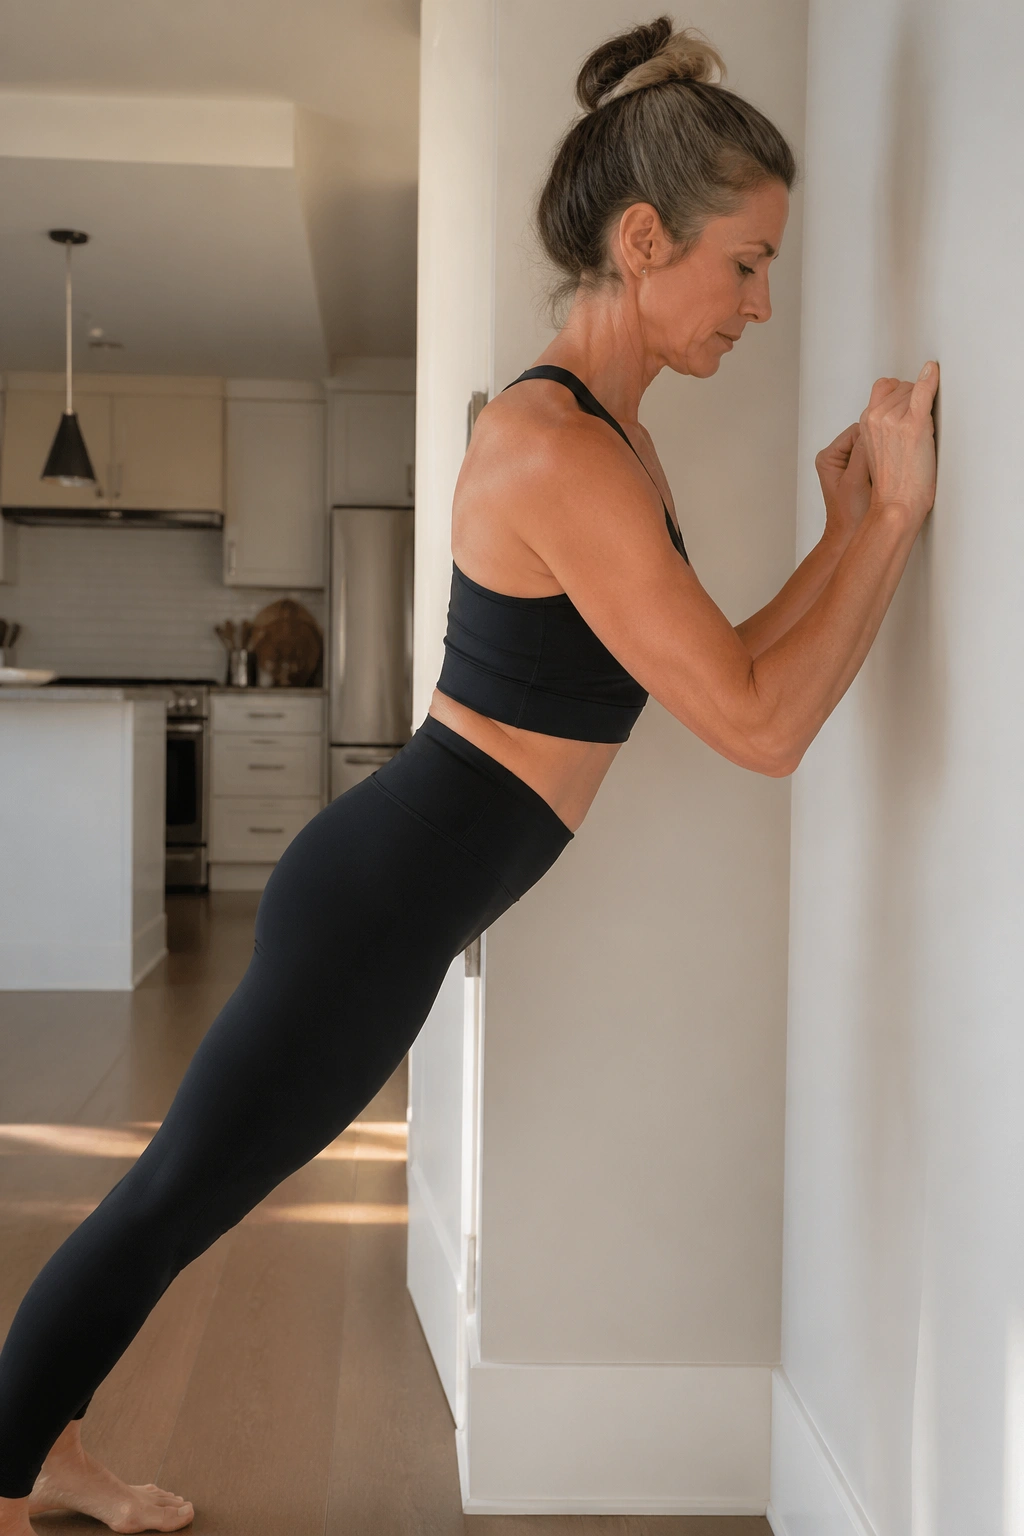
The first 10 seconds feel easy. Then the abs start whispering, and a few breaths later the whisper turns into a complaint.
That is the wall plank. Forearms or hands press into the wall, the body leans forward at an angle, and the core has to hold everything together without letting the ribs flare or the lower back sag. It is a very good exercise for women over 40 because it builds front-body strength without the harshness of a full floor plank.
Keep your feet far enough back that you feel real tension, but not so far that you start doing a standing push-up by accident. Squeeze the glutes lightly, pull the ribs in, and hold for 15 to 40 seconds. If you want more challenge, walk your feet a few inches farther from the wall.
Where to place your feet
- Closer to the wall for a beginner-friendly hold.
- Farther back for more core and shoulder work.
- Forearms on the wall if wrists do not love extension.
- Hands on the wall if you want a little more shoulder challenge.
Do not chase a giant range here. Small, tidy alignment beats a dramatic lean every time.
7. Wall Angels
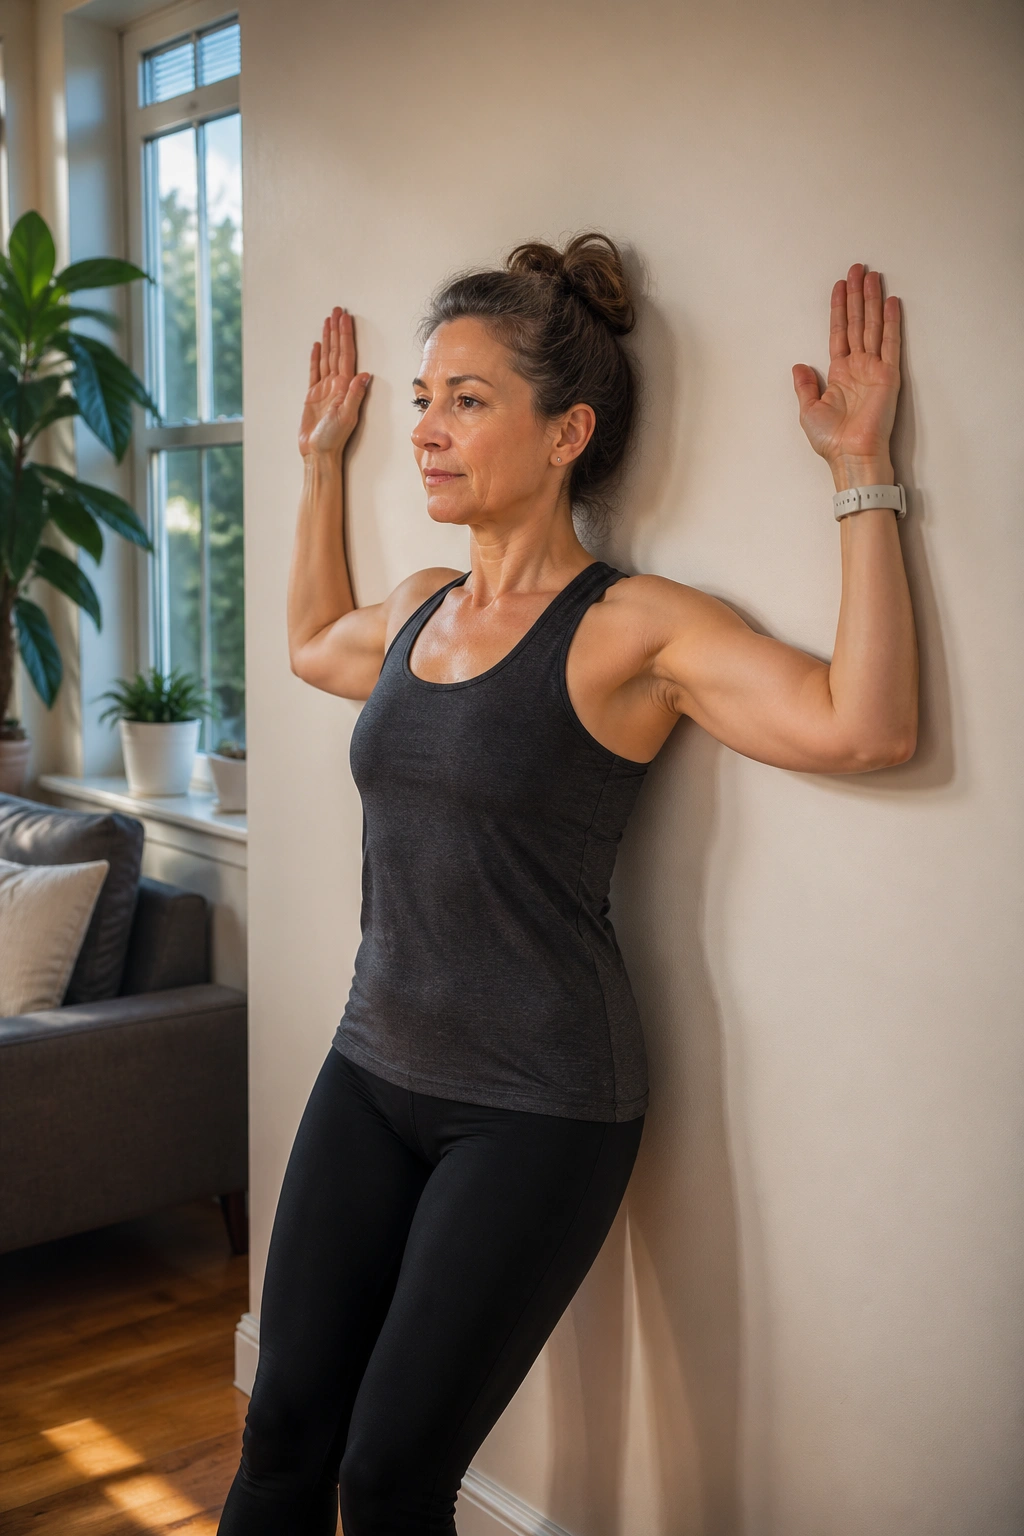
Posture work gets boring because it looks easy. Wall angels are one of those moves that expose the truth fast. If your chest is tight, your upper back is stiff, or your shoulders like to creep upward, the wall will let you know within three reps.
Stand with your back to the wall, feet a few inches forward, and flatten your lower ribs gently toward the wall. Bend your elbows into a goalpost shape. Slide the arms up as far as you can without shrugging, then lower them with control. If your wrists or elbows lift away, that’s fine. Don’t force it.
Small range beats forcing contact
- Keep the chin slightly tucked.
- Press the back of the ribs toward the wall.
- Move slowly through the sticky part.
- Use 6 to 10 reps instead of chasing a perfect picture.
The useful thing about wall angels is that they show you where you are tight without making a drama out of it. A smaller range done cleanly is better than a forced range with rib flare and shoulder hiking.
8. Side Leg Lift at Wall
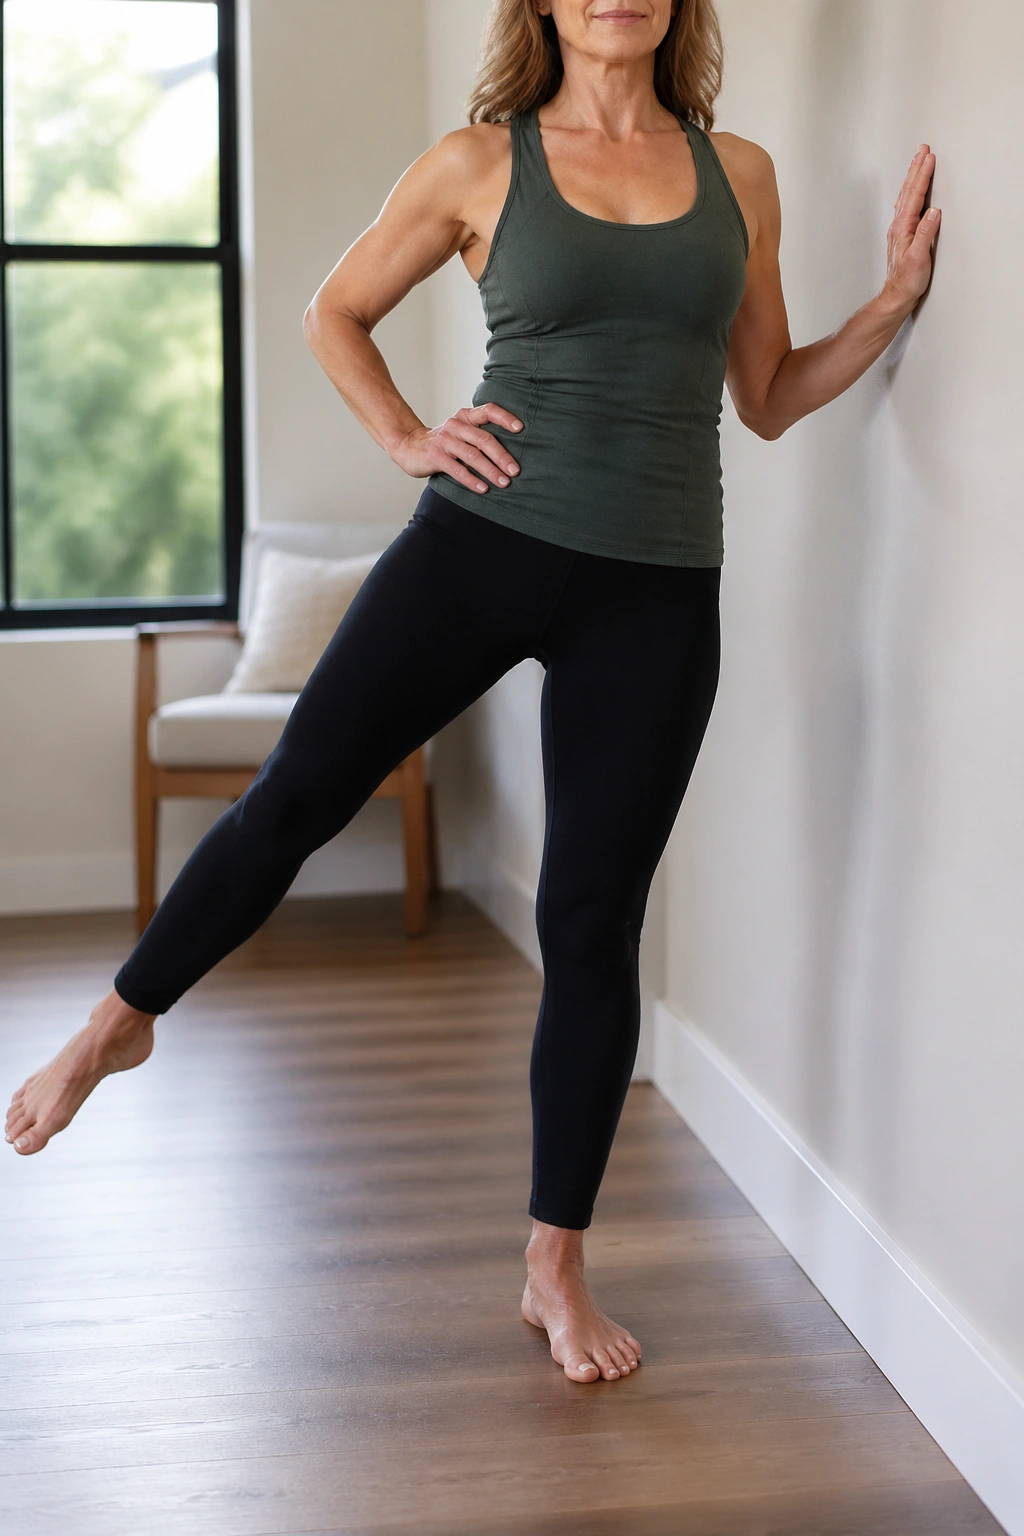
If one hip always feels lazy on stairs, this is the move to keep. The side leg lift works the glute medius, which sounds technical, but all you need to know is that it helps keep the pelvis level when you stand on one leg, walk, or climb.
Stand sideways to the wall and lightly rest one hand on it. Shift your weight into the standing leg and lift the outer leg out to the side a few inches, keeping the toes pointed forward or only slightly down. Lower slowly. The movement should come from the outer hip, not from swinging the whole body.
What to feel in the working hip
- A burn along the side of the butt.
- A steady standing leg, not a bent, wobbly one.
- A torso that stays tall instead of tipping.
- 10 to 15 reps per side done with control.
A lot of people kick too high and turn this into a lower-back exercise. Don’t do that. Keep the lift small, pause for a second at the top, and let the wall help you stay honest.
9. Wall March
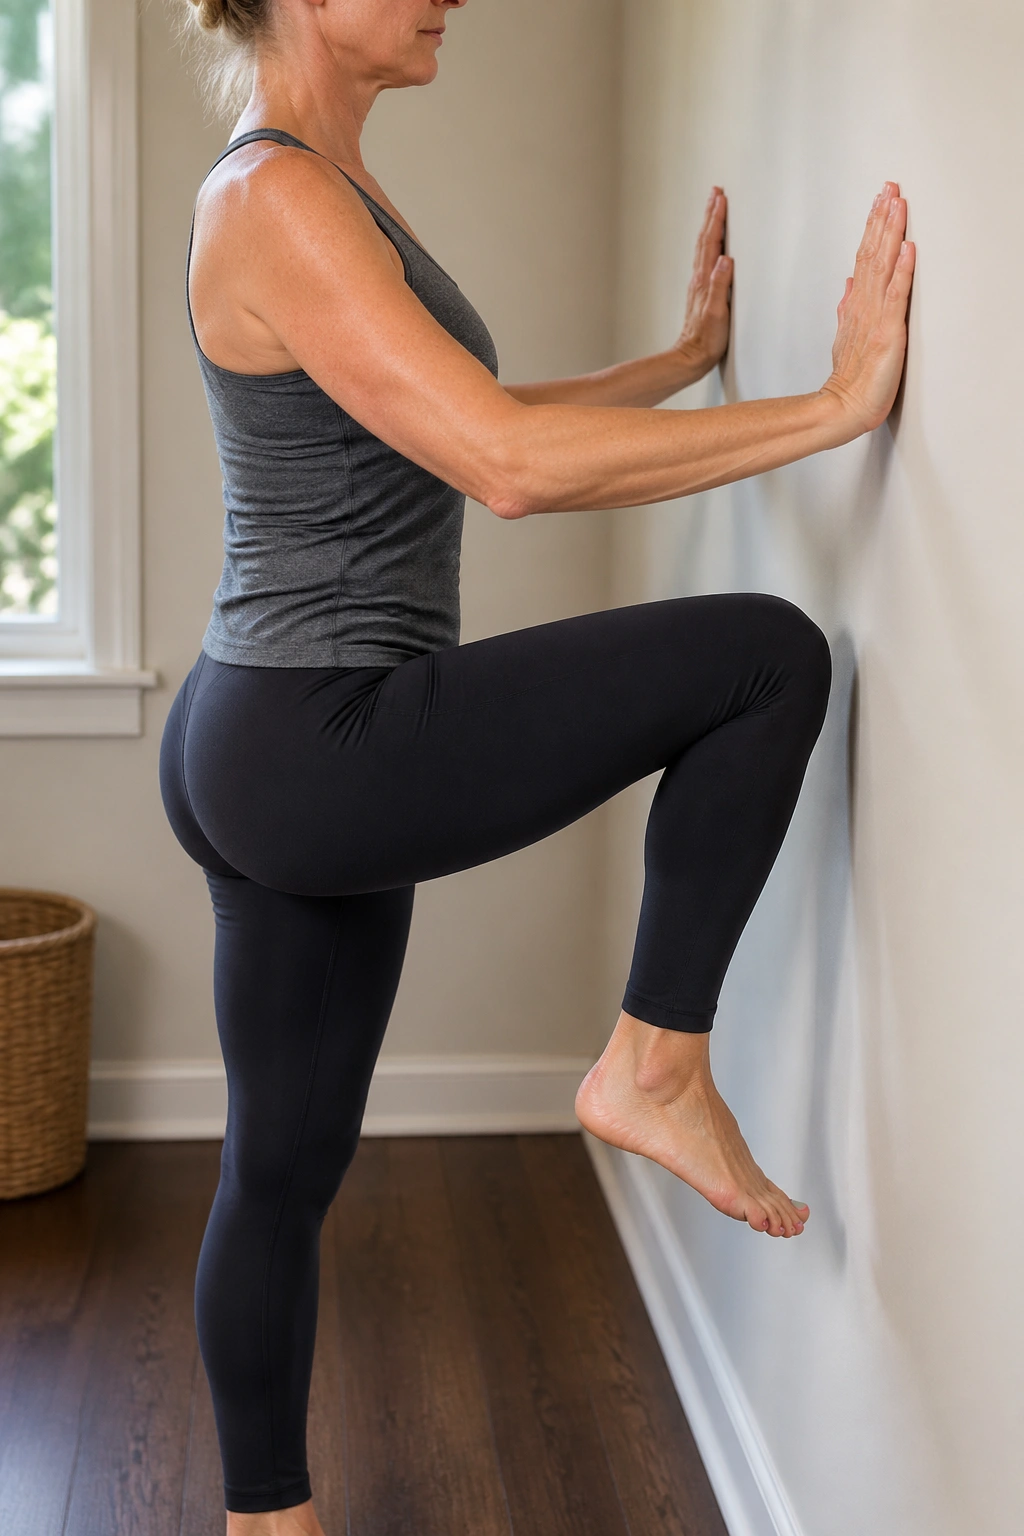
A march looks too easy until you try to keep your torso from bobbing around. That is where the wall earns its keep again. It gives you something to touch lightly while the hips and balance system do the real work.
Stand facing the wall with one or both hands resting there for support. Lift one knee toward hip height, hold for a beat, lower it, then switch sides. Keep the standing leg active and the pelvis level. Think of this as standing core control mixed with a little balance training.
A wall march is useful on days when you feel stiff but not ready for a big workout. It wakes up the hip flexors, the standing glute, and the muscles around the ankle without making the session heavy.
Do 8 to 12 marches per side or work for 30 seconds at a steady pace. If you start leaning into the wall, back up and use less hand pressure. That tiny correction matters more than people think.
10. Wall Sit with Heel Raise
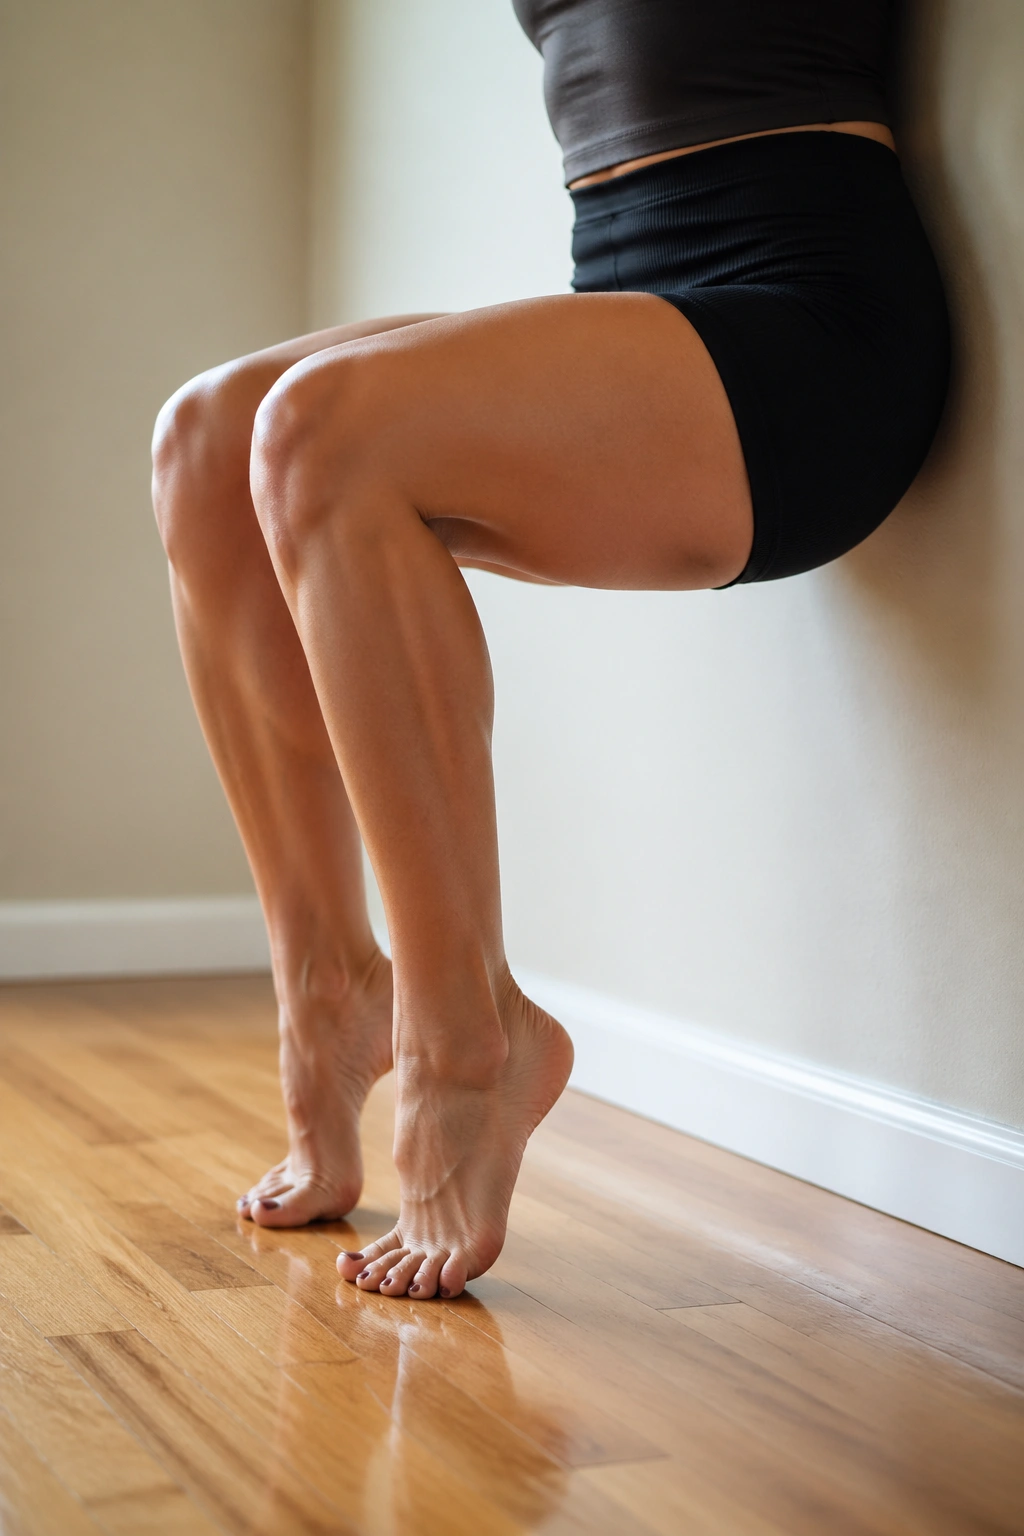
This one burns fast.
A wall sit with heel raise layers calf work on top of quad work, which means you get two useful things at once: stronger thighs and more ankle control. For women over 40, that matters because the lower leg often gets ignored until stairs, uneven pavement, or long walks make it obvious.
Slide down the wall into a comfortable squat. Keep the knees from drifting too far forward if they are sensitive, and start with a higher angle if needed. Once you are steady, lift both heels an inch or two off the floor, lower them, and repeat while keeping the sit position.
A few details that help
- Stay tall through the chest.
- Keep the knees tracking over the toes.
- Use small heel lifts, not giant calf raises.
- Hold the sit for 20 to 30 seconds, then add 8 to 10 heel lifts.
If your knees grumble, raise the squat a little higher. There is no prize for sitting lower than your body likes. The right depth is the one you can control without wincing.
11. Wall Hip Hinge
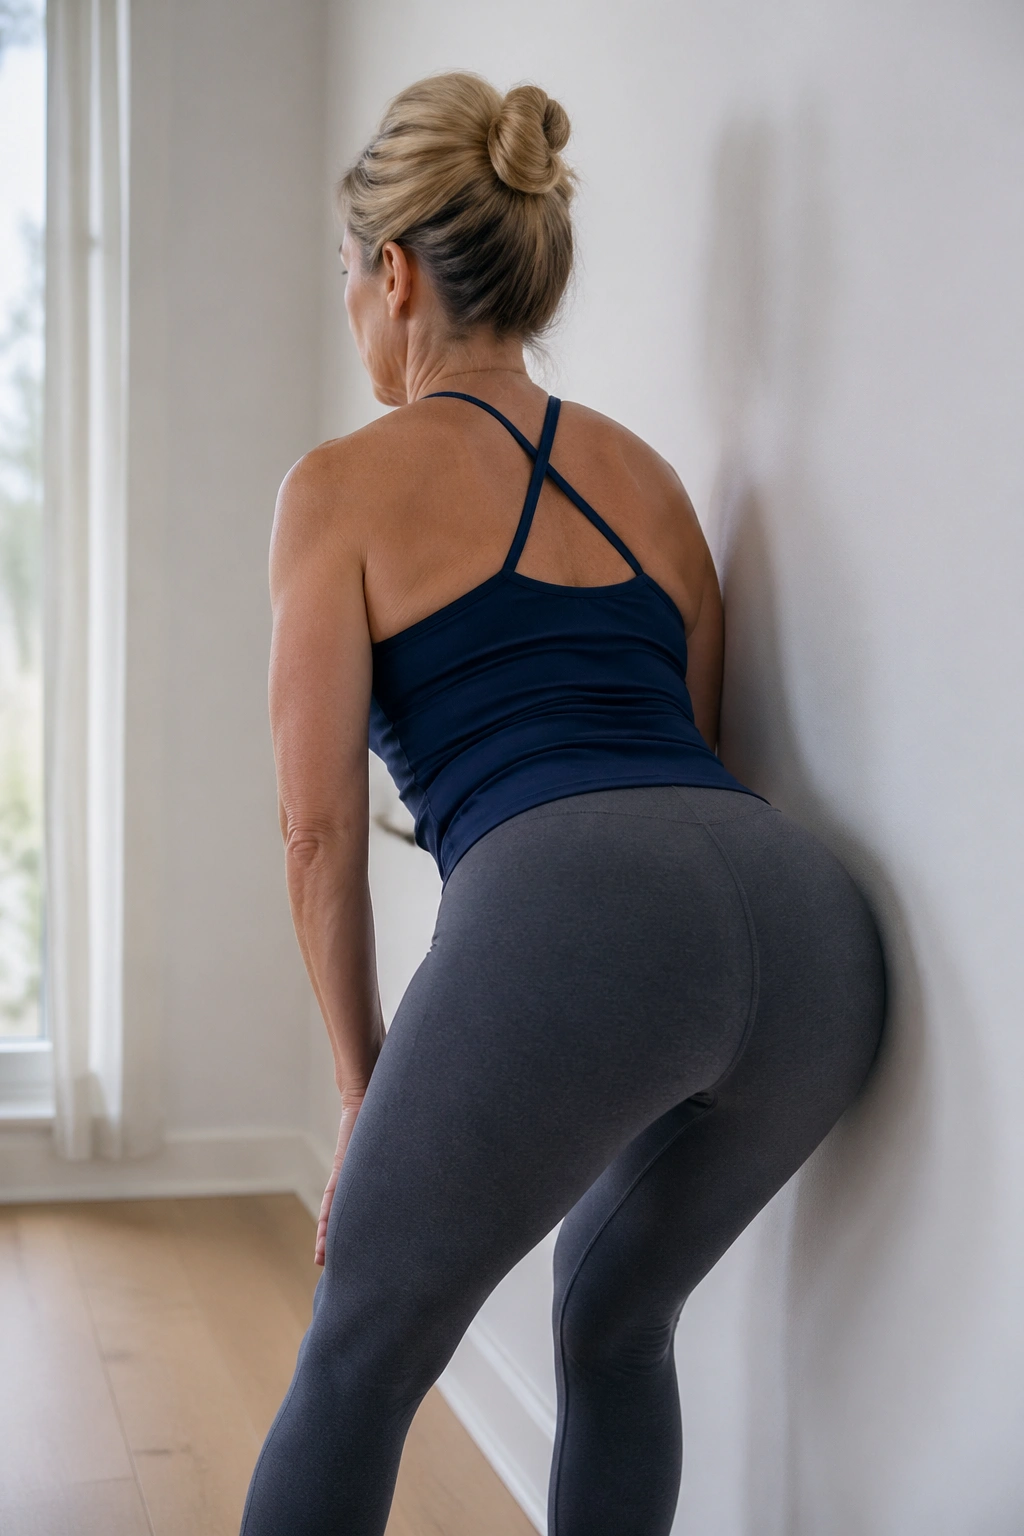
A hip hinge is not a squat.
That is the whole lesson here. In a hinge, the hips move back while the spine stays long, and the wall gives you a place to tap so you know whether you’re doing it right. It is one of the best Pilates-style movement patterns for protecting the lower back while teaching the glutes and hamstrings to share the load.
Stand facing away from the wall, feet about 6 to 10 inches out, knees soft. Push your hips back until your glutes touch the wall, then return to standing by squeezing the glutes and pressing through the feet. The chest stays long, the ribs stay quiet, and the spine does not collapse.
Why it matters for daily life
- Picking up a laundry basket gets safer.
- Bending to a low cabinet feels cleaner.
- The lower back stops doing every job alone.
- The glutes learn to kick in before the spine complains.
Start with 2 sets of 8 reps. If you feel it in the lower back, shorten the range and slow down. The wall tap should feel like a reminder, not a shove.
12. Single-Leg Balance Reach
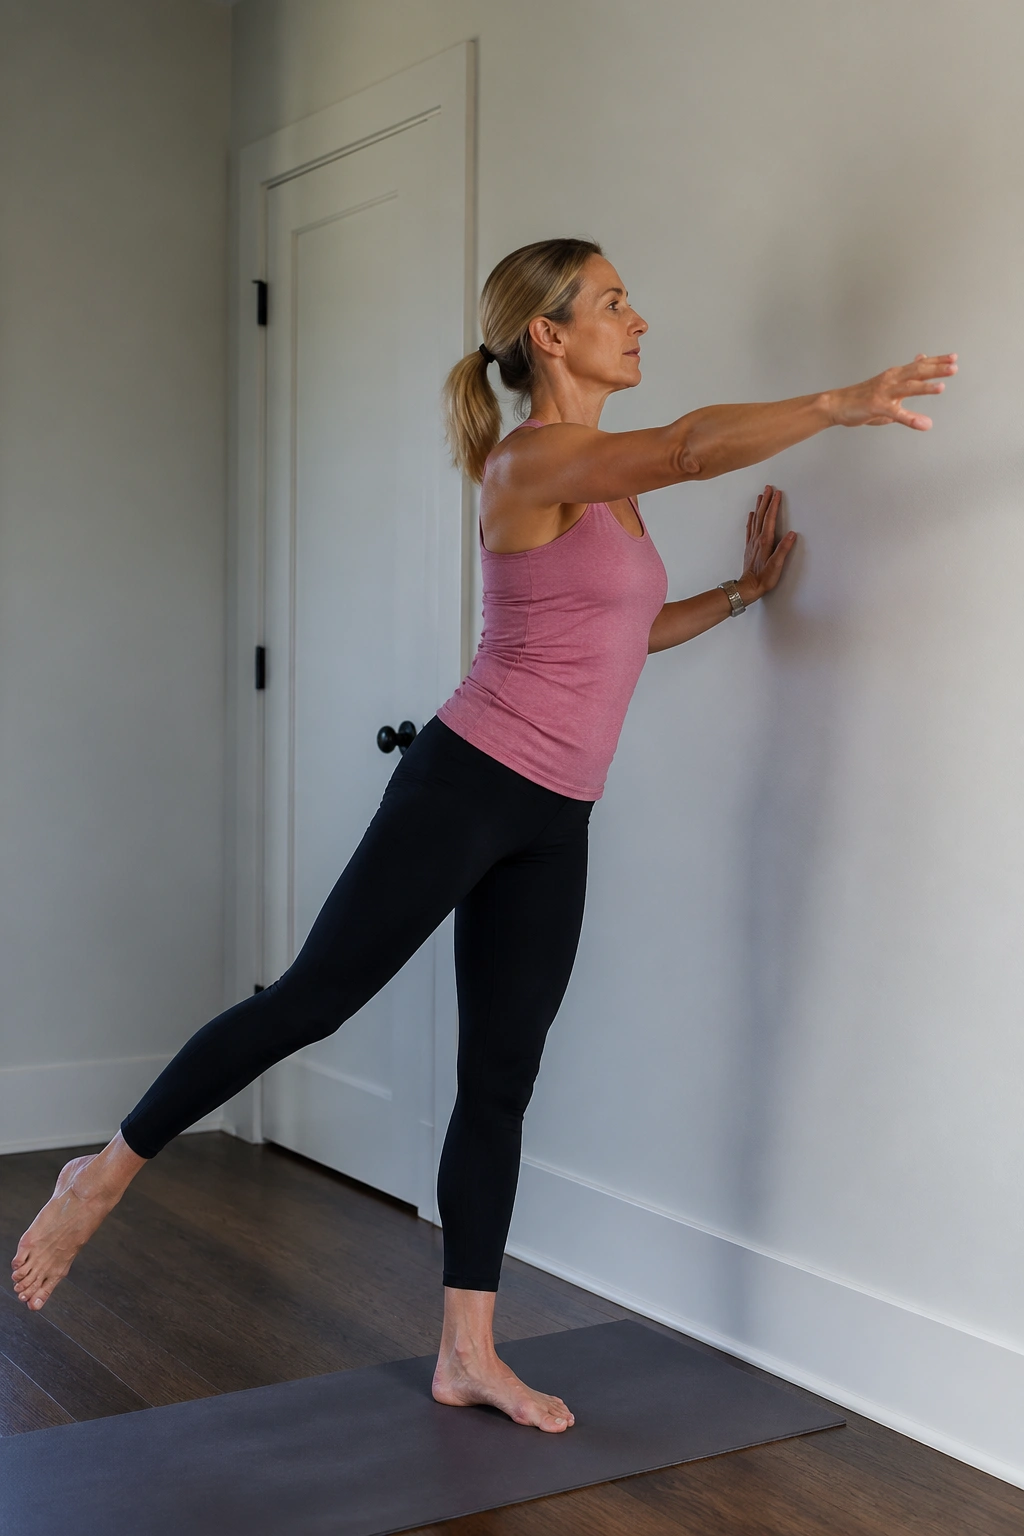
Balance gets trained one shaky second at a time.
Stand side-on to the wall with one hand hovering nearby, not gripping hard. Shift onto one leg, then reach the free leg slightly back while the opposite arm reaches forward, almost like a tiny airplane shape. Hold for a breath, return, and repeat. The move looks graceful when it goes well and a little clumsy when it doesn’t. That is normal.
This exercise builds foot strength, ankle stability, hip control, and confidence on one leg. It also teaches your standing side to stop collapsing into the hip, which is a common habit when the body gets tired.
How to make it harder
- Touch the wall with one fingertip instead of the whole hand.
- Hold the reach for 10 to 20 seconds.
- Keep the standing foot spread wide on the floor — heel, big toe, and little toe all grounded.
- Close the eyes only if you are steady and have space around you.
If the balance wobbles, good. That means you found the edge.
13. Mermaid Side Bend at Wall
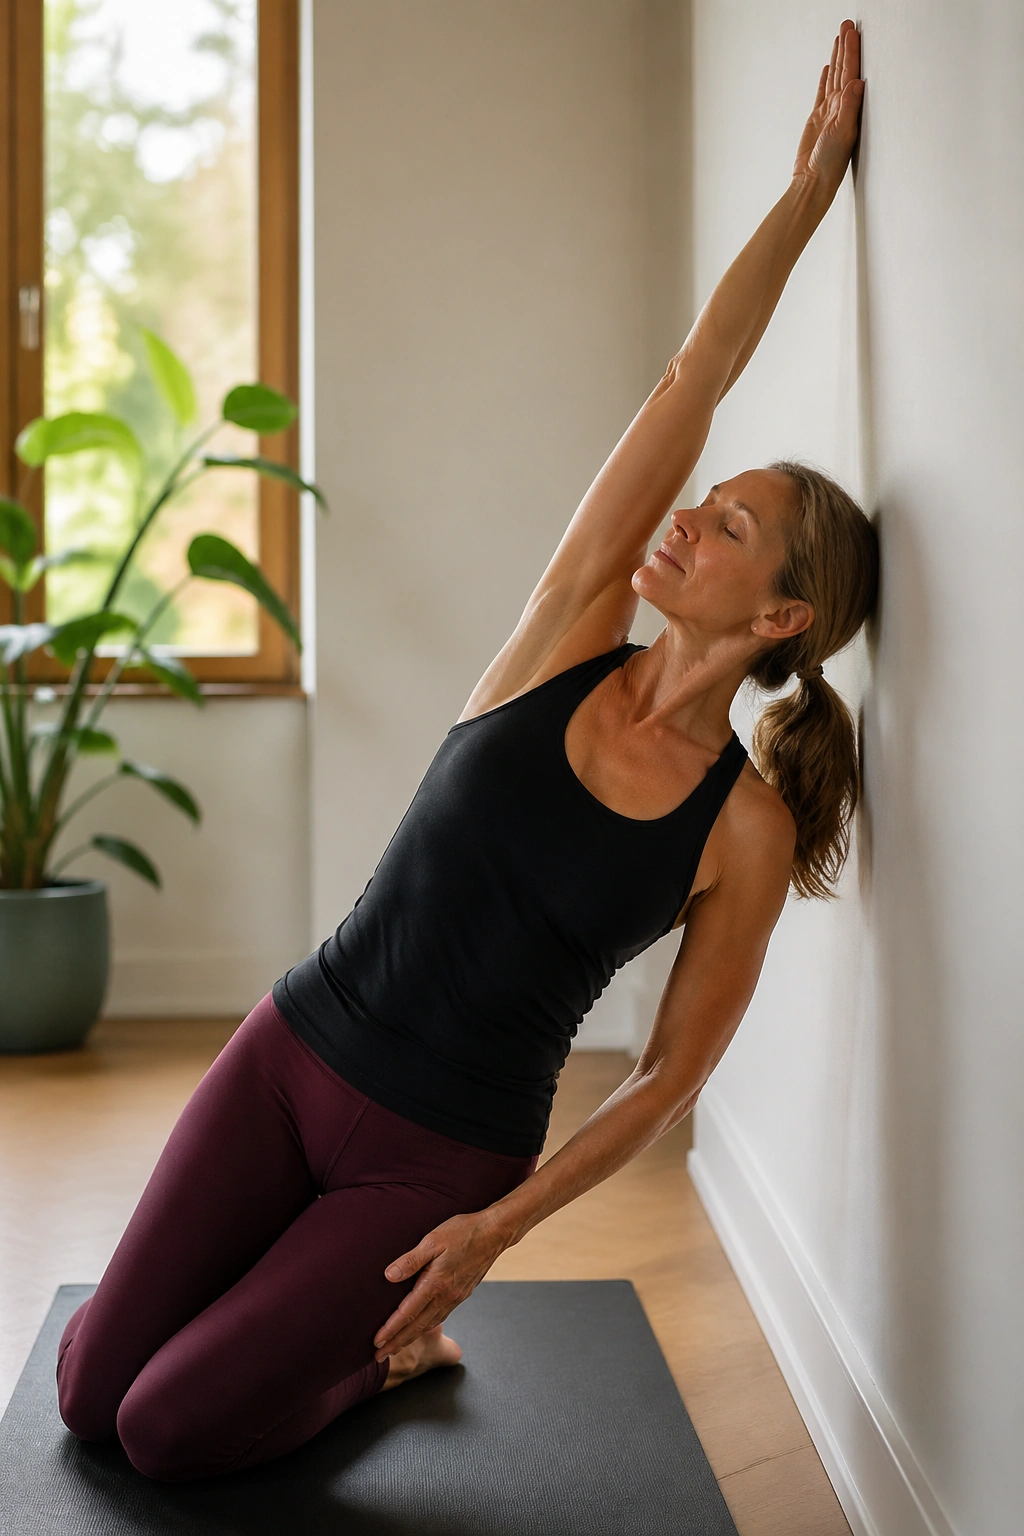
The side body is where stiffness hides. You can have decent posture from the front and still feel glued up through the ribs and waist. The mermaid side bend at the wall opens that area in a way that feels gentle but not pointless.
Stand side-on to the wall and let the hand closest to it slide up as the other hand reaches down the outside of the thigh. Bend away from the wall in a soft arc, keeping both feet rooted and the hips heavy. Breathe into the open side ribs. Come back up slowly, almost like you’re unrolling a towel.
The breath matters here. If you rush it, the movement turns into a neck tug. If you slow it down, the ribs open, the obliques lengthen, and the whole torso feels less compressed.
Do 5 to 8 side bends per side, each one smooth and unforced. Keep the range small if your back is touchy. This is a mobility drill, not a contest.
14. Wall Glute Kickback
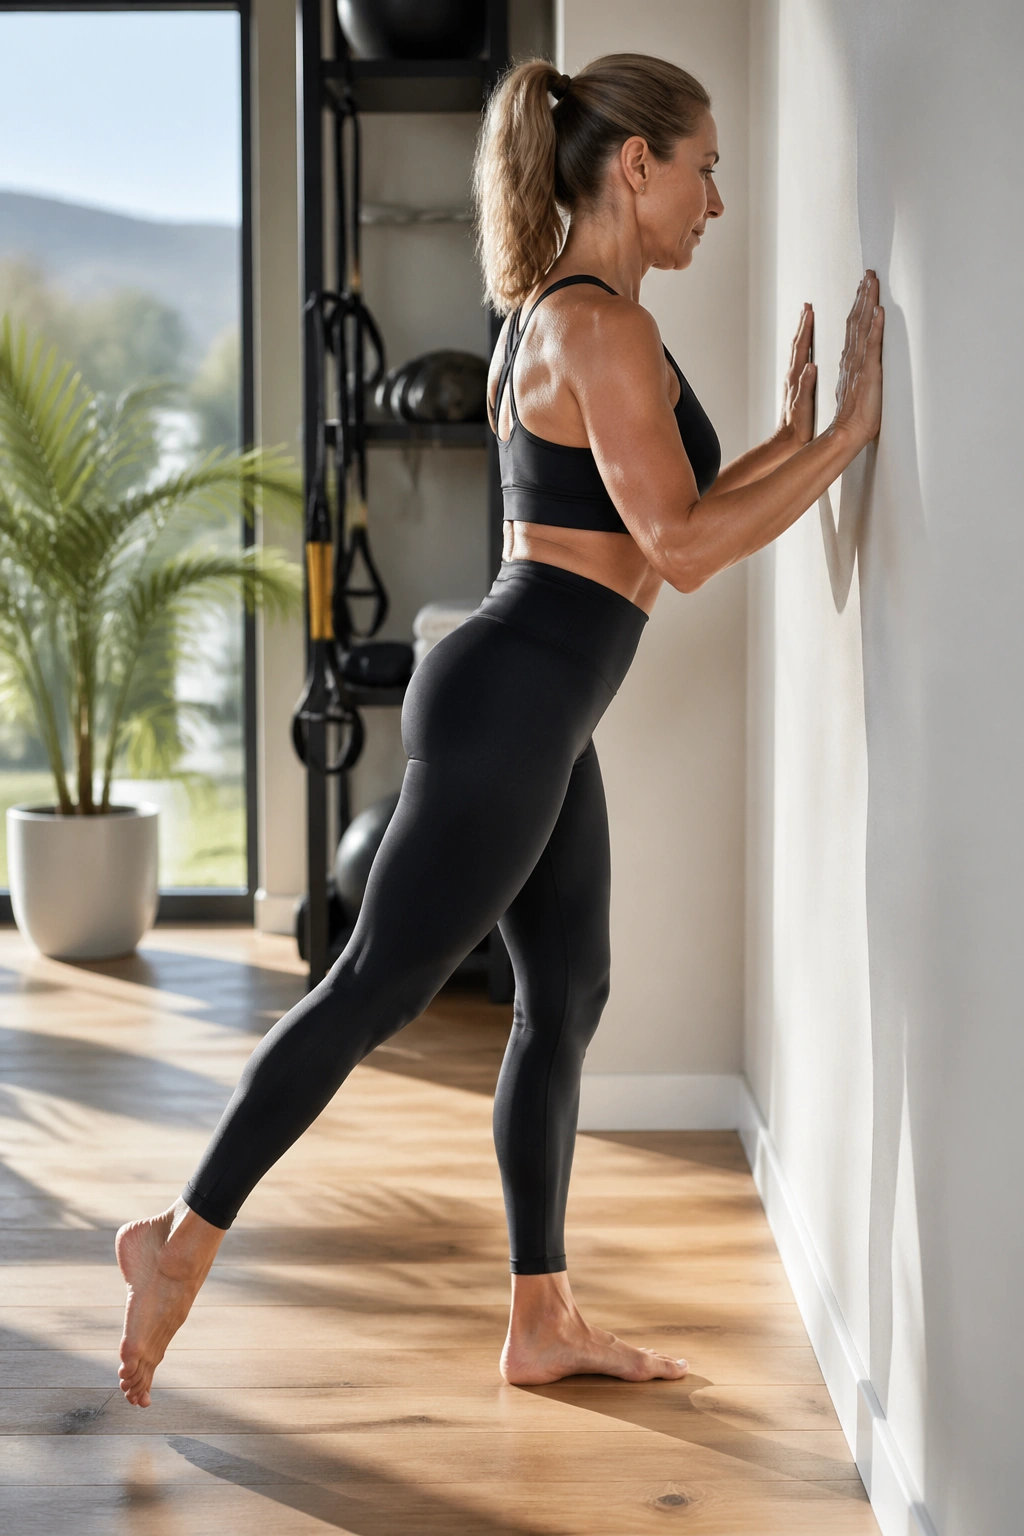
Glute kickbacks can turn into low-back kickbacks in a hurry.
That is the trap. People swing the leg too high, the pelvis tips forward, and suddenly the lower back is doing the work. Keep the range small and the torso steady, and the glute does what it’s supposed to do.
Face the wall, place your hands lightly on it, and step one leg back a few inches with the knee straight or slightly soft. Press the heel backward and up just a little, then lower with control. The motion is tiny, but if you do it right, the standing leg and the glute of the moving leg both have to stay awake.
What to avoid
- Arching the low back.
- Turning the hip open.
- Swinging the leg fast.
- Using momentum to fake the lift.
10 to 12 reps per side is enough. If you want a stronger version, pause for one second at the top and squeeze the glute before lowering. Small work done cleanly beats a big swing every time.
15. Wall Reach-and-Rotate
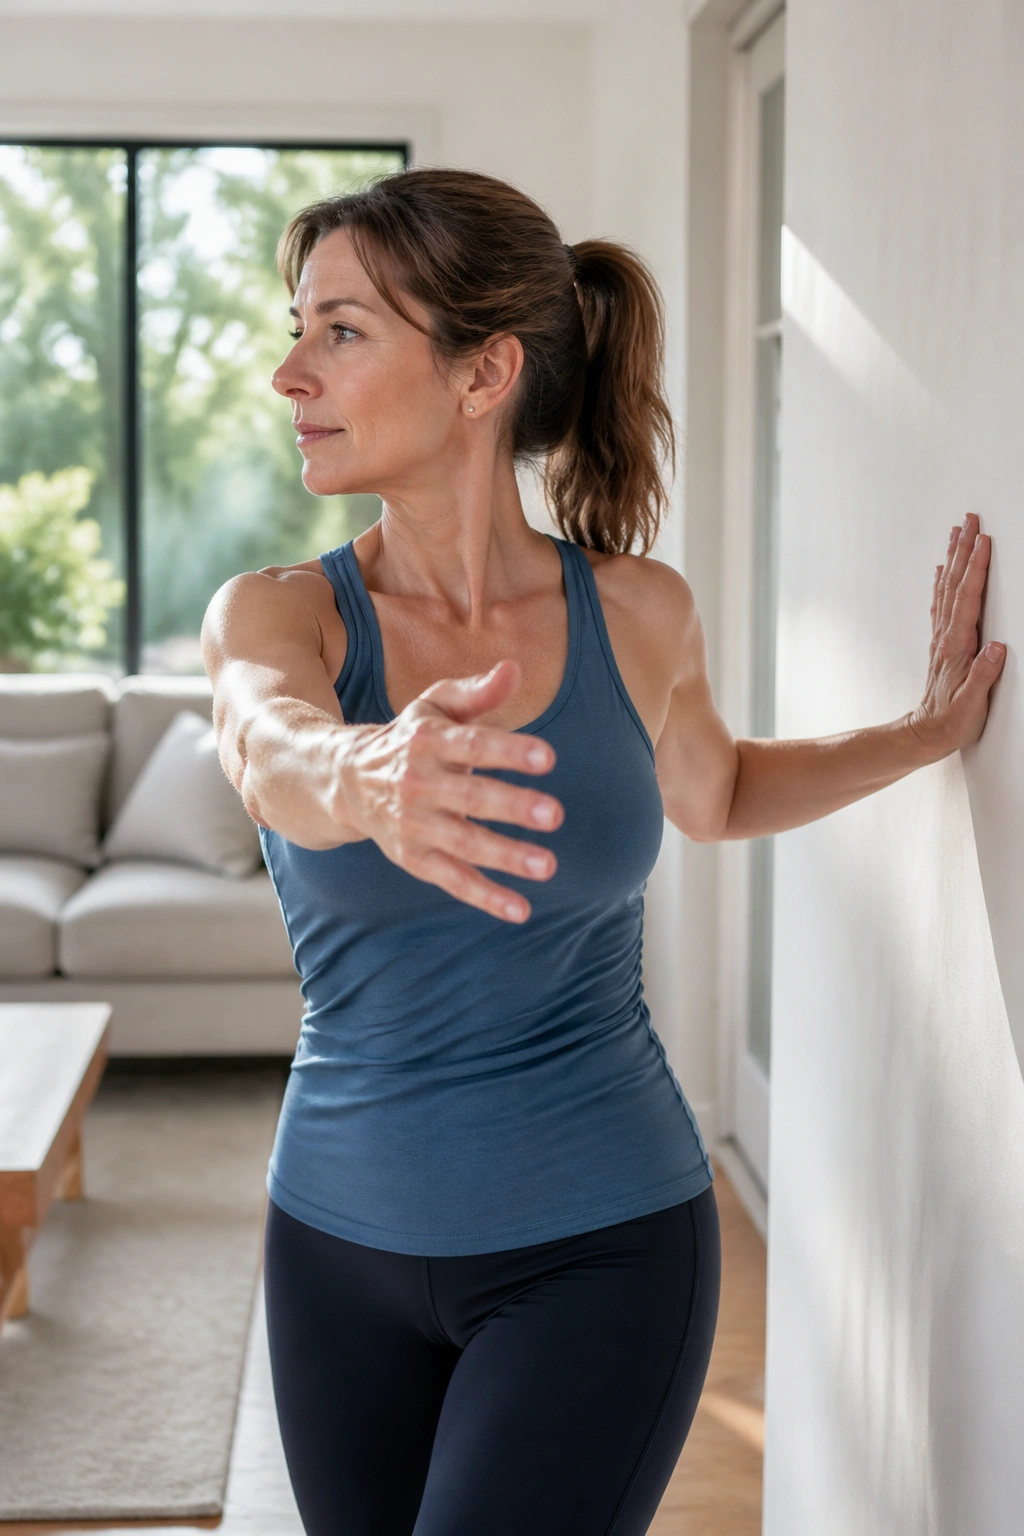
Rotation matters, but it has to come from the right place.
This move is about the ribcage and upper back, not the lower spine. Stand facing the wall, one hand lightly pressed against it for support, and bring the other hand across the body. Rotate the chest a few inches away from the wall as you let the reaching arm open. Then return to center with control. Keep the hips square and the ribs from flaring.
Keep the ribs, not the lower back, in charge
- Rotate only as far as you can keep the pelvis steady.
- Move on the exhale so the ribs soften.
- Think of turning from the sternum upward.
- Do 6 to 8 reps per side.
This is a good one for people who sit a lot or feel stiff when turning to look over a shoulder. It is also a smart warm-up before any session that includes squats, planks, or balance work because the trunk is a little freer afterward.
16. Wall Standing Oblique Crunch
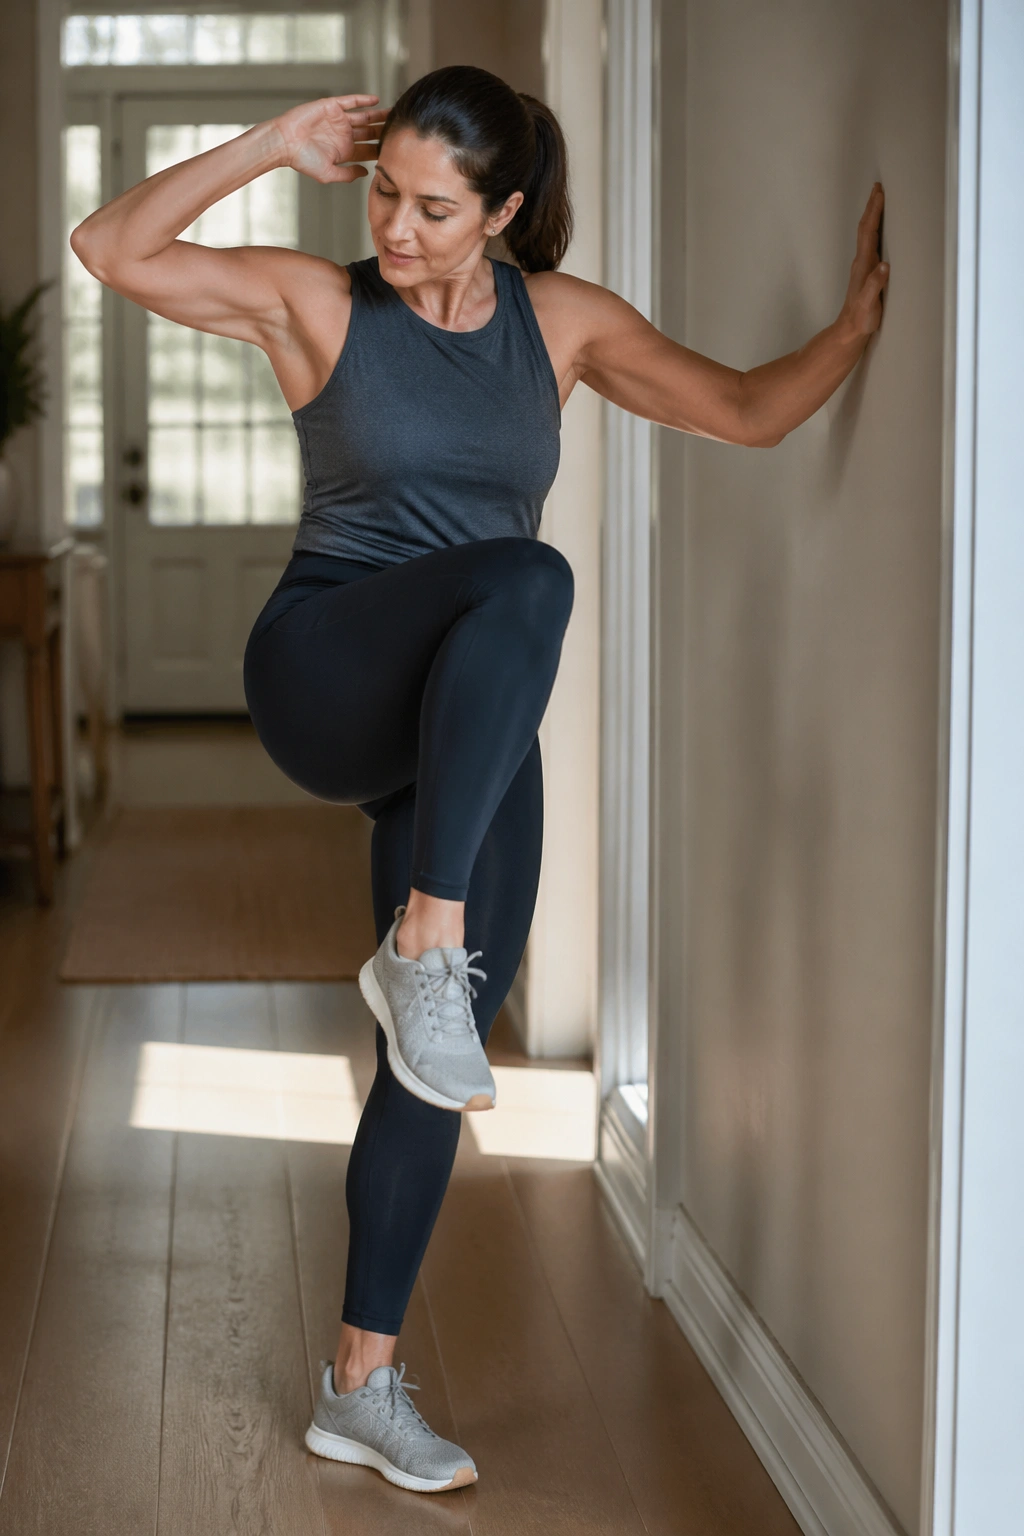
A side crunch is only useful if it stays small.
Stand with one side toward the wall and one hand resting there for balance. Lift the outside knee toward the outside elbow while the torso stays tall, then lower with control. You can also keep the hand behind the head if that feels better, but do not yank the neck. The obliques should do the work, not the shoulder.
This is one of those moves that looks simple and gets messy quickly. People either lean back, swing the leg, or collapse the standing hip. Keep the motion tidy. The goal is a short crunch with a clean return, not a giant twist.
A small crunch is enough
- Lift the knee only as high as you can keep balance.
- Keep the chest broad.
- Pause for a beat at the top.
- Aim for 8 to 12 reps per side.
If your balance feels sketchy, keep two fingers on the wall. That tiny bit of support is not cheating. It is smart.
17. Wall Calf Raise and Toe Lift
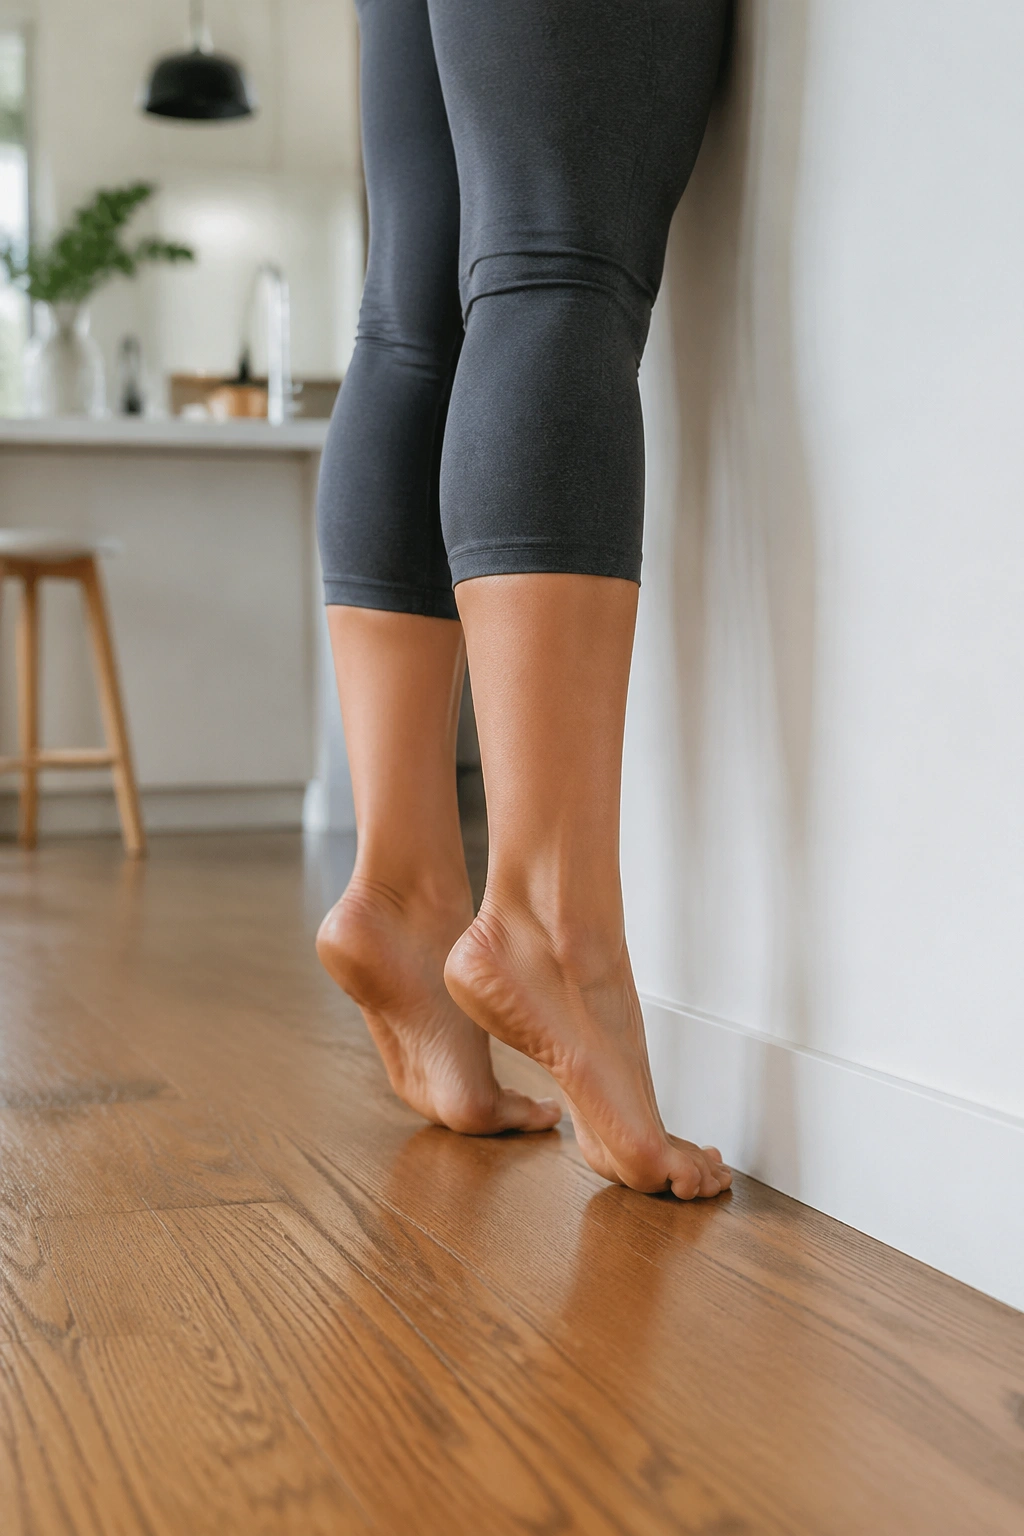
Feet do more work than people think.
This little lower-leg sequence helps with ankle mobility, foot strength, and the sort of balance that keeps you steady on stairs or uneven ground. Stand facing the wall with one hand lightly touching it. Rise onto the balls of the feet for a calf raise, lower slowly, then lift the toes toward the shins for a toe lift. The shin muscles will wake up fast.
Do the two movements as a pair: up onto the toes, down, then toes up while the heels stay grounded. That back-and-forth is simple, but it teaches the lower leg to handle both push-off and control.
- 8 to 12 calf raises
- 8 to 12 toe lifts
- Slow the lowering phase for more challenge
- Keep the knees soft, not locked
If you have foot pain, keep the range small and focus on control. Strong feet love small, steady work.
18. Wall Split Squat
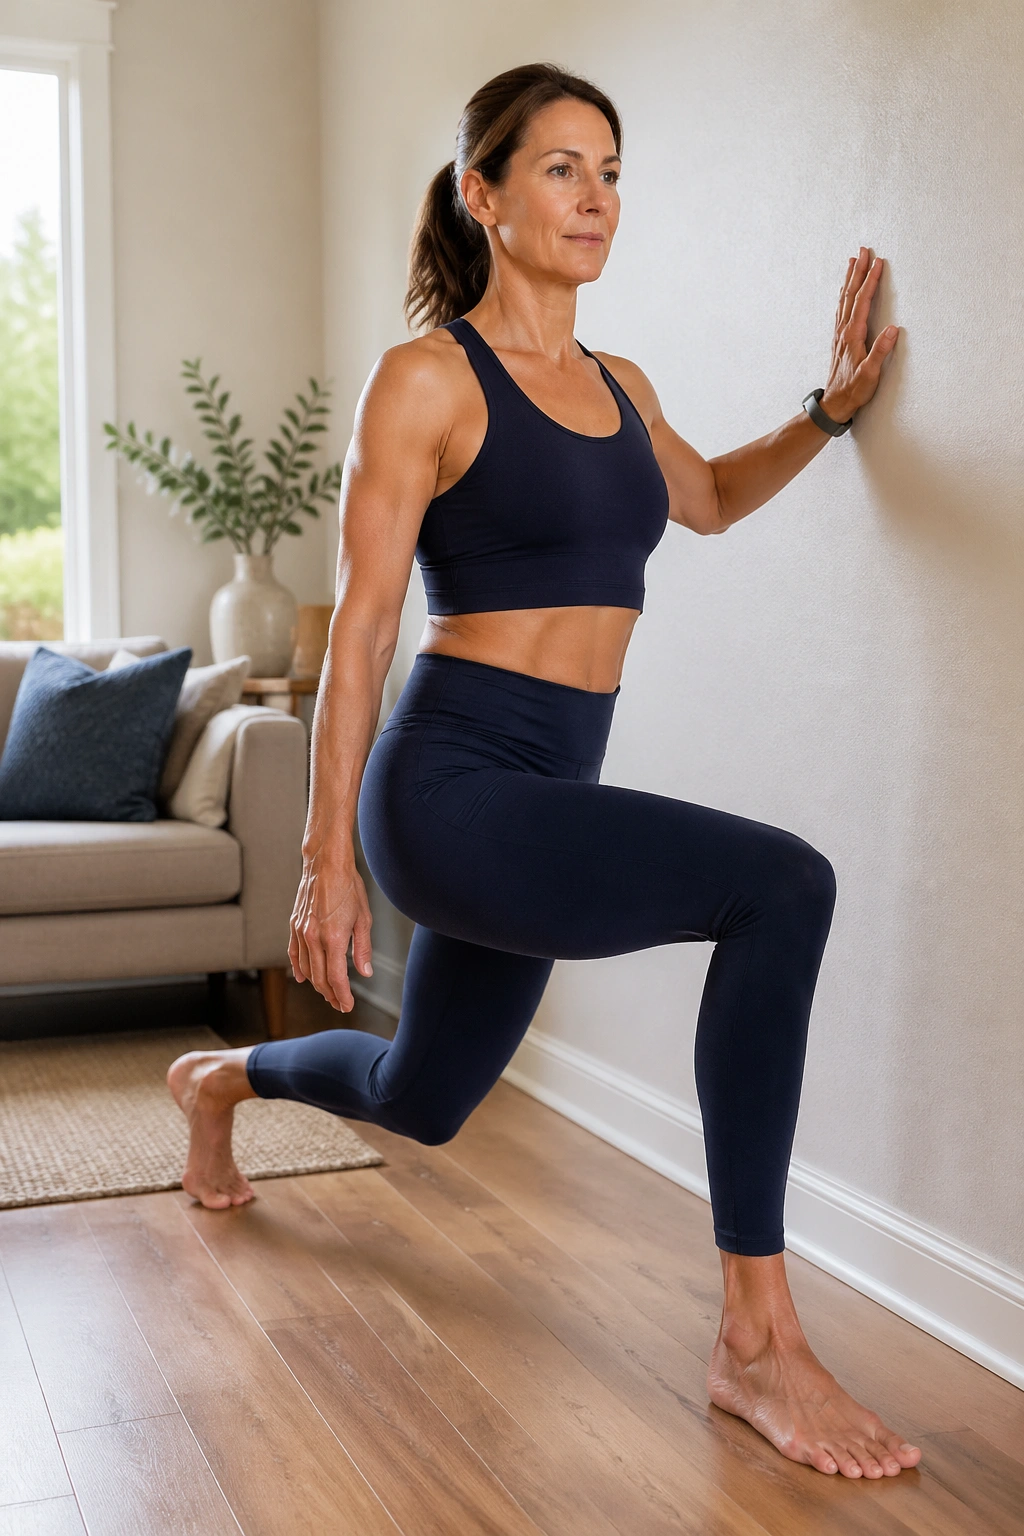
The split squat is the closest thing on this list to a full-body wake-up.
Stand in a staggered stance with one hand on the wall for light support. Keep most of your weight in the front leg, bend both knees a few inches, and lower straight down rather than lunging forward. The front heel stays rooted. The back heel can stay lifted. Come back up through the front glute and quad.
Make your stance work for you
- Shorter stance if balance is the issue.
- Longer stance if the front knee feels crowded.
- Keep the torso tall.
- Use 6 to 10 reps per side before switching.
This move builds leg strength, hip stability, and balance all at once, which is why I like it near the end of a session. It feels practical. Walking, climbing stairs, and standing up from a low seat all ask for this pattern in one form or another. If your knees are sensitive, stay shallow and slow the descent. No need to prove anything to the wall.
Final Thoughts
A wall is useful because it tells the truth. It shows you when the ribs flare, when the shoulders hike, and when the hips try to cheat. That feedback is gold, especially when you want stronger legs, steadier balance, and a core that does more than hold you upright for ten minutes.
The best wall Pilates sessions are not the longest ones. They’re the cleanest ones. Pick a small group of moves, move slowly, and stop before form gets sloppy. A short session with good alignment beats a longer one that turns into flailing.
If you want one simple way to organize these, start with a mobility move, add a squat or hinge, then finish with one balance drill and one core exercise. That combination covers a lot of ground without beating up the joints.
