



Barre exercise is deceptively simple. You walk into a room, grab a light bar or the back of a sturdy chair, and prepare to move in ways that look almost too small to matter. Then, five minutes in, your legs are shaking, your core is on fire, and you realize that small, controlled movements are often the most demanding way to train. The brilliance of this style of fitness is that it relies on high repetition and isometric holds to fatigue the muscle fibers without the need for heavy, cumbersome equipment.
Twenty minutes is the sweet spot for this type of training. It is short enough to fit into a busy morning before the coffee pot finishes brewing, yet long enough to perform a complete, fatigue-based routine that leaves you feeling sculpted and energized. You do not need a studio to get these results. Your living room chair, a clear patch of floor, and a commitment to maintaining your form are all the equipment required. The following twenty workouts are designed to target specific areas, using the principles of alignment, constant tension, and focused breath to deliver the classic barre burn in a tight, efficient timeframe.
1. Chair-Assisted First Position Plies
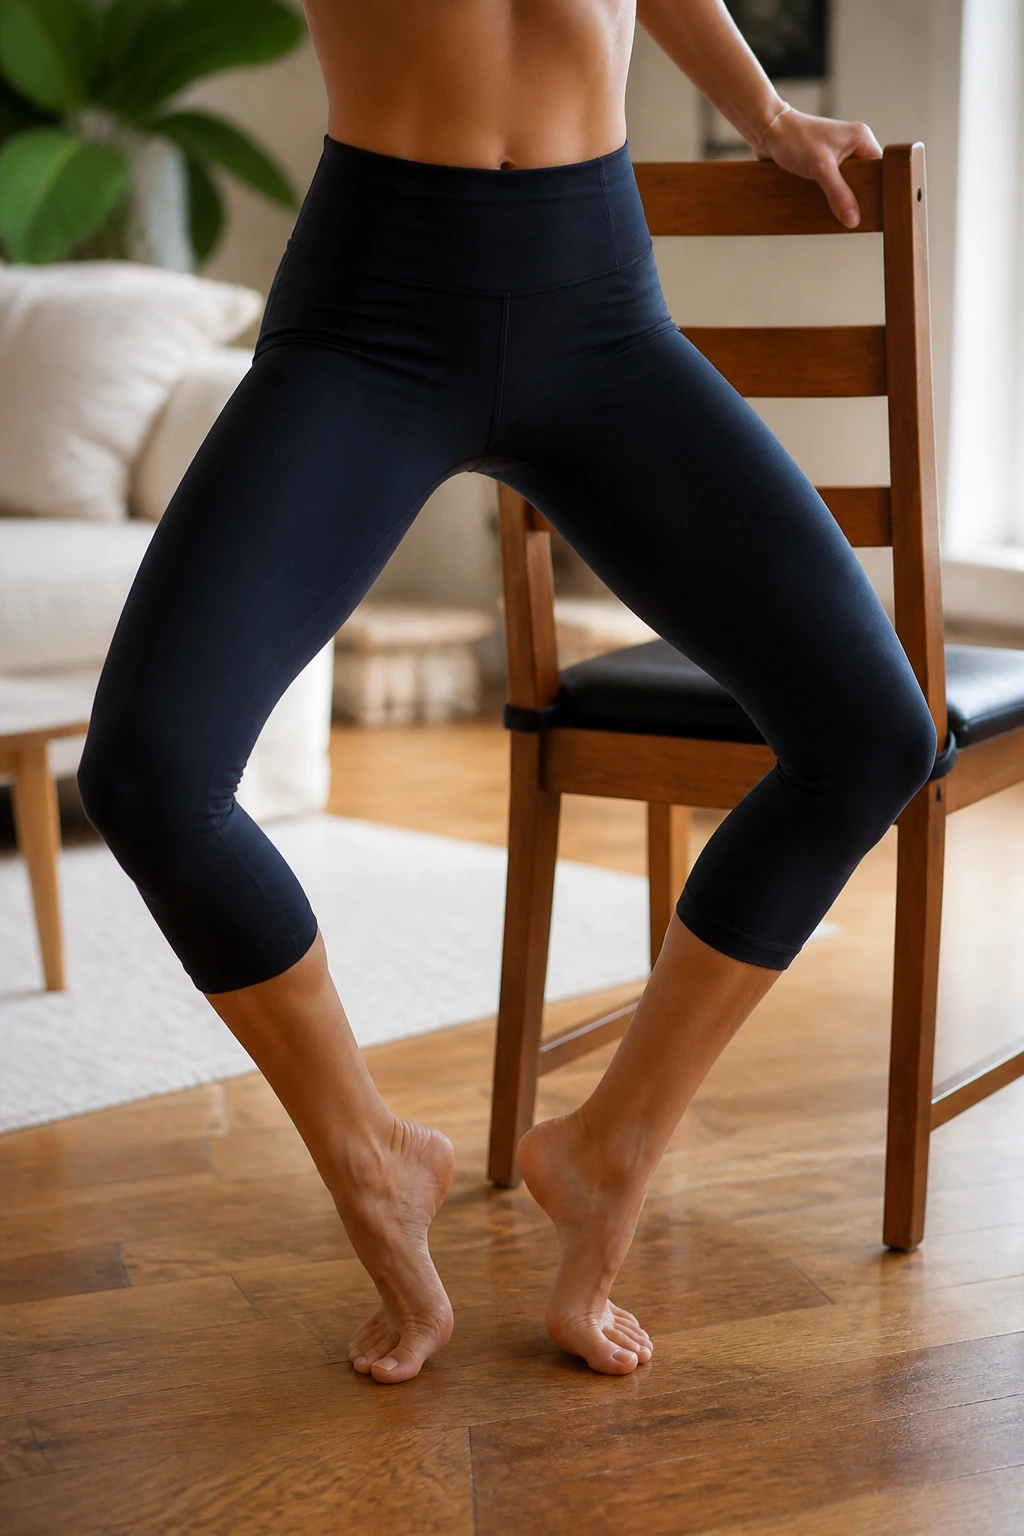
Start by standing facing the back of a chair or a sturdy kitchen counter. Place your feet in first position, heels together and toes turned outward about forty-five degrees. This is the foundation of many barre routines because it engages the inner thighs immediately. Rest your fingertips lightly on the chair for balance; do not grip it tightly.
Begin by lowering your hips into a shallow squat—think of sliding your back down a wall. As you lower, ensure your knees track over your toes. Go down for a count of two, then press through your heels to return to standing for two. Perform this for ten reps, then transition to smaller, pulsing movements at the bottom of the range.
The key here is the tuck of your pelvis. You want to maintain a neutral spine, avoiding the tendency to arch your lower back as you fatigue. Keep your heels glued together throughout the entire movement. If your heels separate, you lose the engagement in the adductor muscles that this position is designed to target.
2. Elevated Heel Glute Bridges
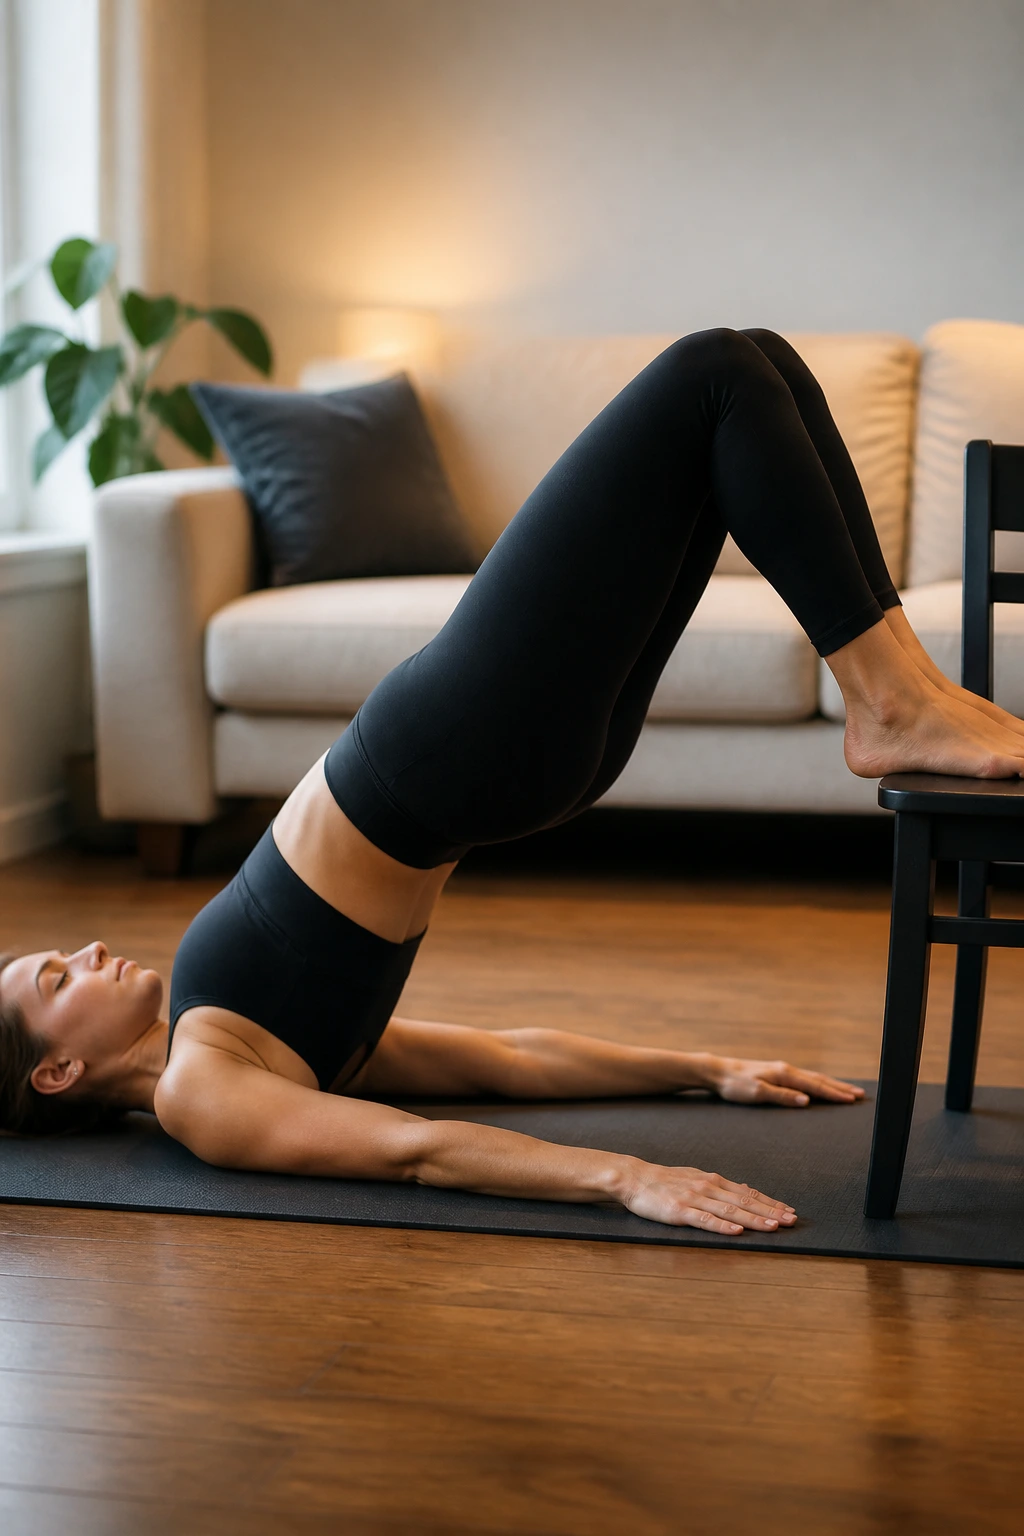
Move to the floor for this sequence, which targets the hamstrings and the glutes. Lie on your back, knees bent, and place your feet on a chair seat or the edge of a sturdy couch. This elevation forces your posterior chain to work significantly harder than it would on flat ground.
Lift your hips toward the ceiling, driving power through your heels. Squeeze your glutes at the top of the lift, holding for a beat before slowly lowering your hips until they hover just above the floor. Repeat this for twenty reps. On the final rep, hold at the top and perform tiny, rhythmic pulses for thirty seconds.
You should feel a distinct fire in the back of your legs. If you feel this in your lower back, adjust your foot placement. You likely need to scoot your feet closer to your glutes or ensure your rib cage is knitting down rather than flaring open. Keep your neck relaxed against the floor; your focus is purely on the hips and the glutes.
3. Standing Outer Thigh Leg Lifts
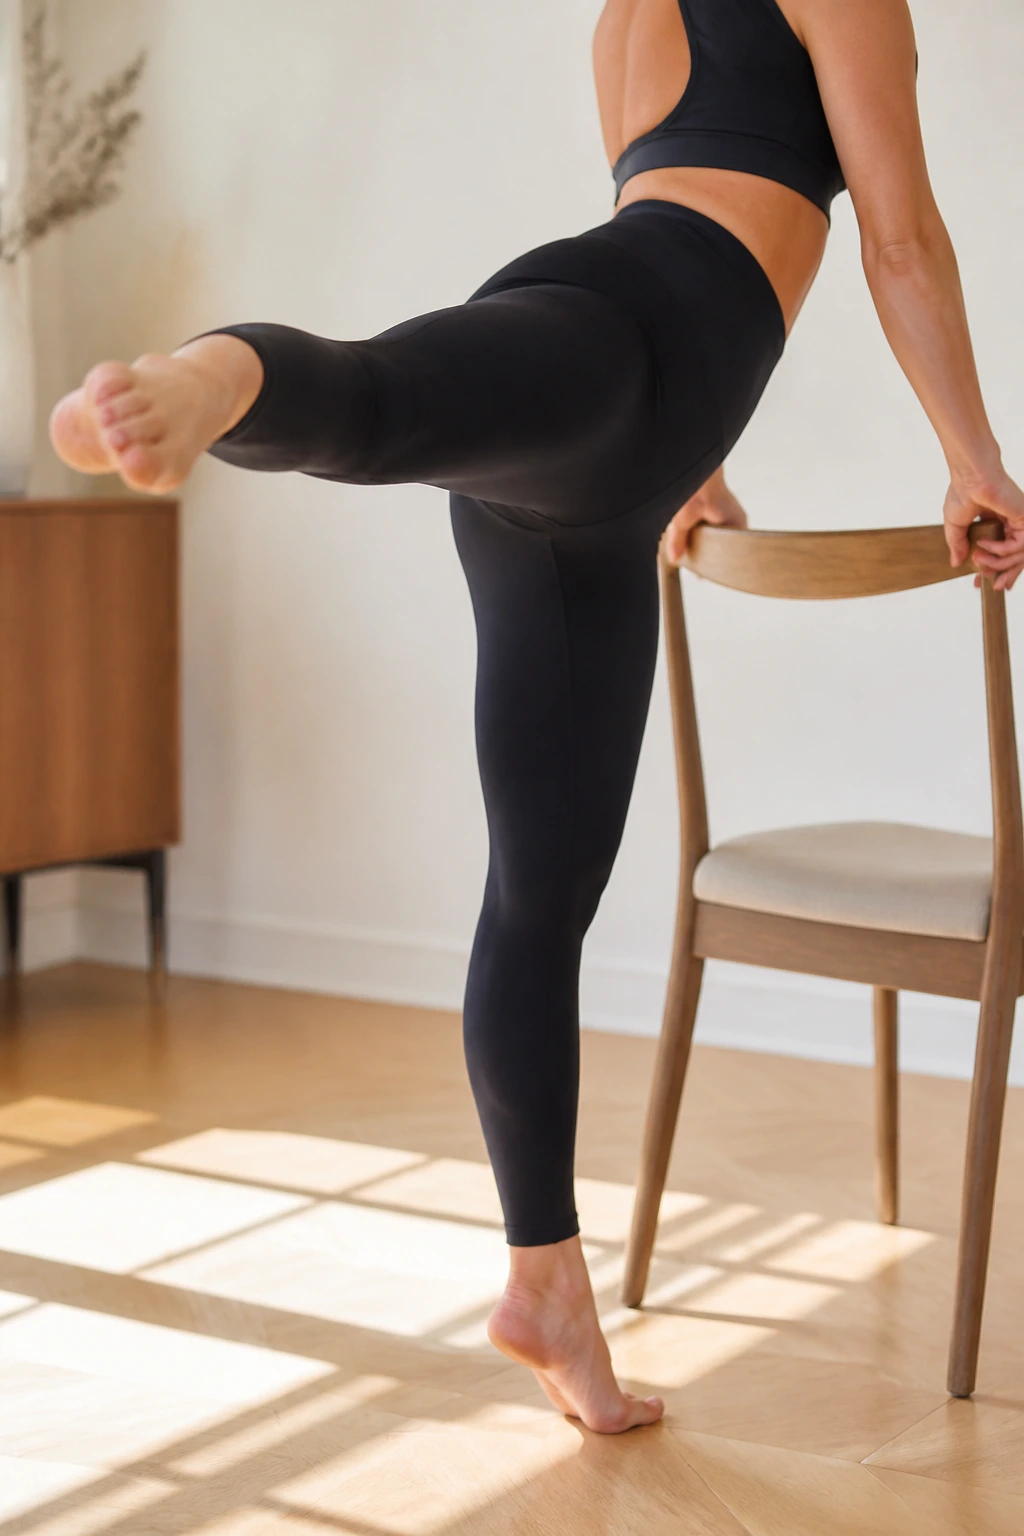
Return to your chair for balance, standing parallel to it. You will perform these on one side first, then switch, but keep the total duration to ten minutes per side for the workout. Stand on your outside leg, maintaining a slight bend in the knee to keep the joint soft and protected.
Extend the inside leg long to the side, toe pointed. Lift the leg to hip height, then lower it just until the toe taps the floor. Keep your torso completely upright; avoid leaning away from the leg you are lifting. It is tempting to tilt the upper body, but that actually takes the work away from the outer hip muscle, known as the gluteus medius.
Perform twenty lifts, then hold the leg at the highest point and draw small circles with your toe—ten circles clockwise, ten counter-clockwise. You will notice the standing leg begins to fatigue just as much as the moving one. That is a hallmark of barre work: the standing leg is your stability and your resistance.
4. The Tricep Dip and Pulse
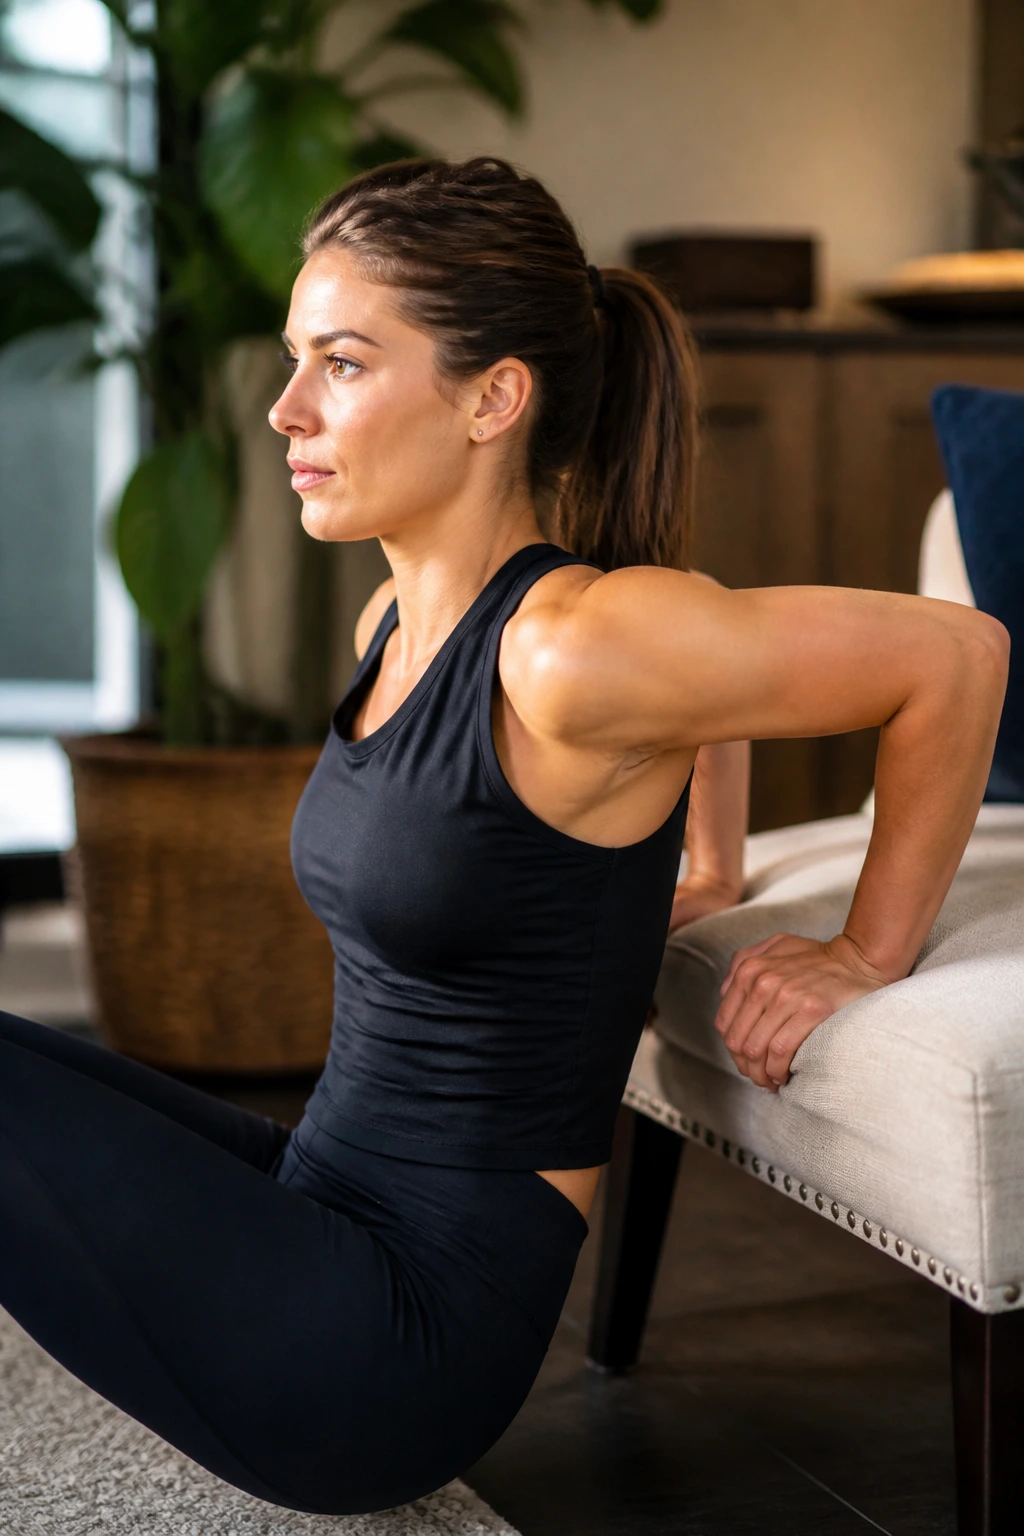
This workout targets the backs of the arms, an area that can be notoriously stubborn. Use the edge of a chair or a low couch. Place your hands on the edge, fingers pointing toward your feet, and extend your legs out in front of you. Keep your back close to the chair edge.
Lower your hips toward the floor by bending at the elbows, keeping them pointing straight back rather than flaring out to the sides. Press back up to the starting position. It is critical that you keep the movement small and controlled; do not let your shoulders creep up toward your ears.
Perform fifteen full-range dips, followed by fifteen pulses at the very bottom of the movement where the tension is highest. The goal is to isolate the triceps, so focus on the extension of the arm. If you feel this more in your chest, shift your weight further back toward the chair.
5. Plié and Relevé Combo
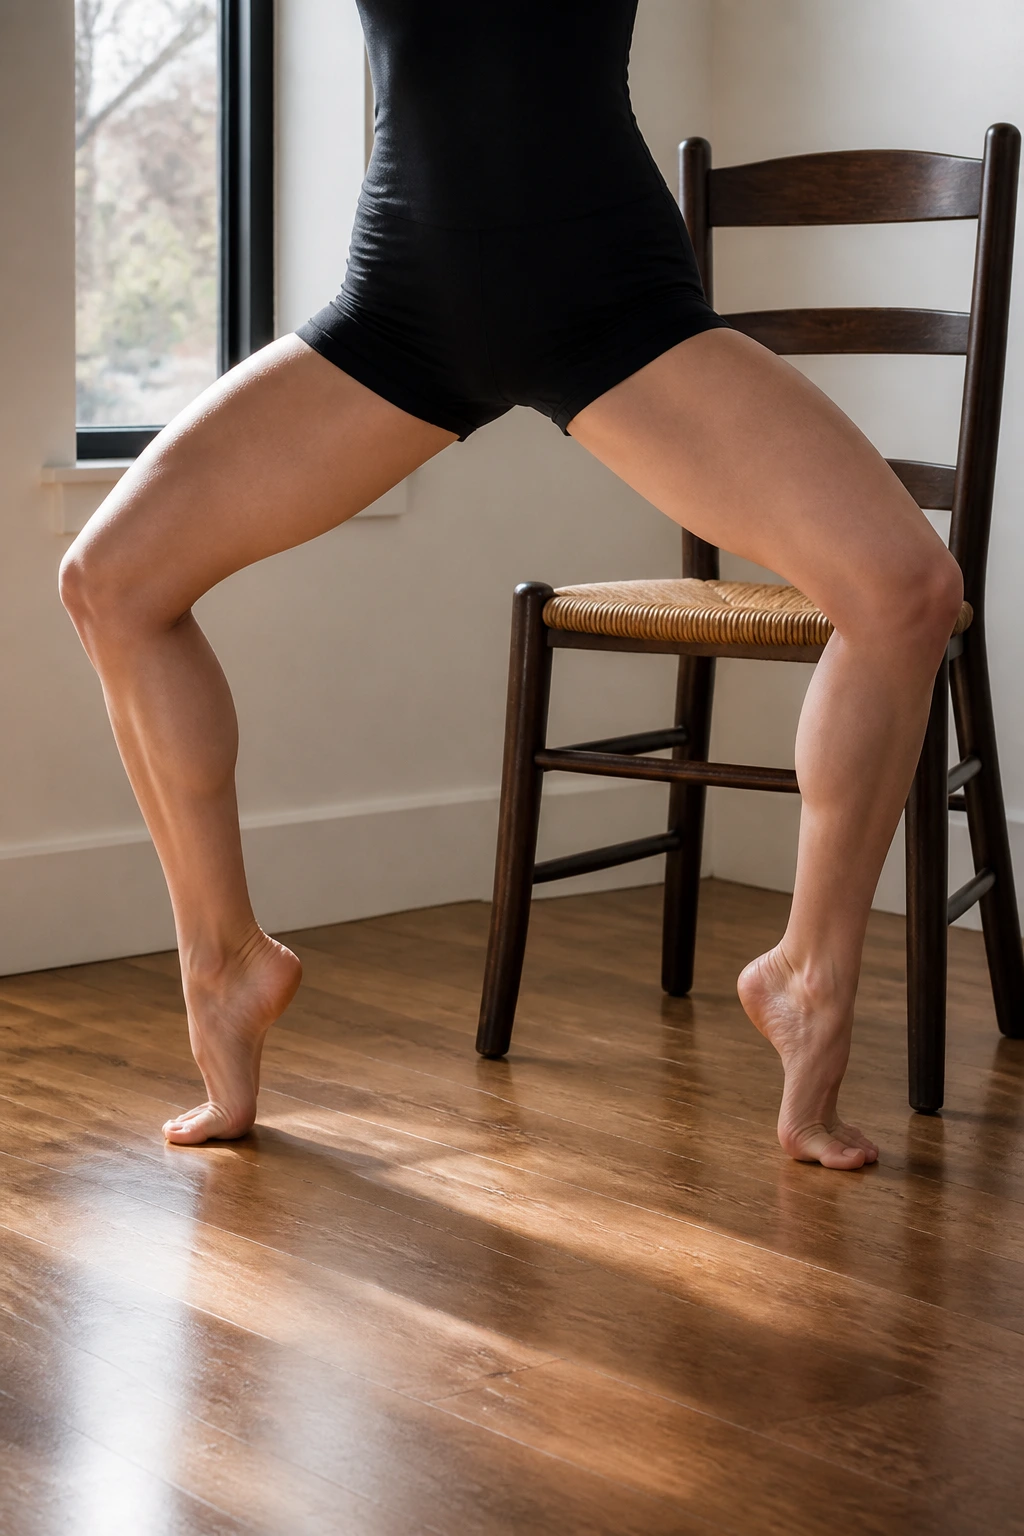
Stand facing your chair again, but this time in a wider second position. Your feet should be wider than hip-width, toes turned out. This position emphasizes the inner thighs and the stability of the hips. Start by performing a deep plié—a wide squat—keeping your chest vertical and your shoulders stacked over your hips.
Once you have mastered the rhythm of the squat, add the relevé. As you rise from the squat, lift your heels off the floor into a high balance. Lower the heels before initiating the next squat. This combination of leg strength and calf engagement creates a full-body stability challenge.
Why This Combination Matters
- Calf Engagement: The relevé forces the lower leg muscles to work in a shortened, contracted state.
- Inner Thigh Activation: The wide second position requires constant engagement of the adductors to prevent the knees from collapsing inward.
- Coordination: Moving from a grounded squat to a balanced rise trains the brain to manage shifting centers of gravity.
6. Tabletop Glute Press
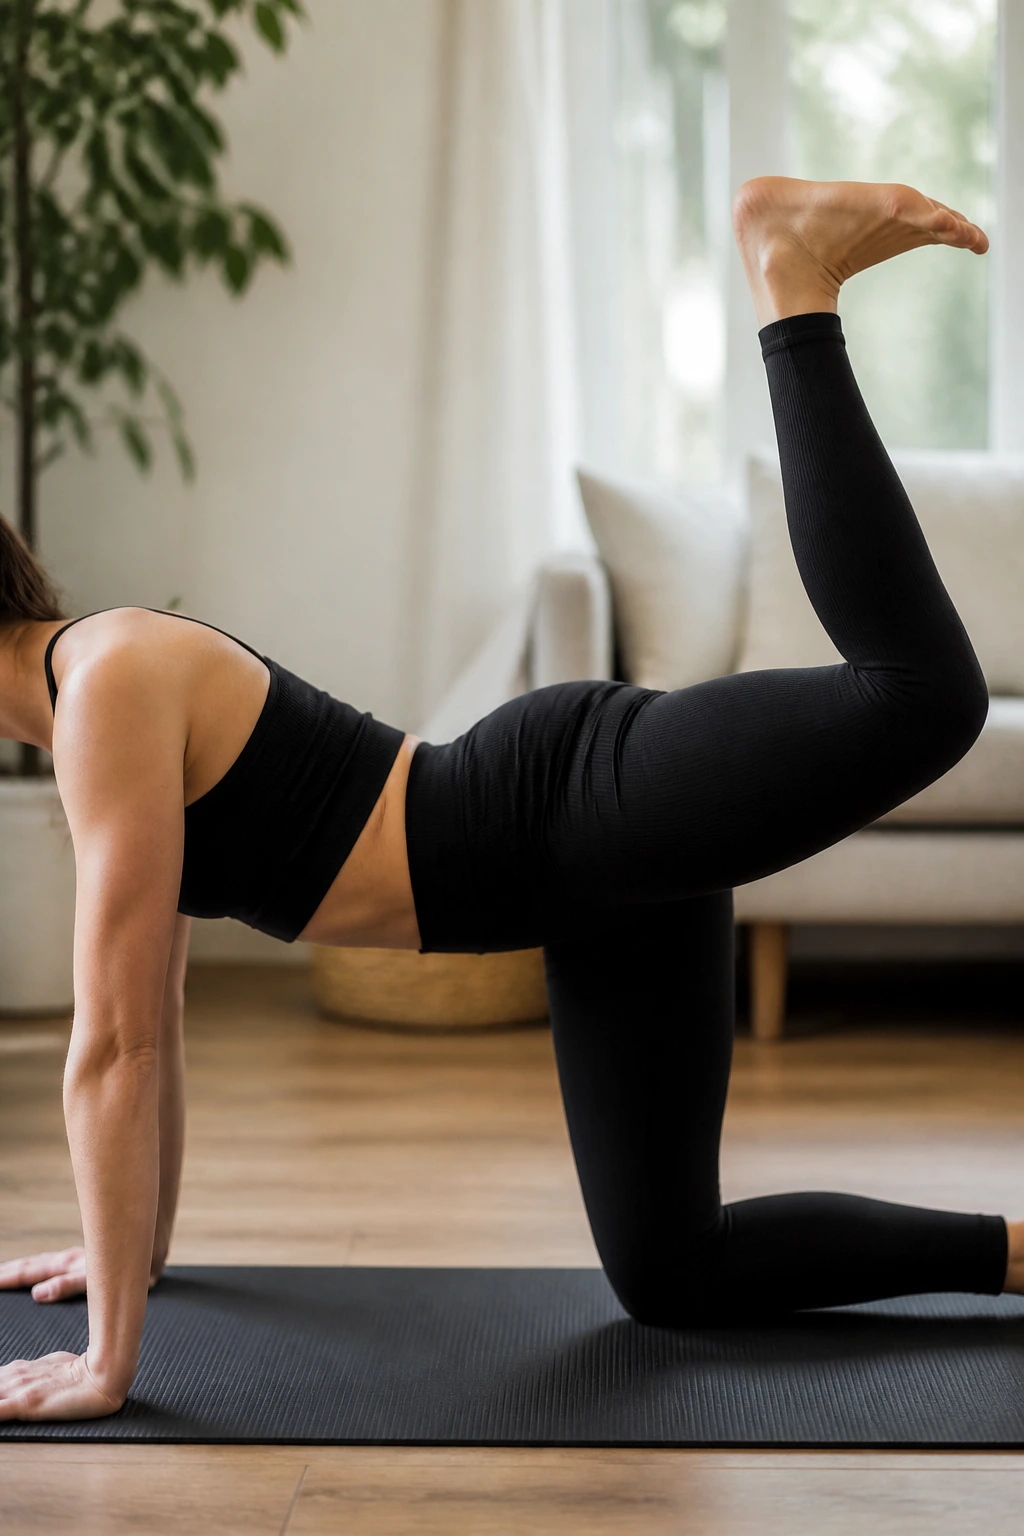
Get into a quadruped position on your mat—hands directly under shoulders, knees under hips. Keep your back flat like a table. Lift one leg, keeping the knee bent at a ninety-degree angle, and raise your foot toward the ceiling. The sole of your foot should face the sky.
Pulse your heel upward, focusing on the squeeze in the glute. The movement should be small, perhaps only two inches of travel. Because you are on your hands and knees, the range of motion is naturally limited, which forces you to use the muscle rather than momentum.
Avoid arching your lower back as you lift. If you feel your spine sagging, draw your belly button toward your spine to engage the deep core stabilizers. Perform thirty pulses on one side, then immediately switch to the other side without a break.
7. The Pretzel Position
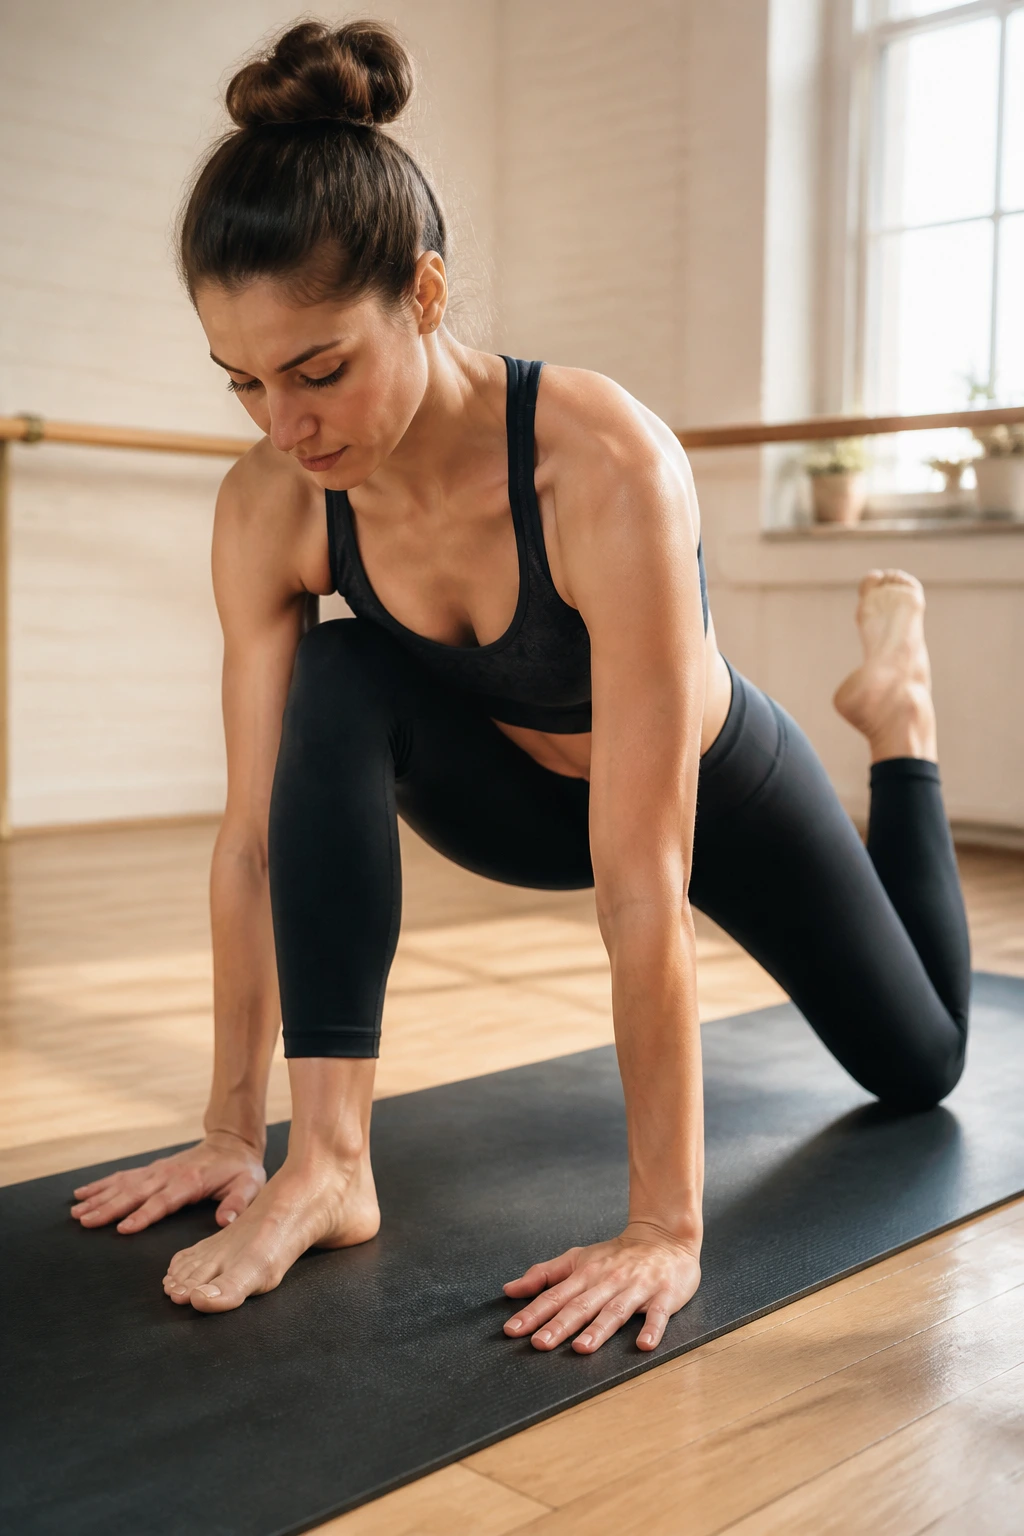
This move is a barre classic for a reason—it is highly effective at hitting the glutes from an angle that other exercises miss. Sit on the floor with your right leg bent at a ninety-degree angle in front of you and your left leg bent at a ninety-degree angle behind you. You should be in a zig-zag shape.
Lean your torso slightly forward over your front leg. Lift the back leg off the floor, even if it is only an inch. Pulse the back leg upward. You will feel a deep, intense burn in the outer hip and glute of the back leg.
The challenge here is maintaining the upright position of the torso. Do not collapse into your hip. Keep your weight centered and your chest lifted. This is a small, quiet, painful movement that delivers results rapidly.
8. Plank Variations with Hip Dips
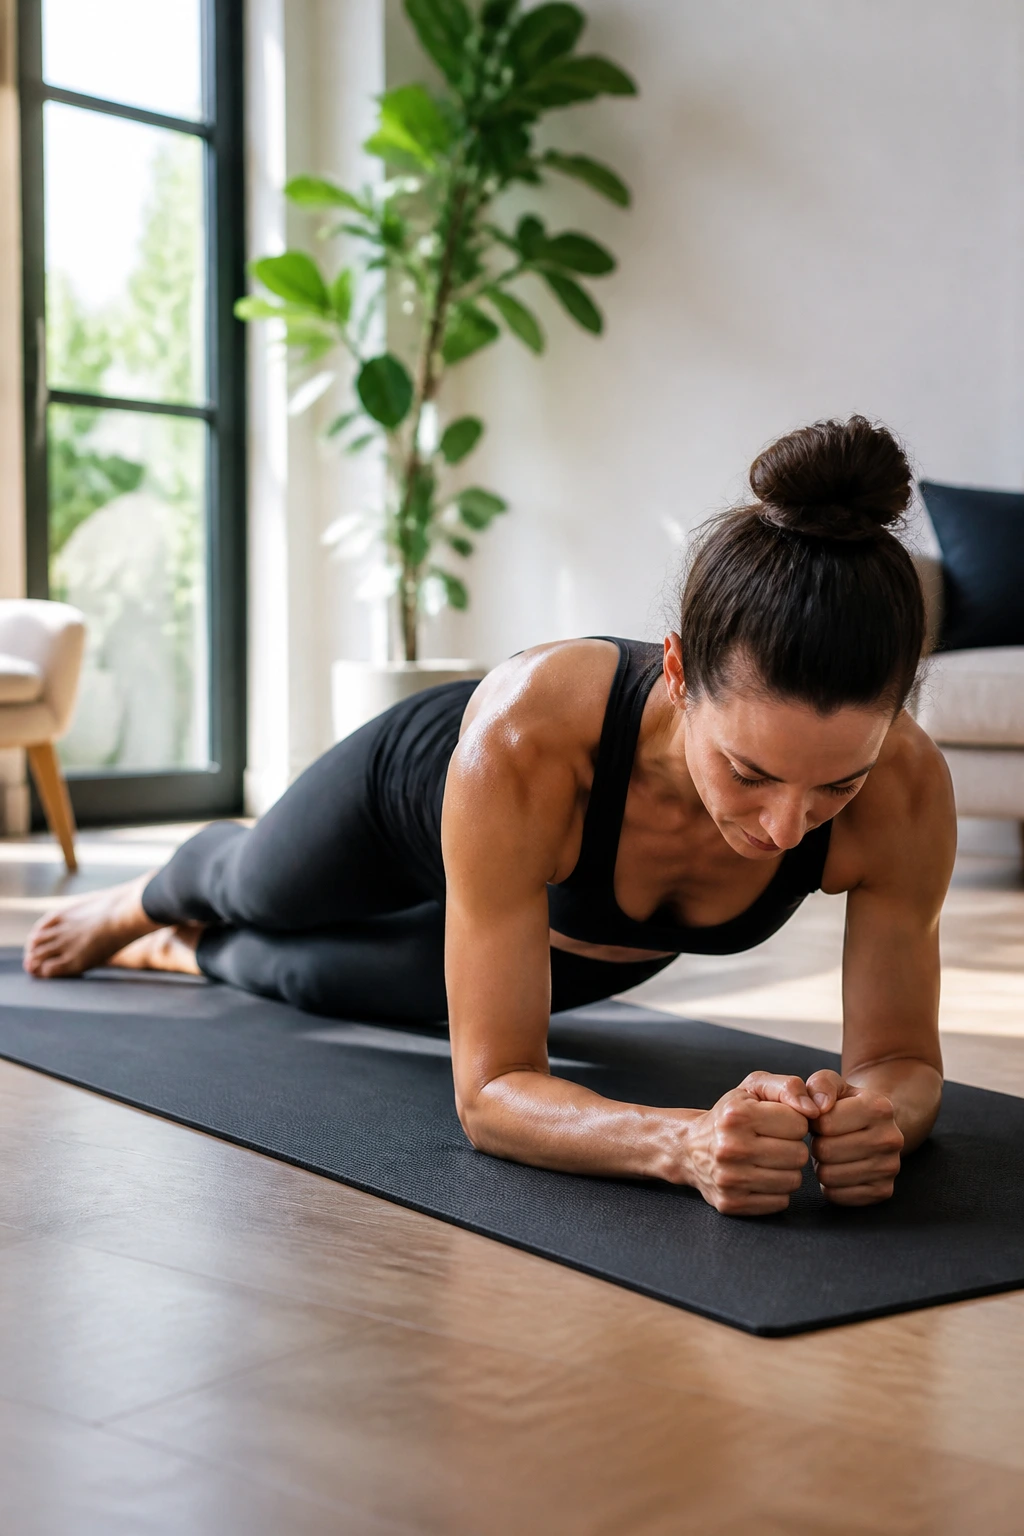
Start in a forearm plank position. Your elbows should be directly under your shoulders, and your body should form a straight line from head to heels. Engage your core, ensuring your hips are not sagging or piked too high.
From this solid base, gently rotate your hips to tap the right side of your body toward the floor, then return to center. Repeat on the left. These hip dips engage the obliques while forcing your shoulders and core to stabilize against the movement.
Focus on the rotation. Do not just let your hips drop; guide them with your abdominal muscles. If your lower back begins to ache, drop your knees to the floor and continue the hip rotation from a modified plank. The form is more important than the full plank position.
9. Parallel Lunge Hold
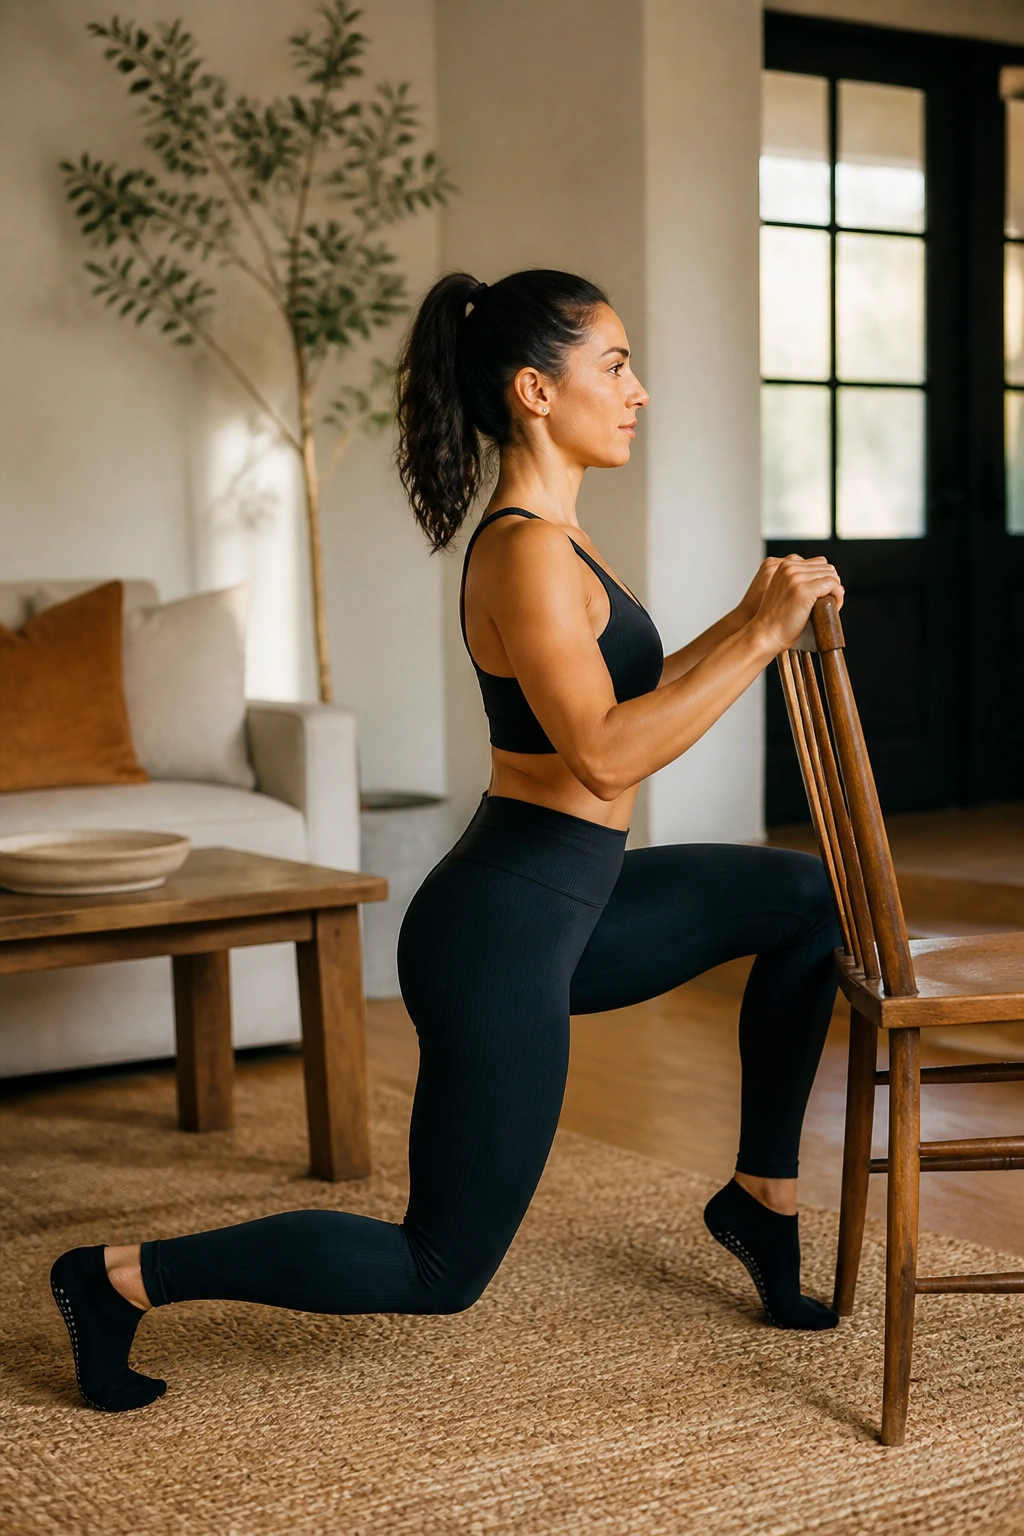
Stand parallel to your chair, a few feet away. Step your inside leg back into a deep lunge. Your front knee should be bent at ninety degrees, and the back knee should hover just above the floor. The heel of your back foot should be lifted.
Hold this low position. While holding, pulse the back knee toward the floor for thirty seconds. Then, shift your weight forward into the front leg and tap the back toe in toward the front heel, then back out to the lunge. Repeat this tapping motion for twenty reps.
This sequence is about managing constant tension. By removing the recovery time at the top of the lunge, you keep the muscles under load for the entire duration. Keep your chest up—do not let yourself fold forward over the front knee.
10. Standing Core Oblique Twists
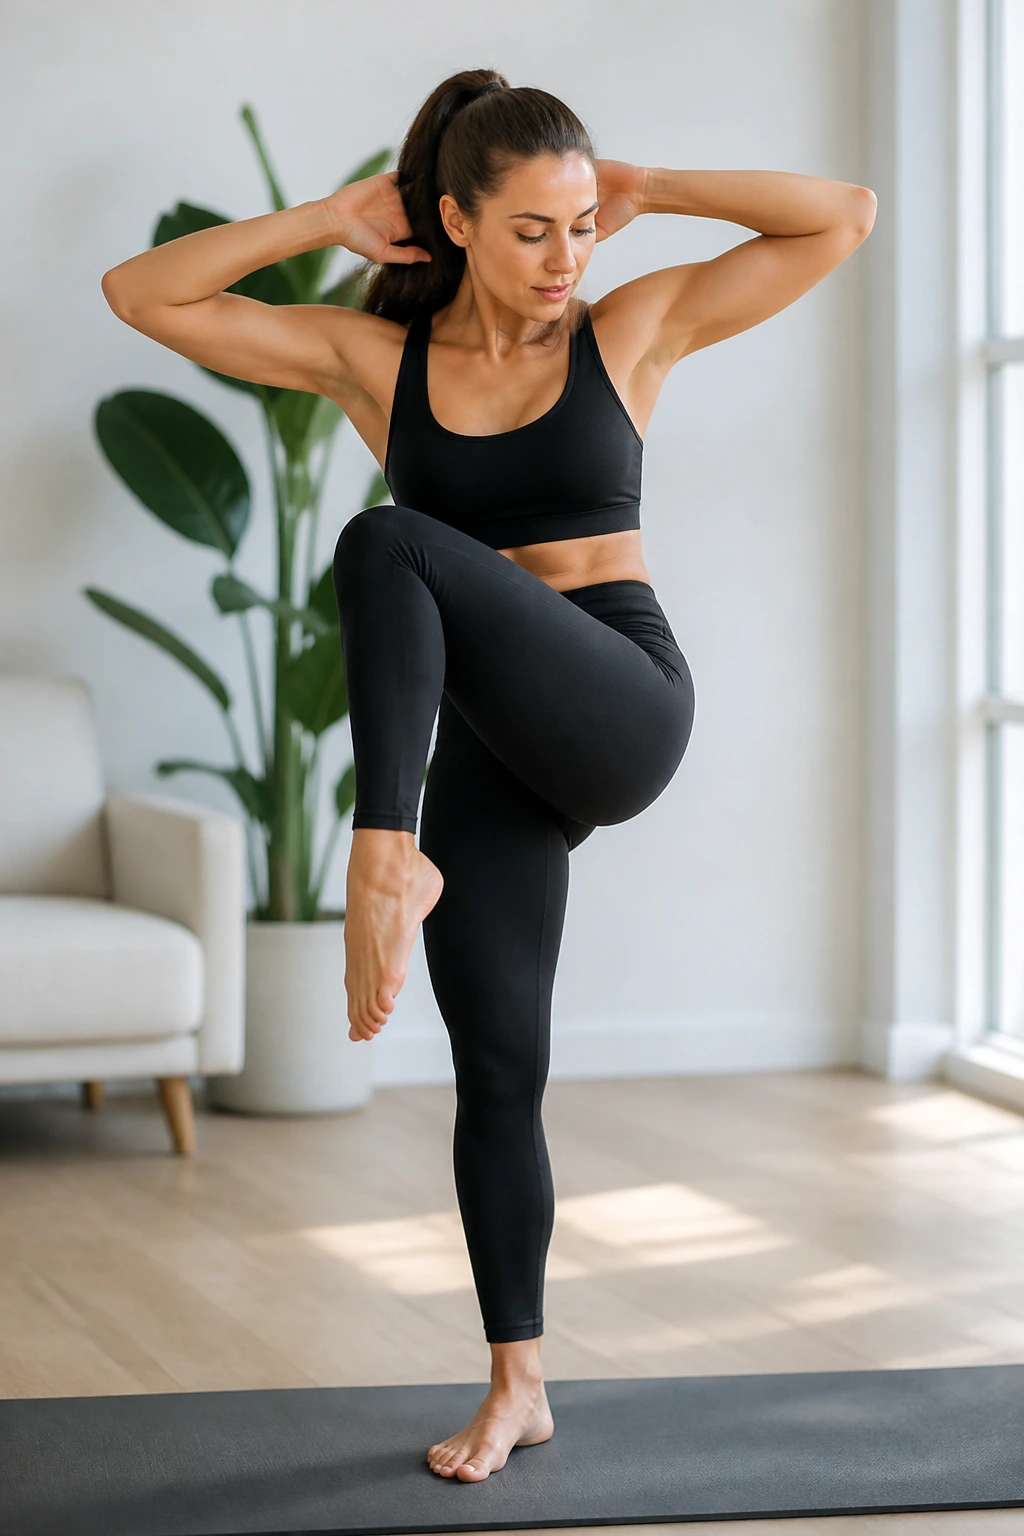
Stand with feet hip-width apart. Clasp your hands behind your head, elbows wide. Lift your right knee toward your right elbow, crunching through the side of your waist. Return the foot to the floor, then immediately switch to the left.
The secret to making this an effective barre exercise is the pace. Do not rush through the motion. Pause at the top of the crunch, squeezing your oblique muscles for a full second before releasing. This slow, deliberate contraction recruits more muscle fibers than a rapid-fire movement.
Think of your spine as a towel being wrung out. You want to rotate the rib cage toward the hip. If you only move the leg, you miss the core engagement. Keep your standing leg stable and your core braced throughout.
11. Scapular Squeeze and Hold
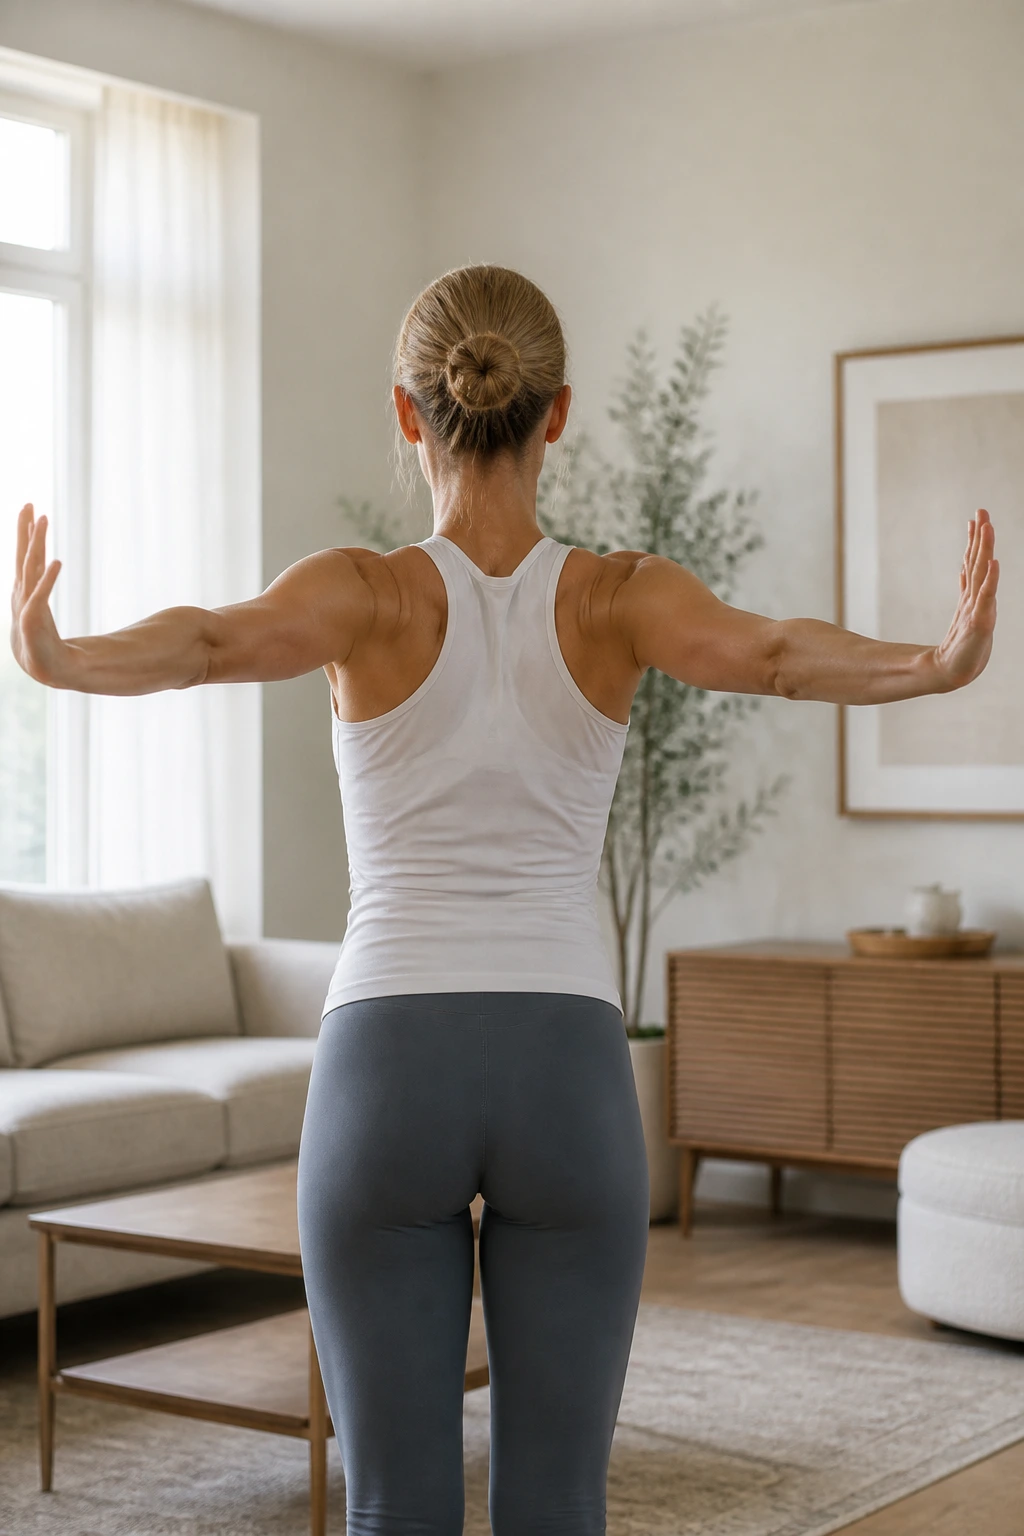
This is a postural workout. Stand tall, feet parallel. Extend your arms out to the sides at shoulder height, palms facing forward. Pull your shoulder blades together as if you are trying to hold a pencil between them.
Pulse your arms back, focusing on the muscles between the shoulder blades and the backs of the shoulders. Keep your neck long—do not let your shoulders shrug up. After thirty seconds of pulsing, turn your palms up and continue pulsing.
Posture is the hidden element of barre. By strengthening the upper back, you naturally counteract the “slouch” that occurs from spending time at computers or looking at phones. This exercise might feel easy at first, but after a minute of continuous pulsing, you will feel the fatigue set in.
12. Plié with Pulse and Hold
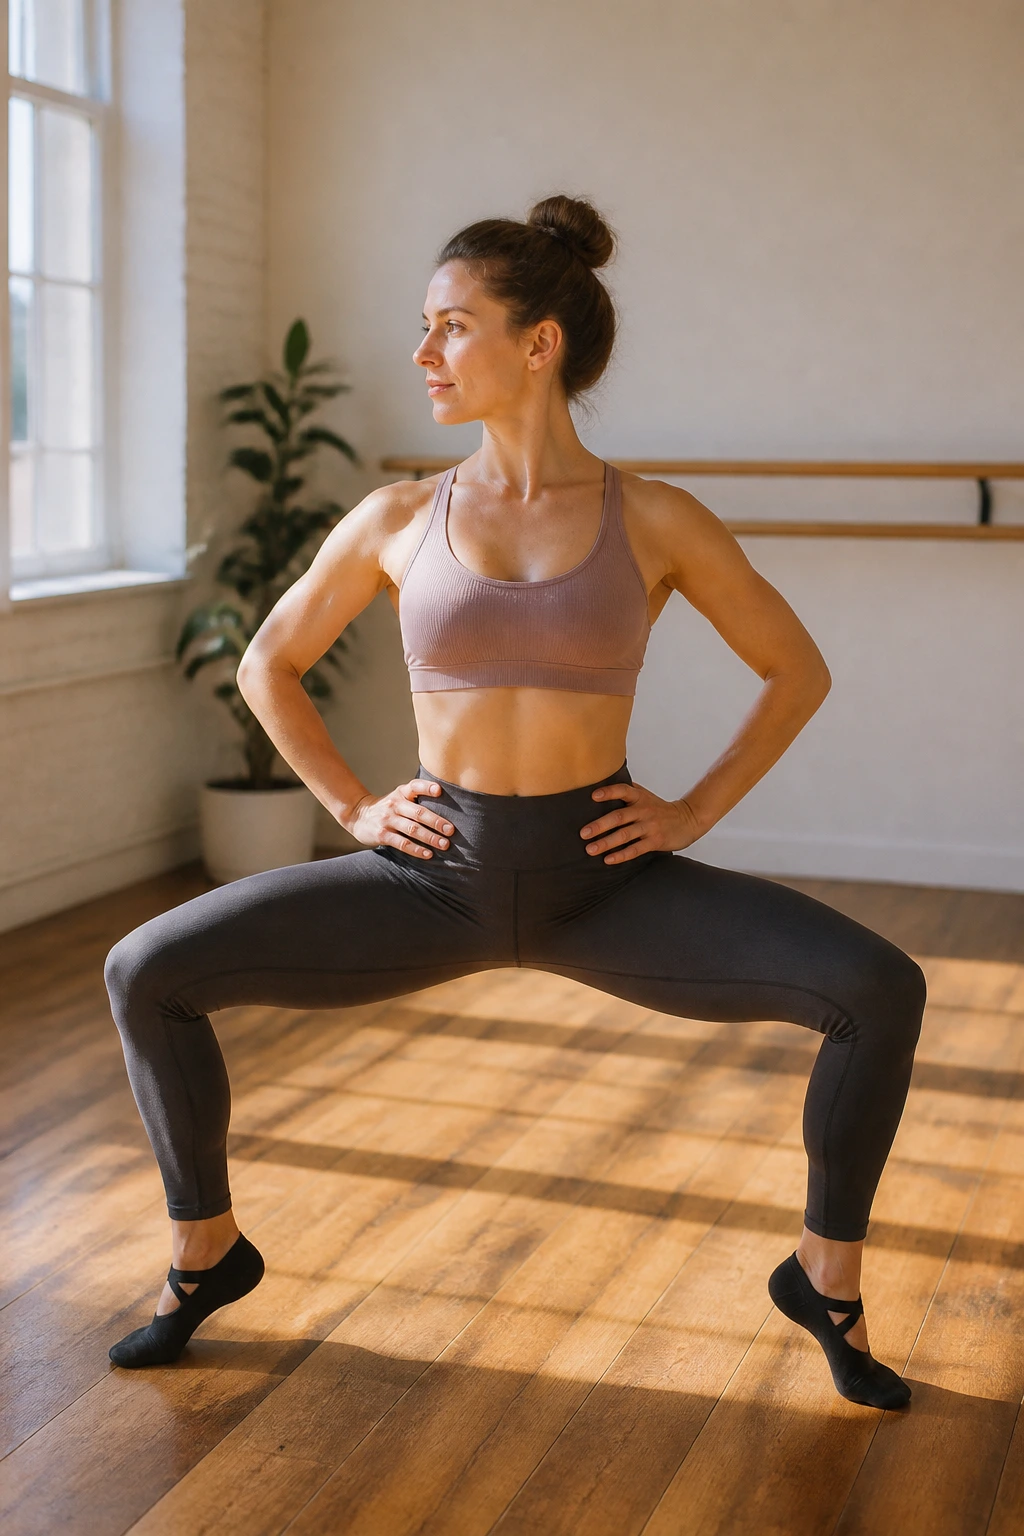
Return to your second position, feet wide and turned out. Drop into your deepest plié, where your thighs are nearly parallel to the floor. Now, hold this position. This is an isometric hold, the hallmark of the barre method.
While holding, pulse an inch up and an inch down. Do not come out of the squat. Your legs will begin to tremble. That trembling is exactly what you are aiming for; it indicates that the muscles are working to the point of exhaustion.
Breathe through the discomfort. It is natural to hold your breath when things get difficult, but deep, rhythmic breathing helps provide oxygen to the working muscles. Stick with the pulses for sixty seconds—it will feel like ten minutes, but it is a short, effective burn.
13. Standing Side-Leg Circles
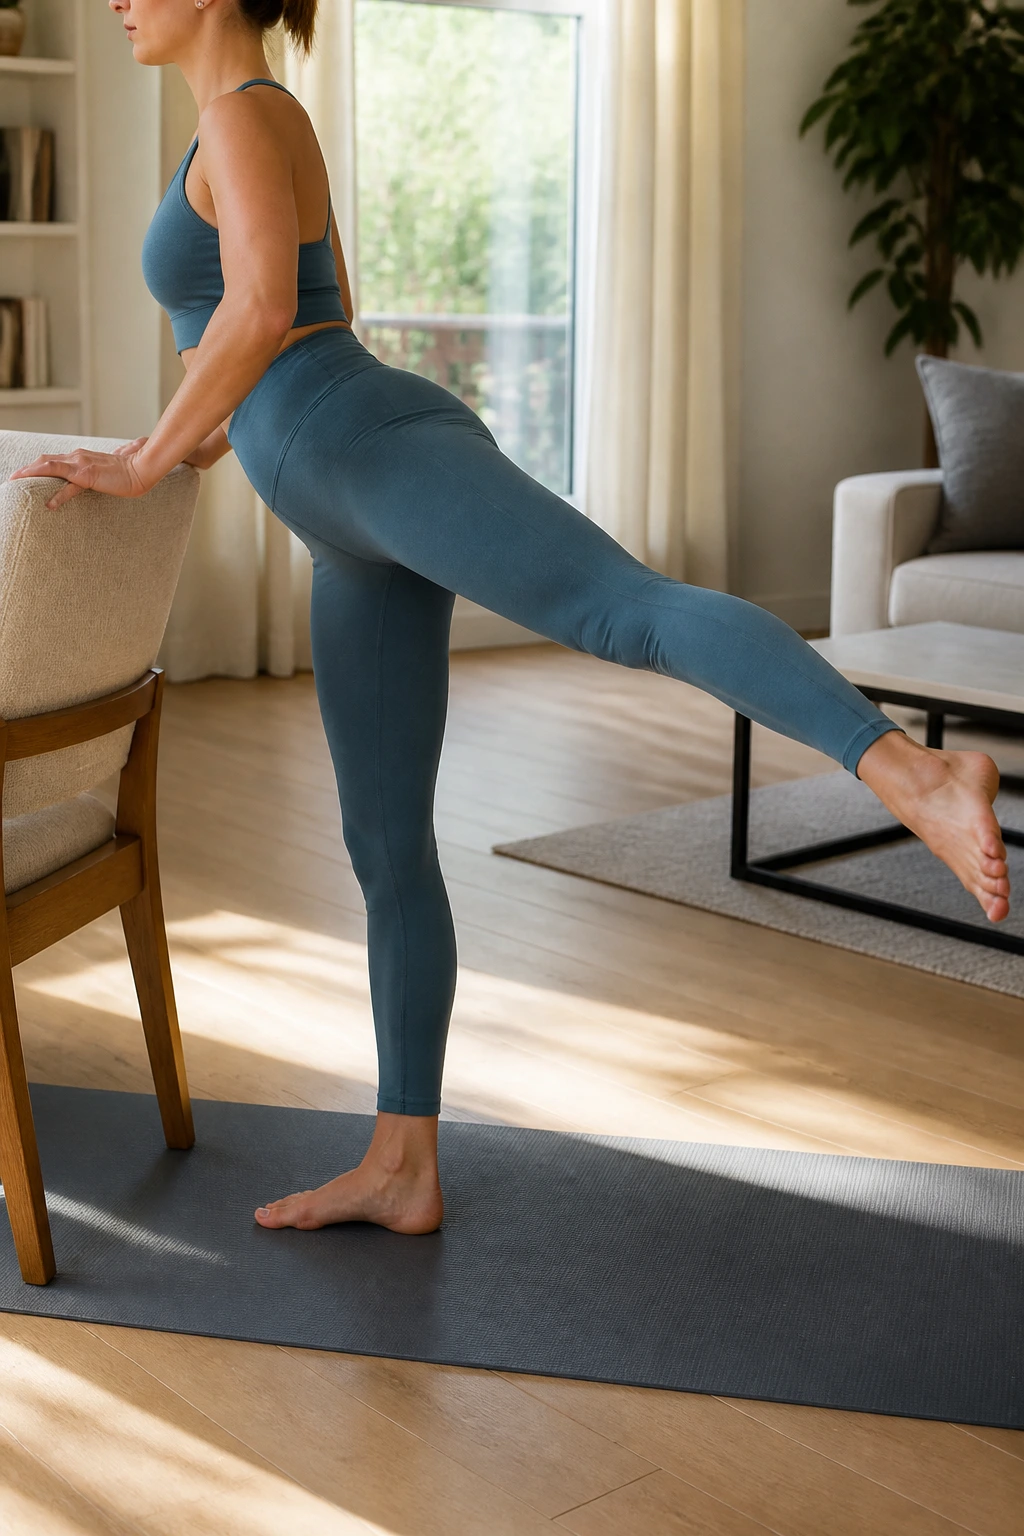
Stand facing the chair, supporting your weight on your right leg. Extend your left leg straight back behind you, toe pointed. Lift the leg to hip height. Keep your hips square to the chair; do not open your hips to the side.
Draw small circles with your extended leg. You should feel this in the hamstring and the glute. After twenty circles, switch the direction of the circle for another twenty reps. Keep your upper body still.
The challenge here is to avoid swinging your leg using your back muscles. Isolate the movement to the hip joint. If you feel your back moving, lower the leg slightly. A lower, controlled lift is better than a high, swinging lift.
14. Quadruped Abduction
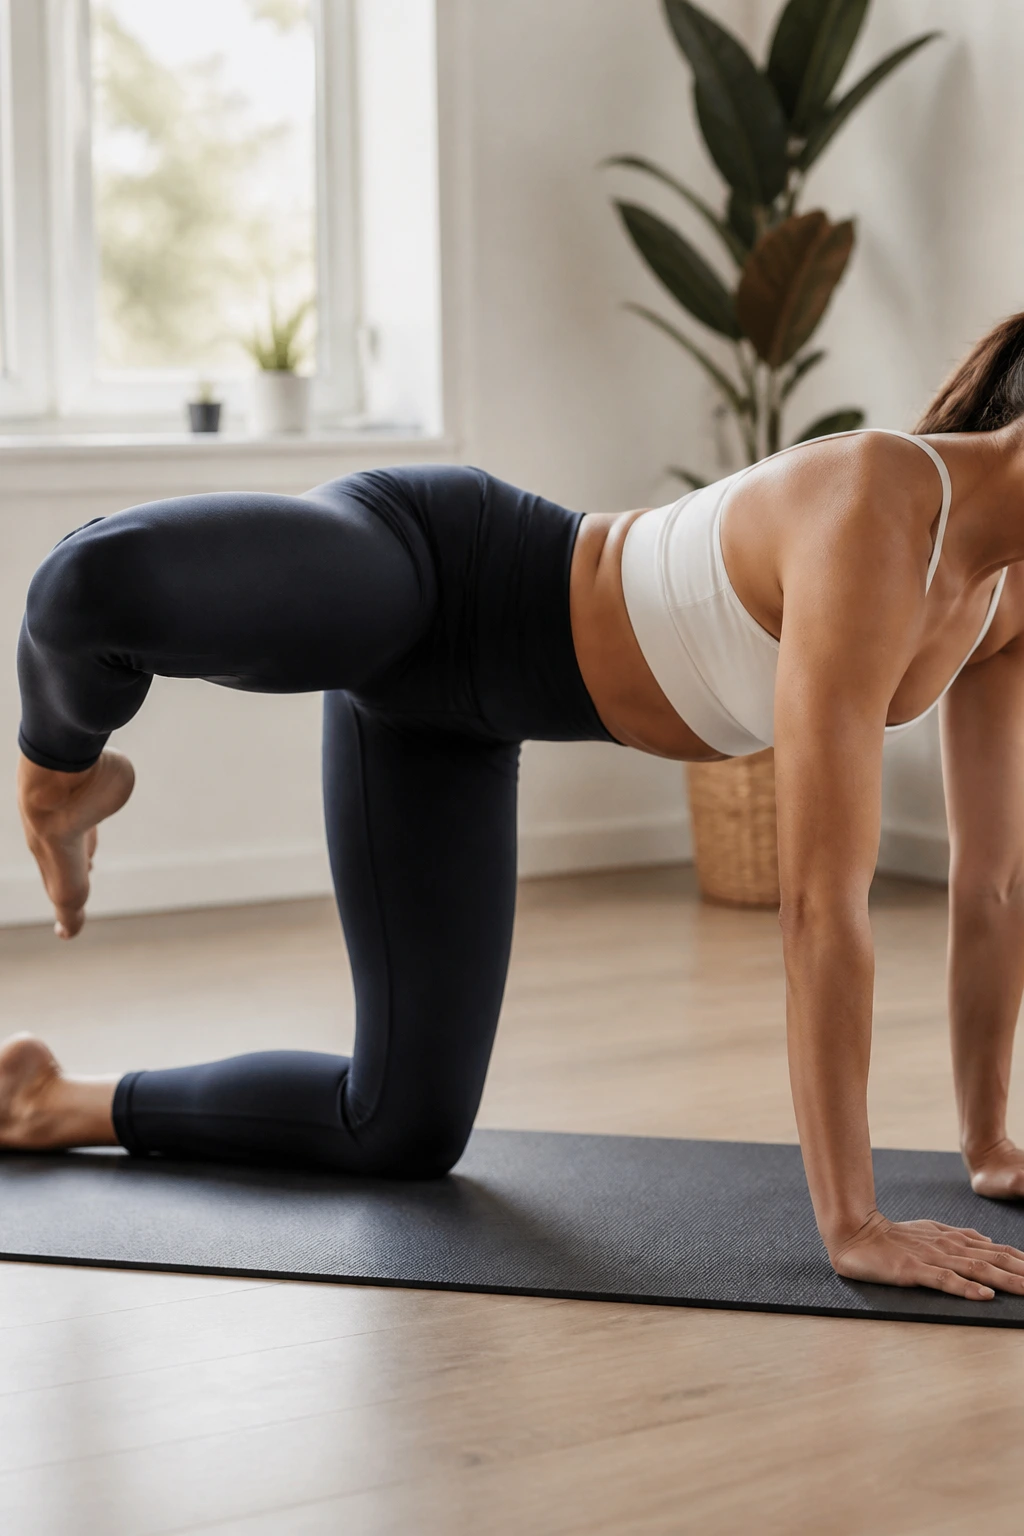
Return to your hands and knees on the mat. Lift your left knee out to the side, keeping the knee bent at ninety degrees. It will look like a dog at a fire hydrant. This is a classic exercise for the outer glute and hip.
Pulse the knee upward. Try to keep your torso completely still. Do not let your body lean to the right as you lift the left knee. The movement should be pure hip abduction.
Perform twenty pulses, then hold at the top for ten seconds, squeezing the glute as hard as you can. Switch to the other side. This exercise is excellent for stabilizing the pelvis and strengthening the glutes, which helps protect the lower back during everyday activities.
15. The “Swan” Arm Sequence
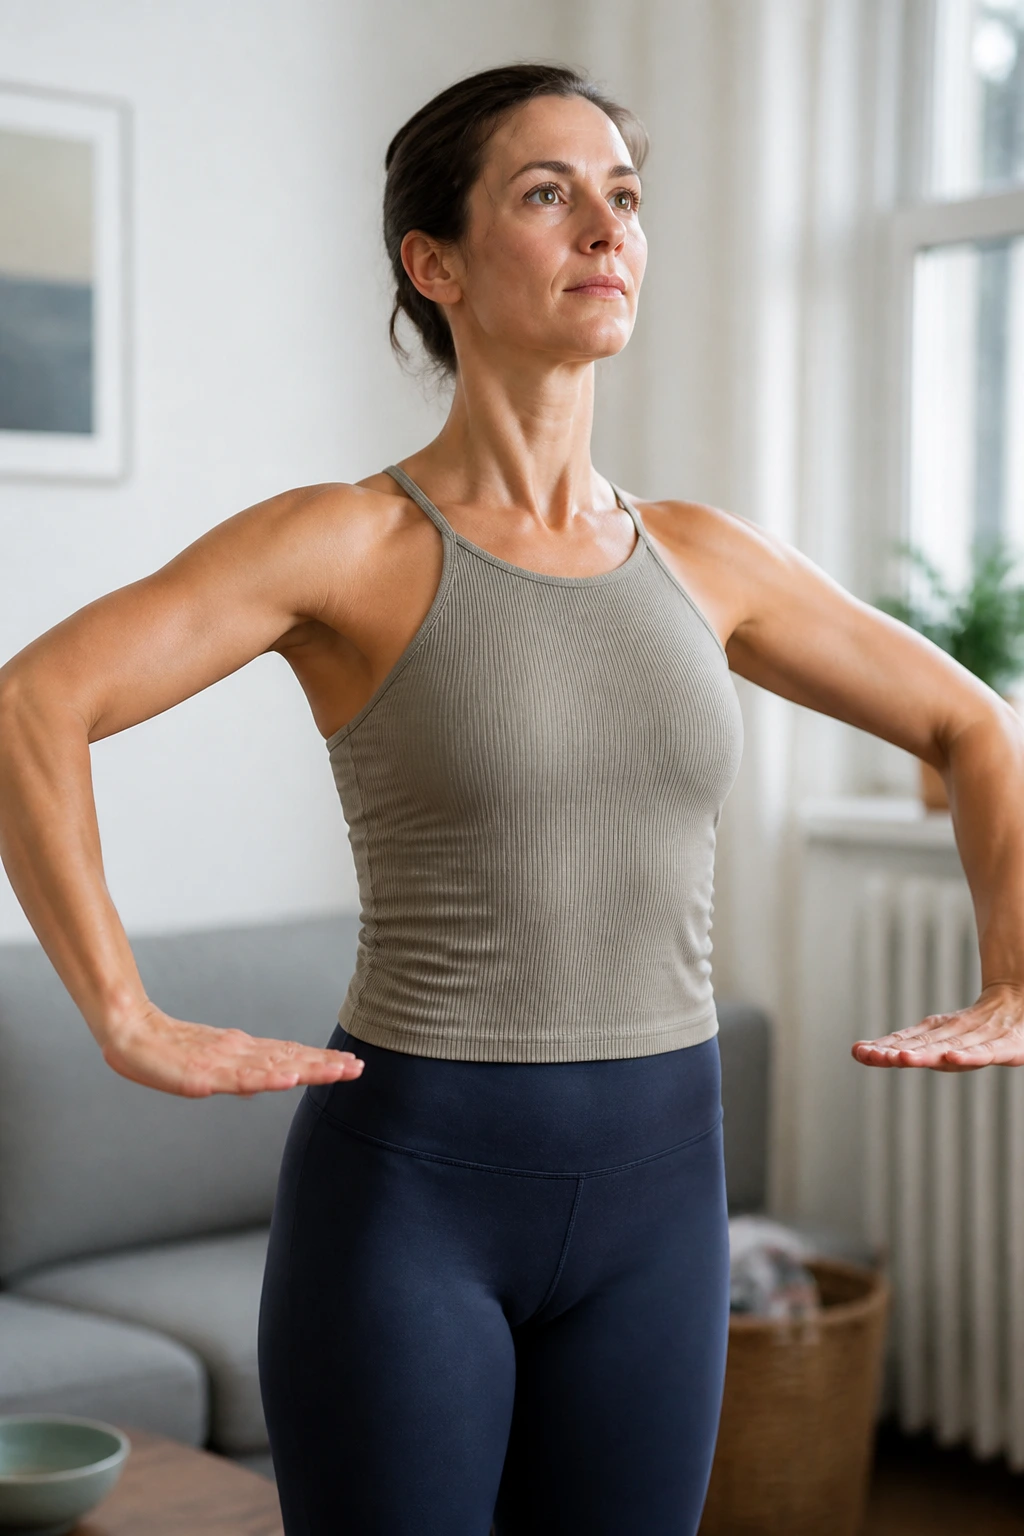
This is a gentle but fatiguing set of movements for the shoulders and back. Stand tall, core engaged. Extend your arms to the sides, but keep a soft bend in the elbows. Imagine you are pressing down on a resistance band.
Press your arms down toward your hips and then back up to shoulder height. Focus on the resistance. Imagine you are moving through water or pushing against heavy air. The intent of the movement provides the resistance.
Continue this pressing motion for one minute. The movement should be smooth and deliberate. This is not about speed; it is about keeping constant tension on the muscles of the upper back, shoulders, and chest.
16. Floor Core: The “C” Curve
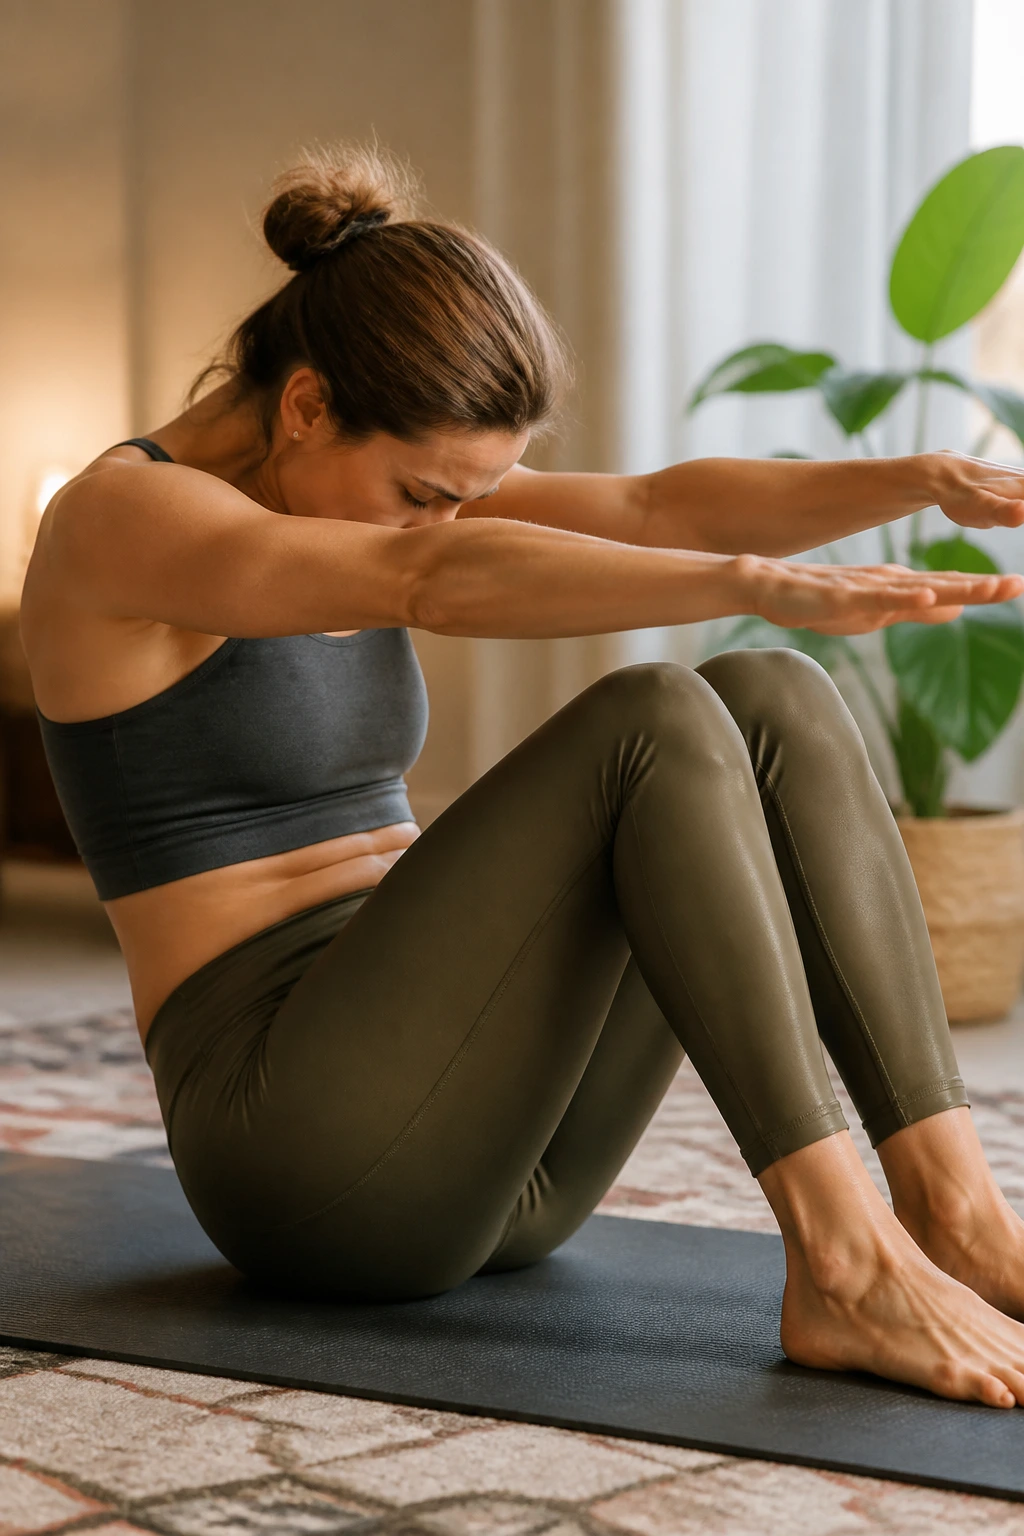
Sit on your mat with your knees bent and feet flat on the floor. Reach your arms forward, palms facing each other. Tuck your tailbone, round your spine, and lean back until you feel your core muscles engage. You should be in a “C” shape, rounding the lumbar spine.
Hold this position. While holding, pulse your arms up and down six inches. Keep your lower back rounded and your belly button pulled in deep. If you feel your feet lifting off the floor, shift your weight further back or extend your legs slightly.
This position is the standard barre abdominal hold. It creates maximum tension in the rectus abdominis. By adding the arm pulses, you distract the brain from the core burn, allowing you to hold the contraction for longer.
17. The Narrow Parallel Squat
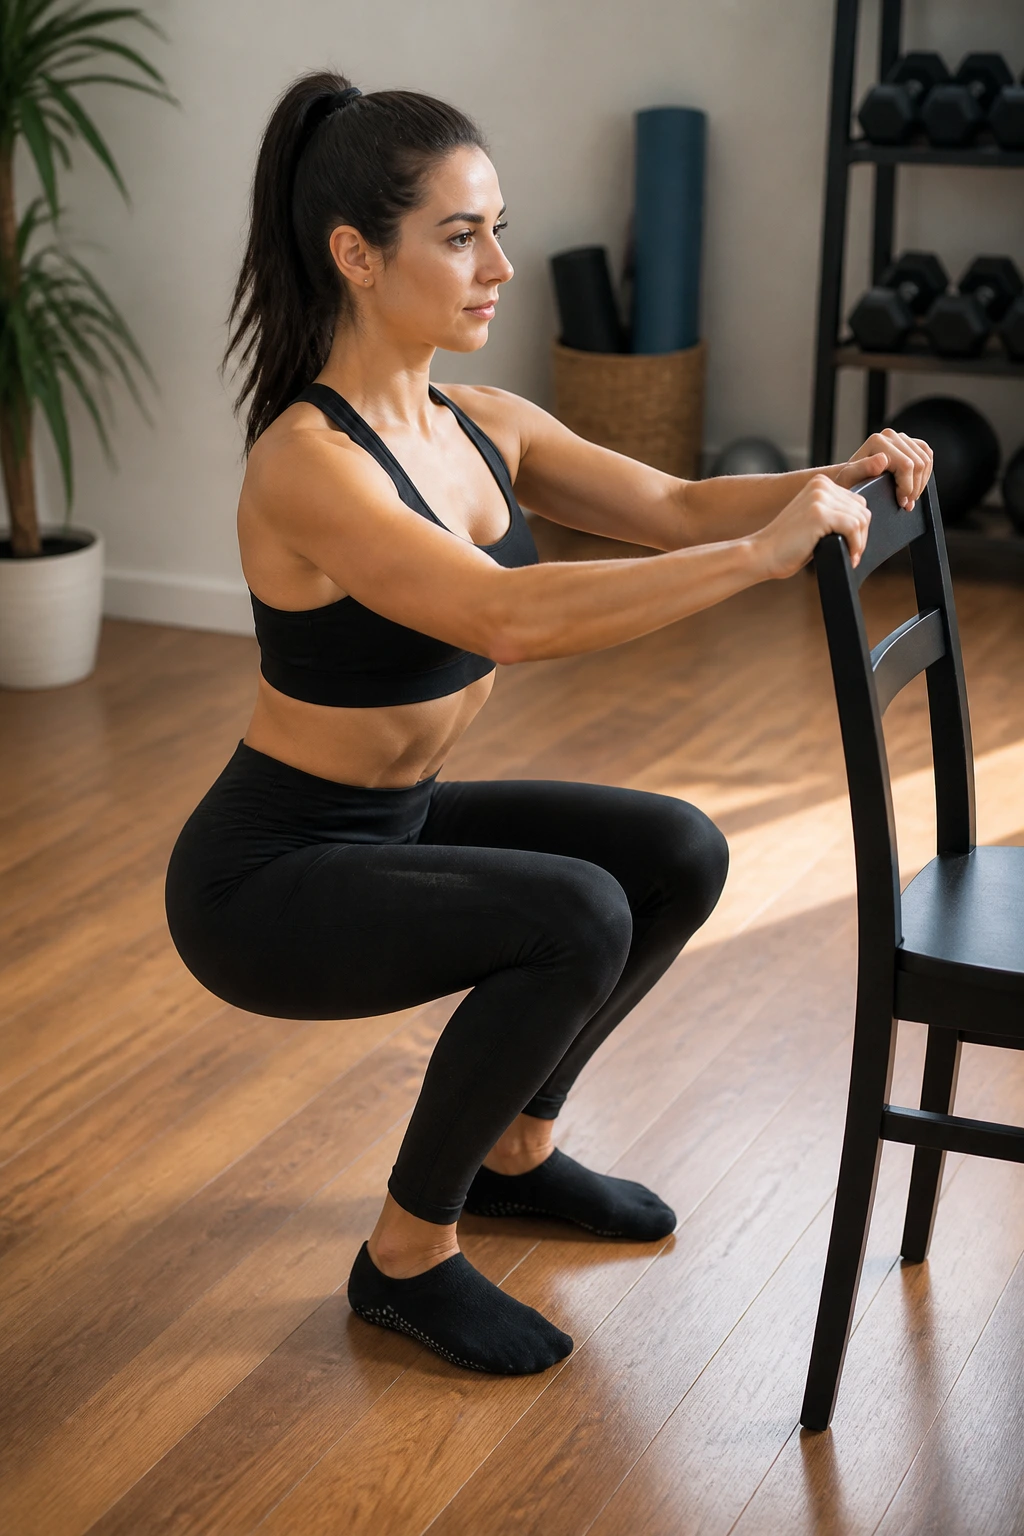
Stand with feet parallel, hip-width apart. Place your hands on your chair. Perform a deep squat, keeping your weight in your heels. Ensure your knees are not caving inward—keep them in line with your second toe.
Pulse at the bottom of the squat for thirty seconds. Then, rise to standing and immediately squeeze your glutes at the top. Repeat the squat and rise for twenty reps. This is a functional movement that builds strength in the quads and glutes.
Concentrate on the shift of weight. As you squat, your hips should go back and down. As you rise, push through the heels. This is a basic movement, but when performed with the precision of a barre technique, it becomes a powerful strength builder.
18. Dynamic Lunge Flow
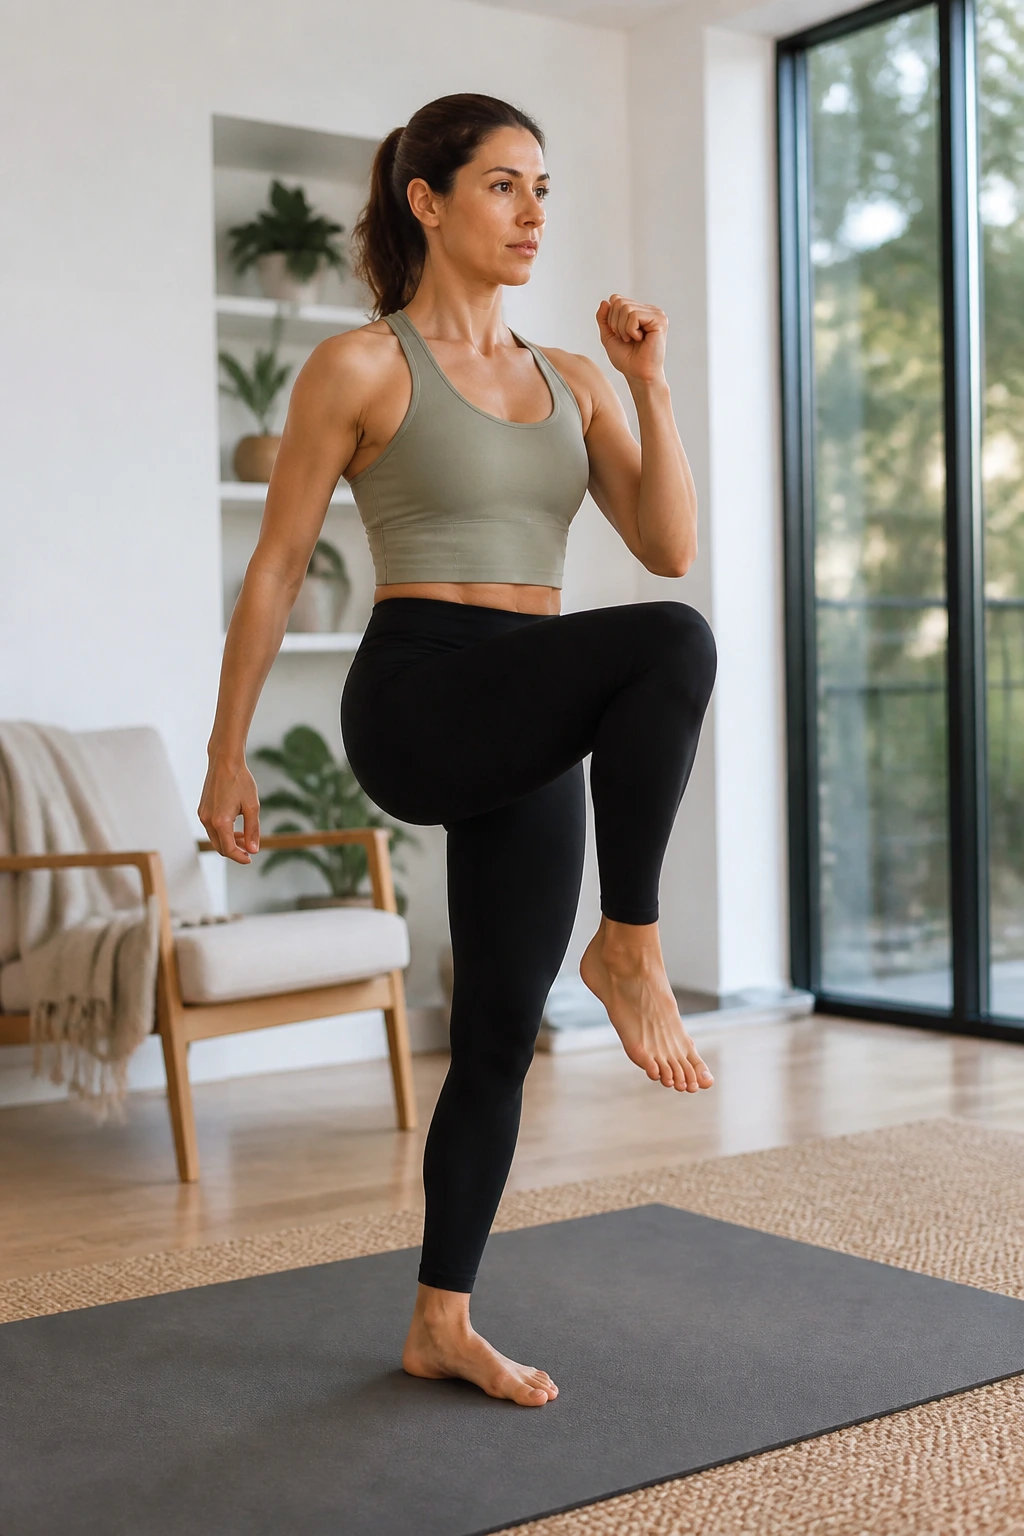
Start in a lunge with your right leg back. As you stand up, bring your right knee up toward your chest, balancing on the left leg. Then, step the right leg back into the lunge again. This is a dynamic, fluid movement.
Focus on the transition. The movement between the lunge and the knee drive should be controlled. Use your core to balance as you bring the knee up. Perform twelve reps on the right, then twelve on the left.
This exercise adds a cardiovascular element to your barre routine. It elevates the heart rate while continuing to strengthen the legs and core. Keep your torso upright throughout the transition to ensure the work stays in the legs rather than the back.
19. Standing Side Crunches with Weights
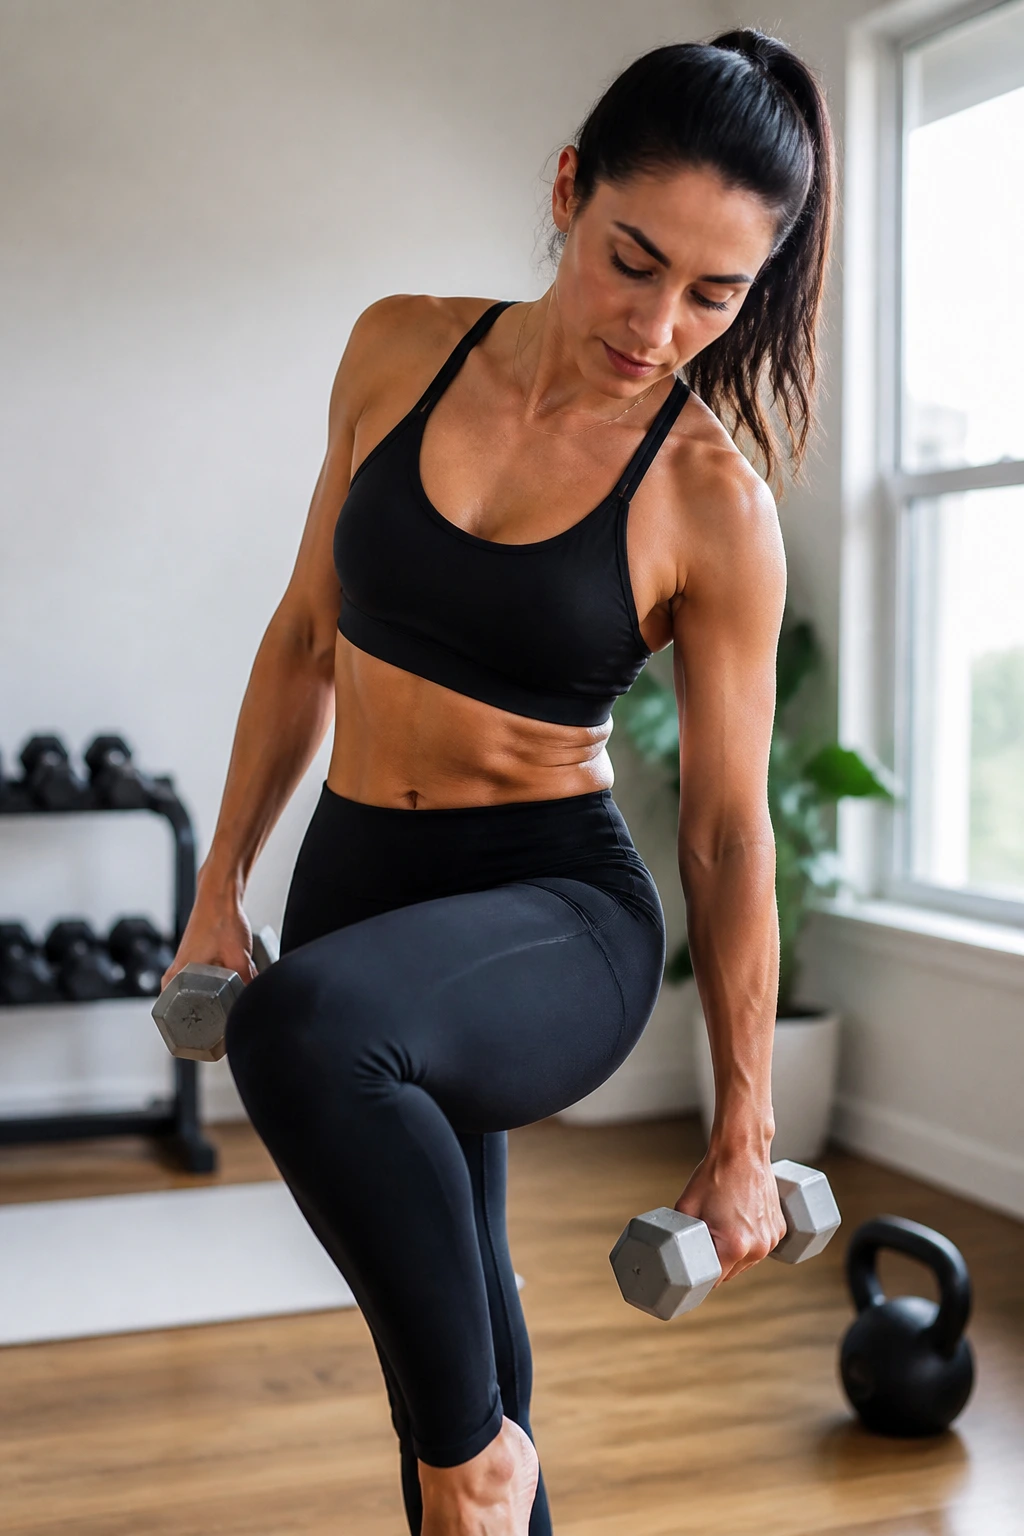
If you have light weights or even cans of food, hold them for this one. Stand with feet wide, holding the weights at your sides. Bend your torso to the right, sliding the right weight down toward your knee. Use your left oblique to pull yourself back to center.
Then, immediately bend to the left, sliding the left weight down. Alternate sides for thirty reps. Focus on the contraction of the side of your torso. Do not just let gravity pull you down; control the descent.
The weights add a small amount of resistance that creates a deeper burn in the obliques. Keep your chest forward; do not let your torso rotate toward the floor. You are moving in a straight vertical plane from side to side.
20. The Final Burnout
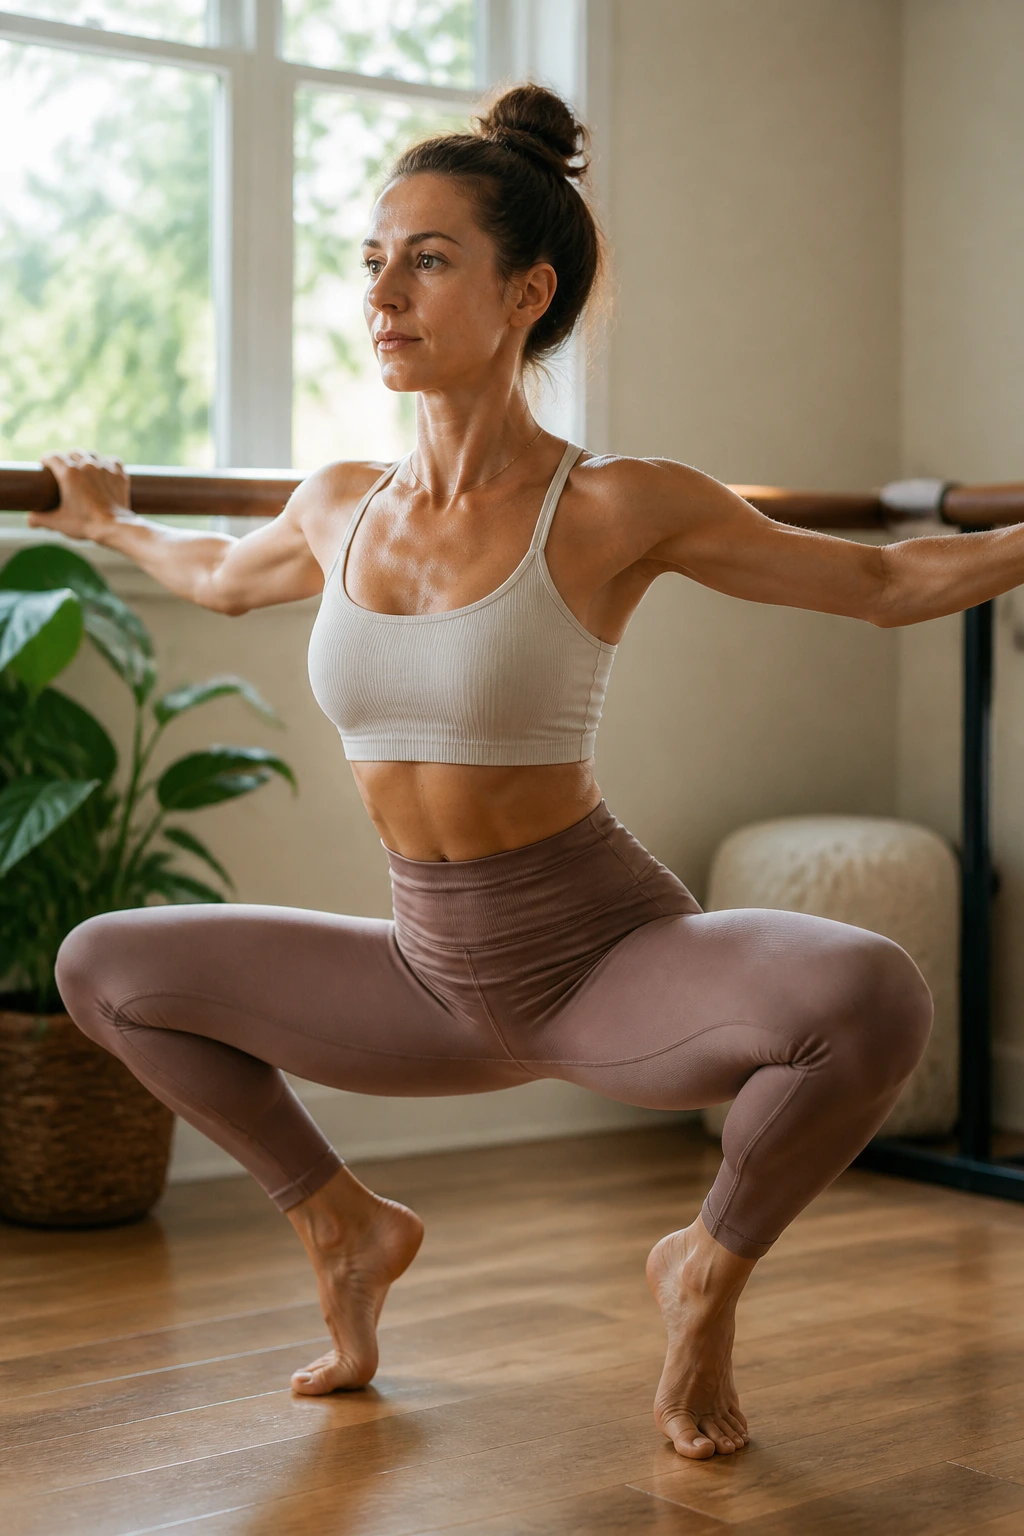
This is the grand finale. Return to the position of the very first exercise: First position, heels together, toes out. Lower into your deepest plié and hold. Now, lift your heels off the floor. You are balancing on the balls of your feet, knees bent, thighs shaking.
Pulse for thirty seconds. Then, stay low and press your knees back, engaging the outer glutes, for thirty seconds. Finally, hold still for ten seconds. If you have any energy left, shake out your legs—you have just completed a comprehensive, high-intensity barre session.
This final sequence is designed to exhaust the muscles completely. By combining the wide range of motion from the start of the workout with this final isometric hold, you maximize the muscle endurance. Your legs should feel heavy, tired, and thoroughly worked.
Final Thoughts
Barre is not about how heavy the weights are or how much you can lift. It is entirely about the quality of the movement and the integrity of your alignment. These twenty-minute routines are designed to be intense because they strip away the distractions of complex equipment and force you to focus entirely on the muscle groups involved.
When you practice these moves, you will notice that the “burn” you feel is the muscles responding to the challenge. Over time, that burn becomes familiar, and you will find you can hold positions longer, go deeper into your squats, and maintain better form throughout the entire session. Stick with the practice, stay consistent with your focus, and you will see the results of this discipline in your strength, posture, and body awareness.
