



That deep, vibrating fatigue in your quadriceps—the kind that makes your legs feel like they have a mind of their own—is the hallmark of a true barre-style workout. You know the feeling if you have ever spent a minute in a sustained isometric hold, hovering just inches above the floor while your muscles fire in a desperate attempt to keep you upright. It is not about how much weight you can lift or how fast you can move. It is entirely about the precision of your form, the length of your holds, and the intensity of your focus.
The magic of this training method lies in the concept of muscular failure. By taking large muscle groups through small, repetitive ranges of motion, you exhaust the fibers that standard gym cardio often skips over. This is not about bulk; it is about density, endurance, and that lean, toned aesthetic that comes from holding a position until your body begs you to release it. You do not need a fancy studio or a professional ballet bar to get these results. Your living room chair, a sturdy countertop, or even a wall will serve the purpose just fine.
These movements require nothing more than body weight and a bit of floor space. If you have light hand weights, you can use them to add resistance, but the real work happens in the mind-to-muscle connection. You must force yourself to stay in the zone, ignoring the burn as it creeps into your glutes, thighs, and core. Keep your movements controlled, keep your spine neutral, and do not let the momentum of a swing replace the effort of a lift.
1. Heel-Clicking Thigh Sculpting
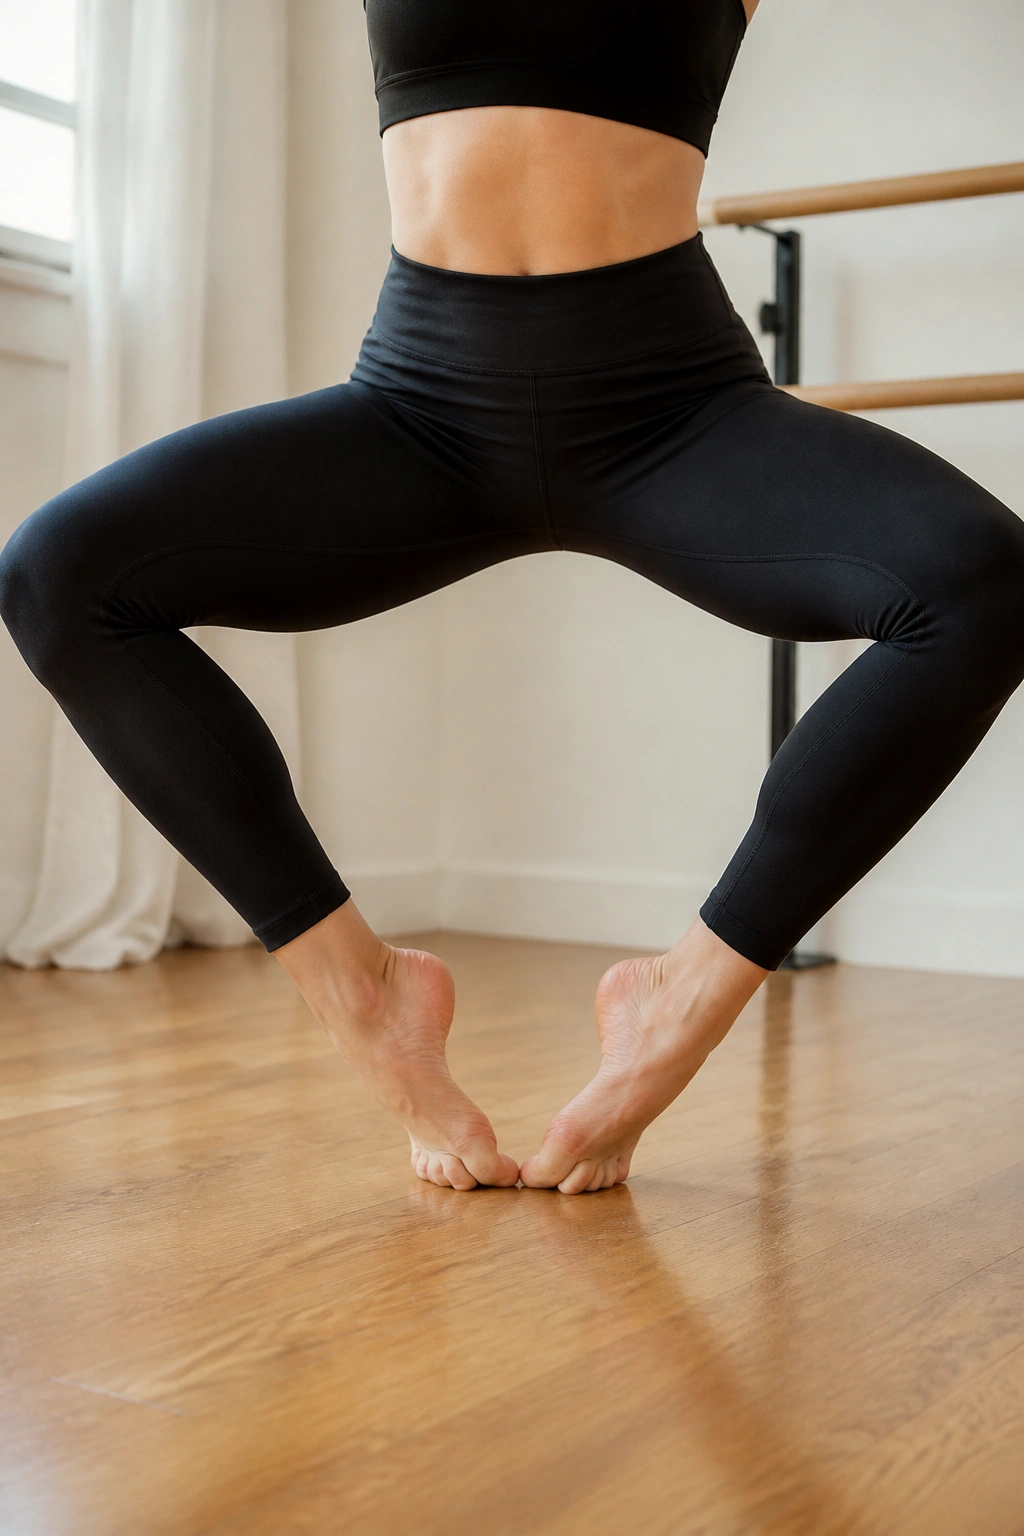
This move demands complete attention to your stance, specifically your turnout. Start by standing with your heels touching and toes turned outward, creating a V-shape with your feet. You do not need to go into a full ballet turnout; just rotate from your hips, not your knees. Keep your spine perfectly straight, as if a string is pulling the crown of your head toward the ceiling.
The Mechanics of the Lift
Drop into a shallow squat, keeping your knees wide and tracking directly over your second toes. Now, lift your heels two inches off the floor. This is where the intensity skyrockets. Pulse your hips up and down in one-inch increments. You are not standing up all the way; you are staying in that “low zone” where the muscles never get a chance to relax.
Why This Works
By keeping the heels elevated and the knees pressed outward, you force the adductors—the inner thighs—to engage continuously. It is an isometric nightmare, in the best way possible.
Form Check: If you feel this in your lower back, tuck your tailbone slightly under to flatten your lumbar spine.
2. The High-Plank Knee Drive
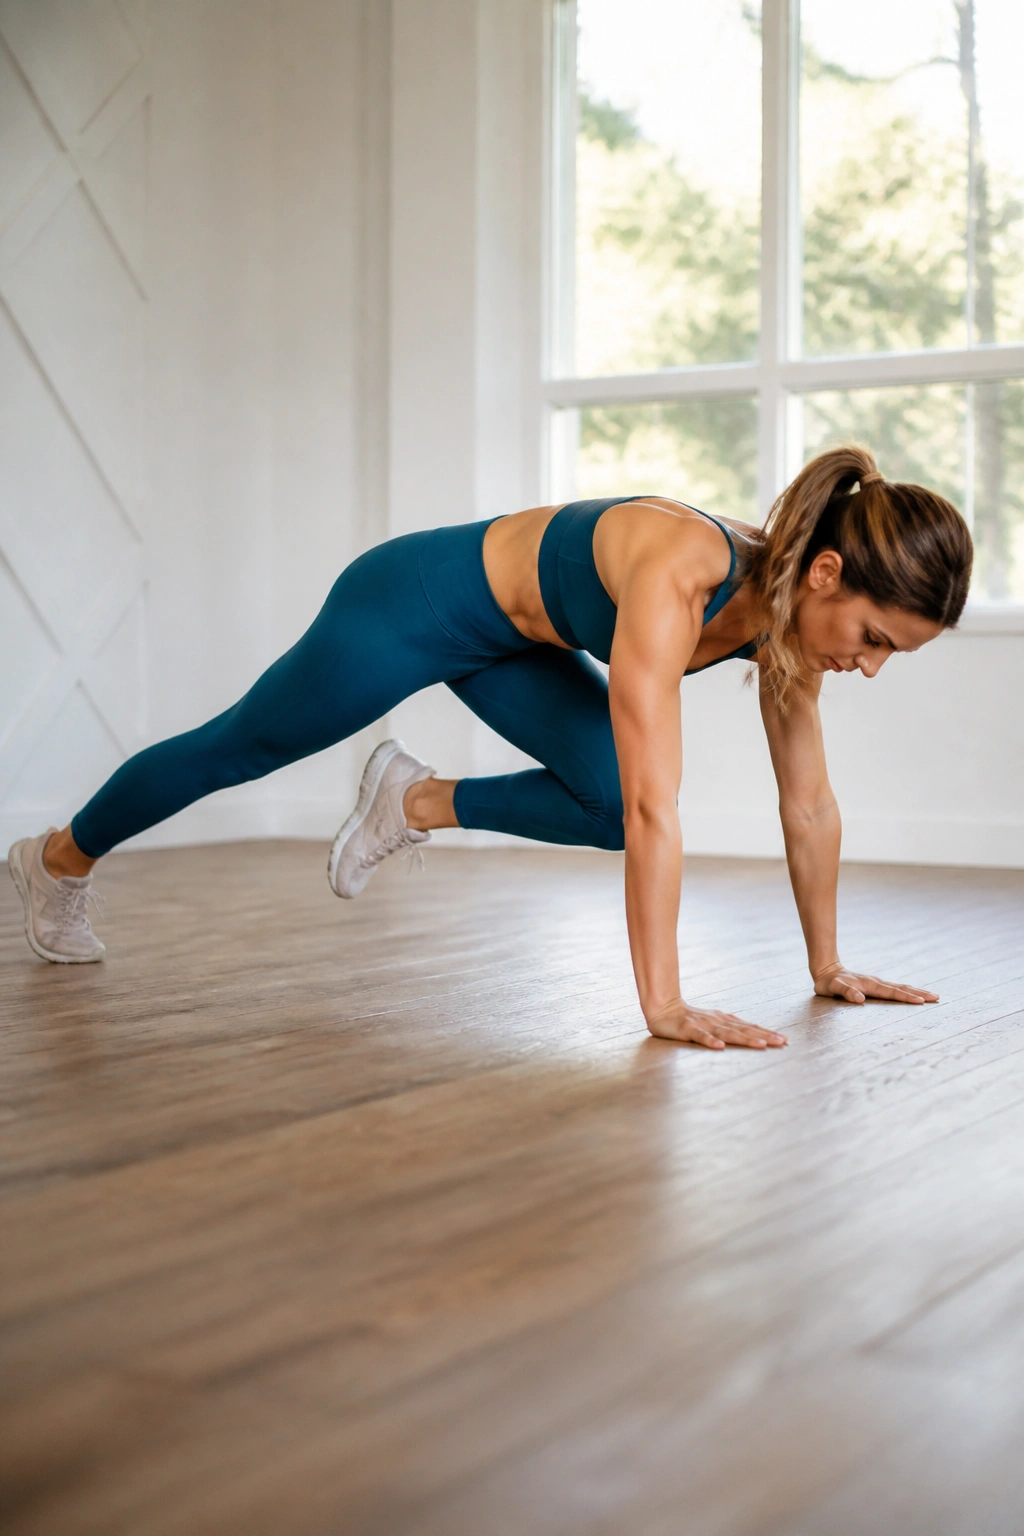
Forget the standard plank where you just hold still for minutes on end. This version introduces movement to increase the metabolic demand, forcing your core to stabilize while the rest of your body is in motion. Start in a high plank position, hands directly under your shoulders, body forming a straight line from heels to crown.
Executing the Drive
Maintain that rock-solid plank, then slowly draw your right knee toward your right elbow. Pause for a beat, squeeze your obliques, and return to the starting position. Keep the movement slow. Do not let your hips sag as you bring the knee forward.
Increasing the Intensity
Focus on the connection between your ribcage and your pelvis. As you drive the knee, exhale forcefully. This contraction is what carves the waistline, not the act of moving the leg itself.
Pro tip: Imagine you are dragging your foot through sand. The resistance you create in your own mind makes this simple movement significantly harder.
3. Chair Pose Isometric Holds
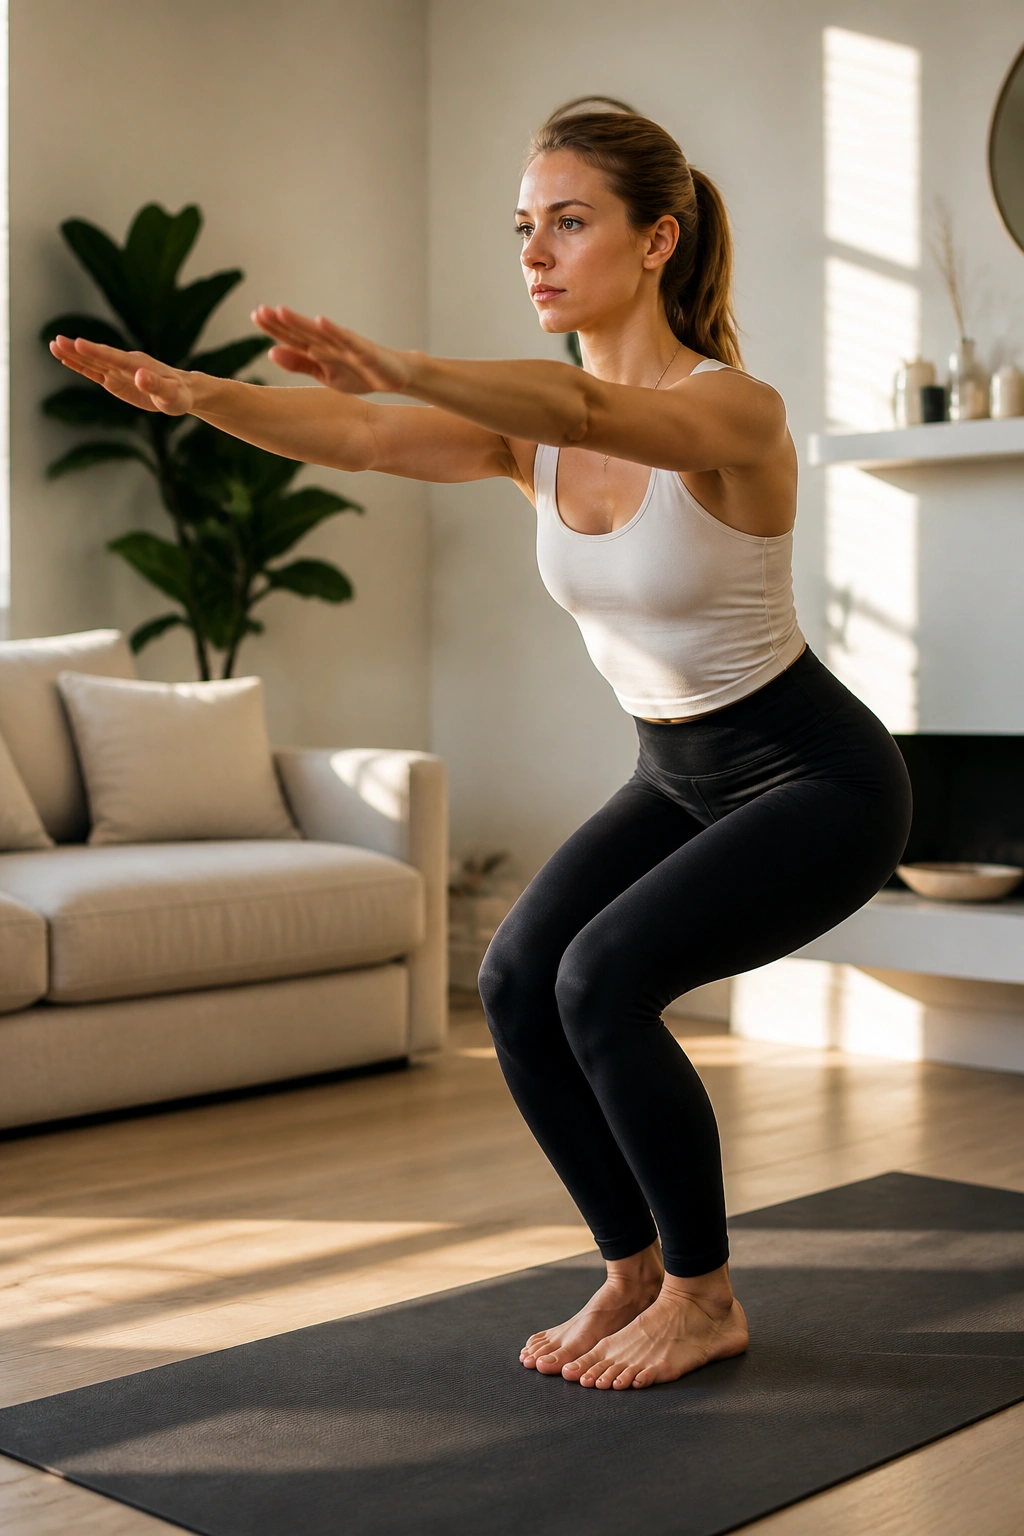
This move sounds simple, but holding it for a full sixty seconds is a different story. Stand with your feet hip-width apart and your arms reaching forward at shoulder height. Lower your hips back as if you are sitting into a low, invisible chair. Your weight should be in your heels, and you should be able to wiggle your toes freely inside your shoes.
The Isometric Principle
Hold the bottom position of the squat. Your goal is to stay perfectly still. If your legs start to shake, you are doing it exactly right. That tremor is your muscle fibers firing rapidly to maintain stability against gravity.
What to Watch For
Do not let your chest collapse forward. Keep your shoulders rolled back and down, away from your ears. Your gaze should remain fixed on a point in front of you to maintain balance and neck alignment.
Modification: If your shoulders fatigue, bring your hands to your heart in a prayer position. The leg work remains equally effective.
4. Standing Glute Kickbacks
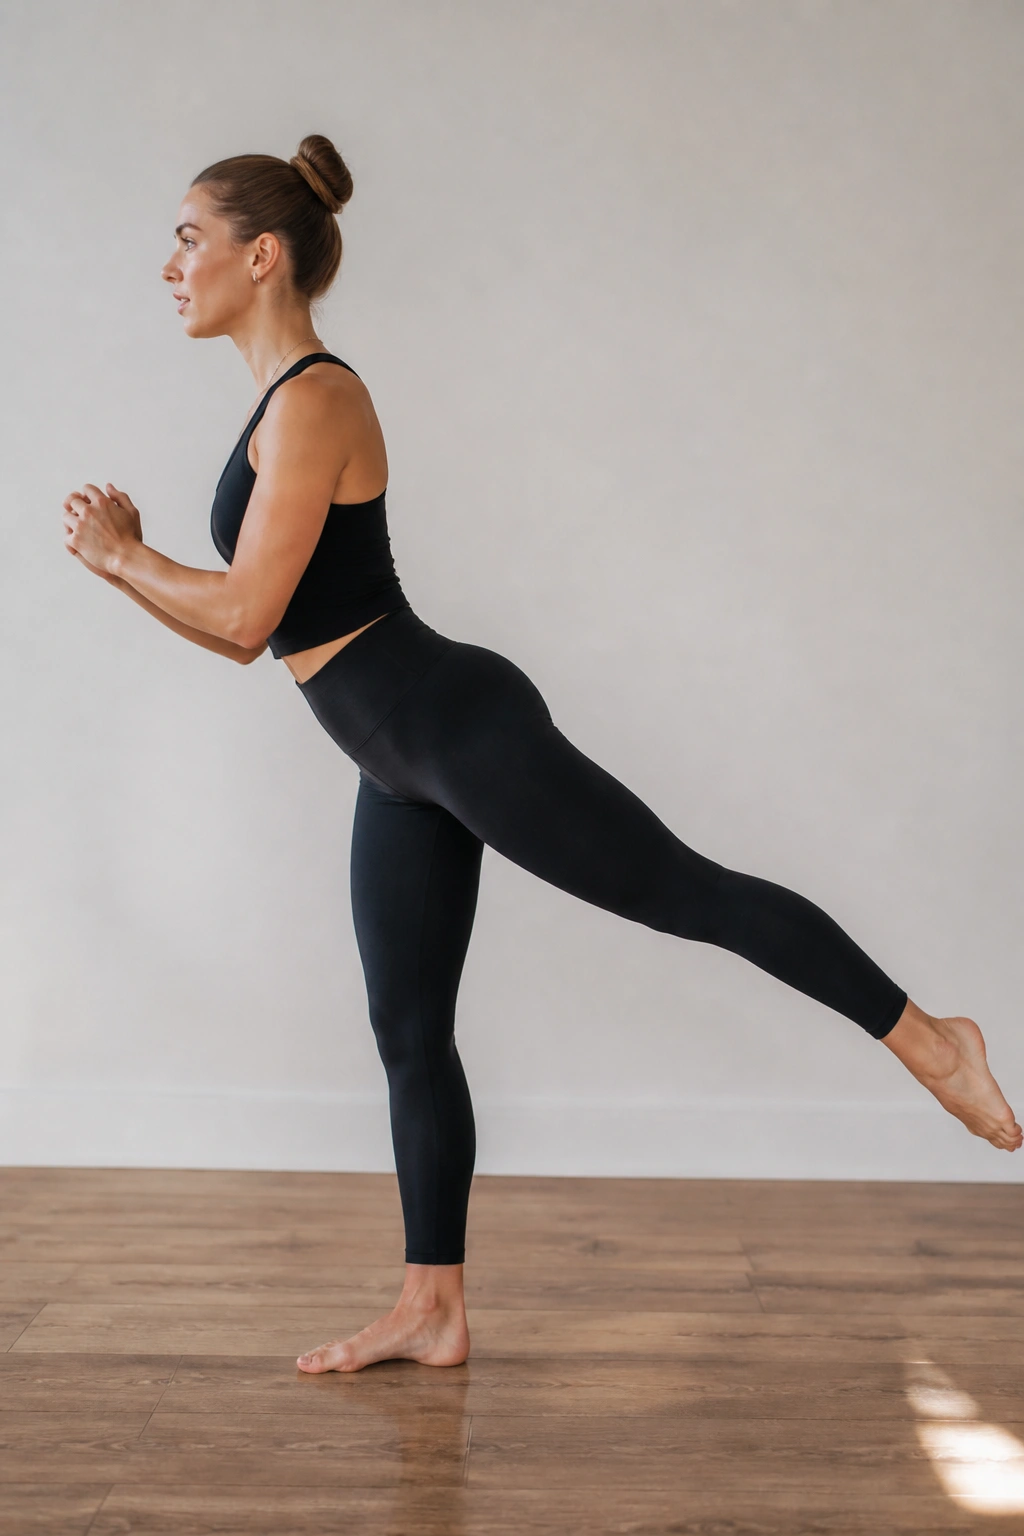
You need a sturdy surface for this one—a chair back or a wall will work. Stand facing your support, feet parallel. Shift your weight into your left leg and keep a micro-bend in that knee. Extend your right leg straight back, toe pointed, just an inch off the floor.
The Pulse Sequence
Lift the right leg up an inch, then lower it an inch. Keep the movement small. If you lift too high, your lower back will arch and take over the work from your glute. The glute should be the only thing firing.
Achieving the Burn
After twenty pulses, hold the leg at its peak height. Squeeze the glute muscle hard—contract it like you are trying to hold a coin between your cheeks. Hold that squeeze for ten seconds before releasing.
Crucial detail: Keep your hips square to the floor. Do not let your right hip open up toward the ceiling.
5. Barre-Style Inner Thigh Pulses
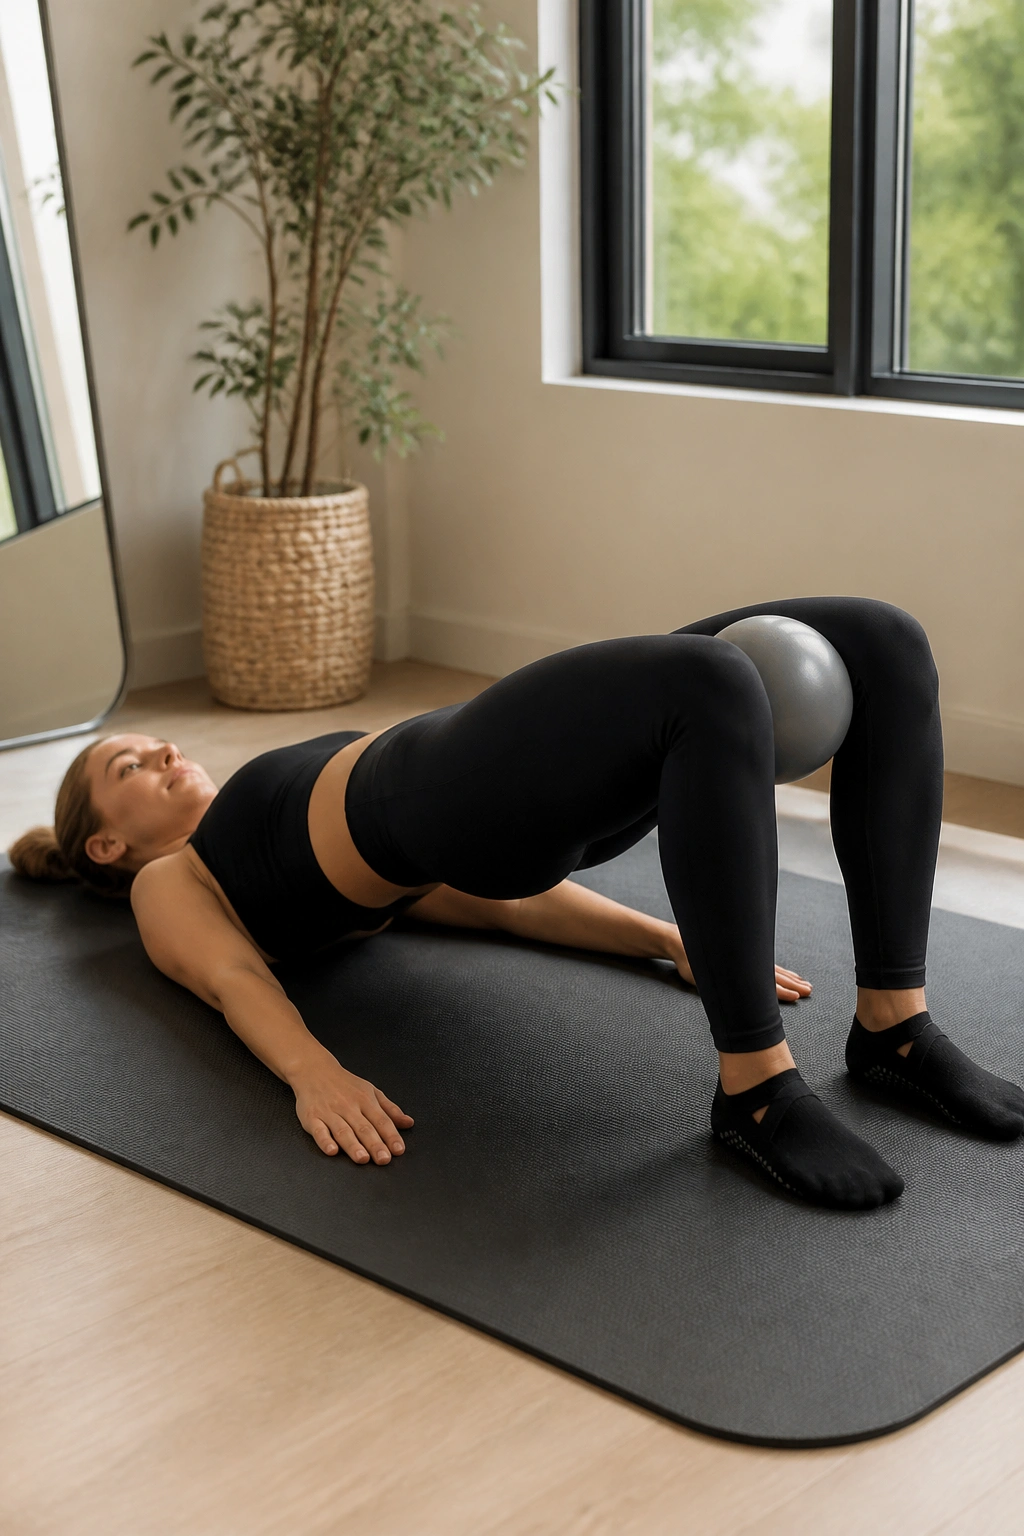
Lie on your back, knees bent, feet flat on the floor. Place a small, squishy ball or a folded towel between your knees. This is a classic barre staple that targets the deep internal muscles of the thighs, which are often neglected in traditional leg exercises.
The Squeeze and Lift
Lift your hips into a bridge position, keeping your spine neutral. Once in the bridge, squeeze the object between your knees as hard as you can. Hold that squeeze while you pulse your hips up toward the ceiling.
Why the Ball Matters
The object between your knees prevents your thighs from drifting apart, which keeps the tension on the inner thigh muscles throughout the entire set. You should feel an immediate, sharp fatigue in the groin area.
Advanced Variation: Raise your heels off the floor while you are in the bridge to add calf activation to the mix.
6. The Tricep Dip Hold
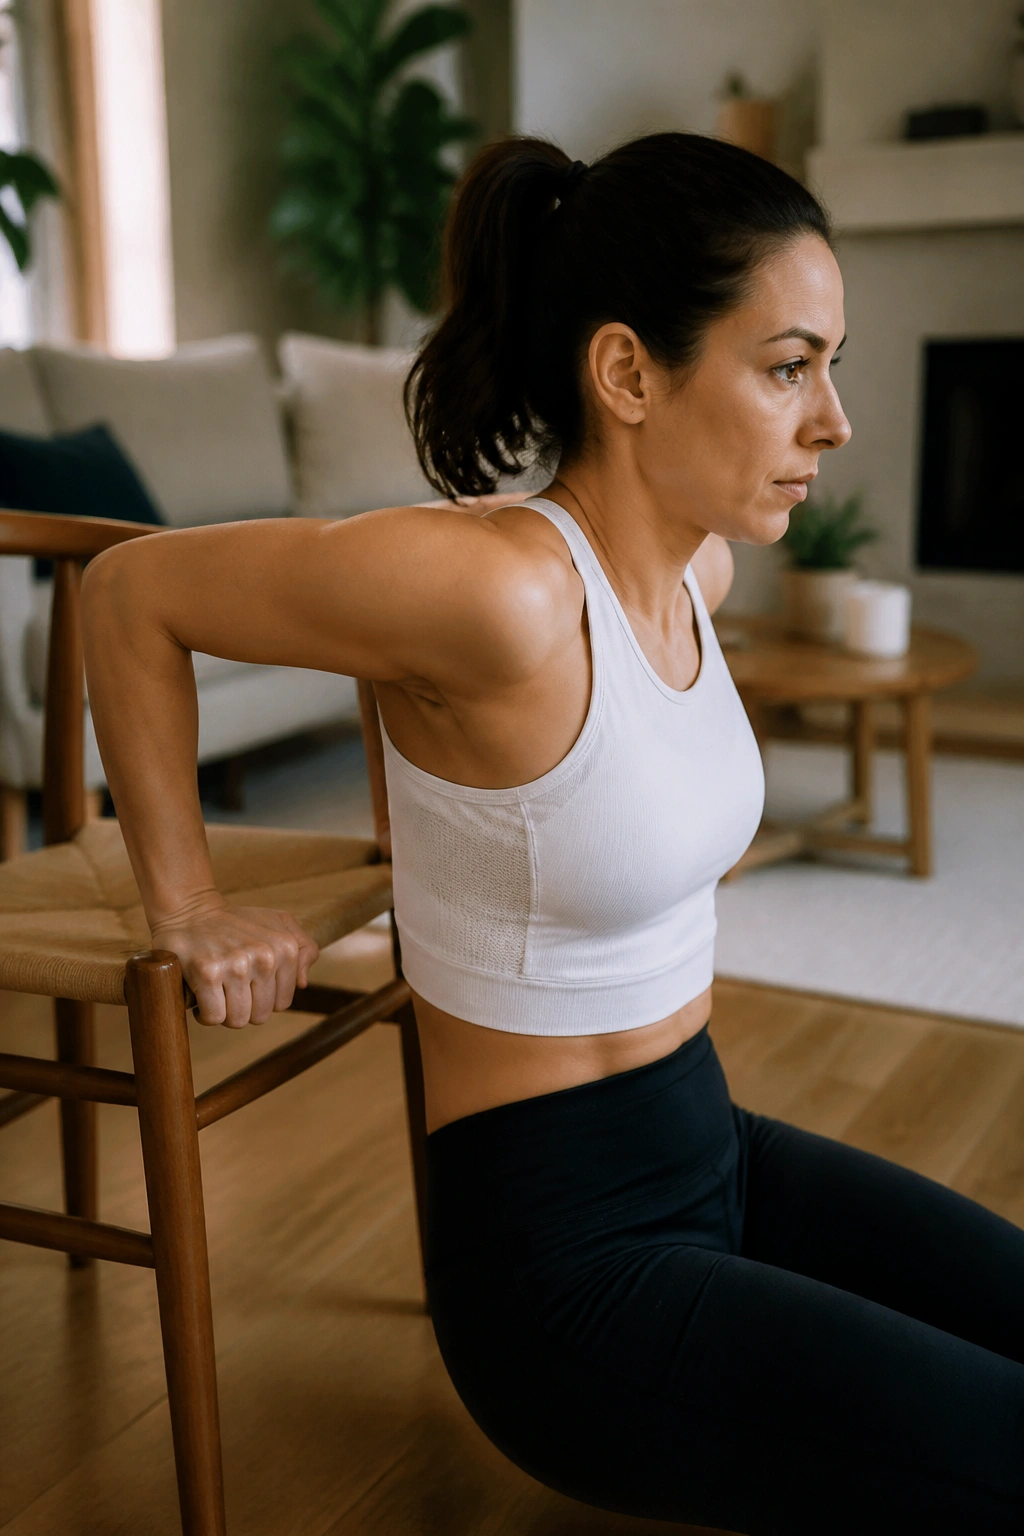
Using a chair or a bench, place your hands shoulder-width apart on the edge. Walk your feet out so your legs are bent, and your butt is hovering just off the edge of the seat. Drop your hips down until your elbows are at a ninety-degree angle.
The Isometric Lock
Instead of pushing back up immediately, stay at the bottom of the dip. Your arms should be trembling. This is the “hold” phase that builds muscular endurance in the back of the arms, where you usually see the most stubborn loose skin.
Correcting Form
Keep your elbows pointed straight back, not splayed out to the sides. If your elbows wing out, you are putting unnecessary strain on your shoulder joints.
Note: If this hurts your wrists, try turning your hands slightly outward or use a pair of dumbbells to create a neutral wrist grip on the floor.
7. Weighted Arabesque Lifts
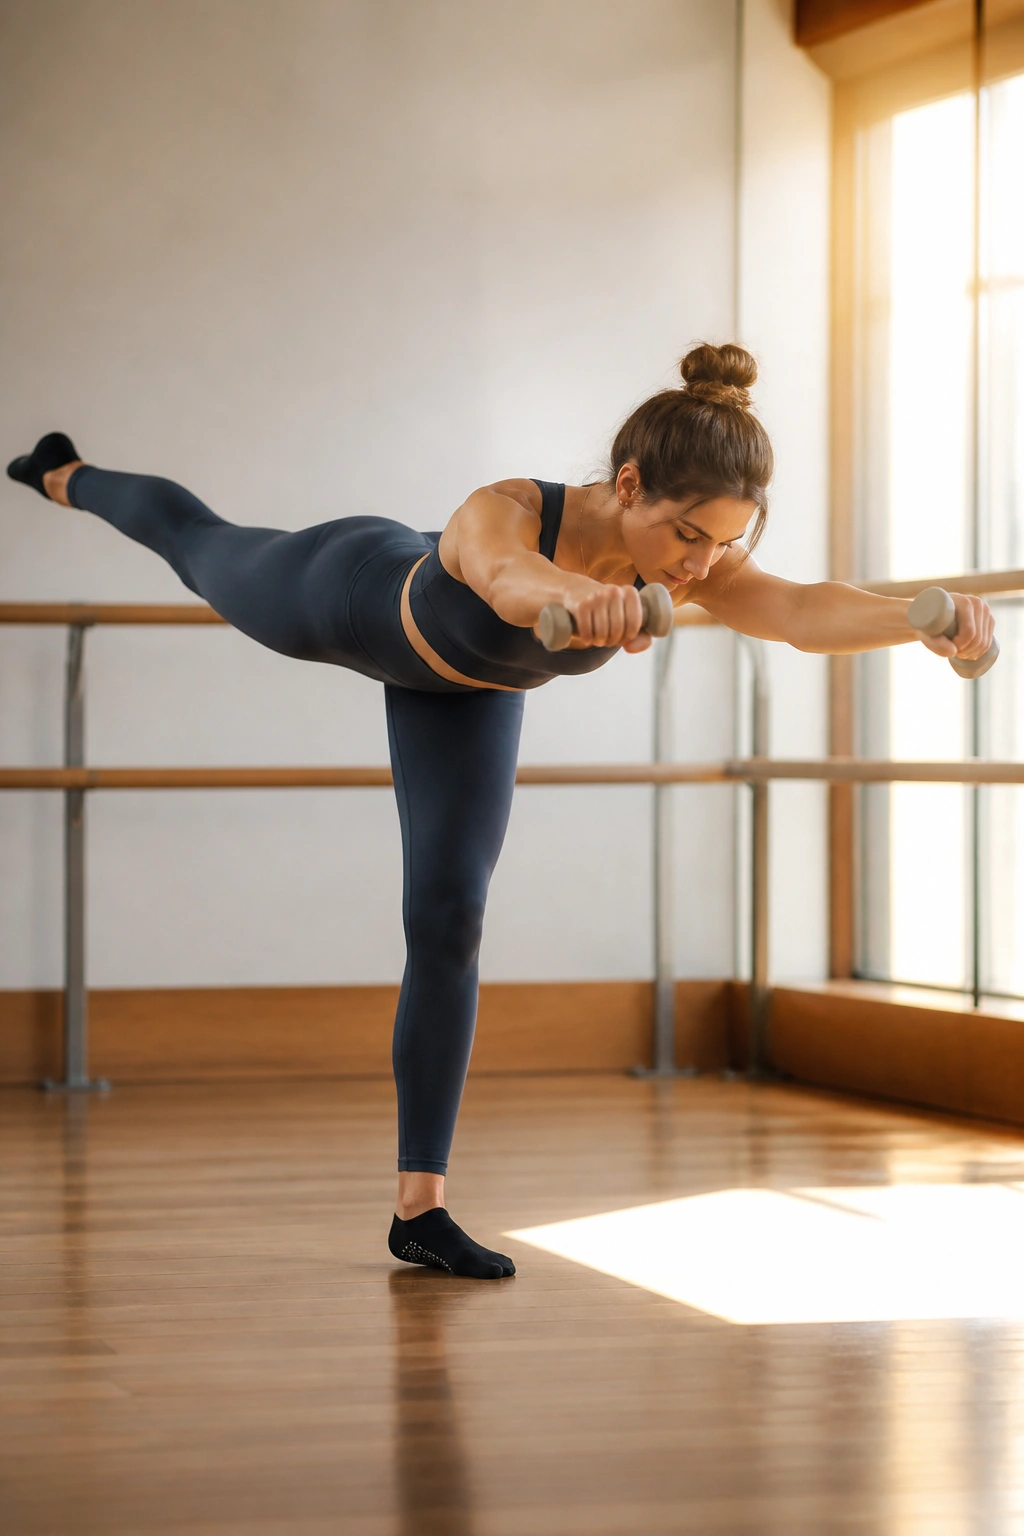
Take a pair of light weights—one or two pounds is plenty—and hold one in each hand. Stand with your feet in a parallel position. Hinge forward at your hips, bringing your torso toward a horizontal position while extending your left leg straight back behind you.
Finding the Balance
Reach your arms forward, framing your ears. Lift the left leg up and down while simultaneously pulsing your arms upward. This is a full-body engagement. You are balancing on one leg, working your core, glutes, and shoulders all at once.
The Focus Point
Stare at a single spot on the floor to maintain your balance. If you wobble, tap your toe down for a split second to reset, then lift it back up immediately. Do not rest your weight on that stabilizing foot.
Why this works: The added weight of the dumbbells lengthens the lever of your arms, making your core work much harder to keep you stable.
8. Lateral Lunge Floor Sweeps
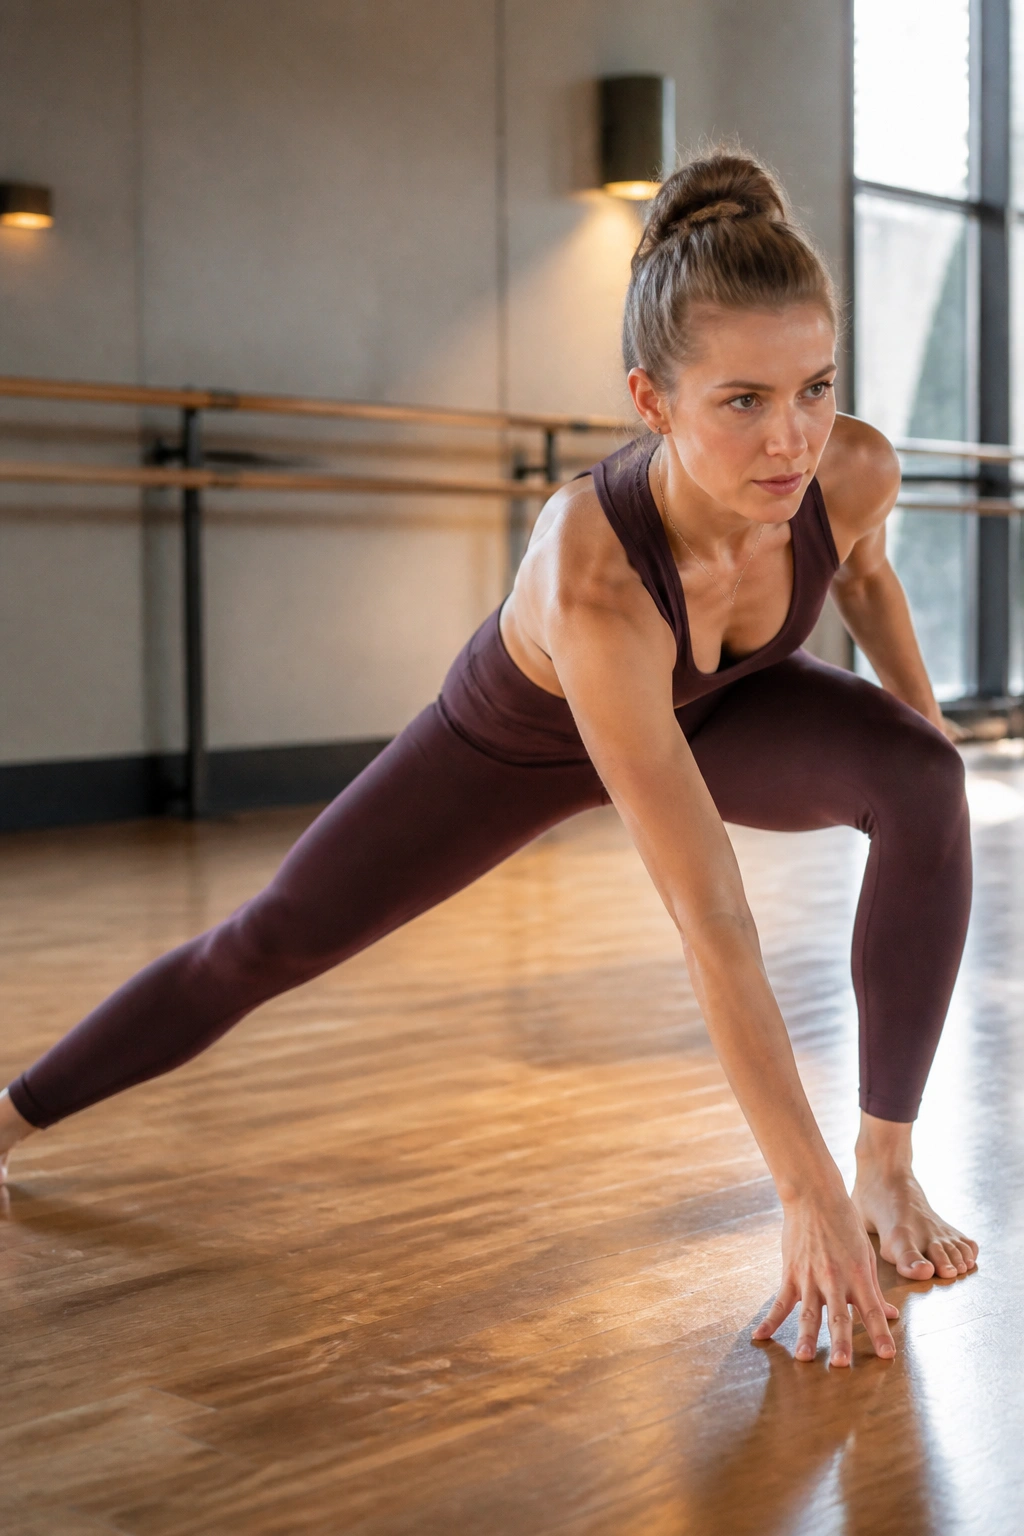
Start standing with feet wider than hip-width. Step your right leg out to the side, bending your right knee and keeping your left leg perfectly straight. As you sink into the lunge, reach your left hand toward your right toes.
The Flow
Come back to standing, and then immediately switch to the other side. This is not about speed; it is about depth. Get your glutes as low as you can on every repetition.
Integrating the Core
As you stand up from the lunge, pull your abs in tight. You are using your core to return to center. If you feel like you are just using your legs to jump back, you are missing the abdominal engagement.
Tip: Keep your chest upright. Do not hunch over to reach the floor. The depth comes from your hips, not your spine.
9. Core-Engaging C-Curve Sit-Ups
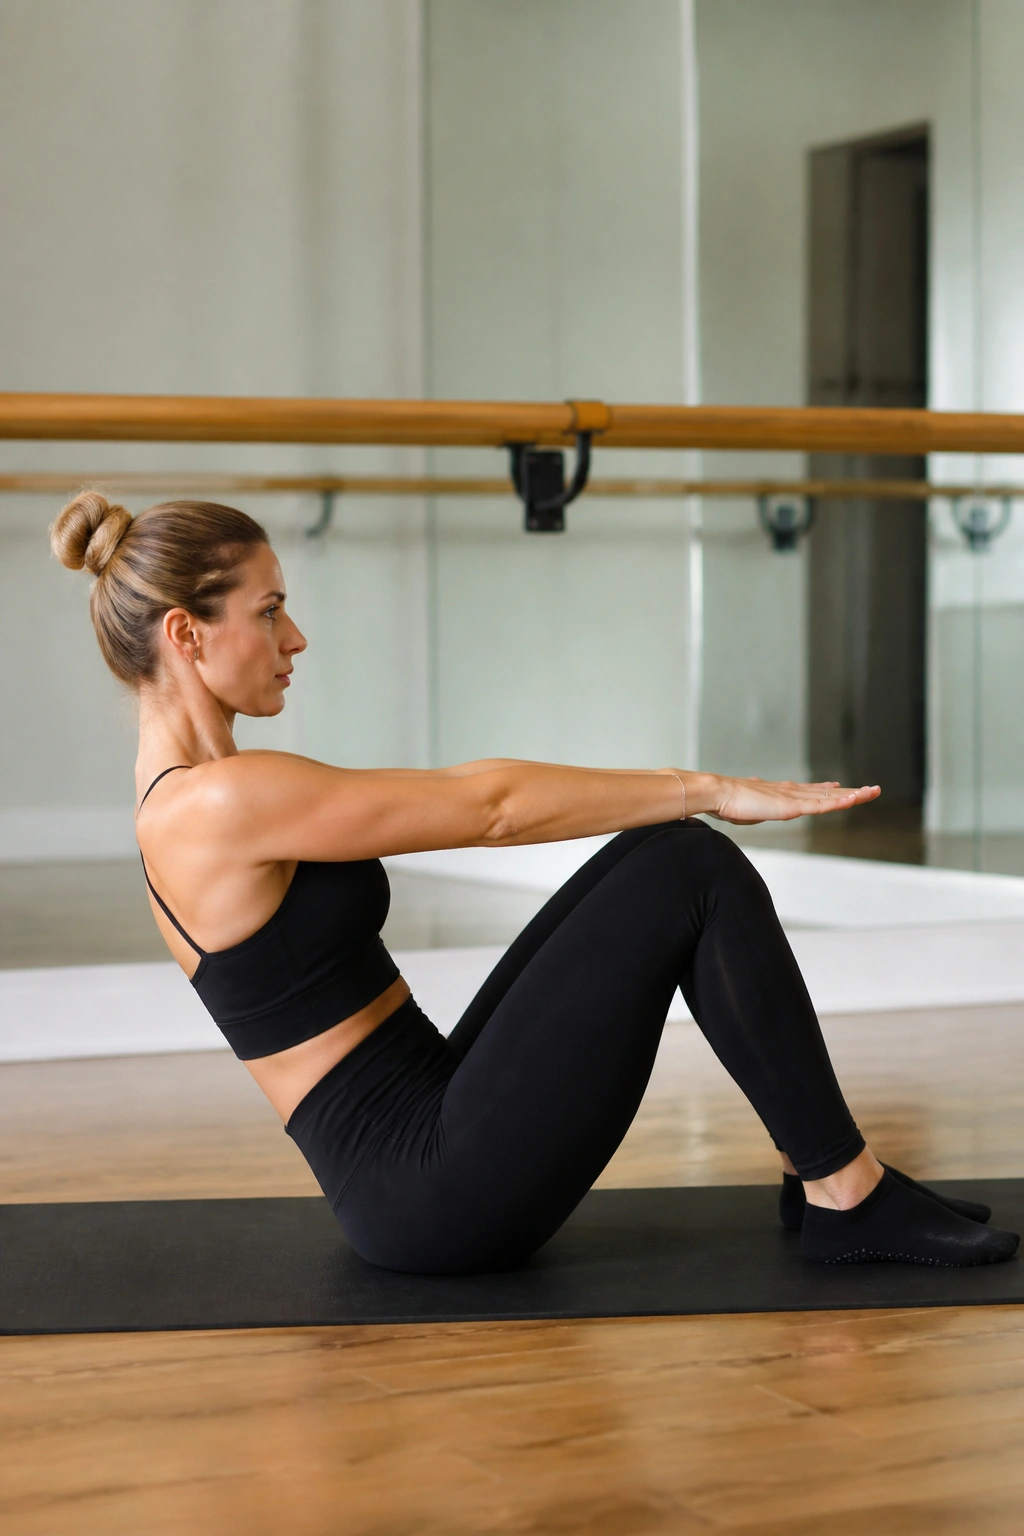
Sit on the floor with your knees bent and feet flat. Reach your arms forward, parallel to the ground. Now, tuck your tailbone and roll your spine back until you are halfway to the floor. This is your “C-curve.” Your belly button should be pulling toward your spine, creating a hollow, scooped shape in your core.
The Tiny Movement
From this C-curve position, pulse your torso an inch back and an inch forward. You should never come all the way up to a sitting position, and you should never let your shoulders touch the mat.
The Mental Check
It is easy to let your hip flexors do the work here. If you feel a pinching sensation in the front of your hips, stop. Focus on hollowing out your abdomen more deeply and pushing your lower back toward the floor.
Warning: Do not strain your neck. If your neck hurts, place one hand behind your head for support while the other continues to reach forward.
10. Reverse Plank Hip Dips
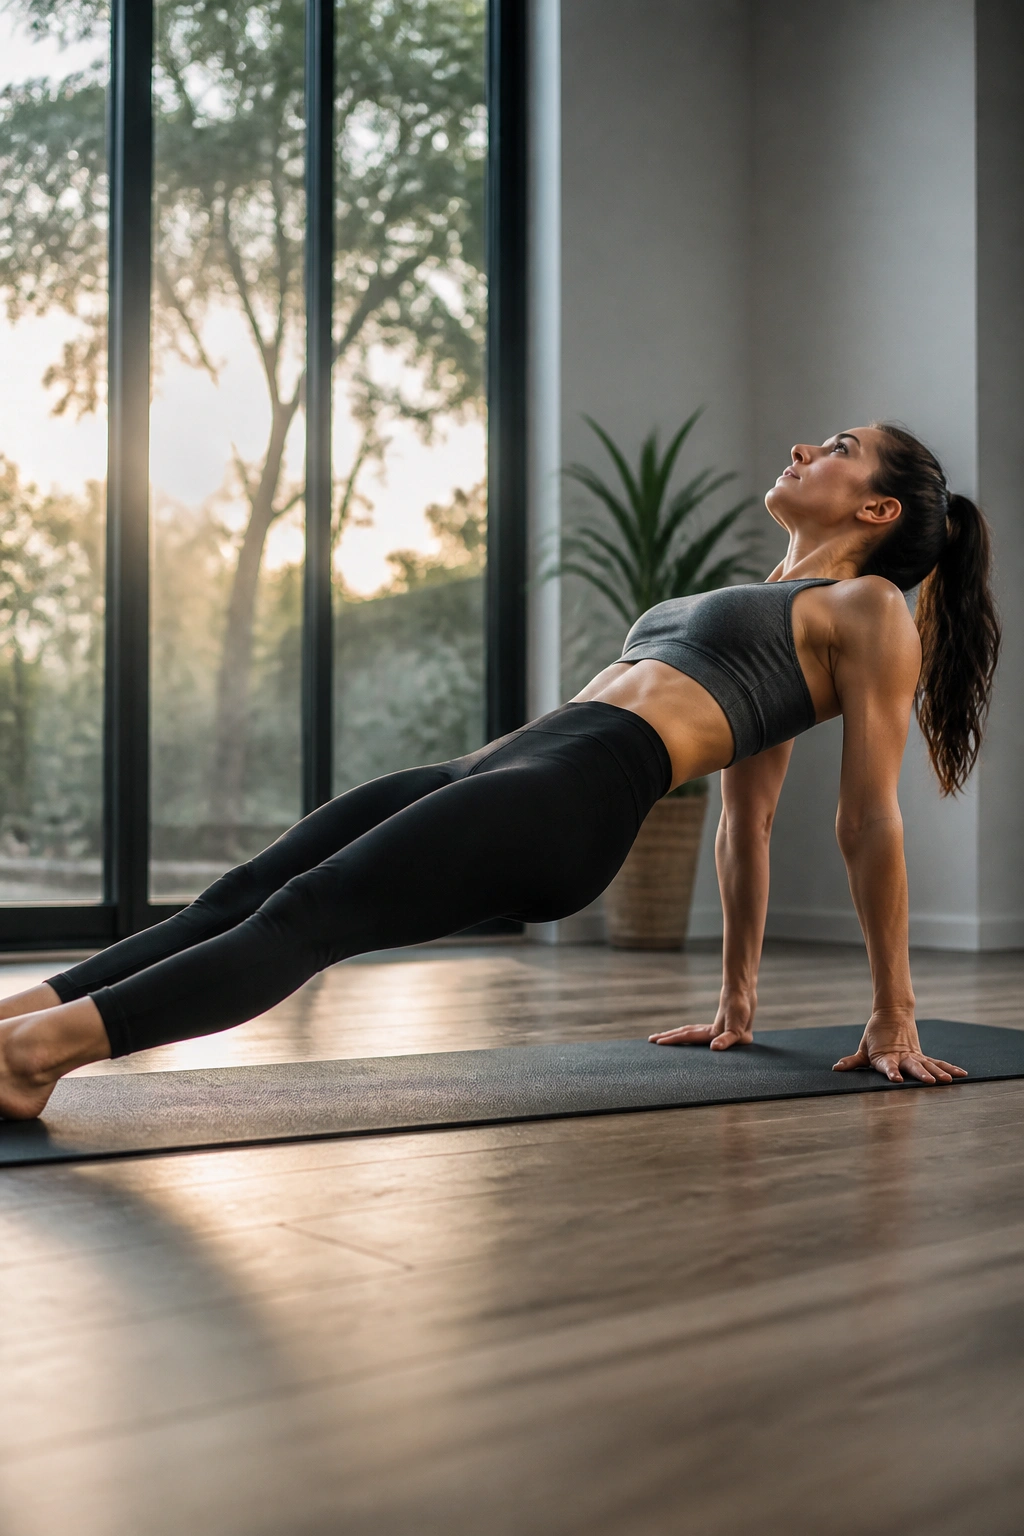
Sit on the floor with your legs extended in front of you. Place your hands behind you, fingers pointing toward your heels. Lift your hips off the floor, forming a straight, inverted line from your head to your heels. This is a reverse plank.
The Dip
Once you are stable, drop your hips down toward the floor—but do not let them touch. Push them back up to the starting position. You are targeting your glutes, hamstrings, and shoulders, but your core is the anchor holding it all together.
Safety Protocol
If you feel pressure in your lower back, lower your hips slightly. You do not need to be in a perfect tabletop. A lower angle is often safer and just as effective for the muscle groups you are trying to target.
Variation: If this is too much for your wrists, drop to your forearms for a modified reverse plank hold.
11. Side-Lying Leg Circles
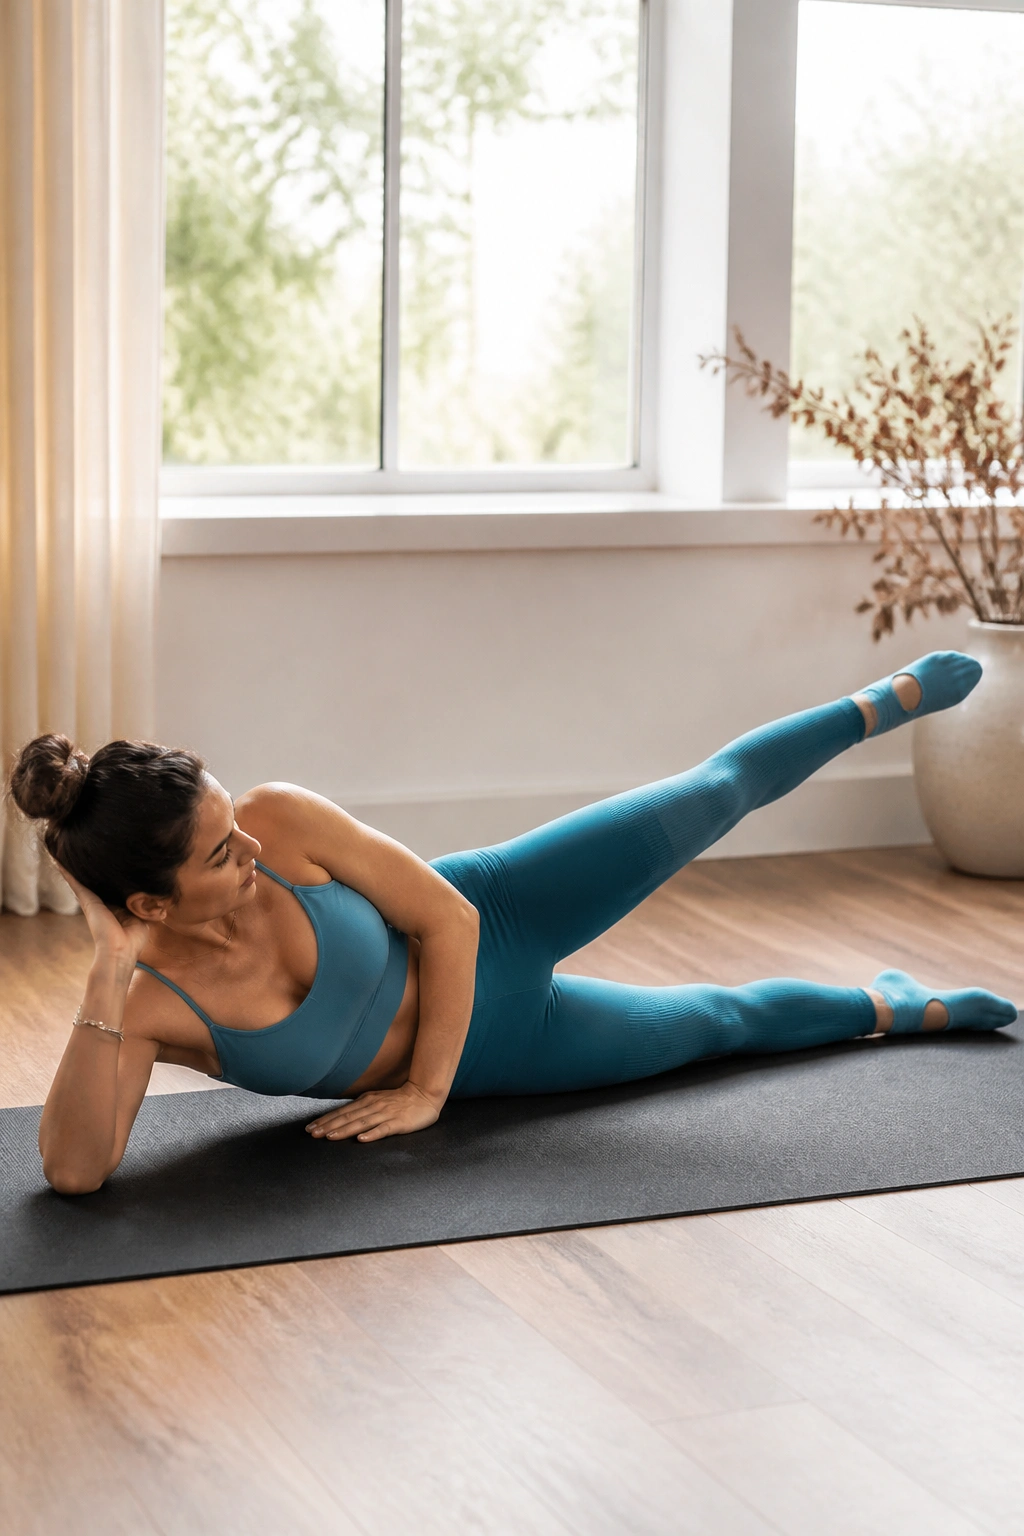
Lie on your side, legs stacked and fully extended. Support your head with your hand. Lift the top leg to hip height. You are now going to draw circles in the air with your toe.
The Precision of the Circle
Make the circles small—no larger than the size of a grapefruit. If the circles get too big, you will start rocking your hips, and you will lose the isolation in your outer glute and hip. Keep your torso completely rigid.
Direction Matters
Do ten circles clockwise, then ten counter-clockwise. You will be shocked at how much this burns your hip stabilizers. This move is excellent for strengthening the muscles that support your pelvis and lower back.
Pro tip: Imagine you are drawing the circle on a wall behind you with your heel, rather than just floating it in the air.
12. The Pretzel Lift
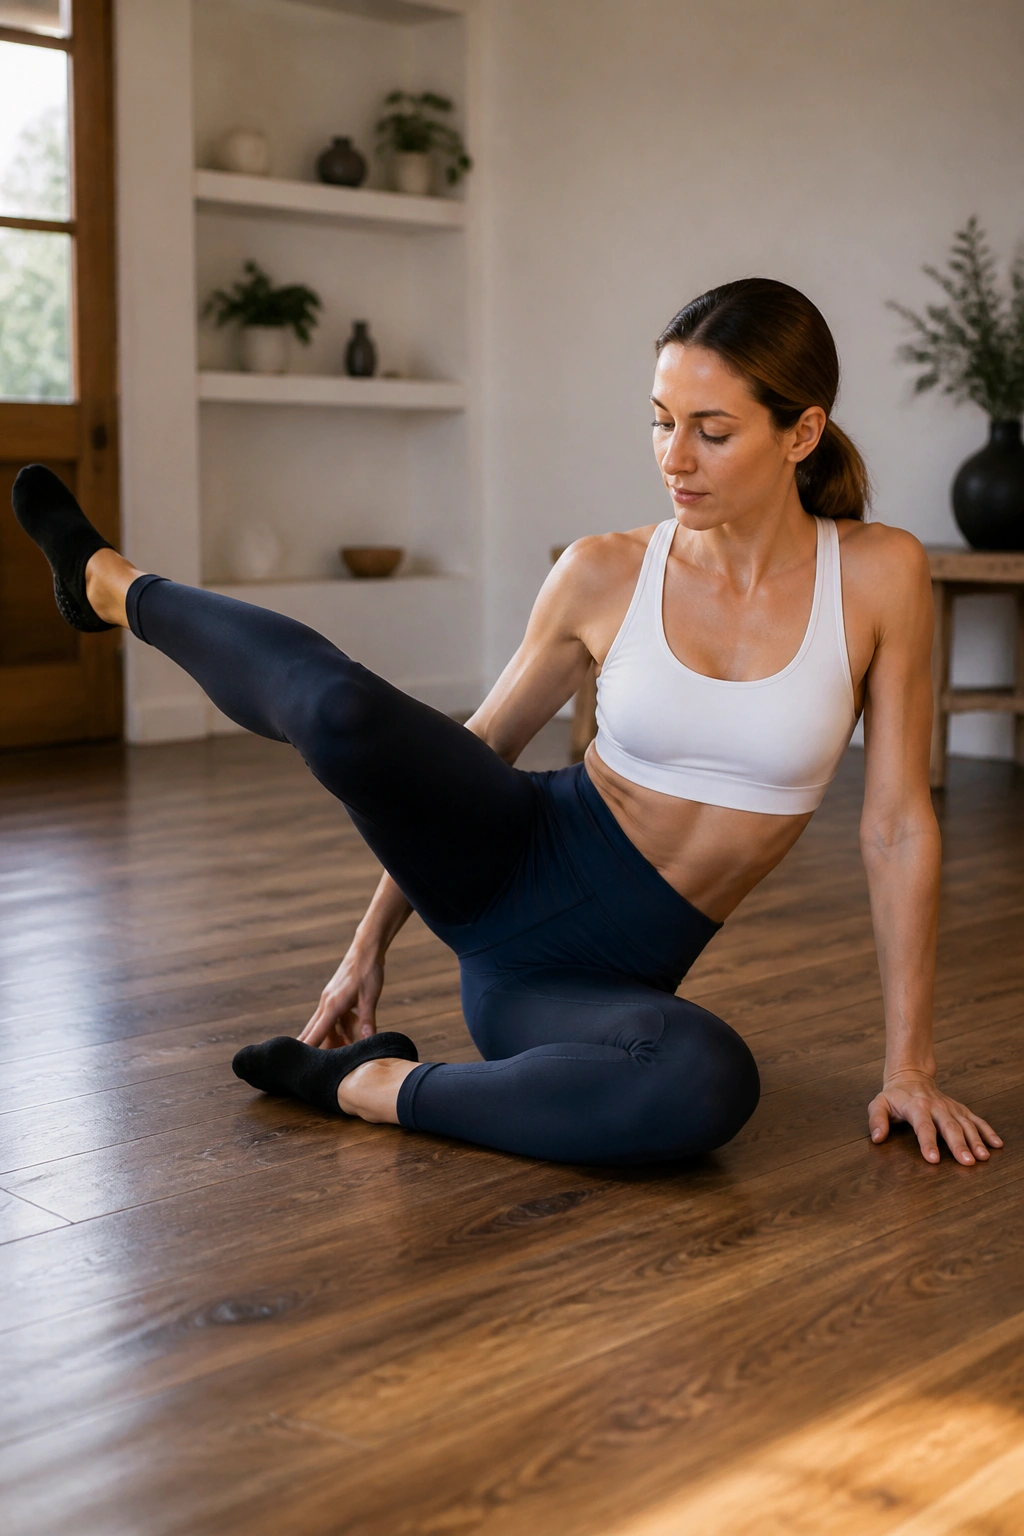
This is perhaps the most iconic move in the barre repertoire. Sit on the floor. Bend your right knee at a ninety-degree angle in front of you. Bend your left knee at a ninety-degree angle behind you. You should look like a pretzel.
The Shift
Lean your torso slightly toward the right. Lift your back leg (the left one) off the floor. Pulse that leg up and down. You are targeting the side of your glute—the medial gluteus—which is responsible for hip stability.
Troubleshooting
This move often feels awkward at first. If you feel this in your knee, stop and readjust. You should feel this exclusively in the meat of your glute muscle. If you are struggling, try placing your hands on the floor to stabilize your torso more effectively.
Why it’s effective: It isolates the glute medius in a way that squats and lunges simply cannot, as it removes the help of the quadriceps.
13. Wide Second-Position Squat Pulses
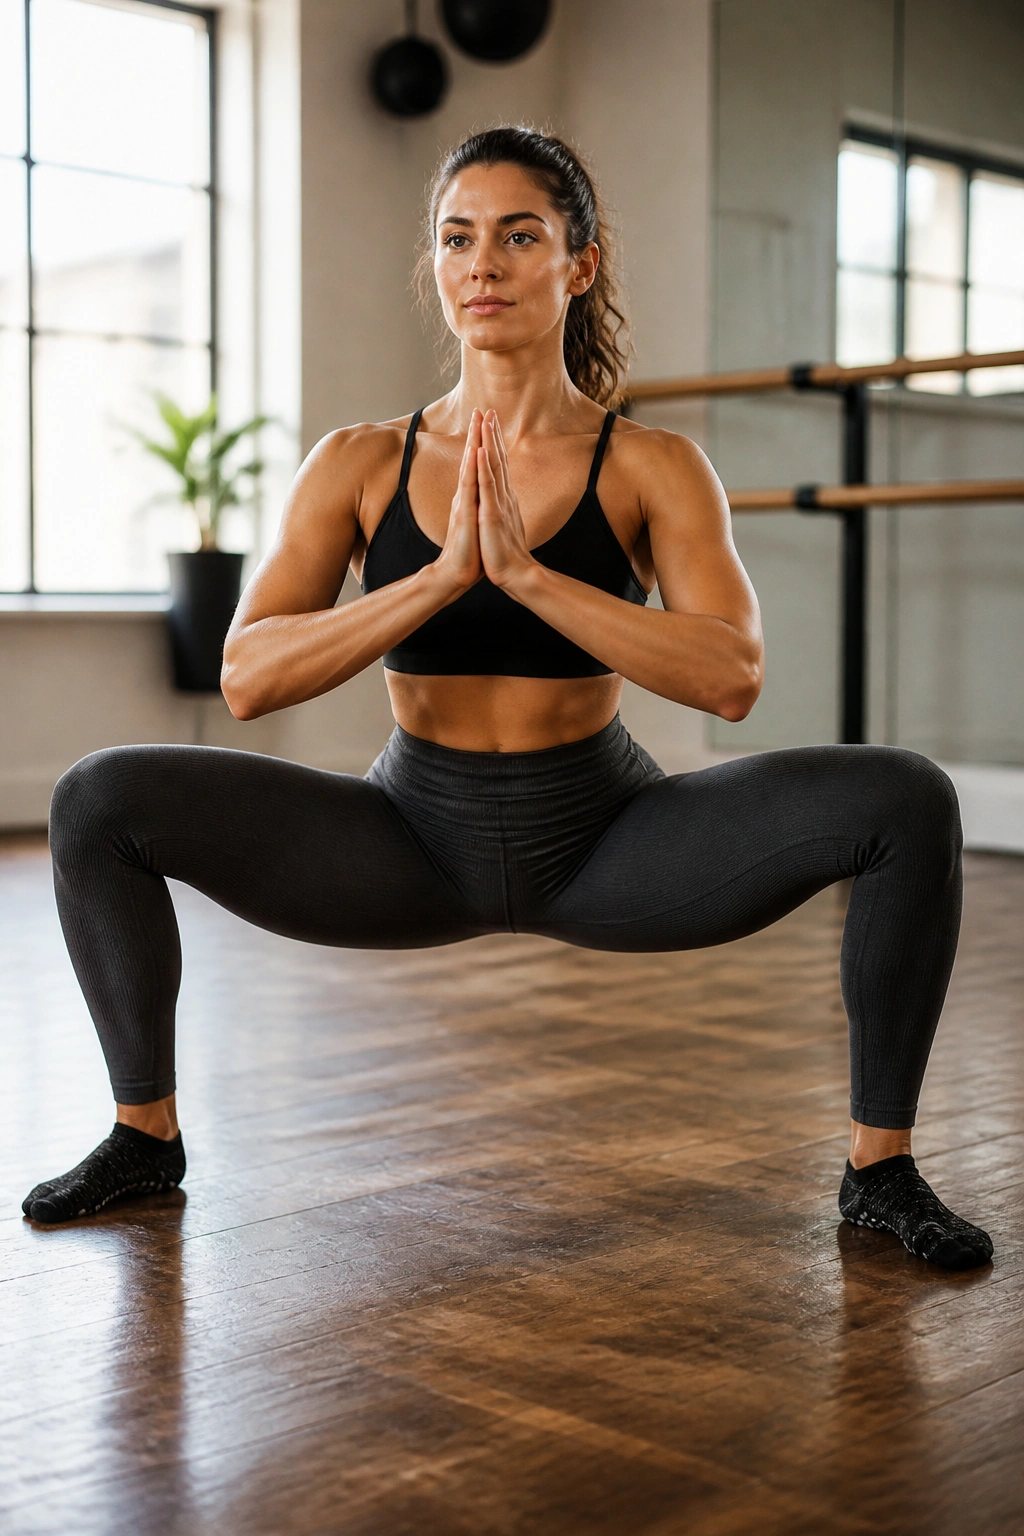
Step your feet out very wide, wider than shoulder-width, and turn your toes out. Drop into a squat, keeping your knees wide and your chest upright. This is second position.
The Low Pulse
Once you are in the bottom of your squat, stay there. Pulse your hips down, not up. You want to stay in the deepest part of the movement. Your thighs should be parallel to the floor, if possible.
The Squeeze
To get more out of this, imagine you are trying to slide your feet together without actually moving them. This inward pulling sensation—isometric adductor engagement—makes the movement ten times harder.
Note: If your knees cave inward, you are losing the alignment. Ensure your knees are constantly tracking over your toes.
14. Plank-to-Pike Slides
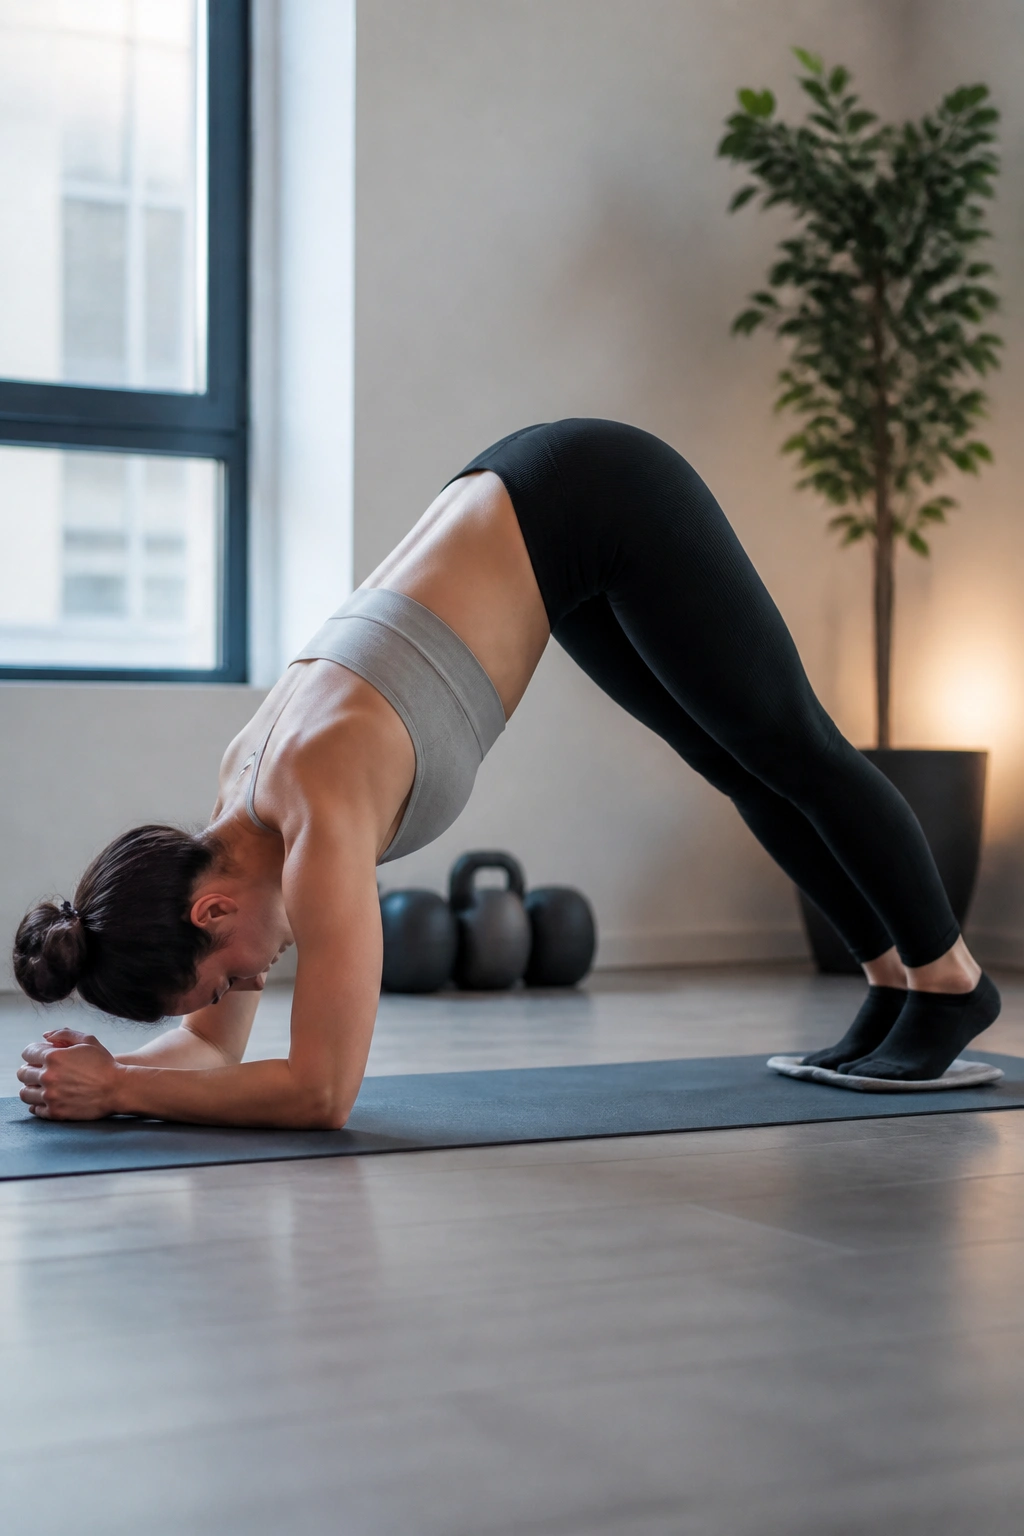
Start in a forearm plank position. Your core must be engaged tight. If you have socks on a smooth floor, this works perfectly. If you are on a mat, place a small towel under your feet.
The Pike
Keep your legs straight and lift your hips high, dragging your feet toward your elbows. Your body should look like an inverted V. Pause at the top, then slowly slide your feet back out to the plank position.
Avoiding the Arch
The biggest mistake here is letting your back sag on the return to the plank. When you slide back, engage your abs aggressively to stop your hips before they dip below the straight line. This is a powerful abdominal strengthener.
Tip: If you cannot do this with straight legs, try the “knee tuck” version, where you bring your knees to your chest instead of piking your hips.
15. Clamshells with Resistance Bands
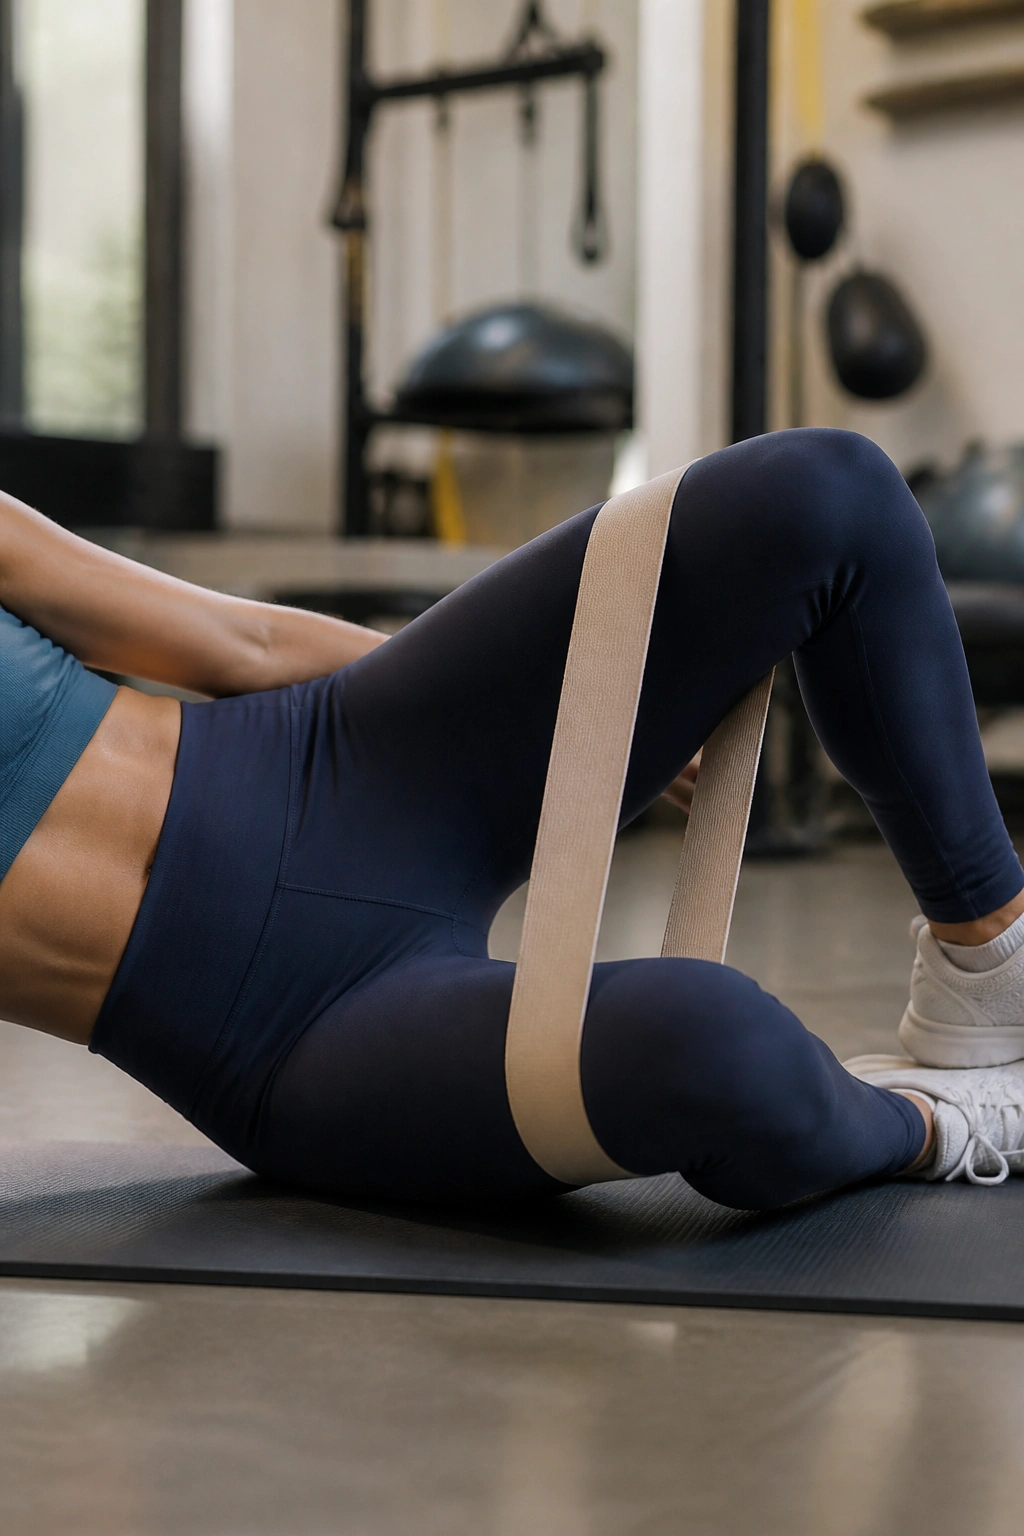
Lie on your side with knees bent at a forty-five-degree angle. Place a resistance band around your thighs, just above your knees. Keep your feet touching.
The Opening
Open your top knee as wide as you can, fighting against the resistance of the band. Pause for a second at the top, feeling the burn in your hip. Lower slowly. Do not rush the return.
Controlling the Return
The eccentric phase—the lowering back down—is where you get the most strength gains. If you let the band snap your knee shut, you are cheating yourself out of half the work. Lower with control.
Why this works: It isolates the deep rotators of the hip, which are essential for preventing knee injuries and stabilizing your gait.
16. Balancing Passé Holds
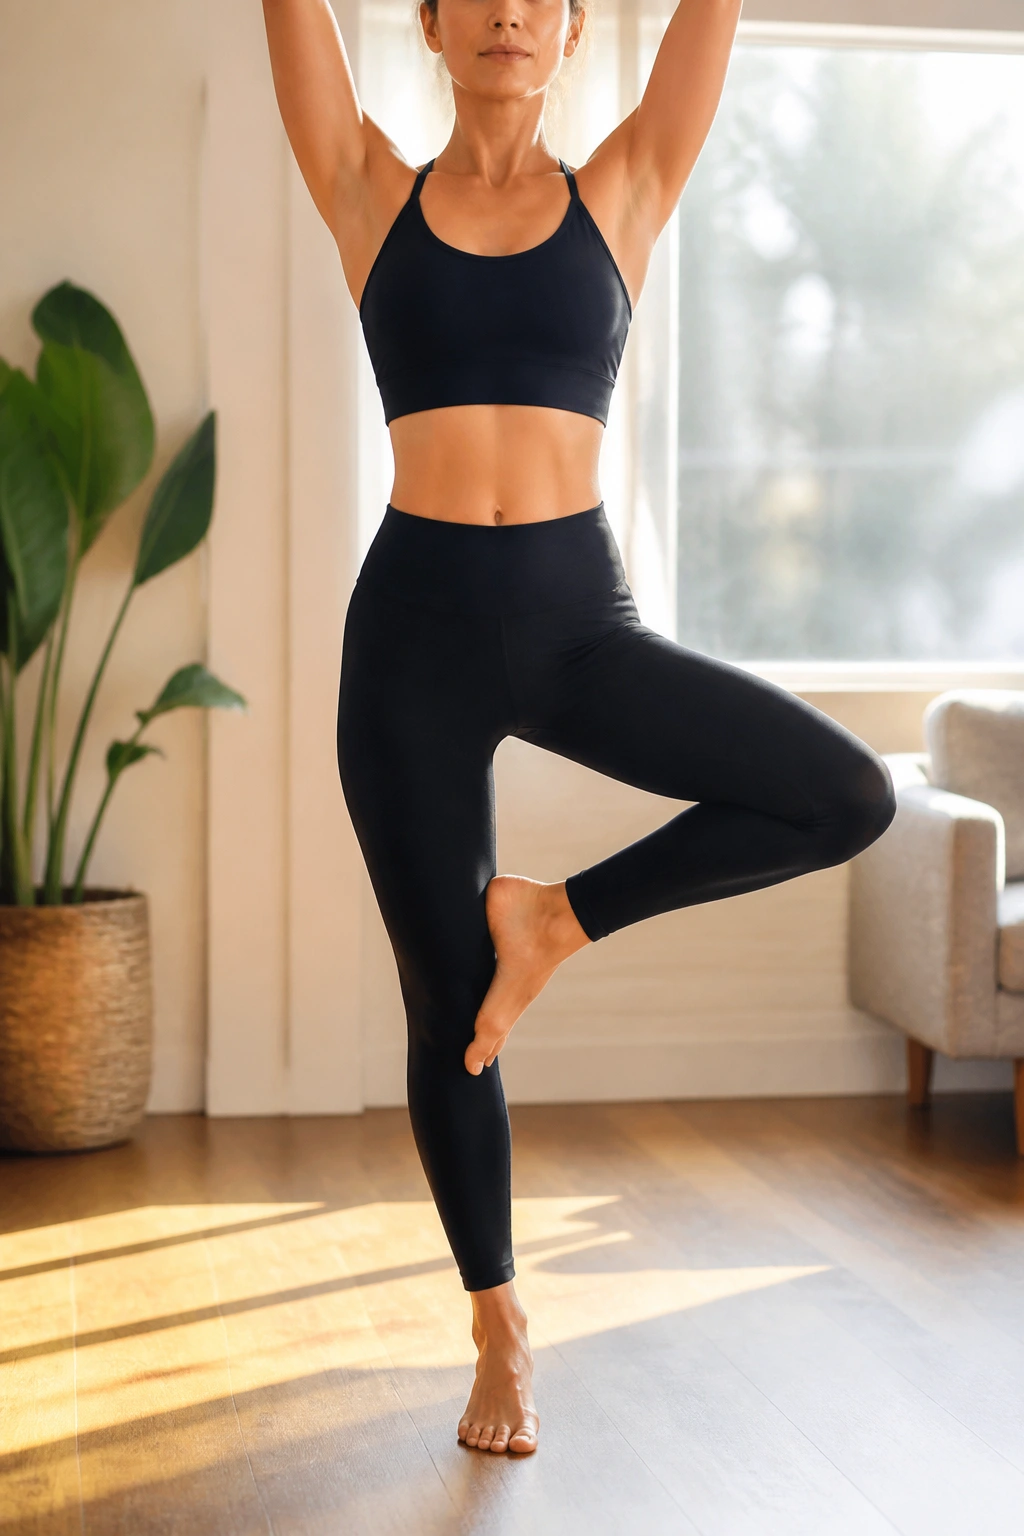
Stand tall with good posture. Shift your weight to your left leg. Bring your right foot to rest against your left calf, knee turned out to the side. This is your passé position.
The Hold
Reach your arms overhead or out to the side for balance. Hold this for as long as you can. It sounds simple, but maintaining this balance while your stabilizing leg is slightly fatigued from previous exercises is a significant challenge.
The Core Connection
To stay upright, you must engage your pelvic floor and lower abdominals. If you feel like you are tipping over, pull your belly button in harder. It acts as your anchor.
Observation: You will notice one side is significantly easier to balance on than the other. That is normal. Spend extra time on your non-dominant side to even out the imbalances.
17. Elevated Glute Bridges
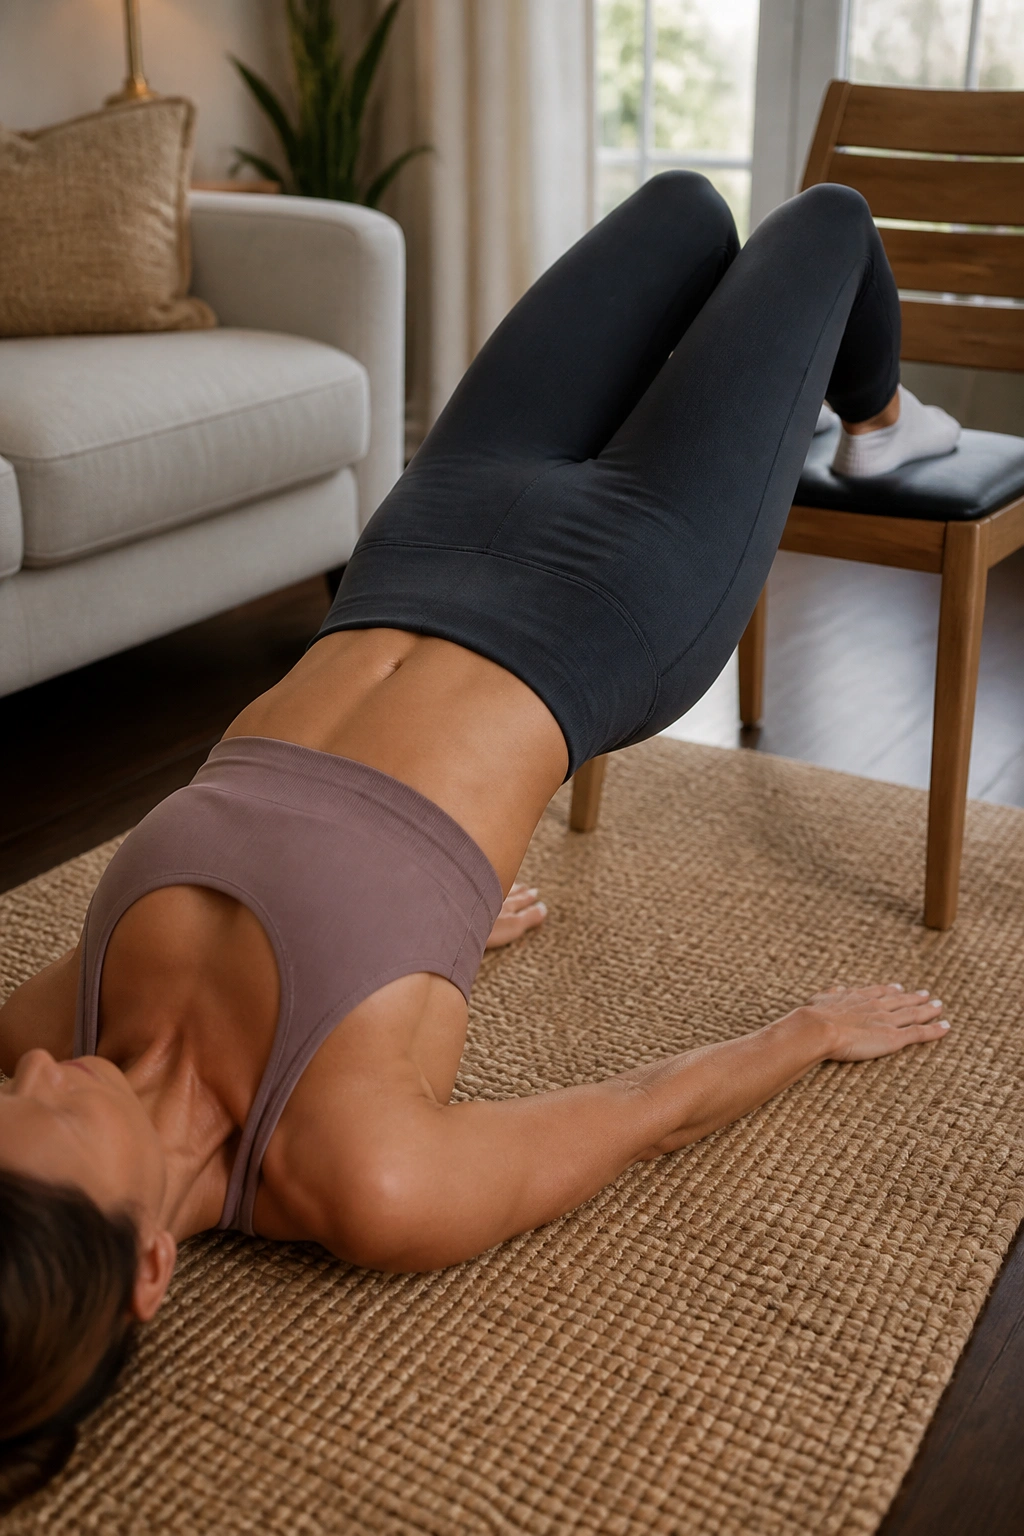
Lie on your back, feet resting on a chair, couch, or bench. Your knees should be bent. This elevation changes the angle of the exercise, forcing your hamstrings to work significantly harder than they do in a floor bridge.
The Lift
Drive through your heels to lift your hips toward the ceiling. Squeeze your glutes at the top. Lower your hips back down until they almost touch the floor.
Hamstring Cramps
If you feel your hamstrings cramping, pull your feet slightly further away from the chair. If you do not feel them enough, pull your feet closer to your glutes. Small adjustments make a massive difference in the muscle recruitment.
Why this matters: Hamstrings are notoriously difficult to target without heavy equipment, making this move essential for a complete leg routine.
18. Calf Raise Marching
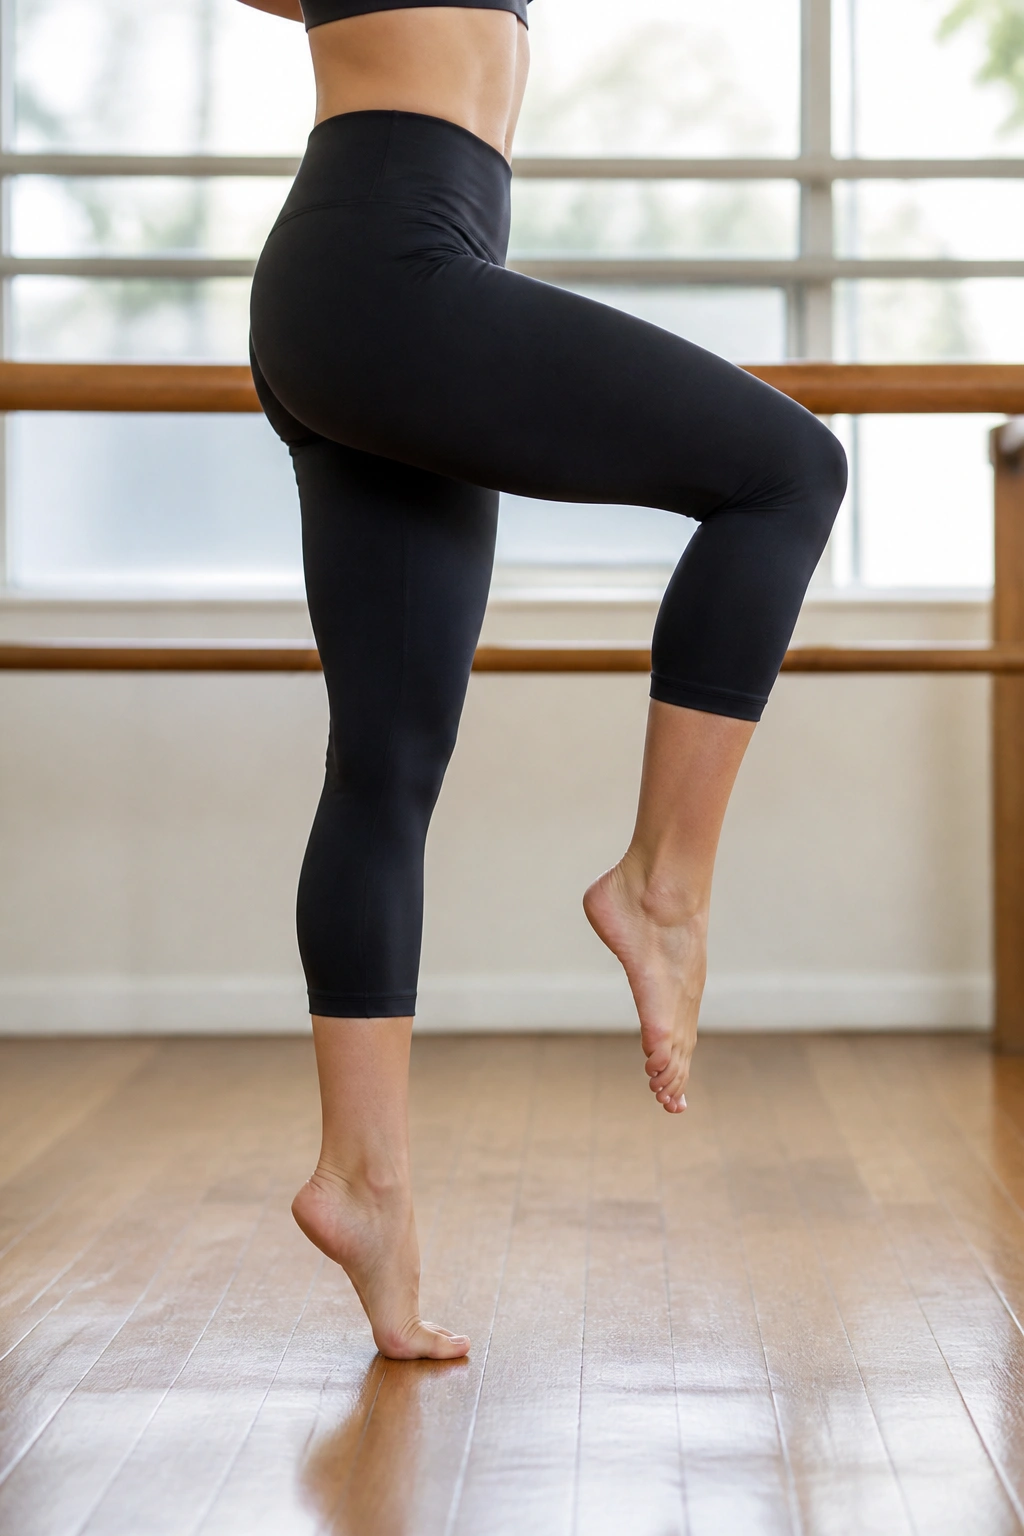
Stand with feet hip-width apart. Rise up onto the balls of your feet, getting as high as you possibly can. This is your starting position.
The March
While keeping your heels elevated, begin to march in place. Lift one knee, then the other. Keep your heels high the entire time. Do not let them drop, even for a millisecond, between steps.
The Burn
Your calves will start to burn intensely after about thirty seconds. This is what you want. The continuous tension of the elevated heel builds explosive strength in the lower leg and improves balance.
Pro tip: Keep your core tight. It is easy to sway side to side while marching, but you want your torso to remain perfectly still.
19. Standing Oblique Twists
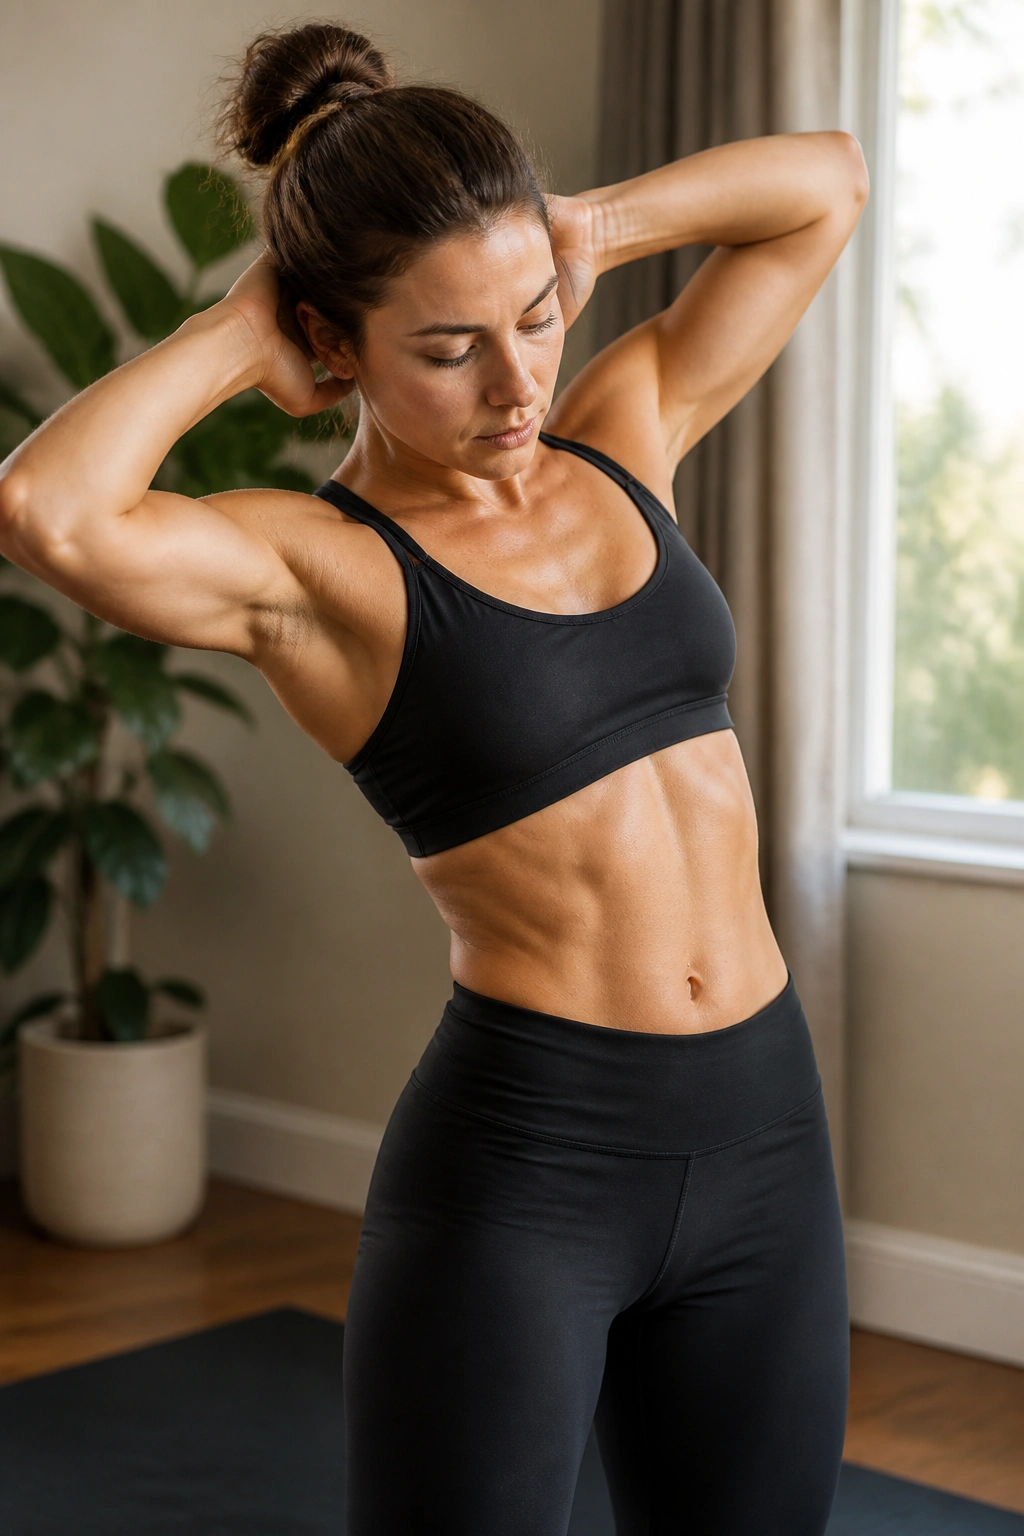
Stand with feet hip-width apart, knees slightly soft. Clasp your hands behind your head, elbows wide. Engage your core as if you are bracing for a punch to the stomach.
The Crunch
Lift your right knee toward your right elbow. You are not just moving the leg; you are using your side abdominals to crunch your ribcage toward your hip. Return to center, then switch.
The Range
Do not just jerk your knee up. You should feel a distinct contraction in your obliques. If you are just swinging your leg, you are working your hip flexors, not your abs. Focus on the crunching sensation in your midsection.
Warning: Do not pull on your neck. Your hands are just resting lightly behind your head. All the effort should be coming from your core muscles.
20. The Final Cool-Down Stretch
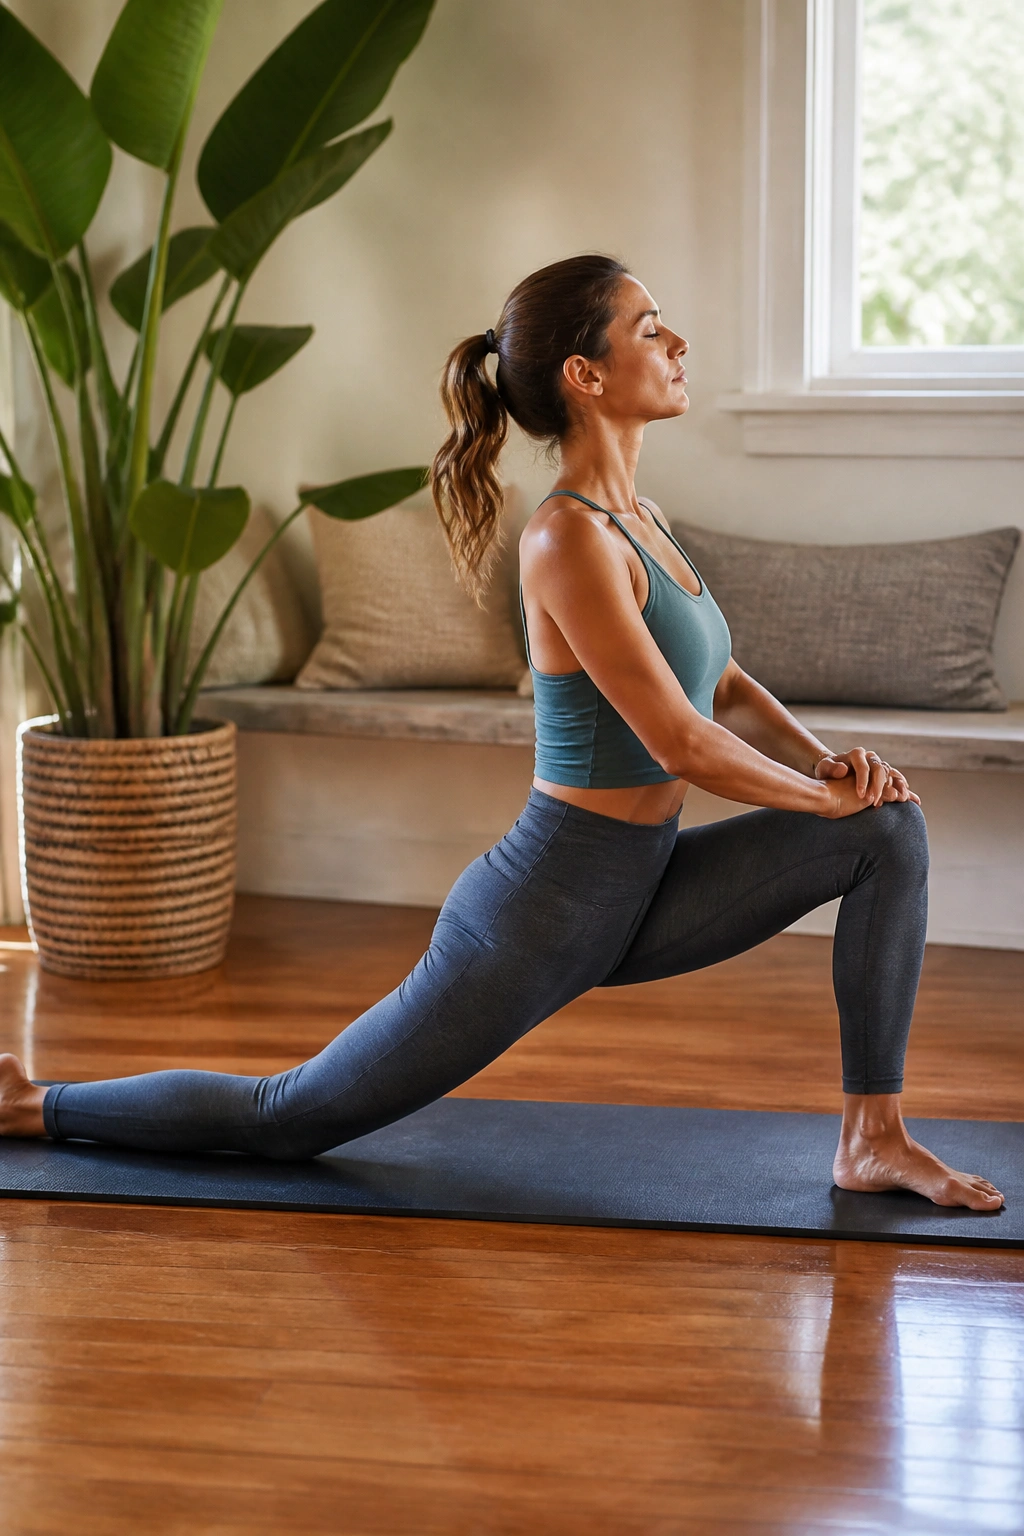
You cannot skip this part. Your muscles are warm, pliable, and screaming for relief. Start with a deep lunge, sinking into the front hip to stretch the hip flexors that you just worked hard.
Lengthening the Fibers
Follow that with a seated forward fold. Keep your knees bent slightly if your hamstrings are tight. Reach for your toes, but focus on keeping your back flat rather than rounding your spine. You want to feel the stretch in the belly of the muscle, not behind the knee.
Finishing the Routine
Finish with a child’s pose, reaching your arms forward as far as possible to stretch the lats and the spine. Take three deep, slow breaths. Let your heart rate come down. Your body will thank you tomorrow.
Consistency note: Stretching is where the “toning” happens. It elongates the muscle fibers you just contracted, contributing to that long, lean look that barre enthusiasts pursue.
Wrapping Up
You have just pushed through twenty movements that, while simple, provide a significant metabolic and structural challenge. The key to these workouts is not how many rounds you complete or how much you sweat, but rather how much focus you apply to every single contraction. If you find yourself rushing to get to the end of the set, stop. Slow down. The magic happens in the hold, in the tiny pulses, and in the refusal to drop your position when the burn sets in.
Your muscles do not know if you are in a high-end studio or your kitchen. They only know the load you place on them. By prioritizing form over speed, you allow yourself to engage deep stabilizer muscles that rarely get recruited in standard exercise. Over time, you will find that the “shake” becomes easier to manage, not because it hurts less, but because your body has built the endurance to handle the demand. Take your time, breathe through the discomfort, and keep showing up.
