



Bad knees can make exercise feel like a negotiation. One wrong bend, one sloppy landing, and the joint lets you know about it for the rest of the day. That’s why standing Pilates exercises for bad knees are such a useful lane: you can build control, balance, foot strength, hip support, and core work without parking yourself in deep squats or kneeling on a hard floor.
The trick is not to treat the knee like the hero of the workout. In Pilates, especially for cranky knees, the real work often happens higher up and lower down — in the hips, glutes, feet, ankles, and trunk. When those pieces do their job, the knee gets less noisy. That’s the part people miss. They keep trying to “strengthen the knee” with more knee movement, when what the joint usually wants is better support around it.
A few ground rules make a big difference. Keep a chair, wall, or counter within reach. Use smaller ranges than you think you need. A mild muscle burn is fine; sharp pain, swelling, catching, or a sense that the knee wants to give way is not. And if a move feels good on day one but leaves the joint grumpy later, scale it back the next time. Simple. Practical. Honest.
1. Wall Alignment Check-In
Start here because most knee-friendly Pilates work gets better when your standing posture is cleaner. If your weight dumps into one hip, your knees usually follow the mess. A wall gives you feedback without needing a mirror or a lot of guesswork.
Stand with your heels a few inches from a wall, your tailbone and upper back lightly touching it. Keep a soft bend in both knees, not locked straight. You want the back of your ribs to settle, your chin to float level, and your feet to feel like they’re sharing the load evenly between heel, big toe, and little toe.
Why It Helps
This is not flashy, and that’s exactly why it works. When your pelvis stacks better over your feet, the knee doesn’t have to twist as much to keep you upright. You also get a clearer sense of whether one leg is doing all the work.
Hold this position for 3 to 5 slow breaths. On each exhale, think about the lower belly drawing in a little and the ribs softening down. Then step away from the wall and try to keep the same shape for another 20 seconds. That tiny transfer matters more than a long speech about posture ever will.
2. Ribcage Breath With Arm Floats
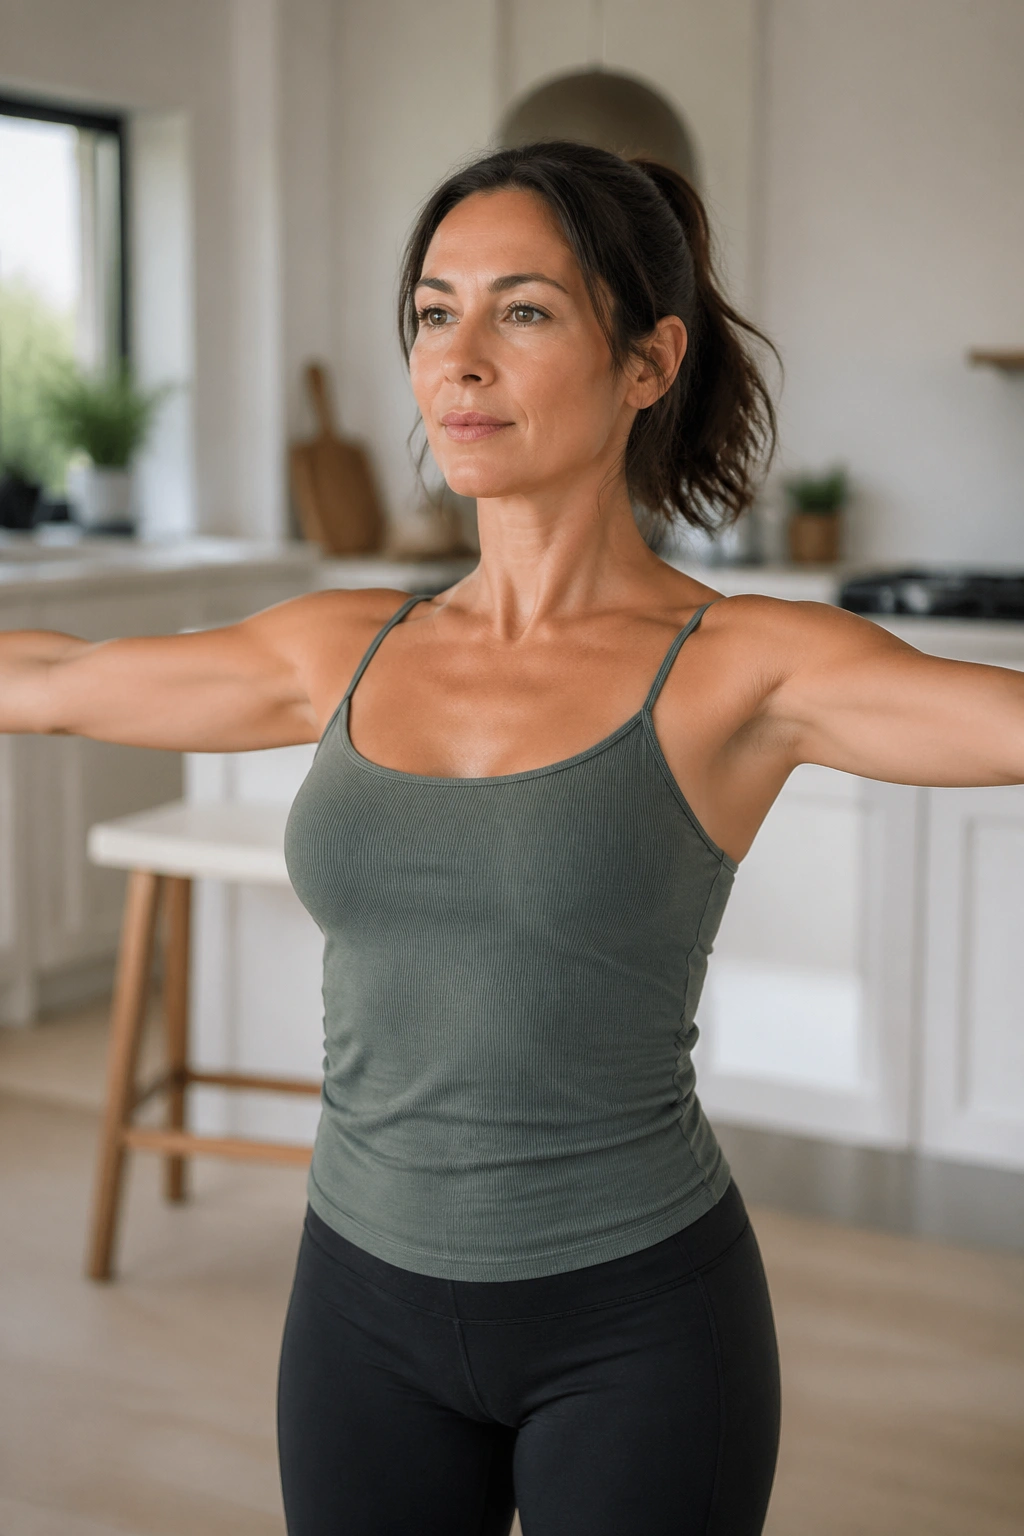
If your torso is stiff, your knees often compensate. That sounds dramatic, but I’ve seen it a thousand times in different forms: locked ribs, tight hip flexors, overworked thighs. Standing Pilates starts to feel easier when the breath can move the chest and upper back a little more freely.
Stand tall with your feet hip-width apart and your knees softly unlocked. Inhale through the nose and let your arms float forward to shoulder height. Exhale and lower them with control, keeping the shoulders relaxed and the neck long. Don’t chase height. Chase smoothness.
A useful cue is to keep the sternum from popping forward when the arms rise. That little rib flare is sneaky, and it tends to make the low back do too much. If you keep the ribs quiet, the legs don’t have to brace as hard to save the shape.
What to Watch For
- Lift the arms only as high as you can without shrugging.
- Keep pressure even across both feet.
- Use 5 to 8 breaths, not speed.
- Stop if your lower back feels pinchy.
3. Pelvic Tilts Against the Wall
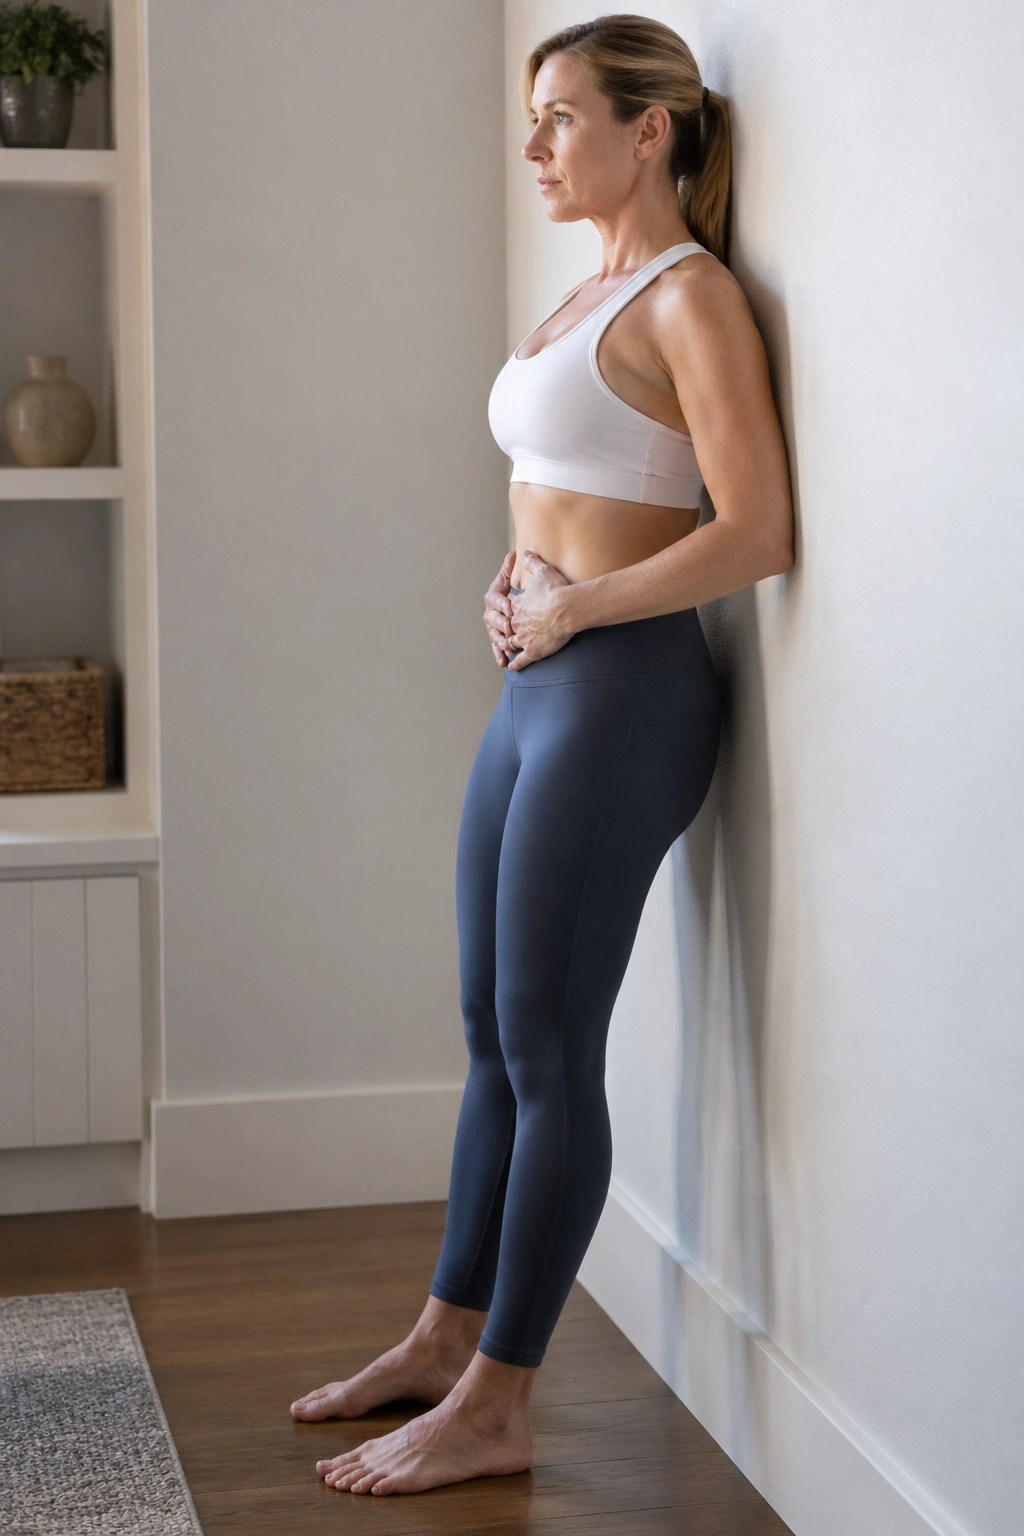
Here’s a move that looks almost too simple to matter. Then you do it for a week and notice your standing balance feels less wobbly when you walk down stairs.
Stand with your back lightly against a wall, feet about 8 to 10 inches forward. On an exhale, flatten the low back a touch toward the wall by drawing the lower belly in. On the inhale, let the pelvis return to neutral. The motion is small — think of it as a gentle rocking, not a big tuck.
Why It Works
The knee likes predictable control. Pelvic tilts help you find that without loading the joint. They also teach you where neutral sits, which is handy because people with sore knees often live in one of two places: too tucked under or too arched through the back.
Do 8 to 10 repetitions at a calm pace. If you want a little extra challenge, keep the arms reaching straight ahead while the pelvis moves. That makes the trunk work harder without asking the knee to bend more. Nice trade.
4. Heel Raises With Chair Support
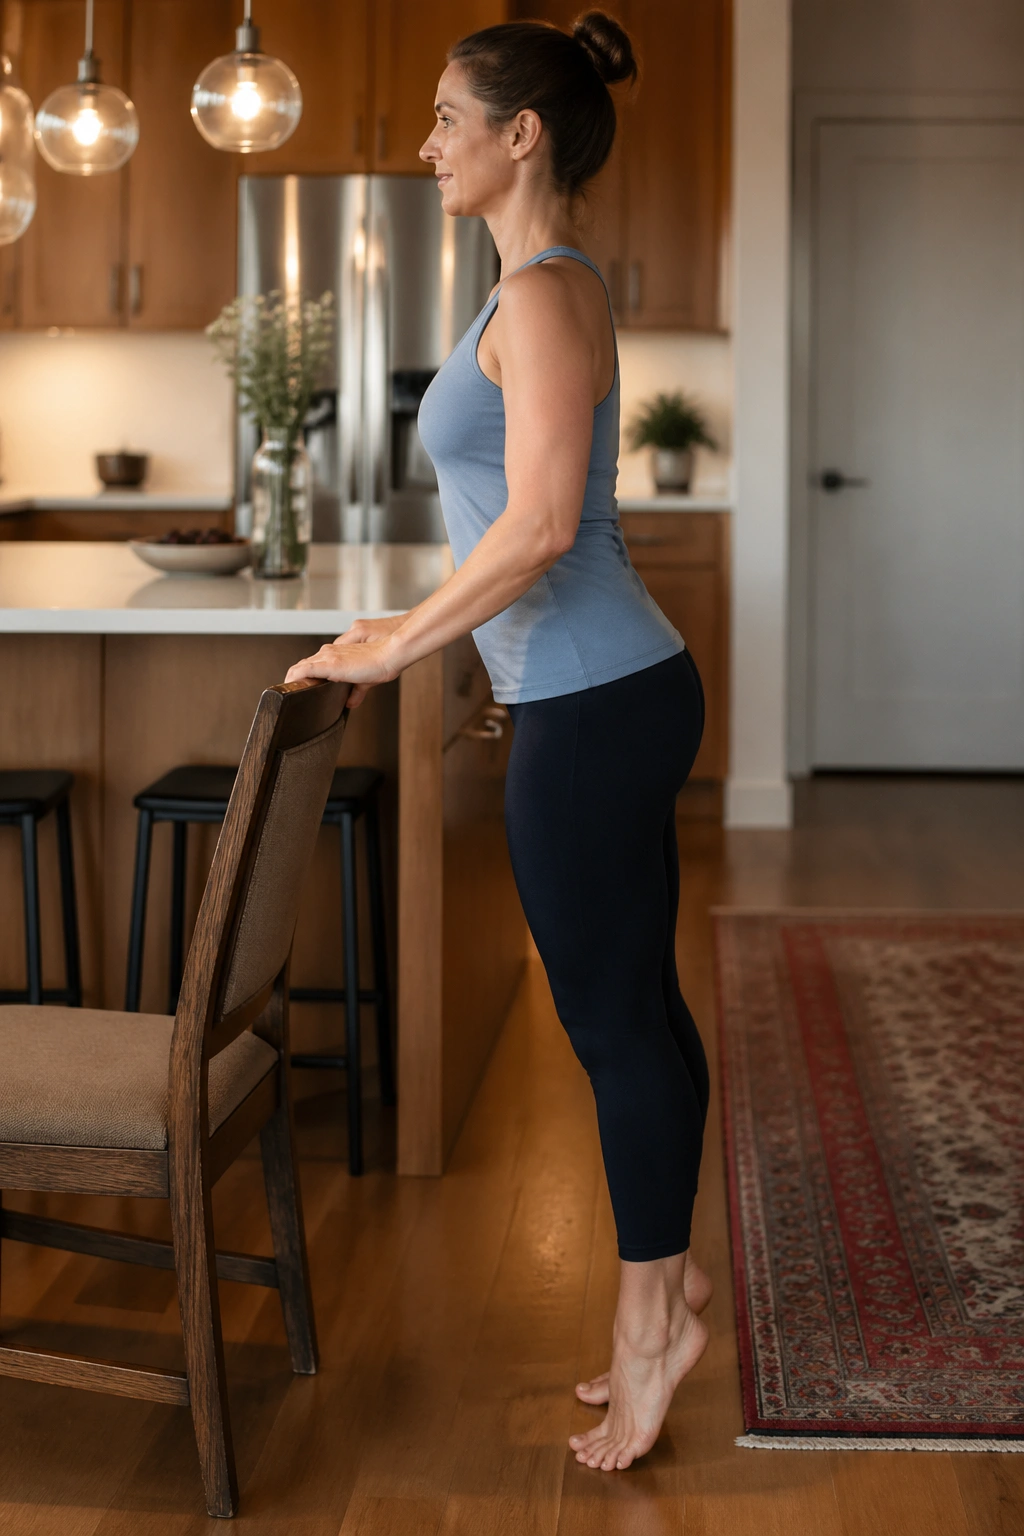
Want a small move with a surprisingly useful payoff? Try heel raises. They wake up the calves, ankles, and foot arches, and that can take some pressure off the knees during walking and standing.
Hold the back of a chair lightly. Rise onto the balls of your feet over 2 seconds, pause at the top, then lower with control for another 2 to 3 seconds. Keep your weight centered over the big toe and second toe, not rolled to the outside edge of the foot. That little detail matters.
How to Make It Knee-Friendly
If your knees like to complain when you stand all the way up, keep a micro-bend in them the whole time. You’re not trying to lock out anything. You’re training the lower leg to support the chain above it.
- Start with 2 sets of 8 reps.
- Pause for 1 second at the top.
- Lower slowly.
- Use a chair, wall, or counter if balance is shaky.
5. Toe Lifts and Foot Wake-Up
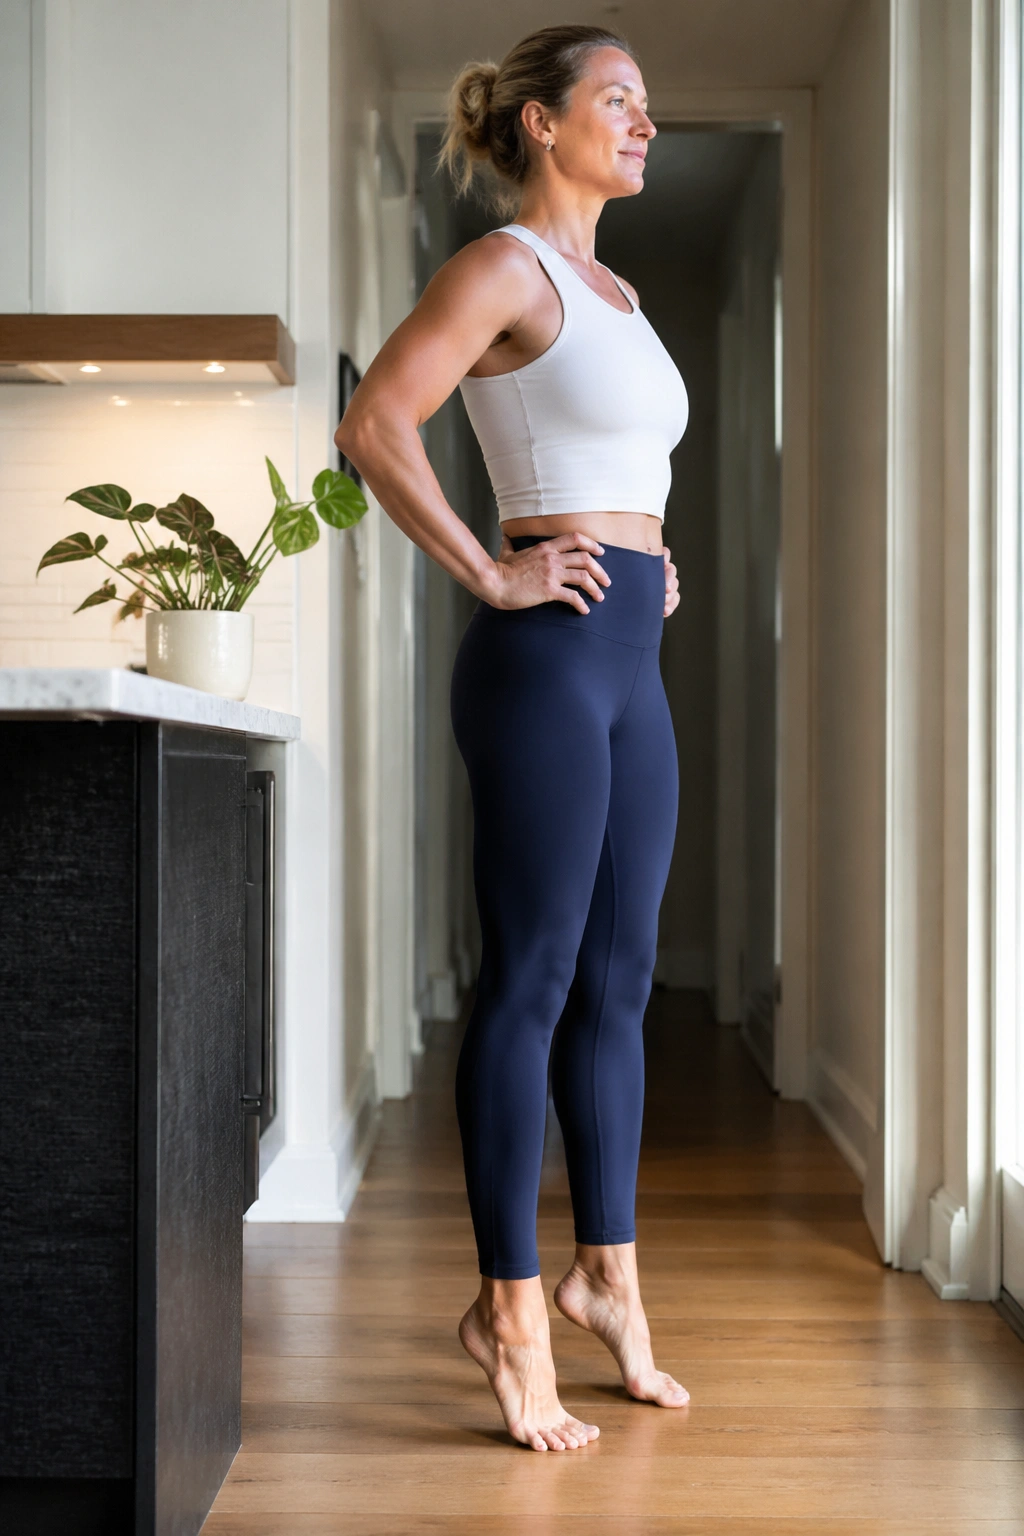
Your feet and knees are in constant conversation. If the feet are asleep, the knees often do extra translation work they were never meant to do. Toe lifts are a tidy way to wake up the front of the shin and improve how you load each step.
Stand with your feet parallel and your hands on your hips or a countertop. Lift your toes while keeping the heels on the floor, then lower them slowly. That’s the whole thing. The front of the shin should feel active, and the floor under your heels should feel steady.
The sensation is a bit odd at first — a mixture of effort and fine control. That’s normal. You may notice your toes want to curl instead of lifting cleanly. Don’t let them. Spread them wide, lift from the front of the foot, and keep the ankles from wobbling.
A good dose is 10 to 15 reps. If you want more, alternate 5 toe lifts with 5 heel raises and repeat twice. It’s a tiny sequence, but it does a lot of quiet work.
6. Mini Plié to a Comfortable Range
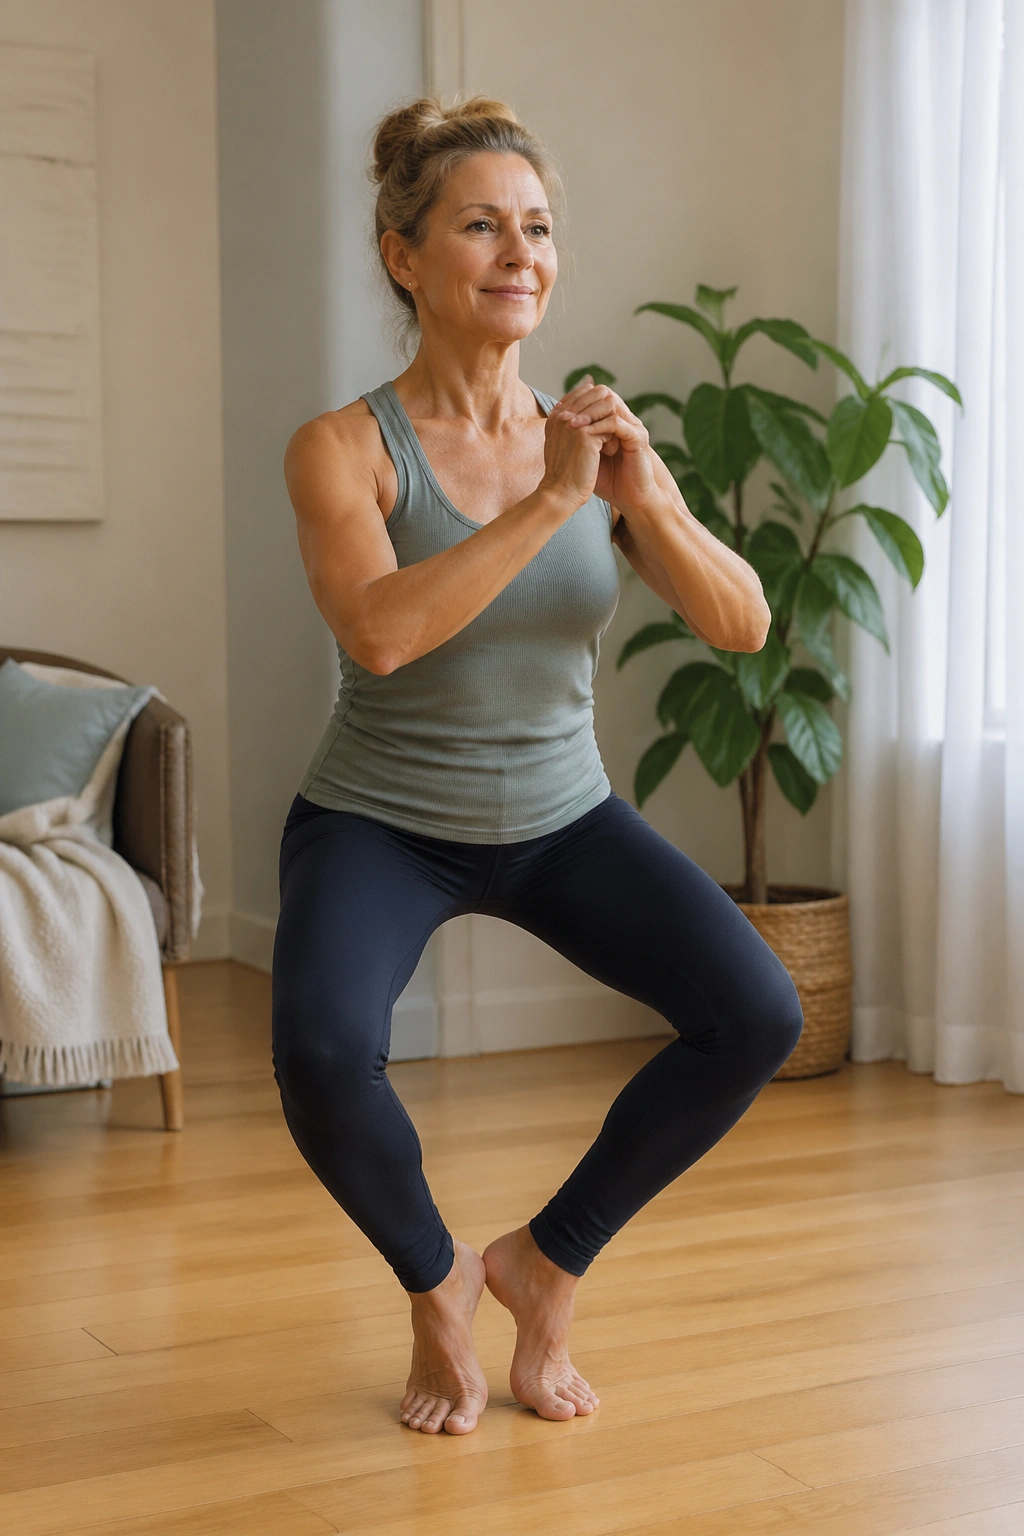
A deep plié is not the goal here. A small, controlled bend is the point. For bad knees, standing Pilates works better when the range is shallow enough to keep the joint calm but loaded enough to teach the legs something useful.
Stand with your heels together or slightly apart, toes turned out only as far as feels natural. Bend the knees a few inches, keeping the tailbone long and the chest relaxed. Then press back to standing through the heels and the inner edge of the feet. The descent should feel smooth, not dropped.
Why This Beats a Big Squat Right Now
A mini plié asks the thighs and glutes to help without cramming the knee into a deep angle. That’s why it’s often a better choice than a traditional squat for people with sensitive fronts of the knees or sore patellar tracking.
Do 6 to 10 repetitions. If your knees drift inward, narrow the range and press the floor apart through the feet. If you want, hold the bottom position for 2 breaths, but only if the joint stays quiet. No heroics. Just clean movement.
7. Hip Hinge With a Long Spine
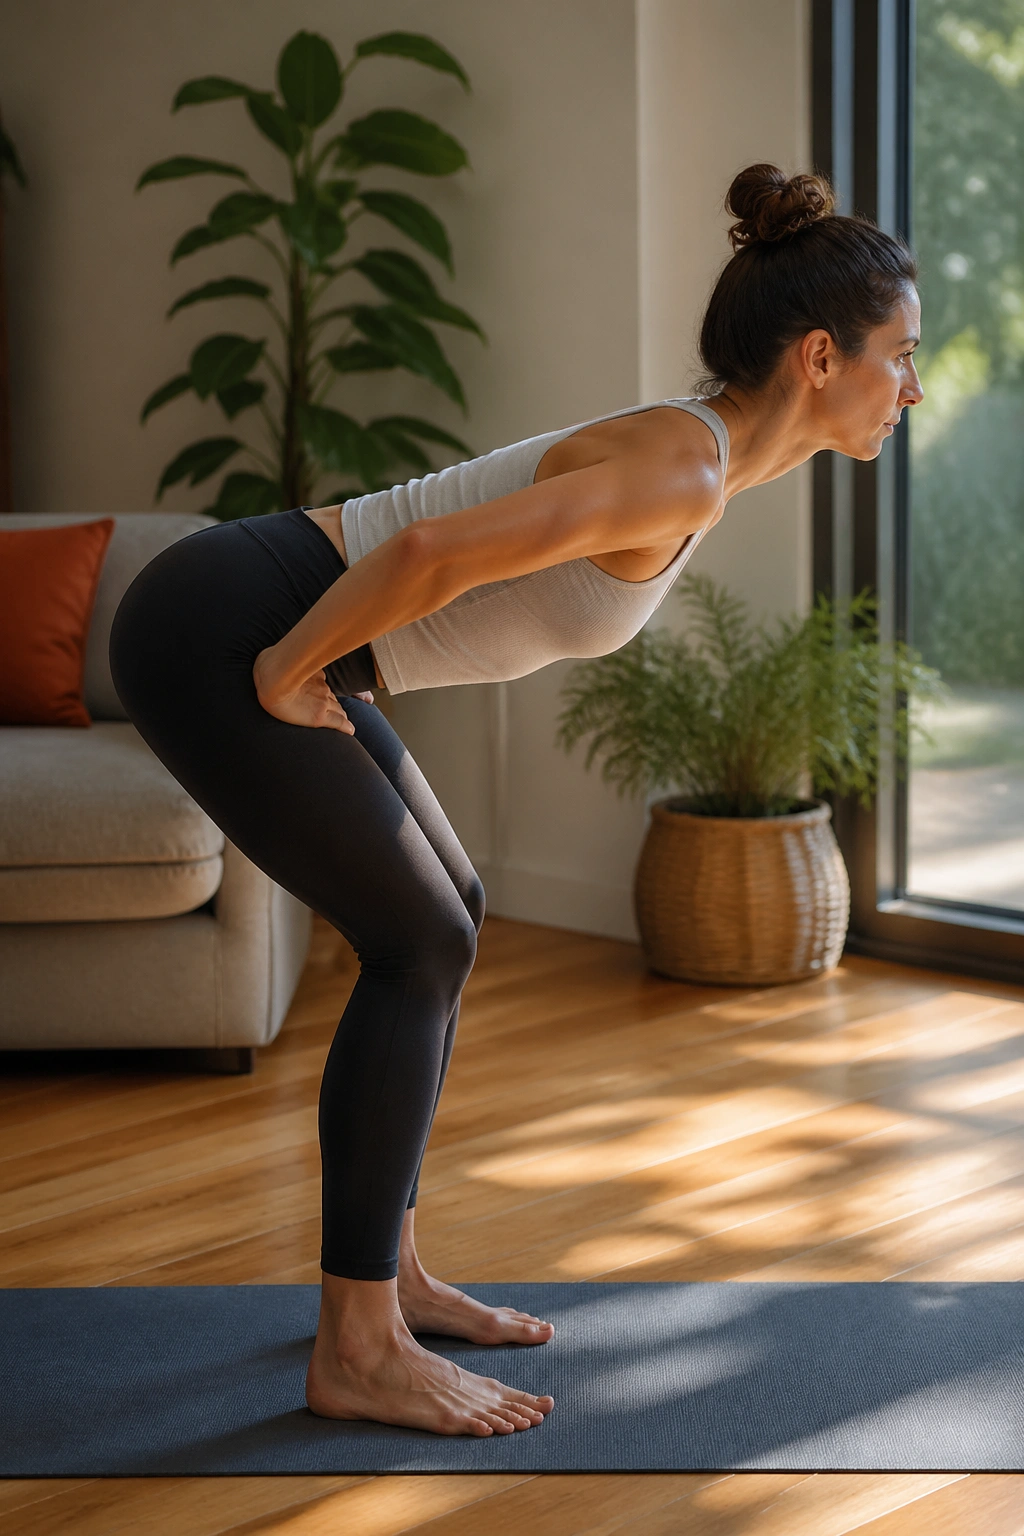
This is one of the best standing exercises for taking stress off the knees because it shifts the work back into the hips. You’ll feel it in the hamstrings and glutes before you feel it in the joint, which is exactly the point.
Stand with your feet hip-width apart and a slight bend in the knees. Push your hips back as if you’re trying to close a car door with your backside, and let the torso tip forward a little with a long spine. Then stand by pressing the hips forward and squeezing the glutes lightly at the top.
The knees stay soft, not deep. If your back rounds quickly, go less far. That’s not failure. That’s a smart adjustment. A good hinge should feel like a loading and unloading pattern, not a forward collapse.
Tip: Put your hands on your hip creases the first few times. That helps you feel the pelvis moving back instead of the chest just diving forward.
8. Supported Marching in Place
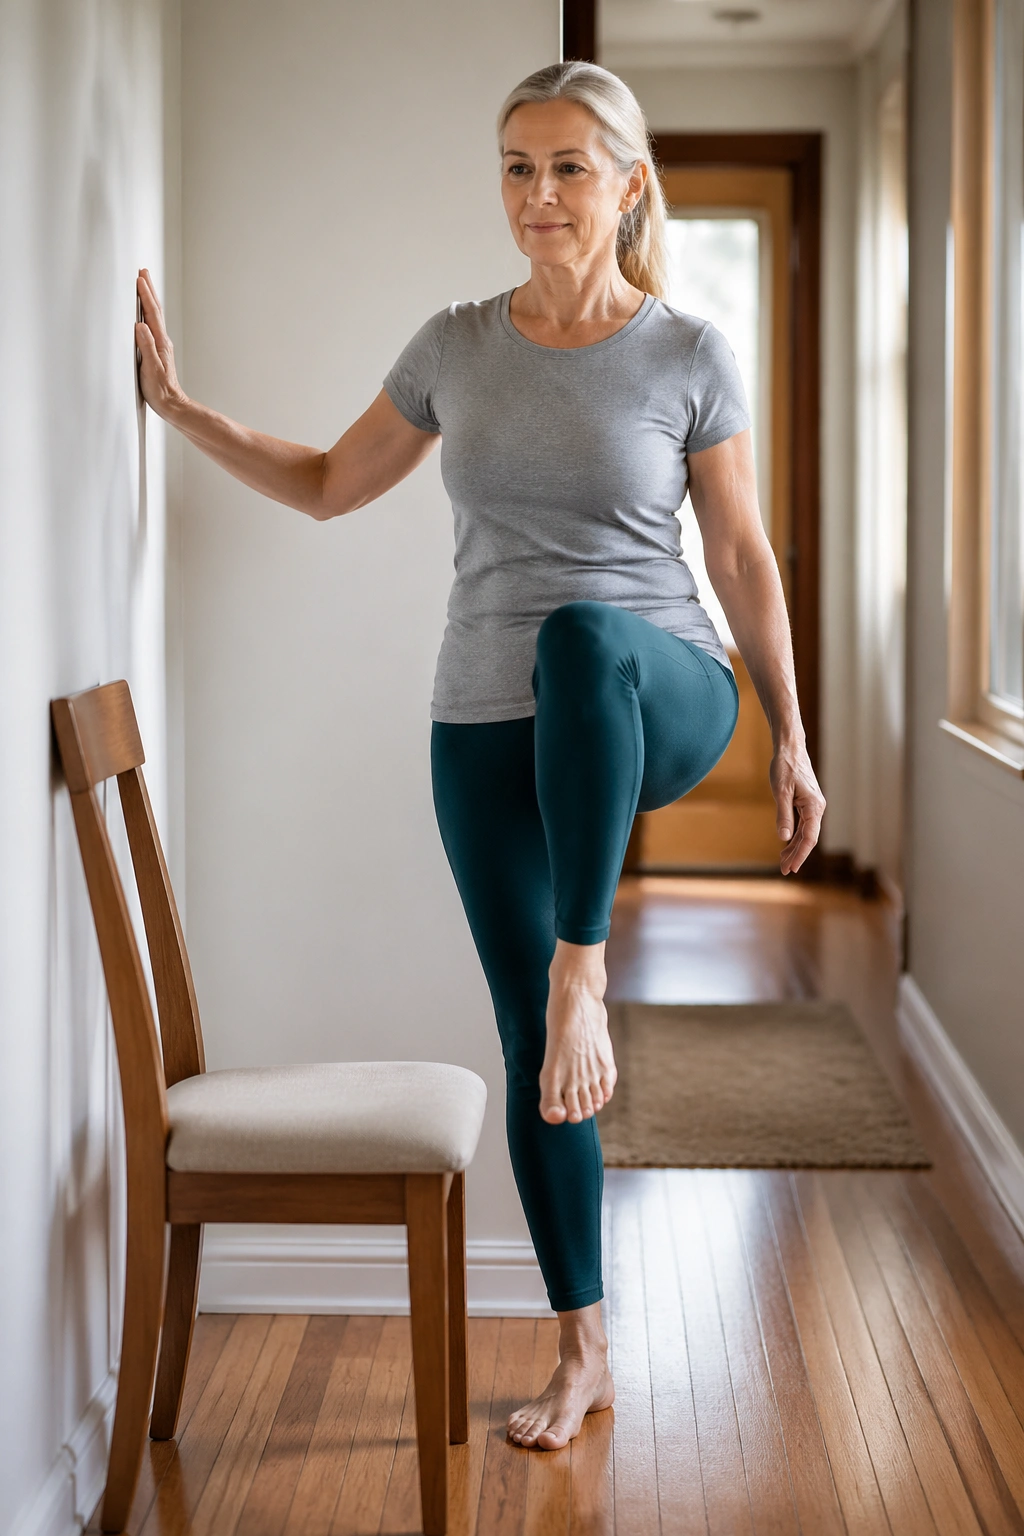
Marching sounds almost laughably basic until you do it with actual control. Then it turns into a core and balance drill that teaches each leg to lift without dragging the pelvis all over the place.
Hold a wall or chair. Lift one knee only to a comfortable height, lower it with control, then switch sides. Keep the torso steady and the standing knee soft. Think of your ribcage and pelvis staying in the same zip code while the legs take turns.
What Makes It Useful
The standing leg gets a little work every time the other leg lifts. That’s good. It teaches the hip stabilizers to support the knee during walking, which is where many people feel pain first. If marching up high bothers your knees, reduce the lift to just an inch or two off the floor.
Use 20 to 30 slow marches. If your balance gets sketchy, tap the lifted foot down between reps instead of holding the leg in the air. The point is control, not proving anything.
9. Standing Side Leg Lift
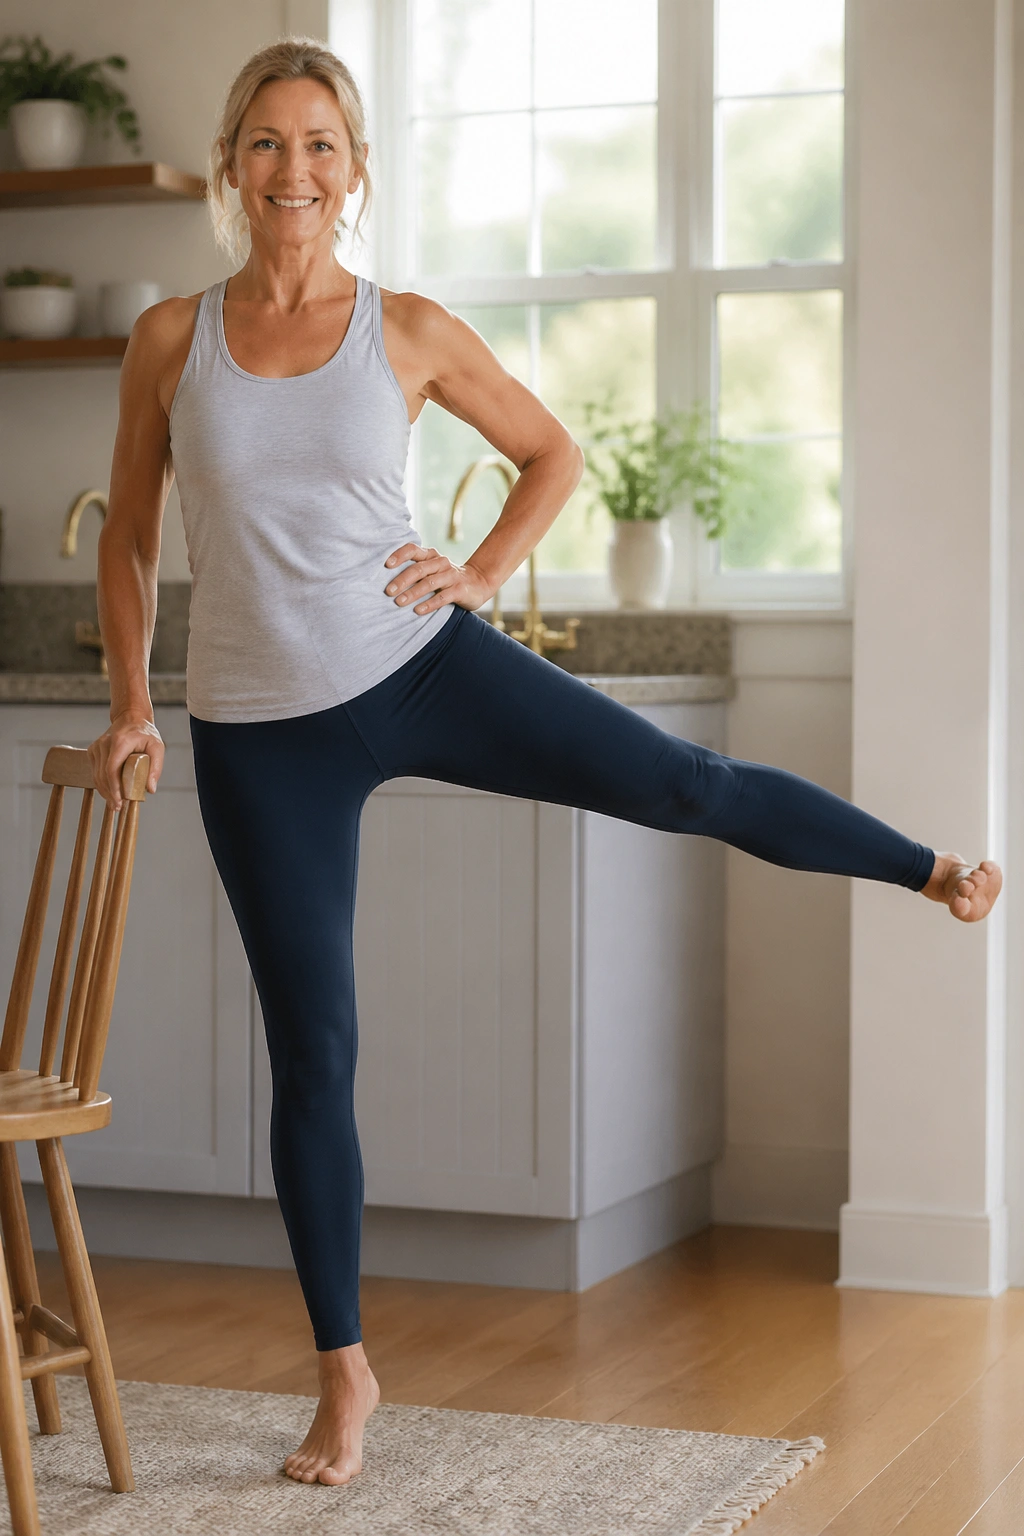
This is a glute exercise disguised as something graceful. And yes, the side glutes matter when the knees are fussy. When the hip holds the pelvis steady, the knee does not have to fight sideways wobble on every step.
Stand tall and hold a chair with one hand. Shift your weight onto one leg, then slide the other leg out to the side a few inches without tipping your torso. Bring it back in with control. Keep the toes facing forward or slightly down; if you turn the leg out too much, you’ll cheat with the hip flexors.
That small lift should feel clean and deliberate. If you swing the leg, the range is too big. If you feel it in the low back, the torso is leaning instead of staying stacked.
Do 8 to 12 reps per side. A smaller, slower arc beats a dramatic kick every single time.
10. Standing Kickback With a Small Reach
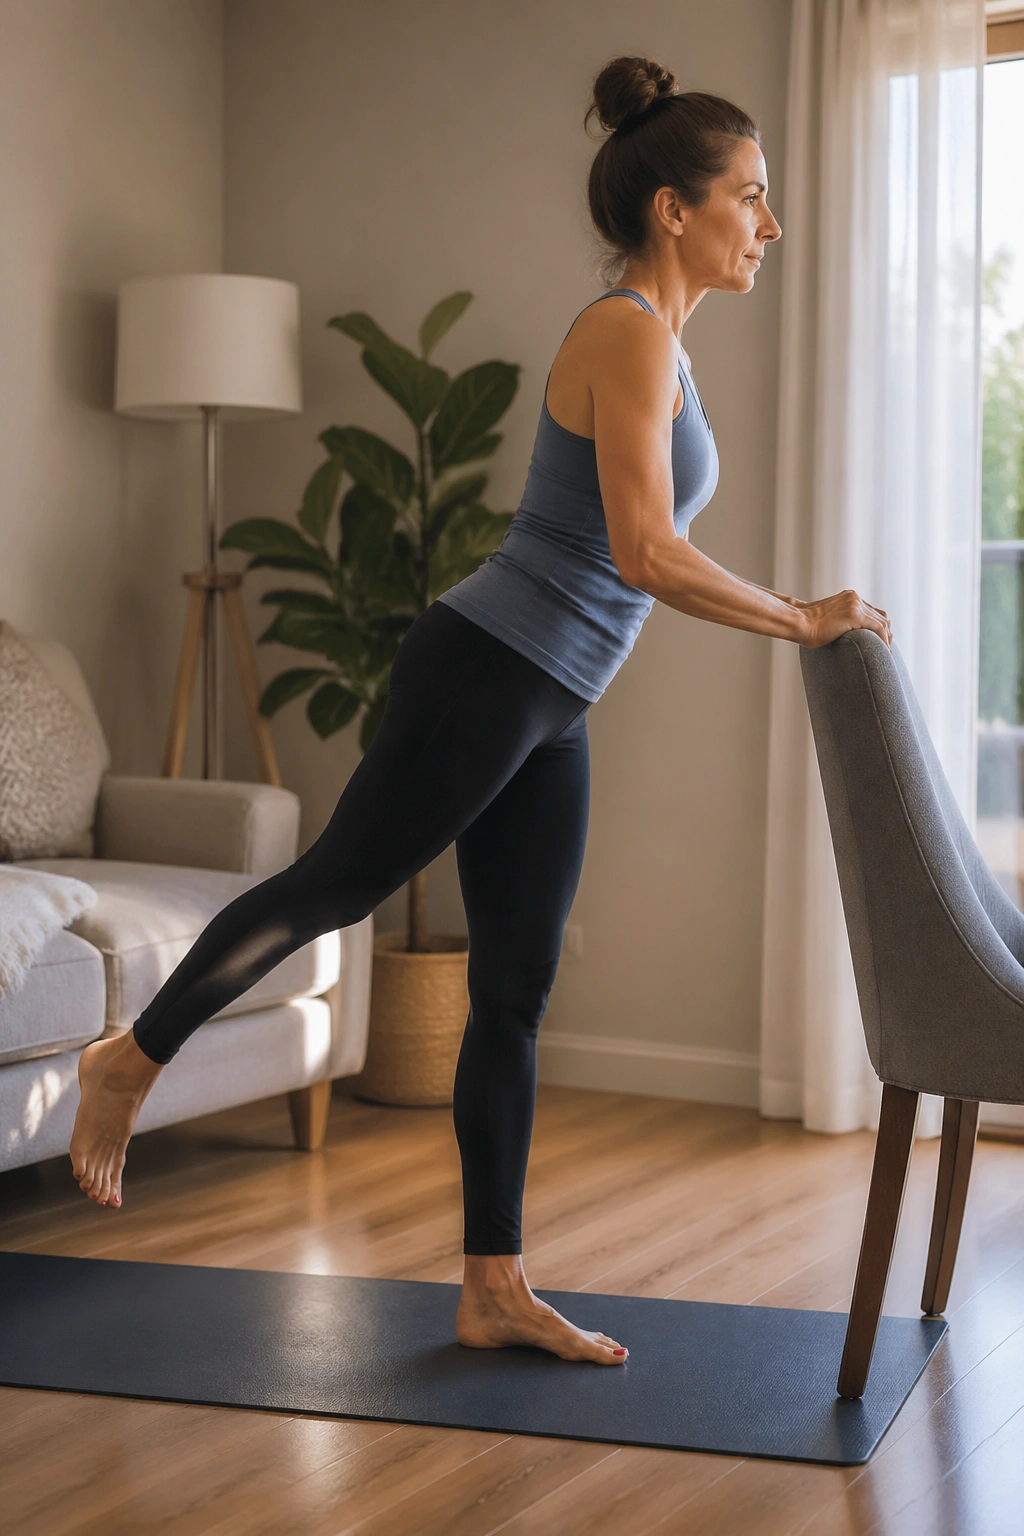
A kickback can turn sloppy fast if you fling the leg behind you. Keep it modest and it becomes one of the nicest standing Pilates moves for glute support around the knee.
Hold the back of a chair. With one leg rooted, slide the other leg straight back a few inches, keeping the toes pointed down or neutral. Squeeze the glute at the end of the reach, then return to center without letting the lower back arch.
A Few Honest Notes
The thigh should not whip backward. If it does, the movement has left Pilates land and wandered into momentum. The standing knee also shouldn’t lock. Keep a soft bend on the supporting leg so the joint stays friendly.
Try 10 reps on each side, then switch. If your lower back takes over, shorten the reach and think “long leg behind me” rather than “higher leg behind me.” Big difference. Much kinder on the body.
- Reach back only 4 to 6 inches at first.
- Keep your hips square.
- Exhale as the leg moves back.
- Stop before you arch the back.
11. Knee Lift With Opposite Arm Reach
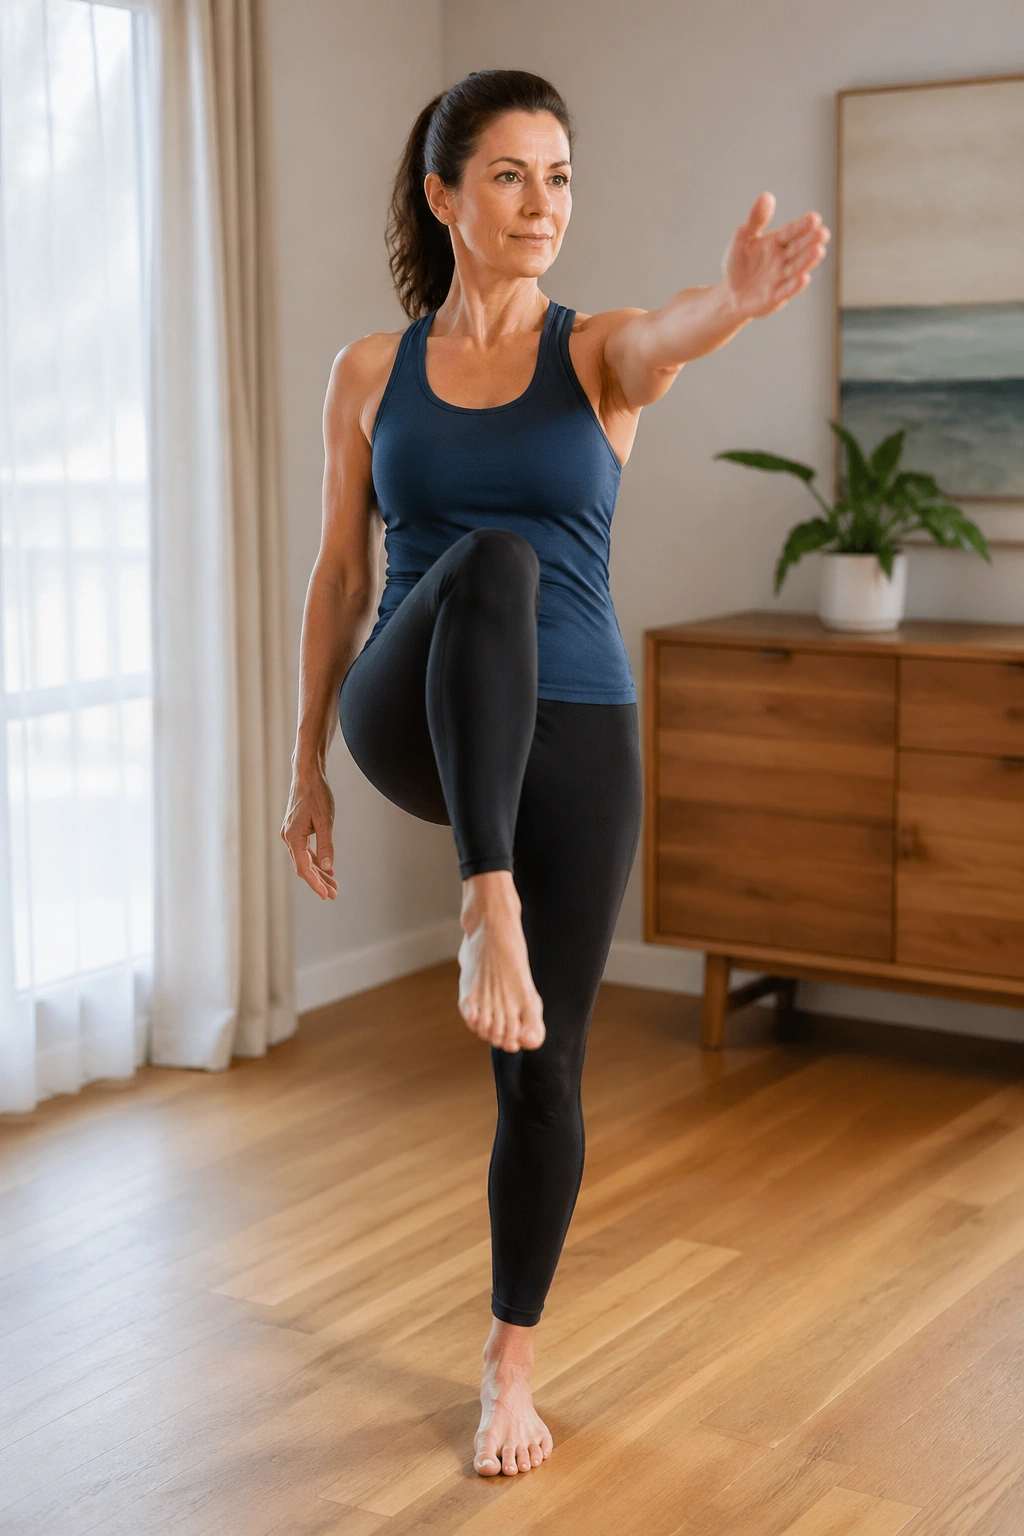
This one brings together balance, core control, and a little cross-body coordination. It’s also a useful reminder that the knee does not work alone; the trunk and opposite arm can help organize the whole thing.
Stand with feet parallel. Lift one knee to a comfortable height while the opposite arm reaches forward or slightly overhead. Lower both with control, then switch sides. Keep the standing leg grounded and the pelvis level. If you wobble, that’s feedback, not failure.
Why It Helps
Cross-body movement gives the trunk something useful to do, and that tends to reduce random strain around the knees. It also wakes up the standing-side hip, which often gets lazy when people avoid bending the joint.
Do 6 to 8 reps per side at first. If lifting the knee itself irritates your front knee, lower the height and keep the motion slower. A small lift with good alignment beats a bigger one that flares things up later.
12. Side-to-Side Weight Shift
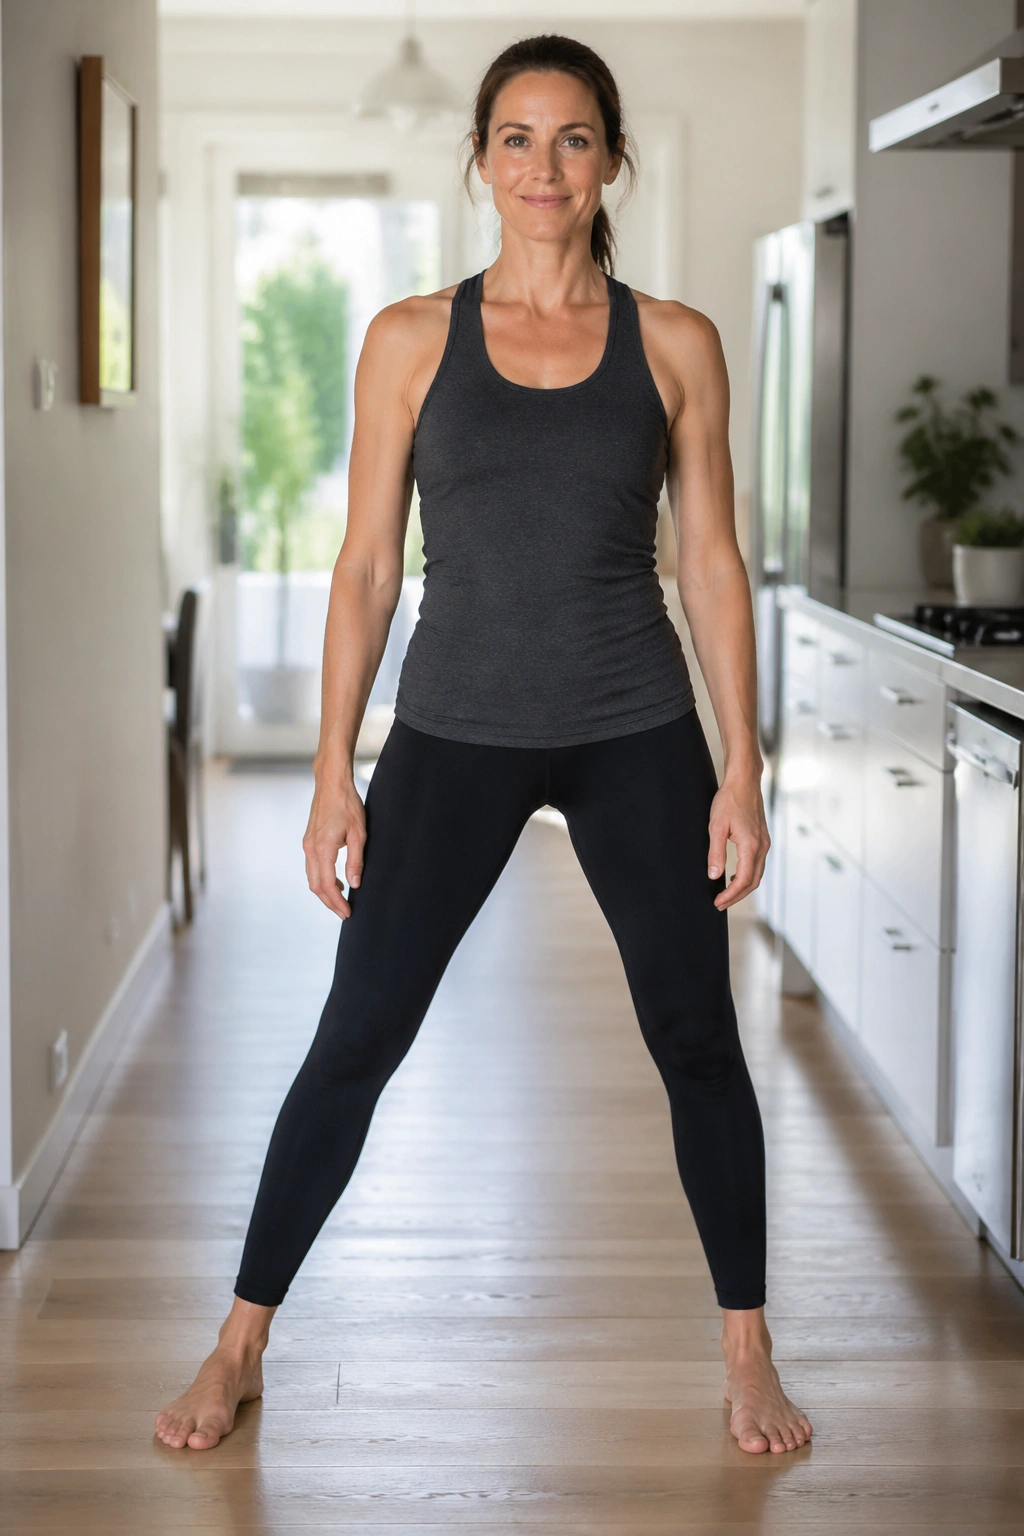
If lunges feel like too much, this is a friendlier place to start. Side-to-side shifts teach the body how to load one leg at a time without throwing the knee into a deep bend.
Stand with your feet a little wider than hip-width. Shift your weight to the right until that leg feels grounded, then come back through center and shift left. Keep the knees soft and the toes pointed forward. Your head should stay level, not bob up and down like a buoy.
The real goal is to feel the foot press the floor evenly while the hip on the loaded side does its job. The knee will bend a little. That is fine. What you do not want is a collapse inward or a hard lateral sway through the torso.
Use 10 slow shifts each way. After that, hold each side for 2 breaths and notice whether one leg feels much more stable than the other. That asymmetry is useful information.
13. Standing Twist With Soft Knees
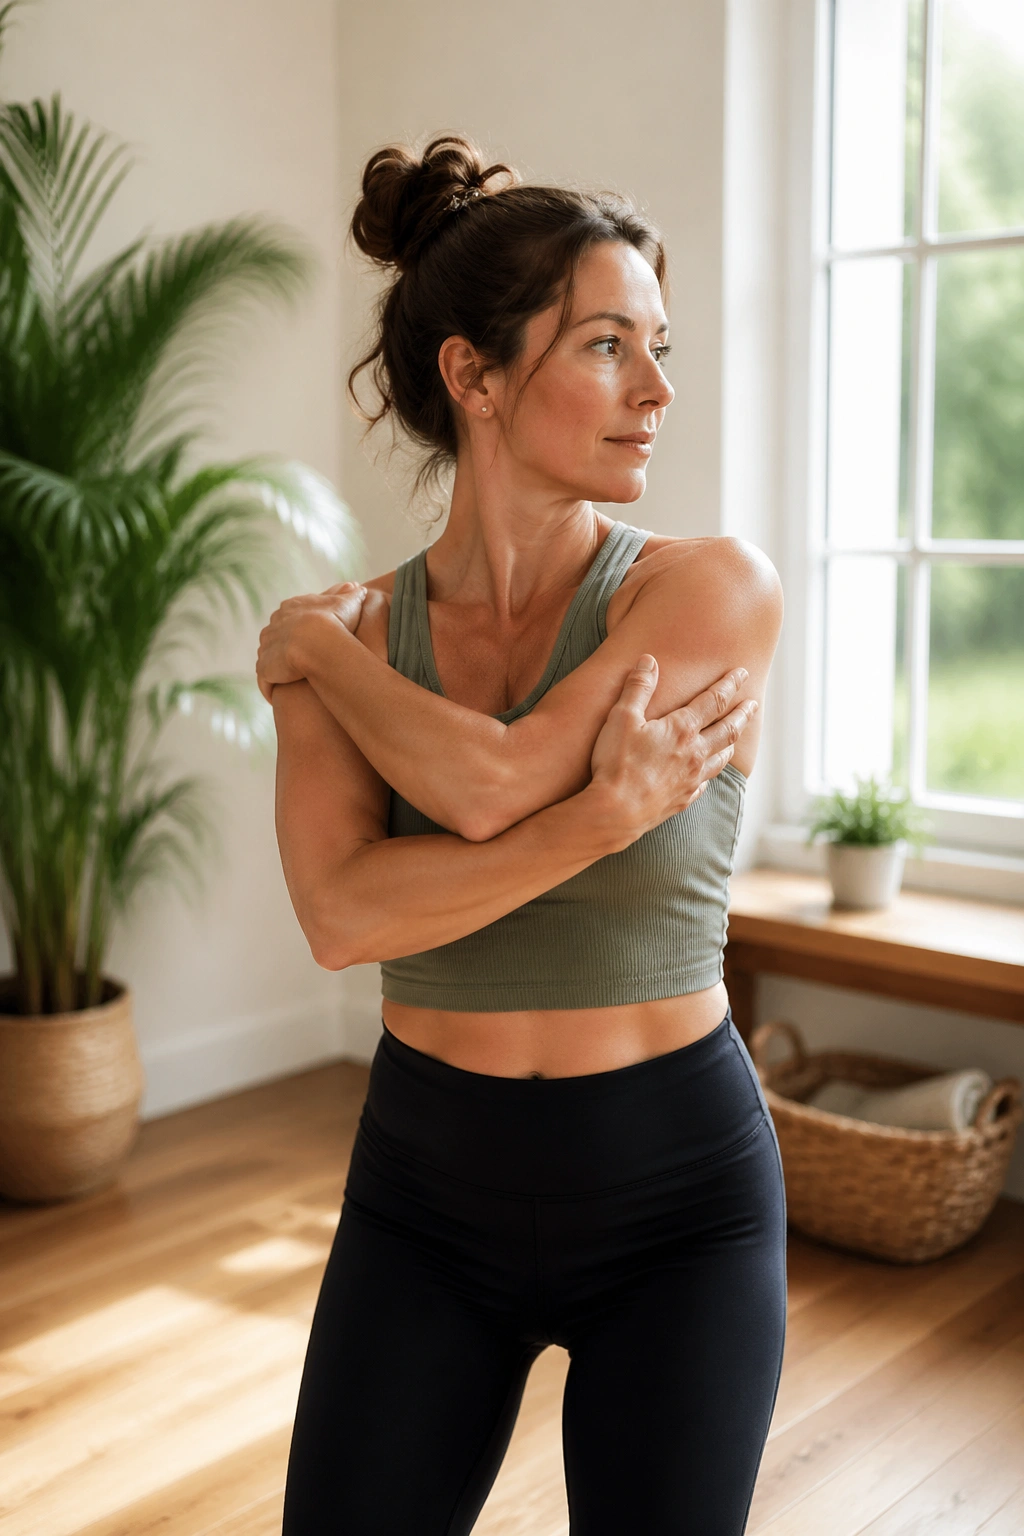
Can you twist with bad knees? Yes, but softly. The trick is to let the ribcage rotate over a steady pelvis rather than yanking the knees around like they’re part of the steering wheel.
Stand with your feet hip-width apart and your hands crossed over your chest or lightly on your ribs. Rotate the upper body a few degrees to one side, return to center, then repeat on the other side. Keep the knees unlocked and the feet planted. The twist should come from the torso, not from the lower legs.
If you feel pressure in the knees, your stance is probably too narrow or the turn is too large. Shorten both. Pilates likes precision more than range. It’s a modest, controlled turn, not a big throw.
How to Keep It Smooth
- Exhale as you rotate.
- Keep the hips facing forward.
- Stay within a range that feels easy to reverse.
- Do 6 reps each side.
14. Wall Angels for Upper-Back Control
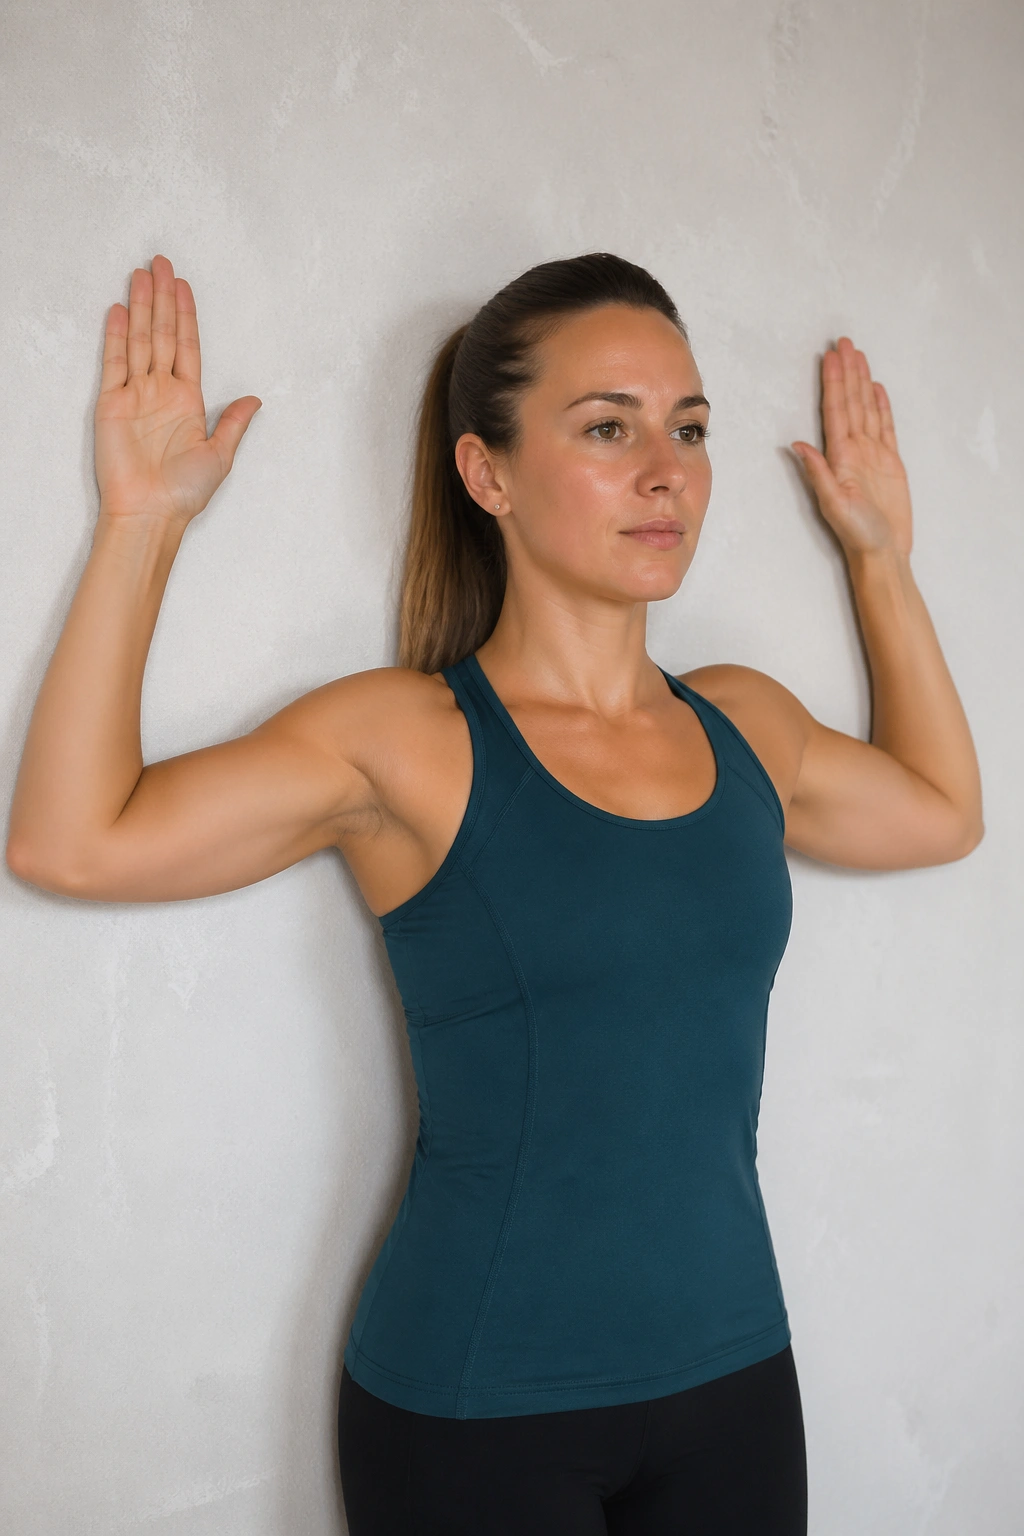
Shoulders and knees don’t seem related until you watch someone with poor posture try to stand for 10 minutes. Then the chain becomes obvious. A collapsed upper back changes where the weight lives, and the knees often pick up the slack.
Stand with your back against a wall, feet slightly forward, elbows bent, and the backs of your arms near the wall if possible. Slide the arms up a little, then lower them with control. If the wrists or elbows can’t stay close to the wall, go only as far as you can without straining.
The movement should feel like the shoulder blades are gliding, not pinching. You may notice the ribs wanting to flare. Don’t let them. Keep breathing into the sides of the ribs and maintain soft knees the whole time.
This works nicely as a reset between leg exercises. Ten slow reps are enough to change how the body carries itself.
15. Figure-Four Balance Hold
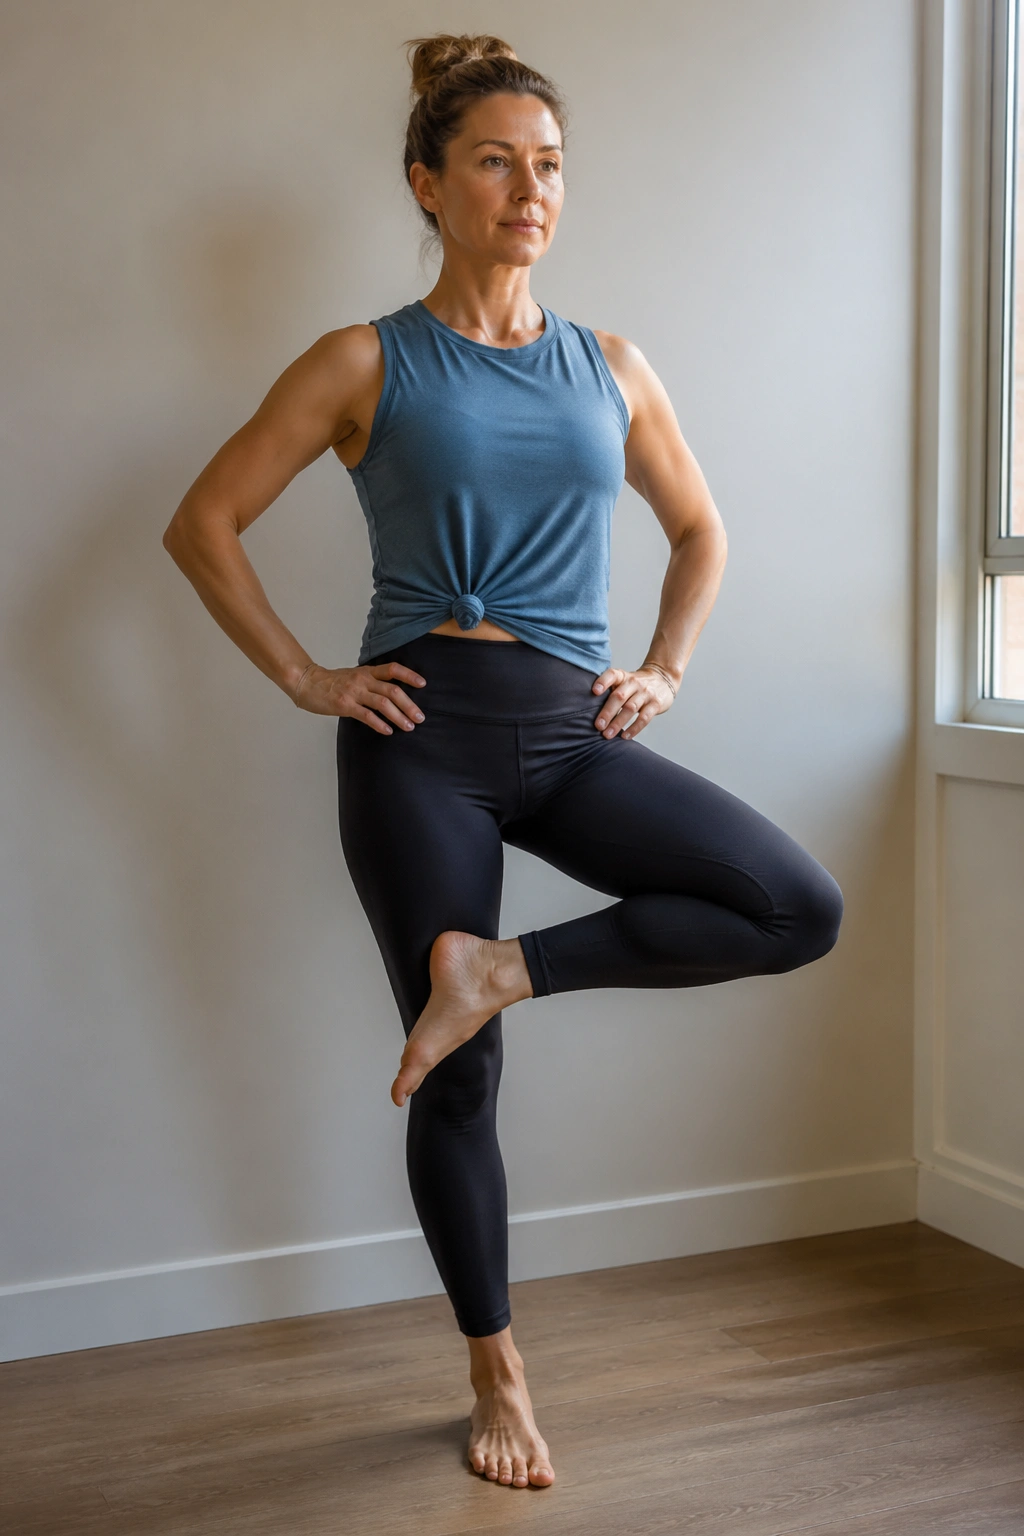
This one asks for patience. It’s part balance drill, part hip opener, and part reminder that the standing leg does a lot more than most people give it credit for.
Stand near a wall or chair. Cross one ankle over the opposite thigh in a small figure-four shape, then lower back down. If that feels stable, hover for a breath or two before placing the foot back on the floor. Keep the standing knee soft and the pelvis level.
A lot of people turn this into a big yoga pose and then wonder why the knee on the standing leg feels irritated. Don’t. Keep the lifted leg low and the opening gentle. You’re after hip work, not a bragging-rights stretch.
A Better Way to Think About It
The supporting glute is doing the stabilizing here. That can help unload the knee over time because the hip stops dumping the body inward. If the stretch sensation lands in the knee instead of the hip, back off immediately.
Do 5 holds per side, about 3 breaths each. Small and tidy. That’s enough.
16. Calf Stretch and Ankle Pump Flow
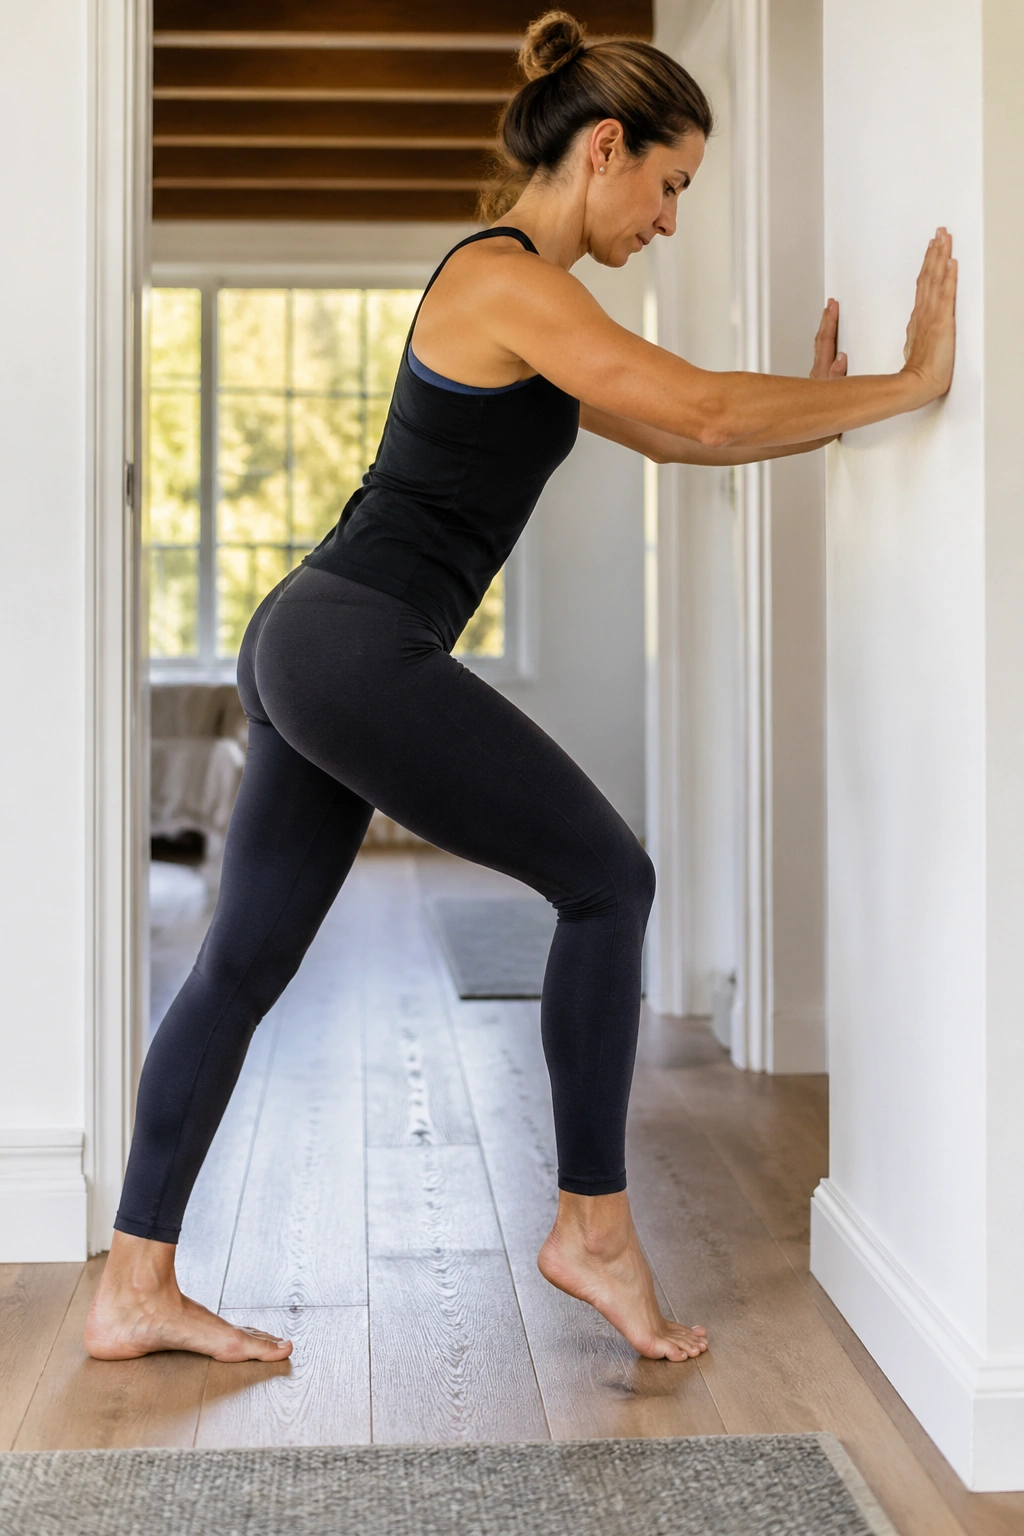
Stiff ankles can make knees miserable. The body steals motion from somewhere, and the knee is often where the bill comes due. A standing calf stretch paired with ankle pumps can loosen the lower leg without asking the knee to bend much.
Stand facing a wall and place both hands on it. Step one foot back, keep the heel down, and bend the front knee a little until you feel the stretch in the back calf. Hold for 20 to 30 seconds, then pump the back heel slightly up and down 8 times before switching sides.
The stretch should live in the calf, not the knee joint itself. If the knee aches during the hold, shorten the stance or turn the back toes out a little. There’s no prize for intensity here.
A looser calf lets the shin move more naturally during walking and standing work. That can make a surprising difference.
17. Single-Leg Balance With Toe Tap
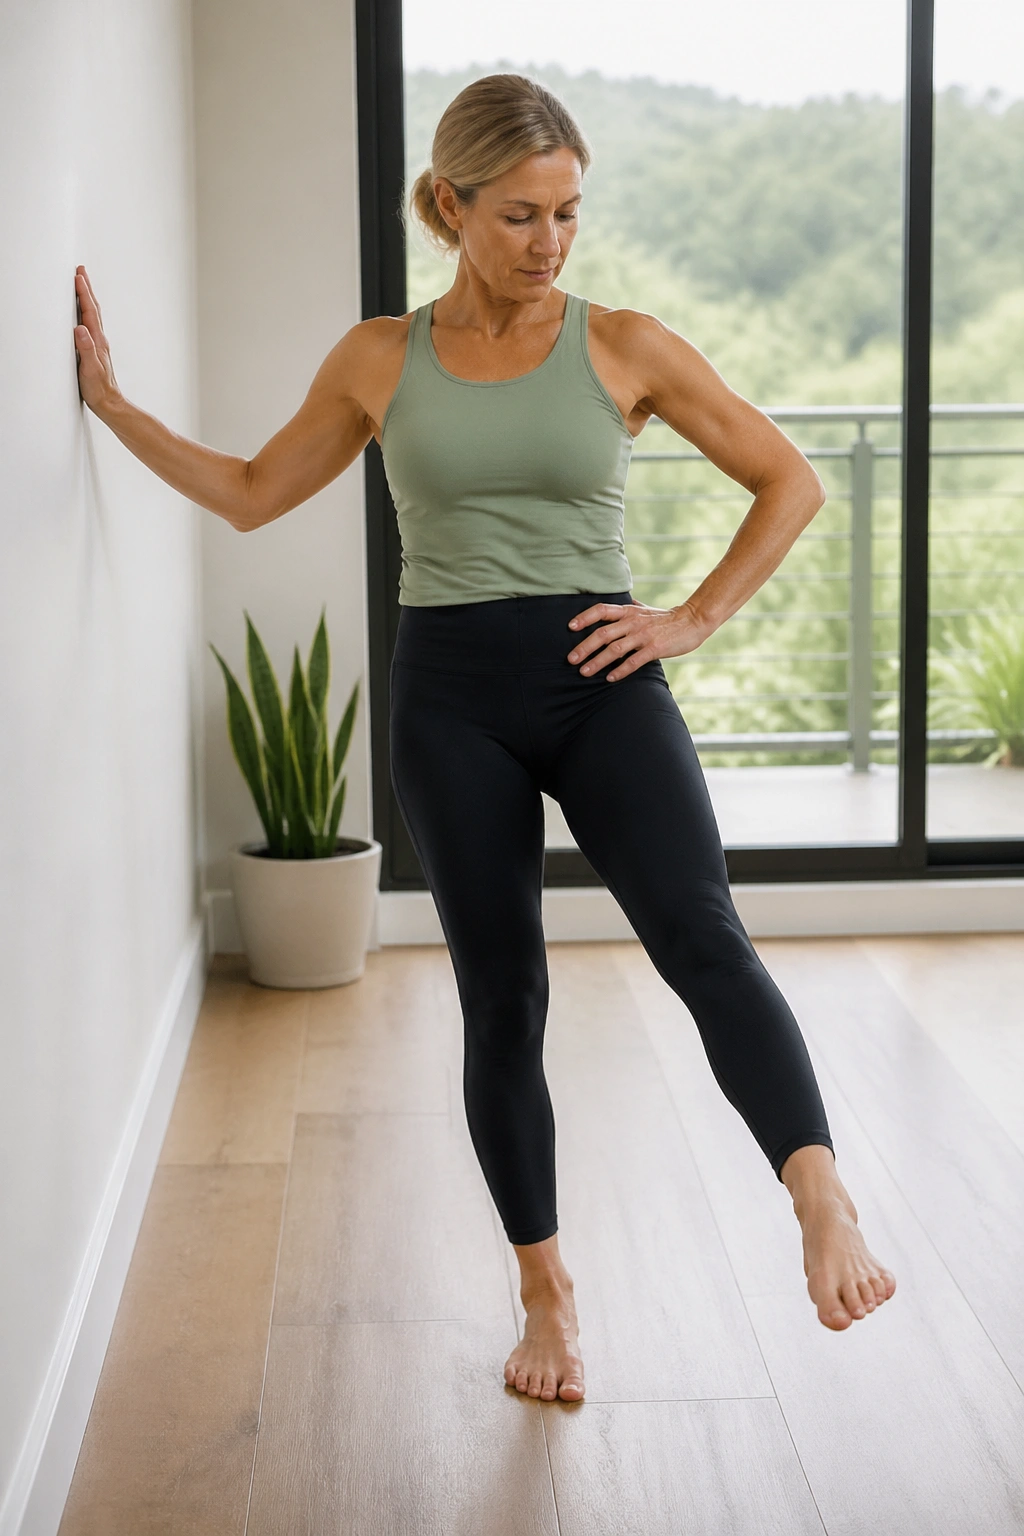
This is the kind of exercise that exposes lazy balance habits fast. It’s also a clean way to build knee-friendly control because the lifted leg isn’t bearing weight; it’s only tapping the floor.
Stand on one leg with a fingertip on a wall if needed. The free foot taps forward, then to the side, then behind you, like a clock face. Keep the pelvis level and the standing knee soft. The standing foot should feel like a tripod: heel, big toe mound, little toe mound.
Why This One Matters
Every tap asks the standing side to stabilize without deep bending. That gives the hip and foot a job, which takes some pressure off the knee. If you wobble a little, fine. If the standing knee caves inward, shorten the reach and slow down.
Do 3 rounds of taps on each leg. If 3 directions feel easy, add a fourth tap diagonally forward or behind. The movement should stay quiet and controlled, never jerky.
18. Inner-Thigh Squeeze With a Pillow
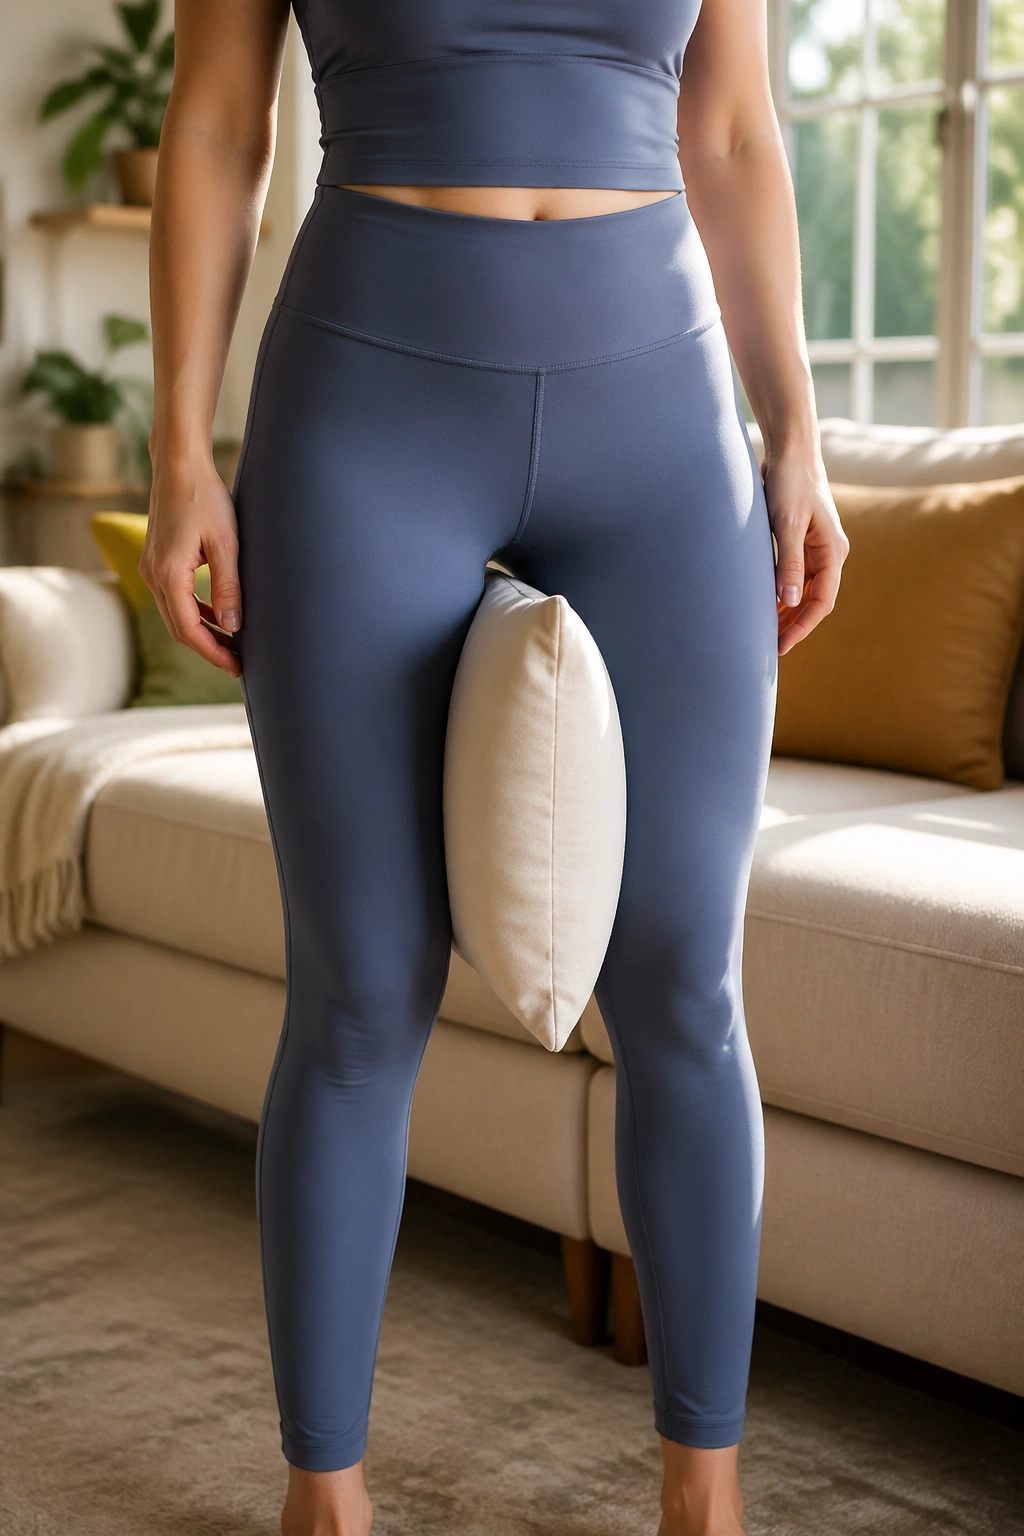
A pillow between the knees or thighs can give you a very specific kind of feedback. It’s useful because the inner thighs help stabilize the legs in standing, and that can calm down noisy knees during everyday movement.
Stand with a small pillow or folded towel between your inner thighs. Press gently for 3 to 5 seconds, then release. Keep the torso upright and the knees softly bent. You’re not trying to crush the pillow; you’re trying to feel the inside line of the legs wake up.
Why It’s Different From a Squat
Unlike a squat, this drill doesn’t demand much knee bend. That makes it a useful option on days when the joint wants less drama but still needs some work. It also reminds you that the legs connect all the way up into the pelvis, which is half the battle.
Try 8 to 10 squeezes. If you want, add a tiny heel lift while you squeeze, but only if balance is solid. Otherwise keep both feet on the floor and let the squeeze do the work.
19. Side Bend With Long Reach
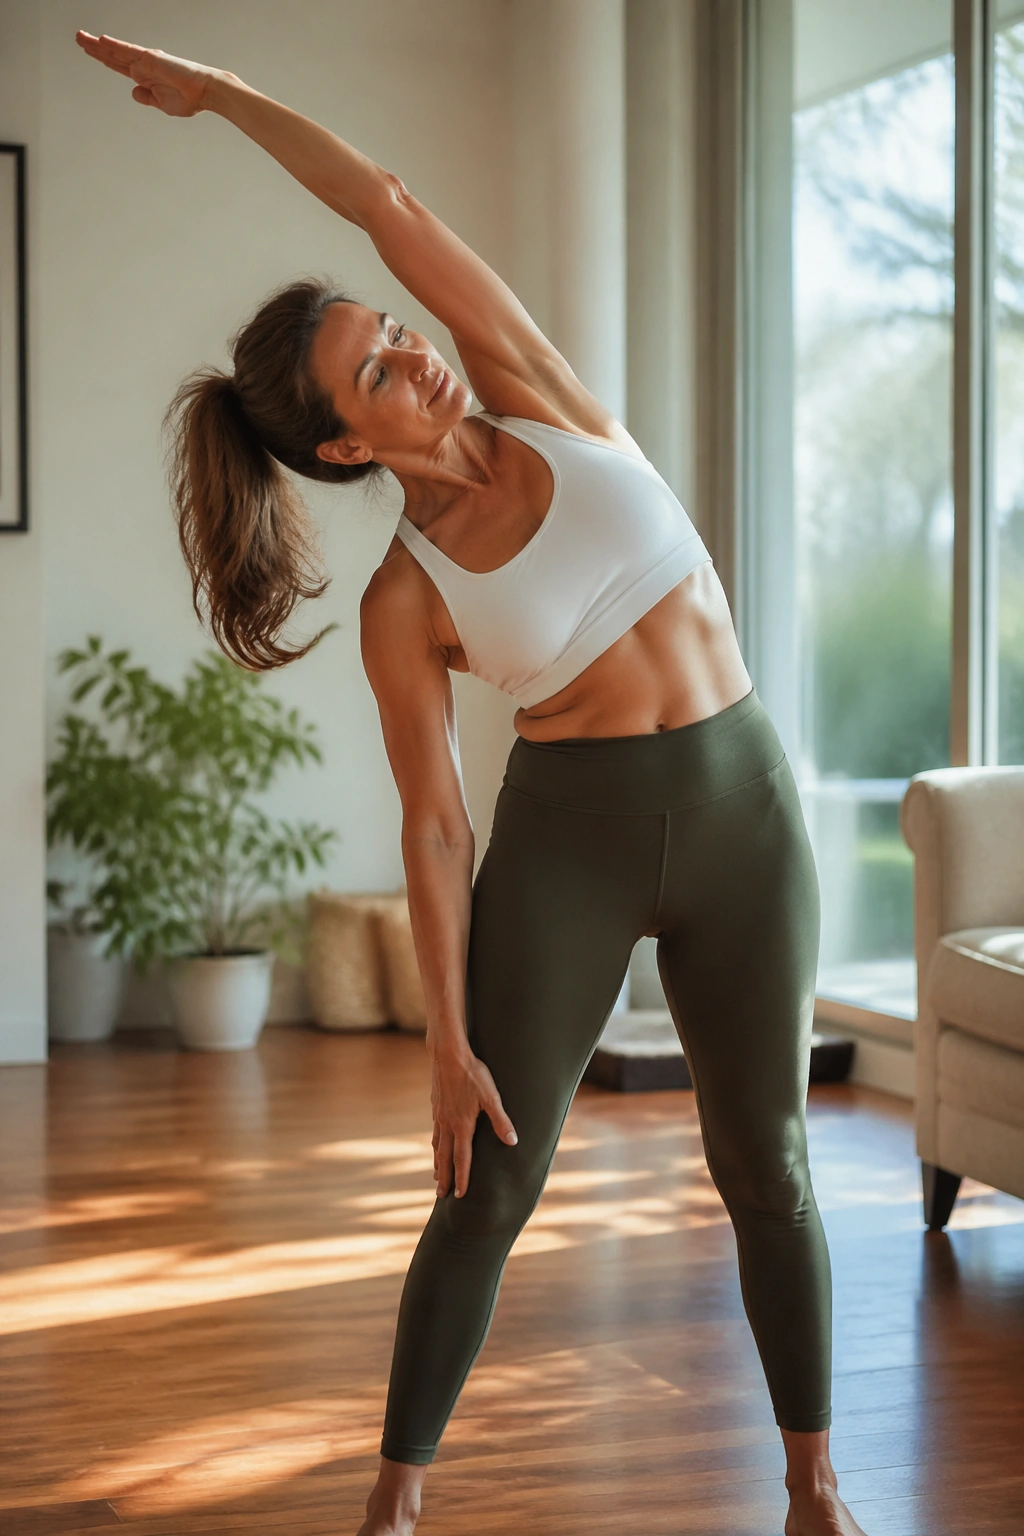
People forget the side body matters until it gets tight. Then the knee starts acting like a complaint department for the whole lower chain. A standing side bend opens the waist, challenges balance, and keeps the lower body from getting lazy.
Stand with feet hip-width apart. Slide one hand down the outside of the thigh while the opposite arm reaches overhead. Keep both feet grounded and the hips facing forward. Come back to center, then repeat on the other side. The bend should happen through the ribs, not by dumping into one hip.
This feels lovely when it’s done well. Not in a glossy, magazine way — in a clean, lengthened, I-can-breathe-better way. The supporting leg gets a little stronger every time you come back upright, which is part of why the move is so useful.
Use This Cue
Imagine the crown of your head reaching up as the side body folds. That keeps the knee from compensating with a sideways collapse. Do 5 slow reps each side.
20. Standing Roll-Down and Breath Reset
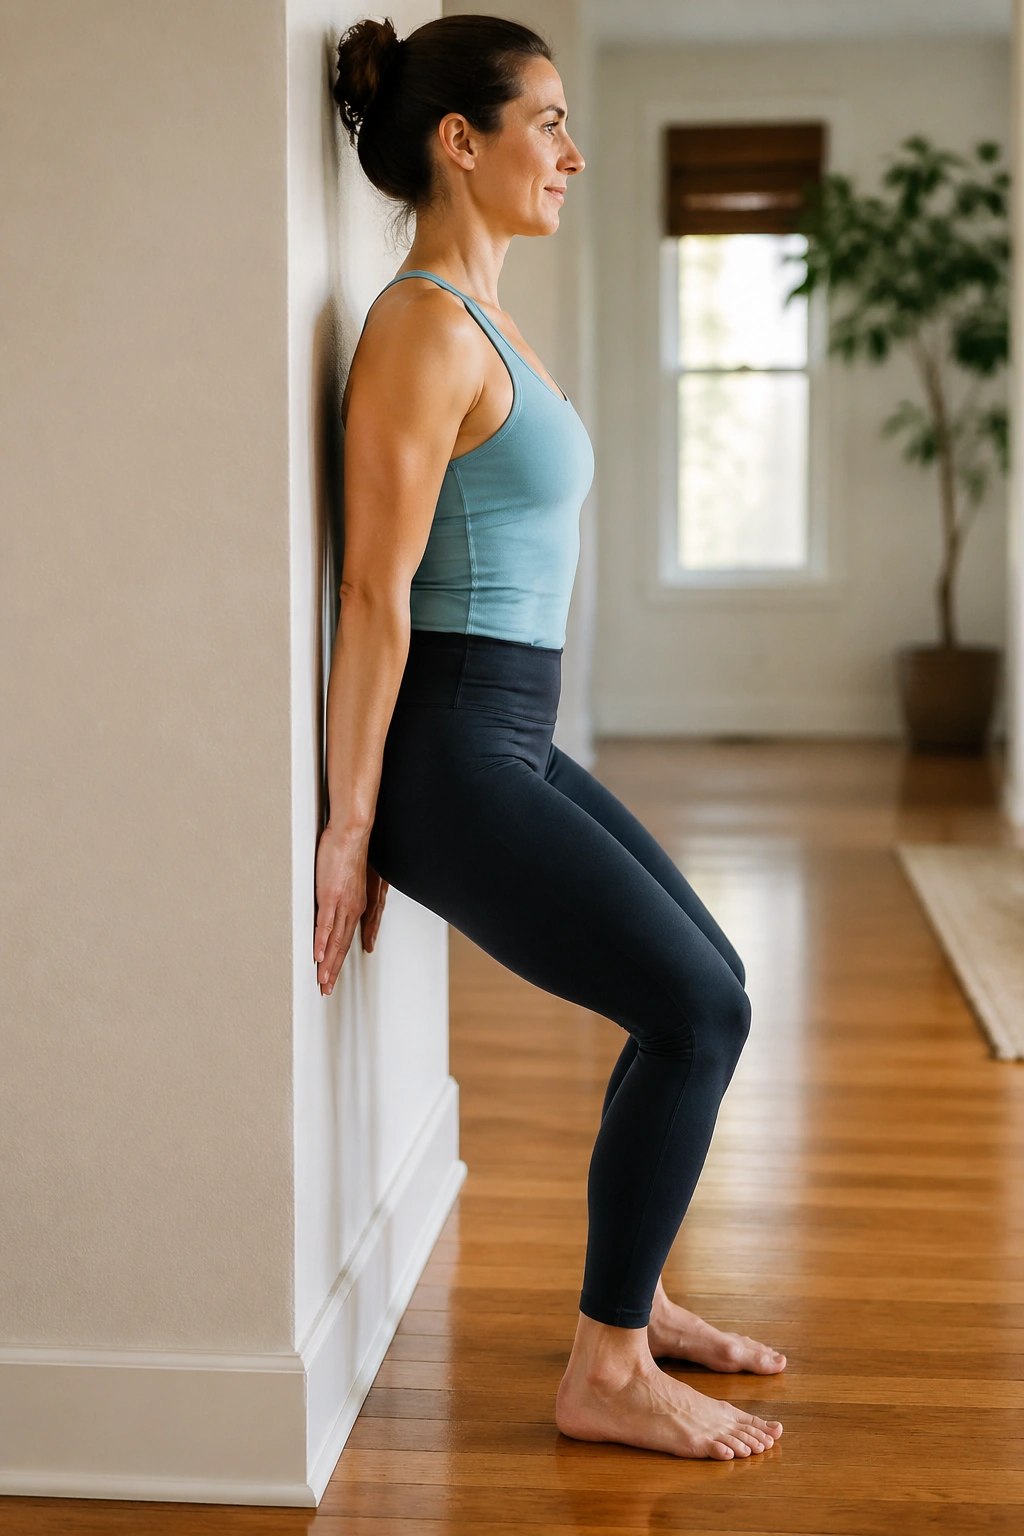
Finish with something that brings the nervous system down a notch. A standing roll-down is a classic Pilates shape, but for bad knees it needs a shorter range and a calmer pace. That’s fine. You’re ending with control, not proving flexibility.
Stand with your feet hip-width apart and your knees softly unlocked. Exhale and nod the chin, then peel the head, shoulders, and upper spine forward only as far as feels easy. Inhale at the bottom. Exhale and stack back up one section at a time, letting the pelvis be the last piece to settle over the legs.
If your hamstrings are tight or your knees hate long holds, keep the roll-down small — maybe halfway to the thighs, maybe less. The point is to decompress the spine and notice whether the feet are still planted evenly. A lot of people leave their weight in the toes without realizing it.
End with 3 slow breaths in standing. Let the arms rest by your sides. Feel both feet on the floor, the knees soft, the hips quiet. That’s the kind of finish that makes the rest of the day easier to live in.
