



A floor Pilates workout can feel easy right up until your ribs start flaring and your low back starts doing all the work.
That is usually the moment the mat tells the truth. Home Pilates looks gentle from a distance, but the small stuff—breath, position, control, timing—decides whether you’re building useful strength or just going through motions on the floor.
The good news is that you do not need a reformer, ankle straps, or a giant chunk of space to make this work. A mat, a little room to stretch out, and enough attention to keep your spine organized will take you a long way. A folded towel helps too. So does patience. Especially patience.
These 18 floor Pilates workouts are built for that exact home setup: low-impact, joint-friendly, and specific enough to give you a real session instead of a generic ab burn. Some are core-heavy, some wake up the glutes, and some give your back body the work it usually misses. The trick is knowing which one to reach for first.
1. The Hundred Prep That Wakes Up Your Core
Start here if you want your abdomen to stop freelancing.
The Hundred is famous, but the prep version is smarter for most home workouts because it teaches the breathing pattern without turning your neck into a complaint department. Lie on your back, bend your knees, and lift one leg at a time into tabletop if that feels steady. Keep your ribs heavy and your lower belly gently drawn in as you pump your arms.
How to keep it clean
- Pump the arms 10 times per breath cycle, then rest.
- Keep the neck long; if your chin starts jutting forward, lower the head.
- Exhale on the arm pumps, and let the inhale happen without collapsing the ribs.
- If tabletop legs make your back arch, leave both feet on the mat.
A lot of people rush this one. Bad idea. The point is not speed; the point is keeping your trunk stable while the breath and arms move. That split focus is classic mat Pilates, and it matters more than the burn. Do 2 to 4 rounds of 10 pumps and you’ll feel the difference fast.
2. Shoulder Bridge March for Glutes and Pelvic Control
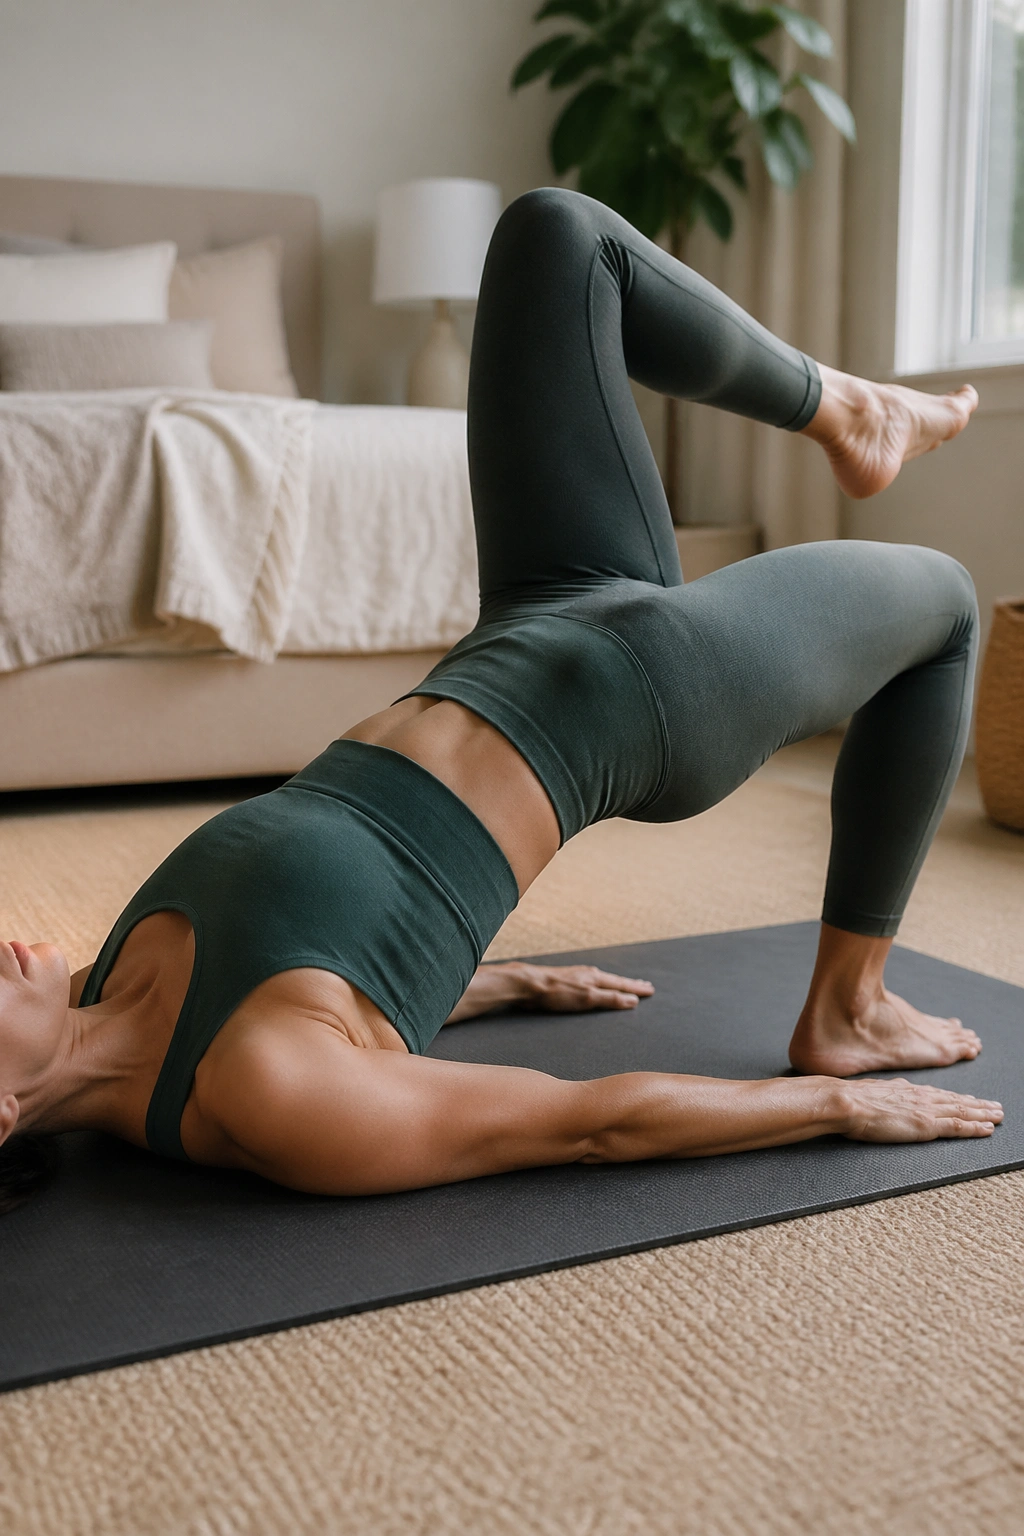
This is one of the few floor Pilates workouts that can wake up your glutes without making your hamstrings hog the whole job.
Lie on your back with your knees bent and feet hip-width apart. Curl your pelvis off the mat until your ribs, hips, and knees form a long line, then hold that bridge while you lift one foot a few inches and set it back down. March slowly. No wobbling. No rib flare. If your pelvis tips from side to side, make the lift smaller.
The bridge march is a sneaky test of pelvic control. You’re asking the backside of your body to stay calm while one leg moves, which is exactly the sort of thing that helps with walking, standing, and those annoying moments when one hip always feels tighter than the other. Work for 6 to 8 marches per side, then lower with control.
If your hamstrings cramp, shift your feet a little closer to your seat. If your low back pinches, lower the bridge height. That’s not a failure. It’s information.
3. Roll-Up Practice for Spinal Articulation
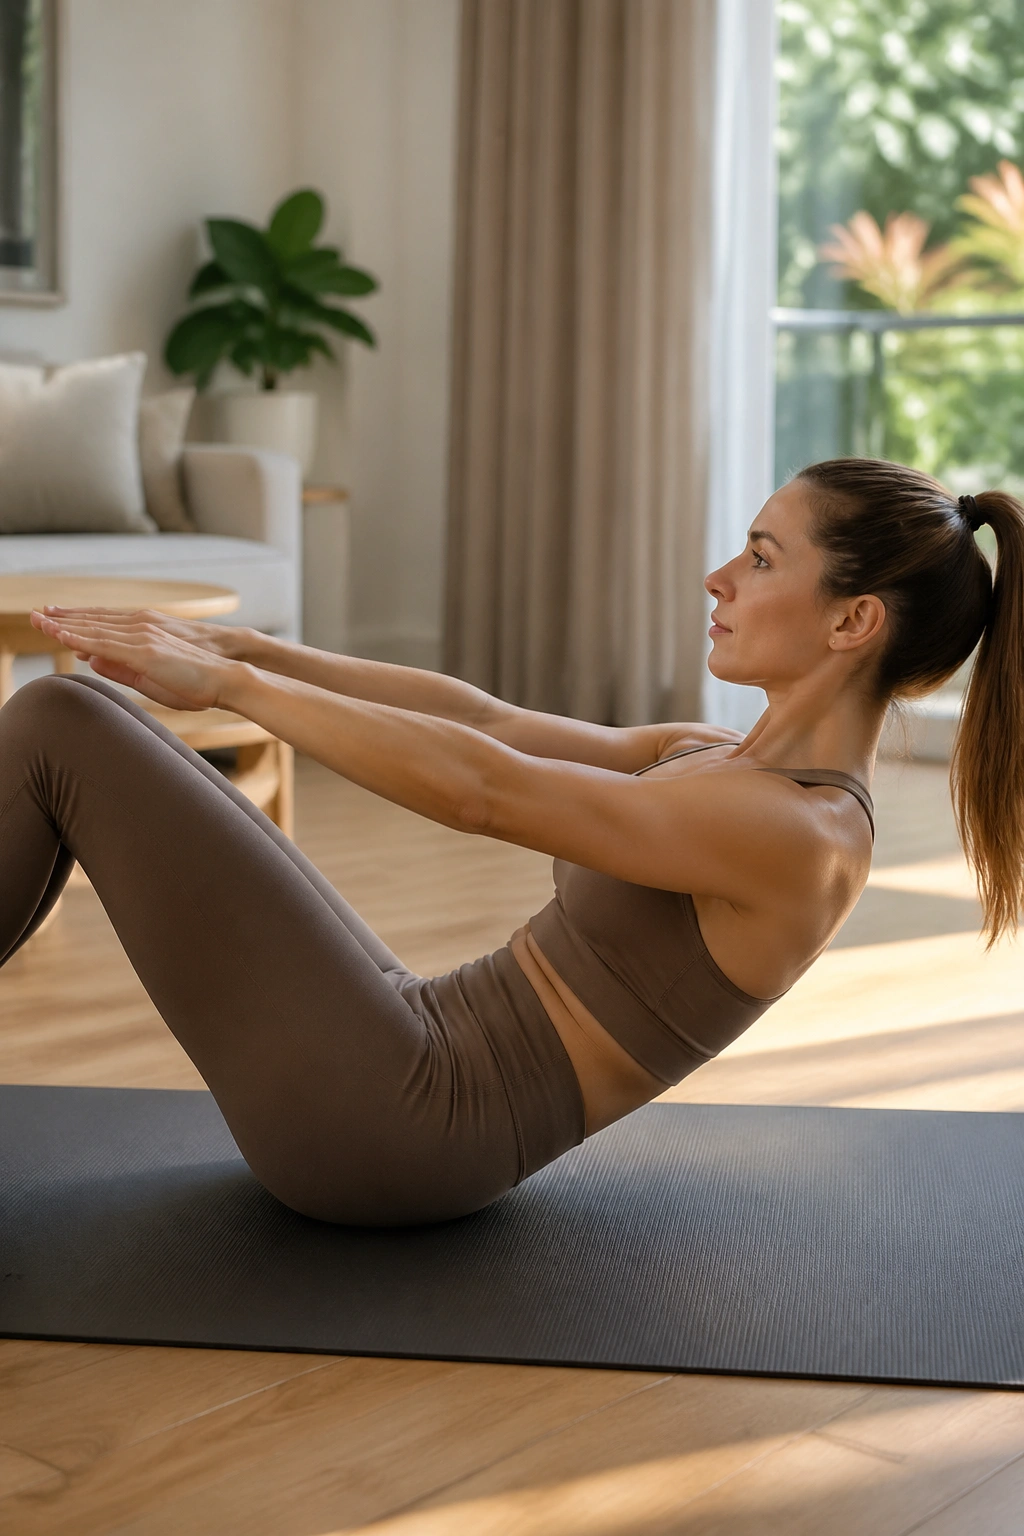
Why do roll-ups feel so brutal? Usually because people try to sit up with their hip flexors and call it core work.
Lie flat with your arms overhead if your shoulders allow it, then nod the chin and peel the spine up one vertebra at a time. If a full roll-up is too much, bend your knees and use a half roll-back instead. That version is not the “easy” one. It’s the smarter one, because it teaches you to keep the ribs tucked and the pelvis honest.
A cleaner way to practice
Use a slow exhale on the way up.
Pause for one breath at the top.
Lower back down with the same control.
That last part matters. Most people can get up. Fewer can come down without dropping like a sack of laundry. Try 4 to 6 repetitions and stop before your neck starts taking over. If your feet pop off the mat, that’s a sign to bend the knees or work with a smaller range.
This is one of those Pilates mat exercises that rewards patience more than effort. That’s annoying. It’s also why it works.
4. Dead Bug Reach for Quiet Abs
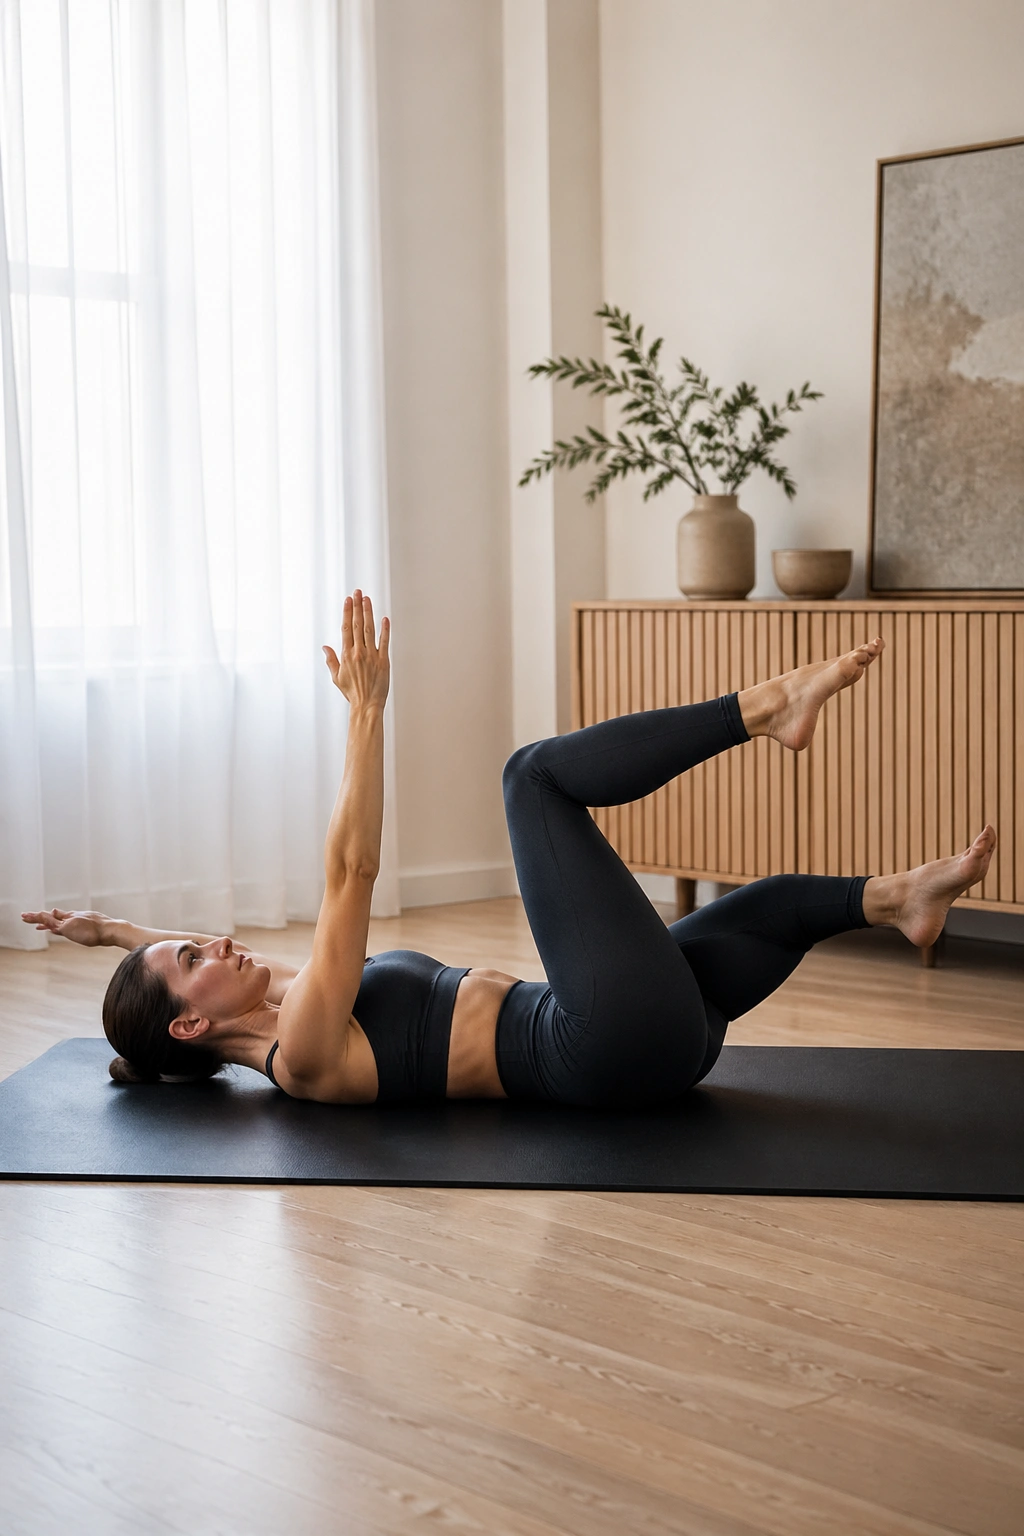
If your low back likes to arch the second your legs leave the floor, this is the move to keep nearby.
Dead bug work looks simple. It is not simple when you do it well. Lie on your back with your arms reaching toward the ceiling and your legs in tabletop, then extend one opposite arm and leg away from the center without letting your spine change shape. The goal is a quiet torso and moving limbs. That’s the whole game.
A tiny range is fine. Honestly, tiny is better than sloppy. The leg does not need to lower far. The arm does not need to hover low. You’re training control, not showing off your flexibility. Do 6 to 8 slow reps per side, and press your lower back gently into the mat before each extension so you know where neutral lives.
I like this one for people who sit a lot, because it teaches the deep core to stay online without crunching the neck or hip flexors. It also pairs well with breathing drills. If you can keep the ribs from popping up while the opposite arm and leg move, you’re on the right track.
5. Toe Taps and Arm Presses for Lower-Ab Work
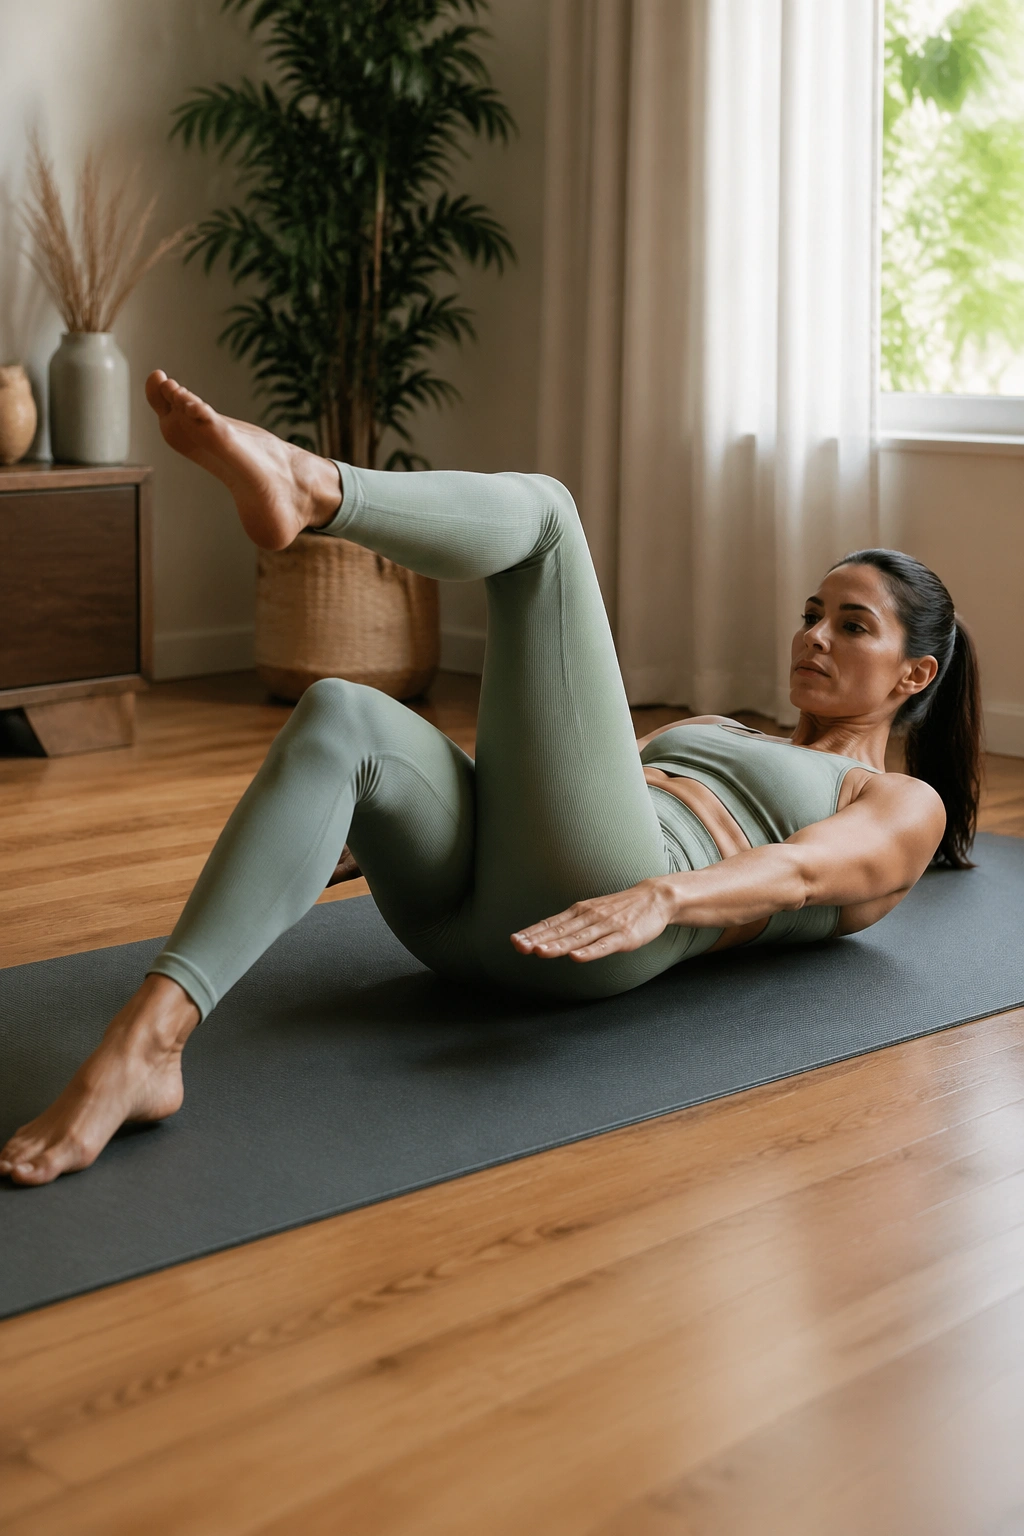
Toe taps are the sort of home Pilates move that looks harmless until rep seven.
Lie on your back with both legs lifted into tabletop, knees bent at 90 degrees. Keep the pelvis still as one foot taps the mat and returns. At the same time, or in a separate set, press your arms down toward the floor as though you’re trying to flatten invisible paper. Small, clean motions. That’s the point.
What makes this one useful is the pairing. Your lower abs have to stay engaged while your limbs do different jobs, and that teaches the trunk to resist movement instead of collapsing into it. Use 8 to 10 taps per side. If your hip flexors start barking, shorten the tap and slow down. If your lower back lifts off the mat, reset.
This is a good middle-ground workout for days when you want something more active than breathing drills but less demanding than full teaser work. It gives you heat without much drama. Which, on a weekday, is kind of perfect.
6. Single Leg Stretch for Coordination
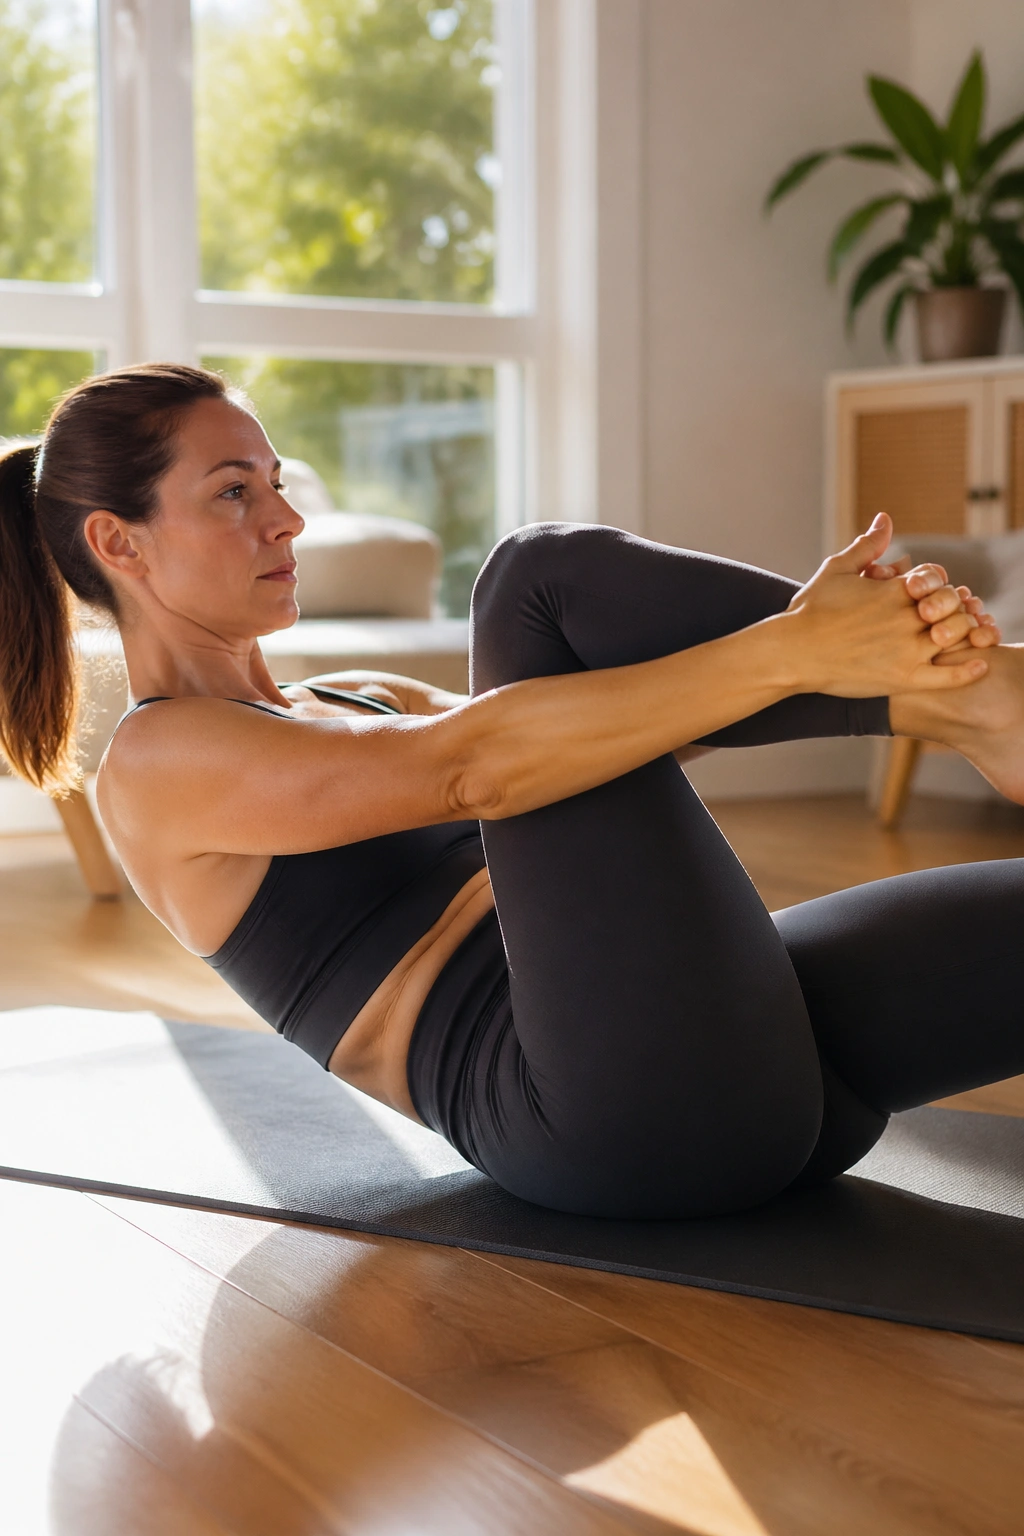
Unlike a crunch, this move asks your torso to stay steady while one leg changes shape and the other one waits its turn.
Lie on your back and bring both knees in toward the chest. Curl the head and shoulders up only if your neck feels good, then extend one leg long while the other knee stays close. Switch on the exhale. The farther the leg reaches, the harder your trunk has to work, so don’t chase a long line before you can keep the ribs quiet.
What to watch for
- Keep the elbows soft, not yanked wide.
- Pull the bent knee in with control, not momentum.
- Move the legs through a range that keeps your low back calm.
- Let the exhale finish before you switch sides.
I prefer this one when someone wants Pilates core work but hates endless crunches. It has rhythm. It has coordination. It also shows you pretty fast whether your abs are doing their job or just hoping for the best. Do 8 to 12 switches total, then rest your head down if the front of your neck starts working too hard.
7. Double Leg Stretch for the Long Levers
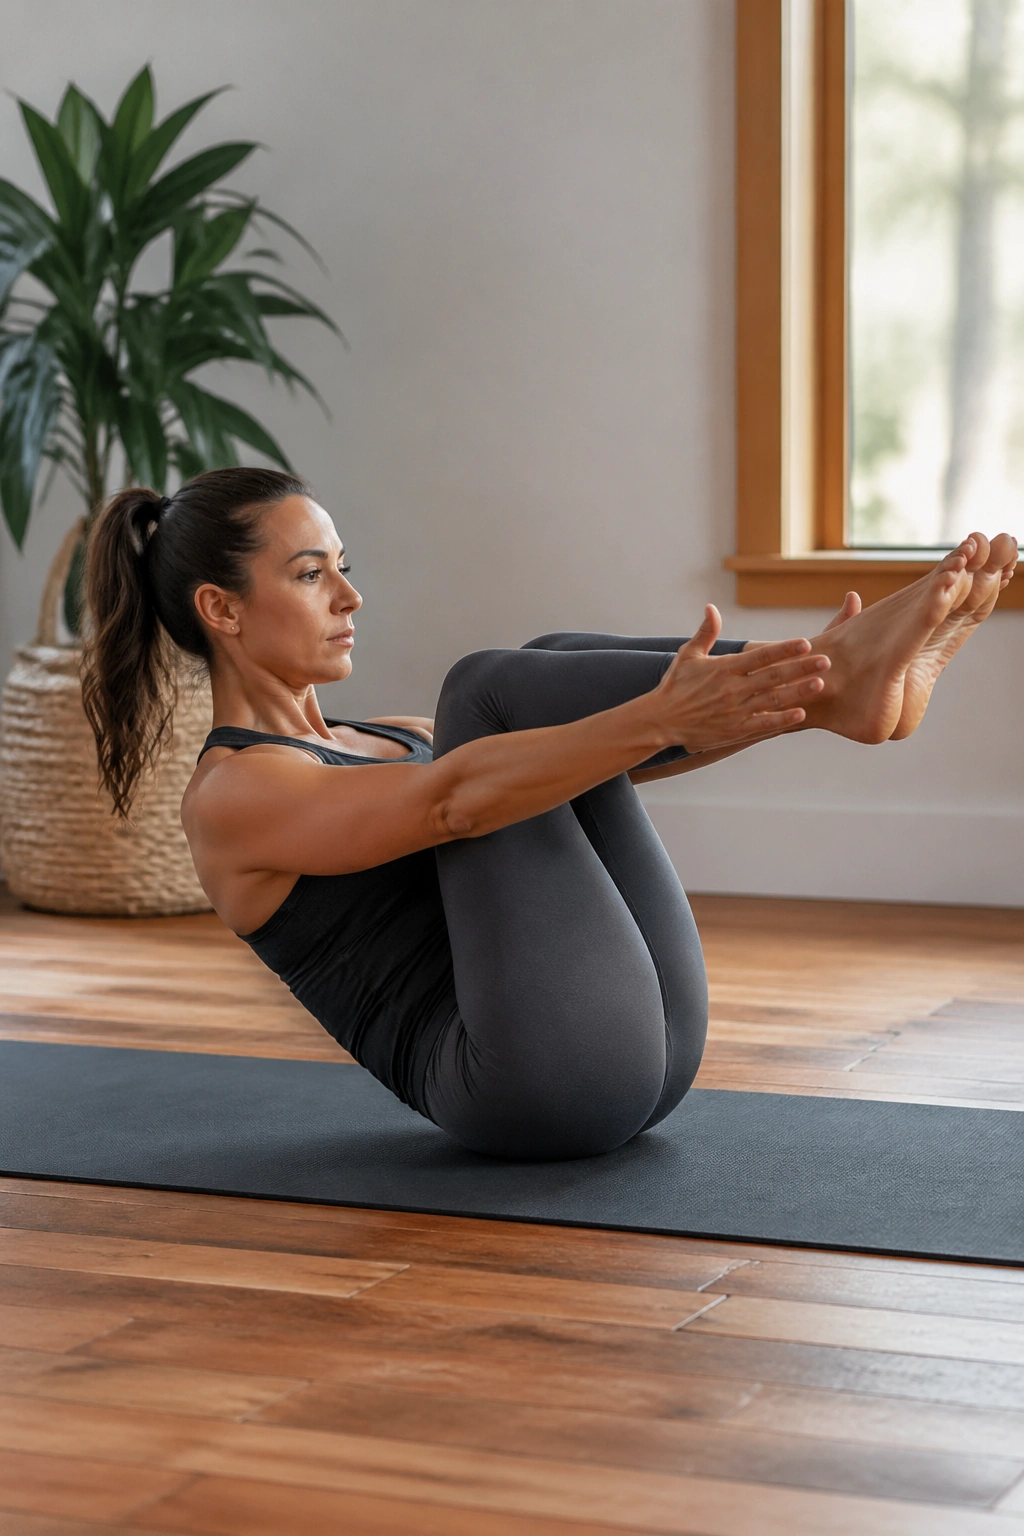
This one looks elegant. It feels like a negotiation.
Start in that same curled position, knees hugged in, then reach both arms and both legs away from the center on one long exhale before circling the arms back in and drawing the knees home. If your back arches the second the limbs extend, bend the knees more and keep the reach smaller. The move only works when the torso stays steady.
The double leg stretch is a stronger core challenge than the single-leg version because both legs leave at once. That means fewer places to hide. You’ll feel the lower abdominals, and if your form is honest, you’ll also feel the area just under the ribs stay pulled in and organized.
Try 6 to 8 repetitions. That’s enough. More is not better if the shape falls apart. I like pairing this with one round of toe taps first, because it warms up the pattern and keeps the first set from feeling like a mugging.
8. Side-Lying Leg Lifts for Outer-Hip Strength
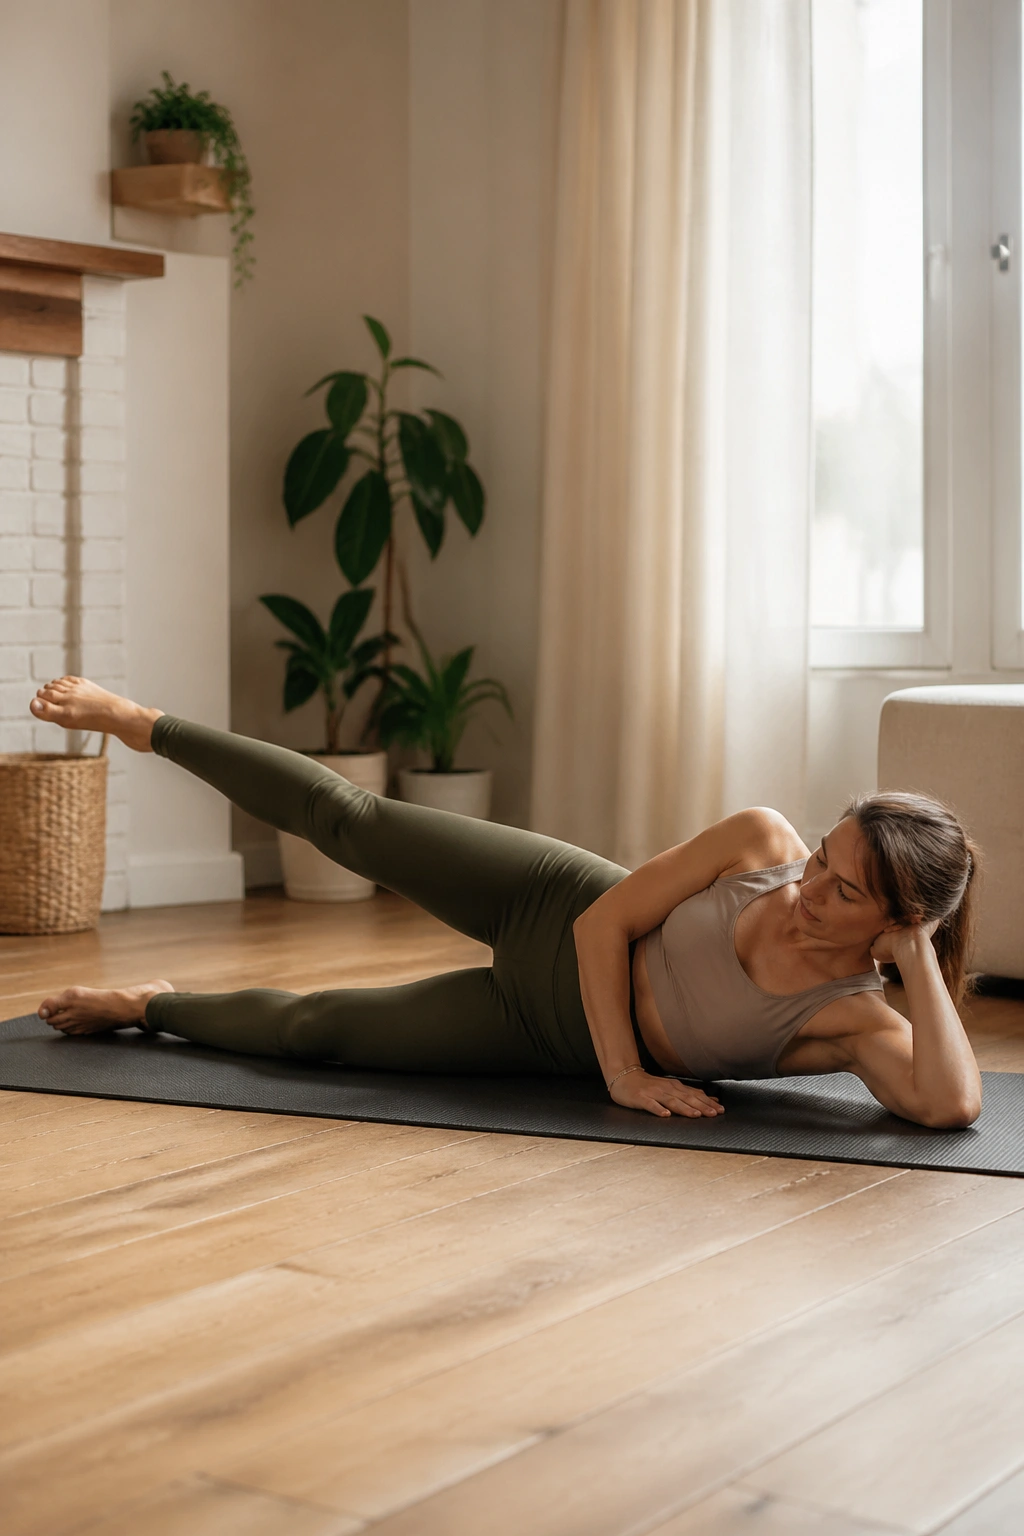
Need a break from all the spine flexion? Good. Your hips do too.
Roll onto one side, stack your shoulders and hips, and stretch the bottom arm long under your head. Lift the top leg in a small, clean line, then lower it without letting the pelvis rock backward. The temptation is to throw the leg up high. Don’t. A lower lift with better alignment usually hits the outer hip harder anyway.
How to use it
- Point or flex the foot based on what feels cleaner; just stay consistent through the set.
- Keep the waist long instead of collapsing into the side.
- Do 10 to 12 lifts, then add 10 tiny circles each way if you want extra work.
- Repeat on the other side without rushing the setup.
This is one of the best floor Pilates workouts for people who feel weak in the hips during walking, stairs, or standing on one leg. It won’t fix everything, but it builds the kind of support that makes other movement feel easier. And yes, it can look boring. Boring moves often earn their keep.
9. Clamshell Pulses for Hip Stability
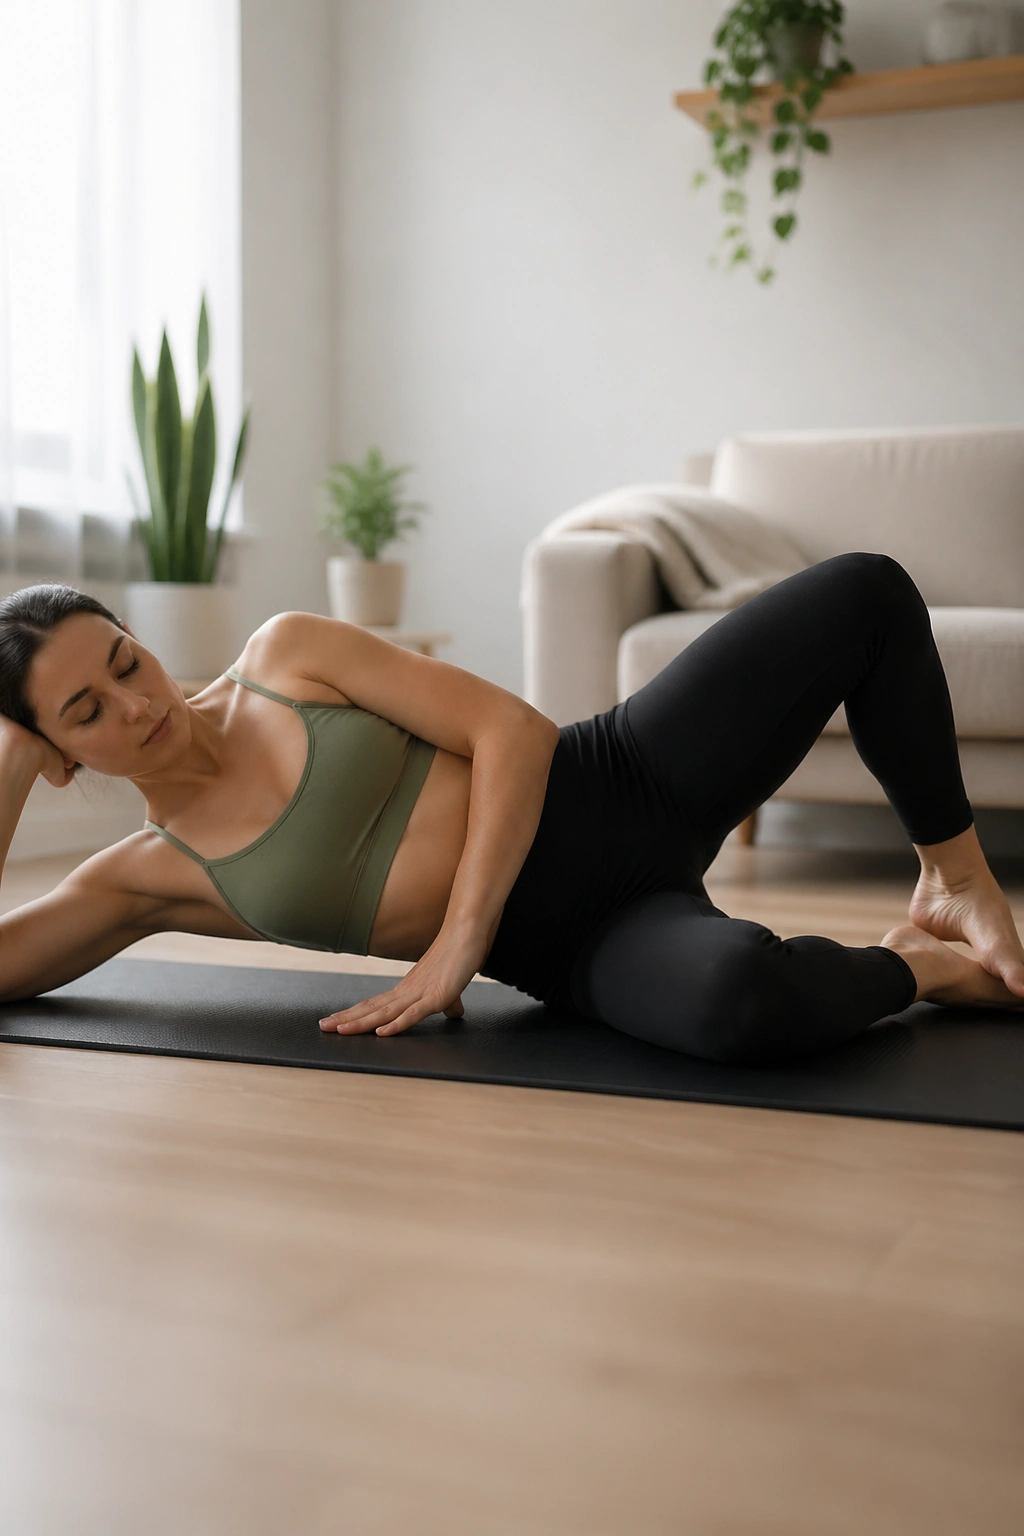
Clamshells are small. They are also rude, in the best way.
Stay on your side with knees bent and heels lined up behind you. Keep the feet touching while you open the top knee like a shell, then pulse at the top for 12 to 15 small lifts. The pelvis should stay stacked. If your top hip rolls backward, the movement has gotten too big.
A folded towel under the waist can make this feel cleaner, especially if your top hip keeps collapsing toward the mat. That little bit of support helps you feel the side body instead of grinding through the low back. Do 2 sets per side if you want a more complete glute medius workout. That muscle matters more than people think, especially for hip stability.
This is a good pairing with side-lying leg lifts because the first move works the bigger lever and the second sharpens the tiny stabilizers. Together, they make a decent at-home lower-body session without a single squat jump in sight. Thank heaven for that.
10. Swimming Prep for Back Body Endurance
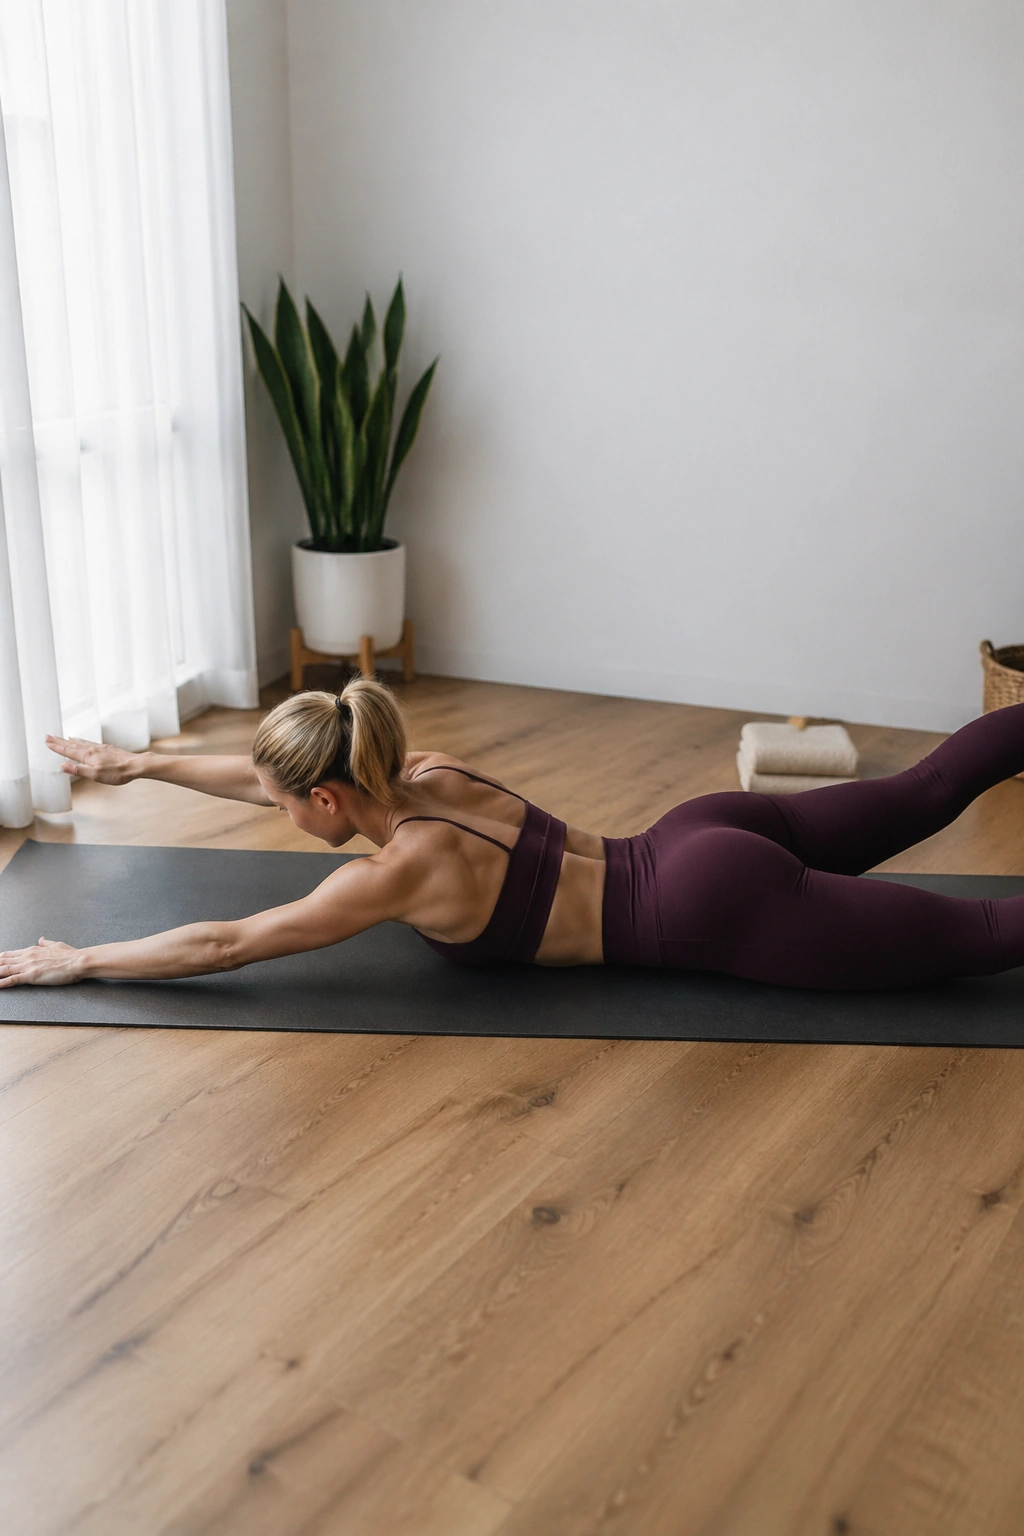
Swimming prep is what I give to people whose fronts are strong but whose backs keep checking out.
Lie face down with your forehead resting lightly on the mat or on your hands. Extend one arm and the opposite leg a few inches off the floor, then switch sides in a steady rhythm. Keep the lift small. A high lift usually turns into low-back compression, and that’s not the goal here. You want length, not heaving.
How to keep the neck calm
Turn the face down between the arms or rest the forehead on a folded towel.
Lift from the back of the thigh and upper arm, not from a hard squeeze in the lower back.
Breathe out for four to six counts while you alternate.
Do 20 to 30 seconds, rest, then repeat 2 or 3 rounds. It’s a modest dose, but the back body gets a surprising amount of work from it. I especially like this for desk-heavy bodies, because it reminds the spine that extension exists and does not need to feel dramatic.
11. Bird Dog Reach for Cross-Body Control
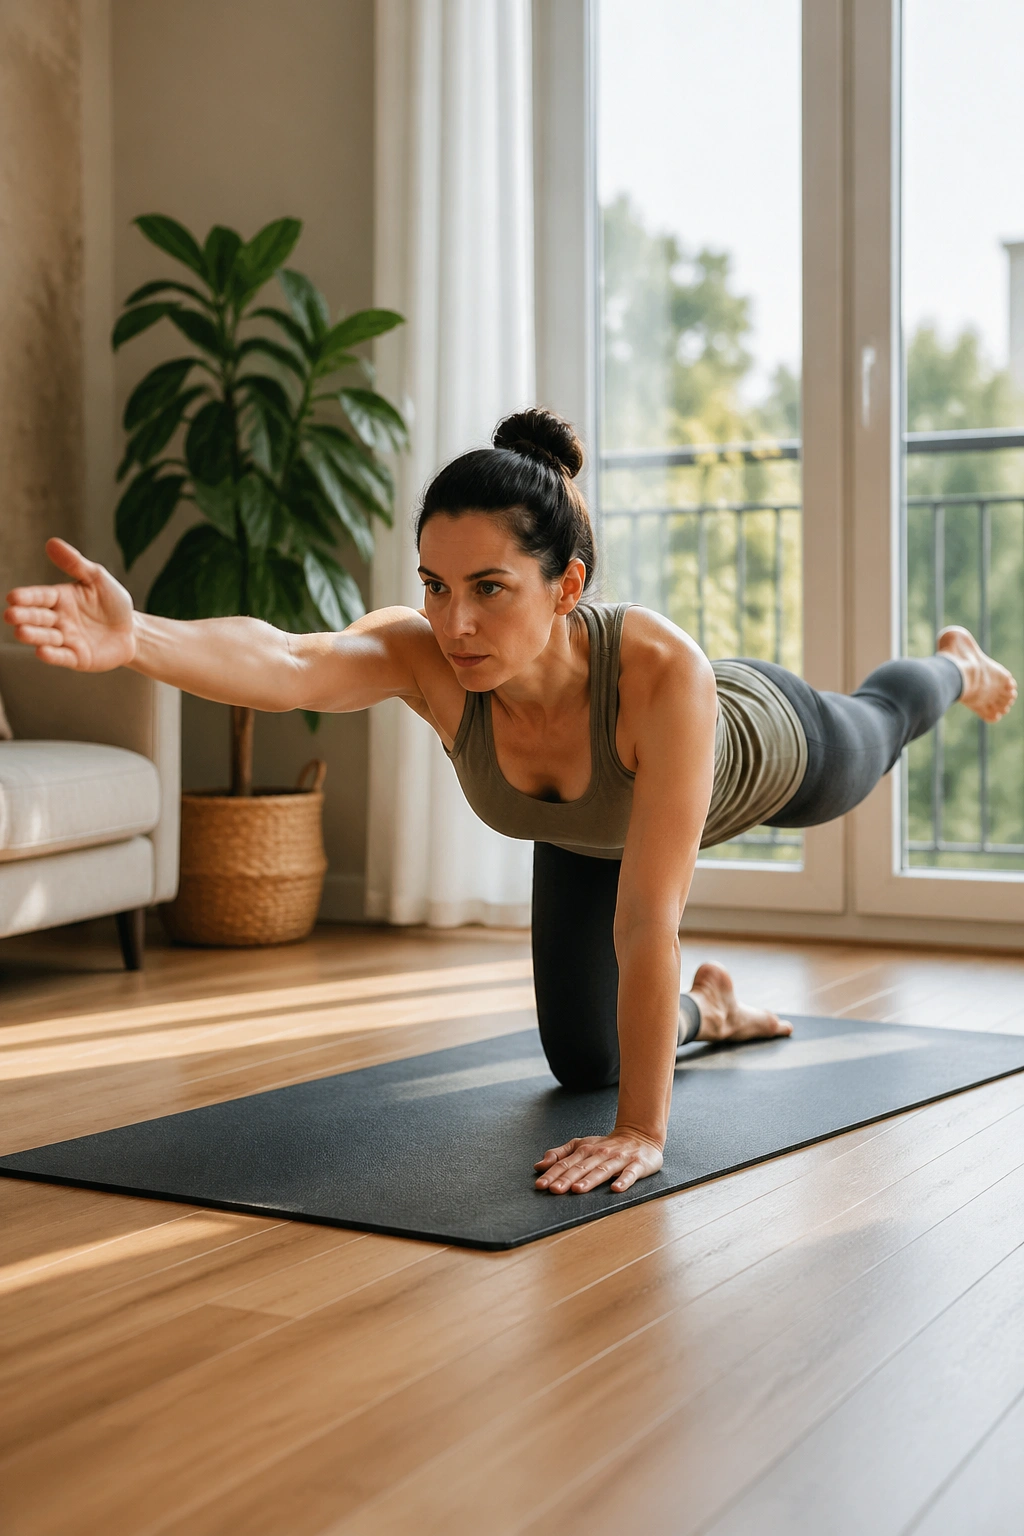
Bird dog gives you anti-rotation training without asking you to hold a plank and pray.
Set up on hands and knees with your wrists under shoulders and knees under hips. Reach one arm forward as the opposite leg extends back, then pause for a breath before returning to center. The hips should stay level. The ribs should stay knit. If one side of the pelvis rotates open, shorten the reach and slow the tempo.
This move is different from dead bug in a useful way. Dead bug teaches you to stabilize on your back; bird dog teaches the same skill on all fours, where gravity has a slightly nastier sense of humor. That makes it a nice progression for home Pilates floor work. Aim for 6 slow reaches per side.
A lot of people rush this one because it feels familiar. Don’t. The pause is the gold. Hold long enough to feel the supporting side of the body wake up, then switch cleanly.
12. Saw for Rotation and Hamstring Length
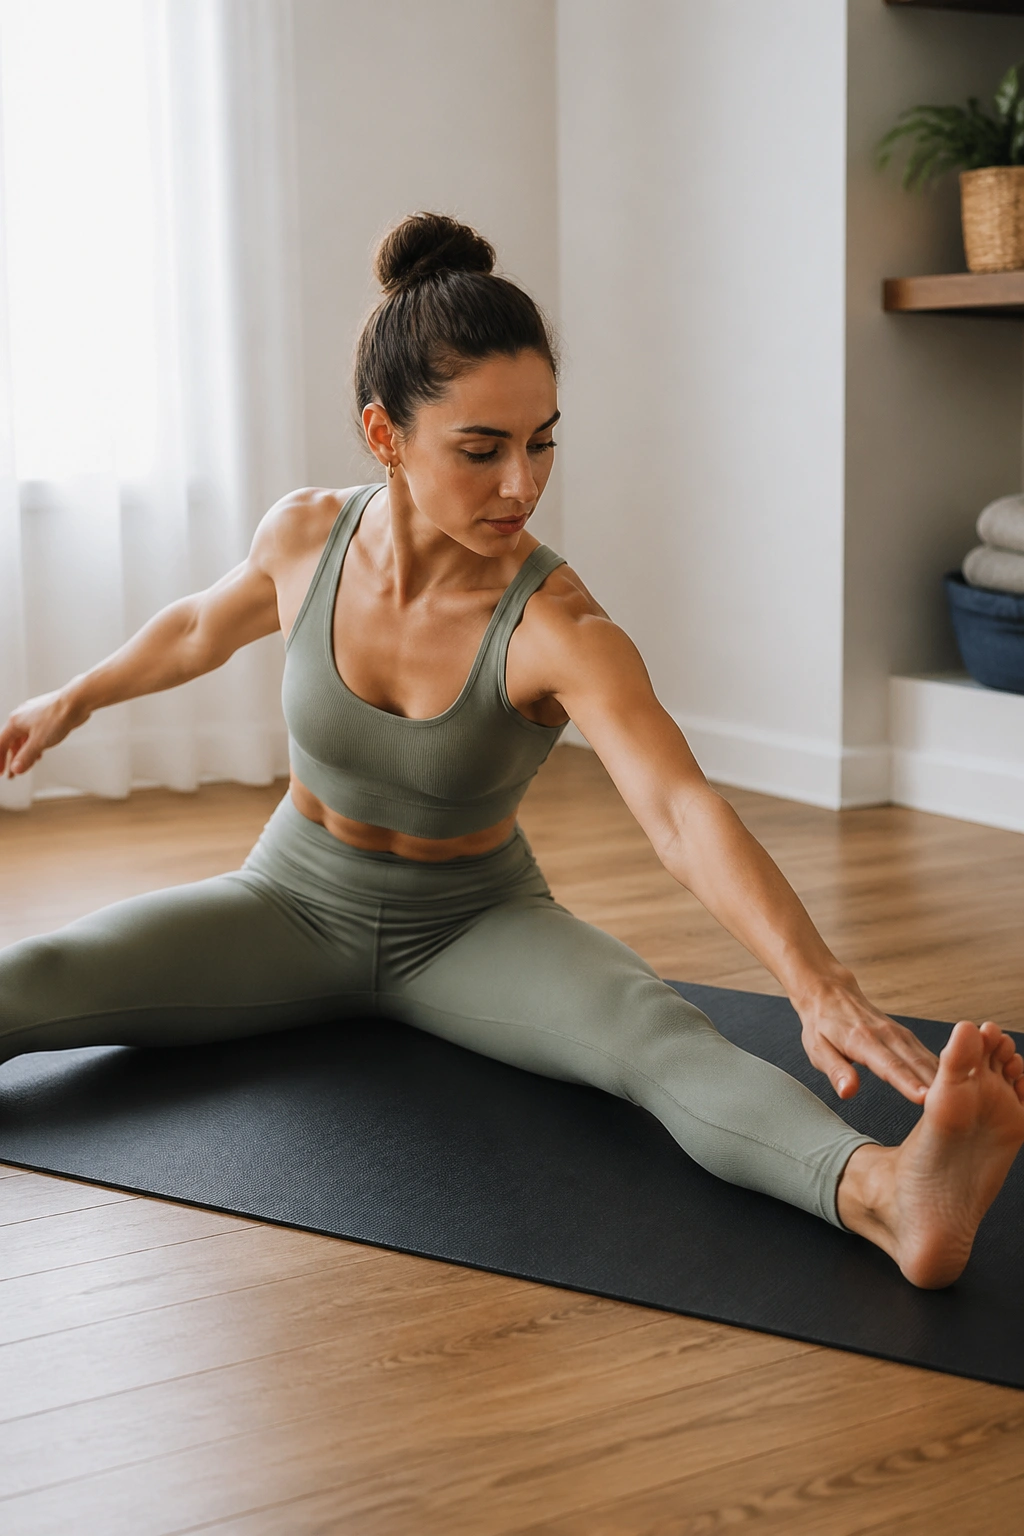
Seated work changes the feel of the whole session.
Sit with your legs open in a wide V, or bend the knees slightly if your hamstrings are tight and your back starts rounding. Rotate your torso, reach the opposite hand toward the outside of the pinky toe, and keep both sit bones as grounded as possible. The movement should come from the ribs and waist, not a crank through the shoulder.
Saw does two jobs at once. It teaches rotation through the upper spine and side body, and it invites a controlled stretch through the back of the legs. If you sit on a folded blanket, you may find the pelvis tilts forward more easily, which helps the spine stay long. Try 4 to 6 reaches per side.
You do not need to touch the foot. You need to keep the chest turning while the reach lengthens. That distinction matters. A sloppy reach feels bigger. A better reach feels cleaner.
13. Side Plank from the Knee for Oblique Work
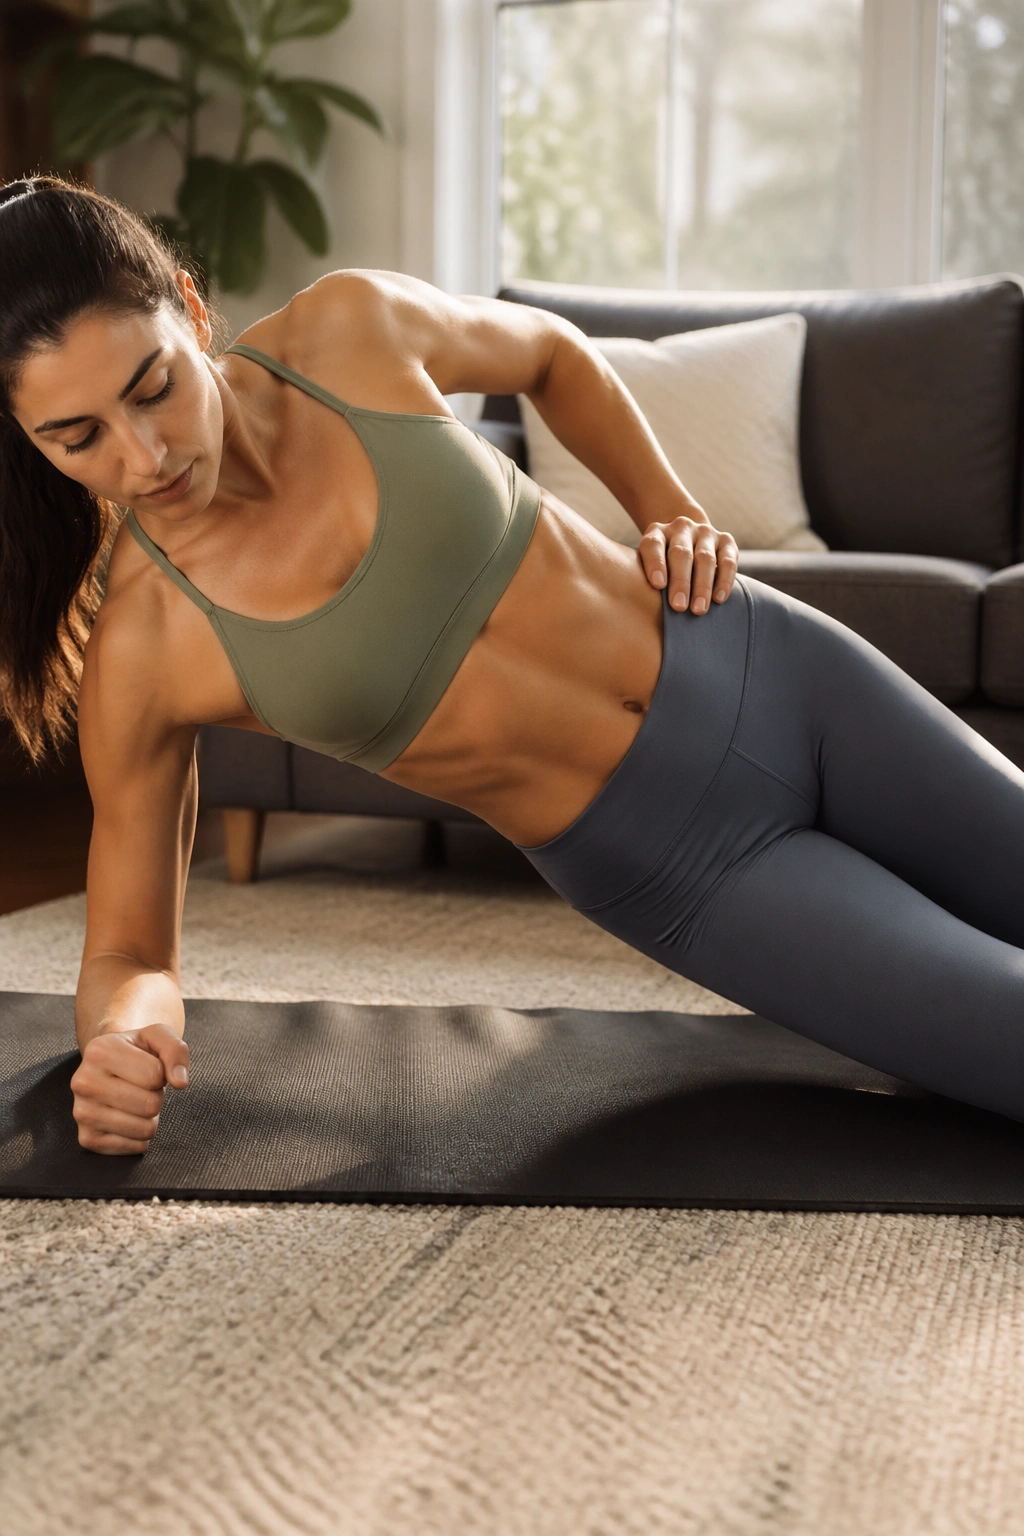
This is the section where a lot of people expect a giant strength test and get something subtler instead.
Side plank from the knees is a smart home version because it loads the side body without demanding a full-body hold that turns into a shoulder shrug. Start on your forearm, stack the elbow under the shoulder, and bend the knees so the hips can lift into one long line from knee to shoulder. Hold for 15 to 20 seconds, then lower with control.
If the bottom shoulder feels jammed, check the elbow position first. Most of the time, it has drifted too far forward. If the hips sag, shorten the hold rather than muscling through a sloppy shape. That is the mistake people make over and over: they chase time instead of alignment.
This move is excellent for oblique strength, side hip support, and shoulder stability all at once. Do 2 holds per side and treat the last 5 seconds as the real work. That’s usually where the shaking starts, anyway.
14. Corkscrew Prep for Controlled Hip Circles
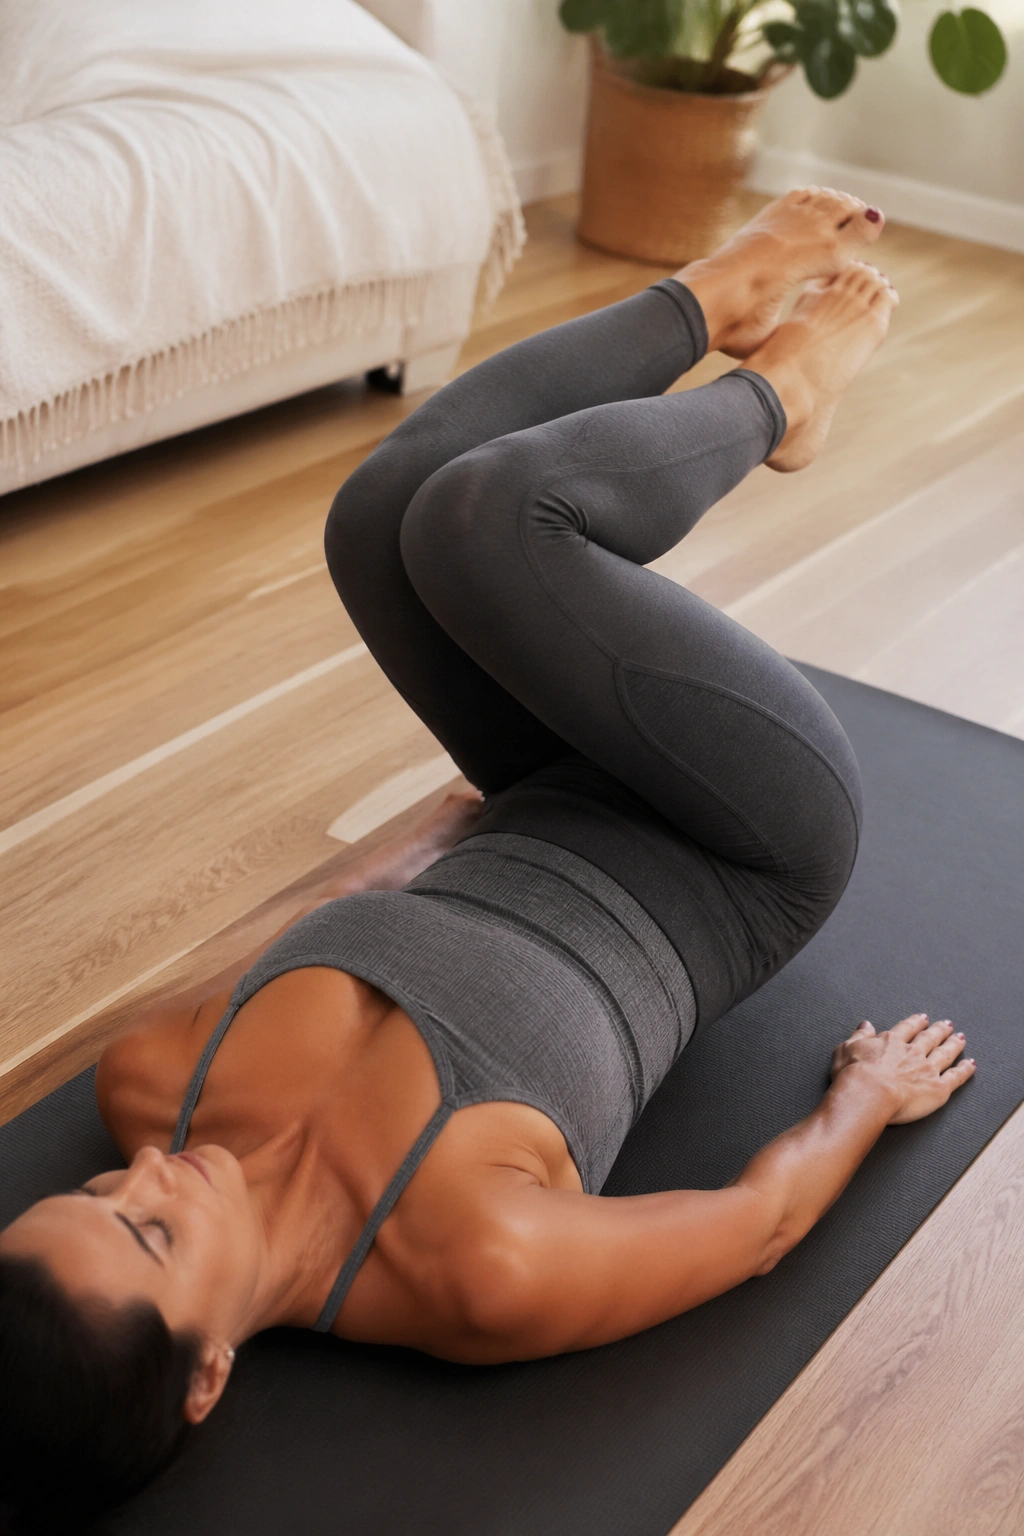
Corkscrew prep is one of those floor Pilates moves that looks like a trick until you feel how much control it asks for.
Lie on your back with your legs lifted toward the ceiling, knees softly bent if needed. Lower the legs a few inches to one side in a small circle, then sweep them through center and over to the other side. The range should be modest. If the low back arches or the shoulders pop up, make the circle smaller. Much smaller.
A few things that help
- Press the upper arms and shoulders into the mat before each circle.
- Keep the pelvis heavy, not tossed around by momentum.
- Start with 3 circles each direction.
- Bend the knees if straight legs pull too hard on the back.
This is not a flashy abdominal move. It is a control drill. The reward is cleaner hip motion and a better sense of how the trunk stabilizes while the lower body moves around it. That’s useful in a sneaky, everyday way. Also, it feels nicer when you stop treating it like a circus act.
15. Teaser Prep for Balance and Deep Core
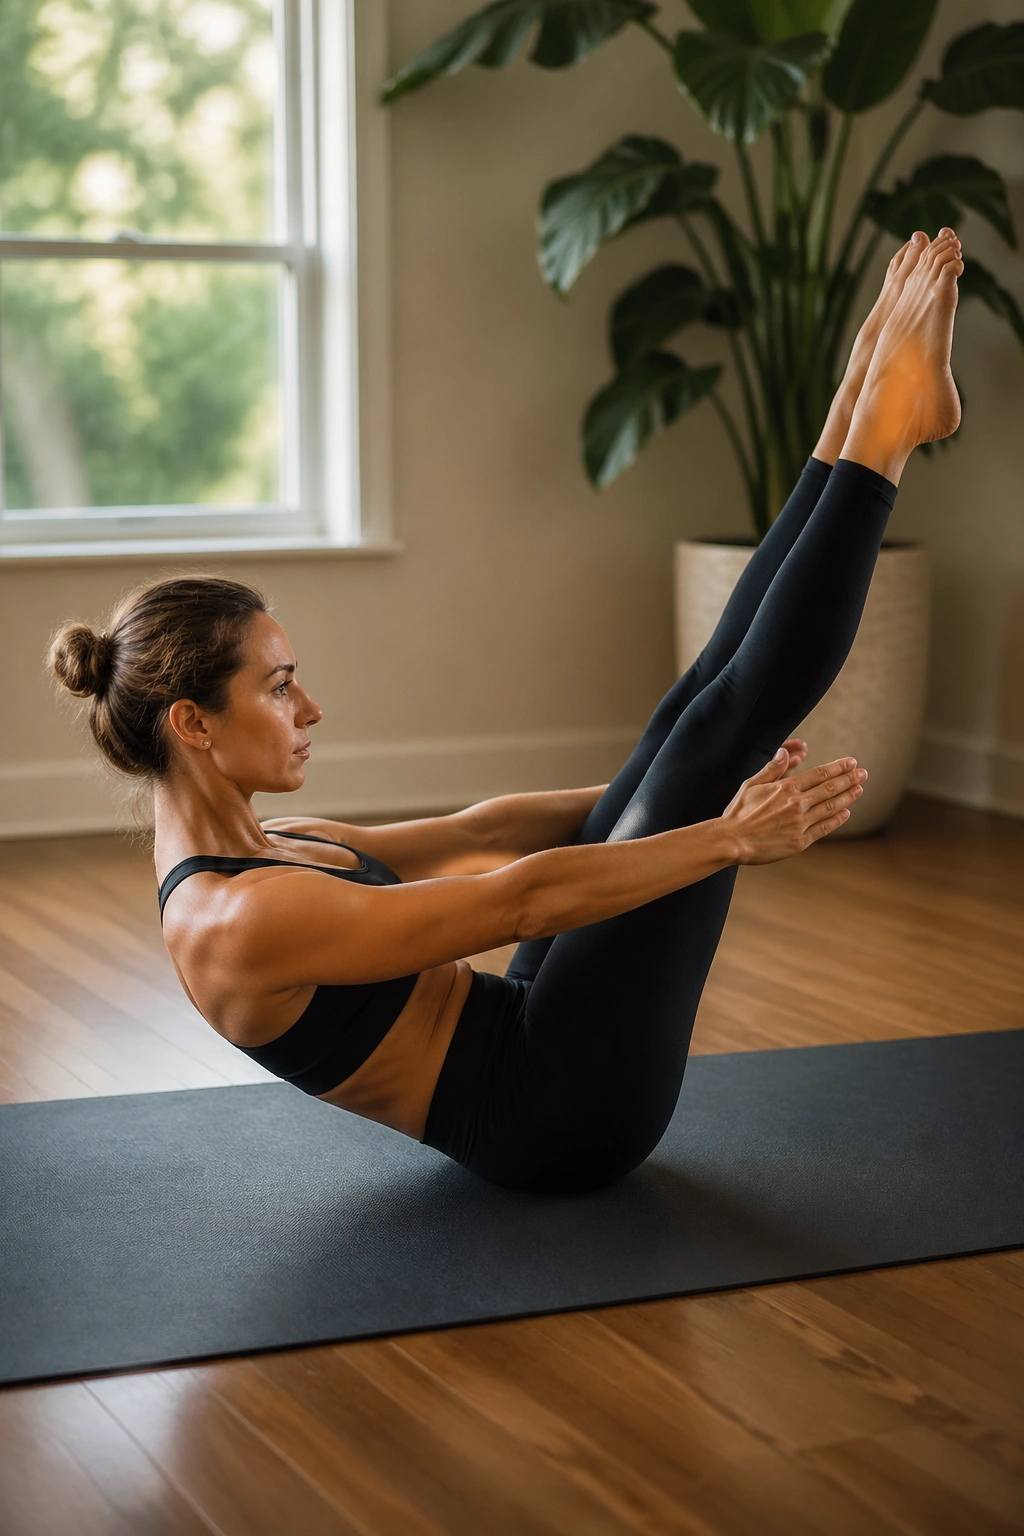
Teaser prep is less about sitting up and more about finding the spot where your torso and legs can meet without panic.
Begin on your back with the knees bent or one leg extended, arms reaching overhead or toward the ceiling. Exhale, curl the head and shoulders up, and float the arms toward the thighs while the legs stay as still as possible. Hold for one breath, then lower with control. If the full teaser shape is too much, keep one knee bent and leave the other foot on the mat.
The interesting part here is the moment of balance. You’re not trying to yank yourself upright. You’re trying to create a clean V shape by stacking the abs, hip flexors, and spinal control together without letting any single part take over. That is hard. It should feel hard.
Use 3 to 5 holds, each one lasting 3 to 5 seconds. If your neck gets shaky, stop before the shape starts wobbling. Strong teaser work comes from restraint, not drama.
16. Mermaid Stretch for Ribcage Mobility
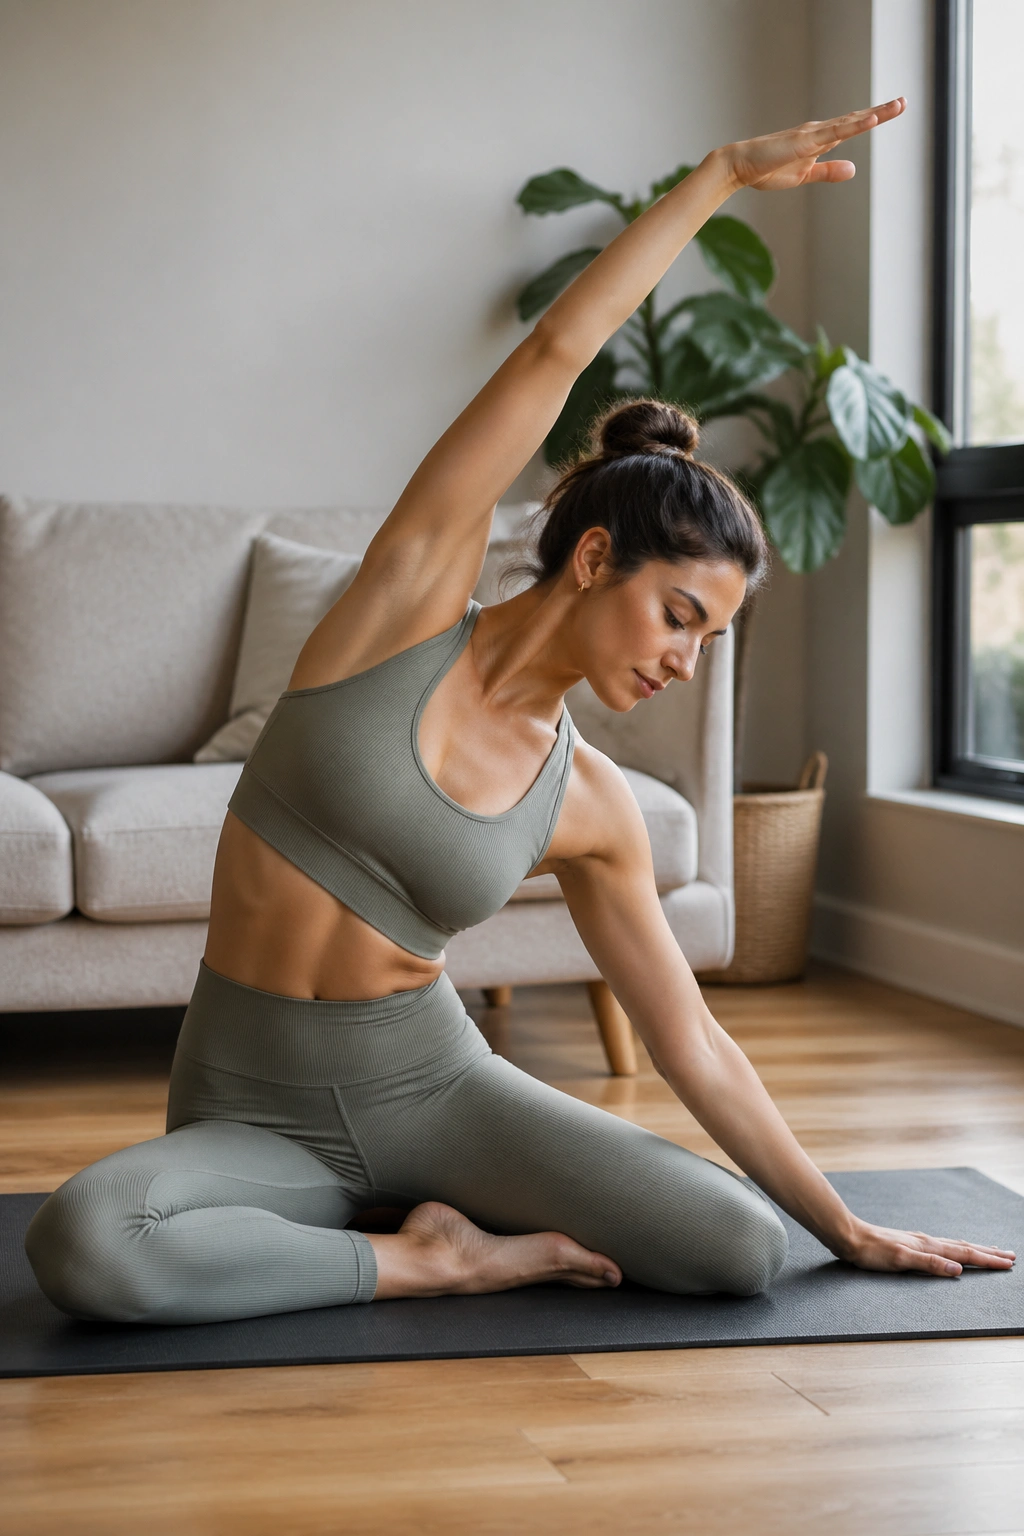
Mermaid is what I reach for after a heavier core block, because it gives the ribcage a chance to open back up.
Sit tall with your legs folded to one side in a comfortable position, then reach one arm overhead and side bend toward the grounded hand. Keep both sit bones as heavy as possible. The stretch should run through the side waist, the ribs, and maybe the outside of the hip. It should not feel like a crank in the lower back.
A lot of people turn this into a giant lean. That misses the point. Mermaid is cleaner when the movement stays long and quiet, almost like you’re making space between the ribs. Breathe 3 to 4 slow breaths on each side and keep the shoulders soft. If you want more intensity, lengthen the top arm farther away rather than collapsing deeper.
I like putting this near the end of a home Pilates workout because it tells the body the hard work is over. That matters. Not every useful move has to be a burner.
17. Prone Swan Prep for Spinal Extension
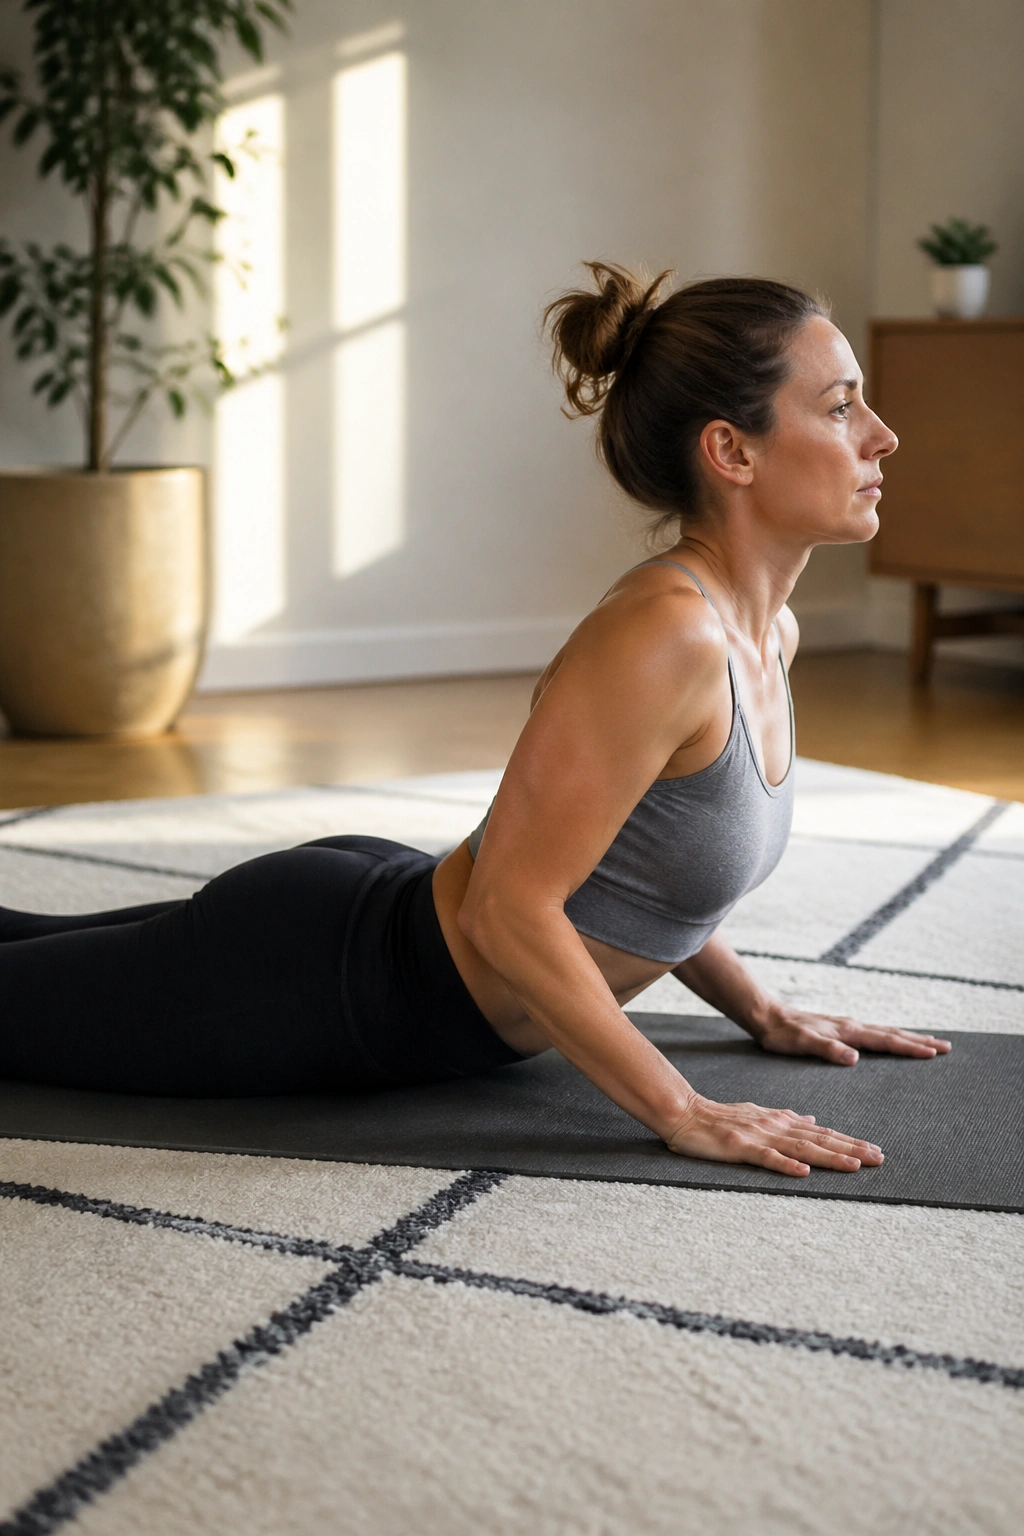
If your day lives in a laptop hunch, this one earns its space on the mat.
Lie face down with your hands under the shoulders and your legs long behind you. Press the pubic bone gently into the mat, draw the shoulder blades down, and lift the chest a few inches using the back muscles rather than a hard push from the hands. Lower slowly. The movement is small on purpose. Too much height often steals from the neck and low back.
Swan prep is one of the cleaner ways to train spinal extension at home. It teaches the back body to engage without the front of the hips clamping shut. You should feel length through the front line even as the chest rises. That sounds odd until you do it. Then it makes perfect sense.
Try 6 to 8 lifts, pausing at the top for one breath. If the shoulders bunch up near the ears, reset and make the lift smaller. This is a good place to be strict. The pretty version is the one with the long neck, not the high chest.
18. A 12-Minute Full Floor Pilates Flow for Busy Days
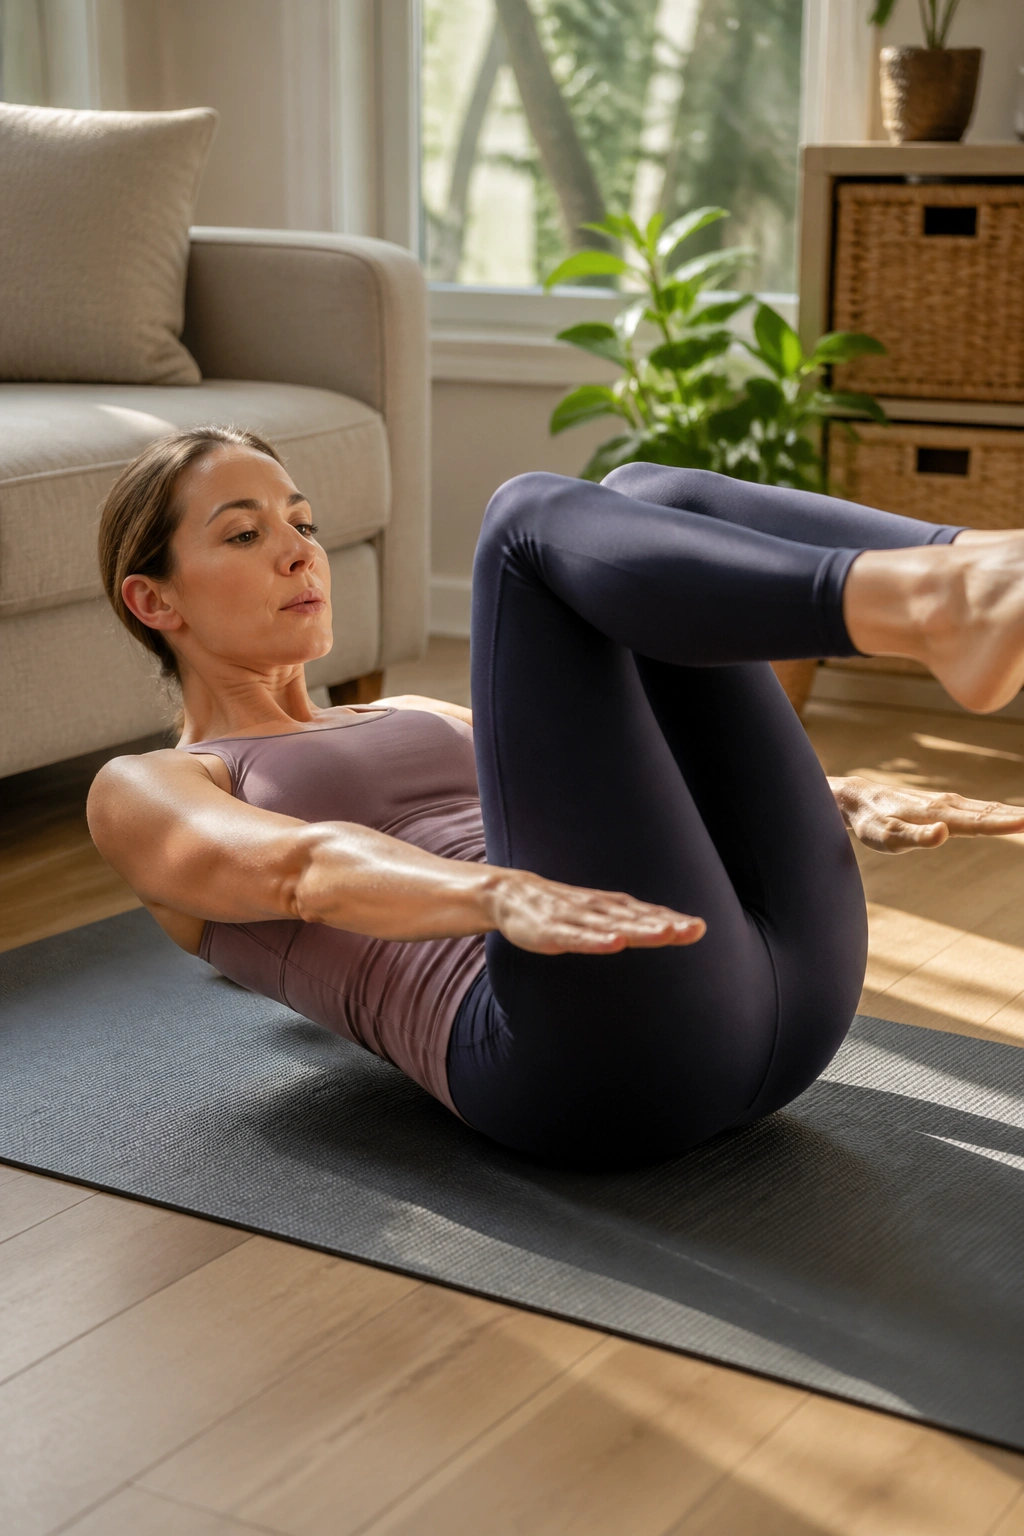
Some days you do not want 18 separate workouts. You want a sane order and a timer.
Start with 1 minute of Hundred prep, then move into 1 minute of toe taps, 1 minute of single leg stretch, and 1 minute of bridge march. After that, do 1 minute of side-lying leg lifts on each side, 1 minute of bird dog, and 1 minute of mermaid on each side if you have the time. That gives you a compact floor Pilates workout at home without turning it into a marathon.
A simple way to build the flow
- Warm-up: Hundred prep, toe taps
- Core: single leg stretch, double leg stretch, teaser prep
- Glutes and hips: bridge march, side-lying lifts, clamshells
- Back body and mobility: bird dog, swan prep, mermaid
If you want the session to feel balanced, avoid stacking all the flexion work together without a break. Mix in a bridge or prone exercise between the abdominal moves. That keeps the trunk from getting cranky and gives your hips and shoulders some variety.
A cleaner mat session is usually a shorter one. Three focused rounds beat one frantic circuit every time. And if you only have time for four moves, pick one from the core group, one from the hips, one from the back body, and one stretch. That’s enough to make the mat feel worth it.
These floor Pilates workouts work best when you treat them like ingredients, not a test. Pick the ones your body needs that day. Pair them with steady breathing, clean reps, and a little honesty about range, and the whole home practice starts to feel a lot more useful.
