



If getting down to the floor feels like a wrestling match, chair Pilates changes the whole conversation. Chair Pilates workouts for seniors at home keep the work upright, steady, and kind to the joints, which is exactly why they’re so easy to stick with. No crawling around. No panic about getting back up.
Pilates works best when the movement is controlled, the breath stays calm, and the spine has enough length to feel organized. That sounds fancy, but in practice it means tiny motions done cleanly — a pelvic tilt, a slow march, a shoulder blade slide — can wake up the core without hammering the knees or hips. The point is not to sweat buckets. The point is to move well.
A sturdy chair with no wheels is enough. A wall nearby helps. Bare feet or grippy socks usually beat slippery soles, and if dizziness, sharp pain, or numbness shows up, that movement stops right there. Older adults do best with routines that feel repeatable, not dramatic.
Some days you’ll want a gentle reset. Other days you’ll want a little more challenge. These chair Pilates exercises give you both, one steady piece at a time.
1. Chair Pilates Tall-Posture Breathing Reset
Posture is the first exercise. Before you lift a leg or reach an arm, this is the piece that tells your body where “center” lives. Sit near the front of the chair with both feet flat, knees bent about 90 degrees, and your weight balanced on both sit bones. Small setup, big difference.
The breath does most of the work here. Inhale through the nose and feel the lower ribs widen to the sides; exhale and let the ribs soften down while the crown of your head reaches upward. That gentle lift through the spine helps the belly engage without bracing hard. It also takes the shoulders out of their usual place near the ears.
How to feel it
- Sit tall, but not stiff.
- Keep the chin level, not poking forward.
- Place one hand on the lower ribs if that helps you notice the breath.
- Take 5 to 8 slow breaths before moving on.
One good reset beats three rushed reps. If the shoulders creep up, start over. If the low back arches too much, flatten it by a small amount and keep breathing. That is enough.
2. Seated March With Arm Reach
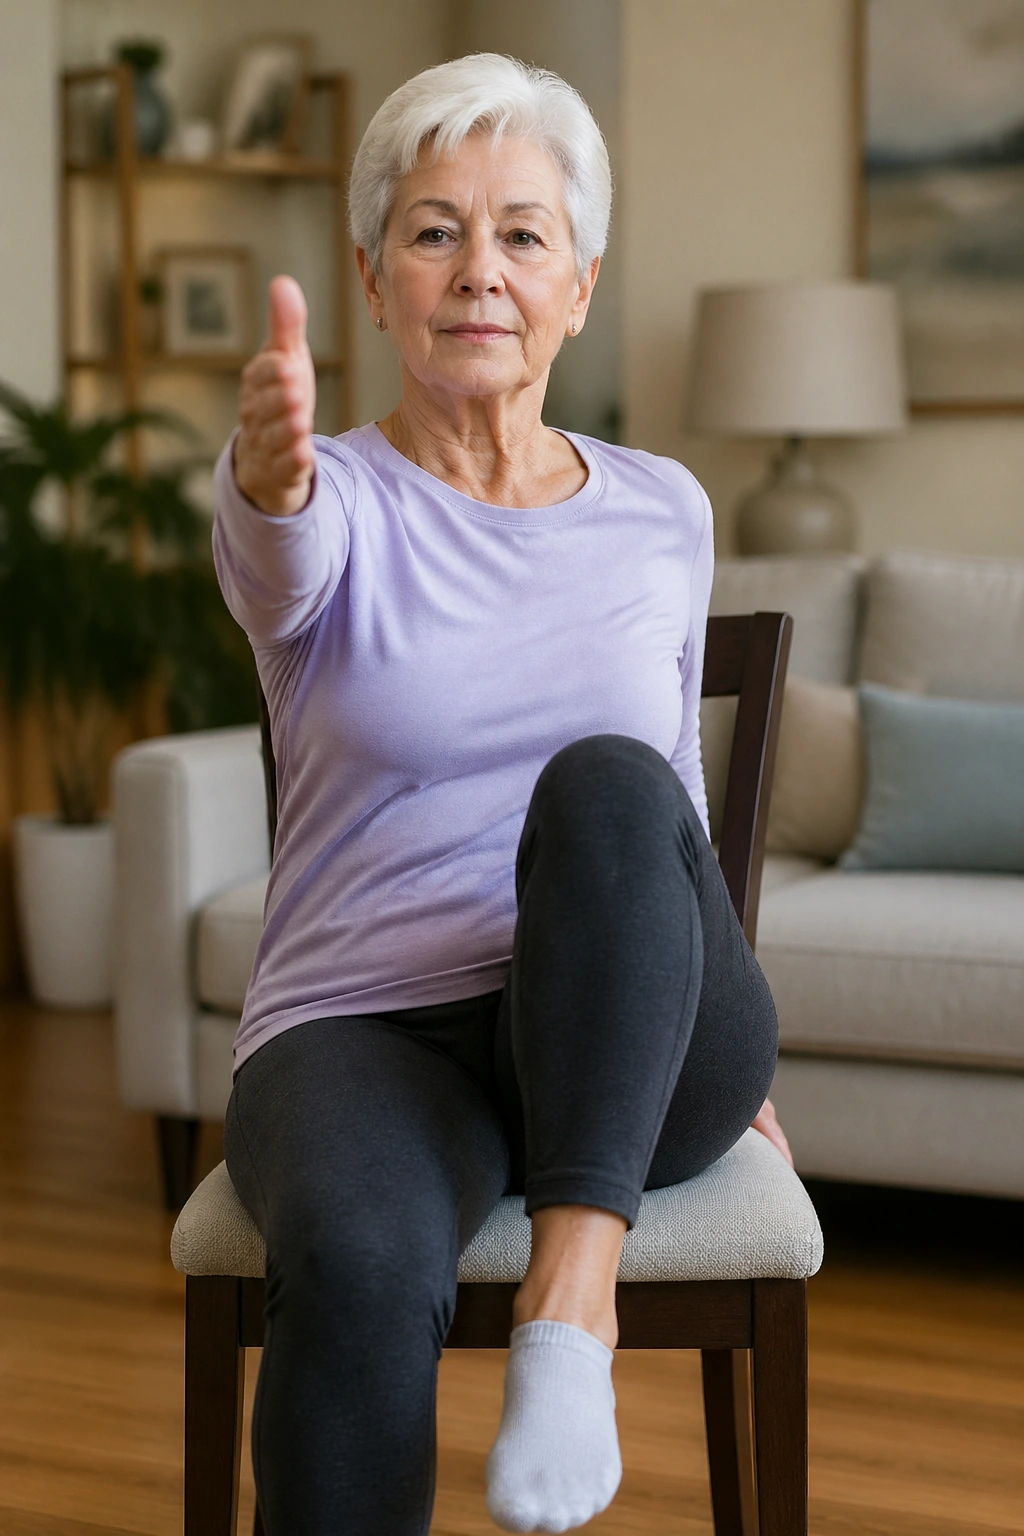
Why does marching in a chair look so simple and still do so much? Because it asks the hips, belly, and balance system to work together without any fancy setup. Lift one knee just a few inches, lower it with control, then alternate sides for 8 to 12 marches. If that feels easy, add an opposite arm reach so the right knee lifts as the left arm reaches forward, then switch.
The cross-body pattern matters. It wakes up coordination, and coordination is one of those quiet things that makes daily life easier — getting up from a sofa, stepping over a cord, turning to reach a shelf. Keep the torso upright instead of leaning back to fake the lift. The movement should come from the hip, not from flinging the whole upper body.
How to make it easier or harder
- Keep both hands on the chair seat for support.
- Lift one foot just an inch if balance feels shaky.
- Slow the lower phase to 3 counts for more core work.
- Add the arm reach only when the leg lift feels steady.
A small, smooth march often works better than a high one. High knees are not the goal here. Control is.
3. Ankle Pumps and Toe Taps
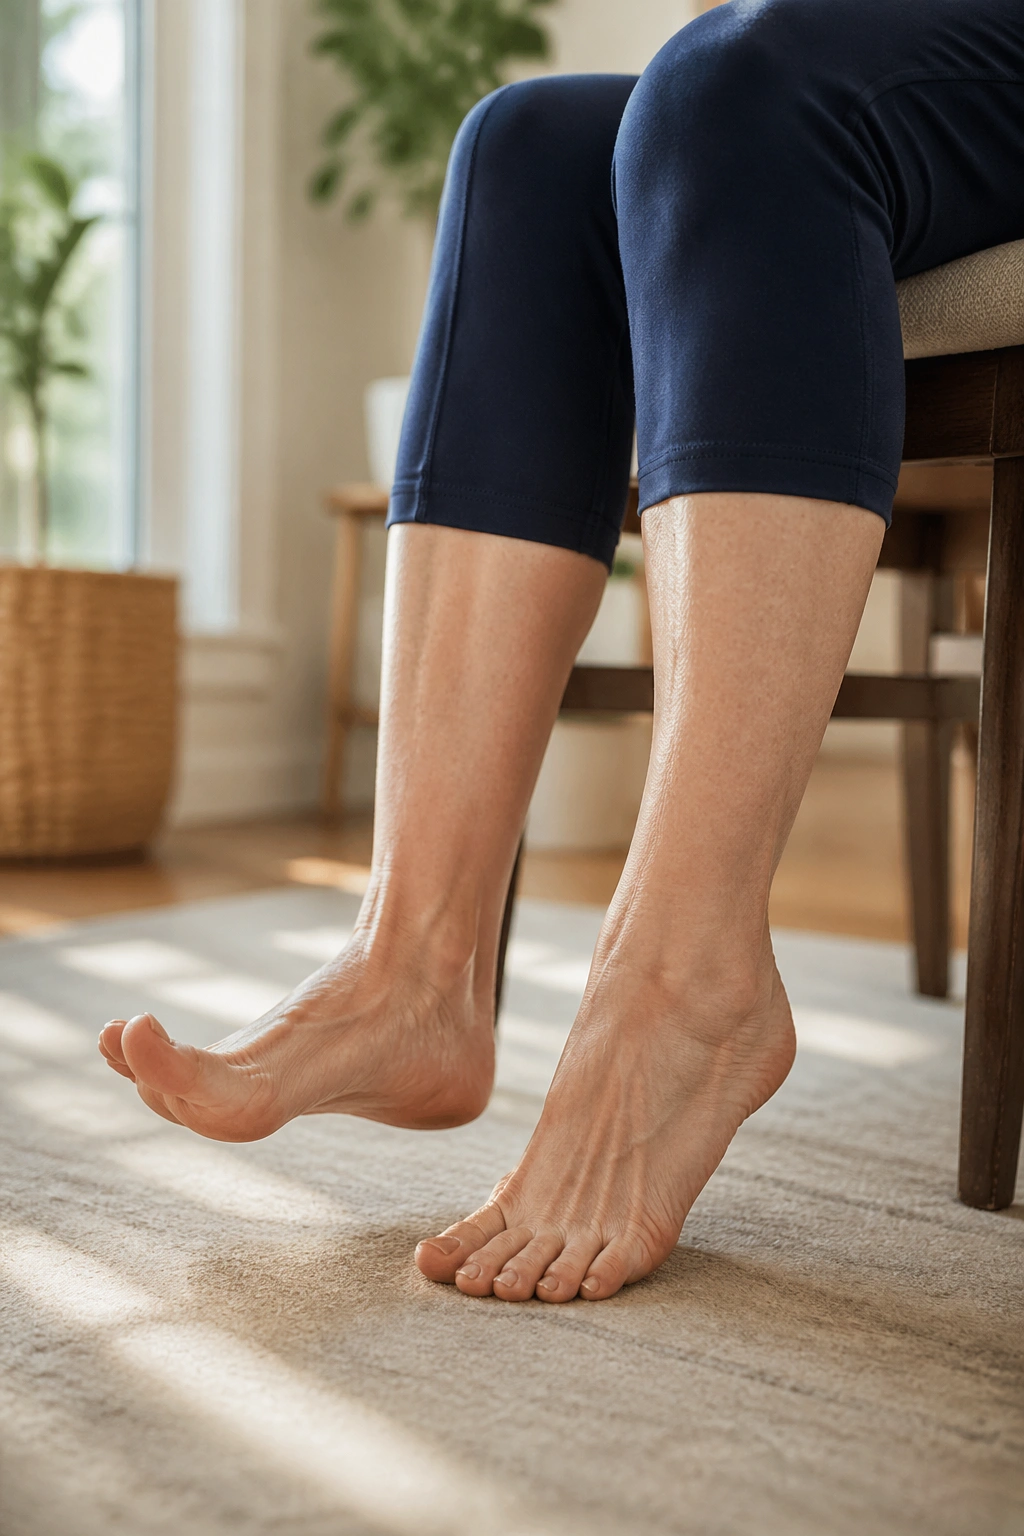
If your feet feel stiff after sitting, start here. Ankles matter more than most people think. Good ankle motion helps with walking, balance, and standing up from a chair, and chair Pilates gives you a clean way to warm them without loading the joints.
Sit tall and lift both forefeet slightly, then press the toes down like you’re tapping a gas pedal. Repeat 10 to 15 times. After that, keep the heels down and lift the toes toward the shins. You can also draw slow circles with each ankle, 5 each direction. Nothing flashy. Very useful.
This move sounds almost too easy, and that’s exactly why it belongs in a senior home routine. It wakes up the calves, shins, and the tiny foot muscles that help you stay steady when you stand. If you’ve ever stood up and felt wobbly for the first two steps, these are the muscles you want to pay attention to.
- Toe taps: 10 to 15 reps
- Heel lifts: 10 to 15 reps
- Ankle circles: 5 each way per side
Tiny move. Big payoff.
4. Shoulder Blade Slides Against the Chair Back
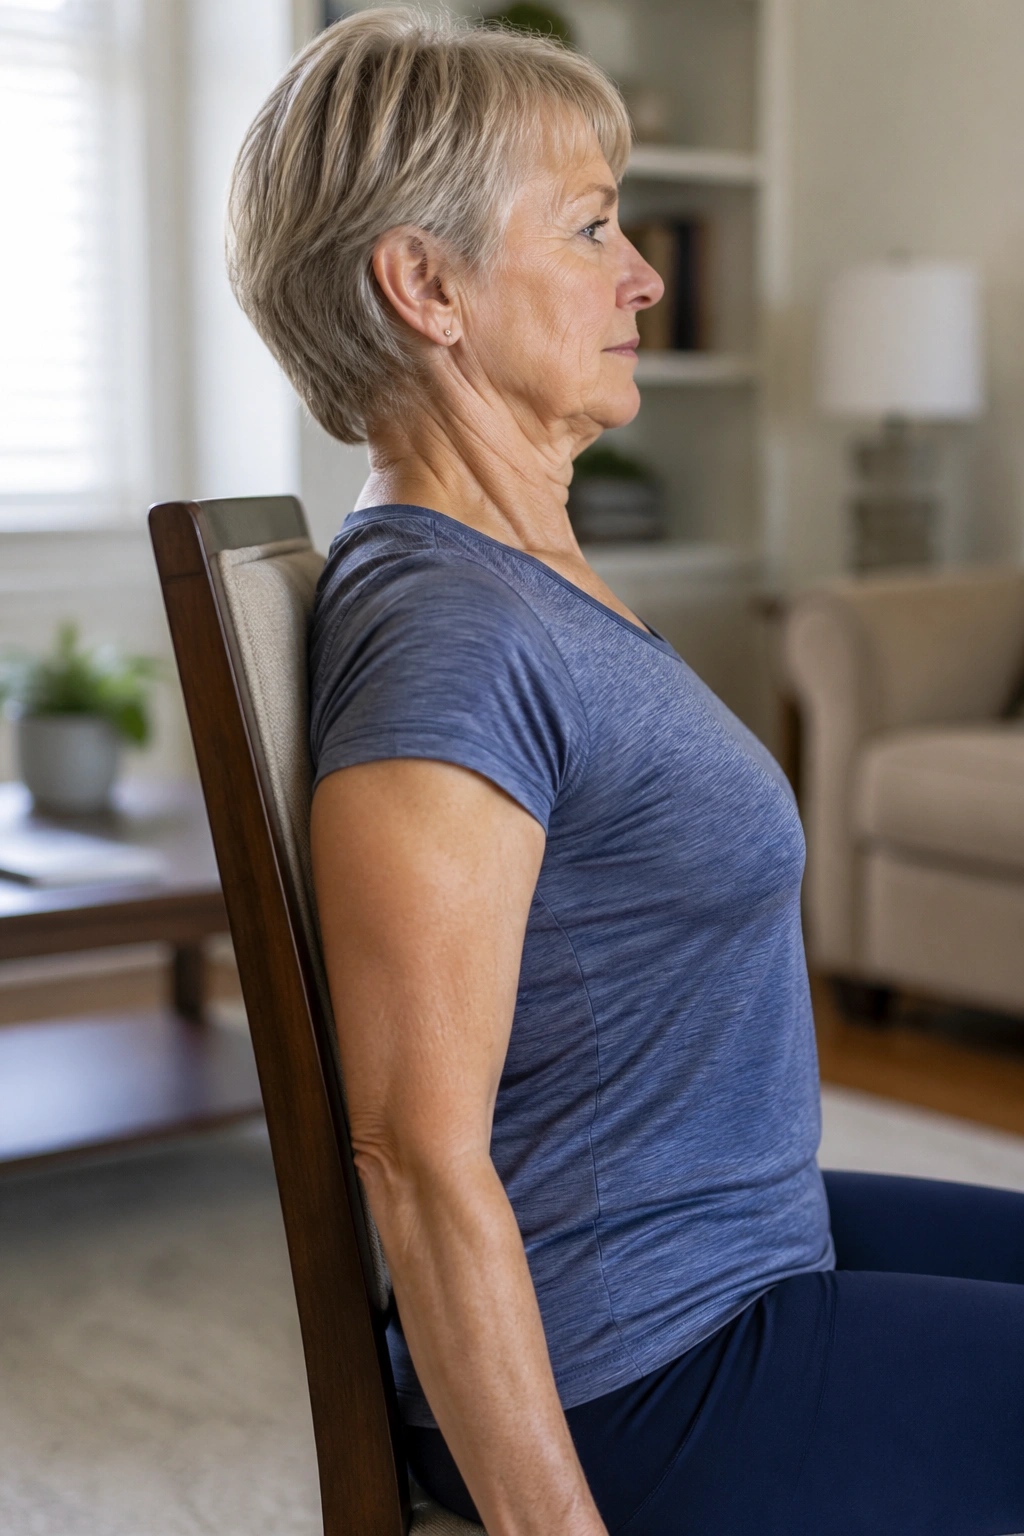
A lot of chair Pilates is really shoulder work in disguise. Sit with your back long and your feet planted, then let the arms hang by your sides. Draw the shoulder blades gently down and back, as if sliding them into your back pockets, then let them release forward again. Do 8 to 10 slow reps.
The trick is not to squeeze hard. A lot of people pinch the shoulder blades together until the neck tenses up and the ribs flare. That’s too much. You want the chest open, the neck long, and the shoulders moving with a soft, gliding quality. Think “wide collarbones,” not “military posture.”
This one helps more than many people expect because upper-back position affects breathing. When the shoulders are jammed forward, the chest feels compressed and the breath gets shallow. When the shoulder blades move well, the rib cage has room to expand.
Do this before marching, side bending, or standing work. It prepares the upper body without tiring it out.
5. Pelvic Tilts While Sitting Tall
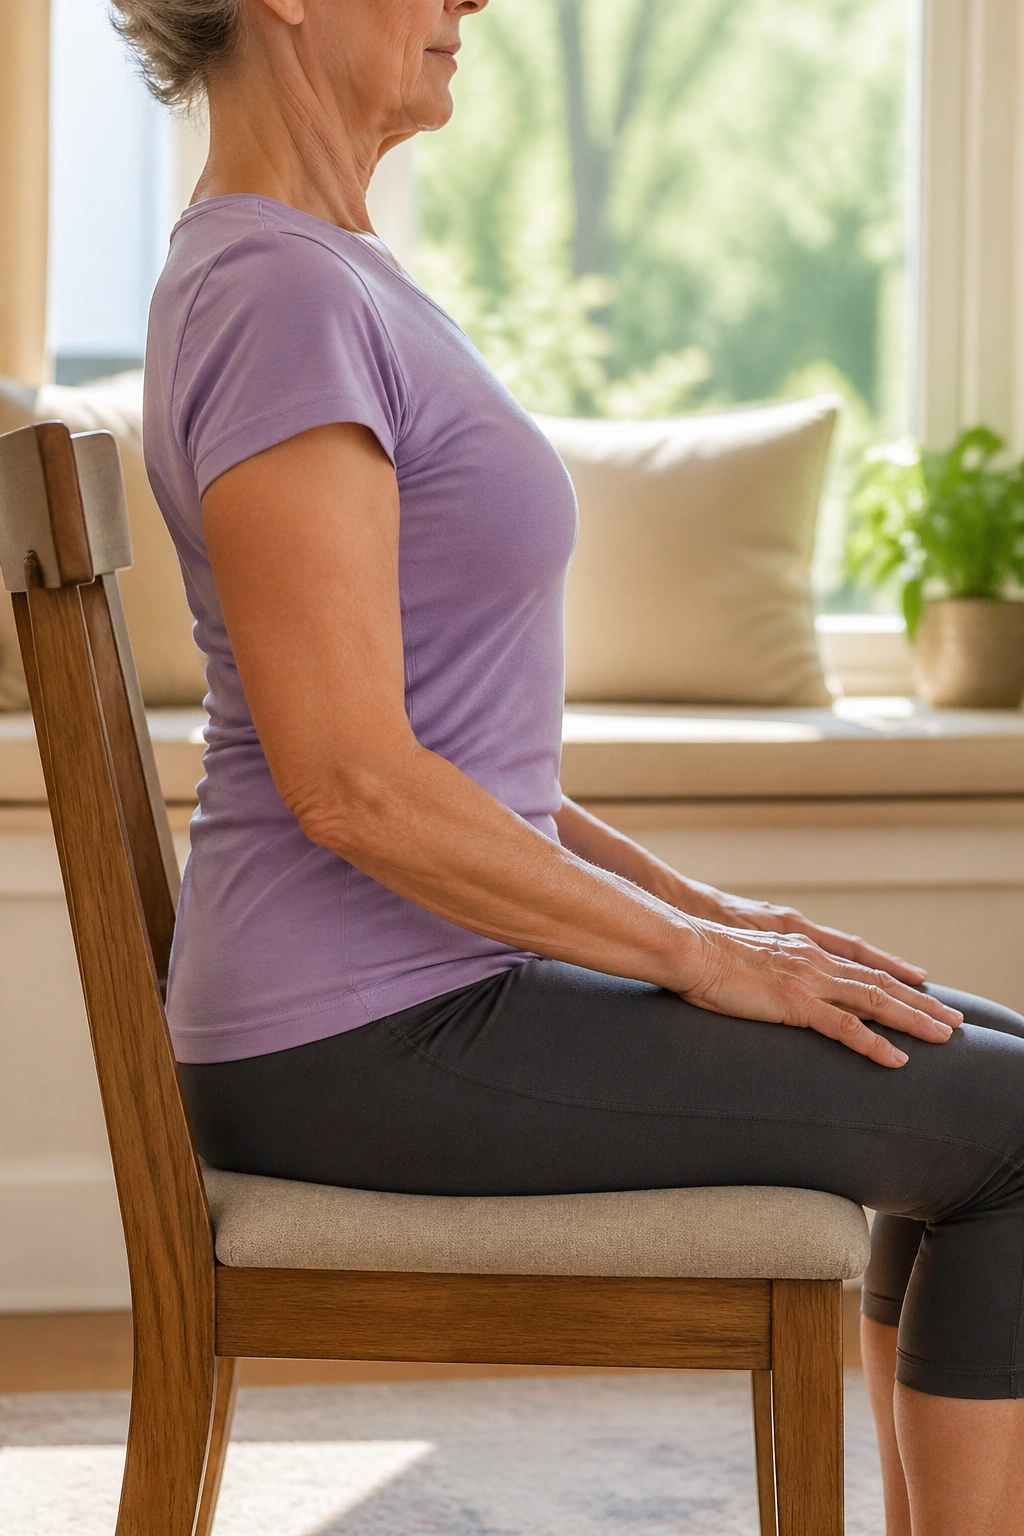
What if the low back feels stiff but you do not want a full floor routine? Pelvic tilts solve that neatly. Sit near the center of the chair and imagine your pelvis as a bowl of water. Tip the bowl slightly forward so the low back arches a little, then tip it back so the low back flattens a little. Keep the movement small and smooth.
The motion should come from the pelvis, not from the shoulders rolling around. That is the part people miss. If the chest is swaying and the whole torso is rocking, the low back never gets a clean signal. Aim for 8 to 12 slow tilts, breathing out as you flatten and breathing in as you return to neutral.
What it should feel like
- The movement is subtle.
- The belly gently firms on the exhale.
- The seat bones stay grounded.
- The neck stays easy.
This is one of the best chair Pilates exercises for waking up the deep core without strain. It also teaches a useful skill: finding neutral again after the body has been stuck in one position too long. That skill carries into standing, walking, and even just getting out of bed.
6. Seated Side Bend With One Hand on the Chair
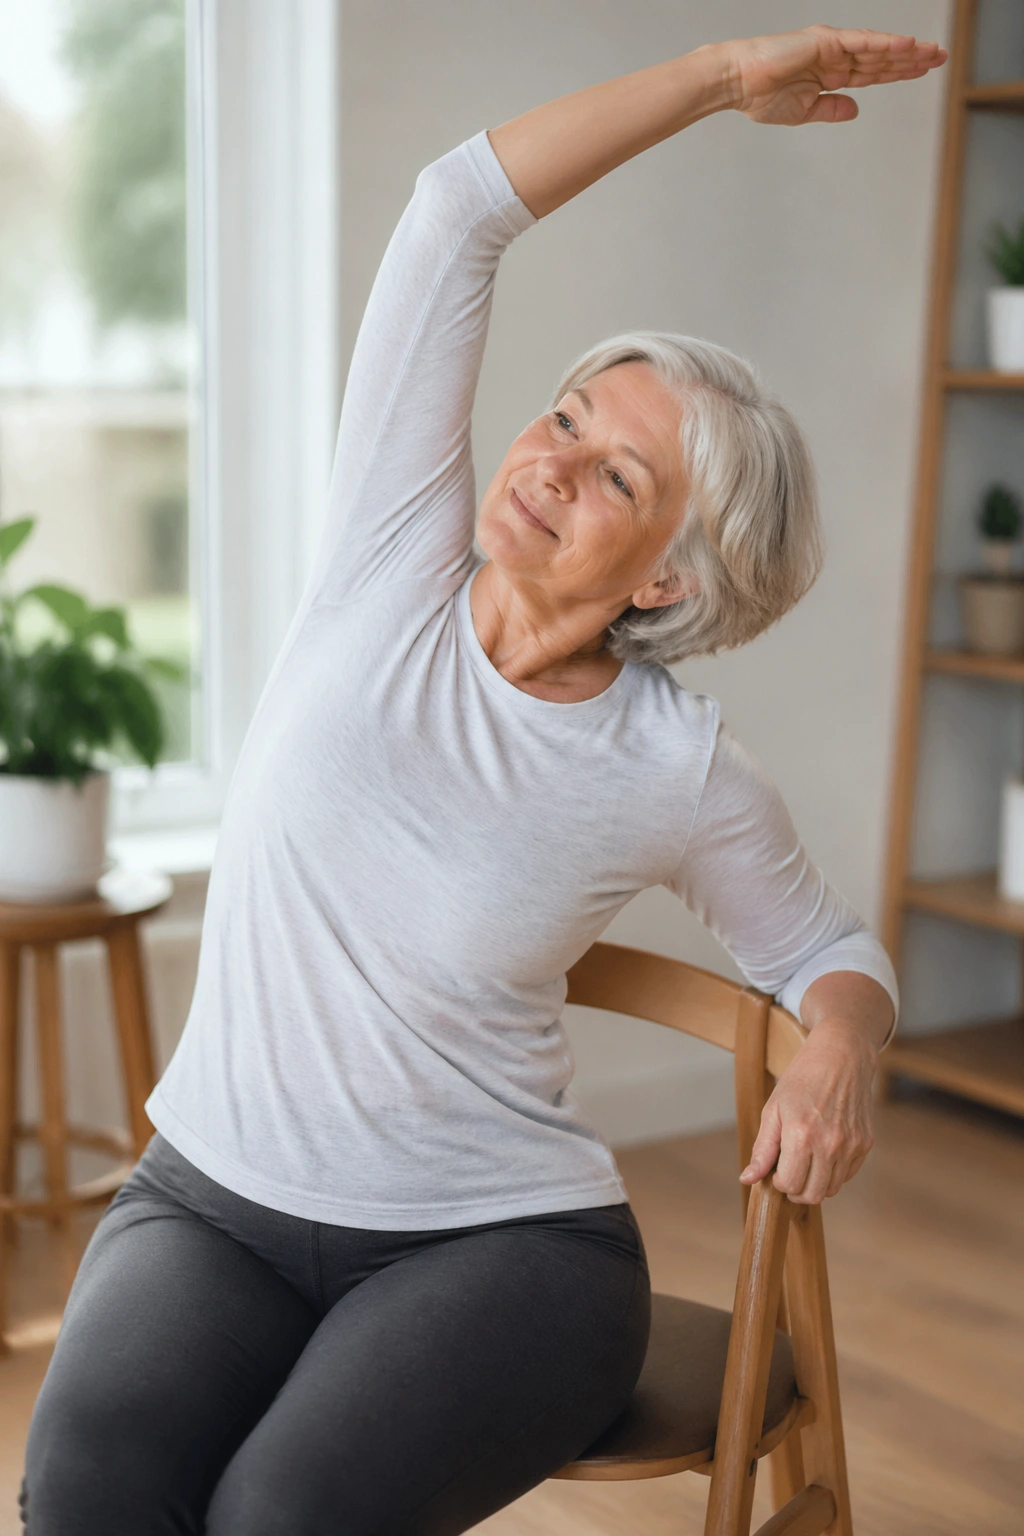
Unlike a hard twist, a side bend opens the ribs without asking the spine to do too much. Sit tall, place your right hand on the chair seat or side rail for support, and reach your left arm overhead. Then glide the left ribs up and over to the right, keeping both sit bones heavy on the chair.
Breathe into the left side of the ribs for 2 or 3 breaths, then come back to center and switch sides. The movement should feel like length first, bend second. If it turns into a crunch, you’ve gone too far. The goal is to create space along the waist and the side body.
This is a nice one for people who feel tight through the torso after sitting, driving, or reading. It also pairs well with breath work because the side ribs actually move. That matters. A lot of older adults breathe more into the upper chest than they realize.
Use 2 to 3 rounds per side. Keep the elbow soft. Keep the chin level. Easy does it.
7. Gentle Seated Spine Twist
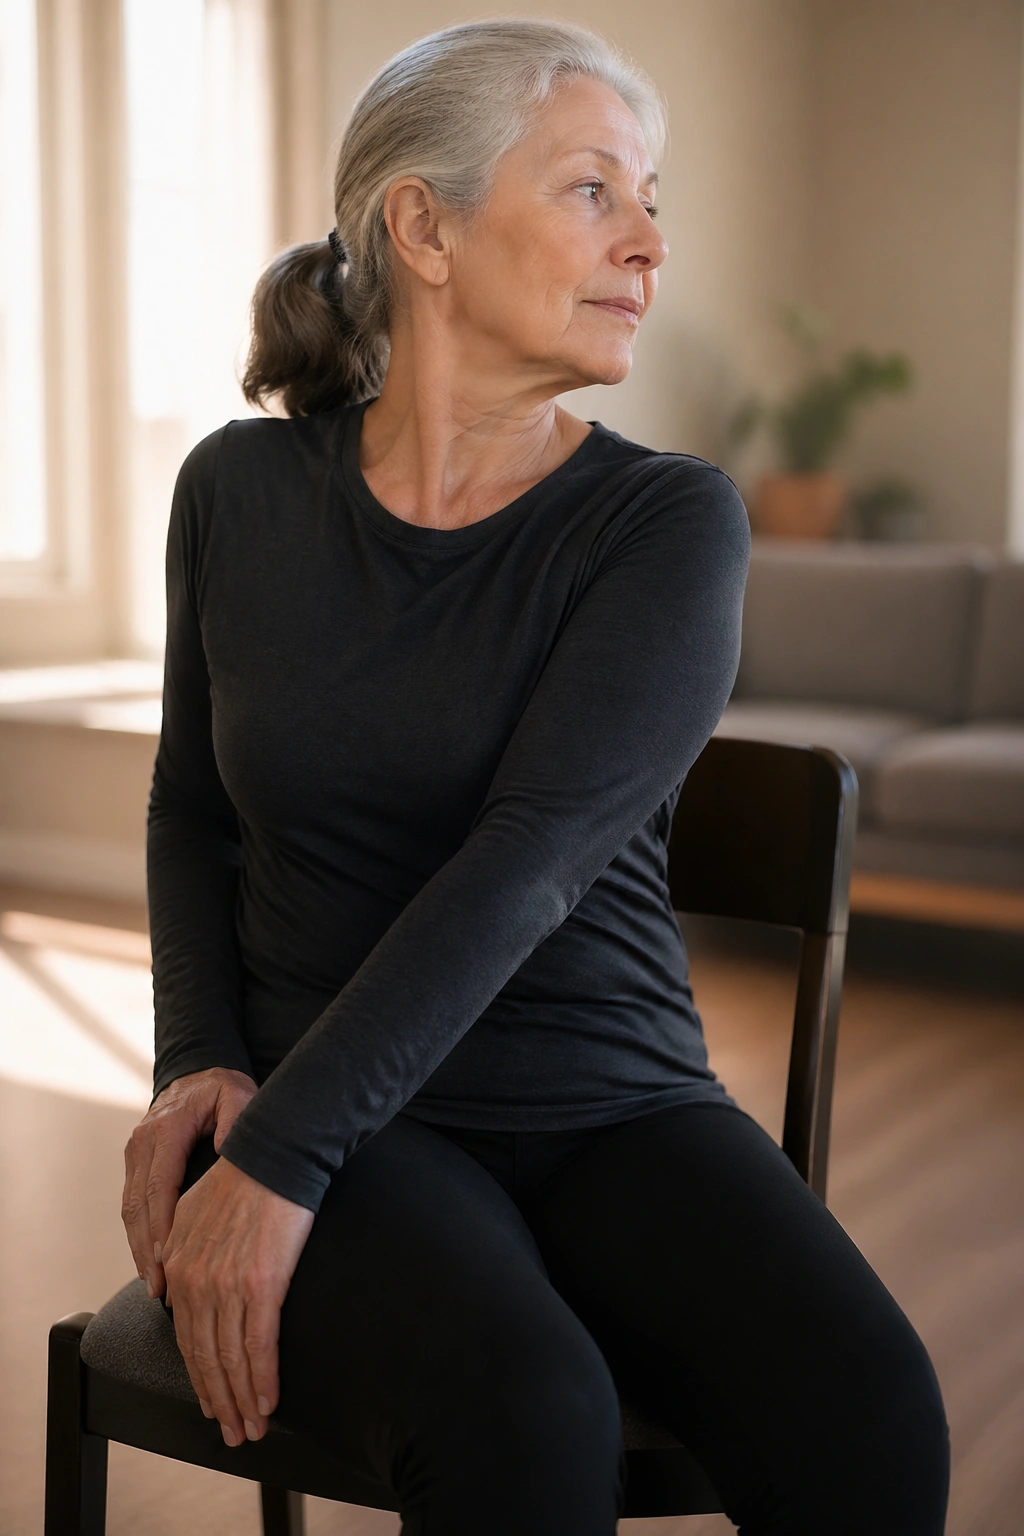
A slow twist feels different from a forced one. Better, honestly. Sit tall with both feet grounded, place your hands lightly on your thighs, and rotate the rib cage a few degrees to the right while the pelvis stays steady. Come back to center, then turn left. The range can be tiny and still count.
This is not about wringing out the body like a towel. It’s about maintaining rotation in the spine and keeping the middle of the back from going rigid. If you have a sensitive back, keep the twist shallow and work with your breathing: exhale as you turn, inhale as you come back. Four to six slow turns each direction is plenty.
If you want a little more reach, let one hand slide to the outside of the opposite thigh and use that as a soft guide. No yanking. No pushing into pain. People often think mobility means big motion. It does not. Sometimes mobility is just the ability to rotate 10 degrees without bracing.
If a twist feels pinchy in the low back, shorten it immediately and stay with the breath. Small range. Clean movement.
8. Leg Extensions With Point-and-Flex Feet
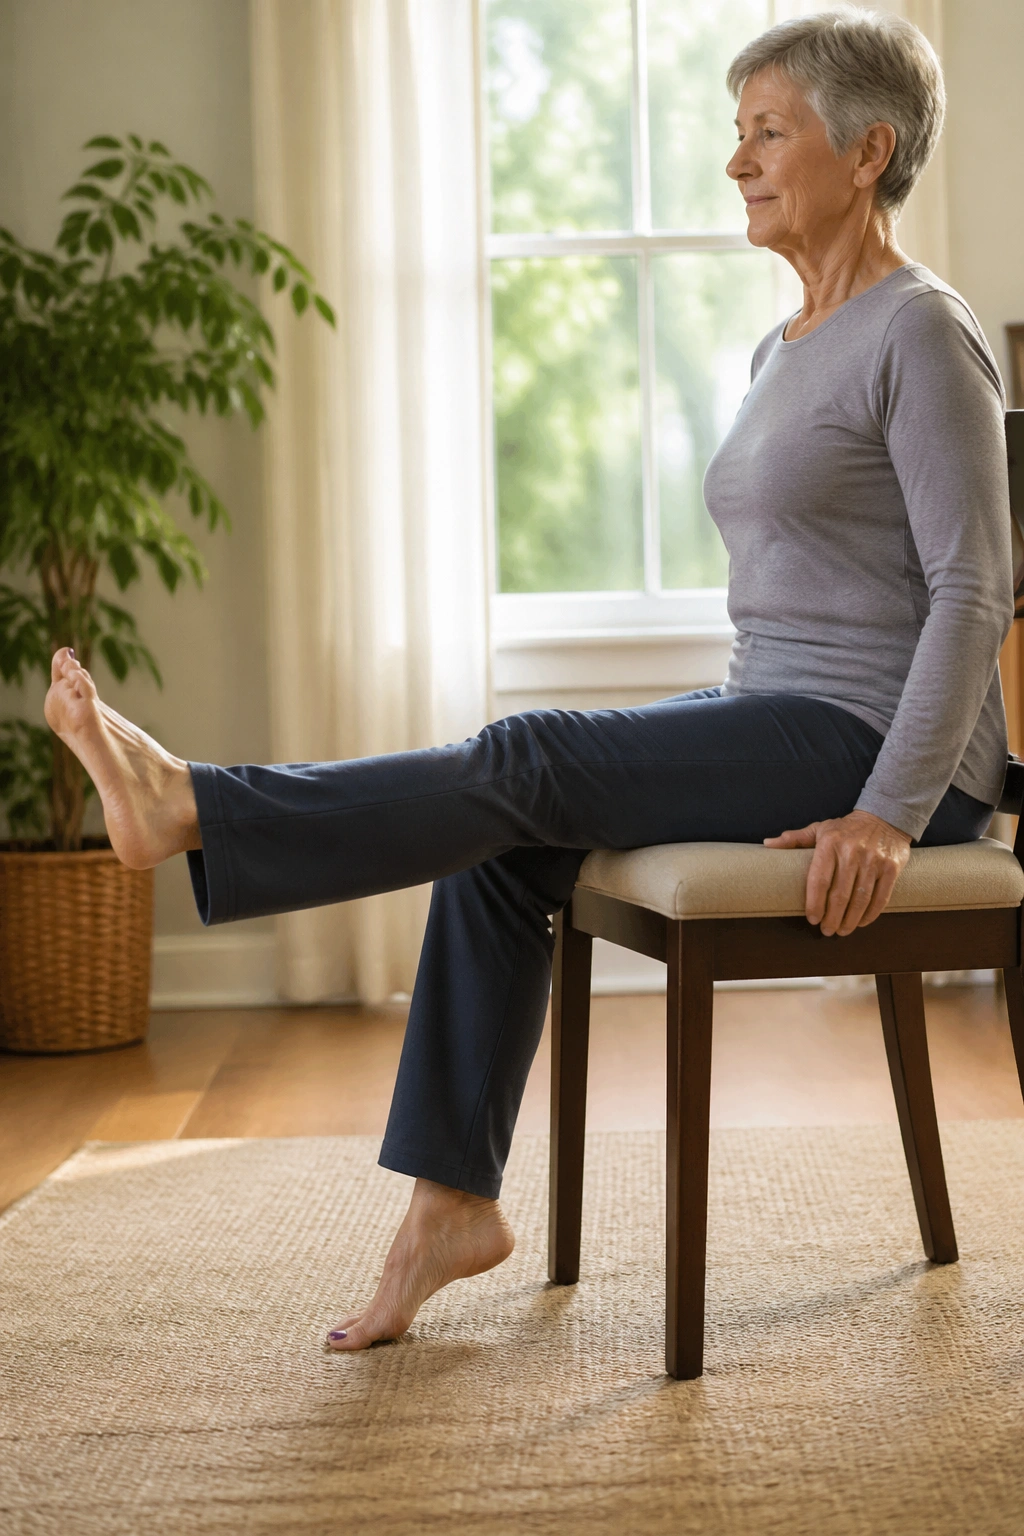
A seated leg extension can wake up the front of the thighs without asking you to stand. Sit tall, lift one foot off the floor, and slowly straighten the knee until the leg is nearly long, not locked. Point the toes away for a second, then flex them back toward the shin, and lower the leg with control. Do 6 to 10 reps per side.
The point-and-flex piece sounds simple, but it does a lot. It trains the calf, ankle, and shin muscles while the thigh works. That combination helps with walking and with stepping down from curbs or low steps. Keep the hip still and avoid leaning back to get the leg higher. If the leg only straightens halfway, that is fine.
- Straighten the knee softly.
- Keep the thigh quiet.
- Move the foot through a full point and flex.
- Lower slowly; do not drop it.
A controlled lower matters as much as the lift. That slow lowering phase is where the muscles learn to brake.
9. Standing Heel Raises With Chair Support
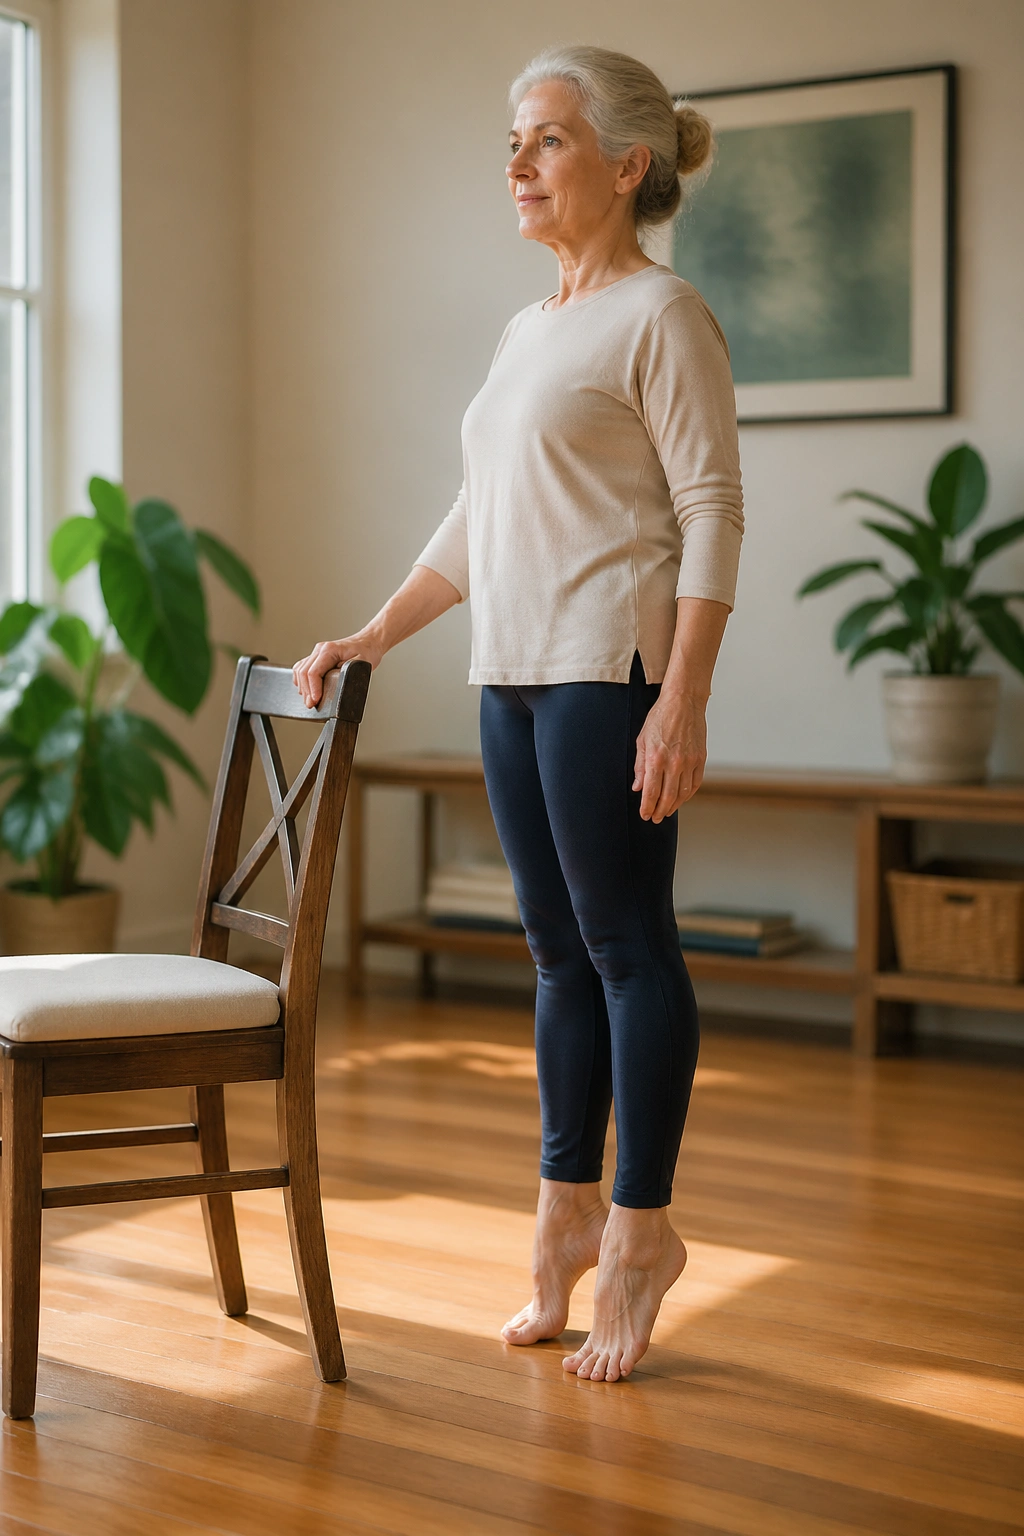
Stand behind or beside the chair and rest one hand on the back lightly. Then rise onto the balls of the feet, pause for one count, and lower slowly until the heels touch down fully. Ten reps is a solid start. Fifteen is fine if the calves do not cramp.
This looks simple because it is simple. That’s the beauty of it. Heel raises strengthen the calves and improve ankle stability, and they ask the balance system to stay awake while the body shifts upward and down again. The movement should feel smooth, not bouncy.
What to watch for
- Keep the weight centered over the big toe and second toe.
- Don’t lean into the chair with a death grip.
- Lift both heels evenly.
- Lower under control instead of collapsing down.
If standing flat on the floor feels uncertain, keep the chair within easy reach and shorten the lift. A half-inch rise still counts. A slow lowering phase is the real exercise here, and that part is often the hardest.
10. Chair Sit-to-Stand With Arms Reaching Forward
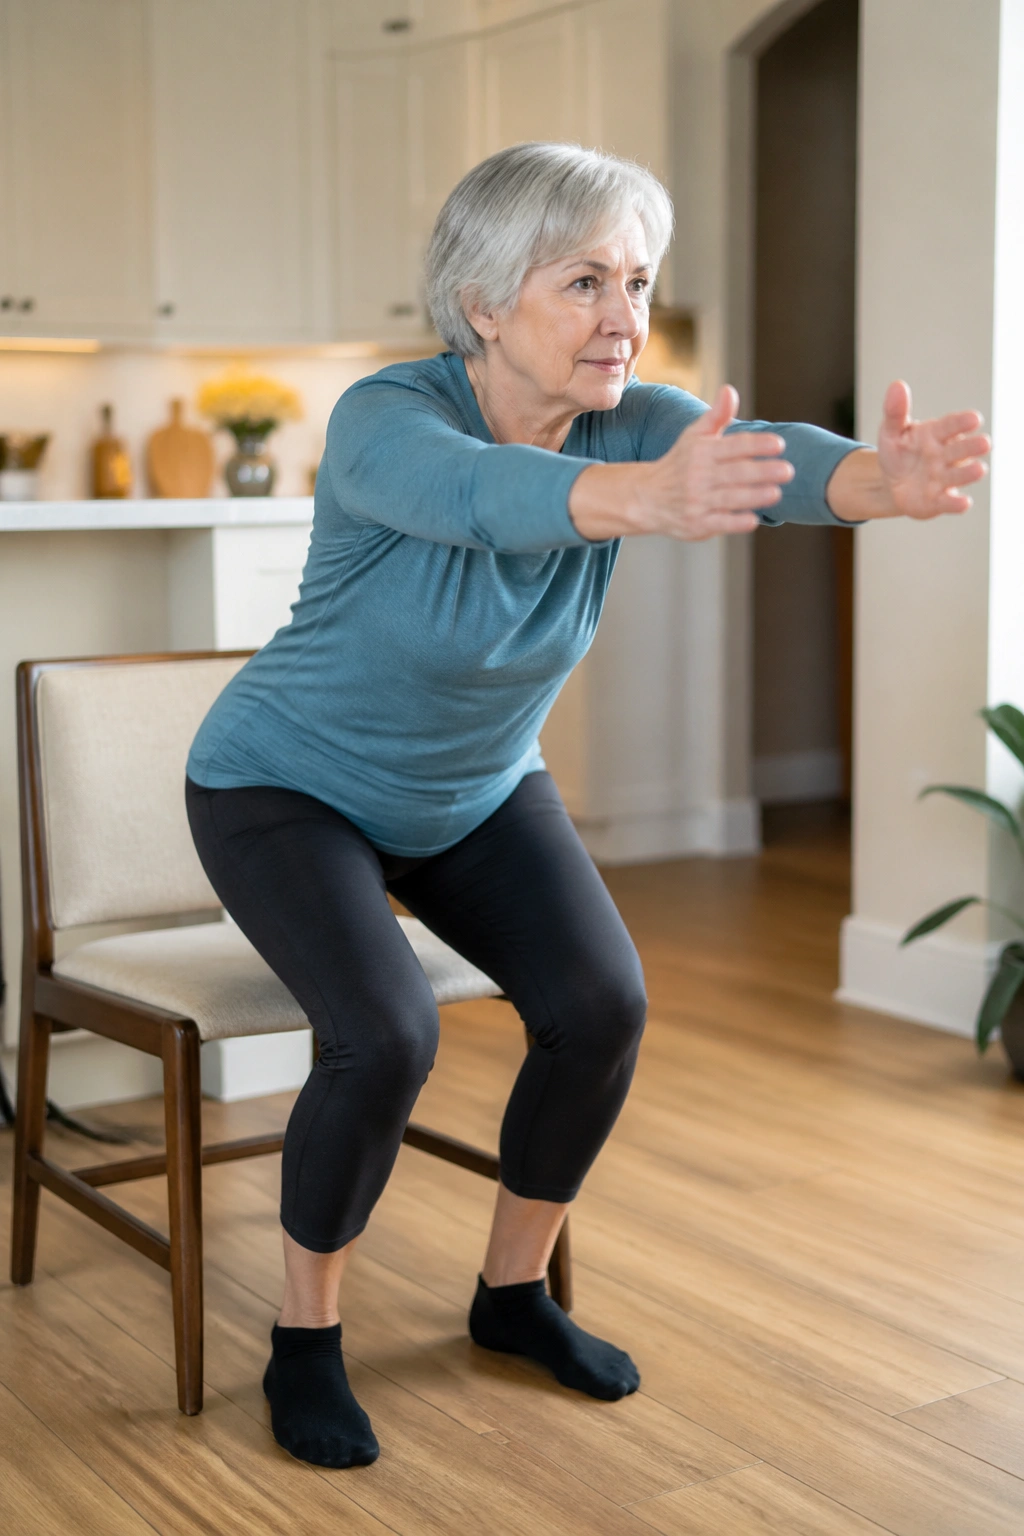
Unlike a gym squat, this move is about practical strength. It trains the exact pattern you use to get off a couch, out of a dining chair, or up from the edge of a bed. Sit near the front half of the chair, feet hip-width apart, then lean the torso slightly forward and press through the feet to stand. Reach both arms forward as you rise if that helps balance, then sit back down with a slow, controlled return.
The chair height matters. A higher chair makes the move easier; a lower one makes it tougher. If the first few reps feel messy, put a cushion on the seat. That can save the knees and make the motion cleaner. Aim for 5 to 8 repetitions, and stop before your knees start to wobble inward.
This one is worth doing well. The whole point is control on the way up and on the way down. The lowering phase builds a surprising amount of leg strength, and people usually skip over it because sitting seems too easy to count. It isn’t.
If you only pick one standing exercise, pick this one.
11. Side Leg Lifts Beside the Chair
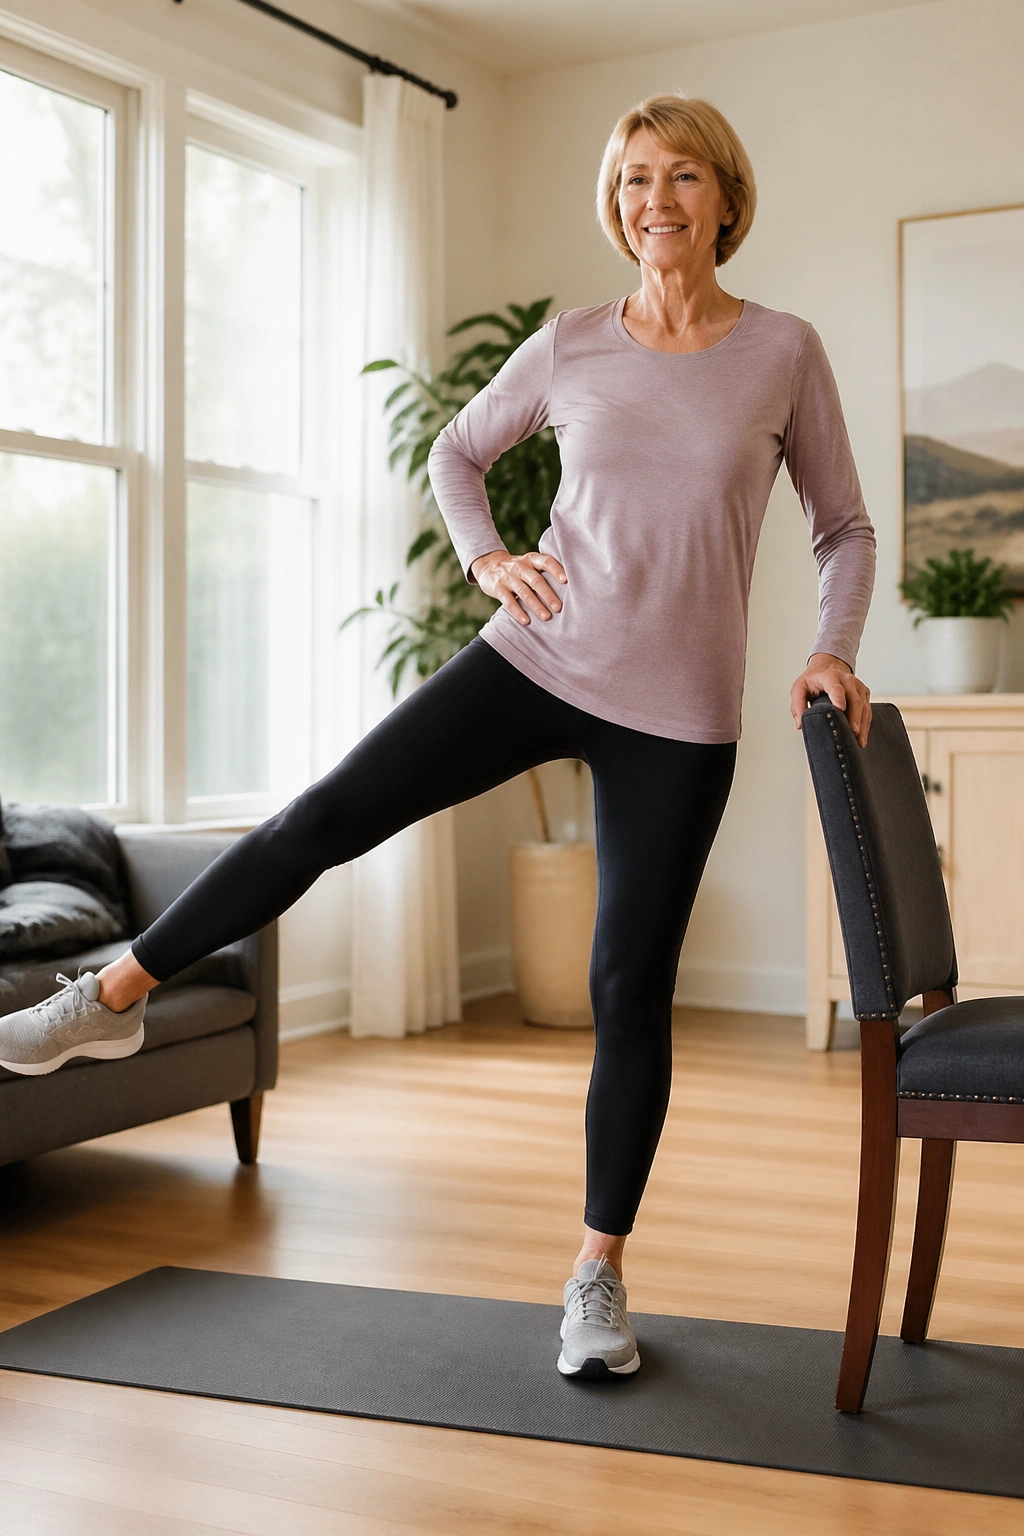
Stand next to the chair and hold it with one hand. The standing leg should feel like a tree trunk. The lifted leg should move like it knows where it’s going. Send the free leg out to the side 6 to 8 inches, keeping the toes pointed forward or slightly down, then bring it back under control. Eight to 12 lifts per side is enough.
This move targets the side hip muscles, especially the glute medius, which helps keep the pelvis level when you walk. Weak side hips often show up as a little hip drop or a wobble when you step. That is exactly what this exercise helps smooth out.
A few details that matter
- Don’t tip the torso to one side.
- Keep the lifted leg a little behind the body line if that feels better.
- Move slowly enough that the chair support stays light.
- Breathe out on the lift.
One clean rep beats three sloppy ones. If the standing ankle feels shaky, stand closer to the chair and shorten the range. The motion can be tiny and still useful.
12. Hip Hinge With a Long Spine
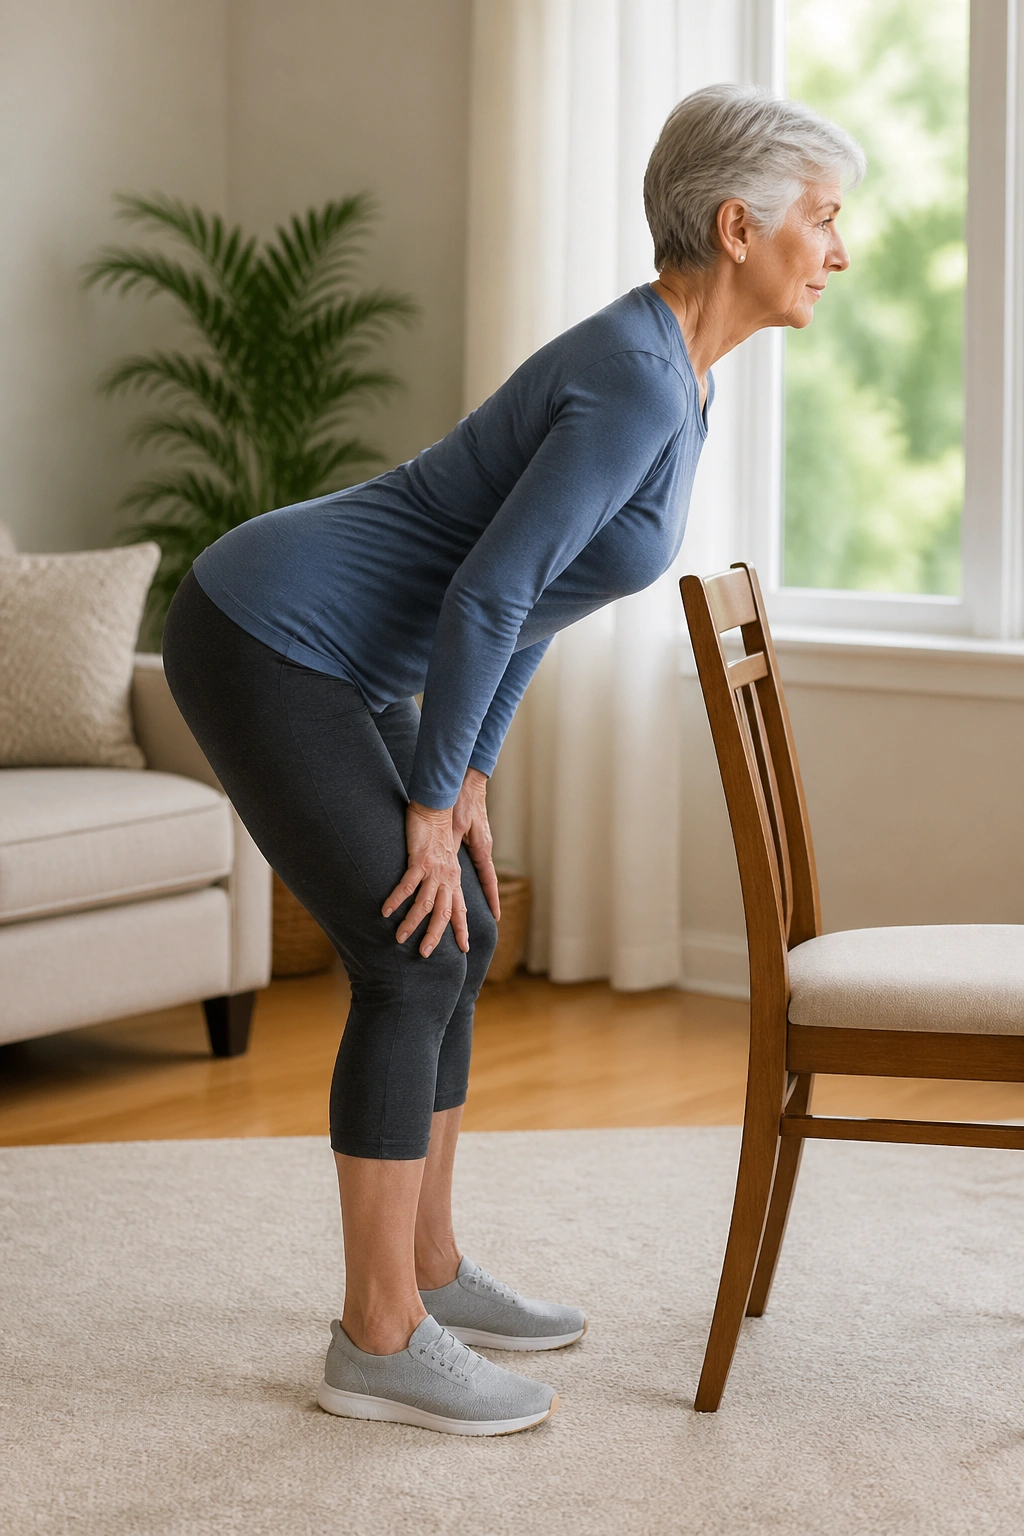
You do not need to bend your back to bend forward. A hip hinge teaches the body to fold at the hips while the spine stays long, and that matters for picking up a bag, reaching into a low cupboard, or getting dressed without that nasty pinch in the low back. Stand facing the chair back or sit with your hands on your thighs, soften the knees, and push the hips back as the torso tips forward a little.
The back should stay long, not rounded into a C shape. That is the whole skill. Keep the head in line with the spine, stop when you feel the hamstrings lengthen, then return by pressing the hips forward again. Six to eight slow reps are enough to start.
What not to do
- Do not lock the knees.
- Do not round the lower back hard.
- Do not let the shoulders collapse toward the ears.
- Do not rush the return to standing.
A good hip hinge feels organized and calm. If it feels like a compromise, shorten the range. The movement should teach your body to load the hips, not the spine.
13. Seated Figure-Four Hip Stretch
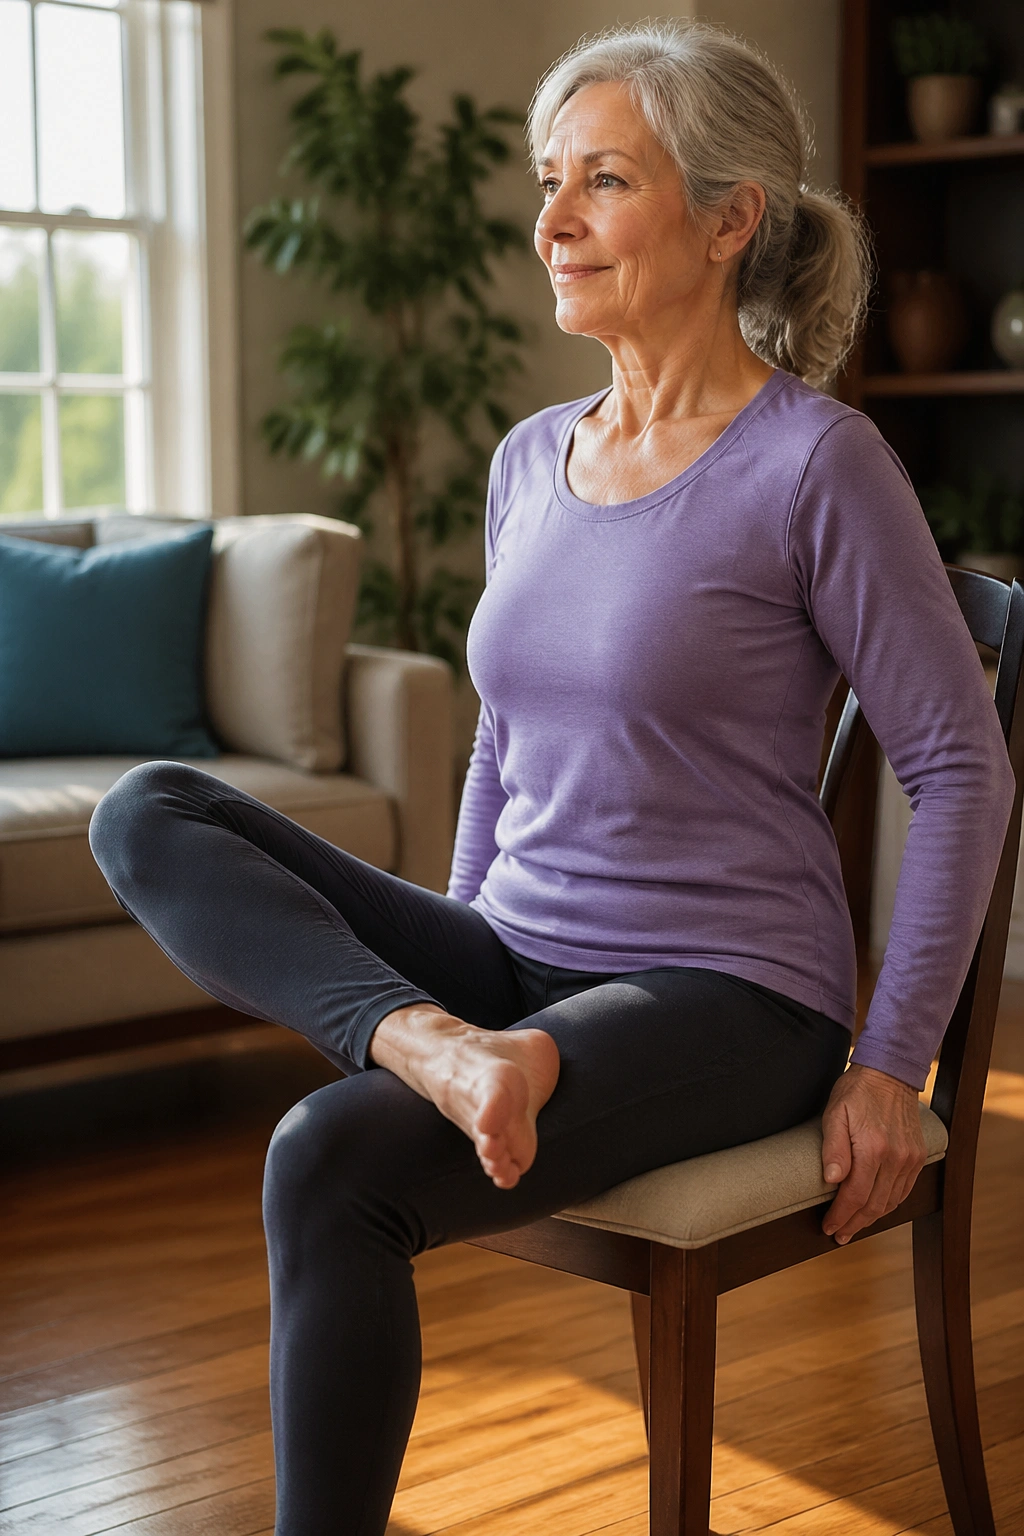
Tight hips often show up as cranky knees or a stiff low back, which is annoying because the hip is usually the real trouble spot. Sit tall and cross your right ankle over your left thigh if that feels comfortable. If that position is too high, keep the ankle lower, closer to the knee or even rest the foot lightly on the floor instead. Then hinge forward from the hips until you feel a stretch in the outer right hip.
The stretch should land in the buttock or outer hip, not in the knee joint. If the knee feels stressed, stop and change the position. Hold for 20 to 30 seconds, breathe slowly, and switch sides. Two rounds per side is plenty.
This is one of those stretches that can either feel lovely or feel wrong fast. The difference is usually the setup. Keep the spine long, keep the stretch gentle, and resist the urge to fold all the way down. More isn’t better here. A little pressure in the right spot is enough.
If one side feels much tighter, that’s normal. Stay curious, not forceful.
14. Chair Cat-Cow for a Stiff Back
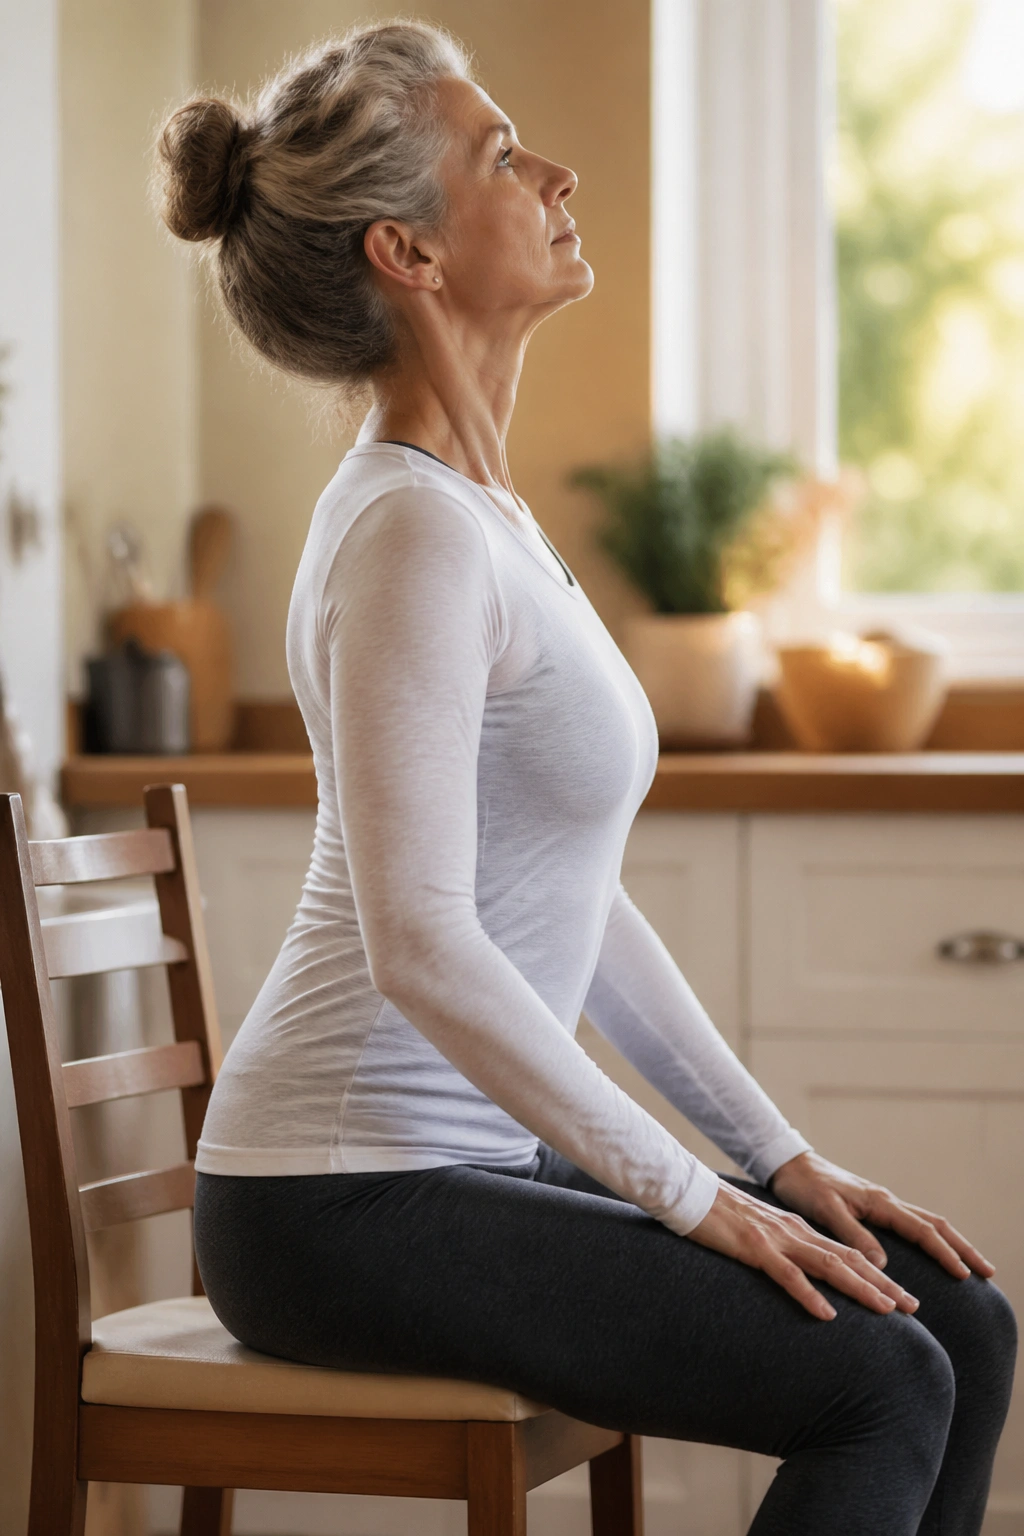
Chair cat-cow is one of my favorite warm-ups because it makes the spine feel awake without getting down on the floor. Sit near the front of the chair, hands on the thighs, and inhale as you tilt the pelvis forward and lift the chest a little. Exhale as you round the spine, drop the chin slightly, and let the pelvis tuck under. Move slowly for 6 to 8 rounds.
The shape is small. That is not a flaw. The point is to move segment by segment instead of locking the spine in one shape all day. When people go too big, they usually collapse into the low back or crank the neck. Keep the motion smooth and spread it through the whole back.
Keep the movement small
- Lead with the pelvis.
- Let the ribs follow.
- Keep the shoulders relaxed.
- Stop before the neck feels pinched.
This works well before the side bends, twists, and sit-to-stands. It wakes up the whole trunk and usually feels better than trying to “stretch” a stiff back by yanking on it.
15. Five-Minute Chair Pilates Flow
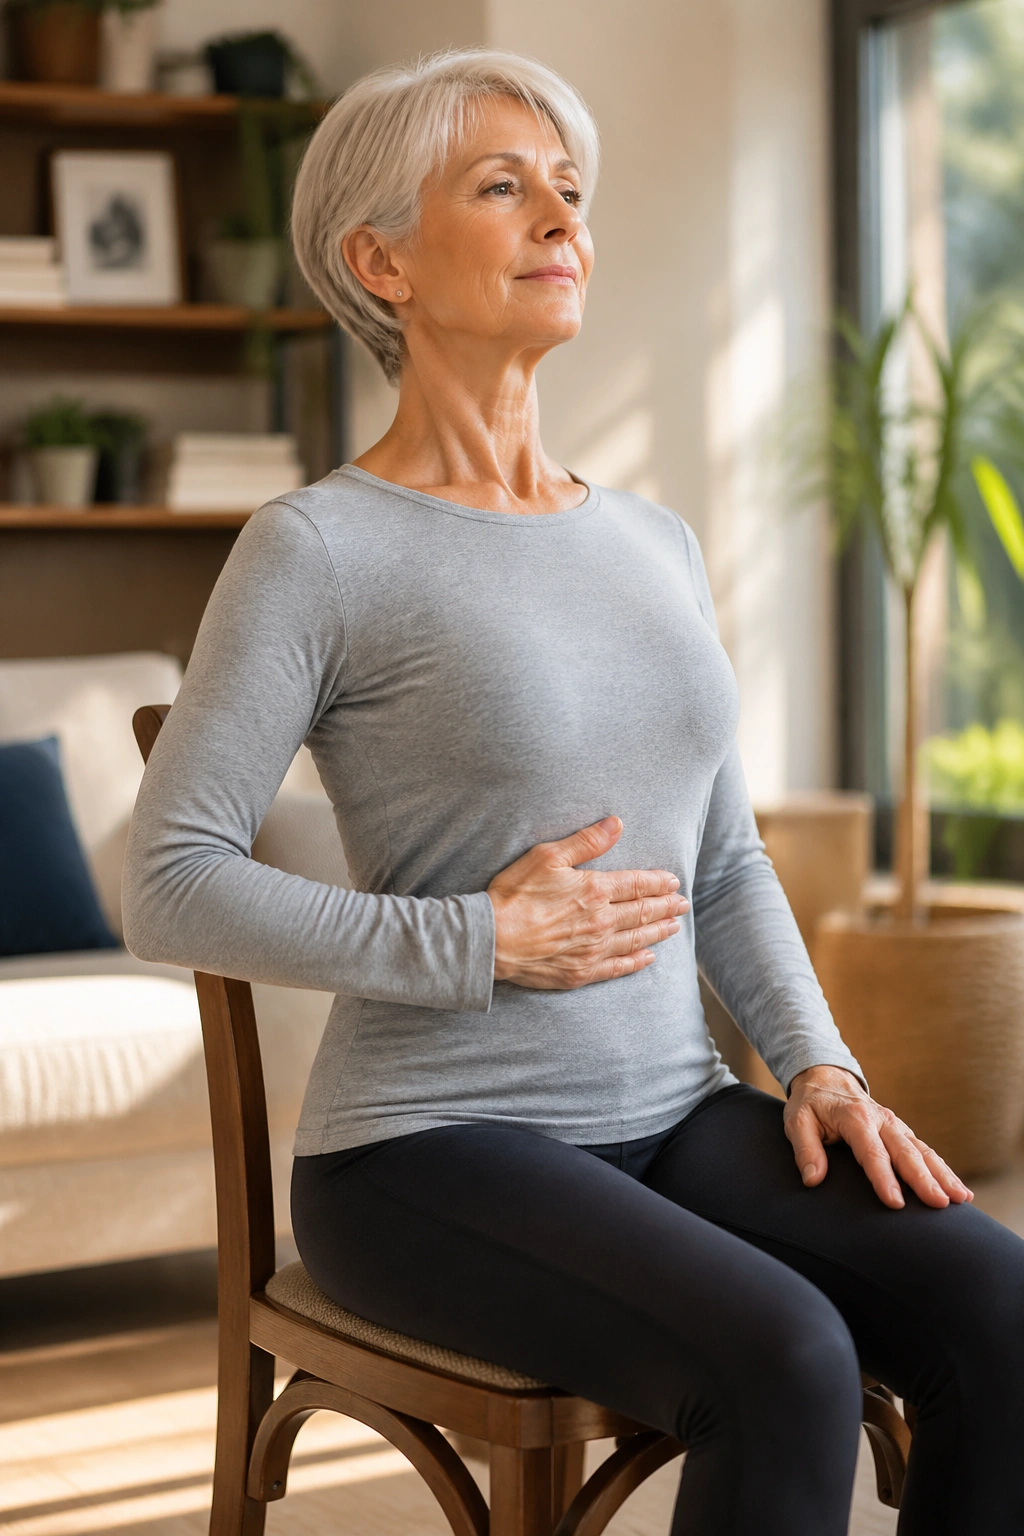
If you only have five minutes, use them well. This little flow links the best chair Pilates moves together in a way that feels calm, balanced, and practical. You do not need to chase a burn. You need a rhythm.
-
Sit tall and take 5 slow breaths.
-
Do 8 pelvic tilts, small and smooth.
-
March 8 times per side with light arm reaches.
-
Rise for 8 heel raises with one hand on the chair.
-
Finish with 4 slow sit-to-stands, or skip that piece if the legs are tired.
The order matters less than the quality. Keep the motions controlled, breathe on the effort, and stay close to the chair if balance feels off. If the body feels good after one round, repeat it once more. Ten minutes is a fine session. So is five. Consistency beats intensity here, every time.
That is the real charm of chair Pilates for older adults at home. It fits into ordinary life. It works before breakfast, after a walk, or between chores, and it asks for almost no setup beyond a sturdy chair and a little attention. Tiny practice, done often, adds up fast.
