



You do not need a rack full of iron plates or a dedicated home gym to build serious leg strength. In fact, some of the most challenging workouts I have ever put myself through were done in a cramped living room with nothing but my own body weight and a bit of floor space. The gym industry wants you to believe that “progressive overload” is impossible without adding external weight, but they are ignoring the physics of leverage, time under tension, and unilateral movement. When you take the bar off your back and focus entirely on your own mechanics, you find new ways to challenge your muscles that often reveal weaknesses a heavy barbell was simply masking.
Gravity is the only equipment you need. It is consistent, it is always available, and if you know how to manipulate it, it is the most demanding training partner you will ever have. The key to home training is not chasing heavier weight, but changing the angle of resistance or the difficulty of the movement pattern. That is where these variations come in. You can turn a simple squat into a brutal conditioning session just by changing your stance, shifting your center of gravity, or slowing down the tempo.
Stop worrying about what you don’t have. Start thinking about how to move your body through space with more precision and control. Whether you are a beginner looking to build a foundation or someone who has been lifting for years but wants to work on mobility and stability, these movements offer a lifetime of challenge. Let’s get to work.
1. The Standard Air Squat
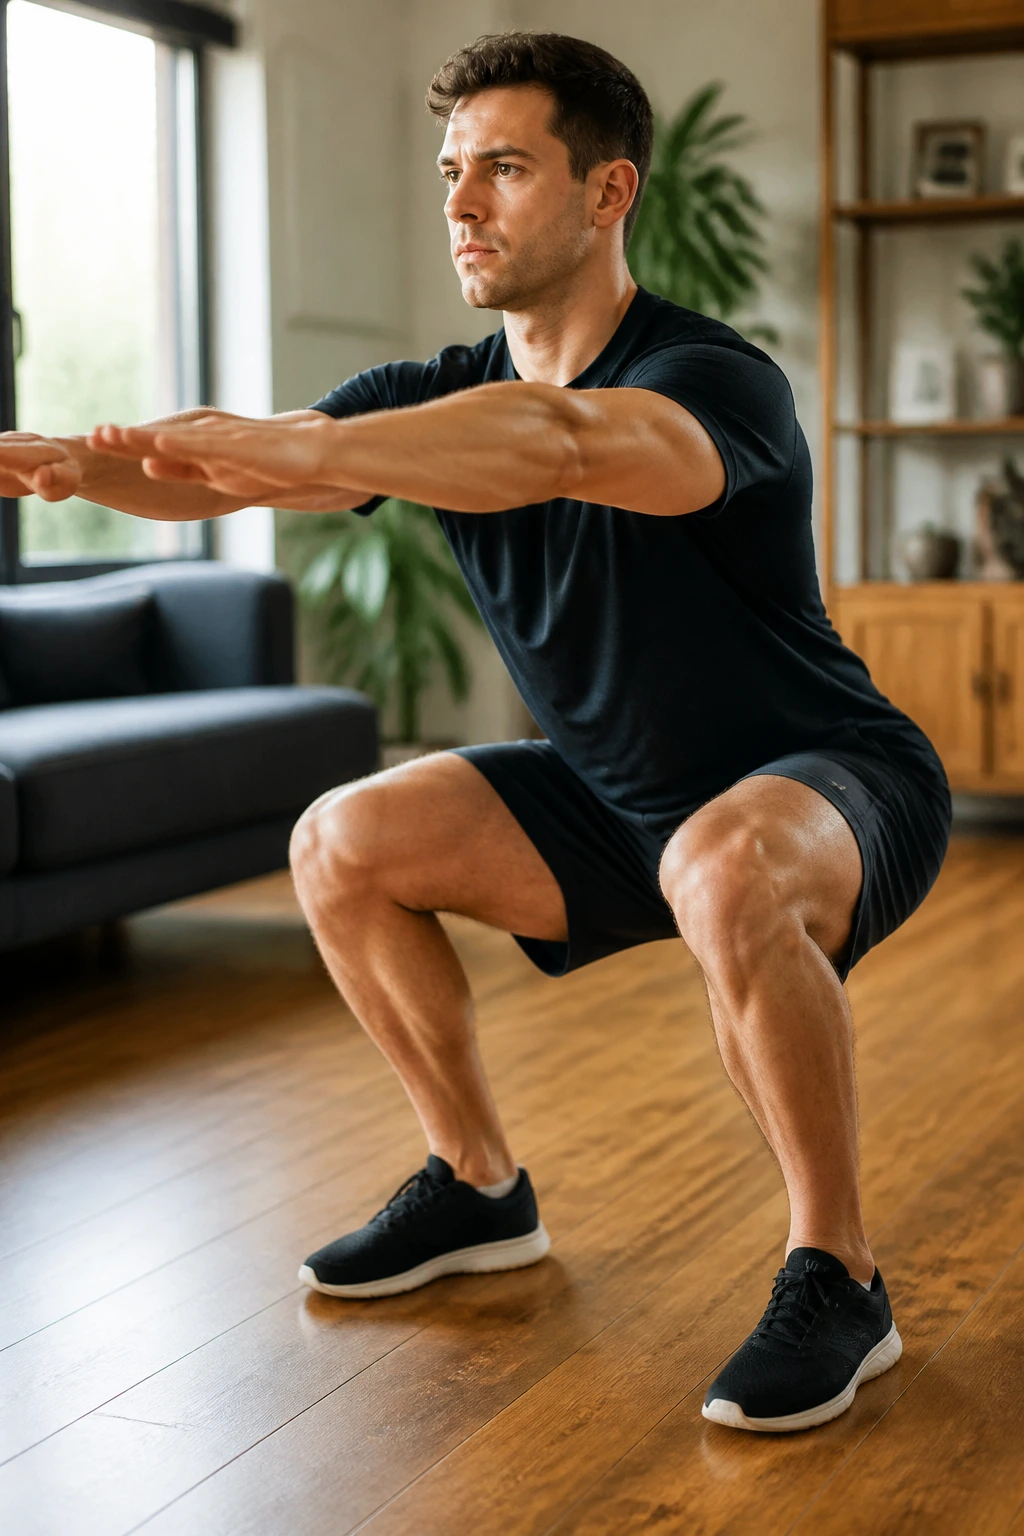
The air squat is the foundation upon which every other lower-body movement is built. If you cannot do twenty of these with perfect form, you have no business loading up a barbell. Start with your feet roughly shoulder-width apart, toes pointed slightly outward. As you begin to descend, think about pushing your hips back as if you are reaching for a chair that is just a bit too far away.
How to Master the Form
Keep your chest up and your gaze forward. Many people make the mistake of looking down at their feet, which causes the upper back to round and the chest to collapse. You want to maintain a “proud chest” throughout the entire movement. Drive your knees outward so they track in line with your toes — never let them cave inward, as that places unnecessary stress on the ligaments.
The Feel
At the bottom of the movement, your hip crease should be below your knee joint. You should feel a deep stretch in your hamstrings and glutes, with your quads working to control the descent. Drive through the mid-foot and heel to return to standing, squeezing your glutes at the top to finish the rep.
Pro tip: If you struggle to keep your heels on the floor, place a thin book or a pair of small, flat plates under your heels. It helps compensate for limited ankle mobility while you work on improving your range of motion.
2. Sumo Squat
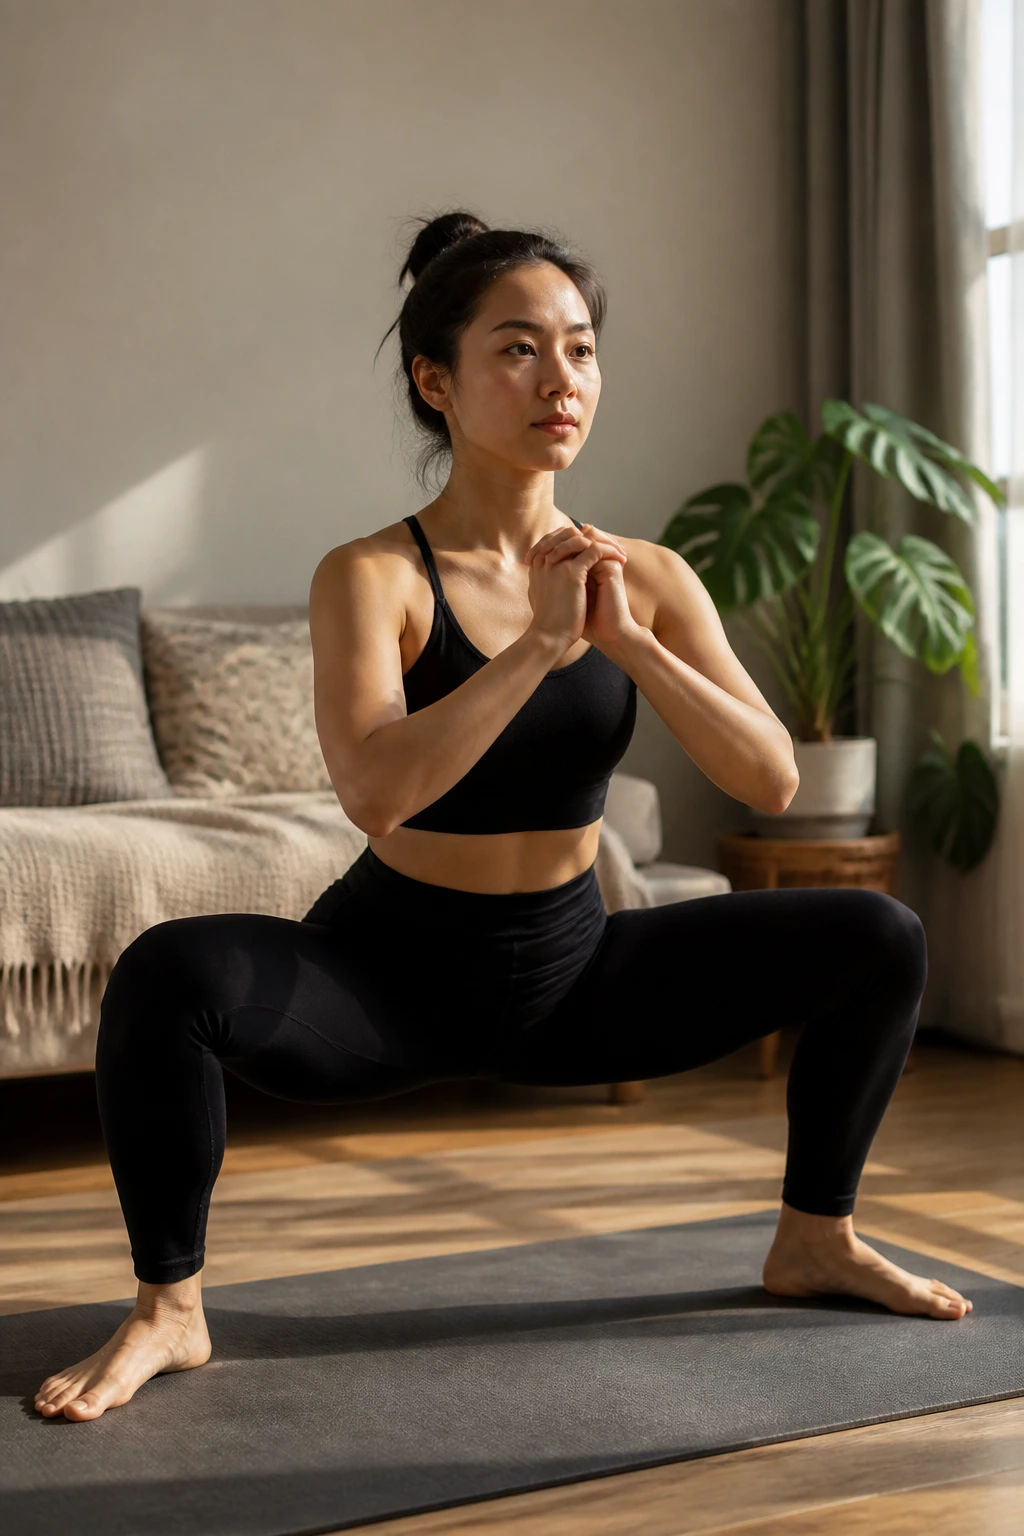
The sumo squat shifts the emphasis from the quads to the inner thighs, or adductors. By widening your stance significantly and pointing your toes outward, you force your body into a different recruitment pattern. This is not just a quad exercise; it is an exercise in hip external rotation.
Mechanics of the Wide Stance
Take a stance that is wider than shoulder-width, with your toes turned out at roughly 45 degrees. When you squat down, the primary focus is to keep the torso as upright as possible. Because your base is wide, your knees will naturally track over your toes, but you must fight to keep them from buckling inward.
Why This Works
- Adductor Activation: You will feel a significant stretch and subsequent contraction in the inner thigh muscles.
- Glute Engagement: The wide stance helps recruit the glutes earlier in the movement compared to a standard squat.
- Vertical Torso: The width of the stance allows for a more upright posture, which takes some of the strain off the lower back.
3. Jump Squat
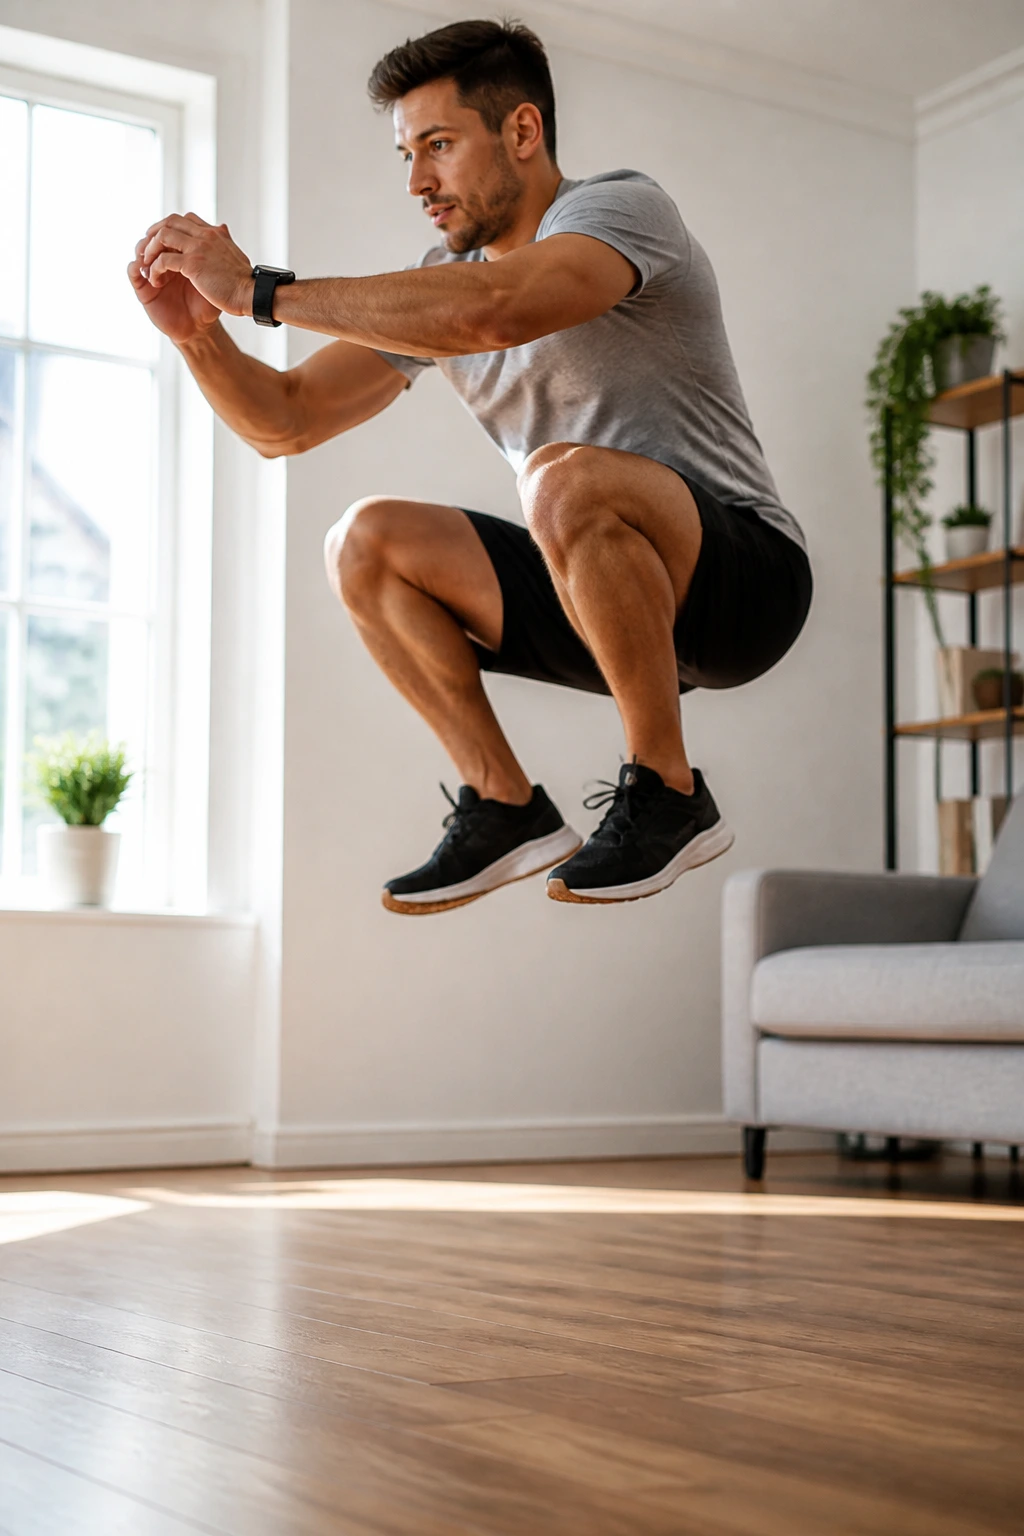
If you want to build explosive power, you have to get off the ground. The jump squat takes the standard air squat and injects it with speed and intensity. This is a plyometric movement, which means it is taxing on your central nervous system. Do not just go through the motions; the goal is max effort on every single rep.
The Execution
Start in your standard squat position. Lower yourself down with control, but as soon as you hit the bottom of your range, explode upward as hard as you can. Your feet should leave the floor entirely. When you land, do not just flop back onto your heels. Absorb the impact through your mid-foot and immediately transition into the next repetition.
Landing Safely
The landing is where most people get injured. You must land softly, like a cat. If you land with locked knees or heavy, flat feet, you are sending a shockwave up your shins and into your joints. Think of your muscles as shock absorbers. Land on the balls of your feet, roll back to your heels, and immediately sink into the next squat.
4. Bulgarian Split Squat
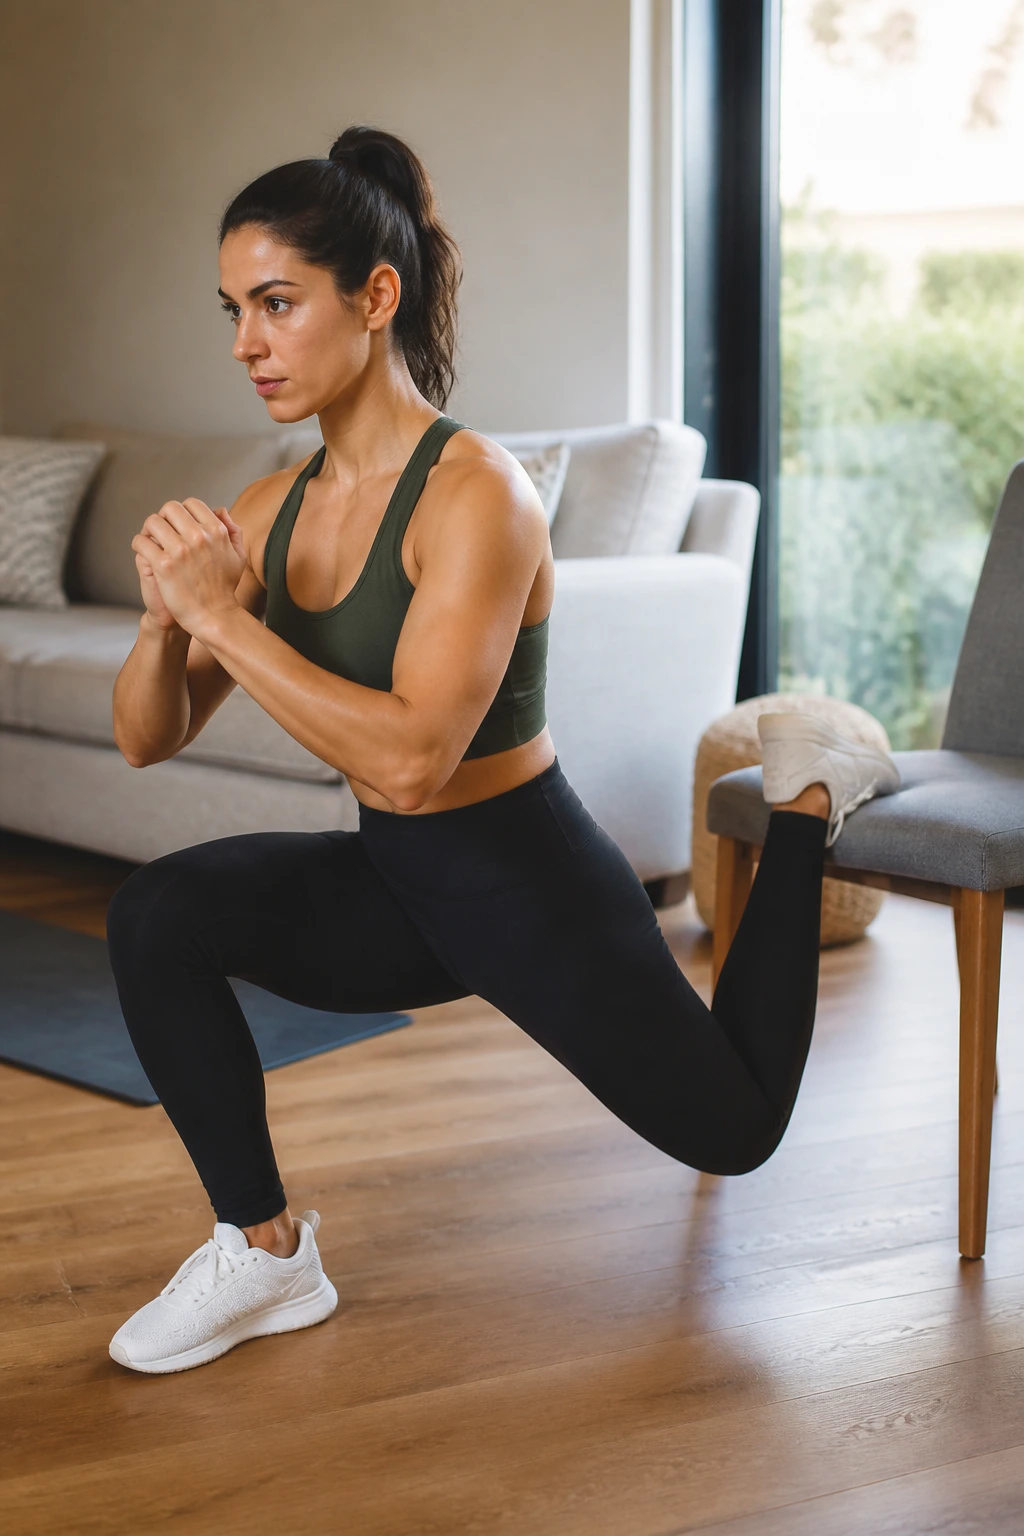
This is arguably the most hated, and yet the most effective, leg movement you can do at home. It is a unilateral exercise, meaning it targets one leg at a time, which forces your core to work overtime to keep you balanced. You need a couch, a chair, or the edge of your bed to pull this off.
Setting Up
Stand a few feet in front of your chair, facing away from it. Reach one foot back and rest the top of your foot on the elevated surface. This is your “kickstand.” The working leg is the one on the floor. Lower your hips down toward the floor, keeping your front knee aligned with your ankle.
The Intensity
You are essentially doing a lunge, but with the back leg elevated, you are putting a massive amount of weight on the front leg. The stretch in the rear leg’s hip flexor is also a major bonus, as tight hip flexors are a common issue for people who spend all day sitting at a desk. If you can do ten reps on each side without your front leg shaking, you are doing well.
5. Pistol Squat
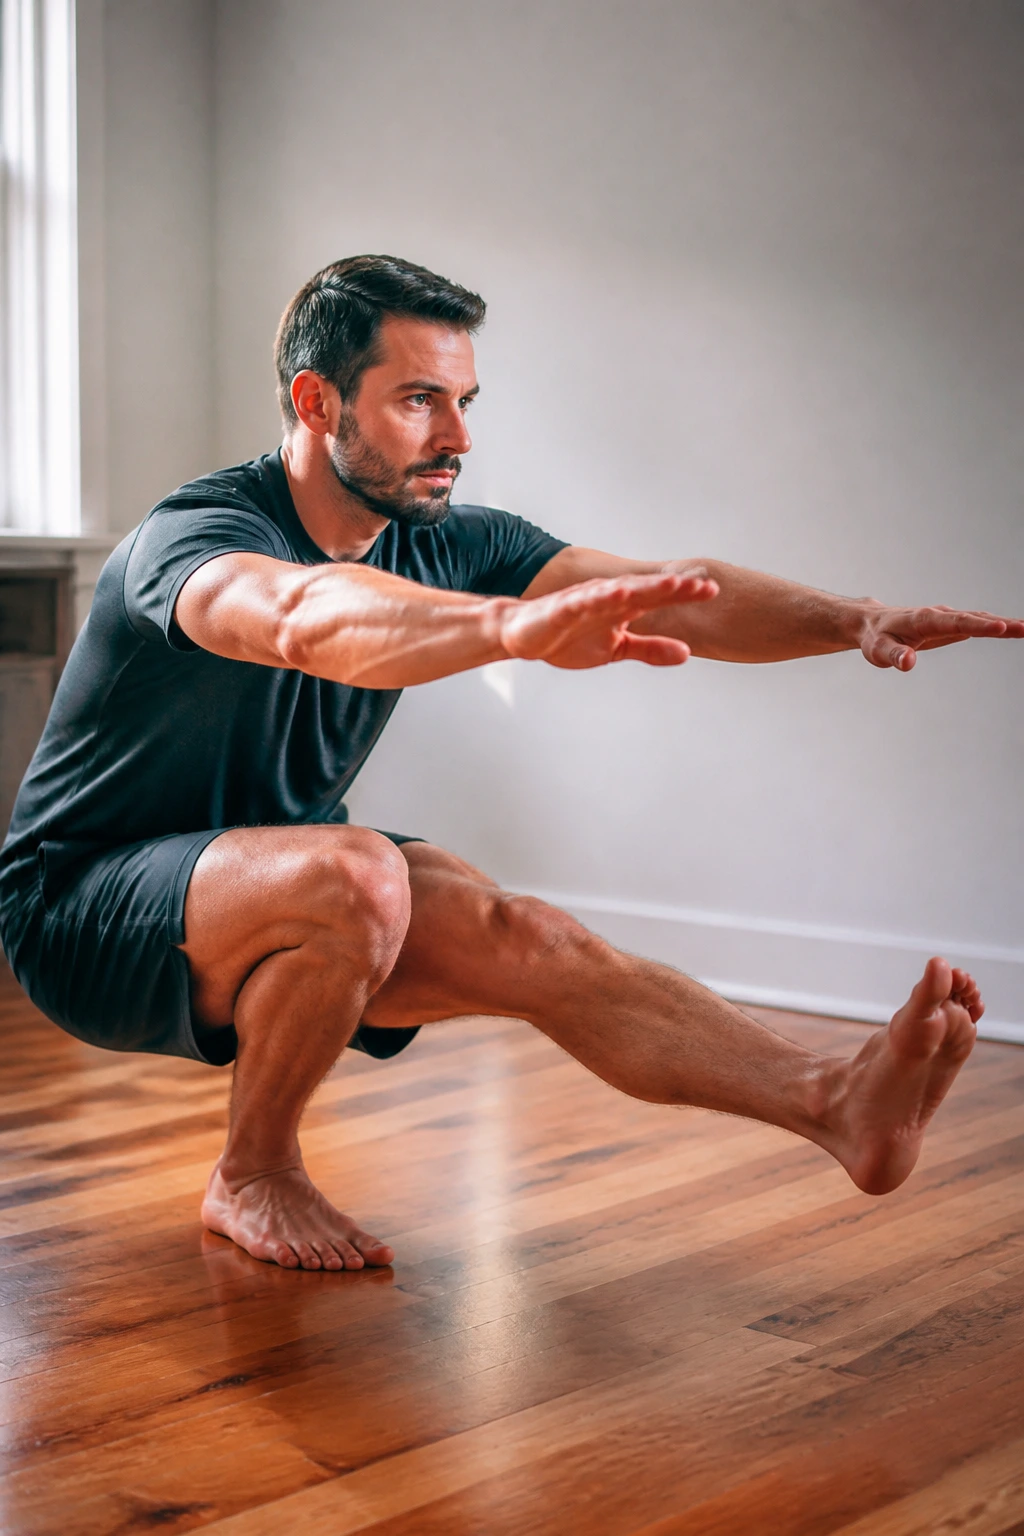
The pistol squat is the holy grail of bodyweight leg training. It is a single-leg squat where you extend the non-working leg straight out in front of you. This requires immense strength, balance, and ankle mobility. If you cannot do a full pistol squat yet, that is perfectly fine; you can use a chair to support your weight on the way down.
The Progression
Stand on one leg, extending the other leg straight out in front of you, hovering it just above the floor. Reach your arms forward for counterbalance. Slowly descend, keeping your heel glued to the floor. If you fall backward, use a doorframe to hold onto until you build the necessary stability.
The Mechanics
- Ankle Mobility: This is the bottleneck for most people. If your ankle is stiff, you will tip over.
- Balance: Keep your weight centered over the mid-foot of the working leg.
- Core Tension: You have to brace your midsection as if you are about to take a punch.
6. Pause Squat
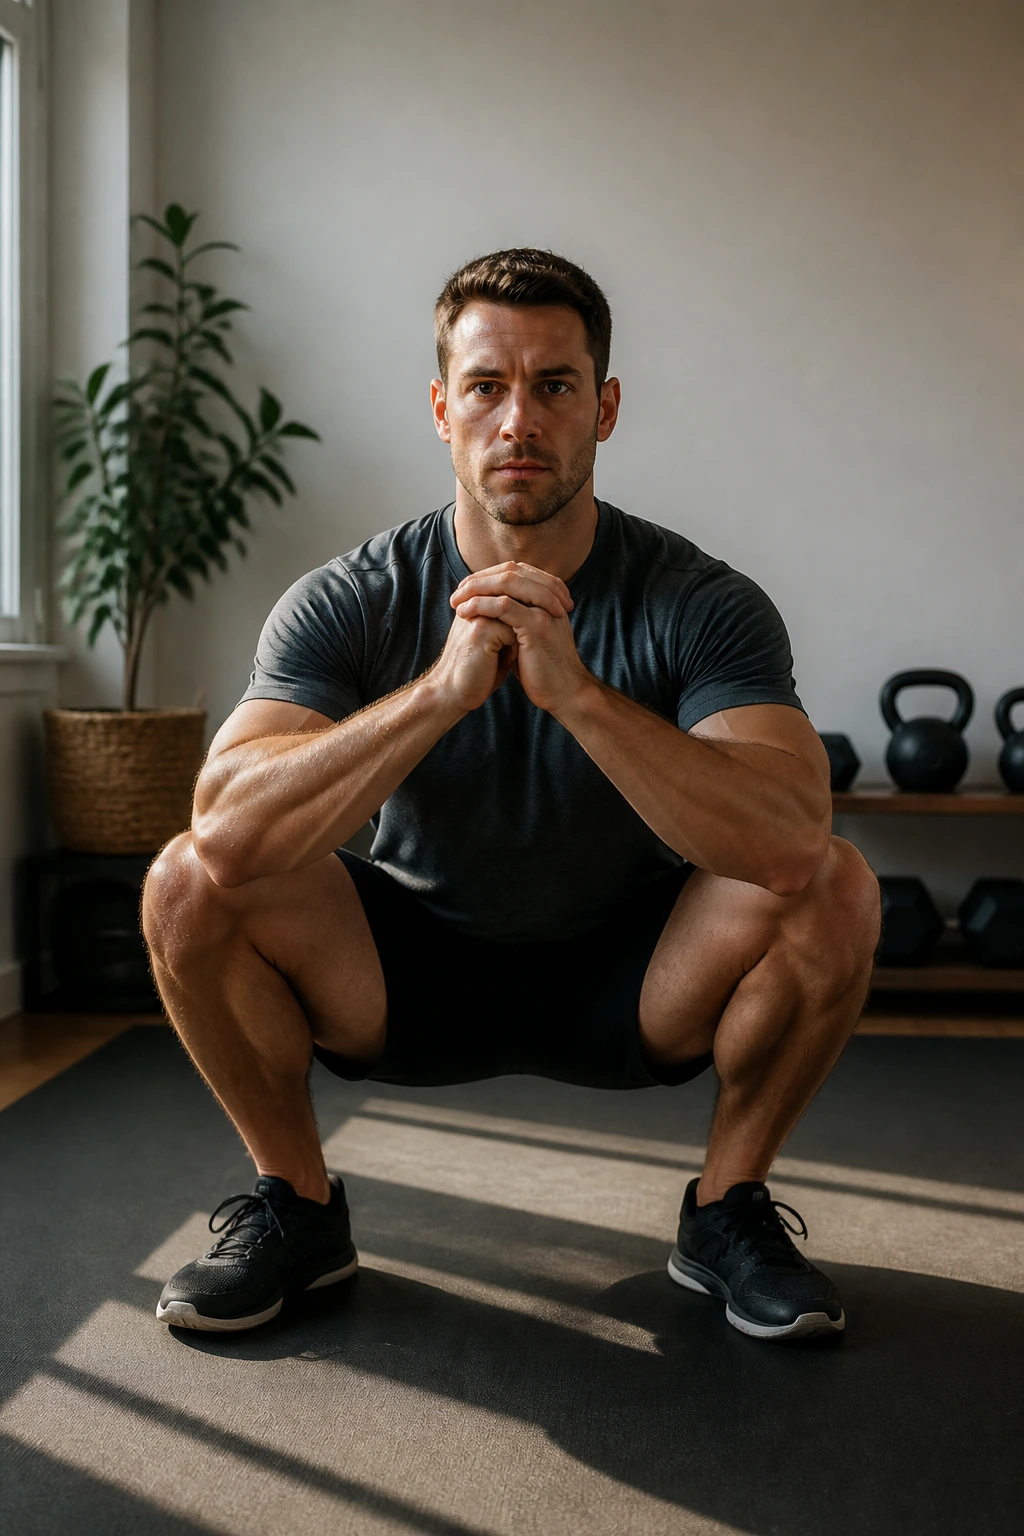
Sometimes the best way to get stronger is to slow down. A pause squat removes the “stretch reflex”—that natural bounce you get at the bottom of a movement—and forces your muscles to work from a dead stop. This builds incredible strength out of the “hole,” which is where most squats fail.
The Technique
Descend into your standard air squat. Once you reach the bottom, stop. Do not move. Hold that position for three full seconds. You will feel your quads, glutes, and core lighting up as they try to stabilize you. After the three seconds are up, drive back up to standing in one explosive motion.
Why It Matters
When you bounce at the bottom, you are using momentum. When you pause, you are forcing the muscles to recruit fibers they might otherwise skip. It is uncomfortable, and that is exactly why it works. If you find yourself holding your breath, force yourself to inhale through your nose while you are holding that pause.
7. Wall Sit
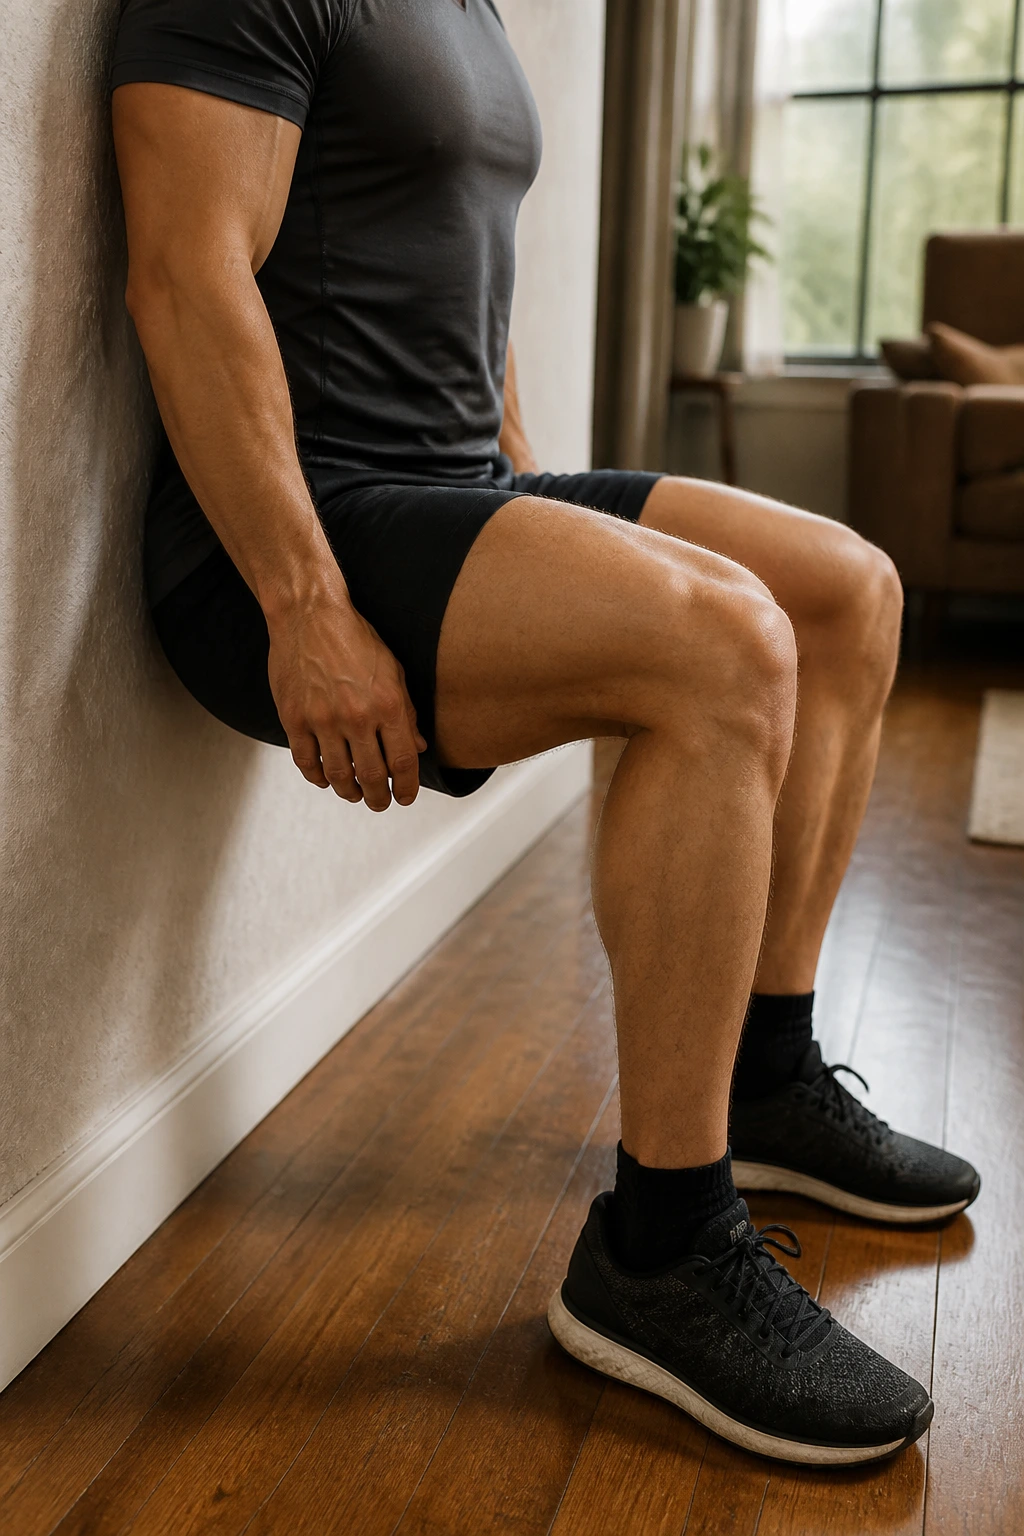
The wall sit is an isometric exercise, meaning there is no movement involved. You are holding a position under tension. While it might look easy, anyone who has held a wall sit for over a minute knows the truth. It turns your quads into fire.
Proper Positioning
Lean your back against a flat wall and slide down until your thighs are parallel to the floor. Your knees should be at a 90-degree angle, and your feet should be flat on the ground, hip-width apart. Keep your back flat against the wall—do not let your lower back arch away from the surface.
The Challenge
Start with a 30-second hold. Once that feels manageable, push for 45, then 60. You can also make this harder by crossing your arms over your chest or, if you are feeling masochistic, placing a heavy book or household item on your lap. Do not let your knees cave inward. Keep the tension consistent.
8. Hindu Squat
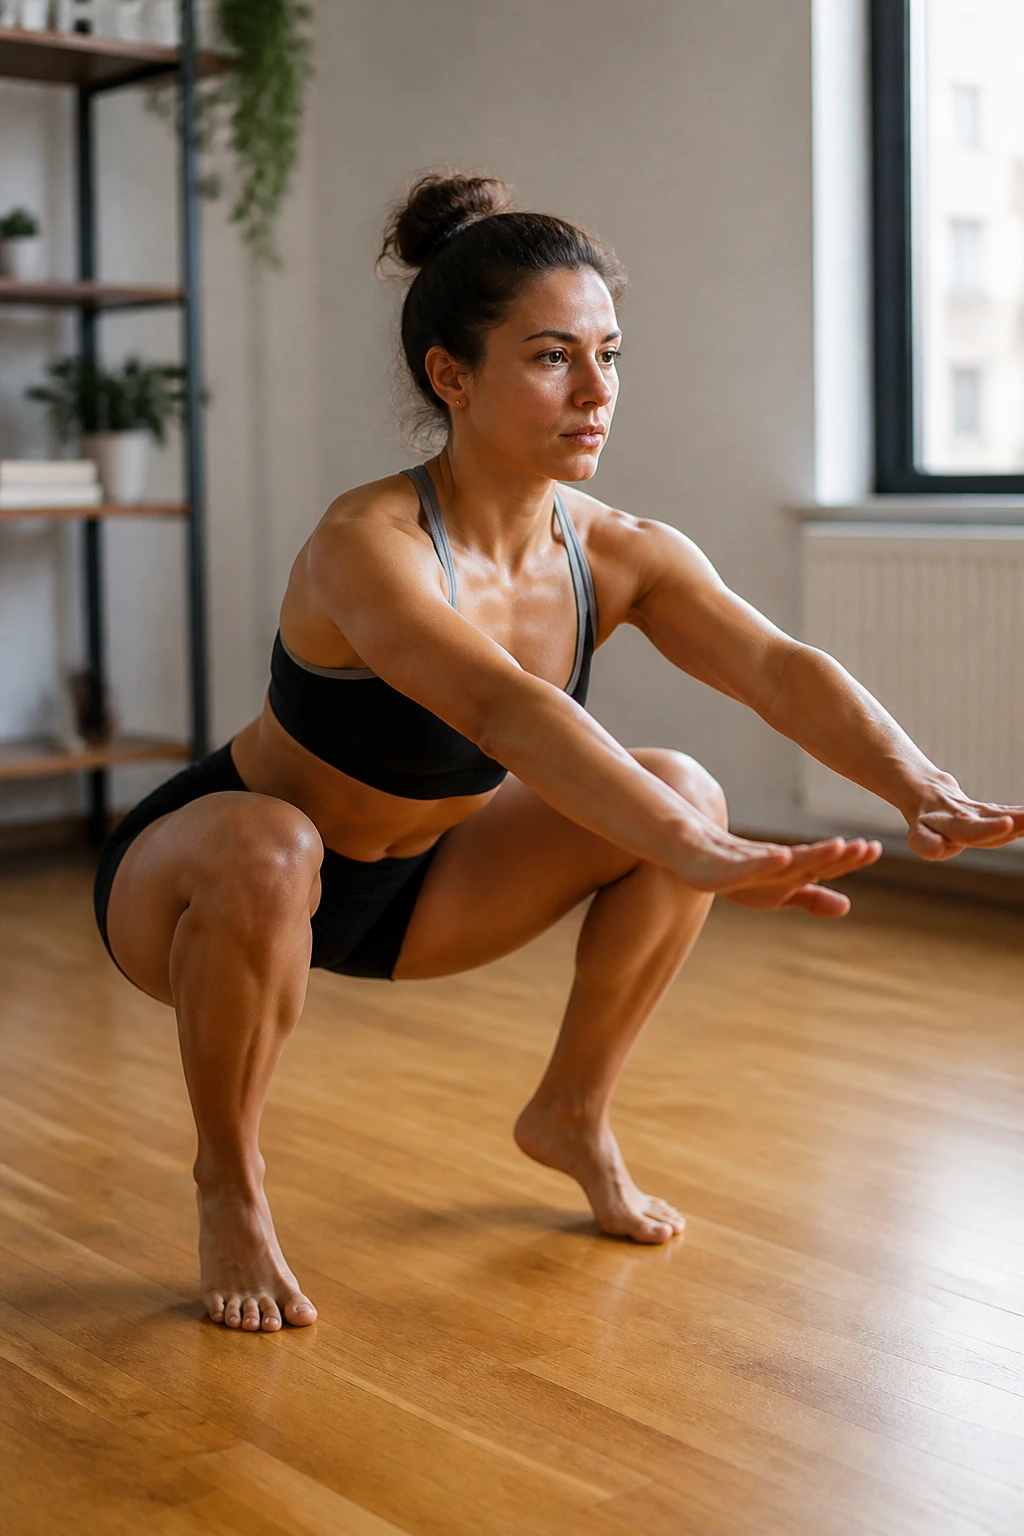
This movement comes from traditional Indian wrestling training, and it is built for endurance and fluidity. Unlike a standard squat where you keep your heels glued to the floor, in a Hindu squat, you lift your heels as you descend. It feels more like a flowing wave than a rigid exercise.
Moving with Rhythm
Stand with your feet shoulder-width apart. As you descend into the squat, allow your heels to rise naturally off the floor. At the bottom, your knees will travel further forward than they would in a standard squat. As you stand back up, push through the balls of your feet and lower your heels back to the ground.
Benefits
The increased knee travel is actually fantastic for building resilience in the connective tissues around the knee, provided you build up slowly. It trains the quads differently because it forces the knee joint to move through a larger range of motion under load. It also improves cardiovascular endurance because of the continuous, rhythmic nature of the movement.
9. Cossack Squat
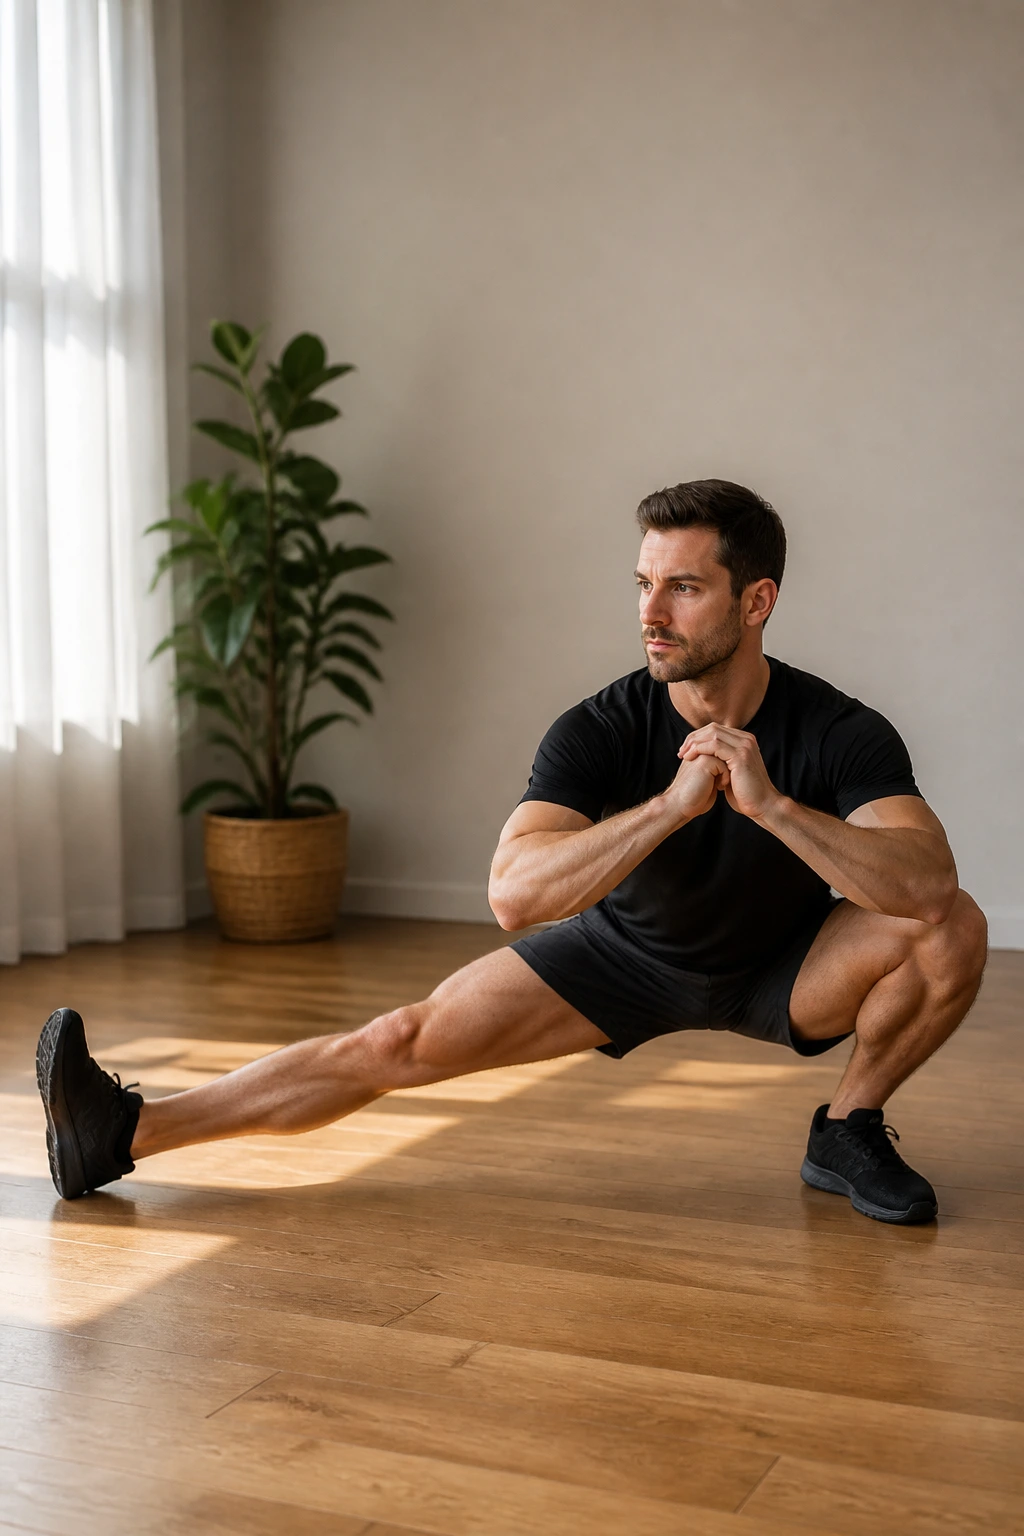
We spend almost all of our lives moving forward and backward. The Cossack squat forces you to move laterally, which is crucial for athletic health and hip mobility. It is a deep, side-to-side squat that stretches the inner thigh and challenges your stability in a plane of motion that is usually ignored.
How to Execute
Take a very wide stance, much wider than a sumo squat. Shift all of your weight onto your right leg, bending your right knee while keeping your left leg completely straight. Your left toes should point up toward the ceiling. Get as low as you can on the right side, then push through that heel to stand up and immediately shift your weight to the left side.
Why It Hurts (in a good way)
This exercise will highlight any imbalances you have. You might find that you can get much lower on your left side than your right. That is normal. Use the Cossack squat to even out those discrepancies. It is essentially a dynamic stretch and a strength exercise rolled into one. Keep your chest up throughout the shift; do not let the upper body collapse.
10. Prisoner Squat
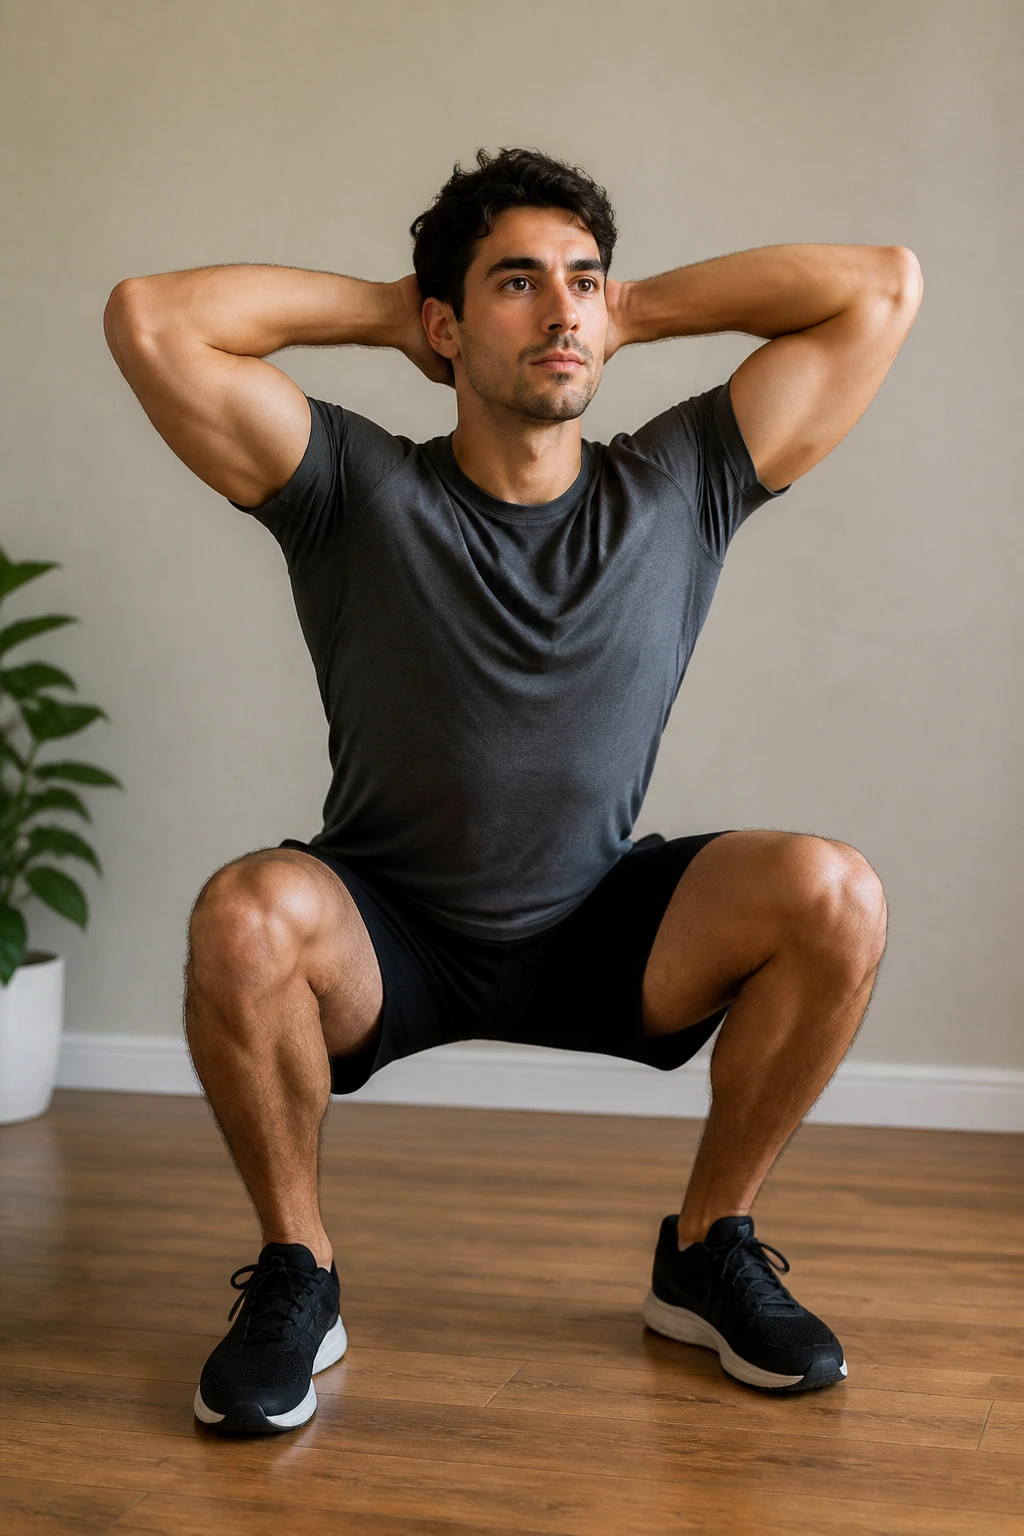
The “prisoner” name comes from the position of your hands: clasped behind your head, like a prisoner of war. This subtle change does two things: it makes it impossible to use your arms for momentum, and it forces you to keep your chest perfectly upright. It is a deceptively simple way to enforce better form.
Why the Hand Placement Matters
When you clasp your hands behind your head, you naturally retract your shoulder blades. This tight upper back creates a stable base for the spine. If you try to round your back or hunch forward during a prisoner squat, your hands will force your elbows wide, making the movement feel strained.
Focus Points
- Elbows Back: Keep your elbows pulled back as far as possible to maintain thoracic extension.
- Deep Breath: Before you start the descent, take a deep breath into your belly.
- Controlled Descent: Since you cannot use your arms to counterbalance, you must rely entirely on your glutes and hamstrings to control the speed of the descent.
11. Chair Squat (Sit-to-Stand)
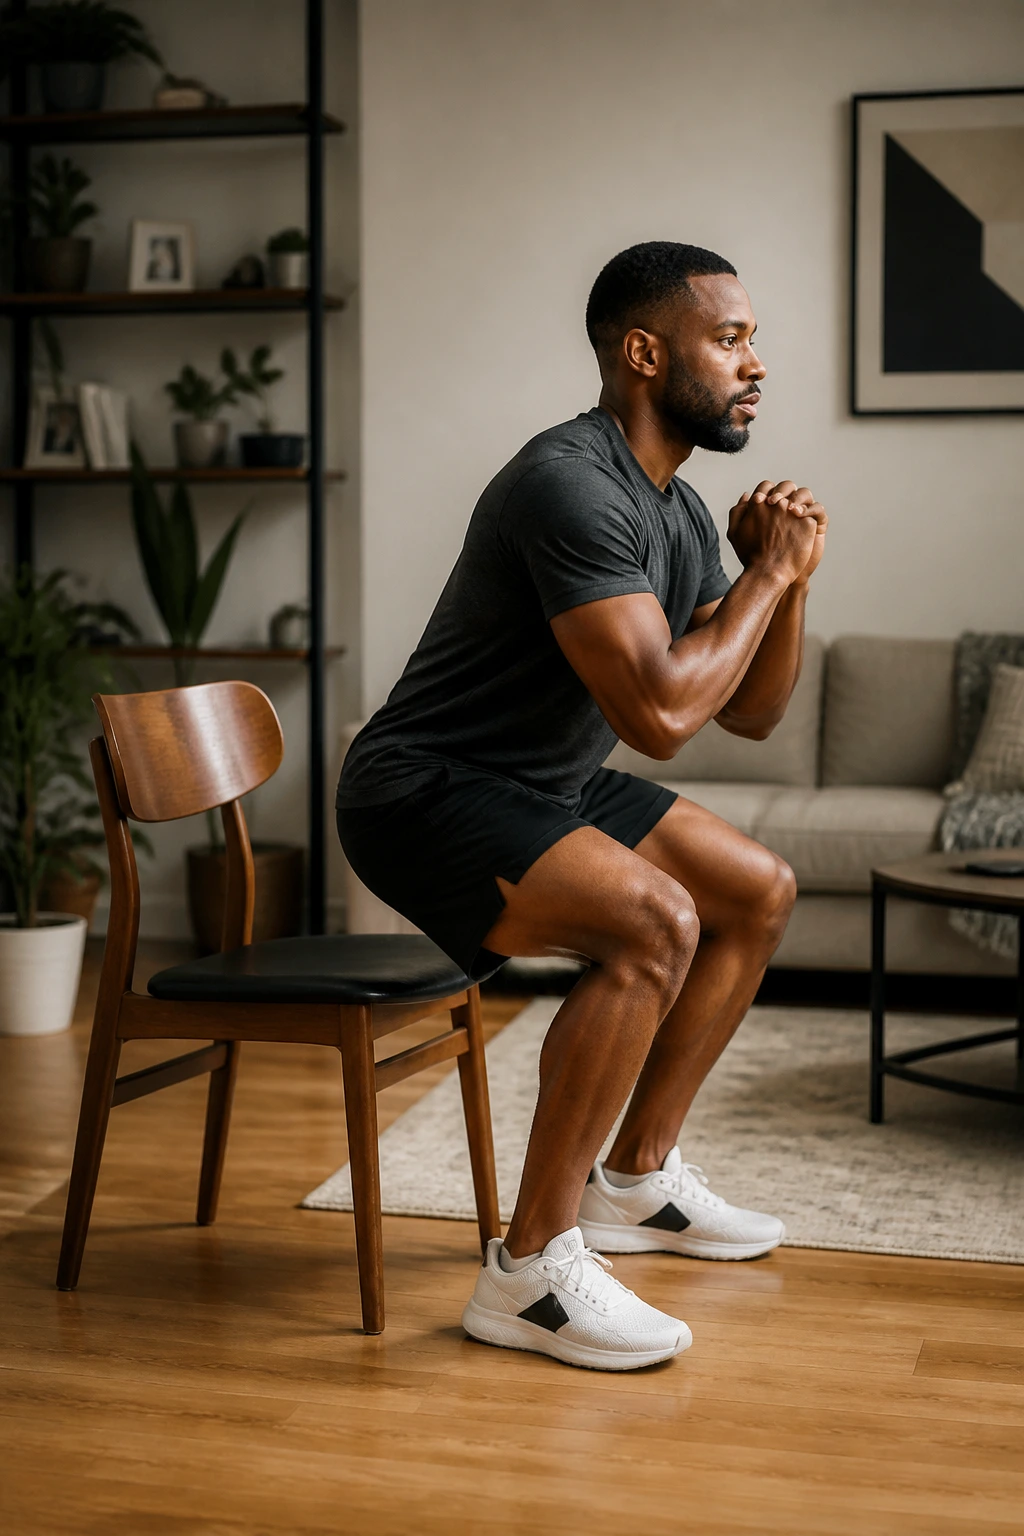
If you are a beginner or if you are returning to exercise after a long hiatus, the sit-to-stand squat is your best friend. It provides a target for your hips and gives you a safety net. It ensures you are hitting the proper depth every single time, which is the most common issue for beginners.
Using the Target
Find a sturdy chair. Stand in front of it, feet hip-width apart. Squat down until your butt just barely taps the chair—do not sit down and relax your weight; just “kiss” the chair with your glutes—and then immediately stand back up. If you sit fully, you lose the tension in your muscles.
Progression
Once this becomes easy, move to a shorter chair or a couch cushion. Alternatively, try to sit down as slowly as possible—take a full four seconds to descend—and then stand up at normal speed. The eccentric (lowering) portion of the lift is where a lot of muscle damage and growth happens.
12. Shrimp Squat
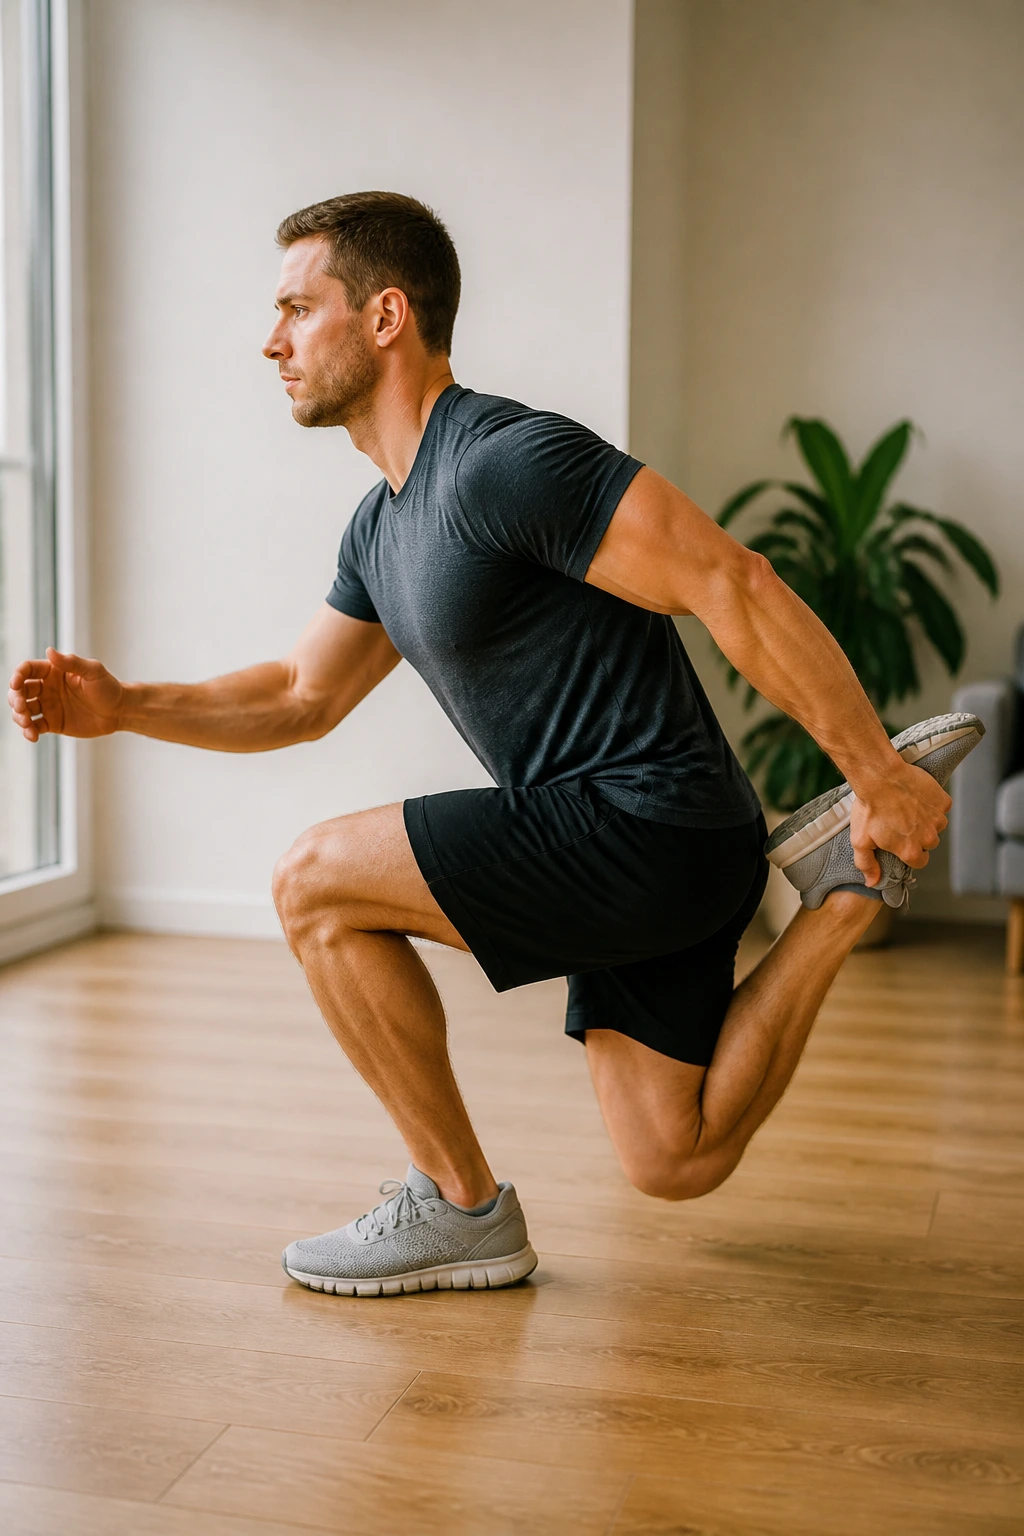
The shrimp squat is a beautiful, albeit difficult, single-leg variation. It requires you to balance on one leg while holding the other leg behind you, almost like a bicep curl for your hamstring. It is an incredible challenge for your quads and your balance simultaneously.
The Mechanics
Stand on your left leg. Bend your right knee, bringing your right heel up toward your glutes. Reach back with your right hand and grab your right foot. Now, with your right hand holding your right foot behind you, slowly squat down on your left leg. Your right knee will eventually tap the floor (or come close to it).
Why It’s Unique
Most people find that their balance is the limiting factor here, not their strength. It forces you to stabilize the hip joint of the standing leg, which is a critical skill for preventing knee injuries. If you struggle to hold your foot, you can try just hovering it behind you, but grabbing it adds a nice stretch to the quad of the non-working leg.
13. Skater Squat
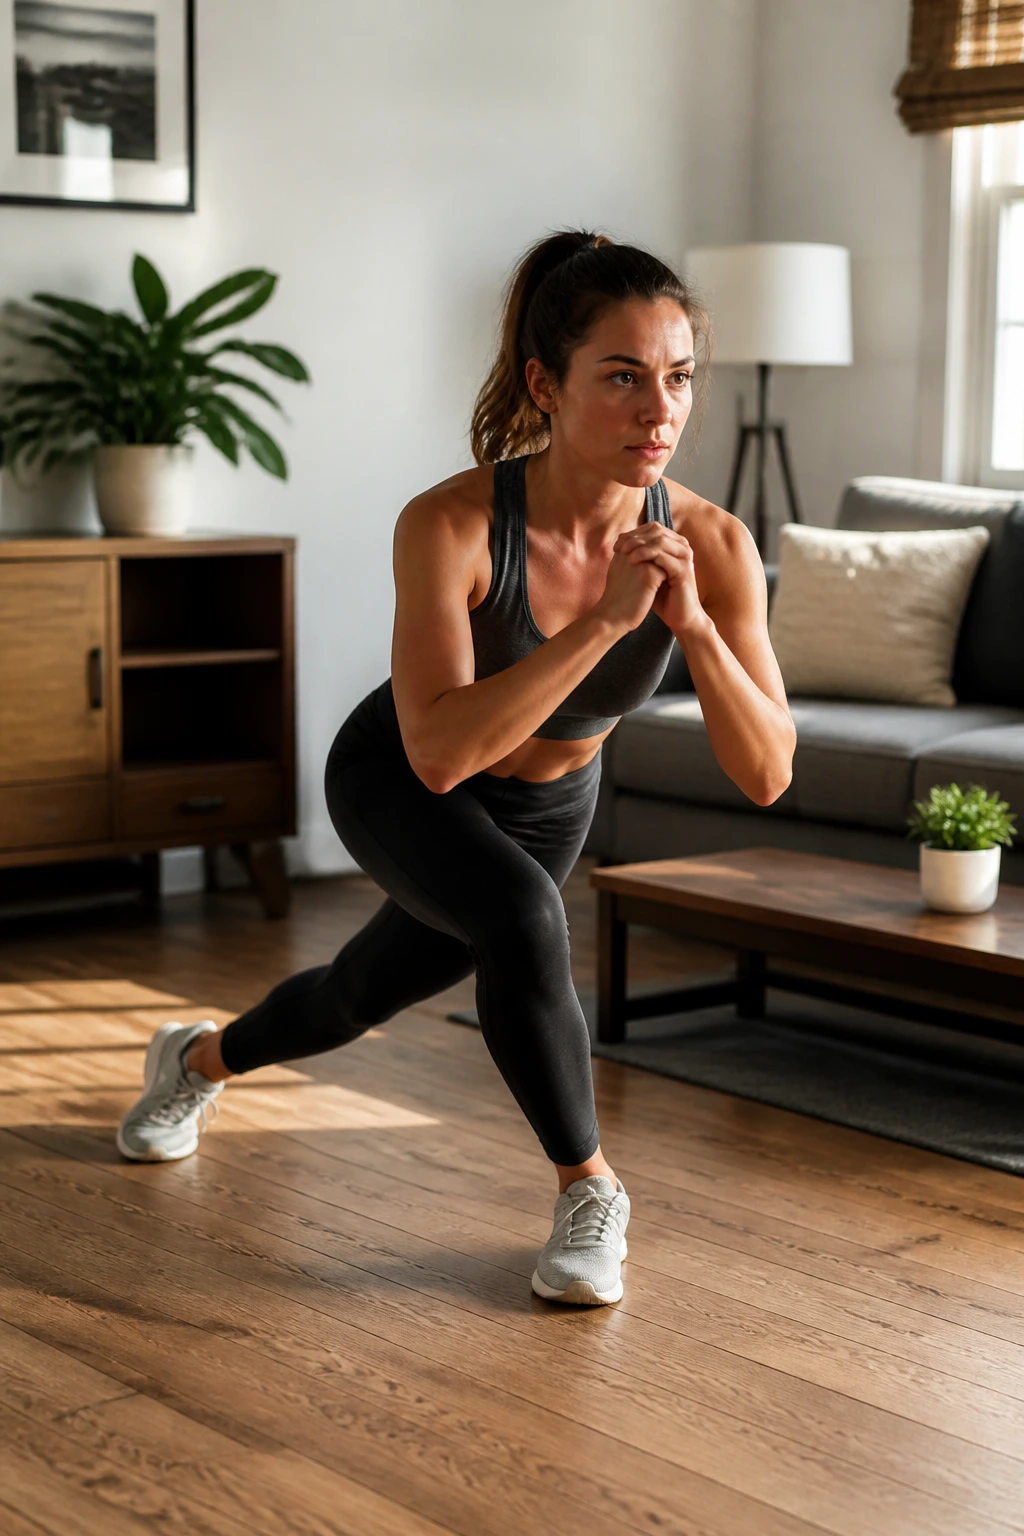
The skater squat is basically a split squat that turns into a balance challenge. You are essentially doing a one-legged squat, but your back leg is reaching behind you, not elevated on a surface. It looks like a speed skater in motion, hence the name.
Step-by-Step
Start standing. Shift your weight to your right leg. Take your left leg and reach it back and across behind your right leg, tapping your left toe on the floor if needed. Descend until your left knee is just hovering above the ground. Stand back up, using only your right leg.
The Athletic Advantage
This movement mimics the mechanics of running and lateral movement, making it excellent for athletes. It requires you to control the rotation of your hip, preventing your knee from collapsing inward. Keep your torso slightly leaned forward to bias the glutes, or keep it more upright to bias the quads. You have options here.
14. Tempo Squat
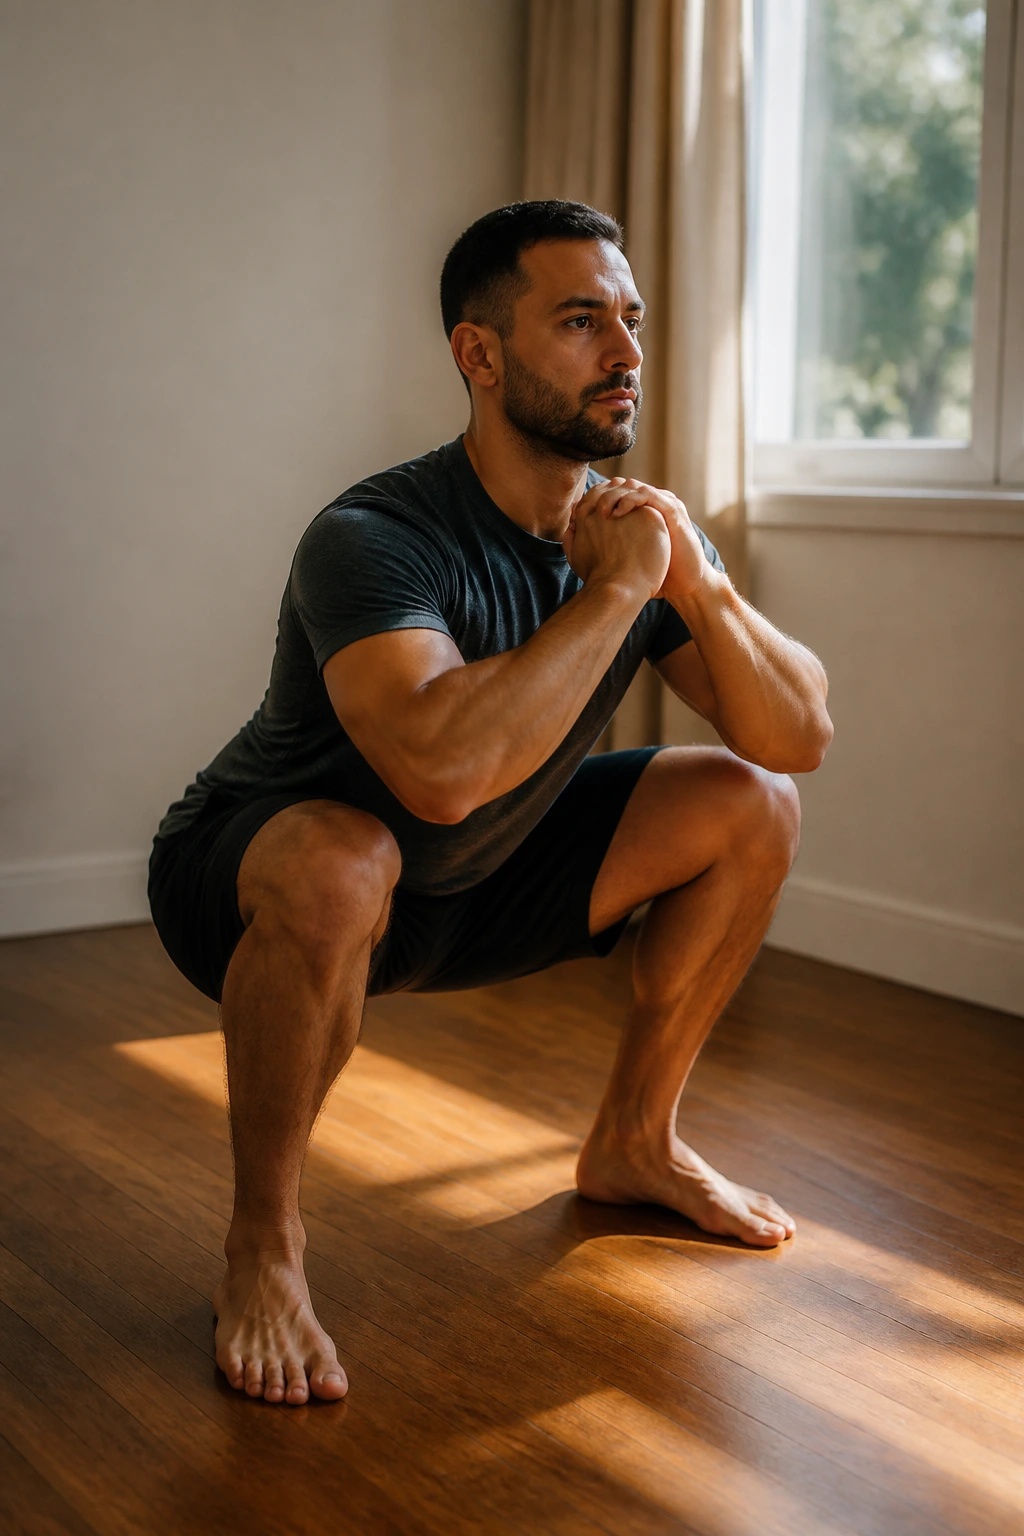
If you want to make an easy exercise hard, change the tempo. Tempo training is a favorite among strength coaches because it forces the muscles to endure stress for a longer duration. You can choose any squat variation, but let’s apply the 3-1-1 tempo to a standard air squat.
The Formula
The numbers represent seconds: 3 seconds to descend, 1 second hold at the bottom, 1 second to explode up. That 3-second descent is the “eccentric” phase, and it is where you are strongest but also where you cause the most micro-tears in the muscle fibers, which leads to growth.
Why You Can’t Cheat
When you are moving quickly, you can use momentum to get through the sticking points. When you are forced to move slowly, you cannot hide. If your knees want to cave in, you will feel it. If you lose tension, you will know immediately. Use a clock or just count in your head; you will be surprised at how long 3 seconds feels when your quads are burning.
15. Narrow Stance Squat
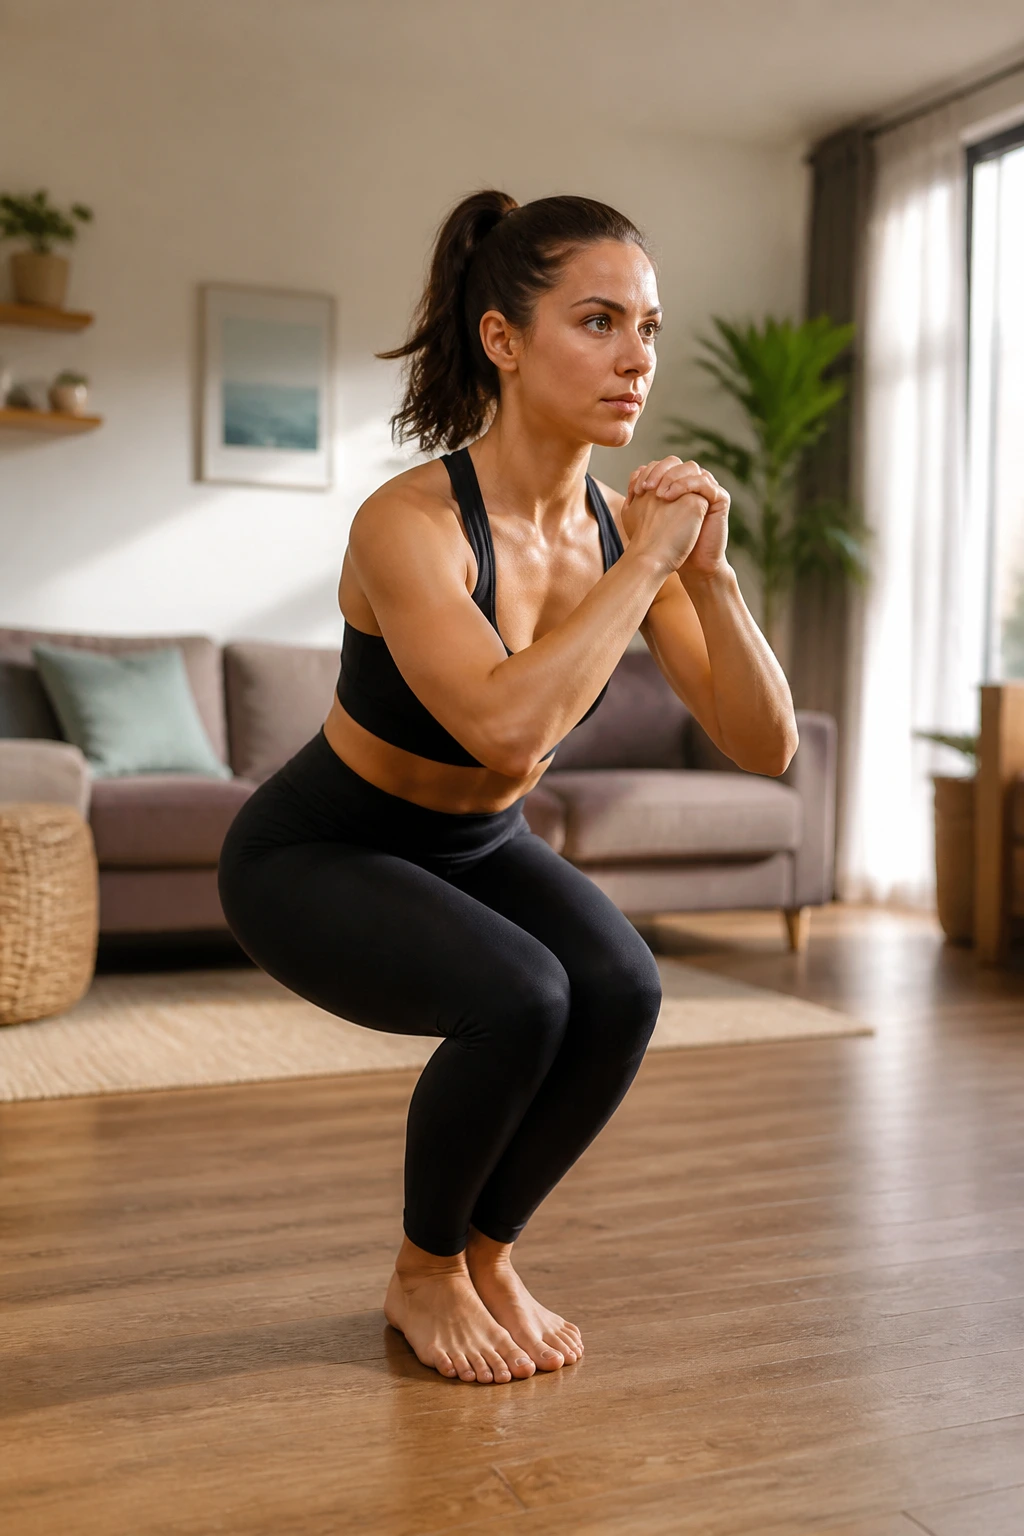
Most squatting advice tells you to keep your feet shoulder-width apart, but closing that stance can be a revelation. By bringing your feet almost together, you shift the load squarely onto the outer quads. It is a fantastic way to target the sweep of the leg.
The Challenge of Stability
A narrow stance is inherently less stable than a wider one, which means your stabilizer muscles have to work much harder. You will feel a different kind of tension in your hips and knees. Keep your feet about two inches apart. When you descend, you will notice your knees naturally travel further forward; this is expected and fine, provided your heels stay on the ground.
When to Use This
Don’t use this for heavy, explosive work. Use it for high-repetition sets where you are focused on the “burn.” It is also a great way to test your ankle mobility. If your heels lift off the floor immediately, work on your calf and ankle flexibility before you try to hammer out high volumes in this position.
16. Split Squat
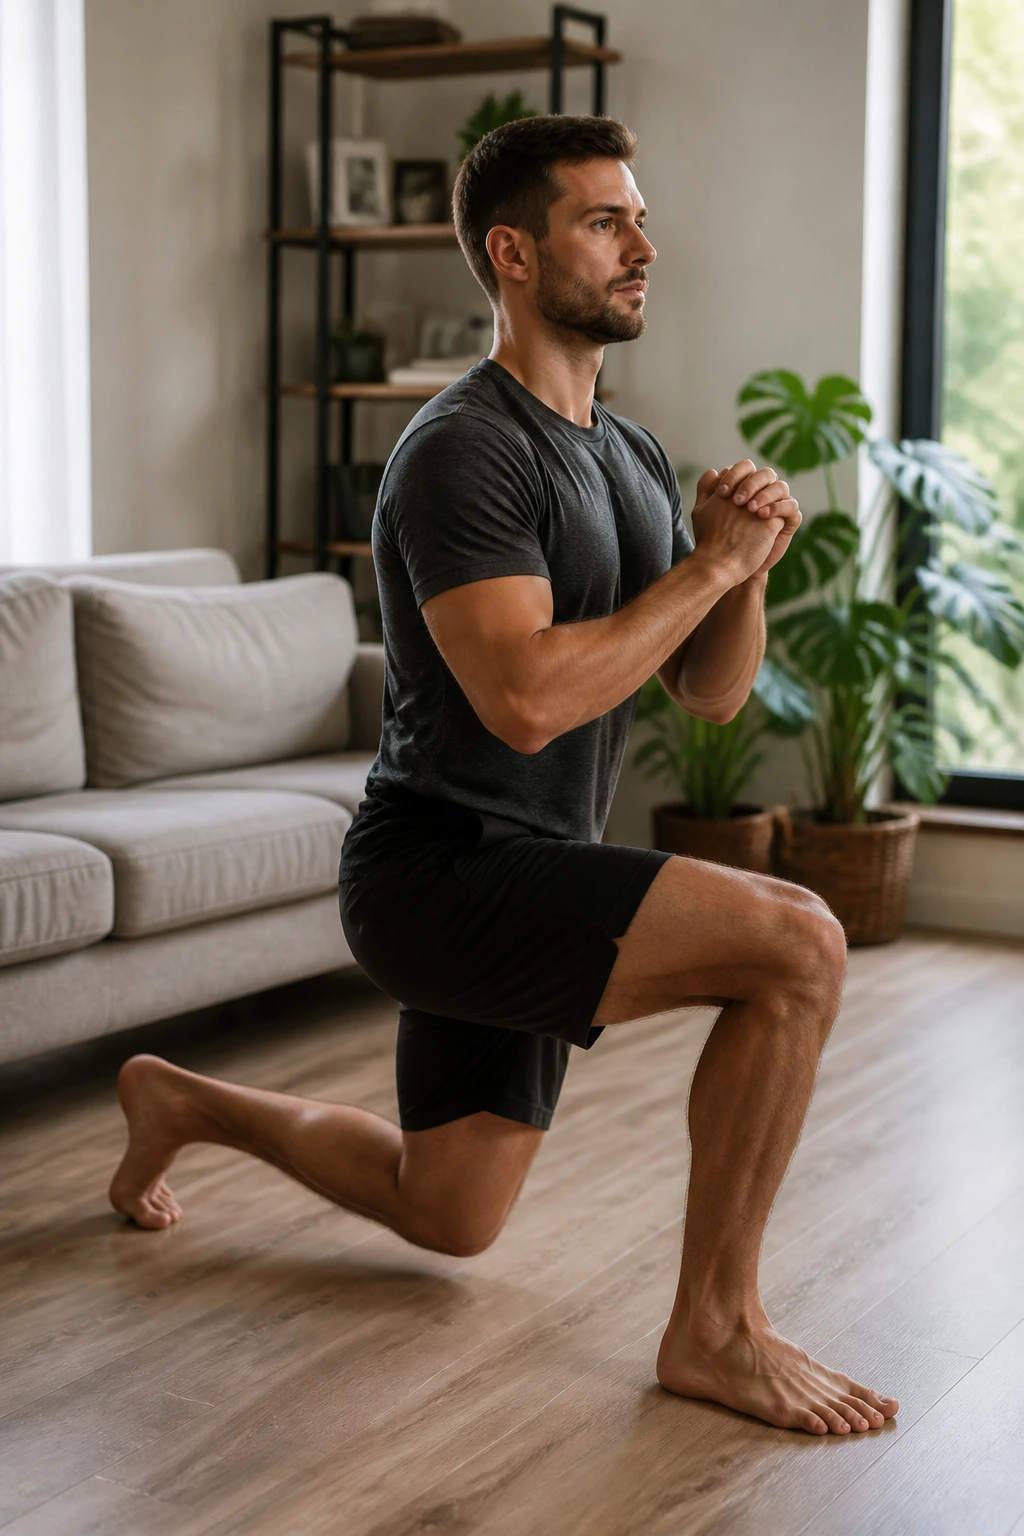
The split squat is similar to a lunge, but the feet stay in a static position. This removes the “step” and the “recovery” phases of a lunge, meaning the tension on the legs never drops. It is continuous, grueling, and simple.
The Setup
Get into a lunge position, with one foot forward and one foot back. Your back heel should be off the floor. Keep your torso upright. Drop your back knee straight down toward the floor until it is an inch away. Drive back up through the front heel. Do not move your feet until you have finished all reps on one side.
Why It’s Efficient
Because you are staying in the same spot, you don’t have to worry about finding your balance every rep. You can focus entirely on the mind-muscle connection. You will feel this intensely in the glute of the front leg and the hip flexor of the back leg. It is a fantastic movement for those who find standard walking lunges too chaotic or unstable.
17. Squat Jacks
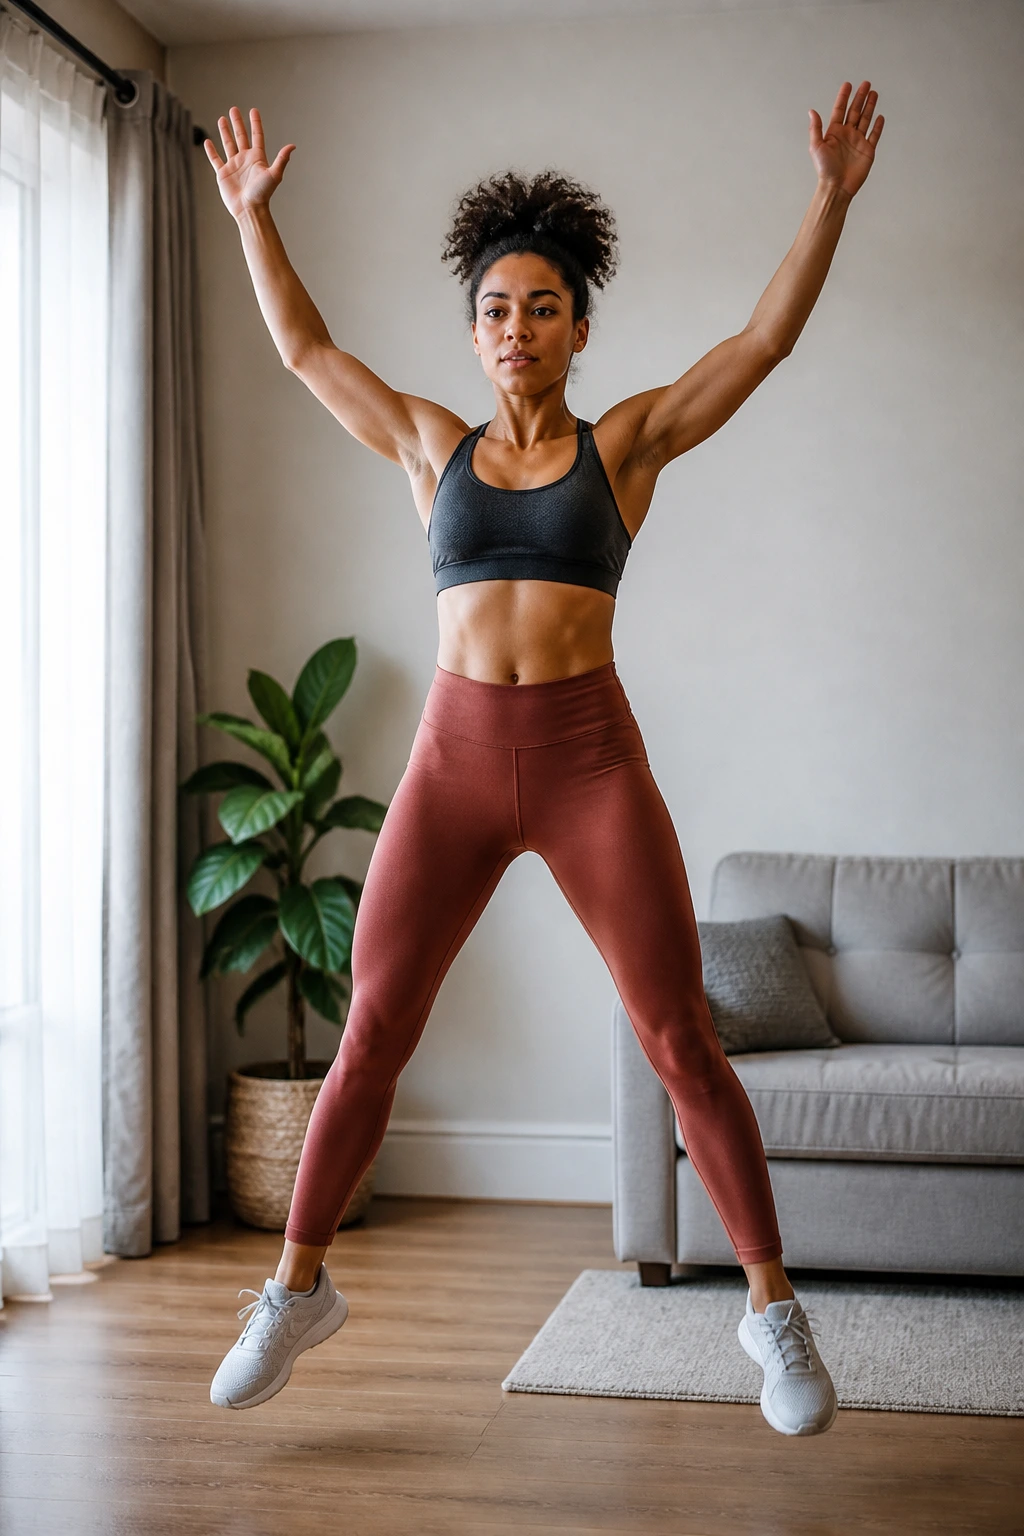
Squat jacks combine the air squat with a bit of cardio. It is a move that will get your heart rate up in seconds. It is essentially a jumping jack where you land in a squat.
The Movement
Start with your feet together and your hands at your sides. Jump your feet out wide into a squat position, dropping your hips down. As you land, your hands should come up or touch the floor between your feet. Immediately jump your feet back together and stand up.
The Cardio Factor
This is not a heavy-strength movement. Do not try to load this with weight. This is for conditioning. Use this as a finisher at the end of your workout to drain whatever energy is left in your legs. It is brutal on the glutes and lungs. If you are doing these correctly, you should be breathing hard by rep number fifteen.
18. Heel-Elevated Squat
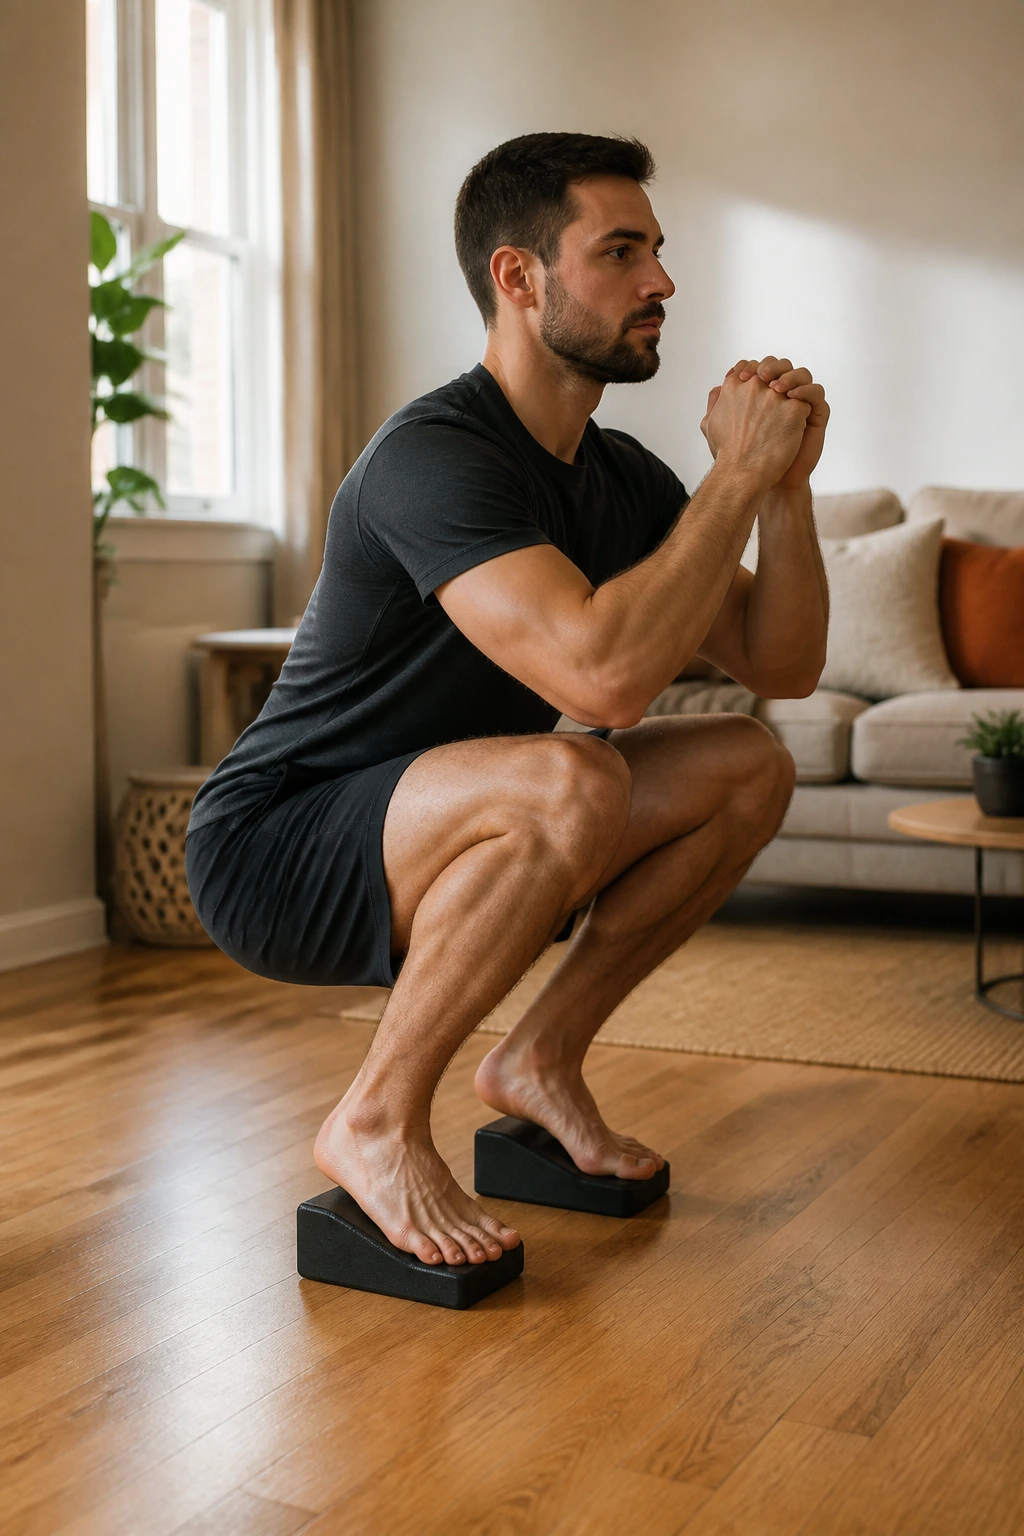
We touched on this briefly in the air squat section, but elevating your heels is a legitimate training strategy, not just a modification for poor mobility. By raising your heels, you allow your knees to travel further forward over your toes, which places a massive, direct load on the quads.
How to Do It
Find a pair of books, a sturdy low step, or some flat weights. Place your heels on them. Now, perform a standard squat. You will notice that your torso can stay much more upright and your knees can go significantly past your toes without straining your back.
The Benefit
This mimics the effect of Olympic weightlifting shoes. It is the closest thing to a “quad-isolation” exercise you can get with just your body weight. If you have been doing squats and feeling them only in your lower back or glutes, try elevating your heels. It will shift the focus immediately to your quads.
19. Single-Leg Box Squat
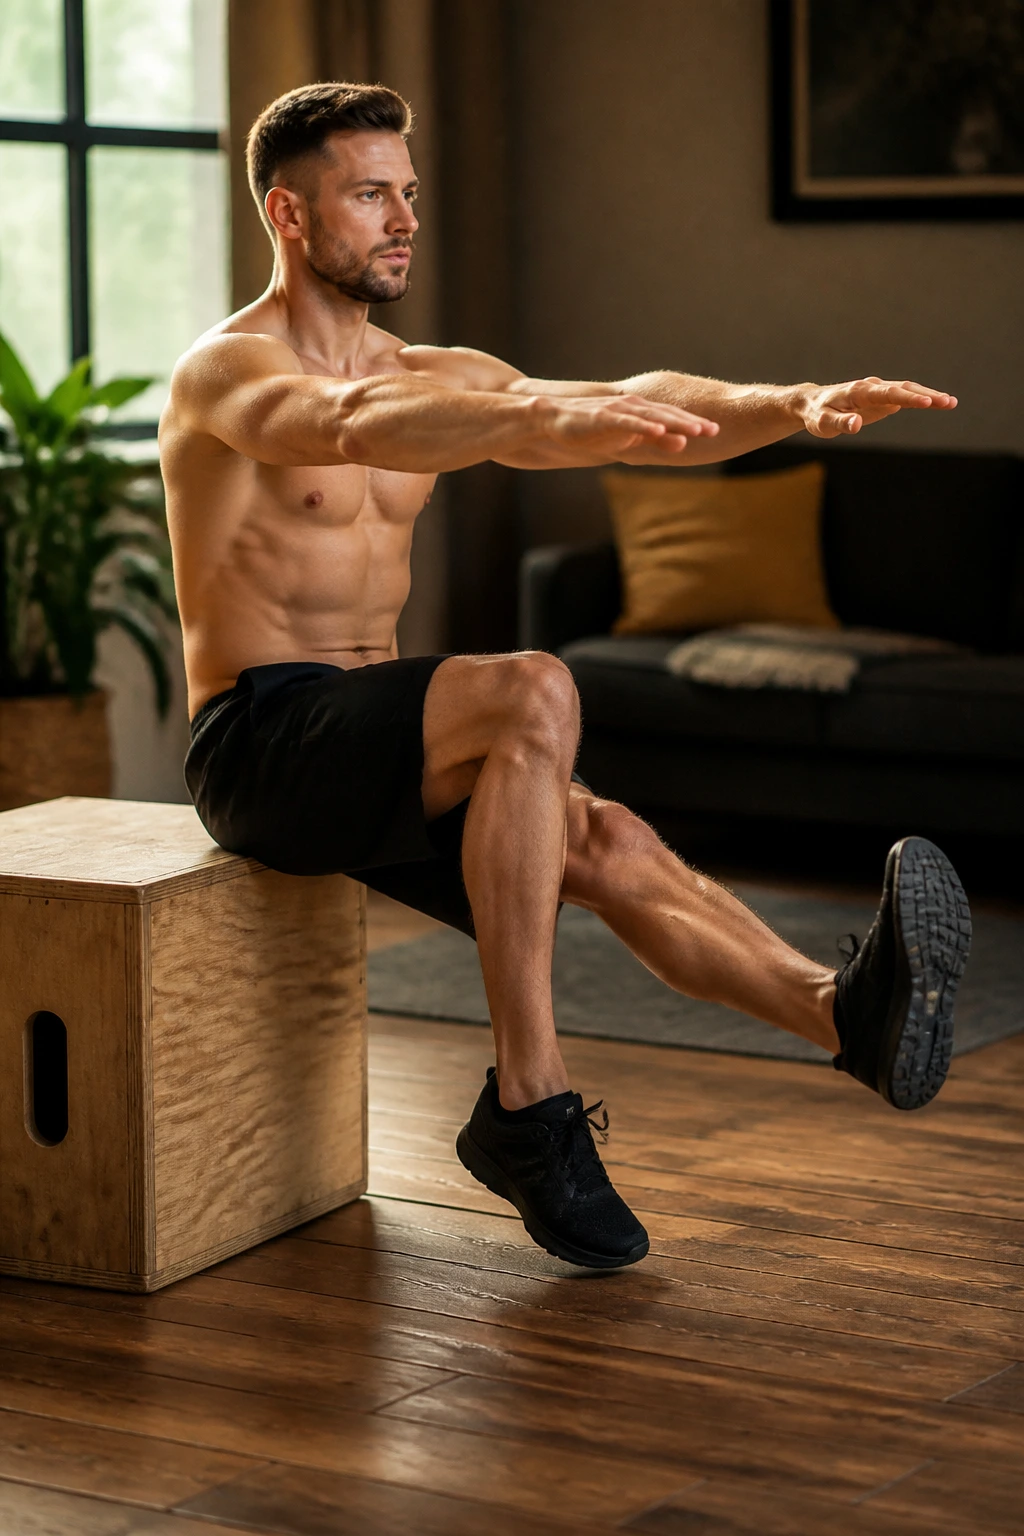
If the pistol squat is too difficult and the standard air squat is too easy, the single-leg box squat is your middle ground. It is the perfect progression. You sit down onto a surface with one leg, then stand back up.
Controlling the Descent
The key here is the control of the descent. Don’t just plop down. Slowly lower yourself onto the chair or box, tap, and stand up. Because you have a target, you can focus on driving your knee out and keeping your chest up without worrying about balancing for a full range of motion.
Progressive Difficulty
You can make this harder by lowering the height of the surface you are sitting on. Start with a standard chair. Next week, use a shorter stool. Eventually, you can remove the surface entirely and you will be doing full pistol squats. It is a fantastic way to measure your progress over time.
20. Isometric Squat Hold
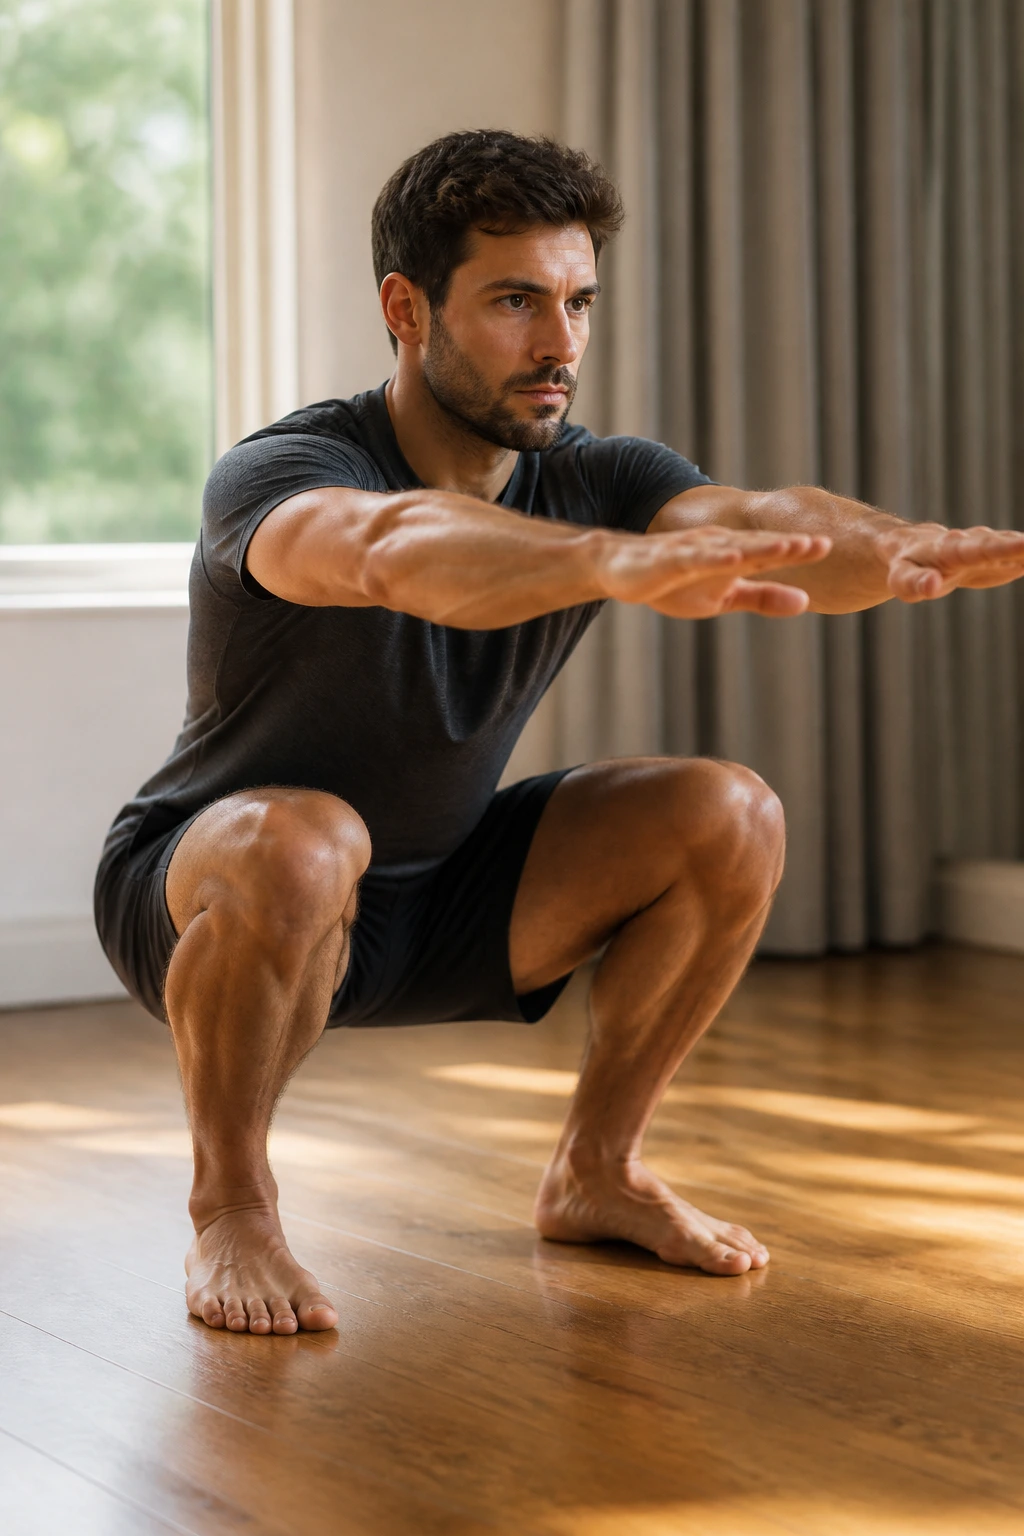
We end where we started, but with a twist. The isometric squat hold is the ultimate finisher. It is not about how many reps you can do; it is about how long you can survive.
The Strategy
Drop into a squat position—parallel is fine, or go deeper if you have the mobility. Keep your core tight, chest up, and weight in your mid-foot. Set a timer. Hold the position until your legs literally give out and you are forced to stand up.
Why This is the Finisher
This is a mental game. When your quads start to shake, that is when the training actually begins. The muscle fibers are screaming for you to quit. If you hold for just 10 more seconds after the shaking starts, you are building immense mental toughness and muscular endurance. It is the simplest, most effective way to end a home leg workout.
Final Thoughts
The most common mistake people make with bodyweight training is assuming that because there is no weight, there is no need for intensity. They perform twenty lazy squats while watching television, feel nothing, and then decide that bodyweight squats “don’t work.” That is not a failure of the exercise; it is a failure of the execution.
You have to bring the intensity yourself. You have to focus on every single repetition. Feel the muscles contract, control the speed, and push your range of motion. When you take the time to master your own movement patterns, you realize that your body is a much more complex and capable machine than any piece of equipment in a gym.
Consistency beats intensity every time, but consistency with intensity is how you change your physique. Pick three of these movements, combine them into a circuit, and repeat it three or four times. You do not need to do all twenty in one session. Just do the work, listen to your body, and keep showing up. The floor is ready when you are.
