



You have probably spent enough time grinding away at standard two-legged glute bridges to know the feeling well. You start strong, you squeeze at the top, and eventually, the exercise stops being a challenge. It becomes maintenance. That is exactly the point where most people plateau, doing fifty reps without feeling a single tremor in their posterior chain. If you are not feeling the burn, you are likely just going through the motions.
The single-leg glute bridge is the remedy for that stagnation. It forces your body to handle your full body weight on one side, which immediately doubles the relative load without requiring a single piece of heavy equipment. It demands stability from your core, strength from your glutes, and coordination from your stabilizers. This is not about trying to do more reps; it is about making each rep significantly harder to execute correctly.
When you switch to a single-leg stance, you eliminate the compensatory help that your stronger leg often provides. Most of us have a dominant side, and in a standard bridge, the stronger glute works harder while the weaker one coasts. Moving to a single-leg variation makes that imbalance impossible to hide. You will quickly realize if your left side is lagging behind your right, or if your lower back is trying to take over the work that your hips should be handling.
The list below outlines fifteen ways to adjust, load, and complicate the single-leg bridge. Some are simple biomechanical shifts, while others require specific equipment. The goal is to provide a progression that lasts for months, not just days. Start where your current strength allows, master the form, and only then look to add intensity. The glutes are stubborn muscles—they respond best to variety and tension, not just repetition.
1. The Standard Single-Leg Bridge
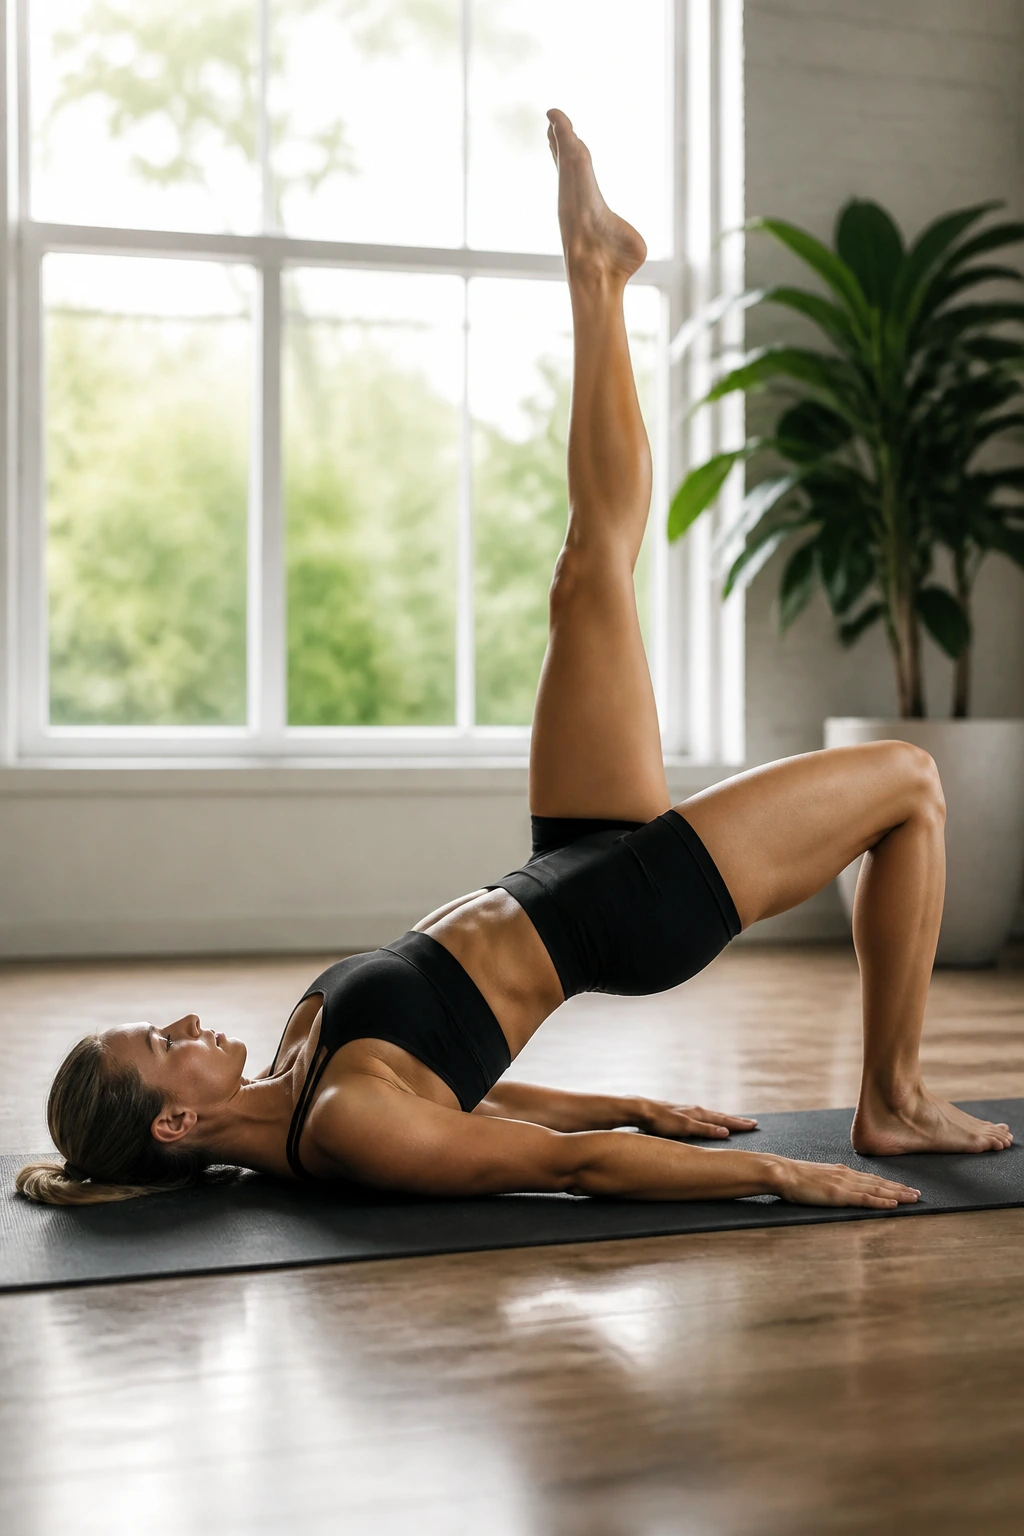
This is the foundational movement. If you cannot do this with perfect form, you should not be adding weights or complexity to the other variations. Lie flat on your back with your arms out to your sides for stability. Bend one knee so your foot is flat on the floor, directly under your knee. Extend your other leg straight out into the air, keeping it locked or slightly soft.
Mastering the Setup
Drive through the heel of the planted foot. Do not push through your toes, or you will shift the tension to your quads and knees. As you lift your hips, aim for a straight line from your shoulder to your knee. Squeeze the glute of the working leg as hard as you can at the top. Do not hyper-extend your lower back. If you feel your spine arching, you have gone too high. Stop once your hips are level.
Why This Works
The primary benefit here is simplicity. You remove one point of contact, forcing the working glute to stabilize the pelvis against gravity. It is the purest way to assess your starting point. If your hips wobble or dip to one side, that is a clear signal that your glute medius and core need more work before you try any advanced variations.
2. Elevated Single-Leg Bridge
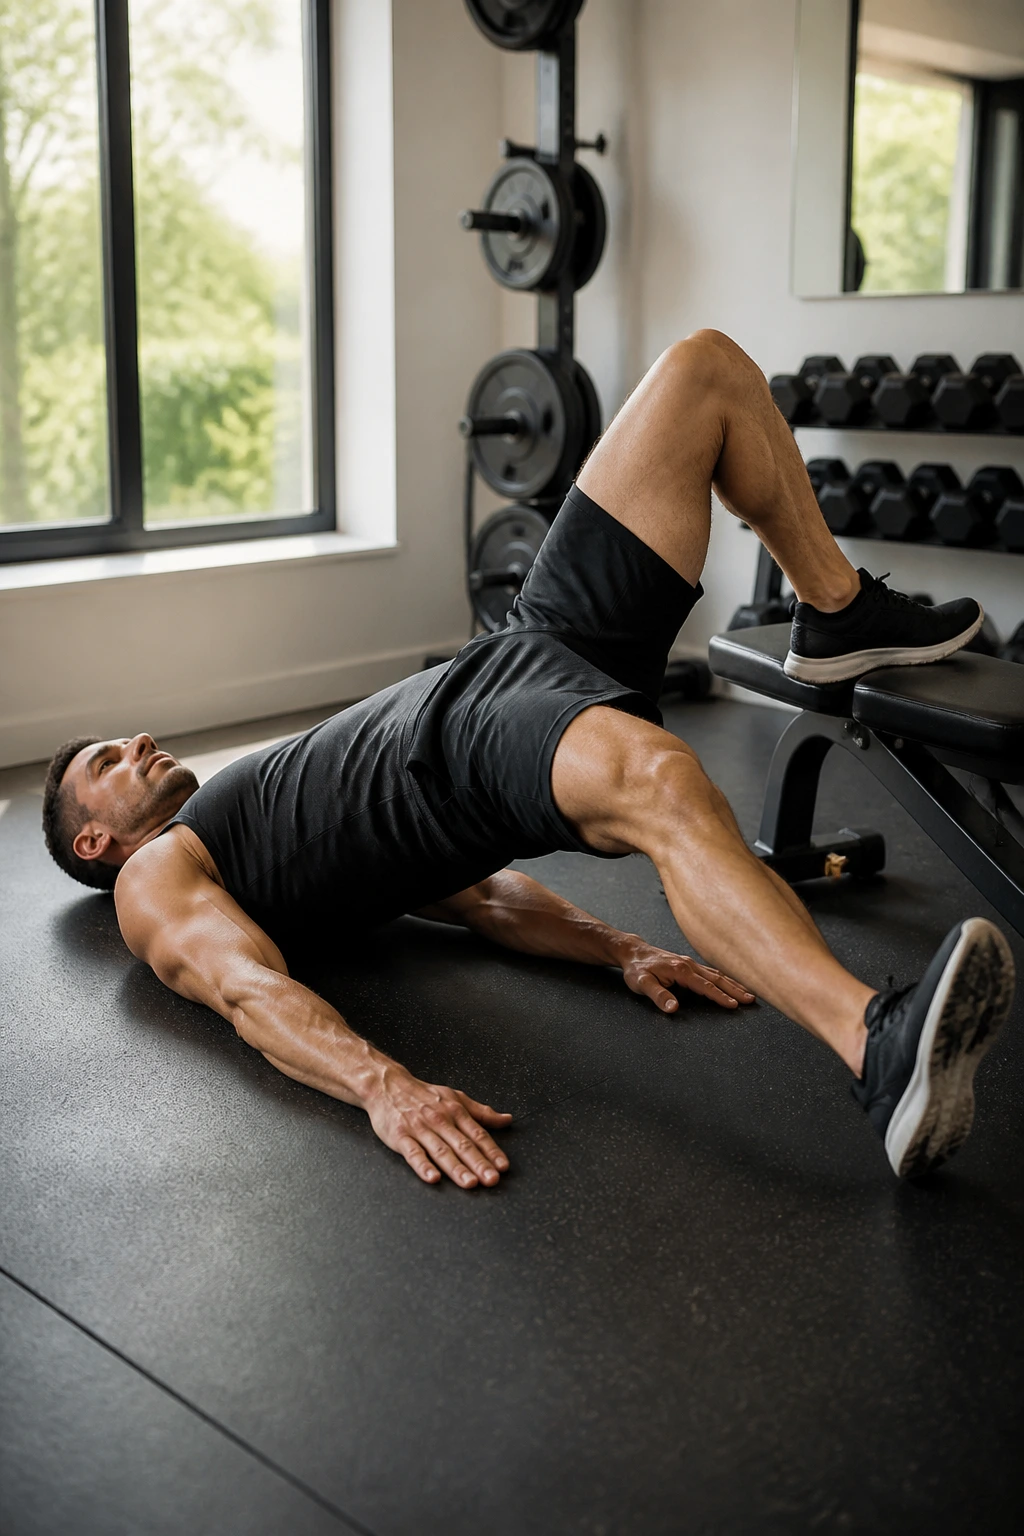
Once the floor variation feels manageable, you need to increase the range of motion. By placing your working foot on a bench, a sturdy box, or even a couch cushion, you force your glute to travel through a deeper stretch at the bottom of the movement. This extra depth recruits more muscle fibers.
Execution Cues
Place your heel on the elevated surface. Keep your hips square throughout the entire range of motion. As you lower your hips, try to touch your glute just barely to the floor before driving back up. The extra distance adds time under tension, which is a key driver for muscle growth. Keep your arms anchored to the ground to prevent your torso from twisting as you fatigue.
Common Mistakes
People often let their knee cave inward when they add elevation. Fight to keep your knee aligned over your second toe. If your knee drops inward, your glute is not firing correctly, and you risk putting unnecessary torque on your knee joint. Use a mirror if you are struggling to keep your alignment true.
3. Weighted Single-Leg Bridge
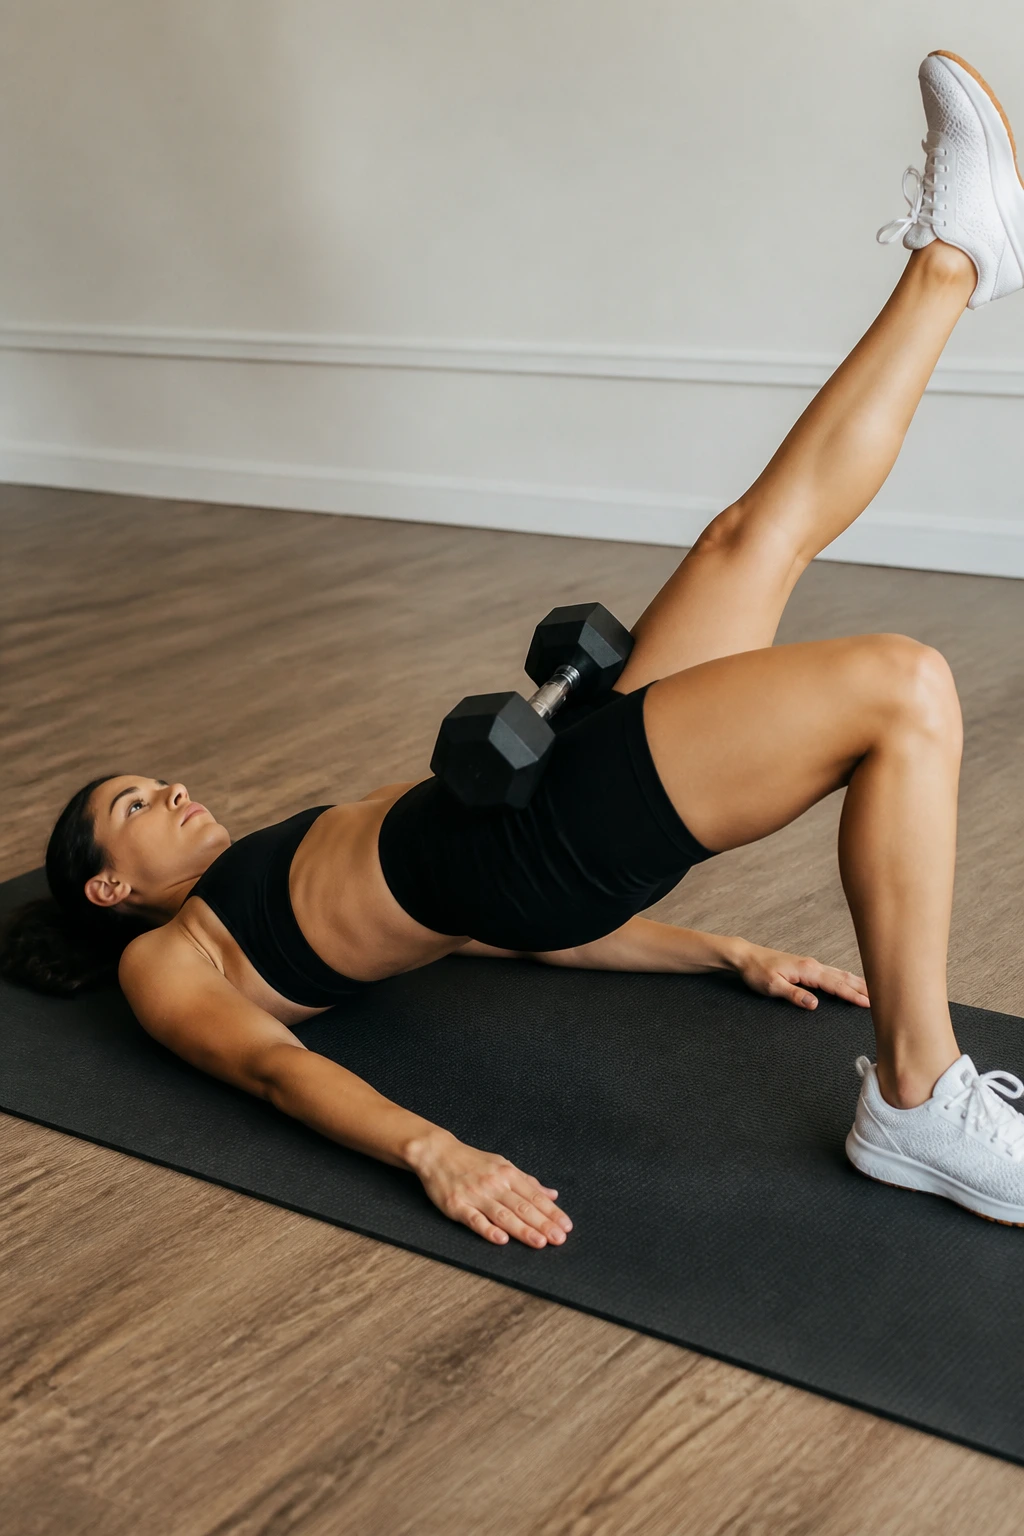
Adding external load is the most direct way to drive strength gains. You do not need a fancy barbell setup for this. A simple dumbbell or kettlebell placed across the crease of your hip is sufficient. The weight creates a vertical vector that your glutes must overcome.
Weight Placement Strategy
Hold the weight firmly with both hands to keep it from sliding. You want the weight sitting right on your hip bone—not your belly button, and not your thigh. Placing it on the belly will make breathing difficult and uncomfortable. If you are using a heavy plate, wrap it in a towel first; metal plates digging into your hip bones will distract you from the actual lift.
How to Progress
Start light. A ten-pound dumbbell feels much heavier when you are balancing on one leg than it does when you are doing a floor press. Focus on a controlled descent. Lower the weight over three seconds, then explode upward in one second. This tempo forces your muscles to resist gravity for longer, which makes the weight feel heavier than it actually is.
4. Single-Leg Bridge March
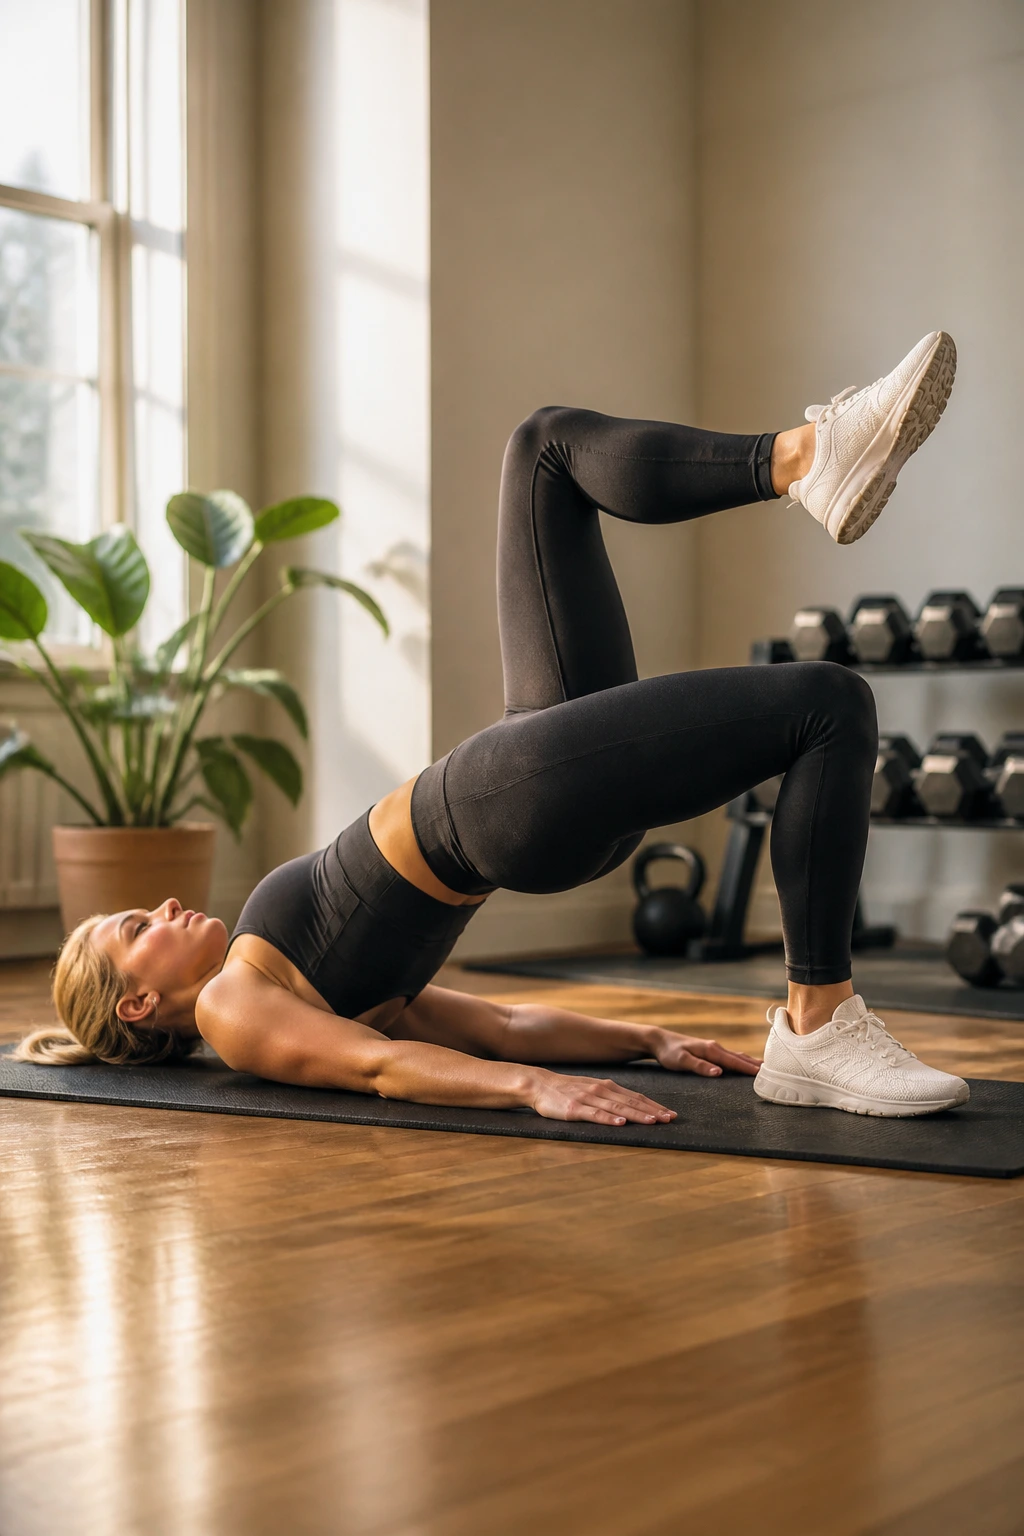
This variation introduces a dynamic element that challenges your core stability more than a static hold. You begin in a standard bridge position with both feet on the floor. Lift your hips, then lift one foot off the ground. Now, while keeping your hips high and level, switch legs in the air—bring the working leg down and lift the other.
The Anti-Rotation Challenge
The goal of the march is to keep your hips perfectly level. Every time you switch legs, your hips will want to drop or rotate toward the side of the raised leg. Fight that rotation. Think of your pelvis as a tray of water you are trying not to spill. Your deep core muscles, specifically the obliques and transverse abdominis, will scream as they work to lock your torso in place.
When to Use This
This is an excellent movement for pre-activation before heavy compound lifts like deadlifts or squats. It ensures your core is awake and your glutes are primed to fire. Do not rush the movement. A slow, deliberate march is far more effective than a frantic, unstable one.
5. Single-Leg Bridge Hold
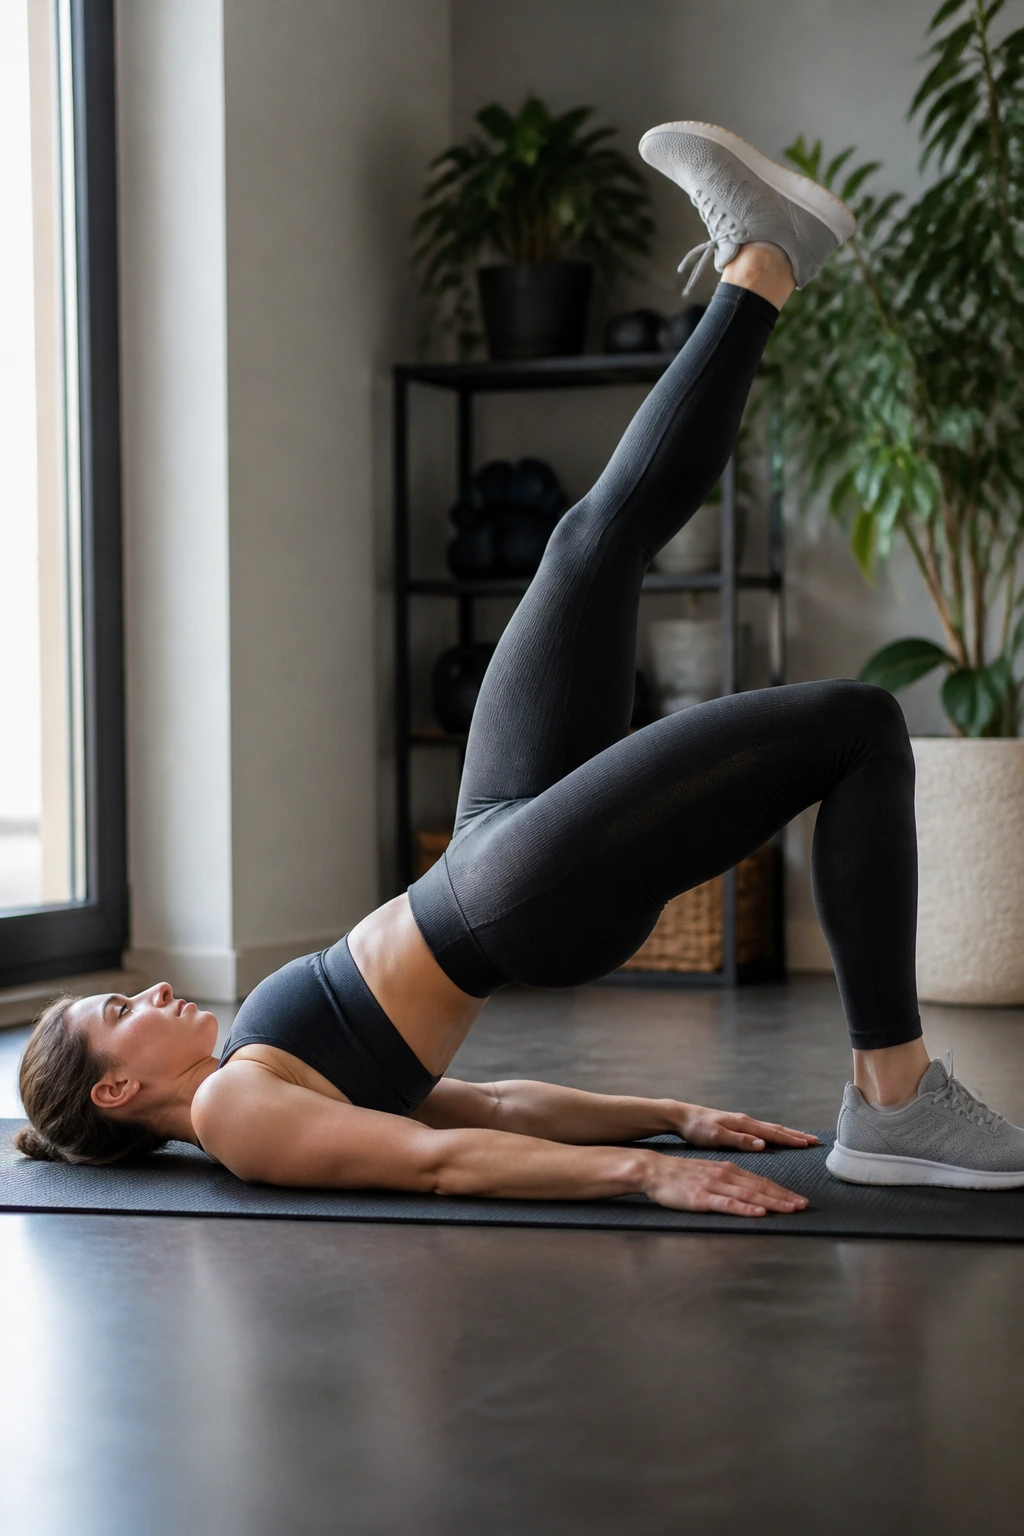
Sometimes, the best way to build strength is to stop moving entirely. The isometric hold is deceptively simple. You lift your hips into a bridge and you stay there. There is no rep count, only a clock. This eliminates momentum and forces your muscle fibers to sustain a maximal contraction.
Why Isometrics Matter
When you move, you naturally find “rest” spots in the range of motion. During a hold, you cannot rest. You are forced to maintain tension at the peak, which is exactly where most people are weakest. You will likely feel a cramp in your hamstring—this is normal. It usually means your glutes are struggling to take over the primary load, and the hamstring is overcompensating.
Pro Tip for Success
If you cramp, bring your heel slightly closer to your glute. If you still cramp, it is a sign that your glute-to-hamstring recruitment ratio is off. Focus on tucking your pelvis (a slight posterior pelvic tilt) to engage the abs. This forces the glutes to do more of the work and relieves the hamstrings.
6. Single-Leg Bridge with Resistance Band
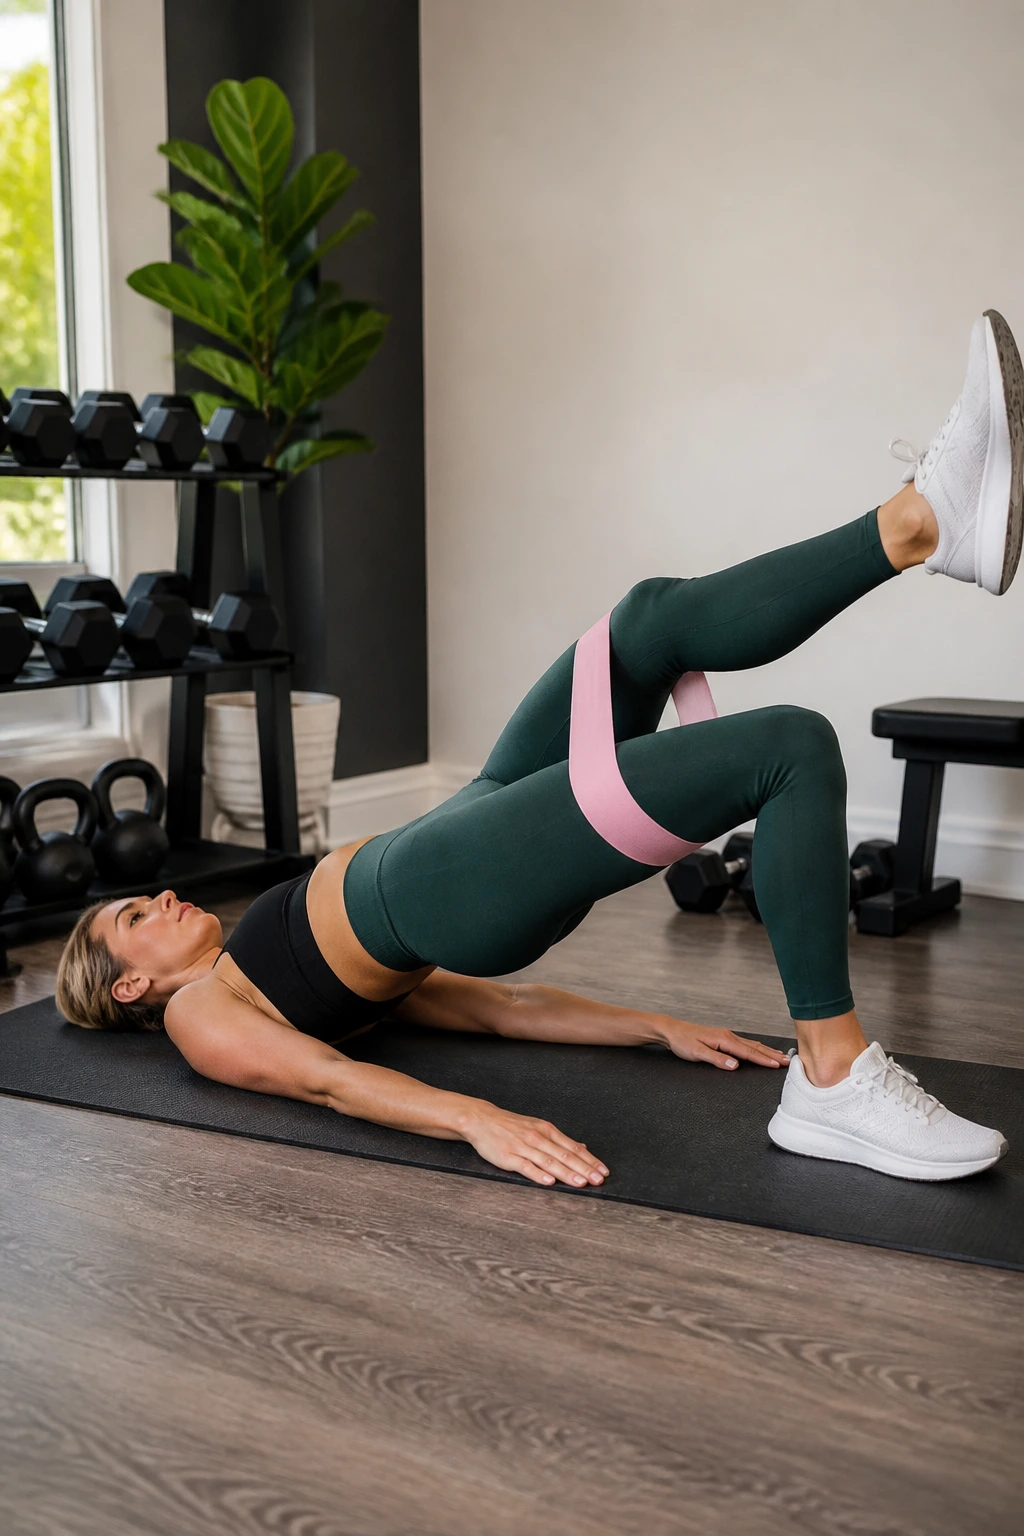
Adding a resistance band around your knees introduces abduction into the movement. Your glutes are responsible for hip extension (the bridge) and hip abduction (moving the leg away from the midline). By forcing your knees out against the band, you activate the glute medius and minimus—the muscles responsible for hip stability and the “side” curve of the hip.
Placement Matters
Place the band just above your knees. Do not put it on your ankles; the leverage makes it too difficult to maintain good form. As you lift into your bridge, press your knees outward into the band. You should feel the burn not just in your glutes, but specifically on the outer part of your hip.
The Sensory Check
If you are doing it right, your knees should feel like they are fighting to come together. If you notice your knees touching, you aren’t fighting the band hard enough. Keep the tension high. This variation is particularly good for those who struggle with “knee cave” during squats.
7. Single-Leg Bridge with Slider
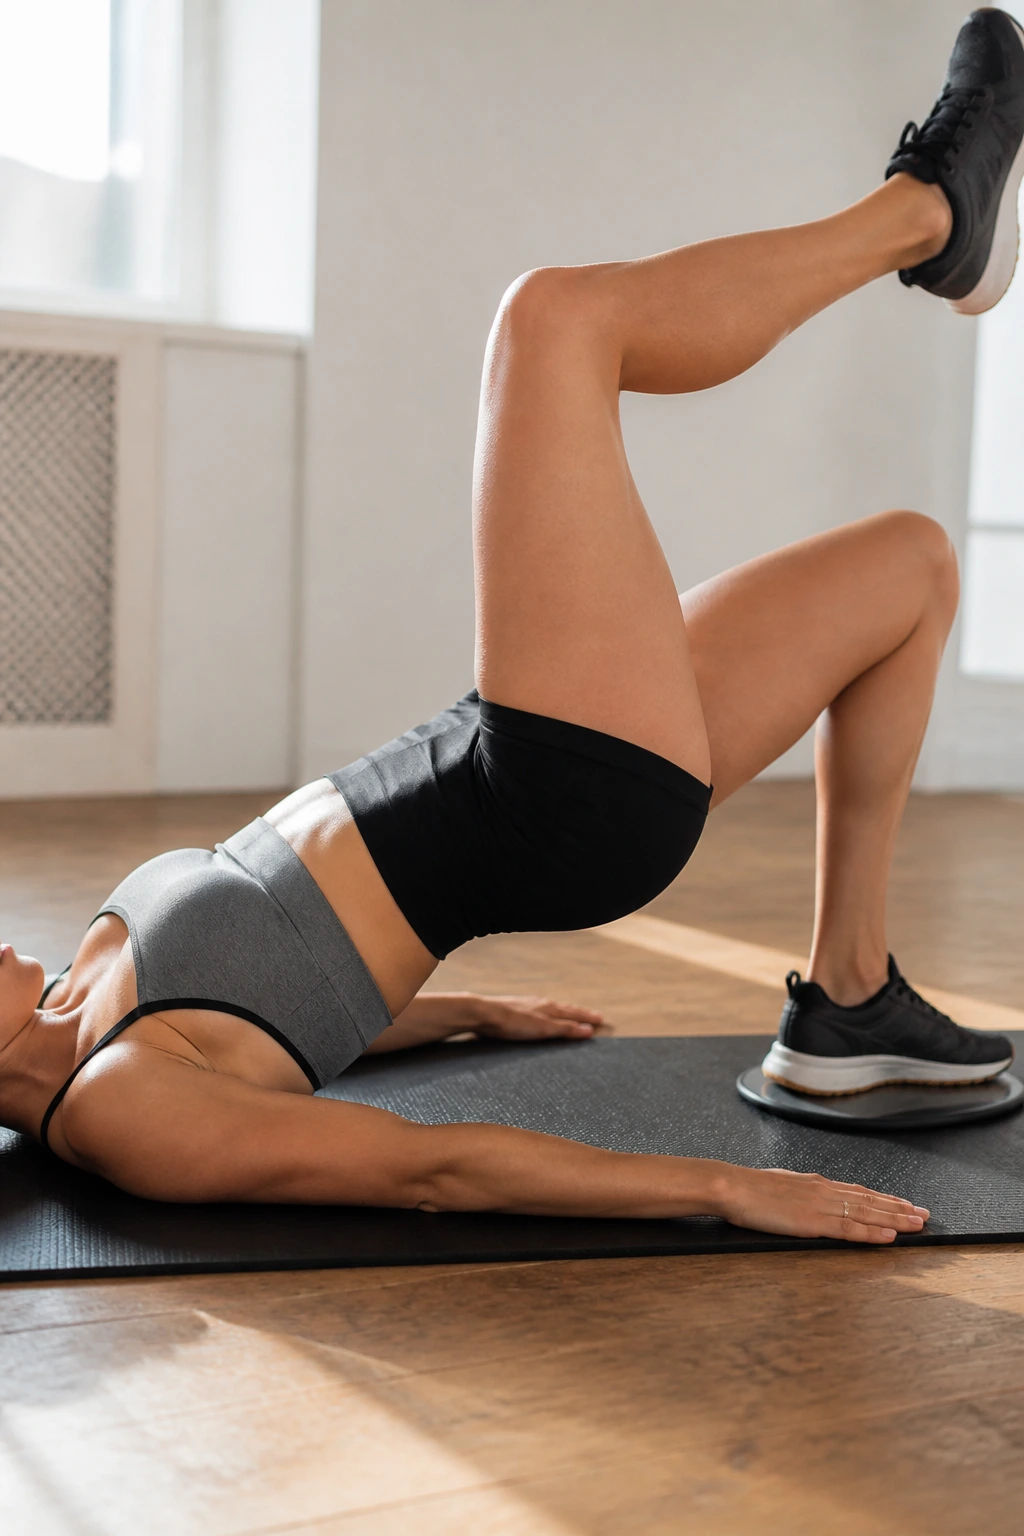
If you have access to a furniture slider, a towel (on a hardwood floor), or a paper plate (on carpet), this variation is essential for hamstring development. It changes the bridge from a pure glute exercise to a hinge-based challenge that puts your hamstrings at a significant mechanical disadvantage.
The Motion
Start with one foot on the slider and one foot in the air. Lift your hips. While keeping your hips high, slowly slide your foot away from your body until your leg is almost straight. Then, pull it back in. This is a bridge combined with a leg curl. It is exceptionally difficult.
Troubleshooting the Slide
Most people will feel their lower back arch as their leg extends. Do not let this happen. If your back starts to arch, your abs have given up. Pull your leg back in sooner. You are better off doing two inches of range with perfect form than a full extension with a compromised spine.
8. Pause-at-the-Top Single-Leg Bridge
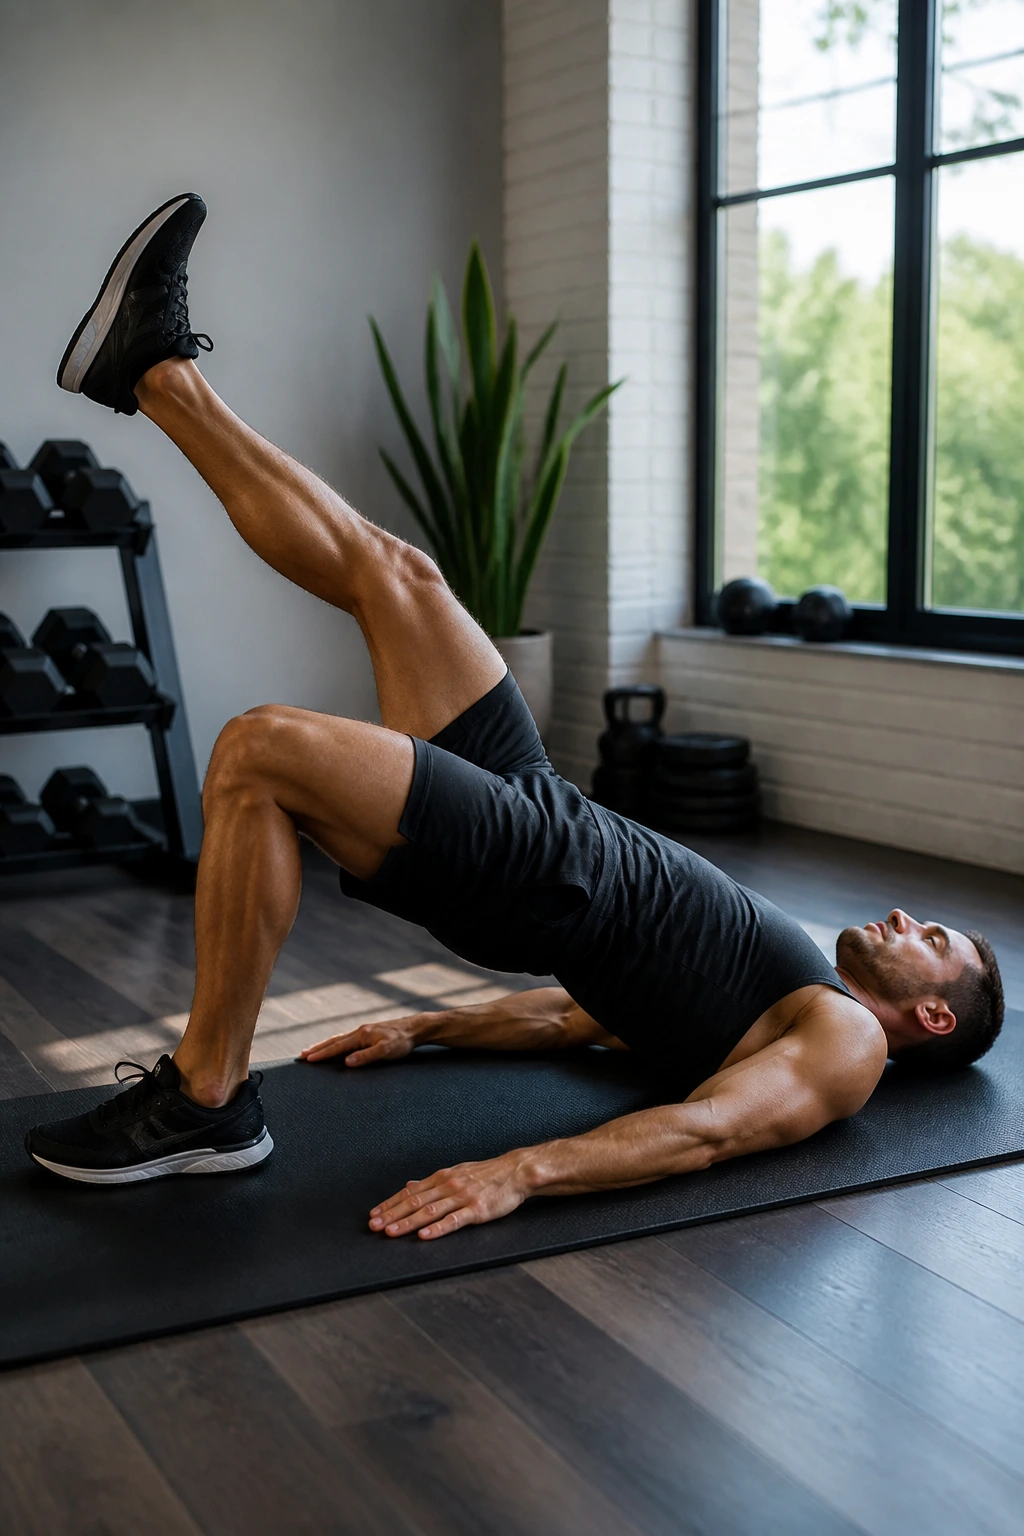
Speed is the enemy of glute development in this exercise. By adding a mandatory pause, you remove the benefit of the stretch reflex—the bounce you get at the bottom of a movement. You are forced to generate force from a dead stop at the hardest part of the range.
How to Implement
Lift your hips, and hold the top position for two to three seconds. Squeeze your glute as hard as you possibly can. Imagine you are trying to crush a walnut between your cheeks. That is not just a cliché; that specific mental cue helps with neurological recruitment.
The Tempo Breakdown
Many people rush the drop. Don’t. Lower yourself slowly, but do not relax at the bottom. Keep your hips hovering just a millimeter off the floor before driving back up for the next rep. This ensures your glutes are under constant, unbroken tension from the first rep to the last.
9. B-Stance Glute Bridge
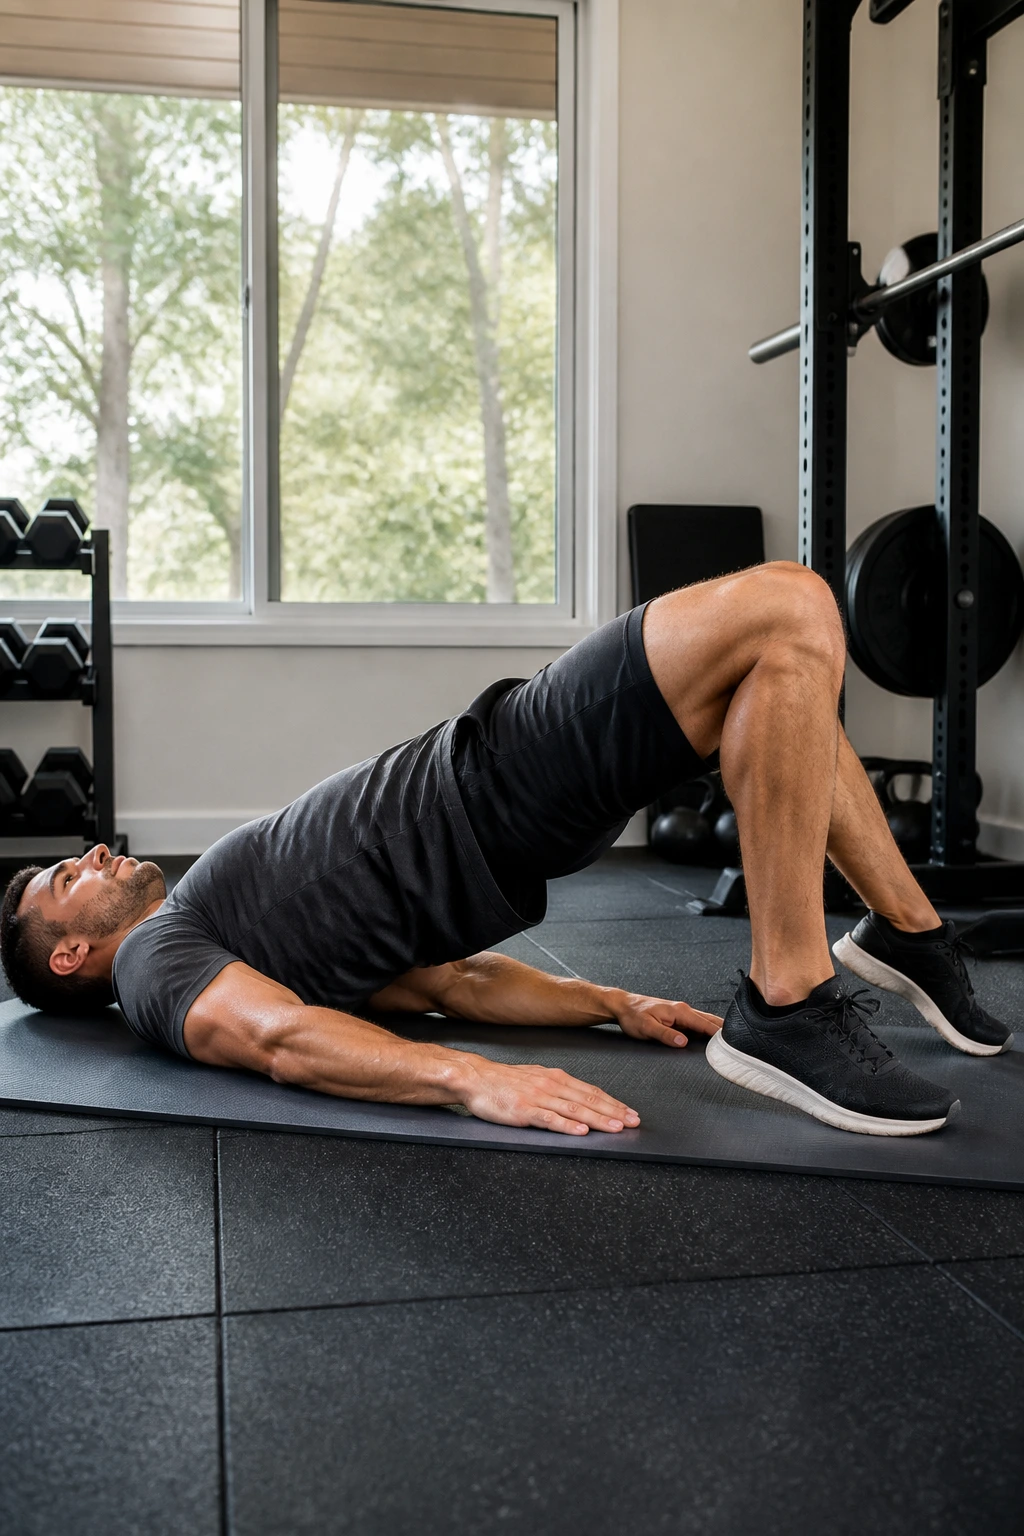
The B-stance is a bridge between a two-legged and a one-legged bridge. It is perfect if you find the true single-leg version too difficult or if your balance is a limiting factor. Place one foot flat on the floor and the other foot on its toes (the ball of the foot), slightly behind your heel.
Why Use a B-Stance?
The “cheat” leg (the one on its toes) provides just enough stability to help you balance, but not enough to take the weight off your working glute. It allows you to overload the working leg while keeping your hips perfectly square. It is a fantastic bridge (no pun intended) for people working toward full single-leg competency.
The Weight Shift
Even though your second foot is on the floor, you must mentally act as if it is not there. Focus 90% of your weight on the full foot and only 10% on the toes of the other. If you find yourself pushing hard with the toes, stop. You are defeating the purpose of the unilateral work.
10. Single-Leg Bridge with Med Ball Squeeze
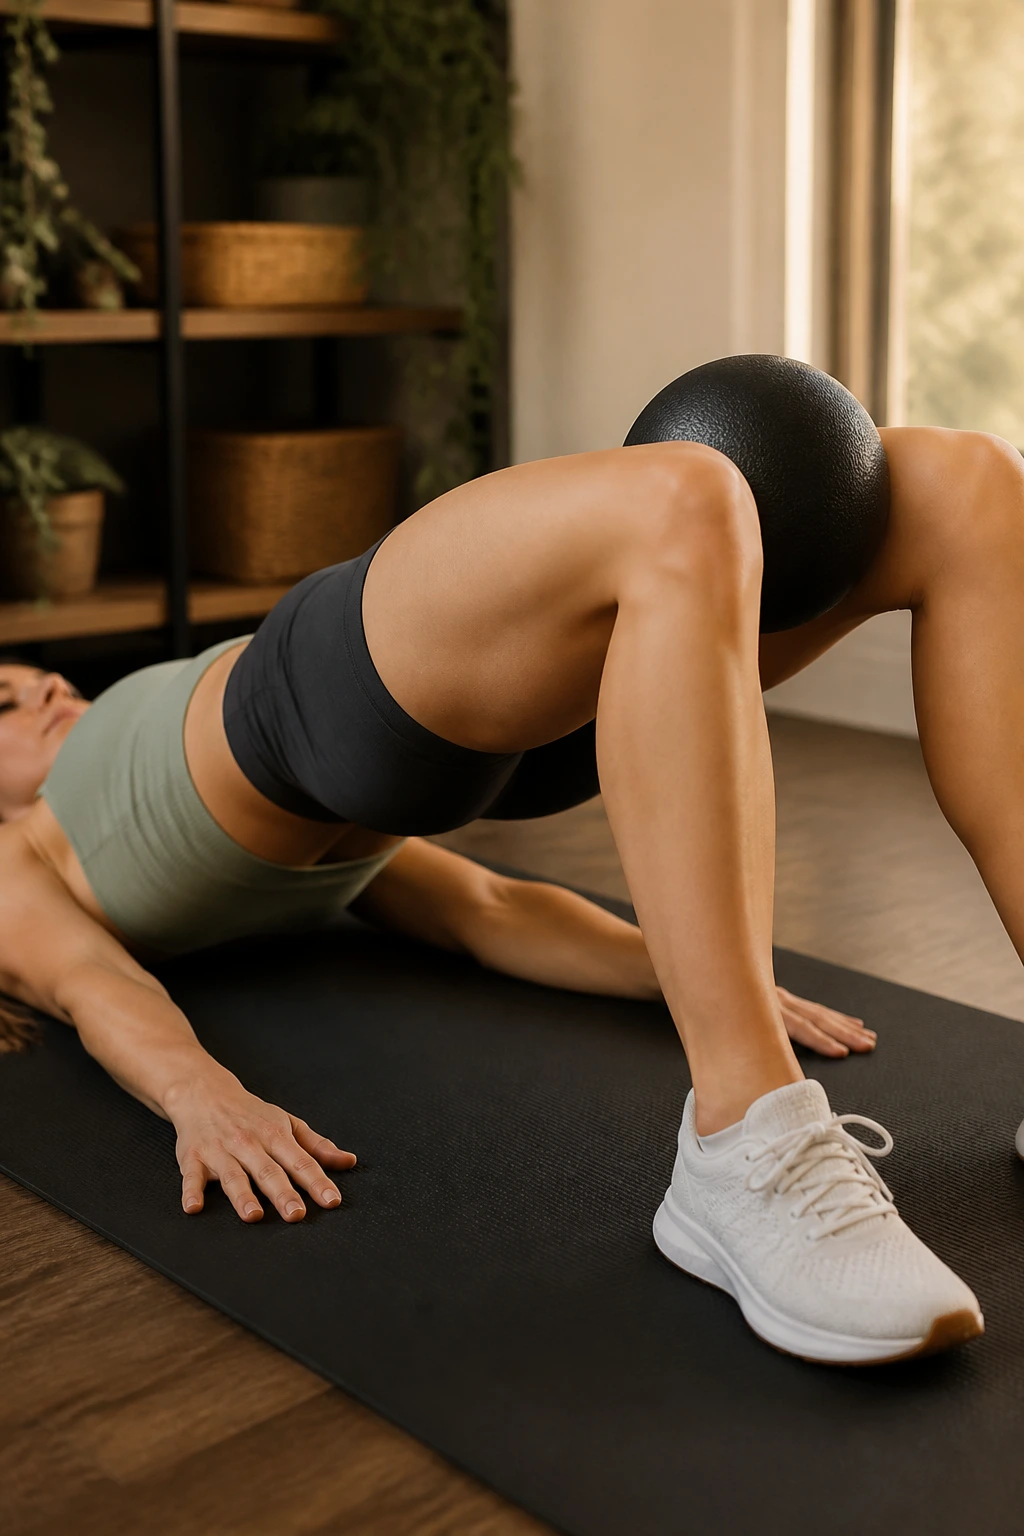
This variation focuses on the adductors (inner thighs) and core integration. Place a small medicine ball or a yoga block between your knees while performing the bridge. The key here is not just the bridge, but the active effort to crush the object between your knees while maintaining the lift.
The Kinetic Chain
When you adduct your legs (squeeze inward), you stabilize the pelvis from the inside out. This makes the hip extension stronger and safer. It prevents the hip from shifting and requires you to hold a deep core brace. It is a multitasking exercise that lights up the hips and inner thighs simultaneously.
The Warning
Be careful with ball selection. If you use a heavy medicine ball, it will roll and frustrate you. A soft, squishy ball or a firm yoga block is better. The goal is consistent pressure, not the weight of the object. Keep the squeeze steady throughout the entire up-and-down motion.
11. Single-Leg Bridge with Offset Weight
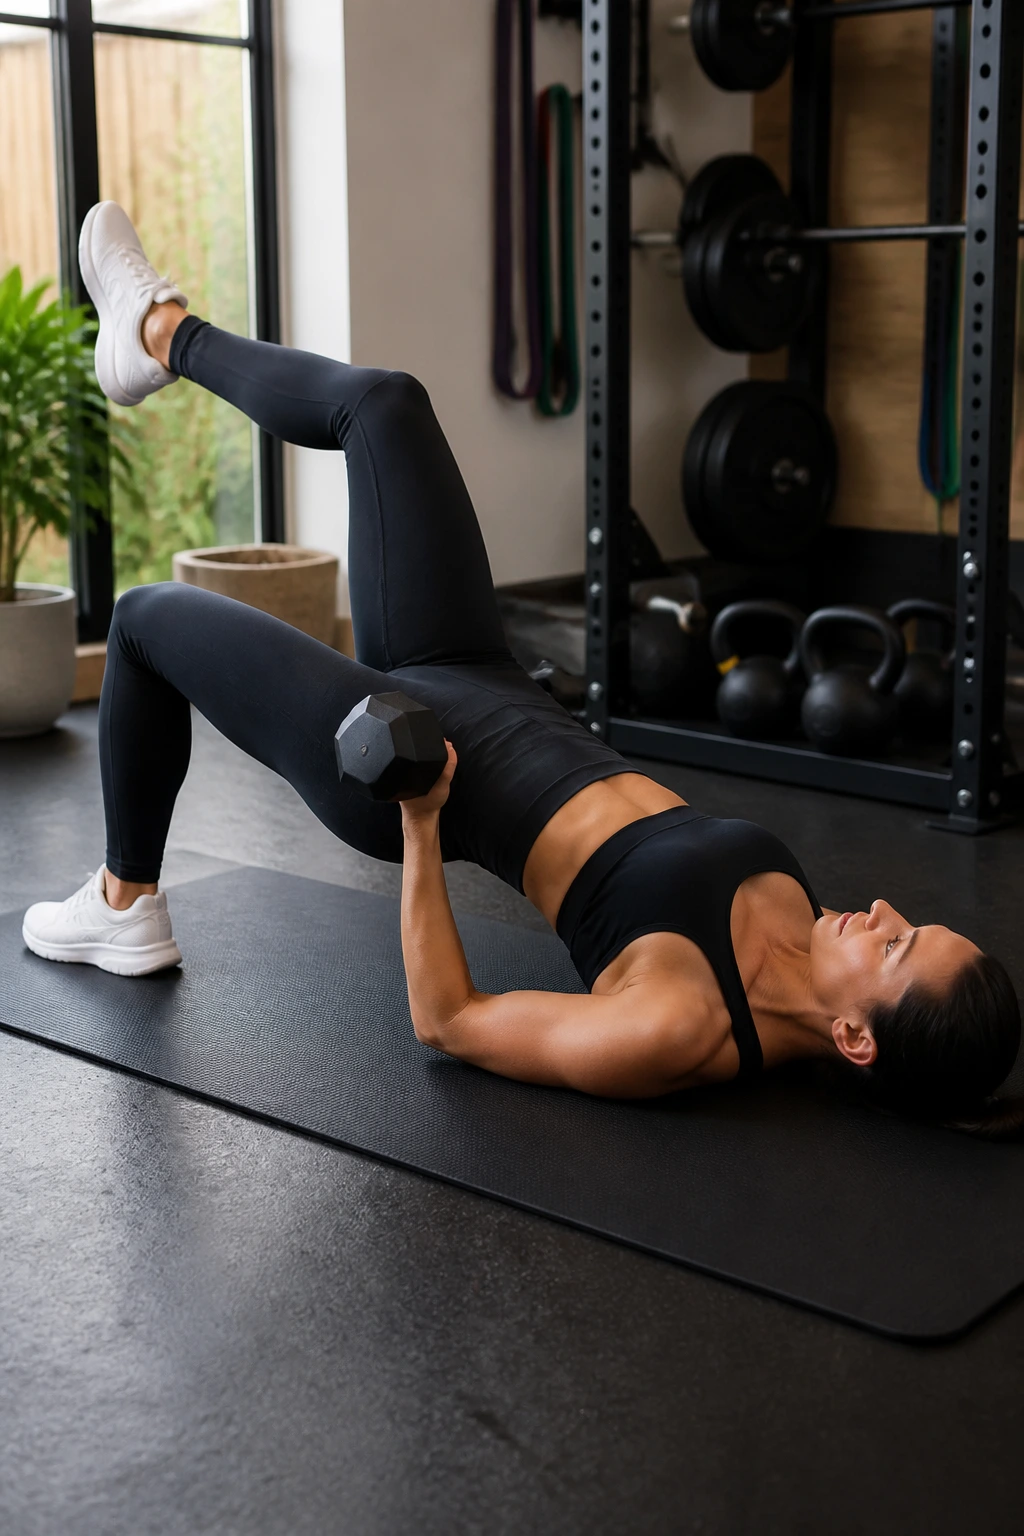
Most people hold a weight at their hips. If you want to increase the stability challenge, hold a dumbbell or kettlebell on only one side of your body. If you are bridging with your left leg, hold the weight in your left hand, pressing it into your left hip.
Why Offset Loading Works
This creates a rotational force—the weight will try to pull you off-balance. Your obliques and glutes must work overtime to prevent your hips from tipping. It simulates real-life scenarios, like carrying a heavy grocery bag, where your body has to stabilize under asymmetrical load.
Proper Execution
Keep your elbow tucked and the weight pressed firmly against your hip. Do not let the dumbbell dangle, or it will swing and throw off your rhythm. Control is everything here. If you are wobbling, lower the weight. You should feel your side-core (the side holding the weight) working as hard as your glute.
12. Single-Leg Bridge with Leg Extended
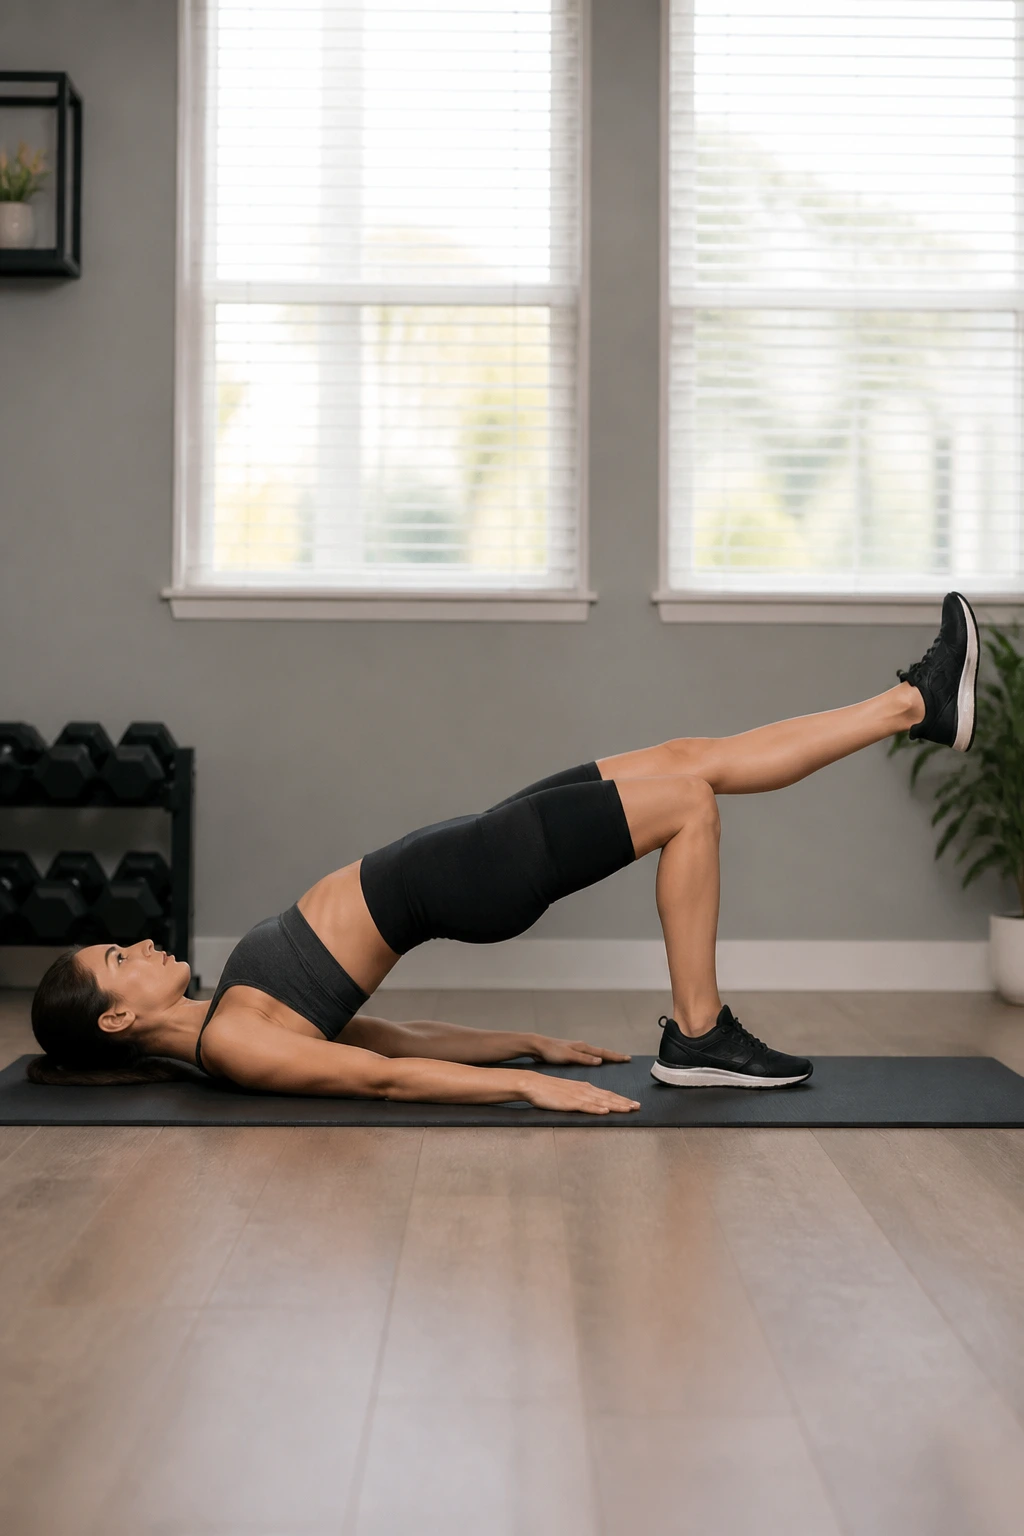
Instead of having your non-working leg bent, keep it perfectly straight and extended forward throughout the entire movement. This increases the lever length of your body. A longer lever means your core has to work significantly harder to keep your torso straight.
The Physics of the Movement
When your leg is straight out, your center of gravity shifts. Your core has to act as a counterweight. This variation is particularly brutal on the upper abs and lower back, as they must prevent you from arching during the lift. It is a great way to combine glute work with core strength.
The Visual Cue
Watch your non-working leg. It should not be flopping around. Keep it straight, quads engaged, and toes pointed. If that leg starts dropping as you get tired, it’s a sign your core stability is failing. Focus on maintaining that straight, locked-out leg position from start to finish.
13. Single-Leg Bridge on Unstable Surface
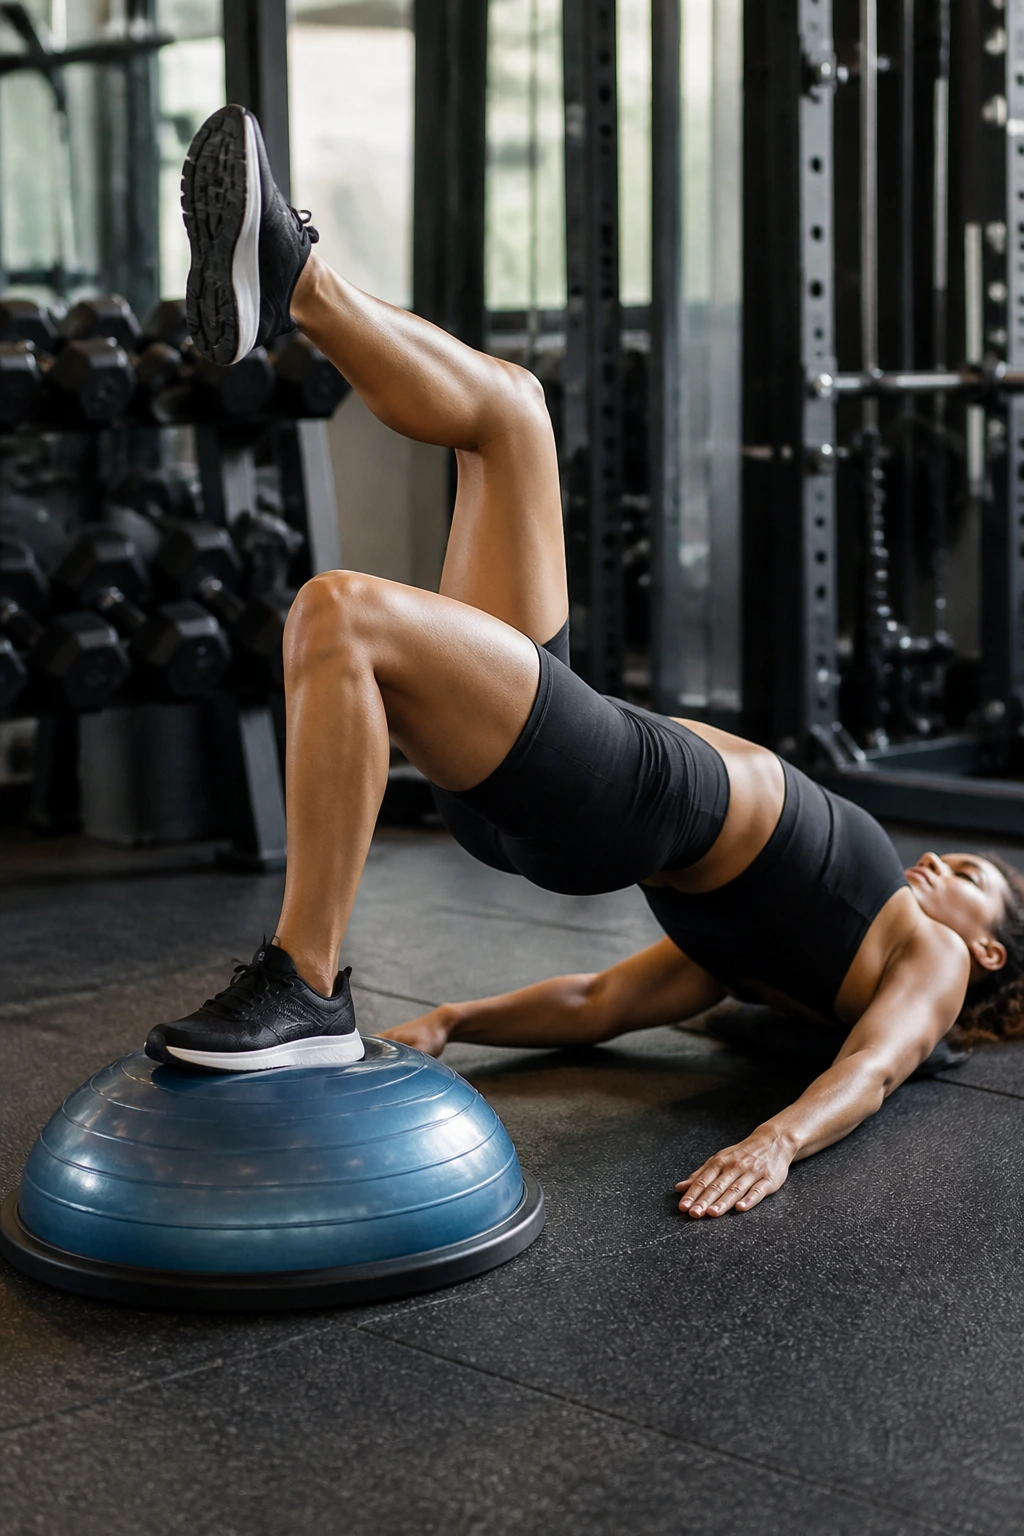
This is an advanced variation. Use a Bosu ball (dome side up) or a foam pad. The instability forces your nervous system to fire more stabilizer muscles. You will notice that you cannot lift as much weight or do as many reps as you can on the floor—this is perfectly normal.
Managing Instability
Do not try to move fast. Speed on an unstable surface is a recipe for a twisted ankle or a strained knee. Slow down. Focus on the connection between your foot and the surface. You will feel your ankle, calf, and hip shaking—that is the neuromuscular system learning how to stabilize the joint.
Who Is This For?
This is not for beginners. If you haven’t mastered the floor-based single-leg bridge, do not get on a Bosu ball. It is meant for athletes or individuals looking to improve joint proprioception and balance. Treat it as a stability drill, not a heavy lifting day.
14. Tempo Single-Leg Bridge
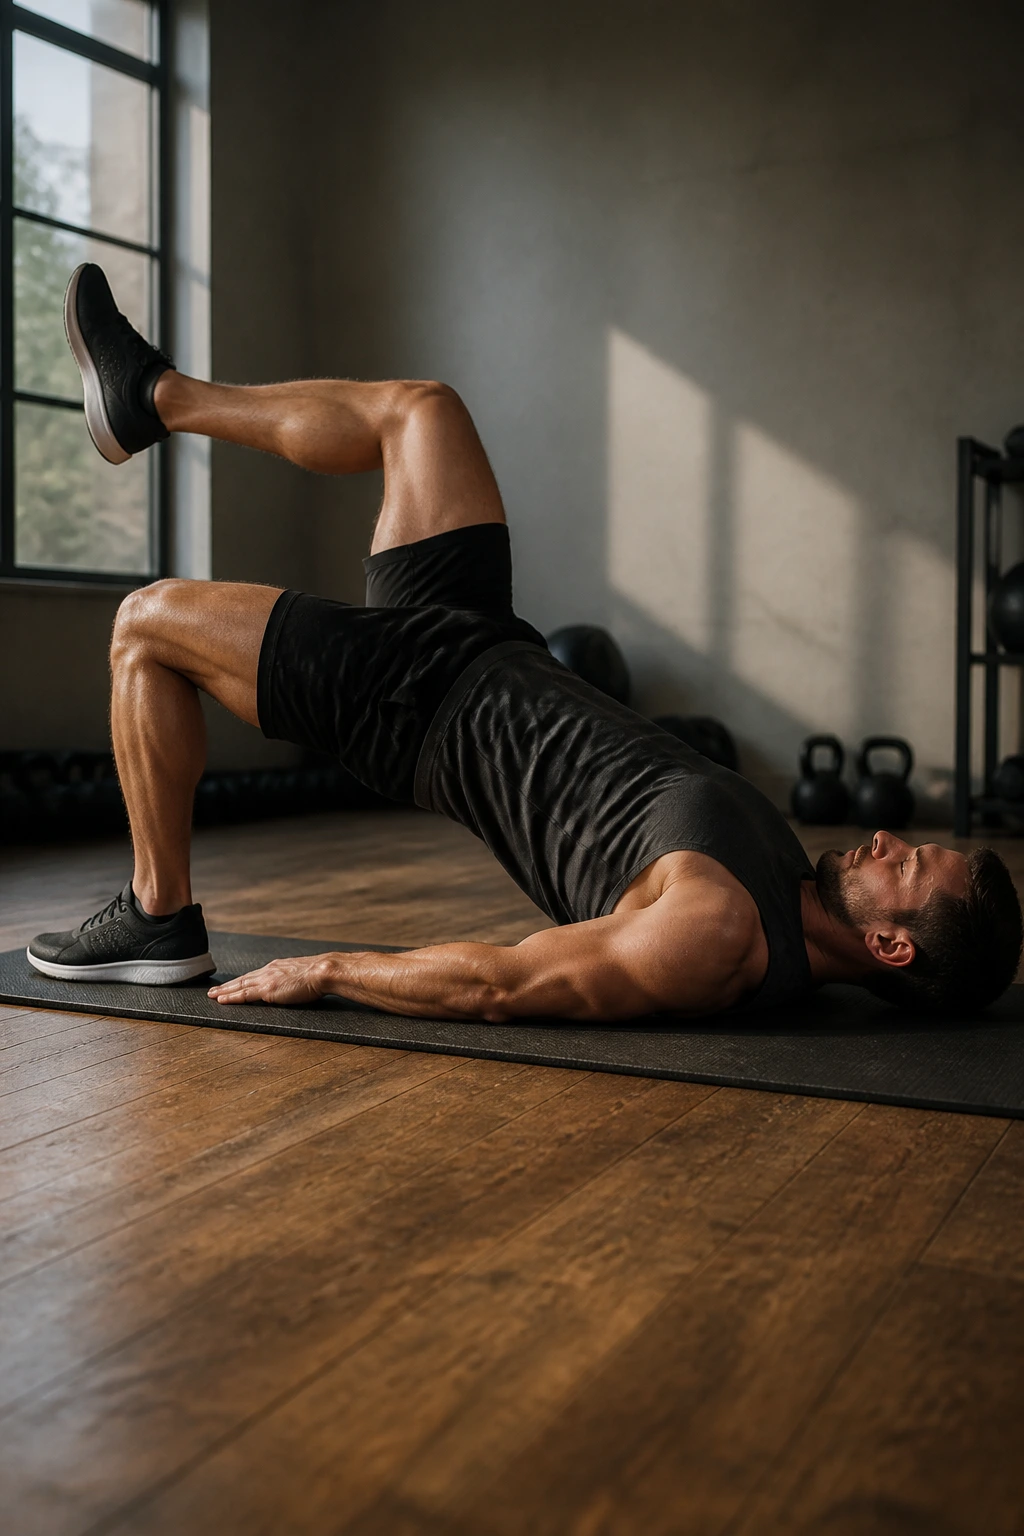
Tempo training is the quickest way to turn a “light” bodyweight exercise into a heavy, taxing one. Forget counting reps—start counting seconds. A standard tempo might be a 3-second ascent, a 2-second hold at the top, and a 4-second descent.
The Mathematical Pain
Let’s do the math. A standard rep might take 2 seconds total. A tempo rep takes 9 seconds. If you do 10 reps, you are doing 90 seconds of work instead of 20. Your muscles do not know how much weight you are lifting; they only know tension. This approach maximizes time under tension.
Keeping the Rhythm
It is very easy to cheat the tempo when it gets hard. You will naturally want to speed up the rep as you get tired. Fight that urge. Use a metronome app or count clearly in your head. The moment you lose the tempo is the moment you should end the set.
15. Single-Leg Bridge to Knee Drive
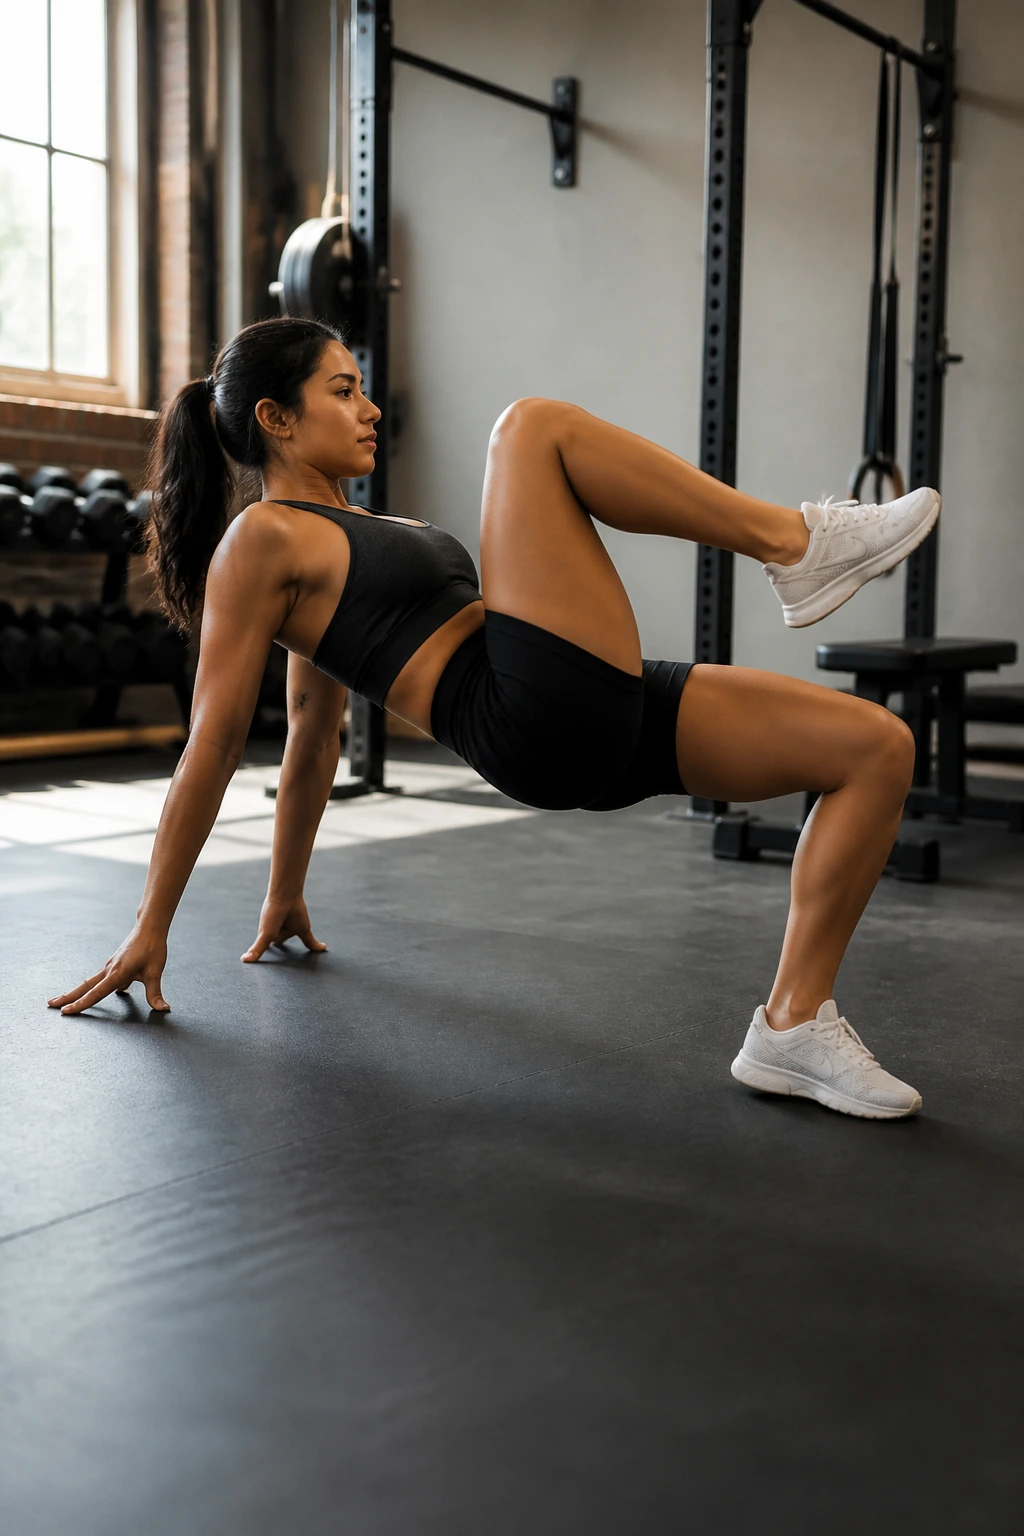
This variation moves from the bridge into a standing position or a high-knee position. As you reach the top of the bridge, drive your non-working knee up toward your chest in an explosive, controlled motion. This bridges the gap between static strength and dynamic power.
Why This Matters
Glutes don’t just exist to make us look good; they are the engines for walking, running, and jumping. The knee drive mimics the mechanics of sprinting. It trains your glute to extend the hip powerfully and then quickly recover.
The Full Range
Start at the bottom of the bridge. Drive up. At the very top, snap your non-working knee to your chest while balancing on the working leg. Return to the starting position with control. Do not just drop back down; descend with intention. This is a high-level coordination drill that will leave you breathless if you do it for high reps.
Final Thoughts
The beauty of the single-leg glute bridge is that it is a bottomless pit of potential progress. You do not need to go to a commercial gym to get strong hips and a powerful posterior. You do not need expensive machines. You just need a floor and a commitment to doing the work properly.
Consistency wins over intensity every time. If you try to jump into the most advanced variations on this list without building a rock-solid foundation, you will end up frustrated, unbalanced, and likely injured. Pick one or two variations that challenge you right now and stick with them for a few weeks. Focus on the squeeze, control the descent, and keep your pelvis level. Once that variation becomes easy, that is your green light to try the next one. Your glutes will thank you.
