



A flatter-looking stomach is usually won with better core control, not louder crunches. Pilates ball exercises for a flat stomach work because the ball adds a small dose of wobble, and wobble exposes every lazy rib flare, tilted pelvis, and sloppy exhale.
That sounds harsh. It is. But the ball is useful for that exact reason — you feel the deep abs switch on before the surface muscles start taking over. When the transverse abdominis, obliques, and pelvic floor work together, the midsection tends to look longer, tighter, and less puffed out.
I’m using “Pilates ball” loosely here to cover both the small soft ball and the larger stability ball, because both earn their place in a core routine. The small one is excellent for squeezes, bridges, and mat work. The bigger ball makes planks, roll-outs, and knee tucks far less forgiving.
Keep the tempo slow, breathe out on the hard part, and stop before your low back starts doing the work of your abs. A flat stomach is a sneaky thing — part strength, part posture, part not racing through the movement like it’s a cardio drill. The first exercise is the kind that looks easy and feels annoyingly honest.
1. Ball Squeeze Curl-Ups That Teach Your Midsection to Brace
This is the one I reach for when someone keeps yanking on the neck during crunches. A small Pilates ball between the knees gives the lower body something to organize around, and that matters more than people think. When the inner thighs gently press inward, the pelvis usually stays quieter and the ribs stop flaring as much.
Lie on your back with your knees bent, feet flat, and the ball placed between your knees. Exhale, press the ball lightly, and curl your head, shoulders, and upper ribs off the mat. Don’t chase height. Chase control.
What to Watch For
- Keep the chin softly tucked, not jammed to the chest.
- Press the ball at about 30 percent effort; this is not a death grip.
- Stop the curl when the shoulder blades just float off the mat.
- Lower slowly, one vertebra at a time.
Do not pull on your head. If your neck feels crowded, your abs have stopped helping and the shoulders are stealing the show. Eight to twelve slow reps is plenty.
2. Tabletop Toe Taps With the Ball Between Your Thighs
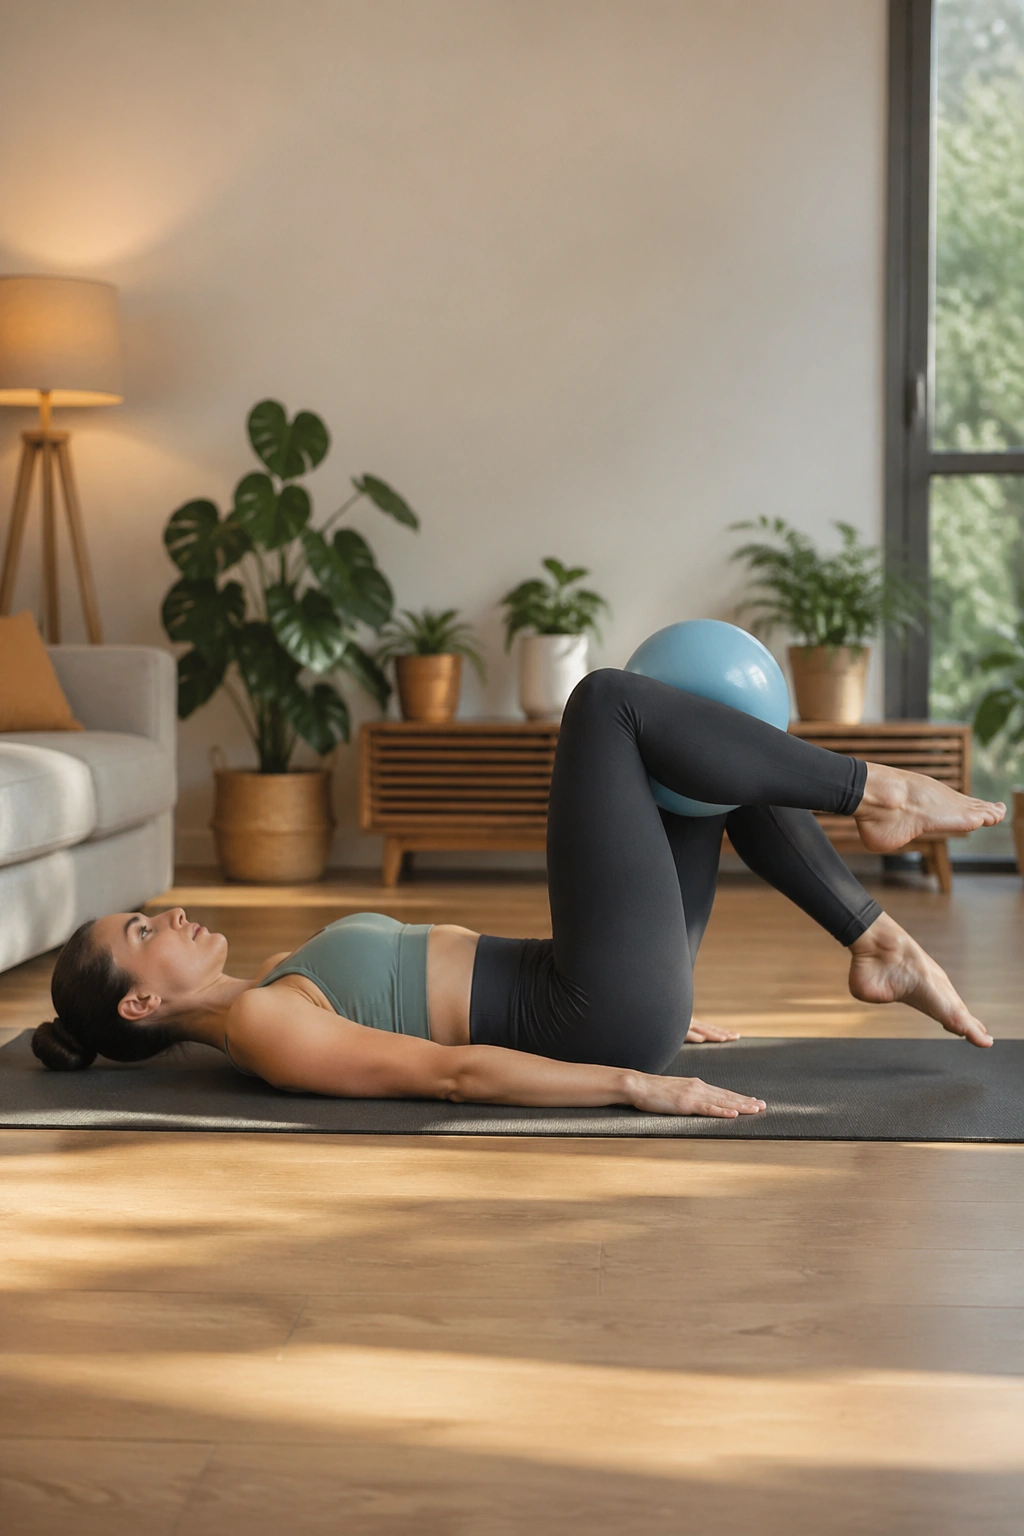
Why does a tiny ball make toe taps harder? Because it removes the little cheats that usually hide in the hips. The moment you squeeze the ball between your thighs, you can feel whether your pelvis is stable or if it’s rocking every time a leg moves.
Start on your back with the knees lifted over the hips in tabletop and the ball lightly held between the thighs. Keep the ribs heavy, then tap one toe to the floor and bring it back up. Alternate sides with a slow, quiet rhythm. The belly should stay flat and firm, not domed.
How to Use It
- Tap only as low as you can without the back arching.
- Exhale on each tap.
- Keep the knees over the hips, not drifting toward the chest.
- If the hips start shaking, shorten the range.
This move looks mild. It isn’t. Six to ten taps per side, done cleanly, will wake up the lower abs faster than a rushed set of fifty.
3. Cross-Body Dead Bug Presses
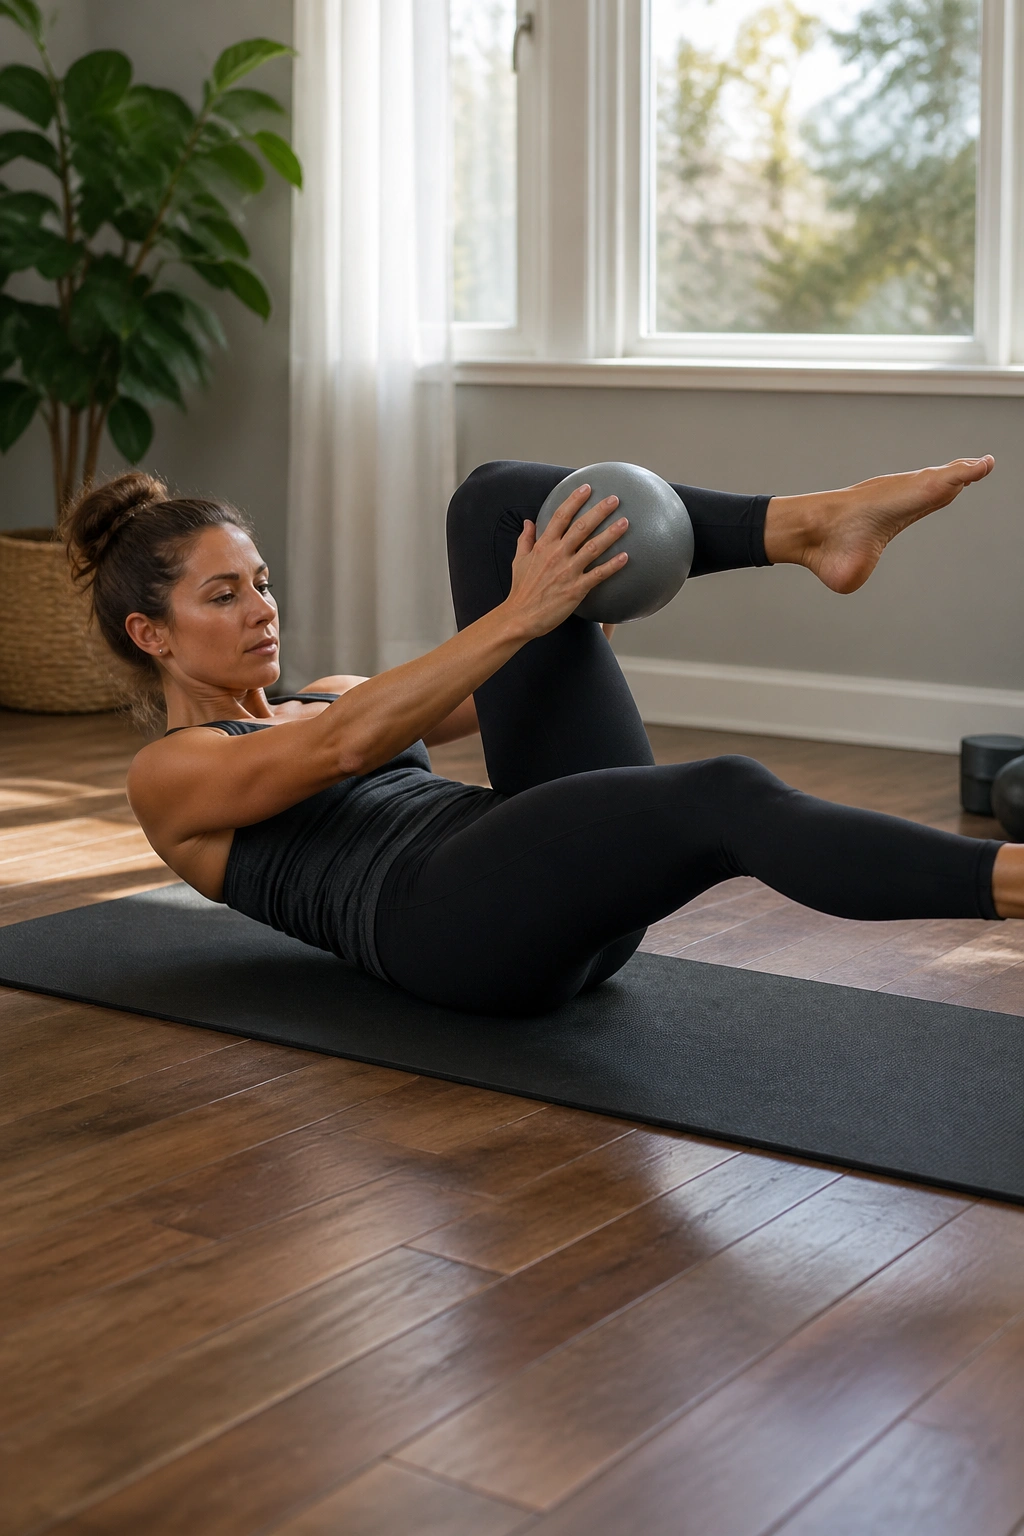
This one works because it connects opposite sides of the body. The ball gives your brain a target, and that target makes the trunk behave. If your goal is a flatter-looking middle, these cross-body patterns matter a lot because they train the waist to resist twisting.
Lie on your back and bring both legs into tabletop. Hold the ball between your right palm and left knee, pressing them together lightly. Then extend the right leg away while the left knee stays bent, and switch. The pressure from hand to knee should feel steady, not crushing.
The trick is to keep the lower back quiet while the limbs move. If the spine arches or the ribcage pops up, the rep is too big. Shorter is better here.
Eight slow switches on each side is a solid start. And yes, it’s boring if you rush it. Done slowly, it burns in exactly the right place.
4. The Hundred With the Ball Squeezed Between the Ankles
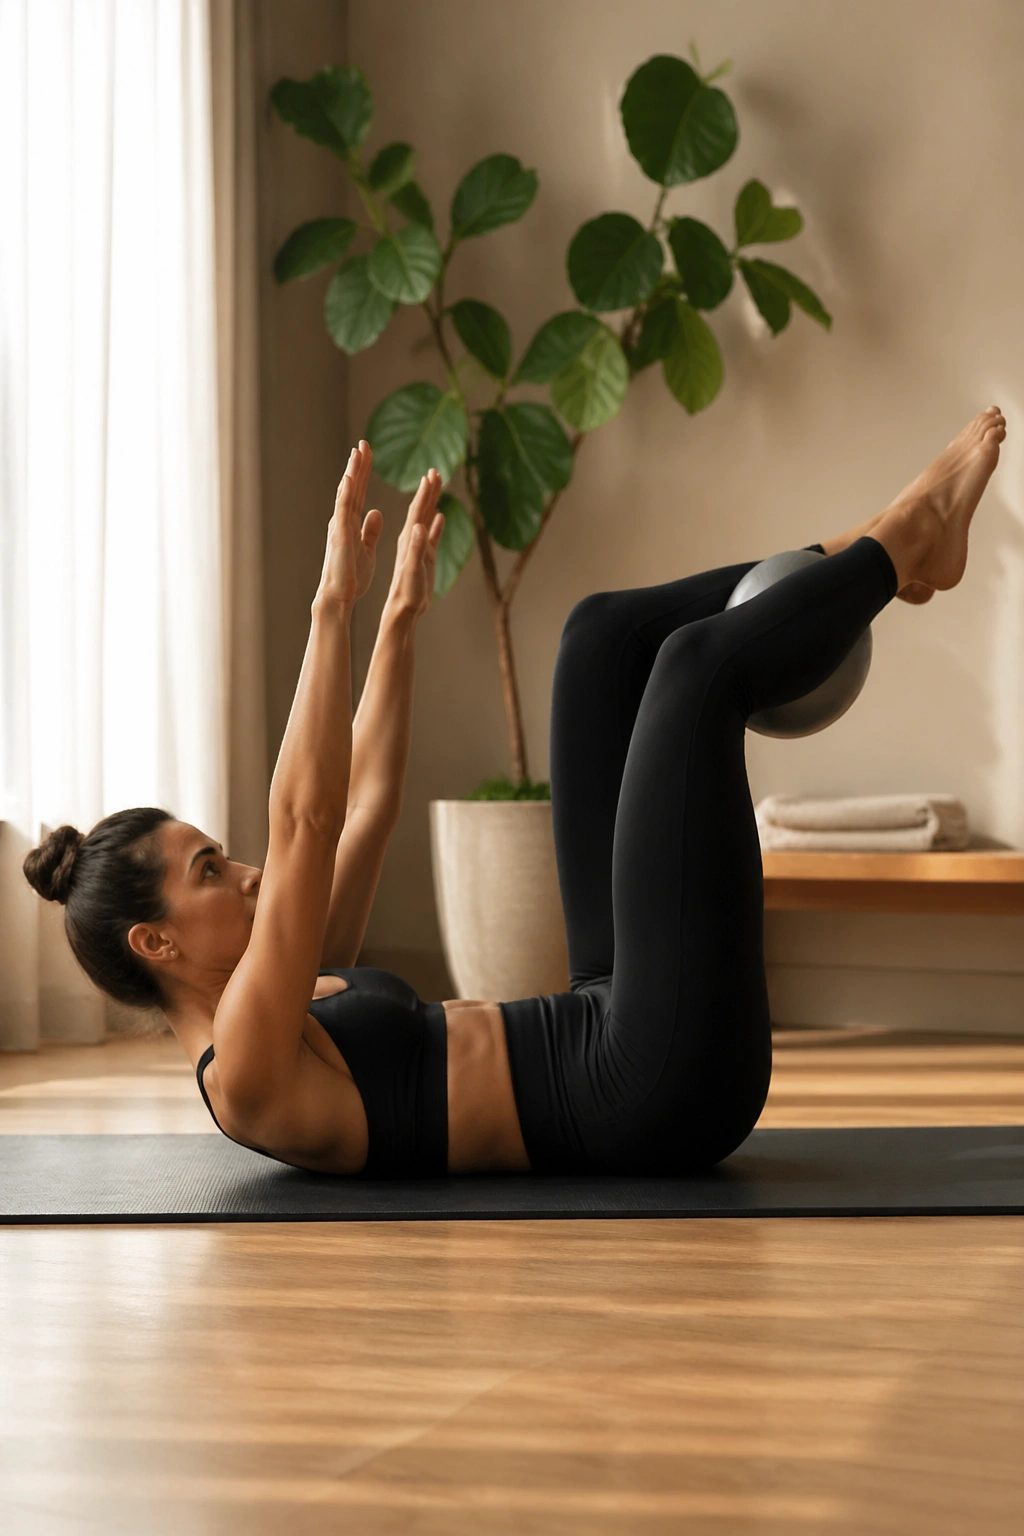
The Hundred gets a cleaner edge when you add a Pilates ball between the ankles. Suddenly the legs have to stay together, the inner thighs wake up, and the lower belly has to keep the pelvis from tipping around. It’s a small change, but it changes the whole shape of the exercise.
Set up on your back, knees bent, then lift into tabletop and place the ball between the ankles. Float the head and shoulders, reach the arms long by your sides, and pump the arms for five breaths in and five breaths out. If full extension is too much, keep the legs higher and bend the knees more.
The lower back should feel broad and heavy on the mat. If it starts arching, the legs are too low or the neck is doing too much. Fix that first.
Five breath cycles are enough for most people. Clean form, sharp exhale, no neck drama. That’s the real version of this exercise.
5. Glute Bridges With the Ball Between the Knees
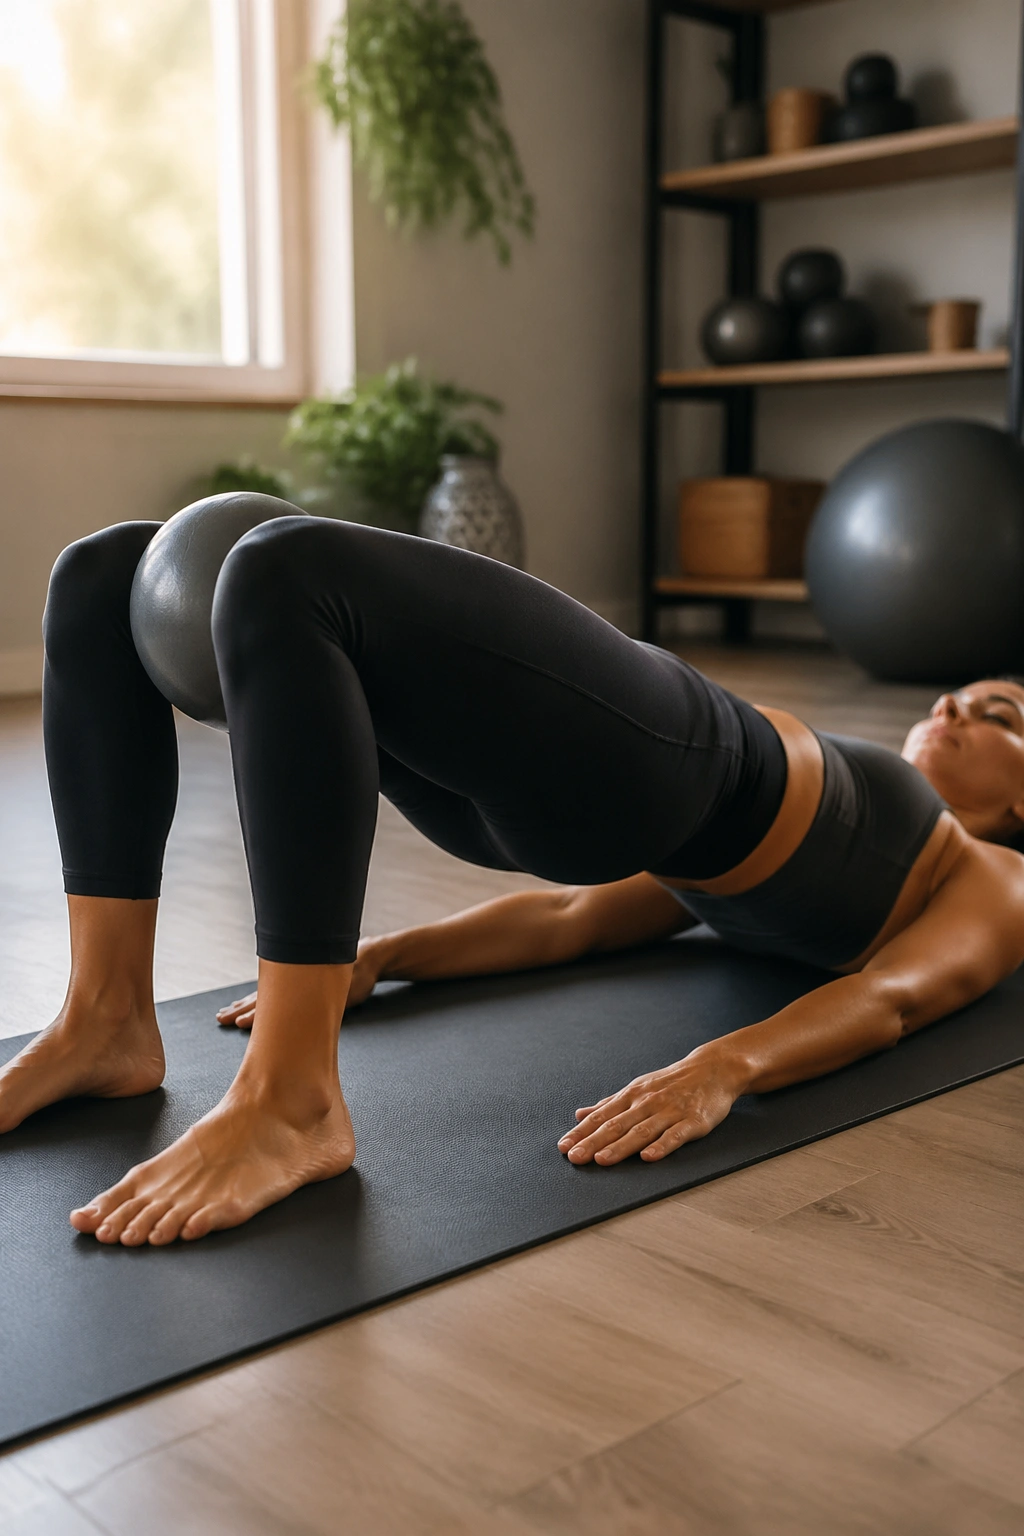
A bridge might look like a butt exercise, and yes, the glutes do plenty of work. But for a flatter stomach, the bridge matters because it teaches the pelvis to stack instead of dumping forward. The Pilates ball between the knees adds a useful squeeze that keeps the inner thighs and lower abs awake.
Lie on your back with knees bent and feet hip-width apart. Place the ball between the knees, exhale, and lift the hips until the body makes a straight line from shoulders to knees. Squeeze the ball gently at the top, then lower with control. The ribs should stay soft, not thrust upward.
Why It Works
- The squeeze keeps the knees from drifting apart.
- The pelvis stays more neutral.
- The low back gets help from the abs instead of doing everything alone.
- The exercise builds the kind of control that shows up when you stand.
Ten to fifteen bridges is a strong set. If the hamstrings cramp, move your feet a little closer to your hips and keep the lift smaller.
6. Roll-Ups With the Ball Reaching Overhead
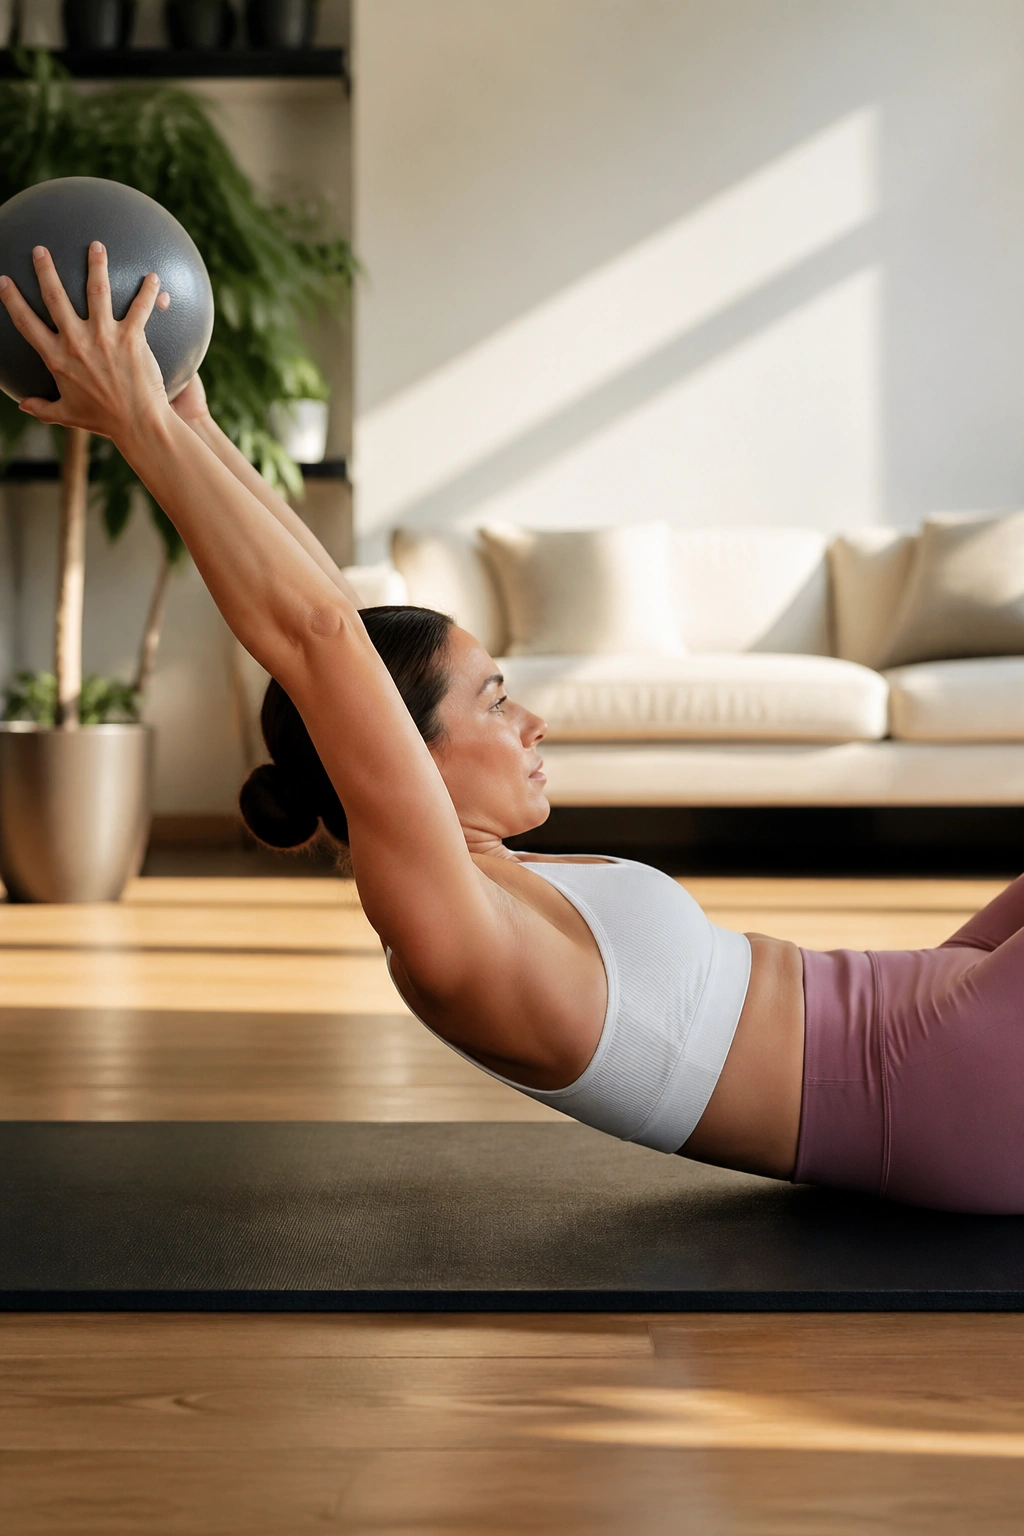
A roll-up punishes momentum. Good. That’s what makes it useful. When you hold a ball overhead, you have to keep the ribs stitched down while the spine curls and uncurls with control.
Lie on your back, legs long, ball held lightly in both hands overhead. Exhale, nod the chin, and peel the spine off the mat one segment at a time until you reach a seated curl. Reach the ball toward your toes, then reverse the movement and lay back down with patience. If the hamstrings tug too hard, bend the knees a little. That’s not cheating; that’s good mechanics.
The most common mistake is yanking the torso up with the hip flexors. Another one is throwing the arms forward so fast that the ball does half the job. Slow it down.
Six to eight roll-ups are enough. Fewer, if they’re clean. More, if your spine stays smooth instead of jerky.
7. Forearm Planks With Feet on a Stability Ball
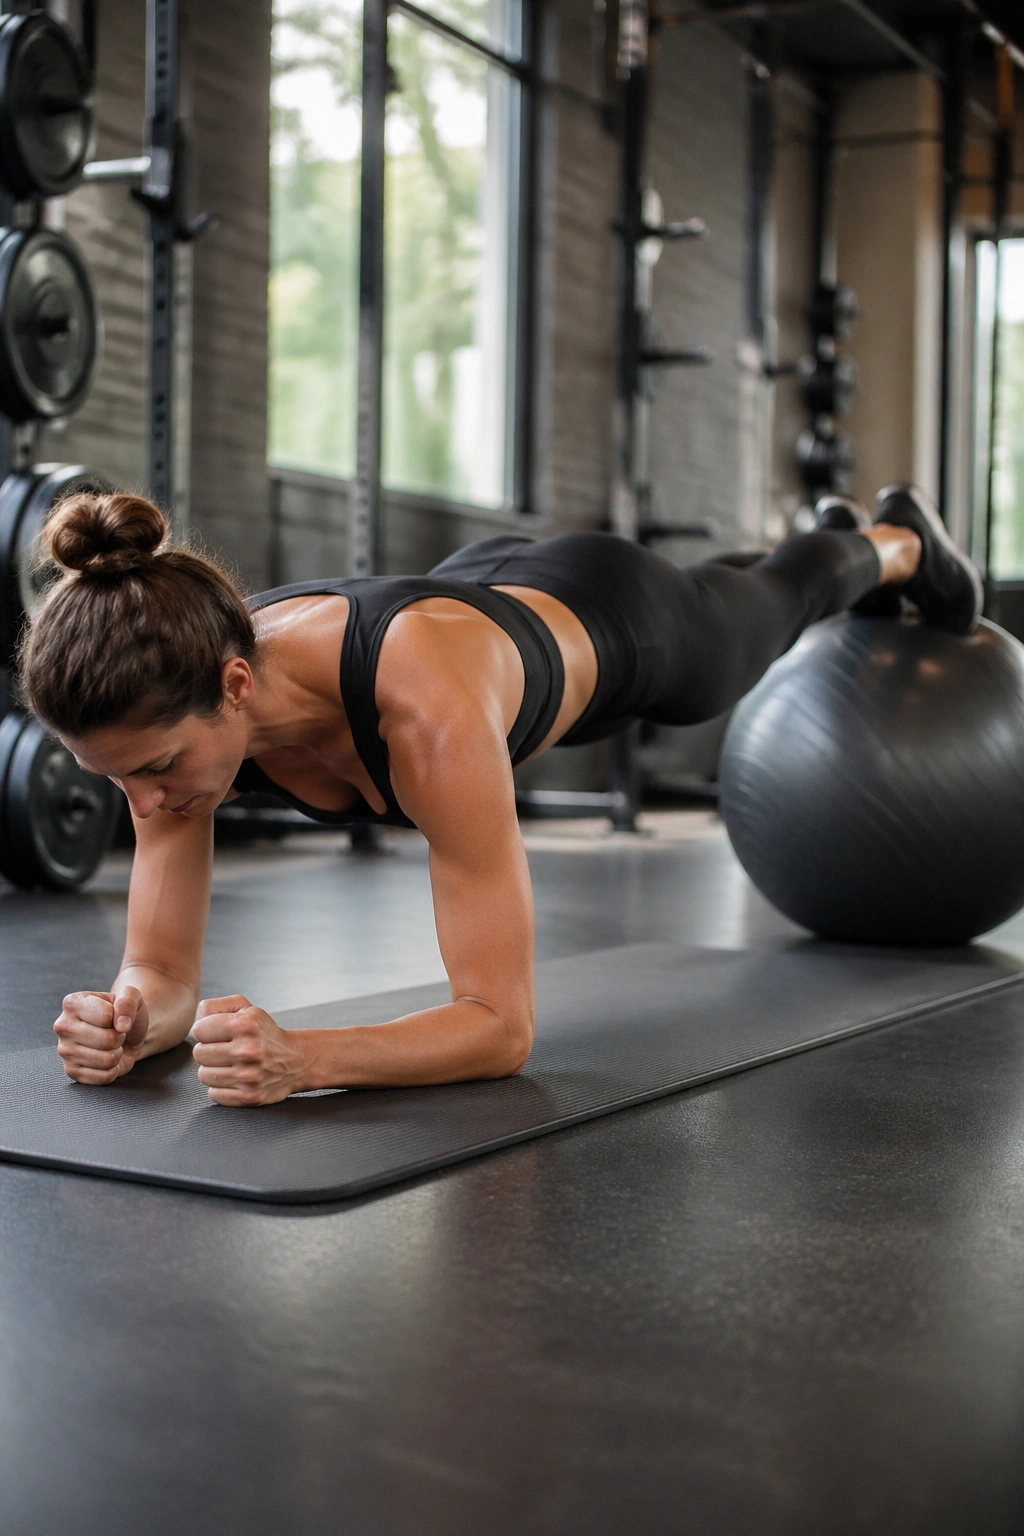
Unlike a floor plank, this one punishes side-to-side drift immediately. The stability ball under the shins or feet turns a familiar core exercise into a moving target, and your abs have to organize the whole body just to keep you from wobbling.
Set your forearms on the floor and place your feet on top of the ball. Walk the feet back until the body forms one long line. Press the floor away, draw the belly up and in, and hold. The movement is tiny, but the tension is loud.
Form Cues
- Keep the hips level.
- Think “long spine,” not “high hips.”
- Push the heels back into the ball.
- Breathe through the hold; don’t lock up.
Twenty to thirty seconds is enough for a clean set. If the lower back sags, shorten the hold rather than fighting through bad alignment.
8. Kneeling Roll-Outs on a Stability Ball
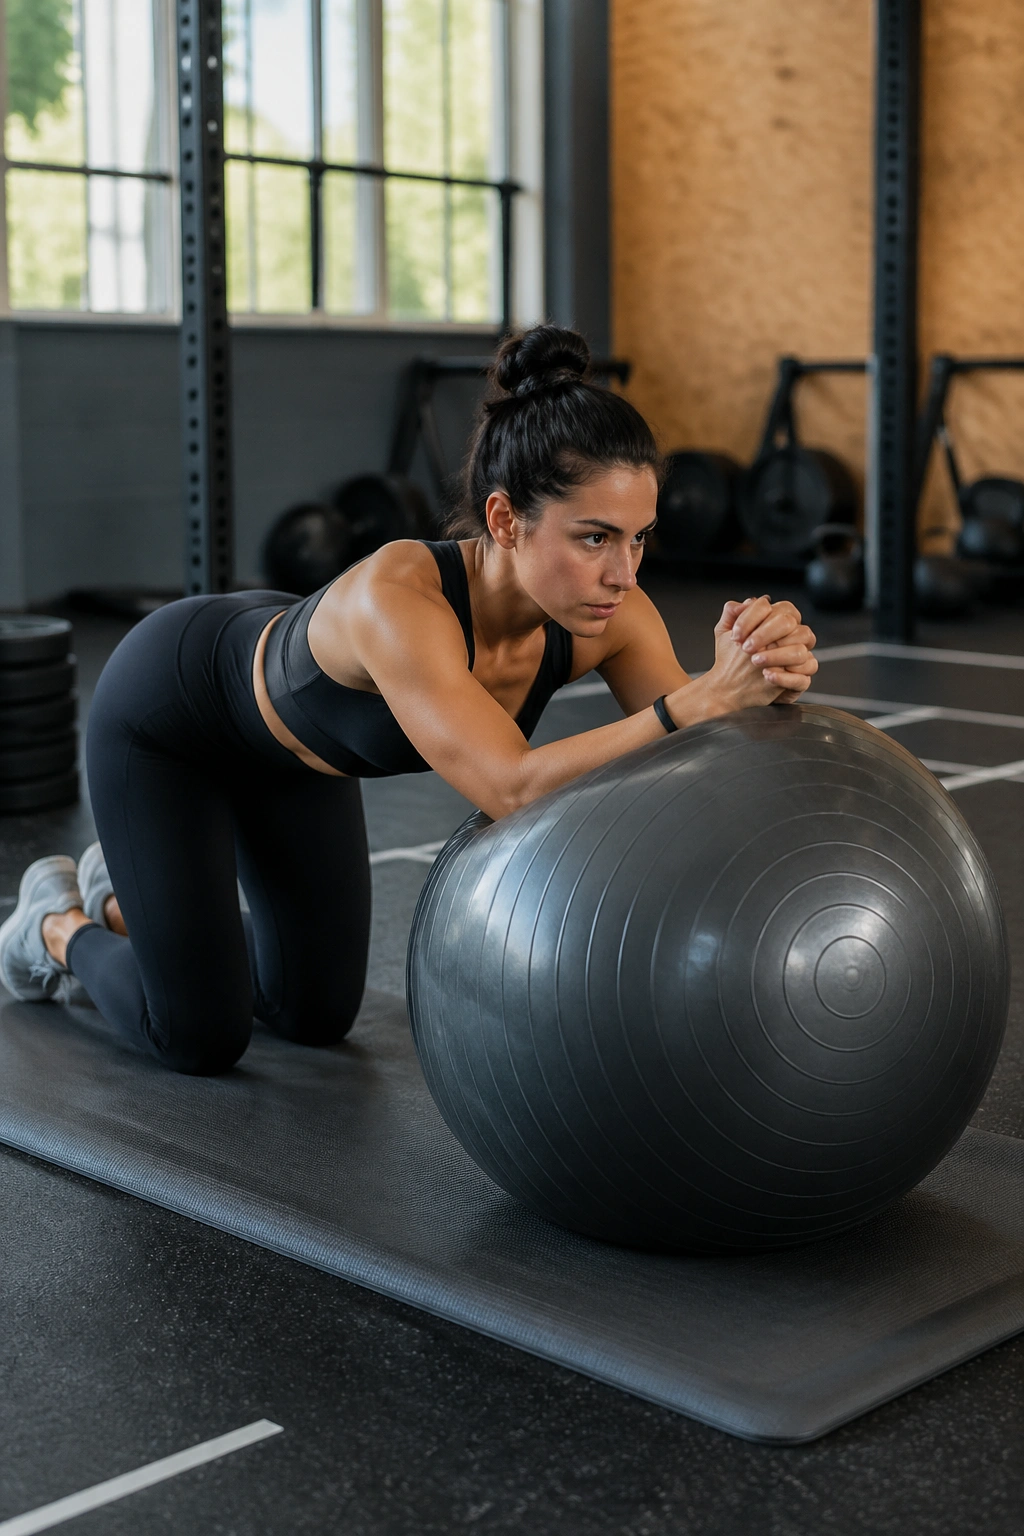
Can a small forward roll work your abs more than a hundred crunchy reps? Yes, if you do it honestly. Kneeling roll-outs force the front of the body to stay long while the ball wants to pull you farther and farther away from your center.
Kneel on the mat with forearms resting on the ball. Keep the hips stacked over the knees, then roll the ball forward just a few inches. Stop before the low back arches, then pull the elbows back toward the knees to return. That tiny range is the whole point.
The first mistake is going too far and dumping into the lumbar spine. The second is shrugging the shoulders up around the ears. Neither helps the stomach.
What to Feel
- A firm pull through the lower abs.
- The front of the ribs staying narrow.
- The thighs and hips staying still.
Six to eight roll-outs with perfect control is enough. If you can’t return without wobbling, you went too far.
9. Pike Lifts on a Stability Ball
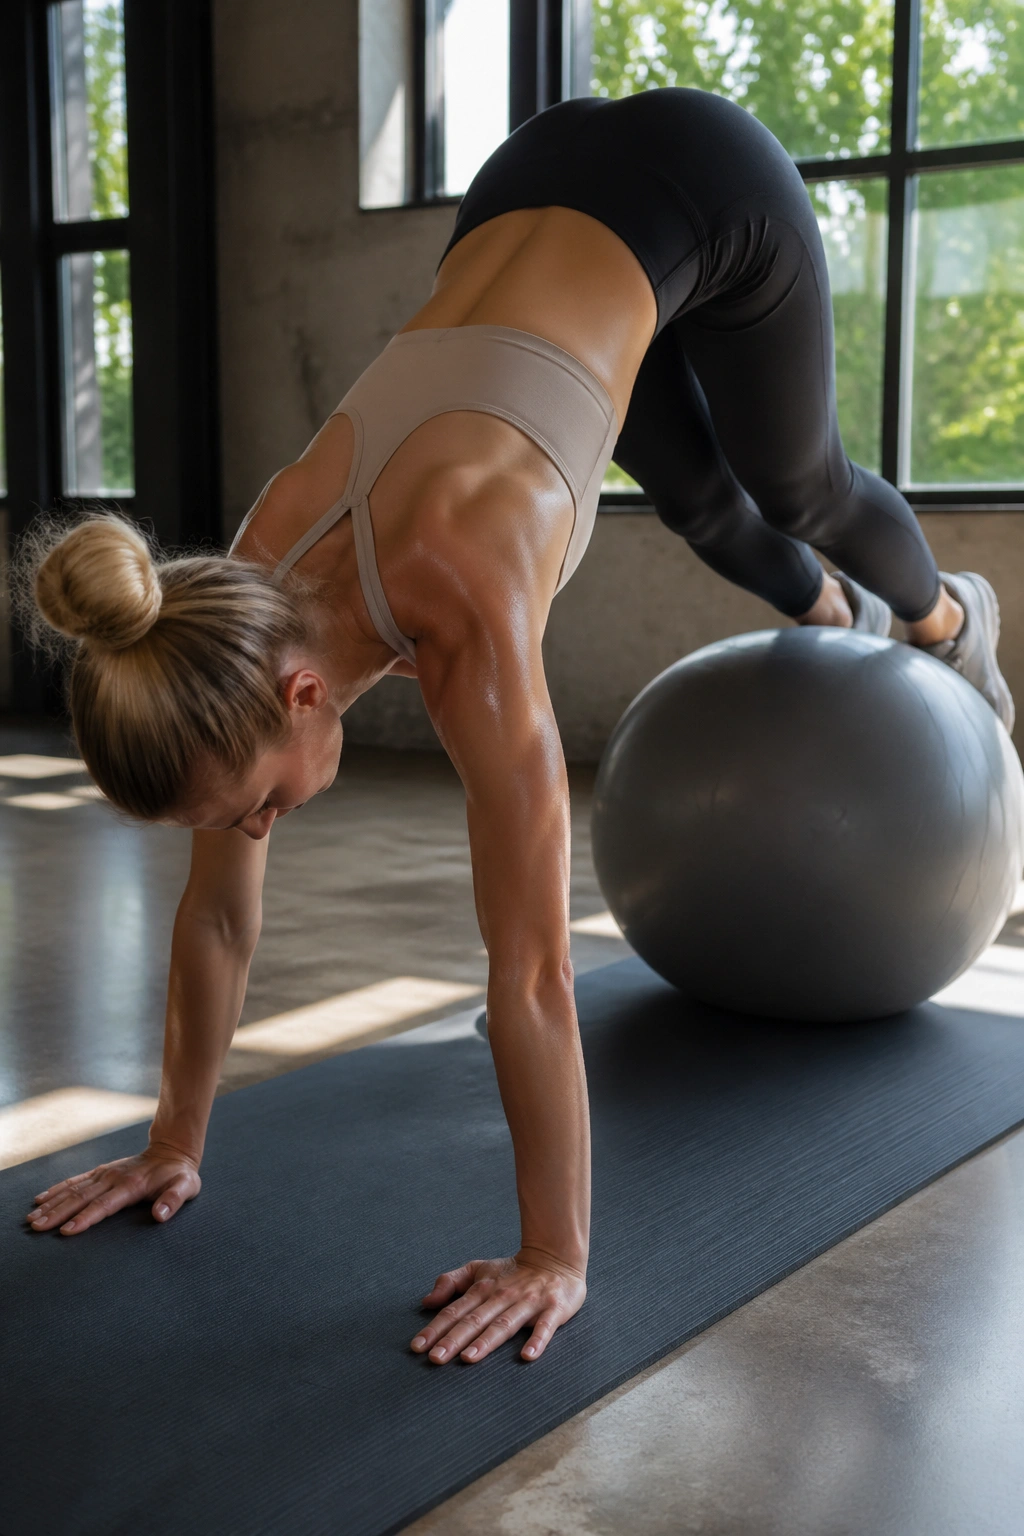
This one is advanced, and I mean that in the plainest way possible: if you fake it, your back will complain. Pike lifts on the stability ball are one of the sharpest tests of core strength in the whole list because they ask the abs to pull the hips up without collapsing the shoulders.
Start in a high plank with shins or feet on the ball. Keeping the legs straight, lift the hips toward the ceiling and roll the ball slightly inward. Then lower back to plank with control. The body makes a sharp upside-down V at the top.
The move is not about speed. It’s about compressing the front of the body without losing shoulder stability. If you feel the shoulders shrugging or the neck tightening, stop and regress to knee tucks first.
Three to five good pikes can be enough. One ugly rep is worth less than zero. Clean ones build a waistline that looks pulled together instead of puffed out.
10. Mountain Climbers With Hands on the Ball
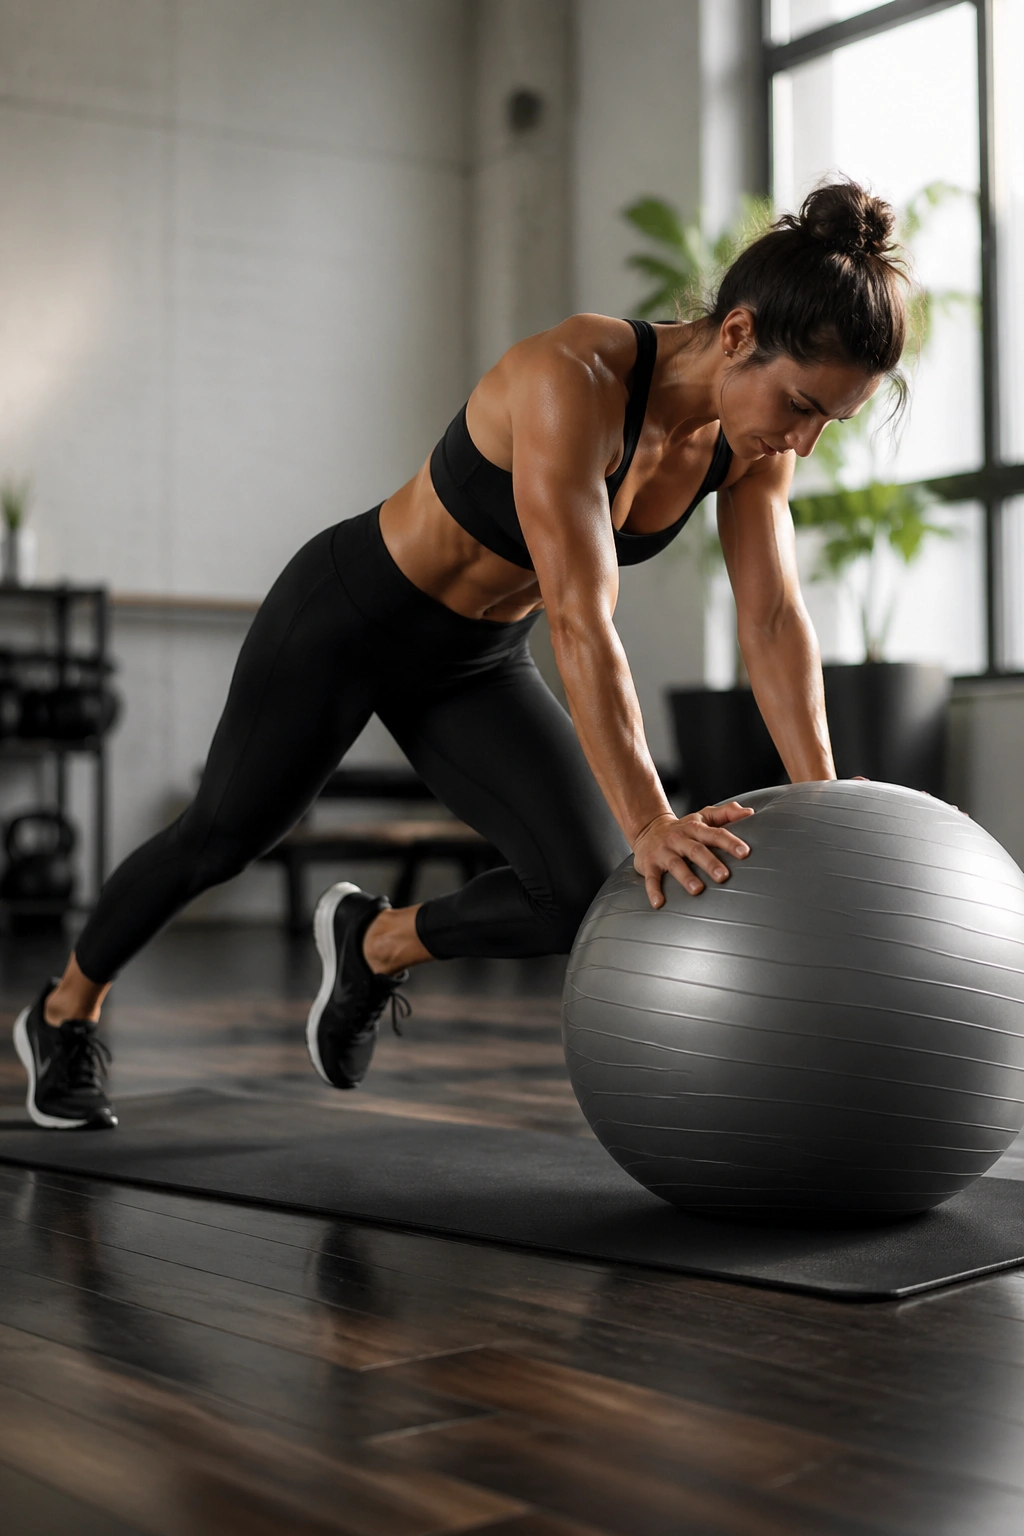
Hands on the ball, feet on the floor, and suddenly the whole midsection has to pay attention. Mountain climbers on a ball are less about speed than about keeping the torso from twisting while the knees drive in and out.
Set your palms on the top of the stability ball and walk your feet back into a strong plank. Drive one knee toward the chest, then switch. Keep the shoulders stacked over the hands and the ball as still as possible. If the ball rolls all over the place, slow down. That’s the lesson right there.
A useful cue: imagine your zipper line lifting toward your ribs. That helps the lower belly stay active instead of hanging loose. And breathe. People love to hold their breath in this one, which only makes the core lock up.
Try ten to twelve drives per side. If the shoulders tire before the abs, move the feet farther back and make the range smaller.
11. Single-Leg Stretchs With the Ball Between the Inner Thighs
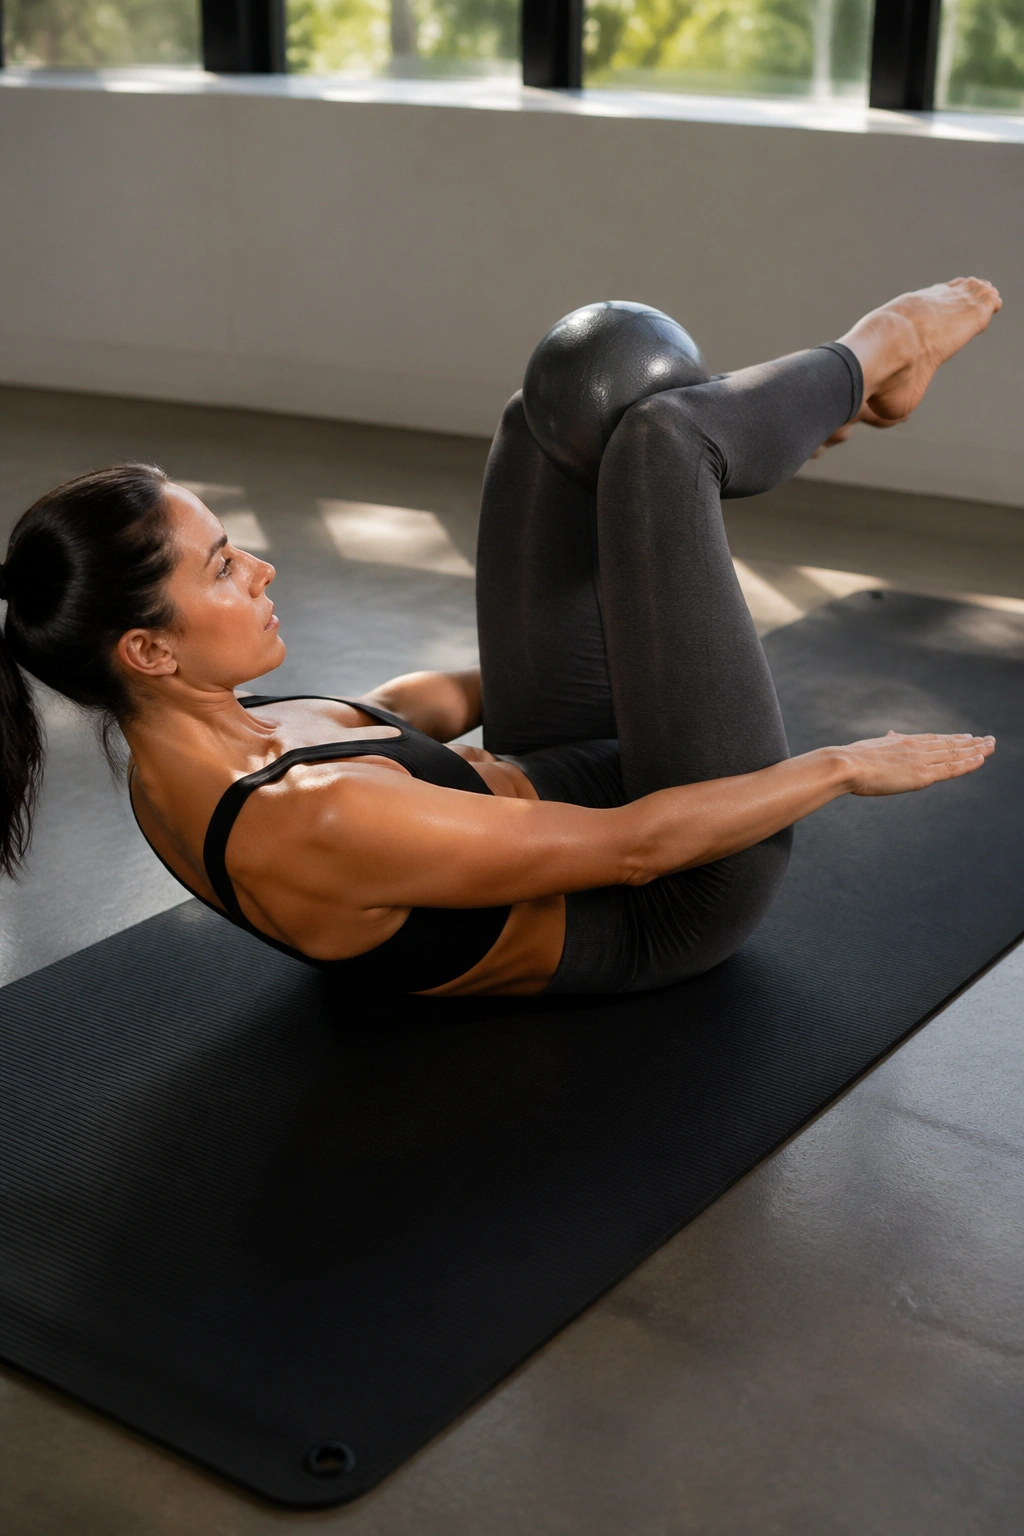
This is a cleaner version of the classic Pilates single-leg stretch. The ball between the thighs stops the legs from splaying and gives the midsection a job that is plain and simple: keep the spine still while one leg changes position.
Lie on your back, bring both knees in, and place the ball between the inner thighs. Lift the head and shoulders, then extend one leg long while the other knee stays close to the chest. Switch sides in a smooth rhythm. The ball should stay lightly pressed, not crushed.
The reason I like this variation is that it keeps the legs honest. Without the ball, people often fling the working leg too far away and lose the shape of the exercise. With the ball, the movement gets smaller and sharper.
Eight to twelve switches per side is enough. Keep the pelvis level and the ribs quiet. That’s where the work is.
12. Double-Leg Stretchs With the Ball Reaching Overhead
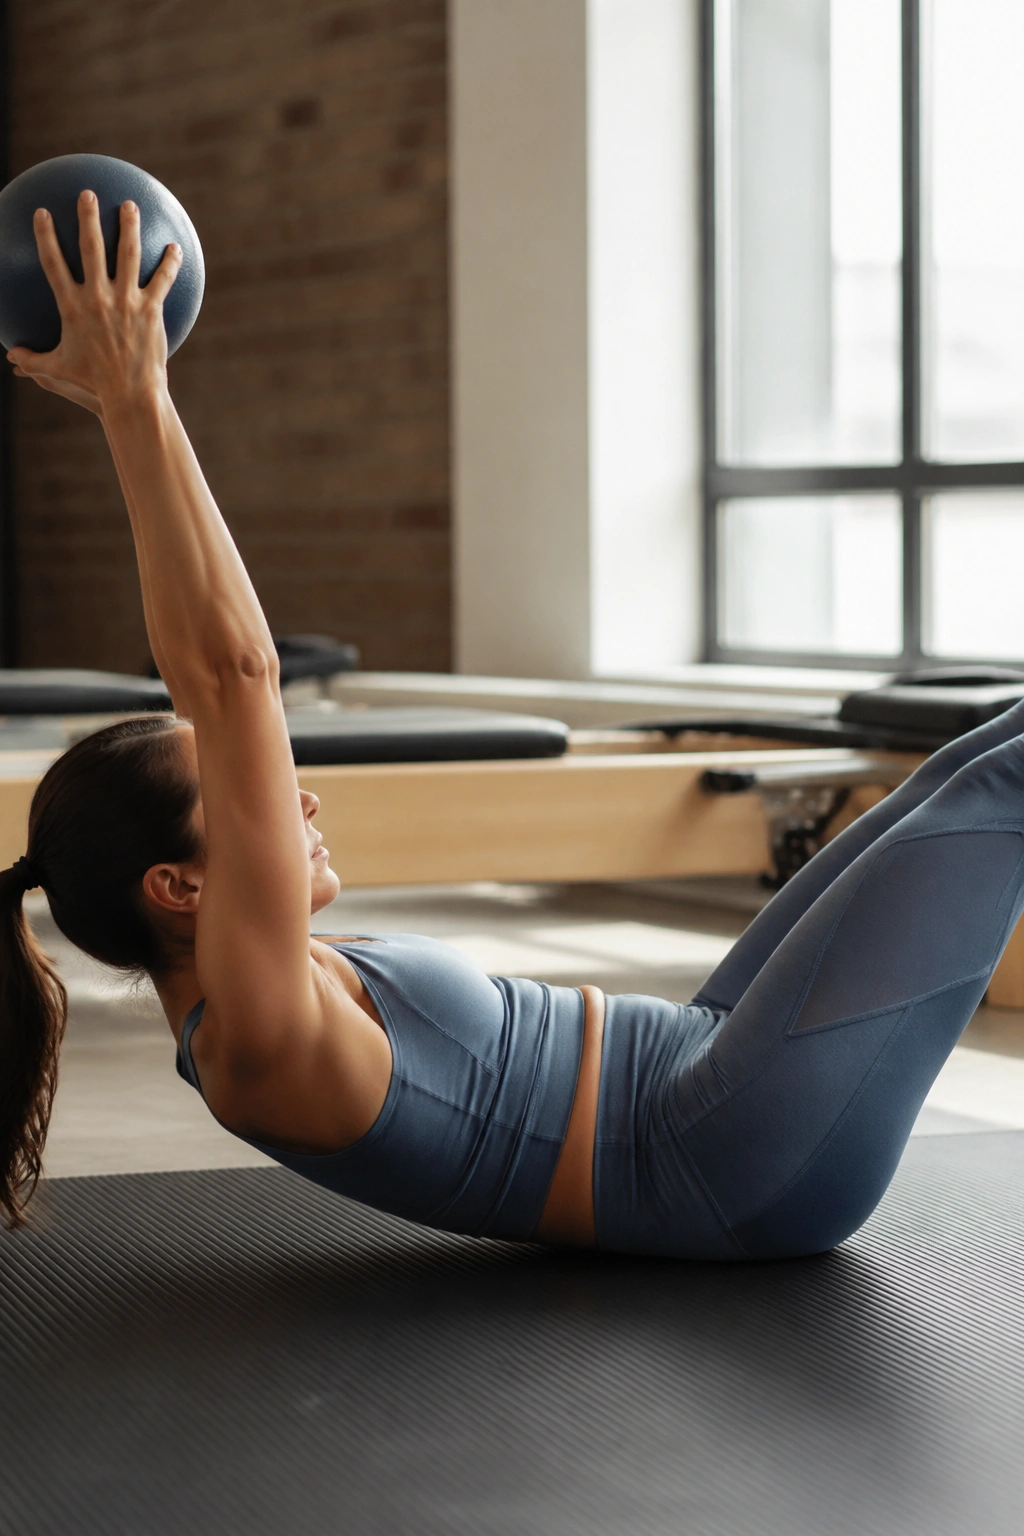
The double-leg stretch looks graceful when it’s done well and messy when it isn’t. Holding the ball overhead gives you a target for the arms and helps you notice when the ribcage starts flaring during the extension.
Start curled up on your back with the knees lifted in and the ball held above the chest. Exhale as you extend both arms overhead and both legs away, then circle the arms back around and draw the knees in again. The lower back should stay heavy enough that you can still feel the mat.
A lot of people go too low with the legs. That’s the trap. The lower the legs go, the more the spine wants to arch, and the abs get stripped out of the exercise. Keep the legs high enough to stay in control.
Six to ten reps is a solid set. Slow the return phase down. That’s where the stomach has to hold the line.
13. Reverse Crunches With the Ball Between the Ankles
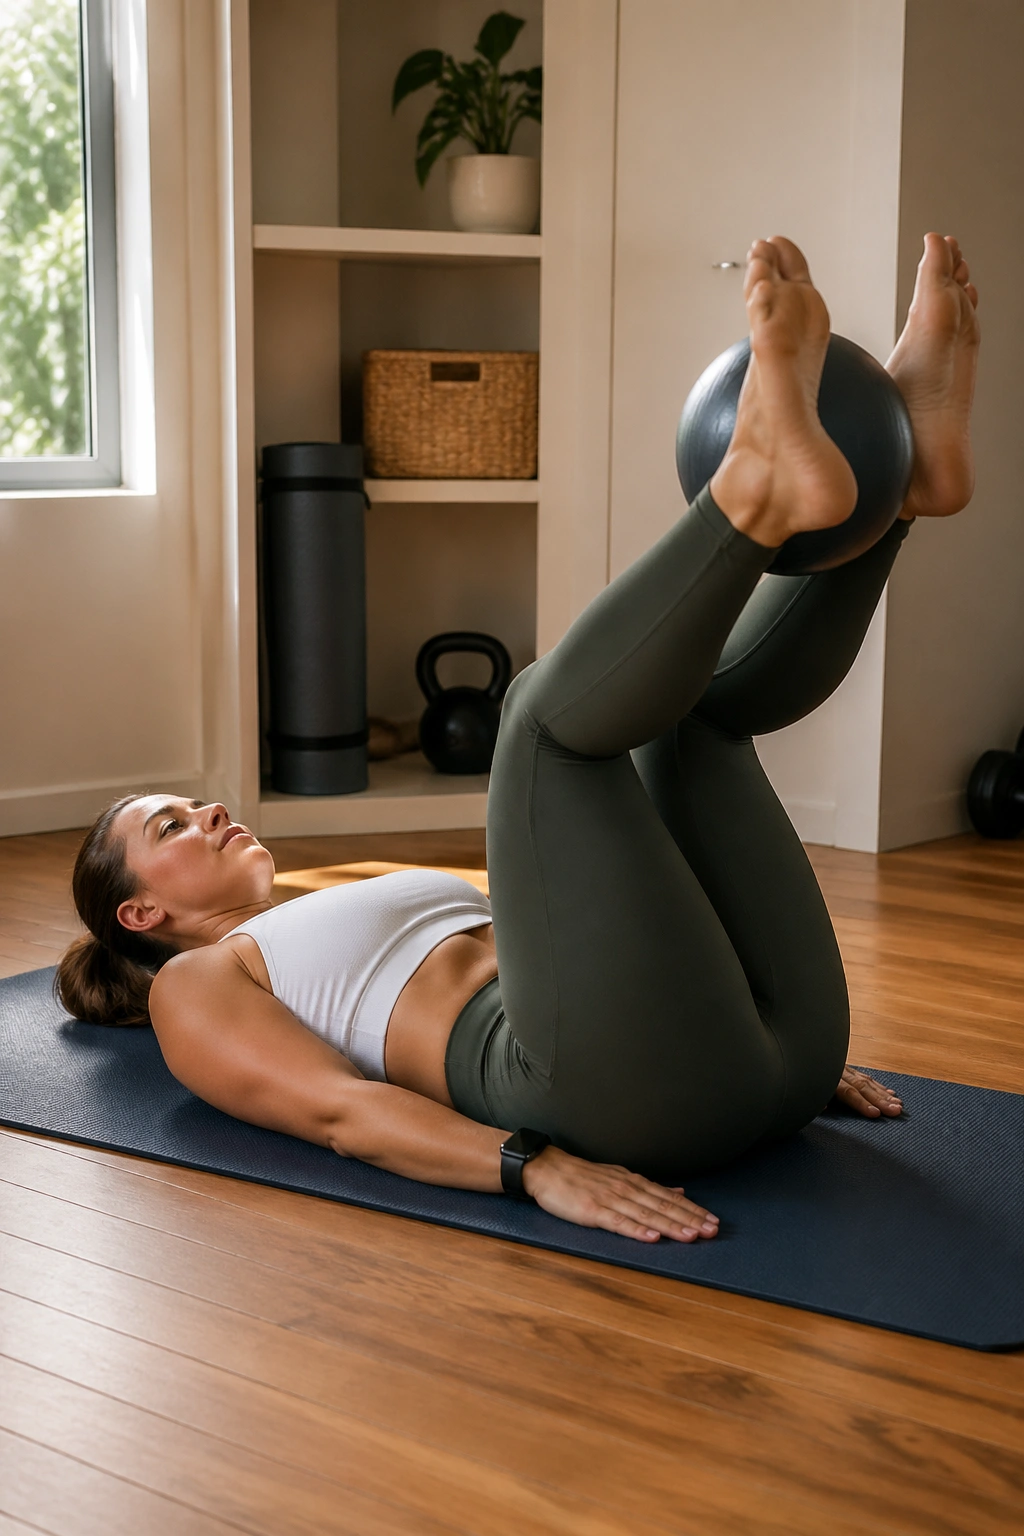
Reverse crunches get more interesting when you squeeze a Pilates ball between the ankles. The adductors wake up, the legs stop wandering, and the lower abs have to curl the pelvis upward instead of letting the hips swing.
Lie on your back with the knees bent to tabletop and the ball between the ankles. Exhale, draw the knees toward the chest, and let the pelvis curl slightly off the mat. Lower with control until the low back reconnects. Keep the movement small and neat.
What Makes It Different
The ball keeps the legs from drifting apart, which means the trunk has to do a cleaner job. That matters because reverse crunches often turn into hip flexor work when the lower body starts flinging around. Here, the squeeze helps organize the whole shape.
If your neck tightens, keep the head down. If your back tugs, shorten the curl. Eight to ten slow reps is plenty.
14. Bird Dogs With One Hand on the Ball
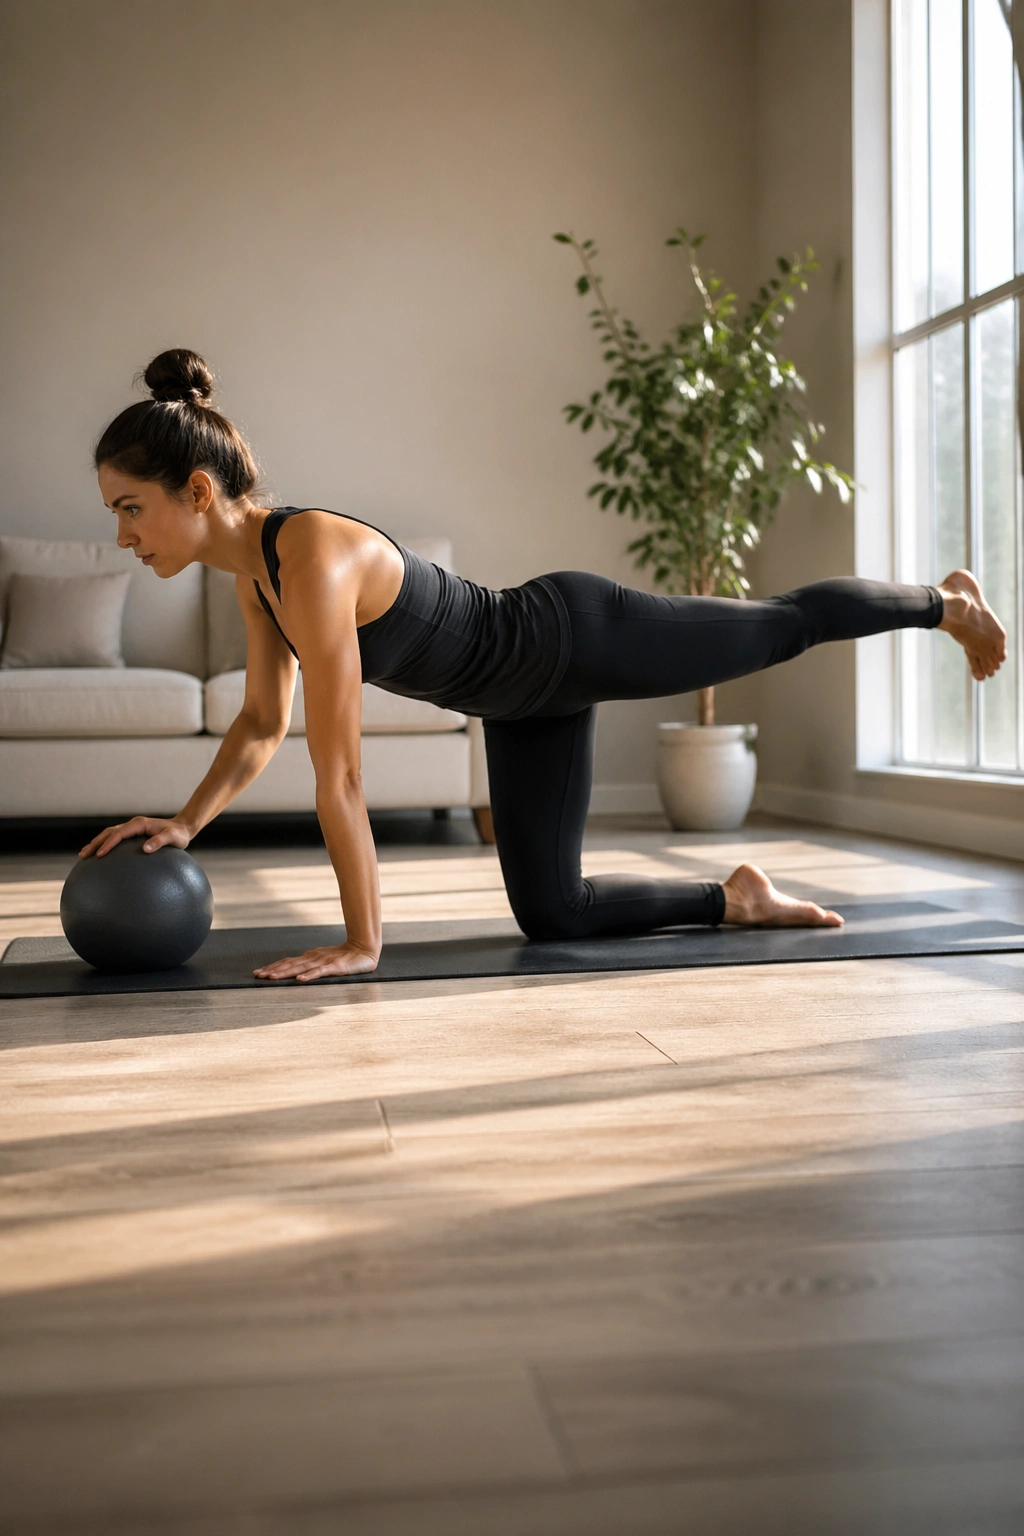
A bird dog on the floor is already useful. Put one hand on the ball and it gets meaner in a good way. The ball shifts under the shoulder, the torso has to stay square, and the obliques light up to keep you from rolling.
Start in tabletop with one palm on the ball and the other hand on the mat, knees under hips. Reach the opposite leg long behind you, then return and switch. The ball will want to roll, so keep pressure through the supporting hand and keep the pelvis level. No rushing.
This version is excellent if your stomach tends to pop out the minute you move a limb. The instability tells on you fast. That feedback is worth more than the burn.
Try six to eight reaches per side. If you wobble too much, move the ball under both hands and keep both knees down for a few reps first.
15. Side Planks With the Top Foot on the Stability Ball
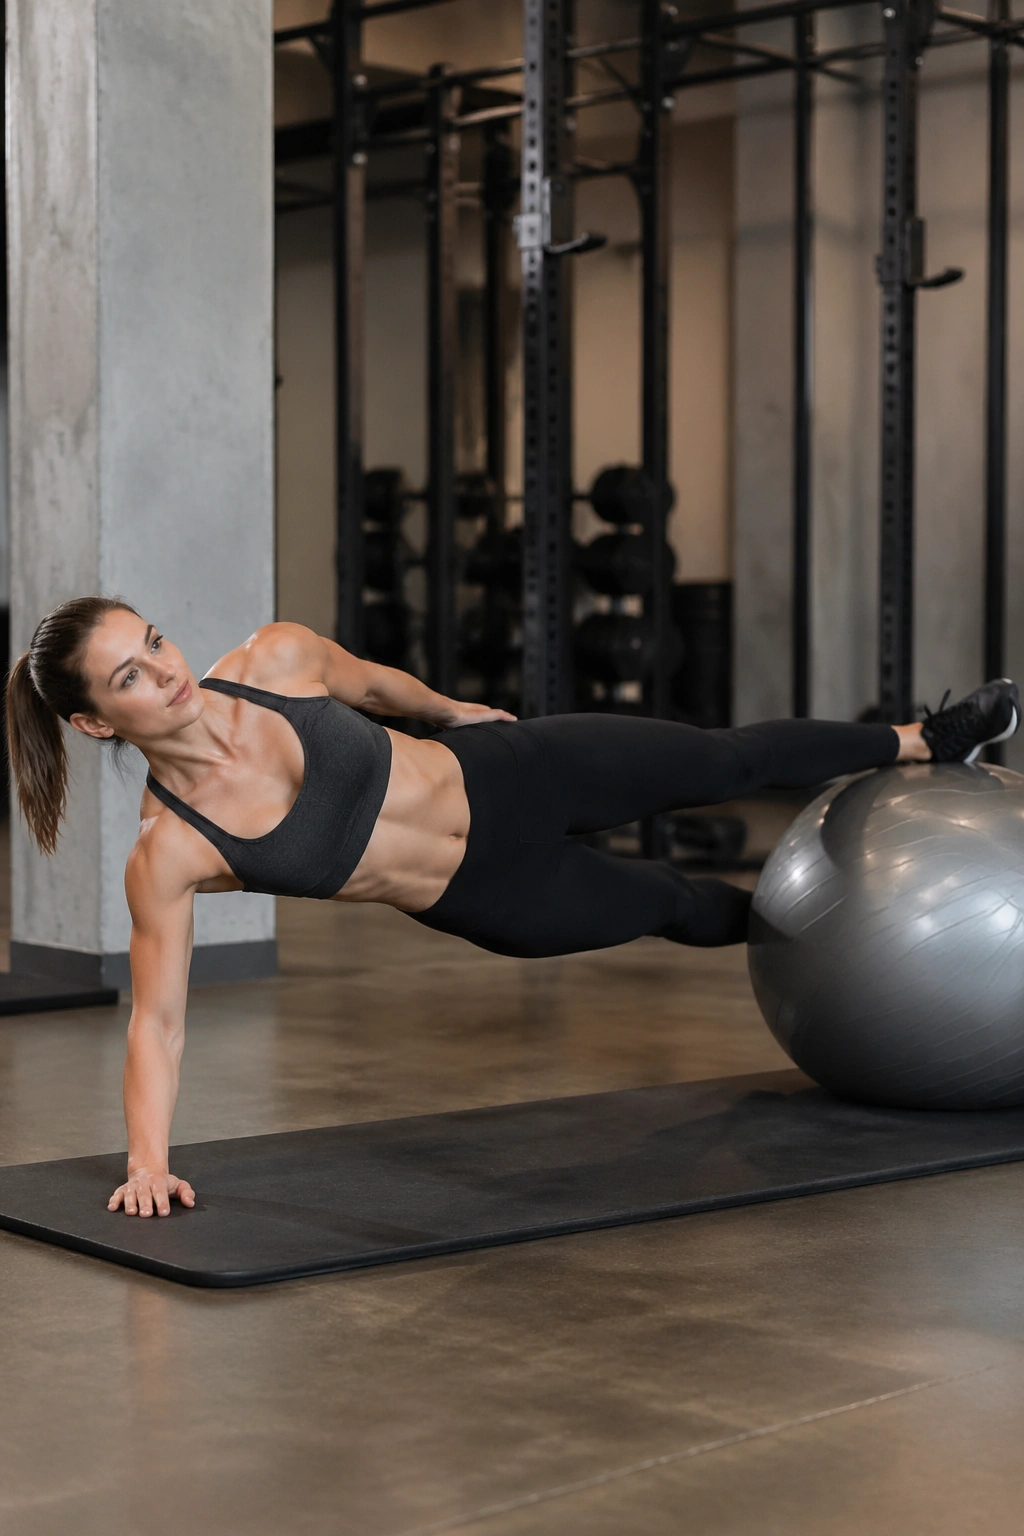
Side planks make the waist work in a way crunches never will. Add the stability ball under the top foot, and the obliques, glute medius, and shoulder all have to share the load. It’s not subtle.
Set up in a side plank on your forearm, with the lower knee down if you need the easier version. Place the top foot on the ball and press into it while lifting the hips. The body should make one long line from head to foot. Hold the shape while breathing steadily.
If the shoulder collapses or the hip rolls backward, back off. This is one of those moves where a smaller version done well beats the full pose done badly. You can keep the bottom knee on the floor and still get real work.
A 15- to 20-second hold is enough to start. That side body fatigue is no joke, and it shows up in the waist faster than most people expect.
16. Seated Spine Twists With a Ball Press
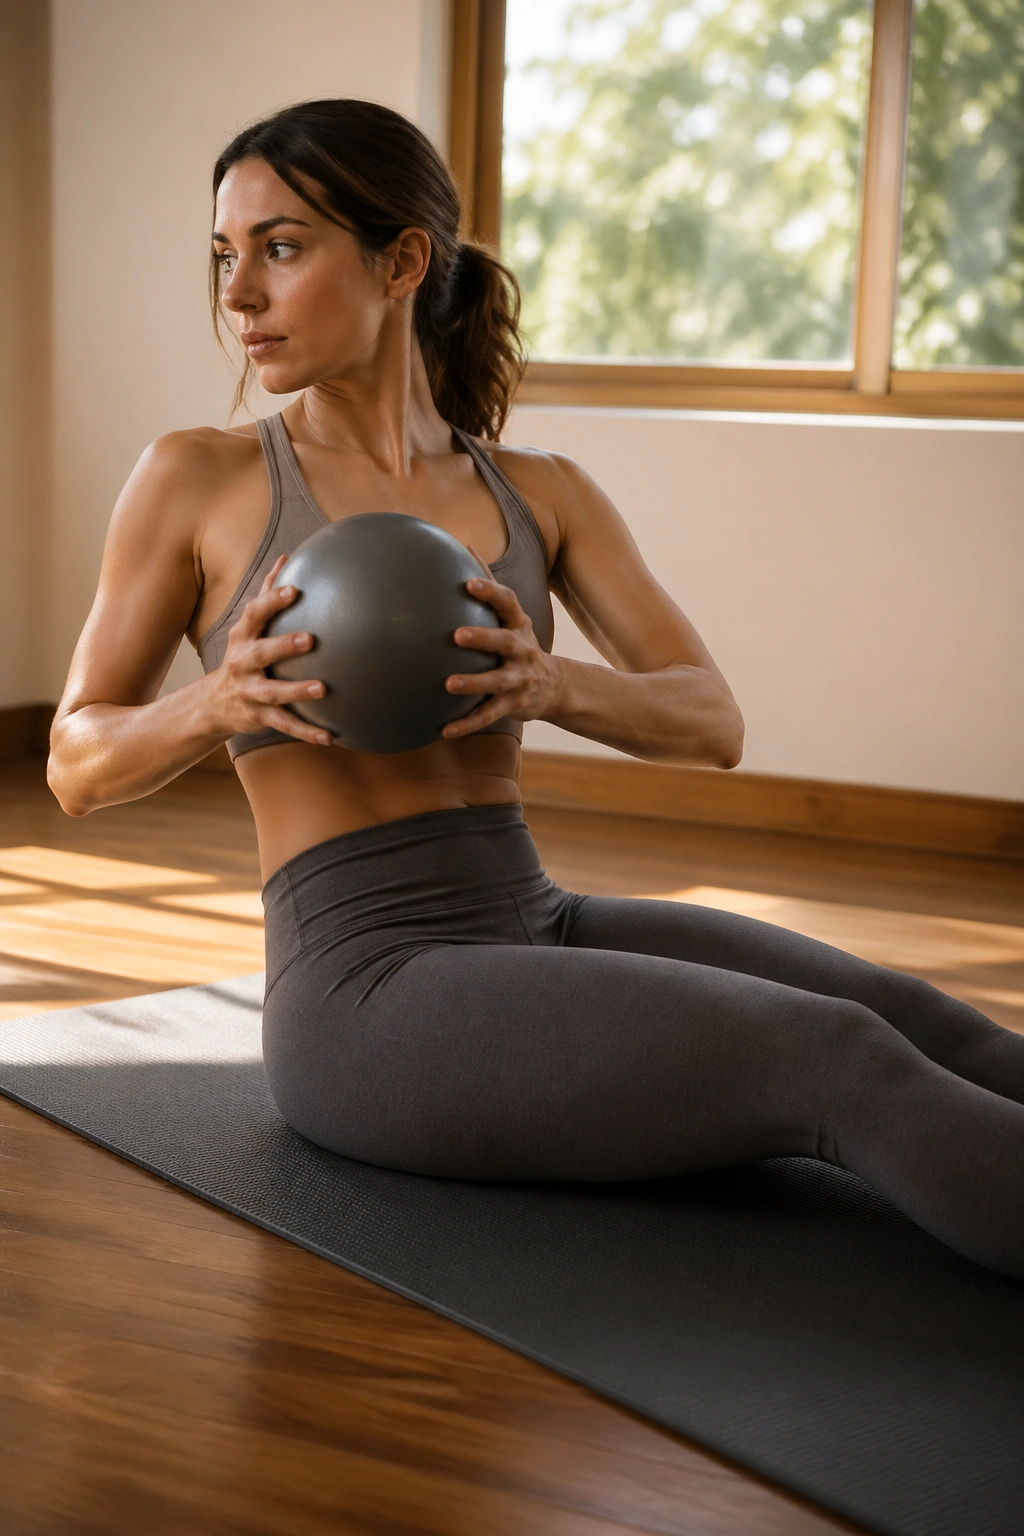
A seated twist with a ball in your hands is a cleaner way to train the waist than many flashy rotation moves. The press gives the arms something to do, while the trunk learns to turn from the ribs instead of flopping from the shoulders.
Sit tall with the legs long or bent, depending on hamstring comfort, and hold the ball at chest height. Grow upward first. Then rotate the ribcage to one side, return to center, and twist to the other side. Keep the hips steady and the shoulders relaxed. If the ball starts traveling wildly, you’re using the arms to fake the turn.
Why It Helps the Midsection
- It trains controlled rotation through the obliques.
- It keeps the spine tall, which helps the waistline look longer.
- It teaches the body not to spill into the lower back.
Eight twists per side is enough. Keep them crisp, not jerky. Rotation should feel organized, not noisy.
17. Saw Reaches With the Ball in Your Hands
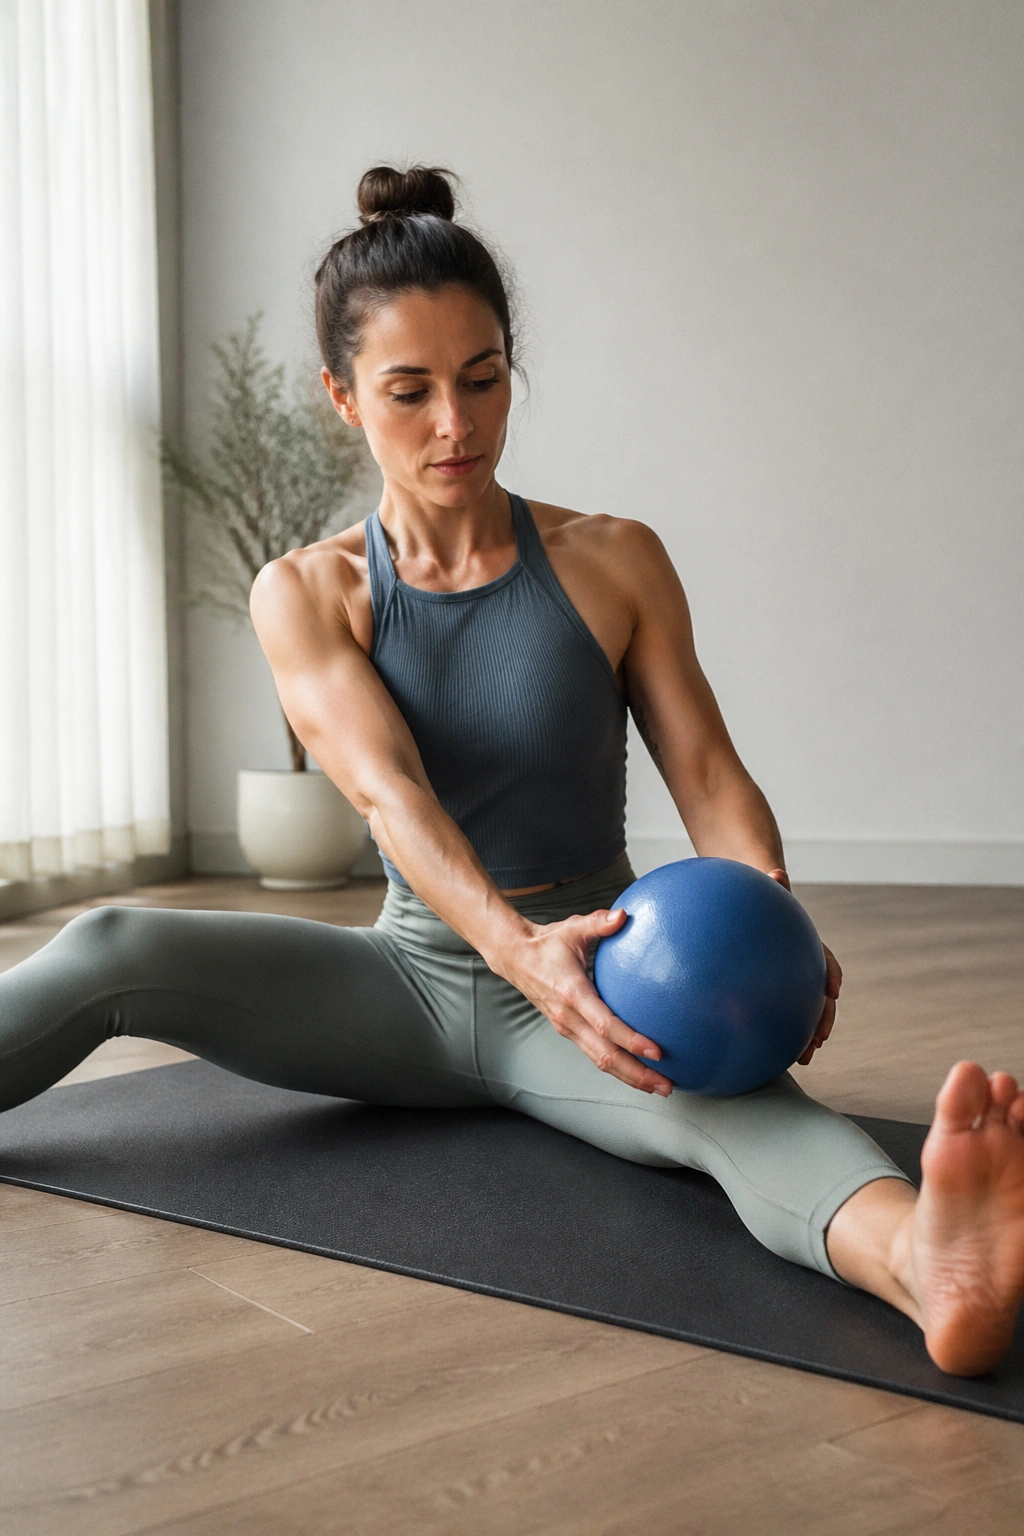
The saw is one of those old Pilates moves that looks calm until your hamstrings and obliques start arguing. Holding the ball makes the reach more deliberate, because you can feel exactly where your ribs want to twist and where your hips want to stay planted.
Sit with the legs wide in a gentle V, or bend the knees if that’s more realistic. Hold the ball with both hands, twist toward one leg, and reach the ball toward the outside of the foot in a long diagonal line. Come back up through center and switch sides. The reach should come from the waist and upper spine, not from collapsing the chest.
This one is as much about posture as it is about the abs. A tall spine, open shoulders, and controlled rotation all help the stomach look flatter when you stand. That part gets ignored too often.
Six reaches per side is plenty. If the lower back rounds hard, sit on a folded towel or keep the knees bent.
18. Wall Sits With a Ball Squeeze and March
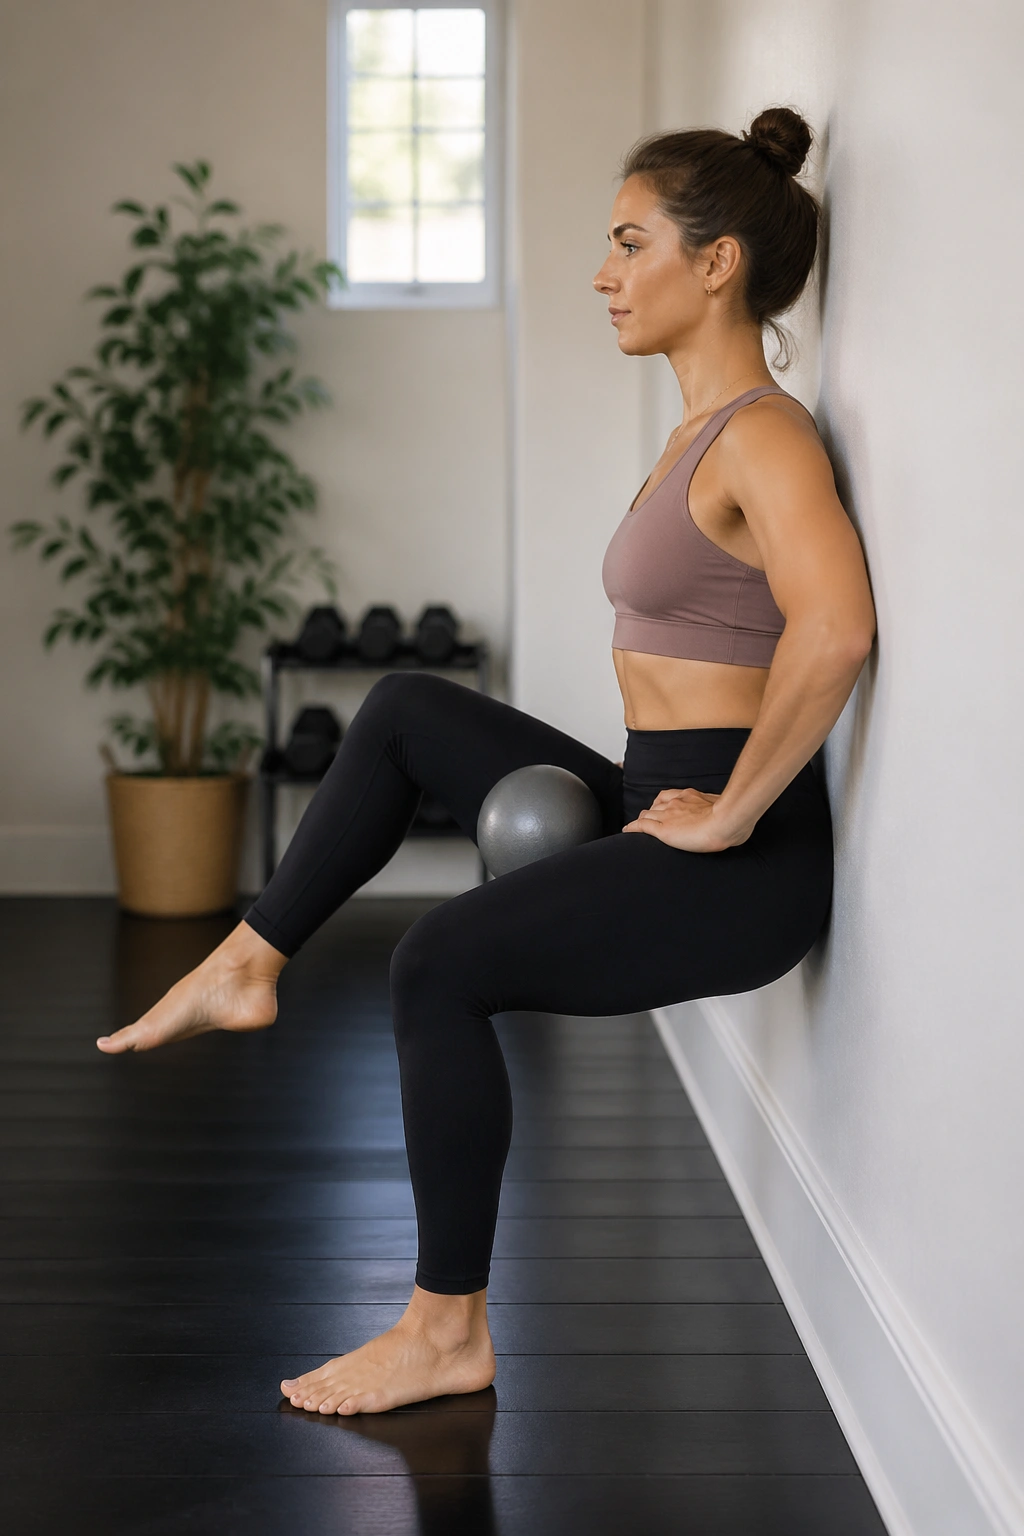
Standing core work is underrated. A wall sit with the ball between the knees and a marching foot pattern teaches your abs to hold shape when the hips and legs are doing real work. That’s useful in daily life, which is a nicer way of saying you stop collapsing every time you stand on one leg.
Lean your back against a wall and lower into a shallow wall sit. Place the Pilates ball between the knees and squeeze lightly. Then lift one foot a few inches off the floor, place it back down, and switch. Keep the chest open and the ribs down.
The challenge is not the burn in the thighs. It’s the temptation to arch the lower back or shove the belly forward to make the march easier. Stay stacked.
Ten marches total is a good starting point. If the thighs shake, good. If the low back does, adjust the depth.
19. Standing Knee Drives With the Ball Reaching Overhead
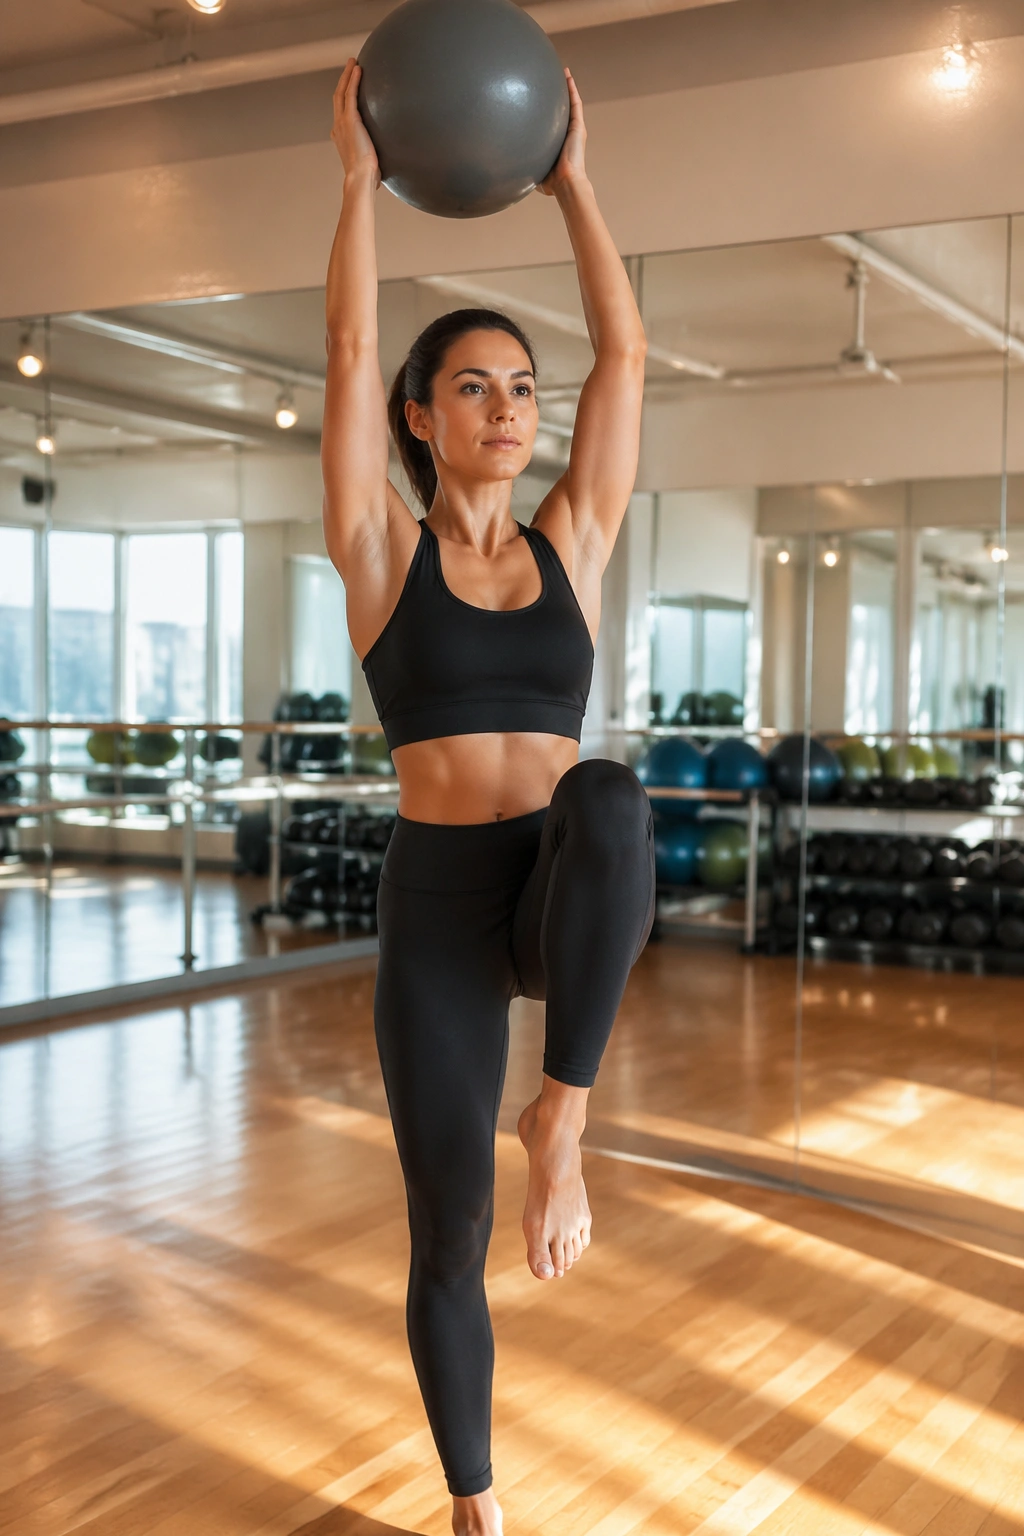
This one is simple, but don’t confuse simple with easy. Reaching the ball overhead while driving one knee up forces the trunk to stay tall, and tall posture often does more for the look of the stomach than endless floor work.
Stand with feet hip-width apart and hold the ball overhead with straight arms. Exhale, drive one knee toward the chest, and lower it with control. Alternate sides. Keep the ribs from flaring and the shoulders from creeping up near the ears. If the ball wobbles, your center line is probably leaking.
The standing version is useful because it teaches the core to work when the body isn’t lying down. That matters. A stomach that looks flatter in the studio but collapses the moment you stand up has not really changed much.
Eight to ten knee drives per side is enough. Move with precision, not speed. The slower version is the one that pays off.
20. Teaser Prep With the Ball Passed From Hands to Legs
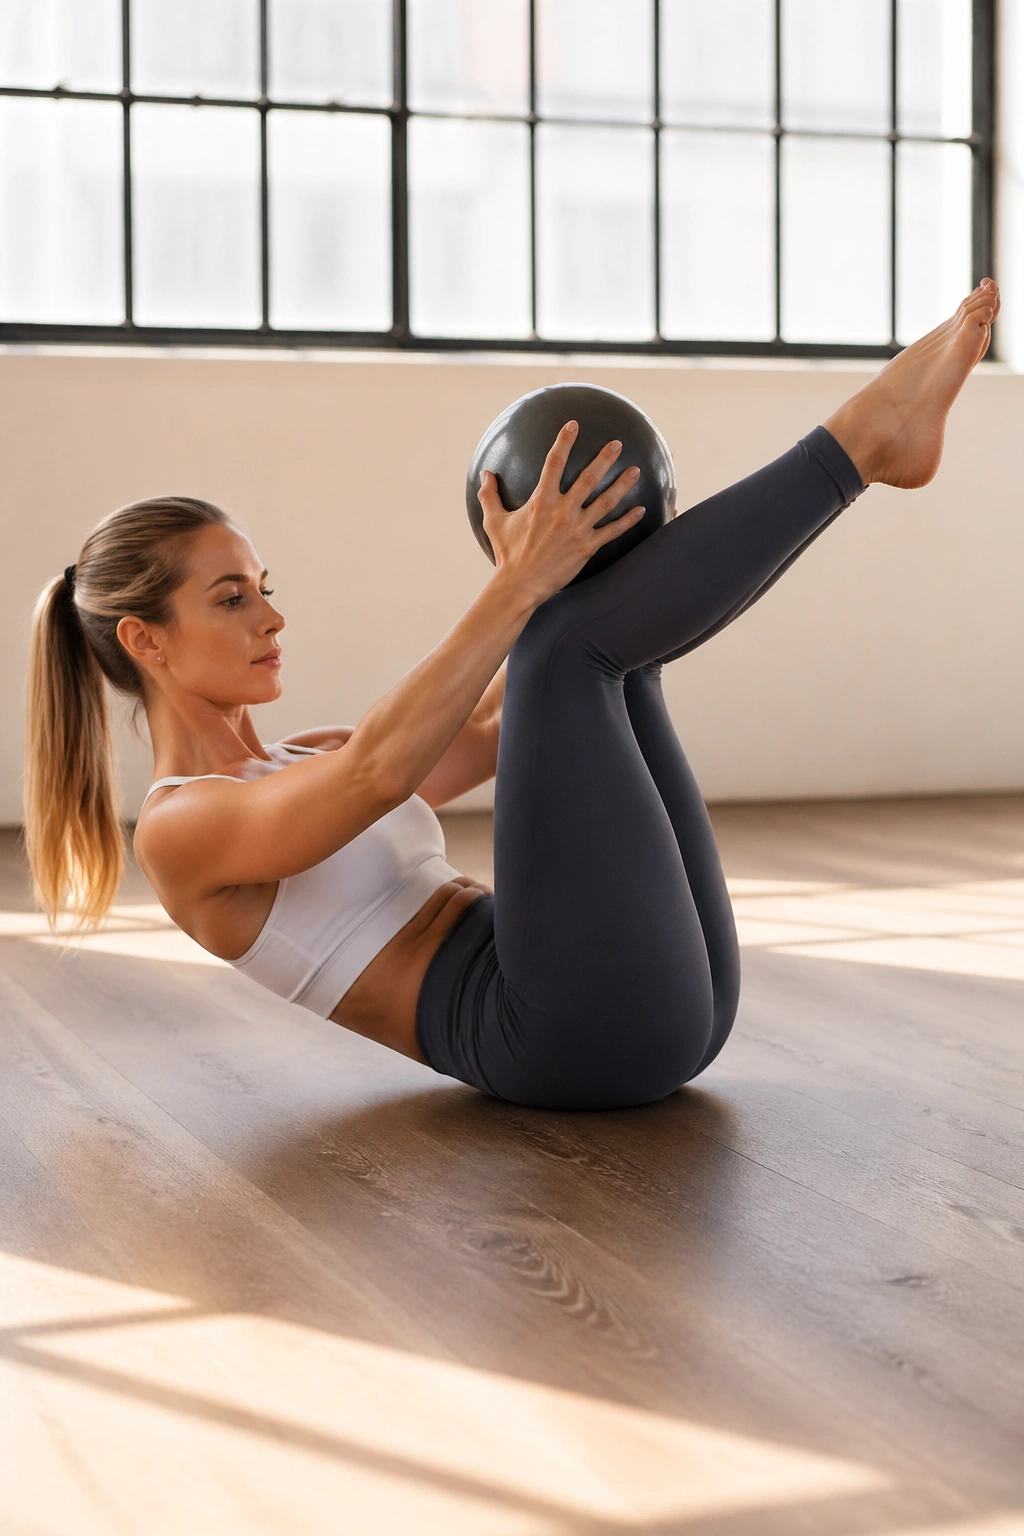
The teaser prep is one of those Pilates shapes that tells the truth fast. Add a small ball pass, and the body has to coordinate the upper abs, lower abs, hip flexors, and balance all at once. It’s a demanding finish, which is exactly why it belongs here.
Lie on your back and bring the knees in. Hold the ball in your hands, curl up into a small V, and pass the ball to the shins or ankles if you can keep the torso steady. Then lower back down with control and repeat. If full teaser position is too much, keep the feet on the floor and do a partial roll-up while passing the ball only as far as the knees.
The key is to stay rounded through the upper back without collapsing the neck. If the lower back strains, shorten the lever immediately. No heroics.
Three to five slow reps is plenty. End with a strong exhale and a quiet hold, because the real point of this whole routine is not to chase fatigue. It’s to teach the middle of the body how to hold itself together.
Final Thoughts
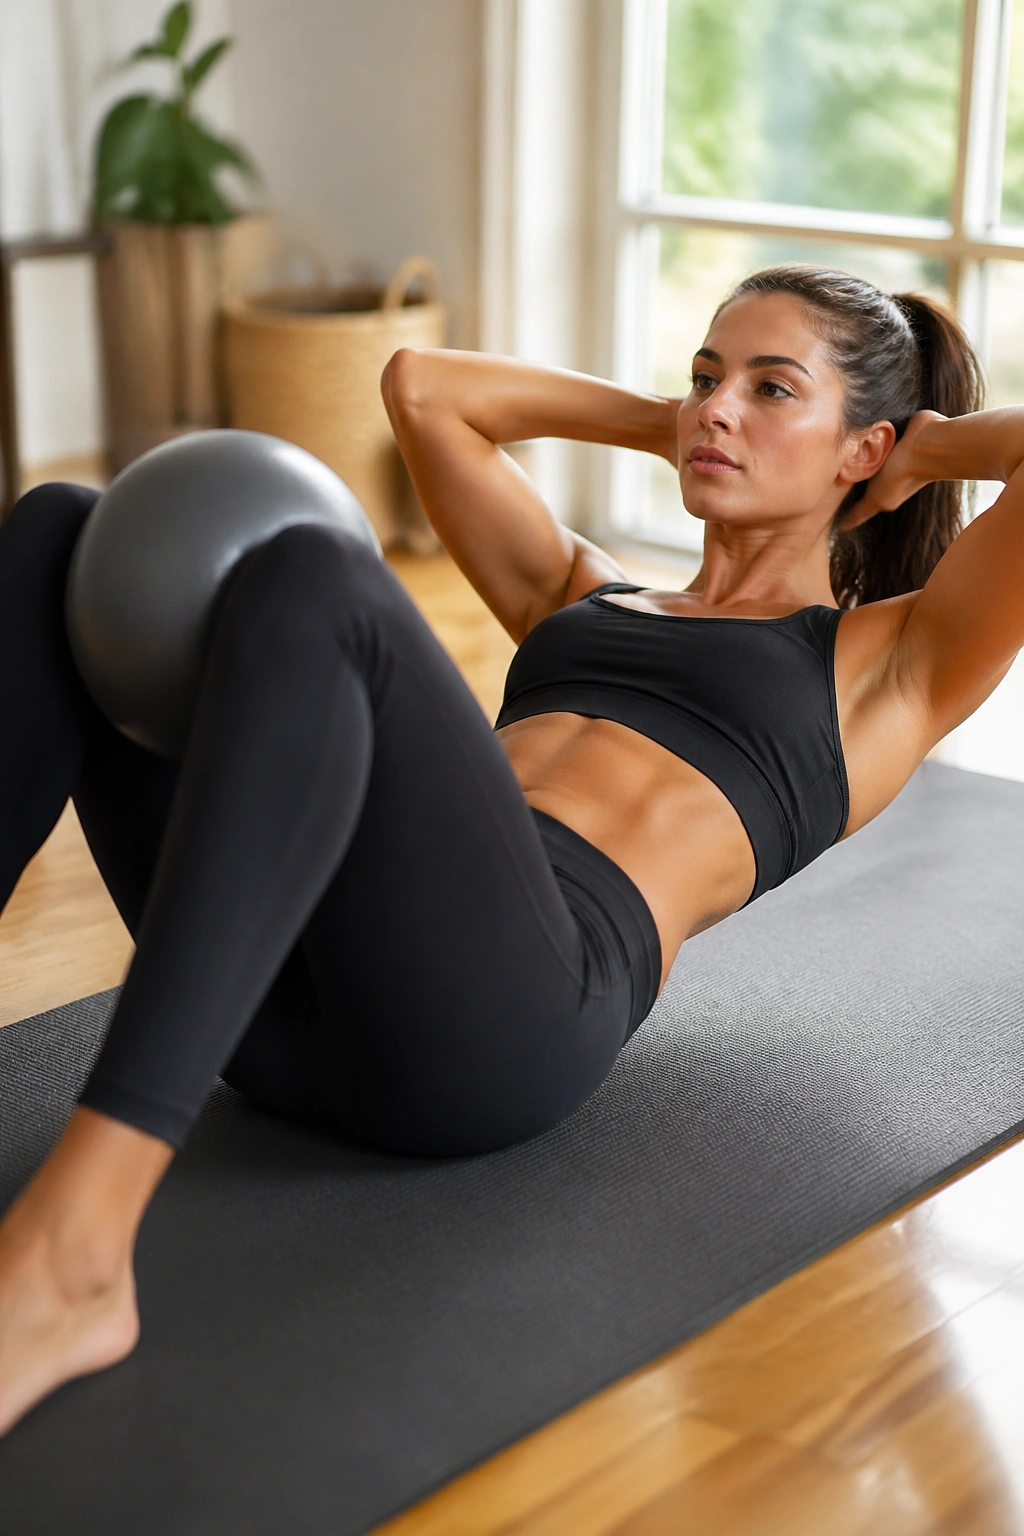
A Pilates ball makes core work harder in a way that matters. It exposes sloppy posture, keeps the deep abs involved, and gives you feedback the whole time. That is why it earns its place in a flat-stomach routine.
The best results usually come from combining a few floor-based moves, one or two stability-ball drills, and a very unglamorous amount of control. If the movement gets noisy, shorten it. If the neck takes over, stop and reset. The body responds fast when the reps are clean.
And honestly, that’s the part most people skip. They want the burn, but the burn is the cheap part. The control is where the shape changes.
