



Good prenatal Pilates workouts do not try to make pregnancy feel like business as usual. They do the opposite. They respect the fact that your breath changes, your ribs widen, your center of gravity shifts, and muscles that used to coast through a workout now have a different job.
That shift is why prenatal Pilates workouts can feel so useful when generic exercise classes suddenly stop fitting. A smart pregnancy Pilates session can help with hip tightness, mid-back ache, glute weakness, swollen feet, posture drift, and that odd mix of needing more support while also craving more space in your body. The American College of Obstetricians and Gynecologists advises moderate activity for most uncomplicated pregnancies, and Pilates fits beautifully when it is modified with care.
A good instructor watches for details that matter during pregnancy: breath-holding, abdominal doming, pelvic pressure, wrist strain, and fatigue that lingers after the session. You do not need fancy choreography. You need positions that let you breathe, move your spine, wake up your glutes, and train your core without fighting your changing shape.
Some days you will want a full 15-minute circuit. Some days you will want five calm minutes on a mat with a pillow under one hip and your hands on your ribs. Both count. Start there.
How Prenatal Pilates Workouts Change Across Pregnancy
First trimester movement often has one enemy: fatigue. Nausea, sudden overheating, and a heart rate that climbs faster than usual can make an old routine feel clumsy. Short sessions tend to work better than long ones. Think 8 to 15 minutes, with enough recovery between sets that you can still speak in full sentences.
Second trimester usually brings a new mechanical puzzle. Your belly changes how you roll, twist, balance, and get off the floor. This is where prenatal Pilates starts to shine, because the method already cares about alignment, breath, and controlled movement. You may also feel stretching across the front of the abdomen, and that is the point where watching for coning or doming at the midline matters.
Third trimester is often about comfort, circulation, and stamina for daily life. Side-lying, all-fours, seated, incline, and standing positions tend to feel better than long stretches flat on your back. Shorter blocks help here too — 2 rounds instead of 4, 6 reps instead of 12, slower transitions.
A simple rule works well: aim for moderate effort, about a 5 or 6 out of 10. If you are straining, clenching your jaw, or cannot keep a steady exhale, back off a notch.
Safety Checks Before Every Pregnancy Pilates Session
Get clearance from your clinician before starting if you have bleeding, placenta previa, severe anemia, preeclampsia, cervical concerns, signs of preterm labor, heart or lung disease, or an activity restriction for any other reason. General advice is useful. Your own medical advice comes first.
Watch for these signs during a session:
- Sharp pain, not muscular effort
- Dizziness or feeling faint
- Vaginal bleeding or fluid leaking
- Painful contractions that do not settle
- One-sided calf pain or swelling
- Pelvic heaviness that builds as you keep moving
- Abdominal doming that does not improve when you lower the effort
Leakage can also be a clue. So can a dragging feeling low in the pelvis. Those signs do not mean you have to stop exercising forever, but they do mean the movement in front of you needs a better version.
Keep props close. A sturdy chair, wall, resistance band, small ball or pillow, folded blanket, and birthing ball will cover almost every workout on this list.
1. Seated Lateral Rib Breathing With Pelvic Floor Connection
This is the one I come back to most. Not because it looks impressive — it does not — but because it changes how the rest of the workout feels.
Sit on a folded blanket, a firm cushion, or a birthing ball with your feet planted wide enough that your belly has room. Wrap your hands around the sides of your rib cage. Inhale through your nose and feel the ribs widen into your hands, not only at the front but also into the side body and back. Exhale through pursed lips for 4 to 6 seconds and think about a gentle lift through the pelvic floor, then let that lift melt fully on the inhale.
Try this 5-minute sequence
- 6 slow breaths with hands on the ribs
- 6 breaths with both arms reaching forward on the exhale
- 6 breaths with arms opening wide on the inhale and softening on the exhale
- 8 seated pelvic tilts, small and smooth
- 4 final breaths with your jaw and shoulders relaxed
The cue I like best is “lift, then let go.” Pregnant bodies often grip. You need the release as much as the support.
If you feel tension in the neck, lower your ribs a touch and soften your sternum. If you feel pressure down into the pelvis on the exhale, make the effort smaller. Tiny corrections matter here.
2. Cat-Cow and Tail-Wag Spine Mobility Flow
When your low back feels stiff before you have even done anything, this flow earns its keep fast.
Set up on all fours with hands under shoulders and knees under hips. If your wrists complain, put your hands on yoga blocks, the seat of a chair, or the edge of a couch. Inhale into a gentle cow shape — sit bones widening, chest easing forward. Exhale into cat, but do not chase the biggest round back you can make. Think length first, then flexion.
Why does this help? Pregnancy often pulls the rib cage up and the pelvis forward, especially later on. Cat-cow gives you motion in both directions without loading the spine hard, and the exhale in cat helps you reconnect deep abdominal support without crunching.
Add the tail-wag
From neutral, look over one shoulder and let the hips drift toward that side. Come back through center, then switch. Move as though you are drawing a wide C-shape through the spine. Do 6 to 8 reps each side.
Finish with 4 to 6 thoracic rotations: keep one hand planted, reach the other arm up, then thread it gently under your body. Keep the range small if the belly feels crowded.
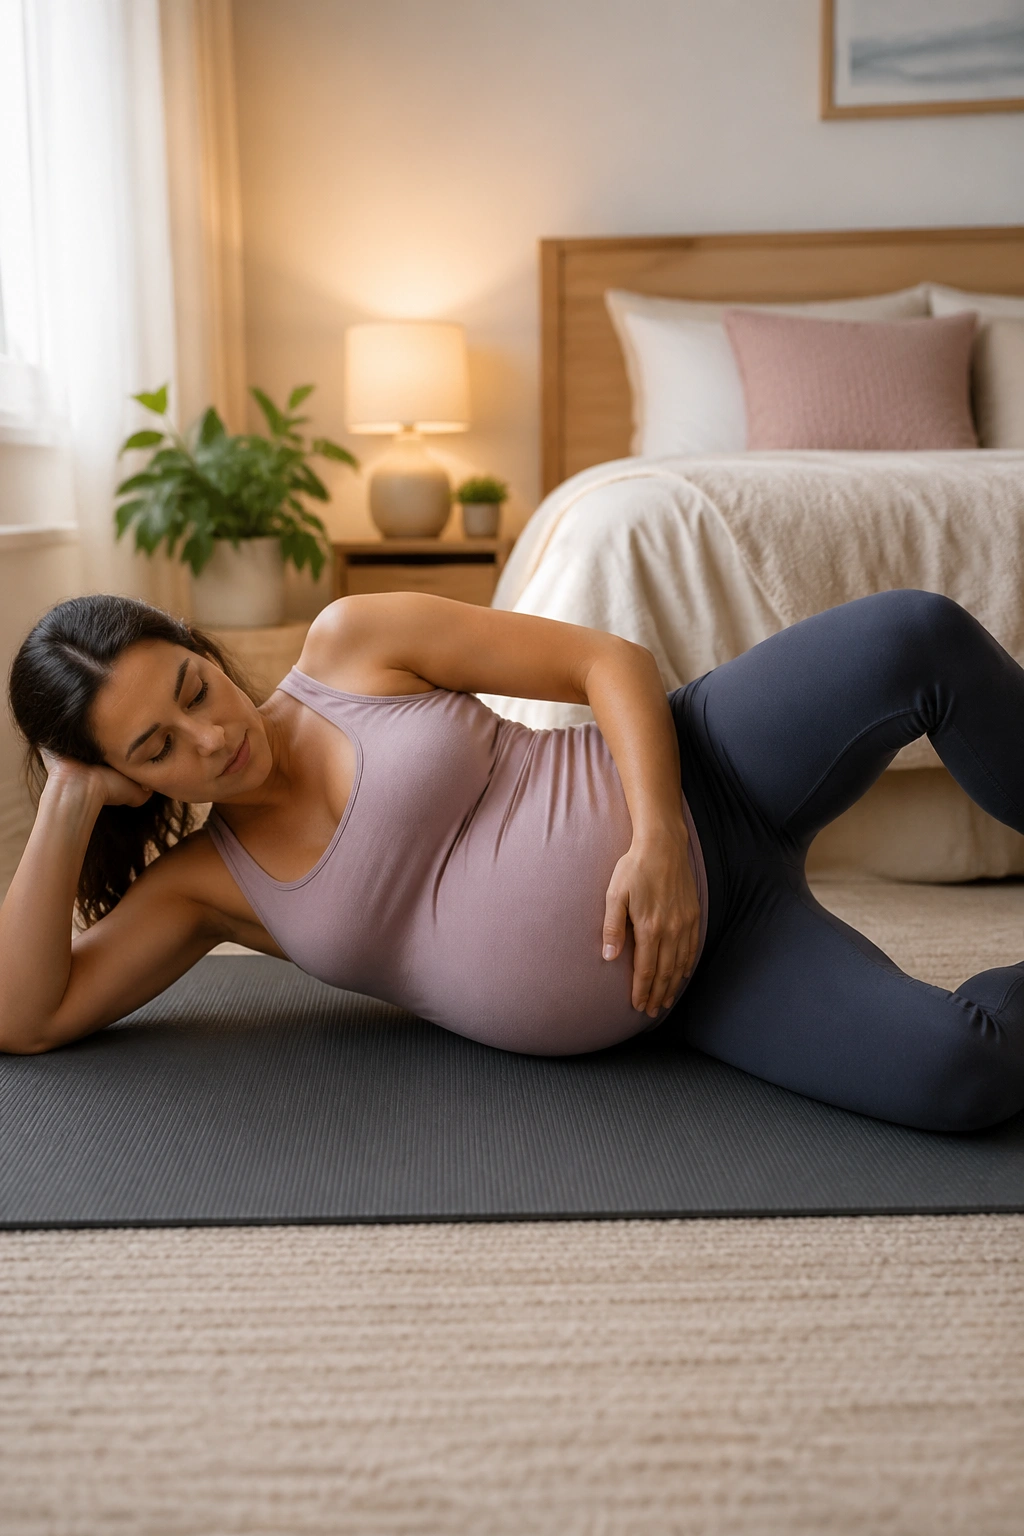
3. Side-Lying Glute Stability Series
If walking leaves you with that waddly, loose-at-the-pelvis feeling, your glutes are asking for attention.
Lie on your side with your head supported and your knees bent about 90 degrees. A pillow between your head and shoulder helps keep the neck quiet. Stack your hips. Then check again, because most people roll back without noticing. That little cheat steals the work from the side glute.
Try this mini series on one side before you switch:
- 12 clamshells with heels together
- 10 straight-leg lifts with the top leg slightly behind your body
- 8 small circles each direction
- 8 bent-knee side lifts
- 20-second hold at the top of the last rep
Keep the waist long. If your top hip hikes toward your ribs, you have gone too high.
This workout helps support the pelvis, knees, and low back because the glute medius — the side-butt muscle that everyone talks about and few people train well — helps stabilize the pelvis while you stand on one leg. Walking, climbing stairs, getting out of a car, even turning in bed all ask for that.
A light burn on the side of the hip is normal. Sharp pain at the front of the hip is your cue to reduce the range.
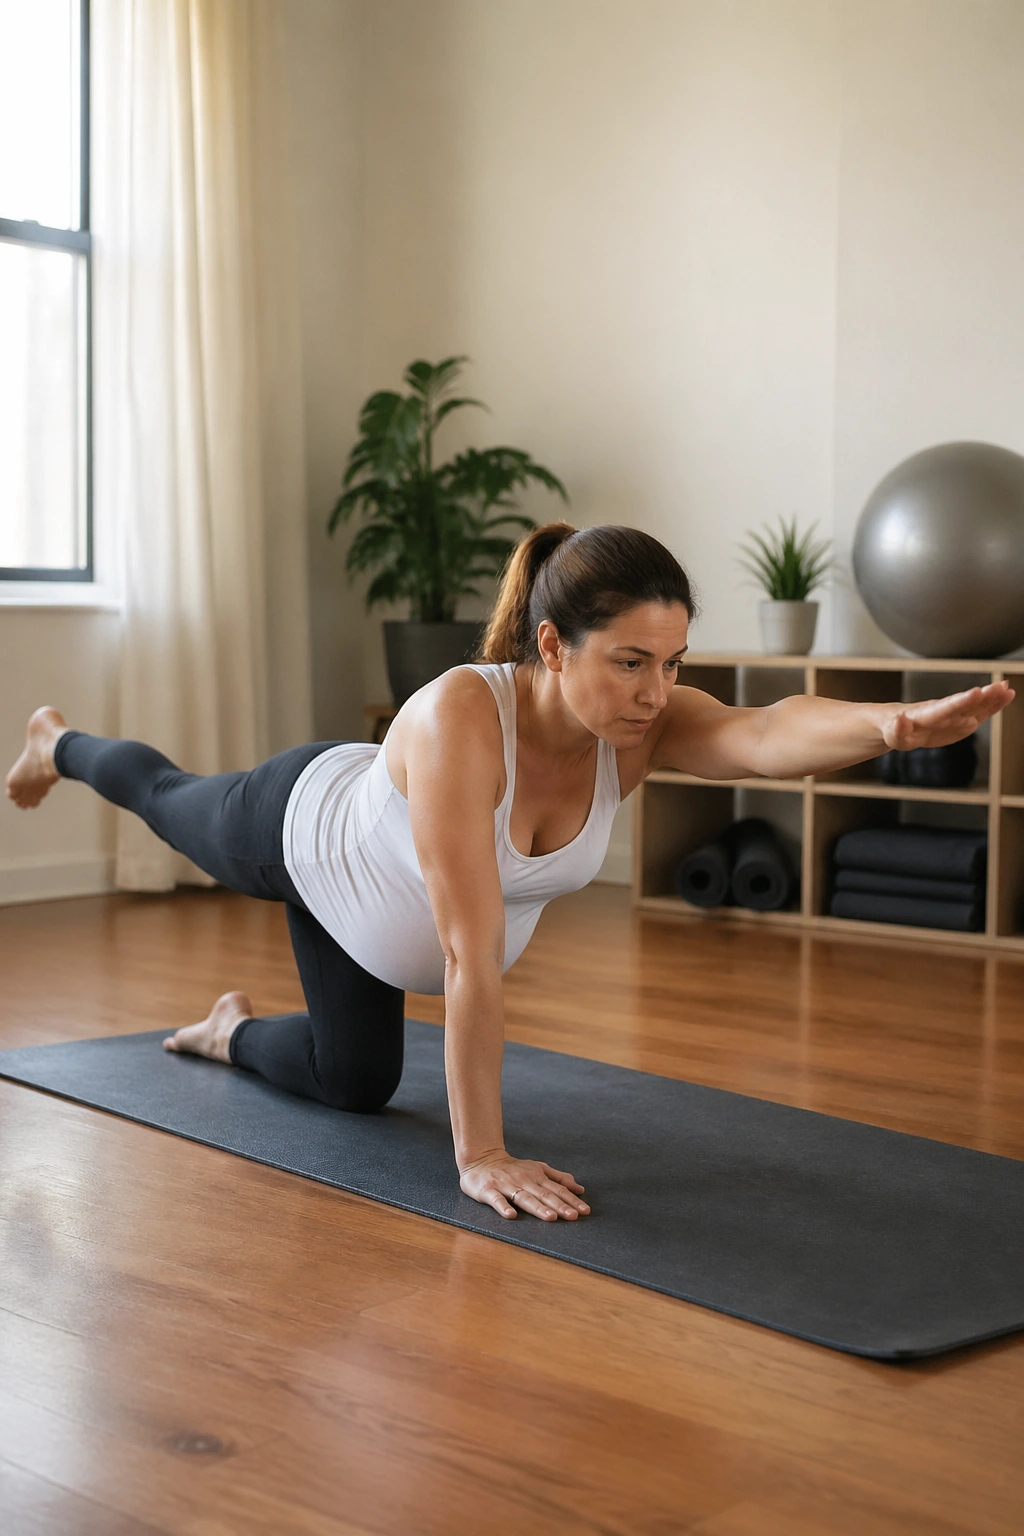
4. Quadruped Bird Dog Balance Routine
Bird dog can be a brilliant prenatal Pilates move. It can also turn into a floppy balancing act with a flared rib cage and a jammed low back. The difference comes down to setup.
Start in all fours and exhale first. That matters. On the exhale, feel the lower belly draw inward without sucking it up hard, and press the floor away so the shoulder blades stay wide. Slide one leg straight back with the toes still brushing the mat. Hold for one breath. Return. Repeat 6 times, then switch sides. Only after that should you try adding the opposite arm.
A lot of people rush to the full version. Skip that urge if your trunk twists or your belly domes. A toe-slide bird dog still trains core control, glute strength, and shoulder stability, and it often looks cleaner.
You can build the workout this way: 6 leg slides each side, 6 opposite arm reaches each side, then 4 full bird dogs with a 2-second pause. Rest in child’s pose with knees wide if that feels good, or sit back onto a cushion if folding deeply is not comfortable.
And if your wrists hate this position, elevate the hands. No prize for suffering through it.
5. Standing Wall Squat and Arm Reach Circuit
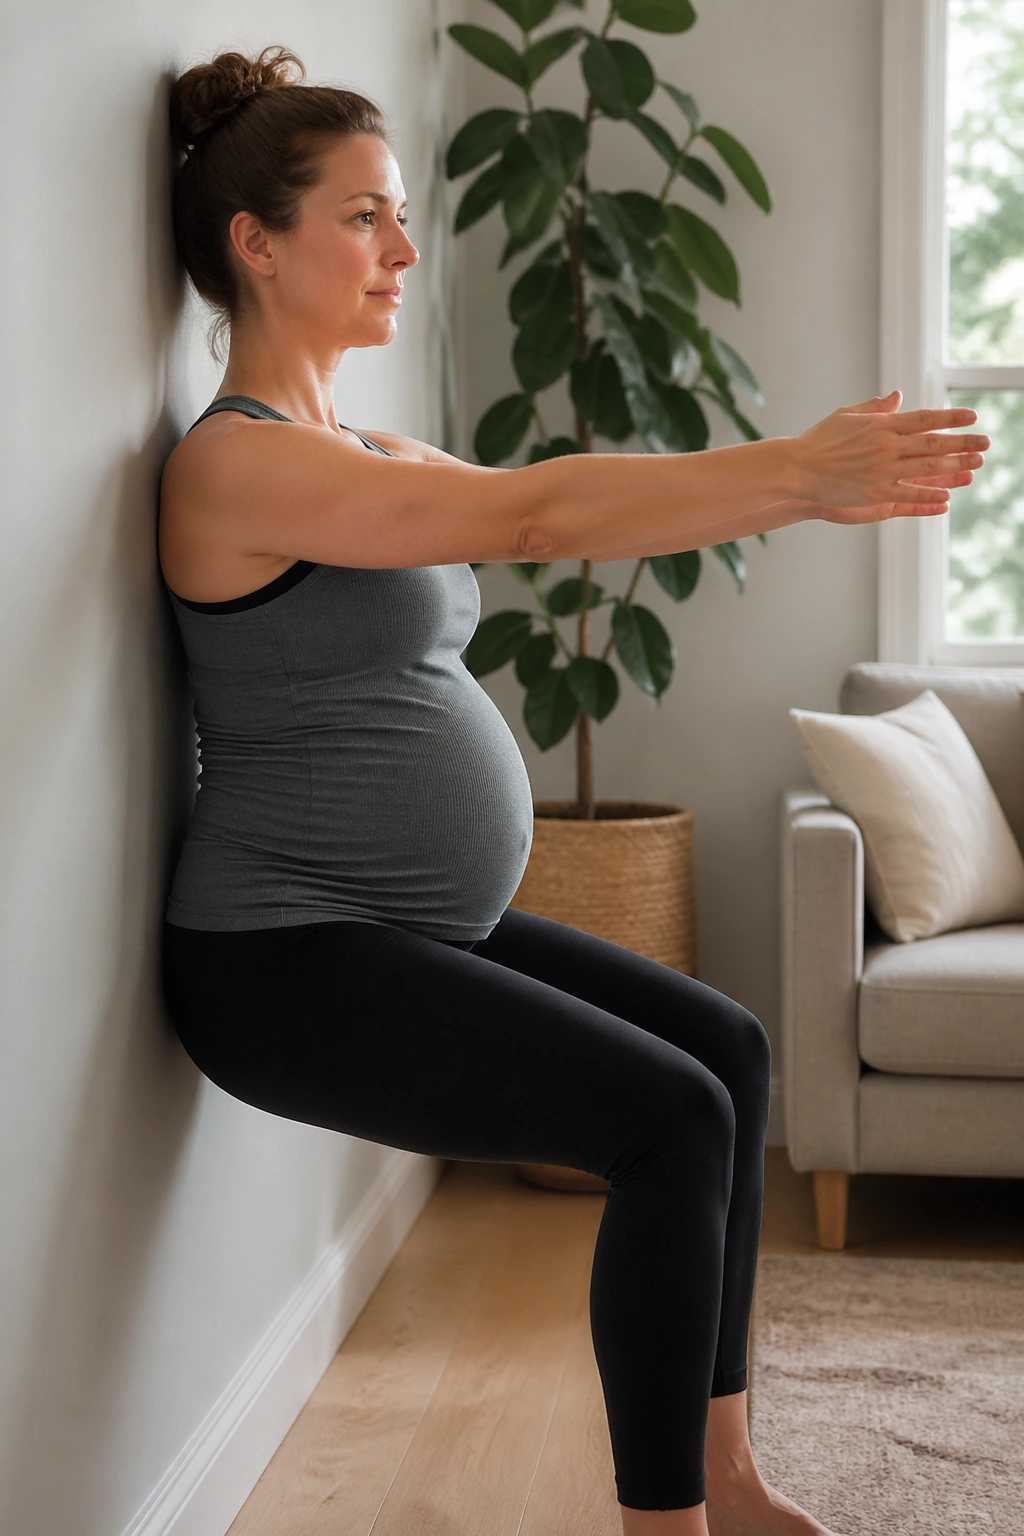
Pregnancy Pilates does not need to live on the mat. Standing work often feels better, especially later on, and it has a nice side effect: it trains the body for actual daily life.
Stand with your back against a wall, feet about 12 to 18 inches forward, hip-width apart. Slide down only as far as you can keep the ribs stacked over the pelvis — for many people that is a quarter squat, not a deep one. Exhale as you reach both arms forward. Inhale as you stand tall again. Do 10 reps.
Then change the arm pattern. Reach the arms overhead only as far as the ribs stay down and the neck stays soft. Add 8 slow calf raises. Finish with 8 sit-to-stand reps from a chair if you want a third round.
What makes this different
Unlike floor-based leg work, the wall gives you feedback. You can feel if your ribs pop, if one knee drifts inward, or if your weight shifts hard into the toes.
This is a strong pick if stairs leave your legs shaky or if you spend a lot of time carrying a toddler, groceries, or a laptop bag. Leg endurance matters during pregnancy more than many people expect.
6. Resistance Band Posture Session for Upper-Back Relief
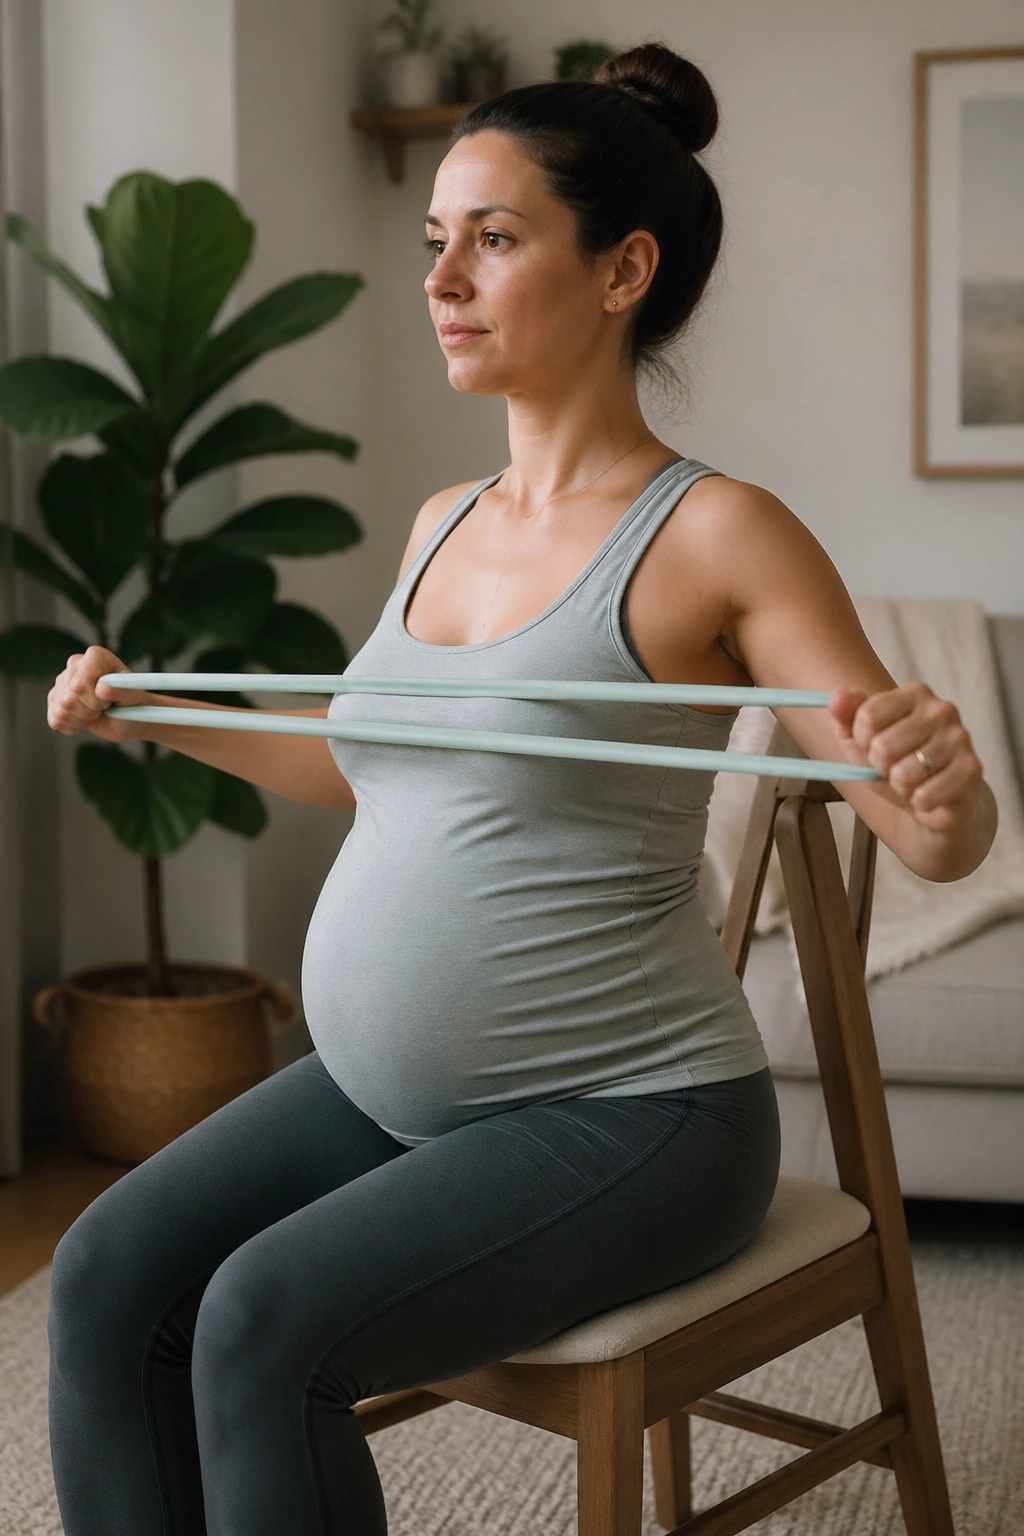
Breasts get heavier, ribs widen, and the head starts drifting forward. Then the upper traps join the party and your neck feels cooked by midafternoon. A short band session can help more than another chest stretch on its own.
Use a light resistance band — lighter than you think. Sit tall on a chair or stand with your back against a wall. Do 10 to 12 band pull-aparts at chest height, 8 to 10 external rotations with elbows tucked at your sides, then 8 diagonal pulls, one arm high and one low. Keep the shoulders low and the back of the neck long.
Watch this common mistake
People often pull the band by arching the low back instead of using the mid-back muscles. If your ribs jump forward, reduce the range and slow the pace.
A nice second round adds “goalpost” arms against the wall: elbows bent to 90 degrees, slide the forearms up only as far as the ribs stay connected. The movement is small. It should feel like the shoulder blades are gliding, not pinching together like crazy.
If you are already thinking about postpartum feeding posture, this session is worth doing a few times a week. Your upper back will thank you long before the baby arrives.
7. Mermaid Stretch and Side-Body Lengthening Flow
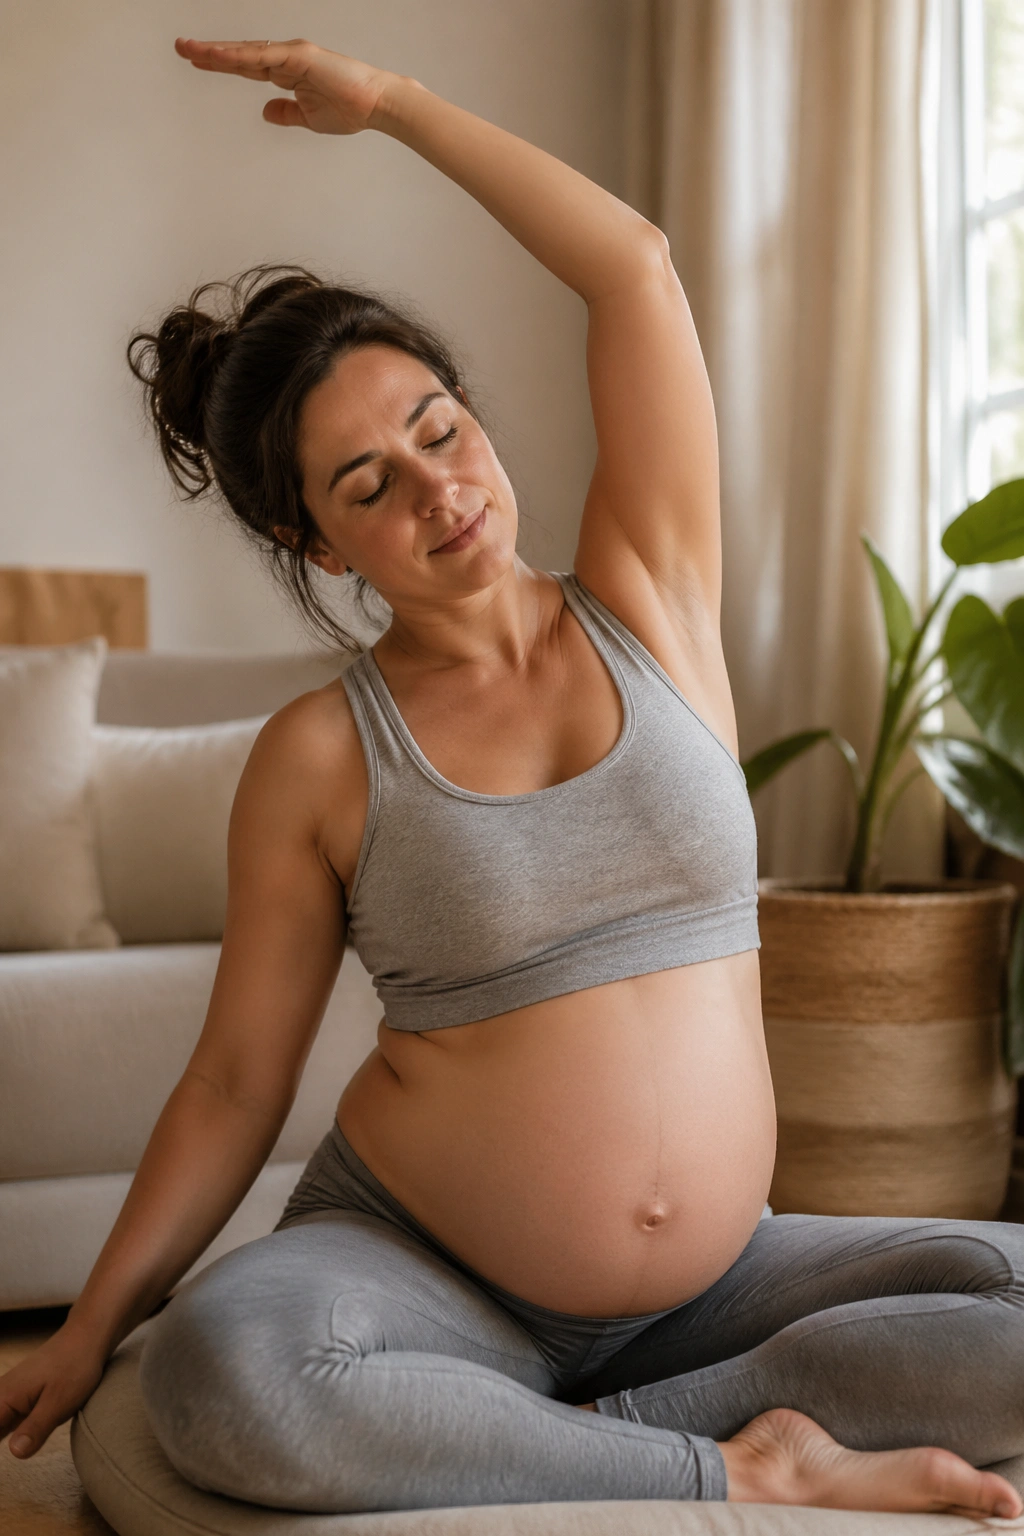
Rib cage tightness can make breathing feel cramped even when your lungs are fine. This flow helps.
Sit cross-legged on a cushion or with one shin folded in front of the other. Place one hand on the floor or on a yoga block beside you, and reach the opposite arm up and over in a side bend. Stay there for 3 slow breaths, sending the inhale into the open side ribs. Come up, switch sides, then add a small rotation toward the floor only if it feels spacious.
A gentle sequence
- 3 side bends each side, holding for 3 breaths
- 6 seated arm circles with a full inhale
- 4 “rainbow” reaches, one arm sweeping overhead
- 2 final side bends with the bottom hand raised onto a block
Do not chase depth. The win here is room to breathe, not the biggest side stretch in the room.
This session pairs well with band work or after long spells at a desk. It also helps later in pregnancy when the baby sits high and you feel crowded under the bra line. A folded blanket under one hip can make the whole thing feel smoother.
8. Chair-Assisted Hip Flexor and Hamstring Reset
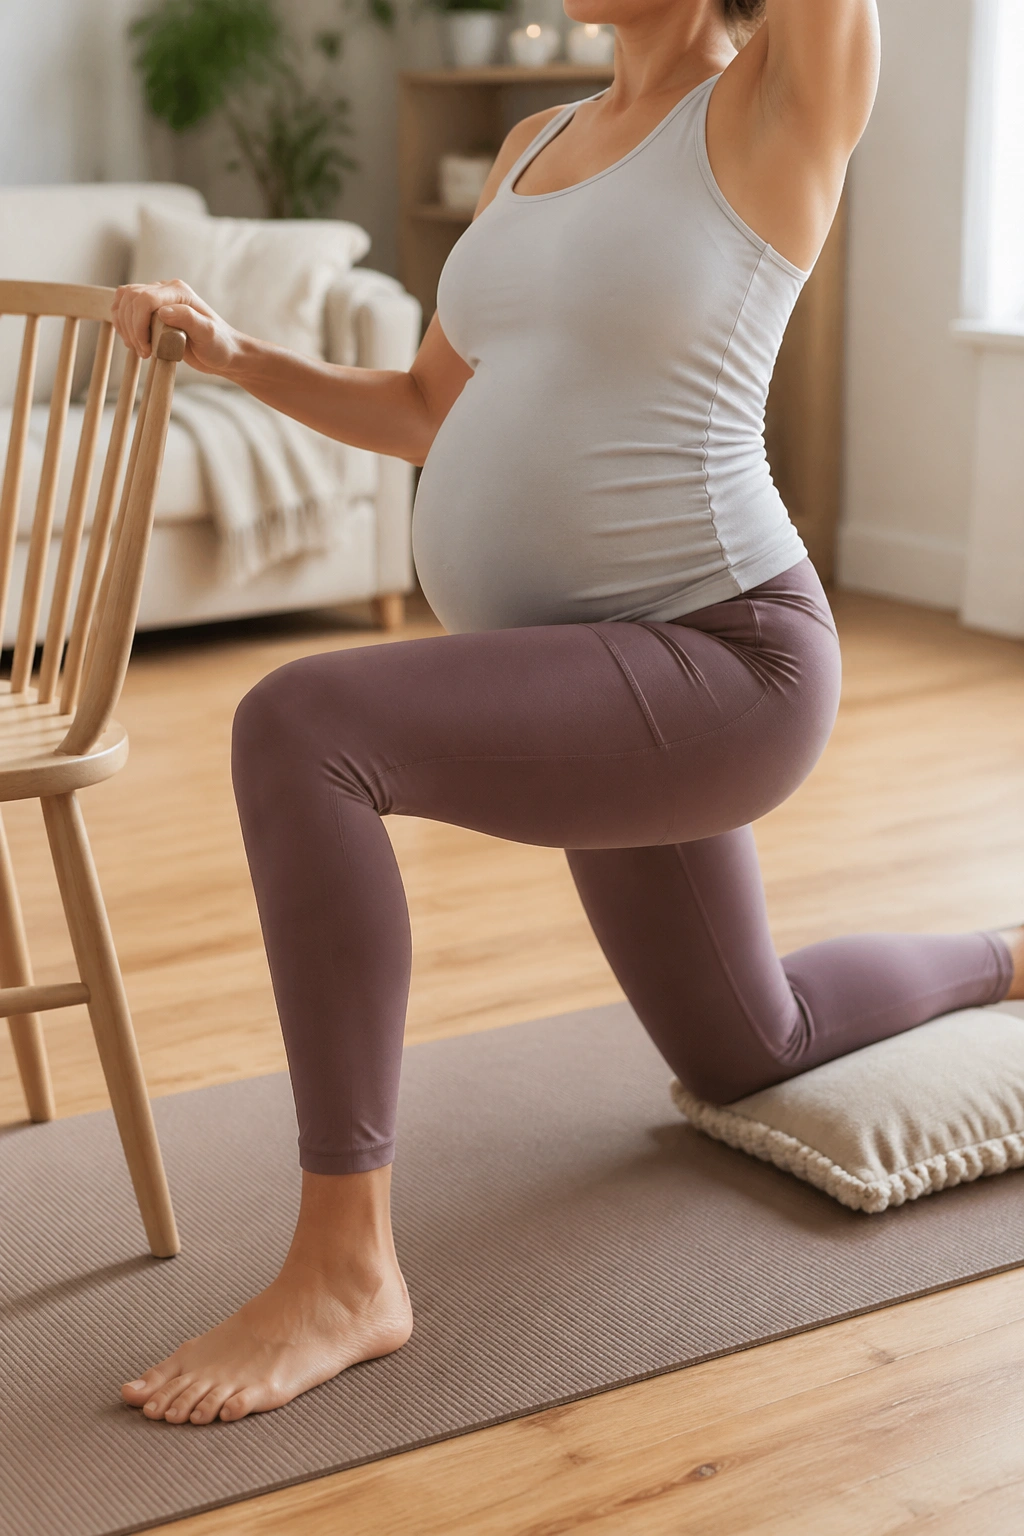
A lot of pregnancy discomfort starts with one boring fact: we sit a lot. Car seat, desk chair, couch, dining chair, then back in the car. Hip flexors get short and grippy, hamstrings feel both tight and weak, and the pelvis starts moving like one solid block.
Set one knee down on a cushion in a half-kneeling lunge with the front foot planted. Hold onto a chair for balance. Tuck the tail slightly, squeeze the glute of the kneeling leg, and reach the same-side arm overhead. Hold 20 to 30 seconds. Switch. Do two rounds.
Then sit on a chair and stretch one leg long with the heel on the floor. Hinge forward from the hips with a flat back until you feel the hamstring. Hold 20 seconds, then do 8 little hinge pulses — small, not bouncy.
Why this one works
You are pairing front-of-hip opening with back-of-leg length, which often restores a more comfortable pelvis position faster than stretching one area alone.
If kneeling is not happening, do a standing split-stance version instead. Same idea. Less pressure on the knees.
9. Inner-Thigh and Pelvic Stability Sequence With a Ball or Pillow
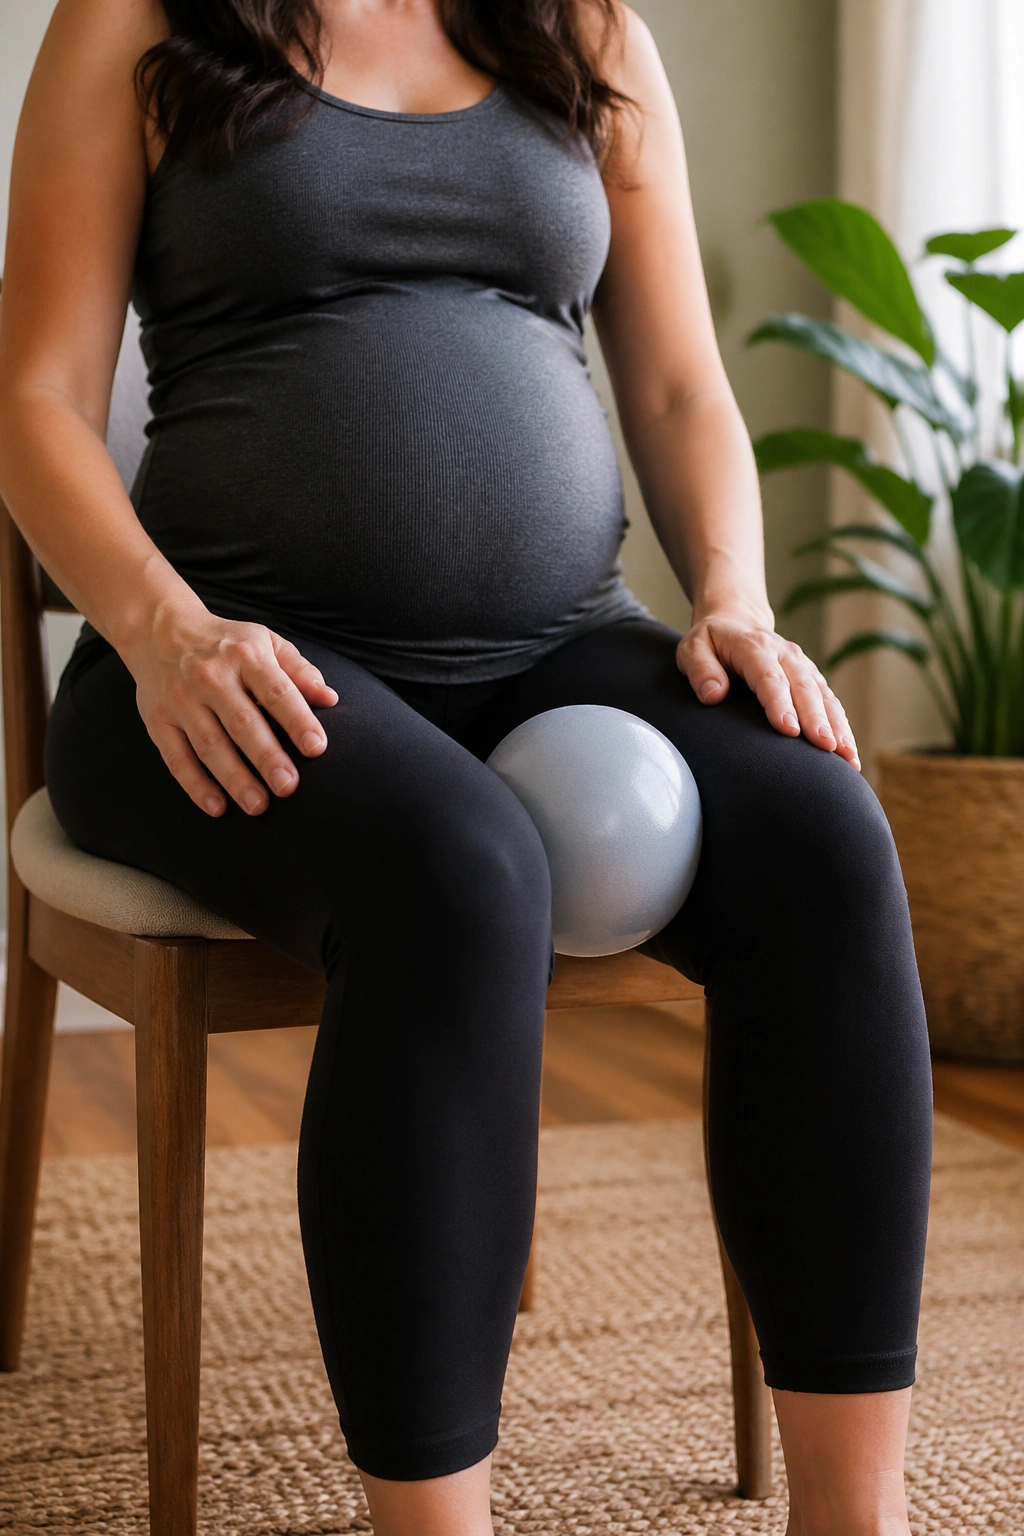
Adductors — the inner-thigh muscles — do more than squeeze your knees together. They also help the pelvis and deep core share the load. During pregnancy that support can feel useful, especially if your pelvis feels wobbly when you roll over or stand on one leg.
Sit tall on a chair with a small ball, yoga block, or folded pillow between the knees. Exhale and do a gentle 5-second squeeze, then inhale and release fully. Start with 8 reps. After that, keep the prop in place and do 10 mini squats holding a chair or countertop. The squeeze should stay soft, not white-knuckle hard.
Want a floor option? Side-lying bottom-leg lifts are excellent here. Lie on one side, bend the top knee and place that foot in front of the bottom leg. Lift the bottom leg 8 to 12 times with a flexed foot. You will feel it fast.
A word of caution, because this one gets overdone: if you already have pubic symphysis pain, hard squeezing can stir it up. Use light pressure only and stop if the front of the pelvis feels sharp or pinchy.
10. Wall Side Plank and Standing Oblique Support
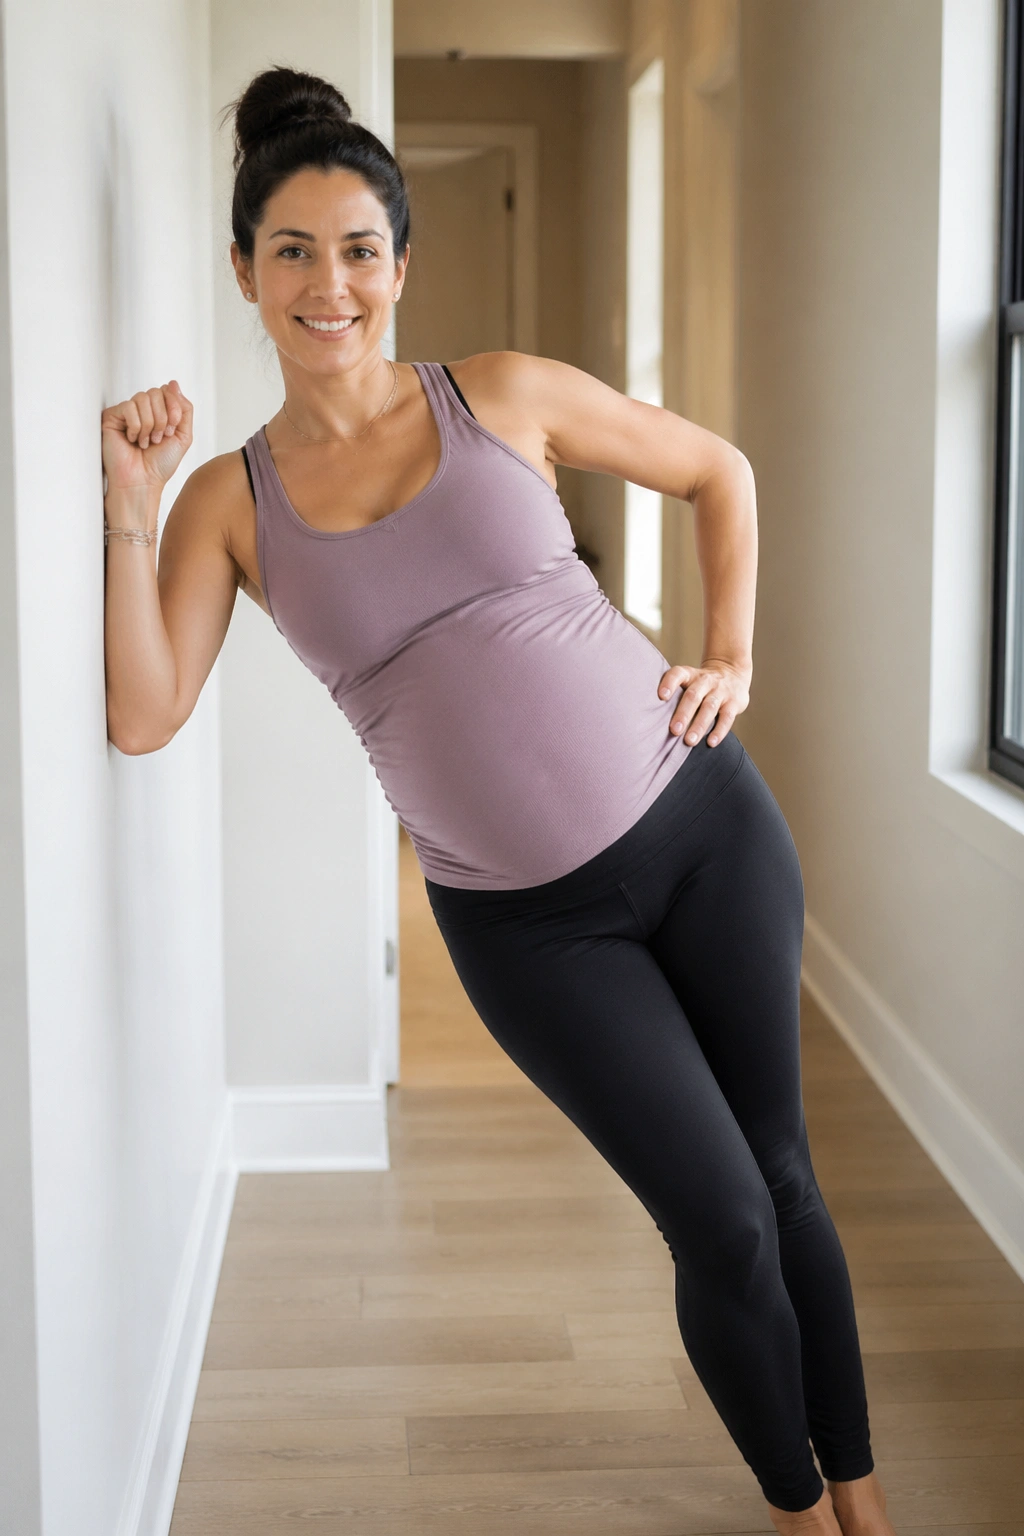
Floor side planks are not the only way to train lateral core strength. A wall version can be cleaner, safer, and easier to breathe through during pregnancy.
Stand sideways to a wall and place your forearm on it, elbow under shoulder. Step your feet away from the wall so your body leans on a diagonal. Exhale, press the forearm into the wall, and think about lifting the underside waist up away from the hip. Hold 15 to 20 seconds. Inhale and soften. Do 3 holds each side.
Then add movement: keep the wall press and march the outside knee up 6 times. Slow. Controlled. No swaying.
Who this suits best
This is a smart pick if you miss abdominal work but crunches and front planks feel wrong. You still train obliques, shoulder stability, and pelvic control without loading the front abdominal wall hard.
If you feel neck strain, move closer to the wall and lower the shoulders. If you feel pressure downward into the pelvis, shorten the hold.
11. Birth Ball Pelvic Circles and Tilts Flow
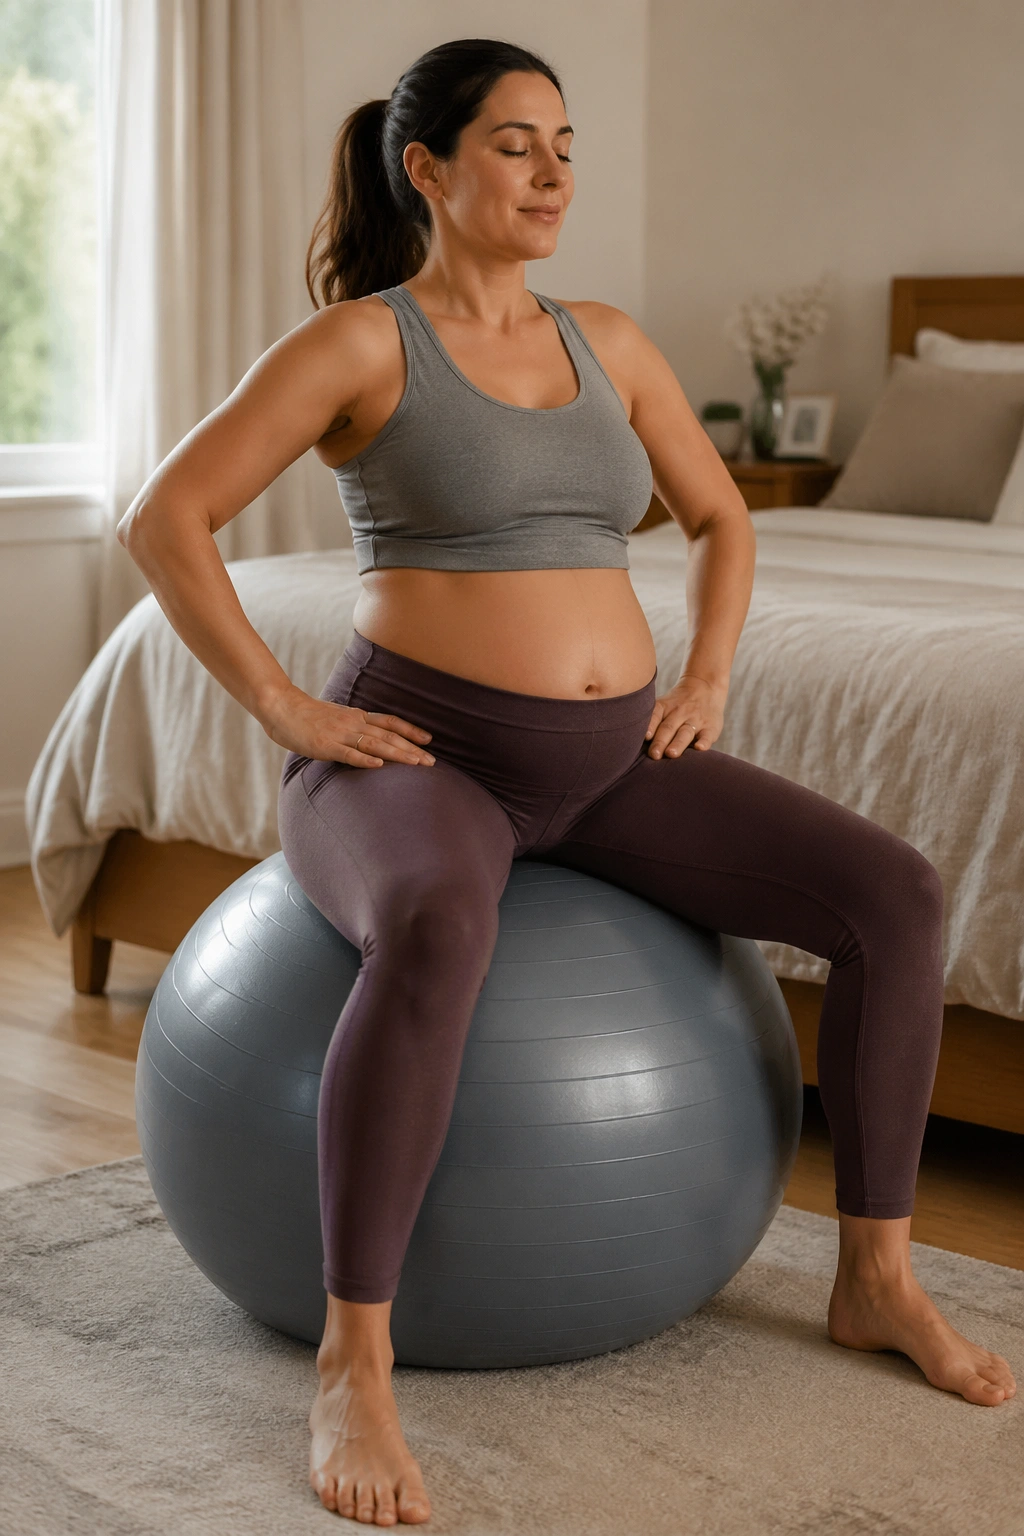
Sit on a correctly sized birthing ball and your hips should be a touch higher than your knees. That setup matters more than people think. Too low and the whole movement gets sticky.
Once you are on the ball, place your hands on your hips and start with 10 anterior-posterior tilts — pelvis tipping forward and back. Then do 10 side-to-side shifts, 10 circles each direction, and 8 figure eights. Finish with 10 slow marches, one foot lifting a few inches at a time.
The beauty of this workout is the small motion. You are not bouncing around. You are giving the pelvis room to move in more than one plane, which can ease back tension and teach control at the same time.
I like this routine late in pregnancy, during desk breaks, or at the end of the day when the pelvis feels jammed. Keep the ball near a wall or sturdy surface if balance feels off. Grip socks help too — one of those tiny details that saves a lot of annoyance.
12. Standing Glute Kickback and Hamstring Curl Routine
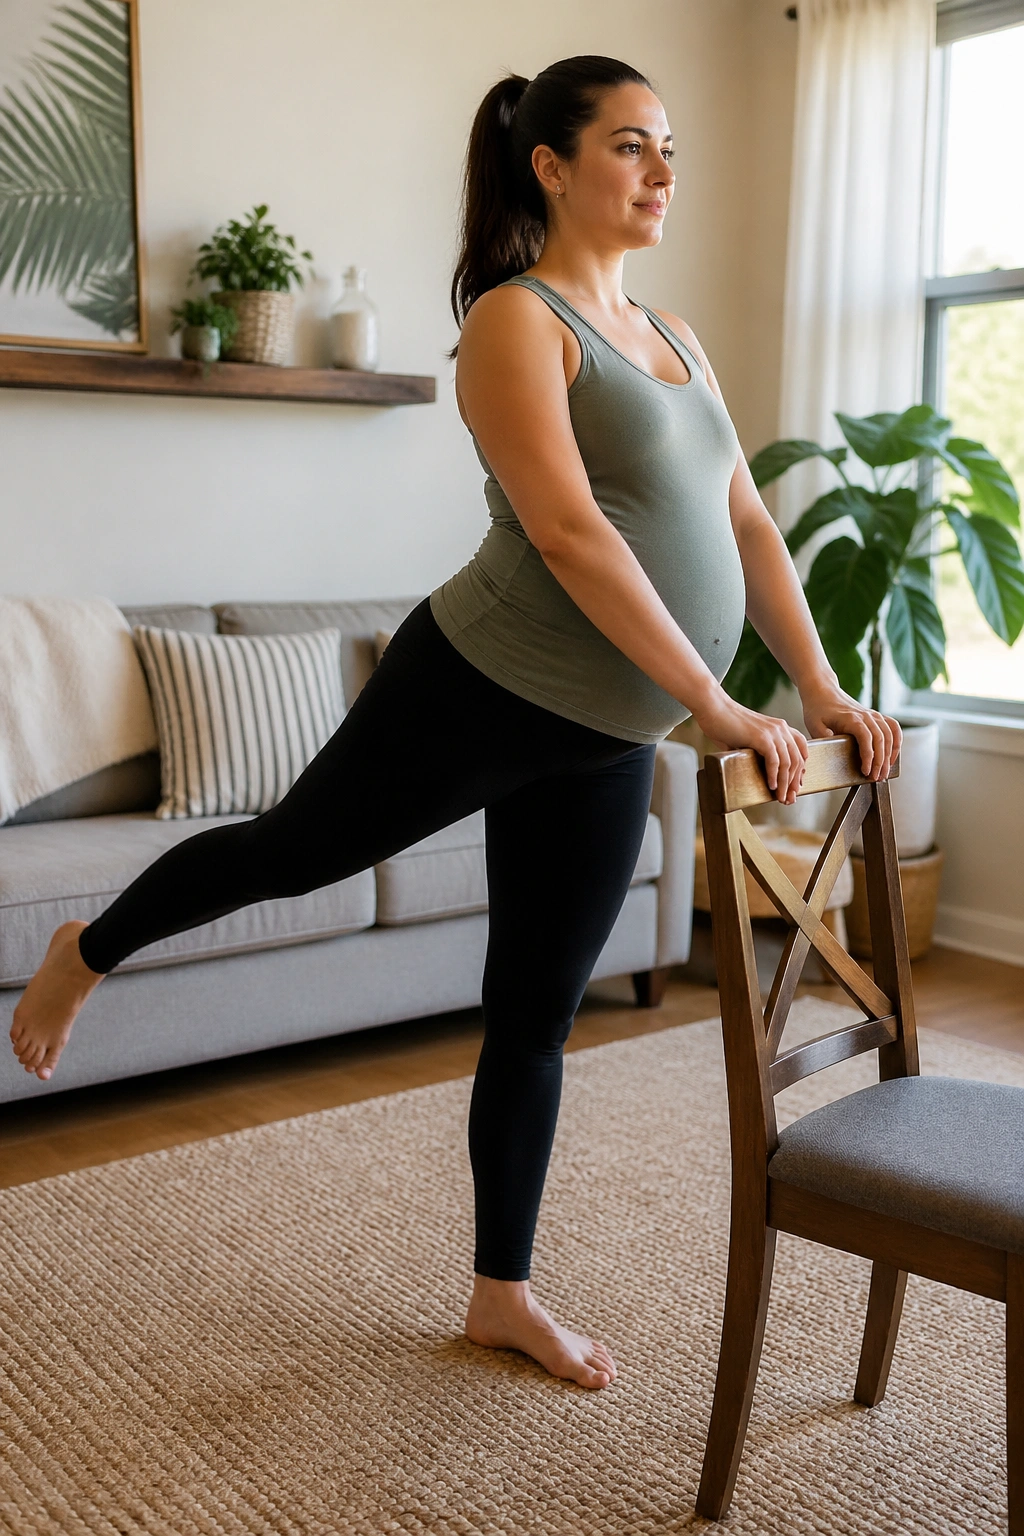
Weak glutes make pregnancy feel heavier. That is not poetry. It is mechanics.
Hold the back of a chair and stand tall with a soft bend in both knees. First, extend one leg behind you without arching the low back. Think glute moving the leg, not the spine doing the work. Do 10 reps. Then keep the thighs parallel and perform 10 hamstring curls on that side, heel toward seat. Switch legs.
For a second round, add 8 diagonal kickbacks — leg reaching slightly out and back — to catch more of the side glute. Move slowly enough that the standing leg has to stabilize. That is part of the point.
Quick form check
- Keep both hip bones facing forward
- Do not let the ribs flare
- Keep the kickback low
- Exhale on the effort
This routine is handy for people who dislike floor work, have trouble getting down and up, or want something they can do while dinner cooks. It is also a good match for pelvic girdle discomfort when done in a small range.
13. Foot, Ankle, and Calf Circulation Workout
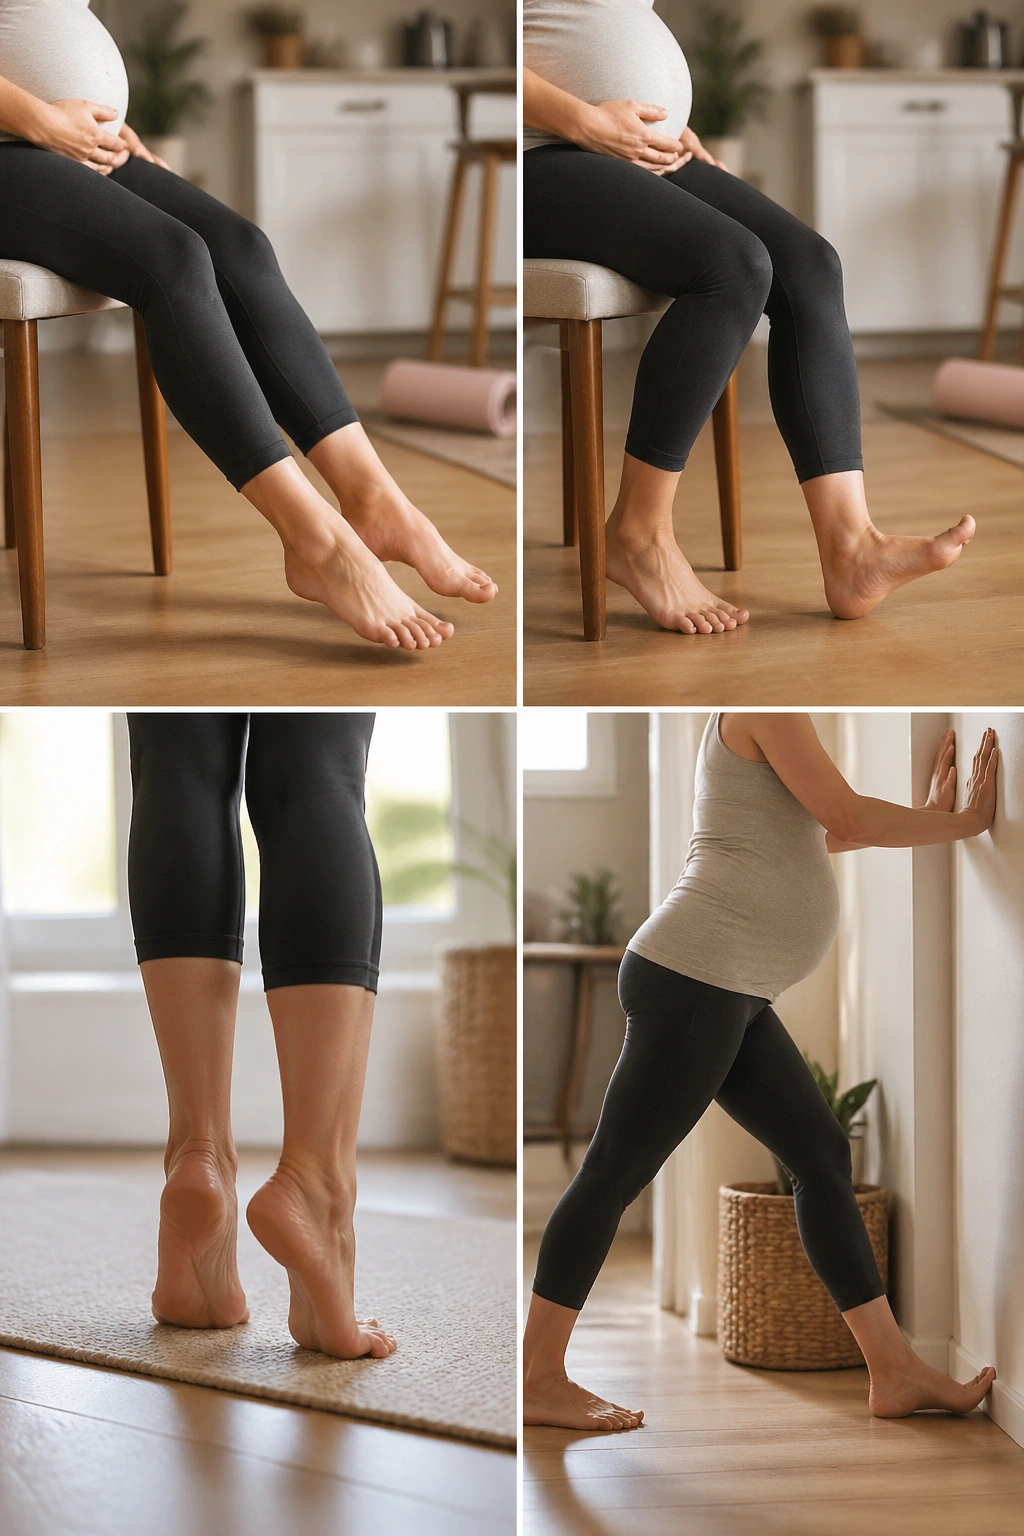
Swollen feet can make the whole body feel tired. Add calf cramps and you have a rotten combo.
Sit on a chair and do 20 ankle pumps on each side, then 10 ankle circles each direction. Stand for 15 slow calf raises, holding a chair or wall. Pause at the top for one second, lower under control, and keep the weight spread across the ball of the foot instead of rolling to the outer toes. Finish with a wall calf stretch for 20 to 30 seconds per side.
A tennis ball or massage ball under the foot works well too. Roll it from heel to forefoot for 30 seconds each side. The pressure should feel relieving, not bruising.
One thing not to ignore
If one calf is suddenly painful, hot, red, or much more swollen than the other, skip the workout and call your clinician. That is not the time to stretch it out and hope.
This section may look humble next to the core work, yet it often gives the quickest comfort return — especially after standing for long stretches or flying.
14. Chair Balance March and Heel Raise Series
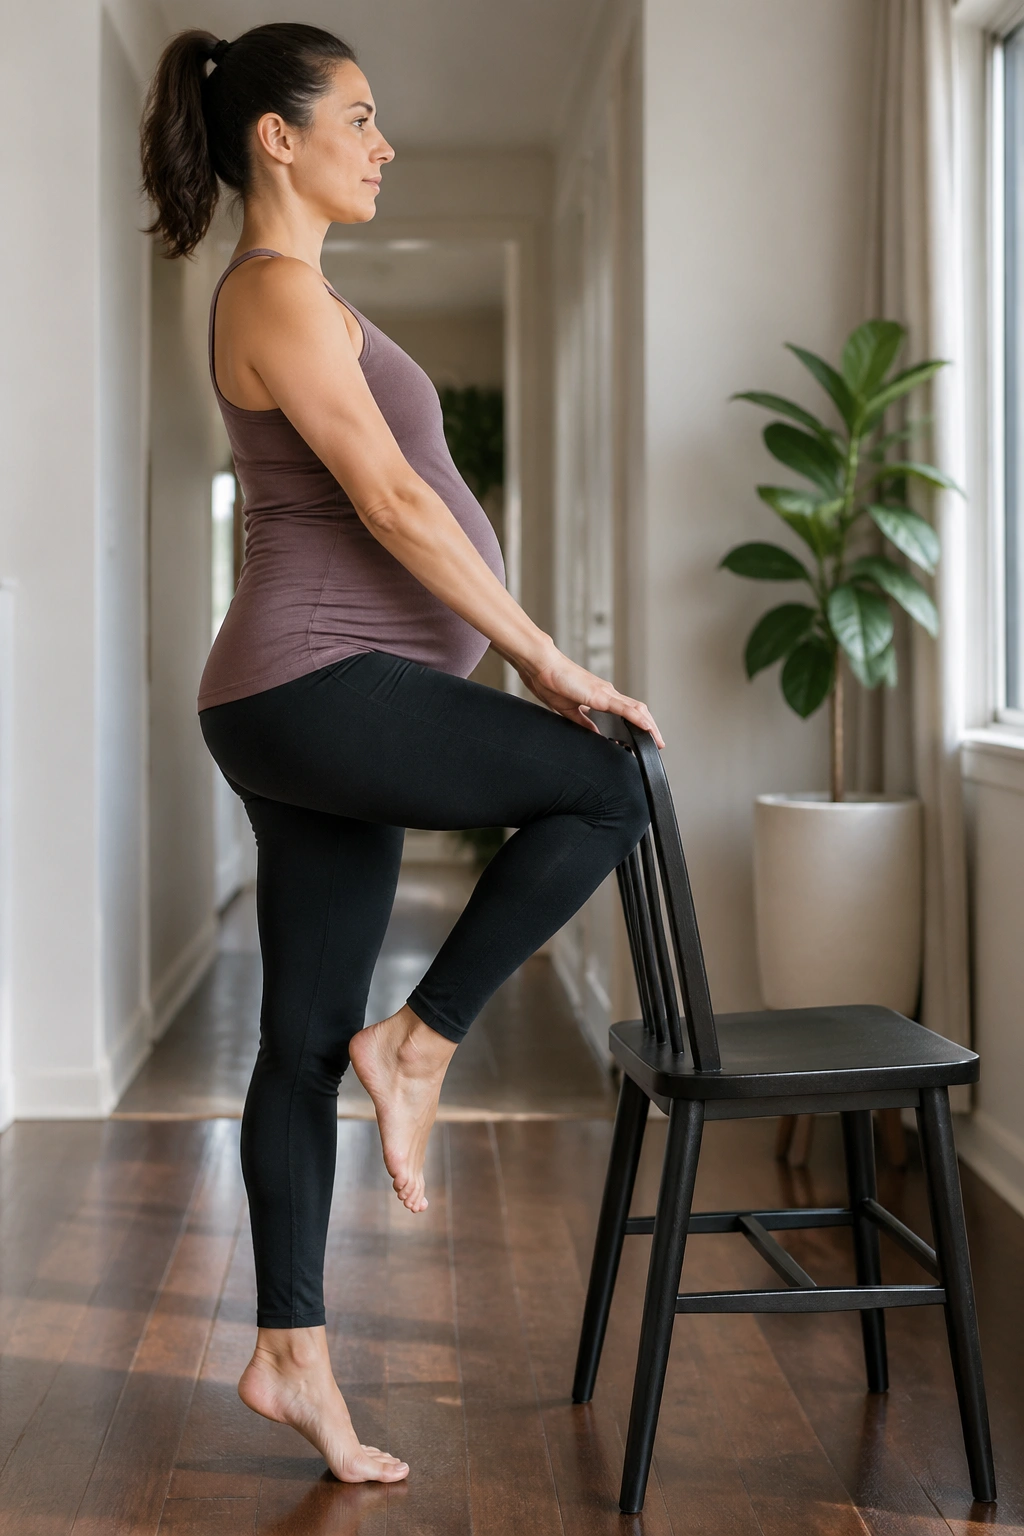
Balance changes quietly during pregnancy. One week you feel steady. A little later, turning too fast while putting on pants suddenly feels like a stunt.
Stand behind a sturdy chair with one or two fingertips resting on it. March one knee up to a comfortable height, pause for 2 seconds, and set it down without thumping. Alternate for 10 reps each side. Then do 12 heel raises and 20 seconds of tandem stance — one foot slightly in front of the other — on each side.
This is not flashy work. It is anti-wobble work, and it carries over to stairs, curbs, uneven sidewalks, and the middle-of-the-night bathroom trip when your body is half awake.
If the marching feels too easy, slow it down. If it feels sketchy, widen your stance and keep both hands on the chair. A lot of balance training is just pacing the movement so the nervous system has time to react.
15. Inclined Core Connection With Heel Slides
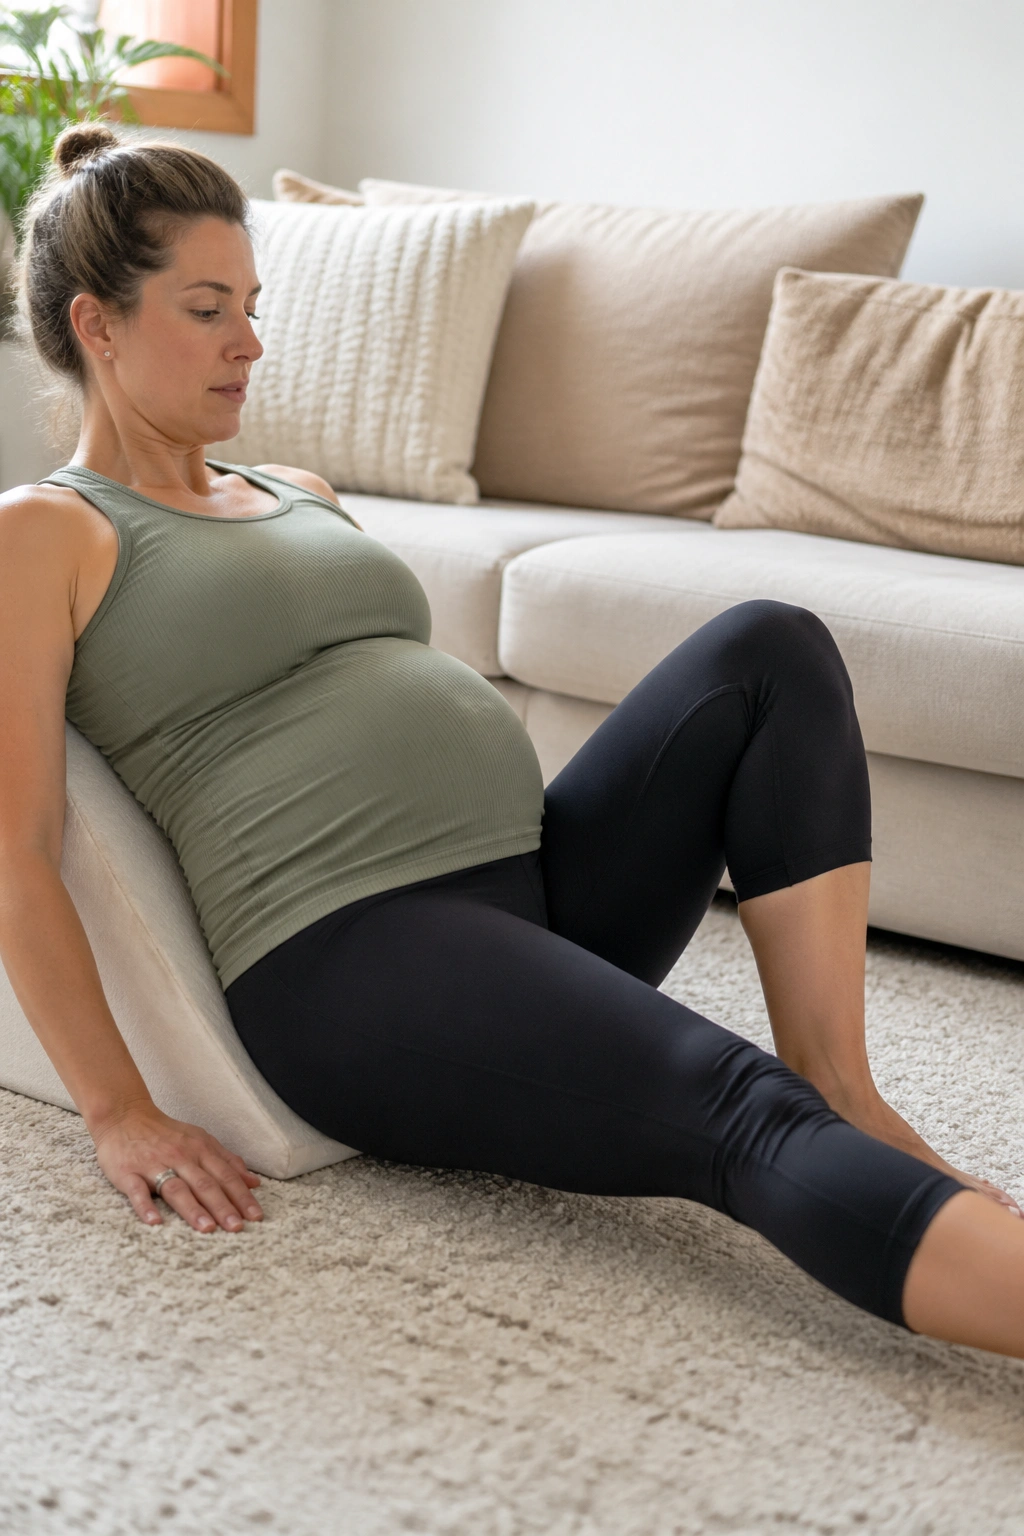
You can still train the abdominal wall in pregnancy. You just need a version that respects pressure.
Set yourself up on a wedge, stacked pillows, or the raised end of a couch so your torso is on an incline of about 30 to 45 degrees. Bend both knees with feet on the floor. Exhale and feel the ribs soften down as the lower belly gently narrows. Slide one heel away until the leg is longer, then inhale to return. Alternate for 8 to 10 reps each side.
What to watch for
- Doming or coning along the midline
- Breath-holding
- Rib flare
- Pelvic pressure
- Low-back gripping
If any of those show up, shorten the slide or keep the moving foot lighter on the floor. Some people do better with a toe tap instead of a full slide. That is not a downgrade. It is a smarter match.
A second set can add bent-knee fallouts — one knee opening to the side while the pelvis stays still. Slow is what makes this work.
16. Thoracic Rotation Session for Rib and Mid-Back Comfort
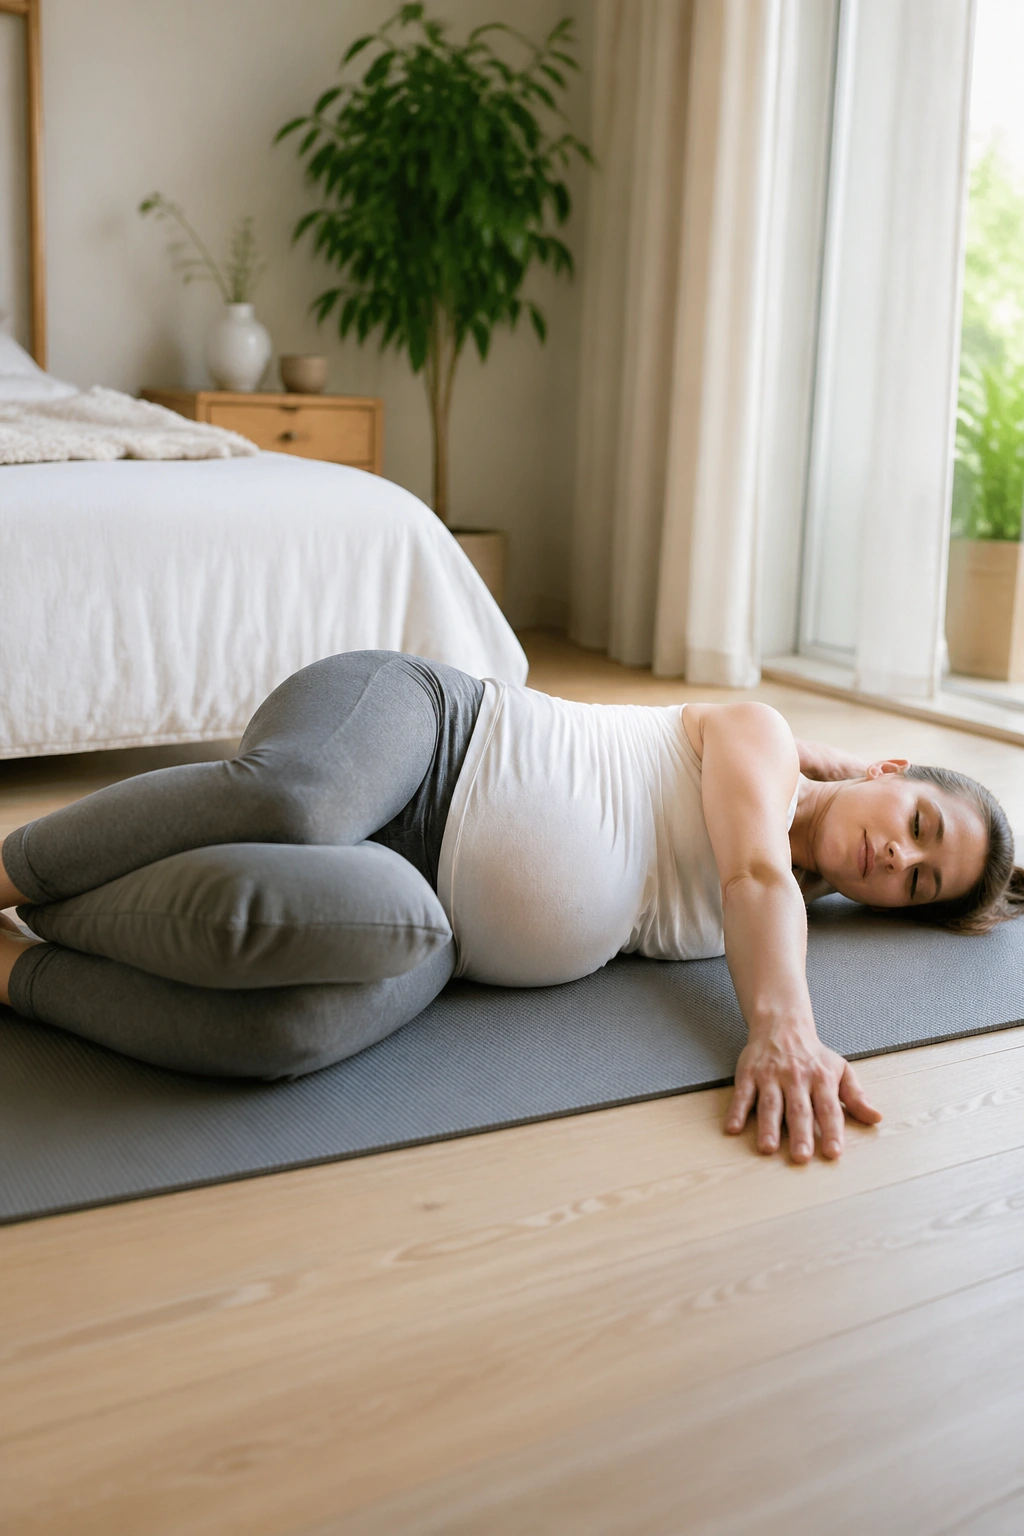
Late pregnancy can make the mid-back feel stiff in a way that is hard to describe until you have felt it yourself. Reaching into the back seat, twisting to get out of bed, pulling on a shirt — all of it can feel cramped around the ribs.
Try a side-lying open book. Lie on your side with knees bent and a pillow between them if that feels better on the pelvis. Reach both arms forward at shoulder height. Then open the top arm across the body, letting the chest rotate only as far as the ribs and belly feel comfortable. Take a full inhale there, then return. Do 6 to 8 reps per side.
No big heroic twist. This is an upper-back movement, not a wrenching of the low back.
You can pair it with seated thread-the-needle on a chair: hands behind the head, rotate gently right and left for 6 reps. The combo helps people who feel stuck through the bra line, especially after long periods sitting or after side-lying sleep positions that leave the mid-back tight.
17. Supported Deep Squat and Pelvic Opening Flow
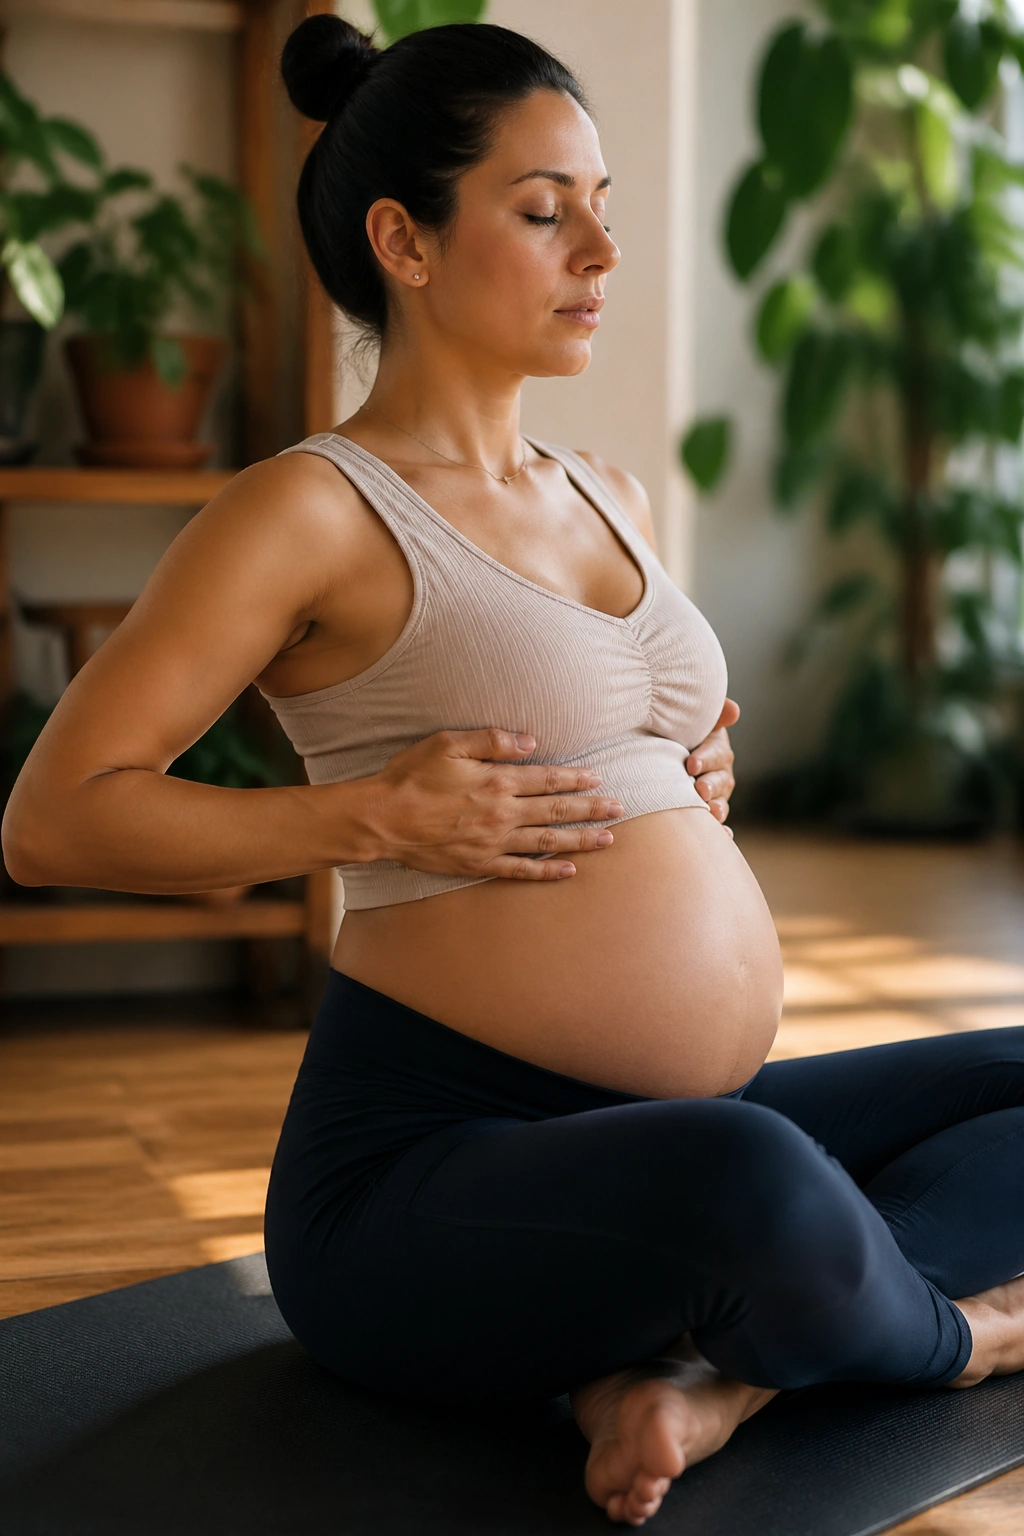
A supported squat can be gold during pregnancy — when it suits your body. It helps open the hips, lengthen the pelvic floor, and rehearse a position that many people find useful during labor. It is not mandatory, and it is not comfortable for everyone.
Hold a door frame, countertop, suspension trainer, or heavy table. Step the feet wider than hips and turn the toes out as much as your hips like, not as much as a photo says you should. Sink down into a squat only to the depth where your heels stay grounded and your knees track comfortably. Hold for 3 breaths. Rise. Repeat 4 times.
Between holds, do 6 adductor rock-backs in all fours: knees wide, hips moving back toward the heels in a small range. That pairing gives you both loaded opening and easier mobility.
Skip the deep version if
- Pubic symphysis pain spikes
- You feel pinching at the front of the hips
- Your heels lift hard
- Pelvic pressure builds
A shallow supported squat still counts. Depth is optional. Comfort and control are not.
18. Morning Reset for Stiff Hips and Low Back
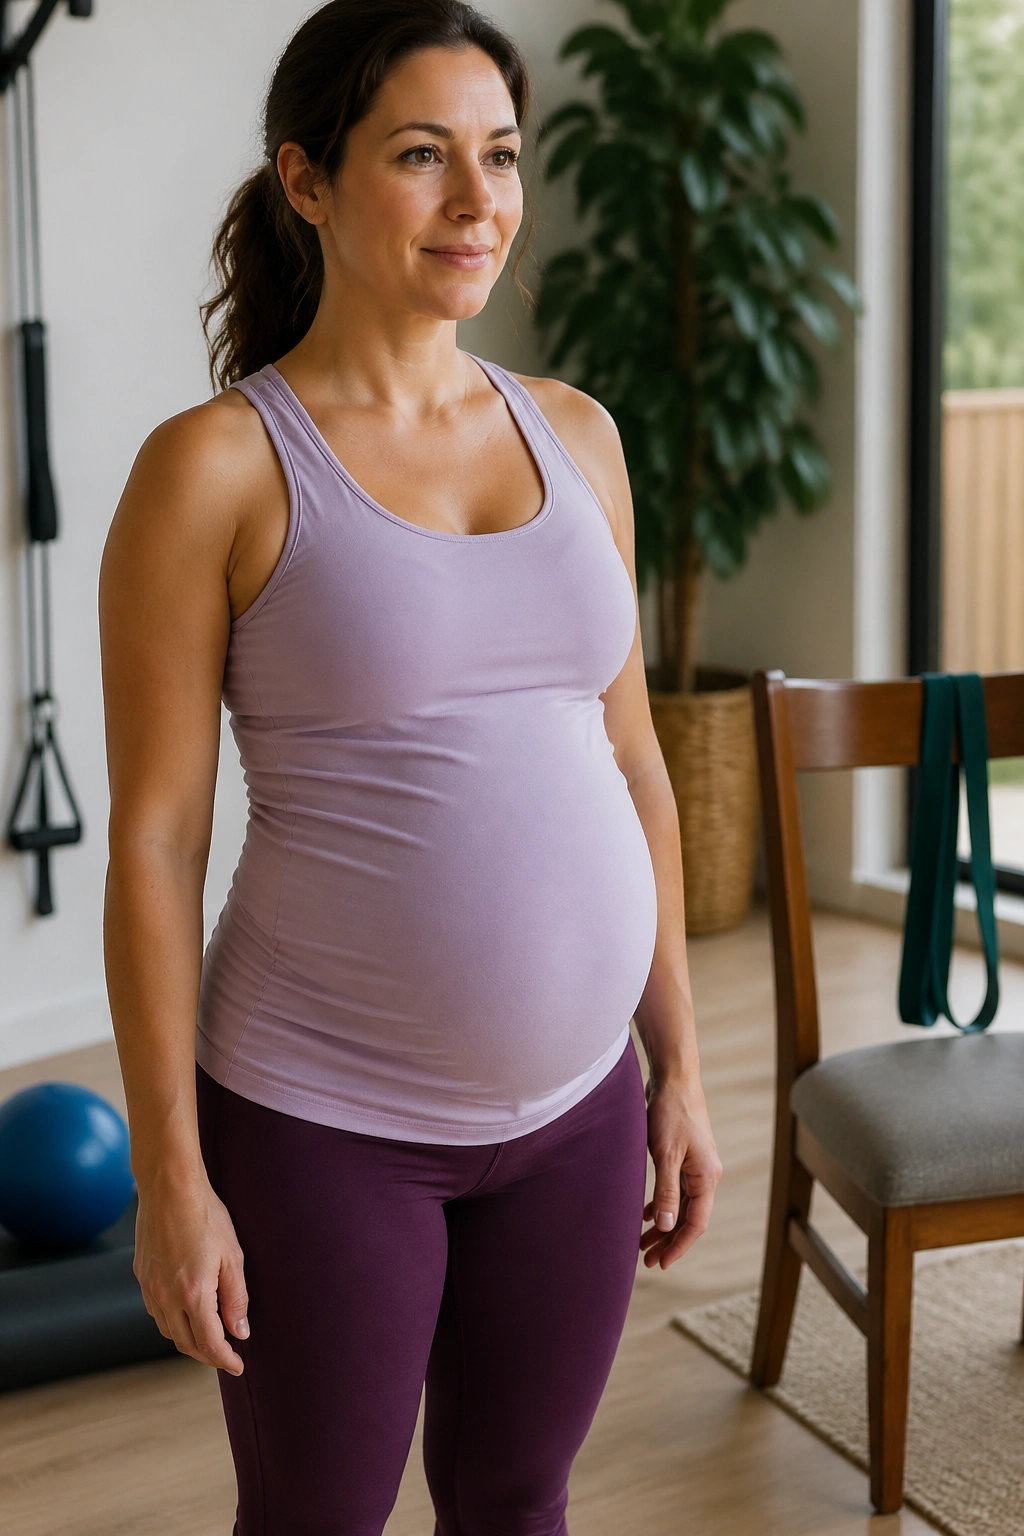
Morning can be rough. You have been in one or two sleep positions for hours, your hips feel cemented, and the low back complains before coffee. This 8- to 12-minute reset is one of the best uses of a Pilates mat during pregnancy.
Start with 6 seated or side-lying breaths into the ribs. Move to all fours for 8 cat-cows and 6 tail-wags each side. Then do 8 hip circles standing at a counter, one direction and then the other. Finish with 10 sit-to-stands from a chair and a 20-second calf stretch on each side.
A quick order that works
- Breath
- Spine
- Hips
- Legs
That order matters because it goes from lowest effort to highest demand. Your body wakes up gradually instead of being asked for strength before it has space.
If getting to the floor feels like too much in the morning, do the whole routine standing at a wall or kitchen counter. No purity tests here.
19. Evening Wind-Down Breath and Mobility Session
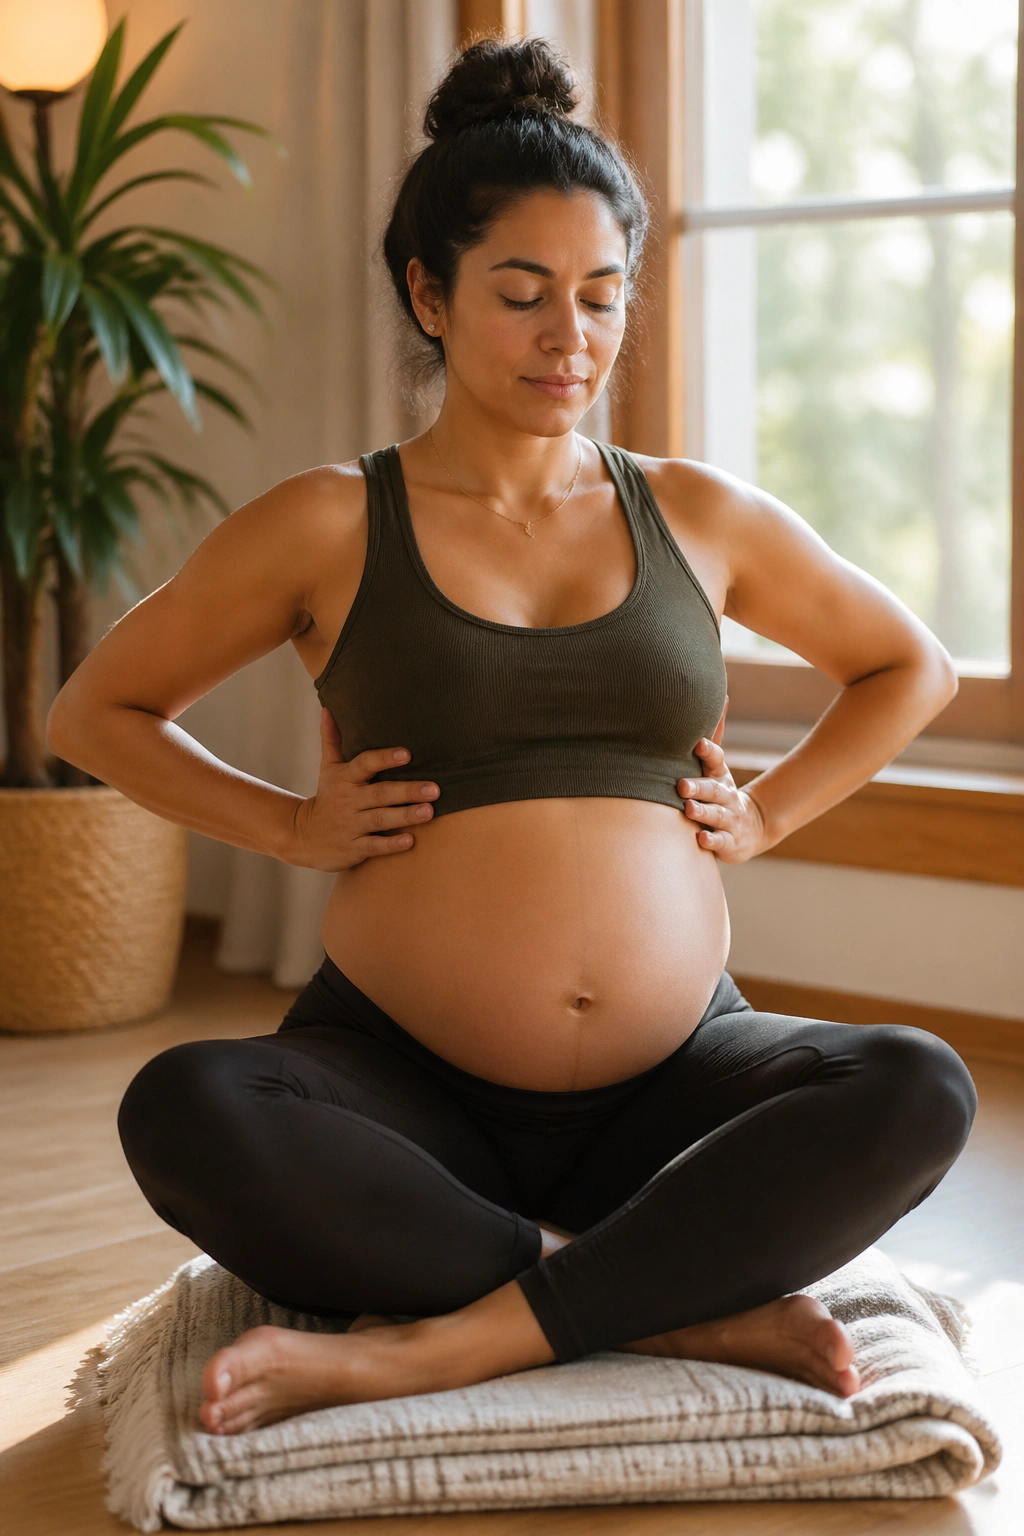
Some prenatal Pilates workouts should feel like training. This one should feel like your nervous system finally exhaled.
Set up in side-lying or seated with pillows so you are not fighting for position. Take 6 slow breaths with a longer exhale than inhale — say 4 counts in, 6 counts out. Add gentle neck turns, shoulder rolls, and seated side bends. Then do 10 pelvic circles on a birthing ball or 8 supported pelvic tilts seated on a chair.
The goal is not sweat. It is downshifting. Many pregnant people carry tension in the jaw, the hands, the glutes, and the pelvic floor by bedtime. A calm session can ease that gripping and make sleep come a little easier.
If you like structure, keep it to three parts: breath, upper body release, pelvis. Ten minutes is enough. Fifteen if you want to linger.
A soft lamp helps. So does leaving your phone in another room.
20. Full-Body Prenatal Pilates Workout for Energy and Posture
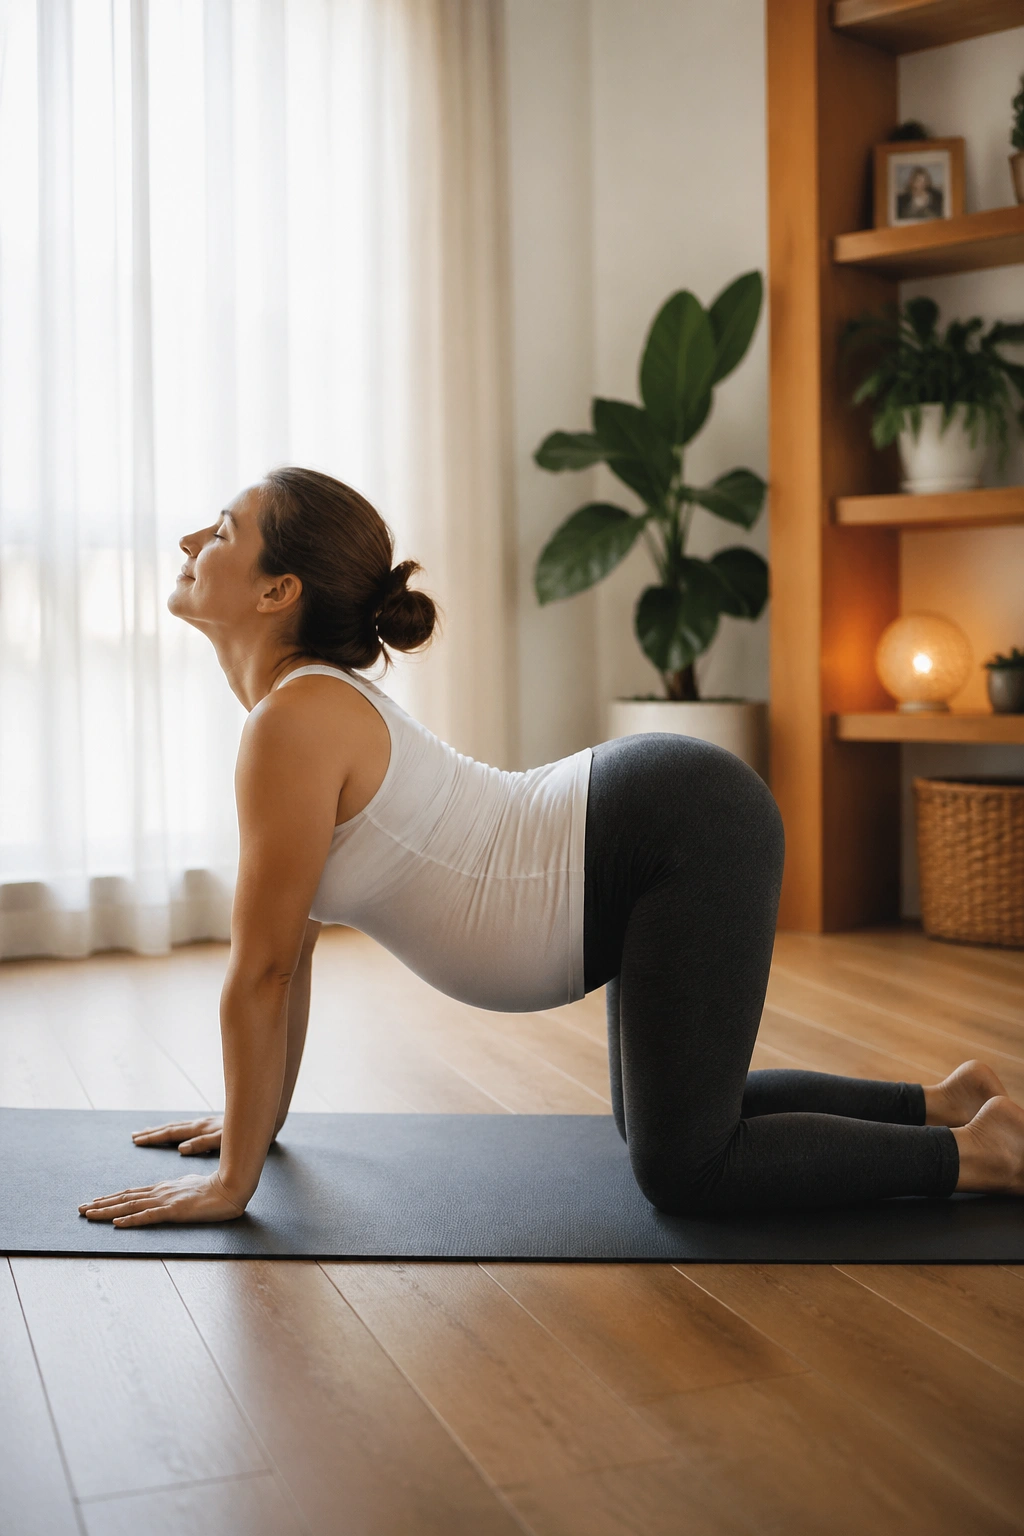
When you want one short routine that covers most of the bases, this is the one I would pick. It is balanced, scalable, and easy to repeat three times a week without frying yourself.
Do 2 to 3 rounds
- 5 lateral rib breaths in seated position
- 8 wall squats with arm reach
- 6 bird dogs per side, toe-slide version or full reach
- 10 band pull-aparts
- 20-second wall side plank hold per side
- 12 calf raises
- 30 seconds of birth ball circles or seated pelvic tilts
Rest 30 to 45 seconds between rounds, longer if you need it. Keep the effort around moderate, where you feel awake and worked but not wrung out.
What I like about this workout is the coverage. You get breath, legs, glutes, core, upper back, and circulation in about 15 minutes. If that is all you have, good. That is enough to make a dent in stiffness and posture fatigue.
And if a full circuit sounds impossible on a given day, do one round. One round still counts.
How to Build a Week of Prenatal Pilates Workouts
You do not need all 20 prenatal Pilates workouts in one week. That would be too much for most people and, frankly, a scheduling headache.
A simple three-day setup works well:
- Day 1: 1, 3, 6, and 13
- Day 2: 2, 4, 10, and 15
- Day 3: 5, 11, 17, and 19
If you want a short daily rhythm, try this instead:
- Morning: 18 or 1
- Midday break: 6, 7, or 13
- Stronger session: 3, 4, 5, 10, or 20
- Evening: 11 or 19
One practical note that gets missed a lot: rotate by how you feel, not by some idea that every workout has to be finished as written. Bad sleep, pelvic pressure, heartburn, and round ligament pain can change what feels good from one day to the next. Swap floor work for standing work. Cut reps in half. Trade a circuit for breath and mobility. That is not slacking. That is good programming.
Final Thoughts
The best prenatal Pilates work is rarely the hardest. It is the work that leaves you walking away taller, breathing easier, and feeling more supported in the spots that pregnancy asks the most from — ribs, pelvis, glutes, feet, and mid-back.
Pick two or three routines that match the day in front of you. Use the stronger sessions when you have energy. Use the breath, mobility, and circulation sessions when your body feels crowded or tired. Both are doing useful work.
And pay attention to what your body says after the workout, not only during it. If you finish feeling steadier, less achy, and more at home in your body, you are on the right track.
