



Pilates exercises for seniors at home work best when they feel calm, steady, and kind to the joints.
That sounds obvious until you watch how many routines jump straight to crunches, fast toe taps, or floor work that turns into a wrestling match with gravity. Older bodies usually do better with slower transitions, clear shapes, and a chair or wall close by. Pilates gives you that.
Breath matters here. So does alignment. A small movement done with control often does more for posture, balance, and core strength than a dramatic-looking move done badly.
If you have osteoporosis, a sore neck, a cranky knee, or balance that feels shaky on certain days, you do not need to fight the floor to get the benefits. Chair work, wall work, and side-lying work count. They count a lot.
Start with the first movement. It looks almost too easy. That is part of the point.
1. Pilates Exercises for Seniors at Home: Breathing with Rib Expansion
Breathing sounds too basic to matter, and that is exactly why people skip it. This is the move that settles everything else—the shoulders drop, the ribs move, and the belly stops bracing like it has a job interview.
Why It Works
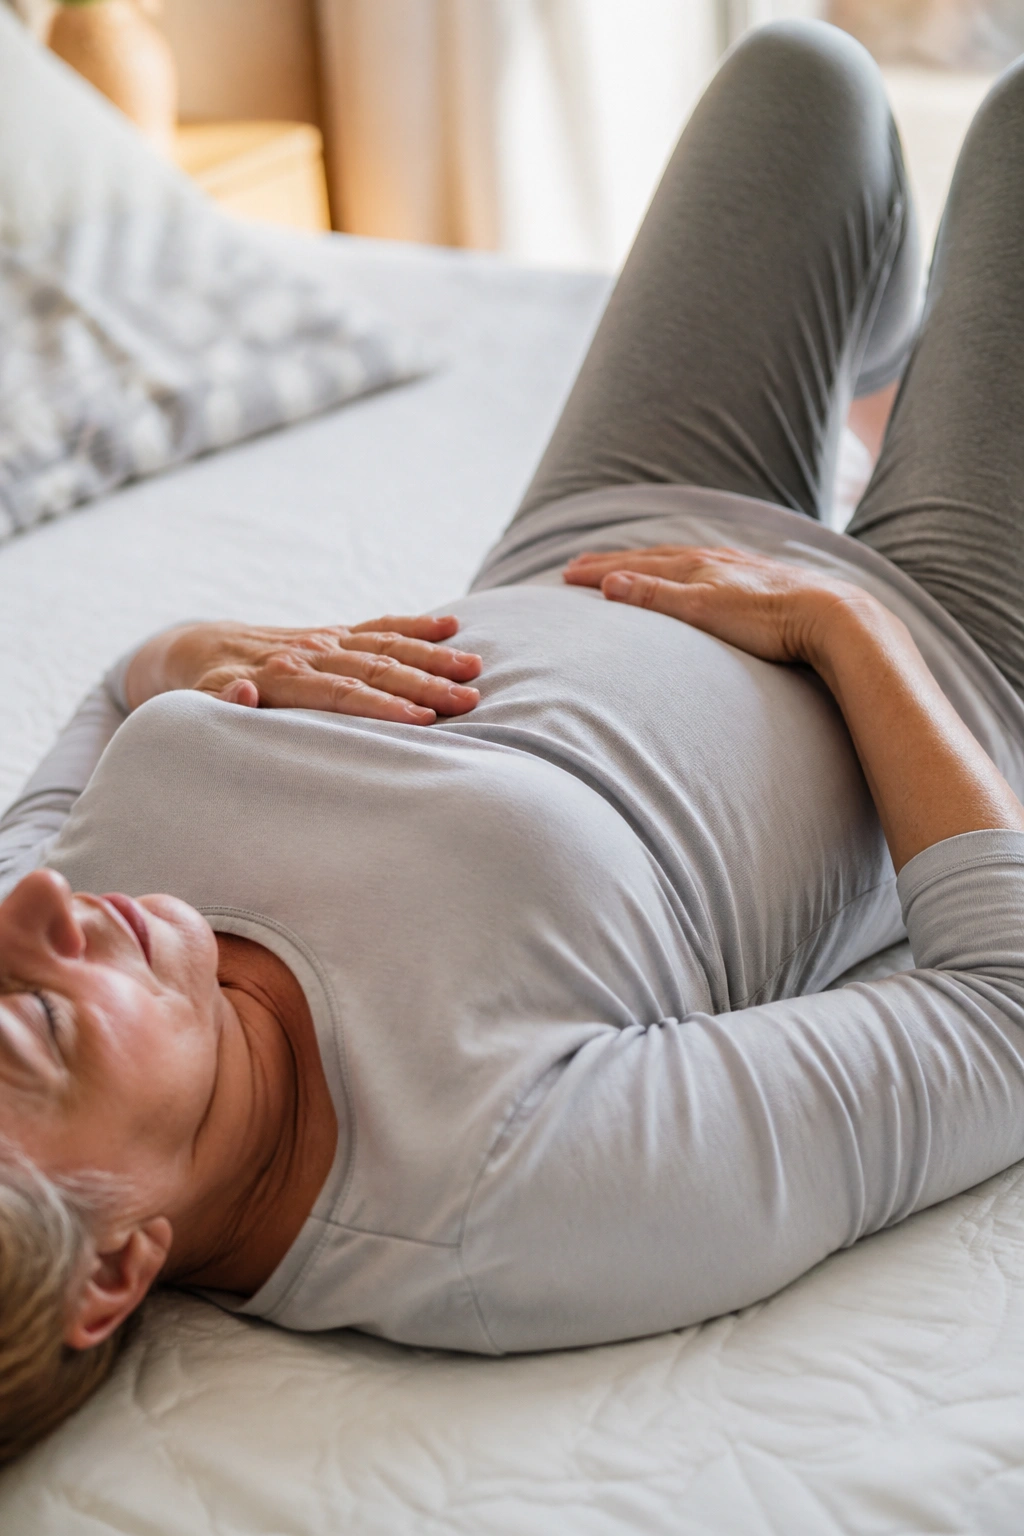
Lie on your back with your knees bent, or sit tall in a firm chair if getting to the floor feels annoying. Place one hand on the lower ribs and the other on the belly. Inhale through the nose for 3 or 4 counts, then exhale through pursed lips for 5 or 6 counts as the ribs soften down.
Do five to eight breaths. That is enough.
The goal is not a giant inhale. It is a smooth one. If your shoulders creep upward or your neck tightens, make the breath smaller and slower. You should feel the sides of the rib cage widen, then gently narrow on the exhale.
Quick Cues to Keep It Clean
- Keep your jaw loose.
- Think “wide ribs,” not “big chest.”
- Exhale as if you are fogging a mirror softly.
- Stop if breathing becomes strained or dizzy.
Best tip: If your lower back arches hard when you inhale, put a folded towel under your head or sit on a firmer chair seat so your ribs can move without the spine overworking.
2. Pelvic Tilts
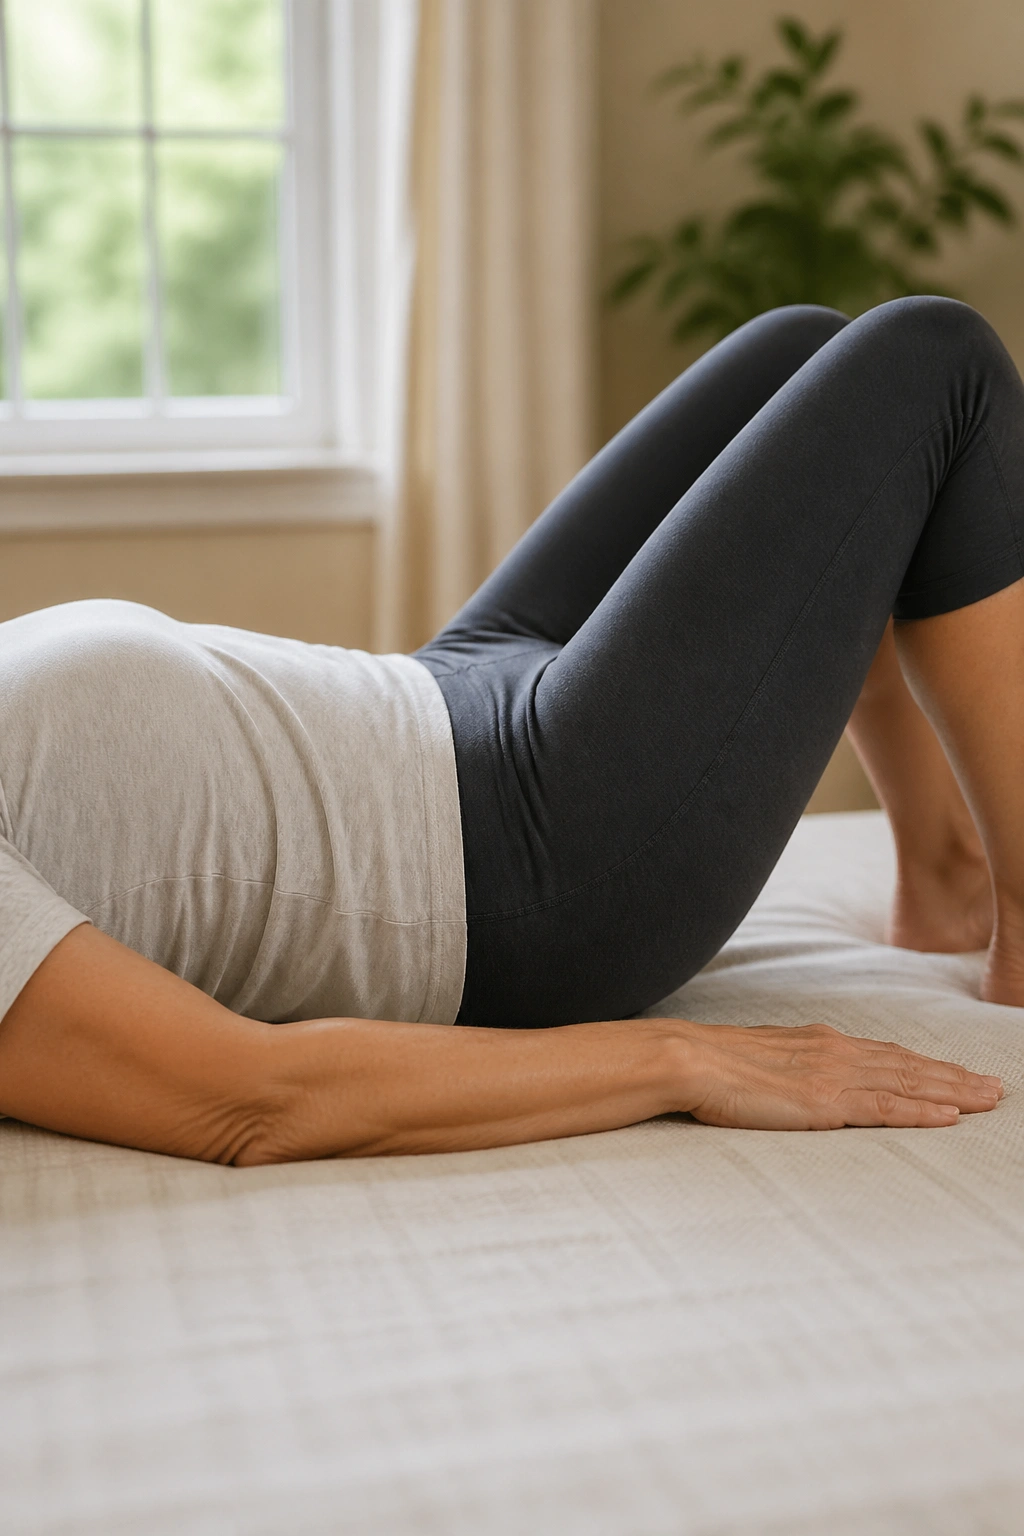
Pelvic tilts are the easiest way to wake up a stiff lower back without yanking on it. The motion is tiny, almost boring, and that is exactly why it works so well for older adults who spend too long sitting.
Lie on your back with knees bent and feet flat. Gently tip your pelvis so the low back presses a little closer to the mat, then release back to neutral. You are not crushing the spine into the floor. You are just rocking the pelvis enough to feel the lower abdomen switch on.
Five to ten slow reps is plenty. Keep the movement smooth, and do not squeeze the glutes so hard that the whole pelvis locks. The lower back should feel looser after the set, not pinched.
When someone says their back feels “stuck,” this is one of the first moves I like because it teaches the body to move without drama. It also sets up bridges and heel slides nicely. Skip the temptation to make it bigger than it is. Bigger is not better here.
3. Heel Slides
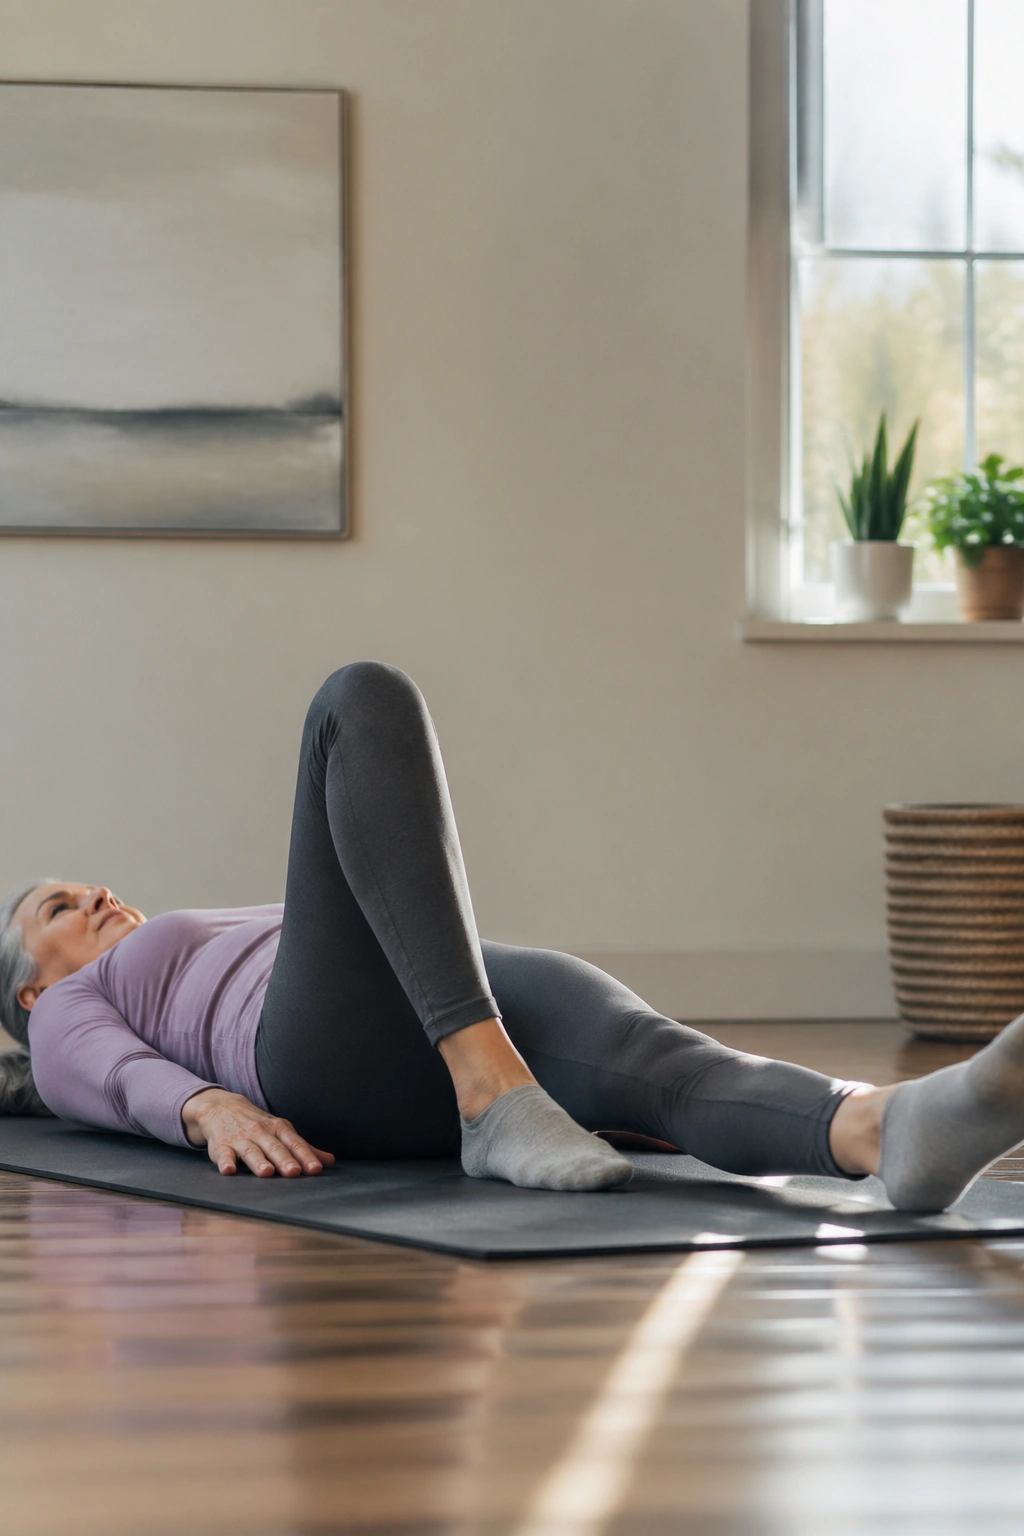
Why do heel slides show up in so many senior-friendly Pilates routines? Because they train the core to stay steady while the legs move, and that skill matters every time you get out of bed, stand from a chair, or reach for something low.
Lie on your back with both knees bent. Keep one foot planted while you slowly slide the other heel away from you until the leg is nearly straight. Then draw it back in along the floor. The pelvis stays quiet. That is the whole game.
How to Use It
Practice five to eight slides on each leg, moving slowly enough that you can notice whether your low back wants to arch. If it does, shorten the slide. A towel under the heel on a smooth floor can make the motion easier, and it keeps the hamstrings from grabbing.
This is a smart warm-up before bridges or marching. It also works well on mornings when your hips feel rusty and you do not want a full workout yet. Tiny motion, clear control, no strain.
If one leg pulls harder than the other, do not chase perfection. Work with the smaller range on the tighter side and let the motion even out over time.
4. Marching on the Mat
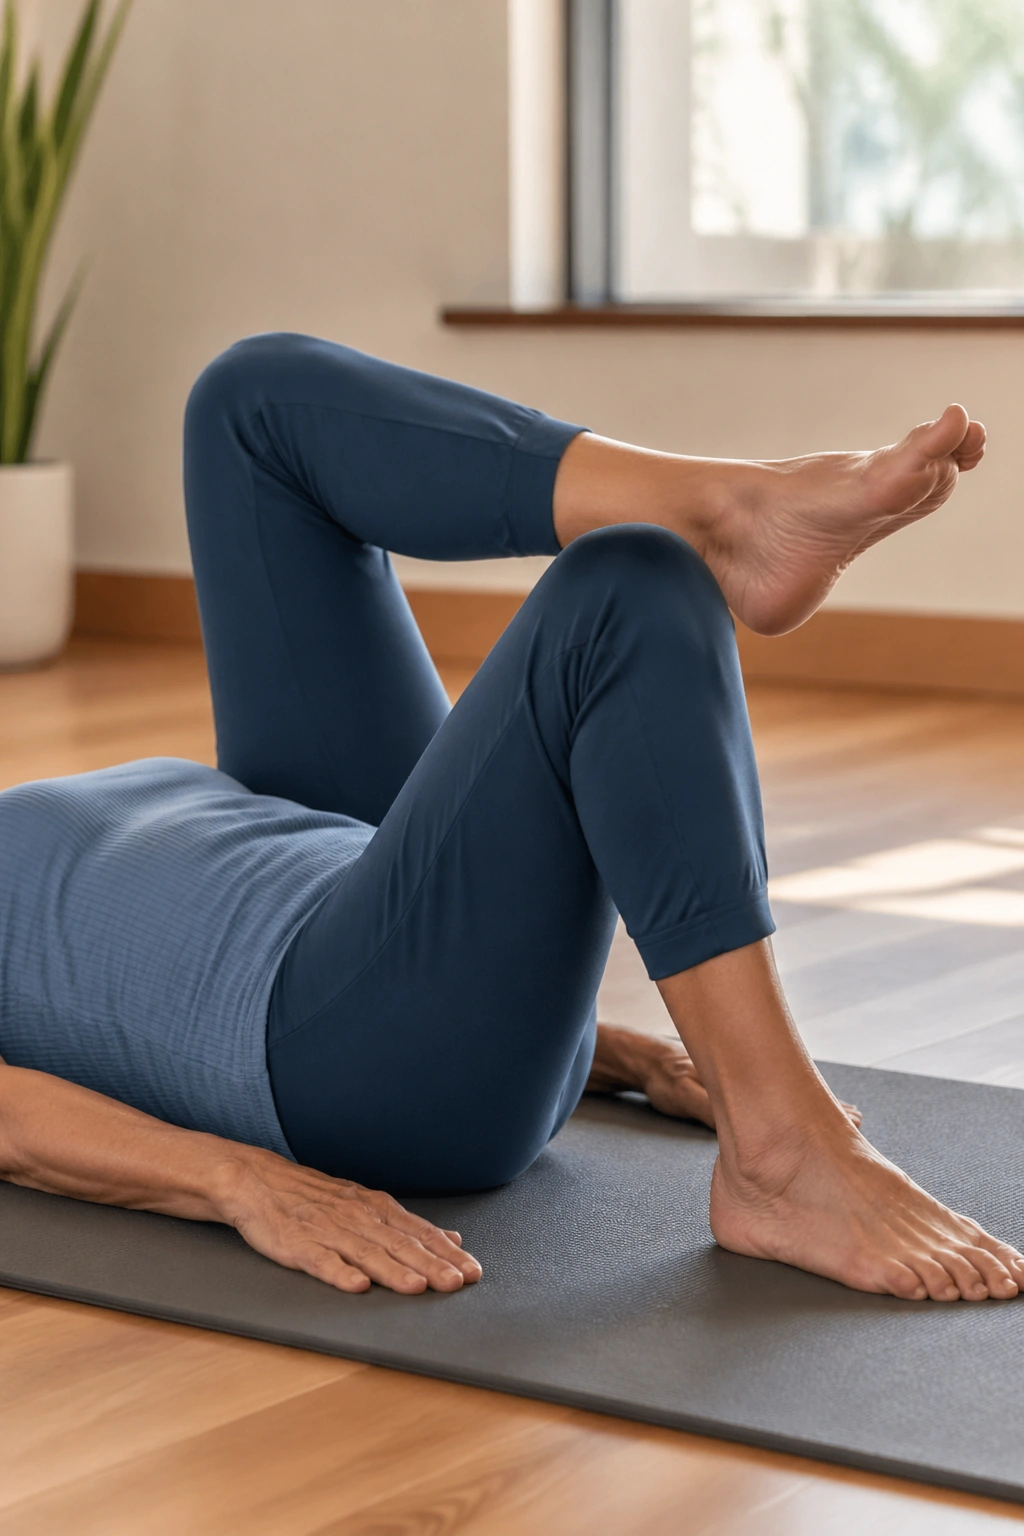
If standing marches feel wobbly, start on the floor. Mat marching teaches the same balance pattern with far less pressure on the knees and ankles.
Lie on your back with knees bent and feet flat. One knee lifts a few inches toward your chest while the other foot stays grounded, then you lower it and switch sides. The pelvis should stay level. If it rocks from side to side, the lift is too high or too fast.
Use a slow breath pattern: exhale on the lift, inhale on the lower. Four to six marches per side is enough for a first round. You want the deep belly muscles to stay awake without the hips seizing up.
- Keep the lifted thigh no higher than a tabletop if your back arches.
- Move one leg at a time; do not switch in a rush.
- Hold the ribs down and the shoulders heavy.
- If the neck tenses, slide a thin pillow under the head.
The beauty of marching is that it trains control you can use in daily life. It is small, but it teaches a very useful kind of steadiness.
5. Glute Bridge
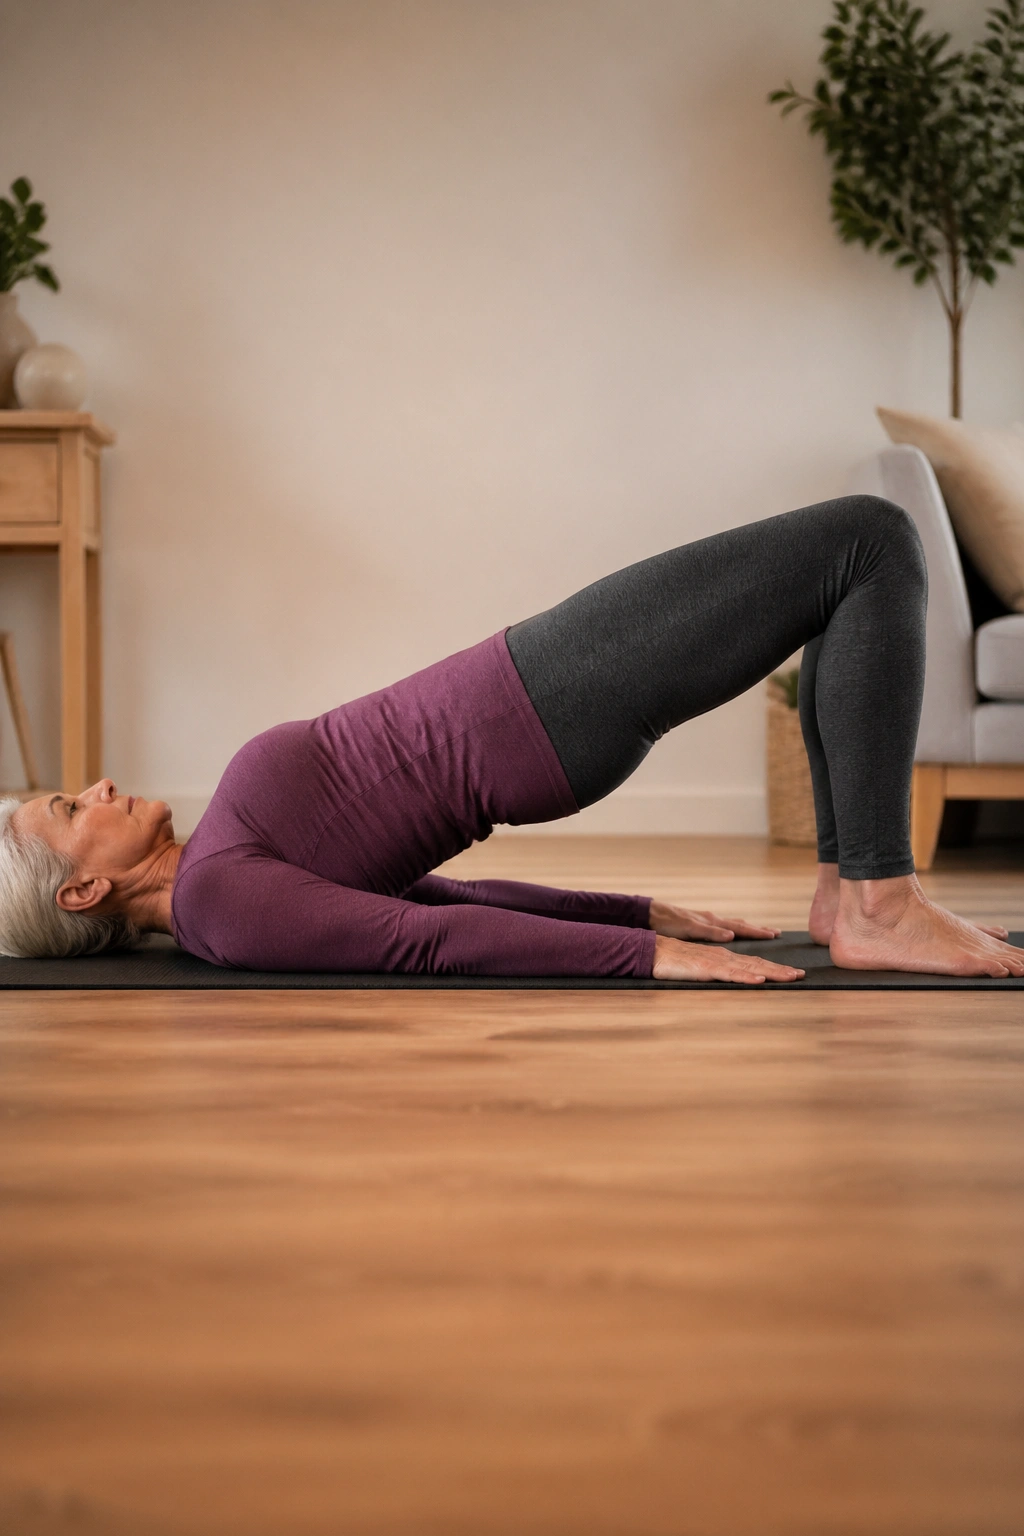
A bridge looks simple until you try to hold it with the glutes and not the back. Then it gets interesting.
Lie on your back with knees bent, feet hip-width apart, and arms resting by your sides. Press through the heels and lift the hips until the body forms a gentle slope from shoulders to knees. Pause for one or two breaths, then lower with control. The lift should feel like the back of the legs and the seat are doing the work together.
The feet matter more than most people think. If they are too far away, the hamstrings grab and cramp. Too close, and the knees get cranky. Aim for a position where you can lift without pinching your lower back or cramping your calves.
A bridge is one of the better at-home Pilates moves for seniors because it supports the muscles that help with standing up, climbing stairs, and getting in and out of bed. It also opens the front of the hips, which can feel wonderfully different after a lot of sitting.
If a full bridge bothers your neck or low back, stay low. A tiny lift is still a bridge.
6. Cat-Cow at the Wall
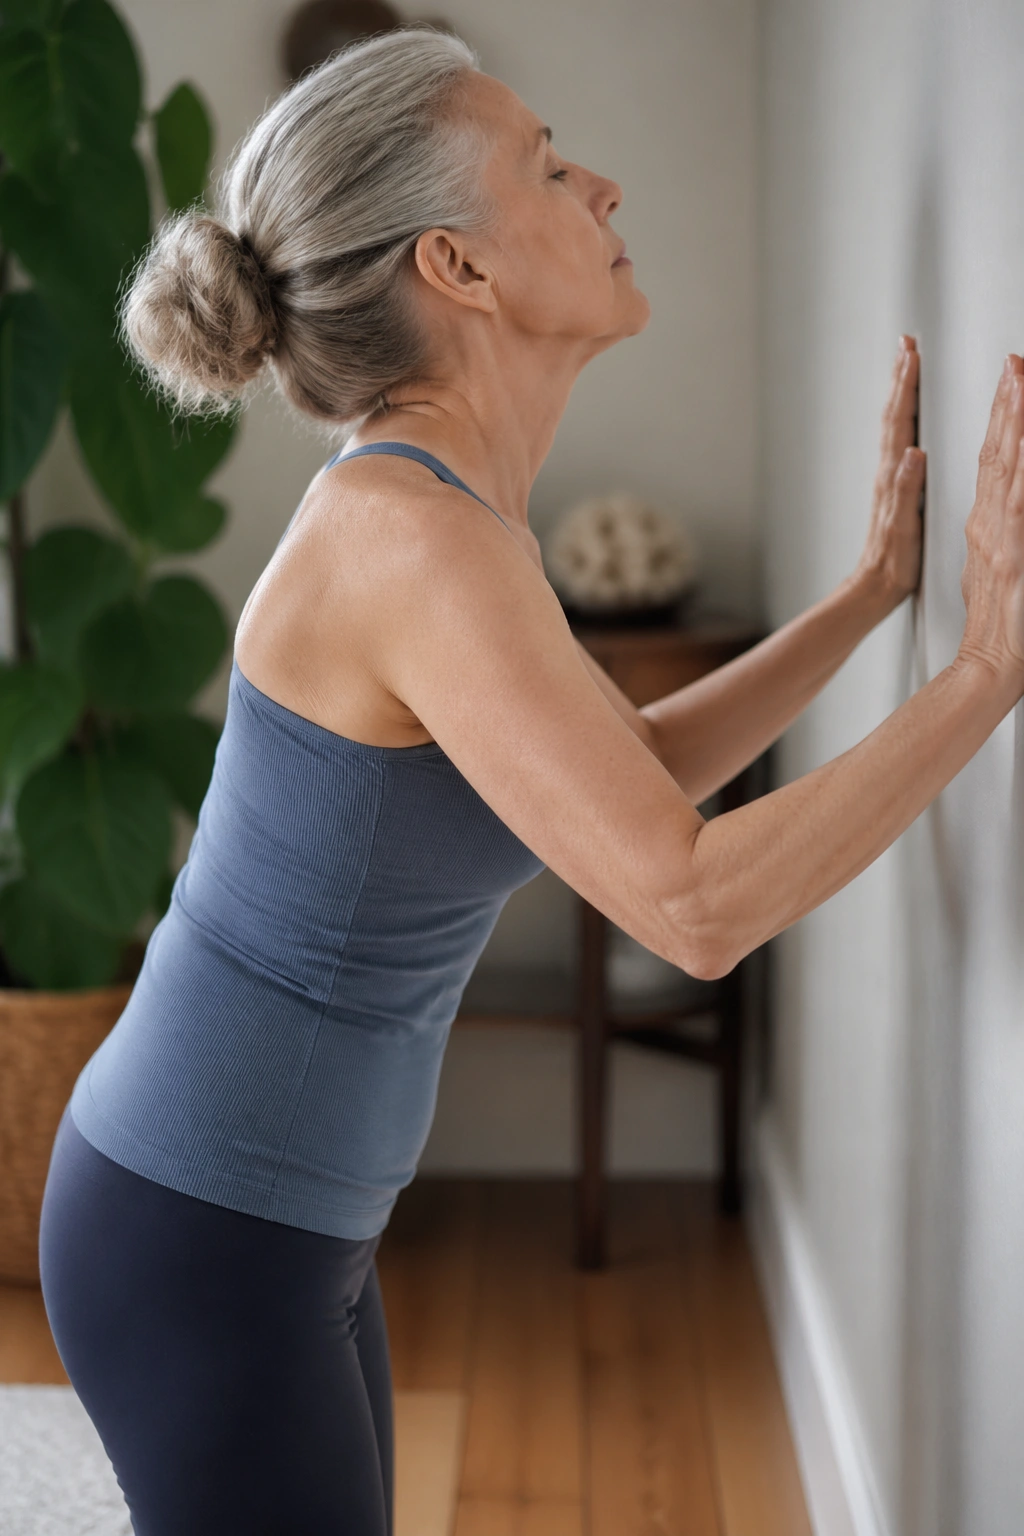
A wall version of cat-cow is not a compromise. It is often the smarter choice when wrists, knees, or balance do not want floor work.
Stand facing a wall with your hands on it at chest height and feet about one step back. As you exhale, round the spine a little and let the tailbone tuck under. As you inhale, lengthen through the chest and gently arch back to a neutral, open shape. The motion is small and smooth, almost like the spine is sliding inside a sleeve.
What Makes It Different
Floor cat-cow asks for wrists, kneeling, and enough balance to shift between positions. The wall version strips out the parts that trip people up. You still get spinal motion and ribcage awareness, but with your feet planted and your knees happier.
This is a good choice for anyone with sensitive wrists, tender knees, or a mat that feels too low to the ground on a given day. It is also a nice option after a long stretch of sitting because it wakes up the mid-back without forcing a deep bend.
Recommendation: Use the wall version first. Save the floor version for days when getting down and back up feels easy.
7. Seated Spine Twist
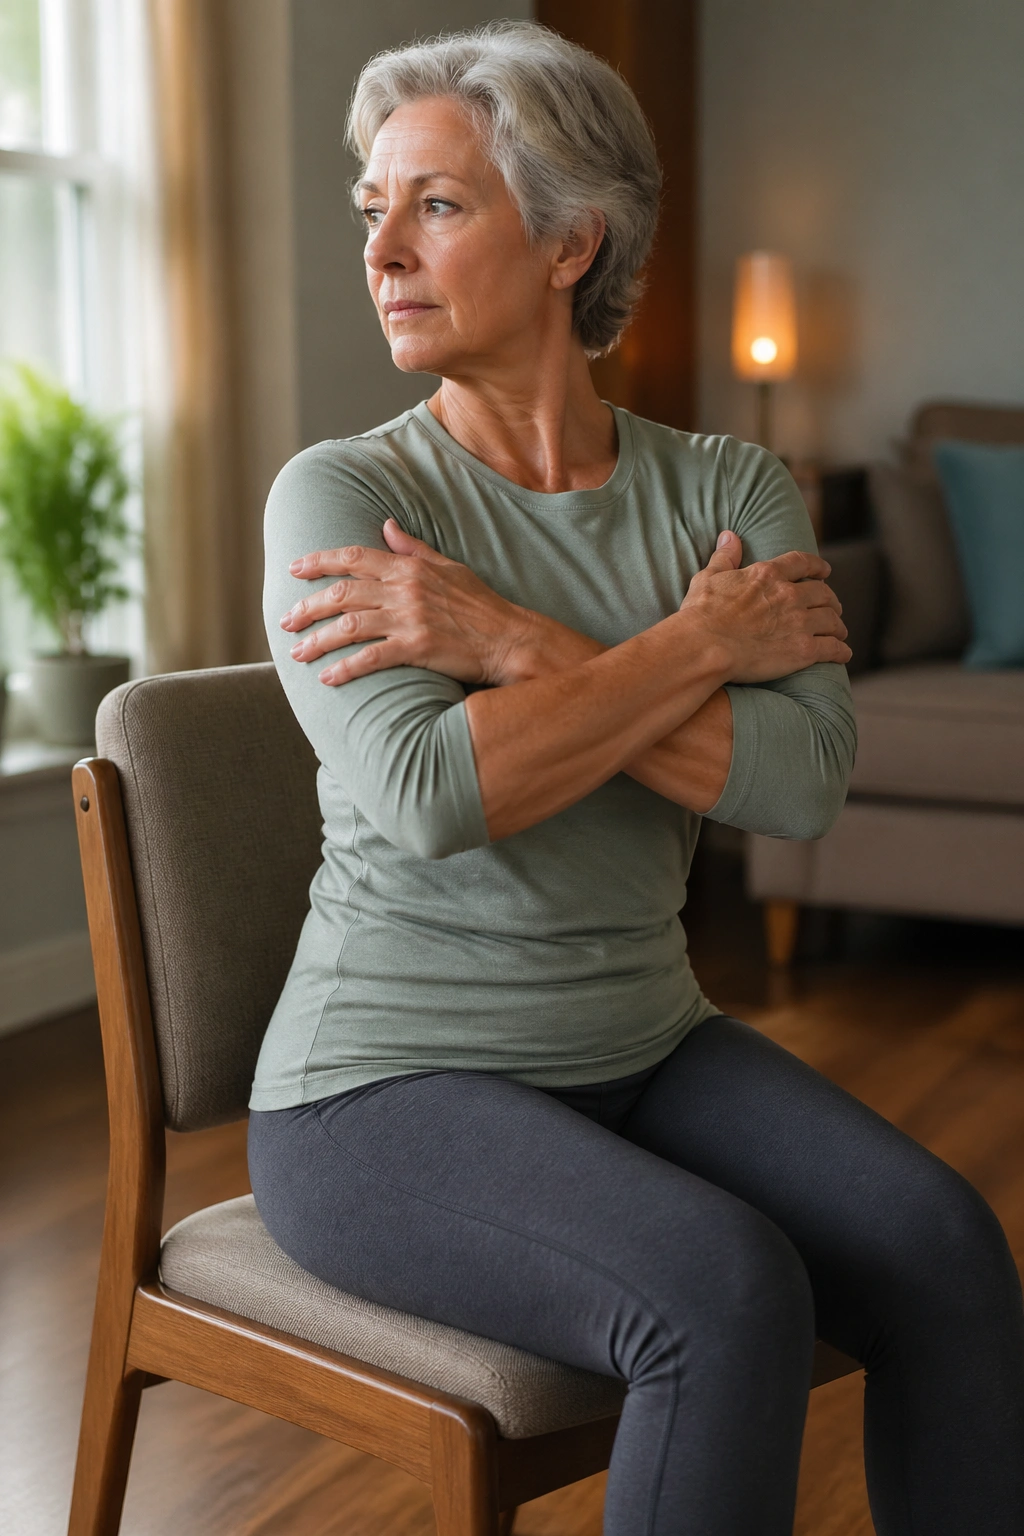
A seated twist can wake up the middle of the back faster than almost any standing stretch. It also feels more controlled than a loose, swinging turn, which matters when you want mobility without yanking on the low back.
Sit on a chair with both feet flat and your spine tall. Cross your arms lightly over your chest or place your hands on your shoulders. Rotate the rib cage to one side while keeping the hips mostly facing forward, then return to center and switch. The turn should come from the torso, not from flinging the shoulders around.
What to Watch For
- Keep both sit bones heavy on the chair.
- Rotate on the exhale.
- Stop before the low back feels pinched.
- Make the motion smaller if the neck leads the twist.
I like this move for people who feel stiff after reading, sewing, cooking, or using a phone for too long. It gives the upper body a reset without needing to lie down. If a full twist feels sharp, shorten the range and stay more upright.
One good rep done cleanly beats eight sloppy ones.
8. Modified Hundred
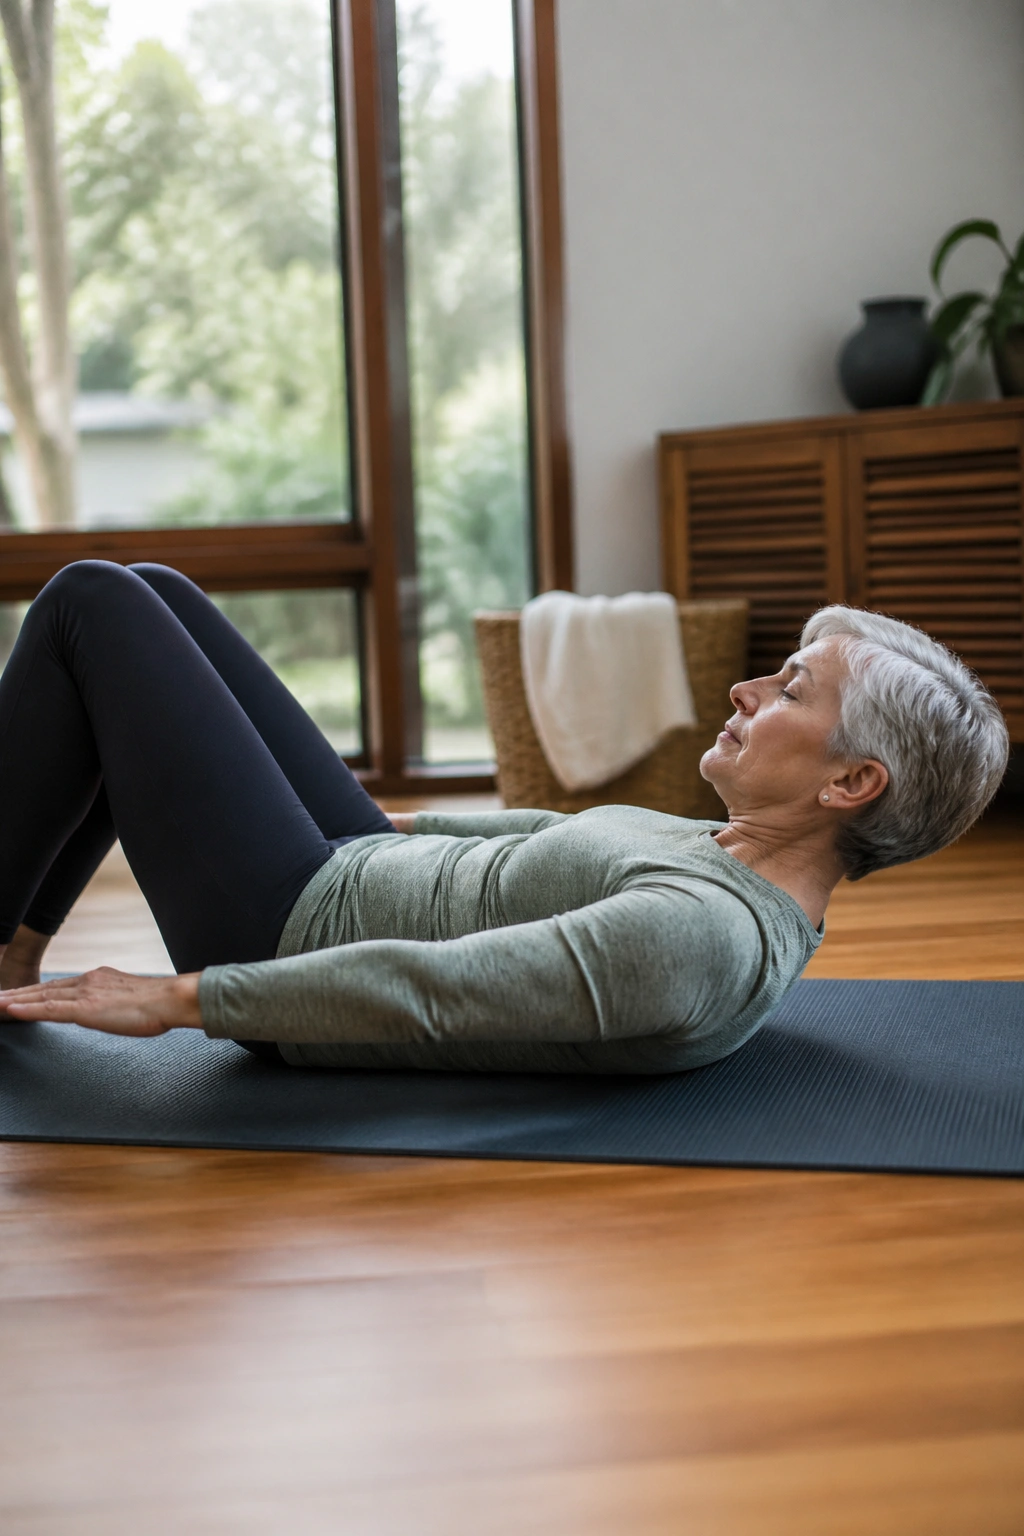
You do not need a full crunch to get the point of the Hundred. The modified version keeps the breathwork and core engagement while sparing the neck and lower back from unnecessary drama.
Lie on your back with knees bent, or hold one leg at a time in a tabletop shape if that feels steady. Lift the head and shoulders only if your neck likes it; otherwise keep the head down and focus on the arms. Pump the arms down a few inches as you inhale for five counts and exhale for five counts.
That rhythm may sound fussy, but it gives the abdomen a reason to stay active without bracing hard. Start with three to five breath cycles. If the shoulders start creeping up, stop, rest, and reset.
For seniors, this is less about looking polished and more about building stamina in the deep trunk muscles. It pairs well with pelvic tilts and marching because it asks for the same kind of control, just with a little more challenge.
If you have neck sensitivity, keep the head down. No prize is waiting at the end for forcing it.
9. Chest Expansion with Arm Reach
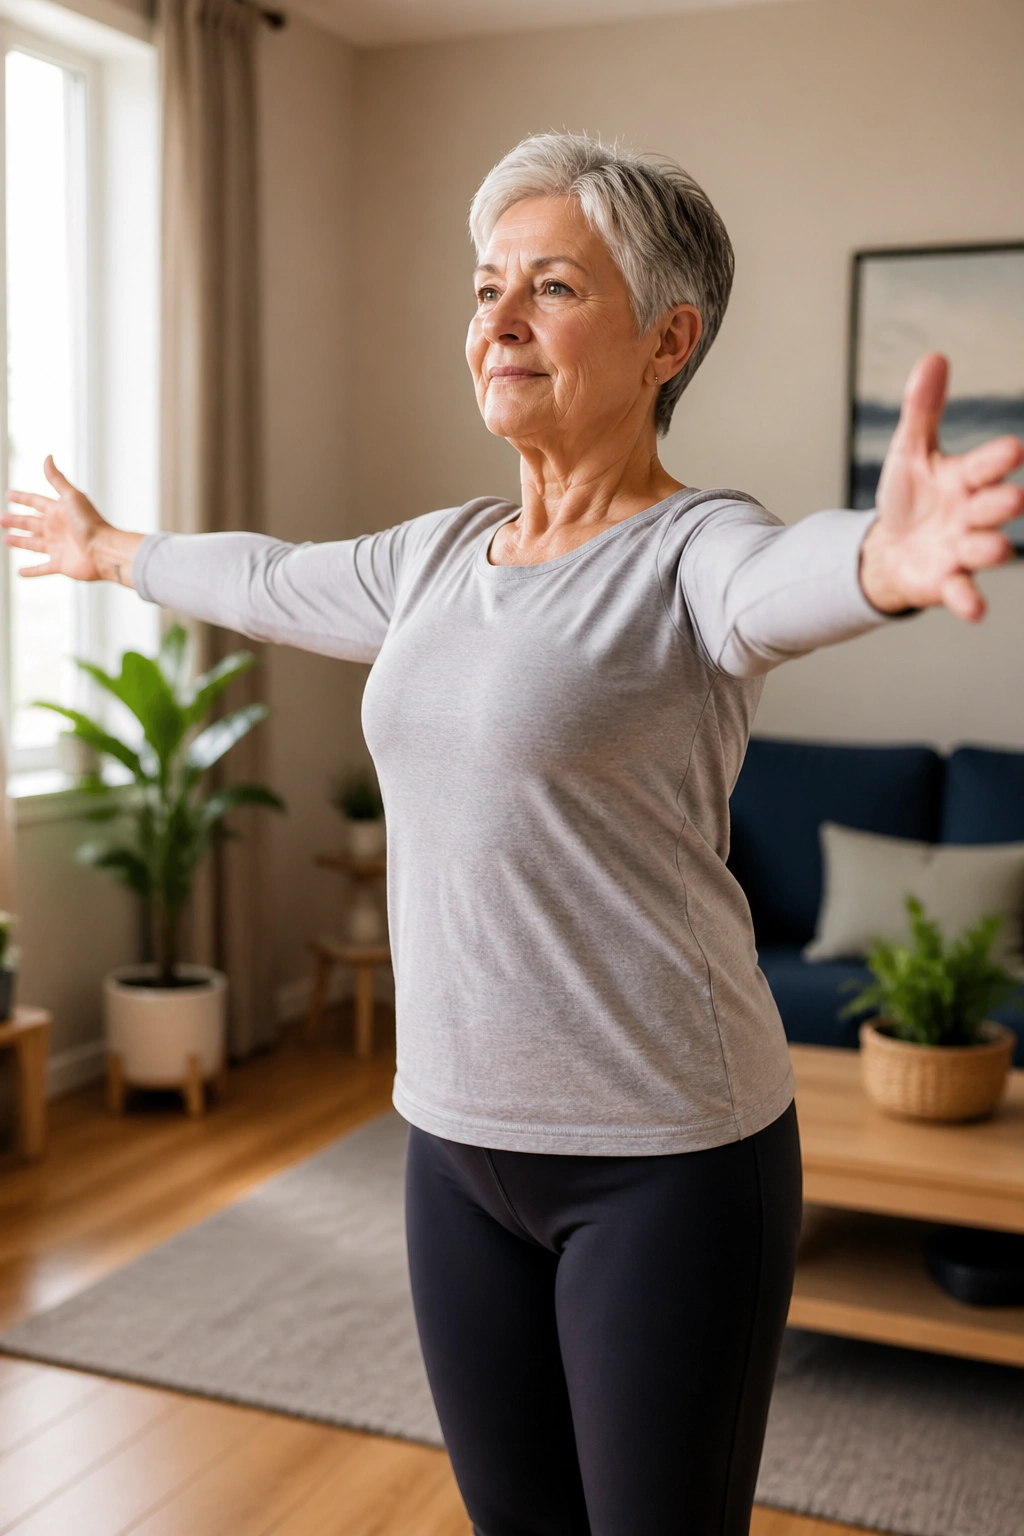
Why bother with arm work in Pilates? Because the upper back gets lazy fast, especially after years of reaching forward for steering wheels, shopping bags, keyboards, and phones.
Sit or stand tall. Extend the arms forward at shoulder height, then open them out wide to the sides as if you are widening the chest across the collarbones. Keep the ribs from flaring. The shoulder blades slide down and back a touch, but they do not pinch together hard.
How to Practice It Without Tight Shoulders
If the shoulders are stiff, bend the elbows slightly or hold a light towel instead of forcing a wide reach. That gives you room to move without feeling jammed. You can also do the motion against a wall, which keeps the rib cage from collapsing forward.
Use six to ten slow reps. The movement should feel smooth, not like a strength contest. A small lift of the chest and a clean opening across the front of the shoulders is enough.
This is one of those exercises that looks almost plain and then pays off later when you stand a little taller. It also helps counter the rounded shape that builds up from everyday life.
10. Wall Roll-Downs
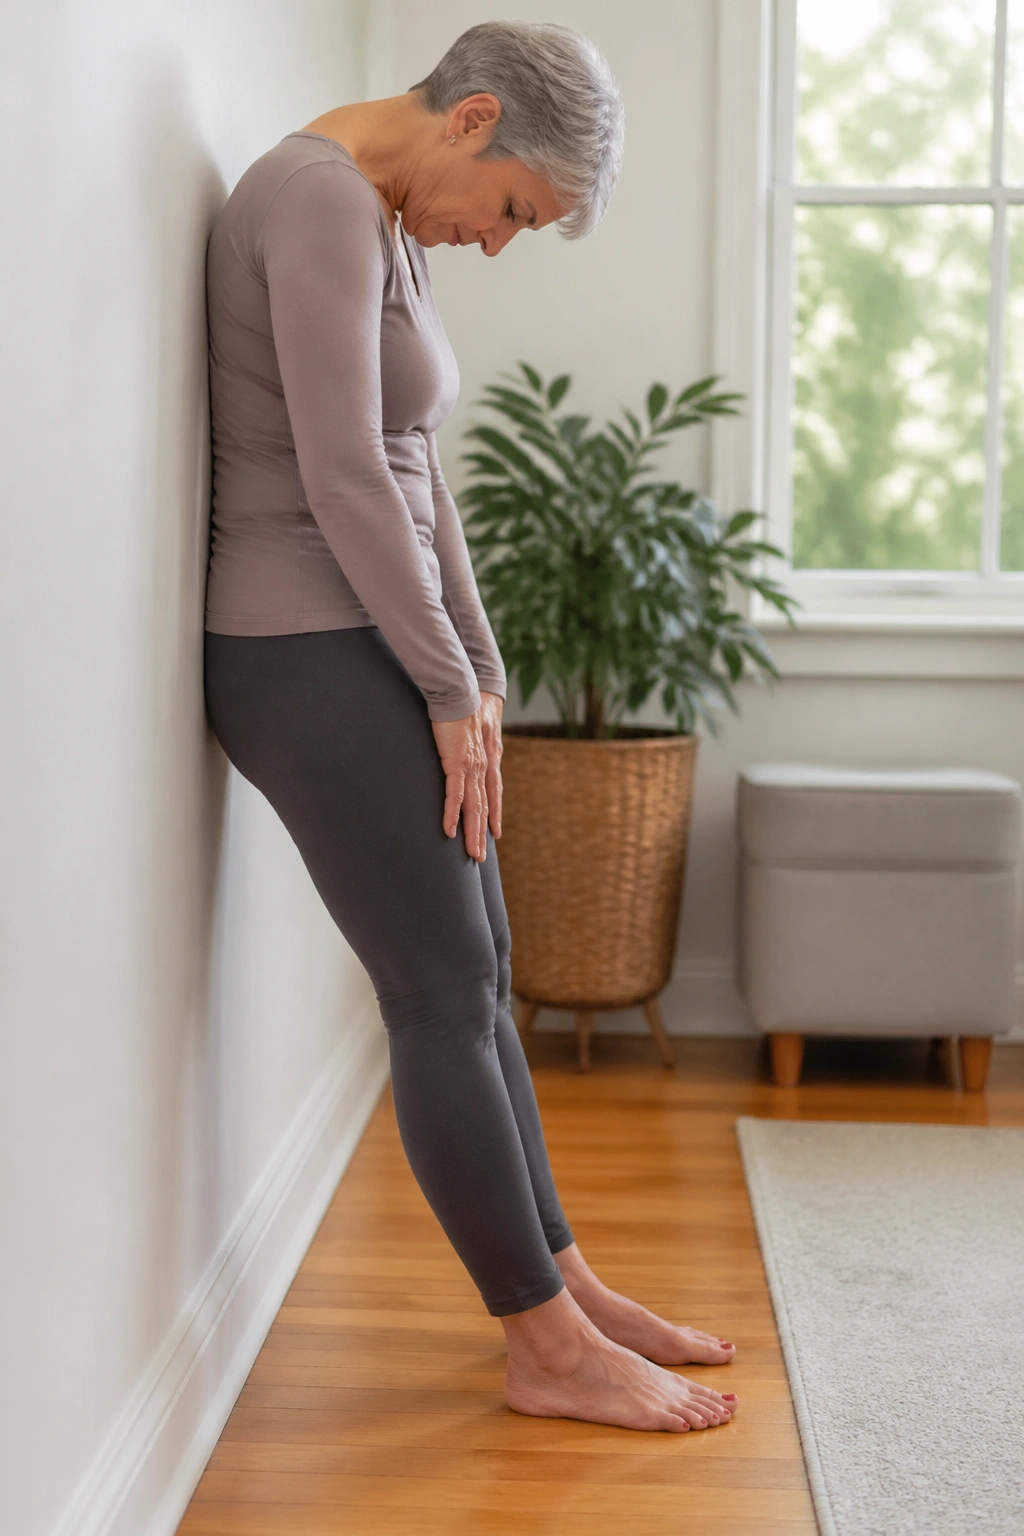
If getting down to the mat feels like too much, the wall becomes your best training partner. Wall roll-downs teach spinal articulation in a way that is easy to scale.
Stand with your back against a wall or your feet a few inches away from it. Nod the chin slightly, then let the head, upper back, middle back, and lower back peel forward one section at a time. Hands can slide down the thighs or along the wall. Pause at the bottom if it feels comfortable, then stack the spine back up slowly.
Key Details
- Keep the knees soft, not locked.
- Move only as far as you can without strain.
- Exhale while rolling down.
- Inhale at the bottom, then roll back up on the exhale.
The wall version gives feedback you can trust. If one part of the body rushes ahead, the wall lets you feel it. It is also kinder to the hamstrings than a deep forward fold on the floor.
If you have been told to avoid deep spinal flexion because of bone health, keep the roll-down small and ask a clinician which range makes sense for you. A half-roll is still useful. Sometimes more useful, honestly.
11. Clamshells on Your Side
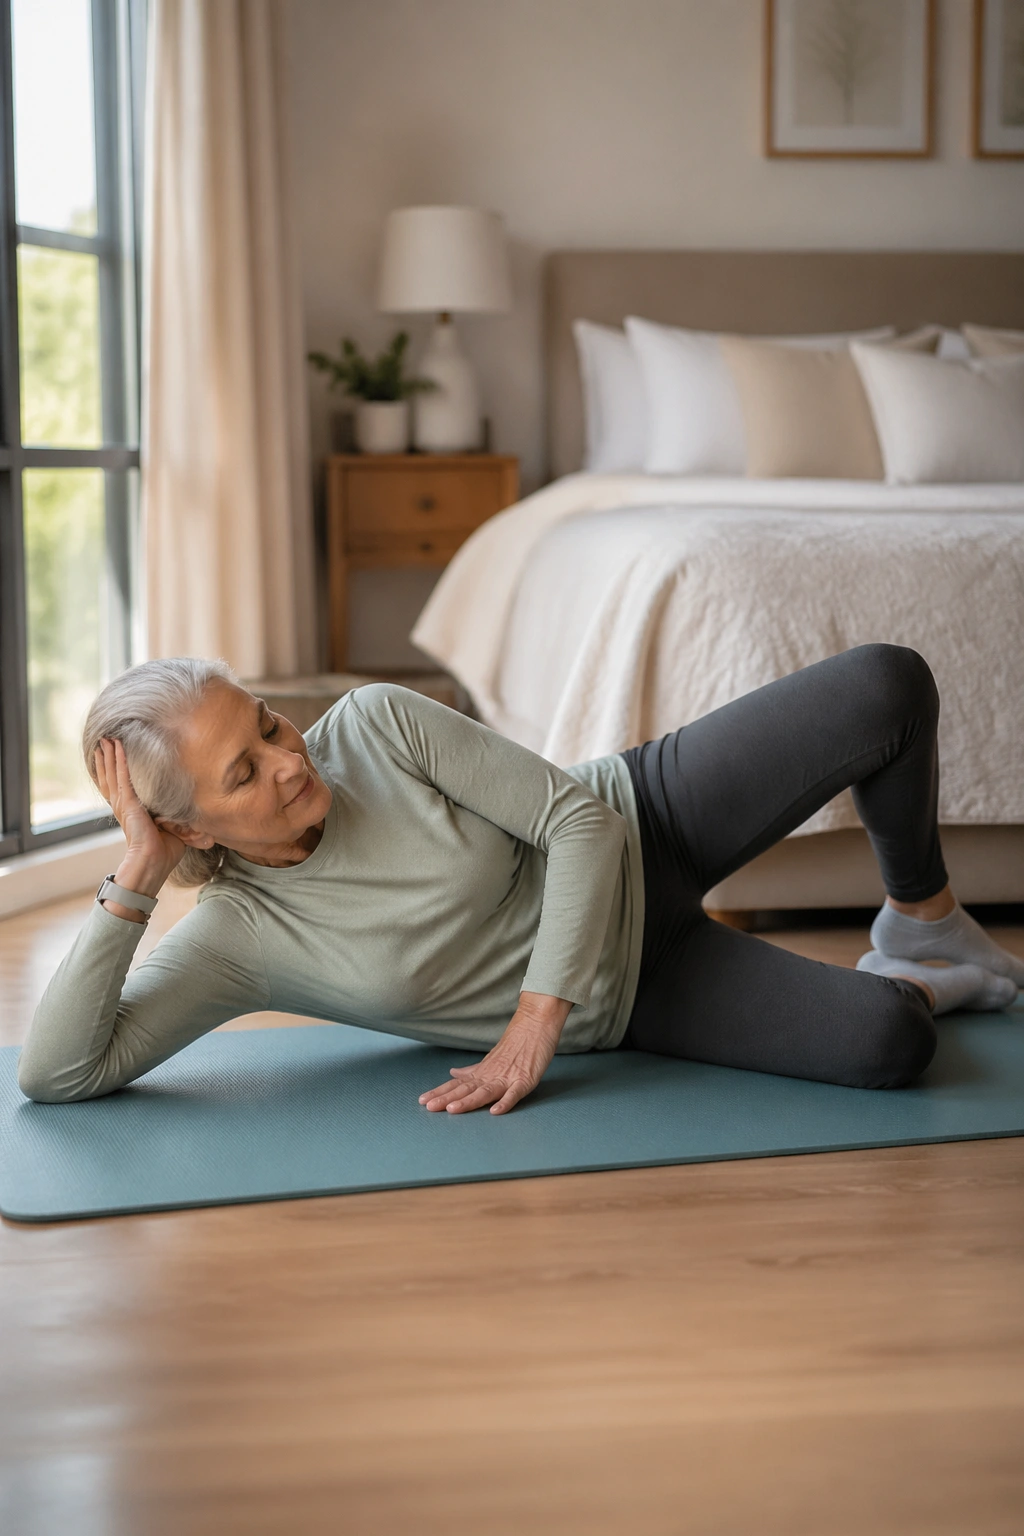
Clamshells are a quiet little exercise with a big job. They wake up the side hip muscles that help keep you steady when you walk, stand on one leg, or step around a curb.
Lie on your side with knees bent and feet lined up behind you. Keep the hips stacked, then open the top knee like a clam shell while the feet stay touching. Close it slowly. The pelvis should not roll backward to cheat.
The first thing people usually feel is the outer hip, sometimes with a hint of work deep in the buttock. That is what you want. If the lower back or front of the hip takes over, the opening is too large.
Do eight to twelve reps on each side. A pillow under the head helps keep the neck relaxed, and another small pillow between the waist and floor can make side-lying more comfortable if your ribs feel pinched.
I like clamshells because they are honest. You cannot fake them much. Either the hip opens under control, or the pelvis cheats. The body tells on itself fast.
12. Side-Lying Leg Lifts
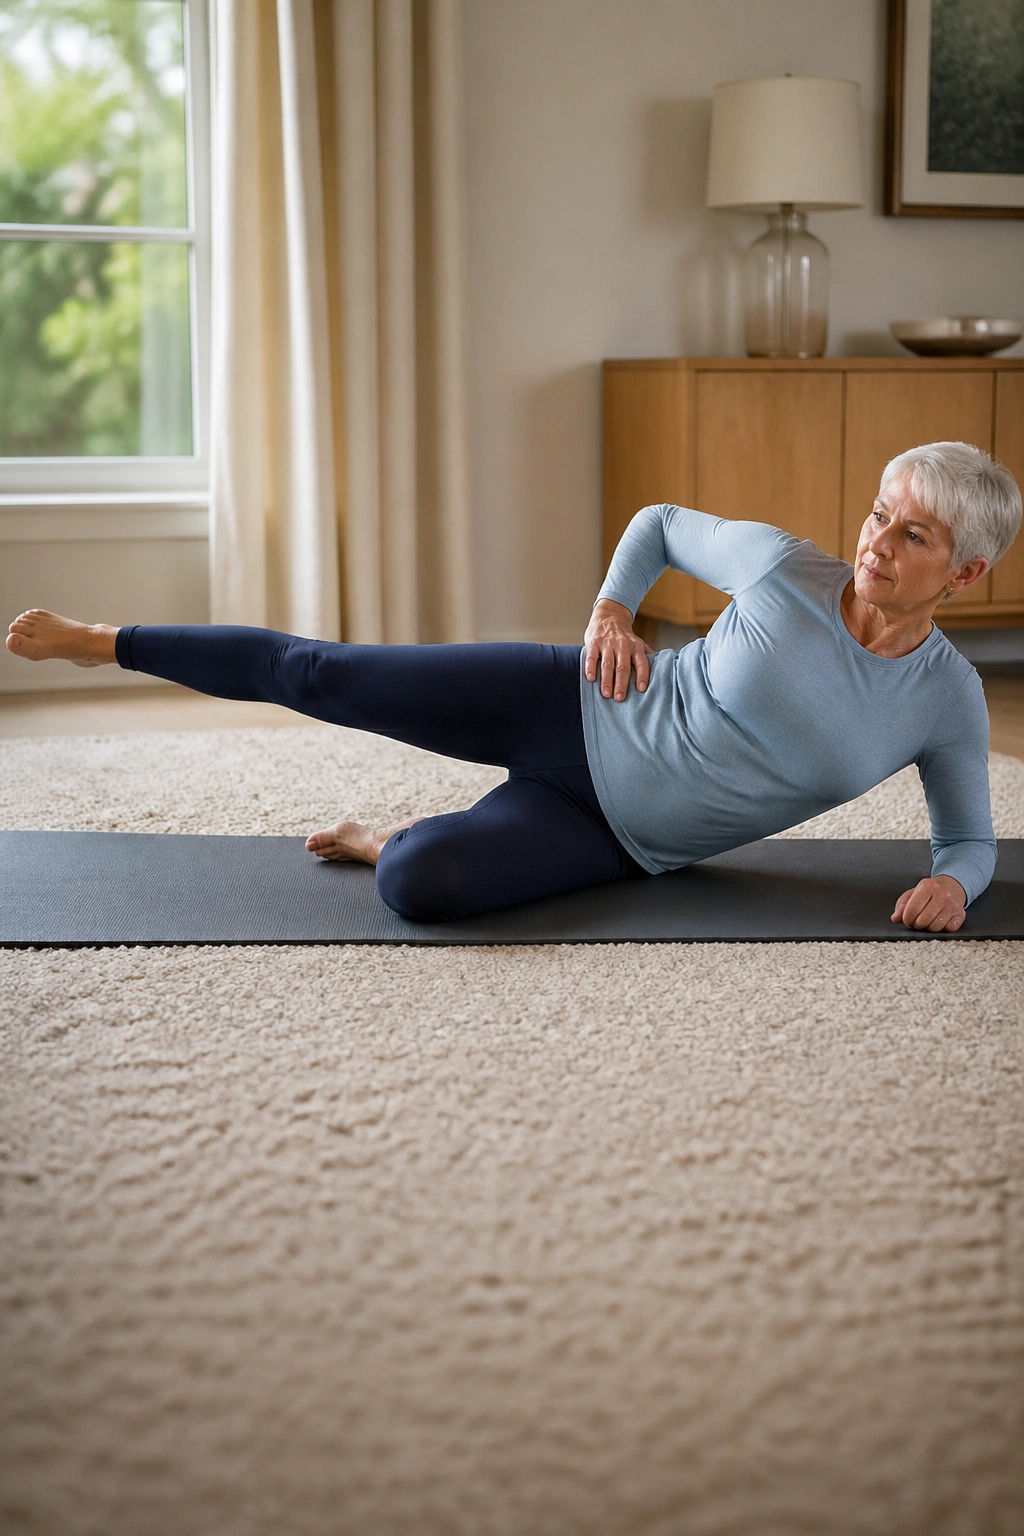
Unlike clamshells, which work the outer hip through a bent-knee motion, side-lying leg lifts ask the leg to move as a longer lever. That makes them a little harder and a little more useful for balance work.
Lie on your side with the bottom knee bent for support and the top leg long. Lift the top leg only 6 to 10 inches, then lower it with control. Keep the toes pointing forward or slightly down so the hip stays honest. If the foot turns up too much, the front of the hip usually cheats.
This move is especially useful for anyone who feels unstable on stairs or when stepping sideways around the house. It targets the glute medius, which is one of those muscles people ignore until it stops doing its job.
If your waist collapses toward the floor, shorten the lift. If your lower back starts to arch, bend the bottom knee more or move the leg less. The best version is the one you can do without twisting yourself into knots.
Do six to ten lifts on each side. Slow lowers matter more than high lifts.
13. Bird Dog
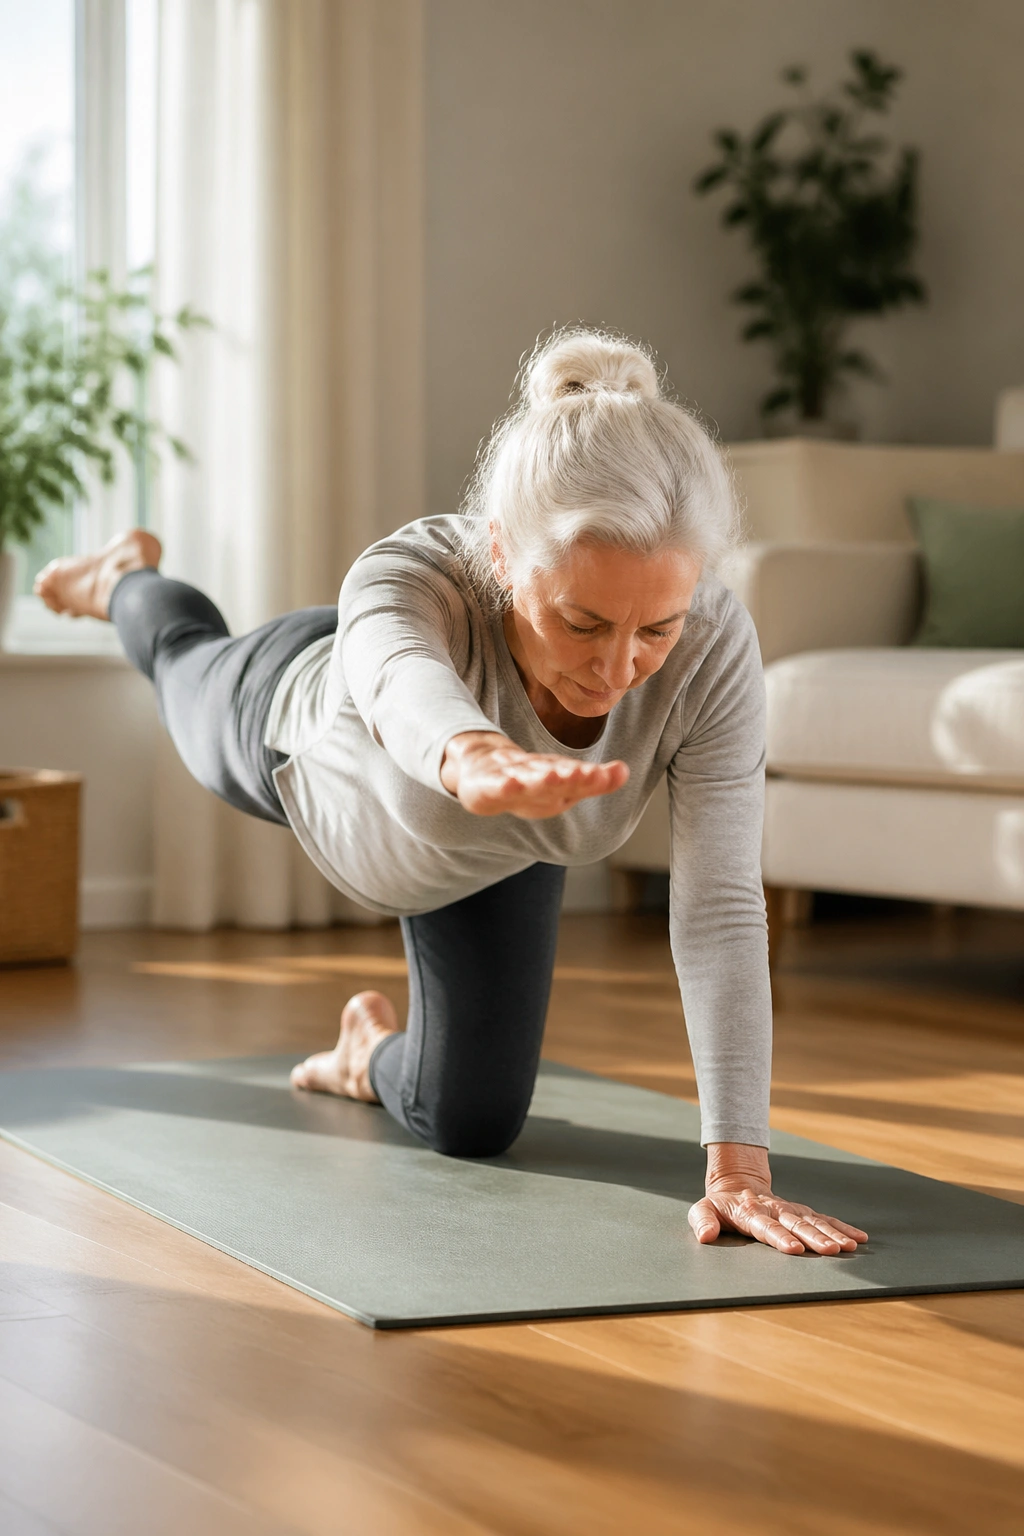
Bird dog is one of the best home Pilates-style exercises for coordination, and it asks for just enough balance to matter. It also teaches the body to stay organized when opposite limbs move at the same time.
Start on hands and knees, with wrists under shoulders and knees under hips. Extend one arm forward and the opposite leg back, keeping both hips level. Reach long rather than high. Then return to center and switch sides.
The Job It Does
This move links the shoulder girdle, trunk, and hips in a way that feels close to real life. You use that pattern when reaching into a cabinet, picking something off the floor, or carrying groceries while walking carefully.
- Keep the lifted leg in line with the body, not higher than the hip.
- Press through the supporting hand.
- Breathe out during the reach.
- Keep the neck long and the gaze down.
If kneeling bothers your knees, fold a thick towel under them. If the wrists complain, make fists, hold dumbbells as handles, or do a standing version with hands on a counter. There is almost always a gentler route.
Bird dog rewards patience. Rushing it strips out the good stuff.
14. Mermaid Stretch
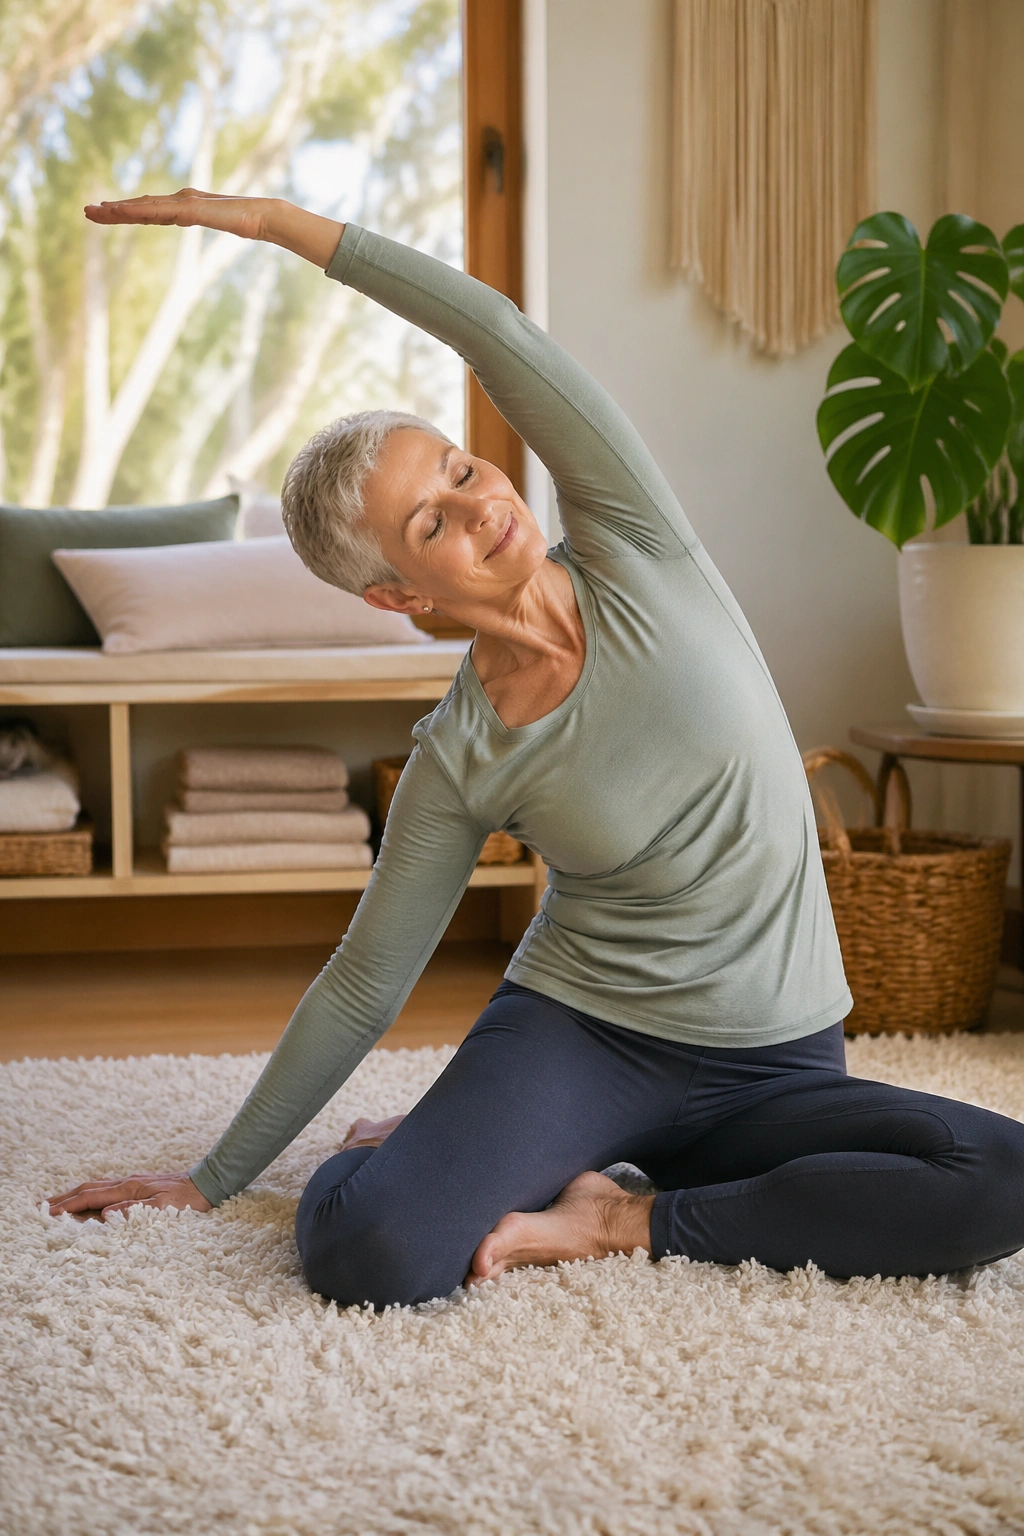
Mermaid is the stretch people dismiss until their side body starts feeling shorter on one side. Then it suddenly feels like a gift.
Sit on the floor with your legs folded to one side, or sit on a chair if the floor setup is awkward. One hand supports you while the other arm reaches overhead as you lean gently to the side. The feeling should run along the ribs, waist, and outer hip. It should not pinch in the low back.
This movement is useful after chores that involve a lot of bending or reaching in one direction. It also helps older adults regain a little side-bending freedom, which matters more than most people realize. A stiff side body can make twisting and reaching feel clumsy.
If the seated floor position annoys your hips, use the chair. That is not cheating. It is a smart workaround that lets you feel the stretch without fussing with the setup.
Hold each side for two or three slow breaths. The long line from the hand to the hip should feel open, not strained.
15. Standing Side Leg Raises
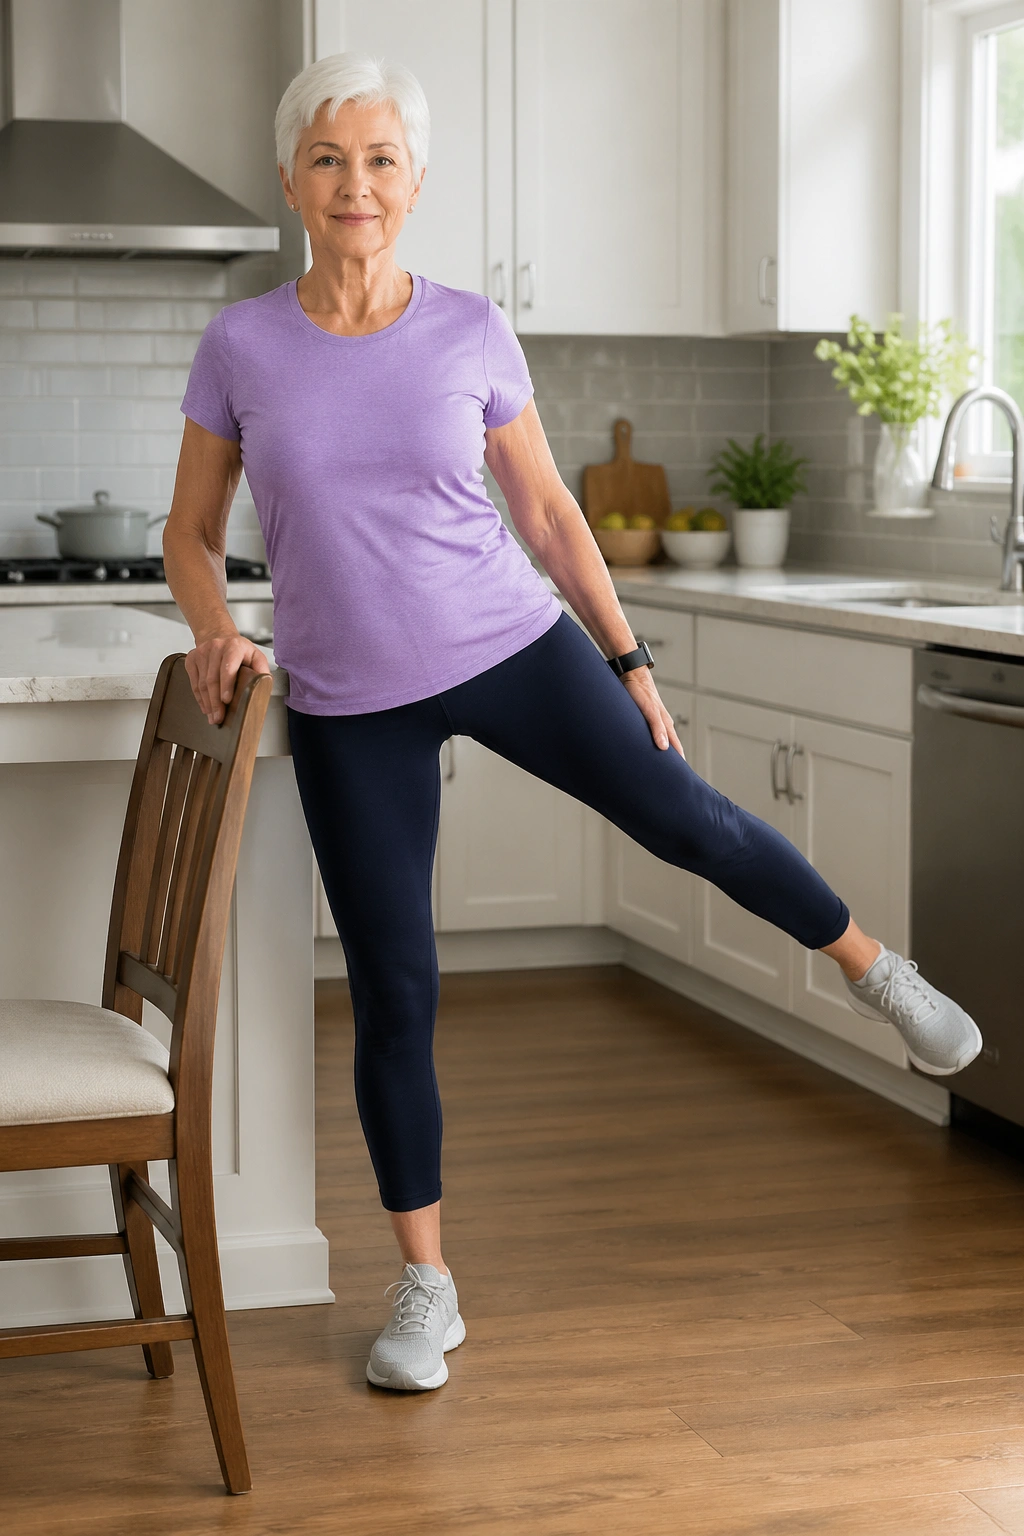
How does lifting one leg a few inches help with balance? Quite a bit, actually. Standing side leg raises train the hip muscles that keep the pelvis level when you walk.
Stand behind a sturdy chair or near a counter. Shift your weight into one leg and slide the other leg out to the side without leaning the trunk. The lifted leg does not need to get high. Four to eight inches is enough. Bring it back under control and repeat.
How to Use the Chair
- Hold the chair lightly, not with a death grip.
- Keep the standing knee soft.
- Point the toes forward.
- Move the leg from the hip, not from the low back.
This is one of the better standing exercises for seniors who want to feel steadier on stairs, curbs, or uneven ground. The supporting leg gets a mild challenge, and the outer hip gets stronger without floor work.
If you lean away from the lifted leg, the lift is too big. If the standing hip aches in a sharp way, shorten the range and check your posture. A small, clean lift is better than a flashy one.
16. Heel Raises and Toe Taps
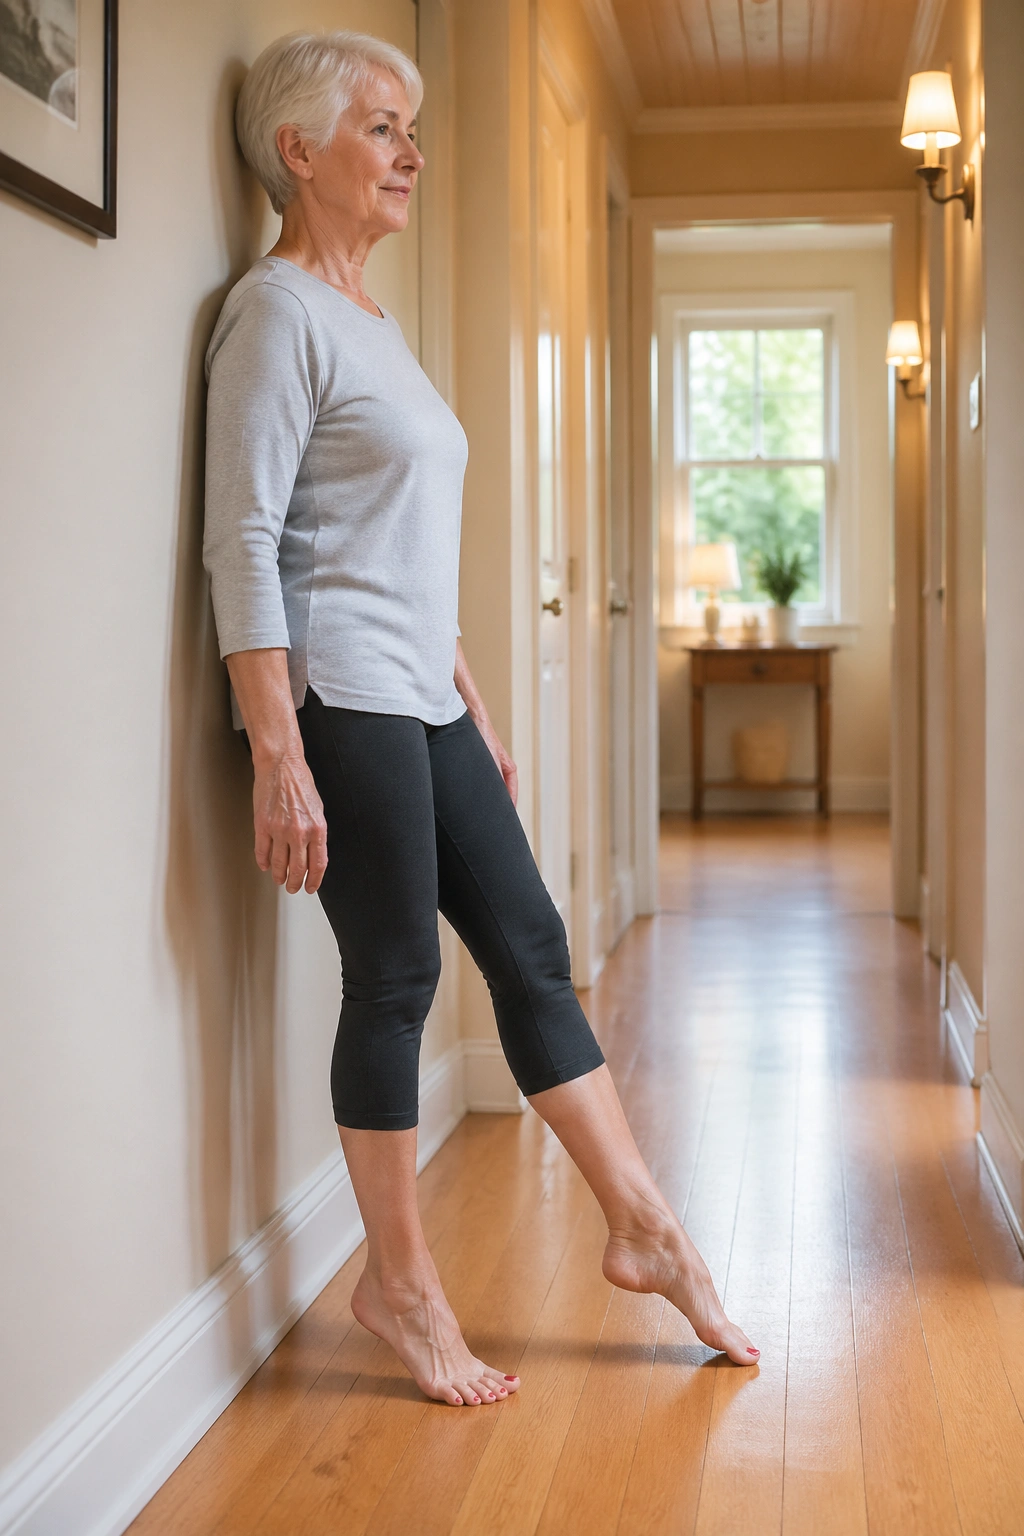
A lot of balance work starts at the ankle, not the hip. That is why heel raises and toe taps deserve a place in a senior Pilates routine at home.
Hold a chair or stand near a wall. Rise onto the balls of the feet, pause for a second, then lower slowly until the heels touch the floor again. After several reps, switch to toe taps: lift one foot a few inches and tap the toes down lightly, keeping the trunk steady.
Heel raises wake up the calves, which help with walking and quick reactions. Toe taps teach weight shifts without making you feel like you are on a tightrope. Together, they cover a lot of useful ground.
- Aim for 10 to 15 heel raises.
- Keep the ankles straight, not rolled outward.
- Tap the toes softly, not with a stomp.
- Breathe out on the lift.
These are not glamorous exercises. They are better than glamorous. They build the kind of day-to-day strength that makes standing in line, stepping onto a curb, or moving around the kitchen feel more secure.
17. Wall Push-Ups
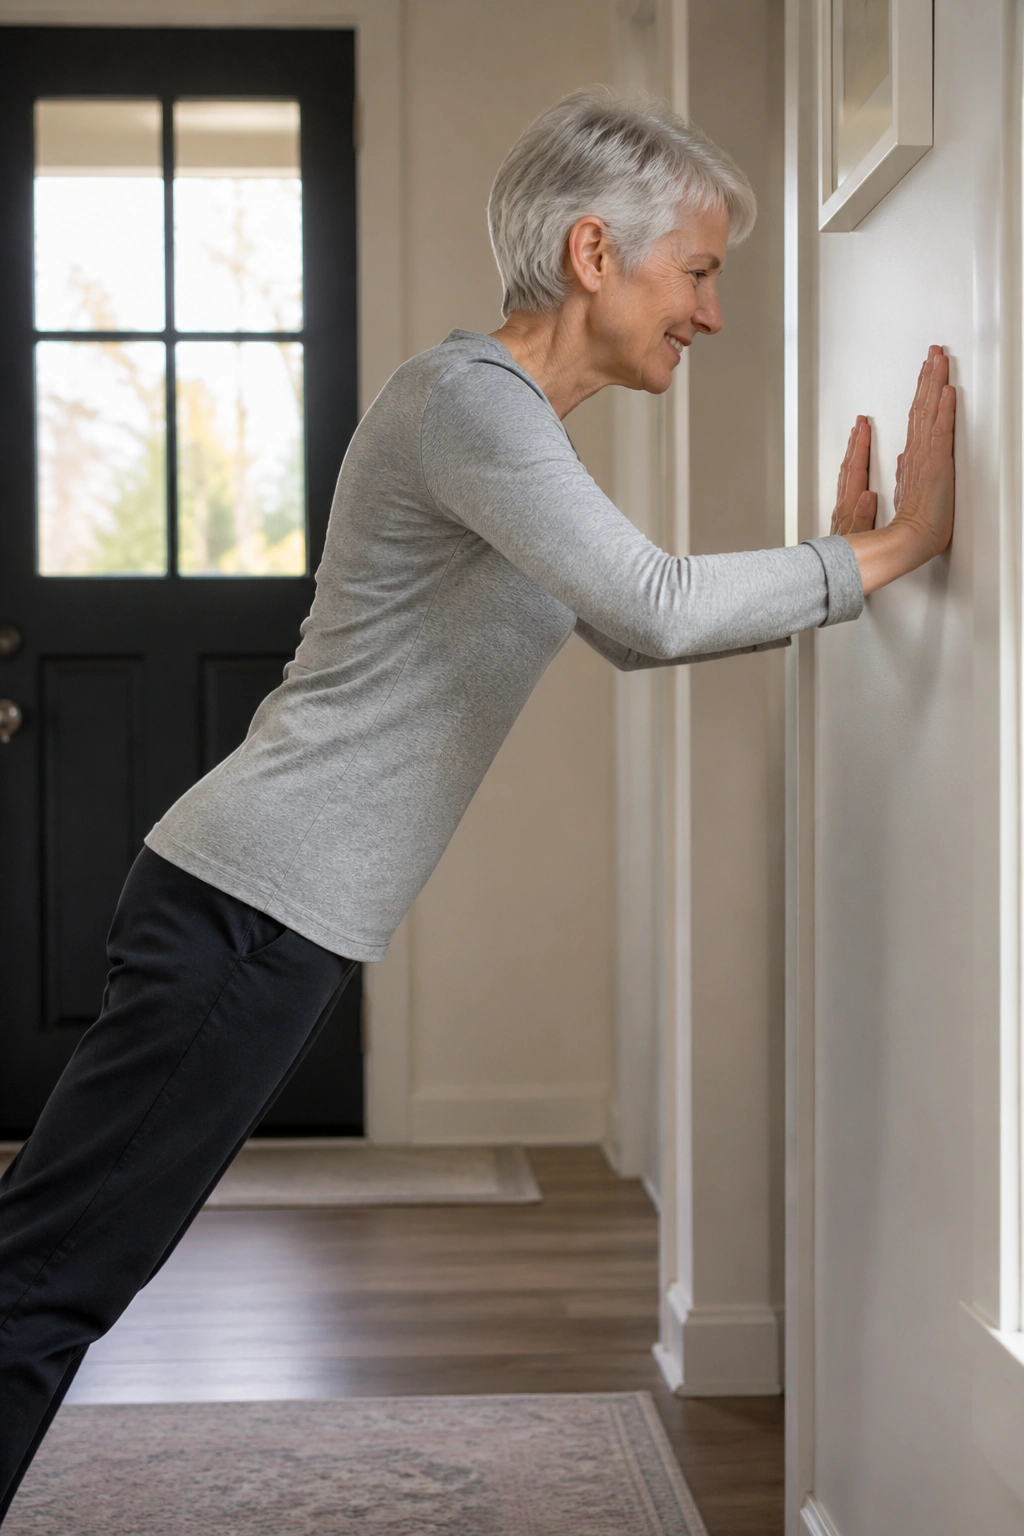
Wall push-ups are one of my favorite ways to keep upper-body strength in the mix without sending the wrists to war with the floor.
Stand arm’s length from a wall and place your hands at chest height. Bend the elbows and bring the chest toward the wall, then press back to start. Keep the body in one straight line from head to heels. The elbows should drift back at about a 30- to 45-degree angle, not flare straight out to the sides.
The wall version builds arm and chest strength, but it also asks the core to stay awake. That matters. If the belly softens and the ribs poke forward, the body loses the line.
Use six to twelve reps. If that feels too easy, step the feet a little farther from the wall. If it feels too hard, move closer. The beauty here is that the difficulty changes with the angle, so you can tune it.
A lot of people think upper-body work needs dumbbells. It doesn’t, at least not at first. This is clean, simple work that keeps the shoulders useful.
18. Single-Leg Balance with Arm Reach
A quiet single-leg stand looks easy until the standing foot starts wobbling. That wobble is the point.
Stand beside a counter or sturdy chair and place one hand nearby for support. Shift weight onto one leg, lift the other foot a few inches, and reach both arms forward or slightly overhead. Hold for 10 to 20 seconds, then switch sides. If the hold feels too unstable, keep the lifted toes brushing the floor instead of coming fully off it.
Unlike a plain one-leg stand, adding the arm reach asks the trunk to organize itself too. That makes the move more useful for dressing, turning, stepping around furniture, and catching yourself before a small trip becomes a bigger one.
Best use: practice this near the kitchen counter, not in the middle of the room. The support lets you work on control instead of fear.
A few details make a big difference:
- Keep the standing knee soft.
- Pick one fixed spot to look at.
- Reach the arms without arching the low back.
- Stop before the ankle starts shaking wildly.
The goal is not perfect stillness. The goal is steadiness that feels usable in real life. That is a better deal, and honestly a more interesting one, than trying to look frozen in place.
