



A Wunda Chair looks harmless until the pedal starts pushing back. Then the little box in the corner turns into one of the most honest strength tools in Pilates, because every lazy rib flare, uneven foot, and rushed return shows up immediately.
Wunda Chair Pilates moves for strength work so well because the chair asks for control from the first inch of motion. You do not get to hide behind momentum. A clean press on the chair tells you your hips are square, your feet are awake, and your trunk is doing its job instead of freeloading.
The other thing people miss: the chair is not only for legs. A good Wunda Chair sequence can build calves, glutes, hamstrings, obliques, shoulders, triceps, and the deep muscles that keep all of that organized. If you have ever watched the pedal slam shut or wobble side to side, you already know the equipment is less forgiving than it looks.
If your chair has split pedals, keep both sides even. If it has a single pedal, center the foot and slow the tempo down. The 18 moves below move from basic leg power to plank work, side-body control, and full-body integration, which is the part that usually separates “I did chair exercises” from “my body feels stronger when I stand, reach, climb, and carry.”
1. Parallel Footwork Presses
If you want one move that tells you almost everything about your line on the chair, start here. Parallel footwork presses wake up the quads, calves, and glutes without asking for circus-level balance, which makes them a smart place to build real strength.
Why It Works
Sit tall on the Wunda Chair seat and place the balls of both feet on the pedal in parallel, hip-width apart. Press the pedal down slowly for 2 counts, then return for 3 counts so you do not bounce out of the bottom. The slower return matters more than people think; that is where the control lives.
Your seat bones should feel heavy on the chair, and your rib cage should stay quiet. If the knees slam inward or the heels pop up like they have somewhere better to be, the springs are not the problem. The pattern is.
Quick Form Cues
- Keep the pressure even through the big toe mound, little toe mound, and heel.
- Stop the press before your knees lock.
- Think of the thighs moving straight, not spinning open.
- Keep the shoulders soft and the neck long.
Best tip: if the pedal feels too light, resist the urge to move faster. Add a pause at the bottom instead. That tiny stop makes footwork feel twice as honest.
2. High Plank Pedal Presses
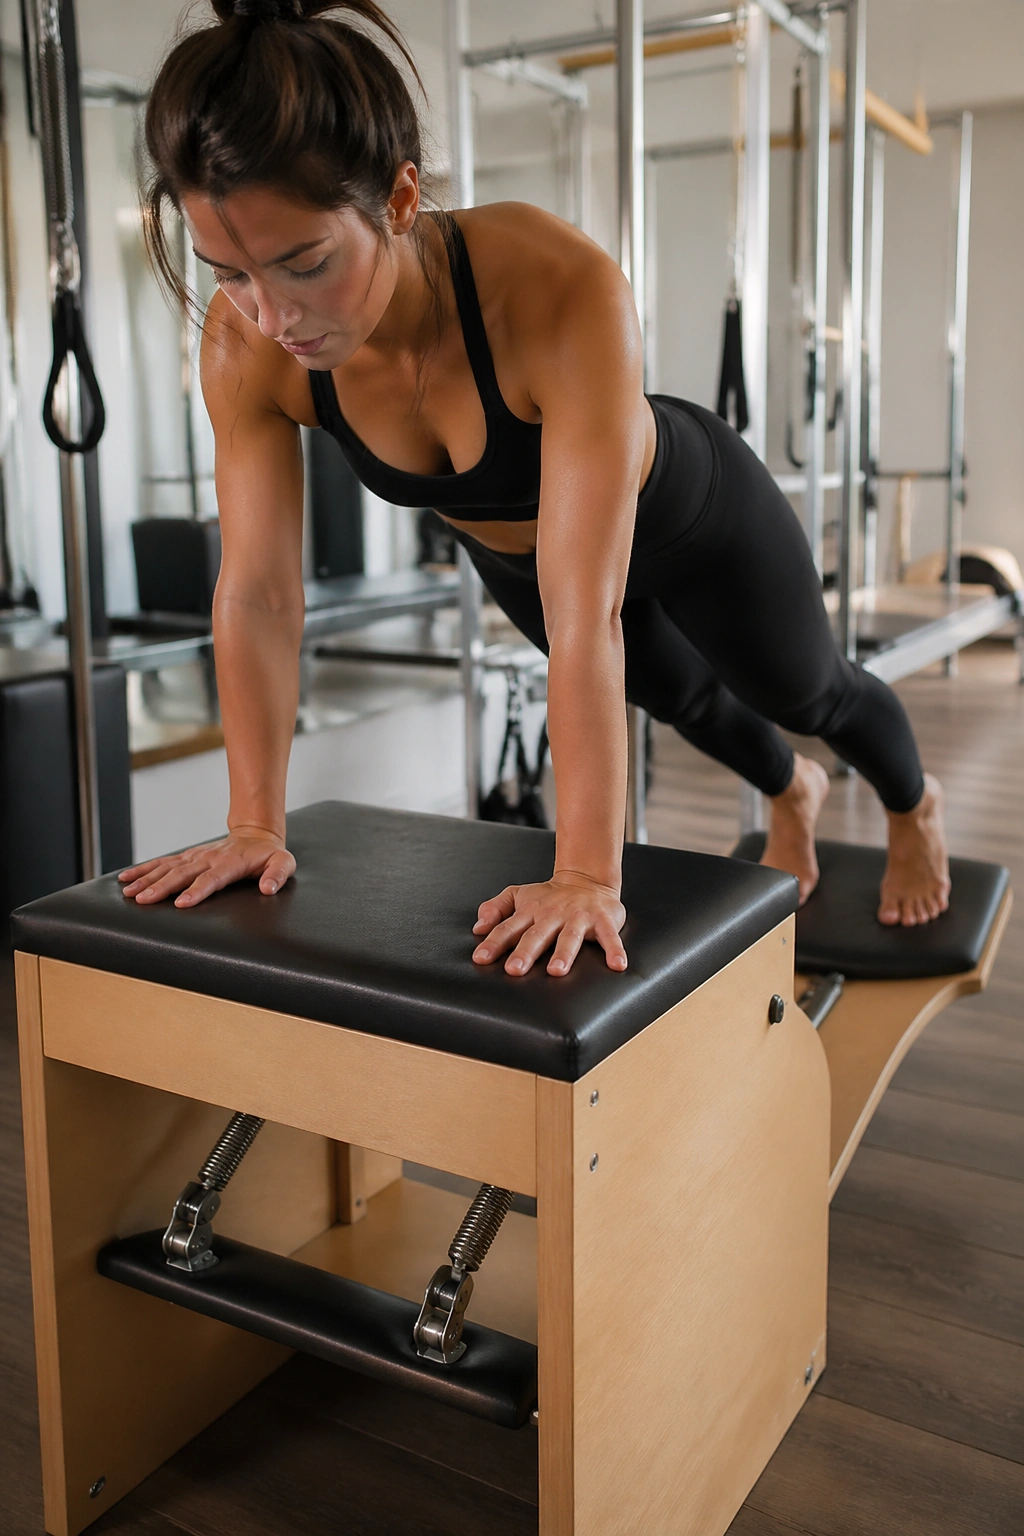
This is where the chair stops being polite. High plank pedal presses load the shoulders, triceps, and deep abdominals in a way that floor planks often do not, because the moving pedal punishes any wobble through the ribs and pelvis.
Place both hands on the chair seat or pedal, step your feet back into a strong plank, and press the pedal down only as far as you can while the body stays long. A lot of people press too far and then shrug through the neck. That is sloppy work, not strength. Keep the shoulders wide, the belly firm, and the pelvis level.
The magic is in the return. Let the pedal rise with control for 2 to 4 counts. If the lower back sags or the elbows lock, shorten the range and keep the body honest. Clean planks on the chair build a kind of shoulder stability that shows up later when you carry bags, push a door open, or hold a heavy object at arm’s length.
One short rep can teach more than ten rushed ones. Serious.
3. Standing Single-Leg Presses
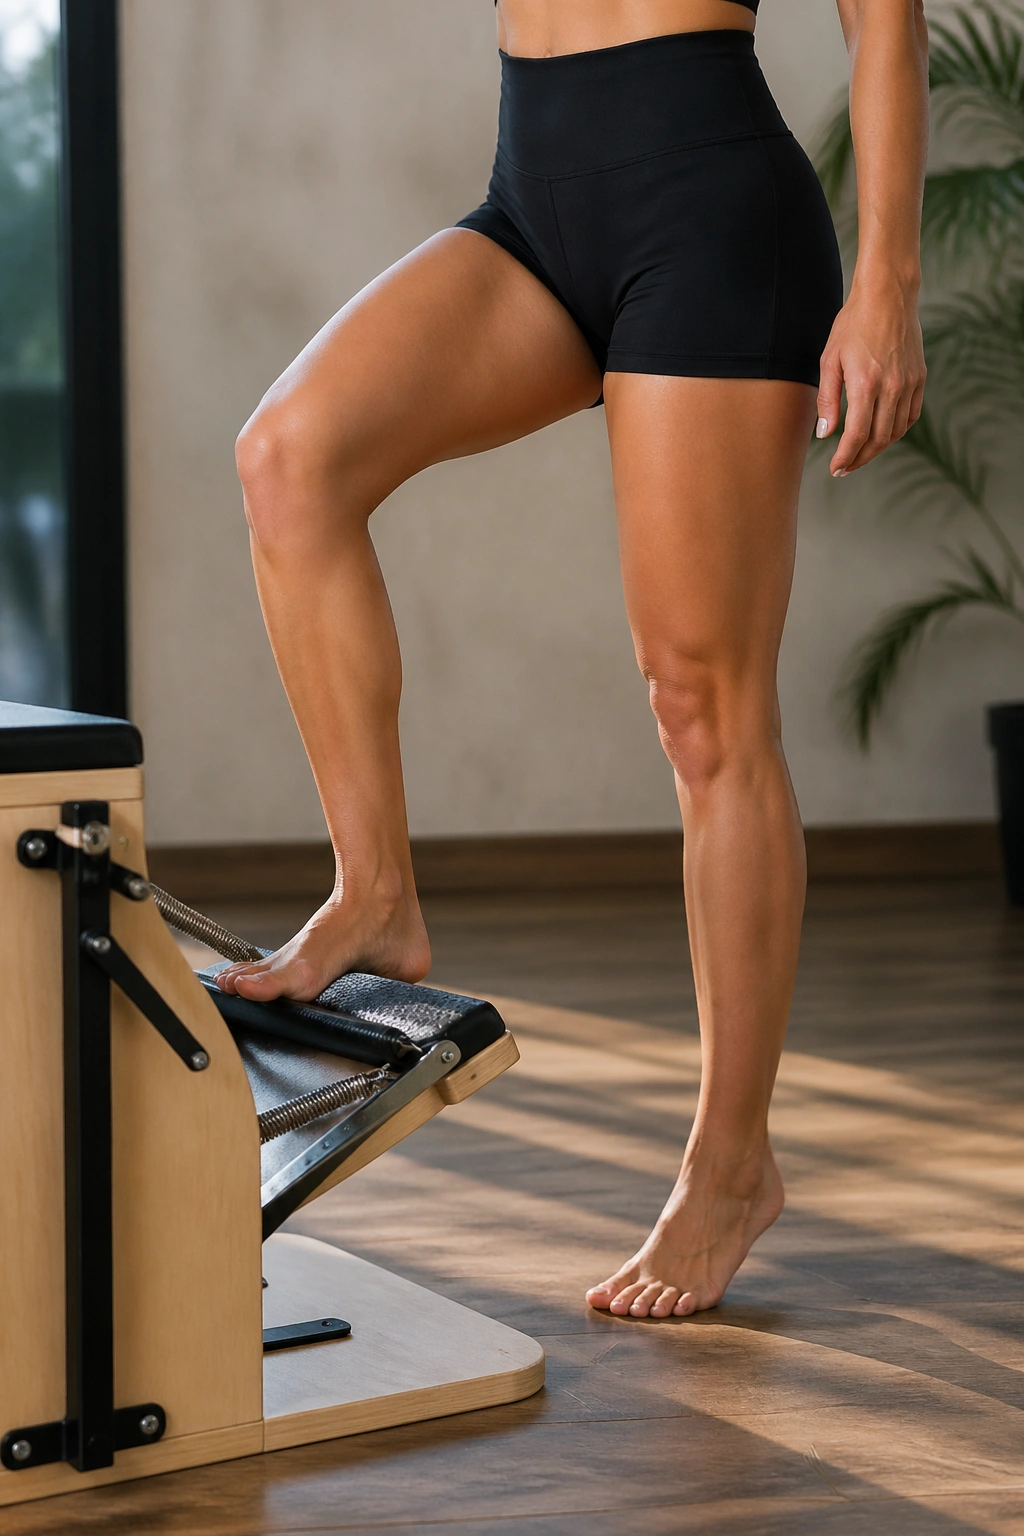
Why does one leg make the chair feel twice as heavy? Because standing single-leg presses expose every small imbalance in the ankle, hip, and trunk, and there is nowhere to hide it.
How to Use It
Stand on the floor with one foot centered on the pedal and the other foot grounded. Keep the pelvis level, press the pedal down in a slow arc, and return without letting the standing knee collapse inward. The working leg should feel like it is doing the job, while the standing side keeps the whole body from tipping.
This move is gold for ankle strength and hip control. It also tells you a lot about side-to-side differences. If one side feels smooth and the other side feels like it is arguing with gravity, do not ignore that. Start with the weaker side and keep the tempo slow.
What to Watch For
- The standing foot should stay rooted.
- The pelvis should not hike or twist.
- The free leg should stay quiet, not flail for balance.
- The pedal should move smoothly, not snap.
A good rule: 3 counts down, 3 counts up. That timing is boring in the best way, because boring reps are often the ones that build usable strength.
4. Teaser Prep Lifts
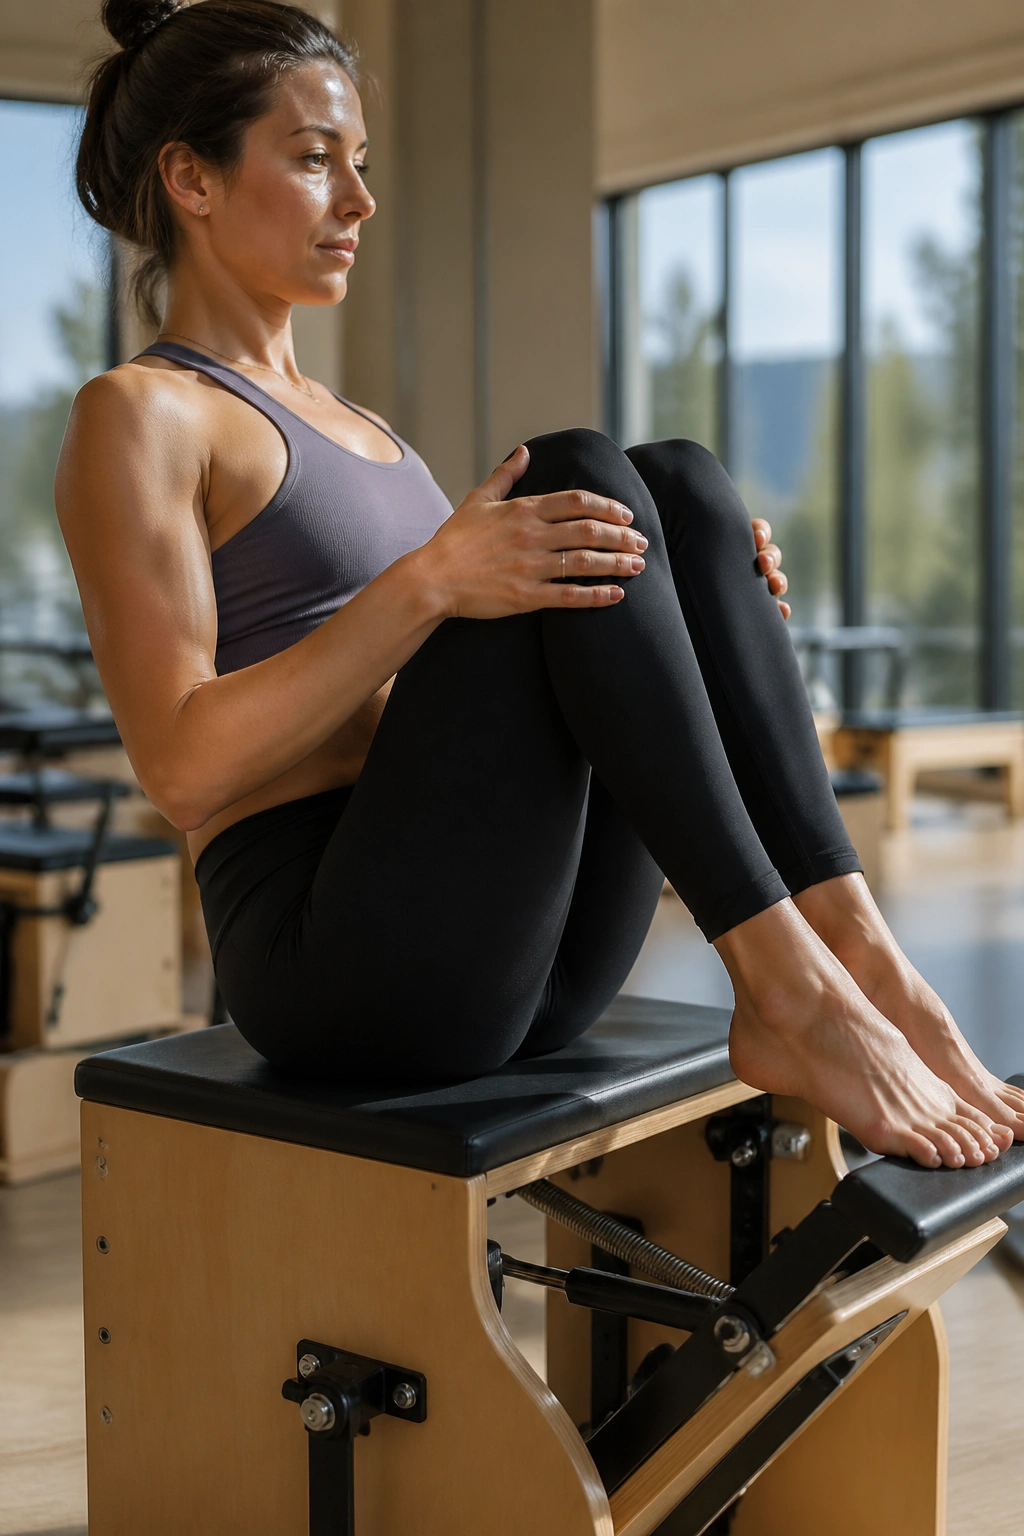
If teaser work on the mat makes your hip flexors scream and your torso fold, the chair can clean that up. Teaser prep lifts give you a way to train abdominal strength without asking your lower back to do all the rescuing.
Sit on the chair seat, hold the sides lightly if you need to, and place your feet on the pedal. Lean back just enough to feel the abs engage, then draw the knees in and lift the feet with control. You are not trying to throw yourself into a full teaser. You are teaching the trunk to hold shape while the legs move.
The key is the hollowing feeling under the ribs, not a crunch in the neck. Keep the chest broad. Keep the chin slightly tucked. And do not chase height with the knees; chase control. A small, clean lift is worth more than a big messy one.
- Start with 5 to 6 reps.
- Hold the top for 1 count.
- Lower with a slow exhale.
- Stop the set before the hip flexors seize up.
That last part matters. Teaser prep should feel demanding, not like a tug-of-war.
5. Pike Presses
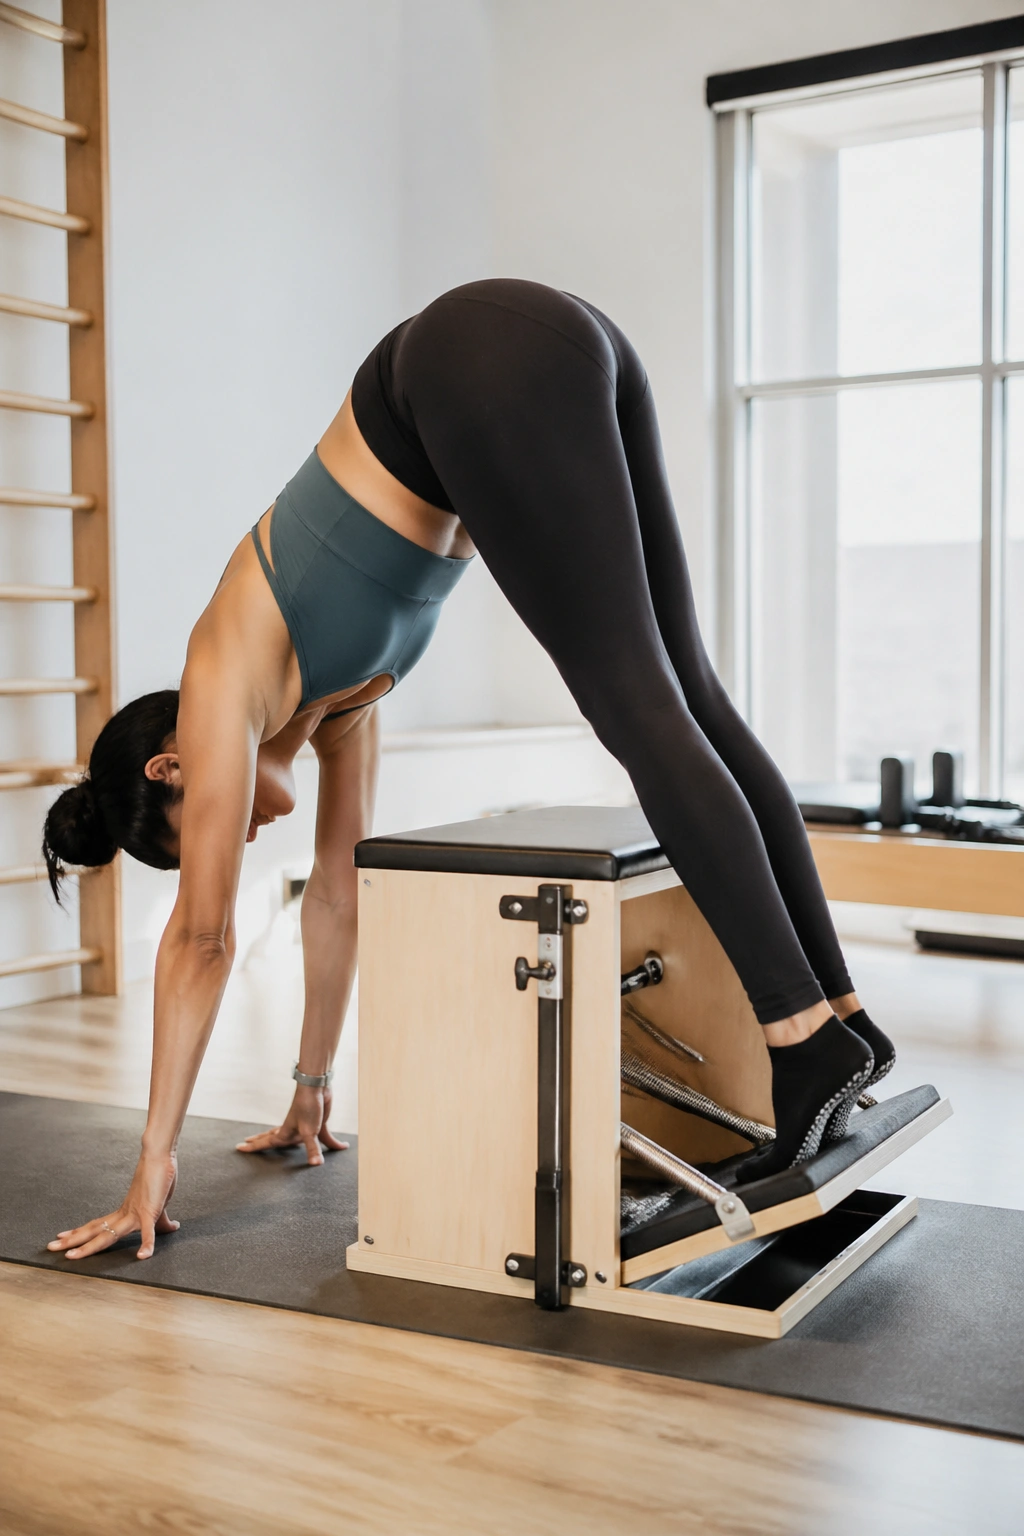
Pike presses on the Wunda Chair are one of those moves that look neat until you try them. Then the shoulders, upper abs, and front of the hips all have opinions.
Place your hands on the chair seat, step your feet back, and walk into a long plank. From there, lift the hips up and back into a pike shape while the pedal stays under control. The spine should lengthen as the hips rise, not collapse into a rounded hunch. If your knees bend a lot, shorten the range and keep the shape clean.
What I like about this one is how obvious the feedback is. If the shoulders are weak, you feel it fast. If the abs are disconnected, the lower back tells on you. If the hamstrings are tight, they make themselves known right away. The chair is not subtle.
The Feel You Want
The back of the legs should lengthen. The shoulders should stay broad. The pedal should move with a quiet, steady path, not a clunk.
This is a strength move, not a speed drill. Four good pikes beat ten rushed ones every time.
6. Kneeling Triceps Presses
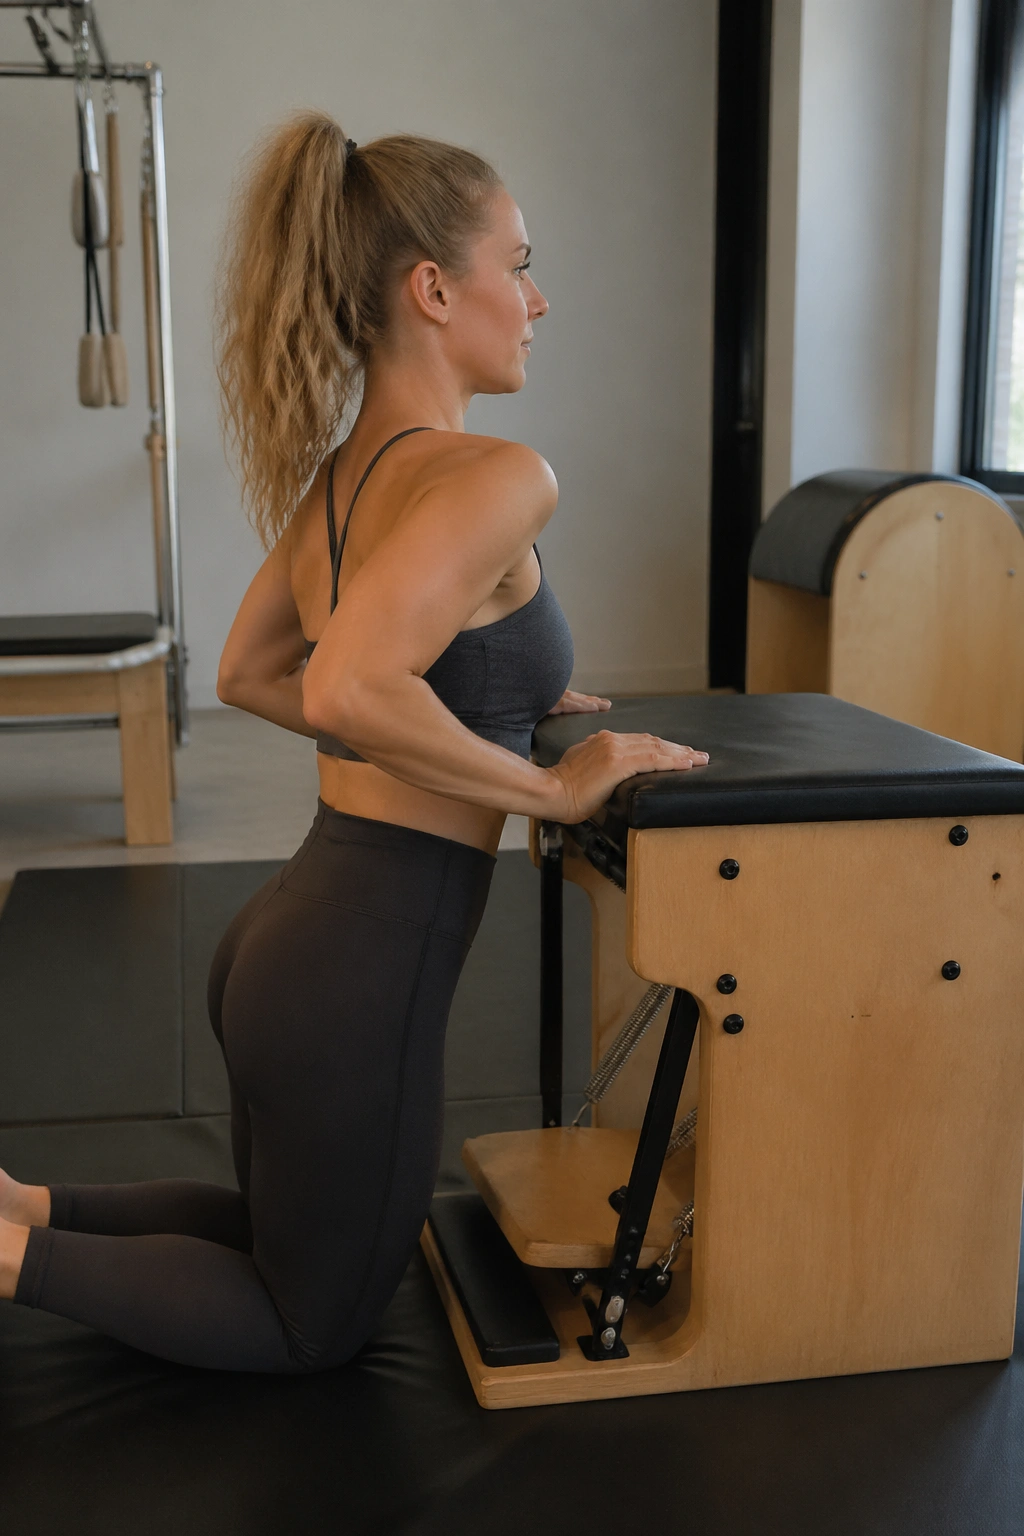
Unlike floor triceps work that dumps a lot of stress into the wrists, kneeling triceps presses on the chair let you manage the load with better precision. That is why they are so useful for building arm strength without turning the shoulders into a mess.
Kneel facing the chair, place your hands on the seat or pedal, and keep the elbows close to the ribs as you bend and straighten the arms. The chest stays lifted, but not flared. The ribs stay knitted together. If the elbows drift wide, the triceps lose the party and the shoulders start overworking.
A lot of people press too deep because it feels strong for a second. Then the neck tightens, the shoulders creep up, and the lower back arches. Skip that version. A smaller bend with a crisp press back to straight arms is cleaner and usually harder.
Who it suits: anyone who wants stronger arms, better shoulder positioning, and a little core work baked into the same rep.
What to use: 2 to 3 sets of 6 to 8 presses, with a slow return.
7. Side Plank Oblique Presses
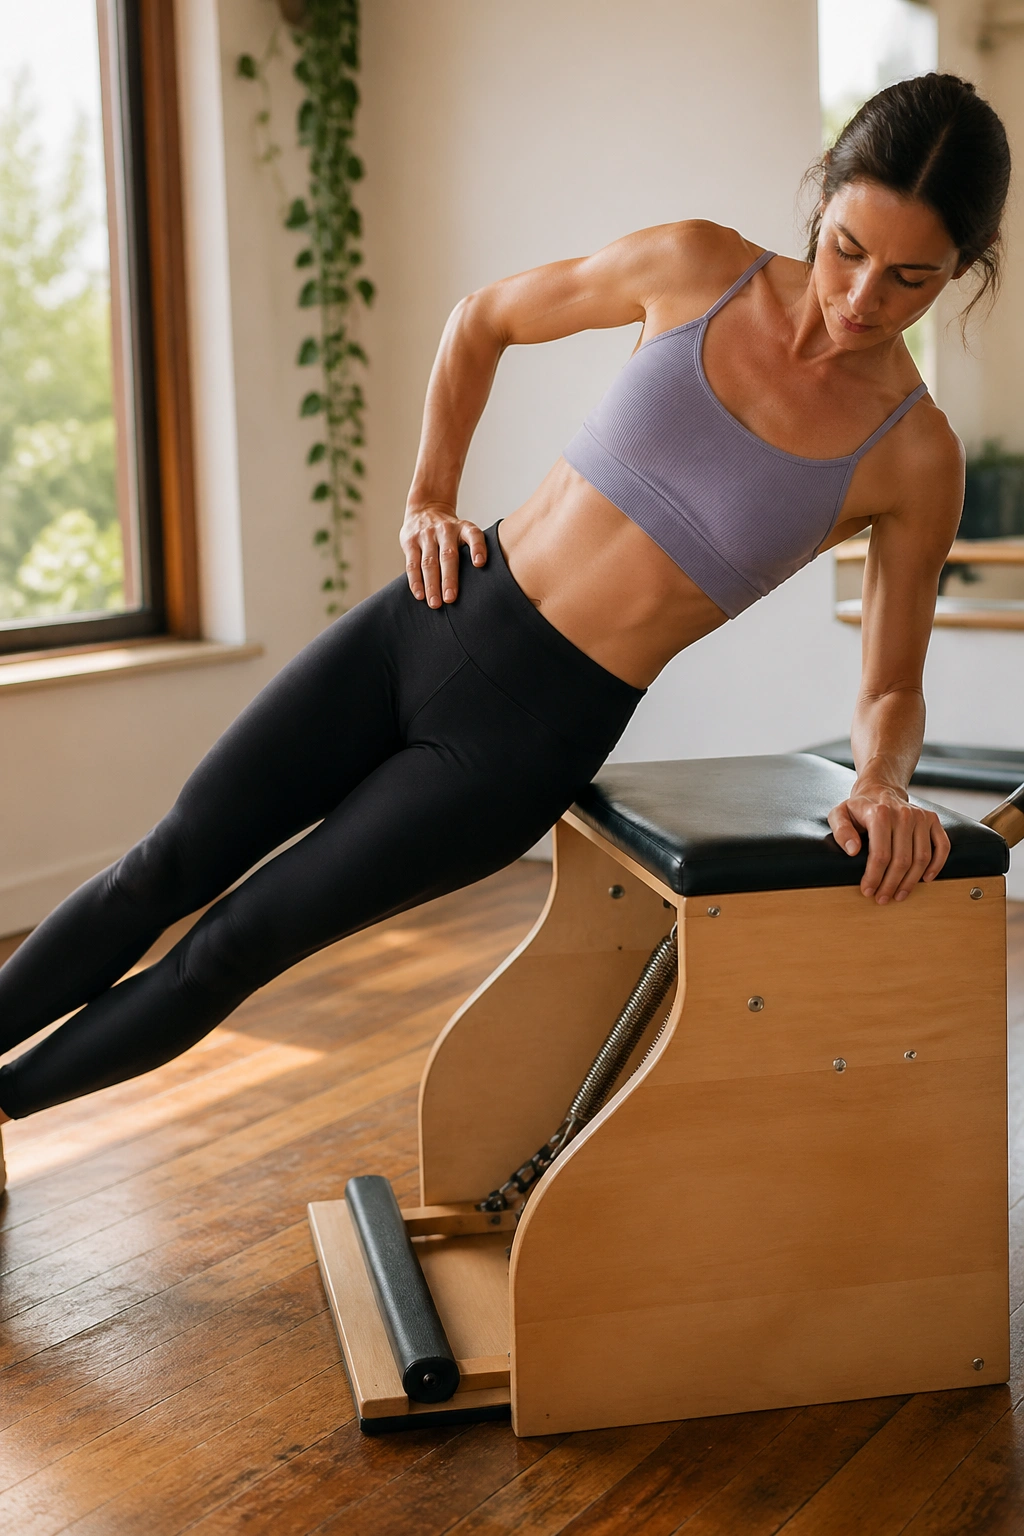
Want your side body to stop folding the second balance gets weird? Side plank oblique presses are one of the best answers I know, because they make the waist work while the shoulder learns to stabilize under load.
Set up in a side plank with one hand on the chair and the other hand on the hip or reaching long overhead, depending on how much support you need. From there, press the pedal down a few inches and return with control. The motion is small. It should be small. The obliques do their best work when the rib cage stays stacked over the pelvis.
What matters most is the lower shoulder. It should feel packed, not jammed. If the neck shortens or the torso tips backward, reduce the range or bring the lower knee down for a half-side plank version. You are training line first, not suffering for the sake of it.
What to Watch For
- Keep the top hip from rolling backward.
- Press through the whole hand, not the wrist only.
- Breathe out on the press.
- Stop if the shoulder feels pinchy.
8. Mermaid Side Bends
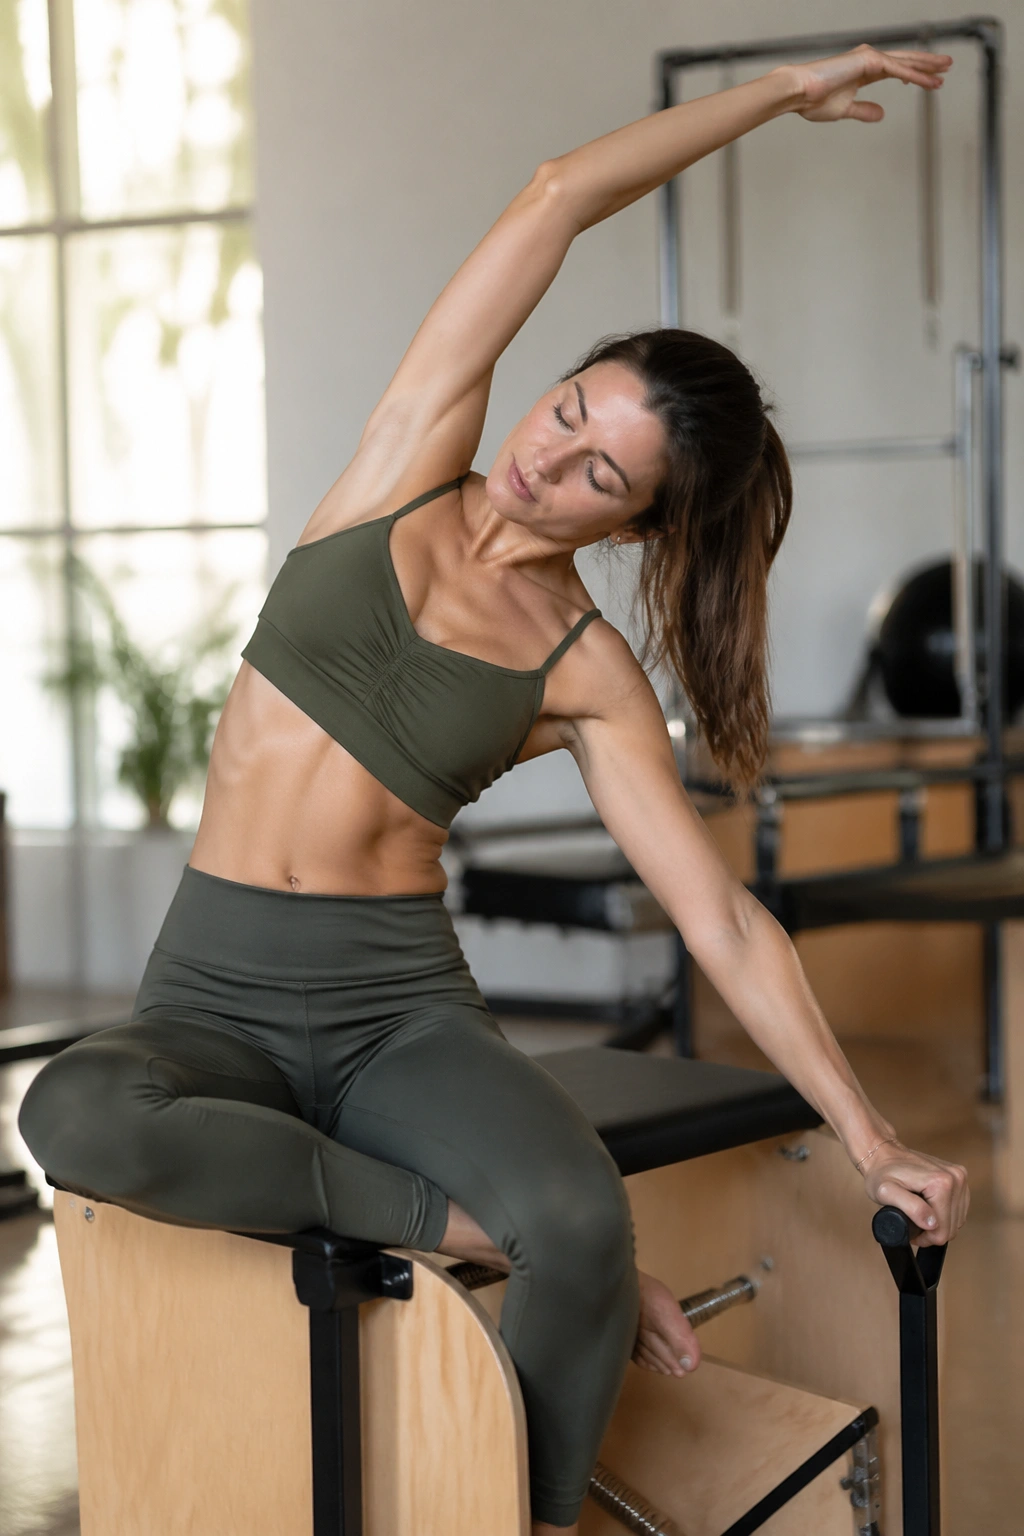
On days when the waist feels stiff and the ribs feel glued together, mermaid side bends are the move I keep coming back to. They stretch one side while the chair gives you enough support to feel safe loading the other.
Sit sideways on the chair or kneel beside it, place one hand on the pedal, and let the other arm arc overhead as you side bend away from the chair. Then press the pedal with control as you return to upright. The two directions work together: the bend opens the side body, and the press teaches it to stay strong while it moves.
It sounds gentle, but it is not fluff. Side bends on the chair load the obliques, the lats, and the deep muscles between the ribs and pelvis. If the shoulder hunches or the lower back pinches, your range is too big. Shrink it and let the breath do more of the work.
A clean mermaid should feel long through the waist, not crushed. That distinction is everything.
9. Swan Lifts
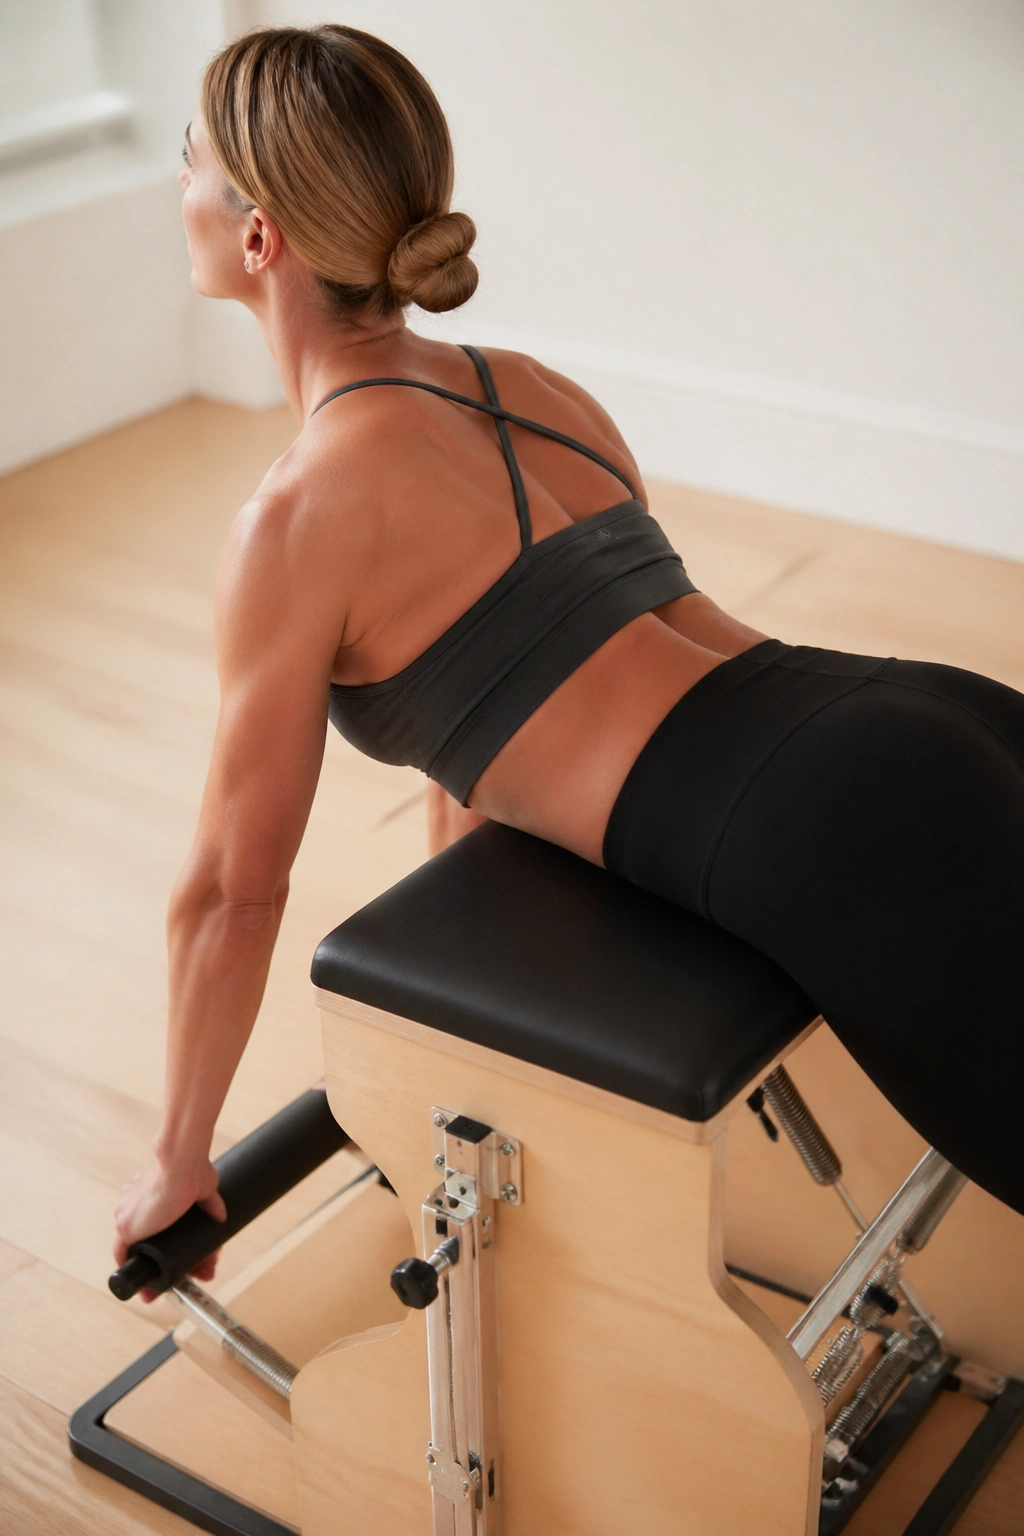
Swan lifts are where the chair earns its place in back-body training. They ask for spinal extension, glute support, and shoulder control at the same time, which is a better deal than many people realize.
Lie prone with your chest supported on the chair seat or place your hands on the pedal, depending on the version you know and the shape of your chair. Lift the sternum forward and up while the back of the neck stays long. The goal is not to toss the chest into a dramatic arch. The goal is to extend the spine with enough control that the ribs do not flare out like wings.
The back line should feel awake: glutes lightly on, hamstrings active, upper back doing its share. If the lower back feels cranked, lower the height and think length first. That one cue fixes more swan work than people expect.
A good swan feels smooth. Not stiff, not flashy. Just strong.
10. Seated Arm Presses
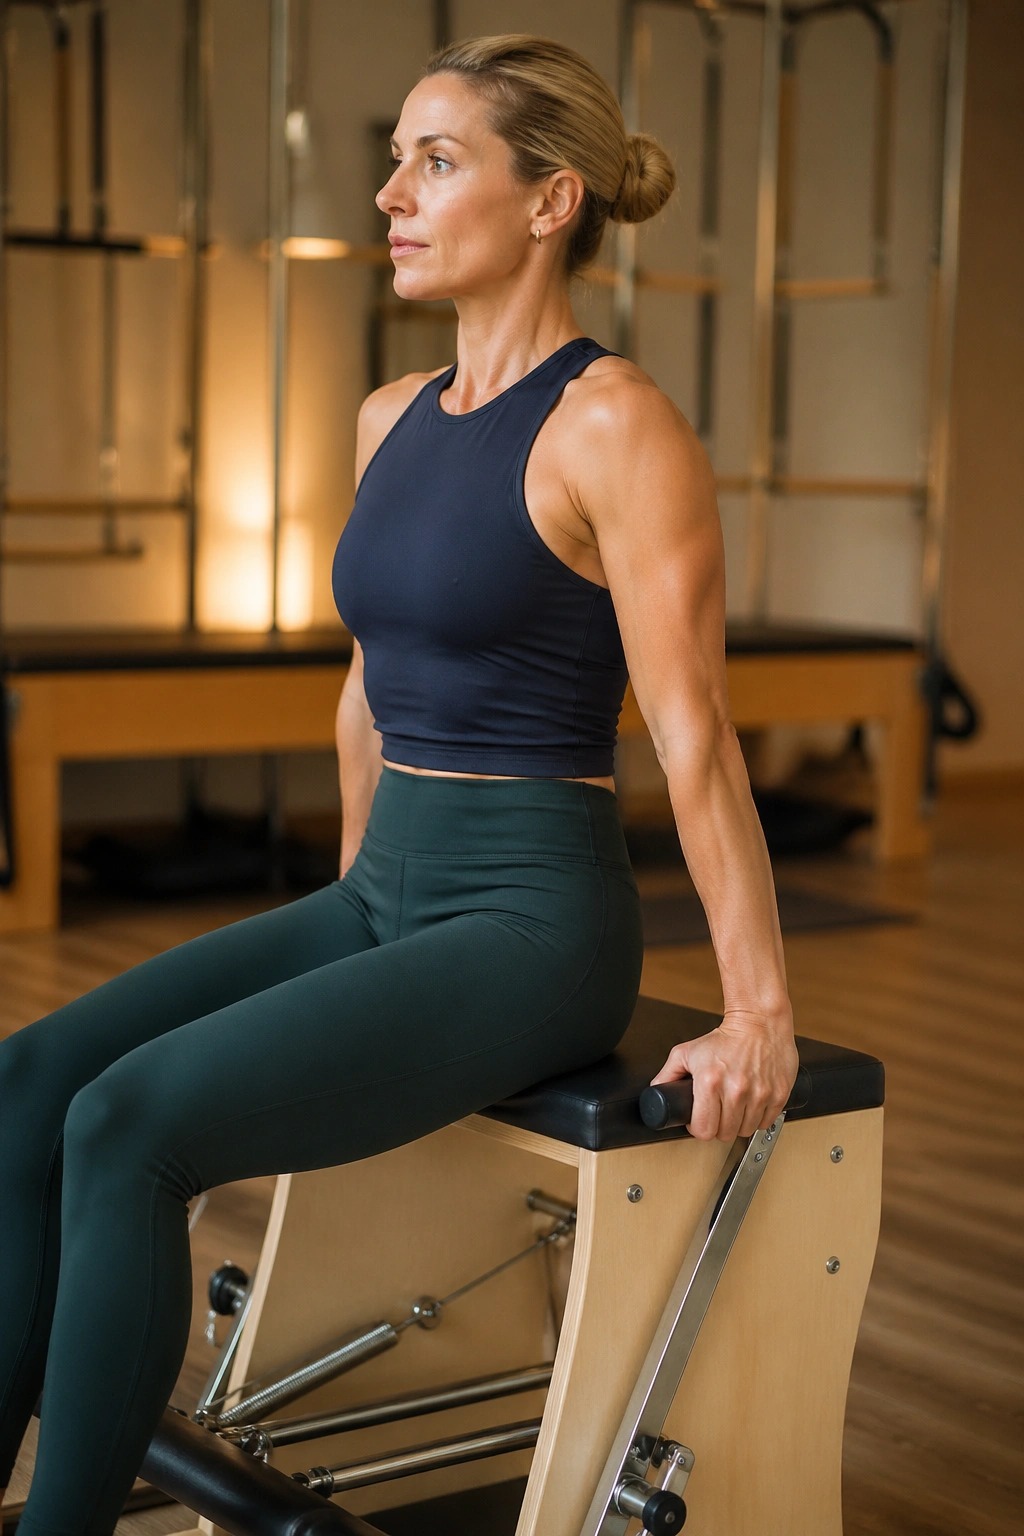
Small movement. Big burn.
Seated arm presses on the Wunda Chair are one of the cleanest ways to build triceps and shoulder endurance because the trunk has to hold still while the arms move the pedal. Sit tall on the chair seat, place your hands where your chair allows stable contact, and press the pedal downward with straightening arms. The farther the ribs drift forward, the more the abs have to fix the mess.
I like this move for people who say they “hate arm work” because it does not rely on speed or momentum. You feel the work in the back of the arms almost immediately, and if you keep the shoulders down, the lower traps join in too.
Press Path
- Start with soft elbows.
- Exhale as you press.
- Keep the wrists stacked.
- Return slowly until the springs want to pull you further, then stop.
If your chair setup makes seated presses awkward, keep the range tiny. The point is not depth. The point is a controlled press that leaves the trunk solid.
11. Hamstring Curl Presses
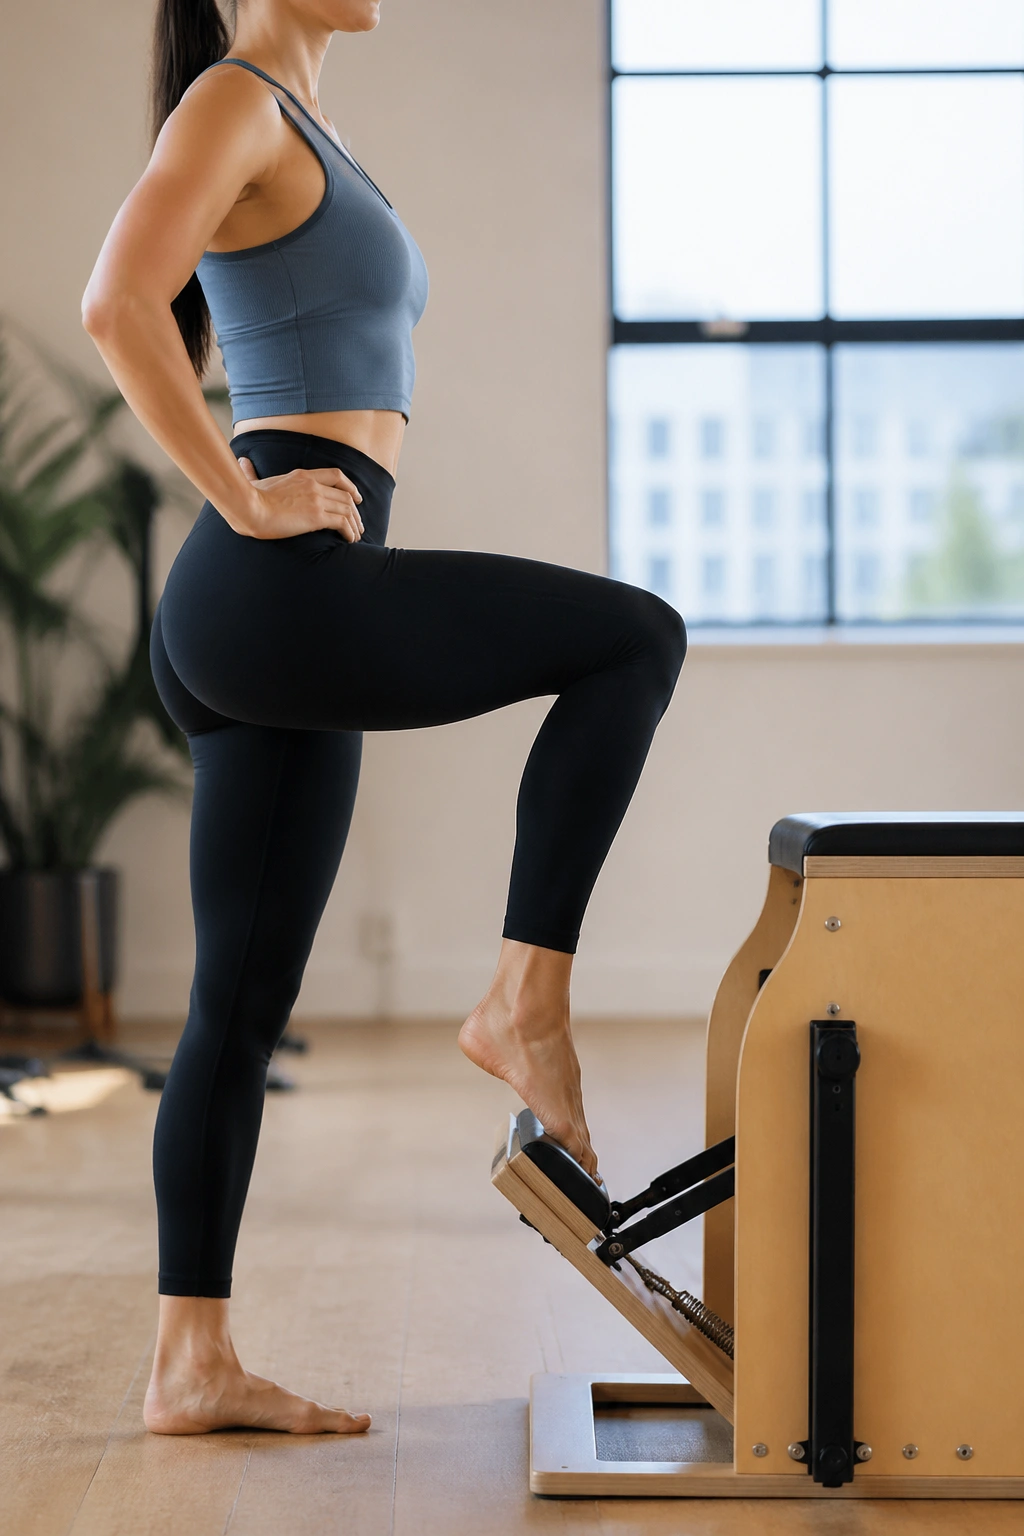
Hamstrings are sneaky. They often look strong in theory and then give up the second the pelvis starts to move. The chair shows that weakness fast.
Stand facing the chair with one foot on the pedal and the other foot on the floor. Keep the pelvis square, then press the pedal by bending the working knee and drawing the heel toward the seat. The motion should come from the back of the thigh, not from throwing the hip forward. If your standing leg is wobbling all over the place, slow down and reduce the range.
How to Keep the Leg Honest
- Keep the ribs over the hips.
- Avoid leaning the torso back.
- Press through the heel of the standing foot.
- Return the pedal with a slow, muscular release.
This is the kind of exercise that makes walking upstairs feel easier later on. Not glamorous. Very useful.
A lot of people cheat hamstrings by letting the glutes take over. On the chair, that cheat shows up fast, and I say good. Better to know.
12. Glute Bridge Pedal Lifts
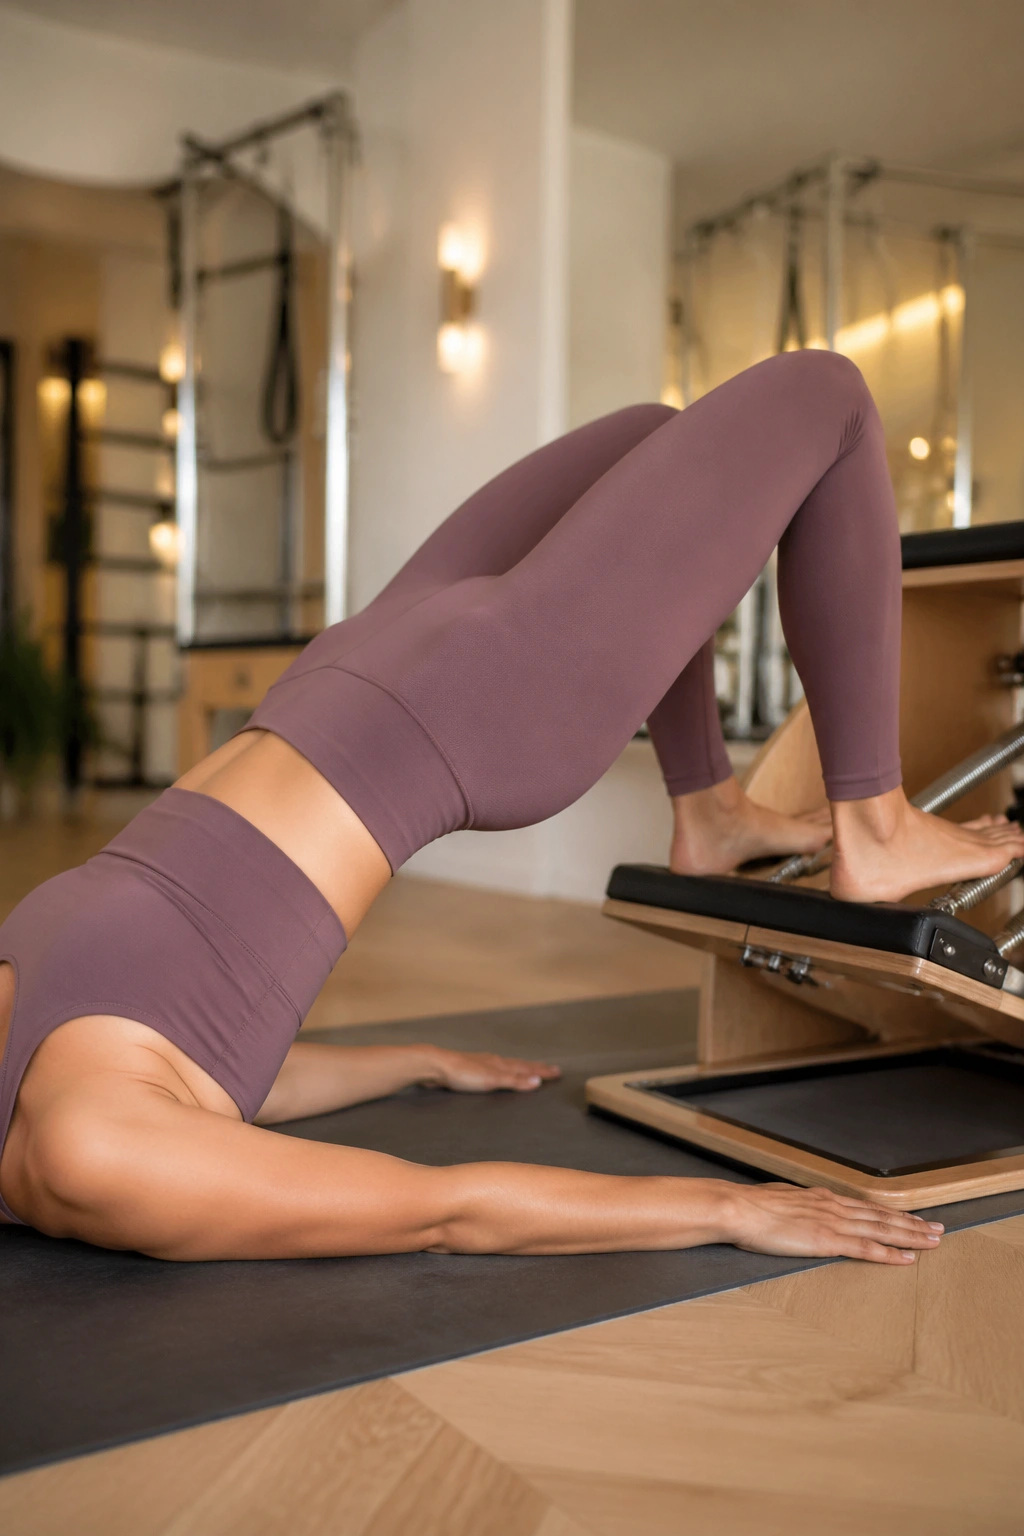
Can a bridge on a chair feel heavier than one on the floor? Absolutely. The moving pedal adds a layer of instability that makes the glutes and hamstrings work harder than they do in a basic floor bridge.
Lie on your back with the feet placed on the pedal, knees bent, and arms long by your sides. Press the pedal away as you lift the pelvis into a bridge, then lower with control until the tailbone meets the mat again. Keep the knees tracking straight and the feet evenly weighted. If the arches collapse or the knees drift apart, the glutes lose their line.
The best part is the top position. You should feel the seat muscles working without pinching the lower back. If the back feels jammed, bring the pelvis lower and focus on length through the knees. A bridge does not need to be huge to be useful.
Use 6 to 8 slow lifts. Hold the top for 2 counts. That pause makes the work settle into the right places.
13. Mountain Climber Drives
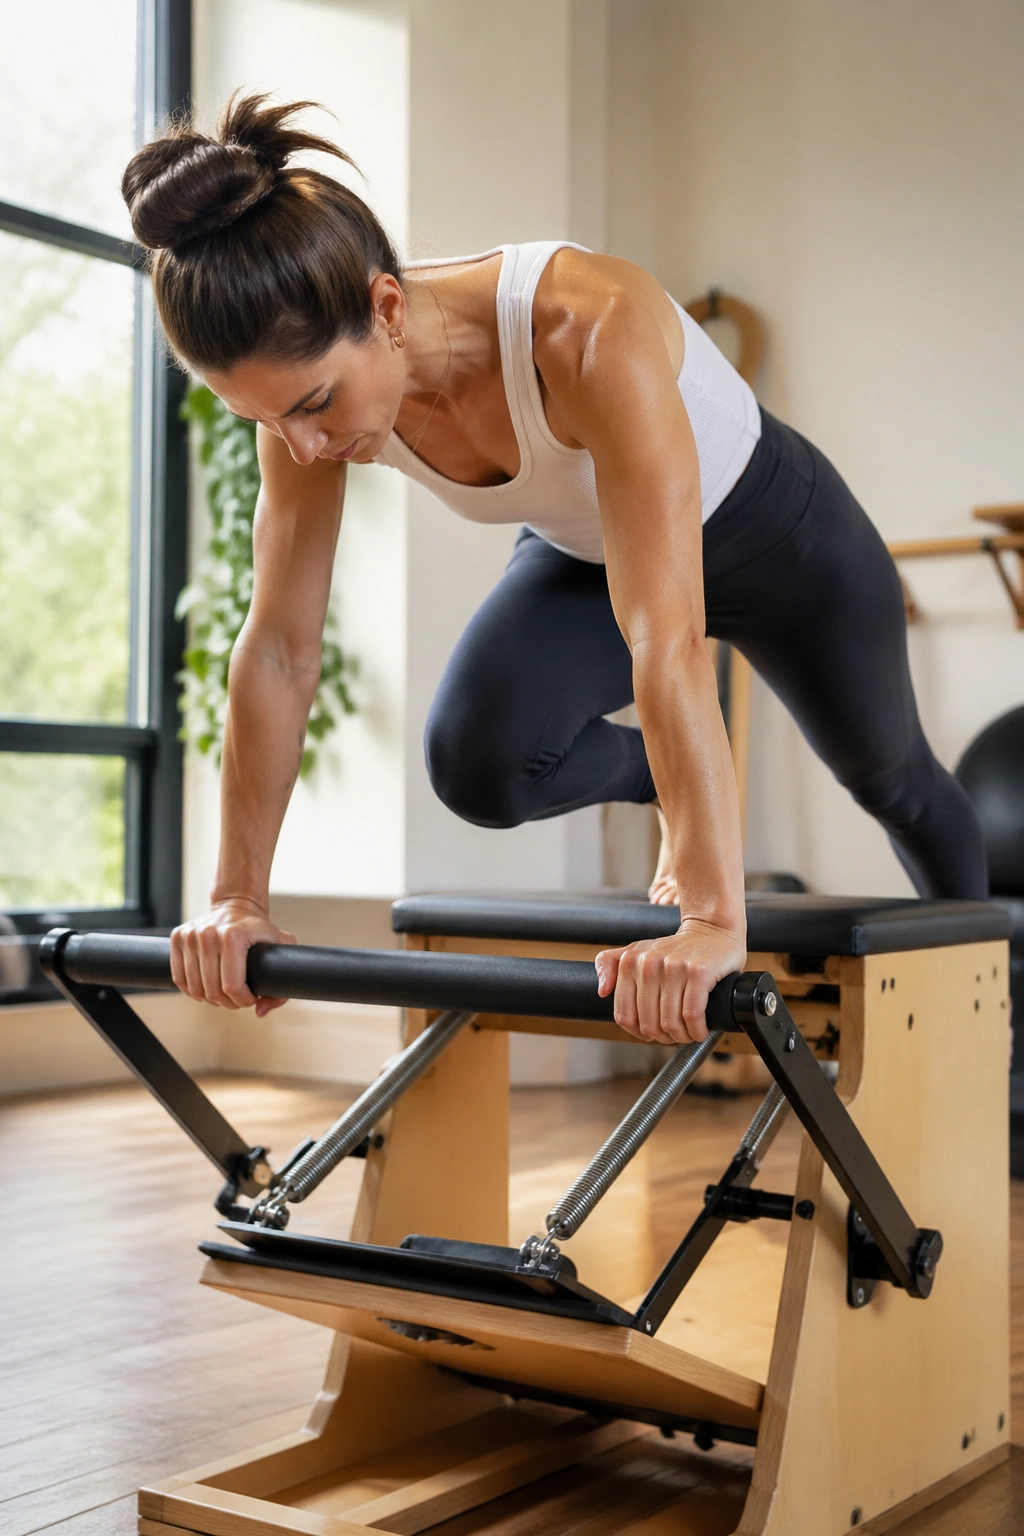
Speed ruins this one.
Mountain climber drives on the chair can be brutal in the best way when they are done slowly, because the moving pedal forces the abs and shoulders to organize every knee drive. Set up in a strong plank with your hands stable on the chair and alternate drawing one knee in at a time, keeping the hips as quiet as possible.
If the pelvis bounces from side to side, the range is too big or the pace is too fast. Bring the knees in a little less and own the shape. The working leg should feel like it is driving from the hip, not swinging from the foot. The upper body should feel anchored, almost stubborn.
A lot of people use climbers as a cardio drill. Fine, but the chair rewards precision more than panic. Keep each switch crisp and clean, and the abs will work much harder than they do when the movement turns sloppy.
Four slow rounds of 8 switches is enough to light up the midsection.
14. Calf Raise Series
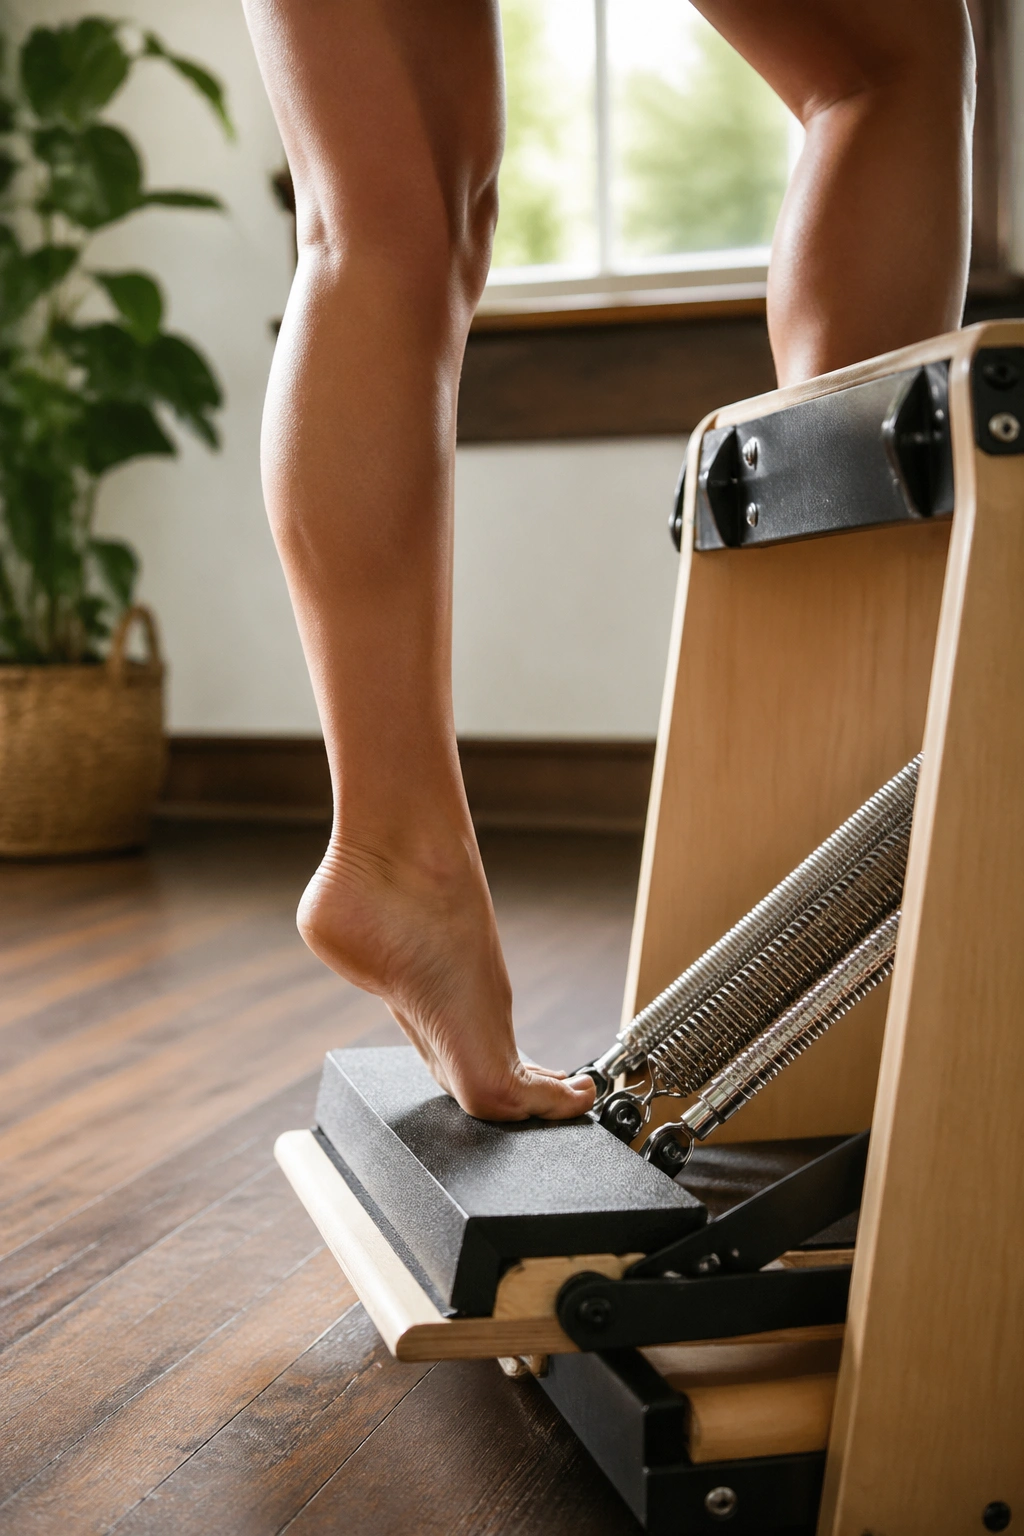
I like calf work on the chair because it exposes the truth about your feet fast. If you roll to the outer edge, you know. If the big toe lifts, you know. If the ankle collapses inward, the chair says it out loud.
Stand with the ball of one or both feet on the pedal and rise up into a controlled calf raise. Lower until the heel is almost level with the pedal, then press back up without bouncing. You can do this with parallel feet, a slight turnout, or a split stance, and each version changes where you feel the work.
Simple Variations
- Parallel: best for clean ankle tracking.
- Turned out slightly: asks more from the inner calves.
- Split stance: challenges balance and foot pressure.
The secret is not height. It is stillness. If the toes claw and the neck tightens, you are trying too hard. A smooth lift and lower, repeated 8 to 12 times, is enough.
Tiny muscle, big payoff. Always has been.
15. Rotational Presses
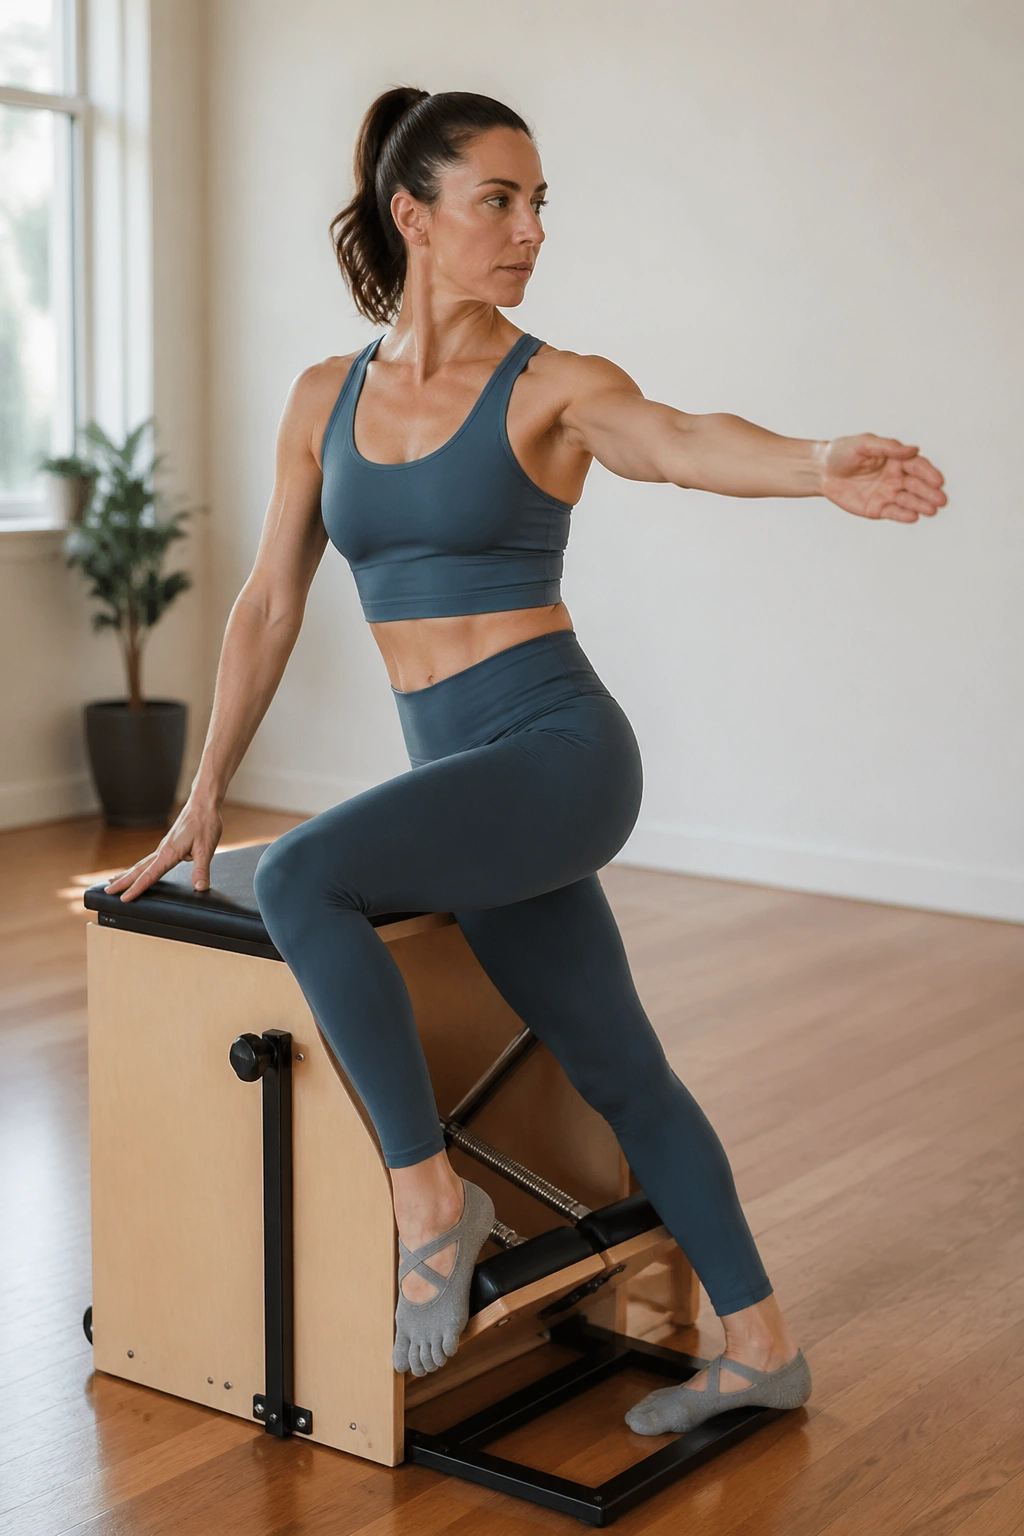
The waist should rotate, not the pelvis. That is the whole game here.
Stand or kneel beside the chair with one hand on the pedal and the other hand reaching across the body, then press the pedal while the rib cage rotates only as far as it can keep the hips steady. The obliques should feel like they are steering the motion. If the whole lower body spins, you have lost the point.
This move is useful because real-life strength is rarely straight up and down. You reach for a seatbelt, turn to pick up a bag, twist to place something on a shelf. The chair can train that pattern if you keep it clean.
What Makes It Work
- The hips stay mostly square.
- The ribs rotate as one unit.
- The press stays slow.
- The return is controlled, not whipped.
A little rotation goes a long way. Two to three slow sets per side is enough to wake up the waist without letting the movement turn into a back crank.
16. Split-Pedal Balance Holds
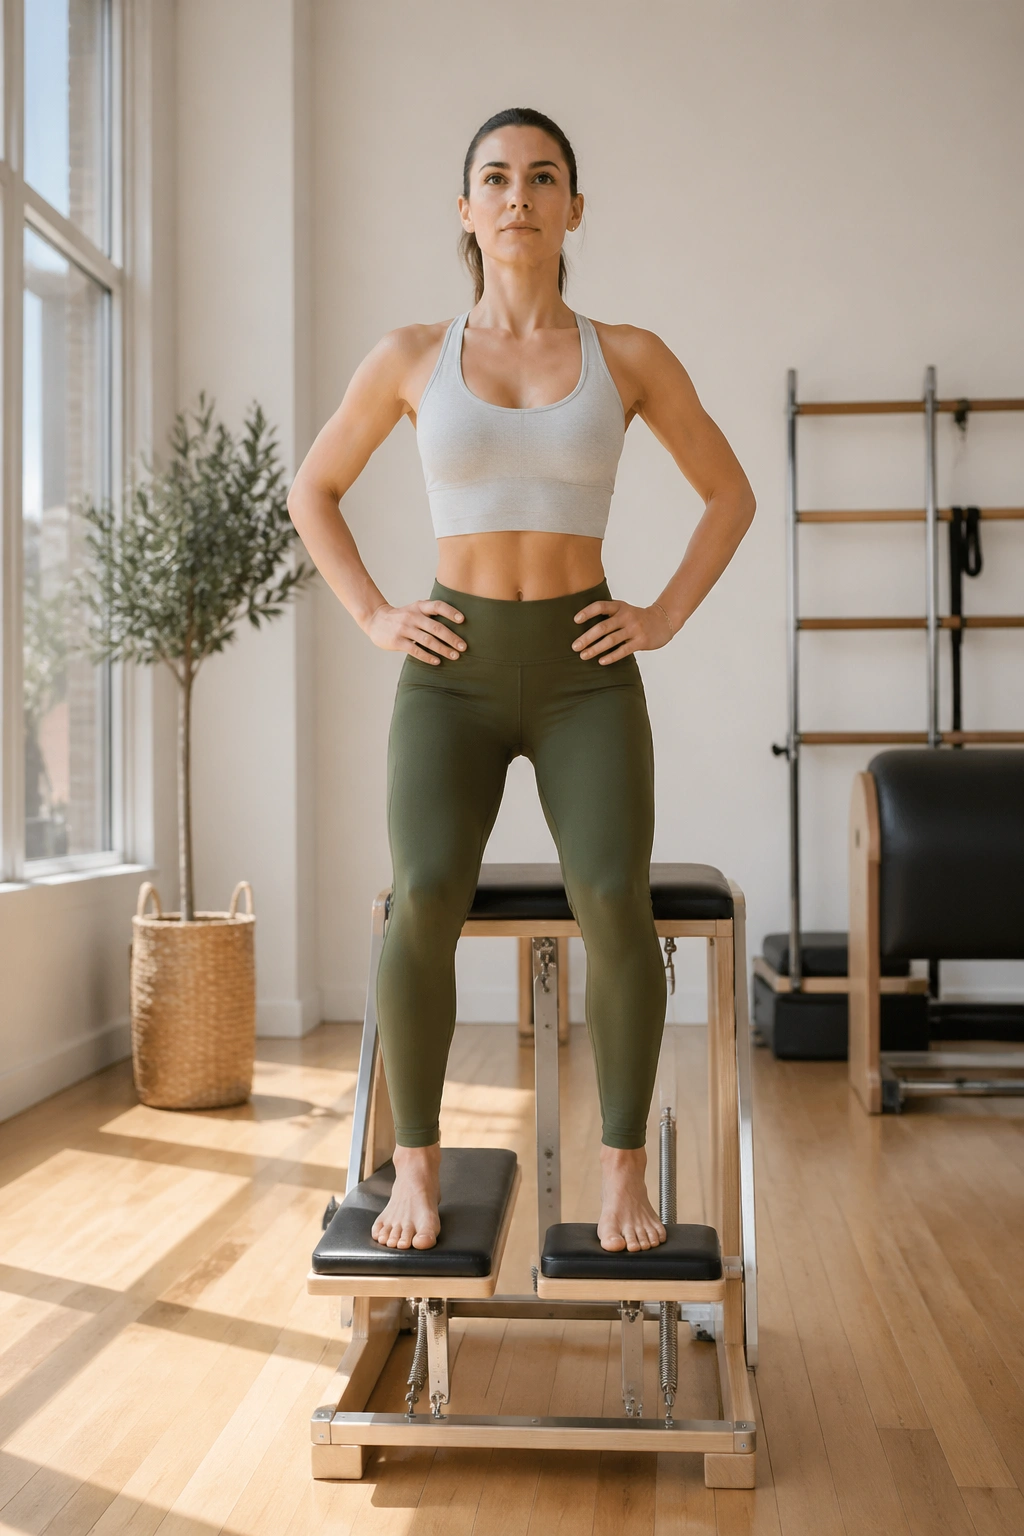
If your chair has split pedals, this is the sobriety test.
Stand with each foot on its own side, or use the split pedal in whatever balanced stance your chair allows, and press both sides to the same level while holding the torso still. The challenge is not moving. The challenge is resisting the tiny shift that wants to happen when one side works harder than the other.
This is a fantastic drill for people who rush strength work. You cannot rush an isometric hold very well. The pedal tells on your feet, your hips, and your trunk all at once. If one side sinks faster, you know where the imbalance lives.
Hold for 10 to 15 seconds, then come up slowly. Do not slam the pedal back or let the stance wobble at the top. On a single-pedal chair, you can still borrow the idea by holding the pedal down with both feet and checking whether the pressure feels equal.
The move is quiet. The shake is not.
17. Split-Stance Hinge Presses
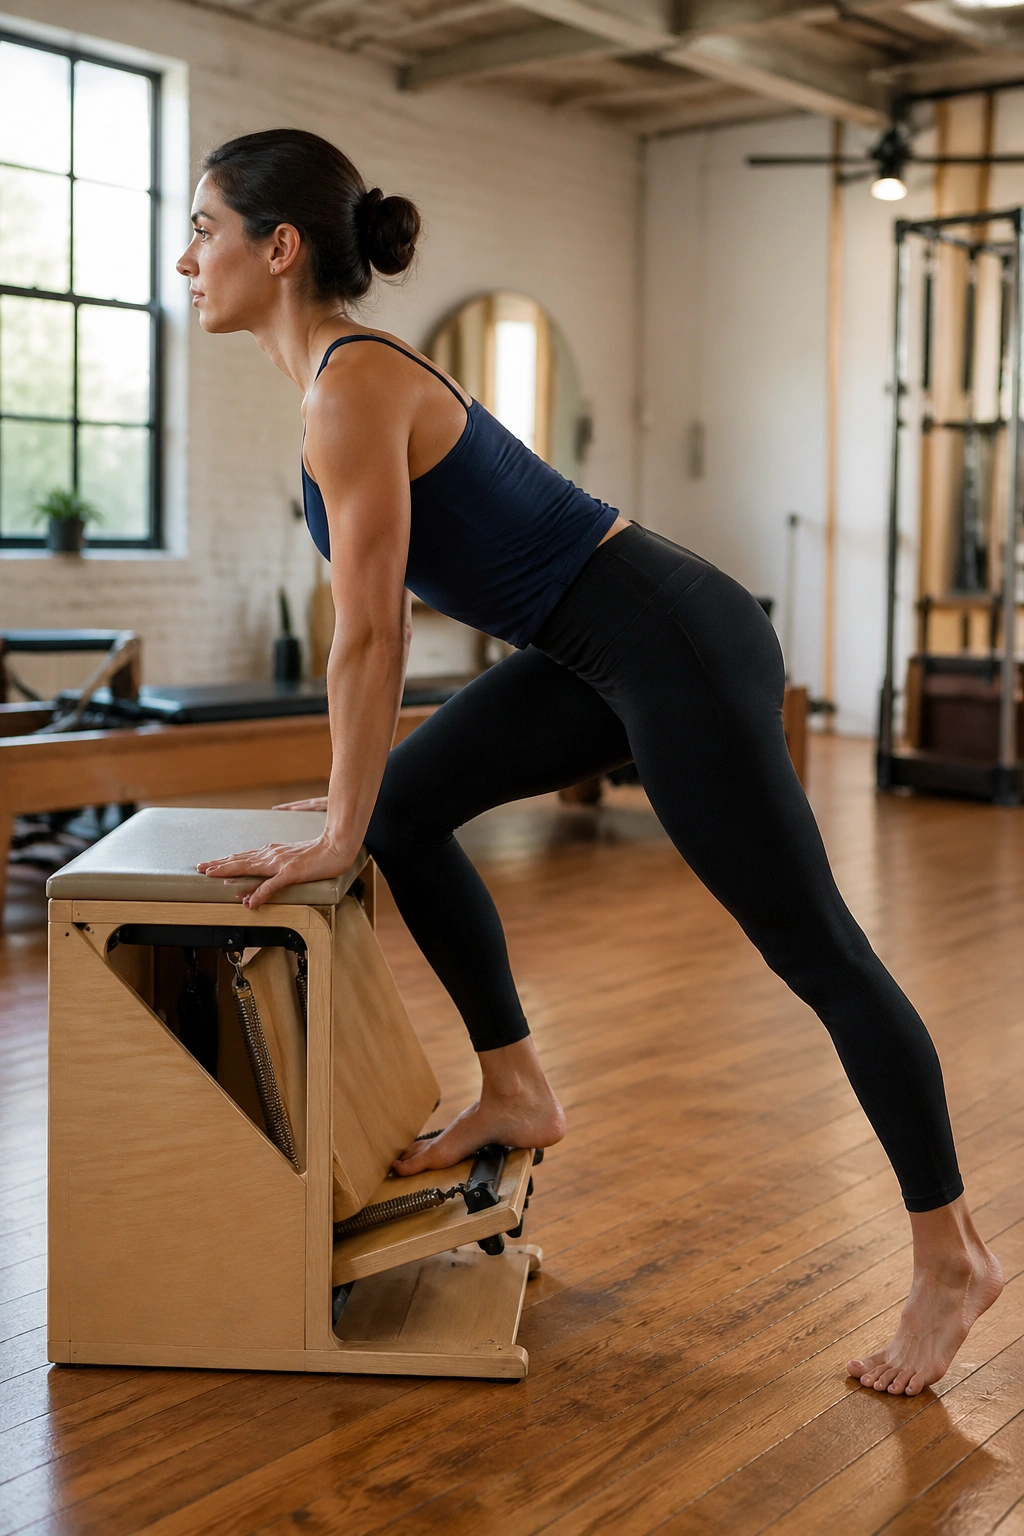
Unlike a squat, which keeps you more upright, a split-stance hinge press asks the back line to do the work while the torso tips forward with control. That makes it a strong choice for glutes, hamstrings, and the muscles that keep your pelvis stable when you walk or climb.
Place one foot on the pedal and the other foot on the floor in a split stance. Hinge from the hips just a little, press the pedal, and keep the chest long as the back hip loads. If you fold at the waist instead of hinging, the lower back will complain. If the front knee caves inward, the line needs more work. Keep both feet awake.
Best For
- People who want stronger glutes without endless floor bridges.
- Anyone whose balance falls apart in lunges.
- Lifters and walkers who need better hip control.
The move feels cleaner when you think of the pelvis moving straight back, not the shoulders diving forward. Slow tempo. Tight line. Quiet pedal.
18. Full-Body Strength Flow
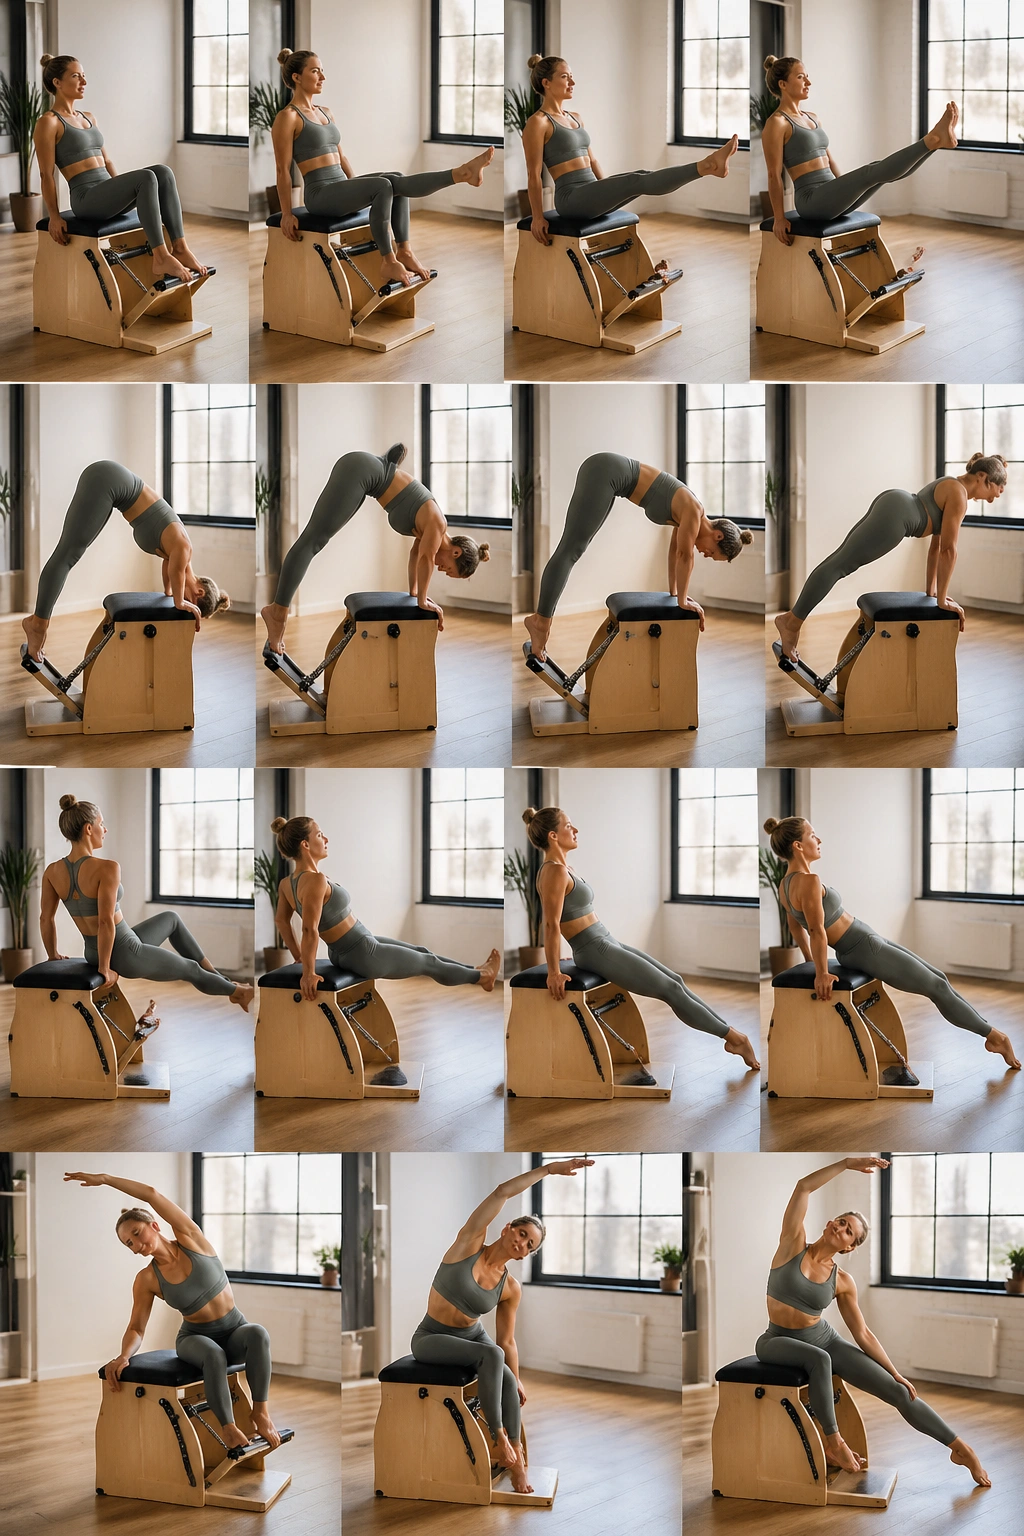
What if you want the chair to feel like a sequence instead of a single exercise? Then string together a short flow and keep the transitions slow enough that form does not collapse when fatigue shows up.
Start with 6 parallel footwork presses, move into 4 pike presses, add 6 triceps presses, then finish with 3 slow mermaid side bends per side. If that feels too long, cut it in half. The point is not to survive the set. The point is to keep the shape clean while the body shifts from legs to shoulders to trunk.
I like ending with a flow because it reveals what solo moves sometimes hide. A person can do decent footwork and decent plank work and still fall apart when the two have to live in the same sequence. That is useful information, not failure.
One Simple Flow
- 6 footwork presses
- 4 pike presses
- 6 triceps presses
- 3 mermaid side bends per side
- Rest for 30 to 45 seconds
- Repeat 2 times if the form stays tidy
If the pedal starts clunking or the ribs start flaring, slow everything down. Strength on the chair should look composed, even when the muscles are burning.
Final Thoughts
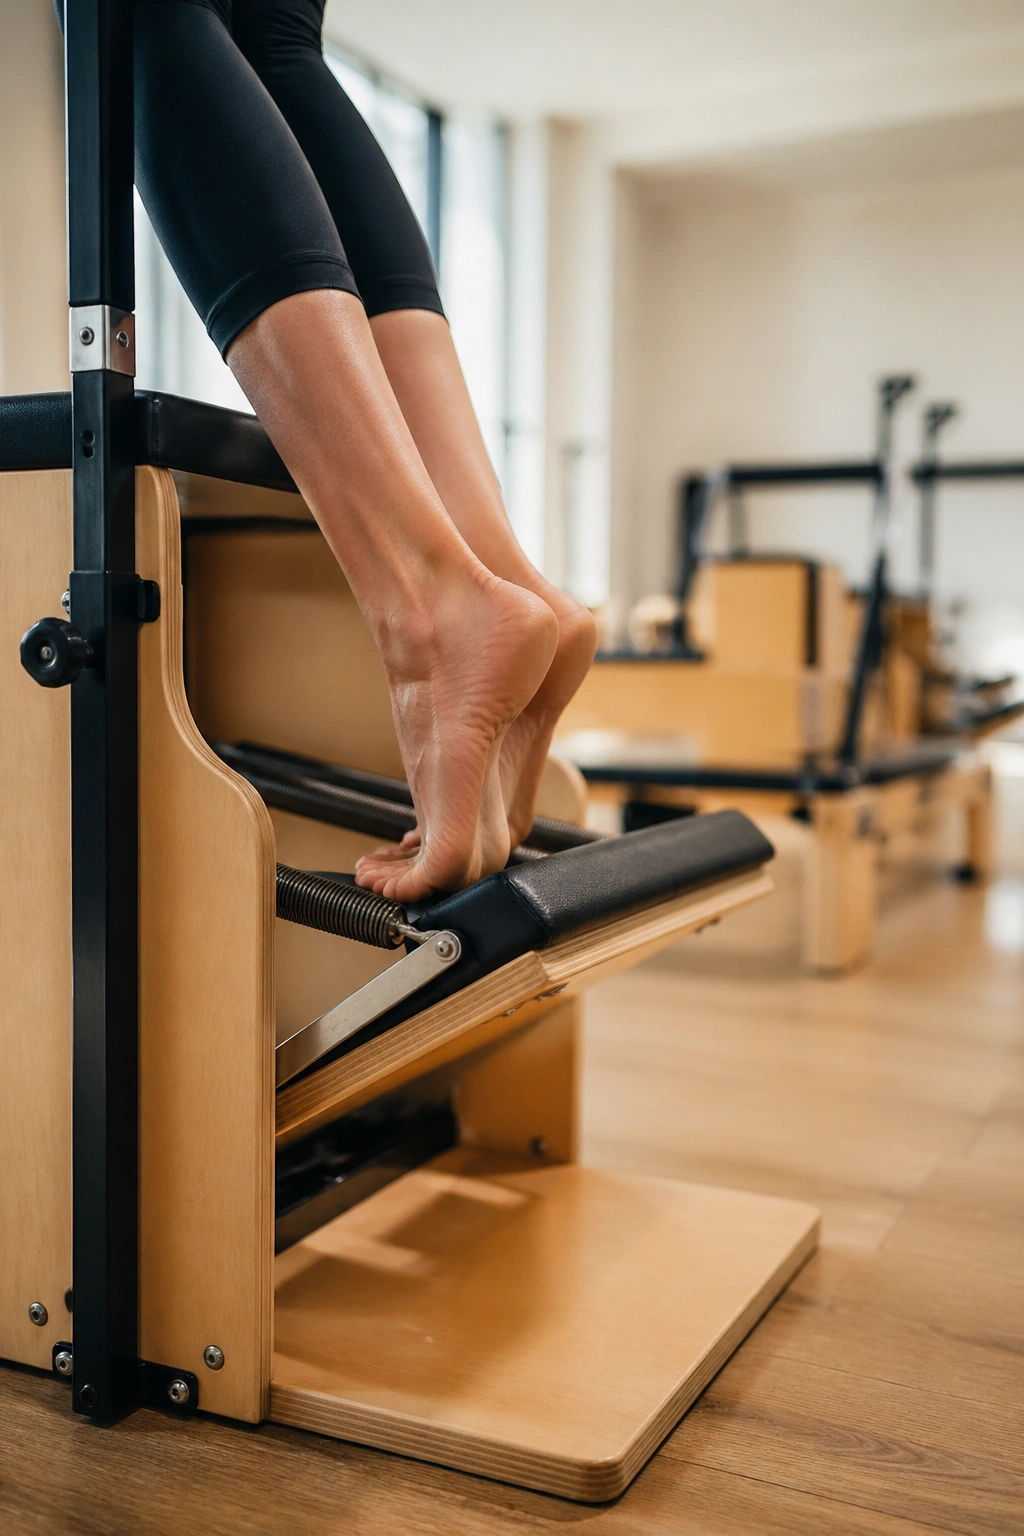
The best Wunda Chair Pilates moves for strength are the ones that make you more precise, not just more tired. A clean press, a quiet return, and a stable trunk matter more than how dramatic the exercise looks from across the room.
If you remember only two things, make them these: keep the pedal under control and keep the ribs from wandering. Those two habits carry over into almost every move on the chair, and they matter even more when the sequence gets harder.
One more thing. Start with fewer moves than you think you need. Four or five done well will do more for your strength than an overstuffed routine full of rushed reps, and the chair will tell you the truth either way.
