



Stretching harder is usually the wrong move.
Tight hips often need better timing, cleaner control, and a little glute work so the front of the hip can stop doing all the work. That is why Pilates exercises for tight hips tend to help so well: they ask the body to move with control instead of yanking on a joint that already feels cranky.
A lot of “tight hip” complaints are not one thing. Sometimes it’s the hip flexors from too much sitting. Sometimes it’s the deep rotators, the outer hips, or the inner thighs hanging onto tension because the pelvis has been parked in the same position for hours. Pilates is good at teasing those pieces apart. It gives you movement, strength, and a stretch that does not feel like a tug-of-war.
You do not need all 15 moves at once. Pick a few, move slowly, and pay attention to where the work lands. If a stretch turns into a pinch, shorten the range. If your low back starts helping too much, that’s a clue to back off a bit. Clean movement beats big movement every time.
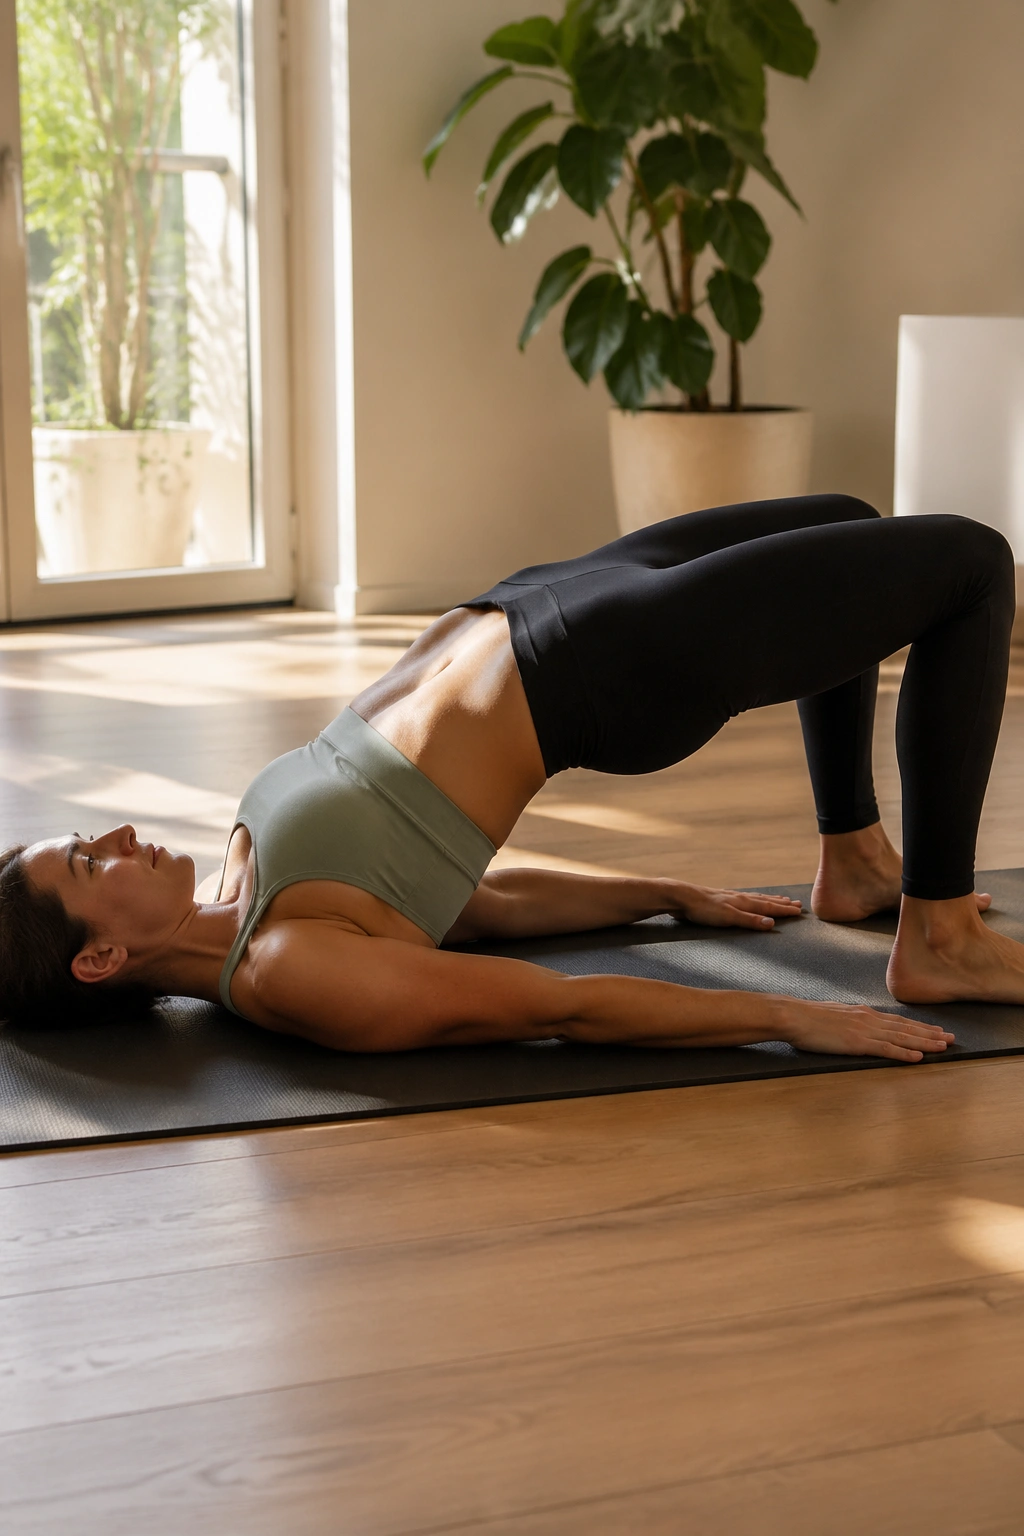
1. Pelvic Curl Bridge
The pelvic curl is the move that earns its reputation. It looks simple on the mat, but it does a sneaky amount of work for tight hips because it wakes up the glutes while asking the spine and pelvis to move one piece at a time.
Why It Helps Tight Hips
When your hip flexors have been doing too much, they tend to hog the job of stabilizing the pelvis. A pelvic curl shifts some of that load into the glutes and hamstrings, which is usually a welcome change. It also gives the front of the hips a small, controlled stretch as you roll up and down.
- Lie on your back with your knees bent and feet hip-width apart.
- Exhale as you gently tilt the pelvis and peel the spine off the mat, one vertebra at a time.
- Pause at the top with the ribs soft, not flared.
- Inhale to hold.
- Exhale to roll back down in the same slow order.
What to Watch For
Do not shove your hips up and call it a bridge. That turns the move into a low-back squeeze. Keep the effort in the back of the legs and the seat, and think about lengthening the tailbone toward the knees as you lower.
Six to eight slow reps are plenty. If your hips feel stuck, place a small Pilates ball or rolled towel between the knees and press lightly into it. That tiny squeeze can help you find better alignment without making the move fussy.
2. Clamshells
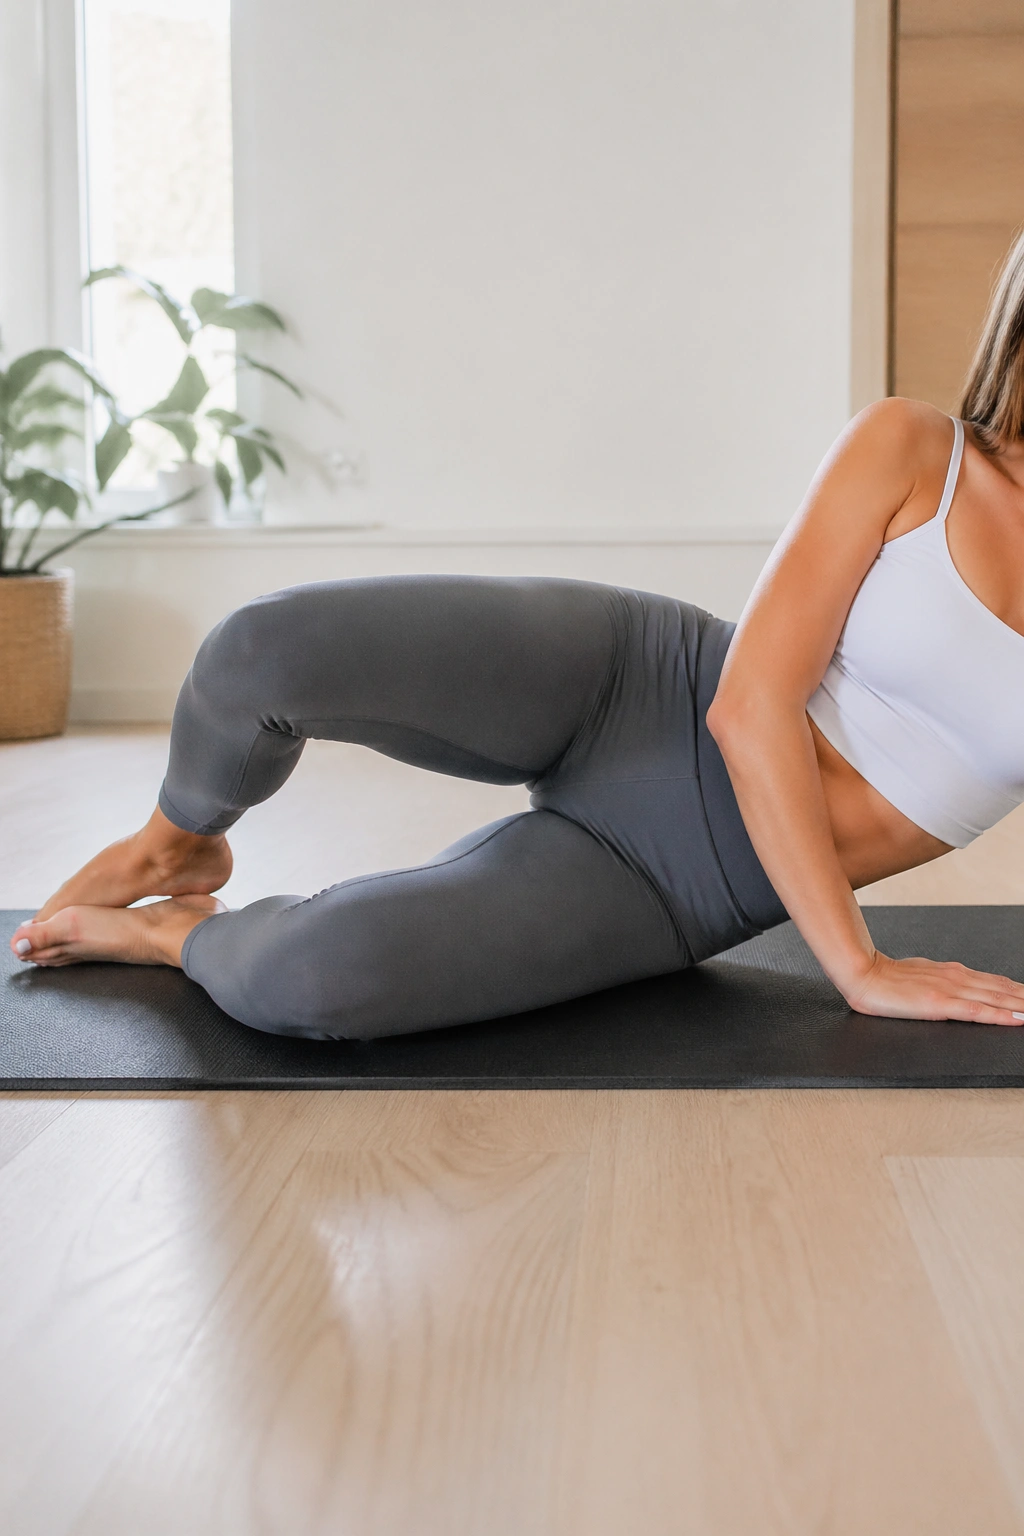
Can a small side-lying movement make a dent in tight hips? Absolutely. Clamshells are one of those unglamorous Pilates exercises that pay rent because they strengthen the outer hip and help the pelvis stop wobbling around.
The trick is to keep the pelvis stacked while the top knee opens. That outer-hip work, especially in the glute medius, gives the hip joint more support so the front of the hip does not have to brace quite so hard. If you sit a lot, run a lot, or feel that one hip always seems to do more than its share, clamshells are worth your time.
How to Keep It Honest
Set up on your side with knees bent, heels lined up with the sit bones, and hips stacked. Open the top knee only as far as you can without rolling the top hip backward. Small range. Clean shape.
A loop band above the knees can add challenge, but it is not required. In fact, a lot of people rush the band and lose the point of the exercise. Slow the opening down to about 2 counts, then lower for 2 counts. That tempo keeps the work where it belongs.
What You Should Feel
The side of the hip should wake up. The front of the thigh should not cramp. If it does, bring the knees a little closer to your chest and make the move smaller.
3. Low Lunge Hip Flexor Stretch
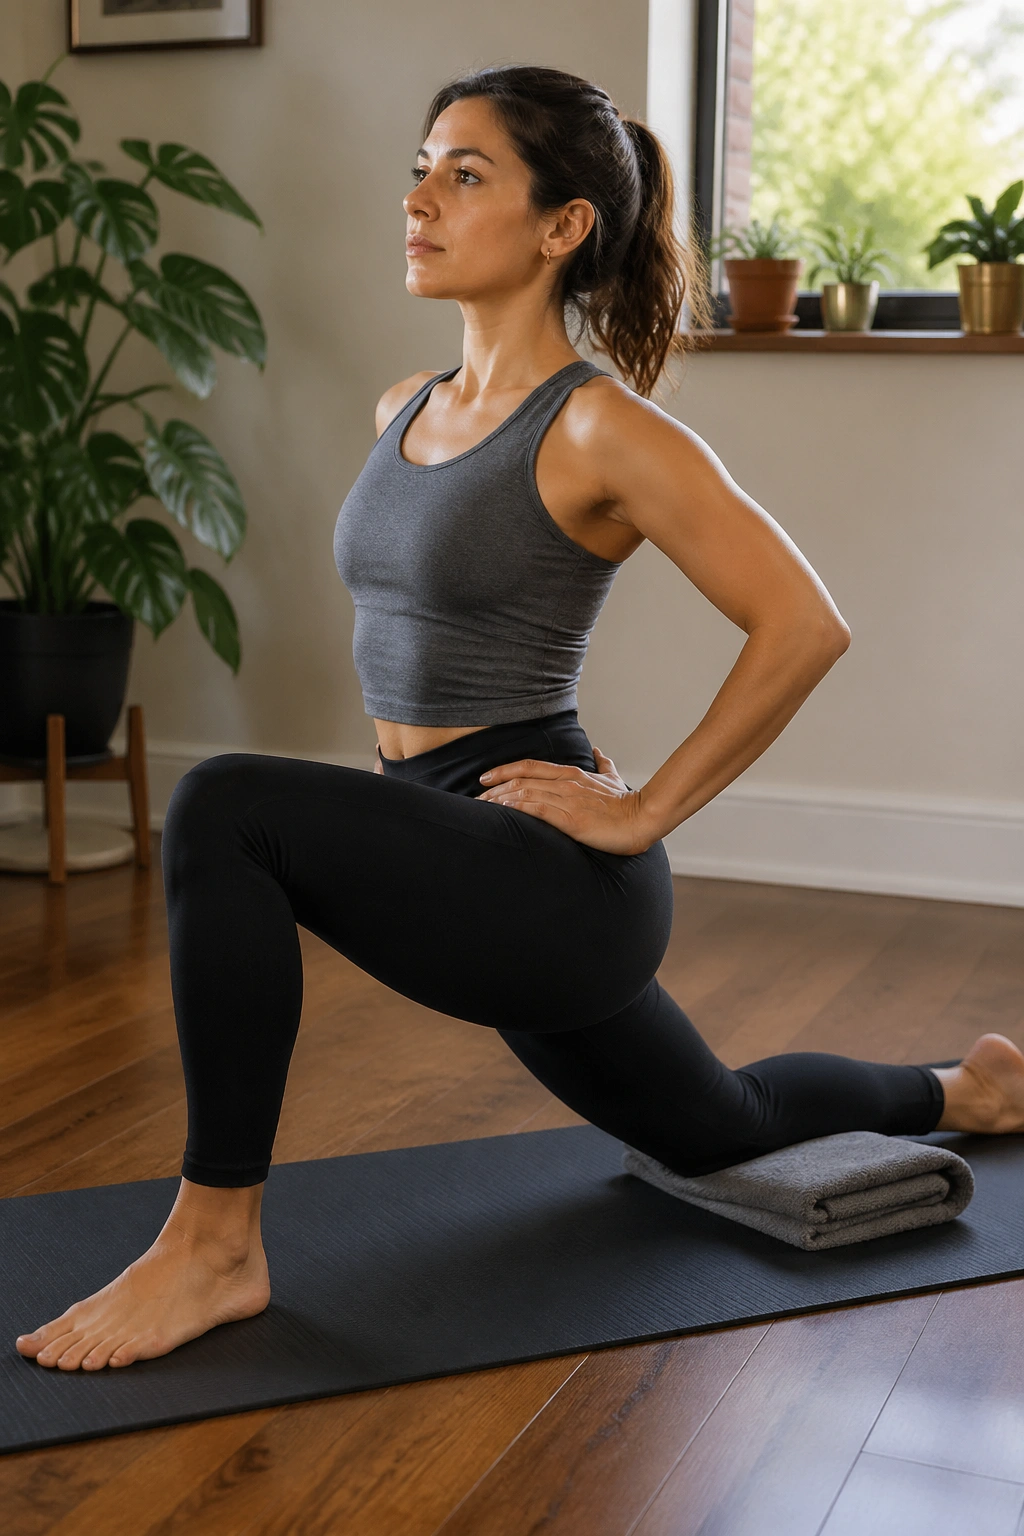
If the front of your hip feels pinchy when you stand up after sitting, this is the stretch to put near the top of the list. It’s not dramatic. It doesn’t need to be. The point is to open the hip flexor without dumping into the low back.
Put one knee on the mat with a folded towel or cushion under it. The other foot stays in front in a small lunge. Before you lean forward, tuck the tailbone slightly and draw the lower ribs in. That tiny posterior pelvic tilt changes the whole stretch. Without it, the lumbar spine will steal the motion and the front of the hip will stay guarded.
What It Should Feel Like
You want a stretch across the front of the back leg hip, not a stab in the low back. Breathe into the lower ribs and hold for 20 to 30 seconds. Two rounds per side is enough for most people.
- Keep the front knee over the ankle.
- Press lightly through the back shin or the top of the back foot.
- Squeeze the glute on the back leg side.
- Stay tall enough to avoid collapsing.
If your balance is shaky, put both hands on the front thigh. That is not cheating. It’s smart. The stretch works better when you can stay stacked.
4. Side-Lying Leg Lifts
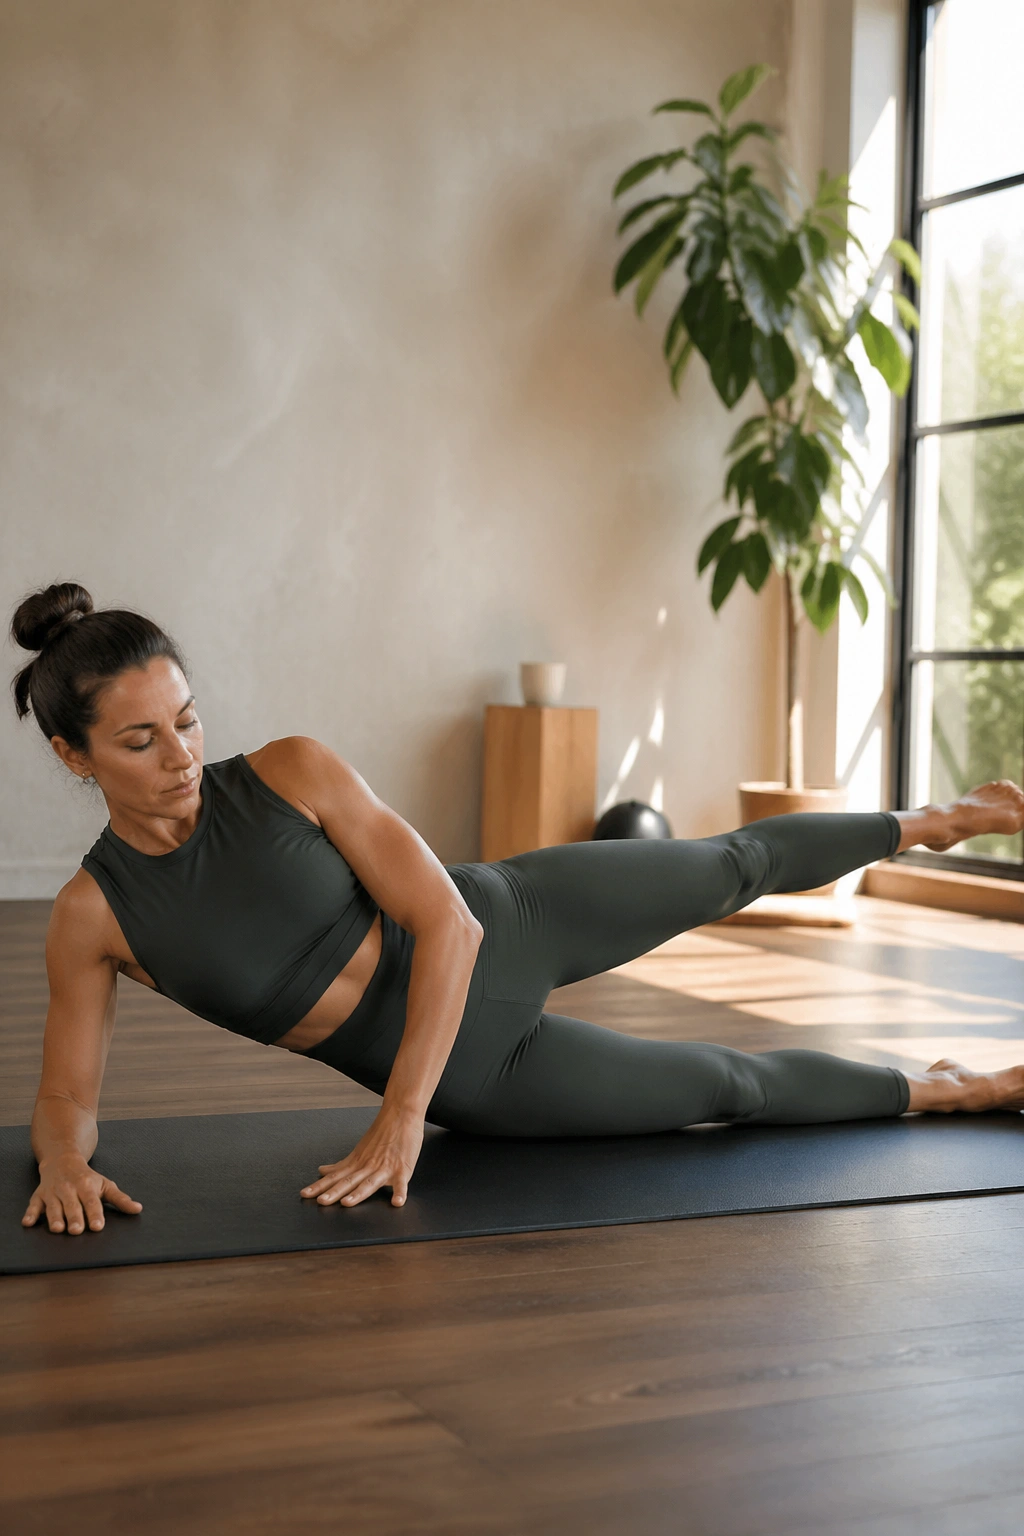
Outer-hip weakness and tight hips often show up together, which is annoying but common. Side-lying leg lifts help because they train the glute medius to stabilize the pelvis while the leg moves independently. That is a useful skill if one hip always feels stiffer than the other.
Lie on your side with both legs long and the bottom waist gently lifted off the mat. The top leg should sit just a little behind the body, not drifting forward into the hip flexor. Turn the top toes slightly down or keep the leg neutral, then lift with control. Think 8 to 12 small reps, not a huge swing.
A lot of people raise the leg too high and start recruiting the low back. Don’t. You only need enough height to feel the outer thigh and side seat switch on. The move is cleaner when the pelvis stays quiet.
I like this one because it changes how the hips feel when you stand up later. It is not a stretch by itself, but it helps the stretches work better. Stronger outer hips often let the front of the hips relax.
5. Leg Circles
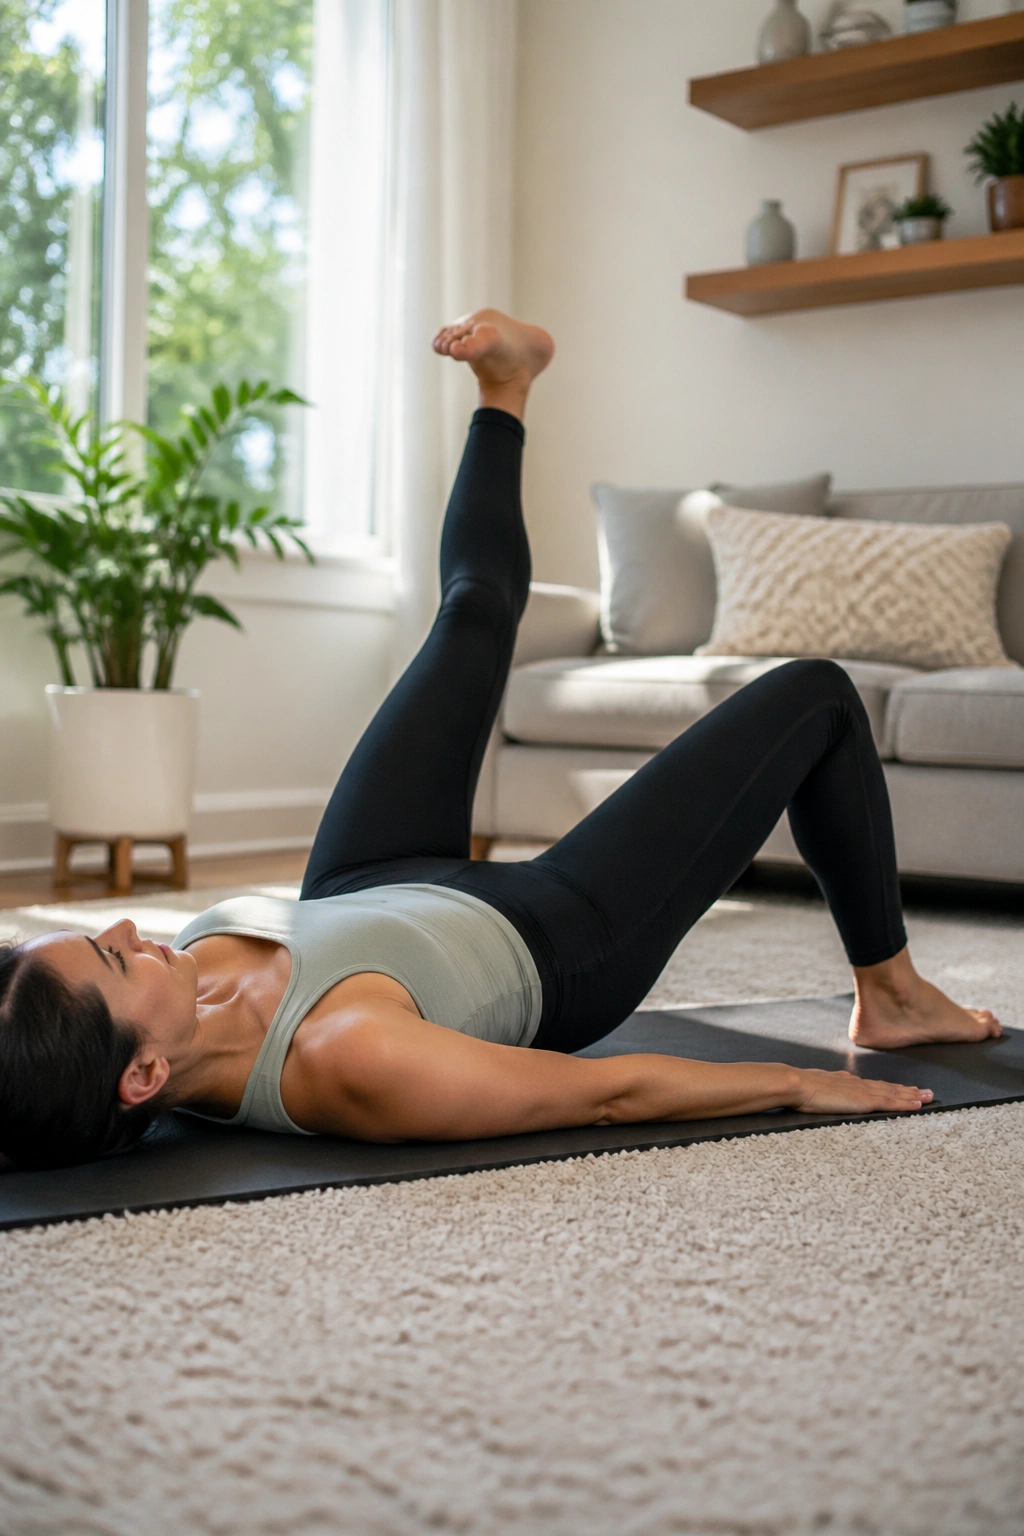
Big circles look satisfying. Small circles work better. That’s the honest version of leg circles for tight hips, and it is one reason the move keeps showing up in Pilates mat work.
Why Small Wins
The goal is not to wave your leg around and hope for the best. The goal is to keep the pelvis still while the femur moves inside the hip socket. That kind of control can be gold for stiff hips because it teaches motion without panic.
Lie on your back, one leg bent or long on the mat, and lift the other leg to a comfortable angle. Circle the working leg across the body, down, and around. If the low back arches or the opposite hip pops up, the circle is too large. Shrink it until the pelvis stays calm.
Quick Cues
- Start with 5 circles each direction.
- Keep the movement smooth, not jerky.
- Make the circle the size of a dinner plate, not a hula hoop.
- Stop if the front of the hip grabs.
If your hamstrings are tight, bend the support leg and keep the lifted leg a little lower. That makes the exercise friendlier and keeps the work inside the hip joint instead of yanking on the back of the leg.
6. Frog Stretch
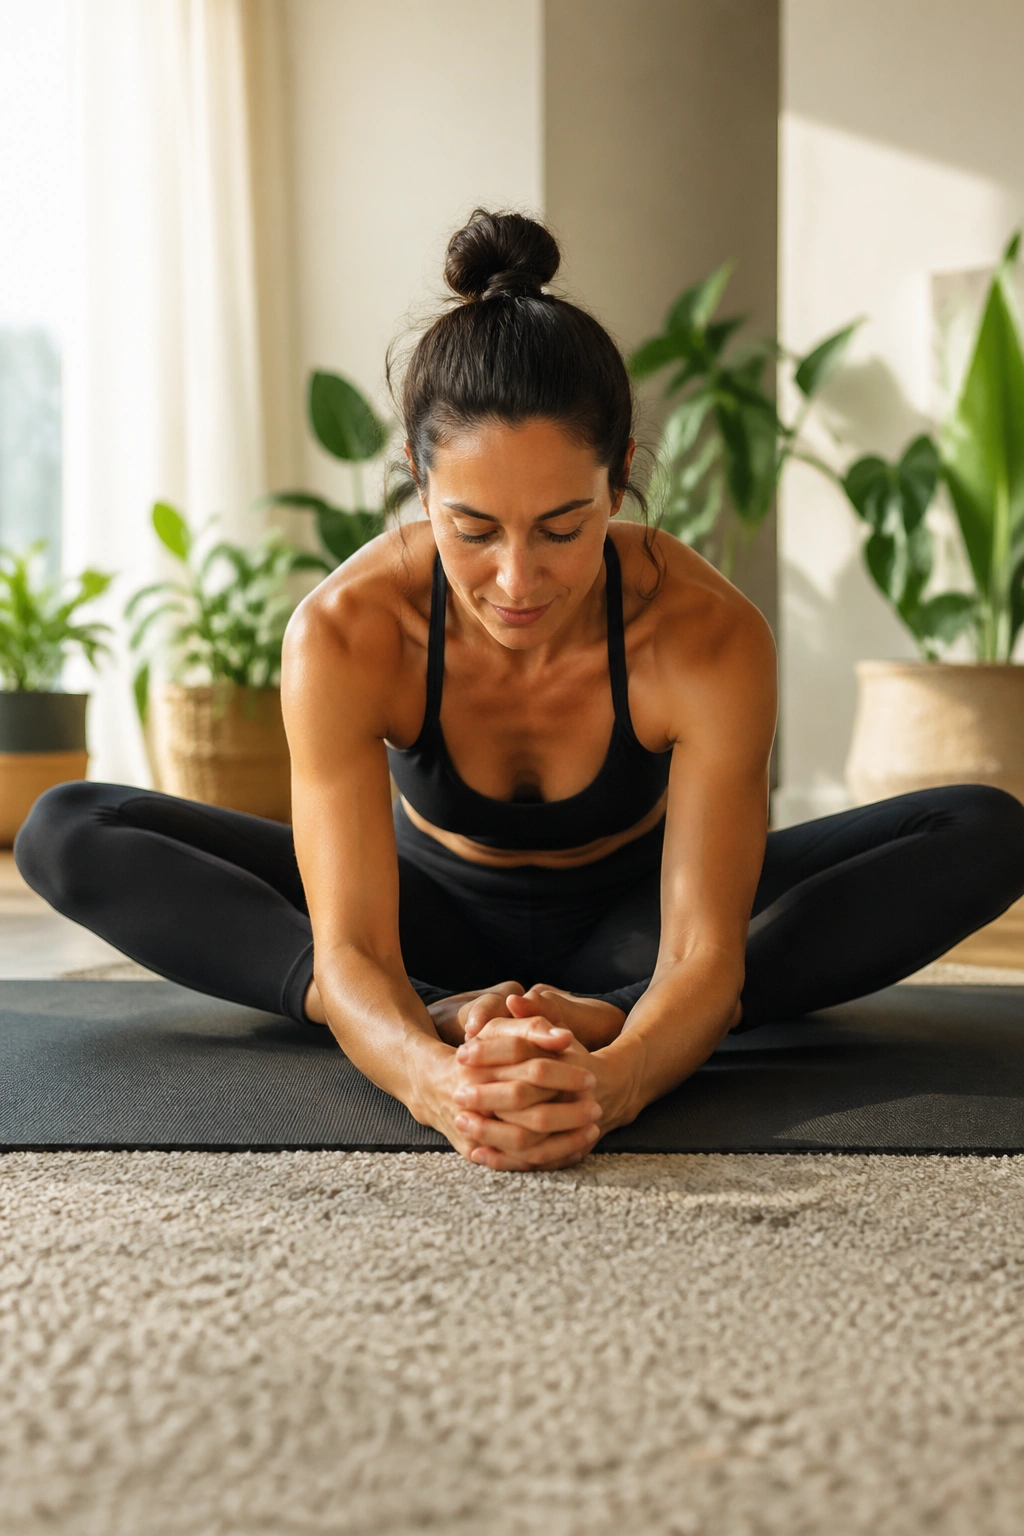
The inner thighs get blamed less than they should. When they stay tight, the hips can feel stiff and crowded, especially in wide stances or deep squats. Frog stretch gives those adductors a chance to open without forcing a deep split shape.
Lie on your stomach or back depending on what feels better, bring the knees apart, and keep the feet turned out with the soles touching. Slide the knees away until you feel a broad stretch through the groin. It should feel roomy, not sharp.
Settle Into It
Try 4 to 6 slow breaths first. If it feels okay, add tiny rocks forward and back. That rocking motion often helps more than holding still because the tissue gets a little signal to release and then lengthen again.
- Put a folded blanket under the knees if the floor feels harsh.
- Keep the ankles in line with the knees.
- Stop before the stretch turns into a groin strain.
- Reduce the angle if the hips feel pinched.
A lot of people push their knees down too far. Bad idea. The inner thigh should melt gradually. If the stretch needs to be forced, it is too much.
7. Knee Folds in Tabletop
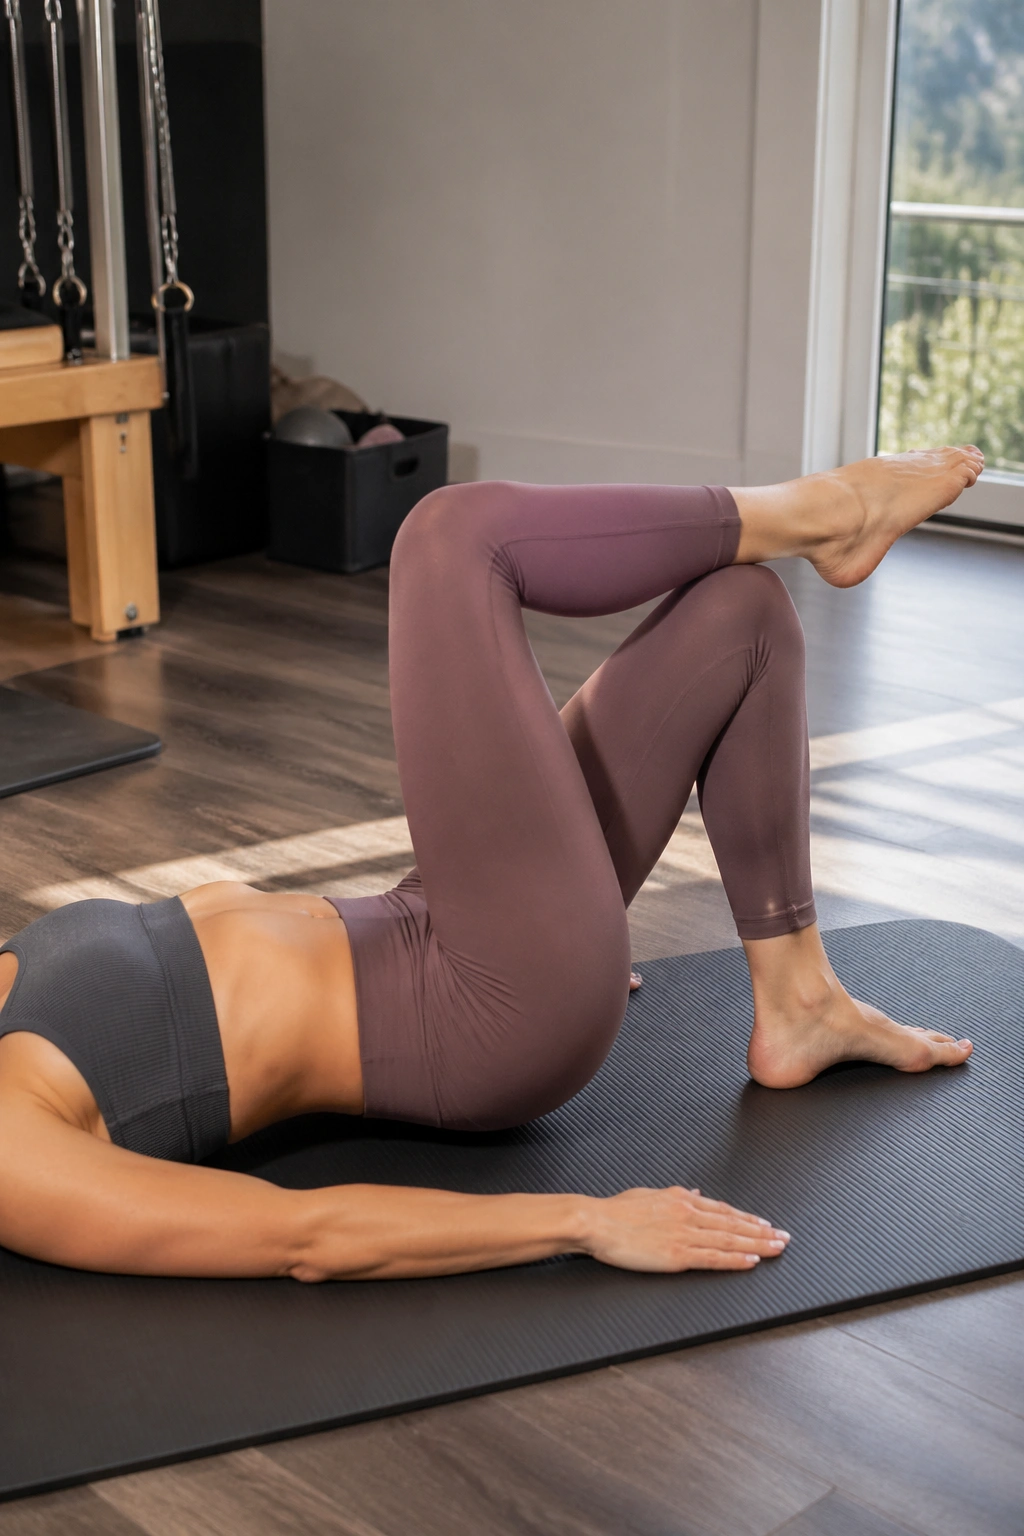
This one looks almost boring. That is the point. Knee folds in tabletop are a quiet way to teach the hips to move without the pelvis losing its shape, and that matters more than people think.
Start on your back with both knees bent in tabletop or one foot on the mat if tabletop feels too heavy. Slowly lower one knee away from you, then bring it back, or float one leg at a time into tabletop and lower it back down. The pelvis stays level. The ribs stay soft. The low back does not pop off the mat.
This drill helps tight hips because it trains the hip flexors to work without bracing hard. It also gives you a clean read on whether one side is tighter than the other. If the leg lowers on one side and the pelvis twists, that side may need more gentle work before you load it harder.
A Simple Rule
Make the range smaller than you think you need. Eight controlled reps per side are more useful than twenty sloppy ones. If the hip flexors start burning fast, pause and reset the breath.
Boring is fine. Boring can be excellent.
8. Side Kick Front and Back
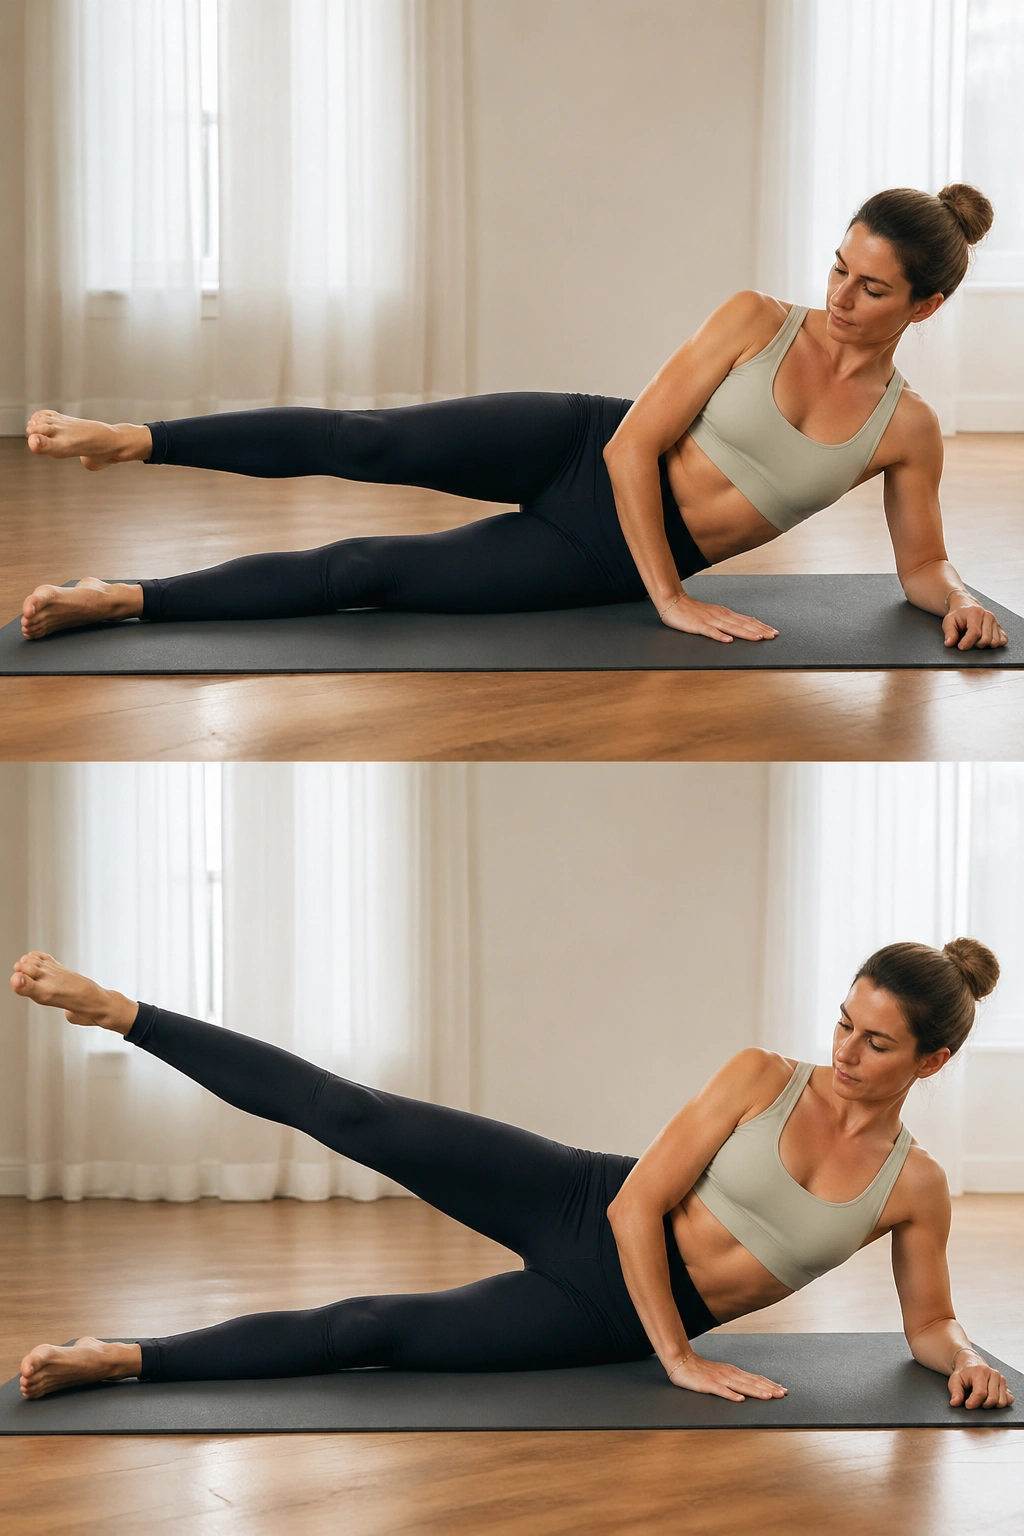
If you want hip mobility with a little backbone, side kick front and back is one of the best mat drills around. It opens the front of the hip, loads the glutes, and teaches the leg to move without the trunk flopping all over the place.
Lie on your side with the body in one long line. Bring the top leg a little forward, then swing it back behind the body in a small, controlled arc. The torso should stay quiet. No twisting. No rocking. Just the leg moving cleanly through the socket.
Keep the Body Still
- Keep the top hip stacked over the bottom hip.
- Point or flex the foot depending on what feels steadier.
- Move only as far back as you can without arching the low back.
- Do 6 to 8 swings each direction.
The forward part of the kick can give you a light hamstring feel. The back part should wake up the seat and the front of the thigh should not take over. If you feel a pinch in front, the leg is probably going too far back too fast.
This exercise is a good reminder that hip mobility is not only about stretching. Sometimes the hip opens because it learns to move better under control.
9. Mermaid Stretch
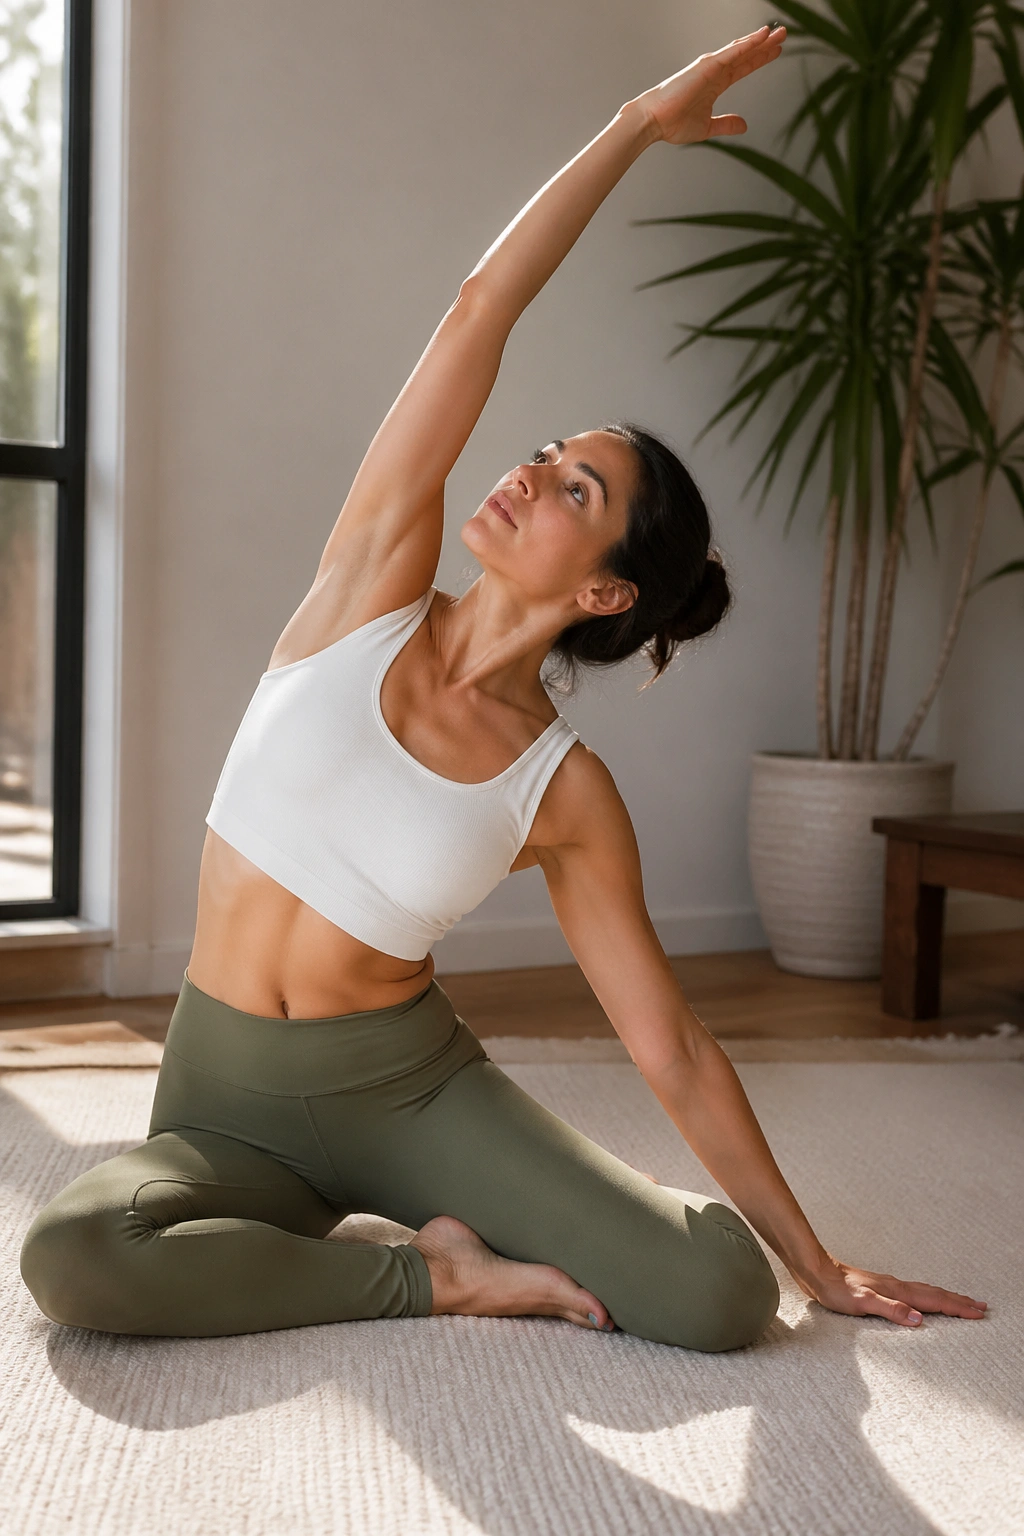
A clean side bend can feel like someone opened a stuck window. Mermaid stretch does that for the rib cage and the side body, and it often helps tight hips because the pelvis gets to stay anchored while the torso lengthens away from it.
Sit with both knees bent to one side or in a seated mermaid shape that feels stable. One hand supports the floor, the other reaches overhead. Inhale to grow tall first. Then exhale and tip over into the side bend. If it feels good, add a small rotation through the ribs and look down toward the lower hand.
The key is to stay out of the low back. People love to collapse there and call it a stretch. Don’t. Think about reaching the top fingertips long while both sitting bones stay heavy.
Three slow breaths per side usually does the trick. If your hips are stiff, this one is a nice bridge between floor work and more upright movement because it reminds the pelvis that it can stay steady while the body moves around it.
A folded towel under the hips can make the seat more comfortable, especially if one side sits higher than the other.
10. Toe Taps
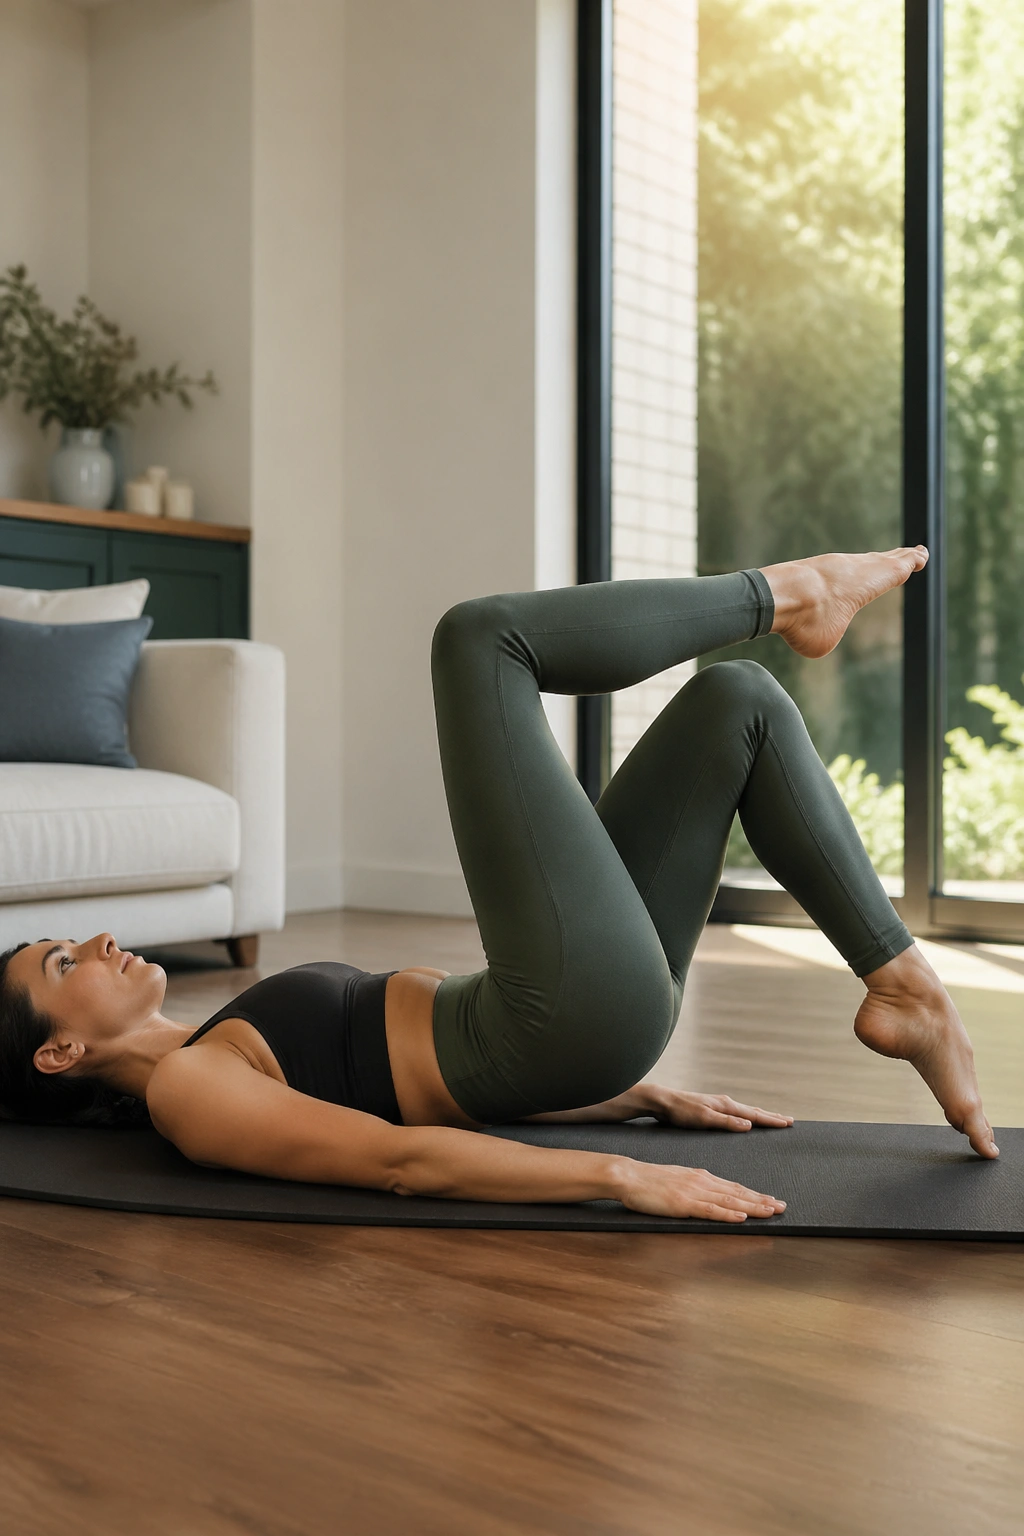
Dead bug work is not glamorous, but your hips will notice it. Toe taps train the lower abs and hip flexors to work without gripping, which is exactly what you want if your hips feel tight every time you lift a leg or climb stairs.
Lie on your back with knees bent to tabletop. Keep the pelvis neutral or gently heavy on the mat, then lower one toe to tap the floor and bring it back. Alternate sides with a slow exhale on the way down. The lower the leg goes, the harder the hip flexors have to control the movement. That sounds useful until the low back starts arching. Then it stops being useful.
How to Use It
- Start with 6 to 8 taps per side.
- Keep the movement slow enough that you can feel the lower belly engage.
- If your low back lifts, raise the working leg higher.
- If the hips shake, that is a sign to reduce the range, not to push through.
This move is especially nice after sitting for a while. It wakes the system up without the aggressive stretch some people try to force on stiff hips. Small, careful taps tend to land better than bigger, faster ones.
11. Shoulder Bridge March
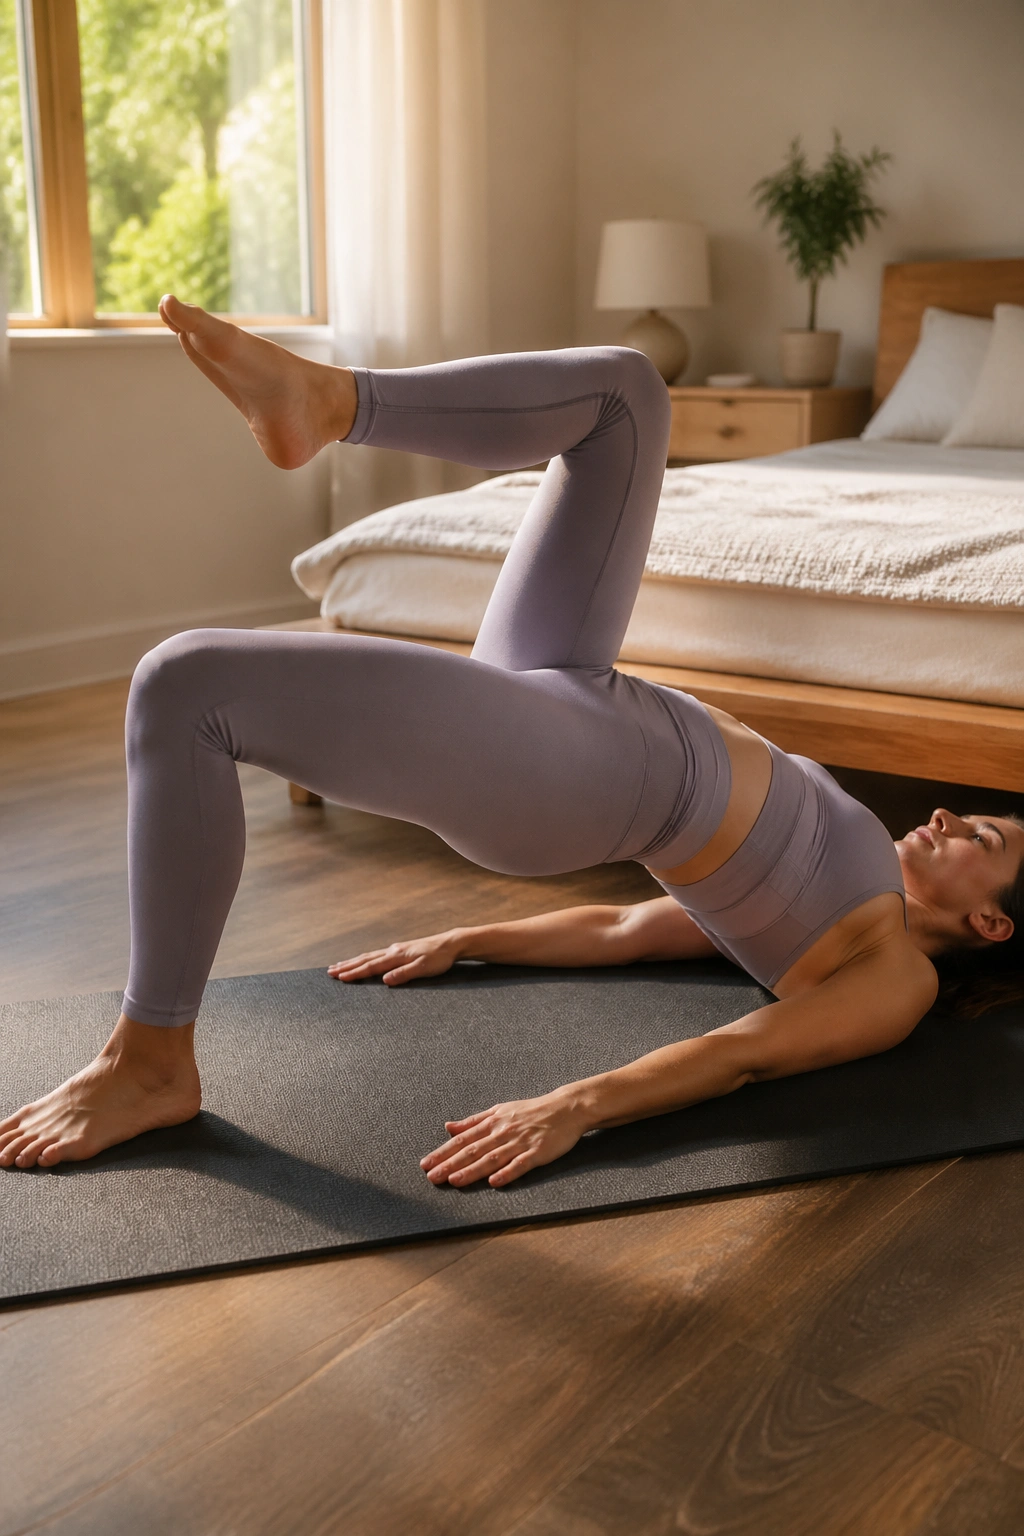
A bridge that never moves gets comfortable. A bridge that has to stay level while one foot lifts tells the truth. Shoulder bridge march is excellent for tight hips because it asks the glutes to stabilize the pelvis while the hip flexors on the lifted side stay honest.
Set up in a basic bridge first. Once you’re stable, float one knee toward tabletop a few inches, then lower it back down without letting the pelvis drop. Switch sides. Keep the ribs soft and the weight even across the shoulders.
That marching pattern makes the hips work in a more real-life way. You are not just opening them. You are teaching them to keep their shape under load, which is a big part of feeling less stiff when you walk, climb, or get up from the floor.
Watch the Level
If the pelvis wobbles, shorten the lift. If the hamstrings cramp, bring the feet a little closer to the seat and press through the heels more evenly. Five to six marches per side is plenty.
This is one of my favorite bridge variations because it does not flatter lazy patterns. It shows you exactly where the weak spot is, and then it gives you a way to fix it.
12. Saw
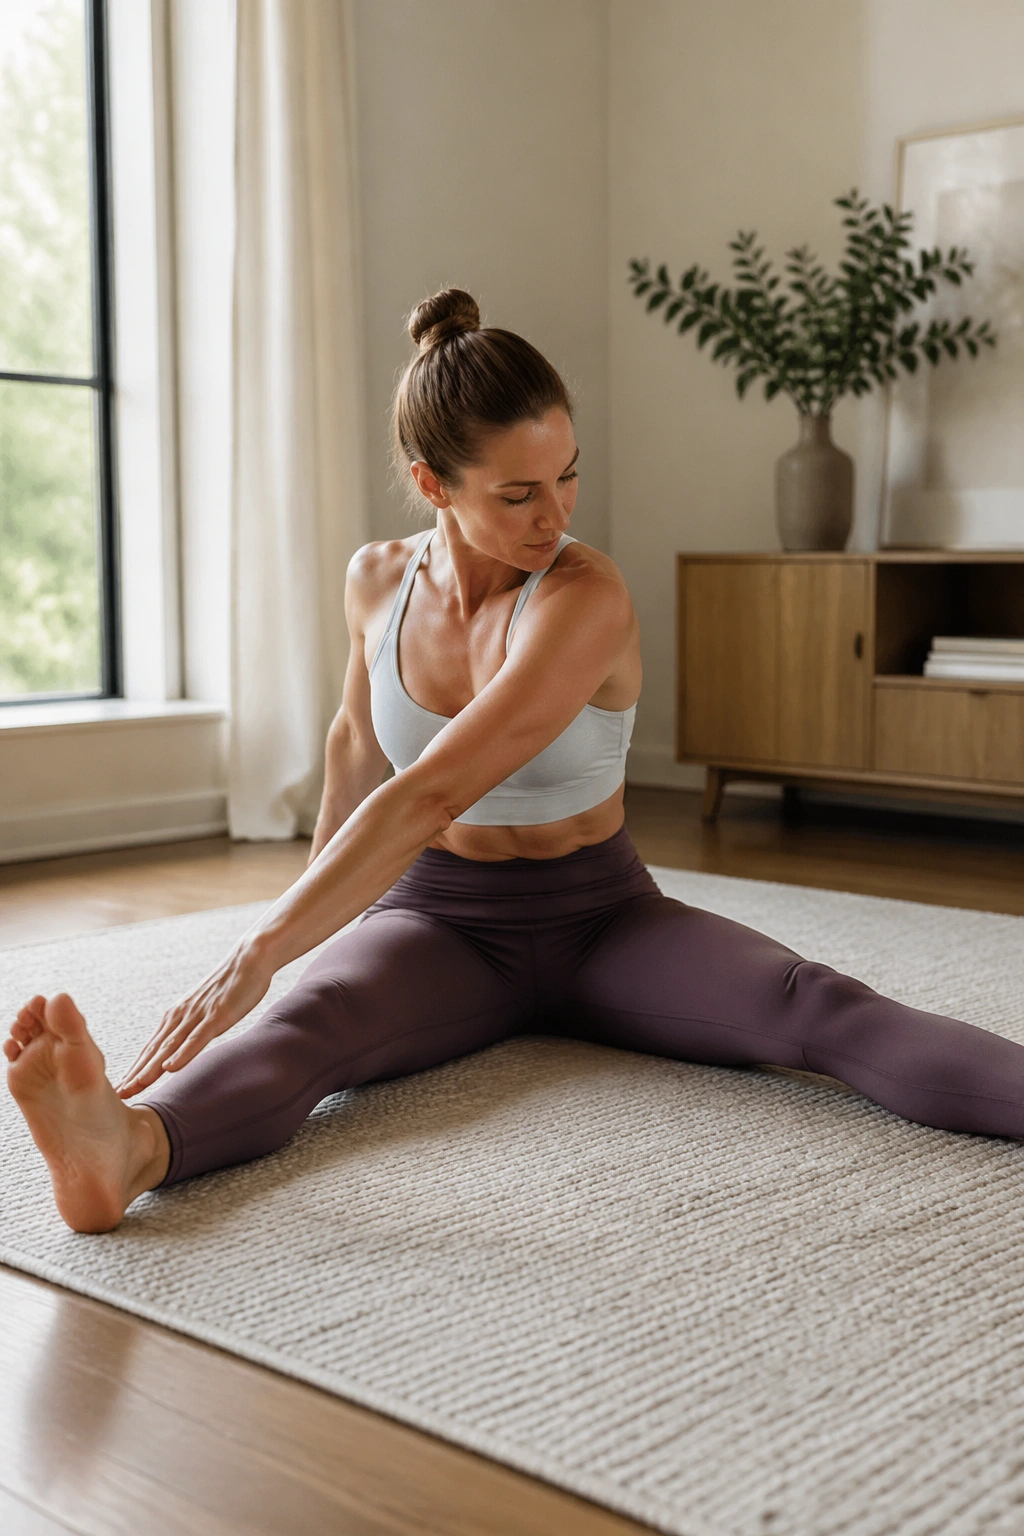
Can a seated twist help tight hips? More than you might expect. Saw blends rotation, side flexion, and a gentle hamstring or adductor stretch, which makes it a tidy way to loosen a stiff lower body without forcing anything.
Sit with both legs open in a comfortable V shape. If your hamstrings are tugging hard, sit on a folded blanket. Reach the arms wide, rotate the torso, and reach the opposite hand toward the outside of the opposite foot, almost like you are “sawing” the pinky toe. Keep the pelvis as even as possible while the spine rotates.
Why It Helps
The adductors on the inner thigh often hold more tension than people realize. Saw gives them a lengthened position while also asking the trunk to move with control. That combination can make the hips feel less jammed than a static stretch alone.
- Keep both sit bones grounded.
- Reach forward, not just down.
- Exhale during the twist to avoid bracing.
- Stop before the spine rounds into a slump.
Three slow reaches per side are enough. If one side feels much tighter, that is useful information. It usually means the pelvis and trunk have been protecting that side for a while.
13. Swan Prep
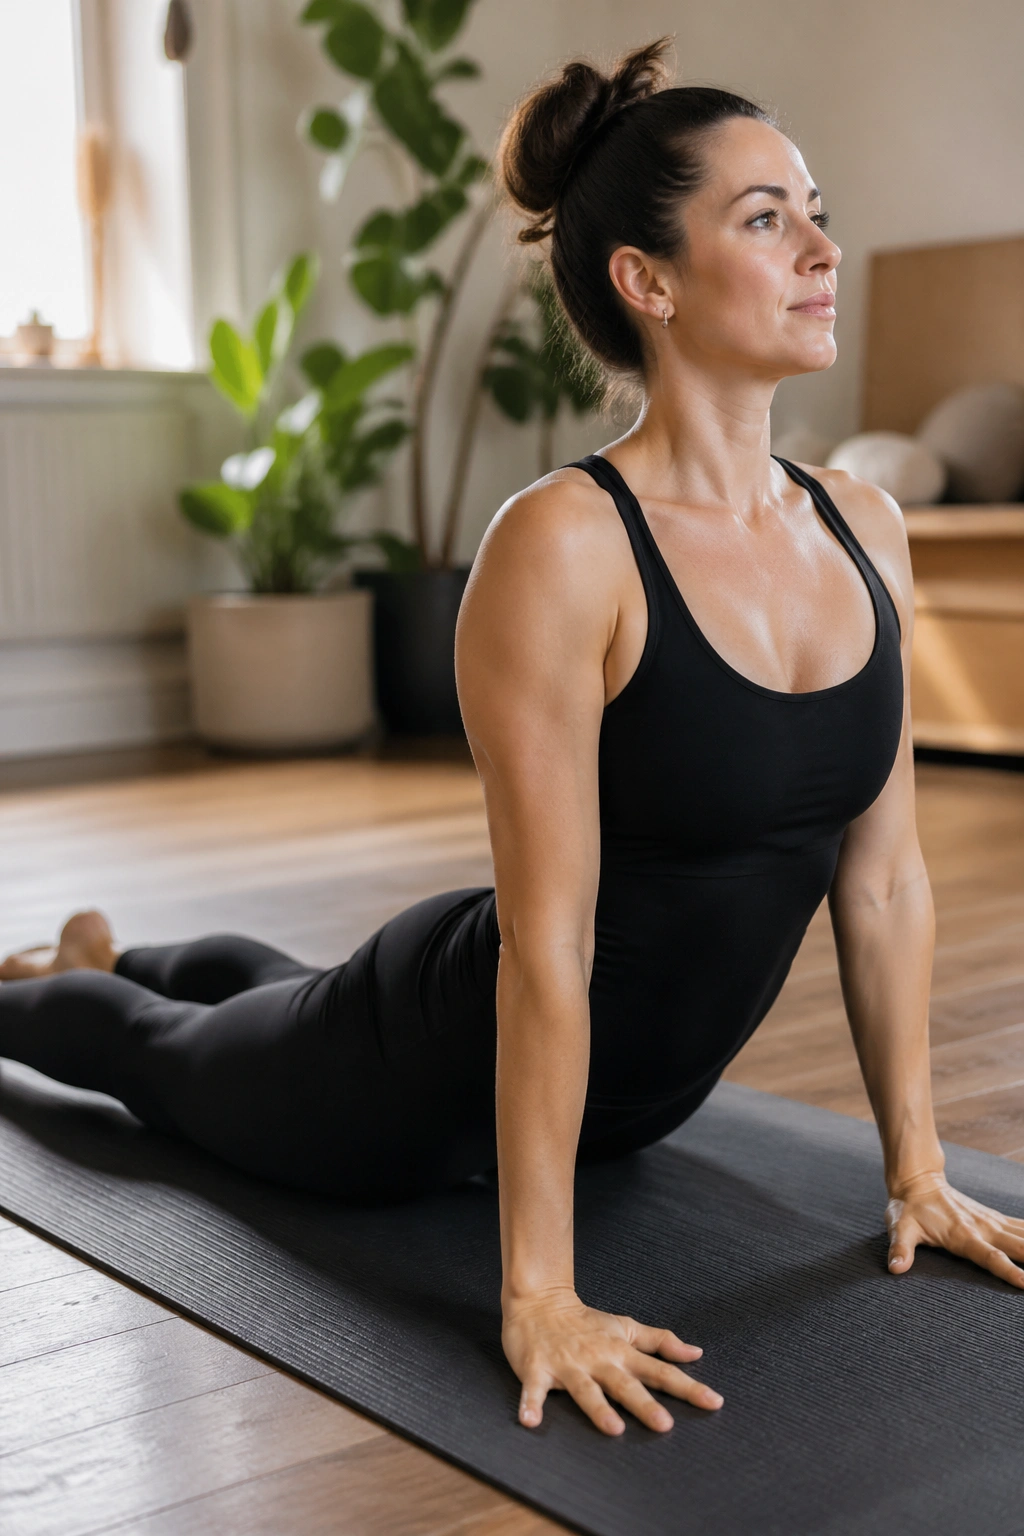
Tight hips are sometimes a front-body problem in disguise. That sounds backwards, but it’s true. When the front line stays shortened from sitting, the hips can feel stuck even if you keep stretching them from the front.
Swan prep, done gently, helps reverse some of that. Lie on your stomach with the hands under the shoulders and the legs long. Press the pubic bone lightly into the mat, lengthen the tailbone toward the heels, and lift the chest just a few inches. The idea is extension, not a giant backbend.
If the movement feels like it is dumping into the low back, make it smaller. A tiny lift with broad collarbones and a long neck is much better than a dramatic shape that leaves the lumbar spine grumpy. Keep the shoulders away from the ears. Breathe into the ribs.
Four to six repetitions is enough. This move can feel surprisingly freeing because it opens the front of the body without asking the hips to clamp down to hold you up.
14. Figure-Four Stretch
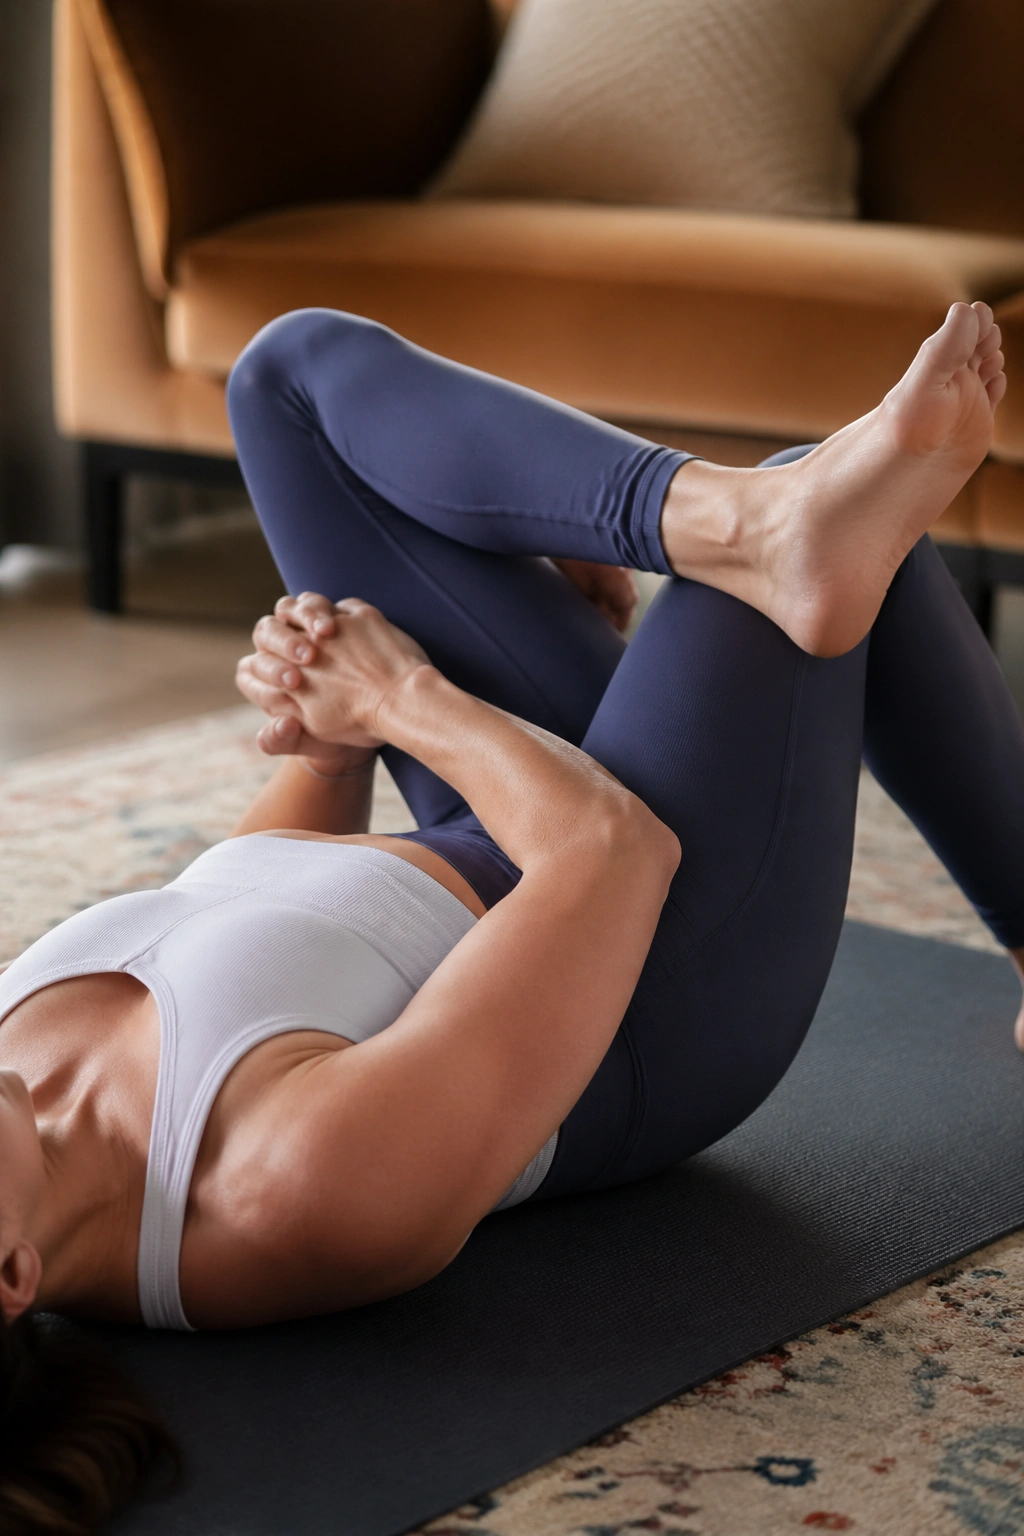
This is the one people reach for after bridges, long walks, or a day in a chair. Figure-four stretch targets the deep outer hip and glute area, and it can be a relief when the back of the hip feels like a knot that won’t give up.
Lie on your back, cross one ankle over the opposite thigh, and thread your hands behind the support leg. Pull the thigh toward you until you feel the stretch in the outer hip. The key detail: pull the thigh, not the knee. That saves the knee joint and keeps the stretch where you want it.
A lot of people tense up here because the shape looks easy and the stretch arrives fast. Breathe through the first few seconds and let the hip soften on the exhale. Twenty to thirty seconds per side is a good starting point. If the hip feels too intense, keep the support foot on the floor instead of lifting it.
You can also do this seated, but the supine version tends to be kinder on a truly tight hip.
15. Standing Hip CARs
If the floor work helps but your hips still feel sticky when you stand up, do this one last. Standing hip CARs — controlled articular rotations — are one of the best ways to teach the hip joint how to move through a full, careful circle without the rest of the body cheating.
Hold a wall or chair for balance, lift one knee, and slowly open it out to the side, then back, then around. Keep the circle small enough that you can stay steady. The motion should feel deliberate, almost slow enough to be boring. That’s the point. The hip learns control before it learns range.
What Good Form Looks Like
- The torso stays tall and quiet.
- The standing foot stays planted.
- The lifted leg moves without a side sway.
- The circle is smooth, not rushed.
Do 3 circles in each direction on each leg. If the hip pinches, shrink the circle. If the standing side feels wobbly, that’s a good sign you found the weak link. No need to muscle through it.
These Pilates exercises for tight hips work best when you stop chasing a huge stretch and start asking for better movement. A bridge, a side-lying drill, one stretch, and one standing control exercise can change how your hips feel in a short session. Keep it slow. Keep it clean. And if your hips feel calmer when you stand up after, that’s the signal that the work landed where it should.
