



Postpartum belly fat workouts for new moms work best when they respect recovery first and fat loss second. That sounds backwards if you’re used to old fitness advice, but the body after birth is not the body that used to tolerate random crunches and jump-heavy cardio without complaint.
A soft belly after pregnancy is not one thing. Sometimes it’s extra fat, yes. Sometimes it’s stretched skin, lingering swelling, a pelvis that’s tilting forward, weak deep abs, or a rib cage that’s sitting wider than it used to. Usually it’s a mix. That’s why the smartest workouts after birth don’t chase the stomach alone; they rebuild movement from the ground up.
If you had a C-section, if you notice leaking, heaviness, a bulge or “doming” down the middle of your abdomen, or pain that gets worse when you move, get medical clearance and scale back. Gentle is not lazy. Gentle is often the difference between feeling better and digging a deeper hole.
The moves below lean hard on walking, breathing, squatting, carrying, and low-impact strength work. Nothing flashy. That’s fine. The body that has fed a baby, carried a baby, and maybe pushed a baby out of a very real opening does not need a punishment circuit. It needs smart work, repeated often enough to matter.
1. Brisk Stroller Walk Intervals for Postpartum Fat Loss
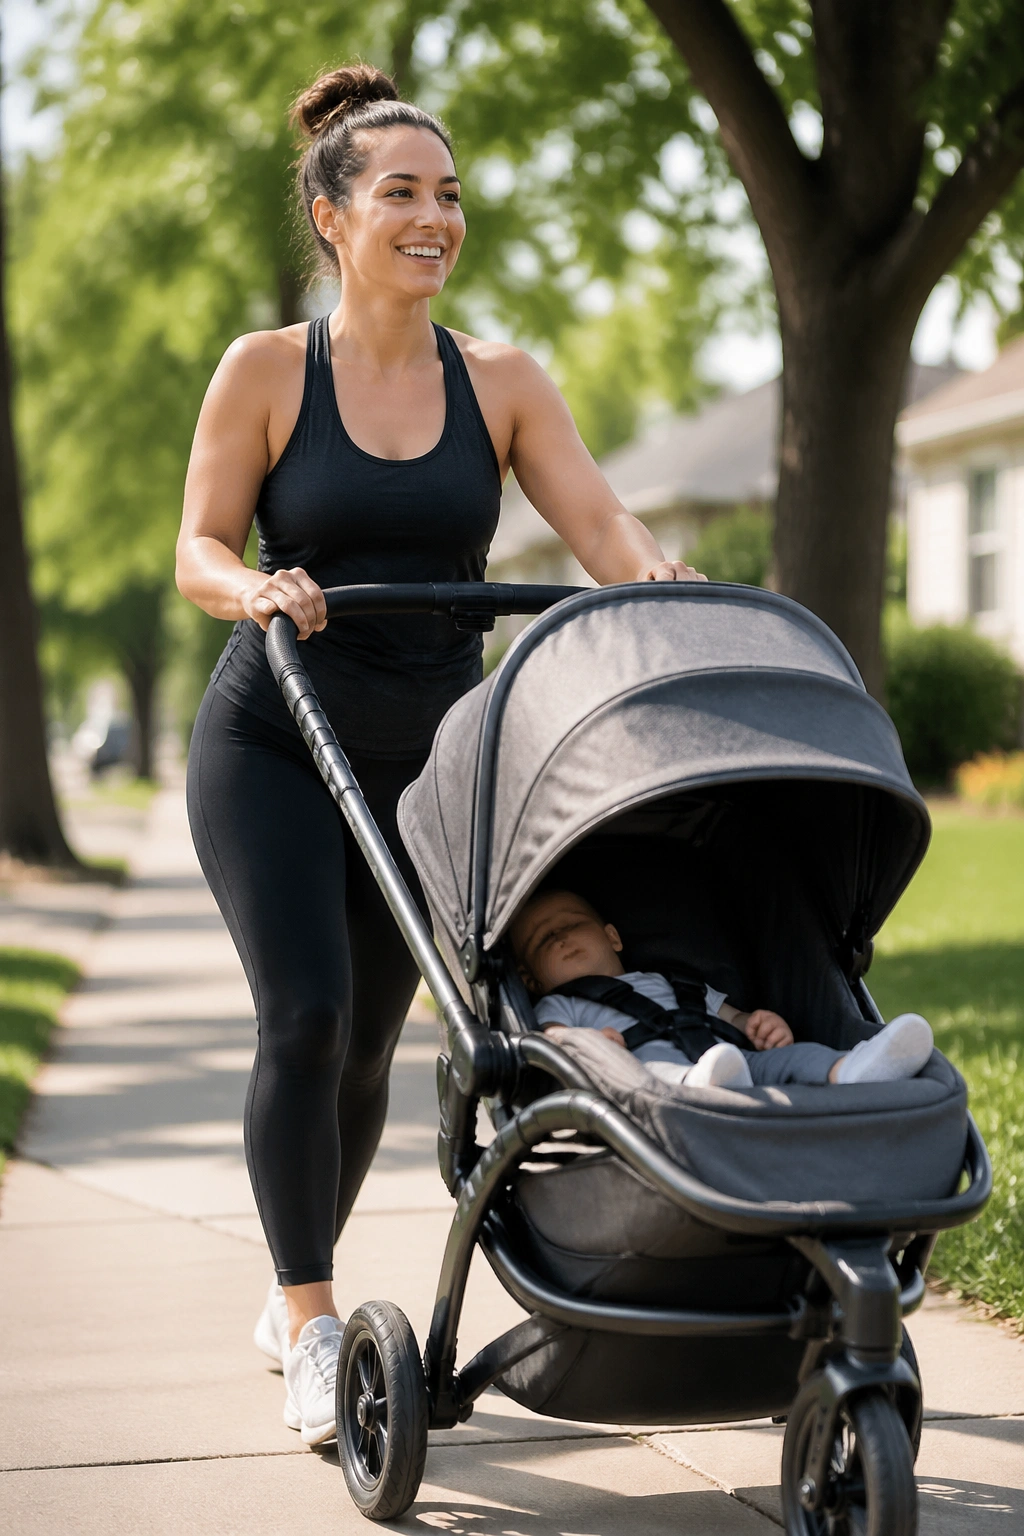
A stroller walk sounds almost too plain to count, which is exactly why it works so well. You can do it between naps, after a feeding, or in the tiny window when the house is quiet and you can hear your own shoes on the sidewalk.
Try 20 minutes with a simple pattern: 1 minute brisk, 2 minutes easy, repeat. If your breathing stays controlled and you can still talk in short sentences, you’re in the right zone. The point is not to crush yourself. The point is to raise your heart rate enough that your body starts using stored fuel while your joints and pelvic floor stay happy.
Keep your ribs stacked over your hips, not flared forward. Push the stroller from your core, not your shoulders, and let your arms swing when you’re not gripping the handle. If the walk feels boring, split it into two 10-minute rounds. Boring is fine. Boring gets repeated.
- Best on flat ground at first
- Use supportive shoes with a stable heel
- Shorten the stride if your low back feels tight
- Add hills only when walking feels easy
Tiny rule: if the walk leaves you more drained than refreshed, it was too hard.
2. 90-Second Breathing Reset That Reconnects Your Core
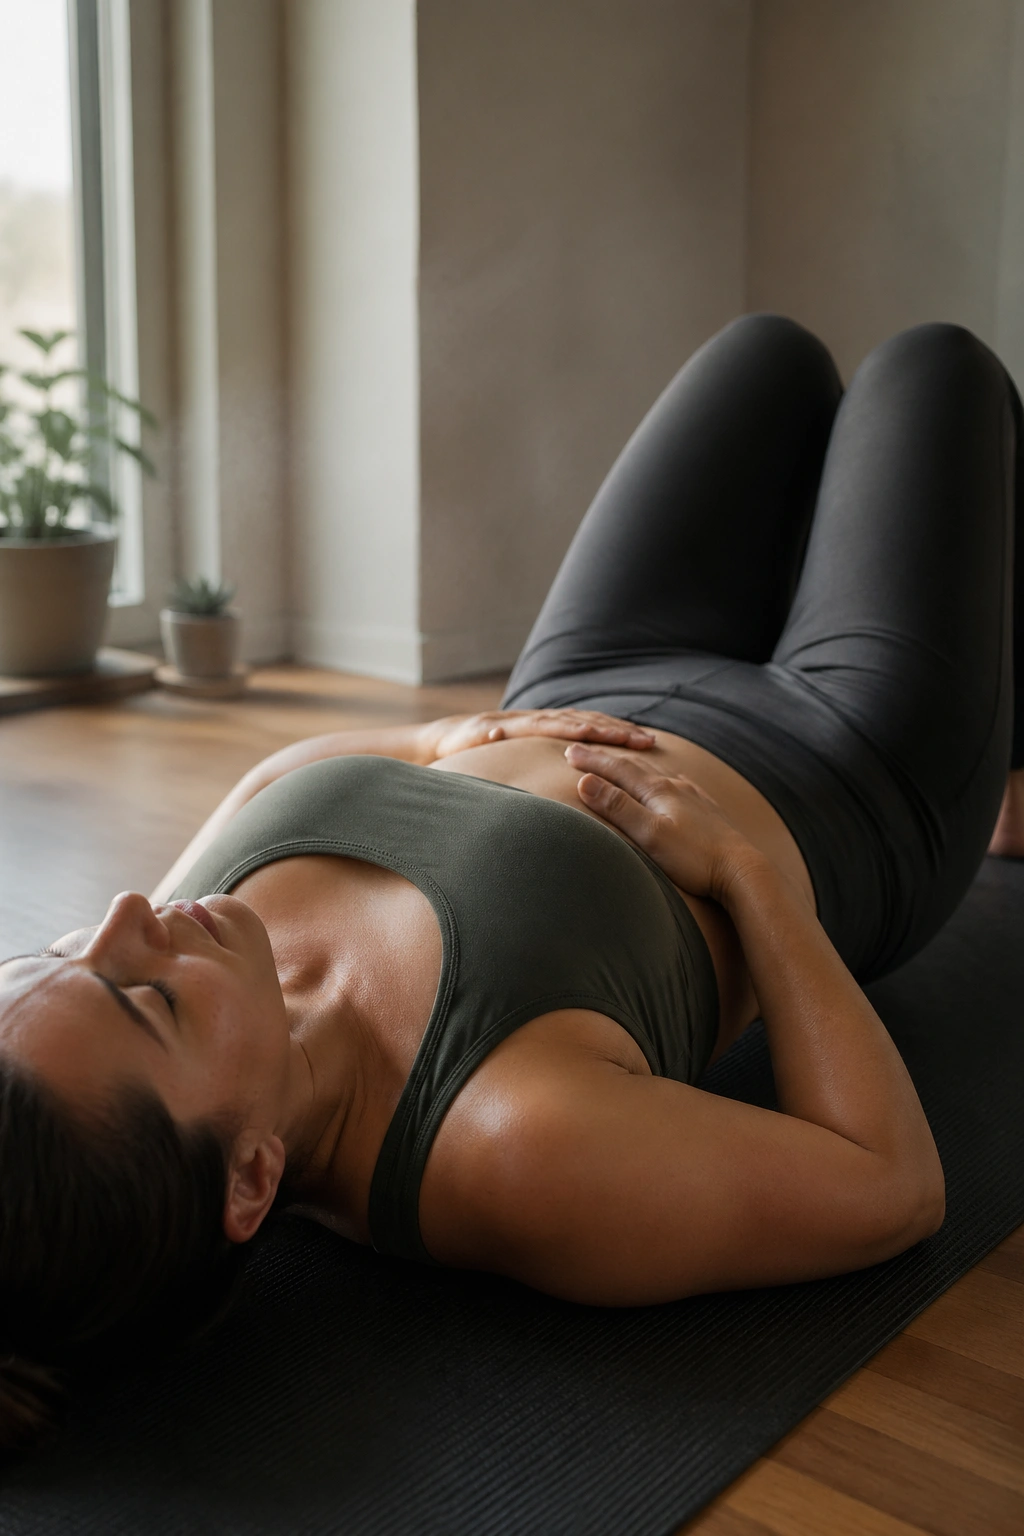
Why start with breathing when you want your belly to shrink? Because the deep core and pelvic floor don’t respond well to chaos. They need pressure control first, not brute force.
Lie on your back with your knees bent, or sit tall if the floor feels like too much. Put one hand on your lower ribs and one on your lower belly. Inhale through your nose for a slow count of 4, then exhale for 6 to 8 seconds like you’re fogging a mirror with your mouth closed. On the exhale, feel the ribs soften down and the lower belly gently draw inward. No sucking in. No hard bracing.
What to feel
You want the breath to move wide into your sides and back, not just straight up into your chest. If your shoulders lift, you’re doing too much work up top. If your jaw tightens, relax it. A good exhale should feel almost boring.
How to use it
- 5 breaths before a walk
- 5 breaths before a strength set
- 5 breaths before bed if your core feels tense
This is the kind of work that looks like nothing and pays off later.
3. Pelvic Tilts on the Mat
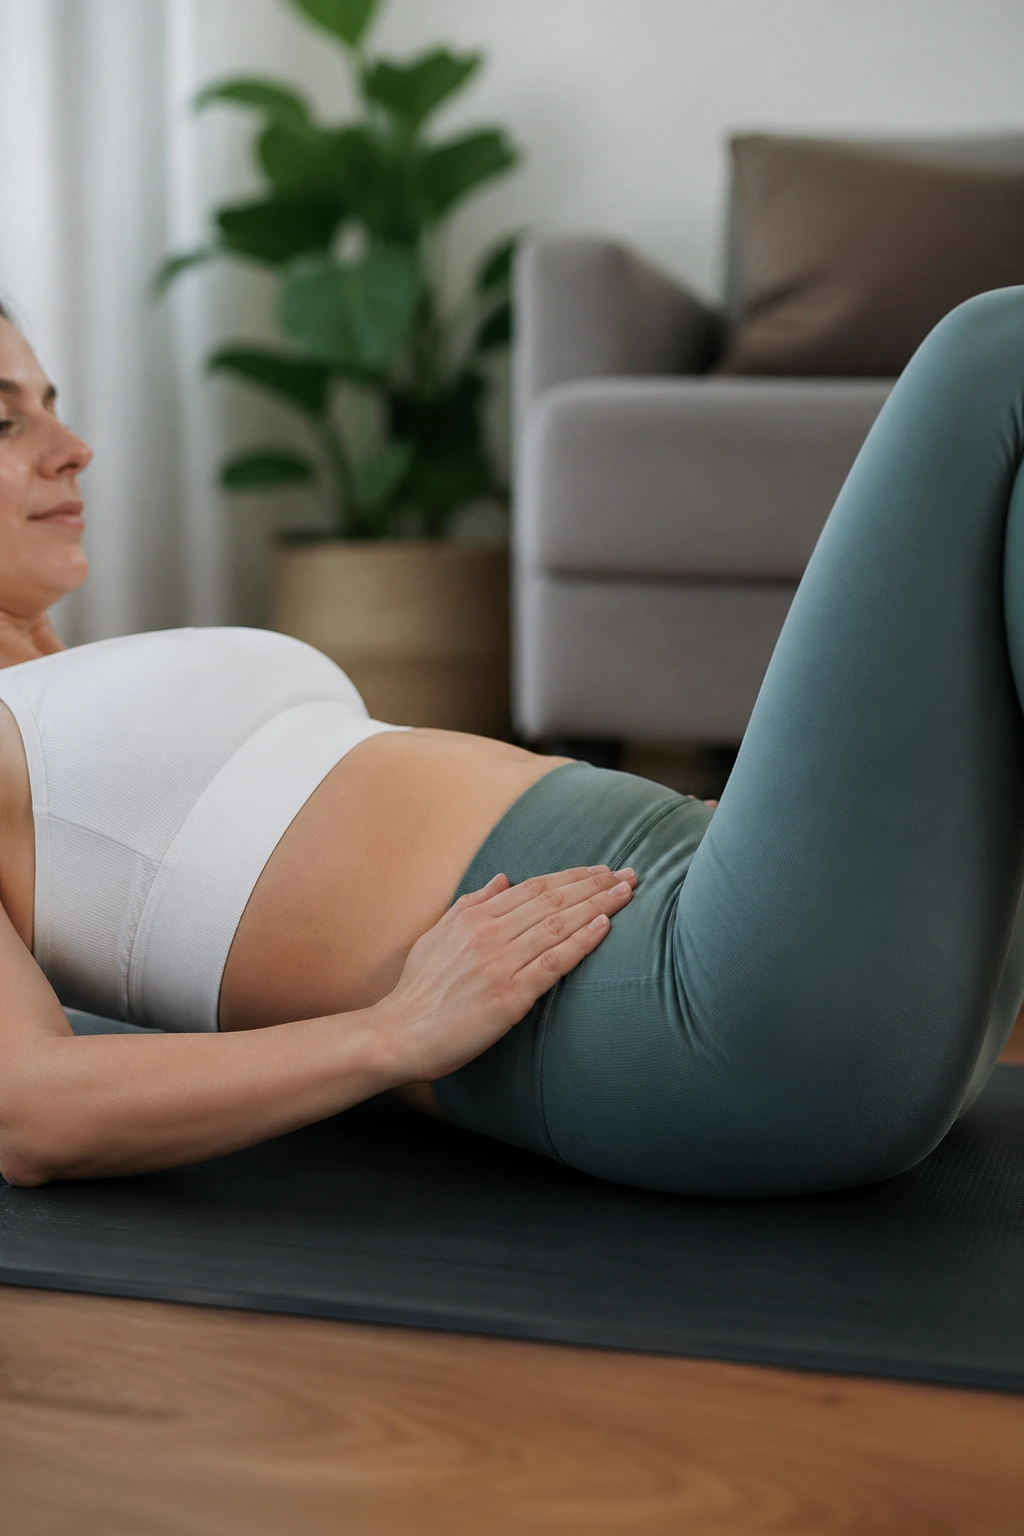
If your lower back feels stuck after a feeding session or a long day of carrying a baby on one hip, pelvic tilts are a kind reset. They wake up the lower abs without asking you to curl into a tiny ball or grind through a full sit-up.
Lie on your back with knees bent and feet flat. Gently tip your pelvis so your lower back presses lightly into the floor, then release it back to neutral. The motion is small. Think “rocking” rather than “crushing.” Ten to 12 slow reps is enough to start. If you’re moving so hard that your glutes cramp, you’ve turned a gentle drill into a wrestling match.
This is also a good place to check for abdominal doming. Keep an eye on the center line of your stomach. If it bumps up into a ridge, reduce the range. A smaller motion that stays controlled is far more useful than a bigger one that makes your midsection push outward.
Do these after waking, after a walk, or before bed. They help your brain remember where neutral is.
4. Heel Slides That Wake Up the Deep Core
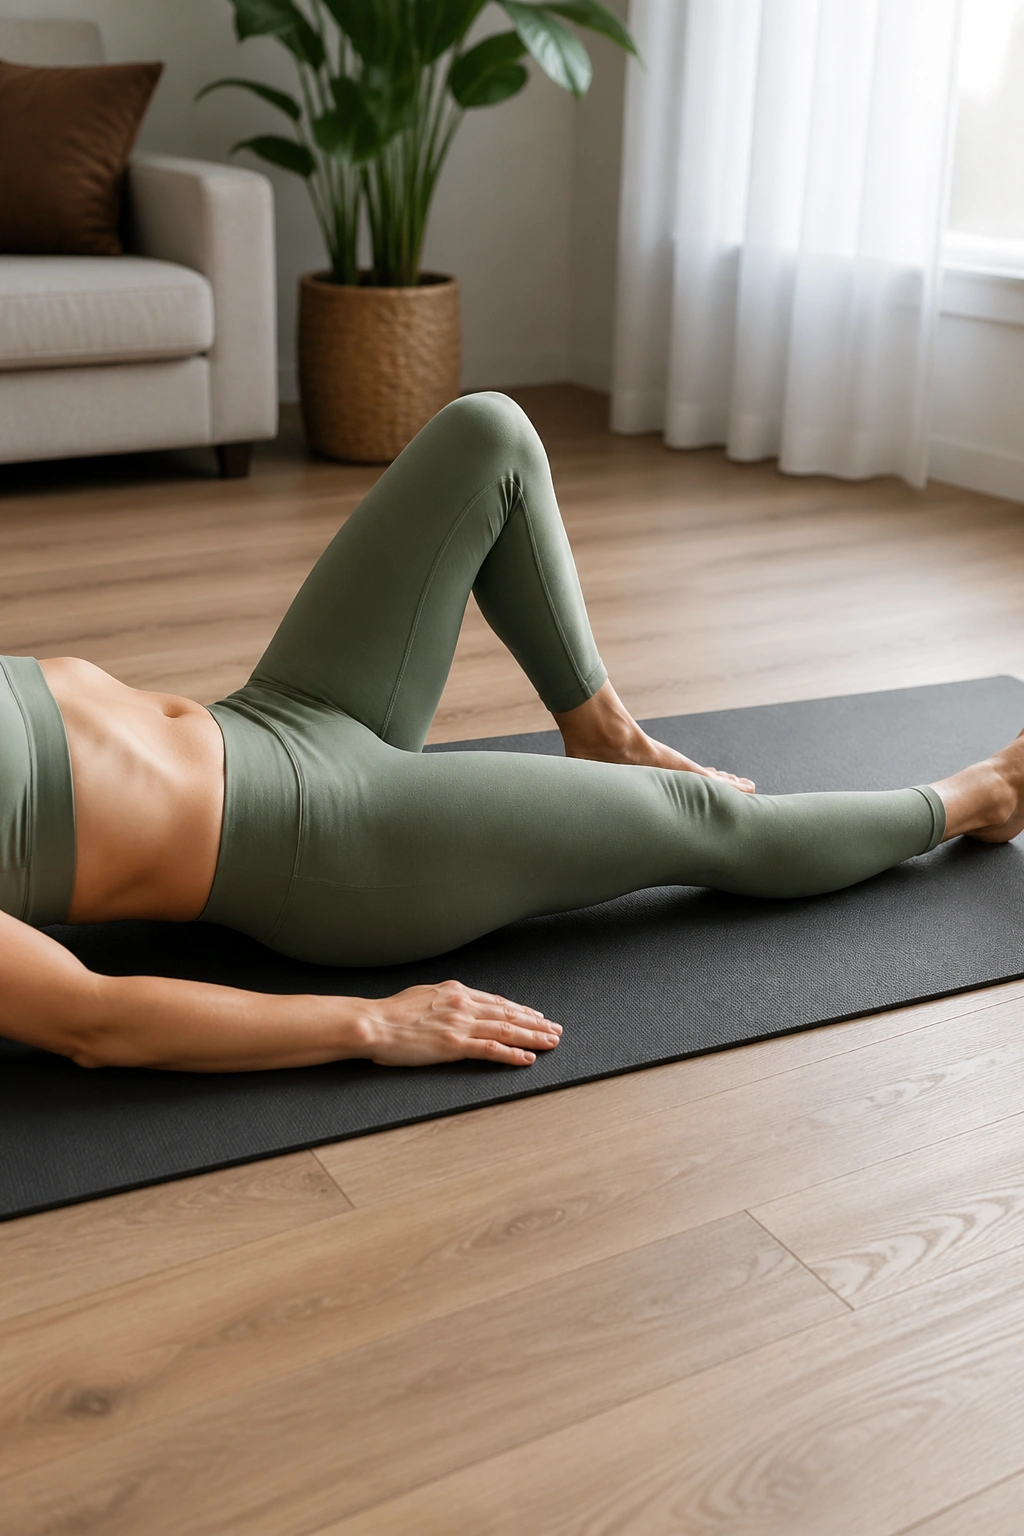
Small movements beat big effort when your core is still relearning the basics. Heel slides are one of the quietest postpartum belly fat workouts because they build control without creating a ton of pressure.
Start lying on your back with both knees bent. Exhale, gently engage your lower belly, and slowly slide one heel away from you until the leg is almost straight. Keep the heel on the floor the whole time. Slide it back in, then switch sides. Six to eight reps per side is plenty. If your belly bulges in the center, shorten the slide and make it smaller.
The trick is to keep the pelvis still. No rocking. No twisting. If the movement feels too easy, slow it down more. A three-second slide out and a three-second slide back often works better than racing through ten sloppy reps.
This one is useful early on because it teaches your body to stabilize while the leg moves. That’s the same skill you’ll need later for squats, lunges, and carrying a squirmy baby on one side while trying to find your keys with the other hand.
5. Glute Bridges for Hip Power
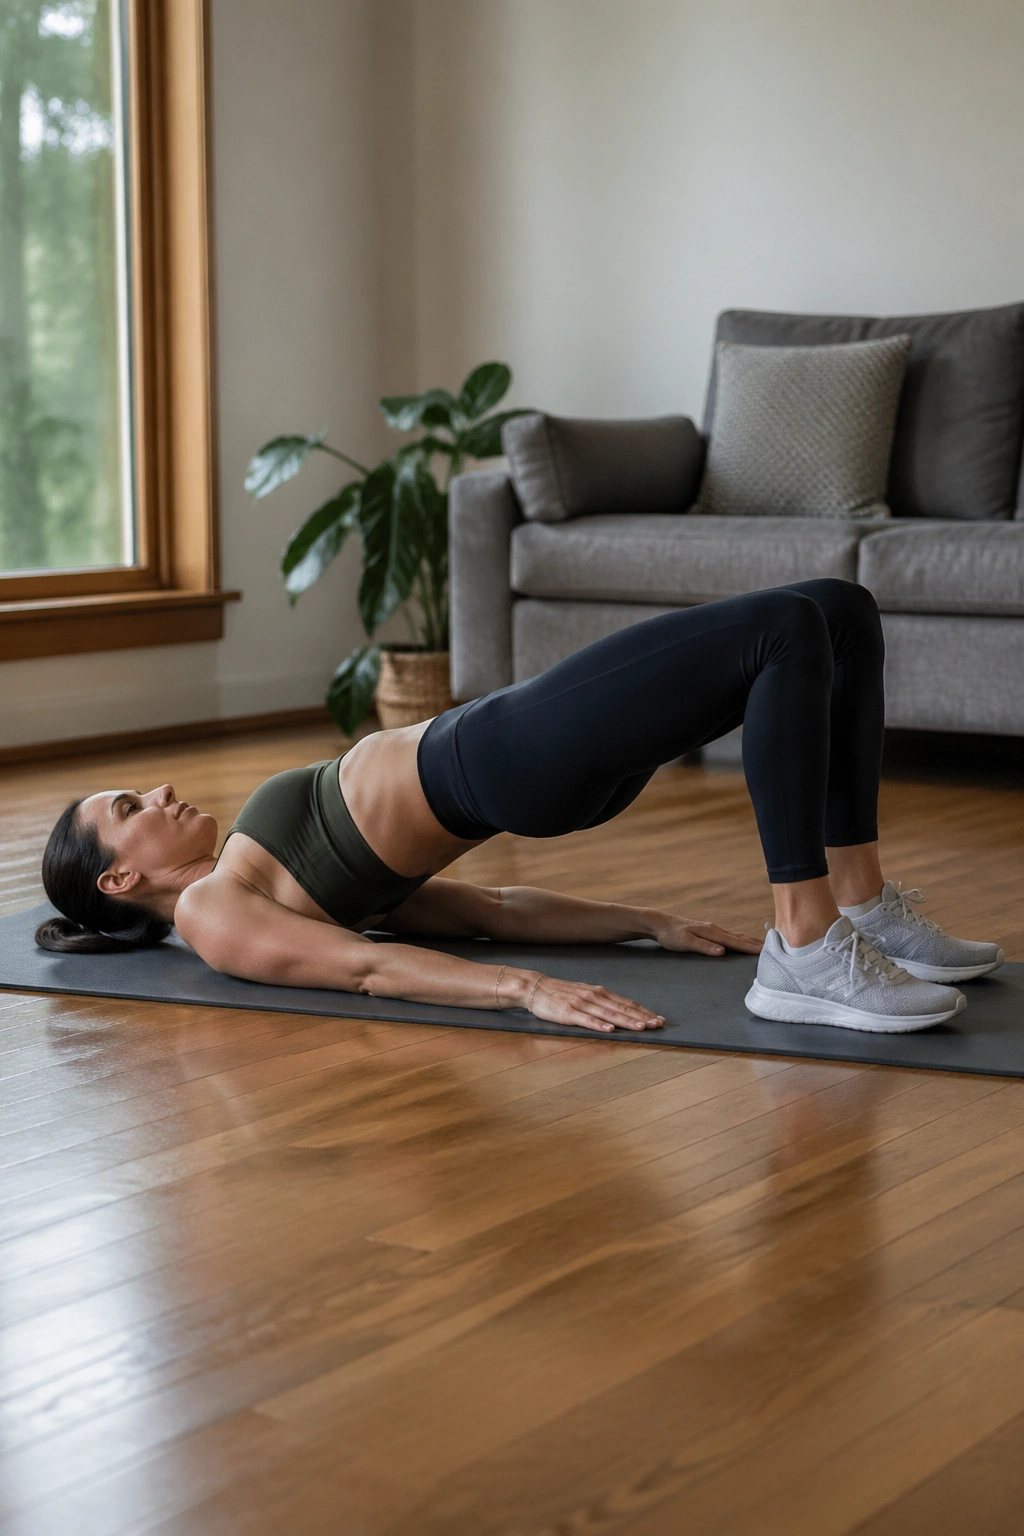
A stronger backside does a lot for a postpartum middle. That may sound odd, but it’s true. When the glutes are asleep, the low back tends to grab too much work and the pelvis dumps forward. Everything feels looser than it should.
Lie on your back, feet hip-width apart, and press through your heels to lift your hips until your body makes a long line from shoulders to knees. Pause for one second at the top, then lower with control. Start with 2 sets of 8 to 12 reps. If that feels easy, add a mini band above the knees or hold the top for 2 full seconds.
Keep the ribs down. That matters. A lot of people flare their chest and turn the move into a back bend, which steals work away from the glutes and can make the belly push out.
If you had a C-section and the scar still feels tender or tight, keep the lift small at first. No need to force height. A low bridge done well is better than a high bridge that yanks on tissue that isn’t ready.
6. Bird-Dog Reaches for Core Stability
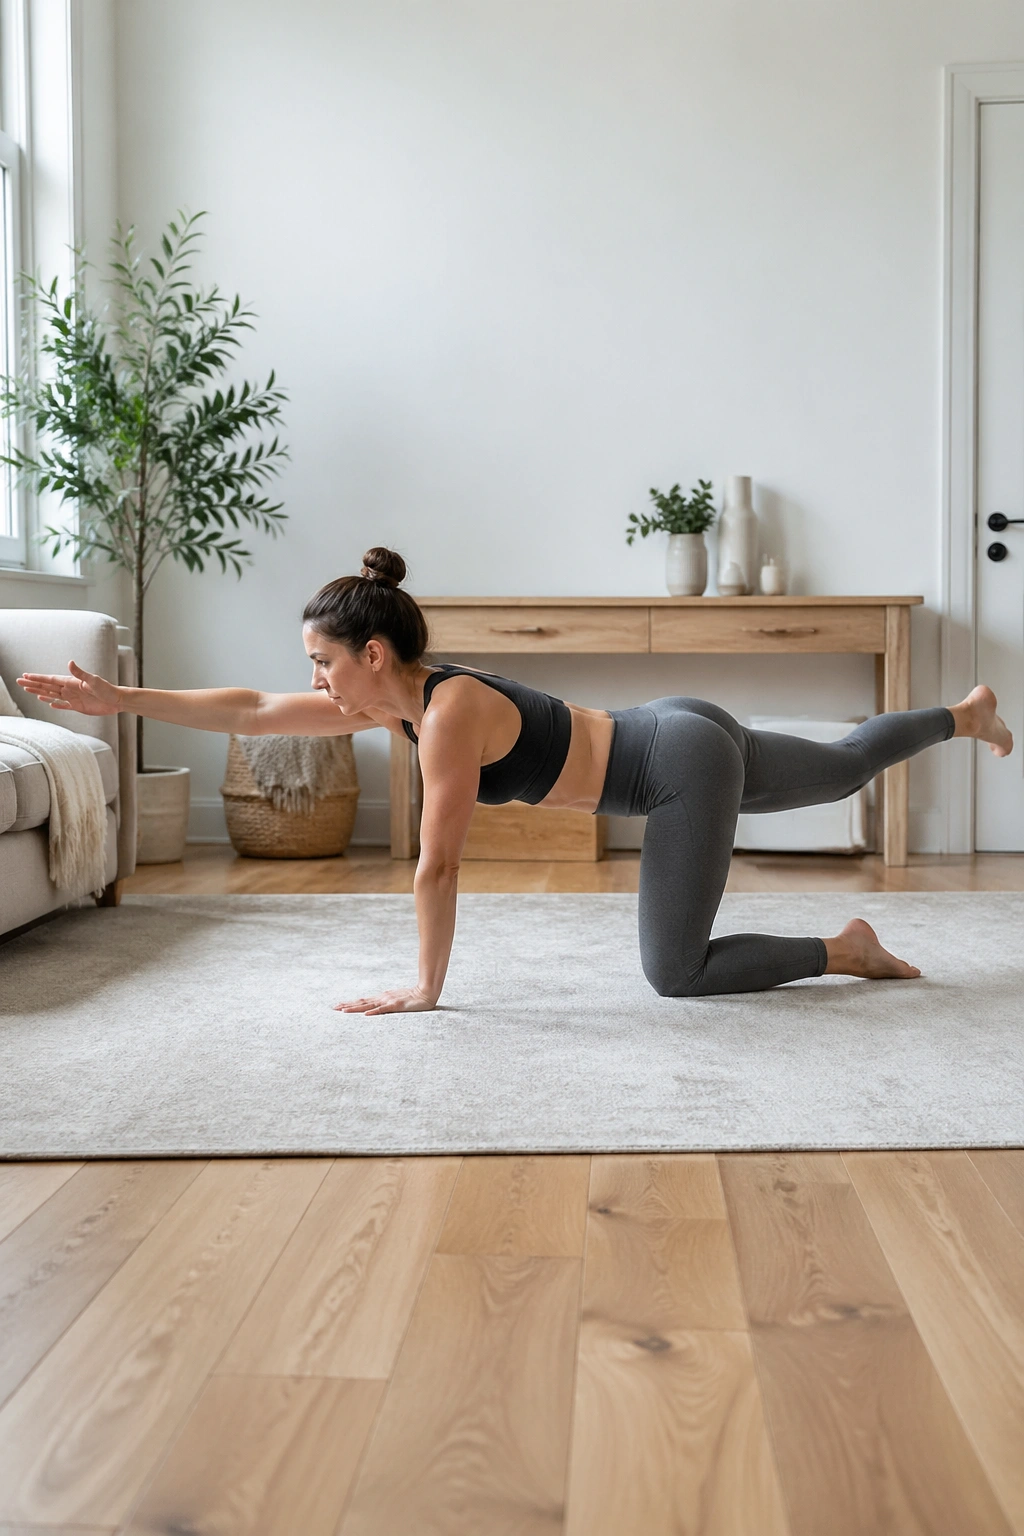
Bird-dogs look simple until you try to keep your hips from wobbling. Then they become honest fast.
Start on hands and knees with your wrists under shoulders and knees under hips. Reach one leg straight back and the opposite arm forward, then pause for 2 to 3 seconds before returning to center. Do 5 to 8 reps per side. If that feels shaky, use only the leg or only the arm for the first week.
Why this one matters
Bird-dogs train your core to resist rotation. That’s a big deal after pregnancy, because daily life is full of one-sided work: carrying a car seat, reaching into a crib, twisting to grab a burp cloth, lifting laundry with one hip shifted out.
What to watch for
- Hips turning open
- Low back sagging
- Neck cranking upward
- Belly doming down the middle
Keep the motion clean and slow. If your balance wobbles, you’re probably doing it right. If the whole thing feels like a circus act, shorten the reach and come back to it in a week.
7. Chair Squats That Build Real-World Strength
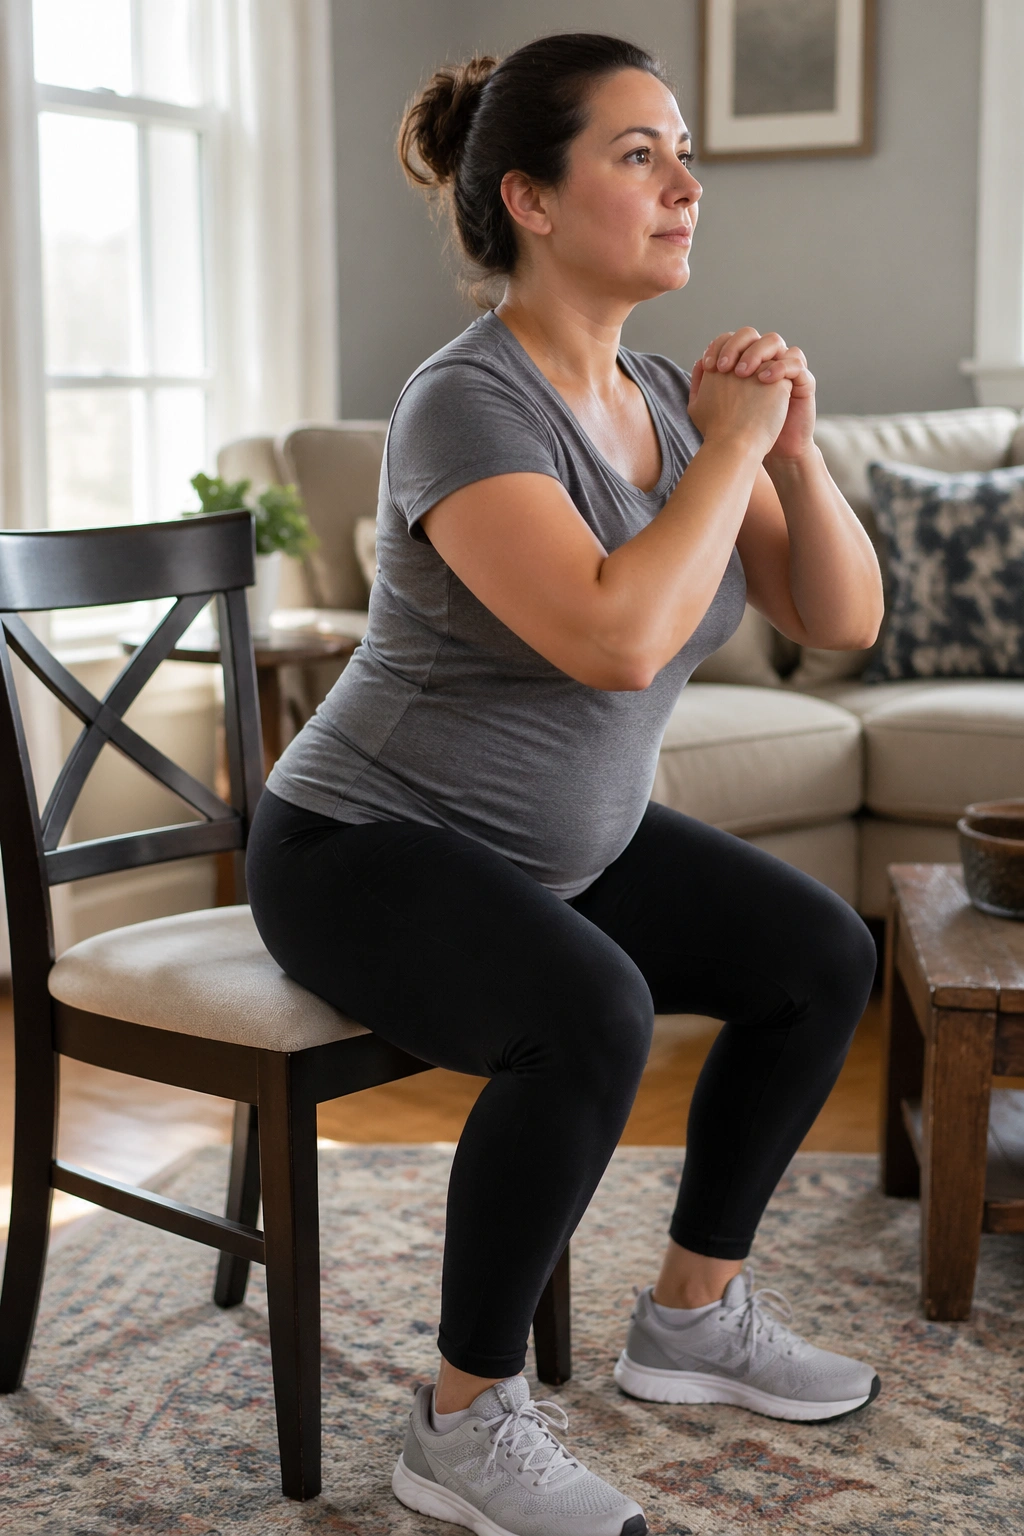
Squats show up in postpartum life whether you train them or not. You squat to pick up a toy, lower yourself into a car seat, and stand up a dozen times before breakfast. You might as well make that pattern stronger.
Use a sturdy chair or box. Stand with feet about shoulder-width apart, send your hips back, and sit lightly until your glutes touch the seat. Stand back up by pressing the floor away. Start with 2 sets of 8 to 10 reps. If that feels fine, hold a light dumbbell at your chest or slow the lowering phase to 3 seconds.
Form check
- Keep your chest open, not flared
- Let your knees track over your toes
- Put your weight through the whole foot
- Stop if you feel pressure down low in the pelvis
A squat that feels smooth should look smooth. If you collapse onto the chair or push off with your hands every time, the box is probably too low. Raise it a few inches and try again.
Strong legs take pressure off the lower back, which takes pressure off the core. It all connects.
8. Wall Push-Ups and Incline Push-Ups
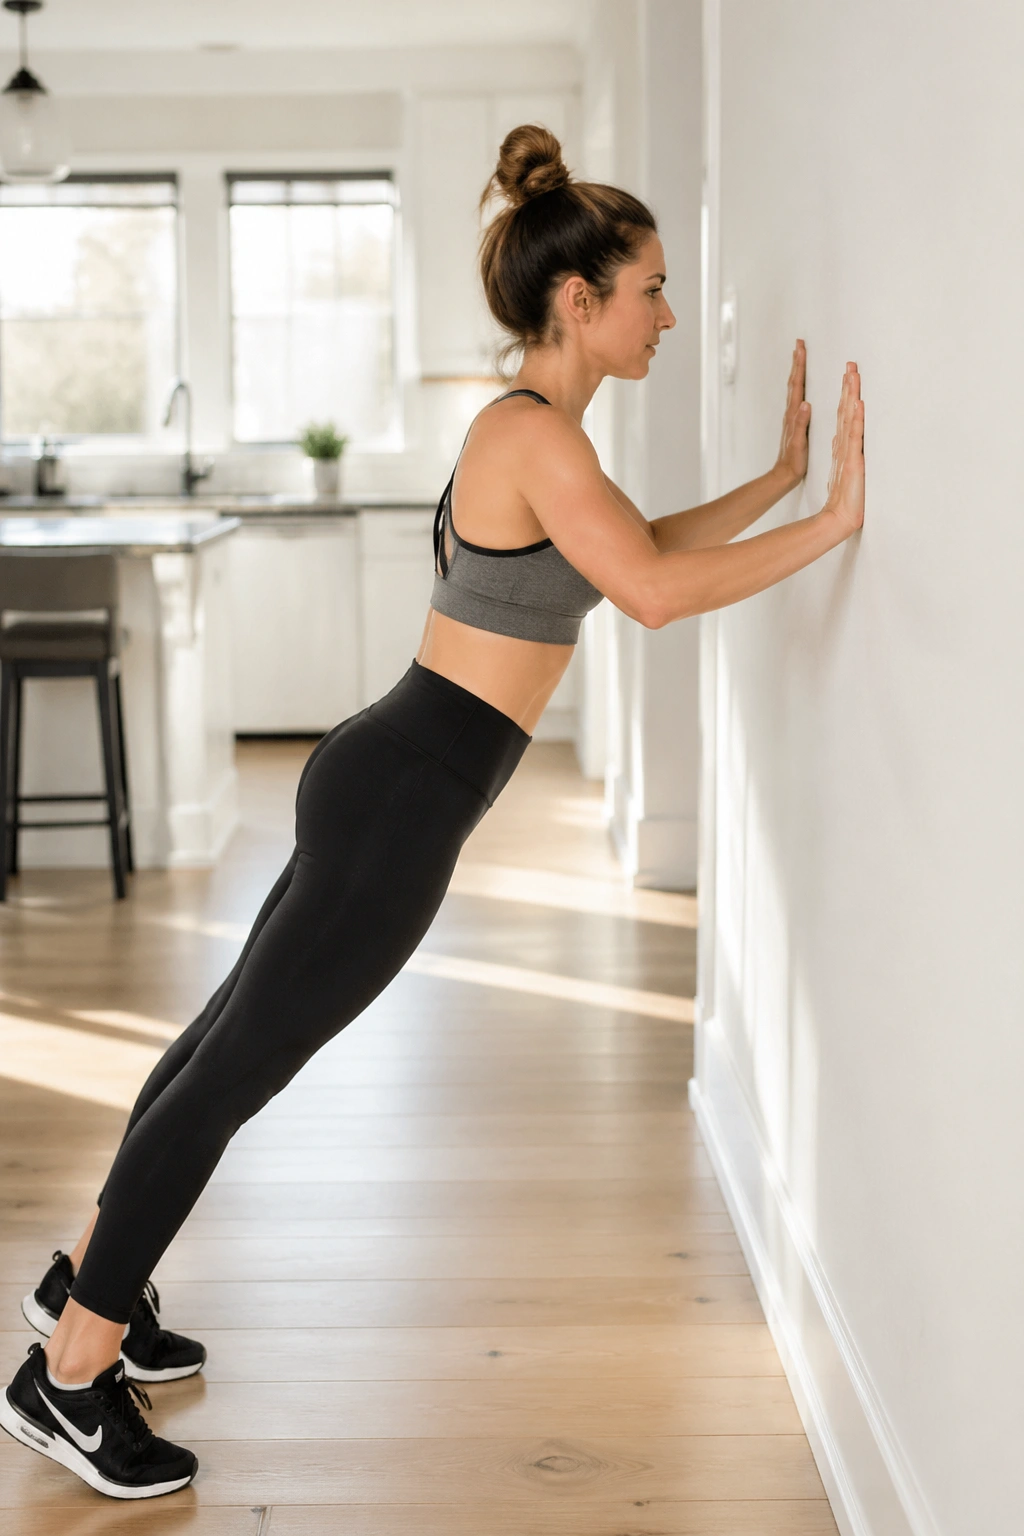
Push-ups matter postpartum even though they don’t seem like a belly move at first glance. Feeding, holding, and lifting a baby can wreck the upper back, and that changes the way your ribs sit. When the ribs tip forward, the stomach tends to stick out more.
Face a wall, place your hands at chest height, and step your feet back so your body forms a straight line. Bend your elbows and bring your chest toward the wall, then press away. Try 2 sets of 8 to 12 reps. When that feels easy, switch to a countertop or sturdy bench for a deeper angle.
If your wrists hate the floor, the wall is not “too easy.” It is a perfectly smart starting point. I’d rather see a crisp wall push-up than a shaky full push-up with a belly that pops outward and shoulders that shrug into the ears.
Keep your elbows about 45 degrees from your sides. Not pinned in. Not flared out like chicken wings. And if your belly domes, shorten the range or bring your feet closer to the wall.
9. Side-Lying Clamshells and Leg Lifts
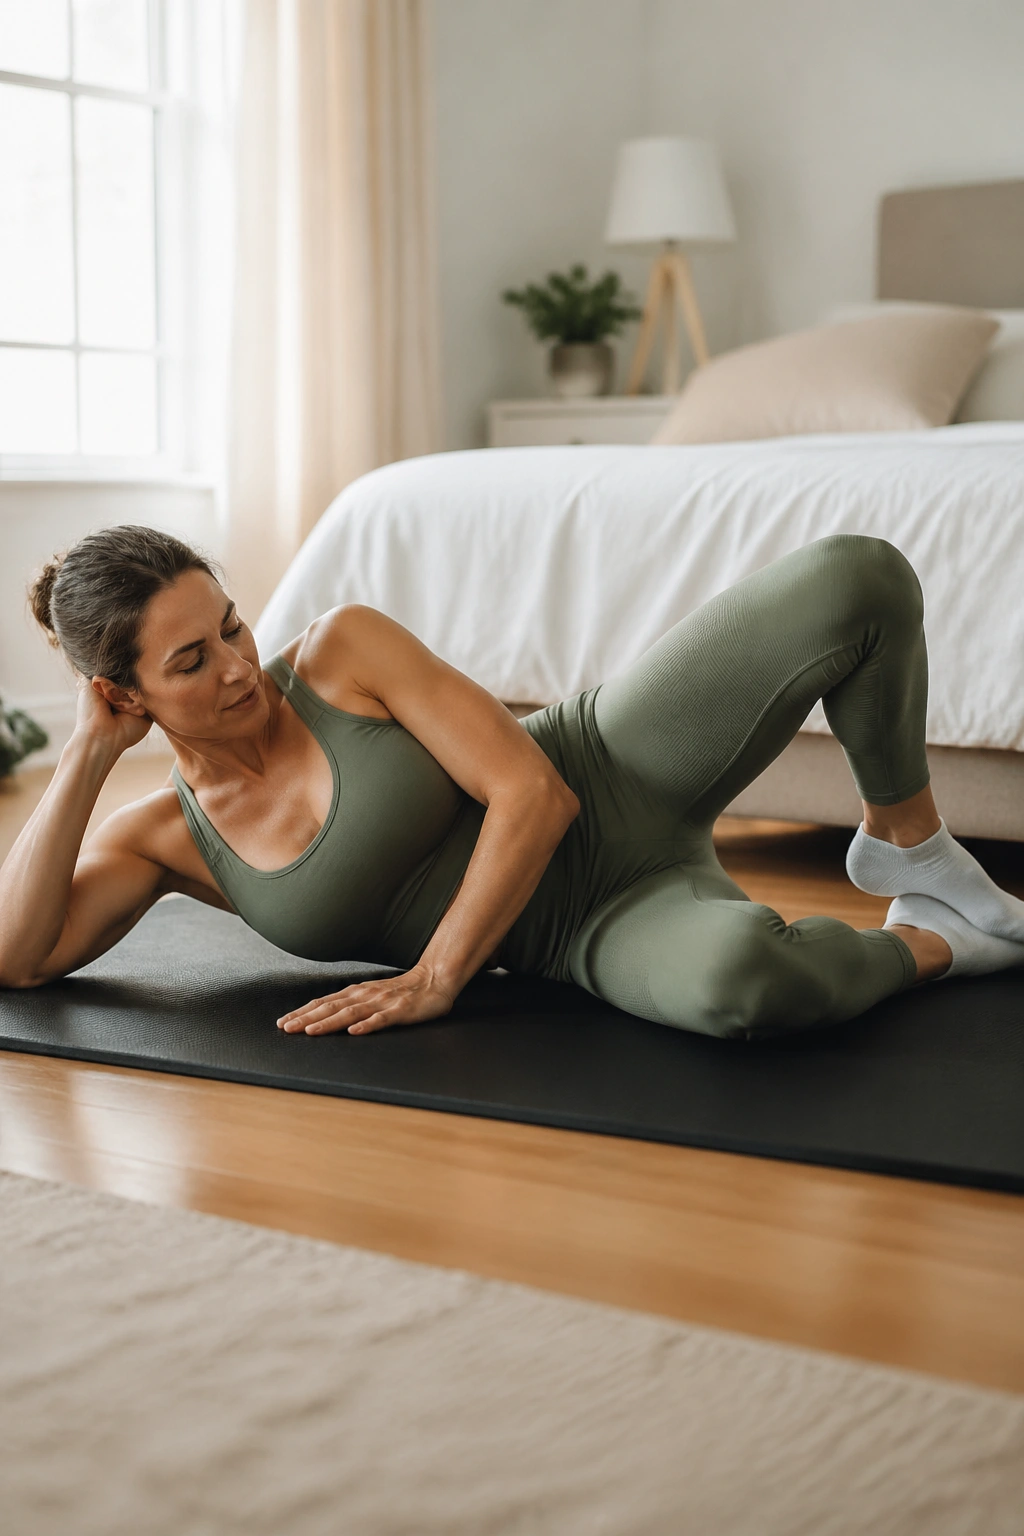
This is one of those exercises that feels tiny but burns in a way you remember later when you stand up from the floor. Good. That burn usually means the side glutes are finally waking up.
Lie on one side with your knees bent and heels together. Keep your hips stacked and open the top knee like a clamshell, then lower it slowly. Do 12 to 15 reps per side. If that feels easy, add a mini band just above the knees. You can also follow it with 10 straight-leg lifts on the same side to make the outer hip work a little harder.
The reason this matters postpartum is simple: weak side glutes can leave your pelvis wobbly and your low back overworked. That’s one reason some women feel “soft” through the middle even when they’re eating well and walking often.
You can do these on a mat, on a bed, or on the carpet while a baby naps next to you. No fancy setup. Just keep the torso still. If the top hip rolls back, you’ve lost the point of the move.
10. Step-Ups on a Low Stair
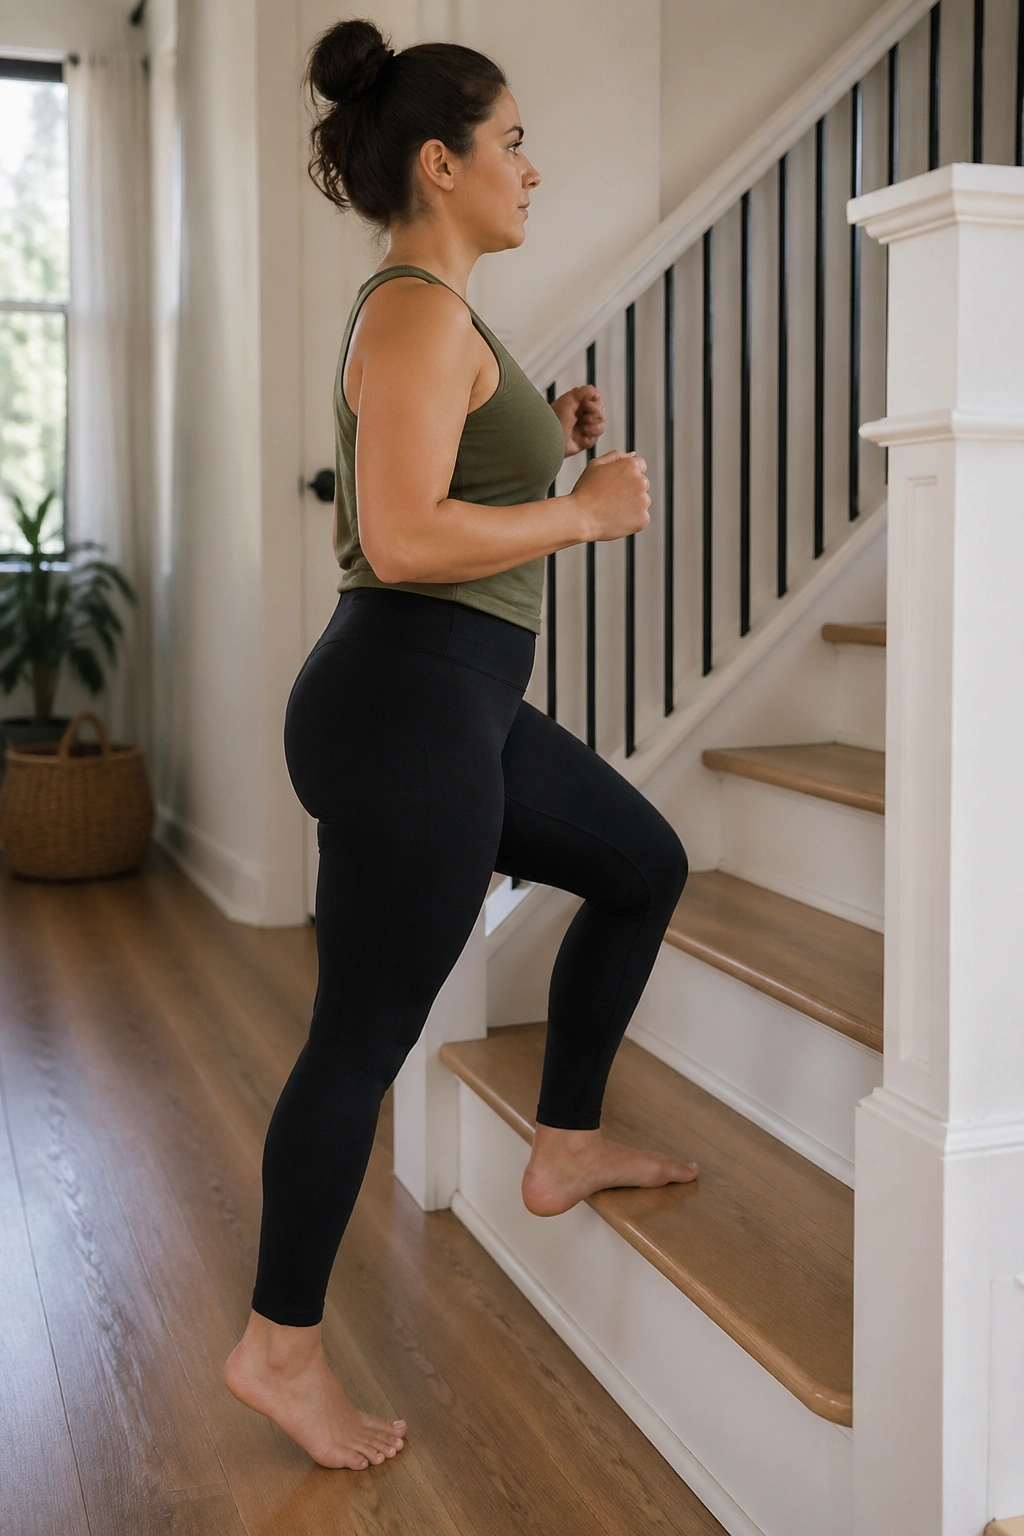
One step is enough. Seriously. You do not need a tall box to get a useful workout.
Find a low, stable step about 4 to 8 inches high. Step one foot up, press through the whole foot, and stand tall on top before stepping back down under control. Aim for 8 reps per side, then rest. If you want more challenge, do 2 or 3 rounds, or hold light dumbbells by your sides.
Step-ups are sneaky because they combine leg strength, balance, and a little bit of cardio without the pounding that comes from jumps or fast running. They also mimic daily life. Stairs happen. Curbs happen. Babies in carriers happen.
Keep your chest lifted and avoid pushing off the back leg too much. The leading leg should do most of the work. If the motion feels wobbly, use a hand on the wall for balance. That is not cheating. It is smart form.
A low step, done steadily, is better than a high step that makes your hips twist and your core brace like it’s under attack.
11. Reverse Lunges with a Countertop Assist
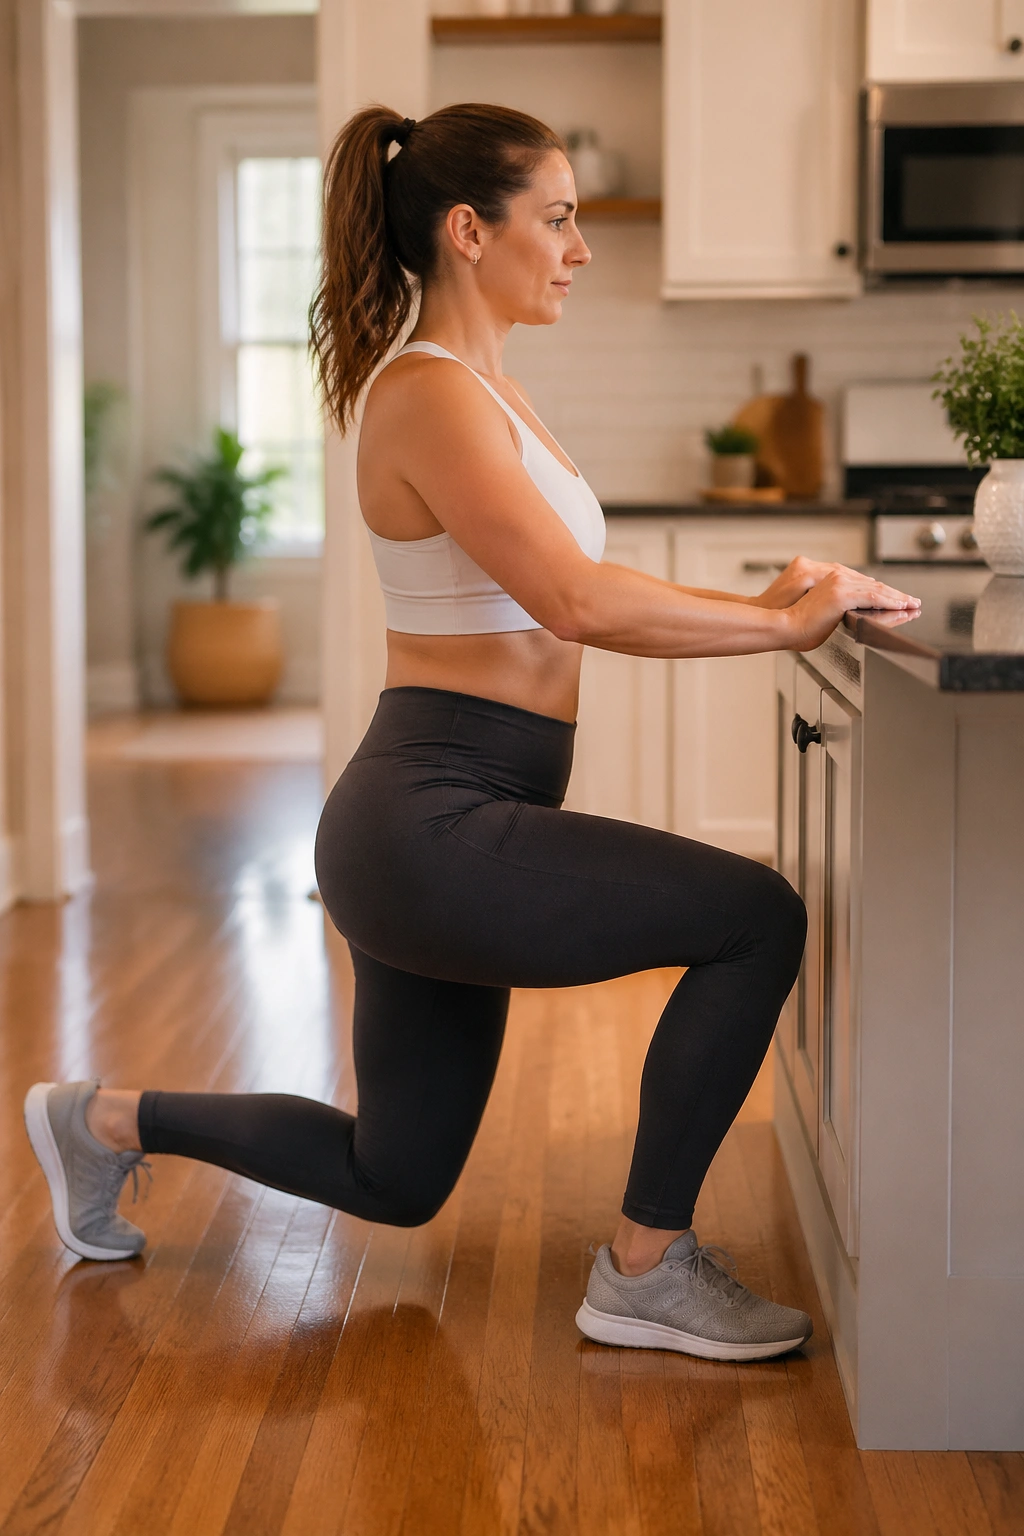
Forward lunges can feel awkward early on. Reverse lunges are friendlier. You step back instead of lunging forward into a wobble, which gives you more control over balance and pressure.
Stand tall near a countertop or sturdy chair. Step one foot back, bend both knees, and lower until the back knee points toward the floor. Push through the front heel to stand. Start with 6 reps per side. If that feels solid, build to 2 sets of 8 or hold light weights by your sides.
Make it easier
- Hold the chair with one hand
- Make the step back shorter
- Keep the back knee high instead of dropping deep
Make it harder
- Add a pause at the bottom
- Hold dumbbells
- Slow the descent to 3 seconds
The front foot should stay flat. If the front heel pops up, the stance is too short or you’re leaning forward. Reverse lunges build the kind of strength that shows up when you’re carrying a baby, a diaper bag, and a cup of coffee all at once. Not glamorous. Useful.
12. Standing Marches with Arm Swings
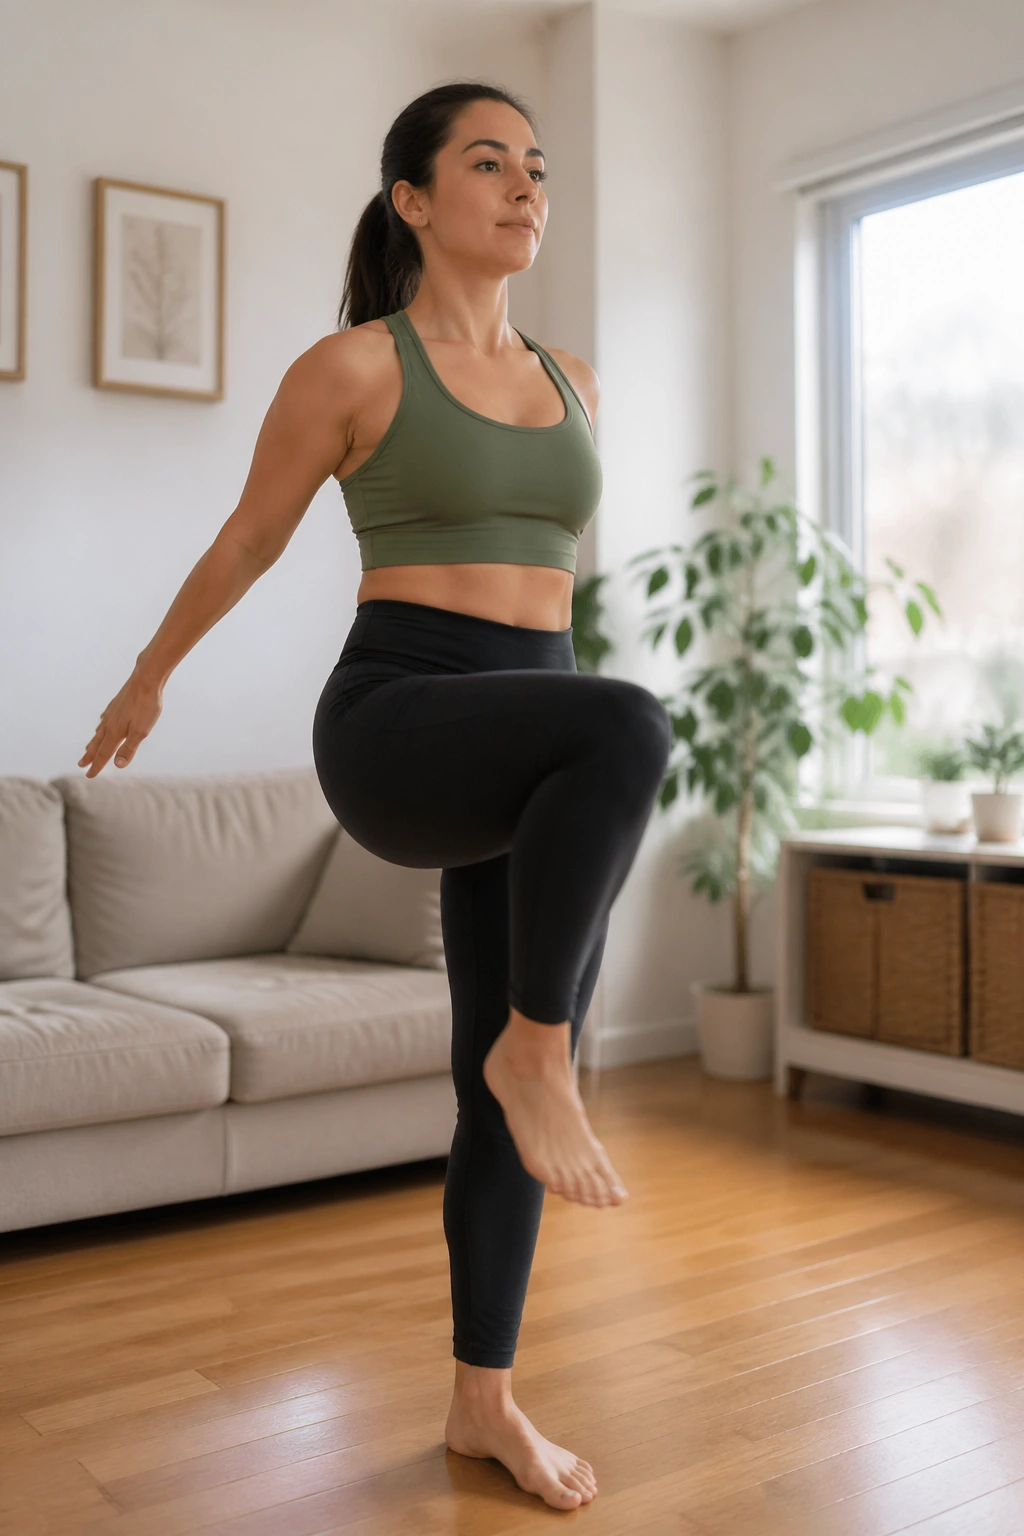
Standing marches are a good choice on tired days, which means they’re worth keeping. You get blood moving, you wake up the hips, and you raise your heart rate without getting on the floor or jumping around a sleeping baby.
Stand with feet hip-width apart and march one knee up at a time. Swing the opposite arm as you go. Start with 30 seconds, rest 30 seconds, and repeat for 6 to 8 rounds. If that feels too easy, speed up the pace a little. If your pelvic floor feels heavy, keep the knees lower and the rhythm slower.
The move only works well if you stay tall. Don’t lean back to lift the knees higher. Don’t tense your shoulders. Let the arms swing from the back, not just the wrists. That small detail makes it feel more like a workout and less like pacing the kitchen in frustration.
This is a good one for apartment living too. No jumping. No noise. Just marching. Some days that’s enough.
13. Resistance Band Rows for Upper-Back Support
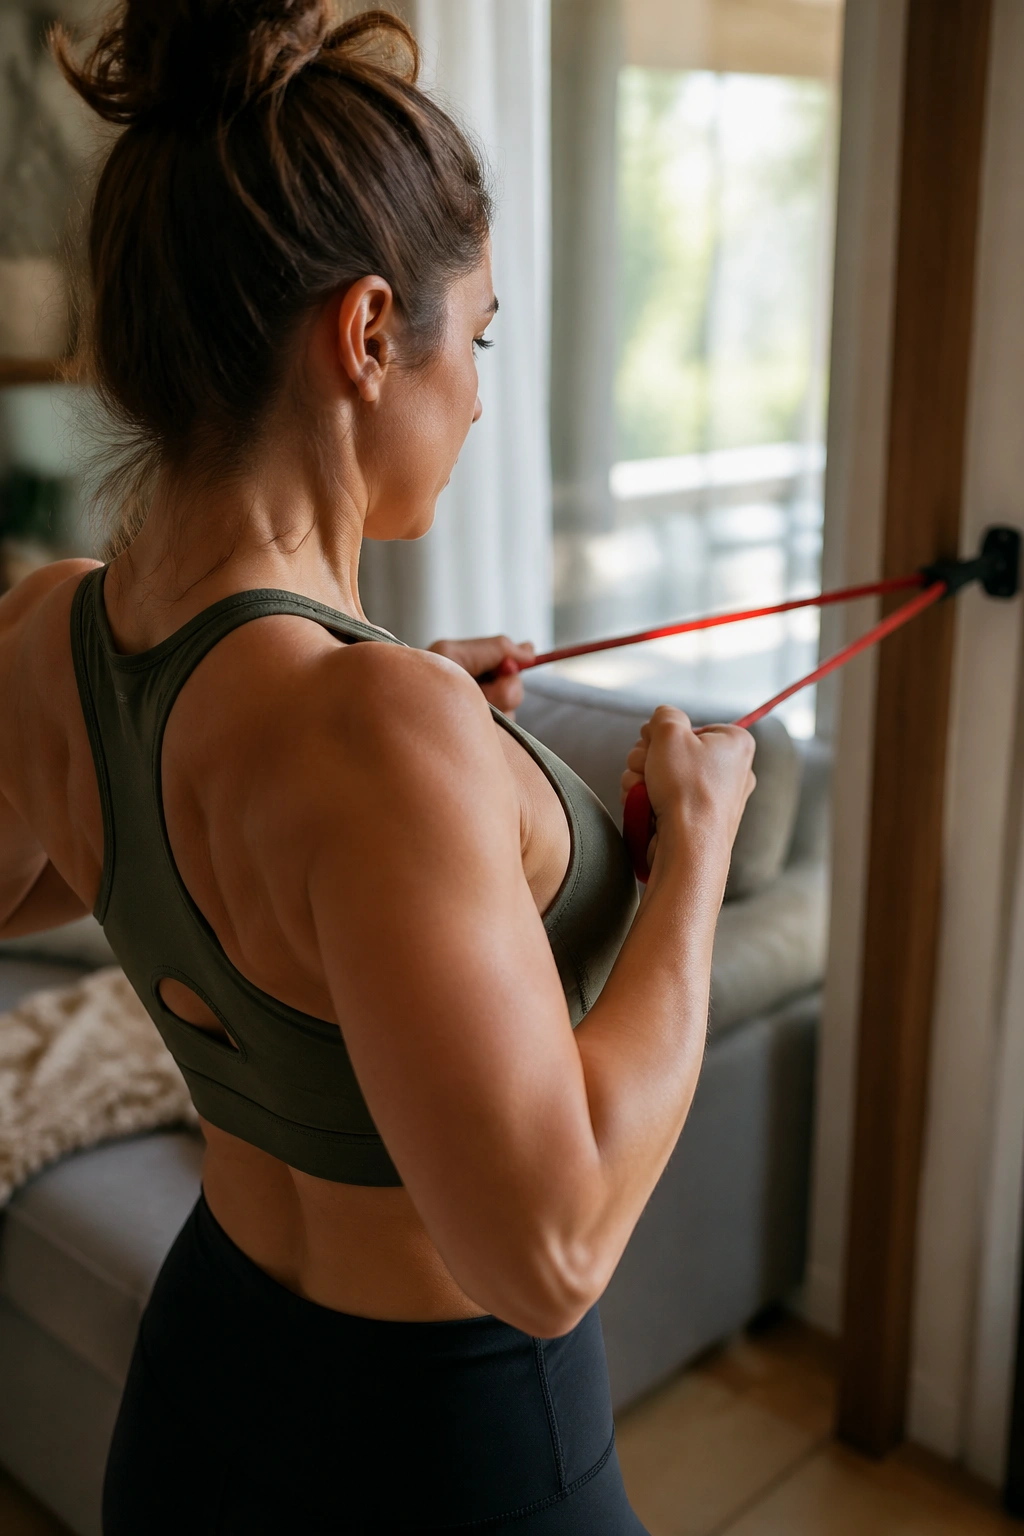
Have you ever noticed how feeding a baby pulls your shoulders forward? After a few weeks of that, your upper back starts to round, and your ribs can slide out of place. Rows help pull you back to center.
Anchor a resistance band at chest height. Hold the ends, step back until there’s tension, and pull your elbows behind you while squeezing your shoulder blades gently down and together. Return slowly. Try 2 to 3 sets of 10 to 15 reps.
The key is not to shrug. If your traps take over and your neck starts climbing toward your ears, lighten the band or stand closer to the anchor. A good row feels like the work lives between the shoulder blades, not in the neck.
Strong upper-back muscles help your posture. Better posture helps your core show up better. That’s not magic, just mechanics. When the chest opens and the ribs stack better, the stomach usually looks less pushed forward, even before any body-fat change happens.
Keep one band near the couch. You’ll use it more if you don’t have to dig through a closet every time.
14. Farmer Carries with Baby-Free Hands
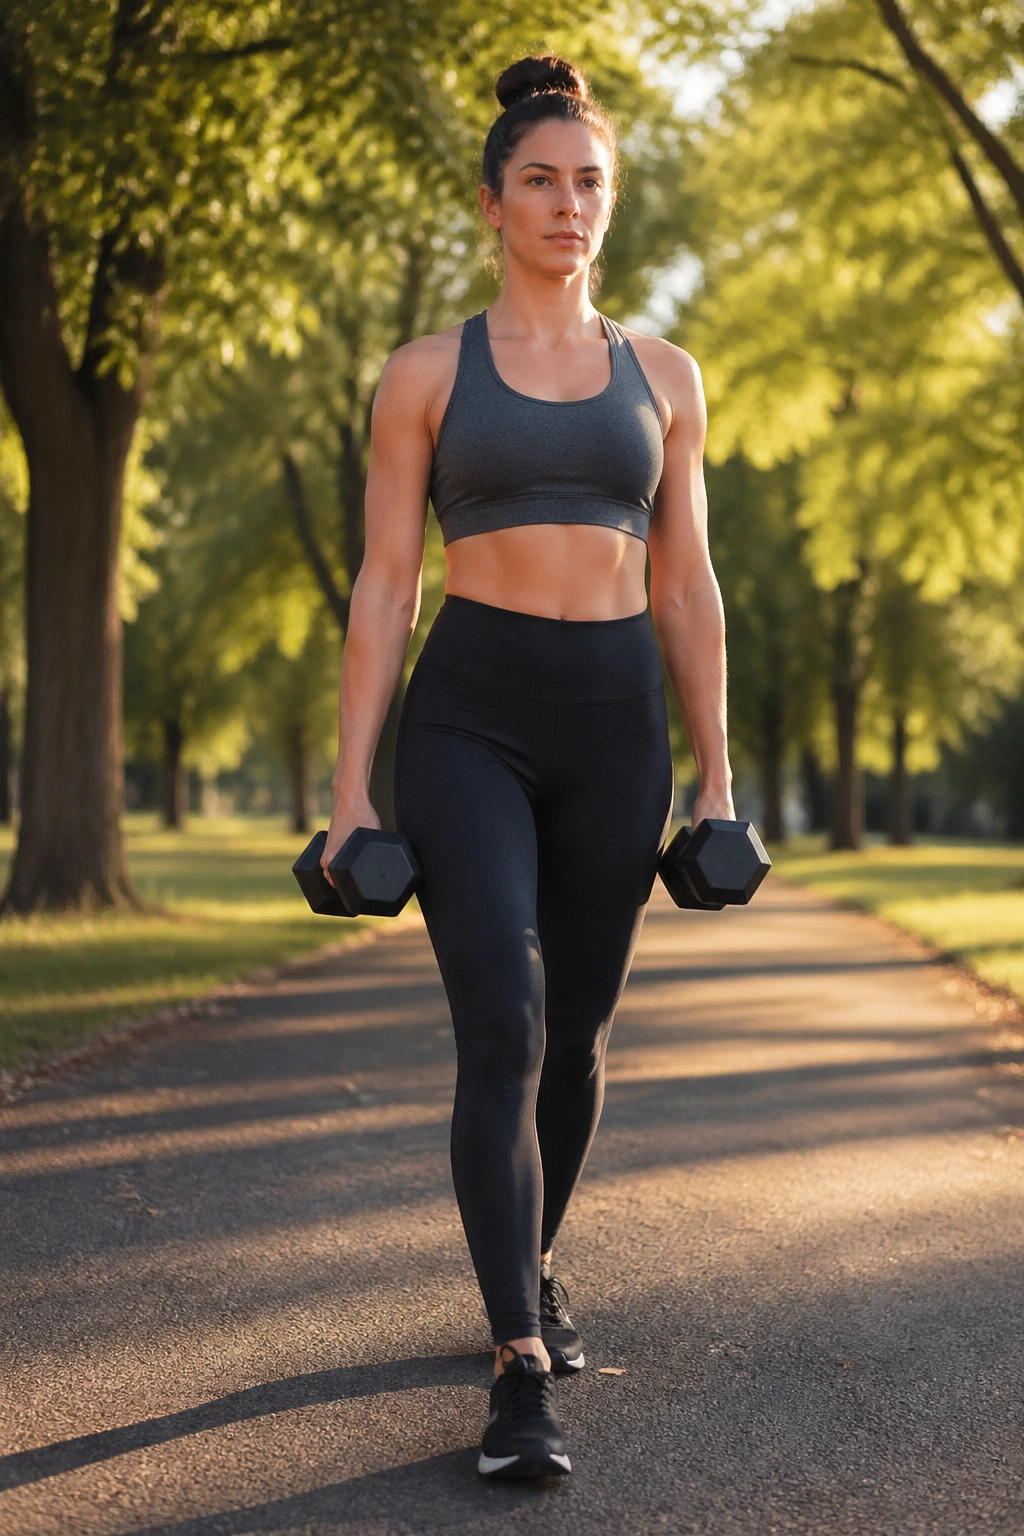
Carrying weight while walking sounds almost too basic to count as exercise. It counts. A lot.
Grab two dumbbells, kettlebells, or even heavy grocery bags and walk for 30 to 60 seconds with your ribs stacked over your hips. Rest, then repeat for 3 to 5 rounds. If your grip fails before your legs do, use lighter weight and keep going. That is still worthwhile.
Why carrying works
Farmer carries train your core to resist side-to-side bending. They also light up your grip, upper back, and breathing muscles. That’s useful postpartum because life is basically one long carrying drill anyway.
You should feel tall and solid, not twisted. If one side drags the other down, the weight is too uneven or too heavy. Keep the shoulders low. Keep the steps short and smooth. No stomping.
This is one of my favorites because it feels like real life dressed up as a workout. You pick something up, you walk, you put it down. Simple. Hard enough. Very few exercises are that honest.
15. Dead Bug Regressions
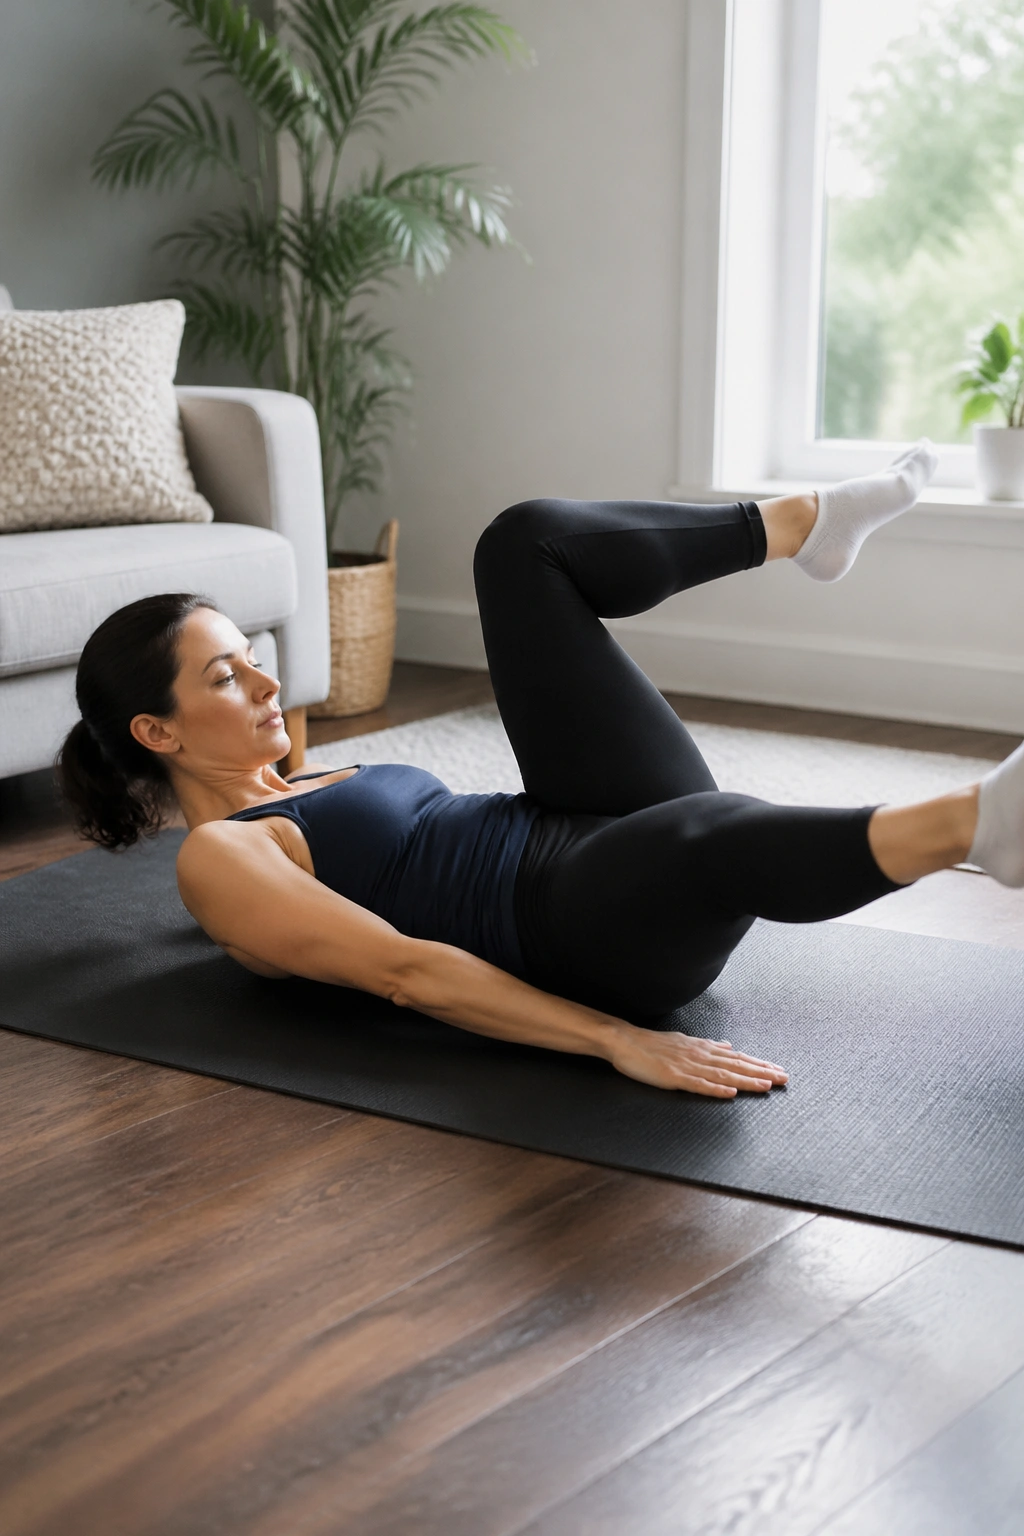
If you can lie on the floor without feeling like a fish on land, dead bugs are worth your time. If the full version feels messy, regress it. That’s the smart move anyway.
Lie on your back with knees bent over your hips. Exhale, lightly flatten the lower back toward the floor, and lower one heel to tap the ground before bringing it back. Keep the opposite leg still. Do 5 to 8 reps per side. Later, you can add opposite arm reaches.
The whole point is to keep the torso quiet while the limbs move. That’s hard after pregnancy, because the abdomen often wants to bulge or brace in the wrong place. If you see doming at the center line, shorten the range or stop at the heel tap stage for now.
A neck that strains means your core is not doing enough. Reset and try again with smaller movement. This exercise rewards calm control. It punishes rushing.
16. Side Planks from the Knees
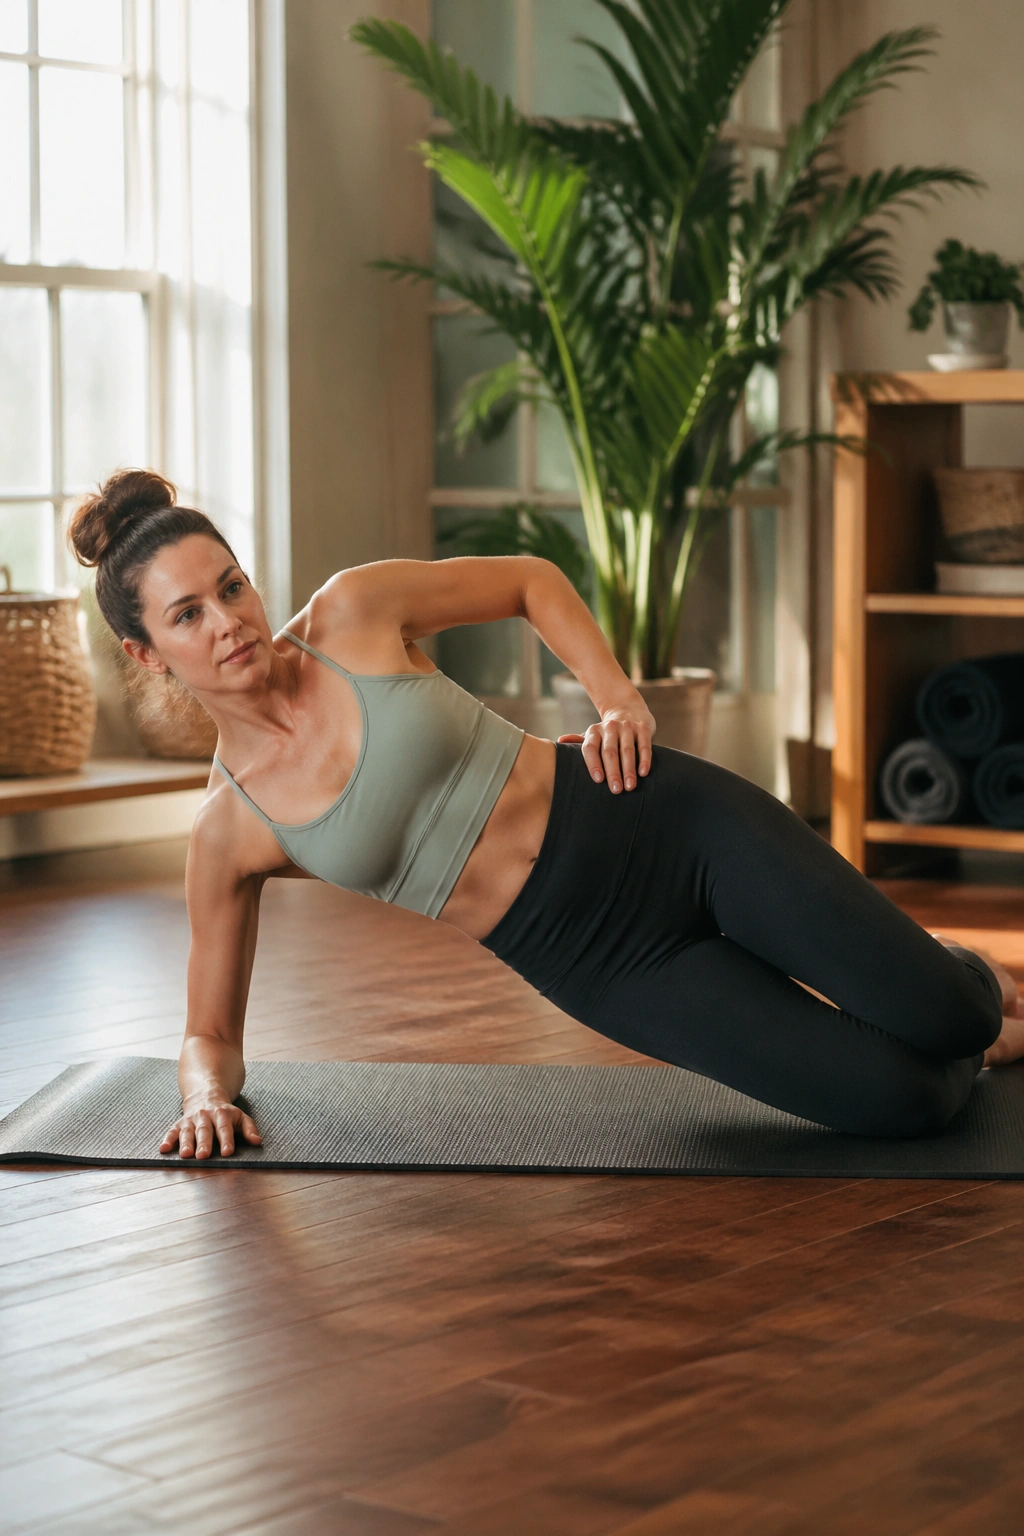
Side planks beat endless crunches for many postpartum bellies because they train the sides of the trunk, not just the front. They also ask the pelvis to stay level, which matters more than most people realize.
Set your elbow under your shoulder, bend your knees, and stack your hips. Lift your hips off the floor and hold for 10 to 20 seconds per side. Do 2 rounds. If that feels too intense, keep your bottom knee on the floor and lift only partway. If it feels too easy, straighten the top leg later or raise the hold time.
What to watch for
- Shoulder shrugging up toward the ear
- Hips rotating forward
- Side of the neck tightening
- Belly bulging instead of bracing
A good side plank should feel like the side of the waist, the glute, and the shoulder are all sharing the work. No single spot should take over. If the floor version is too much, a wall side plank is a fine place to start. Plant your forearm on a wall and lean into it with your body in one line.
17. Low-Impact Dance Cardio
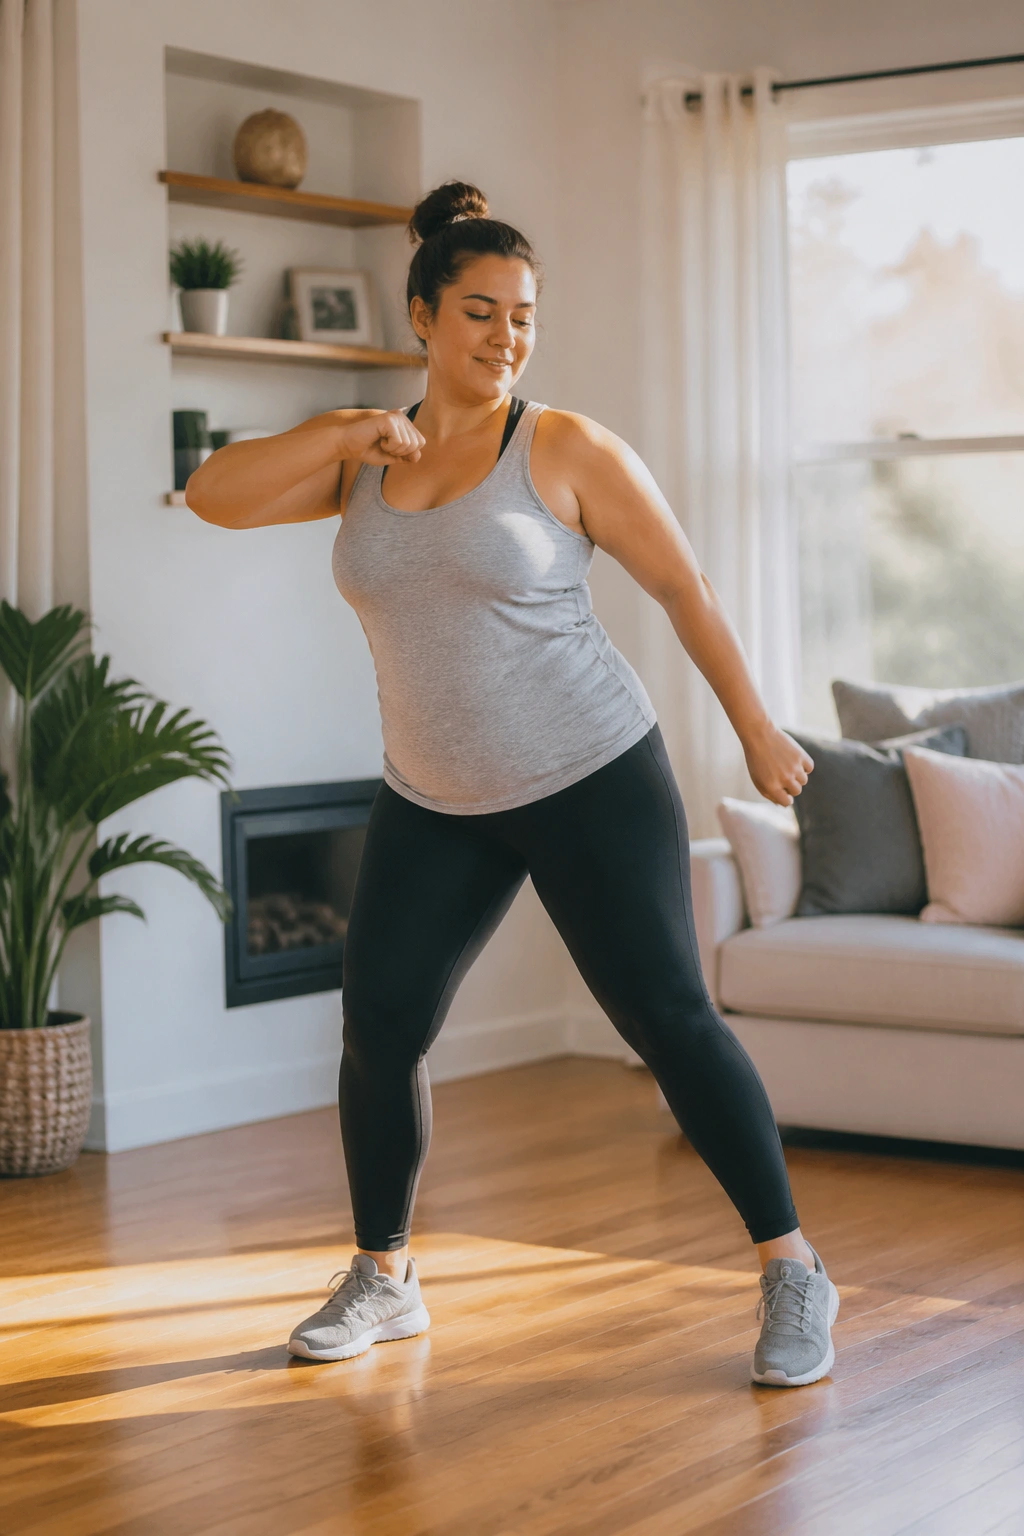
A little music changes everything. Put on a playlist and move for 15 to 20 minutes with zero jumping and zero pressure to “perform.” March in place. Step-touch side to side. Add arm sweeps. Turn the hips. Smile if you feel like it.
What makes dance cardio useful is not the choreography. It’s the way it sneaks movement into your day when you’re tired of staring at a timer. One song can be easy, one can be faster, and the next can be your cool-down. If the baby is asleep nearby, keep the steps quiet and grounded so the floor doesn’t shake.
The best version is the one you’ll repeat. A lot of women quit formal workouts because they feel too strict. Dance cardio gives you a way to sweat a little without needing a perfect setup, a gym bag, or a babysitter.
If you’re postpartum and short on energy, this is one of the easier ways to get your heart rate up without the mental drag that comes from “real exercise.” It still counts.
18. Mini Circuit: Squat, Row, March, Bridge
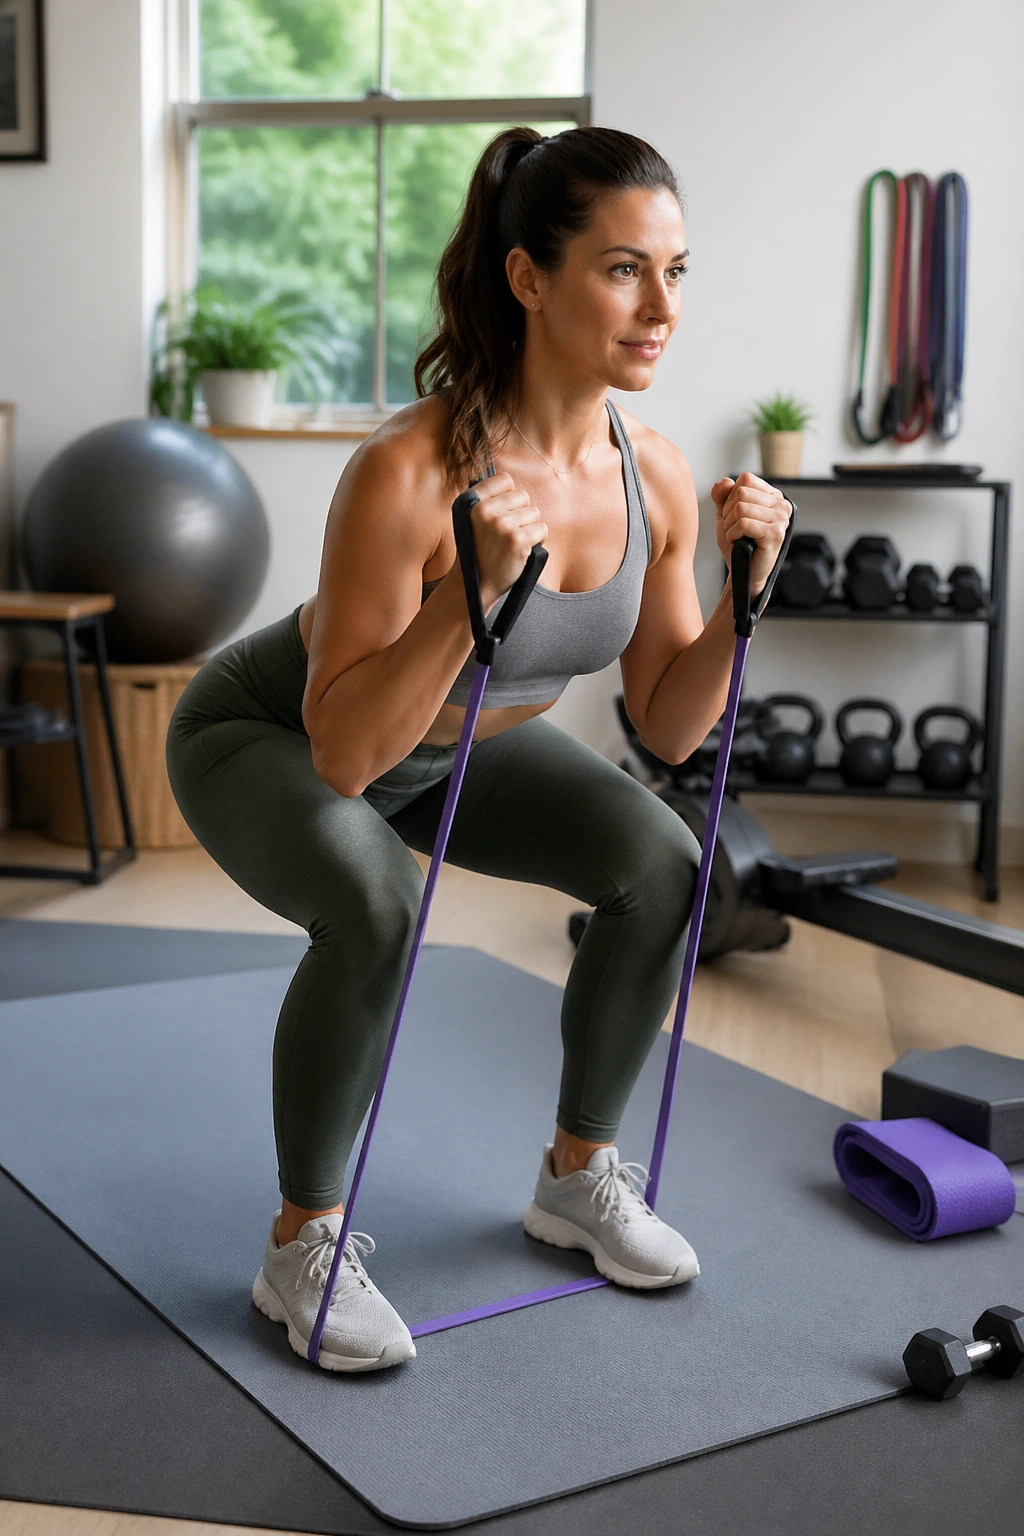
A short circuit keeps you from getting stuck in one position for too long, which matters when your whole day already involves feeding positions, car seat positions, and couch positions. Keep the work simple and repeatable.
Do 3 rounds of the following:
- 10 chair squats
- 12 resistance band rows
- 30 seconds of standing marches
- 10 glute bridges
Rest 30 to 45 seconds between moves if needed. If you’re feeling strong, shorten the rest. If sleep deprivation has flattened your legs, take a full minute. No heroics.
This kind of circuit works because it hits the big patterns: squat, pull, march, bridge. You get legs, back, cardio, and core support without smashing your abdomen with a thousand different moves. It’s the sort of session that gets the job done even when your brain is half on autopilot.
A nice side effect: the whole thing can be finished in about 12 to 15 minutes. That matters more than people admit.
19. Quadruped Toe Taps and Hover Holds
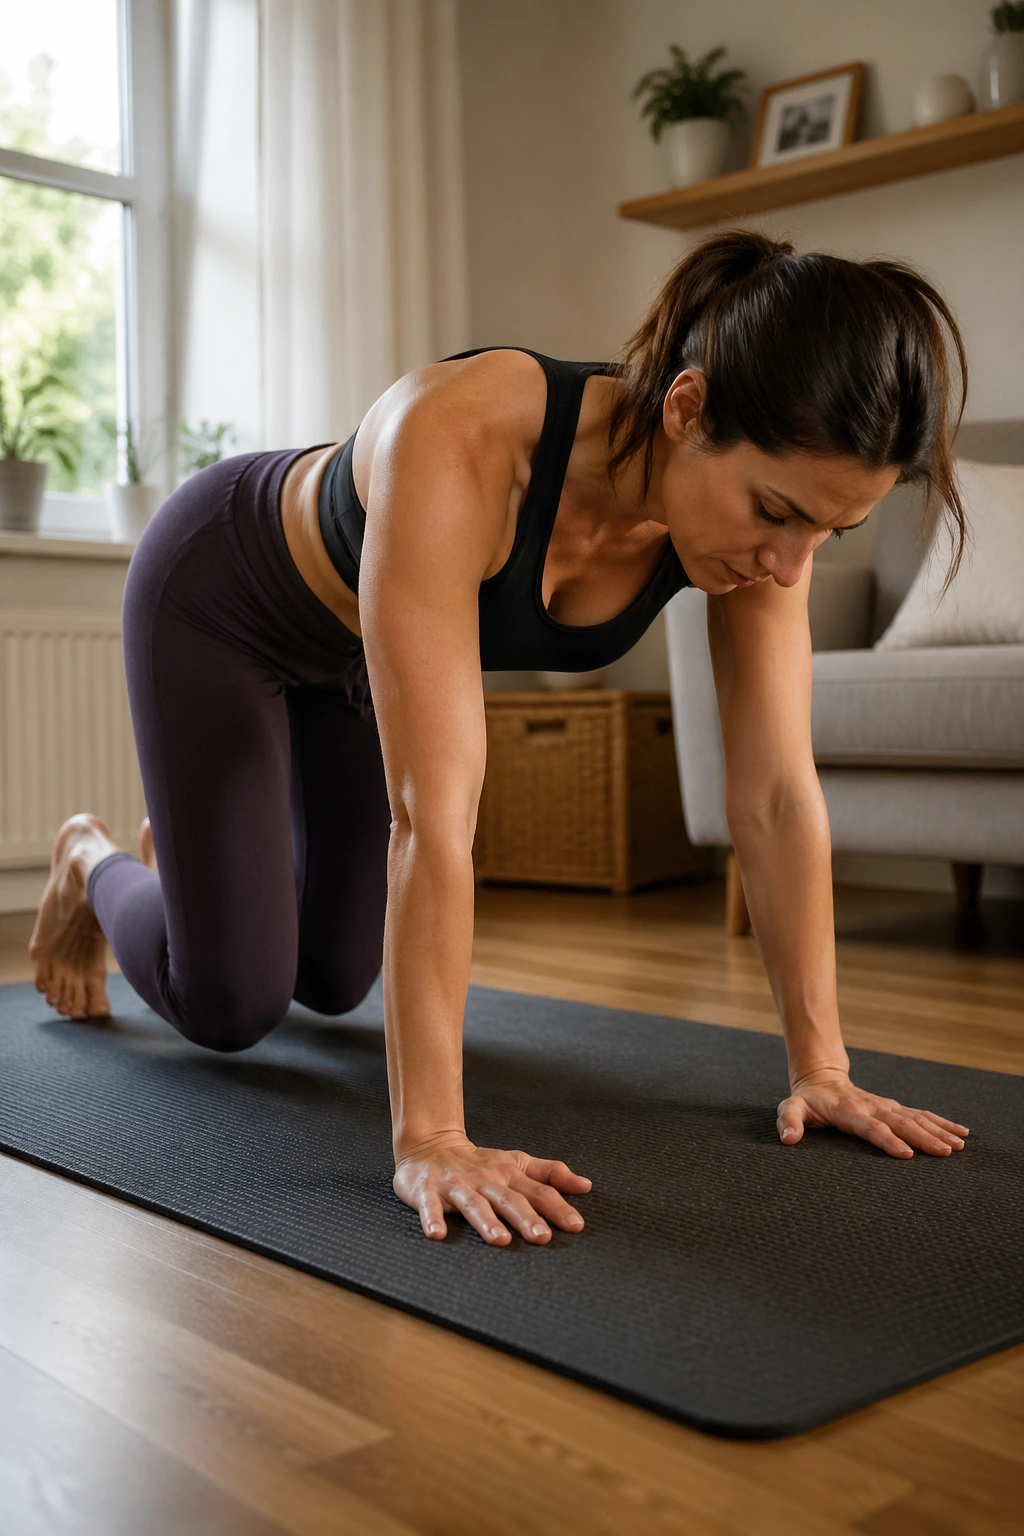
Why bother with hands-and-knees work when you already have planks? Because the floor position lets you train your core with less pressure. For a lot of new moms, that’s the sweet spot.
Start on hands and knees. Keep your back flat and your neck long. Lift one knee an inch or two, hold for 3 seconds, then tap it down softly. Alternate sides for 8 to 10 reps. If that feels easy and you have no doming or pelvic heaviness, try a tiny hover hold with both knees lifted for 5 to 10 seconds.
The goal is not to make your abs scream. The goal is to teach your trunk to hold steady while your body shifts weight. That translates to carrying, lifting, and twisting in real life.
If your wrists are cranky, place your hands on dumbbells or use fists on a folded towel. If your belly pokes upward, lower the intensity. A smaller, cleaner version is the right version. This one is sneaky in the best way.
20. A 20-Minute Full-Body Reset
The most useful postpartum workout is often the one that feels almost too manageable to skip. That’s the point here.
Set a timer for 20 minutes and move through this loop:
- 2 minutes brisk walking in place or around the room
- 10 chair squats
- 10 resistance band rows
- 8 heel slides per side
- 10 glute bridges
- 30 seconds of standing marches
- 30 seconds of rest
Repeat the loop until the timer ends. If 20 minutes is too much, cut it to 12 and keep the same order. If it feels easy after a week or two, add a second round of rows or carries. You do not need to make every workout hard. You need to make it repeatable.
This is the session I’d hand to a new mom who wants one thing that covers a lot of bases without wrecking recovery. It gives you movement, heart rate, and strength in one place, and it leaves room for the unpredictable stuff that comes with a baby.
Pick three or four workouts from this list and repeat them for a couple of weeks. That steady rhythm usually beats trying something new every day and burning out by Thursday.
